

Recommended
More Related Content
What's hot
What's hot (20)
Viewers also liked
Viewers also liked (20)
Similar to G017534144
Similar to G017534144 (20)
More from IOSR Journals
Recently uploaded
Recently uploaded (20)
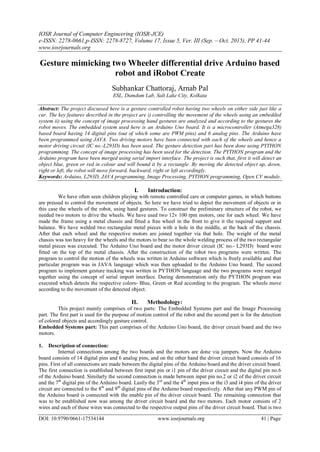
G017534144
- 1. IOSR Journal of Computer Engineering (IOSR-JCE) e-ISSN: 2278-0661,p-ISSN: 2278-8727, Volume 17, Issue 5, Ver. III (Sep. – Oct. 2015), PP 41-44 www.iosrjournals.org DOI: 10.9790/0661-17534144 www.iosrjournals.org 41 | Page Gesture mimicking two Wheeler differential drive Arduino based robot and iRobot Create Subhankar Chattoraj, Arnab Pal ESL, Dumdum Lab, Salt Lake City, Kolkata Abstract: The project discussed here is a gesture controlled robot having two wheels on either side just like a car. The key features described in the project are i) controlling the movement of the wheels using an embedded system ii) using the concept of image processing hand gestures are analyzed and according to the gestures the robot moves. The embedded system used here is an Arduino Uno board. It is a microcontroller (Atmega328) based board having 14 digital pins (out of which some are PWM pins) and 6 analog pins. The Arduino have been programmed using JAVA. Two driving motors have been connected with each of the wheels and hence a motor driving circuit (IC no.-L293D) has been used. The gesture detection part has been done using PYTHON programming. The concept of image processing has been used for the detection. The PYTHON program and the Arduino program have been merged using serial import interface. The project is such that, first it will detect an object blue, green or red in colour and will bound it by a rectangle. By moving the detected object up, down, right or left, the robot will move forward, backward, right or left accordingly. Keywords: Arduino, L293D, JAVA programming, Image Processing, PYTHON programming, Open CV module. I. Introduction: We have often seen children playing with remote controlled cars or computer games, in which buttons are pressed to control the movement of objects. So here we have tried to depict the movement of objects or in this case the wheels of the robot, using hand gestures. To construct the preliminary structure of the robot, we needed two motors to drive the wheels. We have used two 12v 100 rpm motors, one for each wheel. We have made the frame using a metal chassis and fitted a free wheel in the front to give it the required support and balance. We have welded two rectangular metal pieces with a hole in the middle, at the back of the chassis. After that each wheel and the respective motors are joined together via that hole. The weight of the metal chassis was too heavy for the wheels and the motors to bear so the whole welding process of the two rectangular metal pieces was executed. The Arduino Uno board and the motor driver circuit (IC no.- L293D) board were fitted on the top of the metal chassis. After the construction of the robot two programs were written. The program to control the motion of the wheels was written in Arduino software which is freely available and that particular program was in JAVA language which was then uploaded to the Arduino Uno board. The second program to implement gesture tracking was written in PYTHON language and the two programs were merged together using the concept of serial import interface. During demonstration only the PYTHON program was executed which detects the respective colors- Blue, Green or Red according to the program. The wheels move according to the movement of the detected object. II. Methodology: This project mainly comprises of two parts: The Embedded Systems part and the Image Processing part. The first part is used for the purpose of motion control of the robot and the second part is for the detection of colored objects and accordingly gesture control. Embedded Systems part: This part comprises of the Arduino Uno board, the driver circuit board and the two motors. 1. Description of connection: Internal connections among the two boards and the motors are done via jumpers. Now the Arduino board consists of 14 digital pins and 6 analog pins, and on the other hand the driver circuit board consists of 16 pins. First of all connections are made between the digital pins of the Arduino board and the driver circuit board. The first connection is established between first input pin or i1 pin of the driver circuit and the digital pin no.6 of the Arduino board. Similarly the second connection is made between input pin no.2 or i2 of the driver circuit and the 7th digital pin of the Arduino board. Lastly the 3rd and the 4th input pins or the i3 and i4 pins of the driver circuit are connected to the 8th and 9th digital pins of the Arduino board respectively. After that any PWM pin of the Arduino board is connected with the enable pin of the driver circuit board. The remaining connection that was to be established now was among the driver circuit board and the two motors. Each motor consists of 2 wires and each of these wires was connected to the respective output pins of the driver circuit board. That is two
- 2. Gesture mimicking two Wheeler differential drive Arduino based robot and iRobot Create DOI: 10.9790/0661-17534144 www.iosrjournals.org 42 | Page wires from the first motor are connected to the 1st and the 2nd output pins or o1 and o2 pins of the driver circuit board respectively. Wires from the second motor are connected to the 3rd and 4th or the o3 and o4 output pins of the driver circuit. With this the entire connection of the Embedded Systems part of the robot is completed. Connection of the power supply and Ground is done in the end. The allover connection part is checked once again to detect whether any faults are present and are rectified. Now we proceed towards the programming part. Figure-1. Connection between the Arduino board, the driver circuit and the motors Figure-2. The wheeled robot that we had built. 2. Algorithm of the Arduino program: The program that is executed in the Arduino software is directly uploaded to the Arduino Uno board. In the beginning of the program all the input pins are taken into account or is basically listed. Within the setup part of the programming format the pinModes of i1, i2, i3 and i4 are set as OUTPUT. After setting of the pinModes, the Serial.begin(9600) step signifies the setting up of a serial channel between the Arduino board and the computer. Under the void pause() format input pins i1, i2, i3, and i4 are set to LOW using digitalWrite command. This particular part stops the wheels of the robot from moving. The next step is the if statement step. Statement is written as if(Serial.available>0) which implies that this statement is valid if an input is available in the serial window. Now if this statement is valid then a character will be read say c. In order to read the input in the serial window the statement Char c=Serial.read() is written within the loop part of the program. Invalidity of the if statement leads to the immediate termination of program. Now we move on the control of the direction of the movement of the wheels. If character c== ‘f’ that means both the wheels of the robot will move forward. So within this if statement we set the pins i1 and i3 to HIGH and pins i2 and i4 to LOW respectively. The Delay(100) step implies the time taken to receive the next signal. Again the pause() function will work after that
- 3. Gesture mimicking two Wheeler differential drive Arduino based robot and iRobot Create DOI: 10.9790/0661-17534144 www.iosrjournals.org 43 | Page in order to determine the required interval before the execution of the upcoming command. In the upcoming part of the program if the character c==’d’ , the signal to be given to the pins are adjusted in such a way so that both the wheels of the robot will move backwards. Input pins i1 and i4 are set to HIGH and the pins i2 and i3 are set to LOW to control the previously mentioned backward movement. After this in the same way as done during the forward movement, the Delay(100) and the pause() statement will depict the interval before the onset of the next signal given to the robot. Similarly required adjustments are done to control the movement of the robot towards left and right. When we are supposed to move the robot towards right , in the if statement part we take the character c as ‘r’ and if this statement is valid then the pins i1 and i4 are set to HIGH and pins i2 and i3 are set to LOW. This part will allow the right wheel to move forward and the left wheel to move backward. After this again the Delay(100) and pause() statements are repeated. To control the movement of the robot toward left we assume the character c as ‘l’ and the pins i2 and i3 are set to HIGH and the pins i1 and i4 are set to LOW. This allows the left wheel to move forward and the right wheel to move in the opposite direction. The program finally completed after the Delay(100) and the pause() statements and we close the braces to signify the conclusion of the program. The program is now fully set or ready to be uploaded to the Arduino Uno board after compilation. Figure-3. Flowchart of the Arduino program Image Processing part: This is the part of the project in which gesture controlling have been done. PYTHON language has been used to code this part. A module known as OpenCV has been used. This OpenCV or Open Source Computer Vision is a collection of different programming functions assigned to do certain things. OpenCV has many applications such as face recognition, gesture tracking, motion tracking, 2D- 3D features, etc. Since here we have used the concept of gesture tracking, we have imported the OpenCV module/library. OpenCV is also considered as image processing software, hence OpenCV is the base of the project. Algorithm of the code: i) First the openCV module is imported so as to import the functions for image processing and gesture controlling. ii) sleep module is imported so that the sleep() function can be used in the program. This sleep function is used so that the webcam is accessed a few seconds after the execution of the program. This prevents the program from hanging or crashing. iii) The serial module is then imported. Without this module the arduino board and this image processing part cannot be interfaced. After this the serial function is used to access the port to which the arduino board is connected. serial.Serial(‘COM4’) is the actual PYTHON command which accesses port number 4, to which the arduino board is connected. iv) The webcam is accessed and hence the video is obtained. v) The video will be accessed 2 seconds after the execution of the program. This is done using the sleep function. vi) A trackbar is created in the range 20 to 255. This trackbar will adjust the threshold of the video so as to reduce noise and detect the largest red object else the result will not be accurate. vii) While a video is accessed. It is flipped and stored in a variable. This is done because the video obtained by the webcam is a mirror image one hence it was flipped to obtain the actual video. viii) The red channel is extracted from the video. The flipped video is converted to grayscale. After this the red channel is subtracted from the grayscaled image so that the red channel appears as white and the other two channels (blue and green) , appears as black ix) The video is then binarized using the threshold set by the trackbar. x) Erosion is done so that the red objects if placed in front of the webcam will be detected as white blobs. xi) Information is gathered about the white blobs nd the largest white blob is taken into account by adjusting the threshold value using the trackbar and it is bounded by a red rectangle. xii) The entire video area is divided into x-y axes. This is done to track the movement of the detected red object. xiii) If the red object is moved, then the different between the four coordinates of the last position of the bounded rectangle and the moved position of the bounded rectangle is obtained. xiv) It is then checked that which difference is more, the difference in the x-axis coordinates of the bounded rectangle or that of the y-axis coordinates. If the difference is more in the x-axes
- 4. Gesture mimicking two Wheeler differential drive Arduino based robot and iRobot Create DOI: 10.9790/0661-17534144 www.iosrjournals.org 44 | Page coordinates then the movement is along x-axis (right or left) else it is along y-axis (up or down). xv) If the movement is along x-axis, it is then checked if it is > 20. If it is found to be >20 then the movement is towards the right side and the robot is made to turn right by using the command ser.write(‘r’). Else the movement is towards the left side and the robot is made to turn left by using the command ser.left(‘l’). xvi) Now I the difference in the y-axis coordinates is more, then it is checked if it is >20 or <-20. If it is >20 then the movement is considered to be in the up direction and the robot is made to move forward by using the command ser.write(‘f’). Else the movement is considered to be in the downward direction and the robot is moved backward by using the command ser.write(‘d’). xvii) The program continues that is the video is accessed and the red objects are detected until the escape key it hit. Hence the program stops when the escape key is pressed. Hence this completes our project Figure-4. The flowchart of the PYTHON program iRobot Create Part:The same logic of the gesture controlled robot is applied to the control of the iRobot Create. iRobot Create is a multipurpose educational robot and many application Bluetooth Adapter Module to make the iRobot Create wireless. Rest of the logic for moving the robot according to the gesture is similar to the algorithm for moving the Arduino based differential drive robot. III. Results and discussion After the PYTHON program is executed, the webcam will be accessed and the red colored objects will be shown as white blobs and will be bounded by a rectangle. The robot will move according to the movement of the red object. Figure-5. The screenshot of the program execution. As we can see the red object is detected as a white blob and simultaneously is bounded by a rectangle and the movement is printed in the PYTHON shell. IV. Conclusion The project gave us a lot of firsthand experience of using the combined concept of both image processing and embedded systems. This is just the basic part, this project can be further improved by making use of a Bluetooth module and hence making the entire project wireless. Considering the image processing part, here we have detected a red object, similarly blue and green objects can also be detected by slight modification. The more advanced concept can be used in the gesture controlling part such as instead of detecting any colored object the program will detect the movement of the human eyeball.