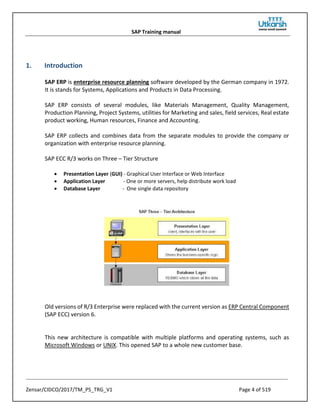
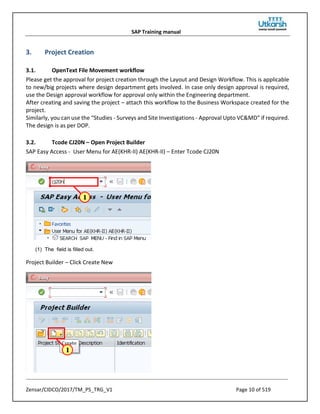
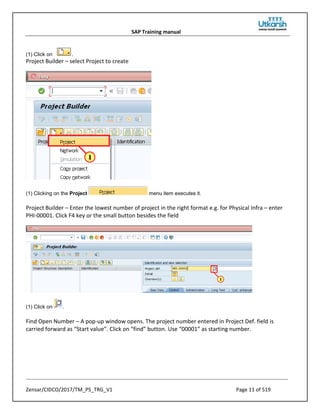
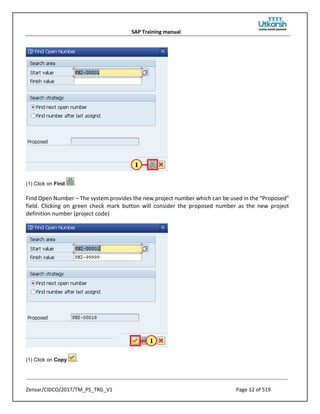
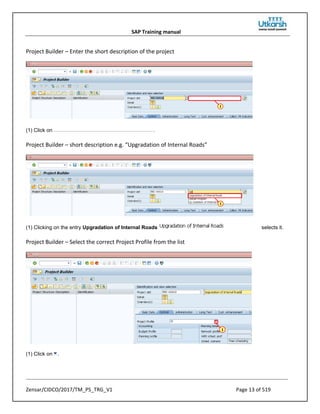
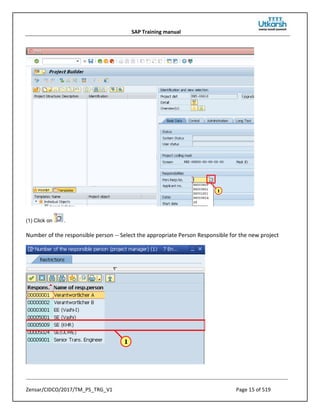
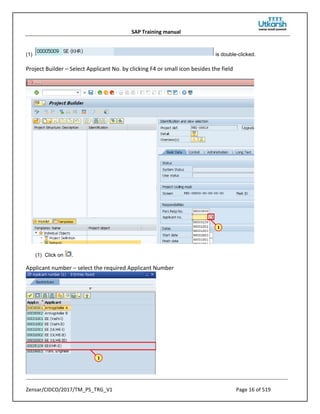
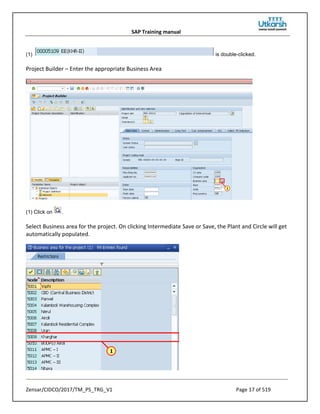
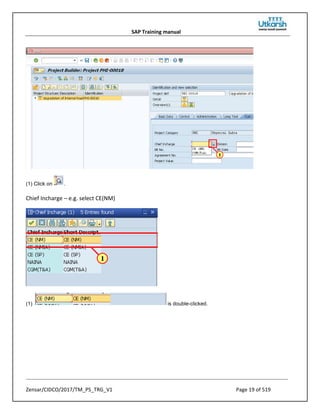
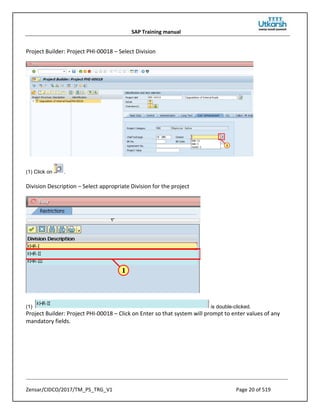
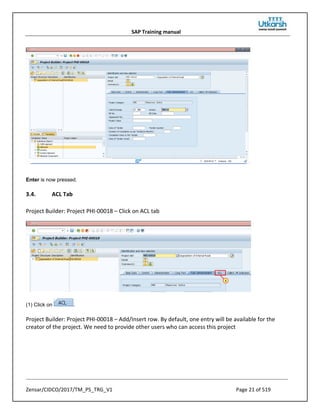
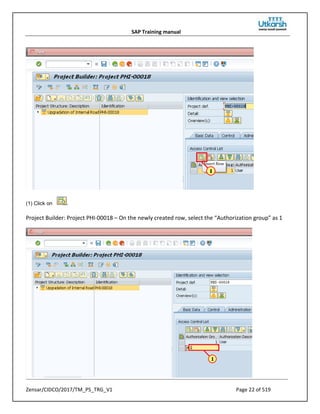
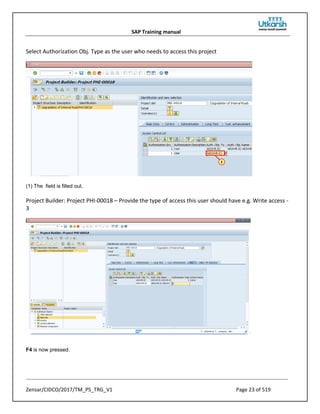
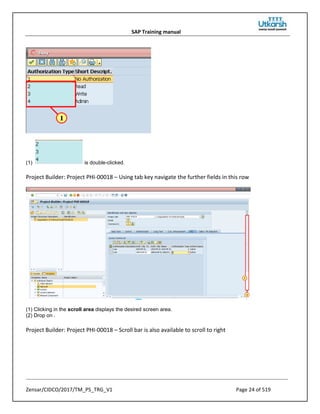
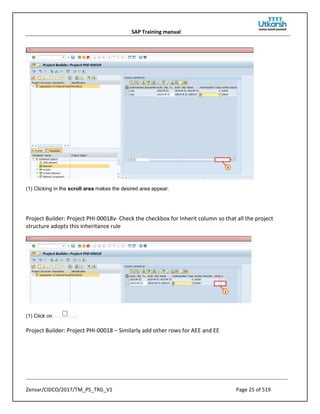
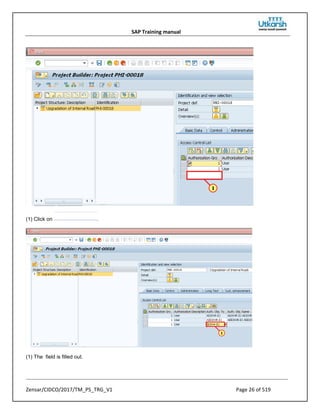
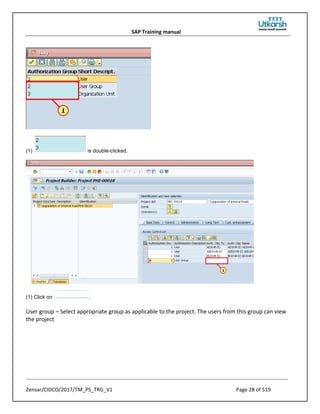
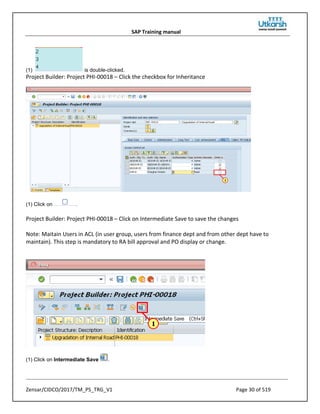
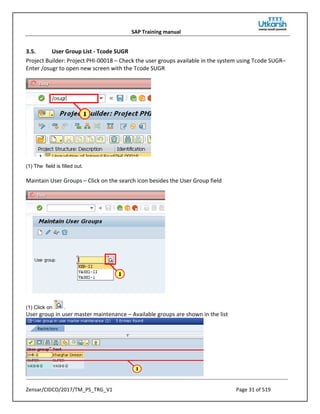
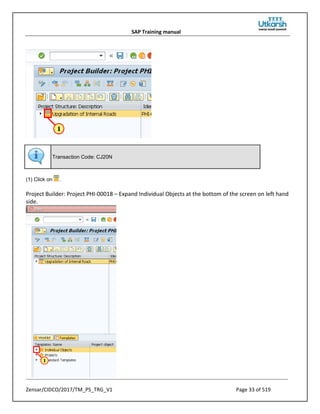
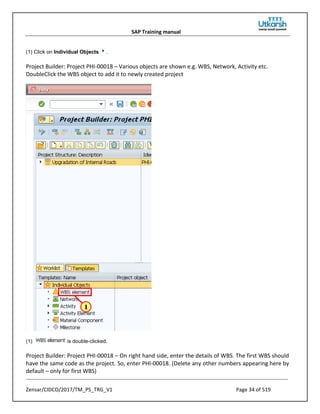
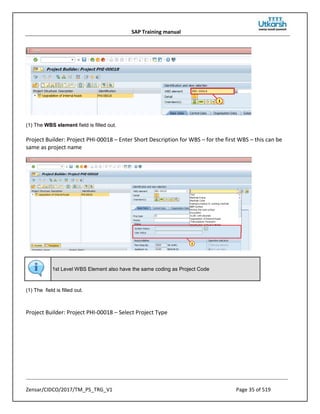
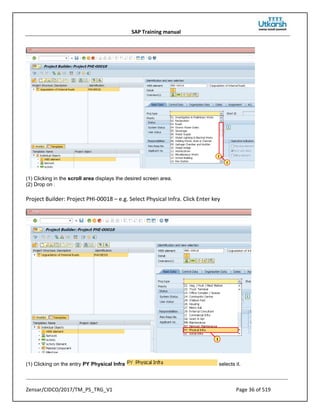
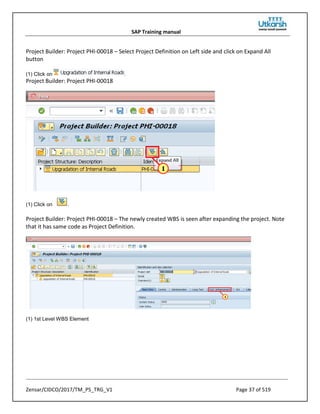
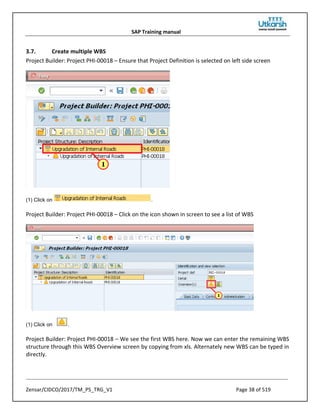
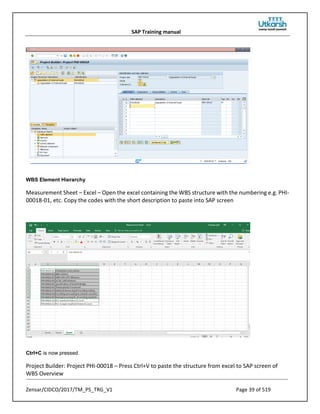
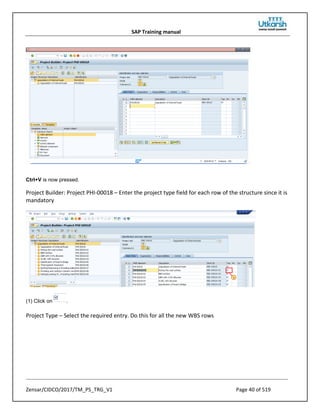
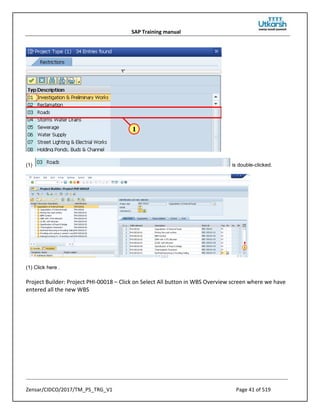
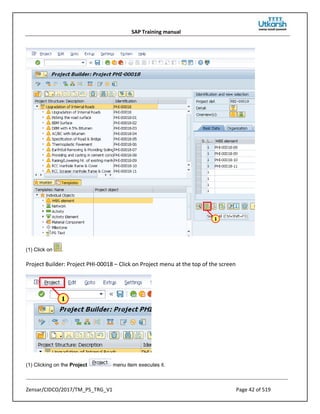
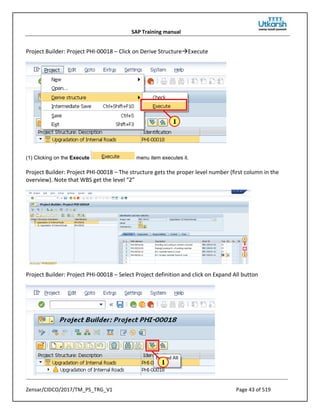
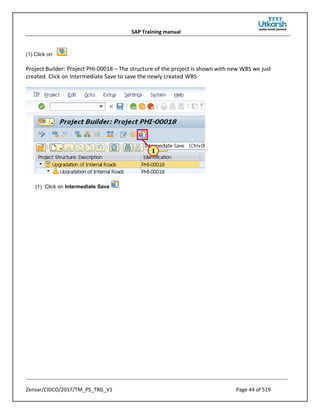
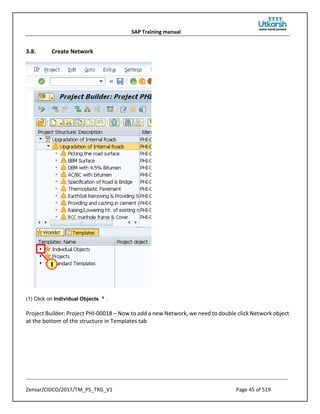
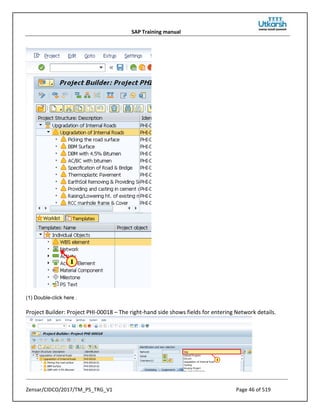
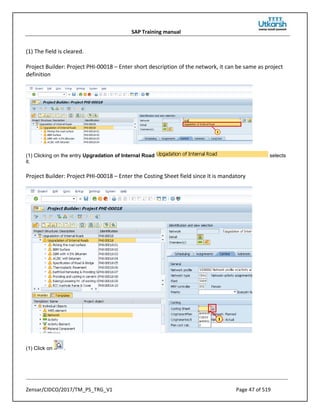
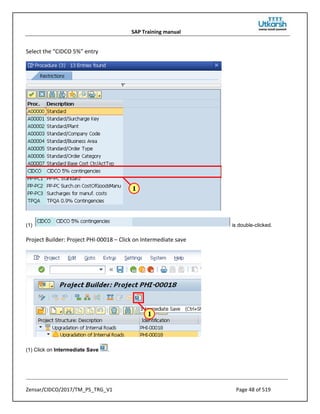
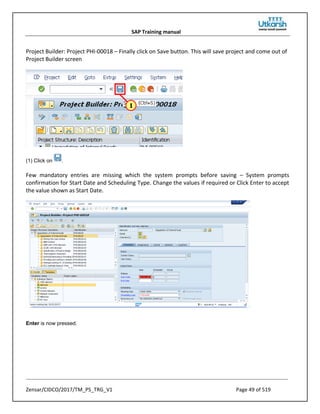
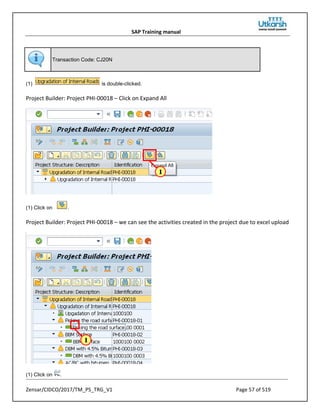
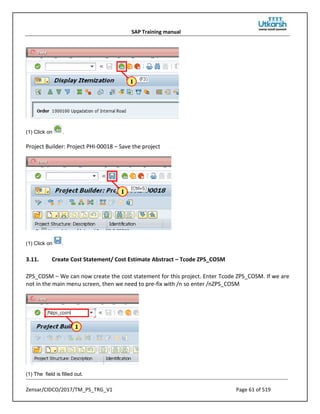
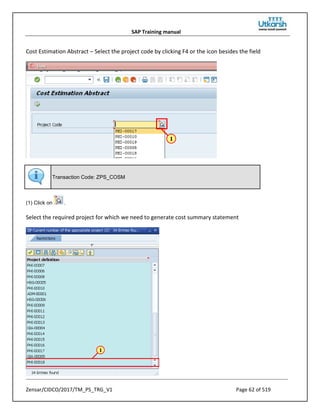
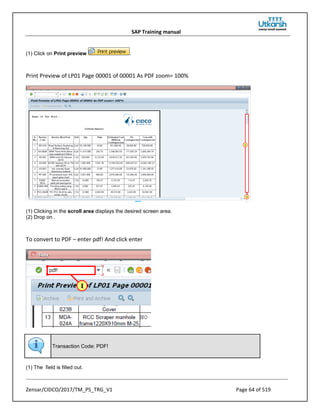
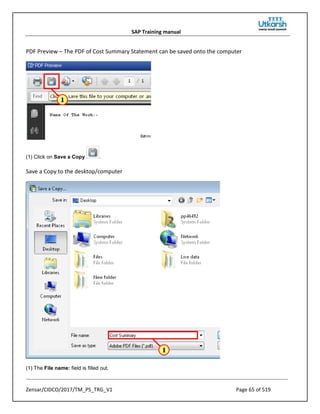
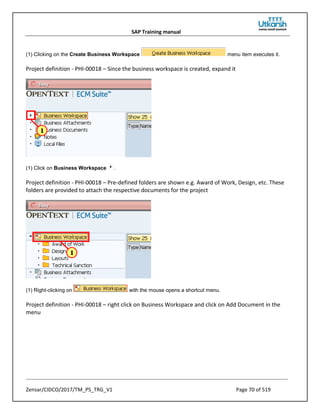
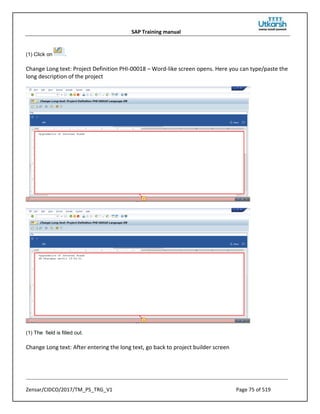
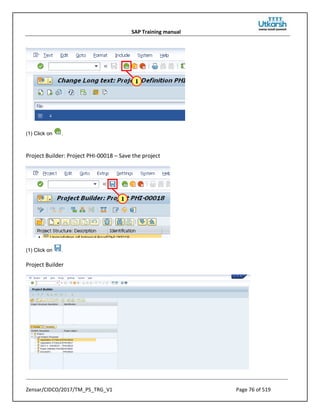
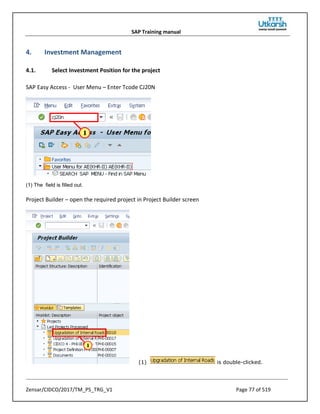
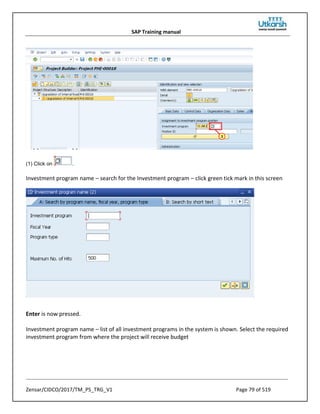
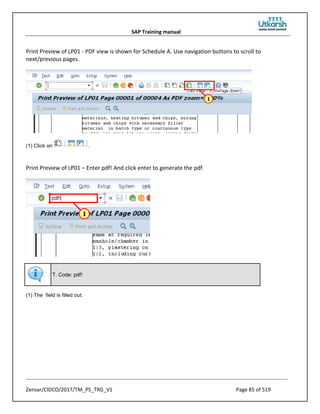
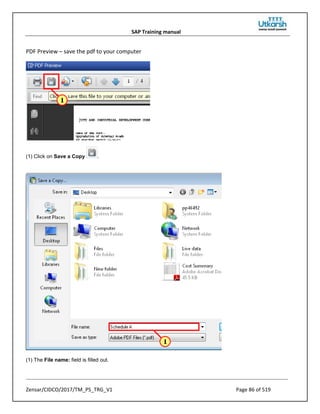
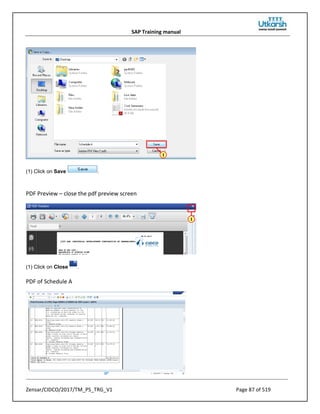
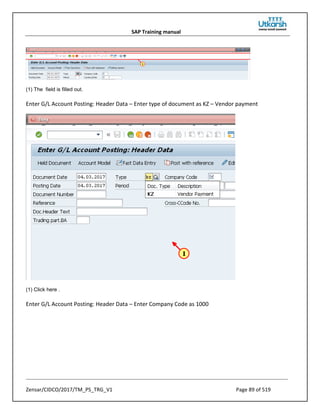
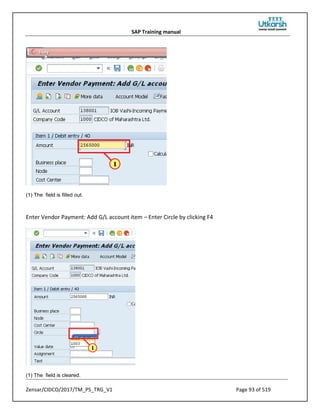
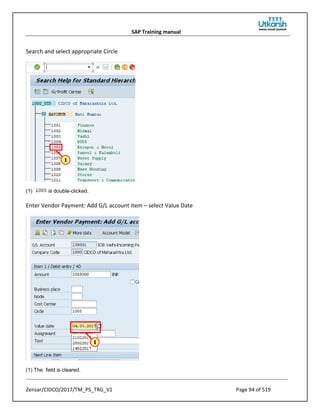
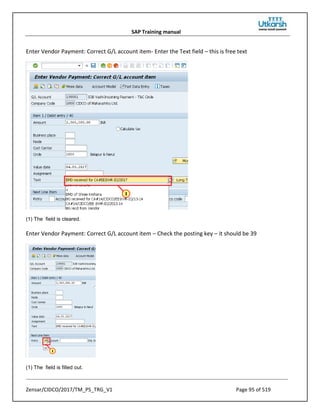
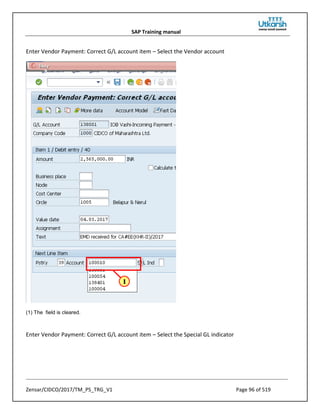
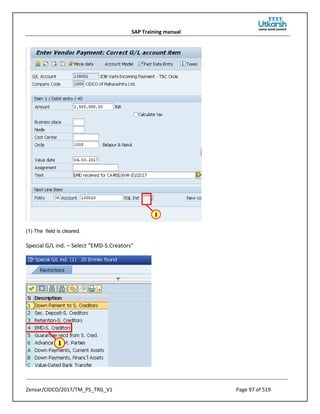
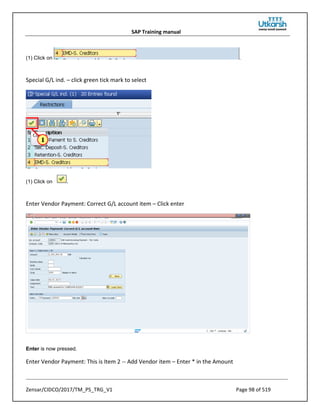
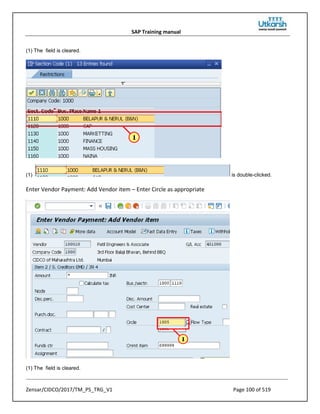
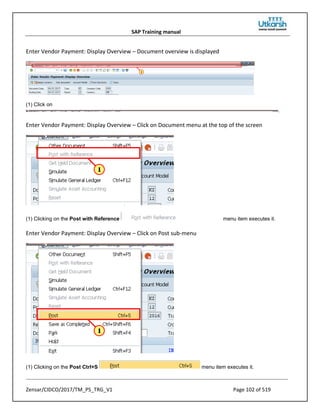
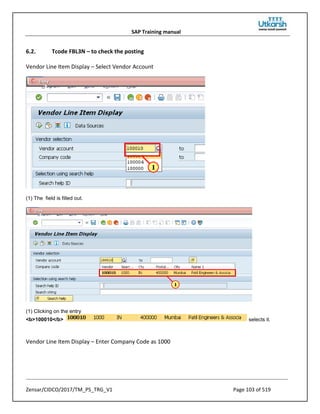
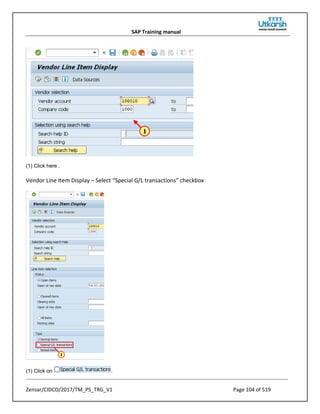
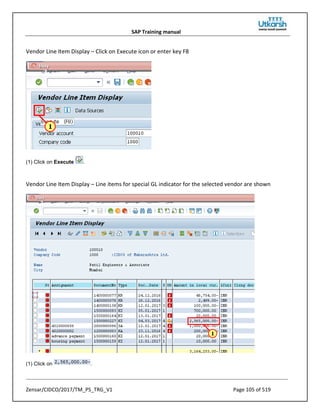
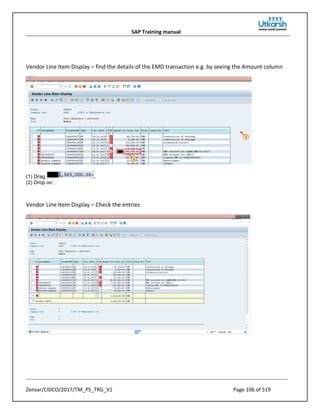
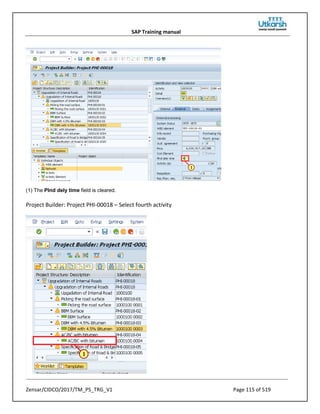
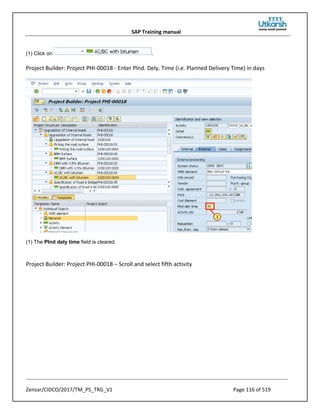
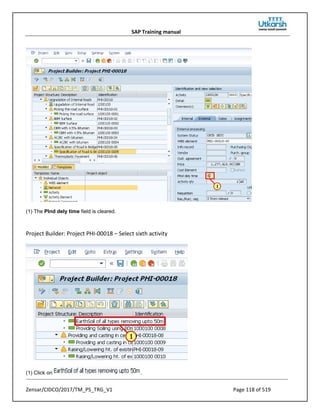
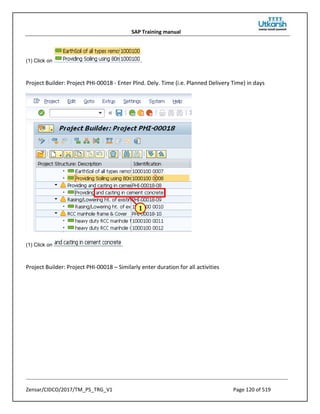
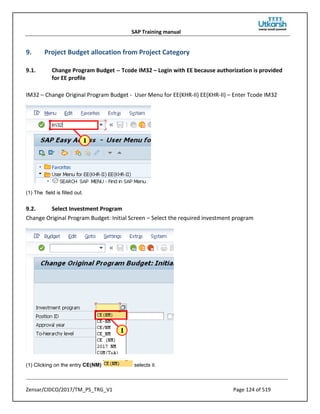
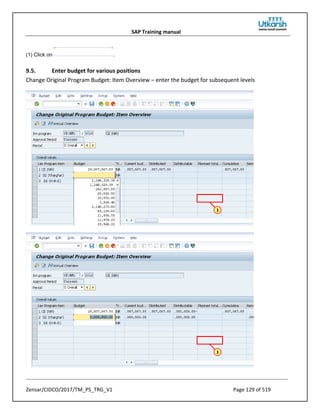
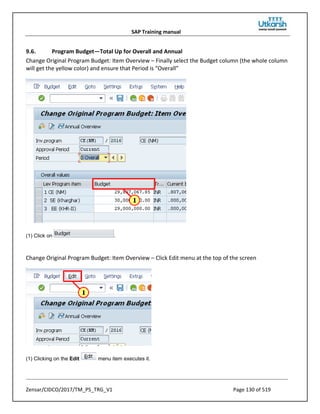
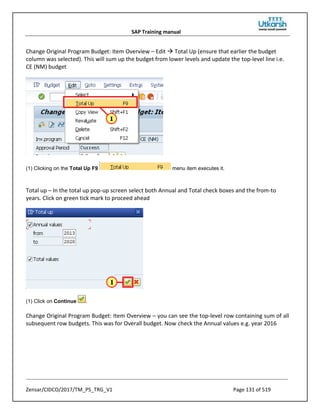
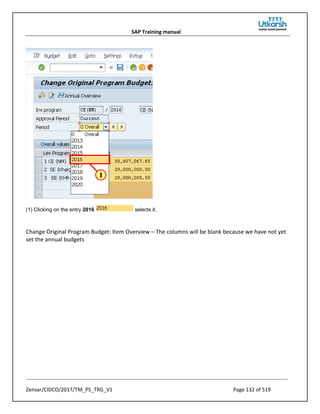
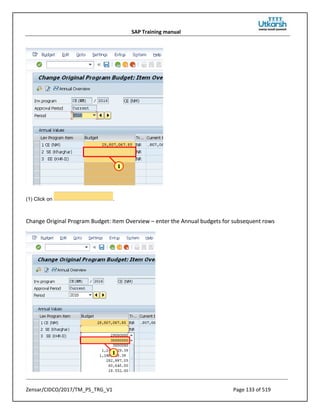
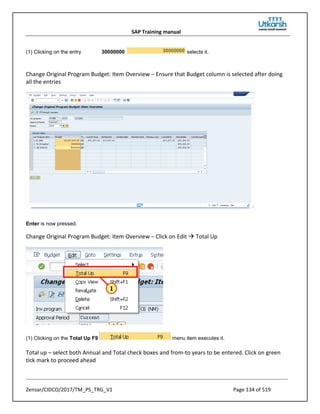
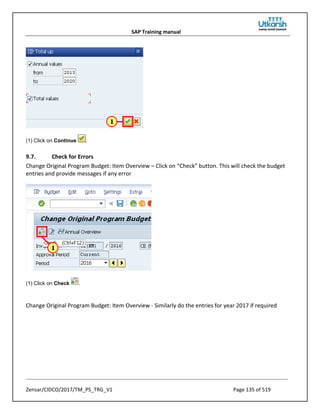
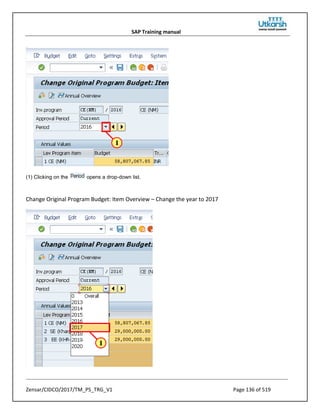
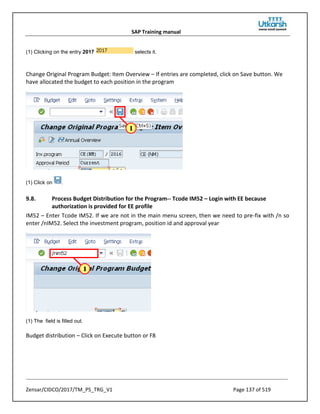
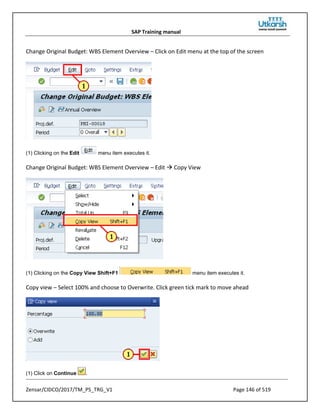
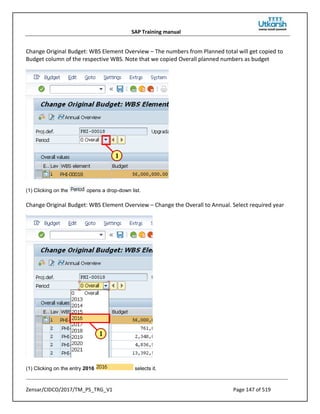
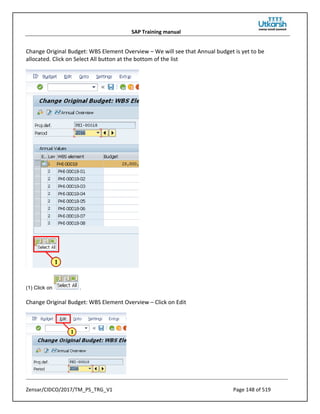
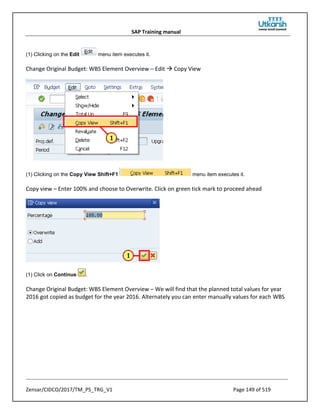
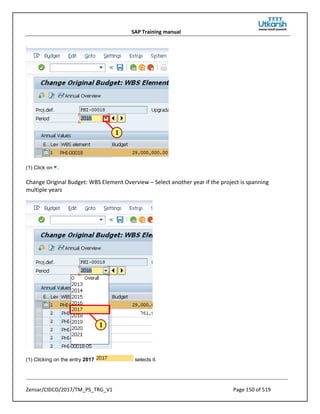
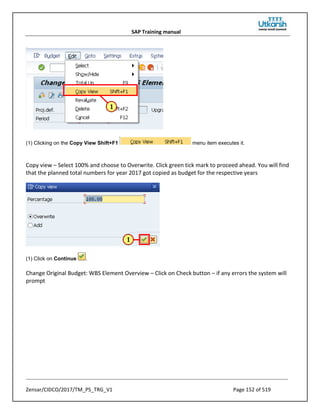
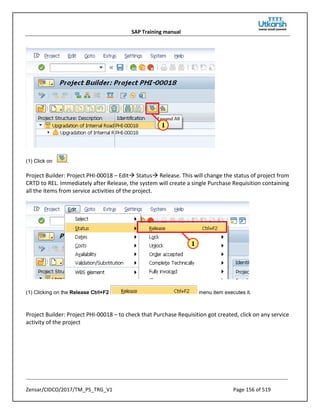
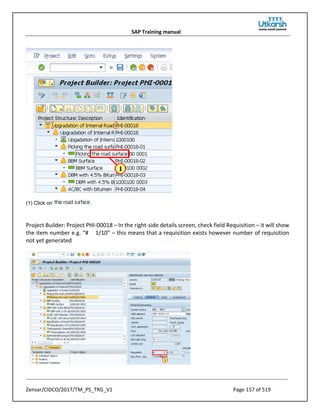
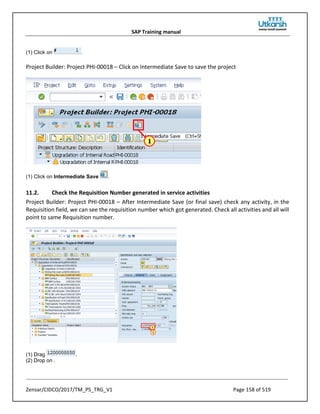
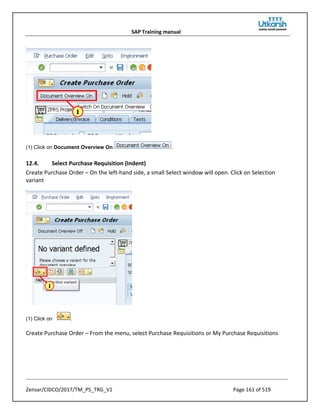
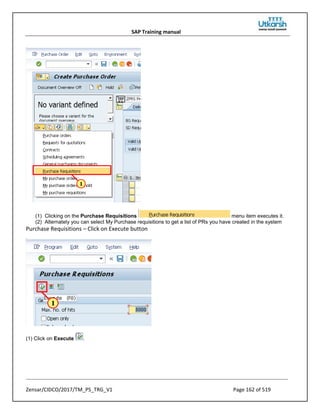
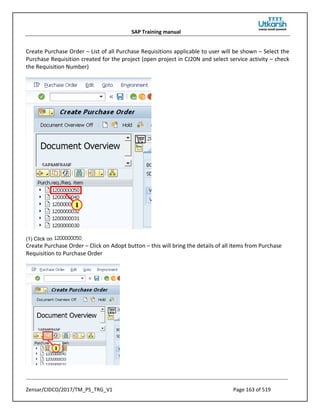
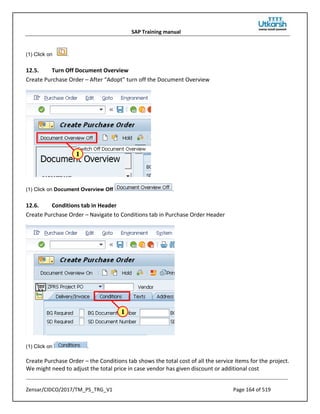
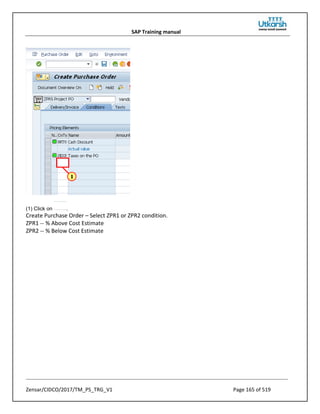
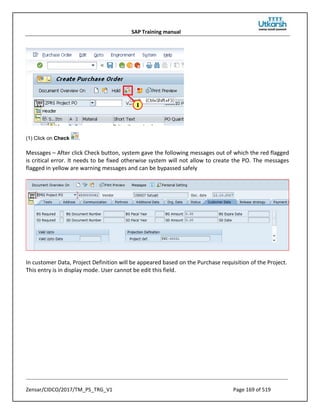
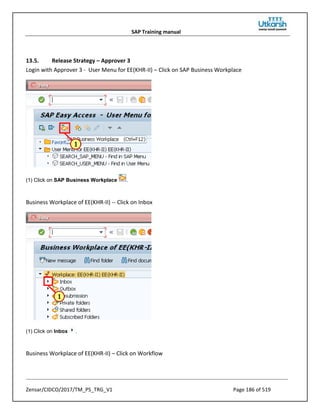
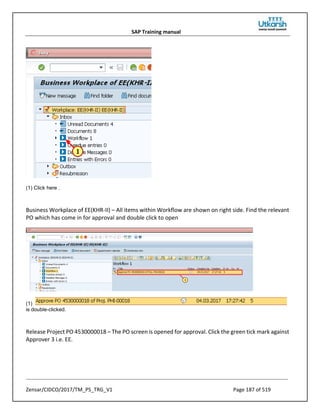
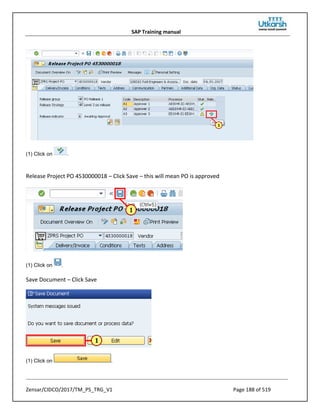
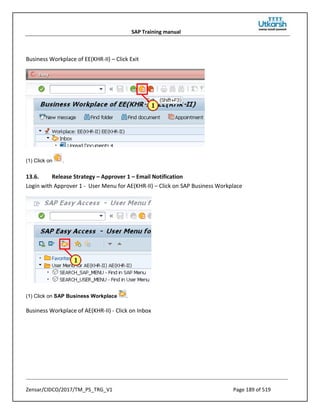
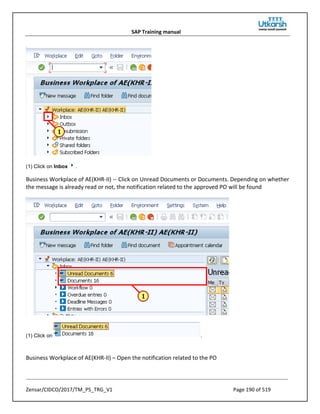
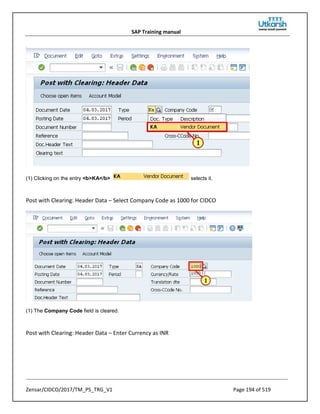
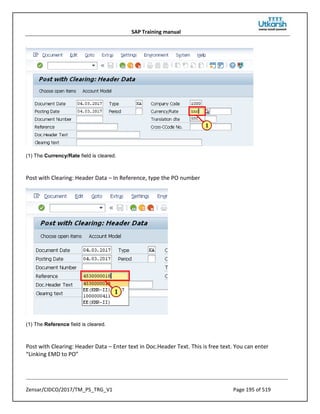
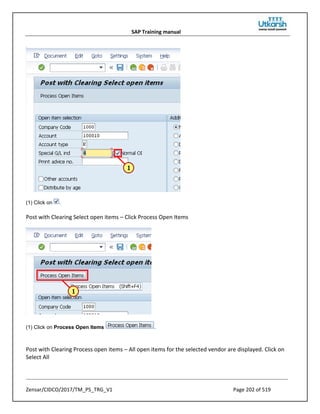
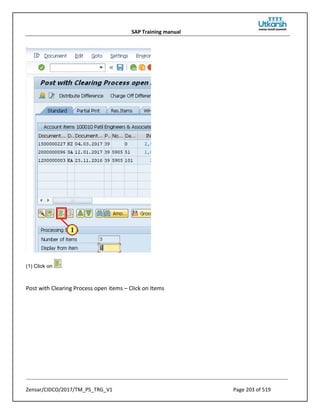
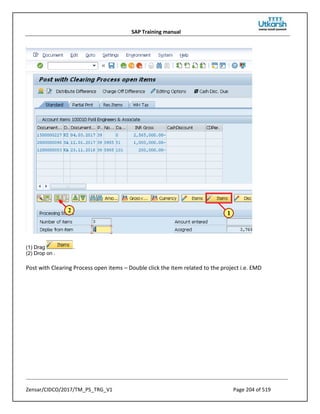
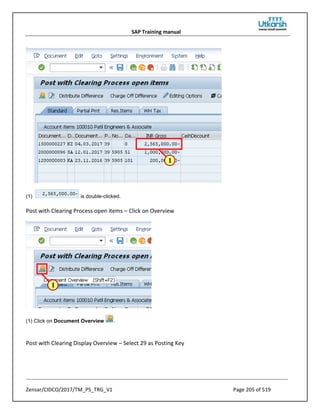
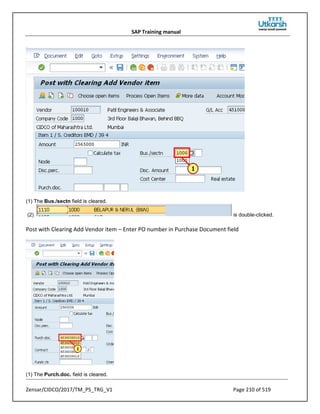
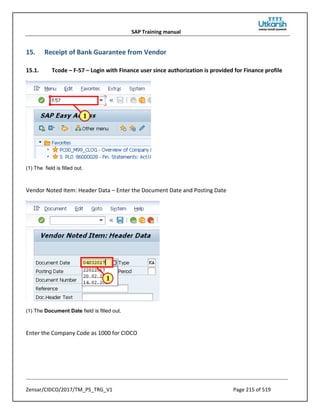
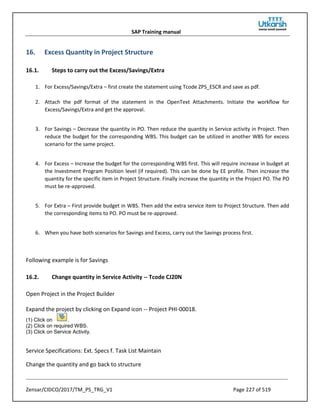
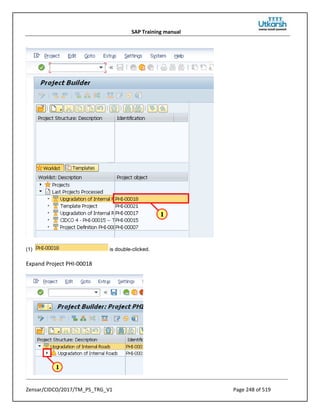
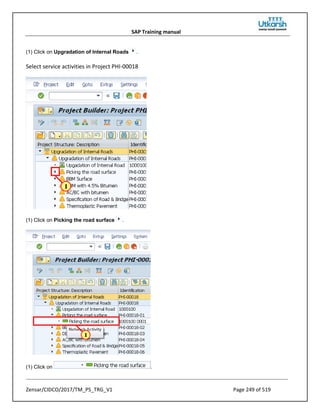
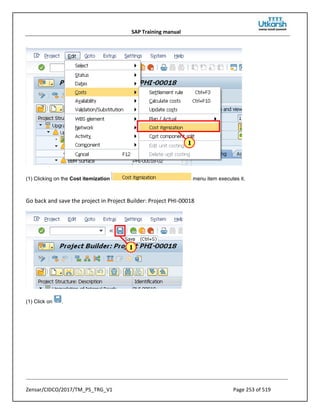
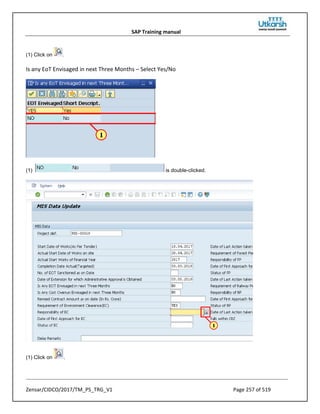
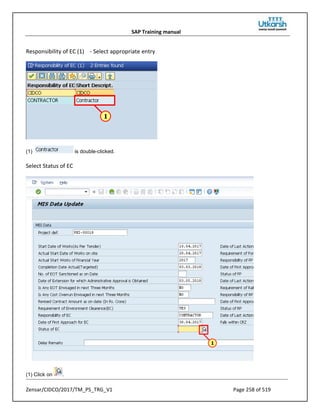
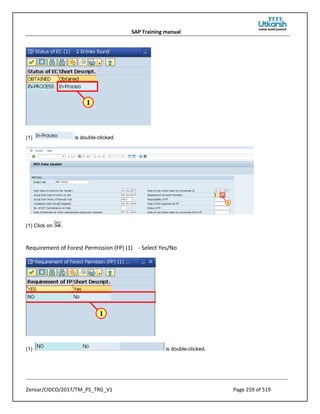
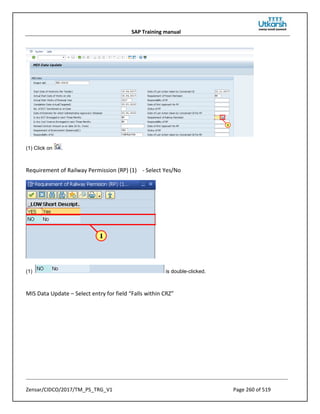
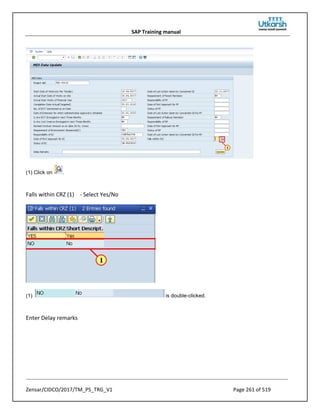
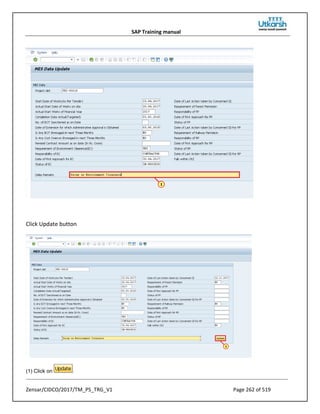
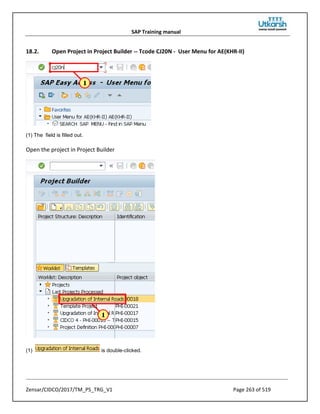
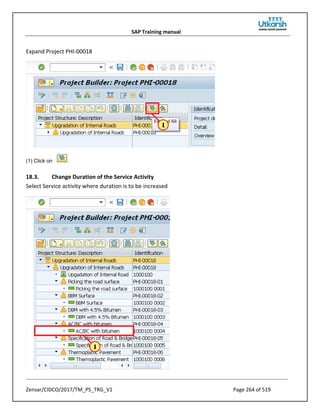
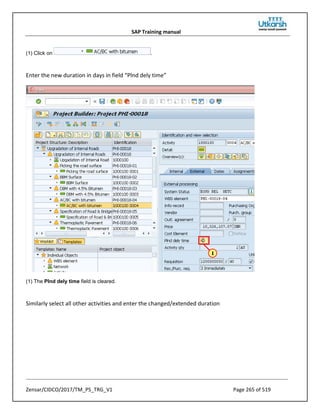
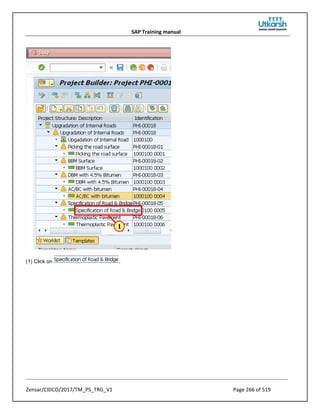
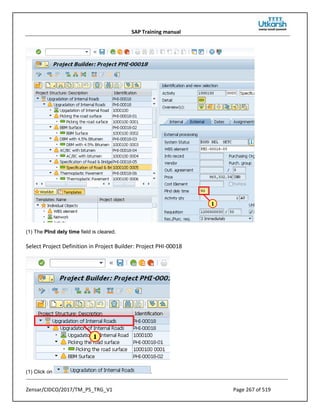
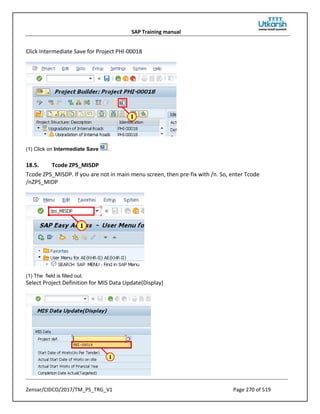
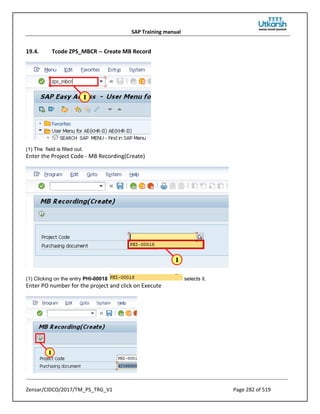
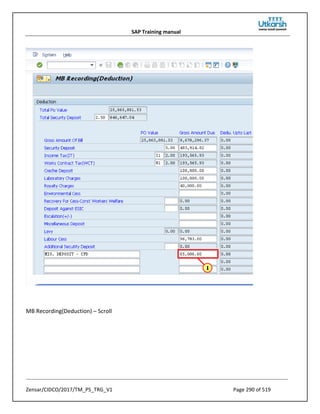
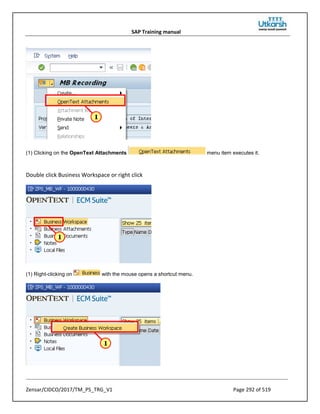
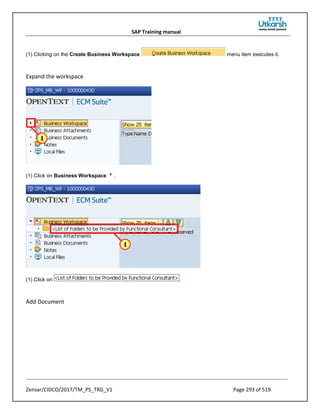
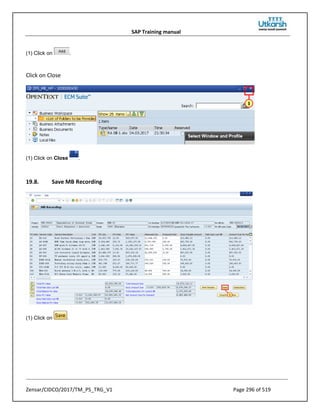
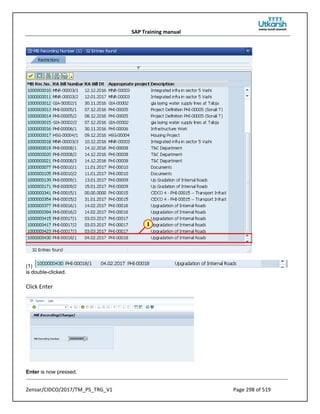
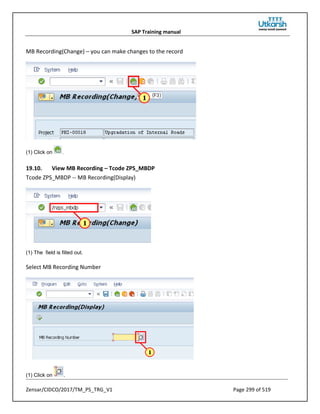
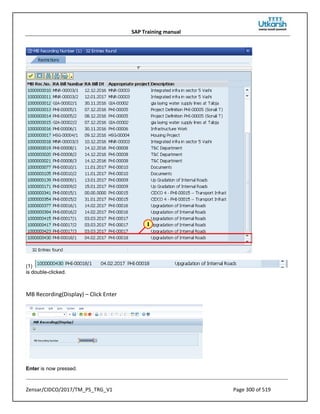
This document provides instructions for creating a new project in SAP using transaction code CJ20N. It describes navigating to the Project Builder screen, entering basic project details like the project number, description, and profile. It also covers creating the top-level work breakdown structure (WBS), setting access control lists to define which users can view and update the project, and saving the initial project details.


![SAP Training manual
Zensar/CIDCO/2017/TM_PS_TRG_V1 Page 233 of 519
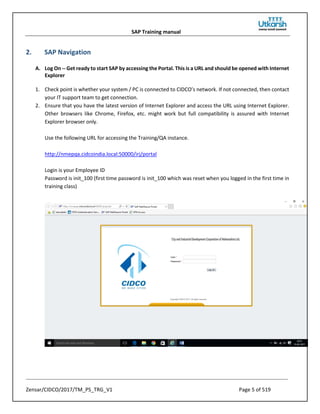
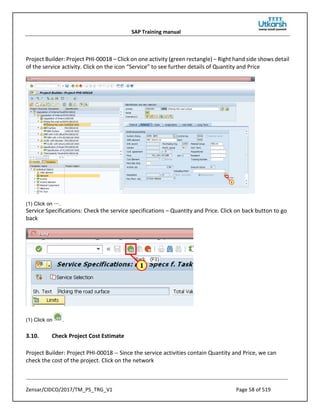
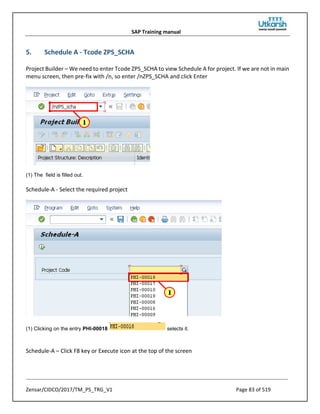
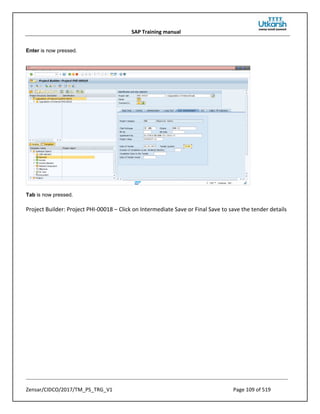
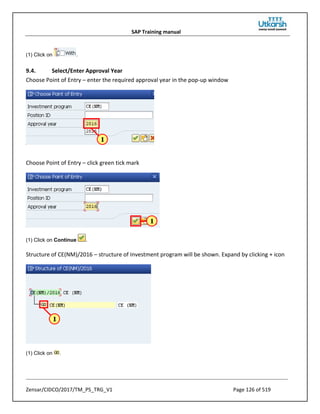
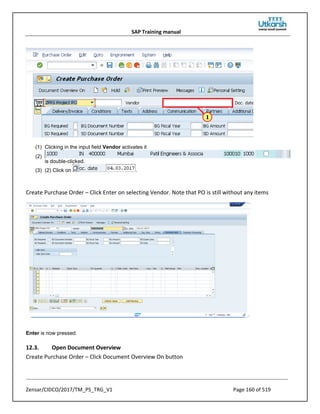
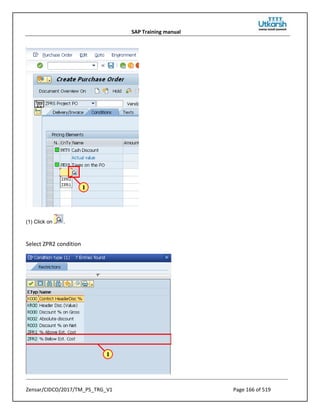
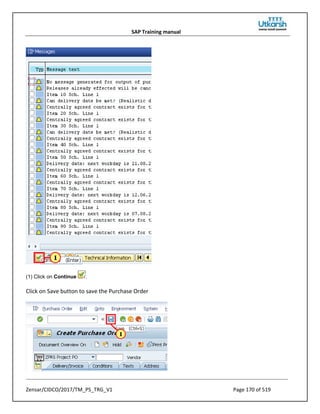
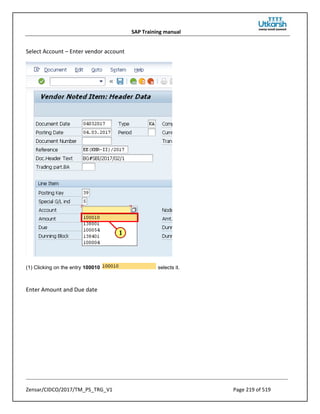
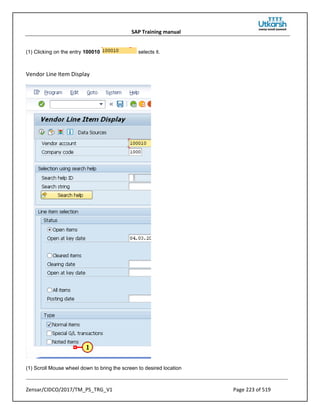
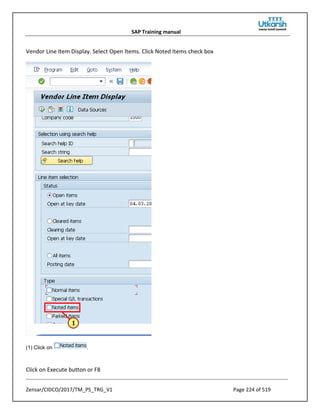
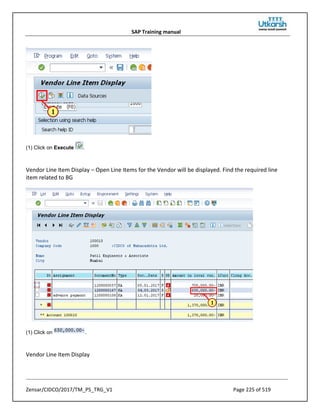
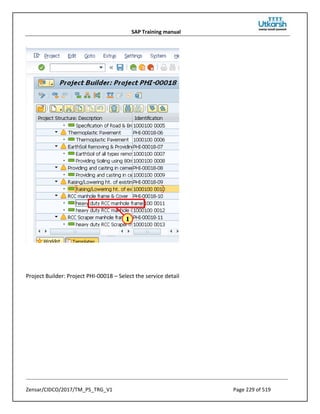
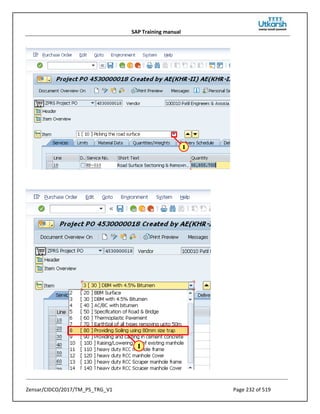
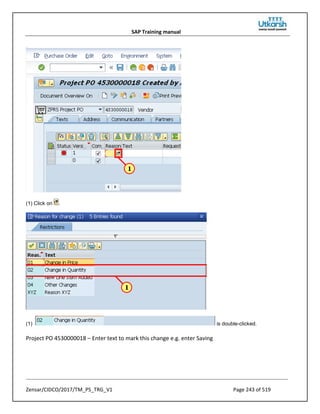
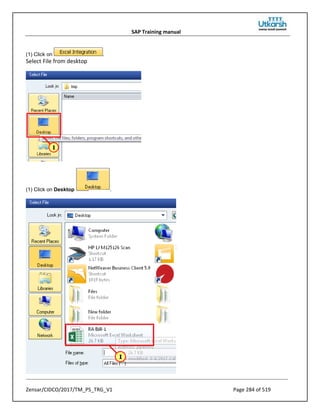
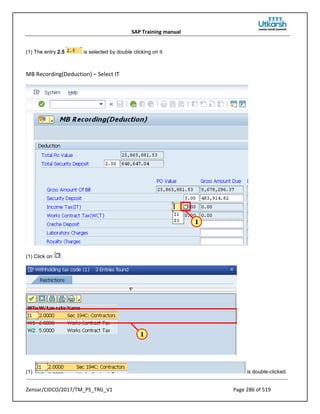
(1) Clicking on the entry 8 [ 80 ] Providing Soiling using 80mm size trap selects it.
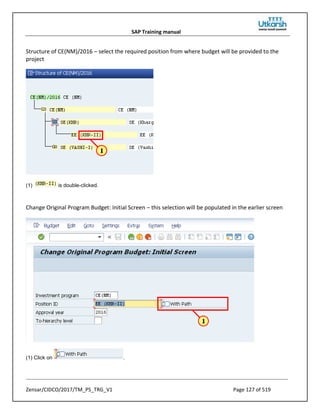
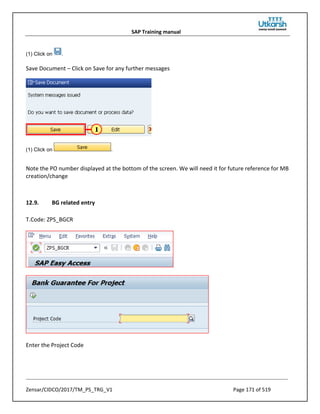
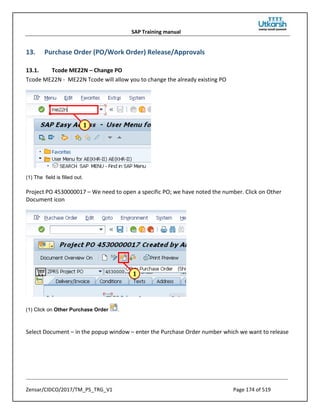
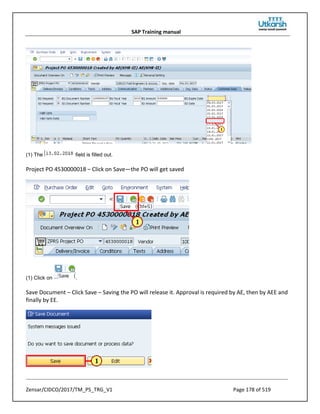
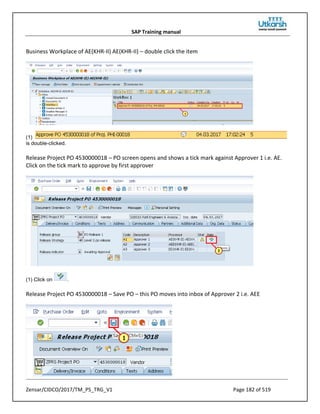
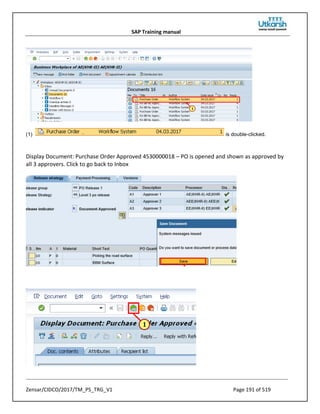
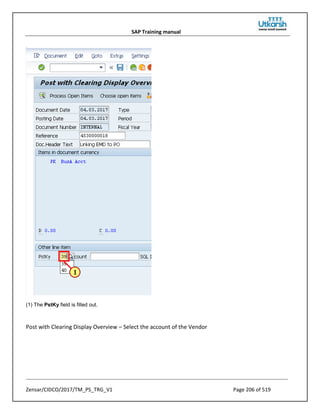
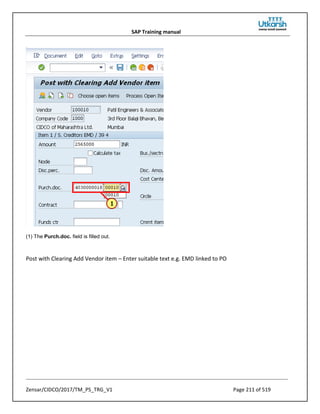
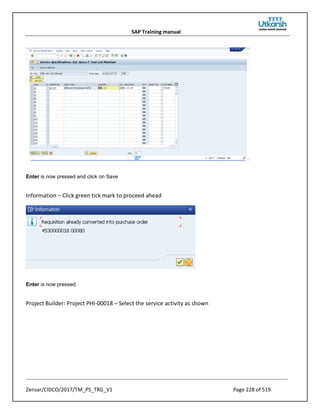
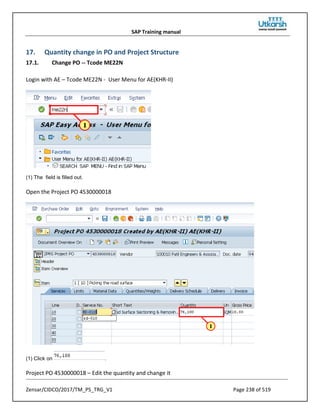
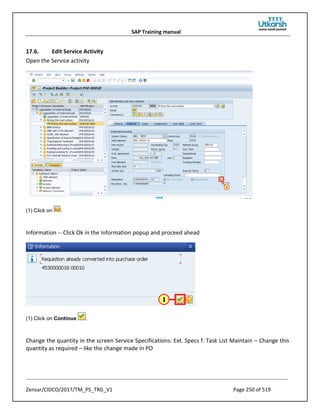
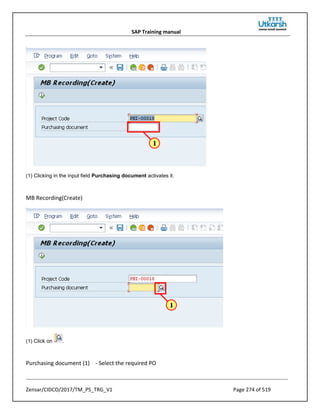
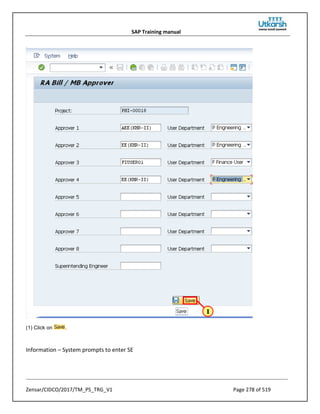
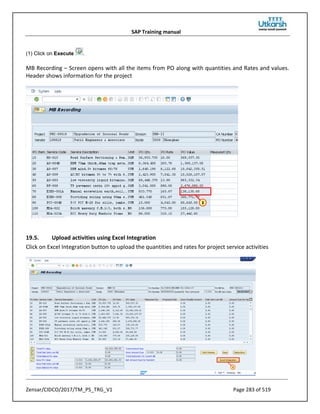
Project PO 4530000018
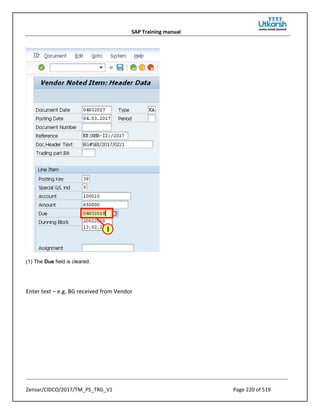
Change the quantity – this should be same as changed in the project structure
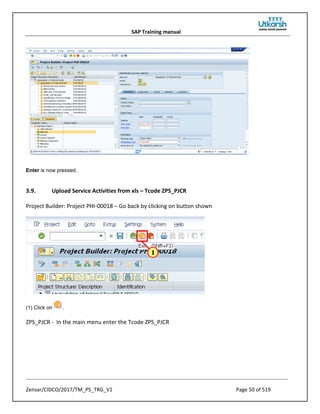
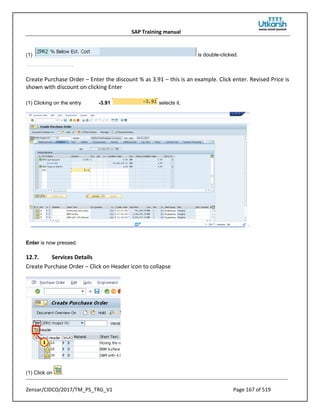
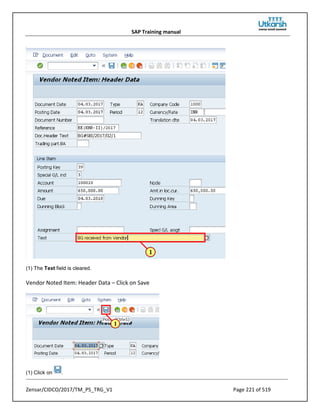
Enter is now pressed.
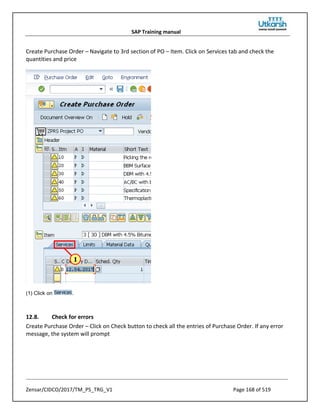
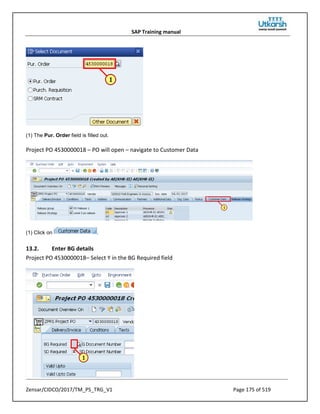
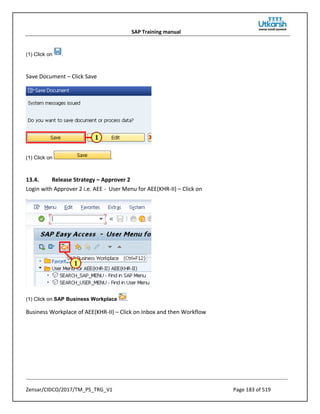
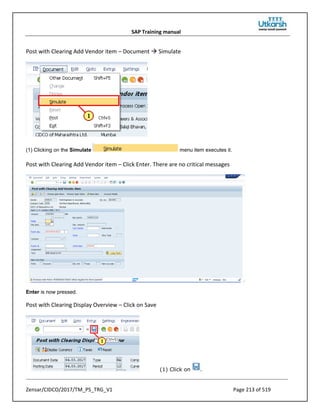
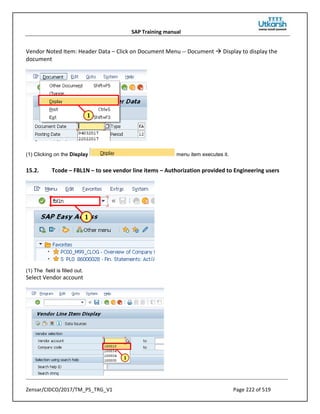
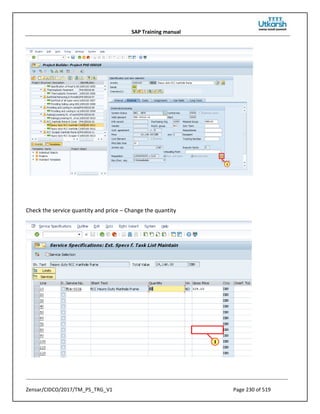
Project PO 4530000018 -- Navigate to another item and change the quantity. Similarly change the
quantity for all required items in PO. These should be same changes done in the Project Structure. This
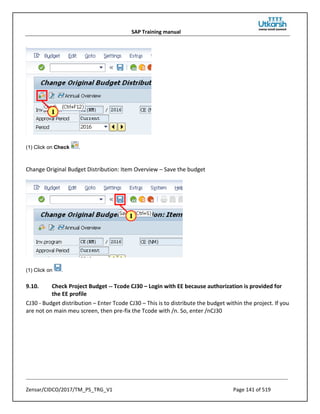
PO was earlier approved however will now need to get re-approved by 3 approvers – AE, AEE and EE](https://image.slidesharecdn.com/saptrainingmanualprojectsystems-220920125513-6c2290bf/85/SAP-Training-Manual-Project-Systems-pdf-233-320.jpg)


![[DSC Europe 25] Josip Saban - Career building for data professionals.pptx](https://cdn.slidesharecdn.com/ss_thumbnails/zroflcttkm1vmli0txea-josip-saban-career-building-for-data-professionals-260123083019-587cdb8c-thumbnail.jpg?width=640&height=640&fit=bounds)


