SlideShare a Scribd company logo
1 of 103
Download to read offline
ANTENTOP 01 2004 # 005
ANTENTOP is FREE e-magazine devoted to ANTENnas
Theory,
1-2004 Operation, and
Practice
Edited by hams for hams
In the Issue:
Practical design of HF
Antennas!
Antennas Theory!
Tesla’s Life!
QRP!
And More….
Nicola Tesla Thanks to our authors:
Prof. Natalia K.Nikolova
Igor Zel'din, UR5LCV
Vladimir Kuz'min, UA9JKW
M. Chirkov, UL7GCC
Alexei Rusakov, UA4ARL
Oleg V.Borodin, RV3GM
Ashhar Farhan
© Kolmogorov-Smirnov Publishing
And others…..
UA9JKW Helical Loop Antenna
EDITORIAL:
Well, my friends, new ANTENTOP –
01 -2004 come in! ANTENTOP is
just authors’ opinions in the world of
amateur radio. I do not correct and
re-edit yours articles, the articles are
printed “as are”. A little note, I am
not a native English, so, of course,
there are some sentence and
grammatical mistakes there…
Please, be indulgent!
Now ANTENTOP is sponsored by
microHAM, please, visit to
microHAM’s site at
http://www.microham.com/
I believe, you find many interesting
there!
Copyright: Here at ANTENTOP we just
wanted to follow traditions of FREE flow of
information in our great radio hobby
around the world. A whole issue of
ANTENTOP may be photocopied, printed,
pasted onto websites. We don't want to
control this process. It comes from all of
us, and thus it belongs to all of us. This
doesn't mean that there are no copyrights.
There is! Any work is copyrighted by the
author. All rights to a particular work are
reserved by the author.
ANTENTOP 01 –2004 contains huge
antenna articles, and several
historical articles. Hope, you will like
it. Our pages opened for all
amateurs, so, you are welcome
always, or as a reader or as a writer.
73! Igor Grigorov, RK3ZK
ex: UA3-117-386, UA3ZNW,
UA3ZNW/UA1N, UZ3ZK
op: UK3ZAM, UK5LAP,
EN1NWB, EN5QRP, EN100GM
Contact us: Just email me or
drop a letter.
Mailing address:
Box 68, 308015, Belgorod, Russia
Email: antentop@mail.ru
NB: Please, use only plain text
and mark email subject as:
igor_ant. I receive lots spam, so, I
delete ALL unknown me
messages without reading.
ANTENTOP is FREE e-magazine, available FREE at http://www.antentop.bel.ru/
ANTENTOP- 01- 2004, # 005 Editorial
Welcome to ANTENTOP, FREE e - magazine!
ANTENTOP is FREE e- magazine, made in PDF,
devoted to antennas and amateur radio. Everyone
may share his experience with others hams on the
pages. Your opinions and articles are published
without any changes, as I know, every your word has
the mean.
Every issue of ANTENTOP is going to have 100
pages and this one will be paste in whole on the site.
Preview's files will be removed in this case. I do not
know what a term for one issue will need, may be 2-3
month or so. As I have counted, a whole issue of
ANTENTOP will hold nearly 10 - 20 MB .
A little note, I am not a native English, so, of
course, there are some sentence and grammatical
mistakes there… Please, be indulgent!
Preview: Some articles from "cooking" issue will be
pasted for preview on this site, others no. Because,
as I think, it must be something mysterious in every
issue.
Publishing: If you have something for share with
your friends, and if you want to do it FREE, just send
me an email. Also, if you want to offer for publishing
any stuff from your website, you are welcome!
Your opinion is important for me, so,
contact if you want to say something!
Copyright Note:
Dear friends, please, note, I respect Copyright.
Always, when I want to use some stuff for
ANTENTOP, I ask owners about it. But… sometimes
my efforts are failed. I have some very interesting
stuff from closed websites, but I can not go to touch
with their owners… as well as I have no response on
some my emails from some owners.
I have a big collection of pictures, I have got the
pictures and stuff in others ways, from FREE
websites, from commercial CDs, intended for FREE
using, and so on... I use to the pictures (and seldom,
some stuff from closed websites) in ANTENTOP. If
the owners still are alive, please, contact with me, I
immediately remove any Copyright stuff, or, if it is
necessary, all needed references will be made there.
I do not know, why the owners do not response me. Are they still alive? Do their companys are a
bankrupt? Or do they move anywhere? Where they are in the end?
Business Advertising: ANTENTOP is not a
commercial magazine. Authors and I (Igor Grigorov,
the editor of the magazine) do not get any profit from
the issue. But off course, I do not mention from
commercial ads in ANTENTOP. It allows me to do
the magazine in most great way, allows me to pay
some money for authors to compensate their hard
work. I have lots interesting stuff in Russian, and
owners of the stuff agree to publish the stuff in
ANTENTOP… but I have no enough time to translate
the interesting stuff in English, however I may pay
money to translators,
and, they will do this work, and we will see lots
interesting articles there.
So, if you want to put a commercial advertisement in
ANTENTOP, please contact with me. A commercial
advertisement will do ANTENTOP even greater
interesting and various! I hope, readers do not
mention against such commercial ads.
Book Advertising: I do not think, that Book
Advertising is a commercial advertisement. So,
Book Advertising is FREE at ANTENTOP. Contact
with me for details.
Mailing address: Box 68, 308015, Belgorod, Russia
Email: antentop@mail.ru subject: igor_ant
NB: Please, use only plain text and mark email
subject as: igor_ant. I receive lots spam and viruses,
so, I delete ALL unknown me messages without
reading.
73! Igor Grigorov, RK3ZK
ex: UA3-117-386, UA3ZNW, UA3ZNW/UA1N, UZ3ZK
op: UK3ZAM, UK5LAP,EN1NWB, EN5QRP, EN100GM
http://www.antentop.bel.ru/ mirror: www.antentop.boom.ru Editorial
ANTENTOP- 01- 2004, # 005 Table of Contents
Table of Contents
Antenna Theory Page
1
Basic Methods in Antenna Measurements: by Prof. Natalia K.Nikolova
Dear friends, I would like to give to you an interesting and reliable antenna theory.
Hours searching in the web gave me lots theoretical information about antennas.
Really, at first I did not know what information to chose for ANTENTOP.
Now I want to present to you one more very interesting Lecture - it is a Lecture
about Basic Methods in Antenna Measurements. I believe, you cannot find such
info anywhere for free! Very interesting and very useful info for every ham, for
every radio- engineer.
5
Antenna Practice
2
Modern Military HF- Antennas of Com. Cars: by Igor Grigorov, RK3ZK
The basic types of military antennas, which for a long time were used on
communication cars, were construed during and before the World War II. After
WW-II researches for new antennas for communication cars was renewed. Below
we shall consider two new type of car antennas which have appeared in army
after the World War-II still are in use on modern communication car. There are
magnet antennas and DDRR antennas, that began to be used for communication
cars (under my information) rather recently - in the middle of 70s years of the 20
century.
34
3
Practical Design of Open- Sleeve Antennas for Upper HF-
Ranges:: by Dmitry Fedorov, UA3AVR
Just practical design of Open- Sleeve Antennas
39
4
Something about Antenna Tuning Units: by Igor Grigorov, RK3ZK
You should not think that an Antenna Tuning Unit (ATU) is a magic thing
to do any antenna work well with your transceiver. At installation between
the transmitter and feeder the ATU only does matching of output
impedance of your transmitter with input impedance of your antenna -
feeder system. It means that ATU allows to the transmitter with output of
50 Ohm to work normally with antenna plus feeder having any input
impedance.
40
5
Antenna Tuning Unit for 6-meters: by Igor Grigorov, RK3ZK
For experimental operation on the 6-meters range some antennas for others
bands with ATU can be used, especially if a radio amateur only starts to work on
the “magic” band. Schematic of such ATU that does match any antenna of 10-20
meters to 6-meters is shown on Fig. 1. The ATU allows match a load of 15 to
1000 Ohms with 50- Ohms coaxial cable or with end stage of the transceiver.
Efficiency is not less than 70 %.
46
6
UR5LCV’s YAGI for Hams: by Igor Zel'din, UR5LCV
Antennas from here were designed and optimized by Igor Zel'din, UR5LCV, and
design of the antennas were wrote in the book: HF- Antennas- 3, by I. Beketov,
UR4LTX, I. Zel'din, UR5LCV, Kharkov, 1994.
10 years has gone from the publishing of the book, for this time lots of these
antennas became well- known to hams of the CIS. Lots of these antennas are
practically made and have shown full conformity to the theoretical parameters.
47
Page 1 http://www.antentop.bel.ru/ mirror: www.antentop.boom.ru
ANTENTOP- 01- 2004, # 005 Table of Contents
Table of Contents
Page
7
UR5LCV’s YAGI for 28-MHz: by Igor Zel'din, UR5LCV
Just practical design.
47
8
UR5LCV’s YAGI for 21-MHz: by Igor Zel'din, UR5LCV
Just practical design.
49
9
UR5LCV’s YAGI for 14-MHz: by Igor Zel'din, UR5LCV
Just practical design.
52
10
UR5LCV’s YAGI for 7-MHz: by Igor Zel'din, UR5LCV
Just practical design.
55
11
UR5LCV’s One Boom YAGI: 3-el 14-MHz & 4-el. 21-MHz: by Igor Zel'din,
UR5LCV
Just practical design.
56
12
UR5LCV’s One Boom YAGI: 4-el 14-MHz & 5-el. 21-MHz: by Igor Zel'din,
UR5LCV
Just practical design.
57
13
UR5LCV’s One Boom YAGI: 4-el 14-MHz & 5-el. 21-MHz: by Igor Zel'din,
UR5LCV
Just practical design.
58
14
UR5LCV’s One Boom YAGI: 4-el 14-MHz & 5-el. 21-MHz: by Igor Zel'din,
UR5LCV
Just practical design.
59
15
A Helical Loop Antenna for the 20-meters Band: By Vladimir Kuz'min,
UA9JKW
Two years back I have moved to Nefteyugansk (Russia, Siberia) where I
could not receive the sanction to installation for a full-sized HF- antenna
on the roof of my house. , So I began to do experimenters with short
indoors antennas.
60
16
Top Load at Vertical Antennas
All amateurs know if at a vertical antenna a top load it is used, the self –
resonance of the vertical antenna would be lower then a vertical without
the top load. How a top load does influence to antenna resonance?
61
17
A Five Bands Vertical Trap Antenna: by M. Chirkov, UL7GCC
The classical W3DZZ antenna in vertical installation designed by
UL7GCC is well known in Russia.
4
Page 2 http://www.antentop.bel.ru/ mirror: www.antentop.boom.ru
ANTENTOP- 01- 2004, # 005 Table of Contents
Table of Contents
Page
QRP
18
QRP- Tales by Alexei Rusakov, UA4ARL/qrp
Continue from ANTENTOP- 03- 2003, # 004 63
19
A QRP-QSO without an Antenna: by Oleg ("Master-72") V.Borodin,
RV3GM
October 5, 2003. Robin, M5AEF, had an unique CW QSO with RX3BO
from Moscow at 17 meters using only 1 watt output. You say ‘it is nothing
especial for 17 meters’, but what do you say, if you know that Robin did
not use any antenna?
63
20
A Simple SSB Transceiver: by by Ashhar Farhan
A dual-band transceiver with a crisp receiver and a clean SSB signal is
described. It started its life as an investigation of the excellent S7C
receiver described in EMRFD. This transceiver was specifically designed
to use components that are easily available in TV and Radio spares
shops. The receiver sports an above average dynamic range, very clean
signal and noiseless performance. Although the components are easily
available, and every detail about making it is covered here, this is not a
weekend project. The design is elaborate and invites improvisation.
64
History
21
The USA Patents of Nicola Tesla
Just list of Patents
70
22
The Strange Life of Nicola Tesla
Nikola Tesla is the true unsung prophet of the electric age; without whom
our radio, auto ignition, telephone, alternating current power generation
and transmission, radio and television would all have been impossible.
Yet his life and times have vanished largely from public access. This
autobiography is released to remedy this situation, and to fill this black
hole in information space.
© Kolmogorov-Smirnov Publishing
73-100
Page 3 http://www.antentop.bel.ru/ mirror: www.antentop.boom.ru
ANTENTOP- 01- 2004, # 005 A Five Bands Vertical Trap Antenna
M. Chirkov, UL7GCC
The classical W3DZZ antenna in vertical installation
designed by UL7GCC and shown at the Reference 1
is well known in Russia. Figure 1 shows the antenna.
Diameter of sections A and B is 40- 50-mm. How is it
work?
40-m band: The trap LC cut out the upper section B
from the antenna. So only section A works as a
radiator, and the section A has length in 10.1 meters,
i.e. has electrical length in 1/4λ. Vertical radiator
having with the length of 1/4λ has a quarter- wave
resonance and works in very effectively way. At the
band the circuit LC works as a trap.
80-m band: On the 80-m band the antenna has
summary physical length of this two sections A+B a
little less than 1/4λ. A + B = 16.47 meters, less then
20 meters OF quarter wave length for the 80-m band.
A short vertical radiator has a capacity part in its input
impedance. But the circuit LC at the 80-m range has
an inductance part in its impedance. The inductance
part compensates capacity part of the electrically short
vertical, and the antenna has a low SWR at the 80-m
range too. In other words, the inductor of the LC works
as a usual lengthening spool.
10-, 15- and 20-m ranges: Visa versa, at the 10-, 15-,
and 20-m the LC has a capacity part at its impedance
that goes the electrical length of the antenna to 1.75λ
at 10-m, to 1.25λ at 15-m and to 0.75λ at 20-m.
Do not forget, verticals like counterpoises, so use
several 1/4λ counterpoises for each bands.
Reference
M. Chirkov, UL7GCC: Multi range vertical //
Radio #12, 1991, p. 21.
http://www.antentop.bel.ru/ mirror: www.antentop.boom.ru Page 4
ANTENTOP- 01- 2004, # 005 Basic Methods in Antenna Measurements
Feel Yourself a Student!
Dear friends, I would like to give to you an interesting and reliable antenna theory. Hours searching in the web
gave me lots theoretical information about antennas. Really, at first I did not know what information to chose for
ANTENTOP. Finally, I stopped on lectures “Modern Antennas in Wireless Telecommunications” written by Prof.
Natalia K. Nikolova from McMaster University, Hamilton, Canada.
You ask me: Why?
Well, I have read many textbooks on Antennas, both, as in Russian as in English. So, I have the possibility to
compare different textbook, and I think, that the lectures give knowledge in antenna field in great way. Here first
lecture “Introduction into Antenna Study” is here. Next issues of ANTENTOP will contain some other lectures.
So, feel yourself a student! Go to Antenna Studies!
I.G.
My Friends, the above placed Intro was given at ANTENTOP- 01- 2003 to Antennas Lectures.
Now I know, that the Lecture is one of popular topics of ANTENTOP. Every Antenna Lecture
was downloaded more than 1000 times!
Now I want to present to you one more very interesting Lecture - it is a Lecture about Basic
Methods in Antenna Measurements. I believe, you cannot find such info anywhere for free!
Very interesting and very useful info for every ham, for every radio- engineer.
So, feel yourself a student! Go to Antenna Studies!
I.G.
McMaster University Hall Prof. Natalia K.
Nikolova
Basic Methods in Antenna Measurements
The basic concepts in antenna measurements are presented in this module. First, a brief description of
antenna ranges and anechoic chambers is given. Second, the basic methods for measuring the far-field
patterns, the gain, the directivity, the radiation efficiency, the impedance and the polarization are
discussed.
by Prof. Natalia K. Nikolova
www.antentop.bel.ru mirror: www.antentop.boom.ru Page-5
ANTENTOP- 01- 2004, # 005 Basic Methods in Antenna Measurements
www.antentop.org Page-6
ANTENTOP- 01- 2004, # 005 Basic Methods in Antenna Measurements
www.antentop.org Page-7
ANTENTOP- 01- 2004, # 005 Basic Methods in Antenna Measurements
www.antentop.org Page-8
ANTENTOP- 01- 2004, # 005 Basic Methods in Antenna Measurements
www.antentop.org Page-9
ANTENTOP- 01- 2004, # 005 Basic Methods in Antenna Measurements
www.antentop.org Page-10
ANTENTOP- 01- 2004, # 005 Basic Methods in Antenna Measurements
www.antentop.org Page-11
ANTENTOP- 01- 2004, # 005 Basic Methods in Antenna Measurements
www.antentop.org Page-12
ANTENTOP- 01- 2004, # 005 Basic Methods in Antenna Measurements
www.antentop.org Page-13
ANTENTOP- 01- 2004, # 005 Basic Methods in Antenna Measurements
www.antentop.org Page-14
ANTENTOP- 01- 2004, # 005 Basic Methods in Antenna Measurements
www.antentop.org Page-15
ANTENTOP- 01- 2004, # 005 Basic Methods in Antenna Measurements
www.antentop.org Page-16
ANTENTOP- 01- 2004, # 005 Basic Methods in Antenna Measurements
www.antentop.org Page-17
ANTENTOP- 01- 2004, # 005 Basic Methods in Antenna Measurements
www.antentop.org Page-18
ANTENTOP- 01- 2004, # 005 Basic Methods in Antenna Measurements
www.antentop.org Page-19
ANTENTOP- 01- 2004, # 005 Basic Methods in Antenna Measurements
www.antentop.org Page-20
ANTENTOP- 01- 2004, # 005 Basic Methods in Antenna Measurements
www.antentop.org Page-21
ANTENTOP- 01- 2004, # 005 Basic Methods in Antenna Measurements
www.antentop.org Page-22
ANTENTOP- 01- 2004, # 005 Basic Methods in Antenna Measurements
www.antentop.org Page-23
ANTENTOP- 01- 2004, # 005 Basic Methods in Antenna Measurements
www.antentop.org Page-24
ANTENTOP- 01- 2004, # 005 Basic Methods in Antenna Measurements
www.antentop.org Page-25
ANTENTOP- 01- 2004, # 005 Basic Methods in Antenna Measurements
www.antentop.org Page-26
ANTENTOP- 01- 2004, # 005 Basic Methods in Antenna Measurements
www.antentop.org Page-27
ANTENTOP- 01- 2004, # 005 Basic Methods in Antenna Measurements
www.antentop.org Page-28
ANTENTOP- 01- 2004, # 005 Basic Methods in Antenna Measurements
www.antentop.org Page-29
ANTENTOP- 01- 2004, # 005 Basic Methods in Antenna Measurements
www.antentop.org Page-30
ANTENTOP- 01- 2004, # 005 Basic Methods in Antenna Measurements
www.antentop.org Page-31
ANTENTOP- 01- 2004, # 005 Basic Methods in Antenna Measurements
www.antentop.org Page-32
ANTENTOP- 01- 2004, # 005 Basic Methods in Antenna Measurements
www.antentop.org Page-33
ANTENTOP- 01- 2004, # 005 Modern Military HF- Antennas of Com. Cars
Igor Grigorov, RK3ZK
antentop@mail.ru
I have a small collection of information about old and modern military HF antennas used over the
World. Presently, two modern automobile HF antennas are described at the article. The antennas
are written “as it is,” i.e., I give all information, that I have had. I know, the information is not
complete at all, but, nevertheless, the information is interesting and it can help somebody to make
own ‘car antennas.’
The basic types of military antennas, which for a
long time were used on communication cars,
were construed during and before the World
War II. After WW-II researches for new antennas
for communication cars was renewed. Below
we shall consider two new type of car antennas
which have appeared in army after the World
War-II still are in use on modern communication
car. There are magnet antennas and DDRR
antennas, that began to be used for
communication cars (under my information)
rather recently - in the middle of 70s years of the
20 century.
corner of the magnet antenna. Driven loop is coupled
to the transmitter with the help of a coaxial cable by
characteristic impedance of100 Ohm. The sizes of
the army magnet antenna for operation in 150 - 80
meters are exhibited in Figure 1b.
Mag Loop antennas of communication cars for
meters
Also magnet antennas are used for operation in HF ra
60 meters. Such magnet antenna has smaller
contrasted to magnet antenna intended for operation
meters. Magnet antenna for 90-60 meters owing to
sizes is installed or above the roof of the cabin of comm
Mag Loop antennas of communication cars for
150-80 meters
As usual a magnet antenna of the range is installed
on a communication car as it is shown in Figure 1.
The magnet antenna ensures sure communication in
radius of 200 kms at the daylight time and up to 400
kilometers at the night time.
Figure 1 Magnet antenna on a communication car
The magnet antenna at marching condition is
installed parallel to the car roof (see. Figure 1a) and
does not hinder to ride the car under low bridges or
under trees in forests. The magnet antenna stands in
operating position with the help of an electric motor
or by operator hand. Figure 1b shows the zenith
magnet antenna in the operating position.
The magnet antenna (item 2, Figure 1b) is tuned in
resonance on the operating frequency with the help
of variable capacitor (item 3, Figure 1b), which is
weatherproofed by hermetic box (item 4, Figure 1b).
The variable capacitor is turned with the help of an
electric motor. The magnet antenna is drove by a
small loop (item 1, Figure 1b) that is installed in
car (see Figure 2) or at back edge of the car (see
Figure 3). At this installation of mag loop the roof of
the car is free to place other antennas or some more
electronic equipment. The sizes of the magnet
antenna for operation in 90 - 60 meters are exhibited
in Figure 2 and Figure 3.
Figure 2 Magnet antenna above the roof of the car
cabin
Figure 3 Magnet antenna on the back edge of the
car
The magnet antennas shown in Figures 1-3 usually
are made of an aluminum bent tube in 20- 40
millimeters in OD and 2-3 millimeters thick.
Magnet antennas for 150 -90 meters is not intended
for operation when a communication car is moving.
But Magnet antennas for 90 - 60 meters can be used
when a communication car is moving.
http://www.antentop.bel.ru/ mirror: www.antentop.boom.ru Page 34
ANTENTOP- 01- 2004, # 005 Modern Military HF- Antennas of Com. Cars
Magnet antenna on a communication car
Antennas DDRR in military communication
Antennas DDRR are used in military communication
of many countries. Figure 4 shows the schematic of
antenna DDRR. Say simple the antenna represents a
tube bent in shape of letter “L”. The length of the ‘L’
Is little smaller the quarter wave of the high lower
range of the antenna, but the length ‘L’ not less the
lower operation range of the antenna. Antenna DDRR
to resonance by the variable capacitor C which is driv
electric motor M. Antenna DDRR, as usual, is mad
aluminum tube in 20-40 millimeters OD.
Figure 4 Schematic of Antenna DDRR of communicatio
http://www.antentop.bel.ru/ mirror: www.antentop.boom.ru Page 35
ANTENTOP- 01- 2004, # 005 Modern Military HF- Antennas of Com. Cars
Magnet antenna above the roof of the car cabin
On military vehicles an antenna DDRR usually
places on one of edges as it is shown in Figure 5. It
allows to install other antennas on the roof of the
communication car. Antennas DDRR often serve as
enclosure of the roof.
Figure 5 Antenna DDRR on military vehicle
Antennas DDRR also are used on some heavy tanks
or BMI (battle machine of infantry). On this military
vehicle the antenna DDRR serves as a rail for other
hand. Antenna DDRR has mechanically strong
design, so it is difficult to damage an antenna DDRR
in battle.
Seldom use two antennas DDRR that fed with
some phase shift to create special diagram
directivity. Figure 6 shows such antenna array.
Figure 6 Array of antennas DDRR
Antenna DDRR is very strong and allows to do comm
when the car is moving. Radio amateurs also can use
DDRR for the operation in ether at installation on the ro
car.
http://www.antentop.bel.ru/ mirror: www.antentop.boom.ru Page 36
ANTENTOP- 01- 2004, # 005 Modern Military HF- Antennas of Com. Cars
http://www.antentop.bel.ru/ mirror: www.antentop.boom.ru Page 37
ANTENTOP- 01- 2004, # 005 Modern Military HF- Antennas of Com. Cars
Antenna DDRR on military vehicle
Array of antennas DDRR
ANTENTOP is Free e- mag for all radioamateurs over the World.
Feel free to share with friends any issue of ANTENTOP.
Feel free to print, copy to CDs or share in any others ways with any issue of
ANTENTOP.
73! Igor Grigorov, RK3ZK
http://www.antentop.bel.ru/ mirror: www.antentop.boom.ru
http://www.antentop.bel.ru/ mirror: www.antentop.boom.ru Page 38
ANTENTOP- 01- 2004, # 005 Practical Design of Open Sleeve Antennas
By Dmitry Fedorov, UA3AVR
Open Sleeve antennas presented at this
article were designed by UA3AVR
(Reference: Dmitry Fedorov (UA3AVR).:
Multi-range vertical Open Sleeve.- Radiomir.
HF and VHF, 2001, #8, pp. 34-36). Table 1
shows data for the Open Sleeve Figure 1
shows the design of the antennas
Band, m Length M,
mm
Length S1,
mm
Distance D1,
mm
Length S2,
mm
Distance D2,
mm
Figure 1
20; 14; 10 5168 3407 220 2573 200 A
14; 10 3630 2527 220 - - B
20; 14; 10 5149 3451 220 2601 200 C
14; 10 3432 2567 210 - - D
http://www.antentop.bel.ru/ mirror: www.antentop.boom.ru Page 39
ANTENTOP- 01- 2004, # 005 Something about ATU
By Igor Grigorov, RK3ZK
antentop@mail.ru
What an ATU does?
You should not think that an Antenna Tuning Unit
(ATU) is a magic thing to do any antenna work well
with your transceiver. At installation between the
transmitter and feeder the ATU only does matching
of output impedance of your transmitter with input
impedance of your antenna - feeder system. It
means that ATU allows to the transmitter with output
of 50 Ohm to work normally with antenna plus
feeder having any input impedance. But probably
SWR would be enough high in the feeder. If the ATU
is installed between antenna and feeder it does low
SWR in feeder and provides good operation for the
transmitter. But probably the antenna would work
not in good way.
So, an ATU provides safe operation for transmitters
end stage, if the ATU is between the transmitter and
the feeder, additionally an ATU does low SWR in
feeder, if the ATU is installed between antenna and
feeder.
As usual modern transceivers and military equipment
have inner ATU that does matching end stage with
feeder or antenna. Below we take close look to ATU
design.
ATU Design
Fig. 1 shows schematic of a “classical” ATU. Such ATU
has:
- a Matching Unit, that provides the matching of
end stage of the transmitter with antenna -
feeder system. Matching Unit is the “heart” of
any ATU;
- A SWR mater or HF-bridge, that shows how the
matching is done;
http://www.antentop.bel.ru/ mirror: www.antentop.boom.ru Page 40
ANTENTOP- 01- 2004, # 005 Something about ATU
- Dummy loads R1, R2 and R3, that help us to
monitor how Matching Unit and SWR – meter (HF-
bridge) do work:
- S1 and S2 for proper connection of the above
mentioned parts;
- J1 and J2 for transmitter and antenna connection.
So, how the ATU does work?
S1 at “Bypass” position does connection of the transmitter
to S2. S2 does connection or to antenna, or to Dummy
Loads R2 (50 Ohms) or R3 (600 Ohms). So, at good 50-
Ohms antenna the transmitter works straight on the
antenna, also is possibility to load the transmitter on 50-
Ohms Dummy Load for a tuning of the transmitter or
checking of the SWR- meter.
S1 at “Tune” position does connection of the transmitter
through inner HF-bridge and Matching Unit to S2. So, it is
possible to tune the Matching Unit or on to real antenna
(S2 in position Ant) or check how the Matching Unit can
tune to 50-Ohms (S2 in position Load 1) or 600-Ohms (S2
in position Load 2) load. When you have your antenna
tuned, switch S1 in position “Operate” and just work in the
ether.
You can see, it is possible to use or SWR- meter or HF-
bridge for tuning the MU on to real load.
As it is visible from this scheme the degree of the
matching of the transmitter with used antenna depends
only on used Matching Unit. Let’s see what our Matching
Unit can contain.
Classical Matching Unit
One of most effective Matching Units is shown on Fig. 2.
This scheme was widely used by the radio amateurs from
early 30s till recently days. As it is visible from Fig. 2, the
end stage of the transmitter is connected through coupling
coil L1 and coupling capacitor C1. L2 and C2 is tuned to
resonance to input signal. C3 does coupling with the load
(antenna).
As usual, L1 has from ¼ to 1/6 from amount of
turns of L2. L1 is winded in lower part of L2. L1
should be unbound from L2 by any qualitative
isolation. In some designs of the MU, L1 is
isolated by means of air. The transmitter is coupled
to the antenna only by magnetic field, so the end
stage of the transmitter is protected from a
lightning. Resonance circuit kills harmonics. The
Classical Matching Unit does well match a load
from 10 to 1000 Ohms with end stage of
transmitter in 50 or 75-Ohm impedance.
C1 should have maximum of capacity up to 1500-
pF at operation through 1,8- 28 MHz, and 500-pF
would be enough for operation through 3.5- 28
MHz. If L1 has optimal number of turns the C1 is
not necessary at all. C2 and C3 should have the
greatest possible clearance between their plates.
At constant parameters of L1 and L2 the Classical
Matching Unit works with high efficiency only in two
multiple amateur HF - ranges, for example, 1,8 and
3,5 MHz, 7 and 14 MHz and so on. At others
ranges efficiency is dropped. Old Classical
Matching Unit had plug-in coils for all amateur
range for keeping the efficiency at high level. L2
should be placed as far as possible from metal
walls of the cabinet of the ATU.
To tune the MU is very simple. At first, C1 has the
maximum capacity, C2 and C3 have minimum
capacity. Then, with help of C2 do tune resonance
circuit L2C2 in the resonance to working frequency,
then C3 does optima matching with the antenna.
After that once more time do tuning C2 and C1. It
is necessary to say, that after final tuning of the MU
C3 has to have the greatest capacity as it is
possible.
Advantages of the MU are following. It does not
require too careful manufacture of L1 and L2. The
system ensures high efficiency, up to 80 percents.
Tuning is done with two capacitors C2 and C3. The
lacks are that for high efficiency in the matching
unit it is necessary to use one spool to two multiple
ranges, and one variable capacitor insulated from
case of an ATU.
Classical Matching Unit with a symmetrical
output
Recently symmetrical antennas with a symmetrical
feeder are applied seldom, but some decades ago
it was a usual matter. Classical Matching Unit with
symmetrical output is shown on Fig. 3. In scheme
shown in Fig. 3 a RF- voltage for antenna - feeder
system is removed symmetrically from both ends
of L2, and it is only difference from the scheme
shown in Fig. 2. In practical design L1 should be
disposed symmetrically concerning resonance
spool L2. Twins capacitors C2.1 and C2.2 should
have one axe. It is as well as to C3.1 and C3.2.
http://www.antentop.bel.ru/ mirror: www.antentop.boom.ru Page 41
ANTENTOP- 01- 2004, # 005 Something about ATU
Classical Matching Unit with taps
You can see that C3 is isolated from metal cabinet of the
ATU. It is not convenient for practical design of an ATU,
so amateurs often use Classical Matching Unit with taps.
Fig. 4 shows such MU with asymmetrical output, Fig.
5 shows Classical Matching Unit with taps with
symmetrical output. These schemes (Fig. 4 and 5)
cannot give such careful matching, as shown in Fig.
2 or Fig. 3 have provided. But in case if it is need to
minimize dimensions of an ATU the schemes can be
used.
Multi-range Matching Unit with taps
So, if you want to build an ATU having minimum
sizes and parts try the schematic shown in Fig. 6.
However, the Matching Unit has not high efficiency
at upper amateur ranges because of lowering of the
Q-factor of L2 and because of not optimal selection
of taps from L2. But usage of such simplified multi-
range Matching Unit at amateur HF - ranges 1,8-
10-MHz is quite acceptable.
T - Matching Unit
Classical Matching Unit is very effective in the work.
However, among radio amateurs and military T-
Matching Unit has more popularity then one shown in
Fig. 2. It takes place because T- Matching Unit have
high efficiency at very wide frequency ranges and T-
Matching Unit allows to do easy automatic tuning
(that very likely to the military!). Also, T- Matching
Unit works very well with for asymmetrical coaxial
cables feeding modern antennas. Fig. 7 shows
schematic of T- Matching Unit. The MU has rather
good parameters. It is possible to do matching a 50–
Ohms transmitter to 10- 1000-Ohms antenna. It is
possible overlap all HF- amateur bands from 3,5 up
to 30 MHz using only one variable inductor at 0.5-30-
µH and two variable capacitor at 10- 250-pF. The
MU does matching at 1.8-MHz if to bridge C1 and C2
to connect fixed capacitors at 200-pF.
http://www.antentop.bel.ru/ mirror: www.antentop.boom.ru Page 42
ANTENTOP- 01- 2004, # 005 Something about ATU
The “cold” end of L1 should be grounded or isolated
carefully from the metal case of ATU. Otherwise you
probably will have strong arc between the
ungrounded end of L1 and a wall of the ATU, as it is
shown in Fig. 8. C1 and C1 should be very
qualitative with aerial or vacuum dielectric. The
clearance between plates of capacitors should be
not less than 2-mm/ to 200-W bypass power. Stray
capacitance of C1 and C2 to the metal case of ATU
should be no more than 25-pF, otherwise the
efficiency at 24-28-MHz drop.
Figure 8 Arcing inductor
If you want to connect symmetrical antennas feeding
through symmetrical ladder lines to the T- Matching
Unit, use symmetrical transformer 1:4 or 1:6. BTW,
many of symmetrical antennas, feeding through
ladder lines have large reactive component, which
bad to transformation by simple transformers 1:4 or
1:6. The T - Matching Unit suppress harmonics up to
10-15 dB.
T - Matching Unit with a “digital” inductor
L1 has to have slide contact to operate the MU in proper
way. Sometimes, even extra half of a turn influences to
the matching. It restricts usage of an inductor with taps,
or demands personal selection taps for real antenna, that
certainly, restricts possibilities “tap” MU. Simple decision
on this problem by W3TS made, he offered a “digital”
inductor that Fig. 9 shows. Really, it is possible with the
help of several switches very fine to tune needed
inductance. Electronic relays with special chips allow
realize automatic ATU. Military also use the method at
their automatic ATU.
T - Matching Unit with mirror parts
For practical design of any ATU it is not conveniently to
have two capacitors insulated from the ground. AEA
corporation (USA) does the MU as Fig. 10 shows. You
can see that they changed C to L. Really, schemes of
MU figured in Fig. 7 and Fig. 10 are equivalent.
http://www.antentop.bel.ru/ mirror: www.antentop.boom.ru Page 43
ANTENTOP- 01- 2004, # 005 Something about ATU
But scheme in Fig. 10 has advantages. At first, it is
much easier to use only one grounded high-quality
capacitor instead of two ones but insulated from
metal cabinet. Secondly, it is wise to substitute
expensive inductor with slide control to two cheapie
spools with taps.
The MU made by me at home conditions worked
well on all amateur ranges from 1,8 up to 30 MHz
and did
matching to 50-Ohms transmitter to antenna with
resistance from 15 up to 500-Ohms.
The inductors were made as Fig. 11 shows. Form of
inductors is made of PC – board with slots for turns. On
the plate switch for taps is installed. The plate is
disposed not in center of the inductor but little sideways
as Fig. 12 shows.
Pi- Matching Unit
Pi - MU is used in radio amateur practice for a long
time. It is possible to find Pi - MU and disputes on
this subject at radio amateur journals issued on 20s
of the 20 century till our time in the Internet. Fig. 13
shows Pi– MU. As usual Pi – MU is used at inner
MU at tube and transistor PA or straight at antenna
clips..
Pi – MU seldom is used at separate ATU. For matching
in a wide frequency ranges loads with resistance 10-
1000- Ohms it need to change C and L at Pi – MU too
greatly. So, it is impossible to do universal Pi – MU.
It is desirable to use slider inductor because. In case if
an inductor with fixed taps is used you can carefully to
select the tap for real antenna.
http://www.antentop.bel.ru/ mirror: www.antentop.boom.ru Page 44
ANTENTOP- 01- 2004, # 005 Something about ATU
L- Matching Unit
Fig. 14 shows L- MU. This one is a simplified
version of Pi – MU. ATU, keeping L- MU often is
used for operation with simple tube and transistor
transceivers and for matching simple multi- range
antennas, which do not contain large reactive
component.
Parts for the ATU
The data of spools for the MU exhibited on Fig. 2
are shown in Tab. 1, for the MU exhibited on Fig. 3
are shown in Tab. 2.
Table 1 Data for MU exhibited on Fig. 2
Frequency band,
MHz
1,9 3,5-3,8 7 10 18 14 21 24 27-30
Diameter of
spool, mm 50 30 25 25 25 25 25 25 25
Length of
winding, mm 50 30 40 40 40 40 30 30 30
Number of
turns 100 30 20 15 10 11,5 8,5 7,5 6,5
Table 2 Data for MU exhibited on Fig. 3
Frequency
band, MHz
1,9 3,5-3,8 7 10 14 18 21 24 27-30
Diameter of
spool, mm 50 40 25 25 25 25 25 25 25
Length of
winding, mm 60 40 40 50 40 40 40 40 35
Number of
turns, n 130 35 28 20 15 11,5 11 9,5 8,5
Tab. 3 Data for digital inductor shown in Fig. 9
Inductance, µH 8 4 2 1 0,5 0,25 0,12
Diameter of
spool, mm 30 20 20 20 25 10 10
Length of
winding, mm 30 20 25 20 20 10 10
Number of
turns, mm 20 18 12 8,5 5 6 4
It is possible to use for T –MU any variometer, which
is possible to get. Variometer has to have maximum
inductance not less than 30-µH and minimum close
to zero. If the maximum of the inductance of the
variometer is less, for expansion of frequency range
of the ATU to include in serial with the variometer a
fixed inductor. If the minimum inductance of the
variometer does not reach zero, it is essentially cut
off the upper range of operation of the ATU.
The design data for spools for digital inductor shown on
Fig. 9 are shown in Tab. 3. Significant RF-currents flow
through parts of MU - capacitors, inductors, and
switches. So all of the parts should be qualitative.
73! I.G.
http://www.antentop.bel.ru/ mirror: www.antentop.boom.ru Page 45
ANTENTOP- 01- 2004, # 005 Antenna Tuning Unit for 6-meters
By Igor Grigorov, RK3ZK
antentop@mail.ru
For experimental operation on the 6-meters range
some antennas for others bands with ATU can be
used, especially if a radio amateur only starts to
work on the “magic” band. Schematic for such ATU
that does match any antenna of 10-20 meters to 6-
meters is shown on Fig. 1.
The ATU allows match a load of 15 to 1000 Ohms
with 50- Ohms coaxial cable or with end stage of the
transceiver. Efficiency is not less than 70 %. The
ATU has L2C1 resonant circuit that kills TVI very
well.
Of course, to install the ATU between the antenna
and the coaxial cable is the best way for the RF
power going to the antenna. In this case you can
connect the antenna to J3 and the coaxial cable to
J1. Of course, the situation is impossible at many
cases, because it requires install the ATU straight by
the antenna terminals. So, more often we have only
one way - connect the coaxial cable going from the
antenna to J2 and the transceiver to J1. The coaxial
cable going from the antenna will work with high
SWR and maybe, with large losses. But we will have
possibility work in the ether at 6-meters.
Some words about parts of the ATU. L2 consist of 8
turns of copper wire of 2.0-mm or #12AWG. The coil
is air wound, OD is 16-mm diameter, the length is
24-mm. L1 consists of 3 turns of copper wire of 1.0-mm
or #18AWG. L1 is wound above "cold" end of L2. The
length of L1 is approximately 5-mm. R1 serves for
removal of static voltage accumulated by the antenna.
J1 is intended for coaxial cable going to the transceiver.
J2 is intended for coaxial cable feeding antennas. J3 is
intended connection to the antenna terminals or for
feeding the antenna through a ladder line. J3 is just two
screws of diameter of 3-mm.
ATU is tuned with help of a Neon bulb VL1. You can use
any small neon bulb. One clip of the bulb is connected to
the antenna a piece of wire of length of 3- 10-cm
(depends on the transceiver power) is connected to
other clip. Tune the ATU to the maxima of glow of the
bulb. If you use a QRP- transceiver you can use a FSM
(Field Strength Meter) for the tuning.
Do tuning in this way. Firstly C2 stands to minimum.
Secondly, with the help of C1 do tune the L2C1 to the
resonance (by the neon bulb VL1). Then gradually do
augment capacity of C2 to maxima of glow of the neon
bulb VL1. C1 and C2 can be aerial dielectric, and plate
clearance should be 0.5-mm to 30 watts bypass power. .
The ATU is assembled inside a box soldered from PC –
board. Box has dimensions 100*70*50 mm.
http://www.antentop.bel.ru/ mirror: www.antentop.boom.ru Page 46
ANTENTOP- 01- 2004, # 005 UR5LCV’s YAGI for Hams
Antennas from here were designed and optimized by
Igor Zel'din, UR5LCV, and design of the antennas
were wrote in the book: HF- Antennas- 3, by I.
Beketov, UR4LTX, I. Zel'din, UR5LCV, Kharkov,
1994.
10 years has gone from the publishing of the book,
for this time lots of these antennas became well-
known to hams of the CIS. Lots of these antennas
are practically made and have shown full conformity
to the theoretical parameters.
The antennas are designed for tubes of 25-mm diameter.
If for tubes with different OD are used for elements of
antennas do correcting of antenna sizes by modern
Antenna Simulation Program. Input resistance of the
antenna is much lower the 50 Ohms so it need to use a
gamma match feed the antenna. You may calculate a
gamma – match using programs given at Appendix to
ARRL-Antenna Book, 19 or 20 Edition.
4-el YAGI for 28-MHz
F, MHz 28.0 28.35 28.7
G, dBd 7.16 7.49 7.87
F/B, dB 20.35 28.36 20.27
Z, Ohm 30.4-j7 26.4+j1.6 20.4+j.14.3
SWR 1:1.63 1:1.14 1:1.6
OD 25-mm Reflector Driver Director 1 Director 2
Length, cm 535 503 479 448
Spacing to
Reflector, cm
0 168 368 683
http://www.antentop.bel.ru/ mirror: www.antentop.boom.ru Page 47
ANTENTOP- 01- 2004, # 005 5-el YAGI for 28-MHz
5-el YAGI for 28-MHz
F, MHz 28.0 28.35 28.7
G, dBd 8.17 8.41 8.46
F/B, dB 20.46 38.03 20.74
Z, Ohm 28.9-j9.8 29.5+j0.3 35+j2.9
SWR 1:1.3 1:1.09 1:1.29
OD 25-mm Reflector Driver Director 1 Director 2 Director 3
Length, cm 524 509 488 482 466
Spacing to Reflector, cm 0 149 253 478 736
6-el YAGI for 28-MHz
F, MHz 28.0 28.35 28.7
G, dBd 9.39 9.62 9.49
F/B, dB 17.1 26.7 18.1
Z, Ohm 29.2-j8.8 24.6+j1 21.4+j21.7
SWR 1:1.95 1:1.3 1:1.94
OD 25-mm Reflector Driver Director 1 Director 2 Director 3 Director 4
Length, cm 530 502 481 480 477 464
Spacing to
Reflector, cm
0 160 308 500 781 1084
http://www.antentop.bel.ru/ mirror: www.antentop.boom.ru Page 48
ANTENTOP- 01- 2004, # 005 7-el YAGI for 28-MHz
7-el YAGI for 28-MHz
F, MHz 28.0 28.35 28.7
G, dBd 9.74 10.1 10.2
F/B, dB 20.48 23.75 18.15
Z, Ohm 30.2-11.1 30.6+j0.8 33.8+j10.9
SWR 1:1.48 1:1 1:1.39
OD 25-mm Reflector Driver Director 1 Director 2 Director 3 Director 4 Director 5
Length, cm 520 501 486 479 473 470 458
Spacing to
Reflector,
cm
0 205 348 541 779 1058 1343
4-el YAGI for 21-MHz
http://www.antentop.bel.ru/ mirror: www.antentop.boom.ru Page 49
ANTENTOP- 01- 2004, # 005 4-el YAGI for 21-MHz
F, MHz 21.0 21.175 21.35
G, dBd 6.88 7.03 7.16
F/B, dB 20.83 21.36 20.83
Z, Ohm 26.7-j3.8 23.3+j1.4 18.3+j8.6
SWR 1:1.4 1:1.09 1:1.4
OD 25-mm Reflector Driver Director 1 Director 2
Length, cm 722 684 658 614
Spacing to Reflector, cm 0 160 340 676
Another One 4-el YAGI for 21-MHz
F, MHz 21.0 21.175 21.35
G, dBd 7.74 8.0 8.26
F/B, dB 19.65 32.1 20.49
Z, Ohm 29-j58 24.2+j0.9 17.5+j10.6
SWR 1:1.53 1:1.15 1:1.54
OD 25-mm Reflector Driver Director 1 Director 2
Length, cm 716 674 650 634
Spacing to Reflector, cm 0 210 516 880
5-el YAGI for 21-MHz
F, MHz 21.0 21.175 21.35
G, dBd 8.19 8.39 8.54
F/B, dB 22.99 29.06 21.34
Z, Ohm 29.3-j8.8 29.3+j0.3 31.2+j11
SWR 1:1.39 1:1.02 1:1.4
OD 25-mm Reflector Driver Director 1 Director 2 Director 3
Length, cm 700 675 645 643 622
Spacing to Reflector, cm 0 234 388 657 1022
http://www.antentop.bel.ru/ mirror: www.antentop.boom.ru Page 50
ANTENTOP- 01- 2004, # 005 6-el YAGI for 21-MHz
6-el YAGI for 21-MHz
F, MHz 21.0 21.175 21.35
G, dBd 9.46 9.63 9.62
F/B, dB 20.24 31.15 20.33
Z, Ohm 27.6-j8.3 23.8+j0.0 20.3+j13.7
SWR 1:1.65 1:1.16 1:1.64
OD 25-mm Reflector Driver Director 1 Director 2 Director 3 Director 4
Length, cm 713 673 647 645 643 625
Spacing to Reflector,
cm
0 218 413 658 1045 1450
7-el YAGI for 21-MHz
F, MHz 21.0 21.175 21.35
G, dBd 9.98 10.1 10.21
F/B, dB 23.61 24.14 20.00
Z, Ohm 29.5-j8.3 29.6+j0.1 30.7+j8.0
SWR 1:1.33 1:1 1:1.64
http://www.antentop.bel.ru/ mirror: www.antentop.boom.ru Page 51
ANTENTOP- 01- 2004, # 005 3-el YAGI for 14-MHz
OD 25-mm Reflector Driver Director 1 Director 2 Director 3 Director 4 Director 5
Length, cm 695 674 649 638 630 626 607
Spacing to
Reflector,
cm
0 275 466 725 1043 1417 1798
3-el YAGI for 14-MHz
F, MHz 14.0 14.15 14.3
G, dBd 5.96 6.11 6.29
F/B, dB 19.07 25.43 18.44
Z, Ohm 22.4-j10.5 22.5+j0.3 21.3+j11.6
SWR 1:1.64 1:1.02 1:1.64
OD 25-mm Reflector Driver Director 1
Length, cm 1054 1010 947
Spacing to Reflector, cm 0 282 696
http://www.antentop.bel.ru/ mirror: www.antentop.boom.ru Page 52
ANTENTOP- 01- 2004, # 005 4-el YAGI for 14-MHz
4-el YAGI for 14-MHz
F, MHz 14.0 14.15 14.3
G, dBd 6.86 7.0 7.12
F/B, dB 18.02 20.13 18.93
Z, Ohm 22.2-j8.9 22.6+j0.3 20.2+j8.6
SWR 1:1.5 1:1.02 1:1.5
OD 25-mm Reflector Driver Director 1 Director 2
Length, cm 1052 1018 982 920
Spacing to Reflector, cm 0 254 536 968
Another One 4-el YAGI for 14-MHz
F, MHz 14.0 14.15 14.3
G, dBd 7.5 7.84 8.24
F/B, dB 18.08 29.19 18.06
Z, Ohm 34.3-j5.9 28.3+j0.8 18.2+j14.3
SWR 1:1.68 1:1.26 1:1.67
OD 25-mm Reflector Driver Director 1 Director 2
Length, cm 1079 1014 976 954
Spacing to Reflector, cm 0 326 771 1320
http://www.antentop.bel.ru/ mirror: www.antentop.boom.ru Page 53
ANTENTOP- 01- 2004, # 005 5-el YAGI for 14-MHz
5-el YAGI for 14-MHz
F, MHz 14.0 14.15 14.3
G, dBd 8.23 8.53 8.77
F/B, dB 20.03 28.74 19.6
Z, Ohm 28.3-j9.4 25.7+j1.6 22.8+j14.4
SWR 1:1.61 1:1.07 1:1.67
OD 25-mm Reflector Driver Director 1 Director 2 Director 3
Length, cm 1046 1013 972 961 929
Spacing to Reflector, cm 0 372 746 1237 1694
6el YAGI for 14-MHz
F, MHz 14.0 14.15 14.3
G, dBd 9.4 9.6 9.45
F/B, dB 17.46 26.31 18.1
Z, Ohm 32.9-j8.7 27.2+j0.3 23.3+j22
SWR 1:1.85 1:1.32 1:1.8
http://www.antentop.bel.ru/ mirror: www.antentop.boom.ru Page 54
ANTENTOP- 01- 2004, # 005 7-el YAGI for 14-MHz
OD 25-mm Reflector Driver Director 1 Director 2 Director 3 Director 4
Length, cm 1066 1016 979 973 971 952
Spacing to
Reflector, cm
0 333 596 983 1574 2142
7el YAGI for 14-MHz
F, MHz 14.0 14.15 14.3
G, dBd 9.8 10.1 10.21
F/B, dB 22.07 24.03 19.01
Z, Ohm 31.2-j11.2 31.4+j0.1 33.3+j9.8
SWR 1:1.46 1:1 1:1.39
OD 25-mm Reflector Driver Director 1 Director 2 Director 3 Director 4 Director 5
Length, cm 1044 1012 976 960 950 946 919
Spacing to
Reflector, cm
0 413 697 1085 1561 2120 2690
3el YAGI for 14-MHz
F, MHz 7.0 7.05 7.1
G, dBd 6.12 6.3 6.5
F/B, dB 21.19 26.44 20.3
Z, Ohm 23.6-j7.7 22.2+j0.2 20.2+j8.8
SWR 1:1.46 1:1.03 1:1.46
OD 25-mm Reflector Driver Director 1
Length, cm 2100 2037 1934
Spacing to
Reflector, cm
0 675 1435
http://www.antentop.bel.ru/ mirror: www.antentop.boom.ru Page 55
ANTENTOP- 01- 2004, # 005 UR5LCV’s One Boom YAGI: 3-el. 14-MHz & 4-el.
F,
MHz
14.0 14.15 14.3 21.0 21.175 21.35
G,
dBd
6.2 6.3 5.9 5.9 6.2 6.5
F/B,
dB
16.7 20.4 16.8 18.6 19.5 19.8
Z,
Ohm
19.5—j11.9 21.1+j0.8 22.0+j14.0 32.8+j6.0 28.8+j0.2 24.2+j7.5
OD 25-
mm
Reflector
14
Reflector
21
Driver
14
Driver
21
Director
21.1
Director
14.1
Director
21.2
Length,
cm
1054 708 1012 688 656 943 631
Spacing to
Reflector
14, cm
0 200 282 380 575 725 830
http://www.antentop.bel.ru/ mirror: www.antentop.boom.ru Page 56
ANTENTOP- 01- 2004, # 005 UR5LCV’s One Boom YAGI: 4-el. 14-MHz & 5-el.
F,
MHz
14.0 14.15 14.3 21.0 21.175 21.35
G,
dBd
6.9 7 7.1 7.6 8.0 8.3
F/B,
dB
15.7 17.4 18.1 23.6 25.0 20.3
Z,
Ohm
22.9—j8.9 23.5+j0.5 25.0+j7.0 24.2+j3.5 27.5+j0.7 32.5+j1.7
OD 25-
mm
Ref.
14
Ref.
21
Driver
14
Driver
21
Director
21.1
Director
14.1
Director
21.2
Director
14.2
Director
21.3
Length,
cm
1050 702 1020 686 664 982 648 920 640
Spacing
to
Reflector
14, cm
0 80 250 300 430 536 705 986 1075
http://www.antentop.bel.ru/ mirror: www.antentop.boom.ru Page 57
ANTENTOP- 01- 2004, # 005 UR5LCV’s One Boom YAGI: 4-el. 21-MHz & 5-el.
F,
MHz
21.0 21.175 21.35 28.0 28.35 28.7
G,
dBd
7.9 8.1 8.2 6.5 7.3 8.1
F/B,
dB
21.3 25.0 21.1 18.1 27.0 17.4
Z,
Ohm
27.3—j11.0 24.1+j1.6 20.1+j17.0 31.9+j6.4 35.8+j0.2 41.0+j5.0
OD 25-
mm
Ref.
21
Ref.
28
Driver
21
Driver
28
Director
28.1
Director
21.1
Director
28.2
Director
21.2
Director
21.3
Length,
cm
716 520 626 508 490 682 475 628 472
Spacing
to
Reflector
14, cm
0 170 210 315 420 516 620 880 950
http://www.antentop.bel.ru/ mirror: www.antentop.boom.ru Page 58
ANTENTOP- 01- 2004, # 005 UR5LCV’s One Boom YAGI: 5-el. 21-MHz & 6-el.
F,
MHz
21.0 21.175 21.35 28.0 28.35 28.7
G,
dBd
8.4 8.6 8.7 8.1 9.3 9.8
F/B,
dB
24.8 25.1 18.6 13.4 20.4 14.3
Z,
Ohm
25.9—j9.9 28.6+j0.9 34.9+j13.1 26.8-j4.8 23.5+j0.4 49.8+j51
OD 25-
mm
Ref.
21
Ref.
28
Dr.
21
Dr.
28
Direct.
28.1
Direct.
21.1
Direct.
28.2
Direct.
21.2
Direct.
28.3
Direct.
21.3
Direct.
28.4
Length,
cm
700 530 677 510 496 647 490 645 478 624 464
Spacing
to
Reflector
14, cm
0 70 234 270 340 388 560 657 900 1022 1200
http://www.antentop.bel.ru/ mirror: www.antentop.boom.ru Page 59
ANTENTOP- 01- 2004, # 005 A Helical Loop Antenna for the 20-meters Band
By Vladimir Kuz'min, UA9JKW,
KuzminVI@pn.yungjsc.com
Two years back I have moved to Nefteyugansk
(Russia, Siberia) where I could not receive the
sanction to installation for a full-sized HF- antenna on
the roof of my house. , So I began to do
experimenters with short indoors antennas. Most
success design of my indoor antenna is a design
similar to Fig. 59, given in Reference 1.
I have used an inch OD plastic pipe to the form of the
antennal. The pipe was bent in a hoop near1 meter
diameter. Antenna has 580 turns (near 61 meters of
length) of multicore isolated wire of 3 mm diameter
with thickness of isolation of 1 mm. So, the spacing
between turns is 2 mm. Antenna has SWR 1:1 to 50-
Ohm coaxial cable to 14.100, bandwidth to SWR 1:1.5
is 300-kHz. I use a simple symmetrical device- 3 turns
on a TV yoke ferrite core. Space from the antenna to
the ceil is near 25 centimeters.
The antenna has quite good directed properties at
rotation within 30-90 degrees the force of signals
varied to 1-1,5 points on mine S-meter. I use a
YAESU FT840 for my work in the ether. Change of
polarization (at rotation of the antenna on the vertical
side) appreciable changes has not given as well as
change of feeding points has not given large change
in the force of signals.
Helical Loop Antenna
Figure 58 & 59 from Reference 1
http://www.antentop.bel.ru/ mirror: www.antentop.boom.ru Page 60
ANTENTOP- 01- 2004, # 005 Top Load at Vertical Antennas
In the last summer I experimented and hung up of
the antenna behind my balcony at 1.5 meters from a
wall. I have received a significant improvement of
the work of the antenna The antenna does very
good operation in the ether, better than others
indoors antennas. It gives low industrial noise and
kills all TVI.
Reference:
I. Grigorov. Antennas for radio amateurs. - Majkop,
1998.
Get free the book from
http://www.cqham.ru/
UA9JKW at his shack
All amateurs know if at a vertical antenna a top load it
is used, the self –resonance of the vertical antenna
would be lower then a vertical without the top load.
How a top load does influence to antenna resonance?
At Reference 1 I found a very interesting table having
the data. I have proved the table with MMANA, all
okey, the table gives very reliable data, so it is
possible to use it at many situations. Figure 1 shows
different top loads. Data for loaded effect for the top
load is shown in Table 1 given at Reference 1. K is
coefficient: K = W/L, where W is a resonance
wavelength for the vertical antenna, L is antenna
length from the ground to the top load.
As it is seen, the “umbrella” top load (Figure 1e) gives
the most effect on the resonance of a vertical antenna.
For example, if to use an umbrella load for a vertical
antenna in five meters height, the antenna quarter
wave fundamental resonance wavelength would be
changed from 20 to 50 meters!
Reference:
1. Polyakov V. Technique of radio: Simple AM
receivers. – Moscow, DMK-Press, 2001.
73! I.G.
http://www.antentop.bel.ru/ mirror: www.antentop.boom.ru Page 61
ANTENTOP- 01- 2004, # 005 Top Load at Vertical Antennas
Kind of an antenna K
Simple vertical
Figure 1a
4
Inverted L with short horizontal part
Figure 1b
4.5-5
Inverted L with long horizontal part
Figure 1c
5-6
T- antenna with long horizontal part
Figure 1d
6-8
Umbrella antenna with 4-8 wires
Figure 1e
6-10
http://www.antentop.bel.ru/ mirror: www.antentop.boom.ru Page 62
ANTENTOP- 01- 2004, # 005 QRP Tales
By Alexei Rusakov, UA4ARL/qrp (RU-QRP # 005) ua4arl@vistcom.ru
Continued from ANTENTOP- 03-2003
1'st March, 2003
The ARRL phone contest was today but propagation
was bad into Volgograd. Even the CW portions were
quiet. I checked all the CW portions of the bands this
morning and figured that everyone was on SSB. In
the evening I went back to check the condition of the
bands but 21.060, 24.900 and 28.060 were already
gone. While in 15 meters I slid down the band and
heard some Europeans. LP's were 549 - 559 while
HP's were no louder than 589 here in Volgograd.
Around 21.006 there was someone that had a 559
signal with 3 or 4 stations calling him. However, he
didn't give his call sign while I was listening.
I changed antennas from a North delta to an Africa
oriented 2 element and the signal went to 579. That
is a good sign, I thought. Suddenly DX starting
sending CQ CQ C98RF UP. I tuned the signal in
with anticipation. I went up 1.5 kHz and called, but
without the /QRP. I must have been the only one
that answered him because he came back to me on
the first try! I then told him that I was running QRP.
After our QSO was over sounded the orchestra of calling
stations on the same frequency. I sat and enjoyed
listening to the pile-up of DXers. Easy propagation for
about an hour and a half then the signals went down to
459.
72! UA4ARL/qrp Alexei Rusakov
Credit Line : http://ruqrp.narod.ru
October 5, 2003. Robin, M5AEF, had an unique
CW QSO with RX3BO from Moscow at 17 meters
using only 1 watt output. You say ‘it is nothing
especial for 17 meters’, but what do you say, if you
know that Robin did not use any antenna?
Yes, Robin was doing a calibration for his FT- 757,
and this one was connected to a dummy load. An
antenna did not connected to the transceiver at this
time, the antenna was connected to monitoring
receiver, that does control for quality of the output
signal from FT- 757. So, Robin heard Anatoly,
RX3BO, from Moscow and they had QSO with each
other. Robin had received 559 from Anatoly for his
dummy- load antenna!
Some minutes later Robin connected his usual 1,5
lambda antenna to the FT – 757 and did QSO with
RX3BO. Robin had received 579!
Don’t say me that there are no miracles!
With the best regards!
Oleg ("Master-72") V.Borodin
72! de RV3GM (UE3QRP)
Credit Line:
http://groups.yahoo.com/group/ruqrp/
Dear Friends,
you can read about a QRP- QSO without antenna
also at ANTENTOP – 01-2003.
72/73! I.G,
http://www.antentop.bel.ru/ mirror: www.antentop.boom.ru Page 63
ANTENTOP- 01- 2004, # 005 A Simple SSB Transceiver
Credit Line:
http://farhan.net.co.nr/
by Ashhar Farhan
computercorp@hotmail.com
A dual-band transceiver with a crisp receiver and a
clean SSB signal is described. It started its life as an
investigation of the excellent S7C receiver described
in EMRFD. This transceiver was specifically
designed to use components that are easily
available in TV and Radio spares shops. The
receiver sports an above average dynamic range,
very clean signal and noiseless performance.
Although the components are easily available, and
every detail about making it is covered here, this is
not a weekend project. The design is elaborate and
invites improvisation.
We decided to pursue the following rules in
designing this transceiver:
► Use what is easily available. Very often, we find
designs that look good but they use exotic parts like
TUF-1 mixers that are simply impossible to get hold
of in India and other countries. Instead, we have
tried using those spares that are universally
available.
► Keep impedances and gain low: Often, we try
coaxing maximum gain out of a stage making it
difficult to duplicate and stabilize. We chose to take
only modest gain out of each stage, using extensive
feedback to make the circuit stable. Most of the
interconnections between modules are for 50 ohms
termination. In fact, the rig was a number of discrete
board connected using RCA audio cables and
sockets before we hooked it all up together to work.
► No PCB. We directly solder the components over
a plain copper clad board (un-etched PCB). It is an
excellent way to experiment, physically robust and
has a quick and dirty appeal. You can usually solder
up a whole circuit as you think it out in a few
minutes. See the pictures.
► Broadband. We wanted to be able to use
broadband design where applicable. We have found
that the television balun cores are an excellent and
very cheap (about Rs. 2 per balun, that is 5 cents)
way of making broadband transformers.
► Modest cost. While we didn’t want to use very
expensive components. We didn’t want to
compromise the performance either. You will see
that we have used 2N3866 exclusively. This was
because we found that the BF195/BF194/2N2222
series transistors available in the market were
consistently inferior in the HF range and performed
below their stated specs. The 2N3866 is commonly
used in cable TV equipment and has a good HF
performance: both as a low noise small signal transistor
as well as driver up to 1 watt level. 2N3866 is expensive
(about Rs.20 each, but well worth the expense). It is
used in a number of critical places.
► Measure what you have built. We used a 12 volt 1.5A
power supply, a frequency counter, a test oscillator (to
measure the crystals and coils) and a high impedance
voltmeter with an RF probe to test and measure the
design. All these test equipment were homemade. The
transmitter design did require a PC-based oscilloscope.
It helped us identify the spurs and harmonics using the
in-built FFT functionality. But now that the design is
complete, just an RF probe and a 14MHz receiver are
enough to align the rig.
► Quality over quantity. A better signal is preferred to a
bigger signal. This is a 6 watt design that will work off a
simple 12V, 1.5A supply (using a single 7812).
The ladder crystal filter
A good filter is central to the crispness of a receiver and
the quality of the transmitter. There are two types of
crystal filters possible, the lattice filter and the ladder
filter. The lattice filter requires ordering crystals with 1.5
KHz frequency difference between them. This was ruled
out, also procuring readymade filters from BEL India and
other sources was ruled out as it is too expensive to do
that. Instead, a ladder filter was chosen. The ladder filter
offers results as good if not better than a lattice filter.
However, the design is crucially dependent upon internal
parameters of the crystals used. It is not possible to
suggest any generic values for the capacitors to be used
in the ladder filter. Rather, a method to measure each of
the crystals and calculate the capacitor values has been
worked out. We present this here. This design procedure
will work only for 10 MHz crystals. 10Mhz is the chosen
IF of our filter as the crystals are easily available and it
sits comfortably between 7 and 14 MHz amateur bands.
We have followed the Butterworth design methodology
given in the new ARRL book ‘Experimental Methods in
RF Design’.
The circuit centers around a four crystal ladder filter.
Each lot of crystals from each manufacturer differs from
the others. We will describe a way to experimentally
calculate the values of the capacitors for the filter. You
should probably buy 10 crystals and select 5 of them.
http://www.antentop.bel.ru/ mirror: www.antentop.boom.ru Page 64
ANTENTOP- 01- 2004, # 005 A Simple SSB Transceiver
Circuit of the transceiver
http://www.antentop.bel.ru/ mirror: www.antentop.boom.ru Page 65
ANTENTOP- 01- 2004, # 005 A Simple SSB Transceiver
VFO of the transceiver
For this purpose, construct the test circuit of figure
1. This is a simple Hartley-style crystal oscillator.
You will require access to either a frequency counter
or a general coverage receiver (ask a neighborhood
ham to allow you to bring over your crystals to his
shack and test them for few minutes). Mark each
crystal with a number and solder it into the circuit
(don’t use a crystal socket). Connect the 9 volt
battery and measure the frequency. If you are using
a receiver, find out the frequency on which the
crystal is absolutely zero. Note the frequencies with
the 33 pf capacitor in series and shorted. You will
have a pair of frequencies for each crystal. Select
four crystals with pairs of frequencies that match
within 50-40 Hz of each other. A fifth (for the carrier)
oscillator crystal should be within 100 hz of the other
four selected.
Calculate the value of the capacitors of Fig.2 like
this:
1. Calculate the average frequency shift of the four
chosen crystals as F (in KHz).
2. C1 = 21 * F, C2 = 40 * F. Choose the nearest
available fixed capacitor. If you can’t find a fixed
capacitor within 10% of this value, then parallel two
capacitors to achieve the capacitance.
For instance, in the case of the first prototype, we
measure an average of 5KHz of shift. Thus, the
capacitors calculated were 107pf and 200pf. We used
100pf and two parallel 100pfs as a substitute for 200pf
capacitors. These calculations are for 200 Ohms
termination. For a complete discussion of this design
method, you are referred to the excellent paper by
Craver in the Communications Quarterly of 1993, Winter.
Broad-band design without Toroids
It was decided to use broad-band techniques where
suitable and keep the circuit free of too many critically
tuned circuits. We decided to investigate the TV baluns
as cores for broadband transformers. The TV baluns as
small ferrites as shown in the picture.
Almost all the broadband transformers are bifilar. Two
(the modulator and the transmit mixer cum product
detector) are trifilarly wound. They are simple to produce.
Making a bifilar transformer:
► Take two lengths of 36 swg copper enameled wire.
►Hold them together. Tie one end to a nail.
► Twist the wires together so that they cleanly have
about 8-10 turns per inch.
► Check that the wires are evenly twisted (although
there will be more twists towards the ends).
► If the balun core is mounted on a PCB, cut it out with
a cutter and remove all the original windings.
http://www.antentop.bel.ru/ mirror: www.antentop.boom.ru Page 66
ANTENTOP- 01- 2004, # 005 A Simple SSB Transceiver
► Pass the twisted pair through one hole to the
other side, bend the wire back and pass it back
through the other hole (like a U turn). This is one
turn, like this, make similar 10 turns.
► Cut out the remaining ends of the windings
leaving about half an inch of the twisted pair on each
end.
► Scrap the enamel off to about quarter inch, and
tin the leads.
► Using a VOM at low ohms setting, identify the
two separate windings of the twisted pair. If we call
the two wires X and Y, each will have two ends A
and B. This you will have four ends AX, BX, AY and
BY. Short AX and BY together and use this as the
center point of the transformer in the circuits. Use
AY and BX as the two opposite ends of the
transformers.
Making a trifilar transformer is similar, except that
you have to use three wires twisted together.
Separate out the three wires as before, use the first
two as described above, and the third winding as the
secondary.
IF sub-system
The crystal filter and its associated IF circuitry is
shared between the receiver and transmitter.
Although the crystals are inexpensive enough to be
able to afford separate filters for the transmitter and
the receiver, we noted that each filter would have a
different center frequency. This would make zero-
tuning difficult for SSB operation. Therefore, it was
decided to share the same crystal filter, carrier
oscillator and the VFO between transmit and receive
functions.
The crystal filter requires 200 ohms impedance
matching at both ends to provide the correct
bandwidth and low ripple. A regular practice among
hams is to strap a resistor of approximately
the same value as the terminating filter impedance
across the input and output ends of the filter. This is
incorrect. This looks like a resistor that is paralleled with
a reactive impedance of the rest of the circuitry attached
to the filter. When the crystal filter is not properly
terminated and sees reactive termination, ripple and
ringing are introduced. This will spoil the crispness of the
receiver and spoil your on-the-air quality.
The crystal filter is terminated on both sides by ‘strong’
RC coupled amplifiers based on 2N3866. This is slightly
unusual. The 2N3866 is used mostly as a VHF power
amplifier. It has excellent low-noise characteristics, good
gain and using it as a small signal device is now an
established practice. The 2N3866 is an expensive
transistor. It costs about Rs.20 in the open market. We
think it is a good investment.
Using RC coupled broadband amplifiers makes the IF
system a ‘no-tune’ affair. The output of the post-filter
amplifier is coupled to a two diode mixer. The two-diode
mixer uses a broadband bifilar wound transformer. It is
next to impossible to get toroids in India. We have
evaluated using TV baluns as substitutes for toroids.
These baluns are available at most TV spare shops.
Most designs we have studied couple the RF input to the
diode detector through the transformer and inject the
BFO at the center of the transformer. This is a wrong
practice. The diode mixer requires a minimum of 5mW of
energy from the transformer input to operate properly.
There should be enough energy to switch on both the
diodes. This means about 1.2 v peak voltage. The
received signals are rarely this level. As a result, the
product detector operates like a regular envelope
detector and the diodes act as distortion devices to mix
the BFO with the signal. The correct configuration is to
inject the BFO across the transformer
An unusual approach is taken here. The IF amplification
gain is just enough to maintain good noise figure and
recover the losses in the ladder filter. We measured
almost 10 dB loss in the filter.
http://www.antentop.bel.ru/ mirror: www.antentop.boom.ru Page 67
ANTENTOP- 01- 2004, # 005 A Simple SSB Transceiver
The Receiver
The receiver is minimal. By keeping the number of
active devices low (3 devices between the antenna
and the audio amplifier), very good fidelity is
achieved. The circuit is kept at a low impedance and
broadband everywhere except the front-end. This
helps in stability.
The front-end uses a low-noise FET. We have used
a BFW11 (because the local component shop ran
out of BFW10). They have slightly different
characteristics. Almost any FET can be used if it is
biased properly. The FET should be biased for
exactly half the pinch-off voltage. Wes Hayward
(W7ZOI) has described the proper way to bias a
FET Mixer for proper operation:
► Short gate and source and measure the current
that flows through a 560 ohms resister connected to
+12V through the drain. This gives the exact Idss.
► Place a 10K resistor between the source and the
ground. Keeping the gate grounded and the drain
still connected through the 560 ohms resister,
measure the voltage between the source and the
ground. This gives you the pinch-off voltage.
► The FET has to be biased such that the voltage
on the source is exactly half the pinch-off voltage
and there is half of Idss current flowing through the
FET. Such a scheme assures you that the FET is
driven between pinch-off and maximum drain by the
VFO injected at the source. This gives the proper
switching action for the mixer to operate as well as
maximum gain. We measured the pinch-off voltage
for BFW11s as 2.1 volts and Idss as 5mA. A
standard 1K resistor at the source gives the proper
bias.
It should be noted here that we first tried a double
balanced diode ring mixer at the front-end. It has a
number of spurious responses that literally made it
impossible to use the receiver. We tried to properly
terminate the diode ring mixer by inserting
attenuators between the mixer and the Ladder filter’s
pre-amp. It didn’t cure the problem. When we
changed to the FET mixer, the noise figure
improved, the receiver’s dynamic range, while
unmeasured, was never found lacking in the last one
month of extensive usage at VU2PEP.
The output of the IF amplifier is detected in a
balanced detector using just two diodes. Here gain,
we break a common myth. You will see most of the
HF receivers employing a two diode balanced
detector with the BFO fed to the center tap and the
incoming signal applied through the primary winding
of the detector transformer. This is wrong. The signal
applied through the primary winding should strong
enough to switch the diodes on and off
(requiring about 0.6 across each diode, that is, 1.2 volts
across the winding). This roughly translates to about 5
mW power. The diodes switch the low level signal
coupled at the center-tap of the coil to the detector
output. Therefore, in our design we have applied the
local oscillator through the primary of the transformer
and the incoming signal from the IF stage to the center
tap.
There is a 100 ohms preset used to null the local
oscillator from appearing at the output. This is of
importance during transmit where the balanced detector
also doubles up as the transmitting mixer.
An audio pre-amplifier follows the detector. The capacitor
of 220 pf between the base and the collector ensures
that the ‘hiss’ is kept down. The audio amplifier used is
an LM380. Almost any audio amplifier can be used. We
have tried everything from the PC’s ampli-speakers to a
Sony amplifier to a TBA810 amplifier. We would
recommend using a high fidelity, low cost amplifier like
the TBA810 if you plan using a speaker. If most of your
work is with headphones (to save your companion from
the late night QRM), we recommend the LM386.
The Transmitter
The transmitter starts with the modulator using a 741.
There is a three resistor network that biases the electret
microphones. We use a Phillips ‘walkman’ style
headphone with built-in microphone for our work. The
electret microphone requires a bias that provides 5V as
given by the circuit.
The balanced modulator also had two 22pf trimming
capacitors for nulling the carrier. They were later found
unnecessary (as long as both the diodes are purchased
from the same roll) and removed. If you do find balance
a bother, feel free to add a 22 pf trimmer to one side and
a 10 pf fixed to the other side as indicated in the
schematic.
The output of the balanced modulator is routed to the
common IF amplifier through a buffer amplifier using a
BF195. This serves to keep the carrier leak from the
modulator out of the IF string during the reception mode.
The balanced detector of the receiver also doubles up as
a mixer during transmit. It is important to balance out the
VFO energy at the output by setting the 100 ohms
trimmer properly. We noticed a 50mW residual out-of-
band output from the transmitter when the VFO is
unbalanced. The power chain is an interesting broad-
band amplifier. You can use this in virtually any
transmitter of up to 7 watts (and higher with more than
12 volts supply to the final stage). Three stages of
broadband amplifiers feed an IRF510 PA. It is an
interesting twist that the driver 2N3866 transistors cost
more than the IRF510! The IRF510 should be biased for
80mA of standing current during transmit with the
microphone disconnected (no modulation) and carrier
nulled by the trimpot of the balanced modulator.
http://www.antentop.bel.ru/ mirror: www.antentop.boom.ru Page 68
ANTENTOP- 01- 2004, # 005 A Simple SSB Transceiver
Construction
We heavily recommend constructing over pieces of
un-etched PCBs. They are cheaply available
everywhere. See the pictures as a guide to
component layout. We recommend the following
rules:
► Keep your leads short. Short connections are
more important than components that are at right
angles to each other. What might look neat to you
might look unstable to the RF design.
► Keep the outputs and inputs isolated from each
other. We have taken care to keep the high
impedance points down to a minimum. But still,
maintain design hygiene.
► Make one module at a time, test it completely,
then move to the next one. Construct the transceiver
in the following steps:
► Make the VFO. Check the RF output using an RF
probe. Check the stability on a regular receiver or a
frequency counter. With the tuning capacitor fully
closed (the plates inside each other), set the trimmer
so that the VF0 frequency is exactly 3.9995 MHz
(keep 5 KHz margin at the band end)
► Make the BFO. Check the output on the RF
probe.
► Calculate the ladder filter values and make the IF
strip along with the audio preamplifier.
► Connect the BFO, VFO, IF strip and an external
audio amplifier together. When you power on and
attach a piece of 2-3 meter long wire to the input of
the IF amplifier you should be able to hear the
atmospheric noise. Tune the BFO coil by fully
screwing the slug in and then slowly tuning it out
until the IF noise sounds right (not too shrill and not
too muffled).
► Wire up the receiver mixer, connect the VFO.
Peak the mixer output and the RF input coils for
maximum output. Then tune to a weak signal on the
band and tune for the best signal. Be careful to tune
for best quality of signal and not for maximum
loudness. Take a break, spend a day or two listening
to the band with your receiver. Nothing is more
enjoyable than using a crisp receiver that you have
homebrewed.
► Wire up the modulator. If you have an
oscilloscope, you can check the modulation. The
modulated output will be too low for you to be able to
measure on the RF probe.
► Wire up the linear chain. DON’T solder the
IRF510 yet.
► Put the transceiver in transmit mode. Whistle into
the microphone and peak the transmit mixer output
coils for about 6 volts peak RF voltage on the probe
at the 56 ohms resistor where the gate of the
IRF510 would be.
► Solder in the IRF510. ATTACH A DUMMY
LOAD. We used four 220 ohms two watts resistors
paralleled together.
► Keep the bias trimmer totally down towards zero.
Attach VOM in series with point X in the power amplifier.
Apply power in transmit mode and slow increase the bias
until you have 80mA flowing through the IRF510.
► Connect the RF probe across the dummy load.
► As you whistle, You should get about 20-24volts of
peak RF on the probe. When you pull out the
microphone from the jack, the RF output should drop to
complete zero. What if your transmitter is unstable?
• Don’t curse your fate. All transmitters start out as
unstable beasts. Relax.
• Start disconnecting power from the stages
starting from final IRF510 and working
backwards. When you have located the unstable
stage, there are a number of things you can do
to fix it.
• Try increasing the value of the 10 ohms resistor
used in the emitter degeneration OR
• Strap a resistor of about 1K across the output
transformer of the unstable stage to ‘load’ it.
• Move the linear amplifier away from the rest of
the circuitry.
• Redo the board. This time spread the stages out.
We guess that the linear chain should occupy
about 6 inches of space, all laid out in one line.
Substitutions
The BF195 transistors can be substituted with any other
HF transistor like 2N2222 etc. The 2N3866s are best not
substituted. The circuit works with slight increase in the
noise figure if BF195 or equivalents are used in place of
2N3866s in the IF stages. The output power on the
transmitter absolutely needs the 2N3866s. Substituting
them with other switching transistors didn’t give good
performance.
The IRF510 should not be substituted with any other
transistor. The other IRFs, though rated higher, have
higher input capacitance which makes them a bad
choice for 14MHz operation.
The LM380/LM386 can be substituted with almost any
other audio amplifier. Our first amplifier was Cambridge
SoundWorks Sound System. If you turn down the bass,
they are an excellent system for the shack. We have
tried a TBA180, an LM386, an LM380 and even a glow-
bug guitar amp. Feel free to experiment.
Final Notes
The first contact we made using this rig was DF6PW. He
reported us 57. Within the first evening we had worked
four continents. The rig is regularly used at VU2PEP.
People are often surprised at how the transmitter quality
is ‘just like a commercial rig’. Many refused to believe
that it is a seven watt rig.
72/73!
http://www.antentop.bel.ru/ mirror: www.antentop.boom.ru Page 69
ANTENTOP- 01- 2004, # 005 The USA Patents of Nicola Tesla
# Patent Year Month Day Title
1 334,823 1886 January 26 Commutator for Dynamo Electric Machines
2 335,786 1886 February 9 Electric Arc Lamp
3 335,787 1886 February 9 Electric Arc Lamp
4 336,961 1886 March 2 Regulator for Dynamo Electric Machines
5 336,962 1886 March 2 Regulator for Dynamo Electric Machines
6 350,954 1886 October 19 Regulator for Dynamo Elecric Machines
7 359,748 1887 March 22 Dynamo Electric Machine
8 381,968 1888 May 1 Electro Magnetic Motor
9 381,969 1888 May 1 Electro Magnetic Motor
10 381,970 1888 May 1 System of Electrical Distribution
11 382,279 1888 May 1 Electro Magnetic Motor
12 382,280 1888 May 1 Electrical Transmission of Power
13 382,281 1888 May 1 Electrical Transmission of Power
14 382,282 1888 May 1 Method of Converting and Distributing Electric Currents
15 382,845 1888 May 15 Commutator for Dynamo Electric Machines
16 390,413 1888 October 2 System of Electrical Distribution
17 390,414 1888 October 2 Dynamo Electric Machine
18 390,415 1888 October 2 Dynamo Electric Machine or Motor
19 390,721 1888 October 9 Dynamo Electric Machine
20 390,820 1888 October 9 Regulator for Alternate Current Motors
21 396,121 1889 January 15 Thermo Magnetic Motor
22 401,520 1889 April 16 Method of Operating Electro Magnetic Motors
23 405,858 1889 June 25 Electro Magnetic Motor
24 405,859 1889 June 25 Method of Electrical Power Transmission
25 406,968 1889 July 16 Dynamo Electric Machine
26 413,353 1889 October 22 Method of Obtaining Direct from Alternating Currents
27 416,191 1889 December 3 Electro Magnetic Motor
28 416,192 1889 December 3 Method of Operating Electro Magnetic Motors
29 416,193 1889 December 3 Electro Magnetic Motor
30 416,194 1889 December 3 Electric Motor
31 416,195 1889 December 3 Electro Magnetic Motor
32 417,794 1889 December 24 Armature for Electric Machines (A. Schmid & N. Tesla)
33 418,248 1889 December 31 Electro Magnetic Motor
34 424,036 1890 March 25 Electro Magnetic Motor
35 428,057 1890 May 13 Pyromagneto Electric Generator
36 433,700 1890 August 5 Alternating Current Electro Magnetic Motor
37 433,701 1890 August 5 Alternating Current Motor
38 433,702 1890 August 5 Electrical Transformer or Induction Device
http://www.antentop.bel.ru/ mirror http://www.antentop.boom.ru Page 70
ANTENTOP- 01- 2004, # 005 The USA Patents of Nicola Tesla
# Patent Year Month Day Title
39 433,703 1890 August 5 Electro Magnetic Motor
40 445,207 1891 January 27 Electro Magnetic Motor
41 447,920 1891 March 10 Method of Operating Arc Lamps
42 447,921 1891 March 10 Alternating Electric Current Generator
43 454,622 1891 June 23 System of Electric Lighting
44 455,067 1891 June 30 Electro Magnetic Motor
45 455,068 1891 June 30 Electrical Meter
46 455,069 1891 June 30 Electric Incandescent Lamp
47 459,772 1891 September 22 Electro Magnetic Motor
48 462,418 1891 November 3
Method of and Apparatus for Electrical Conversion and
Distribution
49 464,666 1891 December 8 Electro Magnetic Motor
50 464,667 1891 December 8 Electrical Condenser
51 487,796 1892 December 13 System of Electrical Transmission of Power
52 511,559 1893 December 26 Electrical Transmission of Power
53 511,560 1893 December 26 System of Electrical Power Transmission
54 511,915 1894 January 2 Electrical Transmission of Power
55 511,916 1894 January 2 Electric Generator
56 512,340 1894 January 9 Coil for Electro Magnets
57 514,167 1894 February 6 Electrical Conductor
58 514,168 1894 February 6 Means for Generating Electric Currents
59 514,169 1894 February 6 Reciprocating Engine
60 514,170 1894 February 6 Incandescent Electric Light
61 514,972 1894 February 20 Electric Railway System
62 514,973 1894 February 20 Electrical Meter
63 517,900 1894 April 10 Steam Engine
64 524,426 1894 August 14 Electromagnetic Motor
65 555,190 1896 February 25 Alternating Motor
66 567,818 1896 September 15 Electrical Condenser
67 568,176 1896 September 22
Apparatus for Producing Electric Currents of High Frequency
and Potential
68 568,177 1896 September 22 Apparatus for Producing Ozone
69 568,178 1896 September 22
Method of Regulating Apparatus for Producing Currents of High
Frequency
70 568,179 1896 September 22
Method of and Apparatus for Producing Currents of High
Frequency
71 568,180 1896 September 22 Apparatus for Producing Electrical Currents of High Frequency
72 577,670 1897 February 23 Apparatus for Producing Electric Currents of High Frequency
73 577,671 1897 February 23 Manufacture of Electrical Condensers, Coils, &c
74 583,953 1897 June 8 Apparatus for Producing Currents of High Frequency
75 593,138 1897 November 2 Electrical Transformer
76 609,245 1898 August 16 Electrical Circuit Controller
77 609,246 1898 August 16 Electric Circuit Controller
78 609,247 1898 August 16 Electric Circuit Controller
79 609,248 1898 August 16 Electric Circuit Controller
http://www.antentop.bel.ru/ mirror http://www.antentop.boom.ru Page 71
ANTENTOP- 01- 2004, # 005 The USA Patents of Nicola Tesla
# Patent Year Month Day Title
80 609,249 1898 August 16 Electric Circuit Controller
81 609,250 1898 August 16 Electrical Igniter for Gas Engines
82 609,251 1898 August 16 Electric Circuit Controller
83 611,719 1898 October 4 Electrical Circuit Controller
84 613,735 1898 November 8 Electric Circuit Controller
85 613,809 1898 November 8
Method of and Apparatus for Controlling Mechansim of Moving
Vessels or Vehicles
86 645,576 1900 March 20 System of Transmission of Electrical Energy
87 649,621 1900 May 15 Apparatus for Transmission of Electrical Energy
88 655,838 1900 August 14 Method of Insulating Electric Conductors
89 11,865 1900 October 23 Method of Insulating Electric Conductors
90 685,012 1901 October 22 Means for Increasing the Intensity of Electrical Oscillations
91 685,953 1901 November 5
Method of Intensifying and Utilizing Effects Transmitted Through
Natural Media
92 685,954 1901 November 5 Method of Utilizing Effects Transmitted Through Natural Media
93 685,955 1901 November 5
Apparatus for Utilizing Effects Transmitted From a Distance to a
Receiving Device Through Natural Media
94 685,956 1901 November 5
Apparatus for Utilizing Effects Transmitted Through Natural
Media
95 685,957 1901 November 5 Apparatus for the Utilization of Radiant Energy
96 685,958 1901 November 5 Method of Utilizing Radiant Energy
97 723,188 1903 March 17 Method of Signaling
98 725,605 1903 April 14 System of Signaling
99 787,412 1905 April 18
Art of Transmitting Electrical Energy Through the Natural
Mediums
100 1,061,142 1913 April 29 Fluid Propulsion
101 1,061,206 1913 May 6 Turbine
102 1,113,716 1914 October 13 Fountain
103 1,119,732 1914 December 1 Apparatus for Transmitting Electrical Energy
104 1,209,359 1916 December 19 Speed Indicator
105 1,266,175 1918 May 14 Lightning Protector
106 1,274,816 1918 August 6 Speed Indicator
107 1,314,718 1919 September 2 Ship's Log
108 1,329,559 1920 February 3 Valvular Conduit
109 1,365,547 1921 January 11 Flow Meter
110 1,402,025 1922 January 3 Frequency Meter
111 1,655,113 1928 January 3 Method of Aerial Transportation
112 1,655,114 1928 January 3 Apparatus for Aerial Transportation
Credit line: http://prometheus.al.ru/phisik/teslapatents.htm
http://www.antentop.bel.ru/ mirror http://www.antentop.boom.ru Page 72
ANTENTOP- 01- 2004, # 005 The Strange Life of Nicola Tesla
Nikola Tesla is the true unsung prophet of the electric age; without whom our radio, auto ignition,
telephone, alternating current power generation and transmission, radio and television would all have
been impossible. Yet his life and times have vanished largely from public access. This autobiography
is released to remedy this situation, and to fill this black hole in information space.
© Kolmogorov-Smirnov Publishing
Introduction & Editors Note
Chapter 1: My Early Life - The progressive
development of man is vitally dependent on
invention. It is the most important product of his
creative brain. Its ultimate purpose is the complete
mastery of mind over the material world, the
harnessing of the forces of nature to human needs.
Chapter 2 - I shall dwell briefly on these
extraordinary experiences, on account of their
possible interest to students of psychology and
physiology and also because this period of agony
was of the greatest consequence on my mental
development and subsequent labors.
Chapter 3: How Tesla Conceived The Rotary
Magnetic Field - At the age of ten I entered the Real
Gymnasium which was a new and fairly well
equipped institution. In the department of physics
were various models of classical scientific
apparatus, electrical and mechanical. The
demonstrations and experiments performed from
time to time by the instructors fascinated me and
were undoubtedly a powerful incentive to invention.
Chapter 4: The Discovery of the Tesla Coil and
Transformer - For a while I gave myself up entirely to
the intense enjoyment of picturing machines and
devising new forms. It was a mental state of
happiness about as complete as I have ever known
in life. Ideas came in an uninterrupted stream and
the only difficulty I had was to hold them fast.
Chapter 5 - As I review the events of my past life I
realize how subtle are the influences that shape our
destinies. An incident of my youth may serve to
illustrate.
Chapter 6 - No subject to which I have ever devoted
myself has called for such concentration of mind, and
strained to so dangerous a degree the finest fibers of my
brain, as the systems of which the magnifying transmitter
is the foundation.
http://www.antentop.bel.ru/ mirror http://www.antentop.boom.ru Page 73
ANTENTOP- 01- 2004, # 005 The Strange Life of Nicola Tesla
Introduction & Editors Note
Nikola Tesla was born in Croatia (then part of
Austria-Hungary) on July 9, 1856, and died January
7, 1943. He was the electrical engineer who
invented the AC (alternating current) induction
motor, which made the universal transmission and
distribution of electricity possible. Tesla began his
studies in physics and mathematics at Gratz
Polytechnic, and then took philosophy at the
University of Prague. He worked as an electrical
engineer in Budapest, Hungary, and subsequently
in France and Germany. In 1888 his discovery that
a magnetic field could be made to rotate if two coils
at right angles are supplied with AC current 90
degrees out of phase made possible the invention
of the AC induction motor. The major advantage of
this motor being its brushless operation, which
many at the time believed impossible.
Tesla moved to the United States in 1884, where he
worked for Thomas Edison who quickly became a rival -
Edison being an advocate of the inferior DC power
transmission system. During this time, Tesla was
commissioned with the design of the AC generators
installed at Niagara Falls. George Westinghouse
purchased the patents to his induction motor, and made it
the basis of the Westinghouse power system which still
underlies the modern electrical power industry today.
He also did notable research on high-voltage electricity
and wireless communication; at one point creating an
earthquake which shook the ground for several miles
around his New York laboratory. He also devised a
system which anticipated world-wide wireless
communications, fax machines, radar, radio-guided
missiles and aircraft.
Editors Note, September 21, 1994
An electronic text (ASCII) and portable document
format (PDF) version of this file was created by
John R.H. Penner from a small booklet found in a
used bookstore for $2.50. The only form of date
identification is the name of the original purchaser,
Arthua Daine (sic), dated April 29, 1978. However,
the book appears to be considerably older, made
with a typewriter, then photocopied and stapled.
The only other significant features of the booklet is
that it contains four photocopied portrait
photographs of Nikola Tesla, and was originally
forty pages long. The book has no copyright
identification, nor any means of contacting the
publishers. As far as this editor is aware, this
autobiography is no longer available in printed form
anywhere. In the interest of making this important
text available to the wider public, the entire original
text has been retyped word-for-word as it originally
appears into this electronic format. If anyone knows
how to reach the original publisher, please contact
the editor, so that proper credit may be given as is
due.
John Roland Hans Penner
464 Scott Street
St. Catharines, Ontario
L2M 3W7, Canada
Phone: 905.646.3551
eMail: J.Penner@GEnie.GEIS.com
These files may be freely redistributed as long as the
content is not modified in any way. It may not be sold or
published for money unless specifically authorized prior
to publication by express permission of Kolmogorov-
Smirnov Publishing, or John R.H. Penner. Unless
otherwise notified, this work is Copyright 1995 by John
R.H. Penner.
http://www.geocities.com/Athens/2424/intro.html
http://www.antentop.bel.ru/ mirror http://www.antentop.boom.ru Page 74
ANTENTOP- 01- 2004, # 005 The Strange Life of Nicola Tesla
Chapter 1: My Early Life
The progressive development of man is vitally
dependent on invention. It is the most important
product of his creative brain. Its ultimate purpose is
the complete mastery of mind over the material
world, the harnessing of the forces of nature to
human needs. This is the difficult task of the
inventor who is often misunderstood and
unrewarded. But he finds ample compensation in
the pleasing exercises of his powers and in the
knowledge of being one of that exceptionally
privileged class without whom the race would have
long ago perished in the bitter struggle against
pitiless elements. Speaking for myself, I have
already had more than my full measure of this
exquisite enjoyment; so much, that for many years
my life was little short of continuous rapture. I am
credited with being one of the hardest workers and
perhaps I am, if thought is the equivalent of labor,
for I have devoted to it almost all of my waking
hours. But if work is interpreted to be a definite
performance in a specified time according to a rigid
rule, then I may be the worst of idlers.
Every effort under compulsion demands a sacrifice
of life-energy. I never paid such a price. On the
contrary, I have thrived on my thoughts. In
attempting to give a connected and faithful account
of my activities in this story of my life, I must dwell,
however reluctantly, on the impressions of my youth
and the circumstances and events which have been
instrumental in determining my career. Our first
endeavors are purely instinctive promptings of an
imagination vivid and undisciplined. As we grow
older, reason asserts itself and we become more
and more systematic and designing. But those early
impulses, though not immediately productive, are of
the greatest moment and may shape our very
destinies. Indeed, I feel now that had I understood
and cultivated instead of suppressing them, I would
have added substantial value to my bequest to the
world. But not until I had attained manhood did I
realize that I was an inventor.
This was due to a number of causes. In the first
place I had a brother who was gifted to an
extraordinary degree; one of those rare phenomena
of mentality which biological investigation has failed
to explain. His premature death left my earth
parents disconsolate. (I will explain my remark
about my "earth parents" later.) We owned a horse
which had been presented to us by a dear friend. It
was a magnificent animal of Arabian breed,
possessed of almost human intelligence, and was
cared for and petted by the whole family, having on
one occasion saved my dear father's life under
remarkable circumstances.
My father had been called one winter night to
perform an urgent duty and while crossing the
the mountains, infested by wolves, the horse became
frightened and ran away, throwing him violently to the
ground. It arrived home bleeding and exhausted, but after
the alarm was sounded, immediately dashed off again,
returning to the spot, and before the searching party were
far on the way they were met by my father, who had
recovered consciousness and remounted, not realizing
that he had been lying in the snow for several hours. This
horse was responsible for my brother's injuries from
which he died. I witnessed the tragic scene and although
so many years have elapsed since, my visual impression
of it has lost none of its force. The recollection of his
attainments made every effort of mine seem dull in
comparison. Anything I did that was creditable merely
caused my parents to feel their loss more keenly. So I
grew up with little confidence in myself.
But I was far from being considered a stupid boy, if I am
to judge from an incident of which I have still a strong
remembrance. One day the Aldermen were passing
through a street where I was playing with other boys. The
oldest of these venerable gentlemen, a wealthy citizen,
paused to give a silver piece to each of us. Coming to
me, he suddenly stopped and commanded, "Look in my
eyes." I met his gaze, my hand outstretched to receive
the much valued coin, when to my dismay, he said, "No,
not much; you can get nothing from me. You are too
smart."
They used to tell a funny story about me. I had two old
aunts with wrinkled faces, one of them having two teeth
protruding like the tusks of an elephant, which she buried
in my cheek every time she kissed me. Nothing would
scare me more then the prospects of being kissed by
these affectionate, unattractive relatives. It happened that
while being carried in my mother's arms, they asked who
was the prettier of the two. After examining their faces
intently, I answered thoughtfully, pointing to one of them,
"This here is not as ugly as the other."
Then again, I was intended from my very birth for the
clerical profession and this thought constantly oppressed
me. I longed to be an engineer, but my father was
http://www.antentop.bel.ru/ mirror http://www.antentop.boom.ru Page 75
Antentop 2004 01
Antentop 2004 01
Antentop 2004 01
Antentop 2004 01
Antentop 2004 01
Antentop 2004 01
Antentop 2004 01
Antentop 2004 01
Antentop 2004 01
Antentop 2004 01
Antentop 2004 01
Antentop 2004 01
Antentop 2004 01
Antentop 2004 01
Antentop 2004 01
Antentop 2004 01
Antentop 2004 01
Antentop 2004 01
Antentop 2004 01
Antentop 2004 01
Antentop 2004 01
Antentop 2004 01
Antentop 2004 01
Antentop 2004 01
Antentop 2004 01
Antentop 2004 01

More Related Content

What's hot

Antentop 2011 01
Antentop 2011 01Antentop 2011 01
Antentop 2011 01BlackOnion
 
Antentop 2012 01
Antentop 2012 01Antentop 2012 01
Antentop 2012 01BlackOnion
 
Antentop 2013 01
Antentop 2013 01Antentop 2013 01
Antentop 2013 01BlackOnion
 
Antentop 2014 01
Antentop 2014 01Antentop 2014 01
Antentop 2014 01BlackOnion
 
Antentop 2015 01
Antentop 2015 01Antentop 2015 01
Antentop 2015 01BlackOnion
 
Antentop 2016 01
Antentop 2016 01Antentop 2016 01
Antentop 2016 01BlackOnion
 

What's hot (6)

Antentop 2011 01
Antentop 2011 01Antentop 2011 01
Antentop 2011 01
 
Antentop 2012 01
Antentop 2012 01Antentop 2012 01
Antentop 2012 01
 
Antentop 2013 01
Antentop 2013 01Antentop 2013 01
Antentop 2013 01
 
Antentop 2014 01
Antentop 2014 01Antentop 2014 01
Antentop 2014 01
 
Antentop 2015 01
Antentop 2015 01Antentop 2015 01
Antentop 2015 01
 
Antentop 2016 01
Antentop 2016 01Antentop 2016 01
Antentop 2016 01
 

Similar to Antentop 2004 01

Antentop 2009 01
Antentop 2009 01Antentop 2009 01
Antentop 2009 01BlackOnion
 
Antentop 2003 03
Antentop 2003 03Antentop 2003 03
Antentop 2003 03BlackOnion
 
Antentop 2005 01
Antentop 2005 01Antentop 2005 01
Antentop 2005 01BlackOnion
 
Ideas & Projects for QRP (Antentop).pdf
Ideas & Projects for QRP (Antentop).pdfIdeas & Projects for QRP (Antentop).pdf
Ideas & Projects for QRP (Antentop).pdfivan ion
 
103 Simple Transistor Projects, Thomas S. Kneitel, HAYDEN BOOK COMPANY, INC.,...
103 Simple Transistor Projects, Thomas S. Kneitel, HAYDEN BOOK COMPANY, INC.,...103 Simple Transistor Projects, Thomas S. Kneitel, HAYDEN BOOK COMPANY, INC.,...
103 Simple Transistor Projects, Thomas S. Kneitel, HAYDEN BOOK COMPANY, INC.,...ivan ion
 
liwoli_machine workshop
liwoli_machine workshopliwoli_machine workshop
liwoli_machine workshopminipimer tv
 
How to make your first robot report
How to make your first robot reportHow to make your first robot report
How to make your first robot reportRamki M
 
JOULE THIEF WHICH GIVES LIFE TO DEAD BATTERIES!!!
JOULE THIEF WHICH GIVES LIFE TO DEAD BATTERIES!!!JOULE THIEF WHICH GIVES LIFE TO DEAD BATTERIES!!!
JOULE THIEF WHICH GIVES LIFE TO DEAD BATTERIES!!!Sanjay4502
 

Similar to Antentop 2004 01 (9)

Antentop 2009 01
Antentop 2009 01Antentop 2009 01
Antentop 2009 01
 
Antentop 2003 03
Antentop 2003 03Antentop 2003 03
Antentop 2003 03
 
Antentop 2005 01
Antentop 2005 01Antentop 2005 01
Antentop 2005 01
 
Ideas & Projects for QRP (Antentop).pdf
Ideas & Projects for QRP (Antentop).pdfIdeas & Projects for QRP (Antentop).pdf
Ideas & Projects for QRP (Antentop).pdf
 
103 Simple Transistor Projects, Thomas S. Kneitel, HAYDEN BOOK COMPANY, INC.,...
103 Simple Transistor Projects, Thomas S. Kneitel, HAYDEN BOOK COMPANY, INC.,...103 Simple Transistor Projects, Thomas S. Kneitel, HAYDEN BOOK COMPANY, INC.,...
103 Simple Transistor Projects, Thomas S. Kneitel, HAYDEN BOOK COMPANY, INC.,...
 
liwoli_machine workshop
liwoli_machine workshopliwoli_machine workshop
liwoli_machine workshop
 
Elektrik
ElektrikElektrik
Elektrik
 
How to make your first robot report
How to make your first robot reportHow to make your first robot report
How to make your first robot report
 
JOULE THIEF WHICH GIVES LIFE TO DEAD BATTERIES!!!
JOULE THIEF WHICH GIVES LIFE TO DEAD BATTERIES!!!JOULE THIEF WHICH GIVES LIFE TO DEAD BATTERIES!!!
JOULE THIEF WHICH GIVES LIFE TO DEAD BATTERIES!!!
 

More from BlackOnion

Muse 2017-catalogue-rev5-small
Muse 2017-catalogue-rev5-smallMuse 2017-catalogue-rev5-small
Muse 2017-catalogue-rev5-smallBlackOnion
 
M 089-r-cs-r-3199-dees-1-1
M 089-r-cs-r-3199-dees-1-1M 089-r-cs-r-3199-dees-1-1
M 089-r-cs-r-3199-dees-1-1BlackOnion
 
M 02 r-cs-r-3745-dees-2
M 02 r-cs-r-3745-dees-2M 02 r-cs-r-3745-dees-2
M 02 r-cs-r-3745-dees-2BlackOnion
 
M 089-r-r-3199-ib-muse-001-rev2
M 089-r-r-3199-ib-muse-001-rev2M 089-r-r-3199-ib-muse-001-rev2
M 089-r-r-3199-ib-muse-001-rev2BlackOnion
 
M 089-r-r-3199-ib-muse-001-rev2-1
M 089-r-r-3199-ib-muse-001-rev2-1M 089-r-r-3199-ib-muse-001-rev2-1
M 089-r-r-3199-ib-muse-001-rev2-1BlackOnion
 
M 089-r-cs-r-3199-dees-1
M 089-r-cs-r-3199-dees-1M 089-r-cs-r-3199-dees-1
M 089-r-cs-r-3199-dees-1BlackOnion
 
M 068 r-cs-r-3567-dees-1
M 068 r-cs-r-3567-dees-1M 068 r-cs-r-3567-dees-1
M 068 r-cs-r-3567-dees-1BlackOnion
 
M 068-r-r-3567-ib-muse-001-rev3
M 068-r-r-3567-ib-muse-001-rev3M 068-r-r-3567-ib-muse-001-rev3
M 068-r-r-3567-ib-muse-001-rev3BlackOnion
 
M 02-r-r-3745-ib-muse-001-rev1
M 02-r-r-3745-ib-muse-001-rev1M 02-r-r-3745-ib-muse-001-rev1
M 02-r-r-3745-ib-muse-001-rev1BlackOnion
 
M 01 rs-cs-r-1791-dees-2
M 01 rs-cs-r-1791-dees-2M 01 rs-cs-r-1791-dees-2
M 01 rs-cs-r-1791-dees-2BlackOnion
 
M 01-rs-r-1791-ib-muse-005-rev3
M 01-rs-r-1791-ib-muse-005-rev3M 01-rs-r-1791-ib-muse-005-rev3
M 01-rs-r-1791-ib-muse-005-rev3BlackOnion
 

More from BlackOnion (13)

Rpds 30 black
Rpds 30 blackRpds 30 black
Rpds 30 black
 
Muse 2017-catalogue-rev5-small
Muse 2017-catalogue-rev5-smallMuse 2017-catalogue-rev5-small
Muse 2017-catalogue-rev5-small
 
M 089-r-cs-r-3199-dees-1-1
M 089-r-cs-r-3199-dees-1-1M 089-r-cs-r-3199-dees-1-1
M 089-r-cs-r-3199-dees-1-1
 
M 02 r-cs-r-3745-dees-2
M 02 r-cs-r-3745-dees-2M 02 r-cs-r-3745-dees-2
M 02 r-cs-r-3745-dees-2
 
M 089-r-r-3199-ib-muse-001-rev2
M 089-r-r-3199-ib-muse-001-rev2M 089-r-r-3199-ib-muse-001-rev2
M 089-r-r-3199-ib-muse-001-rev2
 
M 089-r-r-3199-ib-muse-001-rev2-1
M 089-r-r-3199-ib-muse-001-rev2-1M 089-r-r-3199-ib-muse-001-rev2-1
M 089-r-r-3199-ib-muse-001-rev2-1
 
M 089-r-cs-r-3199-dees-1
M 089-r-cs-r-3199-dees-1M 089-r-cs-r-3199-dees-1
M 089-r-cs-r-3199-dees-1
 
M 068 r-cs-r-3567-dees-1
M 068 r-cs-r-3567-dees-1M 068 r-cs-r-3567-dees-1
M 068 r-cs-r-3567-dees-1
 
M 068-r-r-3567-ib-muse-001-rev3
M 068-r-r-3567-ib-muse-001-rev3M 068-r-r-3567-ib-muse-001-rev3
M 068-r-r-3567-ib-muse-001-rev3
 
M 02-r-r-3745-ib-muse-001-rev1
M 02-r-r-3745-ib-muse-001-rev1M 02-r-r-3745-ib-muse-001-rev1
M 02-r-r-3745-ib-muse-001-rev1
 
M 01 rs-cs-r-1791-dees-2
M 01 rs-cs-r-1791-dees-2M 01 rs-cs-r-1791-dees-2
M 01 rs-cs-r-1791-dees-2
 
M 01-rs-r-1791-ib-muse-005-rev3
M 01-rs-r-1791-ib-muse-005-rev3M 01-rs-r-1791-ib-muse-005-rev3
M 01-rs-r-1791-ib-muse-005-rev3
 
Rev ea3url 06
Rev ea3url 06Rev ea3url 06
Rev ea3url 06
 

Recently uploaded

Design For Accessibility: Getting it right from the start
Design For Accessibility: Getting it right from the startDesign For Accessibility: Getting it right from the start
Design For Accessibility: Getting it right from the startQuintin Balsdon
 
Call Girls Pimpri Chinchwad Call Me 7737669865 Budget Friendly No Advance Boo...
Call Girls Pimpri Chinchwad Call Me 7737669865 Budget Friendly No Advance Boo...Call Girls Pimpri Chinchwad Call Me 7737669865 Budget Friendly No Advance Boo...
Call Girls Pimpri Chinchwad Call Me 7737669865 Budget Friendly No Advance Boo...roncy bisnoi
 
Top Rated Pune Call Girls Budhwar Peth ⟟ 6297143586 ⟟ Call Me For Genuine Se...
Top Rated  Pune Call Girls Budhwar Peth ⟟ 6297143586 ⟟ Call Me For Genuine Se...Top Rated  Pune Call Girls Budhwar Peth ⟟ 6297143586 ⟟ Call Me For Genuine Se...
Top Rated Pune Call Girls Budhwar Peth ⟟ 6297143586 ⟟ Call Me For Genuine Se...Call Girls in Nagpur High Profile
 
Unit 1 - Soil Classification and Compaction.pdf
Unit 1 - Soil Classification and Compaction.pdfUnit 1 - Soil Classification and Compaction.pdf
Unit 1 - Soil Classification and Compaction.pdfRagavanV2
 
Intze Overhead Water Tank Design by Working Stress - IS Method.pdf
Intze Overhead Water Tank  Design by Working Stress - IS Method.pdfIntze Overhead Water Tank  Design by Working Stress - IS Method.pdf
Intze Overhead Water Tank Design by Working Stress - IS Method.pdfSuman Jyoti
 
Bhosari ( Call Girls ) Pune 6297143586 Hot Model With Sexy Bhabi Ready For ...
Bhosari ( Call Girls ) Pune  6297143586  Hot Model With Sexy Bhabi Ready For ...Bhosari ( Call Girls ) Pune  6297143586  Hot Model With Sexy Bhabi Ready For ...
Bhosari ( Call Girls ) Pune 6297143586 Hot Model With Sexy Bhabi Ready For ...tanu pandey
 
Call Girls Wakad Call Me 7737669865 Budget Friendly No Advance Booking
Call Girls Wakad Call Me 7737669865 Budget Friendly No Advance BookingCall Girls Wakad Call Me 7737669865 Budget Friendly No Advance Booking
Call Girls Wakad Call Me 7737669865 Budget Friendly No Advance Bookingroncy bisnoi
 
VIP Model Call Girls Kothrud ( Pune ) Call ON 8005736733 Starting From 5K to ...
VIP Model Call Girls Kothrud ( Pune ) Call ON 8005736733 Starting From 5K to ...VIP Model Call Girls Kothrud ( Pune ) Call ON 8005736733 Starting From 5K to ...
VIP Model Call Girls Kothrud ( Pune ) Call ON 8005736733 Starting From 5K to ...SUHANI PANDEY
 
notes on Evolution Of Analytic Scalability.ppt
notes on Evolution Of Analytic Scalability.pptnotes on Evolution Of Analytic Scalability.ppt
notes on Evolution Of Analytic Scalability.pptMsecMca
 
VIP Call Girls Palanpur 7001035870 Whatsapp Number, 24/07 Booking
VIP Call Girls Palanpur 7001035870 Whatsapp Number, 24/07 BookingVIP Call Girls Palanpur 7001035870 Whatsapp Number, 24/07 Booking
VIP Call Girls Palanpur 7001035870 Whatsapp Number, 24/07 Bookingdharasingh5698
 
CCS335 _ Neural Networks and Deep Learning Laboratory_Lab Complete Record
CCS335 _ Neural Networks and Deep Learning Laboratory_Lab Complete RecordCCS335 _ Neural Networks and Deep Learning Laboratory_Lab Complete Record
CCS335 _ Neural Networks and Deep Learning Laboratory_Lab Complete RecordAsst.prof M.Gokilavani
 
data_management_and _data_science_cheat_sheet.pdf
data_management_and _data_science_cheat_sheet.pdfdata_management_and _data_science_cheat_sheet.pdf
data_management_and _data_science_cheat_sheet.pdfJiananWang21
 
ONLINE FOOD ORDER SYSTEM PROJECT REPORT.pdf
ONLINE FOOD ORDER SYSTEM PROJECT REPORT.pdfONLINE FOOD ORDER SYSTEM PROJECT REPORT.pdf
ONLINE FOOD ORDER SYSTEM PROJECT REPORT.pdfKamal Acharya
 
AKTU Computer Networks notes --- Unit 3.pdf
AKTU Computer Networks notes ---  Unit 3.pdfAKTU Computer Networks notes ---  Unit 3.pdf
AKTU Computer Networks notes --- Unit 3.pdfankushspencer015
 
Top Rated Call Girls In chittoor 📱 {7001035870} VIP Escorts chittoor
Top Rated Call Girls In chittoor 📱 {7001035870} VIP Escorts chittoorTop Rated Call Girls In chittoor 📱 {7001035870} VIP Escorts chittoor
Top Rated Call Girls In chittoor 📱 {7001035870} VIP Escorts chittoordharasingh5698
 
UNIT - IV - Air Compressors and its Performance
UNIT - IV - Air Compressors and its PerformanceUNIT - IV - Air Compressors and its Performance
UNIT - IV - Air Compressors and its Performancesivaprakash250
 

Recently uploaded (20)

Design For Accessibility: Getting it right from the start
Design For Accessibility: Getting it right from the startDesign For Accessibility: Getting it right from the start
Design For Accessibility: Getting it right from the start
 
Call Girls Pimpri Chinchwad Call Me 7737669865 Budget Friendly No Advance Boo...
Call Girls Pimpri Chinchwad Call Me 7737669865 Budget Friendly No Advance Boo...Call Girls Pimpri Chinchwad Call Me 7737669865 Budget Friendly No Advance Boo...
Call Girls Pimpri Chinchwad Call Me 7737669865 Budget Friendly No Advance Boo...
 
Top Rated Pune Call Girls Budhwar Peth ⟟ 6297143586 ⟟ Call Me For Genuine Se...
Top Rated  Pune Call Girls Budhwar Peth ⟟ 6297143586 ⟟ Call Me For Genuine Se...Top Rated  Pune Call Girls Budhwar Peth ⟟ 6297143586 ⟟ Call Me For Genuine Se...
Top Rated Pune Call Girls Budhwar Peth ⟟ 6297143586 ⟟ Call Me For Genuine Se...
 
Unit 1 - Soil Classification and Compaction.pdf
Unit 1 - Soil Classification and Compaction.pdfUnit 1 - Soil Classification and Compaction.pdf
Unit 1 - Soil Classification and Compaction.pdf
 
Intze Overhead Water Tank Design by Working Stress - IS Method.pdf
Intze Overhead Water Tank  Design by Working Stress - IS Method.pdfIntze Overhead Water Tank  Design by Working Stress - IS Method.pdf
Intze Overhead Water Tank Design by Working Stress - IS Method.pdf
 
Bhosari ( Call Girls ) Pune 6297143586 Hot Model With Sexy Bhabi Ready For ...
Bhosari ( Call Girls ) Pune  6297143586  Hot Model With Sexy Bhabi Ready For ...Bhosari ( Call Girls ) Pune  6297143586  Hot Model With Sexy Bhabi Ready For ...
Bhosari ( Call Girls ) Pune 6297143586 Hot Model With Sexy Bhabi Ready For ...
 
(INDIRA) Call Girl Meerut Call Now 8617697112 Meerut Escorts 24x7
(INDIRA) Call Girl Meerut Call Now 8617697112 Meerut Escorts 24x7(INDIRA) Call Girl Meerut Call Now 8617697112 Meerut Escorts 24x7
(INDIRA) Call Girl Meerut Call Now 8617697112 Meerut Escorts 24x7
 
NFPA 5000 2024 standard .
NFPA 5000 2024 standard                                  .NFPA 5000 2024 standard                                  .
NFPA 5000 2024 standard .
 
Call Girls Wakad Call Me 7737669865 Budget Friendly No Advance Booking
Call Girls Wakad Call Me 7737669865 Budget Friendly No Advance BookingCall Girls Wakad Call Me 7737669865 Budget Friendly No Advance Booking
Call Girls Wakad Call Me 7737669865 Budget Friendly No Advance Booking
 
VIP Model Call Girls Kothrud ( Pune ) Call ON 8005736733 Starting From 5K to ...
VIP Model Call Girls Kothrud ( Pune ) Call ON 8005736733 Starting From 5K to ...VIP Model Call Girls Kothrud ( Pune ) Call ON 8005736733 Starting From 5K to ...
VIP Model Call Girls Kothrud ( Pune ) Call ON 8005736733 Starting From 5K to ...
 
(INDIRA) Call Girl Bhosari Call Now 8617697112 Bhosari Escorts 24x7
(INDIRA) Call Girl Bhosari Call Now 8617697112 Bhosari Escorts 24x7(INDIRA) Call Girl Bhosari Call Now 8617697112 Bhosari Escorts 24x7
(INDIRA) Call Girl Bhosari Call Now 8617697112 Bhosari Escorts 24x7
 
notes on Evolution Of Analytic Scalability.ppt
notes on Evolution Of Analytic Scalability.pptnotes on Evolution Of Analytic Scalability.ppt
notes on Evolution Of Analytic Scalability.ppt
 
VIP Call Girls Palanpur 7001035870 Whatsapp Number, 24/07 Booking
VIP Call Girls Palanpur 7001035870 Whatsapp Number, 24/07 BookingVIP Call Girls Palanpur 7001035870 Whatsapp Number, 24/07 Booking
VIP Call Girls Palanpur 7001035870 Whatsapp Number, 24/07 Booking
 
CCS335 _ Neural Networks and Deep Learning Laboratory_Lab Complete Record
CCS335 _ Neural Networks and Deep Learning Laboratory_Lab Complete RecordCCS335 _ Neural Networks and Deep Learning Laboratory_Lab Complete Record
CCS335 _ Neural Networks and Deep Learning Laboratory_Lab Complete Record
 
data_management_and _data_science_cheat_sheet.pdf
data_management_and _data_science_cheat_sheet.pdfdata_management_and _data_science_cheat_sheet.pdf
data_management_and _data_science_cheat_sheet.pdf
 
FEA Based Level 3 Assessment of Deformed Tanks with Fluid Induced Loads
FEA Based Level 3 Assessment of Deformed Tanks with Fluid Induced LoadsFEA Based Level 3 Assessment of Deformed Tanks with Fluid Induced Loads
FEA Based Level 3 Assessment of Deformed Tanks with Fluid Induced Loads
 
ONLINE FOOD ORDER SYSTEM PROJECT REPORT.pdf
ONLINE FOOD ORDER SYSTEM PROJECT REPORT.pdfONLINE FOOD ORDER SYSTEM PROJECT REPORT.pdf
ONLINE FOOD ORDER SYSTEM PROJECT REPORT.pdf
 
AKTU Computer Networks notes --- Unit 3.pdf
AKTU Computer Networks notes ---  Unit 3.pdfAKTU Computer Networks notes ---  Unit 3.pdf
AKTU Computer Networks notes --- Unit 3.pdf
 
Top Rated Call Girls In chittoor 📱 {7001035870} VIP Escorts chittoor
Top Rated Call Girls In chittoor 📱 {7001035870} VIP Escorts chittoorTop Rated Call Girls In chittoor 📱 {7001035870} VIP Escorts chittoor
Top Rated Call Girls In chittoor 📱 {7001035870} VIP Escorts chittoor
 
UNIT - IV - Air Compressors and its Performance
UNIT - IV - Air Compressors and its PerformanceUNIT - IV - Air Compressors and its Performance
UNIT - IV - Air Compressors and its Performance
 

Antentop 2004 01

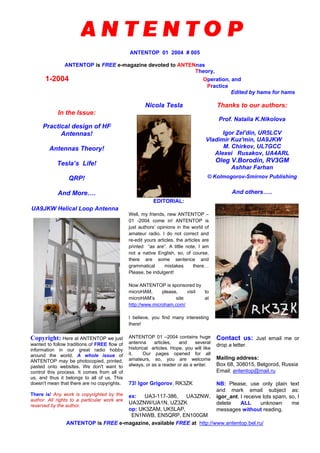
  • 1. ANTENTOP 01 2004 # 005 ANTENTOP is FREE e-magazine devoted to ANTENnas Theory, 1-2004 Operation, and Practice Edited by hams for hams In the Issue: Practical design of HF Antennas! Antennas Theory! Tesla’s Life! QRP! And More…. Nicola Tesla Thanks to our authors: Prof. Natalia K.Nikolova Igor Zel'din, UR5LCV Vladimir Kuz'min, UA9JKW M. Chirkov, UL7GCC Alexei Rusakov, UA4ARL Oleg V.Borodin, RV3GM Ashhar Farhan © Kolmogorov-Smirnov Publishing And others….. UA9JKW Helical Loop Antenna EDITORIAL: Well, my friends, new ANTENTOP – 01 -2004 come in! ANTENTOP is just authors’ opinions in the world of amateur radio. I do not correct and re-edit yours articles, the articles are printed “as are”. A little note, I am not a native English, so, of course, there are some sentence and grammatical mistakes there… Please, be indulgent! Now ANTENTOP is sponsored by microHAM, please, visit to microHAM’s site at http://www.microham.com/ I believe, you find many interesting there! Copyright: Here at ANTENTOP we just wanted to follow traditions of FREE flow of information in our great radio hobby around the world. A whole issue of ANTENTOP may be photocopied, printed, pasted onto websites. We don't want to control this process. It comes from all of us, and thus it belongs to all of us. This doesn't mean that there are no copyrights. There is! Any work is copyrighted by the author. All rights to a particular work are reserved by the author. ANTENTOP 01 –2004 contains huge antenna articles, and several historical articles. Hope, you will like it. Our pages opened for all amateurs, so, you are welcome always, or as a reader or as a writer. 73! Igor Grigorov, RK3ZK ex: UA3-117-386, UA3ZNW, UA3ZNW/UA1N, UZ3ZK op: UK3ZAM, UK5LAP, EN1NWB, EN5QRP, EN100GM Contact us: Just email me or drop a letter. Mailing address: Box 68, 308015, Belgorod, Russia Email: antentop@mail.ru NB: Please, use only plain text and mark email subject as: igor_ant. I receive lots spam, so, I delete ALL unknown me messages without reading. ANTENTOP is FREE e-magazine, available FREE at http://www.antentop.bel.ru/
  • 2. ANTENTOP- 01- 2004, # 005 Editorial Welcome to ANTENTOP, FREE e - magazine! ANTENTOP is FREE e- magazine, made in PDF, devoted to antennas and amateur radio. Everyone may share his experience with others hams on the pages. Your opinions and articles are published without any changes, as I know, every your word has the mean. Every issue of ANTENTOP is going to have 100 pages and this one will be paste in whole on the site. Preview's files will be removed in this case. I do not know what a term for one issue will need, may be 2-3 month or so. As I have counted, a whole issue of ANTENTOP will hold nearly 10 - 20 MB . A little note, I am not a native English, so, of course, there are some sentence and grammatical mistakes there… Please, be indulgent! Preview: Some articles from "cooking" issue will be pasted for preview on this site, others no. Because, as I think, it must be something mysterious in every issue. Publishing: If you have something for share with your friends, and if you want to do it FREE, just send me an email. Also, if you want to offer for publishing any stuff from your website, you are welcome! Your opinion is important for me, so, contact if you want to say something! Copyright Note: Dear friends, please, note, I respect Copyright. Always, when I want to use some stuff for ANTENTOP, I ask owners about it. But… sometimes my efforts are failed. I have some very interesting stuff from closed websites, but I can not go to touch with their owners… as well as I have no response on some my emails from some owners. I have a big collection of pictures, I have got the pictures and stuff in others ways, from FREE websites, from commercial CDs, intended for FREE using, and so on... I use to the pictures (and seldom, some stuff from closed websites) in ANTENTOP. If the owners still are alive, please, contact with me, I immediately remove any Copyright stuff, or, if it is necessary, all needed references will be made there. I do not know, why the owners do not response me. Are they still alive? Do their companys are a bankrupt? Or do they move anywhere? Where they are in the end? Business Advertising: ANTENTOP is not a commercial magazine. Authors and I (Igor Grigorov, the editor of the magazine) do not get any profit from the issue. But off course, I do not mention from commercial ads in ANTENTOP. It allows me to do the magazine in most great way, allows me to pay some money for authors to compensate their hard work. I have lots interesting stuff in Russian, and owners of the stuff agree to publish the stuff in ANTENTOP… but I have no enough time to translate the interesting stuff in English, however I may pay money to translators, and, they will do this work, and we will see lots interesting articles there. So, if you want to put a commercial advertisement in ANTENTOP, please contact with me. A commercial advertisement will do ANTENTOP even greater interesting and various! I hope, readers do not mention against such commercial ads. Book Advertising: I do not think, that Book Advertising is a commercial advertisement. So, Book Advertising is FREE at ANTENTOP. Contact with me for details. Mailing address: Box 68, 308015, Belgorod, Russia Email: antentop@mail.ru subject: igor_ant NB: Please, use only plain text and mark email subject as: igor_ant. I receive lots spam and viruses, so, I delete ALL unknown me messages without reading. 73! Igor Grigorov, RK3ZK ex: UA3-117-386, UA3ZNW, UA3ZNW/UA1N, UZ3ZK op: UK3ZAM, UK5LAP,EN1NWB, EN5QRP, EN100GM http://www.antentop.bel.ru/ mirror: www.antentop.boom.ru Editorial
  • 3. ANTENTOP- 01- 2004, # 005 Table of Contents Table of Contents Antenna Theory Page 1 Basic Methods in Antenna Measurements: by Prof. Natalia K.Nikolova Dear friends, I would like to give to you an interesting and reliable antenna theory. Hours searching in the web gave me lots theoretical information about antennas. Really, at first I did not know what information to chose for ANTENTOP. Now I want to present to you one more very interesting Lecture - it is a Lecture about Basic Methods in Antenna Measurements. I believe, you cannot find such info anywhere for free! Very interesting and very useful info for every ham, for every radio- engineer. 5 Antenna Practice 2 Modern Military HF- Antennas of Com. Cars: by Igor Grigorov, RK3ZK The basic types of military antennas, which for a long time were used on communication cars, were construed during and before the World War II. After WW-II researches for new antennas for communication cars was renewed. Below we shall consider two new type of car antennas which have appeared in army after the World War-II still are in use on modern communication car. There are magnet antennas and DDRR antennas, that began to be used for communication cars (under my information) rather recently - in the middle of 70s years of the 20 century. 34 3 Practical Design of Open- Sleeve Antennas for Upper HF- Ranges:: by Dmitry Fedorov, UA3AVR Just practical design of Open- Sleeve Antennas 39 4 Something about Antenna Tuning Units: by Igor Grigorov, RK3ZK You should not think that an Antenna Tuning Unit (ATU) is a magic thing to do any antenna work well with your transceiver. At installation between the transmitter and feeder the ATU only does matching of output impedance of your transmitter with input impedance of your antenna - feeder system. It means that ATU allows to the transmitter with output of 50 Ohm to work normally with antenna plus feeder having any input impedance. 40 5 Antenna Tuning Unit for 6-meters: by Igor Grigorov, RK3ZK For experimental operation on the 6-meters range some antennas for others bands with ATU can be used, especially if a radio amateur only starts to work on the “magic” band. Schematic of such ATU that does match any antenna of 10-20 meters to 6-meters is shown on Fig. 1. The ATU allows match a load of 15 to 1000 Ohms with 50- Ohms coaxial cable or with end stage of the transceiver. Efficiency is not less than 70 %. 46 6 UR5LCV’s YAGI for Hams: by Igor Zel'din, UR5LCV Antennas from here were designed and optimized by Igor Zel'din, UR5LCV, and design of the antennas were wrote in the book: HF- Antennas- 3, by I. Beketov, UR4LTX, I. Zel'din, UR5LCV, Kharkov, 1994. 10 years has gone from the publishing of the book, for this time lots of these antennas became well- known to hams of the CIS. Lots of these antennas are practically made and have shown full conformity to the theoretical parameters. 47 Page 1 http://www.antentop.bel.ru/ mirror: www.antentop.boom.ru
  • 4. ANTENTOP- 01- 2004, # 005 Table of Contents Table of Contents Page 7 UR5LCV’s YAGI for 28-MHz: by Igor Zel'din, UR5LCV Just practical design. 47 8 UR5LCV’s YAGI for 21-MHz: by Igor Zel'din, UR5LCV Just practical design. 49 9 UR5LCV’s YAGI for 14-MHz: by Igor Zel'din, UR5LCV Just practical design. 52 10 UR5LCV’s YAGI for 7-MHz: by Igor Zel'din, UR5LCV Just practical design. 55 11 UR5LCV’s One Boom YAGI: 3-el 14-MHz & 4-el. 21-MHz: by Igor Zel'din, UR5LCV Just practical design. 56 12 UR5LCV’s One Boom YAGI: 4-el 14-MHz & 5-el. 21-MHz: by Igor Zel'din, UR5LCV Just practical design. 57 13 UR5LCV’s One Boom YAGI: 4-el 14-MHz & 5-el. 21-MHz: by Igor Zel'din, UR5LCV Just practical design. 58 14 UR5LCV’s One Boom YAGI: 4-el 14-MHz & 5-el. 21-MHz: by Igor Zel'din, UR5LCV Just practical design. 59 15 A Helical Loop Antenna for the 20-meters Band: By Vladimir Kuz'min, UA9JKW Two years back I have moved to Nefteyugansk (Russia, Siberia) where I could not receive the sanction to installation for a full-sized HF- antenna on the roof of my house. , So I began to do experimenters with short indoors antennas. 60 16 Top Load at Vertical Antennas All amateurs know if at a vertical antenna a top load it is used, the self – resonance of the vertical antenna would be lower then a vertical without the top load. How a top load does influence to antenna resonance? 61 17 A Five Bands Vertical Trap Antenna: by M. Chirkov, UL7GCC The classical W3DZZ antenna in vertical installation designed by UL7GCC is well known in Russia. 4 Page 2 http://www.antentop.bel.ru/ mirror: www.antentop.boom.ru
  • 5. ANTENTOP- 01- 2004, # 005 Table of Contents Table of Contents Page QRP 18 QRP- Tales by Alexei Rusakov, UA4ARL/qrp Continue from ANTENTOP- 03- 2003, # 004 63 19 A QRP-QSO without an Antenna: by Oleg ("Master-72") V.Borodin, RV3GM October 5, 2003. Robin, M5AEF, had an unique CW QSO with RX3BO from Moscow at 17 meters using only 1 watt output. You say ‘it is nothing especial for 17 meters’, but what do you say, if you know that Robin did not use any antenna? 63 20 A Simple SSB Transceiver: by by Ashhar Farhan A dual-band transceiver with a crisp receiver and a clean SSB signal is described. It started its life as an investigation of the excellent S7C receiver described in EMRFD. This transceiver was specifically designed to use components that are easily available in TV and Radio spares shops. The receiver sports an above average dynamic range, very clean signal and noiseless performance. Although the components are easily available, and every detail about making it is covered here, this is not a weekend project. The design is elaborate and invites improvisation. 64 History 21 The USA Patents of Nicola Tesla Just list of Patents 70 22 The Strange Life of Nicola Tesla Nikola Tesla is the true unsung prophet of the electric age; without whom our radio, auto ignition, telephone, alternating current power generation and transmission, radio and television would all have been impossible. Yet his life and times have vanished largely from public access. This autobiography is released to remedy this situation, and to fill this black hole in information space. © Kolmogorov-Smirnov Publishing 73-100 Page 3 http://www.antentop.bel.ru/ mirror: www.antentop.boom.ru
  • 6. ANTENTOP- 01- 2004, # 005 A Five Bands Vertical Trap Antenna M. Chirkov, UL7GCC The classical W3DZZ antenna in vertical installation designed by UL7GCC and shown at the Reference 1 is well known in Russia. Figure 1 shows the antenna. Diameter of sections A and B is 40- 50-mm. How is it work? 40-m band: The trap LC cut out the upper section B from the antenna. So only section A works as a radiator, and the section A has length in 10.1 meters, i.e. has electrical length in 1/4λ. Vertical radiator having with the length of 1/4λ has a quarter- wave resonance and works in very effectively way. At the band the circuit LC works as a trap. 80-m band: On the 80-m band the antenna has summary physical length of this two sections A+B a little less than 1/4λ. A + B = 16.47 meters, less then 20 meters OF quarter wave length for the 80-m band. A short vertical radiator has a capacity part in its input impedance. But the circuit LC at the 80-m range has an inductance part in its impedance. The inductance part compensates capacity part of the electrically short vertical, and the antenna has a low SWR at the 80-m range too. In other words, the inductor of the LC works as a usual lengthening spool. 10-, 15- and 20-m ranges: Visa versa, at the 10-, 15-, and 20-m the LC has a capacity part at its impedance that goes the electrical length of the antenna to 1.75λ at 10-m, to 1.25λ at 15-m and to 0.75λ at 20-m. Do not forget, verticals like counterpoises, so use several 1/4λ counterpoises for each bands. Reference M. Chirkov, UL7GCC: Multi range vertical // Radio #12, 1991, p. 21. http://www.antentop.bel.ru/ mirror: www.antentop.boom.ru Page 4
  • 7. ANTENTOP- 01- 2004, # 005 Basic Methods in Antenna Measurements Feel Yourself a Student! Dear friends, I would like to give to you an interesting and reliable antenna theory. Hours searching in the web gave me lots theoretical information about antennas. Really, at first I did not know what information to chose for ANTENTOP. Finally, I stopped on lectures “Modern Antennas in Wireless Telecommunications” written by Prof. Natalia K. Nikolova from McMaster University, Hamilton, Canada. You ask me: Why? Well, I have read many textbooks on Antennas, both, as in Russian as in English. So, I have the possibility to compare different textbook, and I think, that the lectures give knowledge in antenna field in great way. Here first lecture “Introduction into Antenna Study” is here. Next issues of ANTENTOP will contain some other lectures. So, feel yourself a student! Go to Antenna Studies! I.G. My Friends, the above placed Intro was given at ANTENTOP- 01- 2003 to Antennas Lectures. Now I know, that the Lecture is one of popular topics of ANTENTOP. Every Antenna Lecture was downloaded more than 1000 times! Now I want to present to you one more very interesting Lecture - it is a Lecture about Basic Methods in Antenna Measurements. I believe, you cannot find such info anywhere for free! Very interesting and very useful info for every ham, for every radio- engineer. So, feel yourself a student! Go to Antenna Studies! I.G. McMaster University Hall Prof. Natalia K. Nikolova Basic Methods in Antenna Measurements The basic concepts in antenna measurements are presented in this module. First, a brief description of antenna ranges and anechoic chambers is given. Second, the basic methods for measuring the far-field patterns, the gain, the directivity, the radiation efficiency, the impedance and the polarization are discussed. by Prof. Natalia K. Nikolova www.antentop.bel.ru mirror: www.antentop.boom.ru Page-5
  • 8. ANTENTOP- 01- 2004, # 005 Basic Methods in Antenna Measurements www.antentop.org Page-6
  • 9. ANTENTOP- 01- 2004, # 005 Basic Methods in Antenna Measurements www.antentop.org Page-7
  • 10. ANTENTOP- 01- 2004, # 005 Basic Methods in Antenna Measurements www.antentop.org Page-8
  • 11. ANTENTOP- 01- 2004, # 005 Basic Methods in Antenna Measurements www.antentop.org Page-9
  • 12. ANTENTOP- 01- 2004, # 005 Basic Methods in Antenna Measurements www.antentop.org Page-10
  • 13. ANTENTOP- 01- 2004, # 005 Basic Methods in Antenna Measurements www.antentop.org Page-11
  • 14. ANTENTOP- 01- 2004, # 005 Basic Methods in Antenna Measurements www.antentop.org Page-12
  • 15. ANTENTOP- 01- 2004, # 005 Basic Methods in Antenna Measurements www.antentop.org Page-13
  • 16. ANTENTOP- 01- 2004, # 005 Basic Methods in Antenna Measurements www.antentop.org Page-14
  • 17. ANTENTOP- 01- 2004, # 005 Basic Methods in Antenna Measurements www.antentop.org Page-15
  • 18. ANTENTOP- 01- 2004, # 005 Basic Methods in Antenna Measurements www.antentop.org Page-16
  • 19. ANTENTOP- 01- 2004, # 005 Basic Methods in Antenna Measurements www.antentop.org Page-17
  • 20. ANTENTOP- 01- 2004, # 005 Basic Methods in Antenna Measurements www.antentop.org Page-18
  • 21. ANTENTOP- 01- 2004, # 005 Basic Methods in Antenna Measurements www.antentop.org Page-19
  • 22. ANTENTOP- 01- 2004, # 005 Basic Methods in Antenna Measurements www.antentop.org Page-20
  • 23. ANTENTOP- 01- 2004, # 005 Basic Methods in Antenna Measurements www.antentop.org Page-21
  • 24. ANTENTOP- 01- 2004, # 005 Basic Methods in Antenna Measurements www.antentop.org Page-22
  • 25. ANTENTOP- 01- 2004, # 005 Basic Methods in Antenna Measurements www.antentop.org Page-23
  • 26. ANTENTOP- 01- 2004, # 005 Basic Methods in Antenna Measurements www.antentop.org Page-24
  • 27. ANTENTOP- 01- 2004, # 005 Basic Methods in Antenna Measurements www.antentop.org Page-25
  • 28. ANTENTOP- 01- 2004, # 005 Basic Methods in Antenna Measurements www.antentop.org Page-26
  • 29. ANTENTOP- 01- 2004, # 005 Basic Methods in Antenna Measurements www.antentop.org Page-27
  • 30. ANTENTOP- 01- 2004, # 005 Basic Methods in Antenna Measurements www.antentop.org Page-28
  • 31. ANTENTOP- 01- 2004, # 005 Basic Methods in Antenna Measurements www.antentop.org Page-29
  • 32. ANTENTOP- 01- 2004, # 005 Basic Methods in Antenna Measurements www.antentop.org Page-30
  • 33. ANTENTOP- 01- 2004, # 005 Basic Methods in Antenna Measurements www.antentop.org Page-31
  • 34. ANTENTOP- 01- 2004, # 005 Basic Methods in Antenna Measurements www.antentop.org Page-32
  • 35. ANTENTOP- 01- 2004, # 005 Basic Methods in Antenna Measurements www.antentop.org Page-33
  • 36. ANTENTOP- 01- 2004, # 005 Modern Military HF- Antennas of Com. Cars Igor Grigorov, RK3ZK antentop@mail.ru I have a small collection of information about old and modern military HF antennas used over the World. Presently, two modern automobile HF antennas are described at the article. The antennas are written “as it is,” i.e., I give all information, that I have had. I know, the information is not complete at all, but, nevertheless, the information is interesting and it can help somebody to make own ‘car antennas.’ The basic types of military antennas, which for a long time were used on communication cars, were construed during and before the World War II. After WW-II researches for new antennas for communication cars was renewed. Below we shall consider two new type of car antennas which have appeared in army after the World War-II still are in use on modern communication car. There are magnet antennas and DDRR antennas, that began to be used for communication cars (under my information) rather recently - in the middle of 70s years of the 20 century. corner of the magnet antenna. Driven loop is coupled to the transmitter with the help of a coaxial cable by characteristic impedance of100 Ohm. The sizes of the army magnet antenna for operation in 150 - 80 meters are exhibited in Figure 1b. Mag Loop antennas of communication cars for meters Also magnet antennas are used for operation in HF ra 60 meters. Such magnet antenna has smaller contrasted to magnet antenna intended for operation meters. Magnet antenna for 90-60 meters owing to sizes is installed or above the roof of the cabin of comm Mag Loop antennas of communication cars for 150-80 meters As usual a magnet antenna of the range is installed on a communication car as it is shown in Figure 1. The magnet antenna ensures sure communication in radius of 200 kms at the daylight time and up to 400 kilometers at the night time. Figure 1 Magnet antenna on a communication car The magnet antenna at marching condition is installed parallel to the car roof (see. Figure 1a) and does not hinder to ride the car under low bridges or under trees in forests. The magnet antenna stands in operating position with the help of an electric motor or by operator hand. Figure 1b shows the zenith magnet antenna in the operating position. The magnet antenna (item 2, Figure 1b) is tuned in resonance on the operating frequency with the help of variable capacitor (item 3, Figure 1b), which is weatherproofed by hermetic box (item 4, Figure 1b). The variable capacitor is turned with the help of an electric motor. The magnet antenna is drove by a small loop (item 1, Figure 1b) that is installed in car (see Figure 2) or at back edge of the car (see Figure 3). At this installation of mag loop the roof of the car is free to place other antennas or some more electronic equipment. The sizes of the magnet antenna for operation in 90 - 60 meters are exhibited in Figure 2 and Figure 3. Figure 2 Magnet antenna above the roof of the car cabin Figure 3 Magnet antenna on the back edge of the car The magnet antennas shown in Figures 1-3 usually are made of an aluminum bent tube in 20- 40 millimeters in OD and 2-3 millimeters thick. Magnet antennas for 150 -90 meters is not intended for operation when a communication car is moving. But Magnet antennas for 90 - 60 meters can be used when a communication car is moving. http://www.antentop.bel.ru/ mirror: www.antentop.boom.ru Page 34
  • 37. ANTENTOP- 01- 2004, # 005 Modern Military HF- Antennas of Com. Cars Magnet antenna on a communication car Antennas DDRR in military communication Antennas DDRR are used in military communication of many countries. Figure 4 shows the schematic of antenna DDRR. Say simple the antenna represents a tube bent in shape of letter “L”. The length of the ‘L’ Is little smaller the quarter wave of the high lower range of the antenna, but the length ‘L’ not less the lower operation range of the antenna. Antenna DDRR to resonance by the variable capacitor C which is driv electric motor M. Antenna DDRR, as usual, is mad aluminum tube in 20-40 millimeters OD. Figure 4 Schematic of Antenna DDRR of communicatio http://www.antentop.bel.ru/ mirror: www.antentop.boom.ru Page 35
  • 38. ANTENTOP- 01- 2004, # 005 Modern Military HF- Antennas of Com. Cars Magnet antenna above the roof of the car cabin On military vehicles an antenna DDRR usually places on one of edges as it is shown in Figure 5. It allows to install other antennas on the roof of the communication car. Antennas DDRR often serve as enclosure of the roof. Figure 5 Antenna DDRR on military vehicle Antennas DDRR also are used on some heavy tanks or BMI (battle machine of infantry). On this military vehicle the antenna DDRR serves as a rail for other hand. Antenna DDRR has mechanically strong design, so it is difficult to damage an antenna DDRR in battle. Seldom use two antennas DDRR that fed with some phase shift to create special diagram directivity. Figure 6 shows such antenna array. Figure 6 Array of antennas DDRR Antenna DDRR is very strong and allows to do comm when the car is moving. Radio amateurs also can use DDRR for the operation in ether at installation on the ro car. http://www.antentop.bel.ru/ mirror: www.antentop.boom.ru Page 36
  • 39. ANTENTOP- 01- 2004, # 005 Modern Military HF- Antennas of Com. Cars http://www.antentop.bel.ru/ mirror: www.antentop.boom.ru Page 37
  • 40. ANTENTOP- 01- 2004, # 005 Modern Military HF- Antennas of Com. Cars Antenna DDRR on military vehicle Array of antennas DDRR ANTENTOP is Free e- mag for all radioamateurs over the World. Feel free to share with friends any issue of ANTENTOP. Feel free to print, copy to CDs or share in any others ways with any issue of ANTENTOP. 73! Igor Grigorov, RK3ZK http://www.antentop.bel.ru/ mirror: www.antentop.boom.ru http://www.antentop.bel.ru/ mirror: www.antentop.boom.ru Page 38
  • 41. ANTENTOP- 01- 2004, # 005 Practical Design of Open Sleeve Antennas By Dmitry Fedorov, UA3AVR Open Sleeve antennas presented at this article were designed by UA3AVR (Reference: Dmitry Fedorov (UA3AVR).: Multi-range vertical Open Sleeve.- Radiomir. HF and VHF, 2001, #8, pp. 34-36). Table 1 shows data for the Open Sleeve Figure 1 shows the design of the antennas Band, m Length M, mm Length S1, mm Distance D1, mm Length S2, mm Distance D2, mm Figure 1 20; 14; 10 5168 3407 220 2573 200 A 14; 10 3630 2527 220 - - B 20; 14; 10 5149 3451 220 2601 200 C 14; 10 3432 2567 210 - - D http://www.antentop.bel.ru/ mirror: www.antentop.boom.ru Page 39
  • 42. ANTENTOP- 01- 2004, # 005 Something about ATU By Igor Grigorov, RK3ZK antentop@mail.ru What an ATU does? You should not think that an Antenna Tuning Unit (ATU) is a magic thing to do any antenna work well with your transceiver. At installation between the transmitter and feeder the ATU only does matching of output impedance of your transmitter with input impedance of your antenna - feeder system. It means that ATU allows to the transmitter with output of 50 Ohm to work normally with antenna plus feeder having any input impedance. But probably SWR would be enough high in the feeder. If the ATU is installed between antenna and feeder it does low SWR in feeder and provides good operation for the transmitter. But probably the antenna would work not in good way. So, an ATU provides safe operation for transmitters end stage, if the ATU is between the transmitter and the feeder, additionally an ATU does low SWR in feeder, if the ATU is installed between antenna and feeder. As usual modern transceivers and military equipment have inner ATU that does matching end stage with feeder or antenna. Below we take close look to ATU design. ATU Design Fig. 1 shows schematic of a “classical” ATU. Such ATU has: - a Matching Unit, that provides the matching of end stage of the transmitter with antenna - feeder system. Matching Unit is the “heart” of any ATU; - A SWR mater or HF-bridge, that shows how the matching is done; http://www.antentop.bel.ru/ mirror: www.antentop.boom.ru Page 40
  • 43. ANTENTOP- 01- 2004, # 005 Something about ATU - Dummy loads R1, R2 and R3, that help us to monitor how Matching Unit and SWR – meter (HF- bridge) do work: - S1 and S2 for proper connection of the above mentioned parts; - J1 and J2 for transmitter and antenna connection. So, how the ATU does work? S1 at “Bypass” position does connection of the transmitter to S2. S2 does connection or to antenna, or to Dummy Loads R2 (50 Ohms) or R3 (600 Ohms). So, at good 50- Ohms antenna the transmitter works straight on the antenna, also is possibility to load the transmitter on 50- Ohms Dummy Load for a tuning of the transmitter or checking of the SWR- meter. S1 at “Tune” position does connection of the transmitter through inner HF-bridge and Matching Unit to S2. So, it is possible to tune the Matching Unit or on to real antenna (S2 in position Ant) or check how the Matching Unit can tune to 50-Ohms (S2 in position Load 1) or 600-Ohms (S2 in position Load 2) load. When you have your antenna tuned, switch S1 in position “Operate” and just work in the ether. You can see, it is possible to use or SWR- meter or HF- bridge for tuning the MU on to real load. As it is visible from this scheme the degree of the matching of the transmitter with used antenna depends only on used Matching Unit. Let’s see what our Matching Unit can contain. Classical Matching Unit One of most effective Matching Units is shown on Fig. 2. This scheme was widely used by the radio amateurs from early 30s till recently days. As it is visible from Fig. 2, the end stage of the transmitter is connected through coupling coil L1 and coupling capacitor C1. L2 and C2 is tuned to resonance to input signal. C3 does coupling with the load (antenna). As usual, L1 has from ¼ to 1/6 from amount of turns of L2. L1 is winded in lower part of L2. L1 should be unbound from L2 by any qualitative isolation. In some designs of the MU, L1 is isolated by means of air. The transmitter is coupled to the antenna only by magnetic field, so the end stage of the transmitter is protected from a lightning. Resonance circuit kills harmonics. The Classical Matching Unit does well match a load from 10 to 1000 Ohms with end stage of transmitter in 50 or 75-Ohm impedance. C1 should have maximum of capacity up to 1500- pF at operation through 1,8- 28 MHz, and 500-pF would be enough for operation through 3.5- 28 MHz. If L1 has optimal number of turns the C1 is not necessary at all. C2 and C3 should have the greatest possible clearance between their plates. At constant parameters of L1 and L2 the Classical Matching Unit works with high efficiency only in two multiple amateur HF - ranges, for example, 1,8 and 3,5 MHz, 7 and 14 MHz and so on. At others ranges efficiency is dropped. Old Classical Matching Unit had plug-in coils for all amateur range for keeping the efficiency at high level. L2 should be placed as far as possible from metal walls of the cabinet of the ATU. To tune the MU is very simple. At first, C1 has the maximum capacity, C2 and C3 have minimum capacity. Then, with help of C2 do tune resonance circuit L2C2 in the resonance to working frequency, then C3 does optima matching with the antenna. After that once more time do tuning C2 and C1. It is necessary to say, that after final tuning of the MU C3 has to have the greatest capacity as it is possible. Advantages of the MU are following. It does not require too careful manufacture of L1 and L2. The system ensures high efficiency, up to 80 percents. Tuning is done with two capacitors C2 and C3. The lacks are that for high efficiency in the matching unit it is necessary to use one spool to two multiple ranges, and one variable capacitor insulated from case of an ATU. Classical Matching Unit with a symmetrical output Recently symmetrical antennas with a symmetrical feeder are applied seldom, but some decades ago it was a usual matter. Classical Matching Unit with symmetrical output is shown on Fig. 3. In scheme shown in Fig. 3 a RF- voltage for antenna - feeder system is removed symmetrically from both ends of L2, and it is only difference from the scheme shown in Fig. 2. In practical design L1 should be disposed symmetrically concerning resonance spool L2. Twins capacitors C2.1 and C2.2 should have one axe. It is as well as to C3.1 and C3.2. http://www.antentop.bel.ru/ mirror: www.antentop.boom.ru Page 41
  • 44. ANTENTOP- 01- 2004, # 005 Something about ATU Classical Matching Unit with taps You can see that C3 is isolated from metal cabinet of the ATU. It is not convenient for practical design of an ATU, so amateurs often use Classical Matching Unit with taps. Fig. 4 shows such MU with asymmetrical output, Fig. 5 shows Classical Matching Unit with taps with symmetrical output. These schemes (Fig. 4 and 5) cannot give such careful matching, as shown in Fig. 2 or Fig. 3 have provided. But in case if it is need to minimize dimensions of an ATU the schemes can be used. Multi-range Matching Unit with taps So, if you want to build an ATU having minimum sizes and parts try the schematic shown in Fig. 6. However, the Matching Unit has not high efficiency at upper amateur ranges because of lowering of the Q-factor of L2 and because of not optimal selection of taps from L2. But usage of such simplified multi- range Matching Unit at amateur HF - ranges 1,8- 10-MHz is quite acceptable. T - Matching Unit Classical Matching Unit is very effective in the work. However, among radio amateurs and military T- Matching Unit has more popularity then one shown in Fig. 2. It takes place because T- Matching Unit have high efficiency at very wide frequency ranges and T- Matching Unit allows to do easy automatic tuning (that very likely to the military!). Also, T- Matching Unit works very well with for asymmetrical coaxial cables feeding modern antennas. Fig. 7 shows schematic of T- Matching Unit. The MU has rather good parameters. It is possible to do matching a 50– Ohms transmitter to 10- 1000-Ohms antenna. It is possible overlap all HF- amateur bands from 3,5 up to 30 MHz using only one variable inductor at 0.5-30- µH and two variable capacitor at 10- 250-pF. The MU does matching at 1.8-MHz if to bridge C1 and C2 to connect fixed capacitors at 200-pF. http://www.antentop.bel.ru/ mirror: www.antentop.boom.ru Page 42
  • 45. ANTENTOP- 01- 2004, # 005 Something about ATU The “cold” end of L1 should be grounded or isolated carefully from the metal case of ATU. Otherwise you probably will have strong arc between the ungrounded end of L1 and a wall of the ATU, as it is shown in Fig. 8. C1 and C1 should be very qualitative with aerial or vacuum dielectric. The clearance between plates of capacitors should be not less than 2-mm/ to 200-W bypass power. Stray capacitance of C1 and C2 to the metal case of ATU should be no more than 25-pF, otherwise the efficiency at 24-28-MHz drop. Figure 8 Arcing inductor If you want to connect symmetrical antennas feeding through symmetrical ladder lines to the T- Matching Unit, use symmetrical transformer 1:4 or 1:6. BTW, many of symmetrical antennas, feeding through ladder lines have large reactive component, which bad to transformation by simple transformers 1:4 or 1:6. The T - Matching Unit suppress harmonics up to 10-15 dB. T - Matching Unit with a “digital” inductor L1 has to have slide contact to operate the MU in proper way. Sometimes, even extra half of a turn influences to the matching. It restricts usage of an inductor with taps, or demands personal selection taps for real antenna, that certainly, restricts possibilities “tap” MU. Simple decision on this problem by W3TS made, he offered a “digital” inductor that Fig. 9 shows. Really, it is possible with the help of several switches very fine to tune needed inductance. Electronic relays with special chips allow realize automatic ATU. Military also use the method at their automatic ATU. T - Matching Unit with mirror parts For practical design of any ATU it is not conveniently to have two capacitors insulated from the ground. AEA corporation (USA) does the MU as Fig. 10 shows. You can see that they changed C to L. Really, schemes of MU figured in Fig. 7 and Fig. 10 are equivalent. http://www.antentop.bel.ru/ mirror: www.antentop.boom.ru Page 43
  • 46. ANTENTOP- 01- 2004, # 005 Something about ATU But scheme in Fig. 10 has advantages. At first, it is much easier to use only one grounded high-quality capacitor instead of two ones but insulated from metal cabinet. Secondly, it is wise to substitute expensive inductor with slide control to two cheapie spools with taps. The MU made by me at home conditions worked well on all amateur ranges from 1,8 up to 30 MHz and did matching to 50-Ohms transmitter to antenna with resistance from 15 up to 500-Ohms. The inductors were made as Fig. 11 shows. Form of inductors is made of PC – board with slots for turns. On the plate switch for taps is installed. The plate is disposed not in center of the inductor but little sideways as Fig. 12 shows. Pi- Matching Unit Pi - MU is used in radio amateur practice for a long time. It is possible to find Pi - MU and disputes on this subject at radio amateur journals issued on 20s of the 20 century till our time in the Internet. Fig. 13 shows Pi– MU. As usual Pi – MU is used at inner MU at tube and transistor PA or straight at antenna clips.. Pi – MU seldom is used at separate ATU. For matching in a wide frequency ranges loads with resistance 10- 1000- Ohms it need to change C and L at Pi – MU too greatly. So, it is impossible to do universal Pi – MU. It is desirable to use slider inductor because. In case if an inductor with fixed taps is used you can carefully to select the tap for real antenna. http://www.antentop.bel.ru/ mirror: www.antentop.boom.ru Page 44
  • 47. ANTENTOP- 01- 2004, # 005 Something about ATU L- Matching Unit Fig. 14 shows L- MU. This one is a simplified version of Pi – MU. ATU, keeping L- MU often is used for operation with simple tube and transistor transceivers and for matching simple multi- range antennas, which do not contain large reactive component. Parts for the ATU The data of spools for the MU exhibited on Fig. 2 are shown in Tab. 1, for the MU exhibited on Fig. 3 are shown in Tab. 2. Table 1 Data for MU exhibited on Fig. 2 Frequency band, MHz 1,9 3,5-3,8 7 10 18 14 21 24 27-30 Diameter of spool, mm 50 30 25 25 25 25 25 25 25 Length of winding, mm 50 30 40 40 40 40 30 30 30 Number of turns 100 30 20 15 10 11,5 8,5 7,5 6,5 Table 2 Data for MU exhibited on Fig. 3 Frequency band, MHz 1,9 3,5-3,8 7 10 14 18 21 24 27-30 Diameter of spool, mm 50 40 25 25 25 25 25 25 25 Length of winding, mm 60 40 40 50 40 40 40 40 35 Number of turns, n 130 35 28 20 15 11,5 11 9,5 8,5 Tab. 3 Data for digital inductor shown in Fig. 9 Inductance, µH 8 4 2 1 0,5 0,25 0,12 Diameter of spool, mm 30 20 20 20 25 10 10 Length of winding, mm 30 20 25 20 20 10 10 Number of turns, mm 20 18 12 8,5 5 6 4 It is possible to use for T –MU any variometer, which is possible to get. Variometer has to have maximum inductance not less than 30-µH and minimum close to zero. If the maximum of the inductance of the variometer is less, for expansion of frequency range of the ATU to include in serial with the variometer a fixed inductor. If the minimum inductance of the variometer does not reach zero, it is essentially cut off the upper range of operation of the ATU. The design data for spools for digital inductor shown on Fig. 9 are shown in Tab. 3. Significant RF-currents flow through parts of MU - capacitors, inductors, and switches. So all of the parts should be qualitative. 73! I.G. http://www.antentop.bel.ru/ mirror: www.antentop.boom.ru Page 45
  • 48. ANTENTOP- 01- 2004, # 005 Antenna Tuning Unit for 6-meters By Igor Grigorov, RK3ZK antentop@mail.ru For experimental operation on the 6-meters range some antennas for others bands with ATU can be used, especially if a radio amateur only starts to work on the “magic” band. Schematic for such ATU that does match any antenna of 10-20 meters to 6- meters is shown on Fig. 1. The ATU allows match a load of 15 to 1000 Ohms with 50- Ohms coaxial cable or with end stage of the transceiver. Efficiency is not less than 70 %. The ATU has L2C1 resonant circuit that kills TVI very well. Of course, to install the ATU between the antenna and the coaxial cable is the best way for the RF power going to the antenna. In this case you can connect the antenna to J3 and the coaxial cable to J1. Of course, the situation is impossible at many cases, because it requires install the ATU straight by the antenna terminals. So, more often we have only one way - connect the coaxial cable going from the antenna to J2 and the transceiver to J1. The coaxial cable going from the antenna will work with high SWR and maybe, with large losses. But we will have possibility work in the ether at 6-meters. Some words about parts of the ATU. L2 consist of 8 turns of copper wire of 2.0-mm or #12AWG. The coil is air wound, OD is 16-mm diameter, the length is 24-mm. L1 consists of 3 turns of copper wire of 1.0-mm or #18AWG. L1 is wound above "cold" end of L2. The length of L1 is approximately 5-mm. R1 serves for removal of static voltage accumulated by the antenna. J1 is intended for coaxial cable going to the transceiver. J2 is intended for coaxial cable feeding antennas. J3 is intended connection to the antenna terminals or for feeding the antenna through a ladder line. J3 is just two screws of diameter of 3-mm. ATU is tuned with help of a Neon bulb VL1. You can use any small neon bulb. One clip of the bulb is connected to the antenna a piece of wire of length of 3- 10-cm (depends on the transceiver power) is connected to other clip. Tune the ATU to the maxima of glow of the bulb. If you use a QRP- transceiver you can use a FSM (Field Strength Meter) for the tuning. Do tuning in this way. Firstly C2 stands to minimum. Secondly, with the help of C1 do tune the L2C1 to the resonance (by the neon bulb VL1). Then gradually do augment capacity of C2 to maxima of glow of the neon bulb VL1. C1 and C2 can be aerial dielectric, and plate clearance should be 0.5-mm to 30 watts bypass power. . The ATU is assembled inside a box soldered from PC – board. Box has dimensions 100*70*50 mm. http://www.antentop.bel.ru/ mirror: www.antentop.boom.ru Page 46
  • 49. ANTENTOP- 01- 2004, # 005 UR5LCV’s YAGI for Hams Antennas from here were designed and optimized by Igor Zel'din, UR5LCV, and design of the antennas were wrote in the book: HF- Antennas- 3, by I. Beketov, UR4LTX, I. Zel'din, UR5LCV, Kharkov, 1994. 10 years has gone from the publishing of the book, for this time lots of these antennas became well- known to hams of the CIS. Lots of these antennas are practically made and have shown full conformity to the theoretical parameters. The antennas are designed for tubes of 25-mm diameter. If for tubes with different OD are used for elements of antennas do correcting of antenna sizes by modern Antenna Simulation Program. Input resistance of the antenna is much lower the 50 Ohms so it need to use a gamma match feed the antenna. You may calculate a gamma – match using programs given at Appendix to ARRL-Antenna Book, 19 or 20 Edition. 4-el YAGI for 28-MHz F, MHz 28.0 28.35 28.7 G, dBd 7.16 7.49 7.87 F/B, dB 20.35 28.36 20.27 Z, Ohm 30.4-j7 26.4+j1.6 20.4+j.14.3 SWR 1:1.63 1:1.14 1:1.6 OD 25-mm Reflector Driver Director 1 Director 2 Length, cm 535 503 479 448 Spacing to Reflector, cm 0 168 368 683 http://www.antentop.bel.ru/ mirror: www.antentop.boom.ru Page 47
  • 50. ANTENTOP- 01- 2004, # 005 5-el YAGI for 28-MHz 5-el YAGI for 28-MHz F, MHz 28.0 28.35 28.7 G, dBd 8.17 8.41 8.46 F/B, dB 20.46 38.03 20.74 Z, Ohm 28.9-j9.8 29.5+j0.3 35+j2.9 SWR 1:1.3 1:1.09 1:1.29 OD 25-mm Reflector Driver Director 1 Director 2 Director 3 Length, cm 524 509 488 482 466 Spacing to Reflector, cm 0 149 253 478 736 6-el YAGI for 28-MHz F, MHz 28.0 28.35 28.7 G, dBd 9.39 9.62 9.49 F/B, dB 17.1 26.7 18.1 Z, Ohm 29.2-j8.8 24.6+j1 21.4+j21.7 SWR 1:1.95 1:1.3 1:1.94 OD 25-mm Reflector Driver Director 1 Director 2 Director 3 Director 4 Length, cm 530 502 481 480 477 464 Spacing to Reflector, cm 0 160 308 500 781 1084 http://www.antentop.bel.ru/ mirror: www.antentop.boom.ru Page 48
  • 51. ANTENTOP- 01- 2004, # 005 7-el YAGI for 28-MHz 7-el YAGI for 28-MHz F, MHz 28.0 28.35 28.7 G, dBd 9.74 10.1 10.2 F/B, dB 20.48 23.75 18.15 Z, Ohm 30.2-11.1 30.6+j0.8 33.8+j10.9 SWR 1:1.48 1:1 1:1.39 OD 25-mm Reflector Driver Director 1 Director 2 Director 3 Director 4 Director 5 Length, cm 520 501 486 479 473 470 458 Spacing to Reflector, cm 0 205 348 541 779 1058 1343 4-el YAGI for 21-MHz http://www.antentop.bel.ru/ mirror: www.antentop.boom.ru Page 49
  • 52. ANTENTOP- 01- 2004, # 005 4-el YAGI for 21-MHz F, MHz 21.0 21.175 21.35 G, dBd 6.88 7.03 7.16 F/B, dB 20.83 21.36 20.83 Z, Ohm 26.7-j3.8 23.3+j1.4 18.3+j8.6 SWR 1:1.4 1:1.09 1:1.4 OD 25-mm Reflector Driver Director 1 Director 2 Length, cm 722 684 658 614 Spacing to Reflector, cm 0 160 340 676 Another One 4-el YAGI for 21-MHz F, MHz 21.0 21.175 21.35 G, dBd 7.74 8.0 8.26 F/B, dB 19.65 32.1 20.49 Z, Ohm 29-j58 24.2+j0.9 17.5+j10.6 SWR 1:1.53 1:1.15 1:1.54 OD 25-mm Reflector Driver Director 1 Director 2 Length, cm 716 674 650 634 Spacing to Reflector, cm 0 210 516 880 5-el YAGI for 21-MHz F, MHz 21.0 21.175 21.35 G, dBd 8.19 8.39 8.54 F/B, dB 22.99 29.06 21.34 Z, Ohm 29.3-j8.8 29.3+j0.3 31.2+j11 SWR 1:1.39 1:1.02 1:1.4 OD 25-mm Reflector Driver Director 1 Director 2 Director 3 Length, cm 700 675 645 643 622 Spacing to Reflector, cm 0 234 388 657 1022 http://www.antentop.bel.ru/ mirror: www.antentop.boom.ru Page 50
  • 53. ANTENTOP- 01- 2004, # 005 6-el YAGI for 21-MHz 6-el YAGI for 21-MHz F, MHz 21.0 21.175 21.35 G, dBd 9.46 9.63 9.62 F/B, dB 20.24 31.15 20.33 Z, Ohm 27.6-j8.3 23.8+j0.0 20.3+j13.7 SWR 1:1.65 1:1.16 1:1.64 OD 25-mm Reflector Driver Director 1 Director 2 Director 3 Director 4 Length, cm 713 673 647 645 643 625 Spacing to Reflector, cm 0 218 413 658 1045 1450 7-el YAGI for 21-MHz F, MHz 21.0 21.175 21.35 G, dBd 9.98 10.1 10.21 F/B, dB 23.61 24.14 20.00 Z, Ohm 29.5-j8.3 29.6+j0.1 30.7+j8.0 SWR 1:1.33 1:1 1:1.64 http://www.antentop.bel.ru/ mirror: www.antentop.boom.ru Page 51
  • 54. ANTENTOP- 01- 2004, # 005 3-el YAGI for 14-MHz OD 25-mm Reflector Driver Director 1 Director 2 Director 3 Director 4 Director 5 Length, cm 695 674 649 638 630 626 607 Spacing to Reflector, cm 0 275 466 725 1043 1417 1798 3-el YAGI for 14-MHz F, MHz 14.0 14.15 14.3 G, dBd 5.96 6.11 6.29 F/B, dB 19.07 25.43 18.44 Z, Ohm 22.4-j10.5 22.5+j0.3 21.3+j11.6 SWR 1:1.64 1:1.02 1:1.64 OD 25-mm Reflector Driver Director 1 Length, cm 1054 1010 947 Spacing to Reflector, cm 0 282 696 http://www.antentop.bel.ru/ mirror: www.antentop.boom.ru Page 52
  • 55. ANTENTOP- 01- 2004, # 005 4-el YAGI for 14-MHz 4-el YAGI for 14-MHz F, MHz 14.0 14.15 14.3 G, dBd 6.86 7.0 7.12 F/B, dB 18.02 20.13 18.93 Z, Ohm 22.2-j8.9 22.6+j0.3 20.2+j8.6 SWR 1:1.5 1:1.02 1:1.5 OD 25-mm Reflector Driver Director 1 Director 2 Length, cm 1052 1018 982 920 Spacing to Reflector, cm 0 254 536 968 Another One 4-el YAGI for 14-MHz F, MHz 14.0 14.15 14.3 G, dBd 7.5 7.84 8.24 F/B, dB 18.08 29.19 18.06 Z, Ohm 34.3-j5.9 28.3+j0.8 18.2+j14.3 SWR 1:1.68 1:1.26 1:1.67 OD 25-mm Reflector Driver Director 1 Director 2 Length, cm 1079 1014 976 954 Spacing to Reflector, cm 0 326 771 1320 http://www.antentop.bel.ru/ mirror: www.antentop.boom.ru Page 53
  • 56. ANTENTOP- 01- 2004, # 005 5-el YAGI for 14-MHz 5-el YAGI for 14-MHz F, MHz 14.0 14.15 14.3 G, dBd 8.23 8.53 8.77 F/B, dB 20.03 28.74 19.6 Z, Ohm 28.3-j9.4 25.7+j1.6 22.8+j14.4 SWR 1:1.61 1:1.07 1:1.67 OD 25-mm Reflector Driver Director 1 Director 2 Director 3 Length, cm 1046 1013 972 961 929 Spacing to Reflector, cm 0 372 746 1237 1694 6el YAGI for 14-MHz F, MHz 14.0 14.15 14.3 G, dBd 9.4 9.6 9.45 F/B, dB 17.46 26.31 18.1 Z, Ohm 32.9-j8.7 27.2+j0.3 23.3+j22 SWR 1:1.85 1:1.32 1:1.8 http://www.antentop.bel.ru/ mirror: www.antentop.boom.ru Page 54
  • 57. ANTENTOP- 01- 2004, # 005 7-el YAGI for 14-MHz OD 25-mm Reflector Driver Director 1 Director 2 Director 3 Director 4 Length, cm 1066 1016 979 973 971 952 Spacing to Reflector, cm 0 333 596 983 1574 2142 7el YAGI for 14-MHz F, MHz 14.0 14.15 14.3 G, dBd 9.8 10.1 10.21 F/B, dB 22.07 24.03 19.01 Z, Ohm 31.2-j11.2 31.4+j0.1 33.3+j9.8 SWR 1:1.46 1:1 1:1.39 OD 25-mm Reflector Driver Director 1 Director 2 Director 3 Director 4 Director 5 Length, cm 1044 1012 976 960 950 946 919 Spacing to Reflector, cm 0 413 697 1085 1561 2120 2690 3el YAGI for 14-MHz F, MHz 7.0 7.05 7.1 G, dBd 6.12 6.3 6.5 F/B, dB 21.19 26.44 20.3 Z, Ohm 23.6-j7.7 22.2+j0.2 20.2+j8.8 SWR 1:1.46 1:1.03 1:1.46 OD 25-mm Reflector Driver Director 1 Length, cm 2100 2037 1934 Spacing to Reflector, cm 0 675 1435 http://www.antentop.bel.ru/ mirror: www.antentop.boom.ru Page 55
  • 58. ANTENTOP- 01- 2004, # 005 UR5LCV’s One Boom YAGI: 3-el. 14-MHz & 4-el. F, MHz 14.0 14.15 14.3 21.0 21.175 21.35 G, dBd 6.2 6.3 5.9 5.9 6.2 6.5 F/B, dB 16.7 20.4 16.8 18.6 19.5 19.8 Z, Ohm 19.5—j11.9 21.1+j0.8 22.0+j14.0 32.8+j6.0 28.8+j0.2 24.2+j7.5 OD 25- mm Reflector 14 Reflector 21 Driver 14 Driver 21 Director 21.1 Director 14.1 Director 21.2 Length, cm 1054 708 1012 688 656 943 631 Spacing to Reflector 14, cm 0 200 282 380 575 725 830 http://www.antentop.bel.ru/ mirror: www.antentop.boom.ru Page 56
  • 59. ANTENTOP- 01- 2004, # 005 UR5LCV’s One Boom YAGI: 4-el. 14-MHz & 5-el. F, MHz 14.0 14.15 14.3 21.0 21.175 21.35 G, dBd 6.9 7 7.1 7.6 8.0 8.3 F/B, dB 15.7 17.4 18.1 23.6 25.0 20.3 Z, Ohm 22.9—j8.9 23.5+j0.5 25.0+j7.0 24.2+j3.5 27.5+j0.7 32.5+j1.7 OD 25- mm Ref. 14 Ref. 21 Driver 14 Driver 21 Director 21.1 Director 14.1 Director 21.2 Director 14.2 Director 21.3 Length, cm 1050 702 1020 686 664 982 648 920 640 Spacing to Reflector 14, cm 0 80 250 300 430 536 705 986 1075 http://www.antentop.bel.ru/ mirror: www.antentop.boom.ru Page 57
  • 60. ANTENTOP- 01- 2004, # 005 UR5LCV’s One Boom YAGI: 4-el. 21-MHz & 5-el. F, MHz 21.0 21.175 21.35 28.0 28.35 28.7 G, dBd 7.9 8.1 8.2 6.5 7.3 8.1 F/B, dB 21.3 25.0 21.1 18.1 27.0 17.4 Z, Ohm 27.3—j11.0 24.1+j1.6 20.1+j17.0 31.9+j6.4 35.8+j0.2 41.0+j5.0 OD 25- mm Ref. 21 Ref. 28 Driver 21 Driver 28 Director 28.1 Director 21.1 Director 28.2 Director 21.2 Director 21.3 Length, cm 716 520 626 508 490 682 475 628 472 Spacing to Reflector 14, cm 0 170 210 315 420 516 620 880 950 http://www.antentop.bel.ru/ mirror: www.antentop.boom.ru Page 58
  • 61. ANTENTOP- 01- 2004, # 005 UR5LCV’s One Boom YAGI: 5-el. 21-MHz & 6-el. F, MHz 21.0 21.175 21.35 28.0 28.35 28.7 G, dBd 8.4 8.6 8.7 8.1 9.3 9.8 F/B, dB 24.8 25.1 18.6 13.4 20.4 14.3 Z, Ohm 25.9—j9.9 28.6+j0.9 34.9+j13.1 26.8-j4.8 23.5+j0.4 49.8+j51 OD 25- mm Ref. 21 Ref. 28 Dr. 21 Dr. 28 Direct. 28.1 Direct. 21.1 Direct. 28.2 Direct. 21.2 Direct. 28.3 Direct. 21.3 Direct. 28.4 Length, cm 700 530 677 510 496 647 490 645 478 624 464 Spacing to Reflector 14, cm 0 70 234 270 340 388 560 657 900 1022 1200 http://www.antentop.bel.ru/ mirror: www.antentop.boom.ru Page 59
  • 62. ANTENTOP- 01- 2004, # 005 A Helical Loop Antenna for the 20-meters Band By Vladimir Kuz'min, UA9JKW, KuzminVI@pn.yungjsc.com Two years back I have moved to Nefteyugansk (Russia, Siberia) where I could not receive the sanction to installation for a full-sized HF- antenna on the roof of my house. , So I began to do experimenters with short indoors antennas. Most success design of my indoor antenna is a design similar to Fig. 59, given in Reference 1. I have used an inch OD plastic pipe to the form of the antennal. The pipe was bent in a hoop near1 meter diameter. Antenna has 580 turns (near 61 meters of length) of multicore isolated wire of 3 mm diameter with thickness of isolation of 1 mm. So, the spacing between turns is 2 mm. Antenna has SWR 1:1 to 50- Ohm coaxial cable to 14.100, bandwidth to SWR 1:1.5 is 300-kHz. I use a simple symmetrical device- 3 turns on a TV yoke ferrite core. Space from the antenna to the ceil is near 25 centimeters. The antenna has quite good directed properties at rotation within 30-90 degrees the force of signals varied to 1-1,5 points on mine S-meter. I use a YAESU FT840 for my work in the ether. Change of polarization (at rotation of the antenna on the vertical side) appreciable changes has not given as well as change of feeding points has not given large change in the force of signals. Helical Loop Antenna Figure 58 & 59 from Reference 1 http://www.antentop.bel.ru/ mirror: www.antentop.boom.ru Page 60
  • 63. ANTENTOP- 01- 2004, # 005 Top Load at Vertical Antennas In the last summer I experimented and hung up of the antenna behind my balcony at 1.5 meters from a wall. I have received a significant improvement of the work of the antenna The antenna does very good operation in the ether, better than others indoors antennas. It gives low industrial noise and kills all TVI. Reference: I. Grigorov. Antennas for radio amateurs. - Majkop, 1998. Get free the book from http://www.cqham.ru/ UA9JKW at his shack All amateurs know if at a vertical antenna a top load it is used, the self –resonance of the vertical antenna would be lower then a vertical without the top load. How a top load does influence to antenna resonance? At Reference 1 I found a very interesting table having the data. I have proved the table with MMANA, all okey, the table gives very reliable data, so it is possible to use it at many situations. Figure 1 shows different top loads. Data for loaded effect for the top load is shown in Table 1 given at Reference 1. K is coefficient: K = W/L, where W is a resonance wavelength for the vertical antenna, L is antenna length from the ground to the top load. As it is seen, the “umbrella” top load (Figure 1e) gives the most effect on the resonance of a vertical antenna. For example, if to use an umbrella load for a vertical antenna in five meters height, the antenna quarter wave fundamental resonance wavelength would be changed from 20 to 50 meters! Reference: 1. Polyakov V. Technique of radio: Simple AM receivers. – Moscow, DMK-Press, 2001. 73! I.G. http://www.antentop.bel.ru/ mirror: www.antentop.boom.ru Page 61
  • 64. ANTENTOP- 01- 2004, # 005 Top Load at Vertical Antennas Kind of an antenna K Simple vertical Figure 1a 4 Inverted L with short horizontal part Figure 1b 4.5-5 Inverted L with long horizontal part Figure 1c 5-6 T- antenna with long horizontal part Figure 1d 6-8 Umbrella antenna with 4-8 wires Figure 1e 6-10 http://www.antentop.bel.ru/ mirror: www.antentop.boom.ru Page 62
  • 65. ANTENTOP- 01- 2004, # 005 QRP Tales By Alexei Rusakov, UA4ARL/qrp (RU-QRP # 005) ua4arl@vistcom.ru Continued from ANTENTOP- 03-2003 1'st March, 2003 The ARRL phone contest was today but propagation was bad into Volgograd. Even the CW portions were quiet. I checked all the CW portions of the bands this morning and figured that everyone was on SSB. In the evening I went back to check the condition of the bands but 21.060, 24.900 and 28.060 were already gone. While in 15 meters I slid down the band and heard some Europeans. LP's were 549 - 559 while HP's were no louder than 589 here in Volgograd. Around 21.006 there was someone that had a 559 signal with 3 or 4 stations calling him. However, he didn't give his call sign while I was listening. I changed antennas from a North delta to an Africa oriented 2 element and the signal went to 579. That is a good sign, I thought. Suddenly DX starting sending CQ CQ C98RF UP. I tuned the signal in with anticipation. I went up 1.5 kHz and called, but without the /QRP. I must have been the only one that answered him because he came back to me on the first try! I then told him that I was running QRP. After our QSO was over sounded the orchestra of calling stations on the same frequency. I sat and enjoyed listening to the pile-up of DXers. Easy propagation for about an hour and a half then the signals went down to 459. 72! UA4ARL/qrp Alexei Rusakov Credit Line : http://ruqrp.narod.ru October 5, 2003. Robin, M5AEF, had an unique CW QSO with RX3BO from Moscow at 17 meters using only 1 watt output. You say ‘it is nothing especial for 17 meters’, but what do you say, if you know that Robin did not use any antenna? Yes, Robin was doing a calibration for his FT- 757, and this one was connected to a dummy load. An antenna did not connected to the transceiver at this time, the antenna was connected to monitoring receiver, that does control for quality of the output signal from FT- 757. So, Robin heard Anatoly, RX3BO, from Moscow and they had QSO with each other. Robin had received 559 from Anatoly for his dummy- load antenna! Some minutes later Robin connected his usual 1,5 lambda antenna to the FT – 757 and did QSO with RX3BO. Robin had received 579! Don’t say me that there are no miracles! With the best regards! Oleg ("Master-72") V.Borodin 72! de RV3GM (UE3QRP) Credit Line: http://groups.yahoo.com/group/ruqrp/ Dear Friends, you can read about a QRP- QSO without antenna also at ANTENTOP – 01-2003. 72/73! I.G, http://www.antentop.bel.ru/ mirror: www.antentop.boom.ru Page 63
  • 66. ANTENTOP- 01- 2004, # 005 A Simple SSB Transceiver Credit Line: http://farhan.net.co.nr/ by Ashhar Farhan computercorp@hotmail.com A dual-band transceiver with a crisp receiver and a clean SSB signal is described. It started its life as an investigation of the excellent S7C receiver described in EMRFD. This transceiver was specifically designed to use components that are easily available in TV and Radio spares shops. The receiver sports an above average dynamic range, very clean signal and noiseless performance. Although the components are easily available, and every detail about making it is covered here, this is not a weekend project. The design is elaborate and invites improvisation. We decided to pursue the following rules in designing this transceiver: ► Use what is easily available. Very often, we find designs that look good but they use exotic parts like TUF-1 mixers that are simply impossible to get hold of in India and other countries. Instead, we have tried using those spares that are universally available. ► Keep impedances and gain low: Often, we try coaxing maximum gain out of a stage making it difficult to duplicate and stabilize. We chose to take only modest gain out of each stage, using extensive feedback to make the circuit stable. Most of the interconnections between modules are for 50 ohms termination. In fact, the rig was a number of discrete board connected using RCA audio cables and sockets before we hooked it all up together to work. ► No PCB. We directly solder the components over a plain copper clad board (un-etched PCB). It is an excellent way to experiment, physically robust and has a quick and dirty appeal. You can usually solder up a whole circuit as you think it out in a few minutes. See the pictures. ► Broadband. We wanted to be able to use broadband design where applicable. We have found that the television balun cores are an excellent and very cheap (about Rs. 2 per balun, that is 5 cents) way of making broadband transformers. ► Modest cost. While we didn’t want to use very expensive components. We didn’t want to compromise the performance either. You will see that we have used 2N3866 exclusively. This was because we found that the BF195/BF194/2N2222 series transistors available in the market were consistently inferior in the HF range and performed below their stated specs. The 2N3866 is commonly used in cable TV equipment and has a good HF performance: both as a low noise small signal transistor as well as driver up to 1 watt level. 2N3866 is expensive (about Rs.20 each, but well worth the expense). It is used in a number of critical places. ► Measure what you have built. We used a 12 volt 1.5A power supply, a frequency counter, a test oscillator (to measure the crystals and coils) and a high impedance voltmeter with an RF probe to test and measure the design. All these test equipment were homemade. The transmitter design did require a PC-based oscilloscope. It helped us identify the spurs and harmonics using the in-built FFT functionality. But now that the design is complete, just an RF probe and a 14MHz receiver are enough to align the rig. ► Quality over quantity. A better signal is preferred to a bigger signal. This is a 6 watt design that will work off a simple 12V, 1.5A supply (using a single 7812). The ladder crystal filter A good filter is central to the crispness of a receiver and the quality of the transmitter. There are two types of crystal filters possible, the lattice filter and the ladder filter. The lattice filter requires ordering crystals with 1.5 KHz frequency difference between them. This was ruled out, also procuring readymade filters from BEL India and other sources was ruled out as it is too expensive to do that. Instead, a ladder filter was chosen. The ladder filter offers results as good if not better than a lattice filter. However, the design is crucially dependent upon internal parameters of the crystals used. It is not possible to suggest any generic values for the capacitors to be used in the ladder filter. Rather, a method to measure each of the crystals and calculate the capacitor values has been worked out. We present this here. This design procedure will work only for 10 MHz crystals. 10Mhz is the chosen IF of our filter as the crystals are easily available and it sits comfortably between 7 and 14 MHz amateur bands. We have followed the Butterworth design methodology given in the new ARRL book ‘Experimental Methods in RF Design’. The circuit centers around a four crystal ladder filter. Each lot of crystals from each manufacturer differs from the others. We will describe a way to experimentally calculate the values of the capacitors for the filter. You should probably buy 10 crystals and select 5 of them. http://www.antentop.bel.ru/ mirror: www.antentop.boom.ru Page 64
  • 67. ANTENTOP- 01- 2004, # 005 A Simple SSB Transceiver Circuit of the transceiver http://www.antentop.bel.ru/ mirror: www.antentop.boom.ru Page 65
  • 68. ANTENTOP- 01- 2004, # 005 A Simple SSB Transceiver VFO of the transceiver For this purpose, construct the test circuit of figure 1. This is a simple Hartley-style crystal oscillator. You will require access to either a frequency counter or a general coverage receiver (ask a neighborhood ham to allow you to bring over your crystals to his shack and test them for few minutes). Mark each crystal with a number and solder it into the circuit (don’t use a crystal socket). Connect the 9 volt battery and measure the frequency. If you are using a receiver, find out the frequency on which the crystal is absolutely zero. Note the frequencies with the 33 pf capacitor in series and shorted. You will have a pair of frequencies for each crystal. Select four crystals with pairs of frequencies that match within 50-40 Hz of each other. A fifth (for the carrier) oscillator crystal should be within 100 hz of the other four selected. Calculate the value of the capacitors of Fig.2 like this: 1. Calculate the average frequency shift of the four chosen crystals as F (in KHz). 2. C1 = 21 * F, C2 = 40 * F. Choose the nearest available fixed capacitor. If you can’t find a fixed capacitor within 10% of this value, then parallel two capacitors to achieve the capacitance. For instance, in the case of the first prototype, we measure an average of 5KHz of shift. Thus, the capacitors calculated were 107pf and 200pf. We used 100pf and two parallel 100pfs as a substitute for 200pf capacitors. These calculations are for 200 Ohms termination. For a complete discussion of this design method, you are referred to the excellent paper by Craver in the Communications Quarterly of 1993, Winter. Broad-band design without Toroids It was decided to use broad-band techniques where suitable and keep the circuit free of too many critically tuned circuits. We decided to investigate the TV baluns as cores for broadband transformers. The TV baluns as small ferrites as shown in the picture. Almost all the broadband transformers are bifilar. Two (the modulator and the transmit mixer cum product detector) are trifilarly wound. They are simple to produce. Making a bifilar transformer: ► Take two lengths of 36 swg copper enameled wire. ►Hold them together. Tie one end to a nail. ► Twist the wires together so that they cleanly have about 8-10 turns per inch. ► Check that the wires are evenly twisted (although there will be more twists towards the ends). ► If the balun core is mounted on a PCB, cut it out with a cutter and remove all the original windings. http://www.antentop.bel.ru/ mirror: www.antentop.boom.ru Page 66
  • 69. ANTENTOP- 01- 2004, # 005 A Simple SSB Transceiver ► Pass the twisted pair through one hole to the other side, bend the wire back and pass it back through the other hole (like a U turn). This is one turn, like this, make similar 10 turns. ► Cut out the remaining ends of the windings leaving about half an inch of the twisted pair on each end. ► Scrap the enamel off to about quarter inch, and tin the leads. ► Using a VOM at low ohms setting, identify the two separate windings of the twisted pair. If we call the two wires X and Y, each will have two ends A and B. This you will have four ends AX, BX, AY and BY. Short AX and BY together and use this as the center point of the transformer in the circuits. Use AY and BX as the two opposite ends of the transformers. Making a trifilar transformer is similar, except that you have to use three wires twisted together. Separate out the three wires as before, use the first two as described above, and the third winding as the secondary. IF sub-system The crystal filter and its associated IF circuitry is shared between the receiver and transmitter. Although the crystals are inexpensive enough to be able to afford separate filters for the transmitter and the receiver, we noted that each filter would have a different center frequency. This would make zero- tuning difficult for SSB operation. Therefore, it was decided to share the same crystal filter, carrier oscillator and the VFO between transmit and receive functions. The crystal filter requires 200 ohms impedance matching at both ends to provide the correct bandwidth and low ripple. A regular practice among hams is to strap a resistor of approximately the same value as the terminating filter impedance across the input and output ends of the filter. This is incorrect. This looks like a resistor that is paralleled with a reactive impedance of the rest of the circuitry attached to the filter. When the crystal filter is not properly terminated and sees reactive termination, ripple and ringing are introduced. This will spoil the crispness of the receiver and spoil your on-the-air quality. The crystal filter is terminated on both sides by ‘strong’ RC coupled amplifiers based on 2N3866. This is slightly unusual. The 2N3866 is used mostly as a VHF power amplifier. It has excellent low-noise characteristics, good gain and using it as a small signal device is now an established practice. The 2N3866 is an expensive transistor. It costs about Rs.20 in the open market. We think it is a good investment. Using RC coupled broadband amplifiers makes the IF system a ‘no-tune’ affair. The output of the post-filter amplifier is coupled to a two diode mixer. The two-diode mixer uses a broadband bifilar wound transformer. It is next to impossible to get toroids in India. We have evaluated using TV baluns as substitutes for toroids. These baluns are available at most TV spare shops. Most designs we have studied couple the RF input to the diode detector through the transformer and inject the BFO at the center of the transformer. This is a wrong practice. The diode mixer requires a minimum of 5mW of energy from the transformer input to operate properly. There should be enough energy to switch on both the diodes. This means about 1.2 v peak voltage. The received signals are rarely this level. As a result, the product detector operates like a regular envelope detector and the diodes act as distortion devices to mix the BFO with the signal. The correct configuration is to inject the BFO across the transformer An unusual approach is taken here. The IF amplification gain is just enough to maintain good noise figure and recover the losses in the ladder filter. We measured almost 10 dB loss in the filter. http://www.antentop.bel.ru/ mirror: www.antentop.boom.ru Page 67
  • 70. ANTENTOP- 01- 2004, # 005 A Simple SSB Transceiver The Receiver The receiver is minimal. By keeping the number of active devices low (3 devices between the antenna and the audio amplifier), very good fidelity is achieved. The circuit is kept at a low impedance and broadband everywhere except the front-end. This helps in stability. The front-end uses a low-noise FET. We have used a BFW11 (because the local component shop ran out of BFW10). They have slightly different characteristics. Almost any FET can be used if it is biased properly. The FET should be biased for exactly half the pinch-off voltage. Wes Hayward (W7ZOI) has described the proper way to bias a FET Mixer for proper operation: ► Short gate and source and measure the current that flows through a 560 ohms resister connected to +12V through the drain. This gives the exact Idss. ► Place a 10K resistor between the source and the ground. Keeping the gate grounded and the drain still connected through the 560 ohms resister, measure the voltage between the source and the ground. This gives you the pinch-off voltage. ► The FET has to be biased such that the voltage on the source is exactly half the pinch-off voltage and there is half of Idss current flowing through the FET. Such a scheme assures you that the FET is driven between pinch-off and maximum drain by the VFO injected at the source. This gives the proper switching action for the mixer to operate as well as maximum gain. We measured the pinch-off voltage for BFW11s as 2.1 volts and Idss as 5mA. A standard 1K resistor at the source gives the proper bias. It should be noted here that we first tried a double balanced diode ring mixer at the front-end. It has a number of spurious responses that literally made it impossible to use the receiver. We tried to properly terminate the diode ring mixer by inserting attenuators between the mixer and the Ladder filter’s pre-amp. It didn’t cure the problem. When we changed to the FET mixer, the noise figure improved, the receiver’s dynamic range, while unmeasured, was never found lacking in the last one month of extensive usage at VU2PEP. The output of the IF amplifier is detected in a balanced detector using just two diodes. Here gain, we break a common myth. You will see most of the HF receivers employing a two diode balanced detector with the BFO fed to the center tap and the incoming signal applied through the primary winding of the detector transformer. This is wrong. The signal applied through the primary winding should strong enough to switch the diodes on and off (requiring about 0.6 across each diode, that is, 1.2 volts across the winding). This roughly translates to about 5 mW power. The diodes switch the low level signal coupled at the center-tap of the coil to the detector output. Therefore, in our design we have applied the local oscillator through the primary of the transformer and the incoming signal from the IF stage to the center tap. There is a 100 ohms preset used to null the local oscillator from appearing at the output. This is of importance during transmit where the balanced detector also doubles up as the transmitting mixer. An audio pre-amplifier follows the detector. The capacitor of 220 pf between the base and the collector ensures that the ‘hiss’ is kept down. The audio amplifier used is an LM380. Almost any audio amplifier can be used. We have tried everything from the PC’s ampli-speakers to a Sony amplifier to a TBA810 amplifier. We would recommend using a high fidelity, low cost amplifier like the TBA810 if you plan using a speaker. If most of your work is with headphones (to save your companion from the late night QRM), we recommend the LM386. The Transmitter The transmitter starts with the modulator using a 741. There is a three resistor network that biases the electret microphones. We use a Phillips ‘walkman’ style headphone with built-in microphone for our work. The electret microphone requires a bias that provides 5V as given by the circuit. The balanced modulator also had two 22pf trimming capacitors for nulling the carrier. They were later found unnecessary (as long as both the diodes are purchased from the same roll) and removed. If you do find balance a bother, feel free to add a 22 pf trimmer to one side and a 10 pf fixed to the other side as indicated in the schematic. The output of the balanced modulator is routed to the common IF amplifier through a buffer amplifier using a BF195. This serves to keep the carrier leak from the modulator out of the IF string during the reception mode. The balanced detector of the receiver also doubles up as a mixer during transmit. It is important to balance out the VFO energy at the output by setting the 100 ohms trimmer properly. We noticed a 50mW residual out-of- band output from the transmitter when the VFO is unbalanced. The power chain is an interesting broad- band amplifier. You can use this in virtually any transmitter of up to 7 watts (and higher with more than 12 volts supply to the final stage). Three stages of broadband amplifiers feed an IRF510 PA. It is an interesting twist that the driver 2N3866 transistors cost more than the IRF510! The IRF510 should be biased for 80mA of standing current during transmit with the microphone disconnected (no modulation) and carrier nulled by the trimpot of the balanced modulator. http://www.antentop.bel.ru/ mirror: www.antentop.boom.ru Page 68
  • 71. ANTENTOP- 01- 2004, # 005 A Simple SSB Transceiver Construction We heavily recommend constructing over pieces of un-etched PCBs. They are cheaply available everywhere. See the pictures as a guide to component layout. We recommend the following rules: ► Keep your leads short. Short connections are more important than components that are at right angles to each other. What might look neat to you might look unstable to the RF design. ► Keep the outputs and inputs isolated from each other. We have taken care to keep the high impedance points down to a minimum. But still, maintain design hygiene. ► Make one module at a time, test it completely, then move to the next one. Construct the transceiver in the following steps: ► Make the VFO. Check the RF output using an RF probe. Check the stability on a regular receiver or a frequency counter. With the tuning capacitor fully closed (the plates inside each other), set the trimmer so that the VF0 frequency is exactly 3.9995 MHz (keep 5 KHz margin at the band end) ► Make the BFO. Check the output on the RF probe. ► Calculate the ladder filter values and make the IF strip along with the audio preamplifier. ► Connect the BFO, VFO, IF strip and an external audio amplifier together. When you power on and attach a piece of 2-3 meter long wire to the input of the IF amplifier you should be able to hear the atmospheric noise. Tune the BFO coil by fully screwing the slug in and then slowly tuning it out until the IF noise sounds right (not too shrill and not too muffled). ► Wire up the receiver mixer, connect the VFO. Peak the mixer output and the RF input coils for maximum output. Then tune to a weak signal on the band and tune for the best signal. Be careful to tune for best quality of signal and not for maximum loudness. Take a break, spend a day or two listening to the band with your receiver. Nothing is more enjoyable than using a crisp receiver that you have homebrewed. ► Wire up the modulator. If you have an oscilloscope, you can check the modulation. The modulated output will be too low for you to be able to measure on the RF probe. ► Wire up the linear chain. DON’T solder the IRF510 yet. ► Put the transceiver in transmit mode. Whistle into the microphone and peak the transmit mixer output coils for about 6 volts peak RF voltage on the probe at the 56 ohms resistor where the gate of the IRF510 would be. ► Solder in the IRF510. ATTACH A DUMMY LOAD. We used four 220 ohms two watts resistors paralleled together. ► Keep the bias trimmer totally down towards zero. Attach VOM in series with point X in the power amplifier. Apply power in transmit mode and slow increase the bias until you have 80mA flowing through the IRF510. ► Connect the RF probe across the dummy load. ► As you whistle, You should get about 20-24volts of peak RF on the probe. When you pull out the microphone from the jack, the RF output should drop to complete zero. What if your transmitter is unstable? • Don’t curse your fate. All transmitters start out as unstable beasts. Relax. • Start disconnecting power from the stages starting from final IRF510 and working backwards. When you have located the unstable stage, there are a number of things you can do to fix it. • Try increasing the value of the 10 ohms resistor used in the emitter degeneration OR • Strap a resistor of about 1K across the output transformer of the unstable stage to ‘load’ it. • Move the linear amplifier away from the rest of the circuitry. • Redo the board. This time spread the stages out. We guess that the linear chain should occupy about 6 inches of space, all laid out in one line. Substitutions The BF195 transistors can be substituted with any other HF transistor like 2N2222 etc. The 2N3866s are best not substituted. The circuit works with slight increase in the noise figure if BF195 or equivalents are used in place of 2N3866s in the IF stages. The output power on the transmitter absolutely needs the 2N3866s. Substituting them with other switching transistors didn’t give good performance. The IRF510 should not be substituted with any other transistor. The other IRFs, though rated higher, have higher input capacitance which makes them a bad choice for 14MHz operation. The LM380/LM386 can be substituted with almost any other audio amplifier. Our first amplifier was Cambridge SoundWorks Sound System. If you turn down the bass, they are an excellent system for the shack. We have tried a TBA180, an LM386, an LM380 and even a glow- bug guitar amp. Feel free to experiment. Final Notes The first contact we made using this rig was DF6PW. He reported us 57. Within the first evening we had worked four continents. The rig is regularly used at VU2PEP. People are often surprised at how the transmitter quality is ‘just like a commercial rig’. Many refused to believe that it is a seven watt rig. 72/73! http://www.antentop.bel.ru/ mirror: www.antentop.boom.ru Page 69
  • 72. ANTENTOP- 01- 2004, # 005 The USA Patents of Nicola Tesla # Patent Year Month Day Title 1 334,823 1886 January 26 Commutator for Dynamo Electric Machines 2 335,786 1886 February 9 Electric Arc Lamp 3 335,787 1886 February 9 Electric Arc Lamp 4 336,961 1886 March 2 Regulator for Dynamo Electric Machines 5 336,962 1886 March 2 Regulator for Dynamo Electric Machines 6 350,954 1886 October 19 Regulator for Dynamo Elecric Machines 7 359,748 1887 March 22 Dynamo Electric Machine 8 381,968 1888 May 1 Electro Magnetic Motor 9 381,969 1888 May 1 Electro Magnetic Motor 10 381,970 1888 May 1 System of Electrical Distribution 11 382,279 1888 May 1 Electro Magnetic Motor 12 382,280 1888 May 1 Electrical Transmission of Power 13 382,281 1888 May 1 Electrical Transmission of Power 14 382,282 1888 May 1 Method of Converting and Distributing Electric Currents 15 382,845 1888 May 15 Commutator for Dynamo Electric Machines 16 390,413 1888 October 2 System of Electrical Distribution 17 390,414 1888 October 2 Dynamo Electric Machine 18 390,415 1888 October 2 Dynamo Electric Machine or Motor 19 390,721 1888 October 9 Dynamo Electric Machine 20 390,820 1888 October 9 Regulator for Alternate Current Motors 21 396,121 1889 January 15 Thermo Magnetic Motor 22 401,520 1889 April 16 Method of Operating Electro Magnetic Motors 23 405,858 1889 June 25 Electro Magnetic Motor 24 405,859 1889 June 25 Method of Electrical Power Transmission 25 406,968 1889 July 16 Dynamo Electric Machine 26 413,353 1889 October 22 Method of Obtaining Direct from Alternating Currents 27 416,191 1889 December 3 Electro Magnetic Motor 28 416,192 1889 December 3 Method of Operating Electro Magnetic Motors 29 416,193 1889 December 3 Electro Magnetic Motor 30 416,194 1889 December 3 Electric Motor 31 416,195 1889 December 3 Electro Magnetic Motor 32 417,794 1889 December 24 Armature for Electric Machines (A. Schmid & N. Tesla) 33 418,248 1889 December 31 Electro Magnetic Motor 34 424,036 1890 March 25 Electro Magnetic Motor 35 428,057 1890 May 13 Pyromagneto Electric Generator 36 433,700 1890 August 5 Alternating Current Electro Magnetic Motor 37 433,701 1890 August 5 Alternating Current Motor 38 433,702 1890 August 5 Electrical Transformer or Induction Device http://www.antentop.bel.ru/ mirror http://www.antentop.boom.ru Page 70
  • 73. ANTENTOP- 01- 2004, # 005 The USA Patents of Nicola Tesla # Patent Year Month Day Title 39 433,703 1890 August 5 Electro Magnetic Motor 40 445,207 1891 January 27 Electro Magnetic Motor 41 447,920 1891 March 10 Method of Operating Arc Lamps 42 447,921 1891 March 10 Alternating Electric Current Generator 43 454,622 1891 June 23 System of Electric Lighting 44 455,067 1891 June 30 Electro Magnetic Motor 45 455,068 1891 June 30 Electrical Meter 46 455,069 1891 June 30 Electric Incandescent Lamp 47 459,772 1891 September 22 Electro Magnetic Motor 48 462,418 1891 November 3 Method of and Apparatus for Electrical Conversion and Distribution 49 464,666 1891 December 8 Electro Magnetic Motor 50 464,667 1891 December 8 Electrical Condenser 51 487,796 1892 December 13 System of Electrical Transmission of Power 52 511,559 1893 December 26 Electrical Transmission of Power 53 511,560 1893 December 26 System of Electrical Power Transmission 54 511,915 1894 January 2 Electrical Transmission of Power 55 511,916 1894 January 2 Electric Generator 56 512,340 1894 January 9 Coil for Electro Magnets 57 514,167 1894 February 6 Electrical Conductor 58 514,168 1894 February 6 Means for Generating Electric Currents 59 514,169 1894 February 6 Reciprocating Engine 60 514,170 1894 February 6 Incandescent Electric Light 61 514,972 1894 February 20 Electric Railway System 62 514,973 1894 February 20 Electrical Meter 63 517,900 1894 April 10 Steam Engine 64 524,426 1894 August 14 Electromagnetic Motor 65 555,190 1896 February 25 Alternating Motor 66 567,818 1896 September 15 Electrical Condenser 67 568,176 1896 September 22 Apparatus for Producing Electric Currents of High Frequency and Potential 68 568,177 1896 September 22 Apparatus for Producing Ozone 69 568,178 1896 September 22 Method of Regulating Apparatus for Producing Currents of High Frequency 70 568,179 1896 September 22 Method of and Apparatus for Producing Currents of High Frequency 71 568,180 1896 September 22 Apparatus for Producing Electrical Currents of High Frequency 72 577,670 1897 February 23 Apparatus for Producing Electric Currents of High Frequency 73 577,671 1897 February 23 Manufacture of Electrical Condensers, Coils, &c 74 583,953 1897 June 8 Apparatus for Producing Currents of High Frequency 75 593,138 1897 November 2 Electrical Transformer 76 609,245 1898 August 16 Electrical Circuit Controller 77 609,246 1898 August 16 Electric Circuit Controller 78 609,247 1898 August 16 Electric Circuit Controller 79 609,248 1898 August 16 Electric Circuit Controller http://www.antentop.bel.ru/ mirror http://www.antentop.boom.ru Page 71
  • 74. ANTENTOP- 01- 2004, # 005 The USA Patents of Nicola Tesla # Patent Year Month Day Title 80 609,249 1898 August 16 Electric Circuit Controller 81 609,250 1898 August 16 Electrical Igniter for Gas Engines 82 609,251 1898 August 16 Electric Circuit Controller 83 611,719 1898 October 4 Electrical Circuit Controller 84 613,735 1898 November 8 Electric Circuit Controller 85 613,809 1898 November 8 Method of and Apparatus for Controlling Mechansim of Moving Vessels or Vehicles 86 645,576 1900 March 20 System of Transmission of Electrical Energy 87 649,621 1900 May 15 Apparatus for Transmission of Electrical Energy 88 655,838 1900 August 14 Method of Insulating Electric Conductors 89 11,865 1900 October 23 Method of Insulating Electric Conductors 90 685,012 1901 October 22 Means for Increasing the Intensity of Electrical Oscillations 91 685,953 1901 November 5 Method of Intensifying and Utilizing Effects Transmitted Through Natural Media 92 685,954 1901 November 5 Method of Utilizing Effects Transmitted Through Natural Media 93 685,955 1901 November 5 Apparatus for Utilizing Effects Transmitted From a Distance to a Receiving Device Through Natural Media 94 685,956 1901 November 5 Apparatus for Utilizing Effects Transmitted Through Natural Media 95 685,957 1901 November 5 Apparatus for the Utilization of Radiant Energy 96 685,958 1901 November 5 Method of Utilizing Radiant Energy 97 723,188 1903 March 17 Method of Signaling 98 725,605 1903 April 14 System of Signaling 99 787,412 1905 April 18 Art of Transmitting Electrical Energy Through the Natural Mediums 100 1,061,142 1913 April 29 Fluid Propulsion 101 1,061,206 1913 May 6 Turbine 102 1,113,716 1914 October 13 Fountain 103 1,119,732 1914 December 1 Apparatus for Transmitting Electrical Energy 104 1,209,359 1916 December 19 Speed Indicator 105 1,266,175 1918 May 14 Lightning Protector 106 1,274,816 1918 August 6 Speed Indicator 107 1,314,718 1919 September 2 Ship's Log 108 1,329,559 1920 February 3 Valvular Conduit 109 1,365,547 1921 January 11 Flow Meter 110 1,402,025 1922 January 3 Frequency Meter 111 1,655,113 1928 January 3 Method of Aerial Transportation 112 1,655,114 1928 January 3 Apparatus for Aerial Transportation Credit line: http://prometheus.al.ru/phisik/teslapatents.htm http://www.antentop.bel.ru/ mirror http://www.antentop.boom.ru Page 72
  • 75. ANTENTOP- 01- 2004, # 005 The Strange Life of Nicola Tesla Nikola Tesla is the true unsung prophet of the electric age; without whom our radio, auto ignition, telephone, alternating current power generation and transmission, radio and television would all have been impossible. Yet his life and times have vanished largely from public access. This autobiography is released to remedy this situation, and to fill this black hole in information space. © Kolmogorov-Smirnov Publishing Introduction & Editors Note Chapter 1: My Early Life - The progressive development of man is vitally dependent on invention. It is the most important product of his creative brain. Its ultimate purpose is the complete mastery of mind over the material world, the harnessing of the forces of nature to human needs. Chapter 2 - I shall dwell briefly on these extraordinary experiences, on account of their possible interest to students of psychology and physiology and also because this period of agony was of the greatest consequence on my mental development and subsequent labors. Chapter 3: How Tesla Conceived The Rotary Magnetic Field - At the age of ten I entered the Real Gymnasium which was a new and fairly well equipped institution. In the department of physics were various models of classical scientific apparatus, electrical and mechanical. The demonstrations and experiments performed from time to time by the instructors fascinated me and were undoubtedly a powerful incentive to invention. Chapter 4: The Discovery of the Tesla Coil and Transformer - For a while I gave myself up entirely to the intense enjoyment of picturing machines and devising new forms. It was a mental state of happiness about as complete as I have ever known in life. Ideas came in an uninterrupted stream and the only difficulty I had was to hold them fast. Chapter 5 - As I review the events of my past life I realize how subtle are the influences that shape our destinies. An incident of my youth may serve to illustrate. Chapter 6 - No subject to which I have ever devoted myself has called for such concentration of mind, and strained to so dangerous a degree the finest fibers of my brain, as the systems of which the magnifying transmitter is the foundation. http://www.antentop.bel.ru/ mirror http://www.antentop.boom.ru Page 73
  • 76. ANTENTOP- 01- 2004, # 005 The Strange Life of Nicola Tesla Introduction & Editors Note Nikola Tesla was born in Croatia (then part of Austria-Hungary) on July 9, 1856, and died January 7, 1943. He was the electrical engineer who invented the AC (alternating current) induction motor, which made the universal transmission and distribution of electricity possible. Tesla began his studies in physics and mathematics at Gratz Polytechnic, and then took philosophy at the University of Prague. He worked as an electrical engineer in Budapest, Hungary, and subsequently in France and Germany. In 1888 his discovery that a magnetic field could be made to rotate if two coils at right angles are supplied with AC current 90 degrees out of phase made possible the invention of the AC induction motor. The major advantage of this motor being its brushless operation, which many at the time believed impossible. Tesla moved to the United States in 1884, where he worked for Thomas Edison who quickly became a rival - Edison being an advocate of the inferior DC power transmission system. During this time, Tesla was commissioned with the design of the AC generators installed at Niagara Falls. George Westinghouse purchased the patents to his induction motor, and made it the basis of the Westinghouse power system which still underlies the modern electrical power industry today. He also did notable research on high-voltage electricity and wireless communication; at one point creating an earthquake which shook the ground for several miles around his New York laboratory. He also devised a system which anticipated world-wide wireless communications, fax machines, radar, radio-guided missiles and aircraft. Editors Note, September 21, 1994 An electronic text (ASCII) and portable document format (PDF) version of this file was created by John R.H. Penner from a small booklet found in a used bookstore for $2.50. The only form of date identification is the name of the original purchaser, Arthua Daine (sic), dated April 29, 1978. However, the book appears to be considerably older, made with a typewriter, then photocopied and stapled. The only other significant features of the booklet is that it contains four photocopied portrait photographs of Nikola Tesla, and was originally forty pages long. The book has no copyright identification, nor any means of contacting the publishers. As far as this editor is aware, this autobiography is no longer available in printed form anywhere. In the interest of making this important text available to the wider public, the entire original text has been retyped word-for-word as it originally appears into this electronic format. If anyone knows how to reach the original publisher, please contact the editor, so that proper credit may be given as is due. John Roland Hans Penner 464 Scott Street St. Catharines, Ontario L2M 3W7, Canada Phone: 905.646.3551 eMail: J.Penner@GEnie.GEIS.com These files may be freely redistributed as long as the content is not modified in any way. It may not be sold or published for money unless specifically authorized prior to publication by express permission of Kolmogorov- Smirnov Publishing, or John R.H. Penner. Unless otherwise notified, this work is Copyright 1995 by John R.H. Penner. http://www.geocities.com/Athens/2424/intro.html http://www.antentop.bel.ru/ mirror http://www.antentop.boom.ru Page 74
  • 77. ANTENTOP- 01- 2004, # 005 The Strange Life of Nicola Tesla Chapter 1: My Early Life The progressive development of man is vitally dependent on invention. It is the most important product of his creative brain. Its ultimate purpose is the complete mastery of mind over the material world, the harnessing of the forces of nature to human needs. This is the difficult task of the inventor who is often misunderstood and unrewarded. But he finds ample compensation in the pleasing exercises of his powers and in the knowledge of being one of that exceptionally privileged class without whom the race would have long ago perished in the bitter struggle against pitiless elements. Speaking for myself, I have already had more than my full measure of this exquisite enjoyment; so much, that for many years my life was little short of continuous rapture. I am credited with being one of the hardest workers and perhaps I am, if thought is the equivalent of labor, for I have devoted to it almost all of my waking hours. But if work is interpreted to be a definite performance in a specified time according to a rigid rule, then I may be the worst of idlers. Every effort under compulsion demands a sacrifice of life-energy. I never paid such a price. On the contrary, I have thrived on my thoughts. In attempting to give a connected and faithful account of my activities in this story of my life, I must dwell, however reluctantly, on the impressions of my youth and the circumstances and events which have been instrumental in determining my career. Our first endeavors are purely instinctive promptings of an imagination vivid and undisciplined. As we grow older, reason asserts itself and we become more and more systematic and designing. But those early impulses, though not immediately productive, are of the greatest moment and may shape our very destinies. Indeed, I feel now that had I understood and cultivated instead of suppressing them, I would have added substantial value to my bequest to the world. But not until I had attained manhood did I realize that I was an inventor. This was due to a number of causes. In the first place I had a brother who was gifted to an extraordinary degree; one of those rare phenomena of mentality which biological investigation has failed to explain. His premature death left my earth parents disconsolate. (I will explain my remark about my "earth parents" later.) We owned a horse which had been presented to us by a dear friend. It was a magnificent animal of Arabian breed, possessed of almost human intelligence, and was cared for and petted by the whole family, having on one occasion saved my dear father's life under remarkable circumstances. My father had been called one winter night to perform an urgent duty and while crossing the the mountains, infested by wolves, the horse became frightened and ran away, throwing him violently to the ground. It arrived home bleeding and exhausted, but after the alarm was sounded, immediately dashed off again, returning to the spot, and before the searching party were far on the way they were met by my father, who had recovered consciousness and remounted, not realizing that he had been lying in the snow for several hours. This horse was responsible for my brother's injuries from which he died. I witnessed the tragic scene and although so many years have elapsed since, my visual impression of it has lost none of its force. The recollection of his attainments made every effort of mine seem dull in comparison. Anything I did that was creditable merely caused my parents to feel their loss more keenly. So I grew up with little confidence in myself. But I was far from being considered a stupid boy, if I am to judge from an incident of which I have still a strong remembrance. One day the Aldermen were passing through a street where I was playing with other boys. The oldest of these venerable gentlemen, a wealthy citizen, paused to give a silver piece to each of us. Coming to me, he suddenly stopped and commanded, "Look in my eyes." I met his gaze, my hand outstretched to receive the much valued coin, when to my dismay, he said, "No, not much; you can get nothing from me. You are too smart." They used to tell a funny story about me. I had two old aunts with wrinkled faces, one of them having two teeth protruding like the tusks of an elephant, which she buried in my cheek every time she kissed me. Nothing would scare me more then the prospects of being kissed by these affectionate, unattractive relatives. It happened that while being carried in my mother's arms, they asked who was the prettier of the two. After examining their faces intently, I answered thoughtfully, pointing to one of them, "This here is not as ugly as the other." Then again, I was intended from my very birth for the clerical profession and this thought constantly oppressed me. I longed to be an engineer, but my father was http://www.antentop.bel.ru/ mirror http://www.antentop.boom.ru Page 75