Bacterial Smear preparation
•
3 likes•8,837 views

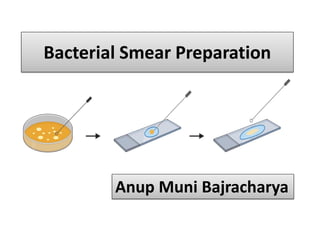
A bacterial smear is a preparation that includes a small amount of culture spread in a very thin film on the surface of the slide.

Recommended
More Related Content
What's hot
What's hot (20)
Similar to Bacterial Smear preparation
Similar to Bacterial Smear preparation (20)
More from Anup Bajracharya
More from Anup Bajracharya (20)
Recently uploaded
Recently uploaded (20)
Bacterial Smear preparation
- 1. Bacterial Smear Preparation Anup Muni Bajracharya
- 2. • The first step in most bacterial staining procedures is the preparation of a smear. • A good smear preparation is the key to a good stain.
- 4. • Requirements: • Culture of Bacteria • Glass slides • Bunsen burner • Inoculating loop • Glassware marking pencil/ Permanent Marker
- 5. Step I: Preparation of the glass slide: • Clean, grease free slides are needed for smear preparation. • Grease or oil from the fingers on slides must be removed by washing the slides with soap and water • Finally rinse the slide with 95% alcohol and dry it. • Hold the slide by their edge.
- 6. • Step II: Labeling of slides: • Proper labeling of the slide is essential. • Every slides should be labeled clearly. • A lead pencil /permanent CD marker is used to write on the frosted areas of the glass slide.
- 7. • Step III: Preparation of smear: • An evenly spread smear should be prepared covering area of 15-20mm diameter. • Avoid thick and dense smear because thick smear prevent light penetration to visualize the morphology of cell. • A good smear is one that, when dried, appears as a thin whitish layer or film. The print of textbook should be legible through the smear.
- 8. i. Broth cultures (liquid medium) • Re-Suspend the culture by tapping the tube with your finger. • Depending on the size of the loop, one or two loopfuls should be applied to the center of the slide with a sterile inoculating loop and spread evenly over an area. • Allow the smear to air-dry Different techniques are used for smear preparation depending upon culture media
- 10. ii. Culture plates (Solid medium) • Suspension is accomplished by spreading the cells in a circular motion in the drop of water with the loop. This helps to avoid cell clumping. • The finished smear should occupy an area about the size of a nickel and should appear as a translucent, or semitransparent, whitish film • Place a drop of water into the circle that has been created on the slide. • Using a sterilized and cooled inoculation loop, obtain a very small sample of a bacterial colony from the culture palte. • Gently mix the bacteria into the water drop.
- 11. • Step IV: Air dry • Smear should be allowed to dry completely at room temperature at safe place
- 12. • Step V: Fixation of smear: • The purpose of fixation of smear is to preserve and prevent smear being washed away during staining. • Heat fixation • After smear is air dried completely, rapidly pass the 3-4 times through flame of Bunsen burner or sprit lamp. • Avoid too much heating. • After heat fix, allow the smear to cool before staining.