Intze Overhead Water Tank Design by Working Stress - IS Method.pdf
Flanged internal valve
1. Type C404-32
D450053T012
Instruction Manual
MCK-1171
July 2014
www.fisherregulators.com
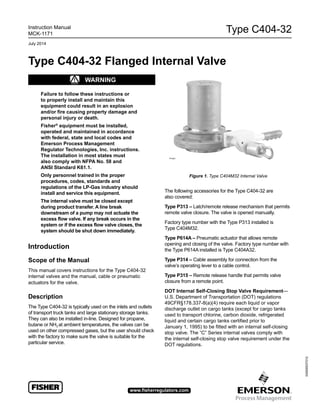
Type C404-32 Flanged Internal Valve
Figure 1. Type C404M32 Internal Valve
! WARnInG
Failure to follow these instructions or
to properly install and maintain this
equipment could result in an explosion
and/or fire causing property damage and
personal injury or death.
Fisher®
equipment must be installed,
operated and maintained in accordance
with federal, state and local codes and
Emerson Process Management
Regulator Technologies, Inc. instructions.
The installation in most states must
also comply with nFPA no. 58 and
AnSI Standard k61.1.
Only personnel trained in the proper
procedures, codes, standards and
regulations of the lP-Gas industry should
install and service this equipment.
The internal valve must be closed except
during product transfer. A line break
downstream of a pump may not actuate the
excess flow valve. If any break occurs in the
system or if the excess flow valve closes, the
system should be shut down immediately.
Introduction
Scope of the Manual
This manual covers instructions for the Type C404-32
internal valves and the manual, cable or pneumatic
actuators for the valve.
Description
The Type C404-32 is typically used on the inlets and outlets
of transport truck tanks and large stationary storage tanks.
They can also be installed in-line. Designed for propane,
butane or NH3 at ambient temperatures, the valves can be
used on other compressed gases, but the user should check
with the factory to make sure the valve is suitable for the
particular service.
The following accessories for the Type C404-32 are
also covered:
Type P313 – Latch/remote release mechanism that permits
remote valve closure. The valve is opened manually.
Factory type number with the Type P313 installed is
Type C404M32.
Type P614A – Pneumatic actuator that allows remote
opening and closing of the valve. Factory type number with
the Type P614A installed is Type C404A32.
Type P314 – Cable assembly for connection from the
valve’s operating lever to a cable control.
Type P315 – Remote release handle that permits valve
closure from a remote point.
DOT Internal Self-Closing Stop Valve Requirement—
U.S. Department of Transportation (DOT) regulations
49CFR§178.337-8(a)(4) require each liquid or vapor
discharge outlet on cargo tanks (except for cargo tanks
used to transport chlorine, carbon dioxide, refrigerated
liquid and certain cargo tanks certified prior to
January 1, 1995) to be fitted with an internal self-closing
stop valve. The “C” Series internal valves comply with
the internal self-closing stop valve requirement under the
DOT regulations.
P1341
2. Type C404-32
2
Specifications
Body Sizes and End Connection Styles
Inlet: NPS(1)
4 / DN 100, CL300 ASME RF Modified
Flange (5.875-inch / 149 mm diameter bore)
Outlet: NPS 4 / DN 100, CL300 ASME Flange
Maximum Allowable Inlet Pressure
500 psig / 34.5 bar WOG
Excess Flow Springs
340, 400, 600, 800 or 1000 GPM /
1287, 1514, 2271, 3028 or 3785 LPM
Temperature Capabilities
-40 to 150°F / -40 to 66°C
Body Material
Stainless steel
Approximate Weight
50 pounds / 23 kg
close to the pump as possible using forged reducers (swage
nipples) or venturi tapers rather than bushings. This assures
minimum flow resistance and efficient pump operation.
The operating linkage must allow the operating lever to
move from the fully closed position to within 2° of the full
open position. The linkage should not apply strong force
to the lever past the full open position or the valve could
be damaged.
If the valve is also used to provide excess flow protection,
the flow rating of the piping, fittings, pump, valves and hose
on both the inlet and outlet of the internal valve must be
greater than the flow rating of the integral excess flow valve
within the internal valve. If branching or other necessary
restrictions are incorporated in the system which reduce the
flow rating to less than that of the excess flow valve rating,
the internal valve will not give excess flow protection.
Installation
Internal Valve
Coat both sides of the spiral wound gaskets with silicone
grease or equivalent. An NPS 4 / DN 100, CL300 ASME RF
flange with a modified bore (see Figure 2) must be installed
in the tank. Special stud bolts, furnished with the valve, are
assembled into this flange. The internal valve and the pump
or piping flange can then be installed as shown in Figure 3.
The screen should be removed if the valve is to be used for
both filling and withdrawal service or for filling alone. Filling
with screen installed is not recommended.
A hydrostatic relief valve does not need to be installed
adjacent to the valve since the internal valve automatically
relieves excessive line pressure into the tank.
Keep piping from the valve outlet to the pump full size and
as short as possible with a minimum of bends. Reduction
in pipe size to suit smaller pump inlets should be made as
Figure 3. Valve Installation Schematic
nps 4 / DN 100 ASME cl300 RF FLANGE
MODIFIED (BORE 5.875-Inch / 149 mm
DIAMETER AND 7-Inch / 177 mm RF)
Pump or
piping
nps 4 / dn 100
CL300 ASME RF
flange
T11444
Figure 2. Tank Flange Dimensions
Table 1. Tank Flange Dimensions, Inch / mm
FLANGE
CL300 ASA
A–BOLTING
B
RF
C
RF
D E
MATING
FLANGE
O.D.DBC NO. SIZE
4 / 102
7.88 /
200
8
3/4 /
19
7 /
178
0.06 /
1.5
1.56 /
40
5.88 /
149
10 /
254
o.d. and thickness to suit
container specifications
c
e
b
a
1 / 25
minimum45°
3/4-io unc
Inch / mm
1. Nominal pipe size.
d max
T10489
3. Type C404-32
3
Selectively Filling Manifolded Tanks
Fisher®
internal valves provide positive shutoff only in one
direction, from out of the tank to downstream of the valve.
The internal valves are designed to allow gas to flow into
a tank when the downstream line pressure exceeds tank
pressure. If you want to selectively fill one or more of the
other tanks in a tank manifold system, you must place a
positive shutoff valve downstream of the internal valve,
otherwise, all tanks will be filled at the same time and at
about the same rate.
Actuators
Type P314 – On Type C404-32 valves, insert the cable
through the hole in the operating lever until the fuse link
portion fits tightly in the hole, see Figure 4. Make sure the
cable runs through the slotted portion of the operating lever.
A remote operating handle, such as those manufactured
by Allegheny or Wheaton, is attached to the other end of
the Type P314 cable. Since the remote operating system
for the valve is extremely important, it must be installed to
conform to applicable codes. DOT MC-331, for example,
most generally applies for trucks; refer to the most recent
revision of this code. Any control system requires thermal
protection (fuse links) at the valve, at the remote control
point, and – if necessary – near the hose connections.
Rotate the valve’s operating lever by hand to the position
shown in Figure 4. In this position the valve’s cam is just
contacting the valve stem, and the cable can be attached
to the remote operating handle. Check to see that the valve
closes properly and that the operating lever returns to its
original position. There should be a little slack in the cable.
Type P614A – If the pneumatic actuator has not been
factory installed (Type C404A32), remove the cable
type operating lever by driving out the roll pin. Remove
the four cap screws and the face plate. Attach the collar
to the stub shaft as shown and secure the bracket and
actuator to the valve body with the four bolts furnished
with the kit, see Figure 8.
Type P614A or C404A32 must be operated by at least
40 psig / 2.7 bar air or nitrogen; maximum actuator
pressure is 125 psig / 8.6 bar. On trucks with air brakes,
the Fisher air actuation hook-up can be used to operate
the valve, refer to manual D45016T012.
Types P313 and P315 – If the Type P313 manual
operating lever and release mechanism has not been
factory installed (Type C404M32), remove the cable
type operating lever by driving out the roll pin. Remove
the four cap screws and the face plate. After attaching
the collar to the valve’s stub shaft, bolt the bracket and
mechanism to the body, see Figure 9.
To install Type P315 remote release handle on
Type C404M32s, refer to the schematic installation
drawing in Figure 5. The hook-up may require two
Type P315s (refer to MC-331) and enough pulleys to
keep the cable away from the tank. The cable must be
taut for proper operation. Pulling the Type P315 handle
allows the manual operating lever to return to the closed
position. Fusible links in both the Types P313 and P315
melt if exposed to fire, permitting the valve to close.
When closing the Type C404M32 manually, grasp the
lever firmly and pull down. At the same time pull back on
the cable eyelet attached to the release mechanism as
the manual lever is pulled downward and then allow the
lever to move upward.
! Warning
Since there is strong spring force on the
operating lever, avoid getting in the way
of lever if it slams to the closed position.
The lever should not be allowed to slam to
the closed position except in emergency
situations, as repeated slamming may
damage the valve and operator.
Excess Flow Operation
The internal valve contains an excess flow function, or
“integral excess flow valve”, that will close when the flow
exceeds the flow rating established by Fisher. Fisher
integral excess flow valve installed on a bobtail truck or
transport can provide protection against the discharge of
hazardous materials during an unloading operation of a
bobtail truck or transport in the event that a pump or piping
attached directly to the internal valve is sheared off before
the first valve, pump or fitting downstream of the internal
valve, provided that the cargo tank pressure produces a
flow rate greater than the valve’s excess flow rating.
Likewise, if the internal valve is installed on a stationary
tank or in the related downstream piping system, the
integral excess flow valve can provide protection against
an unintentional release of hazardous materials in the
event that a pump or piping attached directly to the internal
valve is sheared off before the first valve, pump or fitting
downstream of the internal valve, provided that the flow of
product through the internal valve reaches the rated flow
specified by Fisher.
Figure 4. Type P314 Cable Attachment
T11370
4. Type C404-32
4
Explosion hazard!
Restrictions incorporated in the discharge
system of a bobtail truck or transport or of
a stationary tank (due to pumps, pipe and
hose length and dimensions, branching,
elbows, reductions in pipe diameter or a
number of other in-line valves or fittings),
low operating pressure as a result of
ambient temperature or a partially closed
valve downstream from the integral excess
flow valve, can restrict the rate of flow
through the internal valve below the level
necessary to actuate the integral excess
flow valve. Therefore, DO NOT USE the
excess flow function of the internal valve for
the purpose of providing protection against
the discharge of hazardous materials in
the event of a rupture of hose or piping at a
point in the discharge system downstream
from the first valve, pump or fitting
downstream of the internal valve.
The internal valve is designed with an
internal bleed feature for equalization of
pressure. After the integral excess flow
valve closes, the leakage through the
bleed must be controlled or a hazard can
be created. For this reason the operator
must be familiar with the closure controls
for the internal valve and must close
the internal valve immediately after the
integral excess flow valve closes.
Failure to follow this warning could result
in serious personal injury or property
damage from a fire or explosion.
DOT Passive Shutdown Equipment Requirement—
DOT regulations 49CFR§173.315(n)(2) require certain
cargo tanks transporting propane, anhydrous ammonia
and other liquefied compressed gases to be equipped
with passive emergency discharge control equipment
that will automatically shut off the flow of product without
human intervention within 20 seconds of an unintentional
release caused by complete separation of a delivery
hose. The design for each passive shutdown system
must be certified by a Design Certifying Engineer (DCE)
and all components of the discharge system that are
integral to the design must be included in the DCE
certification. The DCE certification must consider any
specifications of the original component manufacturer.
In the case of downstream ruptures in hose or piping,
a variety of operating conditions routinely encountered
during an unloading operation restrict the rate of flow
through the integral excess flow valve and make such
a valve unsuitable to serve as the means of passive
shutdown required under 49CFR§173.315(n)(2).
Such variables include restrictions incorporated in
the discharge system (due to pumps, pipe and hose
length and dimensions, branching, elbows, reductions
in pipe diameter or a number of other in-line valves or
fittings), low operating pressure as a result of ambient
temperature, or a partially closed valve downstream from
the excess flow valve. Due to the variety of conditions, in
the case of a hose separation, that can restrict the rate
of flow below the level necessary to activate the excess
flow valve, the integral excess flow function of “C” Series
internal valves or “F” Series excess flow valves cannot
be used to satisfy the passive shutdown equipment
requirement under/in 49CFR§173.315(n)(2). Also, a
Design Certifying Engineer cannot include the integral
excess flow valve of a “C” Series internal valve or
“F” Series excess flow valve as a component of the
discharge system in any DCE certification under
49CFR§173.315(n)(2).
Figure 5. Type P315 Installation Schematic
T80137
Type p315 remote
release handle
Type c404m43
internal valve
Cable can be installed
with a conduit or by
use of pulleys
type P315 remote
release handle
5. Type C404-32
5
Figure 6. Operational Schematic
Valve closed
Bleed Bleed
Rapid bleed open
Flow Flow
Valve open
Limited
bleed
Limited
bleed
Excess flow
valve closed
T80178
Explosion hazard!
DO NOT USE the excess flow function
incorporated into “C” Series internal
valves or “F” Series excess flow valves to
satisfy the passive shutdown equipment
requirement in 49CFR§173.315(n)(2). DO
NOT include the excess flow function
incorporated into “C” Series internal valves
or “F” Series excess flow valves in a DCE
certification under 49CFR§173.315(n)(2).
The cargo tank manufacturer must install
some other equipment that satisfies the
requirement for passive shutdown capability
under 49CFR§173.315(n)(2).
Failure to follow this warning could result in
serious personal injury or property damage
from a fire or explosion in the event of an
unintentional release of product during an
unloading operation.
Operation
Since the Type C404-32 is most often used on transport
trucks, the following procedure applies to that type
of application.
1. Always open the internal valve before starting the pump
and before opening the valve on the pump outlet.
2. Normally leave the pumping system “wet” to avoid
repeated drying of the seals and to reduce time in
opening the internal valve. Drain the piping only
when codes or safe operating practices require.
3. If piping is dry or at lower pressure than the tank, open
the internal valve only about halfway for a few seconds
so that line pressure can equalize before fully opening
the operating lever. The valve may not equalize if the
operating lever is moved to the fully open position.
4. Avoid flow surges which could close the built-in
excess flow valve. If the valve should “slug” shut,
stop the pump, close the nearest downstream
valve and move the lever to mid-position to speed
equalizing until the valve opens. There will be an
audible click when the valve opens.
5. Always leave the valve closed except when
transferring product.
6. All valves should be completely open when pumping.
(Throttling type valves could prevent the excess flow
valve from closing when required.)
7. The operator must always be aware of where the
remote closure controls are located and know how
to operate the controls if any emergency requires
valve closure.
Troubleshooting
Internal Valve Will Not Open – This could be due to
leakage downstream, engaging the pump too soon or from
excessive wear in the internal valve. If excessive volume
is in the downstream system, a longer time is required
to equalize the pressures (tank and downstream) before
the pump can be engaged. To determine if the valve pilot
seat is opening, install a gauge downstream of the valve,
operate the valve actuator; if pressure does not buildup to
the tank pressure, the valve pilot seat is not open. This test
should be done with pump off. If the pilot is not opening,
it may be plugged with dirt or some internal part may be
broken. If by operating the lever manually it can be rotated
past the fully open position, there is something wrong
internally and the valve must be disassembled.
Premature Valve Closure – An improperly connected
operating lever which does not fully open the valve (see
the “Installation” section) is the first thing to look for. This
condition could also be caused from engaging the pump
too soon, sudden lines surges or an underrated excess
flow spring. The trouble could stem from a valve that has
its inlet port obstructed.
6. Type C404-32
6
Internal Valve Will Not Close – Most frequently due to
a faulty or sticking actuator. Before disassembling the
valve, check the actuator mechanism to see that it works
freely by disconnecting it from the valve lever and cycling
it several times. Also, operate the valve lever manually.
If it sticks in the open position, the packing and bushings
should be replaced which should free the operating
mechanism if the valve does not have internal damage.
Low Flow Capacity – Too small or long downstream
piping might be being used. Other possibilities include a
plugged screen or strainer, some restriction downstream
system or a bypass valve sticking in the open position.
The bypass valve could also be set too low and be
opening prematurely. Check for high differential pressure
across the internal valve to determine if it is at fault. If the
valve is open, there should never be over 5 or 6 psig /
0.35 or 0.41 bar differential across the valve.
Principle of Operation
Refer to the schematic drawing, Figure 6. In View 1, the
valve is held closed by both tank pressure and the valve’s
closing spring. There is no leakage past the resilient
seats in the poppet to the valve outlet.
The valve is opened by moving the operating lever to
approximately mid-point in its 70° travel (View 2). This
allows the cam to place the rapid equalization portion of
the valve stem in the pilot opening, permitting a larger
amount of product to bleed downstream than if the
operating lever were moved to the full open position.
When tank and downstream pressure are nearly equal
after a few seconds, the excess flow spring pushes open
the main poppet (View 3) and the operating lever can be
moved to the full open position.
If tank pressure is greater than the valve’s outlet
pressure, the main poppet will remain in the closed
position. If valve outlet piping is closed off by other
valves, however, product bleeding through the pilot will
increase until it nearly equals tank pressure and the main
poppet opens.
Note
The main poppet will not open if valve outlet
piping is not closed off so that the outlet
pressure can approach tank pressure.
Once the main poppet opens, a flow greater than the valve’s
excess flow spring rating or a sufficient surge in flow forces
the main poppet closed against the excess flow spring
(View 4). The pilot valve allows a small amount of product
to bleed, but much less than (View 2) where the rapid
equalization portion of the stem is placed in the pilot opening.
When the operating lever is moved to the closed position, the
valve closes completely and seals tightly (View 1).
Maintenance
Caution
Do not use these internal valves if they
leak, fail to work properly or have been
damaged or have missing parts. Prompt
repairs should be made by a properly
trained service person. Continued use
without repair can create a hazardous or
injurious situation.
A simple preventative maintenance program for the valve
and its controls will eliminate a lot of potential problems.
Fisher®
recommends these steps be conducted once a
month. Also refer to the Department of Transpostation (DOT)
CFR 49 Sections 180.416 and 180 Appendix A and B which
specific monthly maintenance and inspection tests for cargo
tank service internal valves and their actuation controls.
1. Inspect the operating lever to see that it moves freely
and smoothly. Also examine the stub shaft bonnet
nuts for leakage using a soap solution. If there is
leakage, the bonnet packing will have to be replaced.
A sticking lever indicates mechanism wear or trapped
dirt. This could mean the need for new shaft seals,
shaft bushings or stem bushings.
2. Check for tight closure of the seat discs. Any
detected leakage, which is normally caused by disc
wear or dirt, scale or debris embedded in the disc,
requires that the internal valve be removed from
service and repaired. Repair most often requires the
replacement of valve discs. To check for leakage:
a. Close the internal valve and exhaust downstream
pressure. Close the first valve downstream from
the internal valve, and note any pressure buildup,
using a pressure gauge, between the closed valve
and the internal valve. If piping is cold, allow it to
warm to ambient temperature.
b. Refer to CFR 49 Section 180 Appendix B for
Meter Creep Test Methods.
3. All operating controls should be inspected, cleaned
and oiled. The controls should be checked to see that
they fully open–but not over-travel–the internal valve
operating lever and work freely to close the valve.
4. Standard construction internal valves must be
removed if the container is to be steam cleaned. Heat
can damage the valve’s seats and seals.
5. Standard construction internal valves are not
designed for water service. Immediately after a
container is hydrostatically tested, remove all water
and allow the container to thoroughly dry out.
7. Type C404-32
7
Disassembly
! Warning
Tank pressure must be released
before removing the valve from the
container. Failure to do so could result in
personal injury.
Numbers in parenthesis refer to key numbers in Figure 7.
To Replace Packing
Note
When using kits RC40432T012, RC404M32T12
or RC404A32T12, please mark the nameplate
with an ‘R’ to indicate the valve has been
Retrofitted with the proper kit.
1. Remove the operating lever assembly from the stub
shaft (key 4).
2. Drive out the pin (key 7) holding the cam (key 6) to the
stub shaft and slide the stub shaft out of the body.
3. Remove the face plate (key 16) by taking out four
screws (key 17). The guide (key 13), packing (keys 10
and 2) can then be removed.
4. Besides the packing, the liner bushing (keys 3 and 14)
and the O-ring (key 15) should be replaced. Also check
the Polytetrafluoroethylene (PTFE) washer (key 5) and
replace it if necessary.
5. A new face plate (key 16) is furnished with the packing
kit so that the packing and the guide (key 13) can be
pressed into the body when reassembling.
6. Reassemble in reverse order. Replace cap screw
(key 17) using 25 to 30 foot-pound / 33.9 to
40.7 N•m torque.
7. Make sure the operating lever can move freely after
the new parts are installed. Conduct a leak test under
pressure with a soap solution.
To Replace Seat Discs and Seat Ring
1. Unscrew the six flange screws (key 29) holding the
valve cage (key 28) and seat ring (key 82) to the
body (key 1). Remove the cage from the body.
2. The seat ring can be examined and replaced if
necessary. Replace the O-ring (key 83). Be careful
reinstalling the seat ring so as not to damage the
O-ring (key 83). Lubricate the O-ring with Magna-Lub G
before attempting to replace the seat ring.
3. To replace the seat discs (keys 19 and 20), remove the
bolts (key 22) holding the disc retainer (key 21) to the
disc holder (key 18).
4. Examine both seat discs (keys 19 and 20) and replace
if necessary.
5. Reassemble in reverse order using 10 to 15 foot-
pounds / 13.6 to 20.3 N•m torque to install the disc
retainer bolts (key 22) and 4 to 5 foot-pounds / 13.6 to
6.8 N•m torque on the six flange screws (key 29).
Type P614A Piping For Bulk
Storage Installation
There are numerous piping arrangements using single
or multiple internal valves, in one or more tanks.
The following suggests possible piping schematics
to operate Type C404-32 internal valves mounted
with Type P614A Pneumatic actuators. Other piping
arrangements could be used as each installation
may have different requirements. Consult your local
Sales Office, state and federal codes for each installation.
General Instructions
Remove the shipping plug from the Type P614A actuator
and “Supply” port.
Use a good grade of pipe compound on all pipe fittings
and connections.
Thermal Release
A 212°F / 100°C Fuse Plug, Fisher®
Part
Number T1033699982, is installed in the Type P614A
actuator. The fuse plug will exhaust supply pressure if fire
impinges on the fuse plug and allows the internal valve to
close by exhausting supply pressure.
Restricting Orifice in Supply Line
Install a restricting orifice, #50 Drill (0.070-inch / 1.8 mm
diameter) in the supply line leading to the actuating valve.
This will limit flow to the system so when a fuse plug
opens, the system will exhaust faster than the incoming
supply source.
Exhaust Port Protection
All exhaust ports must be protected from plugging, freezing
or any other inadvertent closure if no pressurized piping is
installed to aid in actuator closure. A FisherY602 Series
vent assembly can be installed at any exhaust port. If
exhaust piping is used, it should be installed and piped to
a protected location and the Y602 Series vent assembly
installed on the end of the exhaust piping. The Y602 Series
vent should be pointed down to prevent plugging or closing
the exhaust port.
Select the Y602 Series vent style and size that fits the
application and piping size.
8. Type C404-32
8
! Warning
All exhaust ports, must be protected so
that they do not become plugged with
insects, ice, pipe fittings, etc. A plugged
exhaust port will not let the internal
valve(s) close.
Key Description Part Number
1 Body, Stainless steel T80199T0012
2* Bushing, 410/416 Stainless steel T11175X0012
3* Liner Bushing, Polytetrafluoroethylene (PTFE) T1117806992
4 Stub Shaft, 316 Stainless steel T1117335162
5 Washer, PTFE T1116301012
6 Cam Assembly T11185T0012
7 Clevis Pin, Stainless steel T11473T0012
8 Packing Spring, Inconel®
T14114T0012
9 Washer, 316 Stainless steel 1F125036042
10* Male Adaptor, PTFE 1F124601012
11* Packing Ring, PTFE (3 required) 1C752801012
12* Female Adaptor, PTFE 1F124201012
13 Packing Follower, 410/416 Stainless steel ERSA01564A0
14* Liner Bushing, PTFE ERSA01565A0
15* Rod Wiper/O-ring, Polyurethane (PUR) T1116606832
16 Stuffing Box Plate, Zinc-plated steel ERSA01607A0
17 Hex Head Cap Screw,
Zinc-plated steel (4 required) T1133624052
18 Disc Holder, Stainless steel T20842T0012
19* Disc, Nitrile (NBR) T1116703202
19** Disc, Emerson™ Formulation for Y-Gas ERAA05475A0
20* Disc, Nitrile (NBR) T1116803202
20** Disc, Emerson Formulation for Y-Gas ERAA05476A0
21* Disc Retainer, 304 Stainless steel T11162T0012
22 Cap Screw, Stainless steel (4 required) T11187T0012
23* Stem Assembly, Stainless steel/Nitrile (NBR) T11183000A2
24 Excess Flow Spring, 302 Stainless steel
Closing Flow - Propane
340 GPM / 1287 LPM, Red T1117037022
400 GPM / 1514 LPM, Black T1200137022
600 GPM / 2271 LPM, Green T1117137022
800 GPM / 3028 LPM, Silver T1200237022
1000 GPM / 3785 LPM, Unpainted T12922T0012
25 Retainer, 304 Stainless steel T11169T0012
26 Roll Pin, Stainless steel 1A9184T0012
27 Main Spring, 302 Stainless steel T1117437022
28* Valve Cage, Stainless steel T40422T0012
29 Flange Screw, Stainless steel (6 required) T13325T0012
30 Strainer, Stainless steel T2027438992
31 Retainer, 304 Stainless steel T2027338992
32 Cap Screws, Stainless steel (3 required) 1E6208T0012
33* Lower Spiral Wound Gasket,
304 Stainless steel/Graphite (Not shown) 1P110799152
34* Upper Spiral Wound Gasket,
304 Stainless steel/Graphite (Not Shown) ERSA03240A0
35* Stud Bolts (Not Shown) (8 required) T1118131032
36* Hex Nut (Not Shown) (16 required) 1A368124112
38 Drive Screw,
Plated carbon steel (Not Shown) (2 required) 1E501728982
Parts Ordering
When corresponding about this equipment, always reference
the type number found on the nameplate. When ordering
replacement parts, reference the complete 11-character part
number of each needed part.
Parts List
Types C404-32 (Figure 7), C404A32 (Figure 8)
and C404M32 (Figure 9) Internal Valves
See Table 2 to determine which replacement kit to order.
Key Description Part Number
Packing Retrofit Kit for Types C404-32, C404M32
and C404A32 valves includes keys 3, 8, 10,
11, 12, 13, 14, 15 and 17 for packing
retrofit only. RFC40432T12
(Type C404-32 packing retrofit kit also
requires ERAA03396A0).
Type C404-32 Cable Pulley Kit ONLY includes
keys 16 and 39 ERAA03396A0
Packing Replacement Parts Kit includes
keys 3, 10, 11, 12, 14 and 15: T11396000B2
For use only after fitment of Type RFC404 Kit(1)
.
Seals Replacement Parts Kit
includes keys 19, 20 and 83 T11396000C2
Seals Replacement Parts Kit
for Y-Gas applications includes
keys 19**, 20** and 83** RC404YGT012
*Recommended spare parts
**For Y-Gas applications
Inconel®
is a mark owned by Special Metals Corporation.
1. Valves with MFG Date stamped after DATE should be fitted with corresponding Type RFC404 kit before this kit applies.
Manufacturing Date Was It Retrofitted? Valve Type Part Number Description
Before 3/15/2012
No
All RFC40432T12 4” Packing Retrofit Kit
C404-32 ERAA03396A0(2)
Type C404-32 Hardware
Yes All T11396000B2 New-Style Packing Kit
After 3/15/2012 N/A(1)
All T11396000B2 New-Style Packing Kit
1. Retrofit kits only needed on valve manufactured prior to 3/15/2012.
2. Type C404-32 requires both RFC40432T12 and ERAA03396A0.
Table 2. Type C404-32 Kit Selection Table
9. Type C404-32
9
17
16
11
L
10
9
8
14
2
3
5
7
4
31
30
26
24
19
83
22
6
L
A
A
32 27
23
28
25
18
29
82
20
21
80
1
13 15 40 39 12
www.FISHE
17
16
11
L
10
9
8
14
2
3
5
7
4
31
30
26
24
19
83
22
6
L
A
A
32 27
23
28
25
18
29
82
20
21
80
1
13 15 40 39 12
Figure 7. Type C404-32 Flanged Internal Valve Assemblies
8 to 9 foot-pounds /
10.8 to 12.2 N•m
25 to 30 foot-pounds /
33.9 to 40.7 N•m
drill 3/32 ø - thru
and pin
10 to 15 foot-pounds /
13.6 to 20.3 N•m
4 to 5 foot-pounds /
5.42 to 6.78 N•m
section: a-a
T80202
Apply lubricant