

Recommended
Recommended
More Related Content
Viewers also liked
Viewers also liked (20)
Similar to MANUAL DE ESTACION TOTAL
Similar to MANUAL DE ESTACION TOTAL (16)
More from ANGEL RUBEN TICONA ARPI
Recently uploaded
Recently uploaded (20)
MANUAL DE ESTACION TOTAL
- 2. Foreword Thanks for you purchasing the FOIF RTS238/538 series total station. In order to use the instrument well, please read this in- struction manualcarefully and keep it cautiously forconsulting in the further. Product confirmation: Please fill the model and the serial number of your instrument in corresponding blank. Feedback to local distributor or our sales department. Series No: Model:
- 3. NOTE: • Please read this instruction manual carefully before use it. • Avoiding insolates the instrument, and don’t collimate thesun directly for protecting eyes andinstrument. • When usingit please insure the connection between tripodand instrument is firm. If raining, you can hood it with rainproof cover. • Please loose the clamp system when theinstrument in the case, and keep thecase dry. • When transporting, keepthe instrument in the case andtry your best to lighten librations. • After workingin wet or raining condition, please wipe water on surface and keep it in air, whenit is dry completely, you canput it in thecase. • Don’t clean the instrument surfacewith alcohol, aether or other irritant chemical things; and use the equipped paper to cleanthe opticalparts. • If you do not use the instrument for a longtime, youshould takethe batterypackdown and discharge out the batteries. • If you donot usethe instrument for a long time, take the instru- ment out of the case and keepit in the drycondition. • If the temperature changingis sharp (for example: move it out from onehot vehicle), the range of measure distance will shorten, so it can beusedwhenit adapts thesurrounding condition. • Before useit, you should check the voltagefor whether it is enough.
- 4. Safety Cautions: ●There is a risk of fire, electric shock or physical harm if you attempt to disassemble or repair the instrument yourself. This is only to be carried out by FOIF or an authorized dealer, only! ● Cause eye injury or blindness. Do not look at the sun through a telescope. ● Laser beams can be dangerous, and can cause eye injury if used incorrectly. Never attempt to repair the instrument yourself. ● Cause eye injury or blindness. Do not stare into laser beam. ● High temperature may cause fire. Do not cover the charger while it is charging. ● Risk of fire or electric shock. Do not use damaged power cable, plug and socket. ● Risk of fire or electric shock. Do not use a wet battery or charger. ● May ignite explosively. Never use an instrument near flammable gas, liquid matter, and do not use in a coal mine. ● Battery can cause explosion or injury. Do not dispose in fire or heat. ● Risk of fire or electric shock. Do not use any other type of charger other than the one specified. ● Risk of fire. Do not use any other power cable other than the one specified. ● The short circuit of a battery can cause a fire. Do not short circuit battery when storing it.
- 5. ●Do not connect or disconnect equipment with wet hands, you are at risk of electric shocks if you do! ● Risk of injury by overturn the carrying case. Do not stand or sit on the carrying cases. ● Please note that the tips of tripod can be hazardous, be aware of this when setting up or carrying the tripod. ● Risk of injury by falling down the instrument or case. Do not use a carrying case with a damaged which belts, grips or latches. ●Do not allow skin or clothing to come into contact withacid from the batteries, if this does occur then wash off with copious amounts of water and seek medical advice. ● Ensure that you mount the Tribrach correctly, failing to do so may result in injury if the tribrach were to fall over. ● It could be dangerous if the instrument falls over, please check that you fix the instrument to the tripod correctly. ● Risk of injury by falling down a tripod and an instrument. Always check that the screws of tripod are tightened. ● It could cause meaurement error when there is leave or other object between instrument and target. User 1)This product is for professional use only! The user is required to be a qualified surveyor or have a good knowedge of surveying, in order to understand the user manual and safety instructions, before operating, inspecting or adjusting. 2)Wear the required protectors (safety shoes, helmet, etc.) when operating. CAUTION
- 6. Exceptions from Responsibility 1)The user of this products is expected to follow all operating in- structions and make periodic checks of the product’s performance. 2)Themanufacturer, assumes no responsibilityfor results of a faulty or intentional usage or misuse including any direct, indirect, conse- quential damage, and loss of profits. 3)The manufacturer, assumes no resonsibility for consequential damage, and loss of profits by any disaster, (an earthquake, storms, floods etc.). 4)The manufacturer, assumes no responsibility for any damage, and loss of profits due to a change of data, loss of data, an interrup- tion of business etc., caused by using the product or an unusable product. 5)The manufacturer, assumes no responsibility for any damage, and loss of profits caused by usage except for explained in the user manual. 6)The manufacturer, assumes no responsibility for damage caused by wrong transport, or action due to connecting with other products.
- 7. Applications .....................................................................................................1 1. Nomenclature and functions......................................................................2 1.1 Nomenclature..........................................................................................2 1.2 Display....................................................................................................4 1.3 Operation key...........................................................................................6 1.4 Function key............................................................................................7 2. Battery...........................................................................................................9 2.1 Mounting the battery................................................................................9 2.2 Recharge................................................................................................10 3. Preparaion for mesurement......................................................................11 3.1 Setting up the instrument.........................................................................11 3.2 Leveling the instrument..........................................................................11 3.3 Centering...............................................................................................12 3.4 Focusing.................................................................................................12 3.5 Switch on.................................................................................................13 3.6 Switch off.................................................................................................13 3.7 Illumination on/off................................................................................13 3.8 How to input number and letter...............................................................14 3.9 Vertical angle tilt correction...................................................................17 4. Angle measurement...................................................................................18 4.1Measuring horizontal angle right and vertical angle..................................18 4.2 Switching horizontal angle Right/ Left.....................................................19 4.3 Messuring from the required horizontal angle..........................................20 4.4 Vertical angle percent grade mode...........................................................22 4.5 Compasses (vertical angle)......................................................................22 4.6 Buzzer sounding for horizontal angle 90°increments.............................23 5.Distance measurment.................................................................................24 5.1 Distance measurement (Slope distance mode)..........................................24 5.2 Distance measurement(HD/VD mode).....................................................25 5.3 Offset measureme....................................................................................25 5.4 Stake out (S.O).......................................................................................27 5.5 Set the distance measurement mode.........................................................29 5.6 Setting of the correction for prism constant............................................30 5.7 Setting of the atmospheric correction......................................................31 Contents
- 8. 5.8 Returned singal checking.......................................................................32 6. Coordinate measurement.........................................................................33 6.1 Setting coordinate values of occupied point.............................................33 6.2 Setting backsight point..........................................................................37 6.3 Confirm the direction of back sight.........................................................42 6.4 Measuring and record.............................................................................43 6.5 Offset measurement...............................................................................44 7. Layout......................................................................................................45 7.1 Layout menu operation..........................................................................45 7.2 Selecting coordinate data file...................................................................46 7.3 Setting occupied point...........................................................................47 7.4 Setting backsight point...........................................................................49 7.5 Executing a layout................................................................................52 7.6 Setting a new point...............................................................................55 7.6.1 Side shot method...........................................................................55 7.6.2 Resection method..........................................................................57 7.7 Setting the GRID FACTOR...................................................................61 8. Data collection............................................................................................63 8.1 Operating procedure................................................................................63 8.2 Selecting a file for data collection..........................................................65 8.3 Selecting a coordinate file for data collection..........................................66 8.4 Occupied point......................................................................................67 8.5 Backsight point.....................................................................................69 8.6 Operational procedure of “Data Collect”................................................72 8.7 Data collect offset measurement mode...................................................73 8.7.1 Angle offset measurement................................................................73 8.7.2 Distance offset measurement...........................................................75 8.7.3 Plane offset measurement.................................................................77 8.7.4 Column offset measurement............................................................79 8.8 Editing PCODE Library [PCODE INPUT]...............................................81 9. Application measurement (Programs)......................................................82 9.1 Remote elevation measurement (REM)...................................................82 9.2 Missing line measurement (MLM)..........................................................85 9.3 Area measurement....................................................................................87 9.4 Setting Z Coordinate of occupied point....................................................88 9.5 Point to line...........................................................................................92
- 9. 10. Memory Manager Mode..........................................................................95 10.1 Enter memory managermode................................................................95 10.2 Display internal memory status.............................................................96 10.3 Searching data........................................................................................96 10.3 .1 Measured data searching................................................................96 10.3.2 Coordinate data searching..............................................................98 10.3.3 PCODE library Searching...............................................................99 10.4 File Maintenance.................................................................................100 10.4.1 Create a new file............................................................................101 10.4.2 Rename a file..............................................................................102 10.4.3 Deleting a file...............................................................................103 10.4.4 Searching data in a file..................................................................103 10.5 Coordinate data direct key input..........................................................104 10.6 Delete a coordinate data from a File.....................................................105 10.7 Editing PCODE library.........................................................................106 10.8 Sending data...........................................................................................107 10.9 Loading data..........................................................................................108 10.10 Initialization....................................................................................109 11.Recordportsetting.....................................................................................110 12.Settingoftheinstrument..........................................................................111 12.1 Items of instrument settings.................................................................111 12.2 Enter setting mode..............................................................................112 12.3 Setting minimum reading....................................................................113 12.4 Setting angle unit ...............................................................................113 12.5 Setting distance unit ............................................................................114 12.6 Setting power auto-off ........................................................................114 12.7 Setting distance measurement times.....................................................115 12.8 Setting the correction of atmosphere refraction ..................................116 12.9 Setting constrast of display..................................................................117 12.10 Setting parameter of data communication .........................................118 12.10.1 Setting protocol........................................................................118 12.10.2 Setting baud rate.........................................................................119 12.10.3 Setting data length and parity......................................................120 12.10.4 Setting stop bits..........................................................................121 12.11 Setting the GRID FACTOR ..............................................................122 12.12 Setting displaying language.................................................................123 12.13 Seting temperature unit.......................................................................124 12.14 Setting atmosphere pressure unit........................................................125
- 10. 13. Check and adjustment..............................................................................126 13.1 Checking and adjusting of instrument constant....................................126 13.2 Checking/adjusting the plate level........................................................128 13.3 Checking/adjusting the circular level....................................................129 13.4 Checking/adjusting the optical sight....................................................130 13.5 Checking/Adjusting the plummet...........................................................131 13.6 Checking/adjusting the vertical cross-hair on telescope.......................133 13.7 Checking/adjusting horizontal collimation error C................................134 13.8 Checking/adjusting of the vertical index error i....................................134 13.9 Checking the optical axis....................................................................137 14. Error displays..........................................................................................138 15.Specifications..........................................................................................139 16. Packing list...............................................................................................142 Attachment 1: atmospheric correction formula and char........................143 Attachment 2 correction for refraction and earth curvature...................147 Attached file 3: communication instruction and data formate................148
- 11. Applications RTS238/538 series Total Station applied optical grating incremental system to digital angle measurements, adopt phases measurement system to measure distance. It can measure distance not only with prism but also with reflective sheet, so much as it can work without cooperate objective. It can achieve measurement, calculating, dis- play and storage etc. by means of microcomputer-technology. It can display measuring results of horizontal, vertical angle and dis- tance at the same time. Furthermore, it can work in many mode, for example angle measurement mode or coordinate mode and so on. RTS238/538 series Total Station is designed for engineering items, especially for every construction area. It can be used in coordinate measurement or location measurement for construction, remote el- evation measurement, plumb line surveying, ductwork surveying and sectional surveying etc. It also can be used in triangulation con- trol survey, cadastral surveying, topographic surveying and house property surveying. 1
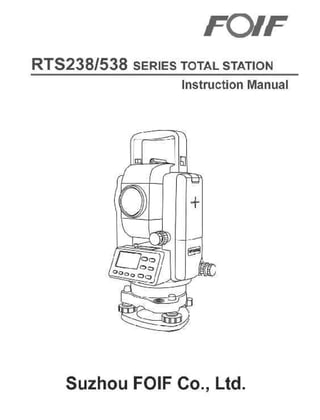
- 12. 2 1. Nomenclature and functions 1.1 Nomenclature Handle Battery screw Model lable Tribrach clamp Levelling screw Circular level Vertical tangent screw Key board Display unit Plate level Objective Optical sight Handle locking screw
- 13. 3 Tilt axis center mark Series number Communication port Tribrach tangent screw Eyepiece Focussing knob Horizontal motion clamp Optical/laser plummet
- 14. 4 1.2 Display The display uses a dot matrix LCD which has 4 lines and 16 characters per line. In general, the upper three lines display measured data, and the bottom line displays the soft key function which changes with the mea- suring mode. There are two type mode: measurement mode and menu mode. Angle measurement mode Zenith distance:81°54′21″ H-angle:157°33′58″ Distance measurement mode 1 Zenithdistance:81°54′21″ H-angle: 157°33′58″ Slopedistance: 130.216 m Distance measurement mode 2 H-angle: 157°33′58″ H-distance:128.919 m Height difference:18.334 m Coordinatemeasurement mode N: 5.838 m E: -3.308 m Z: 0.226 m ◆ Example of measurement mode: VZ: 81°54' 21 " HR: 157°33' 58 " 0SET HOLD REC P1 VZ: 81°54' 21 " HR: 157°33' 58 " SD: 130.216m HR: 157°33' 58 " HD: 128.919m VD: 18.334m DIST` REC MMPT P1 N: 5.838m E: -3.308m Z: 0.226m DIST REC MMPT P1 DIST REC MMPT P1
- 15. 5 ◆ Example of menu mode: MENU(page 1,total 3) Press F1 enter “stake out” Press F2 enter “data collection” Press F3 enter “program” PARAMETERS(page 1, total 3) Press F1 enter “min reading” Press F2 enter “angle unit” Press F3 enter “length unit” PARAMETERS 1/4 F1: MIN READING F2: ANGLE UNIT F3: DISTANCE UNIT ◆ Display mark MEMU 1/3 F1: LAYOUT F2: DATA COLLECT F3: PROGRAMS VZ VH V% HR/HL SD/HD/VD N E Z PT# ST/BS/SS Ins.Hi(I.HT) Ref.Hr(R.HT) ID PCODE P1/P2/P3 Zenith distance Height angle grade H-angle right/H-angle left S-distance/H-distance/Height difference N coordinate E coordinate Z coordinate Point number Measured station/Backsight/Measured point Instrument height Prism Height Registered number of PCODE Point code Page 1/Page 2/Page 3
- 16. 6 1.3 Operating Key Keys Function F1~F4 MENU Escape from manu Power on/off Angle measurement key, in memory management mode, cur- sor move left, return to next page Distance measurment key, cursor move down, display next point in memory management mode Cooridinate measurement key, cursor move up, display previ- ous point in memory management mode Enter manu ESC Function keys corresponds to the message displayed
- 17. 7 1.4 Function key (Soft Key) The Soft Key function is displayed at the bottomline of display. The functions is changed with measurement mode. VZ: 90°16′00″ HR: 156°16′18″ 0SET HOLD REC P 1 [F1] [F2] [F3] [F4] : : : : Function key RFHT INHT INCO P 2 OFST MODE BSCP P3 VZ: 90°16′00″ HR: 156°16′18″ OSET HOLD REC P 1 TILT V% CMPS P 2 HABZ HARL HSET P 3 VZ: 90°16′00″ HR: 156°16′18″ OFST S.O. MODE P2 SD: 0.000 m HR: 156°16′18″ DIST REC MODE P 1 OFST S.O. MODE P2 HD: 0.000 m VD: 0.000 m Angle measurement H-distance measurement N: 123456.789m E: -123456.789m DIST REC MMPT P1 Z: -0.789m Coordinate measurement S-distance measurement DIST REC MMPT P1
- 18. 8 P1 P2 P3 P1 P2 P1 P2 P3 Mode AnglemeasurementCoordinatemeas. Function Horizontal angle is set to 0 Hold the horizontal angle Record the data Setting tilt compensator on/off Switch grade V%/zenith distance VZ Switch height angle VH/zenith distance VZ Buzzer set for every horizontal angle 90° Switch horizontal angle mode (HR/HL) Set a required horizontal angle Send laser/Start distance measurement Record the data Select Offset measurement mode Select stake out measurement mode Send laser/Start distance measurement Record the data Sets a prism height by input values Sets the instrument height Select Offset measurement mode Sets the back sight coordinate point Display mark HOLD REC TILT V% CMPS HABZ HARL HSET DIST REC OFST S.O. OFST BSCO DIST REC RFHT INHT Soft Key F1 F2 F3 F1 F2 F3 F1 F2 F3 F1 F2 F1 F2 F1 F2 F1 F2 F1 F3 0SET S-distancemeas. MMPT F3 Setting EDM parameters MODE Change distance measurement modeF3 MMPT Setting EDM parametersF3 Sets the instrument coordinatesINCO F3 Change distance measurement modeMODE F2
- 19. 9 2.1 Mounting the battery (1)Insert the battery byaligning thebat- tery pack’s tenon with the notch in the instrument, press the battery clamp and push the top of the battery pack until you hear a click. 2. Battery Battery clamp Battery pack Fig5 Fig6 (2)Removing the battery Press thebattery clamp andremove the battery pack by pulling it toward you. (3)Battery Indicator Battery power display indi- cates the power condition. You should recharge or re- place the battery when you hearthe continue buzz. Please turn off in the normal way in order to save the data. Please find the battery operating time on Specifications. VZ: 81°54' 21 " HL: 157°33' 58 " 0SET HOLD REC P1 Th e p ower is poor. Need to recharge or re- place the battery Battery power display Measurementispossible
- 20. 10 2.2 Recharge 2.Plug the charger on 220V/110V(50Hz) power supply. The red lamp become lighting. It shows recharging. 1. Connect the charger connector to the battery.; 3.When recharge is coomplete, the red lamp flashes. It shows recharge complete. The red lamp light: recharging The red lamp flash and the interval-time is longer: the connector is not fixwell. The red lamp flash: recharge complete. Note::
- 21. 11 3.1 Setting up the instrument (1)Setting up the tripod First, extend the extension legs to suit- able lengths and tighten the screws on the midsections. (2)Attaching the instrument on the tri- pod head Place the instrument carefully on the tripod head and slide the instrument by loosening the tripod screw. 3. Preparation for measurement 3.2 Leveling the instrument (1) Leveling with the circular level by adjusting leveling screws A and B, position the bubble in the centerof vial (Fig 9). Adjust the leveling screw C, position the bubble in the center of circle (Fig 10). (2) Leveling precisely by plate level Loosen horizontal motion clamp, place the plate level in parallel with the line joining leveling screwsA andB.Adjust the leveling screws A and B, position thebubble in the centerofthe plate level (Fig 11). Loosen horizontal motion clamp, rotate the plate level through 90°around the vertical axis.Adjust leveling screw C, positionthe bubble in thecenterofplate level (Fig 12). Repeat above steps until the bubble remains in the center ofplate levelwhile the instrument is rotated to any position. ScrewA ScrewC ScrewA Screw B ScrewC Fig.9 Fig.10 Screw B ScrewA Screw B ScrewC ScrewA Screw B ScrewC Platelevel Bubble Fig.11 Fig.12
- 22. 12 3.3 Centering 3.3.1 Centering with optical plummet Leveling the instrument by plate level first. Rotate the focusing ring of the opticalplummet andadjust the focus to the ground markpoint. Then loosen the centerscrew ofthe tripod,look through the optical plummet,and move the base plate on the tripodhead untilthe center mark coincides with the ground mark point.At last tighten the center screw. Repeat above steps to leveling the in- strument again, untilthecenterofreticle coincides with the mark point when ro- tating alidade of instrument. 3.4 Focusing (1) Diopter adjustment Point telescope to sky or a uniformly light surface (Do not point to the sun). Turn eyepiece until cross hairs are sharp and black. Fig.14 Crossmark Plummetcenter Fig.13 Fig. 15 Reticle 3.3.2 Centering with laser plummet(Optional accessory) (1) According to laser intensity symbol (towards “on”side) direction turn the switch knob to turn on,the laser emits and adjust laser energy, then turn the focusing knob until the laser spot on the same horizontal plane with mark point on the ground. (2) Loosen the center screwofthe tripod,and move the base plateon the tripod head until the laser spot coincides with the ground mark point. Tighten the center screw. (3) Repeat leveling and (2) steps until the instrument keeps leveling and the laser spot coincides with the mark point when rotating alidade of instrument to any direction. (4)After centering, please turn switch knob off(towards “off”side) to save power.
- 23. 13 1.Confirmthe instriment is leveled and centered. 2.Press red key to switch on. 3.Rotate telescope a circle, the buzzer make a sound completed initialization and begin operation. Confirmthe battery power display. Re- place with charged battery or charge when battery level is low or indicates “Battery empty”. Confirmprismconstant value(PSM) and atmospheric correction value(PPM). 3.5 Switch on Press to switch on ROTATE TELESCOPE PRISM: -30mm PPM: 0ppm FOIF RTS-AV 1.04 VZ: 82°21' 50 " HL: 157°33' 58 " 0SET HOLD REC P1 Rotate telescope a circle Flow chart for switch on Press + F1 key POWER OFF Press F3 to turn off Press F4 to escape Flow chart for switch off YES NO 3.7 Illumination on/off Press +F4 key at same time,illumination is on.Press +F4 key again, the illumination is off. 1.Press + F1 key at the same time. 2.Press F3and switch off; Press F4 back to the latest mode. 3.6 Switch off (2) Target image focusing Look through telescope eyepiece and turn focusing ring until target is seen. There should be no apparent movement between cross hairs and target as observer moves his eye slightly. If there is parallax, please remove it by adjusting the focusing ring slightly.
- 24. 14 3.8 How to input number and letter It is convinient to input number and letter with function key. Example: Rename the file in memory manager mode ① After press the [MENU] key, press [ ]key to get the menu on page 2/2. Operating procedure Operation Display MENU 2/2 F2: Rec Port F1: MEMORY MGR. F3: PARAMETERS ② Press[F1]key to enter me- mory management submenu, press the [F3]key to enter fi- le manager menu. >SYG01 /M0015 REN SRCH DEL --- ③ Press [F1] key to rename file. ④ Press the [ ] key (EFGH). ⑤ Press the [F2](EFGH) key. > = _ /M0015 ABCDEFGHIJKL ENT ⑥ Press the [F2](F) key. > = _ /M0015 1234567890.- ENT [MENU] [EDM] [F1] [F3] [F1] [F2] [F] ▲ ▲ > = _ /M0015 (E) (F) (G) (H) > = F_ /M0015 ABCDEFGHIJKL ENT ▲
- 25. ⑦ Press the [ ] key. Press [F1](MNOP) key. Press [F3] (O) key. Operating procedure Operation Display ⑧ Press the [ ▲ ] key. Press [F3](IJKL) key. Press [F1] (O) key. ⑨ Press the [F2] key (EFGH). Press [F2] (F) key. >=FOI_ /M0015 ABCDEFGHIJKL ENT ⑩ Press the [ ] key twice. Press the [F1](YZ+#)key. Press the [F1](Y) key. (11)Press the [ ▲ ] thress times. Press the [F3] (90.-) key. Press the [F2] (0) key. > =FOIFY_ /M0015 YZ+# --- --- ENT (12)Press the [F1](1234) key. Press the [F1] key. > =FOIF_ /M0015 ABCDEFGHIJKL ENT [ ] [F1] [F3] [▲] [F3] [F1] [F2] [F2] [F1] [F1] ▲ ▲ ▲ [F3] [F2] [F1] [F1] ▲ ▲ >=FOIFY0_ /M0015 1234567890.- ENT > = FO_ /M0015 1234567890.- ENT ▲ >=FOIFY01_ /M0015 ▲ MNOPQRTSUVWX ENT ▲ 15
- 26. ▲ (13)Press the [F4] (ENT) key. Operating procedure Operation Display [F4] >=FOIFY01 /M0015 REN SRCH DEL --- ※ 1)The length of file name is 8 bits, the characters over 8 bit will be deleted automatically. ※ 2)On inputting procedure, the current inputting charactor on the cursor “-” , if you find error, press the [ ] to move cursor under the error character, and input the correct one again, press the [ESC] to finish inputting. 16
- 27. 17 3.9 Vertical Angle Tilt Correction When the tilt sensors are activated,automatic correction ofverticalangle for mislevelment is displayed. To ensure a precise angle measurement, tilt sensors must be turned on. The display can also be used to precise level the instrument. If the (Tilt over) display appears the instrument is out of automatic compensation range and must be leveled manually. The display of vertical angle is unstable when instrument is on an un- stable stage or a windy day. You can turn off the auto tilt correction function of Vangle in this case. Setting Tilt Correction by Soft Key Example: Setting Tilt OFF Operation Display [F4] [F1] [F3] [ESC] UnderAngel measurement mode, press[F4] to enter P2. ② Press [F1] key. In case ON is already selected, the display shows tilt correction value.※ 1) ③ Press[F3](OFF) key. ④ Press[ESC]key. VZ: 82°21' 50 " HL: 157°33' 58 " TILT V% CMPS P2 TILT [XON] X: -0°1' 12 " XON XYON OFF --- TILT [XYOFF] XON XYON OFF --- ※ 1)Due to RTS128/538 just has single-axis compensator, so [F2] is useless.
- 28. 18 4. Angle Measurement 4.1 Measuring HorizontalAngle (Right) and VerticalAngle Make sure the mode is in Angle measurement Reference: How to Collimate ① Point the telescope toward the light back ground. Turn the diopter ring andadjust the diopterso that the corss hairs are clearly observed. ② Aimthe target at the cross hair of the sighting collimator.Allow a certain space between the sighting collimator and yourself for collimating. ③ Focus the target with the focusing knob. ※ If parallaxis created between the corss hairs and the target when your eyes move vertically or horizontally, focusing is incorrect or di- opter adjustment is poor. This affects precision in measurement. Elimi- nate the parallaxby carefully focusing and using diopter adjustment. Operating procedure Operation Display ① Collimate the 1st target(A). ② Set horizontal angle of target A at 0°00' 00, press the [F1] (0 set) key and press the [F3] (YES) key. ③ Collimate the 2nd target (B). The horizontal angle between B and A and vertical angle of B be displayed. VZ: 89°25' 55 " HR: 157°33' 58 " 0SET HOLD REC P1 H-ANG SET0 >SET? --- --- YES NO VZ: 89°25' 55 " HR: 0°00' 00 " 0SET HOLD REC P1 VZ: 124°34' 20 " HR: 56°21' 01 " 0SET HOLD REC P1 Colli- mate A [F1] [F3] Colli- mate B
- 29. 19 4.2 Switching HorizontalAngle Right/ Left Make sure the mode is Angle measurement. Operating procedure Operation Display ① Press the[F4]key twice to get the function on page3. ② Press[F2](HARL) key. The modeHorizontal angle Right(HR) switches to (HL) mode. ③ Measure at HL mode as HR mode. VZ: 89°25' 55 " HR: 168°36' 18 " HABZ HARL HSET P3 VZ: 89°25' 55 " HR: 191°23' 42 " HABZ HARL HSET P3 [F4] [F4] [F2] ● Every time pressing the [F2] (HARL) key, HR/HL mode swithes. Note: Please check the horizontal angle is HR or not when you find the angle display is not correct.
- 30. 20 4.3 Set a HorizontalAngle Make sure the mode is angle measurement Operatingprocedure Operation Display ① Set the required horizontal angle, using Horizontal tangent screw ② Press[F2](HOLD) key. ③ Collimate the target.※ 1) VZ: 89°25' 55 " HR: 191°23' 42 " 0SET HOLD REC P1 H-ANG HOLD HR: 191°23' 42 " >SET? Display angle [F2] 1) Setting by Holding the HorizontalAngle ④Press [F3](YES) key to fin- ish holding the horizontalangle. The display turns backtonormal angle measurement mode. [F3] ※ 1) To return to the previous mode, press the [F4] (NO) key. VZ: 89°25' 55 " HR: 191°23' 42 " 0SET HOLD REC P1
- 31. 21 Make sure the mode is Angle measurment Operating procedure Operation Display ① Collimate the target. ② Press the[F4]key twice to get the function on page 3. Press[F3](HSET) key. ③ Press[F1]and refer to sec- tion 3.8 “Howto input nput the number and letter”to required horizonal angle.※ 1) For example:80°30′50″ Colli- mate [F4][F4] [F3] 2) Setting a horizontal angle by the number key VZ: 89°25' 55 " HR: 80°30' 50 " HABZ HARL HSET P3 ④ Press[F4]. Press[F4]again toconfirm the setting. ※ 1)If input is mistake, press [ ] (left move) or press [ESC] input correct angle again. ※ 2) If input wrong data, you should reedit from step 3. VZ: 89°25' 55 " HR: 168°36' 18 " 0SET HOLD REC P1 TILT V% CMPS P2 HABZ HARL HSET P3 H-ANG SET HR: 80.3050 NUM --- --- ENT [F1] [80.3050] [F4] [F4] ▲
- 32. 22 4.4 VerticalAngle Grade Mode Switch Make sure the mode is Angle measurement Operating procedure Operation Display ① Press[F4] (P1) key to get the function on page2. ② Press [F2](V%) key.※ 1) VZ: 89°25' 55 " HR: 168°36' 18 " 0SET HOLD REC P1 [F4] [F2] V: 0.99%" HR: 168°36' 18 " 0SET HOLD REC P1 TILT V% CMPS P2 ※ 1)Every time pressing the [F2] (V%) key, the display mode switches. 4.5 Zenith distance/ vetical angle mode switch Make sure the mode is Angle measurement Operating procedure Operation Display ① Press[F4] (P1) key to get the functin on page 2. ② Press [F3] key.※ 1) VZ: 89°25' 55 " HR: 168°36' 18 " 0SET HOLD REC P1 [F4] [F3] VH: 0°34' 55 " HR: 168°36' 18 " 0SET HOLD REC P1 TILT V% CMPS P2 ※ 1)Every time press the [F3] key, the display mode switches. ● Under vertical angle mode, vertical angle is 0 when telescope is in horizontal direction.
- 33. 23 Make sure the mode is Angle measurement Operating procedure Operation Display ① Press the [F4]key twice to get the function on page 3. ② Press[F1]key. The previ- ously status is shown. [F4][F4] 4.6 Set Buzzer Sounding for HorizontalAngle 90° ④ Press[ESC]key. [F1] [F1] or [F2] When the horizontal angle falls in the range of ± 1°of 0°,90°, 180°or 270°, the buzzer sounds. Buzzer stops only when the hori- zontal angle is adjusted to 0°00′00″(±1″),90°00′00″(± 1″),180°00′00″(± 1″)or 270°00′00″(± 1″) ③ Press[ F 1 ] (ON) key or [F2](OFF) key to select the buzzer ON/OFF. [ESC] VZ: 89°25' 55 " HR: 168°36' 18 " HABZ HARL HSET P3 H-ANG BEEP [ON] ON OFF --- --- H-ANG BEEP [OFF] ON OFF --- --- VZ: 89°25' 55 " HR: 168°36' 18 " 0SET HOLD REC P1 TILT V% CMPS P2 HABZ HARL HSET P3
- 34. 24 5. Distance Measurment 5.1 Distance Measurement (Slope distance mode) Make sure the mode is angle measurement Operating procedure Operation Display ① Press[ ]key to enter distance measuremet menu. ② Collimate the center of prism. [ ] [F1] Twice ※ 5)If the target is covered, the measured distance will be wrong or display “E02”. Please make sure there is nothing between the target and instrument. ③ Press[F1] key twice.※ 1) The measured distance are shown.※ 2)~ ※ 5) VZ: 89°25' 55 " HR: 168°36' 18 " SD: * m STOP REC MMPT P1 VZ: 89°25' 55 " HR: 168°36' 18 " SD: 88.888 m DIST REC MMPT P1 ※ 1)When EDM is working, the“*”mark appears in the display. ※ 2)The measured distance appears with buzzer sounds. ※ 3)The measured distance display values depend on the different measurement mode.When the mode is Single measurement, thevalue is the current measured distance; When the mode is Continuous measurement, the lastest display is the average value of all; When the mode is tracking measurement, the measured distance precision is 0. 01m. ※4)Press [ ] keythree times,switches the measured distance to HD/ VD mode. ④ Press[ESC]key to clear out the measured value VZ: 89°25' 55 " HR: 168°36' 18 " SD: 0.000 m DIST REC MMPT P1
- 35. HR: 168°36' 18 " HD: 88.886m VD: 0.002 m AIM REC MMPT P1 25 5.2 Distance Measurement(HD/VD mode) Make sure the mode is angle measurement Operating procedure Operation Display VZ: 89°25' 55 " HR: 168°36' 18 0SET HOLD REC P1 [ ] twice [F1] twice ※ 1)When EDM is working, the“*”mark appears in the display. ※ 2)The measured distance appears with buzzer sounds. ※ 3)The measured distance display values depend on the different measurement mode.When the mode is Single measurement, the value is the current measured distance; When the mode is Continuous measurement, the lastest display is the average value of all; When the mode is tracking measurement, the measured distance precision is 0. 01m. ※ 4)Press[ ]key three times, switches the measured distance to slope mode. 5.3 Offset Measurement This mode is usefulwhen it is difficult to set up the prismdirectly, for example at the centerofa pole(A).Place the prismat the same horizon- tal distance fromthe insturment as (B). To measure the coordinates of the center position, operate the offset measurement after setting the instrument height/prismheight. ①Press[ ]key twice to get the slope distance mode. ② Collima te th e ce nter of prism. ③ Press[F1]key twice. ※ 1) The measured distances are shown.※ 2)~ ※ 4) ④ Press[ESC]key to clear out the measured value. HR: 168°36' 18 " HD: m VD: m AIM REC MMPT P1
- 36. 26 Make sure the mode is distance measurement. Operating procedure Operation Display ① Press[F4](P1) key fromdis- tancemeasuring mode to get the function on page 2. ② Press[F1](OFST) key. [F4] [F1] ※ 1)Press[F1](NEXT) key to continue offset measurement. Press [ESC] to returnto the previous mode. ③ Collimate prismB. ④ Press[F1](MEAS) key. ⑤ Collimate pointA0, press [F4]key. Show the slope dis- tance ofA. ※ 1)※ 2) colli- mate B Colli- mate A [F4] HR: 168°36' 18" HD: m VD: m OFST S.O. MODE P2 OFFSET MEAS HR: 168°36' 18 " HD m MEAS --- --- SET OFFSET MEAS HR: 168°36' 18 " HD: 88.888m MEAS --- --- SET OFFSET MEAS HR: 180°36' 18 " HD: 88.888m NEXT --- --- --- P r i s m height Inst rument height Occ.point PrismB A0 A1 ※ 2)Press[DISP]key, VD, SD,N, E and Z are shown in sequence. (the third line) [F1]
- 37. HR: 168°36' 18 " dHD: -12.410m VD: 0.000m OFST S.O. MODE P2 27 5.4 Stake out (S.O) Example: HD Operating procedure Operation Display ① Press[F4]key in the dis- tance measuringmode to getthe function on page 2. ② Press[F2](S.O) key. [F4] [F1] ※ 1)To return the normal distance measurement mode, under stake out mode and after step ①、②,press[F4] (CA) key. ③ Press [F1] (HD) key.※ 1) The difference between the measured distance and the input stake out distance is displayed. Displayed value=Measured distance-Stake out distance In stake out operation, you can select either horizontal distance(HD), relative elevation(VD) or slope distance (SD) ④Enterthe distance for stake out and press[F4]key. Collimate the target. ⑤ Press [F4]key to return HD mode page 1, press[F1]starts measuring. +value means move prism toward the instrument. -value means move prism backward the instrument. [F2] [F4] [F4] SET OUT HD=123.2 m NUM --- --- ENT SET OUT HD VD SD CA [F1] HR: 168°36' 18 " HD: 0.000m VD: 0.000m OFST S.O. MODE P2
- 38. This mode is used for offset of stake out. Place the instrument at the stake. Setting the distance for stake out, collimate the other stake on the same line. Collimate the prismand start measuring. The value is positive, move the prism towards instrument. Otherwise, move the prismback ward instrument. 50m 50m 50m 50m 50m 50m 28
- 39. 29 5.5 Set the distance measurement mode Operating procedure Operation Display ① Press [F4] key to enter func- tion menu on page 2. ② Press [F1] key. [EDM] [F1] ③ Press[F1](DIST) key,[F2] (TRK)key, or[F3](CONT)key to select the distance measurement mode. ④Press[ESC]key to return pre- vious measurement mode. CONT Mode:This is a normaldiatance measuring mode and the distance measurement time is set. It could get high accuracy but cost time. Measurement time: approx. 3 sec. The unit to be displayed: 1mm DIST MODE: This mode measures in shorter time and the instrument only measure one time. The accuracy is 0.01m. It is useful when carrying out stake-out work. Measurement time: approx. 1 sec. The unit to be displayed: 1mm Coarse Mode: This mode measures in shorter time than in fine mode. Measurement time: approx. 1 sec. The unit to be displayed: 10mm [F4] Make sure the mode is distance measurement HR: 168°36' 18 " HD: 0.000m VD: 0.000m DIST TRK CONT T HR: 168°36' 18 " HD: 0.000m VD: 0.000m OFST S.O. MODE P2 HR: 168°36' 18 " HD: 0.000m VD: 0.000m OFST S.O. MODE P2
- 40. 30 5.6 Setting of the Correction for Prism Constant Operating procedure Operation Display ① Make sure the instrument displays distance measurement function menu on page 1. ② Press[F3] (MMPT) key, the data previously set is shown. [F1] [F3] ③Press[F1](PRM) key, the prism constant prev iously set is shown. ④ Press the [F1] to input the new value.Press[F4] (ENT)key. Press the [F4] again to confirm. Prismconstant default value of RTS238/538 is 0 (FOIF’s single prism constant is 0 and three-prismconstant is 30mm), If the prismconstant value is not 0, the appropriate constant shall be set beforehand. The setting value is kept in the memory even after power is off. [F4] [F1] *Refer to section 3.8 “How to input number and letter” [F4] HR: 168°36' 18 " HD: m VD: m DIST REC MMPT P1 SET CONDITION PSM: 000mm PPM:004 SIGNAL: 0 PRM PPM T-P ---- PRISM CONST SET :000 mm INPT --- --- ENT PRISM CONST SET :-30 mm INPT --- --- ENT
- 41. ④ Press the ▲ or key to switch temperature or pressure inputing. Press[F4]key to save the setting. 31 5.7 Setting of the Atmospheric Correction Operating procedure Operation Display ① Make sure the instrument displays distance measurement function menu on page 1. ② Press[F3] (MMPT) key. [F3] ③Press[F3] (T-P) key, the tem- perature and pressure value previously set is shown. Press the [F1] (INPT) to input the Temp. value and Pressure value. RTS 238/538 series Total Station setting the atmospheric correction value by input directly the temperature and pressure value. [F4] TEMP & PRES SET TEMP > 20 °C PRES : 1020.0 hPa NUM --- --- ENT [F3] [F1] The atmospheric correction is little effect on distance measurement. But if the input Temp. value and pressure value is big different from the measuring value, the distance different should be more than 0. 001m. HR: 168°36' 18 " HD: m VD: m AIM REC MMPT P1 SET CONDITION PSM: 000mm PPM:004 SIGNAL: 0 PRM PPM T-P T---- PPM:000 TEMP = °C PRES : 1020.0 hPa 1234567890.- ENT ▲
- 42. 32 5.8 Returned singal Checking Operating procedure Operation Display ① Make sure the instrument displays distance measurement function menu on page 1. ② Collimate prism and press [F3] key. The intensity of cur- rent returned singal is shown on the third line. [F3] ③ Press[ESC]key to return the previous mode. Check to make surethat sufficient reflected light is returned by the reflec- tive prismsighted by the telescope. It couldn’t changed by user. The normal returned single should be more than 10. [ESC] *When the distance measured stop for long time or displayed E02, please checking as above and collimate the prismagain. HR: 168°36' 18 " HD: m VD: m AIM REC MMPT P1 SET CONDITION PSM: 000mm PPM:004 SIGNAL: 0 PRM PPM T-P ----
- 43. 33 6. Coordinate Measurement Operating Procedure Operation Display ① Press [ ] key to enter coordinate measurement menu. ② Press[F4](P1)key from co- ordinate measurement mode to the function page 2. [F4] ③ Press[F3](INCO) key. Set thecoordinates of theinstrument(occupied point) and backsight point. The instrument measures and displays the unknown point (prism point) coordi- nates . [F3] N : 0.000m E : 0.000m Z : 0.000m DIST REC MMPT P1 RFHT INHT INCO P2 6.1 Setting Coordinate Values of Occupied point SELECT A FILE FN: INPT LIST --- ENT 1) Coordinate data input by keyboard directly(under angle measurement mode) Origin (0, 0, 0) Prism (n, e, z) OCC.point n e N z E Backsight point
- 44. 34 ※ 1)You also could choose the file name frommemory files by press [F2]key. ※ 2)“>”means the current entering item.After enter and press [F4]key, the“>”move the next line and press[F1]key to continue entering. If this itemneedn’t to enter, press[EDM]key. Operating procedure Operation Display ④ Press[F1]key and input file name. Press[F4]key.※ 1) ⑤ Press[F4](NEZ)key and enter the occupied point No. Press[F1]key and enter coordi- nate data in the same way. Then press[F4]key. ※ 2)※ 3) ⑥ Press[ F 1 ]key twice and enter PT#. Press[F4]key. [F1] [F4] [F4] [F1] enter coordinate data [F4] [F4] [F1] Enter OCC. point No. [F4] [ ] PT# > PCODE: Ins.Hi: INPT SRCH REC NEZ N : 123.456m E : -987.015m Z = 0. m NUM --- --- ENT OCC. PT PT# : INPT ENT PT# :S1 PCODE > Ins.Hi : 0.000m INPT SRCH REC NEZ ⑧ Press[F3]key. the display returns coordinate measuring display page2.※ 5) N : 0.000m E : 0.000m Z : 0.000m RFHT --- INCO P2 ⑦Press[ ]key.Enter PCODE and Ins. height as requirement. ※ 4) [F3] ▲▲
- 45. ※ 3)Input range: -999999.999m< N、E< +999999.999m -9999.999m< Z< +9999.999m -999999.999ft< N、E< +999999.999ft -9999.999ft< Z< +9999.999ft ※ 4)You could select the PCODE from internal PCODE library by press [F2](SCRH) key.If the input numberis 0-49, firstly it should be as ID of PCODE in PCODE library, but if the instrument find the corre- sponding PCODE is empty, this entering number will be as PCODE. NOTE: The [F2](SCRH) just used for PCODE. ※ 5) Press[ESC] key return measurement mode if you don’t need to record. Operating procedure Operation Display ① Press[ ] key to enter coordinate measurement. ②Press[F4] (P1) key to get the function of page2. [F4] ③ Press[F3] (INCO) key. [F3] 2)SettingOccupied Point frommemory file. (Displayedanglemeasurement mode) ④ Press[F1]key to input file name. Press[F4] key.※ 1) [F1] Input file name [F4] PT# > PCODE Ins.Hi : INPT SRCH REC NEZ N : 0.000m E : 0.000m Z : 0.000m DIST REC MMPT P1 RFHT INHT INCO P2 SELECT A FILE FN: INPT LIST --- ENT 35
- 46. ⑤ Press[ F 1 ]key to get the function of coordinate file selected. ⑥Press[F1]key and input co- ordinate file. Press[F4]key. ※ 1) OCC. PT PT#: INPT LIST --- ENT SELECT A FILE FN: INPT LIST --- ENT PT# :S1 PCODE > Ins.Hi : 0.000m INPT SRCH REC NEZ ⑦ Press[F1] key and input PCODE. Press[F4]key. ※ 1) [F1] [F1] Input PT [F4] [F1] Input PCODE [F4] Operating procedure Operation Display PT# :S1 PCODE :01 Ins.Hi : 1.000m INPT SRCH REC NEZ ⑧ Press[F3]key return the co- ordinate measurement mode and get the function page2.※ 3) N : 123.456m E : 987.654m Z : 1.000m RFHT --- INCO P2 [F3] ※1) You also could view the data frommemory files by press[F2]key and select needed file. ※ 2)You could select the PCODE from internal PCODE library by press [F2](SCRH) key.If the input numberis 0-49, firstly it should be as ID of PCODE in PCODE library, but if the instrument find the corre- sponding PCODE is empty, this entering number will be as PCODE. NOTE: The [F2](SCRH) just used for PCODE. ※ 3)Press[ESC] key return measurement mode if you don’t need to record. ⑦ Pres s[ ▲ ] key , in pu t PCODE and Ins. Hi.※ 2) [ ] Input PCODE and Ins. Hi ▲ 36
- 47. 37 6.2 Setting Backsight Point Measure the coordinates by entering the instrument height and prism height, coordinate of unknown point will be measured directly. In case the coordinate of instrument point is not entered, (0, 0, 0) will be used as the default for the instrument point. The following three setting methods for backsight point can be selected 1) Direct key input of coordinate data. 2) Setting the coordinate data fromthe intermal memory. 3) Direct key input of backsight angle. 1) Direct key input of coordinate data Operating procedure Operation Display ② Press[F3]key to get the func- tion of setting backsight point. [F3] ① Displaying the coordinate measurement mode page 3. ③ Pre ss [ F 1 ] ke y, inp u t backsight point number and PCODE, Ref.Hr. ※ 1)※ 2) BS# > PCODE : Ref.Hr : 0.000m INPT BS MEAS 0SET BS# :S2 PCODE :05 Ref.Hr : 1.000m INPT BS MEAS 0SET [F1] Input backsight point, PCODE, Ref.Hr N : 0.000m E : 0.000m Z : 0.000m DIST REC MMPT P1 RFHT INHT INCO P2 OFST MODE BSCO P3
- 48. 38 Operating procedure Operation Display ⑤ Press[F3] (NE) key.※ 3) [F1] Input [F4] ⑥ P r e s s [ F 1 ] k e y , i n p u t backsight point coordinate, press[F4]key.※ 4) BACKSIGHT N: 0.000m E: 0.000m INPT LIST AZ ENT BACKSIGHT HR: 12°34′56″ >Sight? YES NO ⑦ Collimate backsight point prismcenter, press[F3]key. Collimate [F3] BS# :S2 PCODE :05 Ref.Hr > 1.000m INPT BS MEAS 0SET BACKSIGHT PT# : INPT LIST NE ENT ④ Press[F2]key. [F2] [F2] ※ 1)If you don’t select the store file when setting Occ. point, you should select the store file before setting backsight point number. Refer to 6.1”Setting Coordinate Values of Occupied point”. ※ 2)You could select the PCODE from internal PCODE library by press [F2](SCRH) key.If the input numberis 0-49, firstly it should be as ID of PCODE in PCODE library, but if the instrument find the corre- sponding PCODE is empty, this entering number will be as PCODE. NOTE: The [F2](SCRH) just used for PCODE. ※ 3)Press[F3] (NE) key again, the input method change as NE,AZ, PT#. ※ 4)Input range: -999999.999m< N、E< +999999.999m -999999.999ft< N、E< +999999.999ft
- 49. 39 2) Setting the coordinate data from the internal memory Operating procedure Operation Display ② Press [F3] key. [F3] ① Displayed coordinate mea- surement mode function page 3. ③ Pre ss [ F 1 ] ke y, inp u t backsight point number, PCODE and Ref. Hr.※ 1)※ 2) BS# > PCODE : Ref.Hr : 0.000m INPT BS MEAS 0SET BS# :S2 PCODE :05 Ref.Hr : 1.000m INPT BS MEAS 0SET [F1] Input backsight point, POCDE, Ref. Hr. BACKSIGHT PT# : INPT LIST NE ENT ④ Press [F2] key. [F2] ⑤ Press [F1] key, input PT# (stored in memory). Press[F4] key. ※ 3)※ 4) BACKSIGHT PT# :F2 INPT LIST NE ENT ⑥ Press [F4] key. BACKSIGHT HR: 12°34′56″ >Sight? YES NO [F1] Input PT# [F4] [F4] N : 0.000m E : 0.000m Z : 0.000m DIST REC MMPT P1 RFHT INHT INCO P2 OFST MODE BSCO P3
- 50. 40 Operating procedue Operation Display ⑦ Collimate backsight point prismcenter, press[F3]key. Collimate [F3] BS# :S2 PCODE :05 Ref.Hr > 1.000m INPT BS MEAS 0SET ※ 1)If you don’t select the store file when setting Occ. point, you should select the store file before setting backsight point number. Refer to 6.1 “Setting Coordinate Values of Occupied point”. ※ 2)You could select the PCODE from internal PCODE library by press [F2](SCRH) key.If the input numberis 0-49, firstly it should be as ID of PCODE in PCODE library, but if the instrument find the corre- sponding PCODE is empty, this entering number will be as PCODE. NOTE: The [F2](SCRH) just used for PCODE. ※ 3)Press[F2]key, choose the PT# fromthe coordinate file. ※ 4)Press[F3] (NE) key again, the input method change as NE,AZ, PT#. 3)Direct key input of backsight angle Operating procedure Operation Display ②Press [F3] key to get the func- tion of setting backsight point. [F3] ① Displaying the coordinate measurement mode page3. BS# > PCODE : Ref.Hr : 0.000m INPT BS MEAS 0SET N : 0.000m E : 0.000m Z : 0.000m DIST REC MMPT P1 RFHT INHT INCO P2 OFST MODE BSCO P3
- 51. 41 Operating procedure Operation Display ⑤ Press[F3](NE)Key. [F3]⑥ Press[F3] (AZ) key.※ 3) BACKSIGHT N: 0.000m E: 0.000m INPT LIST AZ ENT BACKSIGHT HR: INPT LIST PT# ENT ⑦ Collimate prism center, press[F3]key. Collimate [F3] BS# :S2 PCODE :05 Ref.Hr > 1.000m INPT BS MEAS 0SET BACKSIGHT PT# : INPT LIST NE ENT ④ Press[F2]key. [F2] [F3] ⑥ Press[F1]key, input the angle value. Press[F4]key. ※ 4) [F1] [12.0406] [F4] BACKSIGHT HR: 12.0406 >Sight? YES NO ③ Press[F1]key, input back- sight point number, PCODE and Ref. Hr. ※ 1)※ 2) BS# :S2 PCODE :05 Ref.Hr : 1.000m INPT BS MEAS 0SET [F1] Input BS#, POCDE, Ref. Hr. ※ 1)If you don’t select the store file when setting Occ. point, you should select the store file beforesetting backsight point. Refer to 6.1”Setting Coordi- nate Values of Occupied point”.
- 52. 42 6.3 Confirm the direction of back sight Make sure the the setting of backsight is finished. Operating procedure Operation Display ②Collimatethebacksightprism, press the [F3] (MEAS)key to measure. ③ Press the [F3] (NEZ) key, the instrument begin to measure and record.※ 2) ①After the setting of back sight point, its displays as right figure ※ 1) Collimate target [F3] [F3] VH:Angle HD:Angle + distance NEZ:Coordinate BS# :S002 ID :000 Ref.Hr > 1.000m INPT BS MEAS 0SET BS# :S002 ID :000 Ref.Hr > 1.000m VH HD NEZ OFST N: E: Z: <Measuring> < Complete> ※ 2)You could select the PCODE from internal PCODE library by press [F2](SCRH) key.If the input numberis 0-49, firstly it should be as ID of PCODE in PCODE library, but if the instrument find the corre- sponding PCODE is empty, this entering number will be as PCODE. NOTE: The [F2](SCRH) just used for PCODE. ※ 3)Press[F3](NE)key again, the input method change as NE,AZ, PT#. ※ 4)It need add dot after degree. There is no space for minute and second. It also need add “0”before one digital. After the setting of backsight point, require to confirm the direction by collimating and measuring. OFST MODE BSCO P3
- 53. 6.4 Measuring and record Operating procedure Operation Display ② Collimate prism, press[F1] key twice. ① In coordinate measurement mode function page1. Collimate [F1] Twice [F2] N : 123.456m E : 987.654m Z : 1.000m DIST REC MMPT P1 N : 135.400m E : 1020.821m Z : -2.345m DIST REC MMPT P1 ③ Press[F2]key. PT# > PCODE :000 Ref.Hr > 0.000m INPT --- --- ENT PT# > PCODE : Ref.Hr : 0.000m INPT --- --- ENT ③ Press[F1]key, input PT#, PCODE, Ref.Hr. Press[F4]key. ※ 1)※ 2), N : 135.400m E : 1020.821m Z : -2.345m AIM REC --- P1 [F1] input PT #, PCODE,Ref. Hr. [F4] ④ Return coordinate measure- ment mode page 1. ※ 1)If you don’t select the store file when setting Occ. point, you should select the store file before setting backsight point. Refer to 6. 1”Setting Coordinate Values of Occupied point”. ※ 2)You could select the PCODE from internal PCODE library by press [F2](SCRH) key.If the input numberis 0-49, firstly it should be as ID of PCODE in PCODE library, but if the instrument find the corre- sponding PCODE is empty, this entering number will be as PCODE. NOTE: The [F2] (SCRH) just used for PCODE. 43
- 54. 6.5 Offset Measurement This mode is usefulwhen it is difficult to set up the prismdirectly, for example at the centerofa pole(A).Place the prismat the same horizon- tal distance fromthe insturment as (B). To measure the coordinates of the center position (A), operate the offset measurement after setting the instrument height/prismheight.Refer to 5.3”offset measurement.” 44 Make sure the mode is coordinate measurement mode. Operating procedure Operation Display ① Press [F4] (P1) key twice to get the function page3. ② Press [F1] key. [F4] [F1] ※ 1)Press[F1](NEXT) key to continue offset measurement. Press[ESC] to returnto the previous mode. ③ Collimate point B. ④ Press[F1] key. ⑤ Collimate point A. Press [F4] key. ※ 1)※ 2) Colli- mate B Colli- mate A [F4] HR: 168°36' 18 " HD: m VD: m OFST MODE BSCO P3 OFFSET MEAS HR: 168°36' 18 " HD m MEAS --- --- SET OFFSET MEAS HR: 168°36' 18 " HD 88.888m MEAS --- --- SET OFFSET MEAS HR: 180°36' 18" HD 88.888m NEXT --- --- --- ※ 2)Press[DISP]key, VD, SD,N, E and Z are shown in sequence. (the third line).
- 55. 45 7. Layout Layout mode has two functions which are setting of layout points and setting new points using coordinate data in the internal memory.Also, if the coordinate data is not stored in the internal memory, this can be input from key board. The coordinate data is loaded from PC to the internal memory via RS232C. The coordinate data The coordinate data is memorized into a file, the memory has three re- corded parts, one is for measured data, another is for coordinate data, and the last one is for PCODE data. For the internal memory, refer to Chapter 11”Memory Manager Mode” The number of coordinate data (In case not using the internal memory in the data collect mode), max. 8000 points. Becuase the internal memory covers both data collection mode and layout mode, the number of coordinate data will be decreased when the data collection mode is used. 1)When turning off the power, ensure that you are in the main menu screen or main angle measurement mode. This ensures completion of the memory access process and avoids possible damage of the stored data. 2) It is recommended for safety to charge the battery beforehand and prepared fully charged spare batteries. 3)When recording newpoint data, remember to considerthe amount of internal memory. 7.1 Layout menu operation 1) Selecting a file for layout. 2) Input Occ. point. 3) Input backsight point and backsight angle. 4) Input data or pick-up (from internal memory) the coordinate data of layout point. Start layout.
- 56. 46 7.2 Selecting coordinate data file You can execute a Layout fromselected coordinate date file. The only existing coordinate data file can be selected and you can not make a new file in this mode. (Refer to chapter 10.4.1) Operating procedure Operation Display ①Press[MENU] key, the instru- ment will be in MENU mode. ② Press[F1]key, the menu of layout will be shown. [MENU] [F1] ③Press[F2]key to display the list of coordinate data file. ※ 1) ④ Scoll file list by pressing the [▲]or[ ] key and select a file to use. ※ 2) MENU 1/2 F1: LAYOUT F2: DATA COLLECT F3: PROGRAMS [F4]⑤Press[F4]key.The file willbe selected. SELECT A FILE FN: INPT LIST --- ENT > @FOIF_01/0012 FOIF_02/0102 FOIF_03/0008 --- VIEW --- ENT Layout 1/2 F1: OCC. PT# INPUT F2: BACKSIGHT F3: LAYOUT [F2] ※ 1)If you want to input file name directly, press[F1]key and en- ter a file name. ※ 2)When a file has been selected already, mark .“@”is indicated on left of current file name. FOIF_01/0012 > @FOIF_02/0102 FOIF_03/0008 --- VIEW --- ENT [ ] ▲ ▲
- 57. 47 7.3 Setting occupied point 1) Setting the coordinate data fromthe internal memory. Examle: Confirm the coordinate data file has been selected already Operating procedure Operation Display ② Press[F1]key. [F1] [F4] [F2] ※ 1)Direct input PT#: press[F1]key and input PT#. ③ Press[F2]key. ※ 1)※ 2)※ 3) ⑤ Press [F4]key. ⑥ Input Ins.Hi. Range:-99.999~ +99.999m Press [F4]key. Layout 1/2 F1: OCC. PT# INPUT F2: BACKSIGHT F3: LAYOUT OCC. PT PT# > Ins.Hi : 0.000 m INPT LIST NEZ ENT OCC. PT PT# : F001 INPT LIST --- ENT OCC. PT PT# : F001 Ins.Hi >1.000 m INPT LIST NEZ ENT > F001 F002 F003 VIEW SRCH --- ENT [F4] ※ 2)The selected coordinate data can be searched by press[F1]key. ※3)The coordiante data can be searched by press[F2]and input PT#. [F4] ① The insturment be in LAY- OUT mode. ▲
- 58. 48 2) Setting the instrument point coordinates directly Make sure the coordinate data file is selected. Operating procedure Operation Display ② Press[F1]key. [F1] [F4] [NEZ] [F1] [F4] ③ Press[NEZ]key. ④ Press[F1]key and enter coordinate value. Press[F4] key.※ 1) ⑤ Press[F4]key. ⑥ Input Ins. Hr. Press[F4] key to confirm. Layout 1/2 F1: OCC. PT# INPUT F2: BACKSIGHT F3: LAYOUT OCC. PT PT# > Ins.Hi : 1.000 m INPT LIST NEZ ENT OCC. PT PT# : F001 Ins.Hi >1.00 m INPT LIST NEZ ENT N > 0.000m E 0.000m Z 0.000m INPT --- --- ENT [F4] ① Layout menu. N 123.456m E 987.654m Z= -1.608m NUM --- --- ENT ※1) The itemfollowing “<“is current inputting item.Afterthe inputting o f this itempress F4 to confirm, the mark “<”will move downward to another item.Otherwise, press the mark “<”will also move to otheritem. ▲
- 59. 49 7.4 Setting Backsight Point 1) Setting the coordinate data file fromthe internal memory Make sure the instrument displays layout menu ※ 1)Direct input PT#: press[F1]key and input PT#. ※ 2)The selected coordinate data can be searched by press[F1]key. ※3)The coordiante data can be searched by press[F2]and input PT#. Operating procedure Operation Display [F2] [F4] [F2] BACKSIGHT PT# : INPT LIST NE ENT BACKSIGHT PT# : F002 INPT LIST --- ENT BACKSIGHT PT# : F002 INPT LIST --- ENT > F001 F002 F003 VIEW SRCH --- ENT [F4] [F4] ① Press[F2] (BACKSIGHT) key to set backsight point. ② Press [F2] key to view data file. ※ 1)※ 2)※ 3) ③ Press[▲]or[ ▲ ]key to select PT#. Press [F4]key. ④ Press [F4] key. ⑤ Press [F4] key. [ ] BACKSIGHT HR:283°25′33″ >Sight? YES NO⑥ Collimate backsight, press [F3] key and return back the lay- out menu. Collimate backsight [F3] ▲
- 60. 2) Direct key input of coordinate data ※ 1)With each pressing of [F3] key, the inputting way to confirm backsight point switched between NE (coordinate) and AZ (backsight angle). Make sure the instrument displays layout menu 50 Operating procedure Operation Display [F2] [F3] BACKSIGHT PT# : INPT LIST NE ENT [F4] ① Press [F2] key. ② Press [F3] (NE) key.※ 1) ③Press[F1]key and enter co- ordinate value. Press[F4]key. ④ Press[F4]key. ⑤ Collimate backsight, press [F3]key and return back the lay- out menu. [F1] [F4] BACKSIGHT HR:283°25′33″ >Sight? YES NO Collimate backsight [F3] BACKSIGHT N > 0.000m E : 0.000m INPT LIST AZ ENT BACKSIGHT N: 123.450m E = 987.640m NUM --- --- ENT
- 61. 51 3) Direct key input of setting angle. Operating procedure Operation Display ※ 1)With each pressing of[F3] key, method of inputting backsight is changed. Make sure the instrument displays layout menu [F2] [F3] BACKSIGHT PT# : INPT LIST NE ENT [F1] [123.1618] [F4] ① Press[F2]key. ② Press[F3] (NE) key.※ 1) ③ Press [F3] (AZ) key. ④ Press [F1]key and enter setting angle. 123°16′18″ Press[F4]key. ⑥ Collimate backsight, press [F3]key and return back the layout menu. [F3] BACKSIGHT HL :123°16′18″ >Sight? YES NO Collimate backsight [F3] BACKSIGHT N > 0.000m E: 0.000m INPT LIST AZ ENT BACKSIGHT HL: INPT LIST PT# ENT BACKSIGHT HL =123.1618 NUM --- --- ENT ⑤ Press[F4]key. [F4]
- 62. 52 ④ Press[▲]or[ ▲ ]key to select PT#. Press [F4]key. 7.5 Executing a Layout The following methods can be selected for executing a layout. 1) Recalling point s frominternal memory by point number. 2) Direct key input of coordinate values. Example: setting recalling point frominternal memory Operating procedure Operation Display ② Press[F3]key. [F3] [F2]③ Press[F2] key. ※ 1)※ 2)※ 3) ⑤ Press [F4]key. ※ 4) Layout 1/2 F1: OCC. PT# INPUT F2: BACKSIGHT F3: LAYOUT LAYOUT PT# > Ref.Hr : 0.000 m INPT LIST NEZ ENT LAYOUT. PT PT#: F003 INPT LIST --- ENT LAYOUT PT# > F003 Ref.Hr : 0.000 m INPT LIST NEZ ENT > F001 F002 F003 VIEW SRCH --- ENT [F4] [ ] Twice [F4] ①Make sure the displaying is layout menu. ▲
- 63. 53 Operating procedure Operation Display ⑧ Press[F1] key. dHR: Horizontal angle to be turned to the layout point=Actual horizon- tal angle-Calculated horizontal angle. Correct direction when dHR= 0°00′00″ [F1] CACULATED HL: 44°38′29″ HD: 173.464m A&D NEZ NEXT [F1] ⑦ Press[F4] key. HR: calculated horizontal angle of the layout point HD: Calculated horizontal distance from the instrument to the layout point [F4] [F1] I n p u t Ref.Hr ⑥ Input Ref.Hr. LAYOUT PT# : F003 Ref.Hr >1.000 m INPT LIST NEZ ENT ⑨ Press [F1]key. dHD:Horizontal distance to be moved to the layout point=Actual horizontaldistance-Calculated hori- zontal distance. dZ:Vertical distance to be moved to the layout point=Actualverticaldis- tance-Calculated vertical distance. ⑩When the display value dHR, dHD and dZ are less than allow- able error, the layout point is established. ※ 5) dHR: 12°34′56″ dHD: dZ: DIST MODENEZNEXT dHR: 12°34′56″ dHD: -34.333 m dZ : 2.000 m DIST MODE NEZ NEXT dHR: 0°00′00″ dHD: 0 .000 m dZ : 0.000 m DIST MODE NEZ NEXT
- 64. 54 Operating procedure Operation Display [F4] dN: 56.287m dE: 986.321 m dZ: 123.345 m DIST MODE NEZ NEXT (12)Press[F3] key. The coordinate data is shown.※ 6) [F3] [F2](11)Press [F2]key to seclect the distance measurement mode. MODE SET F1: FAST F2: TRACK [ F3: FINE] ENT (13)Press[F4] key to set next layout p oint . PT# is a ut oma tica lly incremented. LAYOUT PT# > Ref.Hr : 0.000 m INPT LIST NEZ ENT ※ 1)If you want to input PT# directly, press [F1]key and enter PT#. ※ 2)The coordinate data can be searched by press [F1]key. ※ 3)The coordinate data can be searched by press [F2]key and en- ter PT#. ※ 4)Point number should be entered again if entered number don’t comply with required point number or coordinate data. ※ 5)As normal, rotating the horizontal circle and make dHR reach 0. Setting the prism as this direction. Make the dHD and dZ reach 0 by distance measured. ※ 6)Switch A&D and NEZ by press [F3]key. After layout, collimate the layout point and measure its coordinate, and then confirmits accuracy, the meaasurement mode can be selected.
- 65. 55 7.6 Setting a new point New pointis required for example when a layout point cannot be sighted fromexisting control point. 7.6.1Side short method Set up the instrument at a known point, and measure the coordinate of the new points by the side short method. Operating procedure Operation Display ② Press[F2] key. [EDM] [F1]③ Press [F1]key. ④ Press [F2]key to display the list of coordinate date file. ※ 1) [ALL] or [EDM] ① Press [EDM] key from lay- out menu 1/2 to get the layout menu 2/2. [F2] [F2] Layout 2/2 F1: SELECT A FILE F2: NEW POINT F3: GRID FACTOR NEW POINT F1: SIDE SHORT F2: RESECTION SELECT A FILE FN: INPT LIST --- ENT > @FOIF_001/0024 FOIF_001/0018 FOIF_001/0016 --- VIEW --- ENT FOIF_001 > @FOIF_001 FOIF_001 --- VIEW --- ENT ⑤ Scroll file list by pressing [▲]key or[ ]key and se- lect a file to use.※ 2) ▲
- 66. 56 Operating procedure Operation Display [F3] ⑦Press the[F1] key , and enter the new point name PT#. Press the [F4] key. [F1] Enter PT# [F4] [F4]⑥ Press the[F4] key. The file will be set. SIDE SHOT PT#: INPT SCRH --- ENT ⑧ Enter R.HT in the same way. REFLECTOR HEIGHT INPUT R.HT 0.000 m INPT --- --- ENT ⑨Collimate the new point, and press the[F3]key. Distance measuring starts. REFLECTOR HEIGHT INPUT R.HT 1.000 m Sight? YES NO dN: 56.287m dE: 986.321 m dZ: 123.345 m >REC? [YES] [NO] SIDE SHOT PT#: F002 INPT SCRA --- ENT HR: 12°34′56″ HD* < m VD: m >Measuring... < Complete > ⑩ Press[F3] key. The name and coordinate value are stored into COORD.DATA. The input menu for next new point is displayed. PT# is automatically incremented. [F3] ※ 1)Press [F1] key and enter a file name. ※ 2)The coordinate data can be searched by press[F1] key. ※ 3)An error code will be displayed when the internal memory is full.
- 67. 57 7.6.2 Resection method Set up the instrument at a new point, and calculate the coordinate of the new point using the coordinate data ofup to five known points and the measuements make to these points. By following observation, resection is possible: *Resection by distance measurement: 2 or more known points must be measured. NOTE:the new point can not be on the circumcircle formed by the known points,otherwise the coordinate ofnew point is dubious and inseverable. Known pointA Known point B Known point C Known point D (Max. 5 points) New point (Instrument) Operating procedure Operation Display [ ] Layout 2/2 F1: SELECT A FILE F2: NEW POINT F3: GRID FACTOR ① Press[ ] key fromthe lay- out menu 1/2 to get the layout menu 2/2. ▲ ▲
- 68. 58 Operating procedure Operation Display [F2] [F2] [F1] EnterINS.HT [F4] ② Press [F2]key. ③ Press [F2]key. ④ Press [F1]key. and enter the new point number. Press [F4] key.※ 1) ⑥ Press [F1]key, and enter the known point A.Press [F4] [F1] Enter PT# [F4] N001# PT#: F001 INPT LIST NEZ ENT INSTRUMENT HEIGHT INPUT I.HT: 0.000m INPT --- --- ENT ⑤ Press [F1]key. and enter the instrument height. Press [F4] key.※ 2) NEW POINT F1: SIDE SHORT F2: RESECTION NEW POINT PT# : INPT SRCH SKP ENT REFLECTOR HEIGHT INPUT R.HT= 0.000m INPT --- --- ENT REFLECTOR HEIGHT INPUT R.HT: 1.000m >SIGHT? YES NO ⑦Press [F1]key and enter re- flector height. Press[F4] key. [F1] Enter PT# [F4] [F1] Enter R. HT [F4]
- 69. 59 Operating procedure Operation Display Collimate [F4] [F1] ⑧Collimate the known point A, and press[F3] key. ⑨ Known point B entering display will be shown. ⑩ Same as procedure ⑥ - ⑧ pro- ceed to the known point B. When three points have been neasured by the [F3]key, the RE- SIDUAL ERROR will be calculated. ※ 3) ⑿ Press the [F1]key to measure other points. Maximum five points can be measured. Collimate [F3] N002# PT#: INPT LIST NEZ ENT ⑾ Select GRID FACTORY for cal- culation of RESIDUAL ERROR by press [F1]or [F2]key. [F2]Update GRID FACTORY auto- matically by current Occ. point height. ⒀ Same as procedure ⑥ - ⑧ pro- ceed to the known point C. [F1] HR: 1°23′45″ HD* < m VD: m >Measureing... < Complete > SELT GRID FACTOR F1: USE LAST DATA F2: CALC MEAS DATA RESIDUAL ERROR dHD= 0.120m dZ = 0.003m NEXT --- G.F. CALC N003# PT# : INPT LIST NEZ ENT HR: 1°23′45″ HD* < m VD: m >Measuring ,... < Complete >
- 70. 60 Operating procedure Operation Display [F4] ⒁ Display the measured value. ⒂ Press the[F4]key. Standard De- viation will be shown. ⒃ Press the[F2] key. Standard De- viations of each coordinate will be shown. The display will be changed alter- nately by pressing [F2] key. ⒅Press the[F3] key.The newpoint data will be stored into the coordi- nate data file and the value of occupied. Coordinate data will change to that of the calculated NEW POINT. The display returns to new point menu. ※ 4) [F2] Standard Dev =0.000sec --- NEXT --- NEZ ⒄ Press the [F4]key. Coordinate data of the newpoint will be shown. [F3] HR: 1°23′45″ HD: 1.234 m VD: 0.001 m NEXT --- --- CALC SD(n) = 1.234m SD(e) = 0.001m SD(z) = 0.000m -- NEXT --- NEZ N: 1.234m E: 0.001m Z: 0.000m REC? [YES] [NO] NEW POINT F1: SIDE SHORT F2: RESECTION [F4] ※1)When there is no needto memorize thenewpoint data, press the [F3] key. ※2)Toenter the knownpoint coordinatedataby direct key inputting, press the [F3] key. ※3)RESIDUAL ERROR dHD(Horizontal distance between two known points)=Measuredvalue-Calculatedvalue dZ=(Z coordinate ofthe newpoint calculatedfromknown point A)-(Z coordinateofthe newpoint calculatedfrom knownpoint B) ※4)When [F3] key pressed instep4,in this case, thenewpoint data is not storedinto the coordinatedata file, onlythevalue of occupiedcoordinate datachanges to that of the calculatedNEWPOINT.
- 71. 61 7.7 Setting the GRID FACTOR Calculation Formula 1.Elevation Factor = R R+ELEV R: The average radius of the earth ELEV. : The elevation above mean sea level 2.Scale Factor Scale Factor: Scale Factor at the surveying station 3.Grid Factor Grid Factor=Elevation Factor × Scale Factor Distance Calculation 1.Grid Distance HDg=HD × Grid Factor HDg: Gird distance HD: Ground distance 2.Ground Distance HD= After the Grid Factor setting is finished, it is used for layout and other coordinate measurement programs. HDg Grid Factor Operating procedure Operation Display ① Displayed the layout menu 2/2. Layout 2/2 F1: SELECT A FILE F2: NEW POINT F3: GRID FACTOR
- 72. 62 Operating procedure Operation Display [F1] enter Elevation [F3] ※ 1)Press[F4] key if don’t need to changed the Grid Factor. ※ 2)Elevation enter range:-9999m ~ +9999m。 GRID FACTOR =1.000000 > MODIFY? YES NO GRID FACTOR ELEV. > 0 m SCALE : 1.000000 INPT --- --- ENT GRID FACTOR ELEV. : 1000 m SCALE> 1.000000 INPT --- --- ENT GRID FACTOR =1.000685 ② Press [F3]key. ③ Press [F3]key.※ 1) ④ Press [F1]key and enter Elevation.※ 2) ⑤ Press [F1]key and enter Scale Factor. Press [F4]key. ※ 3) ⑥Grid Factoris displayed and display returns to Layout menu. ※ 4) [F3] [F1] enter Scale Factor [F4] ※ 3)Scale enter range:0.990000 ~ 1.010000。 ※4) If you do want to modify the grid factor, following the procedures from ② to ⑤ to do that.
- 73. 63 8. Data collection The RTS238/538 is able to store the measured data into the internal memory. The internal memory is shared by the measured data files and the coordinate data files. Measured data: The collected data is memorized into a files. The number of measurement points: ( In case not using the internal memory in layout mode) MAX. 8000 points. Because the internalmemory covers both data collection mode and lay- out mode, the number of measurement points will be decreased when the layout mode is used. 1)When turning off the power, ensure that you are in the basic measurement mode. This ensures completion of the memory access process and avoids possible damage to the stored data. 2)It is recommended for safety to charge the battery beforehand and prepare fully charged spare batteries. 1) Select data collection file, it stored the collected data. 2)Select coordinate data file. The Occ. point coordinate data and backsight coordinate data could be recalled. 3) Setting occupied point, include instrument height and Occ.point PT# and coordinate. 4) Setting backsight point and backsight angle. 5) Setting measured point prismheight. Executing data collection. Stor- ing into internal memory. 8.1 Operating procedure
- 74. Normalmeasurement mode SELECT A FILE FN: INPT LIST --- ENT MENU 1/2 F1: LAYOUT F2: DATA COLLECT F3: PROGRAMS Set file COLLECT 1/2 F1: OCC. PT# INPT F2: BACKSIGHT F3: FS/SS COLLECT 2/2 F1: SELECT A FILE F2: PCODE INPUT Occ.PT#input Backsight FS/SS Settingbacksight point .Referto 8.5 Settingoccupied point.Referto8.4 Executingdata collction.Referto 8.6 Select afile PCODEinput EditingPCODE library.Referto8.8 Selectinga coordinate file.Refer to8.3 Datacollectionmenu1/2 Datacollectionmenu2/2 MENUESC F2 ▲ ▲ 64
- 75. 65 8.2 Selecting a file for data collection Select a file before beginning data collection. The measured data could be stored into the selected file. Operating procedure Operation Display ① Press [MENU]key enter the menu display. ② Press[F2]key enter data collection. [MENU] [F2] ③ Press[F2] key to display the list of file. ※ 1) ④ Scroll file list by pressing [▲]or [ ] key and select a file to use.※ 2) MENU 1/2 F1: LAYOUT F2: DATA COLLECT F3: PROGRAMS [F4]⑤Press [F4]key. The file will be set. COLLECT 1/2 F1: OCC. PT# INPT F2: BACKSIGHT F3: FS/SS [F2] ※ 1)If you want to input file name directly, press[F1] key and enter a file name. ※ 2)When a file has been selected already, “*”mark is indicated on left of current file name. SELECT A FILE FN: INPT LIST --- ENT > *FDATA_01/0012 FDATA_02/0102 FDATA_03/0008 --- VIEW --- ENT FDATA_01/0012 > *FDATA_02/0102 FDATA_03/0008 --- VIEW --- ENT ▲ [ ]▲
- 76. 66 8.3 Selecting a coordinate file for data collection When coordinate data in a coordinate date file are used for occupied point or backsight point, select a coordinate file beforehand. Operating procedure Operation Display ① Press [EDM] key enter data collect menu 2/2. Press[F1] key to select SELECT A FILE. ② Press [F2] key. [MENU] [F1] [F2] ③ Press[F2] key to display the list of file.※ 1) ④ Scroll file list by pressing [▲]or [ ] key and select a file to use.※ 2) COLLECT 2/2 F1: SELECT A FILE F2: PCODE INPUT [F4]⑤ Press [F4]key. The file will be set. > @FOIF_01/0012 FOIF_02/0102 FOIF_03/0008 --- VIEW --- ENT COLLECT 2/2 F1: SELECT A FILE F2: PCODE INPUT [F2] ※ 1)If you want to input file name directly, press[F1] key and enter a file name. ※ 2)When a file has been selected already, “@”mark is indicated on left of current file name. FOIF_01/0012 > @FOIF_02/0102 FOIF_03/0008 --- VIEW --- ENT [ ] SELECT A FILE FN: INPT LIST --- ENT ▲ ▲
- 77. 67 8.4 Occupied Point 1) Setting the coordinate data fromthe internal memory. Operating procedure Operation Display ②Press[F1] key ,displays PT# input menu. [F1] [F3] [F2] ※ 1)If you want to input PT# directly, press [F1]key and enter PT#. ③ Press[F1] key. ④ Press[F2] key to display the list of PT#.※ 1) ⑥ Enter Ins. Hi, PCODE,Press [F3] key. ※ 4) [F4] ※ 2)The coordinate data can be searched by press [F1]key. [F4] ① Make sure the displaying is data collect menu. ※ 3)The coordinate data can be searched by press [F2]key and enter PT#. MENU 1/2 F1: LAYOUT F2: DATA COLLECT F3: PROGRAMS PT# > PCODE : Ins.Hi : 1.000 m INPT SRCH REC NEZ OCC. PT PT#: INPT LIST --- ENT > F001 F002 F003 VIEW SRCH --- ENT PT# : F001 PCODE : SYG Ins.Hi >1.000 m INPT SRCH REC NEZ ⑤ Scroll PT# list by pressing [▲]or [ ] key and select PT#.Press [F4]key. ※ 2)※ 3) ※ 4)If the input number is 0-49, it should be ID of PCODE in PCODE library. ▲
- 78. 68 2) Direct key input Operating porcedure Operation Display ②Press[F1] key ,displays PT# input menu. [F1] [F3] [F4] [F1] [F4] ③ Press[F4](NEZ)key . ④Press [F1]key, enter the coor- dinate data. Press[F4] key. ⑥ Enter Ins. Hi, PCODE, press [F3]key. ① Make sure the displaying is data collect menu. COLLECT 1/2 F1: OCC. PT# INPT F2: BACKSIGHT F3: FS/SS PT# > ID : Ins.Hi : 1.000 m INPT SRCH REC NEZ N > 0.000m E 0.000m Z 0.000m INPT --- --- ENT N 123.456m E 987.654m Z= -1.68m INPT --- --- ENT PT# :F001 ID :SYG Ins.Hi > 1.000 m INPT SRCH REC NEZ OCC. PT PT# : INPT ENT ⑤ Press [F4]key, input the PT#. Press[F4] key.※ 1) ※ 1)When the coordinate inputting finished, the instrument displays the PT# input menu.
- 79. 69 8.5 Backsight Point 1) Setting the coordinate data fromthe internal memory Make sure the mode is data collect. Operating procedure Operation Display [F2] [F4] [F2] ※ 1)The coordinate data can be searched by press [F1]key. BS# > PCODE: Ref.Hr: 0.000m INPT BS MEAS 0SET BACK SIGHT PT# :F002 INPT LIST --- ENT BACK SIGHT PT# : F002 INPT LIST --- ENT BACK SIGHT PT# : INPT LIST NE ENT [F4] ※ 2)The coordinate data can be input directly by press[F3](NE)key. ① Press[F2] key. ② Press[F2] key. ③ Press[F1] key and enter PT#.※ 1)※ 2) ④ Press[F4] key. ⑤ Press[F4] key. [F1] Input PT# BACKSIAHT HL :283°25′33″ >SightLz YES NO⑥ Collimate backsight point, press [F3]key. The display re- turns to the data collect menu. Collimate backsight point [F3]
- 80. 70 2) Direct key input of coordinate data. Operating procedure Operation Display ※ 1)Pressing the[F3] key each time,the input method changes as direct key input ofsetting angle, setting fromthe coordinate data stored in the internal memory, direct key input of coordinate data alternatively. Make sure the mode is backsight point. [F2] [F2] [F4] ① Press[F1] key, enter PT#, PCODE, Ins.Hi. ② Press[F2] key.※ 1) ③ Press[F3](NE) key.※ 1) ⑤ Press[F4] key. ⑥ Collimate backsight point, press [F3]key. The display re- turns to the data collect menu. [F1] [F4] Collimate backsight point [F3] BS# > PCODE: Ref.Hr: 0.000m INPT BS MEAS 0SET BACK SIGHT PT# : INPT LIST NE ENT BACK SIGHT HL :283°25′33″ >Sight? YES NO BACK SIGHT N > 0.000m E : 0.000m INPT LIST AZ ENT BACK SIGHT N: 123.450m E = 987.640m NUM --- --- ENT ④ Press[F1] key. [F3]
- 81. 71 3) Setting the direction angle Operating procedure Operation Display ※ 1)Pressing each time the[F3] key,the input method changes as direct key input ofsetting angle, setting fromthe coordinate data stored in the internal memory, direct key input of coordinate data alternatively Make sure the mode is layout. [F2] [F3] BACK SIGHT PT# : INPT LIST NE ENT [F1] [123.1618] [F4] ① After enter PT#, PCODE, Ref.Hr, press[F2] key. ② Press[F3] key.※ 1) ③ Press[F3](AZ) key. ④ Press[F1] key, input the direction angle. 123°16′18″ Press[F4] key. ⑥ Collimate backsight point, press [F3]key.The displayre- turns tothe data collect menu. [F3] BACK SIGHT HR :123°16′18″ >Sight? YES NO Collimate backsight point [F3] BACK SIGHT N > 0.000m E : 0.000m INPT LIST AZ ENT BACK SIGHT HR : INPT LIST PT# ENT BACK SIGHT HR =123.1618 NUM --- --- ENT ⑤ Press[F4] key. [F4]
- 82. 72 8.6 Operational Procedure of “Data Collect” Operating procedure Operation Display [F3] [F2] Make sure the mode is data collect. ① Press[F3] key. ② Press[F1] key and input PT#, ID (point code),Ref.Hr. Press [F3] key. ※ 1) ③Press[F2](HD)key to choose the formate of data collect. The data is record automatically aftermeasured. ※ 2) ④ The display changes to next point. PT# is automatically incremented. Press[F4] key. Measur- ing starts in the same measuring for- mate of the previous point.※ 3) [F1] [F3] ※ 1)When the mark “>”is located ID, ID can be input directly, or input by inputting a registernumber linked with PCODE Library.To show the list of PCODE library, press the [F2] (SRCH) ※ 2)VH means the measured data is in angle format, the HD means the data is in angle and distance format, NEZ means the data is in coordinate format. ※3)Press F4 (AUTO) to measure next point, the pT# will increase one automatically, the PCODE will clear, and the Ref.Hr will not change, acoording to your need to edit every item. PT# > PCODE : 0 Ref.Hr : 0.000m INPT SRCH MEAS ALL PT# :F001 ID : FOIF Ref.Hr : 1.000m VH HD NEZ OFST HR : 0°00′00″ HD: m VD* <Meauring> < Complete > PT# :F002 ID :FOIF Ref.Hr : 1.000m INPT SRCH MEAS ALL
- 83. 8.7 Data Collect Offset Measurement mode For RTS600 series total station,Offset measurement has four measuring methods: 1.Angle offset measurement 2. Distance offset measurement 3. Plane offset measurement 4. Column offset measurement 8.7.1 Angle offset measurement This programis used to measure the point where is difficult to set prism. Place the prism at the same horizontal distance from the instrument as that of point A0 to measure. When measuring coordinates of ground point A1: Set the instrument height/prismheight. When measuring coordinates ofpoint A0: set the instrument height only. (Set the prismheight to 0). Prismheight Instrument height Occ.Point Prism A0 A1 73 Operating procedure Operation Display [F3]① Press the [F3](MEAS) key. PT# :F001 ID >0 Ref.Hr : 0.000m INPT SRCH MEAS ALL VH HD NEZ OFST
- 84. 74 ⑦Each time pressing [DISP] key, the third line display changed. ※ 1) Operating procedure Operation Display [F4② Press the [F4] (OFST) key. OFFSET 1/2 F1: ANG. OFFSET F2: DIST. OFFSET F3: PLANE OFFSET OFFSET MEAS HR: 0°00′00″ HD m MEAS --- --- SET OFFSET MEAS HR: 0°00′00″ HD: 12.345m > OK? [YES] [NO] ③ Press the [F1](angle offset). ④ Collimate the prism. PT# :F002 ID >0 Ref.Hr : 0.000m INPT SRCH MEAS ALL OFFSET MEAS HR: 20°00′00″ HD: 12.345m > OK? [YES] [NO] ⑤ Press the [F1] (MEAS) key. ⑥ Rotate the instrument to col- limate the point A0. OFFSET MEAS HR: 20°00′00″ VD: 1.345m > OK? [YES] [NO] ⑧ Press the [F3] (YES) key, then to measure the next point. [F1] Collimate prism [F1] [DISP] [F3] ※ 1)The factory setting of display is horizontal distance, each time pressing [DISP] key, HD, VD, SD, N, E, Z are shown in sequence, and recorded mode is displayed mode. Collimate A0
- 85. 75 8.7.2 Distance Offset Measurement The measurement of a object point apart from a prism is possible by inputting offset horizontal distance of front and back/right and left. When measuring coordinates of ground point A1: set the instrument height and prism height. When measuring A0: set instrument height [F3]① Press the [F3] (MEAS) key. PT# :F001 ID >0 Ref.Hr : 0.000m INPT SRCH MEAS ALL VH HD NEZ OFST [F4]② Press the [F4](OFST) key. OFFSET 1/2 F1: ANG. OFFSET F2: DIST. OFFSET F3: PLANE OFFSET DisplayOperationOperating procedure Instrument height Occ.Point Prism P A0 A1 Forward HD RorL HD ○+ -○ ○+ -○ Prism height
- 86. 76 Operating procedure Display DISTANCE OFFSET INPUT RorL HD oHD: m INPT --- SKP ENT PT# :F002 PCODE: Ref.Hr : 0.000m INPT SRCH MEAS ALL PT#: F001 PCODE: 000 R.HT: 1.000m MEAS --- --- --- [F1] [F1] [F4] [F1] [F4] [F1] ※ 1)Press [F3] (SKP) key, cancel the enter data and not record. DISTANCE OFFSET INPUT FORWARD HD oHD: m INPUT --- SKP ENT ※ 2)After press [F1] key, the instrument begin measuring coordinate and record results automatically,then enter next display mode. N: 1.234m E: 1.234m Z: 1.234m >Measuring > Calculating... < Complete> Operation Collimate A0 ③ Press the [F2] key (DIST OFFSET). ④ Press the [F1] (INPT) key and enter Right or Left distance offset value, press [F4] to confirm. ※ 1) ⑤Press the [F1] (INPT) and enter forward distance offset value, press [F4] to confirm. ⑥ Rotate instrument to colli- mateA0. ⑦Press[F1] key, measuring starts. ※ 2) ⑧ Measured data is showned, and then the next measuring point is displayed, the pT# will increase one automatically, the PCODE will clear, acoording to your need to edit every item.
- 87. 77 8.7.3 Plane Offset Measurement Measuring will be taken for the place where direct measuring can not be done, for example distance or coordinate measuring for a edge of a plane. Three random points (P1, P2, P3) on a plane will be measured at first in the plane offset measurement to determine the measured plane, collimate the measuring point (P0), the instrument calculates and displays coordinate and distance value of cross point between collimation axis and of the plane. [F3] PT# : F001 PCODE >0 Ref.Hr : 0.000m INPT SRCH MEAS ALL VH HD NEZ OFST [F4] OFFSET 1/2 F1: ANG. OFFSET F2: DIST. OFFSET F3: PLANE OFFSET Prism height of P1 to P3 is set to zero automatically. P1 P3 P2 P0Edge PLANE N001# SD: m MEAS --- --- --- [F3] Operating procedure Operation Display ① Press the [F3] key (MEAS) ② Press the [F4](OFST) key. ③ Press the [F3] key (plane offset).
- 88. ※ 1)In case the calculation of plane was not successful by the mea- sured three points, errordisplays. Start measuring over again from the first point. ※ 2)Error will be displayed when the collimated direction does not cross with the determined plane. ※ 3)Each time pressing [DISP] key, HD, VD, SD, N, E, Z are shown in sequence, and the recorded mode is displayed mode. 78 ④Collimate point P1,and press the [F1] (MEAS)key to measure. Af- ter measuring, the display will show the second point measurement. ⑤ Collimate point P2,and press the [F1] (MEAS)key to measure. ⑥ Collimate point P3,and press the [F1] (MEAS)key to measure. ⑧Press the F4 (MEAS) key, the in- strument calculates and displays co- ordinate and distance value of cross point between collimation axis and of the plane.※ 1)※ 2) ⑦ Collimate the point P0 on plane edge. Collimate P2 [F1] Collimate P0 [F4] ⑨ Press [DISP] to show different display mode in sequence. ※ 3) ⑩ Press the [F3] (YES) key to con- firm and record, the display returns to the next point number in data col- lect mode. Collimate P1 [F1] Collimate P3 [F1] [DISP] [F3] PLANE N002# SD: m MEAS --- --- --- PLANE N003# SD: m MEAS --- --- --- PLANE PT# >F001 PCODE: 000 INPT SRCH --- MEAS HR : 12°34′56″ HD : 1.234m VD : 0.000m > OK? [YES] [NO] VZ : 90°00′00″ HR : 12°34′56″ SD : 1.234m > OK? [YES] [NO] PLANE PT# >F002 PCODE : INPT SRCH --- MEAS Operating procedure Operation Display
- 89. 79 8.7.4 Column Offset Measurement It is possible to measure circumscription point (P1) of column directly, the distance to the center of the column (P0), coordinate and direction angle can be calculated by measured circumscription points (P2) and (P3) The direction angle of the centerof the column is 1/2 of total direction angle of circumscription points (P2) and (P3). [F3] PT# :F001 PCODE > Ref.Hr : 0.000m INPT SRCH MEAS ALL VH HD NEZ OFST [F4] [EDM] OFFSET 2/2 F1: COLUMN OFFSET COLUMN OFFSET Center HD: m MEAS --- --- --- ③Press the [F1] (column offset) key. [F3] Operating procedure P0 P3 P1 P2 Operation Display ① Press the [F3] key (MEAS) ② Press the [F4](OFST) key, press [EDM] key to show next page.
- 90. 80 ④ Collimate the center of column P1,and press the [F1] (MEAS) key to measure N times. ⑤ Collimate the left side of the col- umn (P2) and press the [F4] (SET) key. ⑥ Collimate the right side of the column (P3) and press the [F4] (SET) key. ⑧ Press [DISP] to show different display mode in sequence. ※ 1) ⑦ The distance between the in- strument and center of the column (P0) will be calculated and showned. ※ 1)Each time pressing [DISP] key, HD, VD, SD, N, E, Z are shown in sequence, and the recorded mode is displayed mode. COLUMN OFFSET Center HD* 1.234m < Measuring> COLUMN OFFSET Right HR: 12°34′56″ --- --- --- SET COLUMN OFFSET Left HR: 12°34′56″ --- --- --- SET COLUMN OFFSET HR: 12°34′56″ HD: 1.234m > OK? [YES] [NO] COLUMN OFFSET HR: 12°34′56″ VD: 0.000m > OK? [YES] [NO] PT# :F002 PCODE > Ref.Hr : 0.000m INPT SRCH MEAS ALL ⑨ Press the [F3] (YES) key to con- firm and record, the display returns to the next point number in data col- lect mode. [DISP] [F3] Operating procedure Operation Display Collimate P1 [F1] Collimate P2 [F1] Collimate P3 [F1]
- 91. 81 8.8 Editing PCODE Library [PCODE INPUT] PCODE data can be entered into PCODE Library in this mode. A PCODE is linked with a number of 0 to 49. PCODE can be also edited in MEMORY MANAGER mode in the same way. In measurement procedure, the in- strument record the PCODE information but linked number, so you can enterPCODEdirectly,orenterlinked numberto searchPCODEin Library. [F3]① The instrment in data collect mode. [ ] ② Press [ ] to enter menu 2/2. COLLECT 2/2 F1: SELECT A FILE F2: PCODE INPUT > 000 : SYG 001 : FOIF 002 : GPS EDIT --- CLR --- ③ Press [F2] to show PCODE list, press [ ] or [ ] keys, the list will increase or decrease one by one. [F3] MENU 1/2 F1: LAYOUT F2: DATA COLLECT F3: PROGRAMS 010 : KILL > 011 = 1U 012 : NET ALPHA --- --- ENT ④ Press [F1] to edit PCODE, and press [F4] to confirm. [F1] [F4] ▲ ▲ ▲ Operating procedure Operation Display ▲
- 92. 82 9.1 Remote Elevation Measurement (REM) Two mode of with prism and without prism can be selected to measure the vertical height from target to prism or ground point, the prism or groun point should be on the vertical line from the target. ① Press the [MENU] key to menu mode. [F3]② Press the [F3] (PROGRAMS) key. PROGRAMS 1/2 F1: REM F2: MLM F3: AREA REM F1: INPUT R.HT F2: NO R.HT ③ Press the [F1] (REM) key. [F1] MENU 1/2 F1: LAYOUT F2: DATA COLLECT F3: PROGRAMS 9. Application Measurement (Programs) [MENU] 1)With prism height (h) input (Example: h=1.5m) Instrument Operating procedure Operation Display Prism Prism height VD Target K Ground point G