Downloaded 107 times


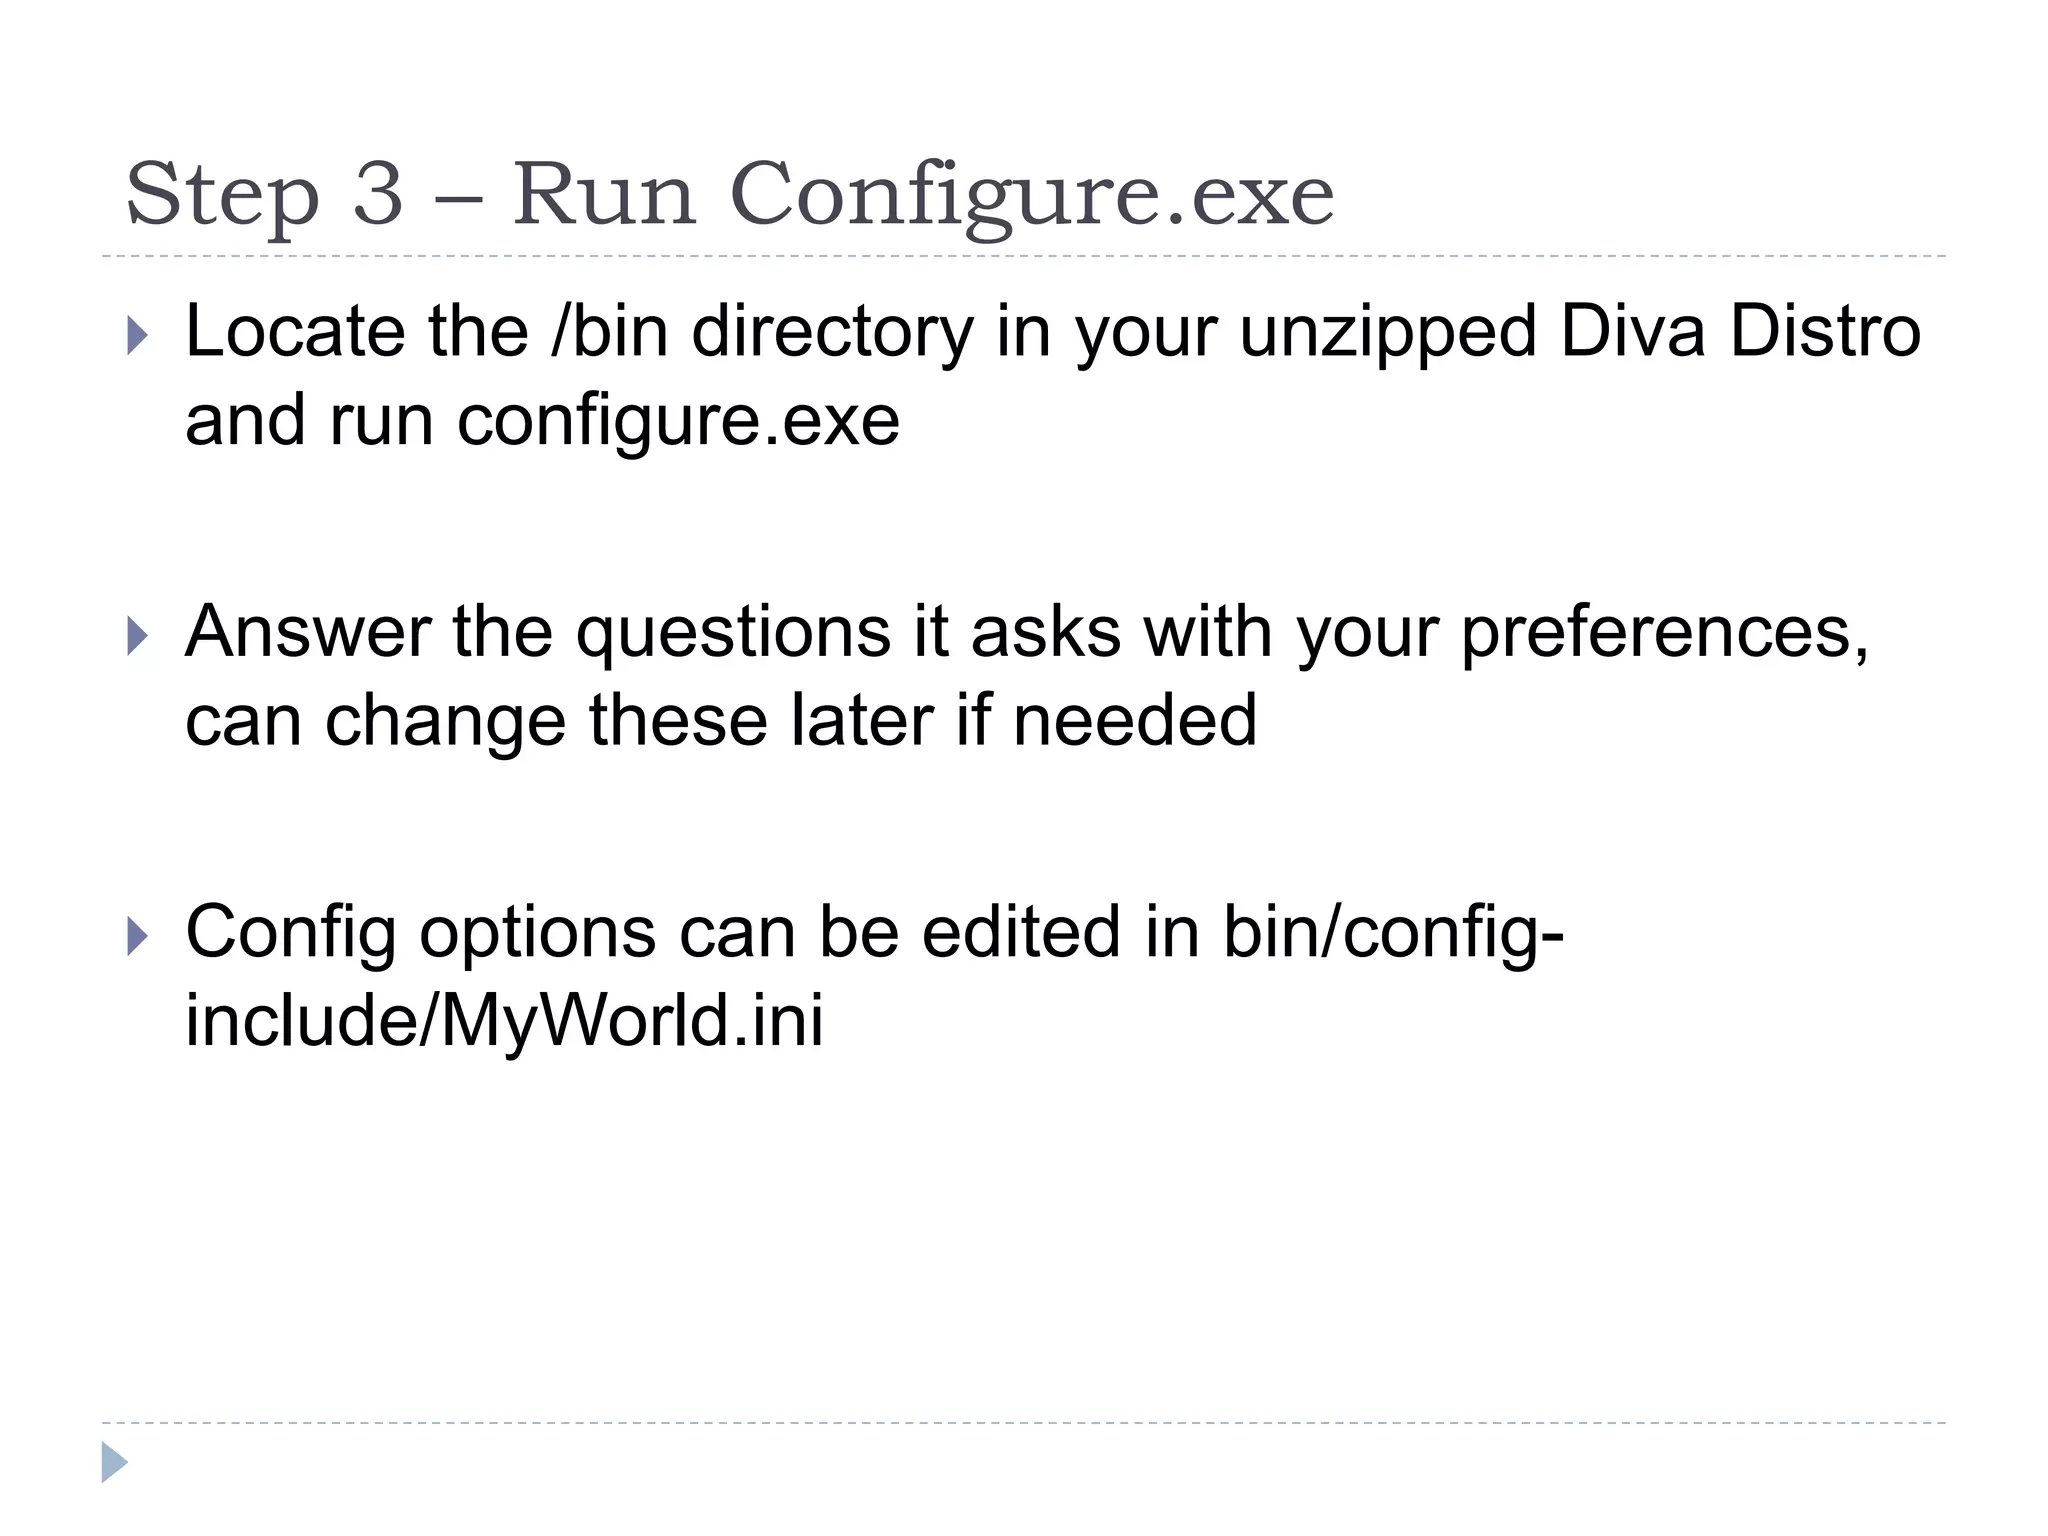
![Run Configure.exeName of your world: [Enter your region name]Enter MySQL passwordEnter your internal IP address noted in earlier stepChoose 1 for Windows or 2 for UnixHit enter through all the wifi options (leave at defaults)](https://image.slidesharecdn.com/oln2010novemberopensimstep0opensimfullinstructions-101109142240-phpapp01/75/Installing-OpenSim-Diva-Distro-to-Create-Your-Own-Private-Sim-Sandbox-39-2048.jpg)
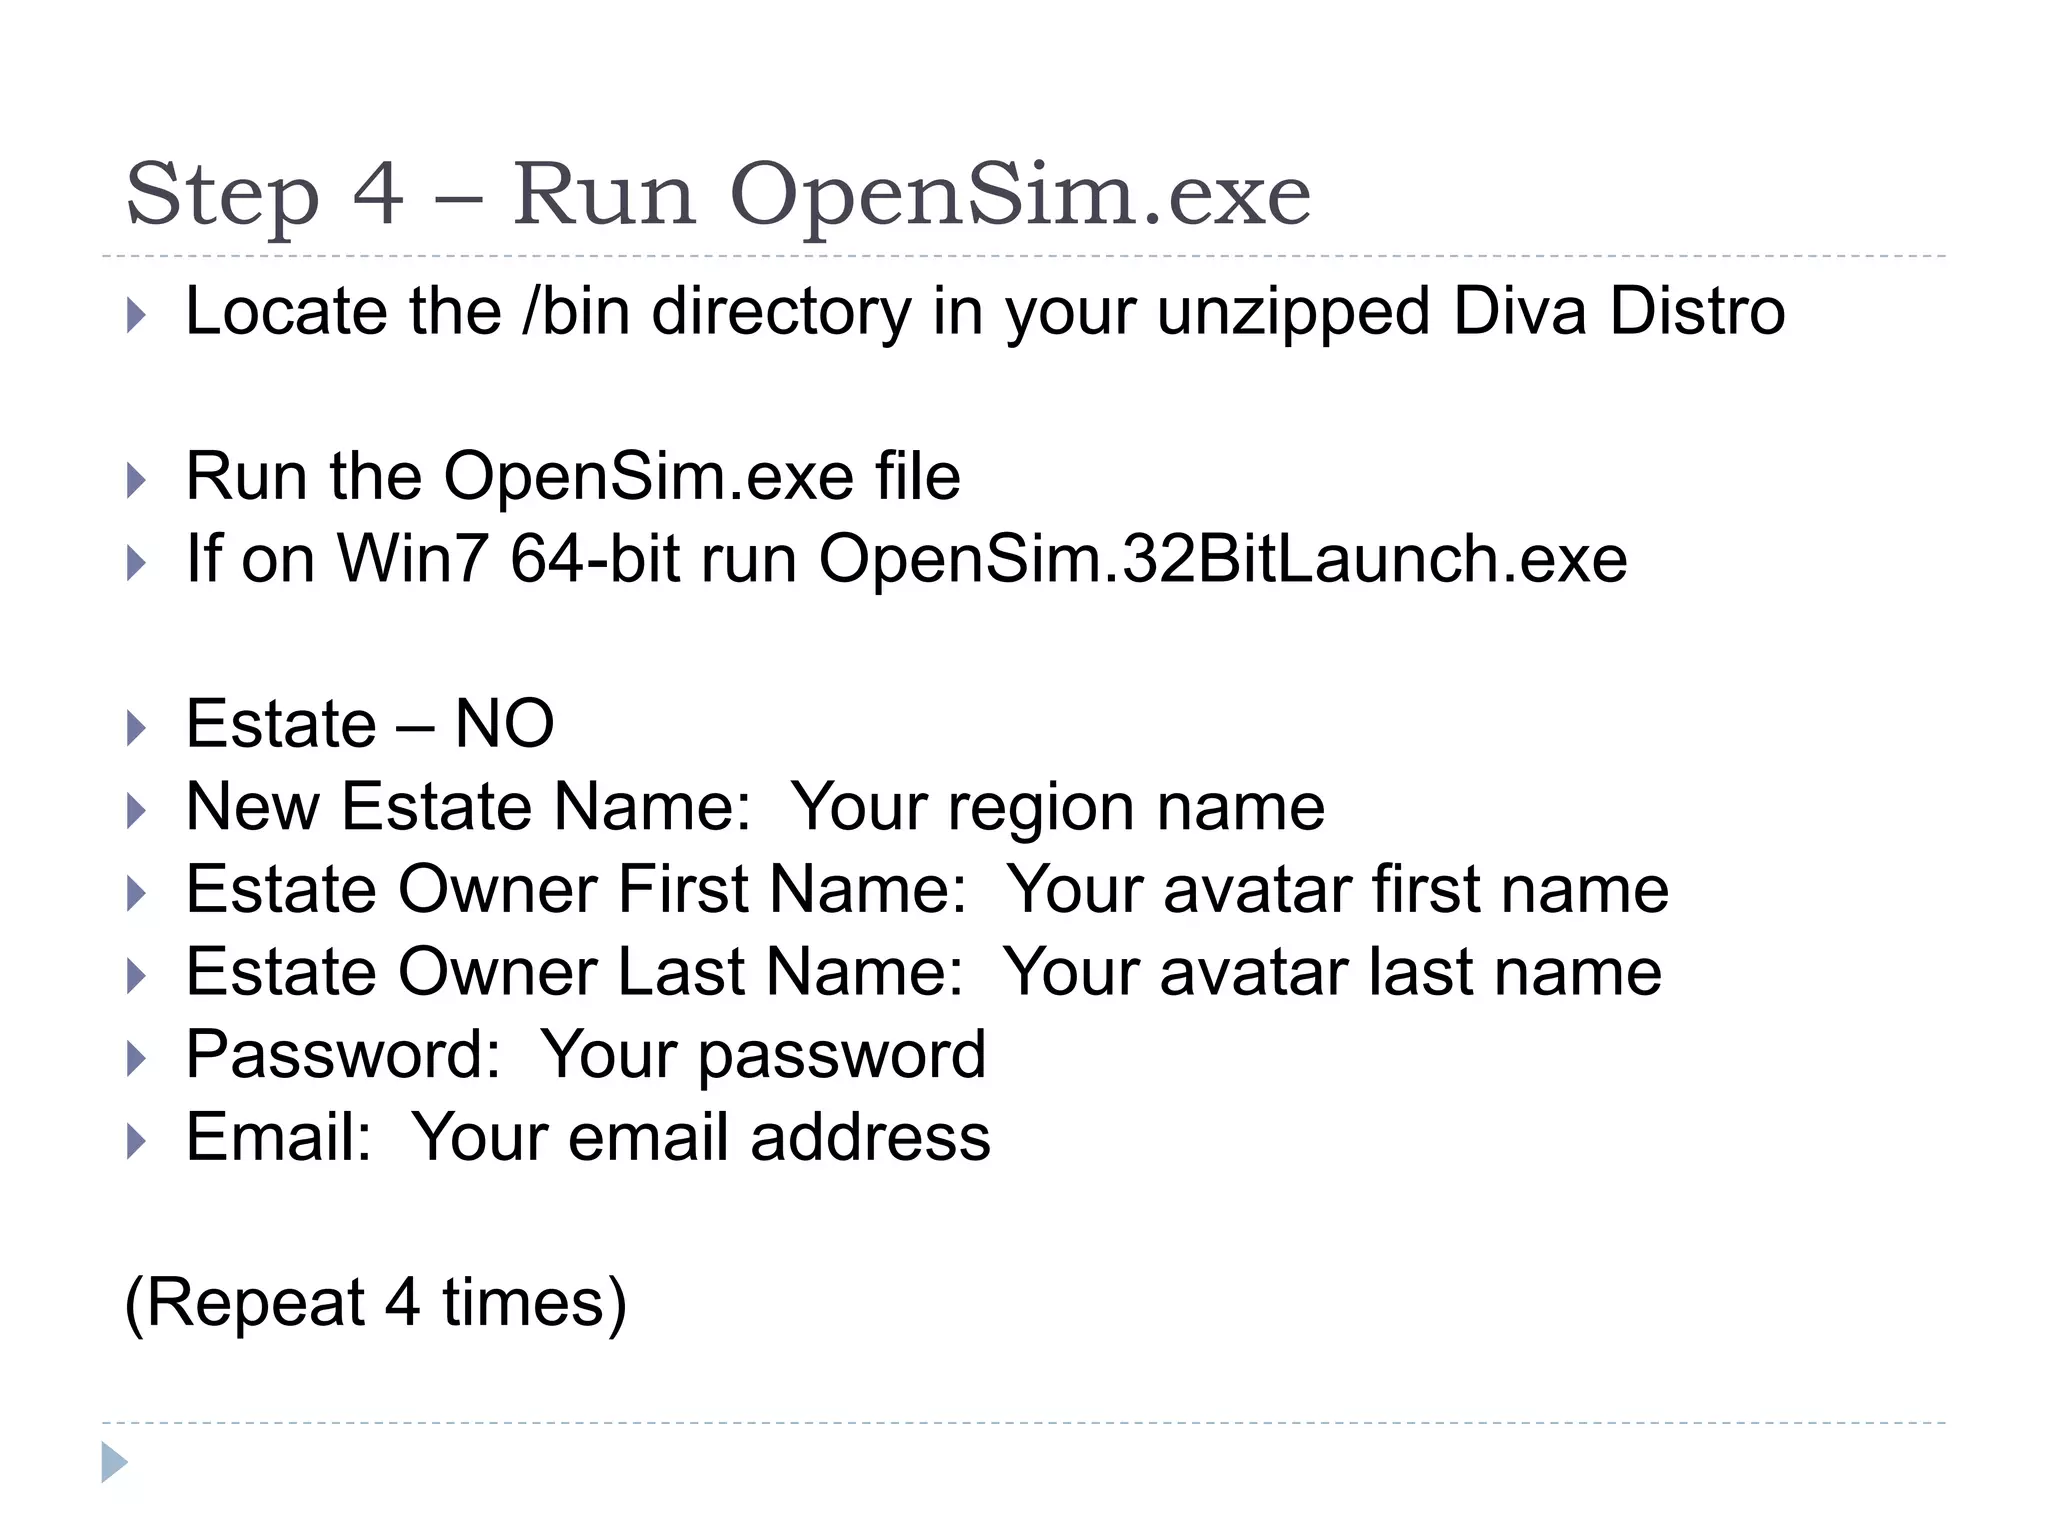
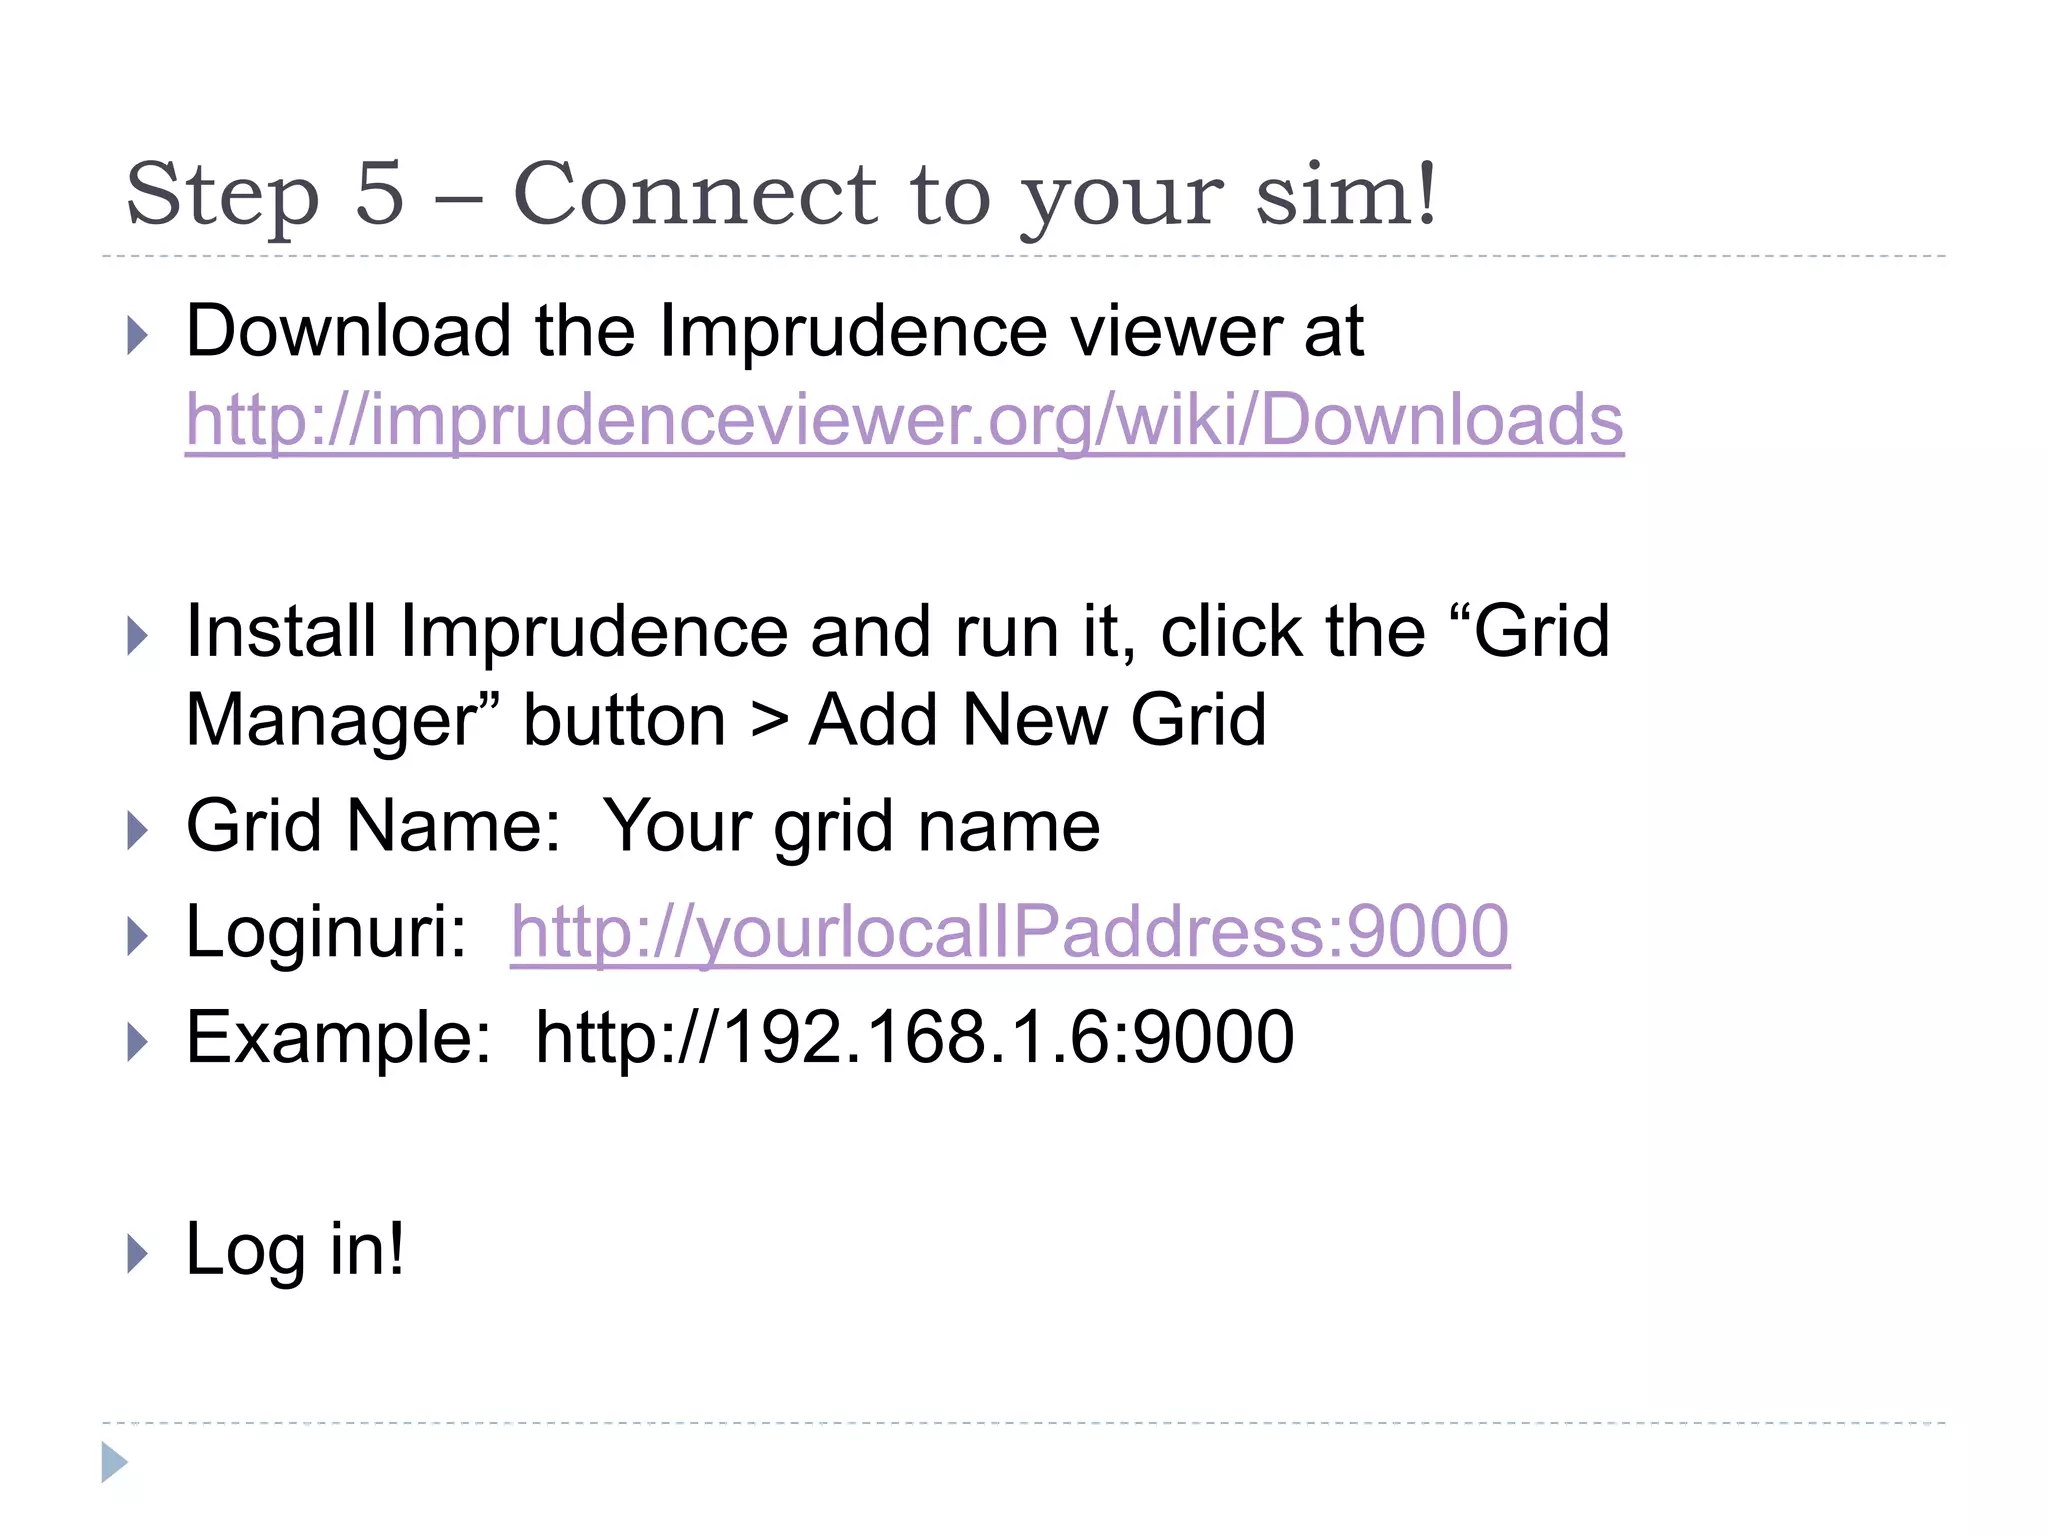

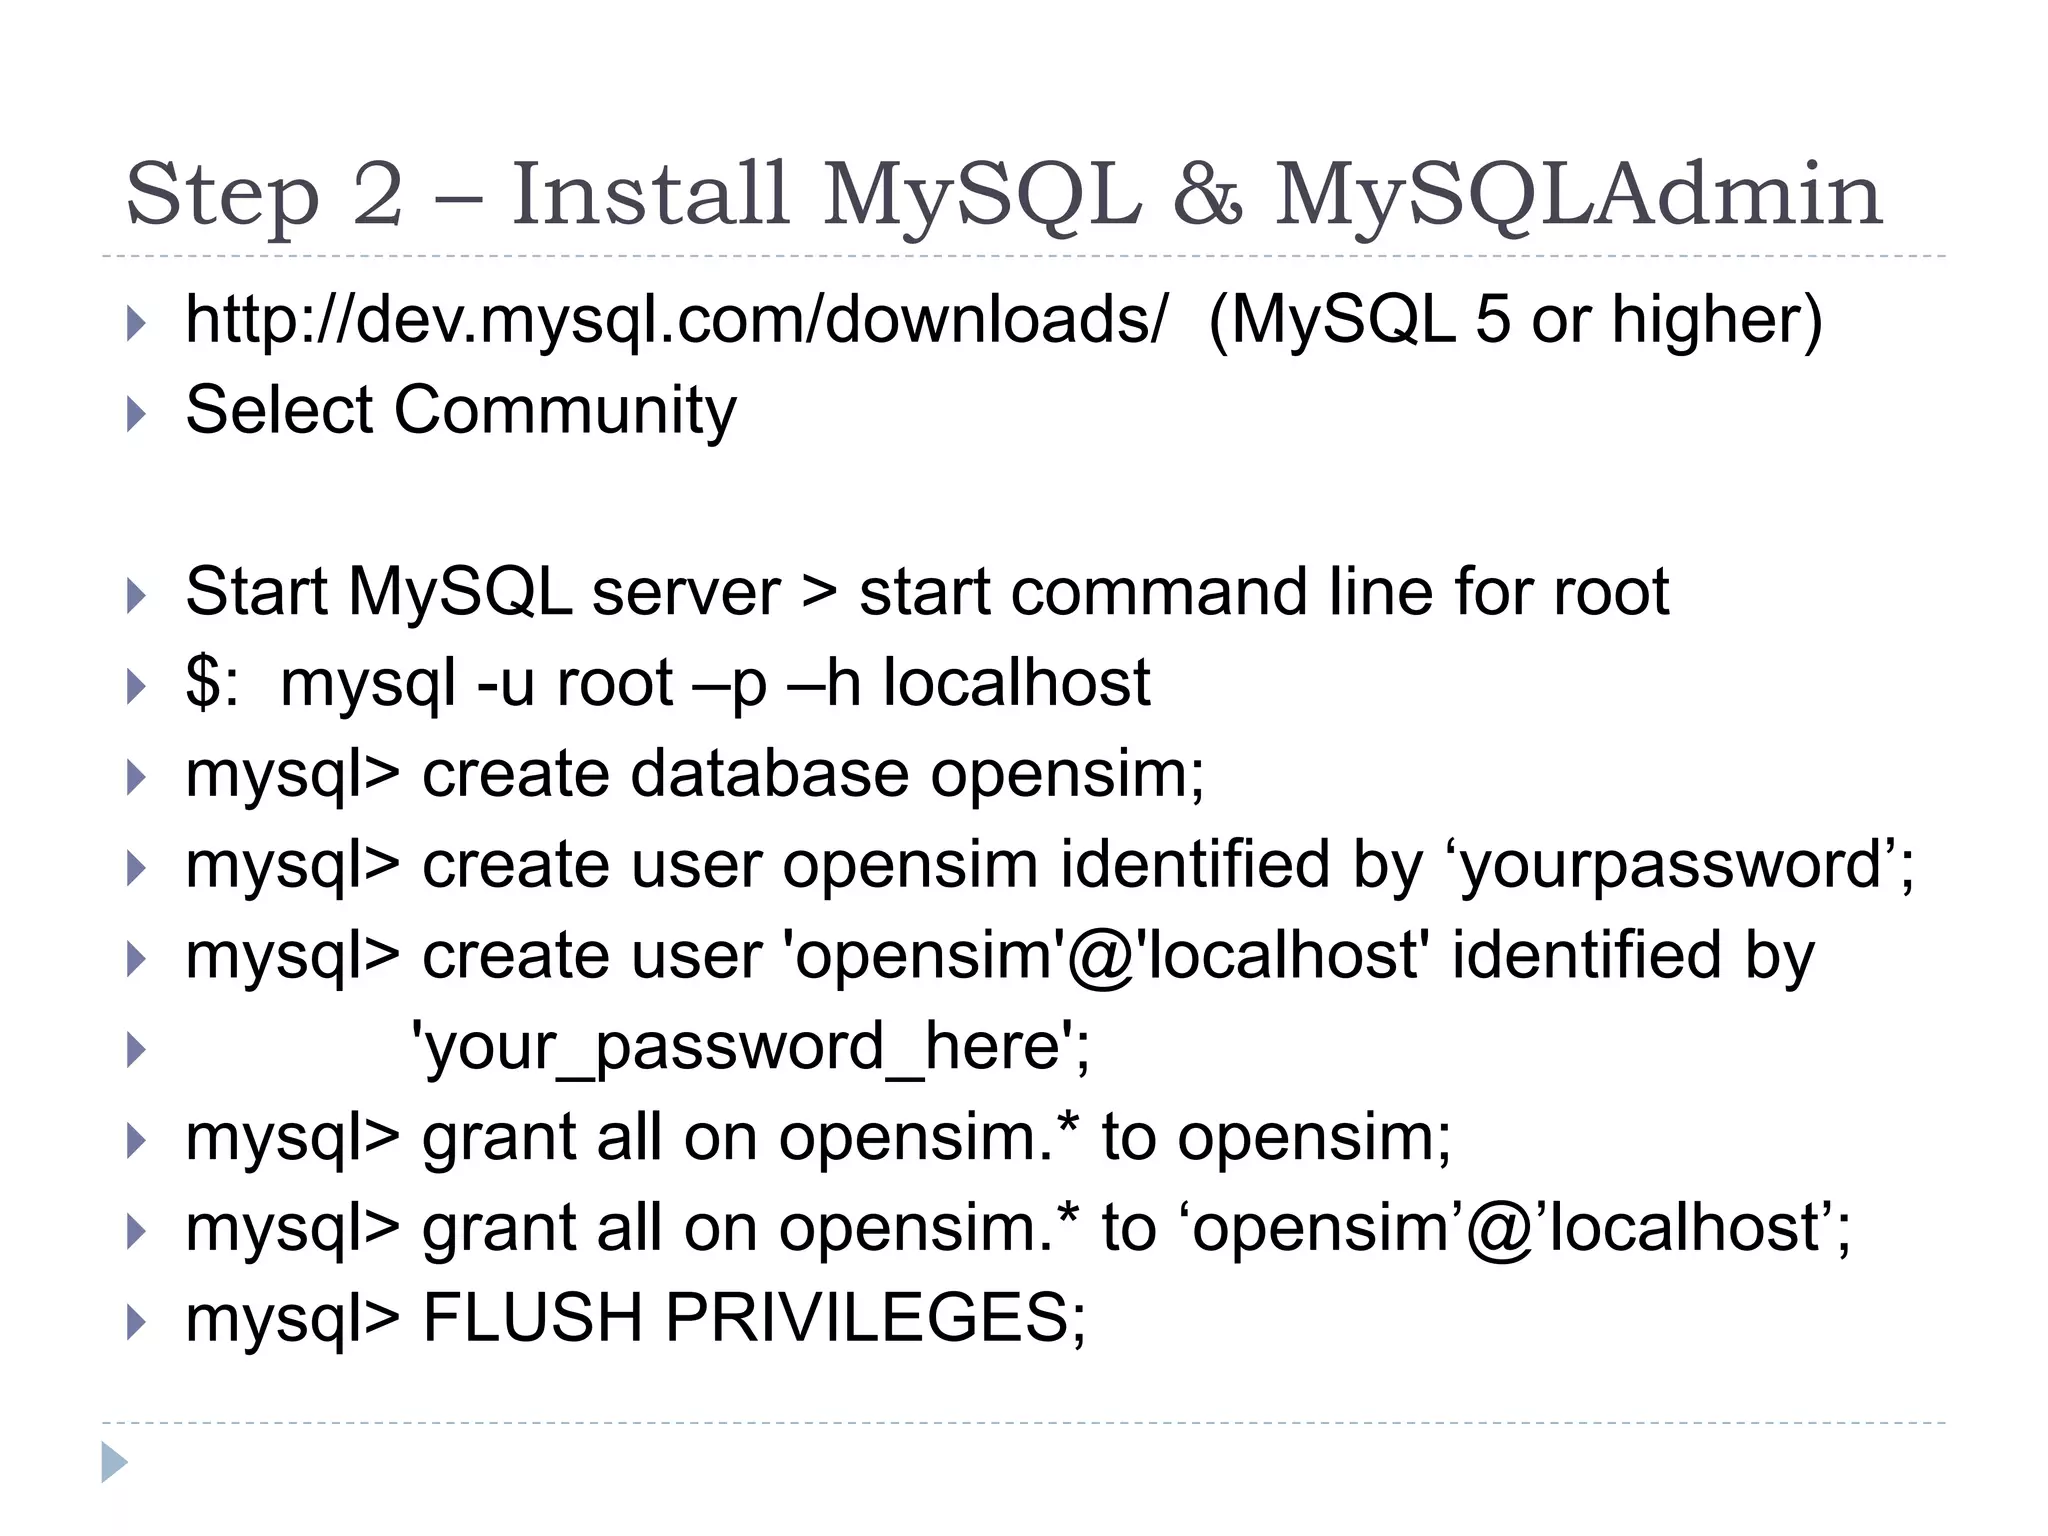
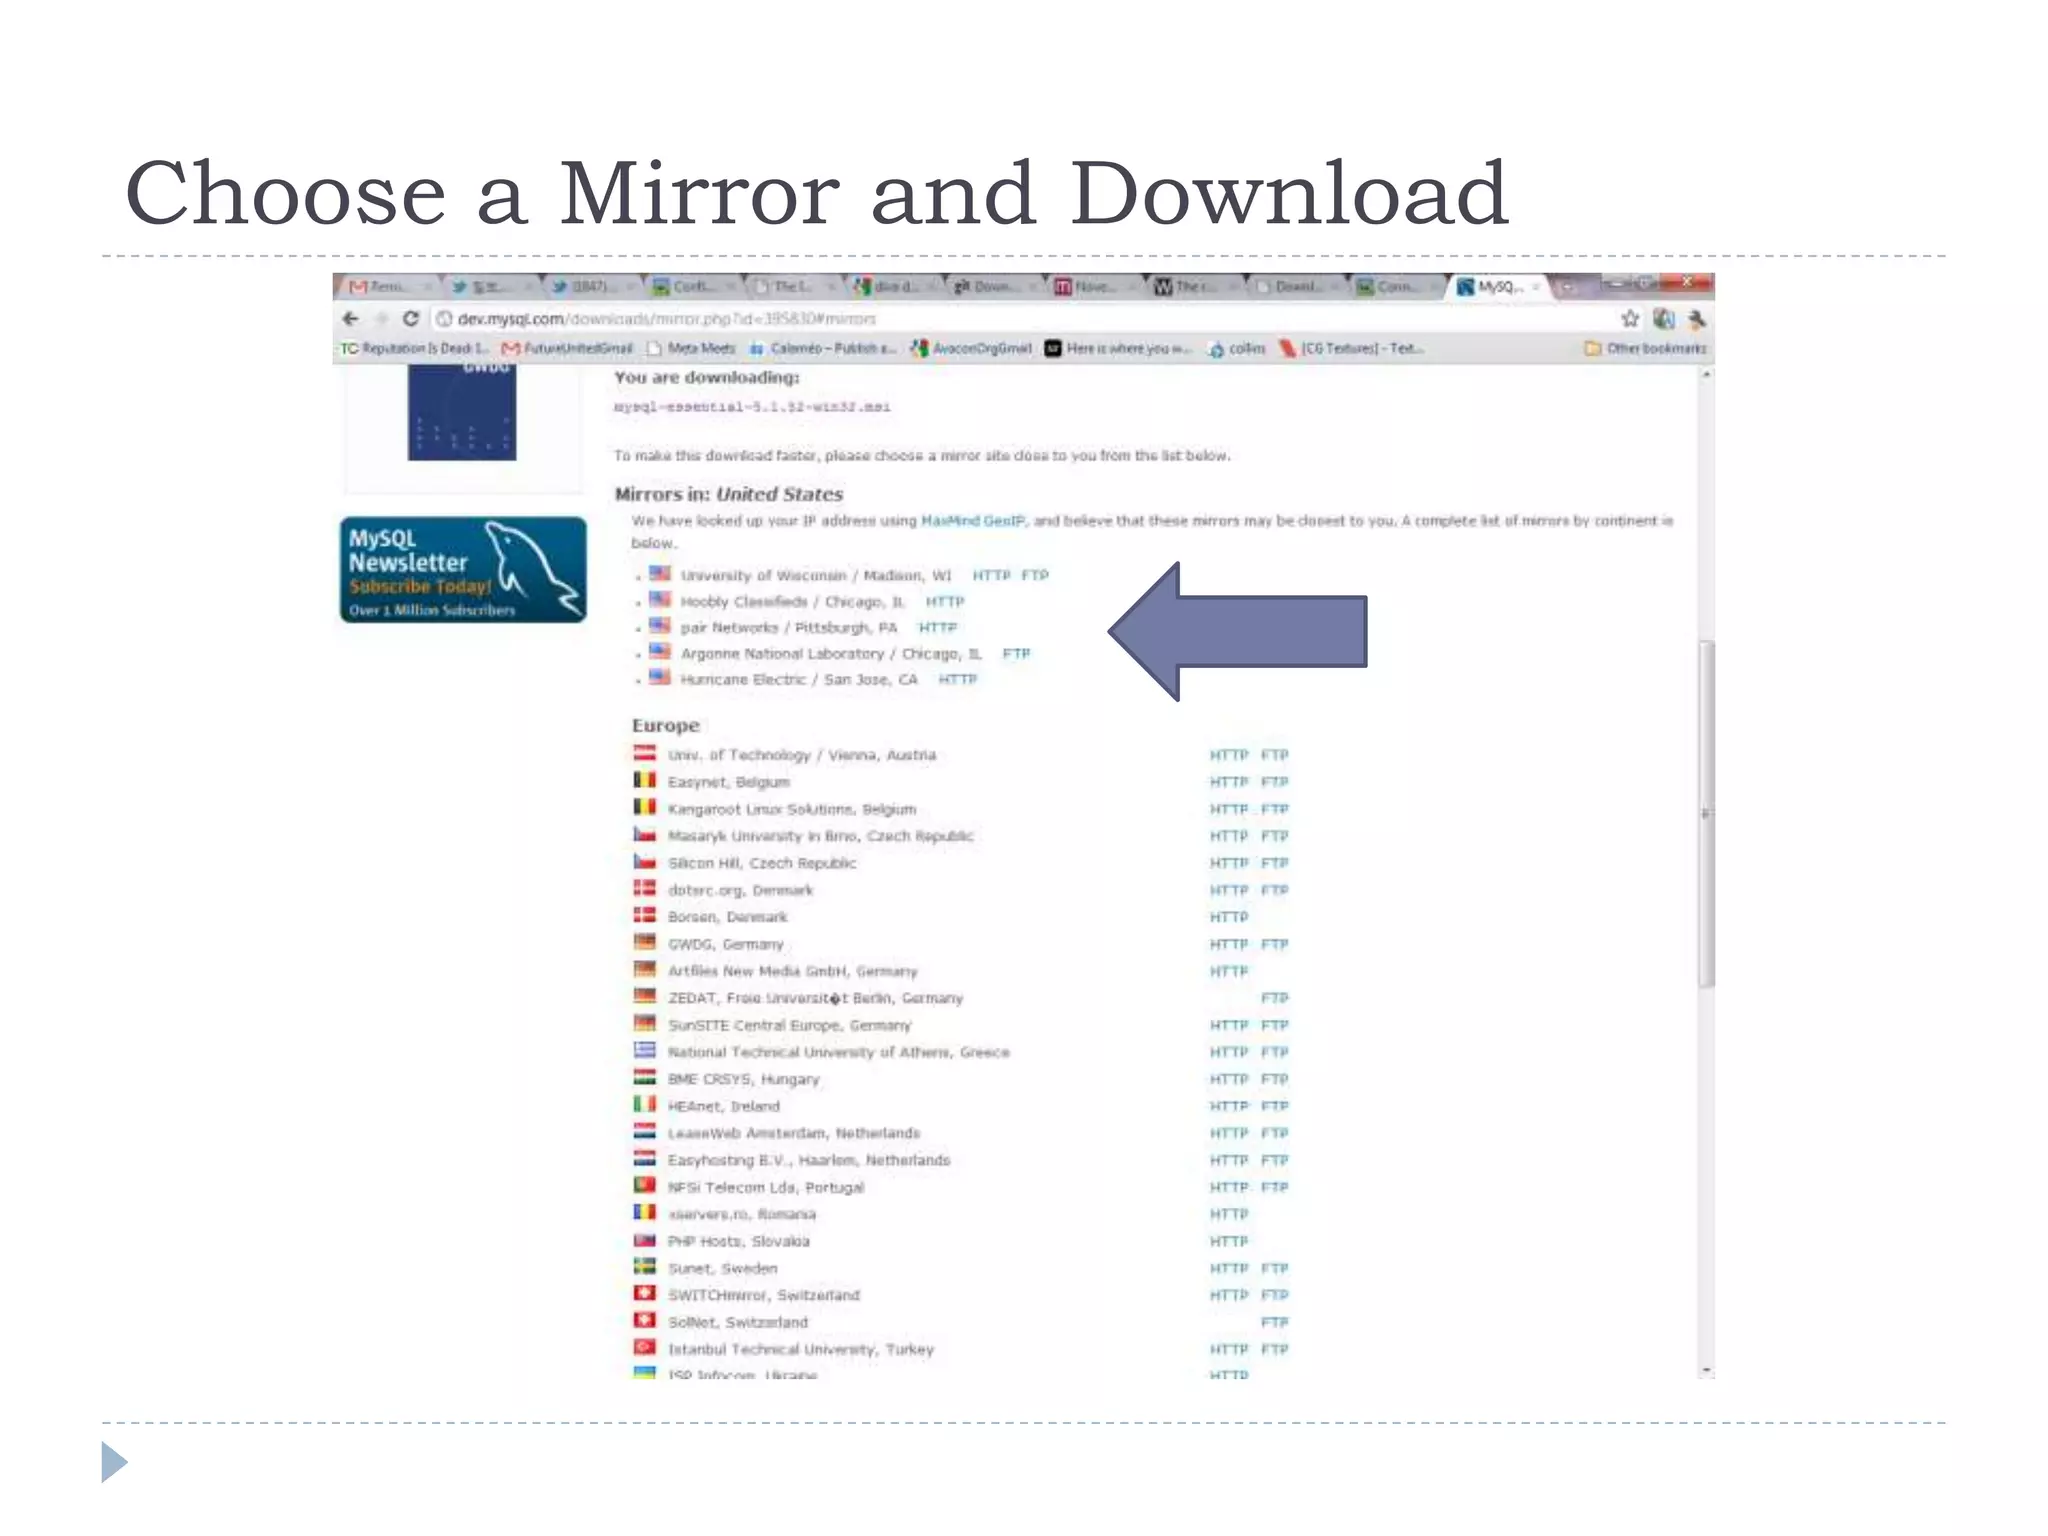
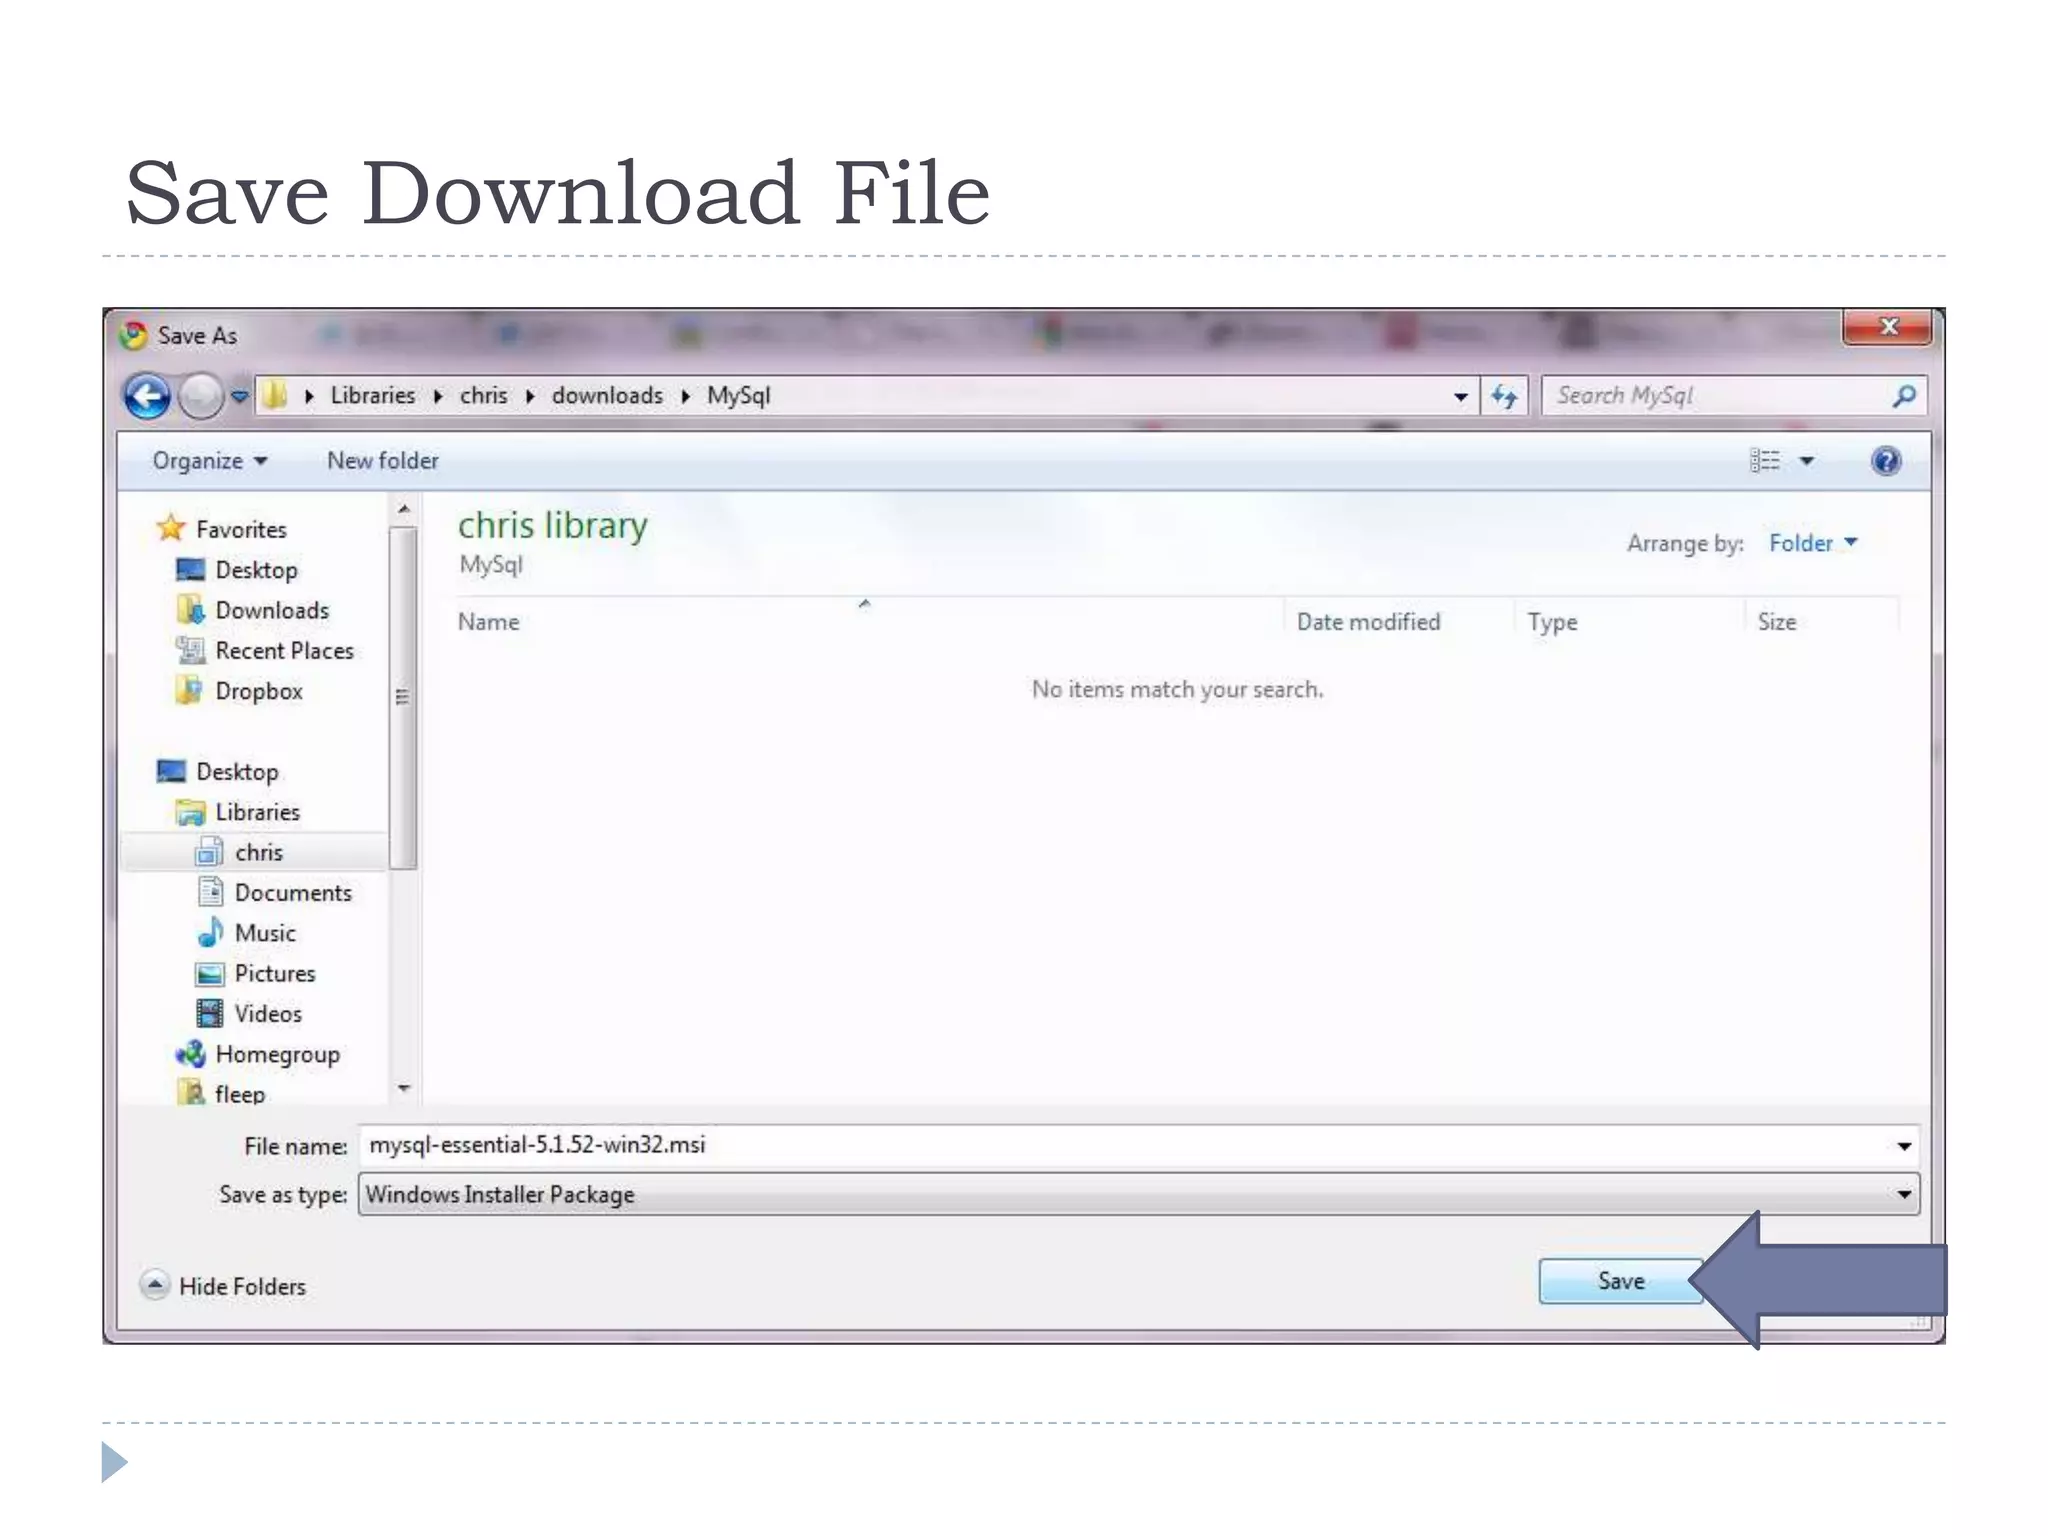
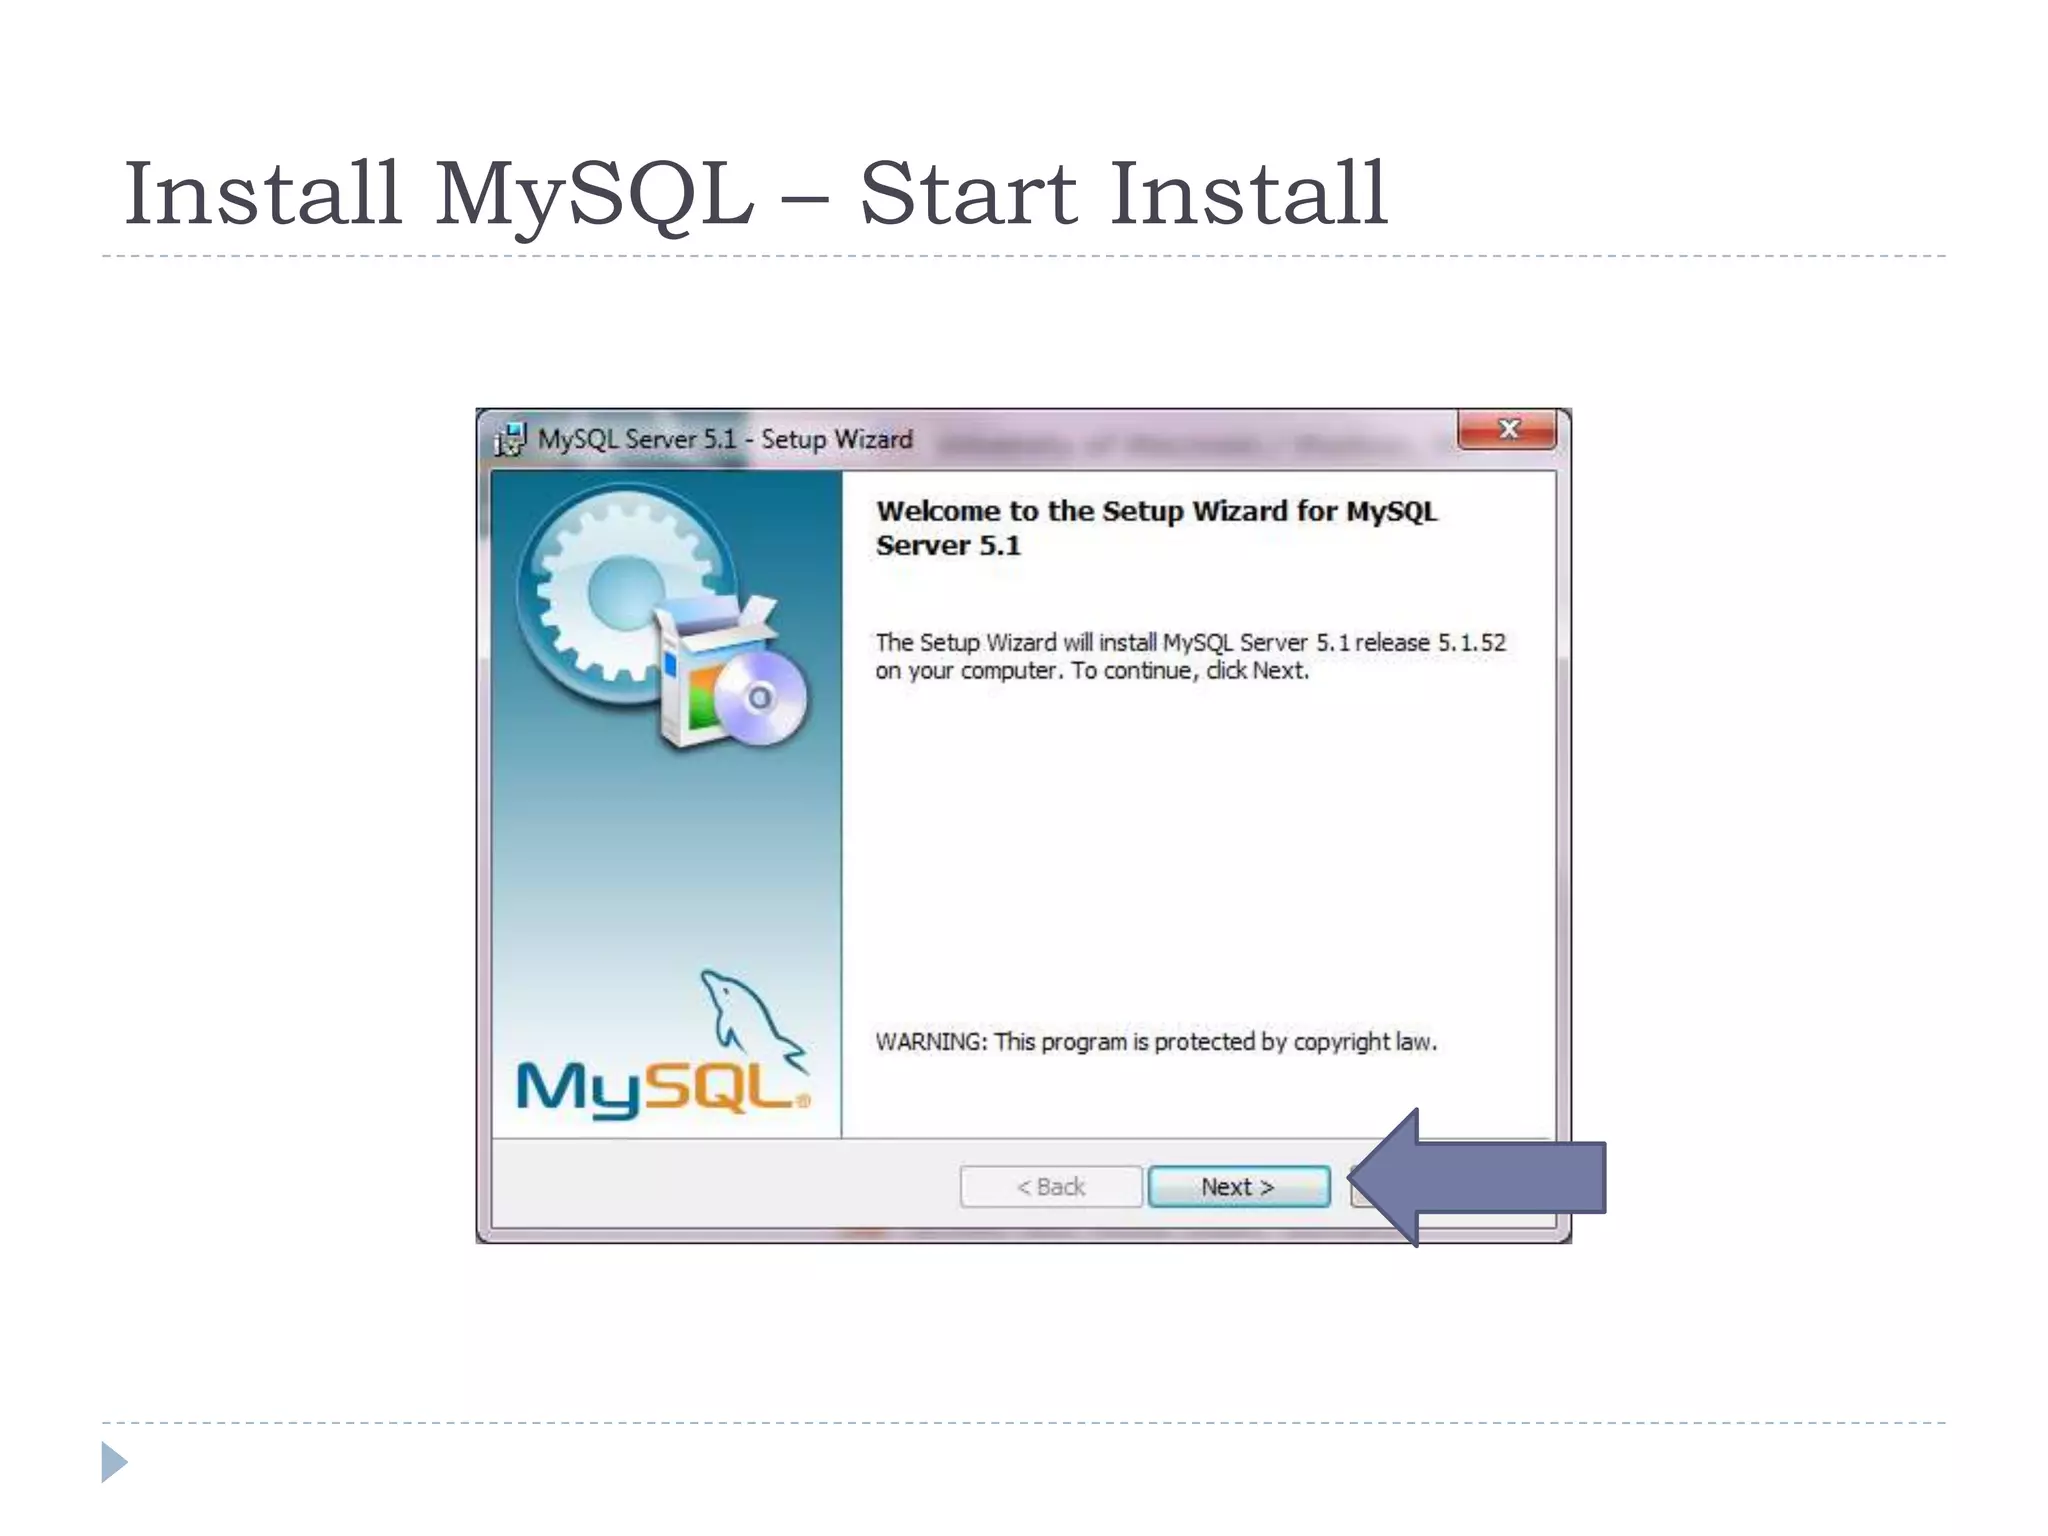
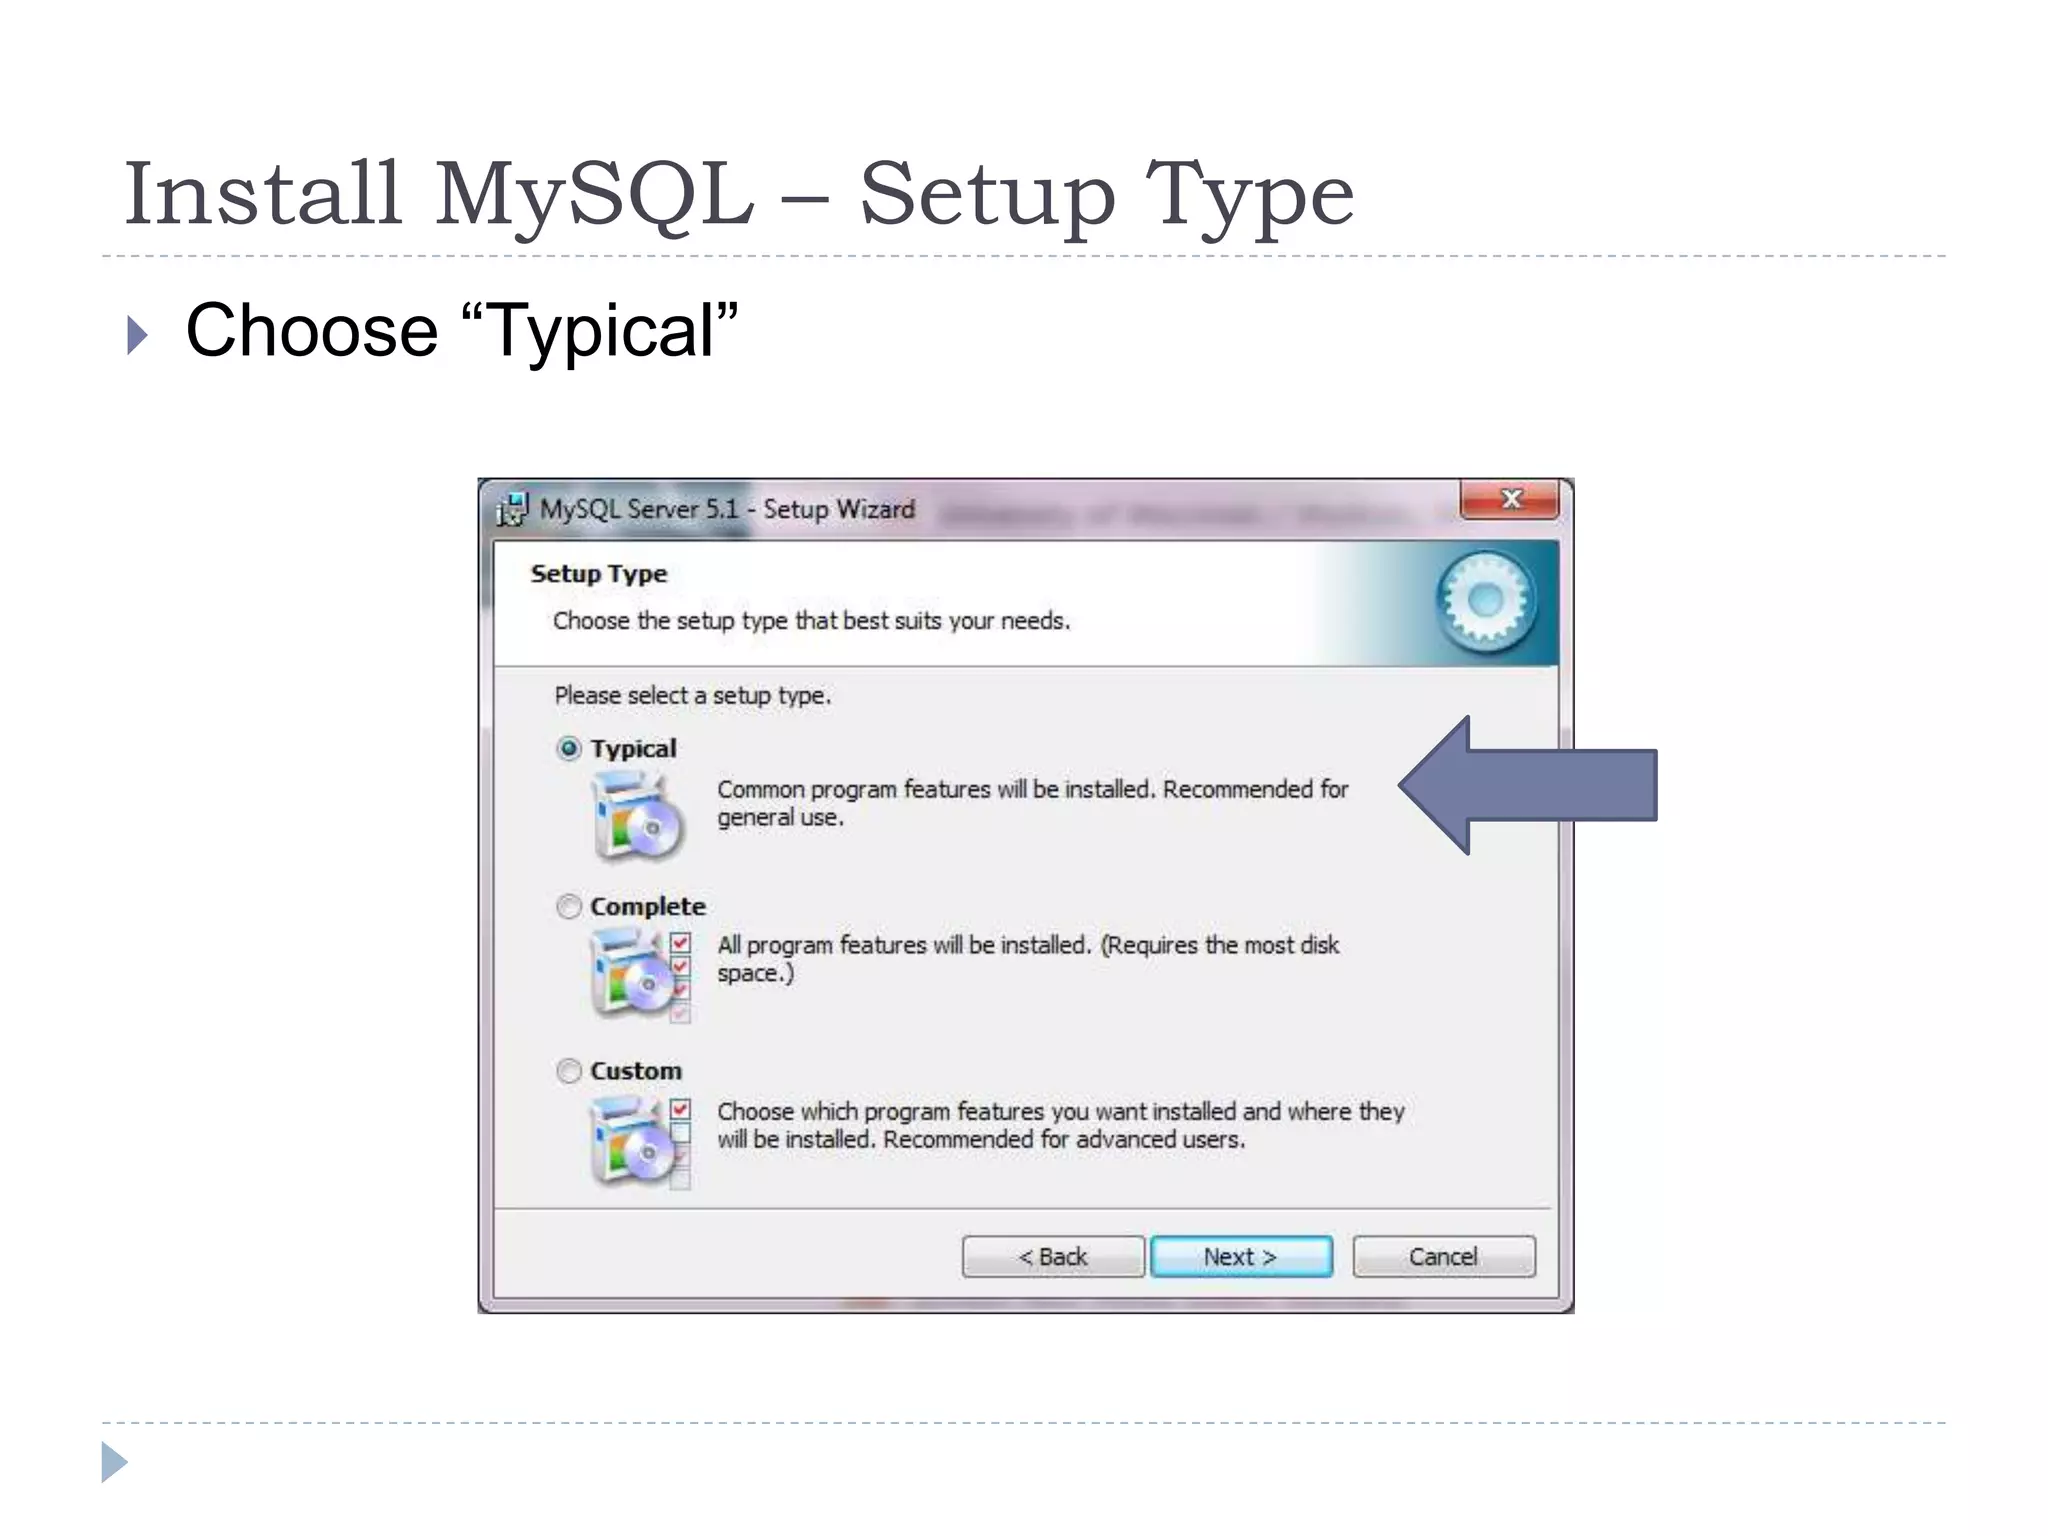
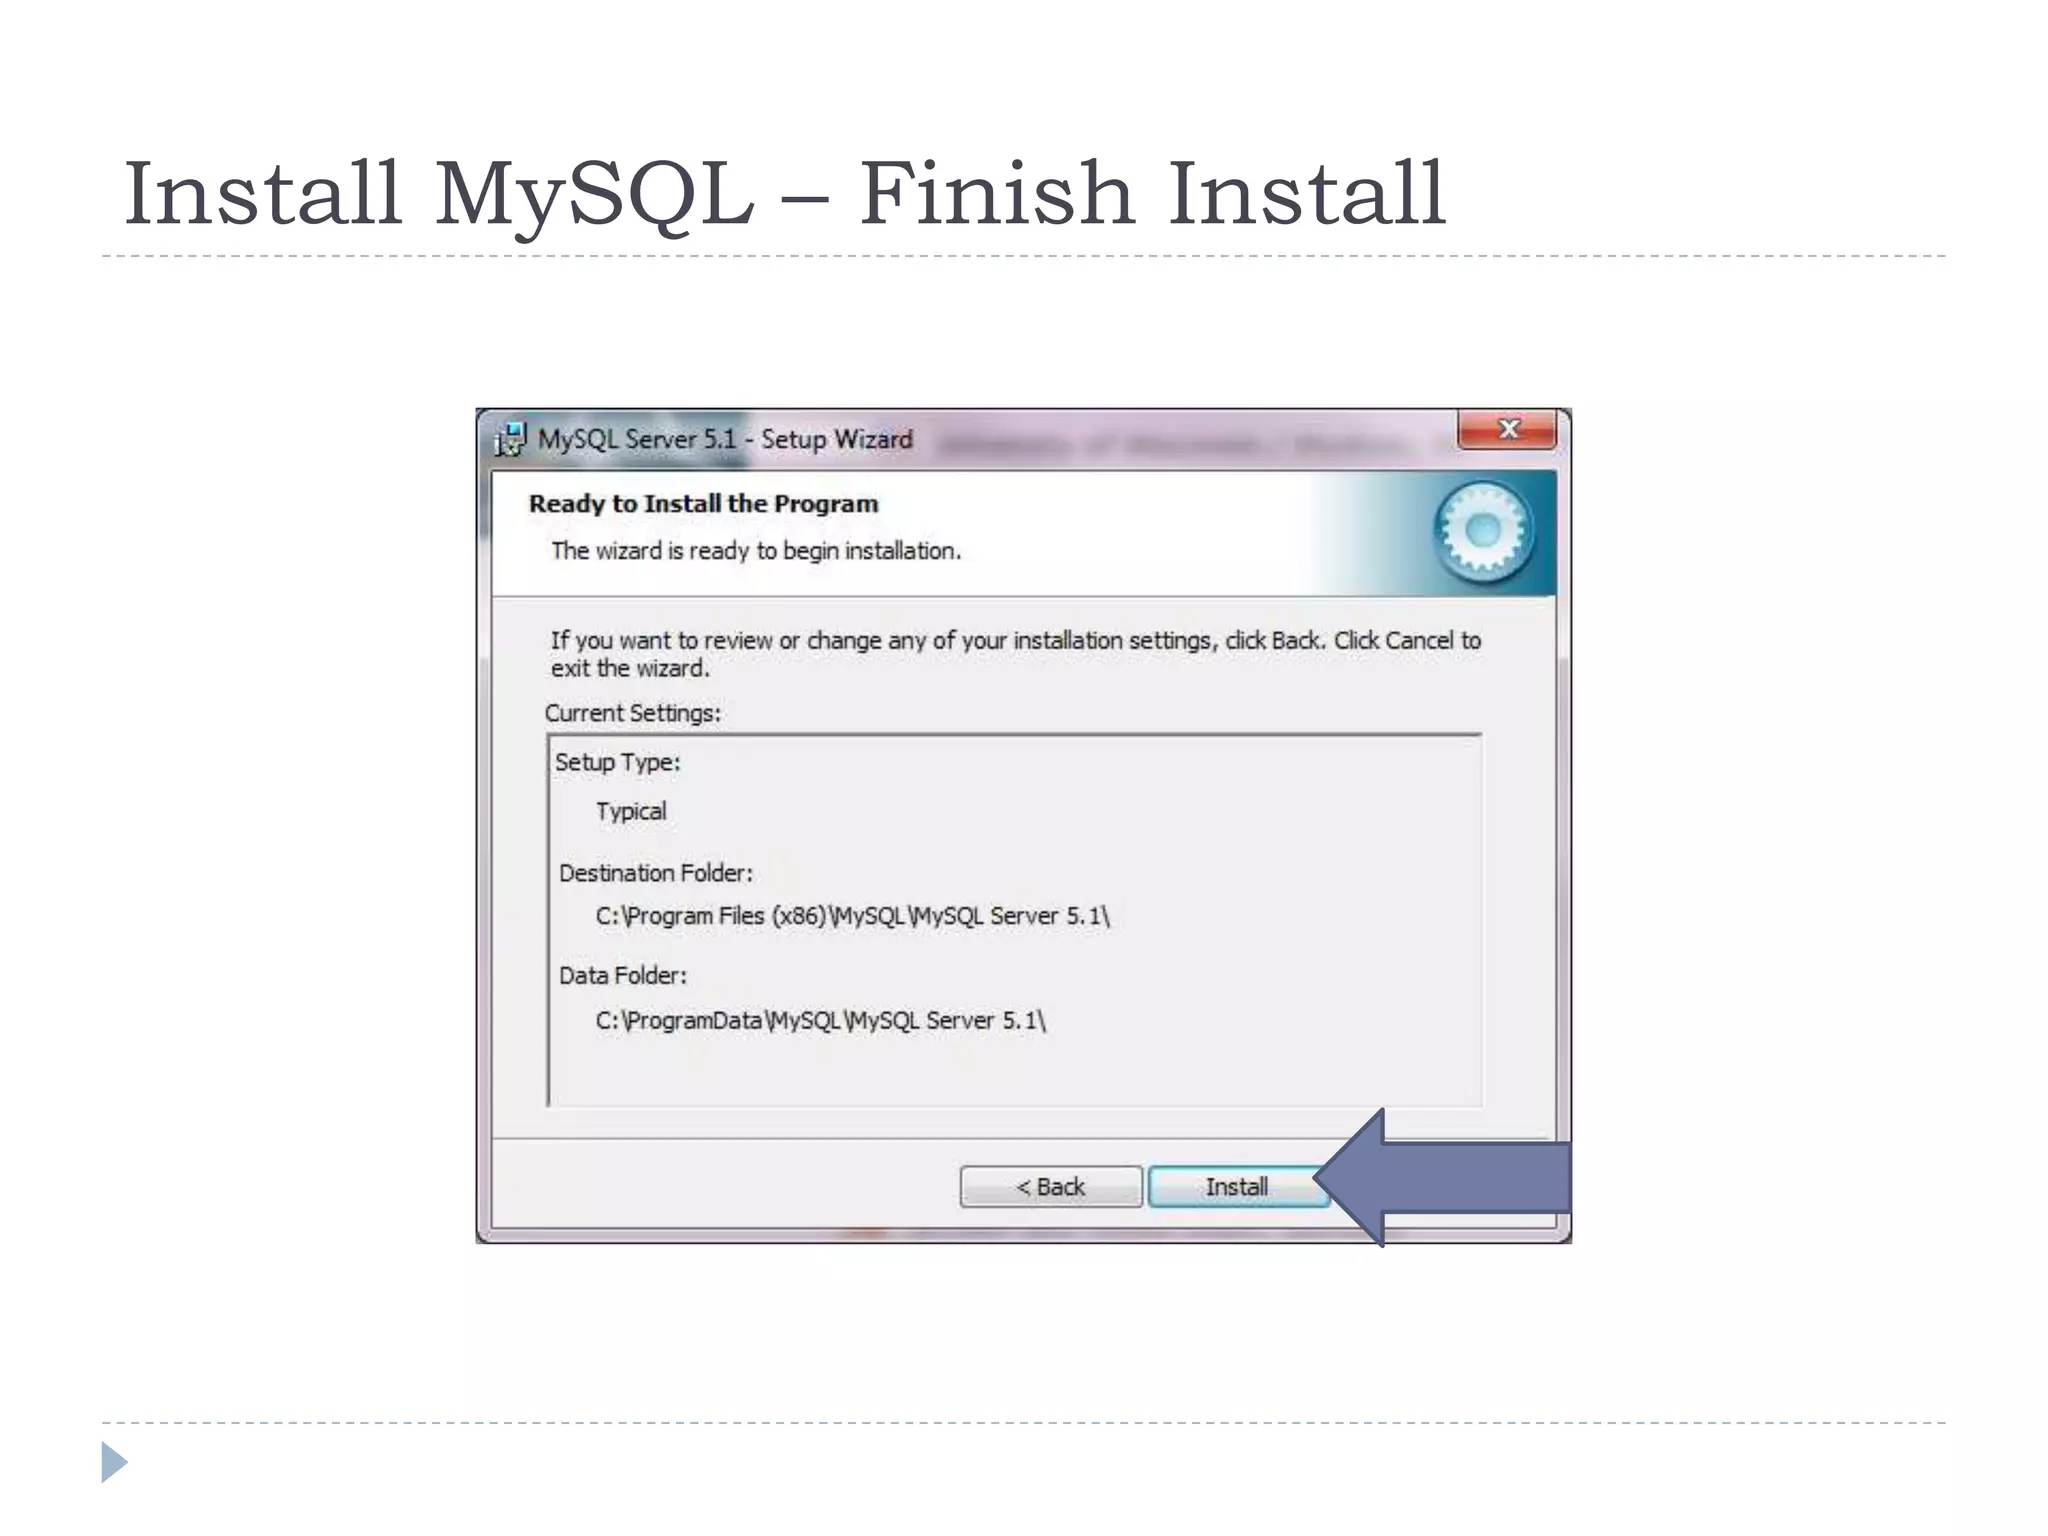
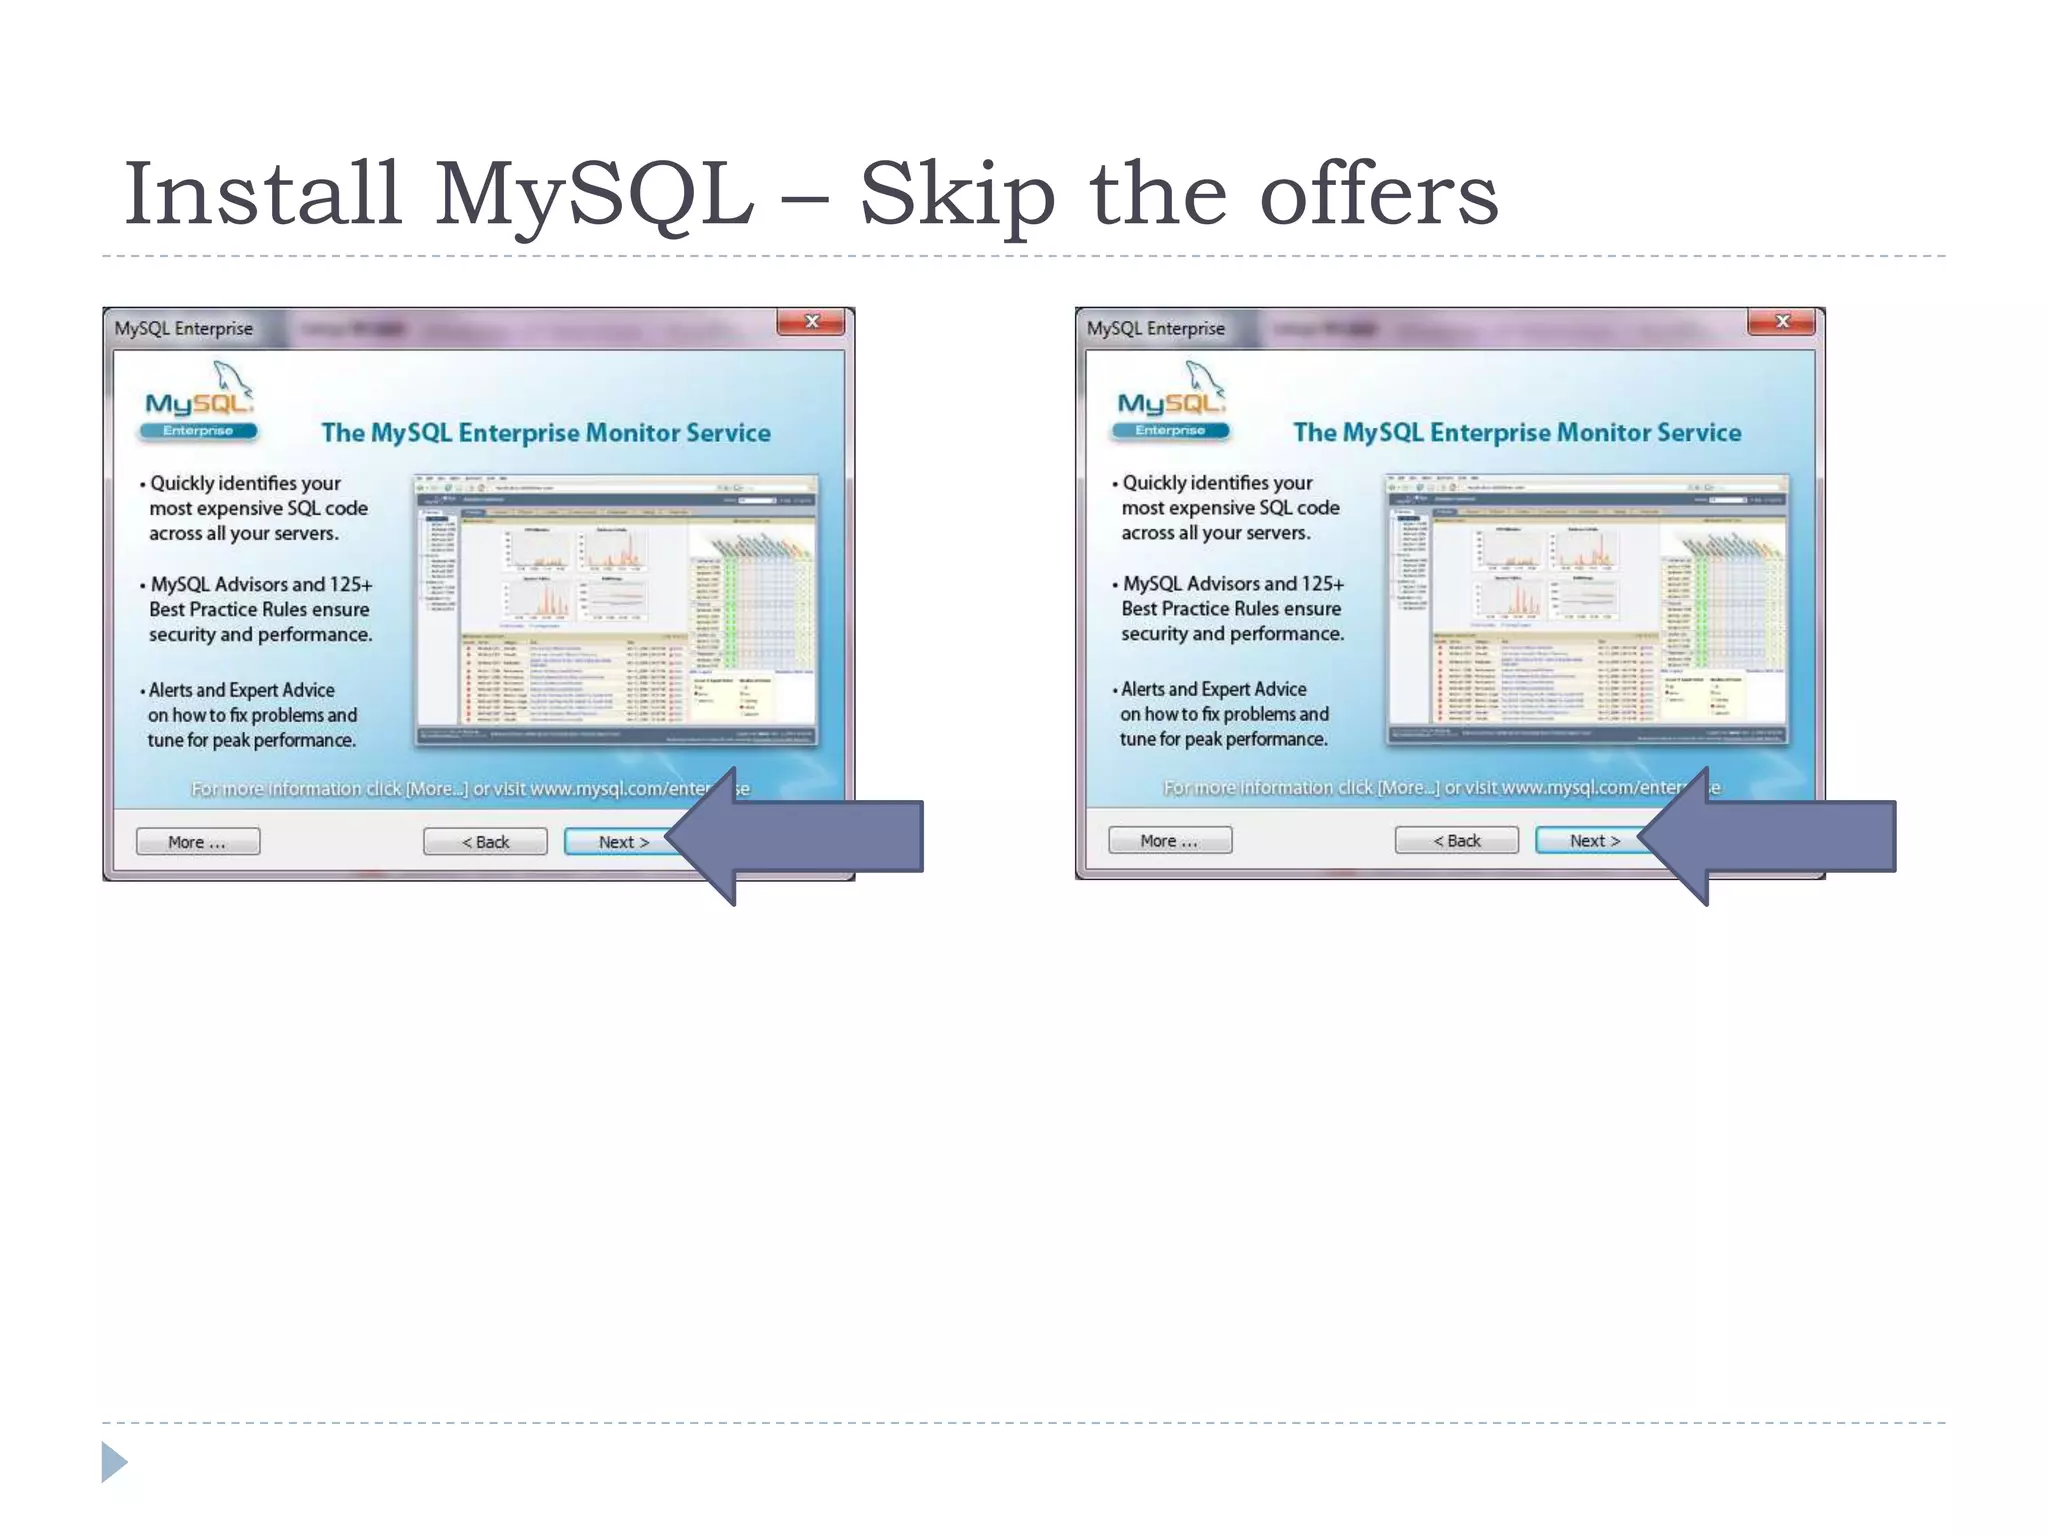
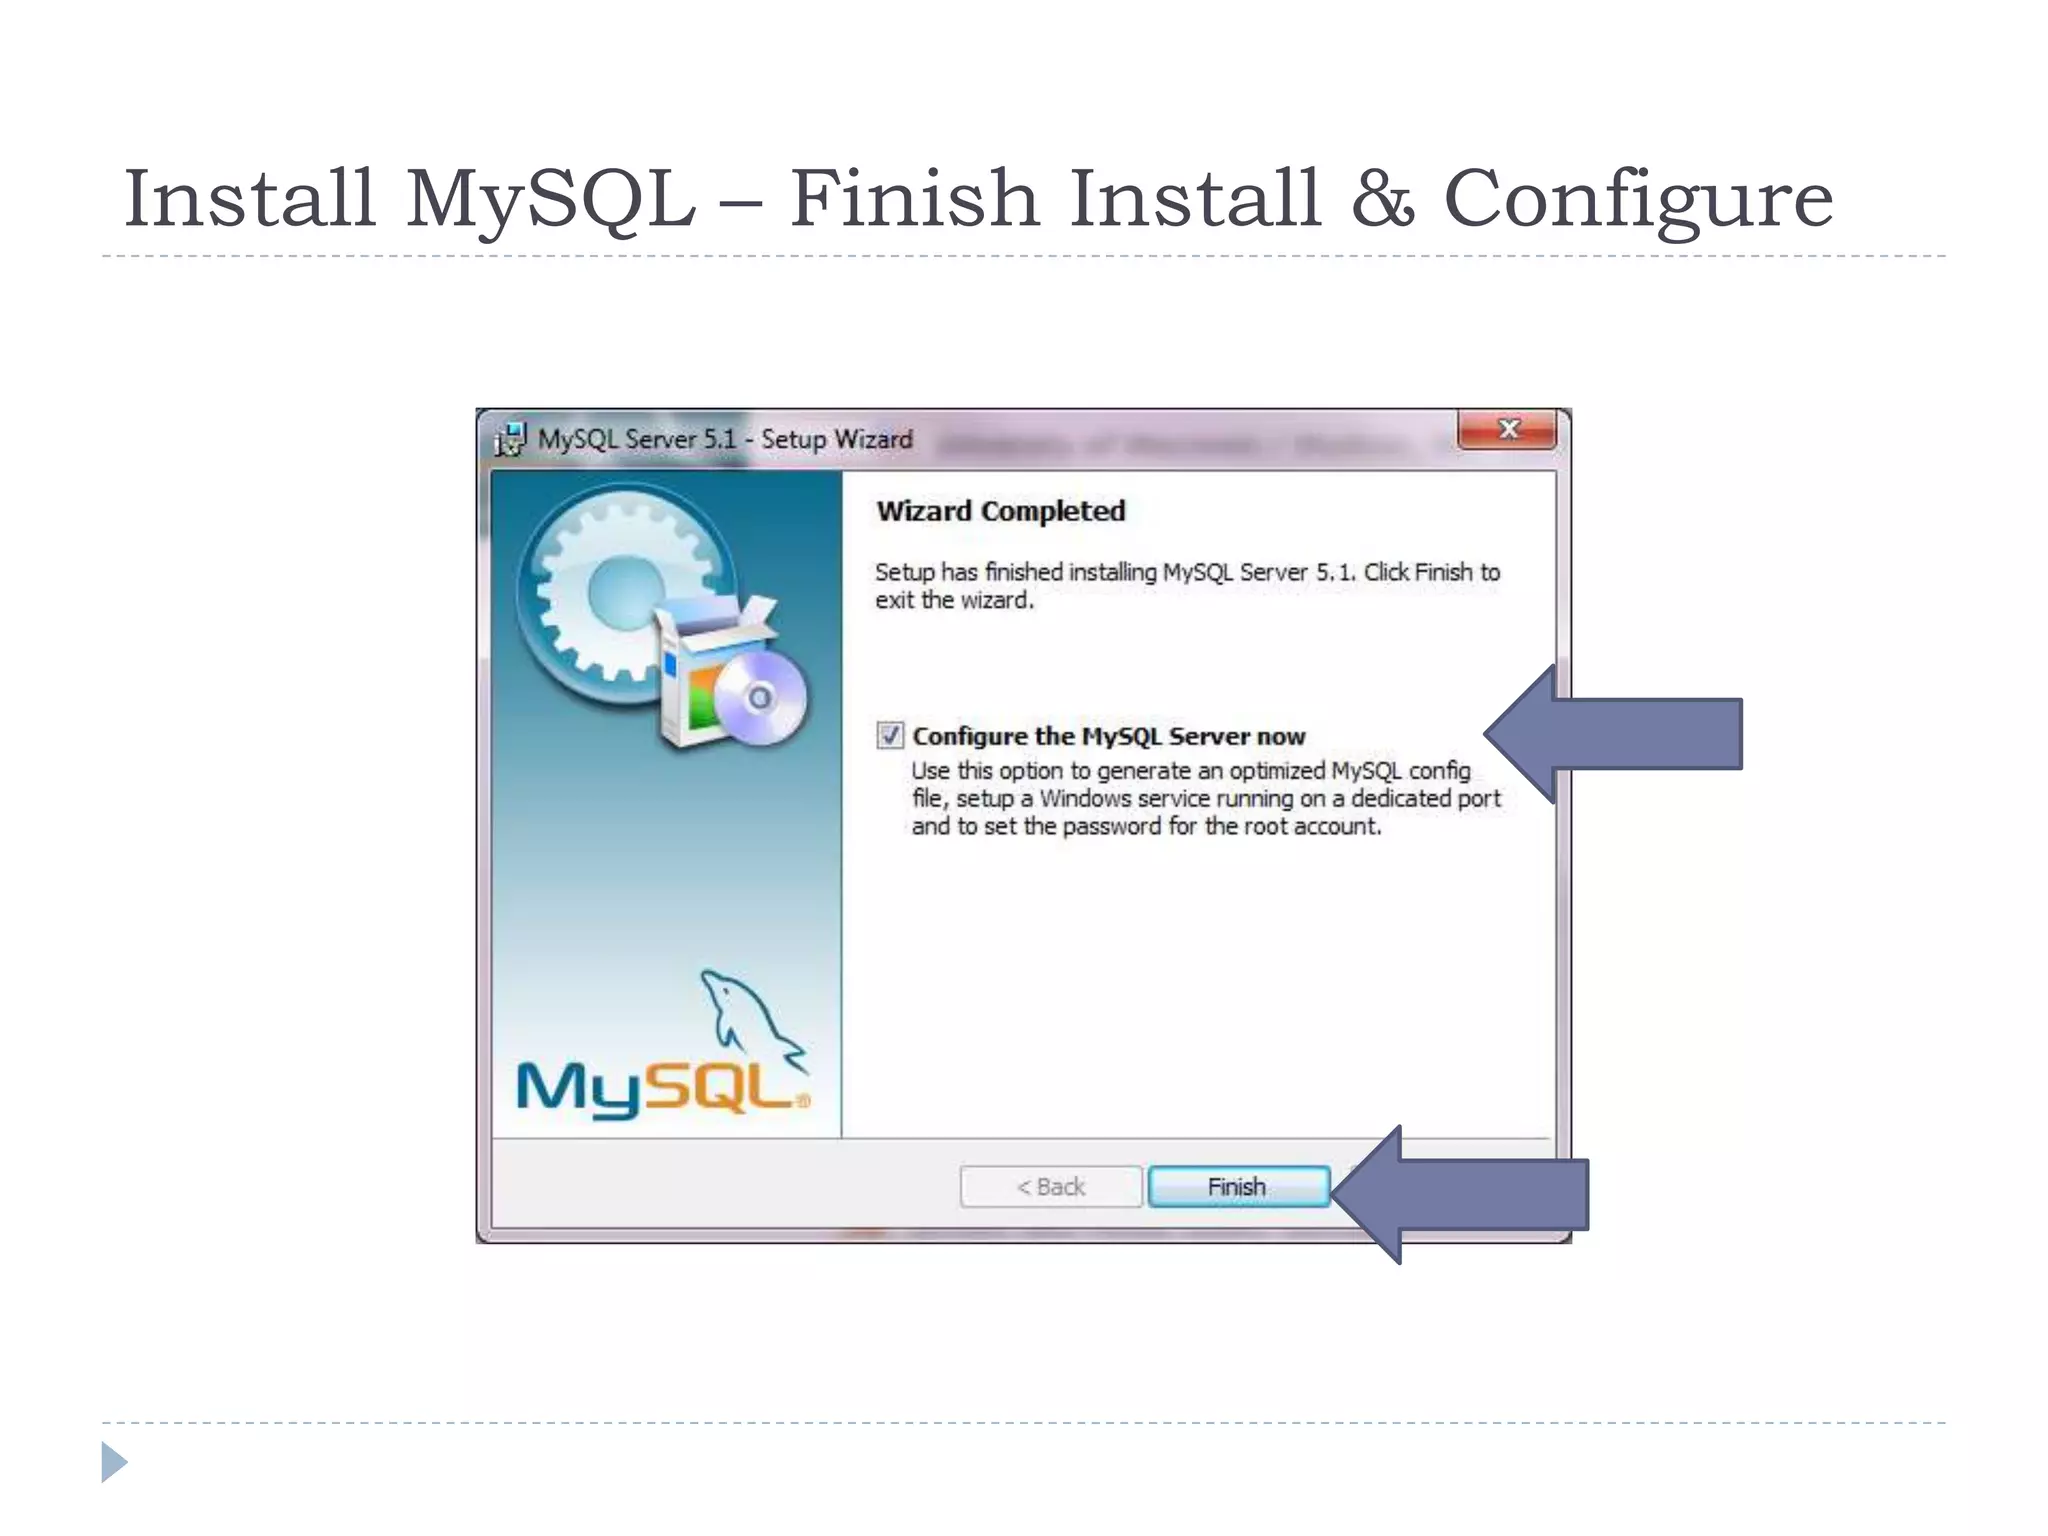
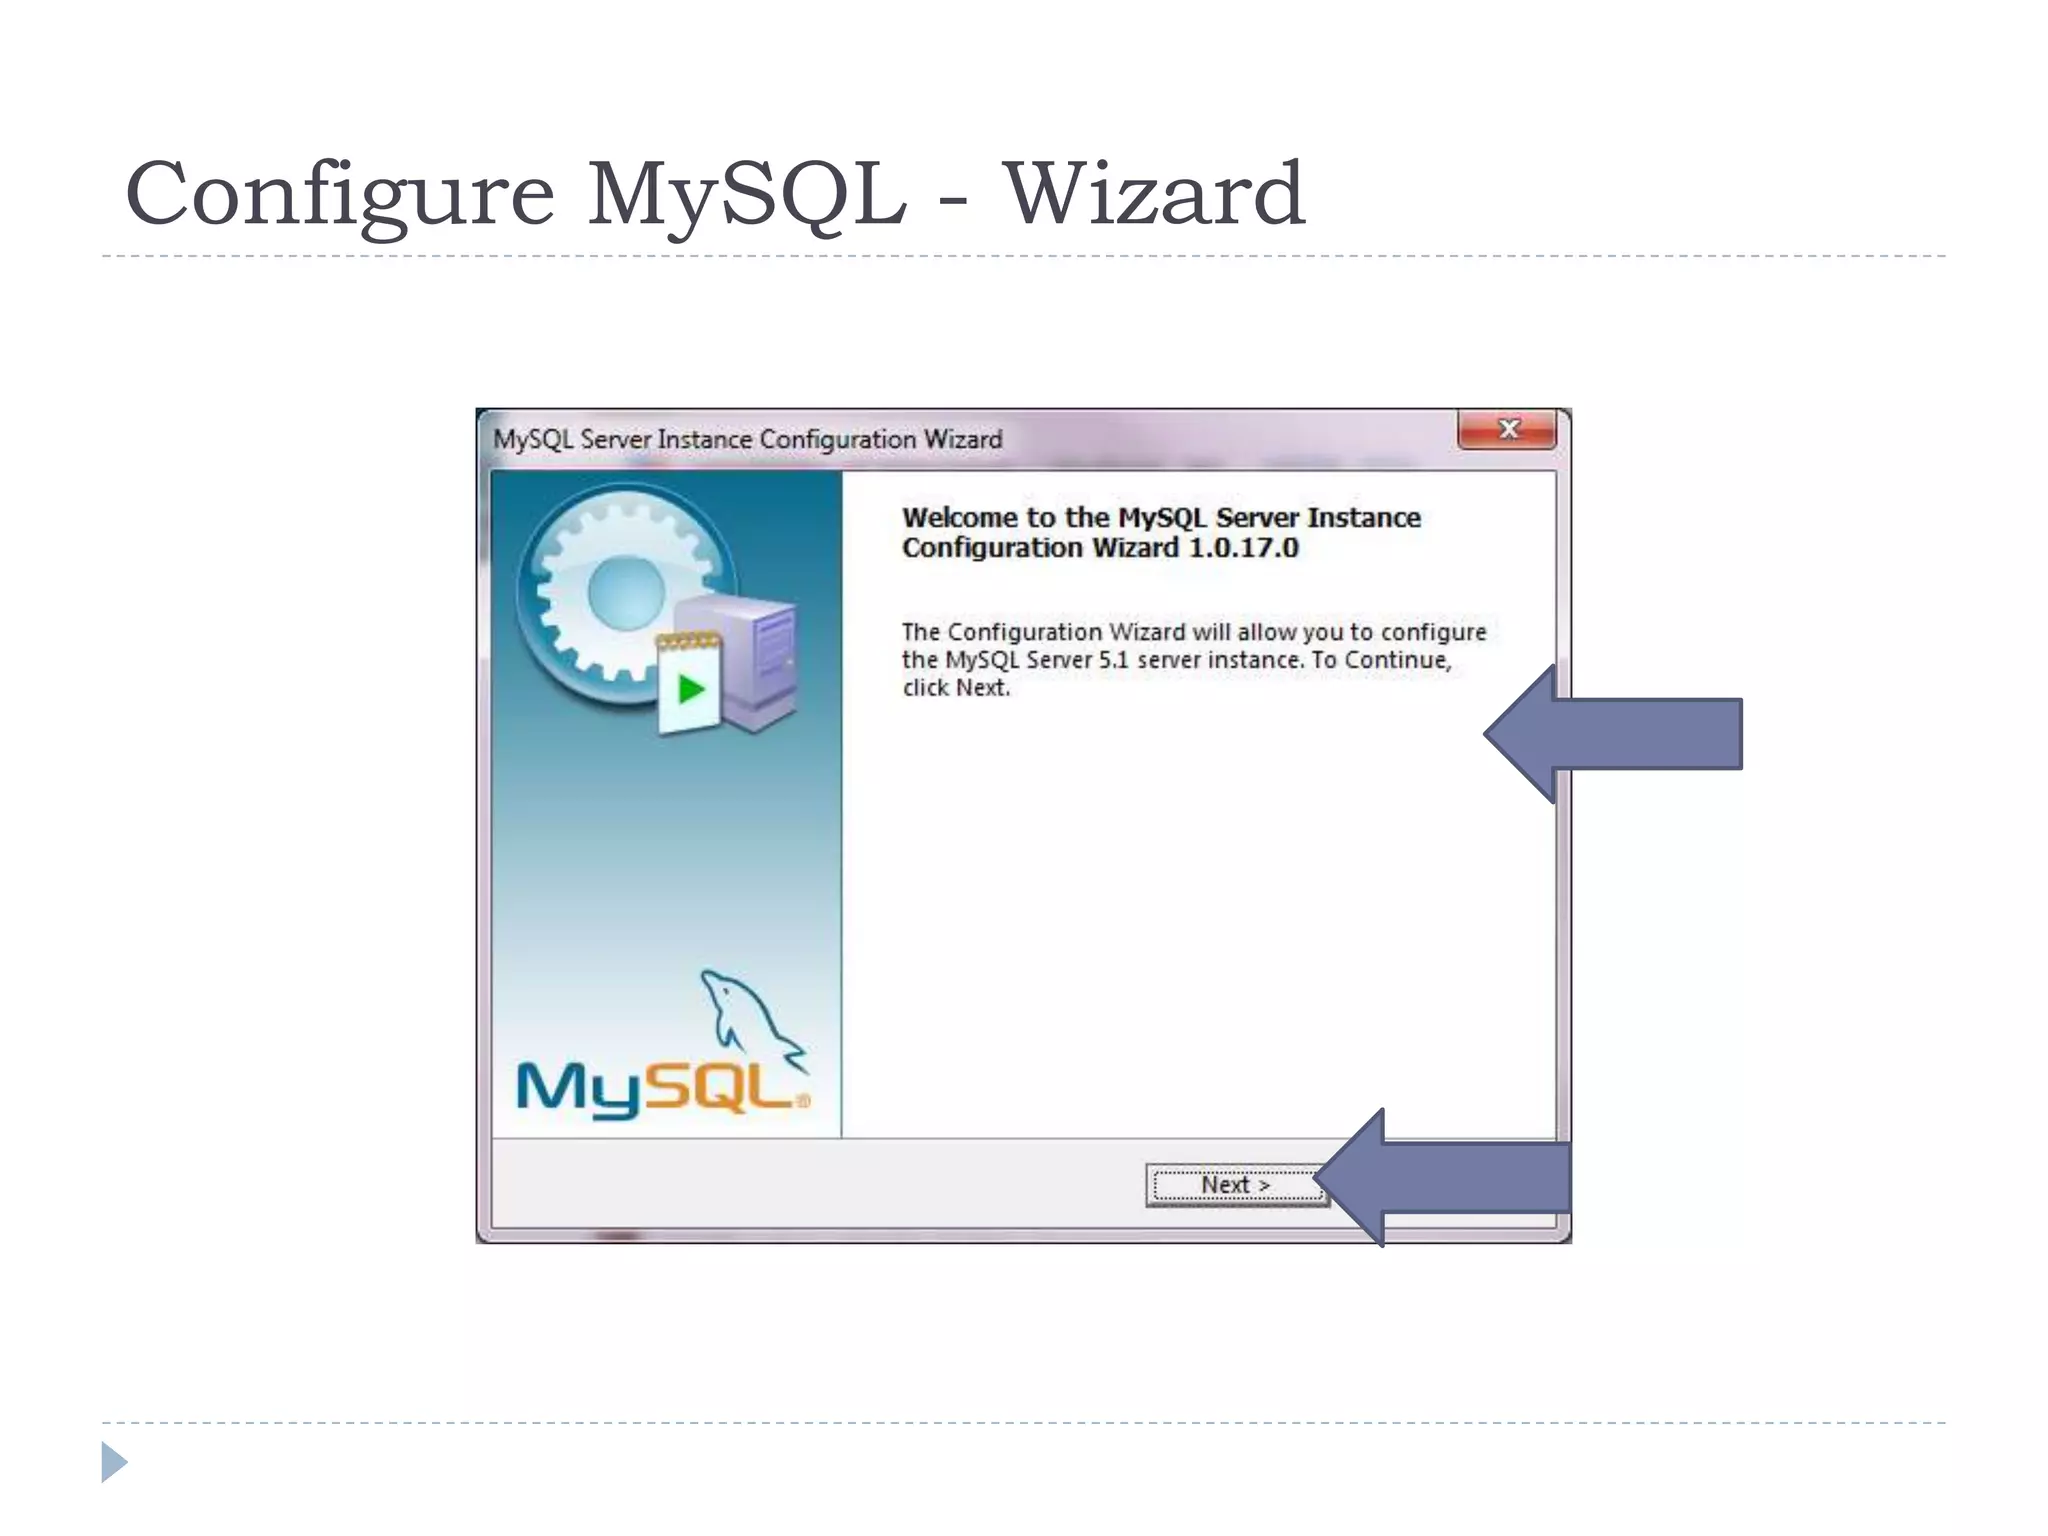
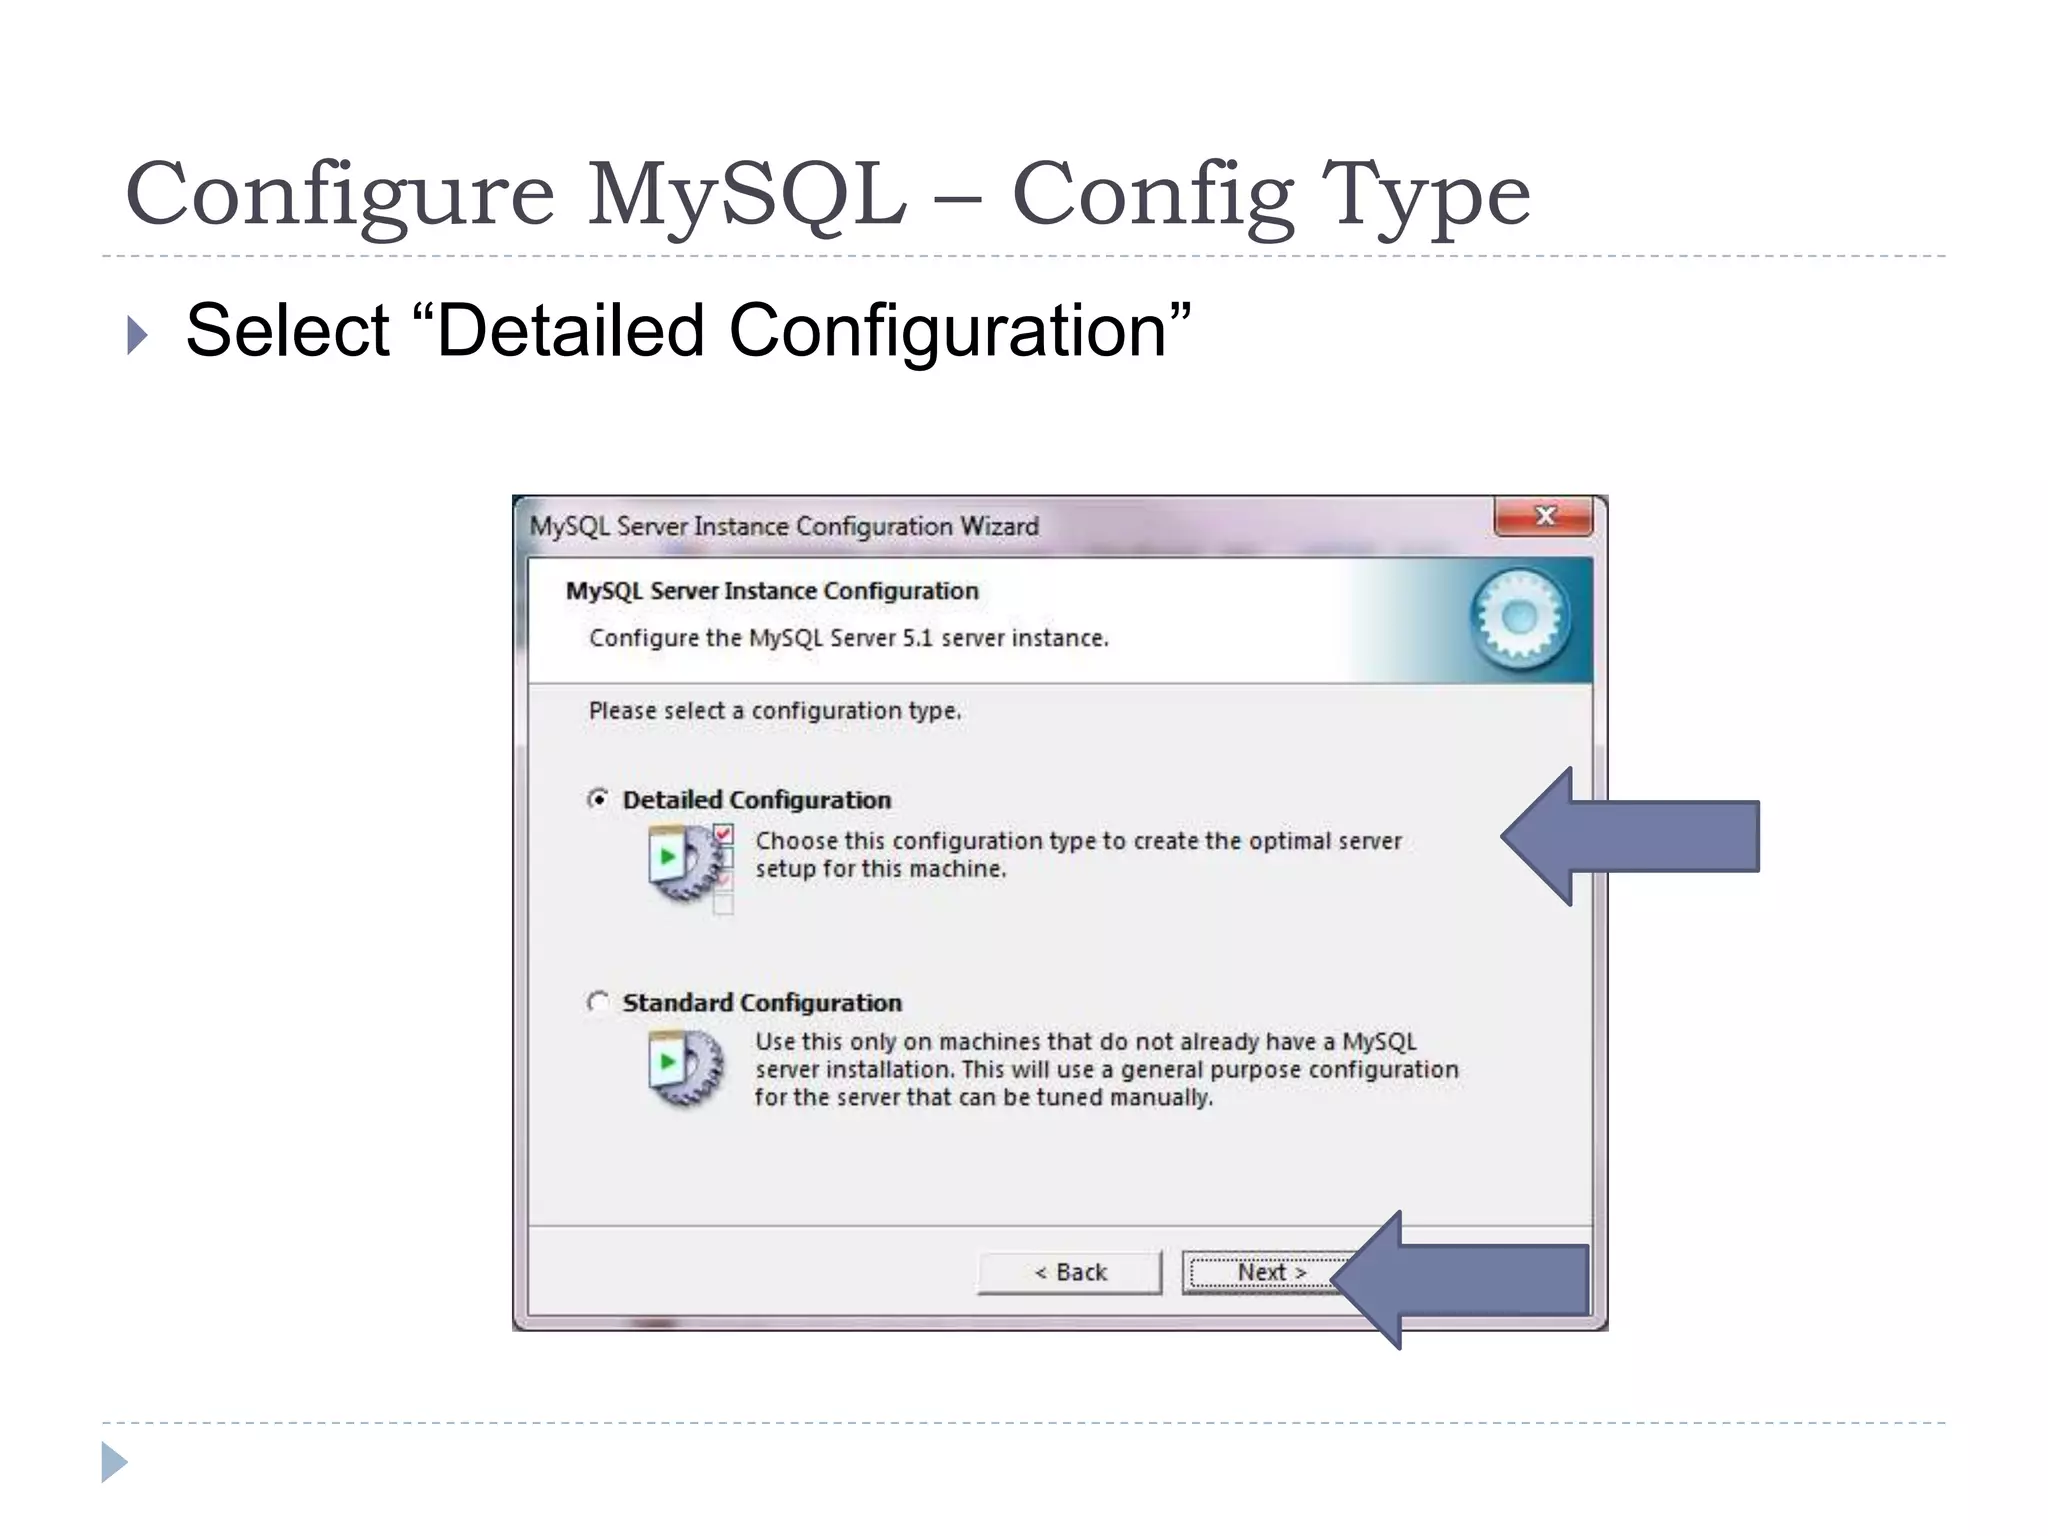
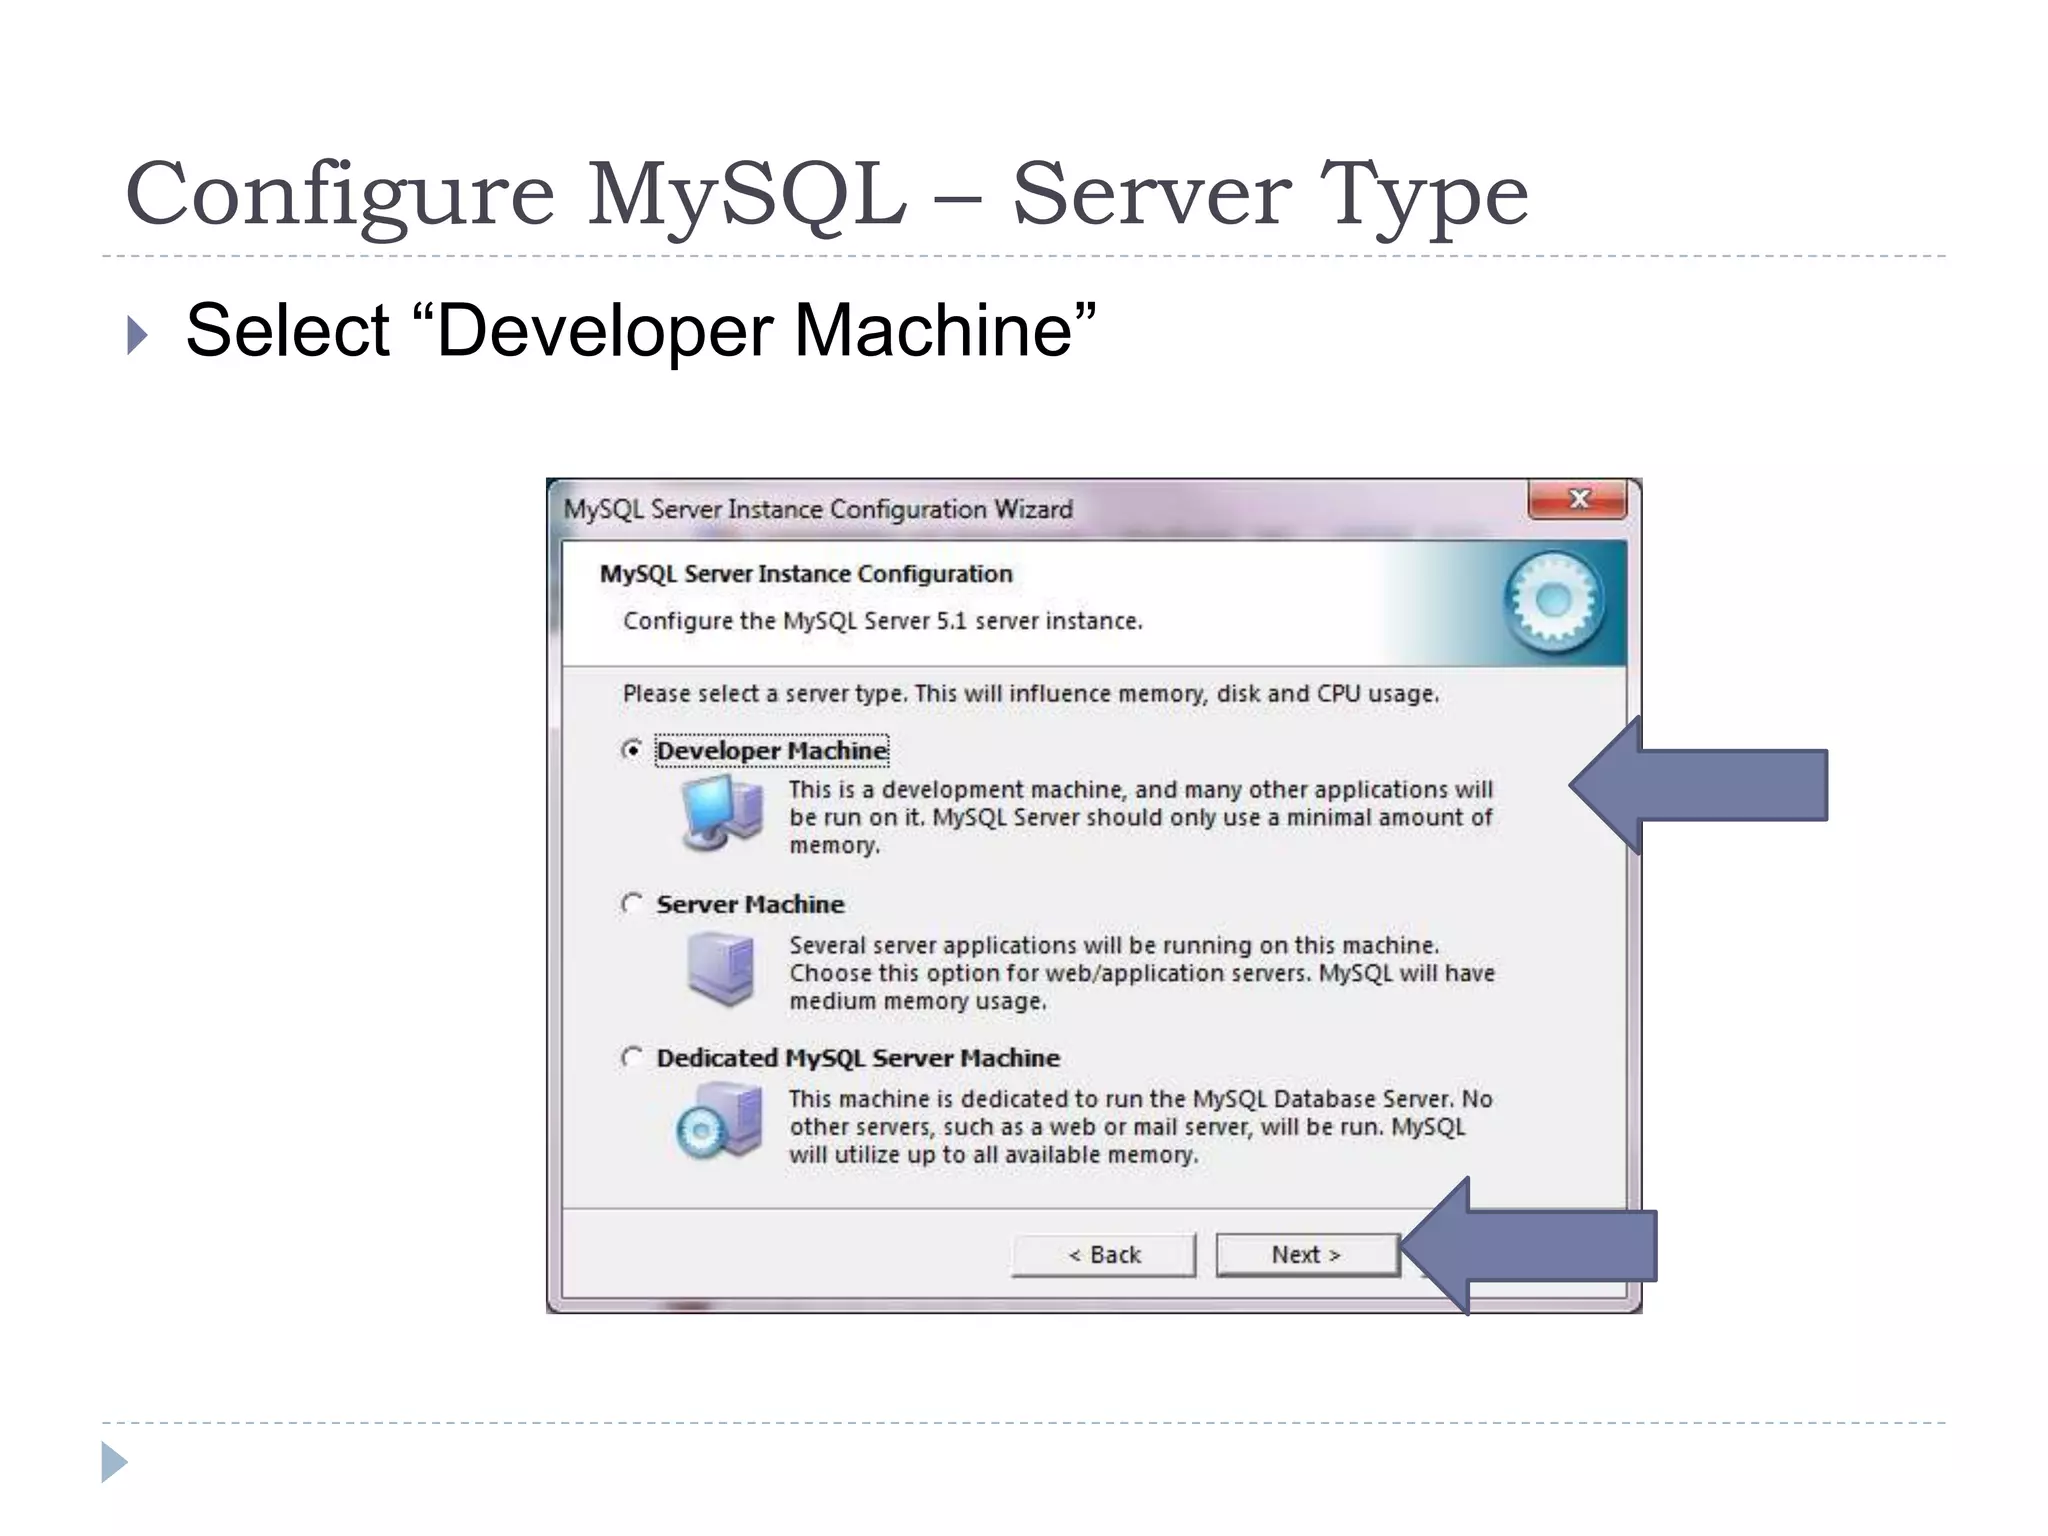
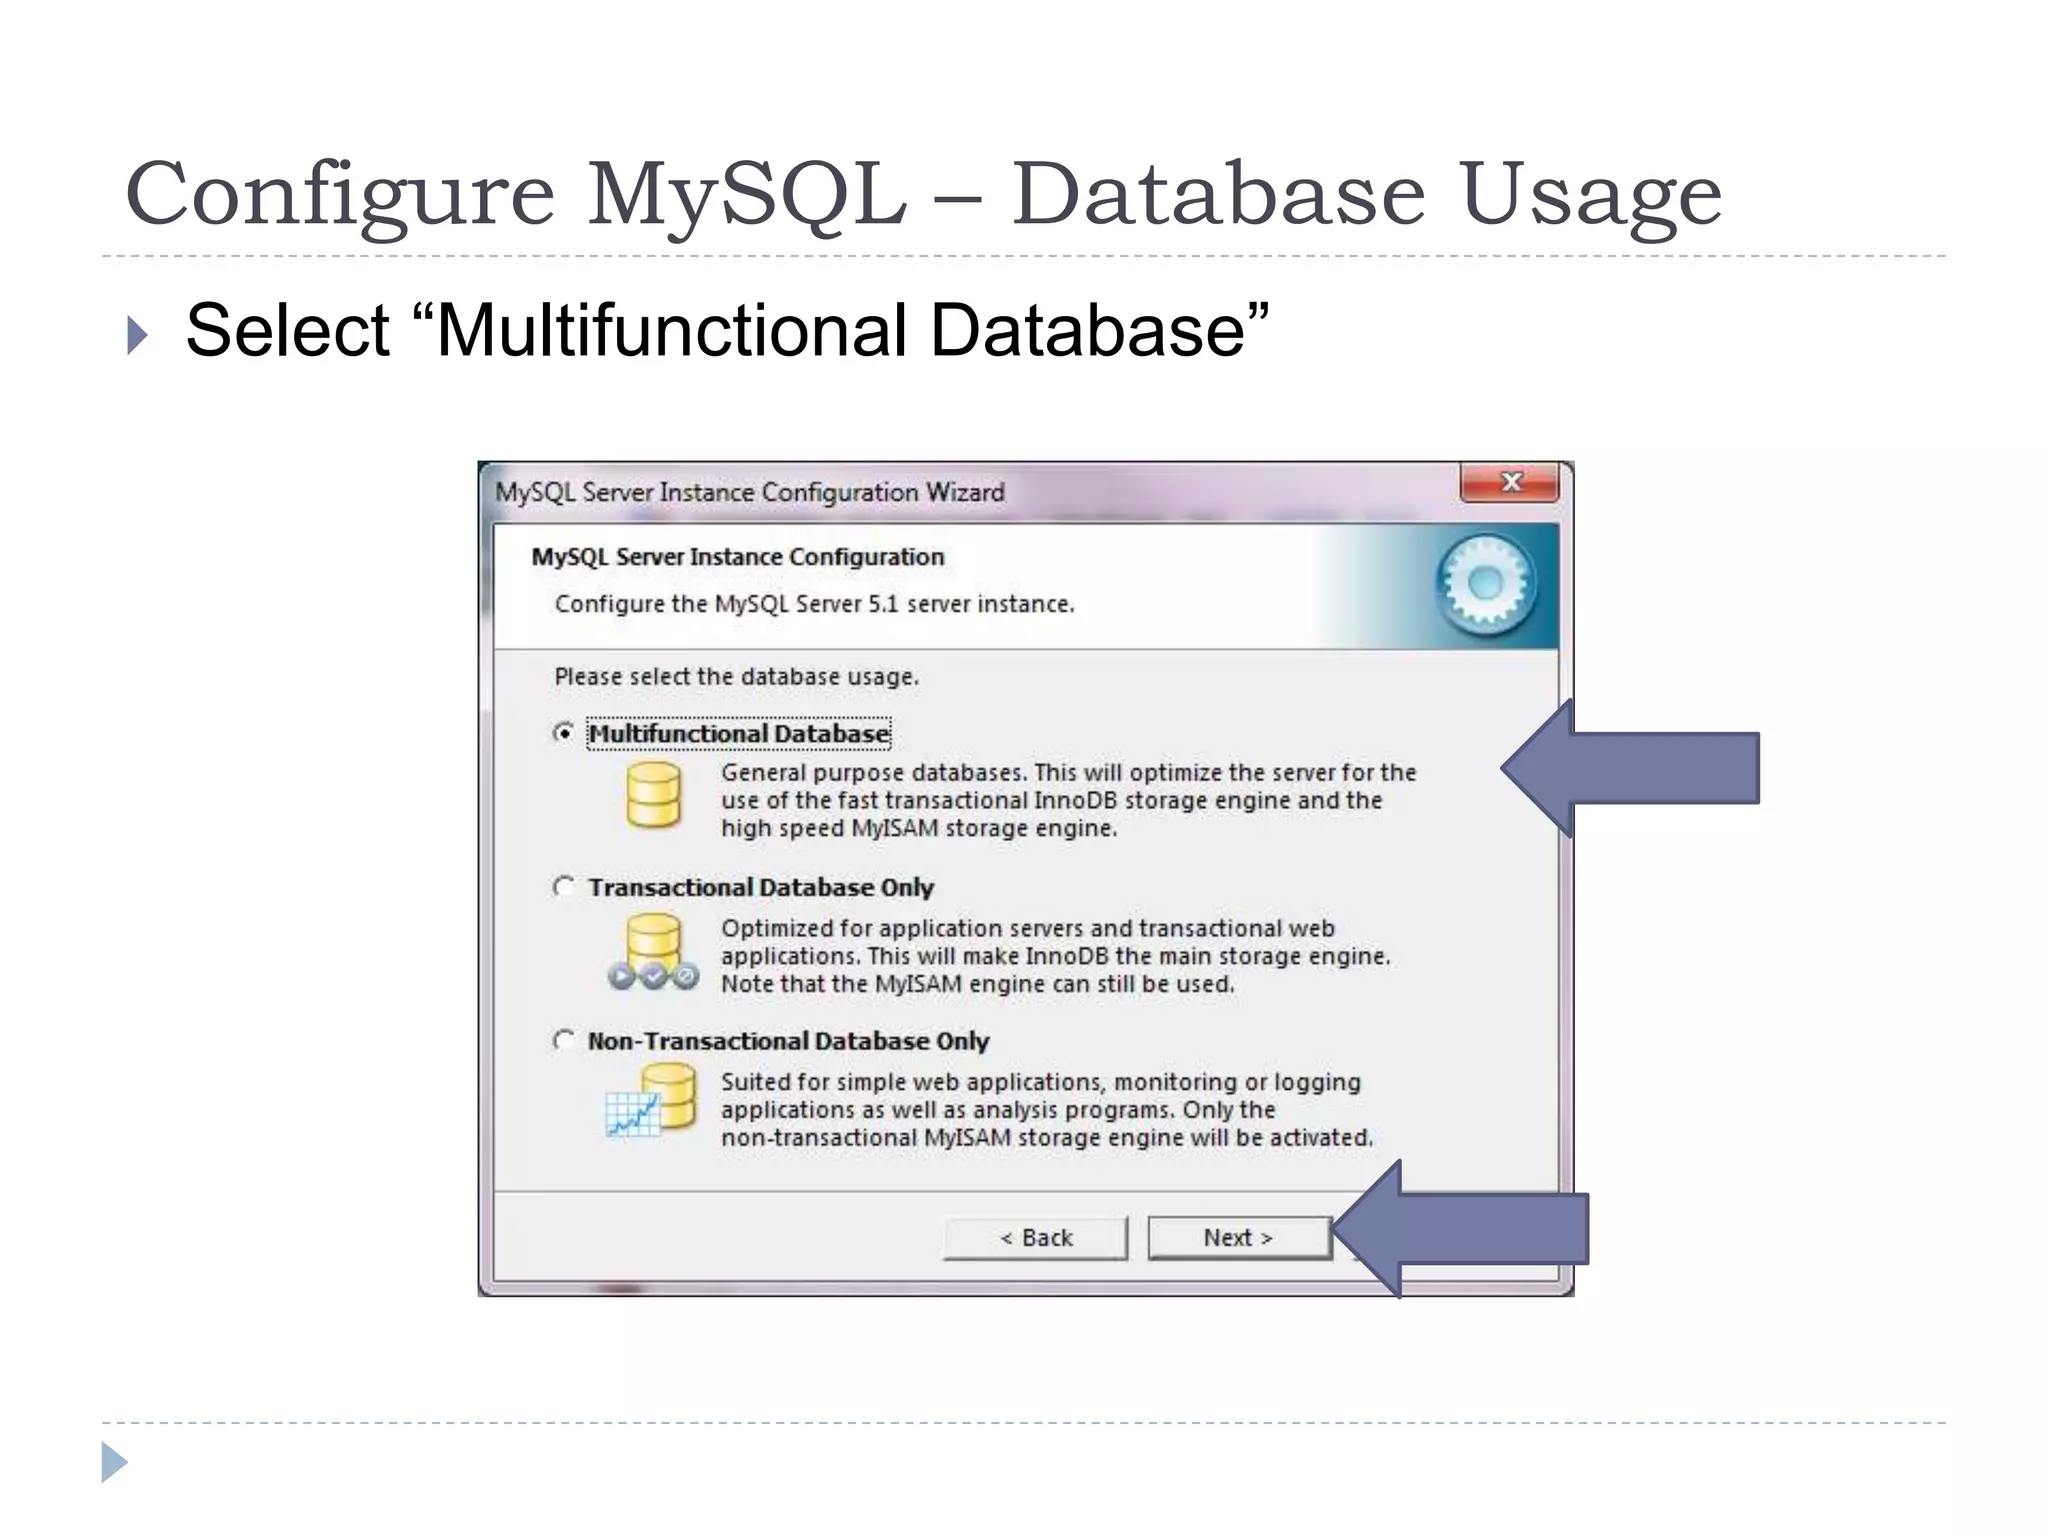
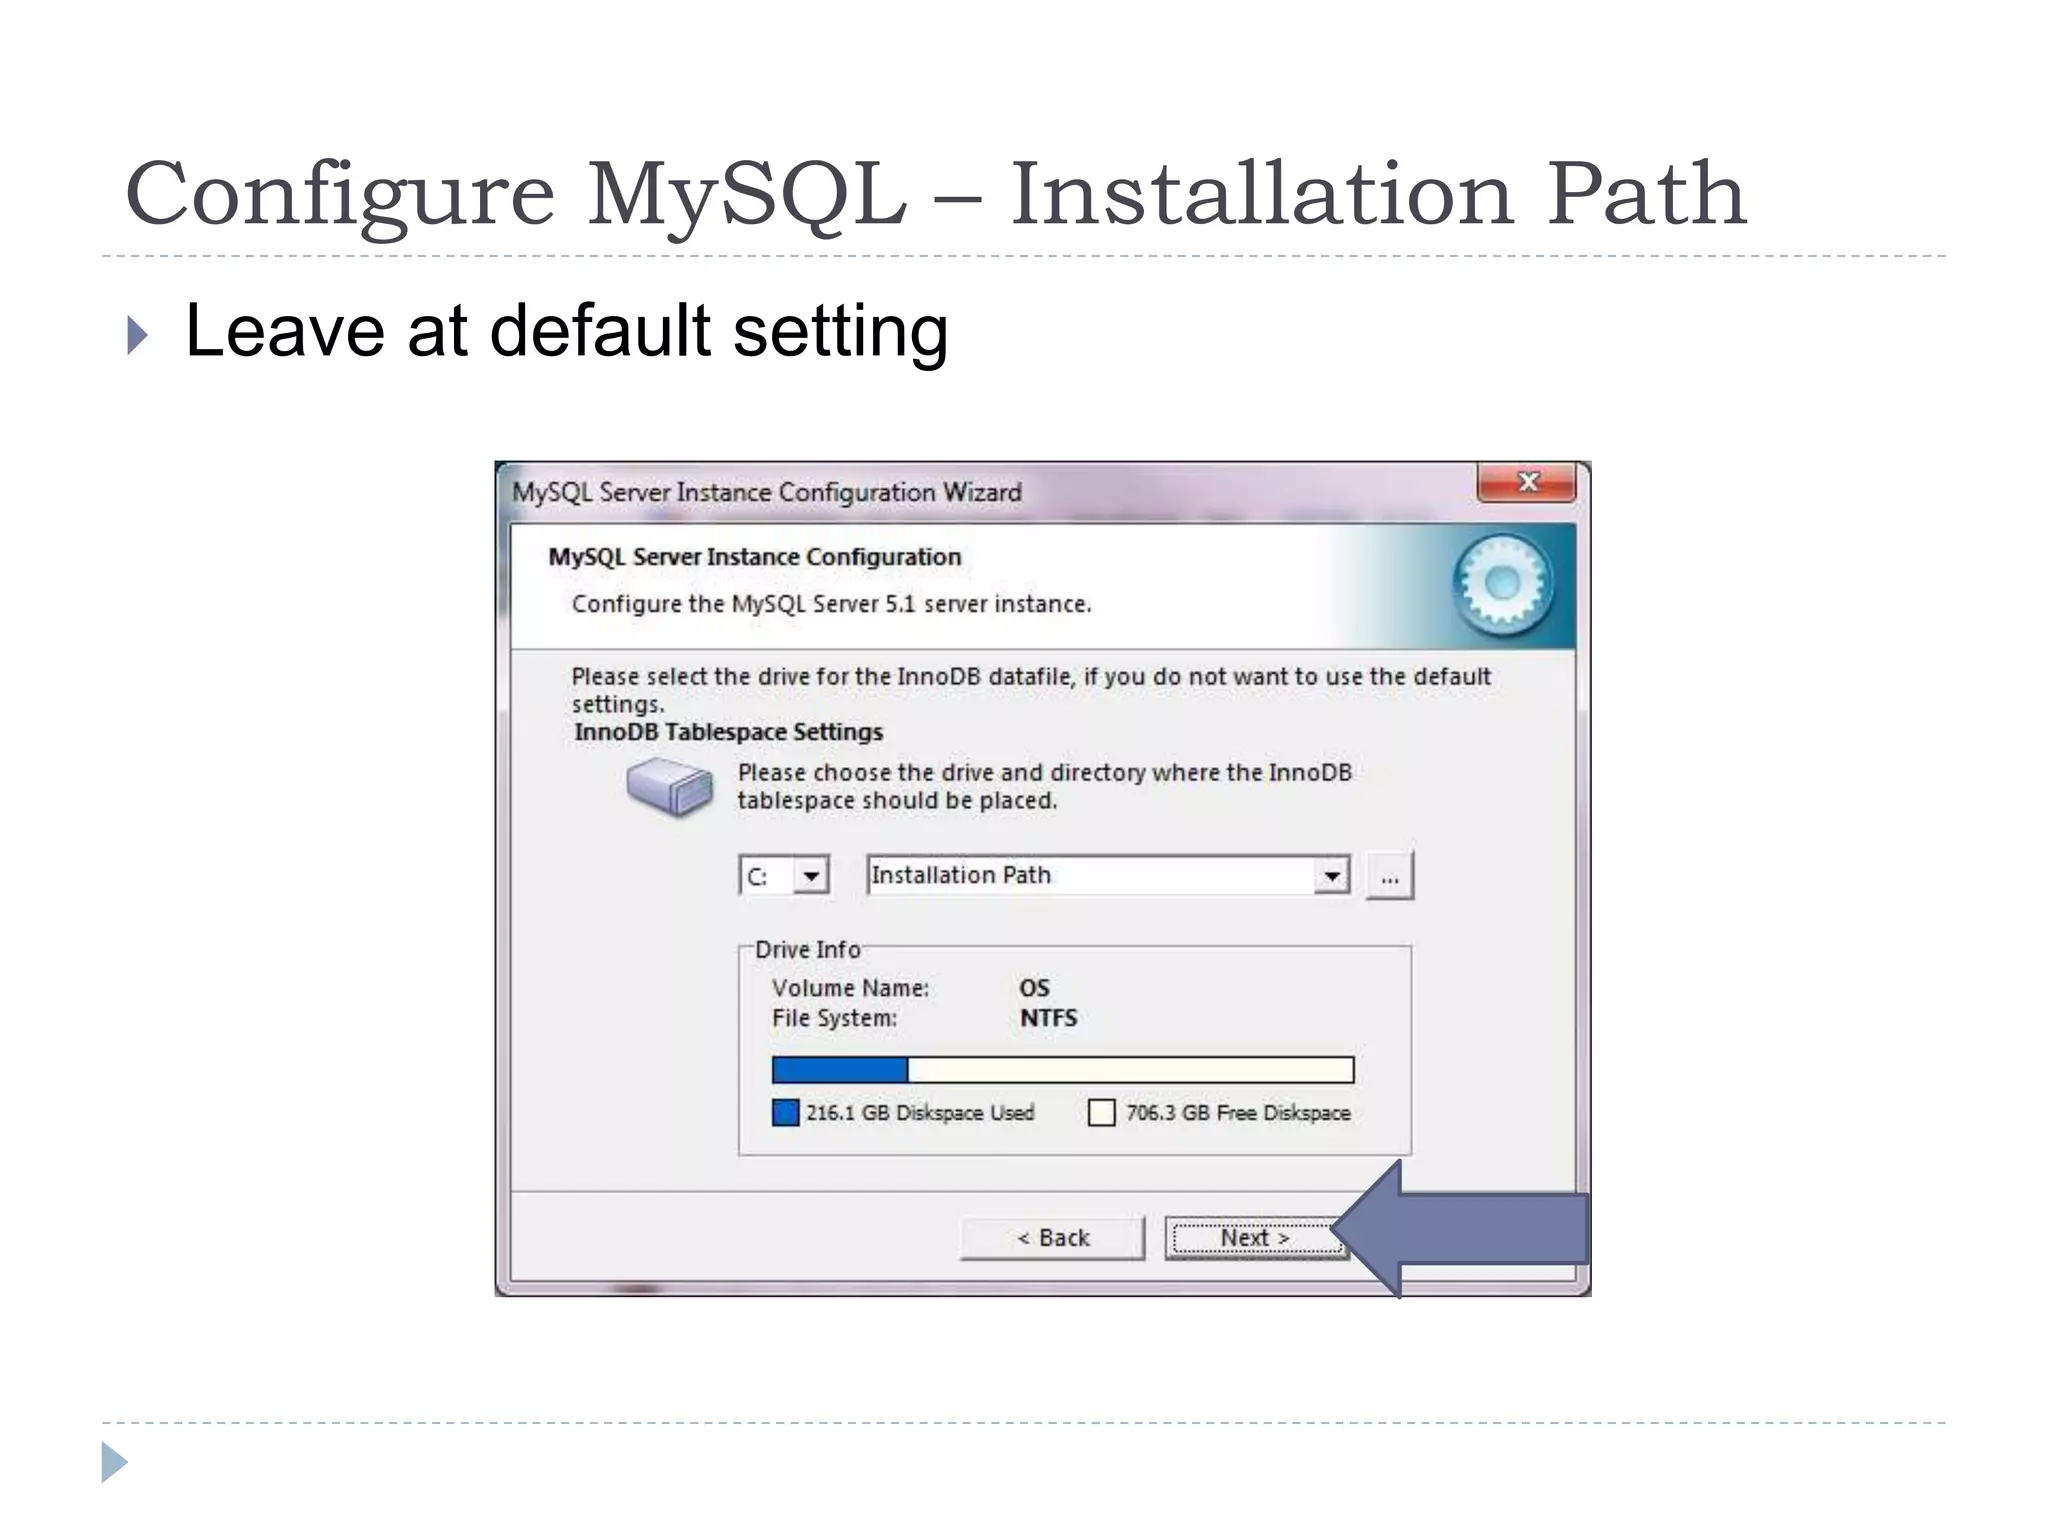
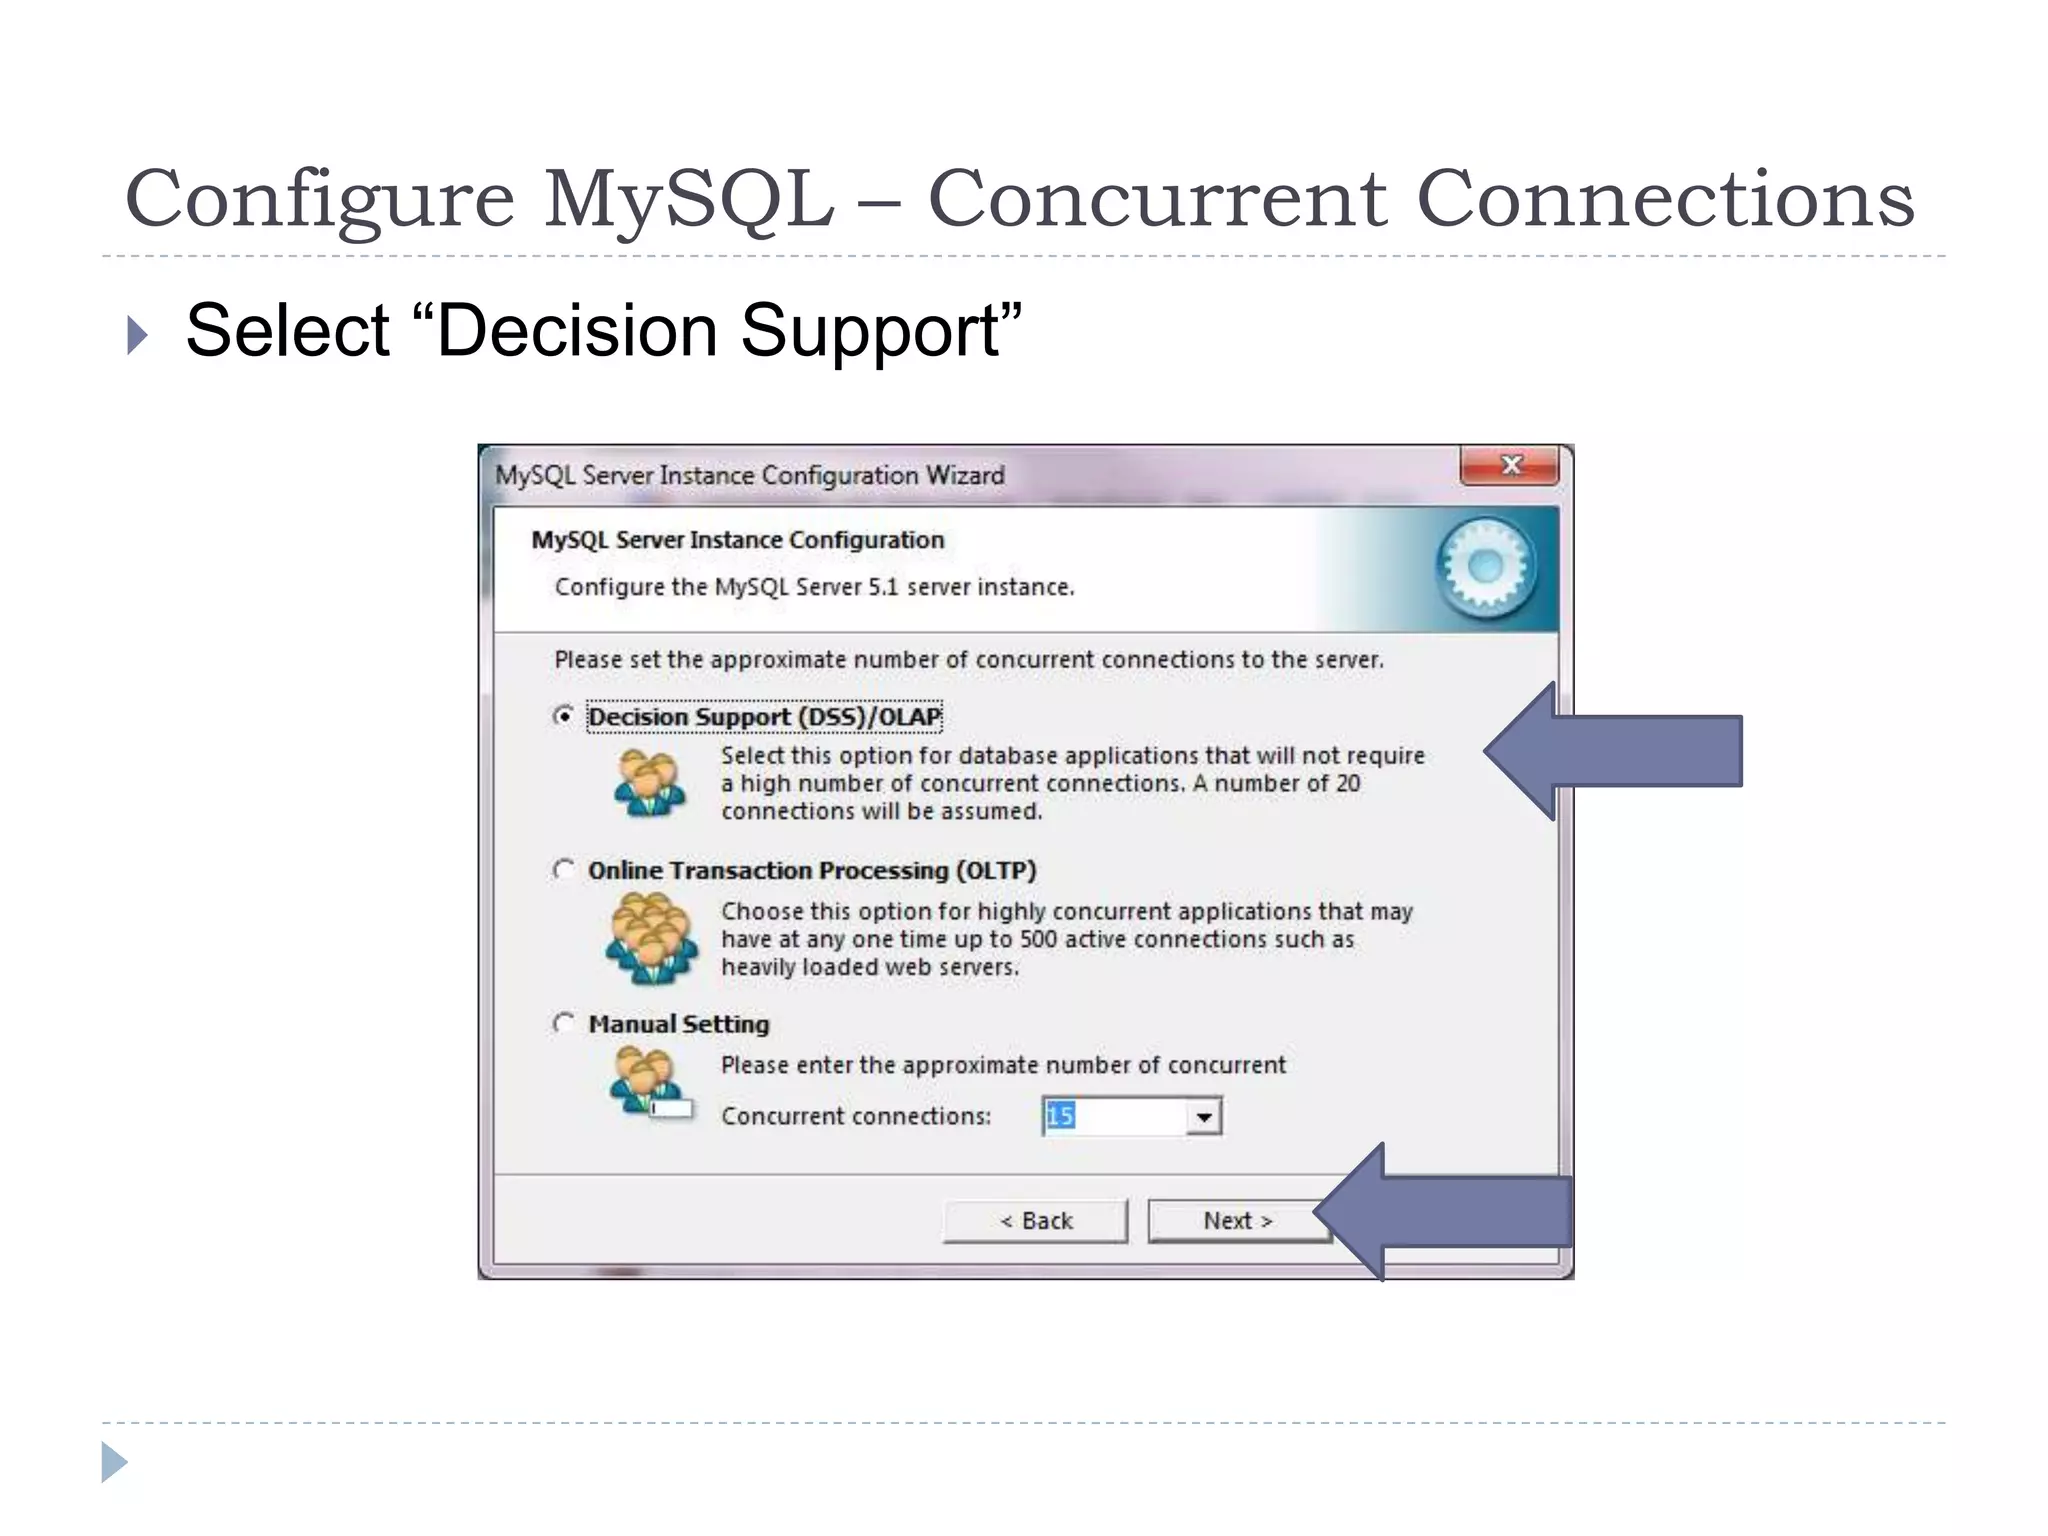
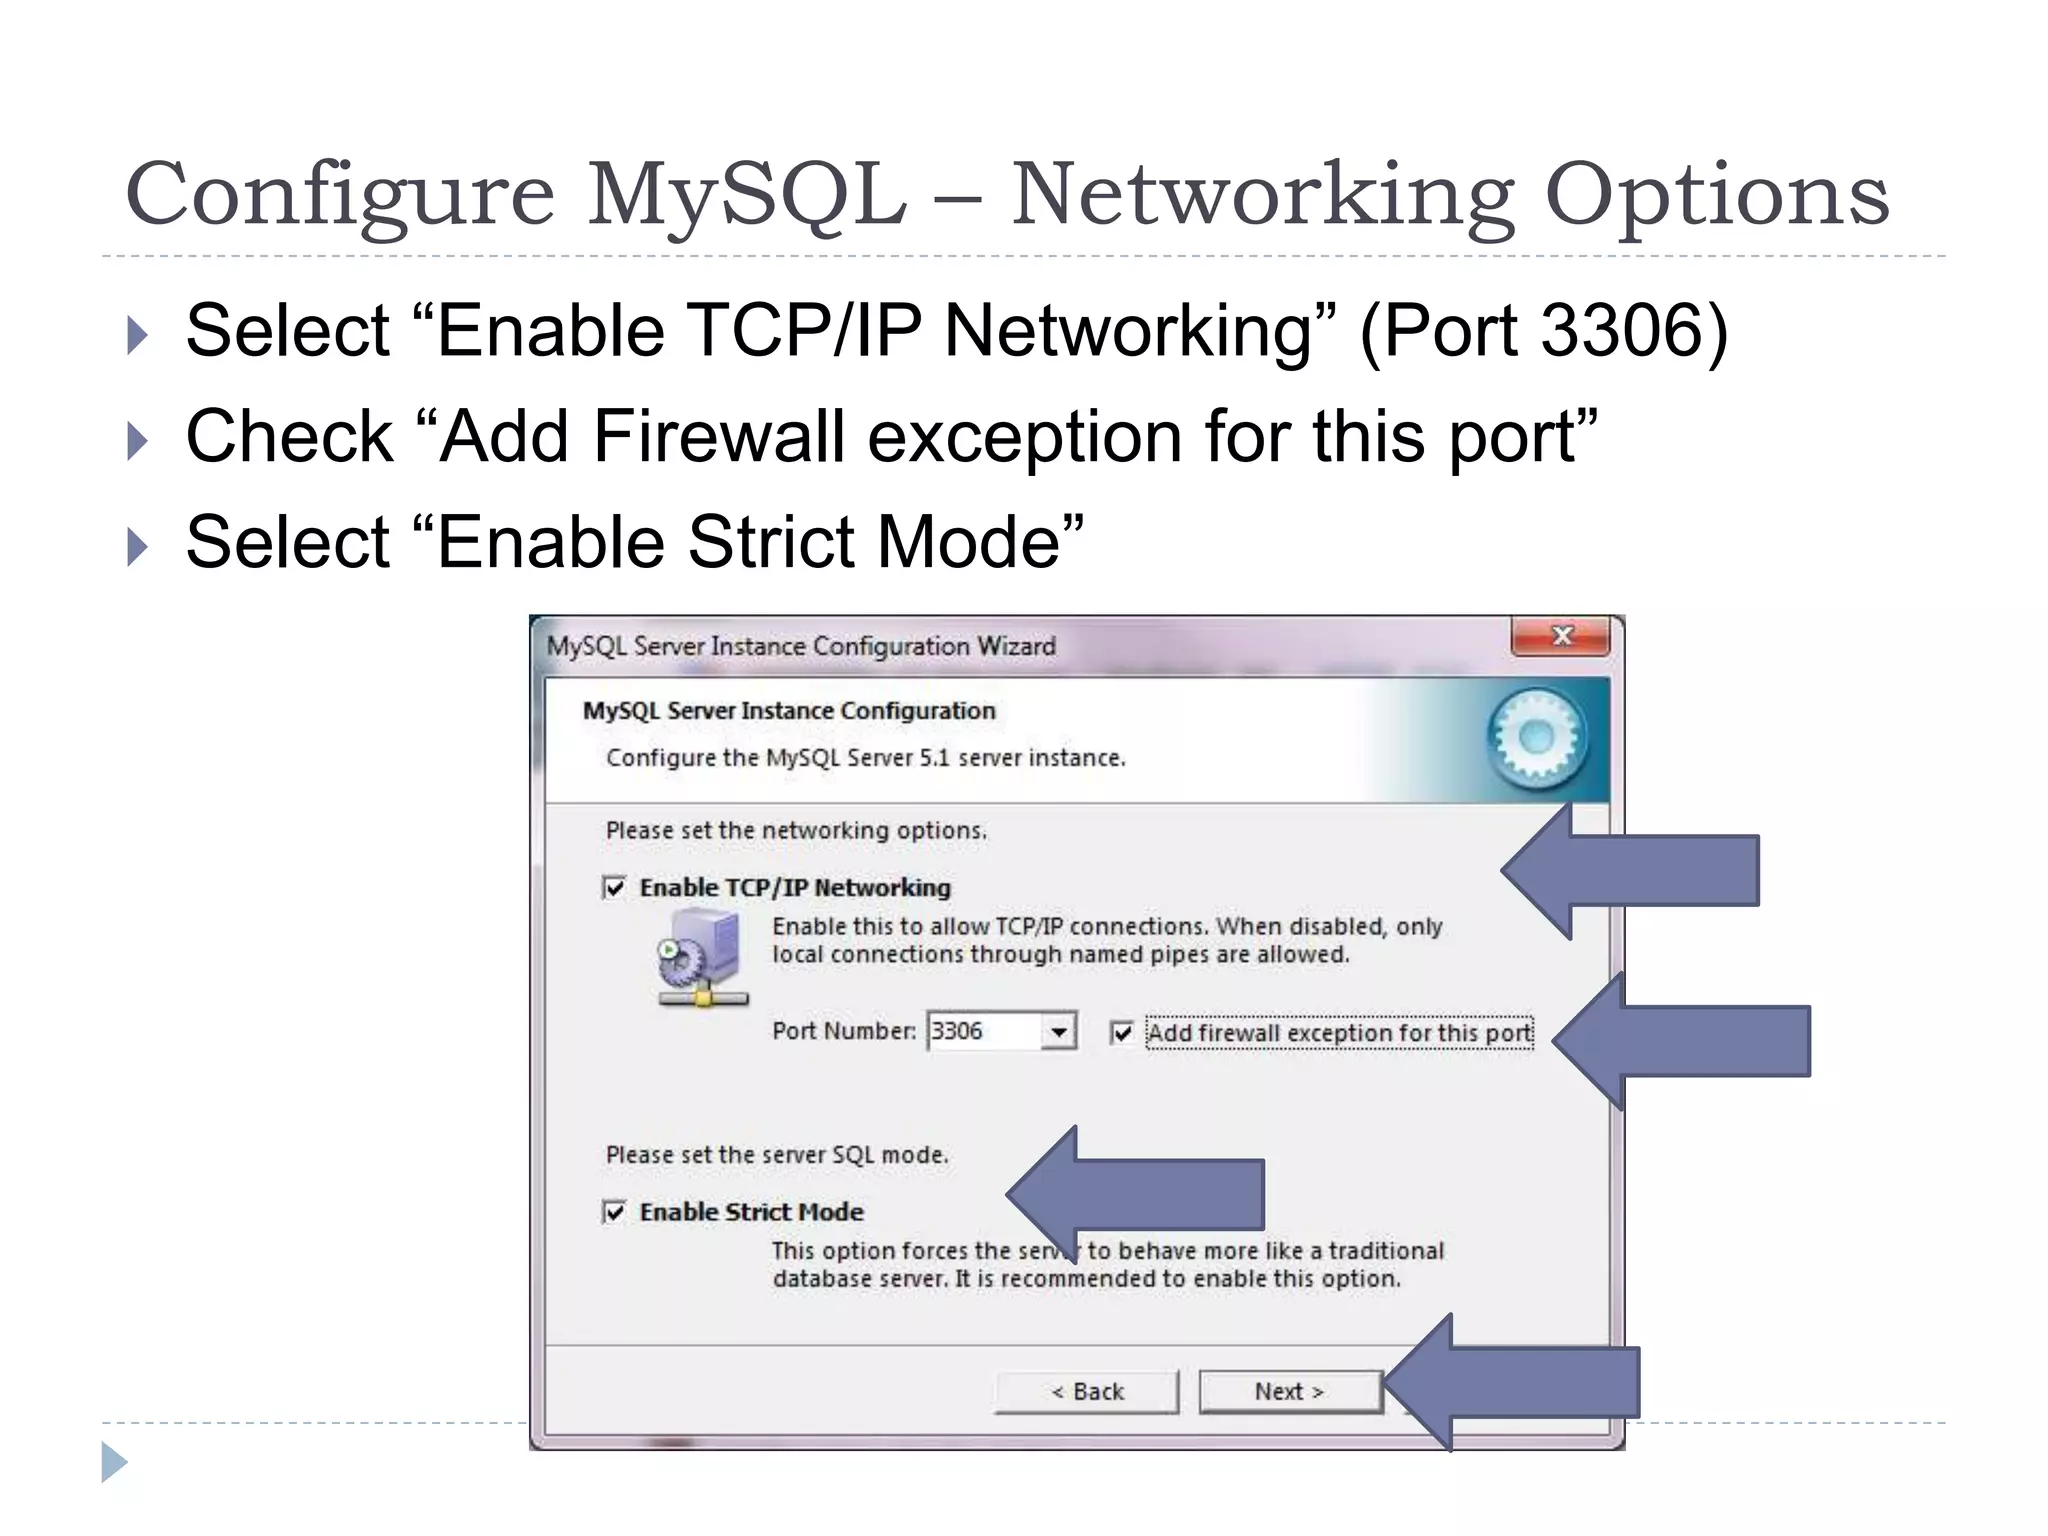
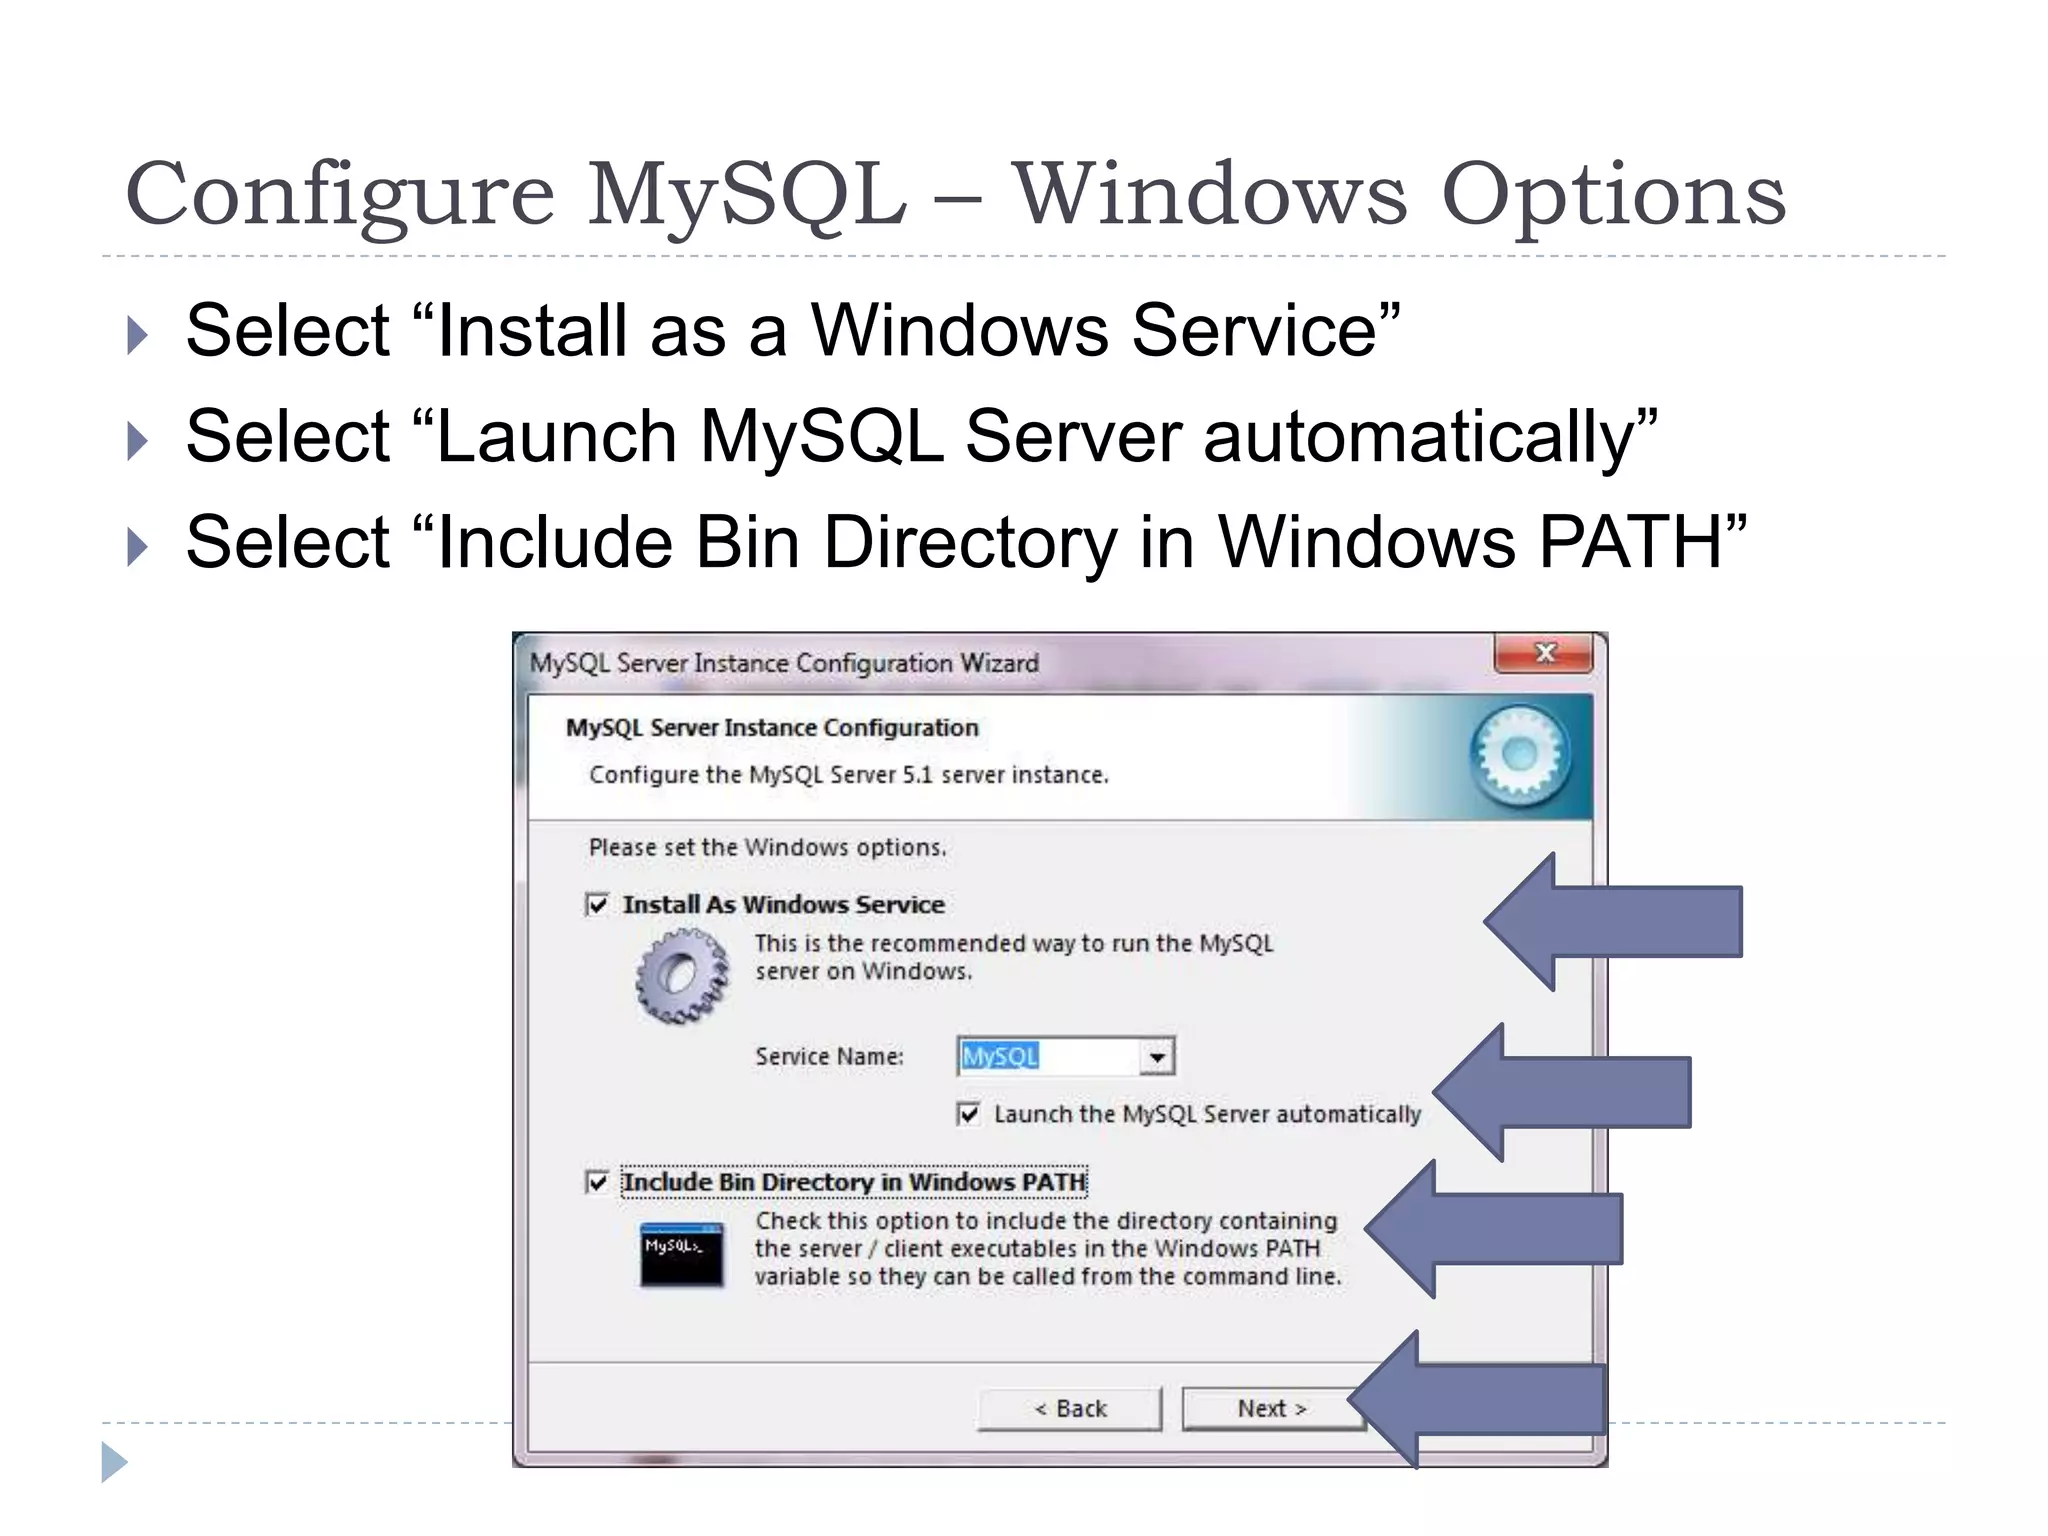
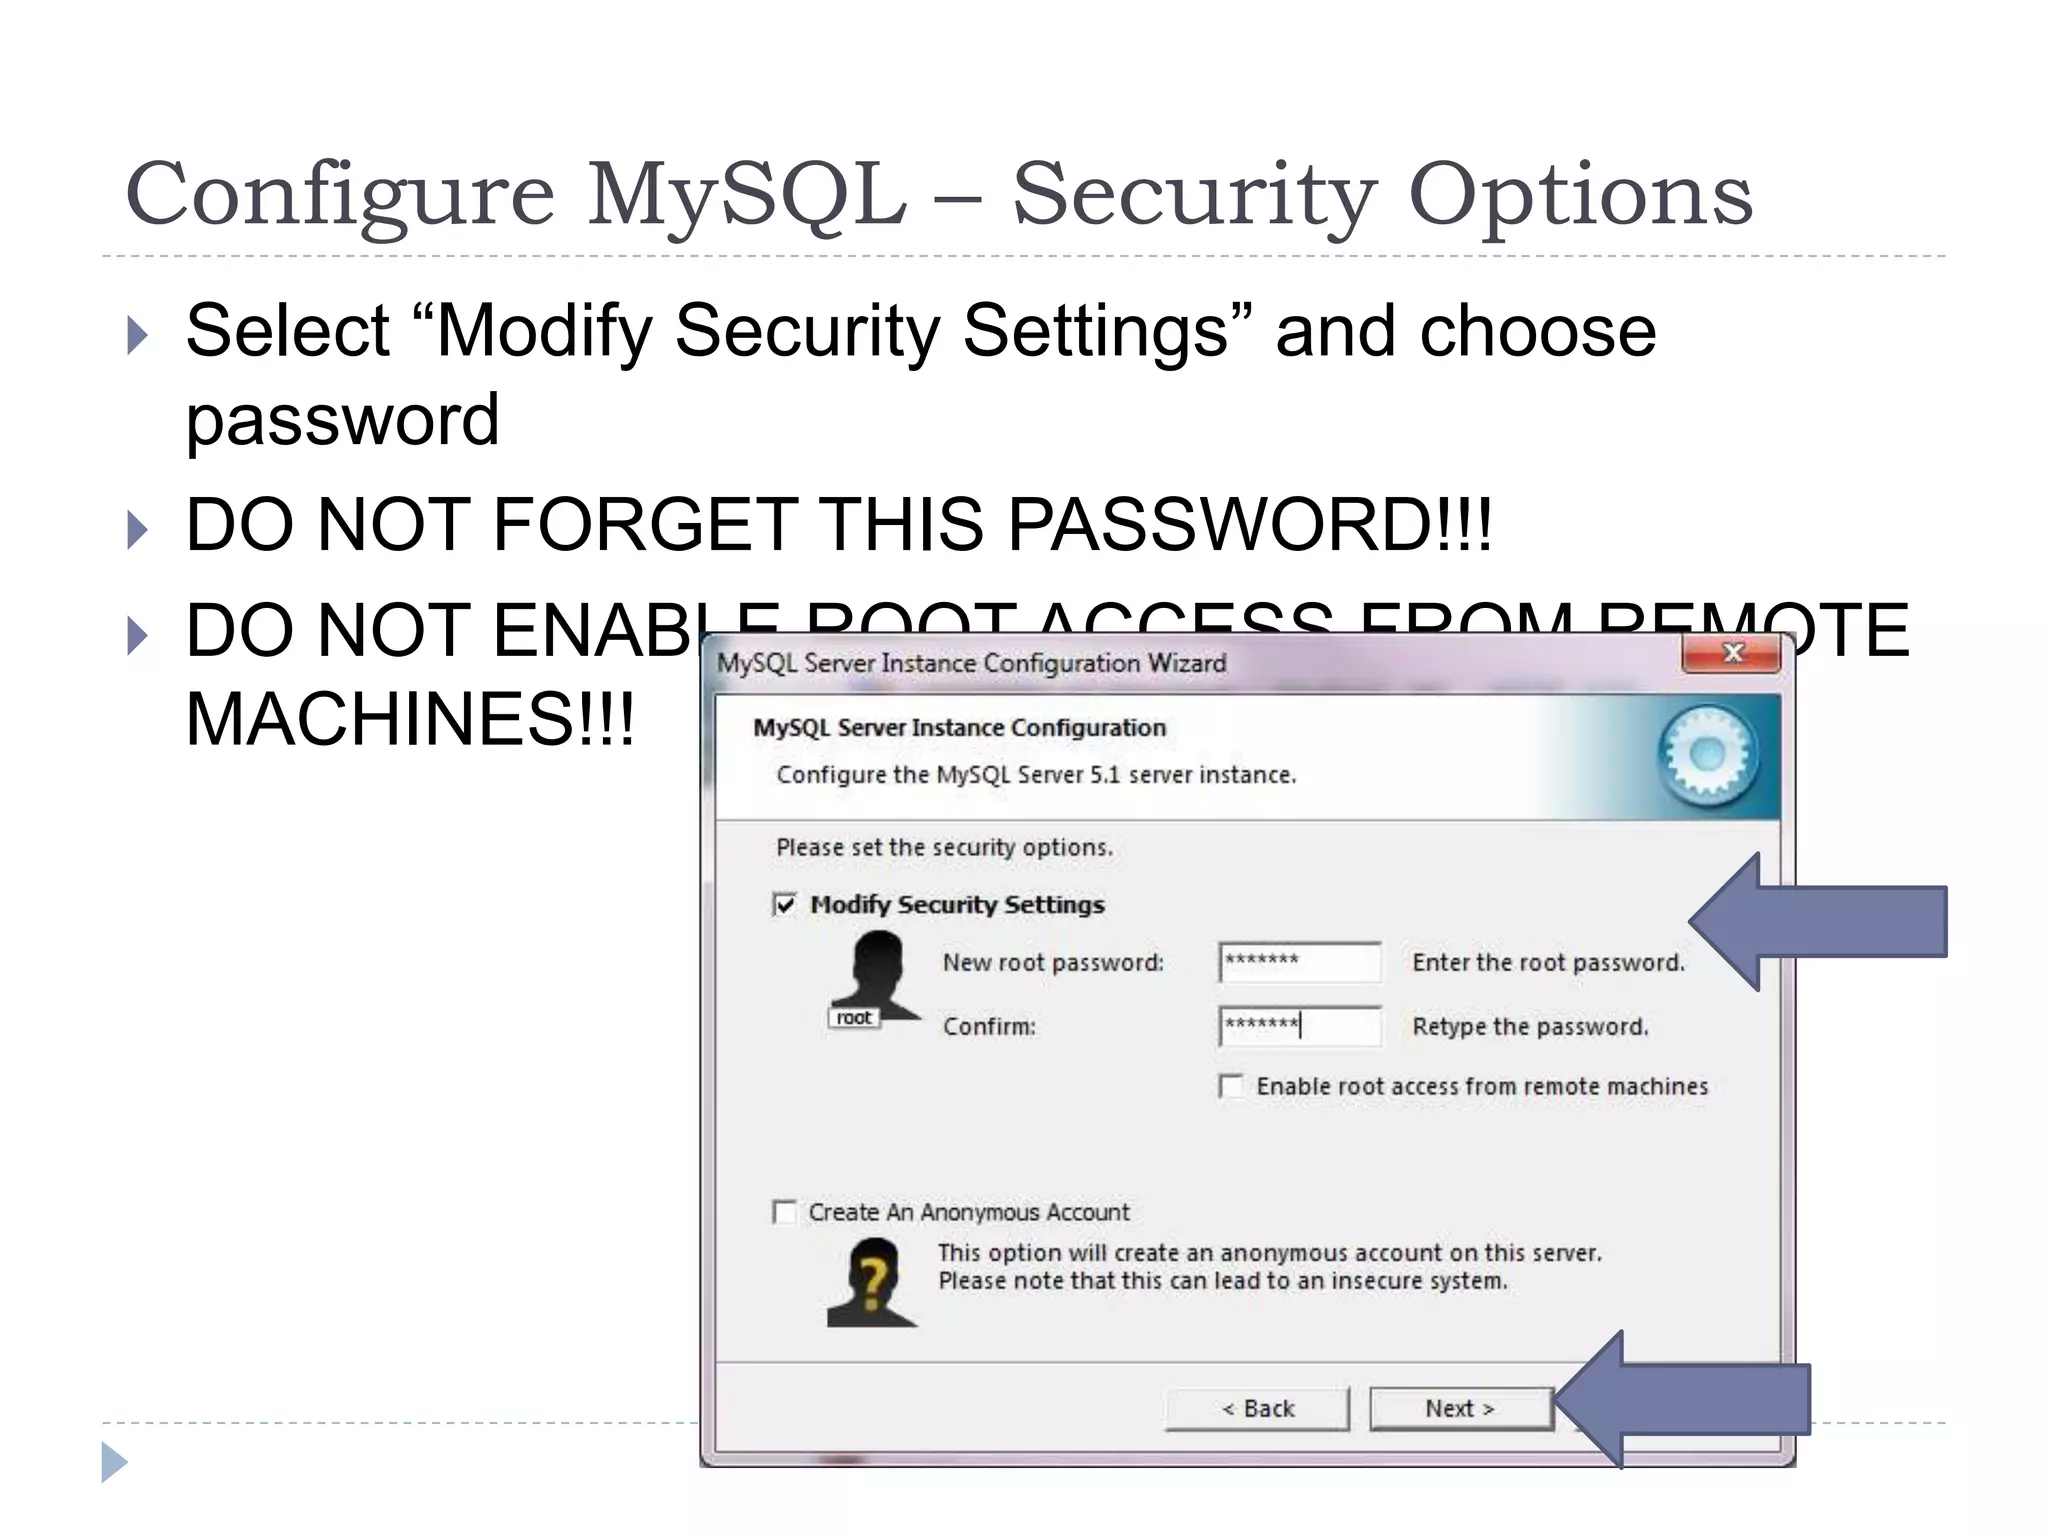
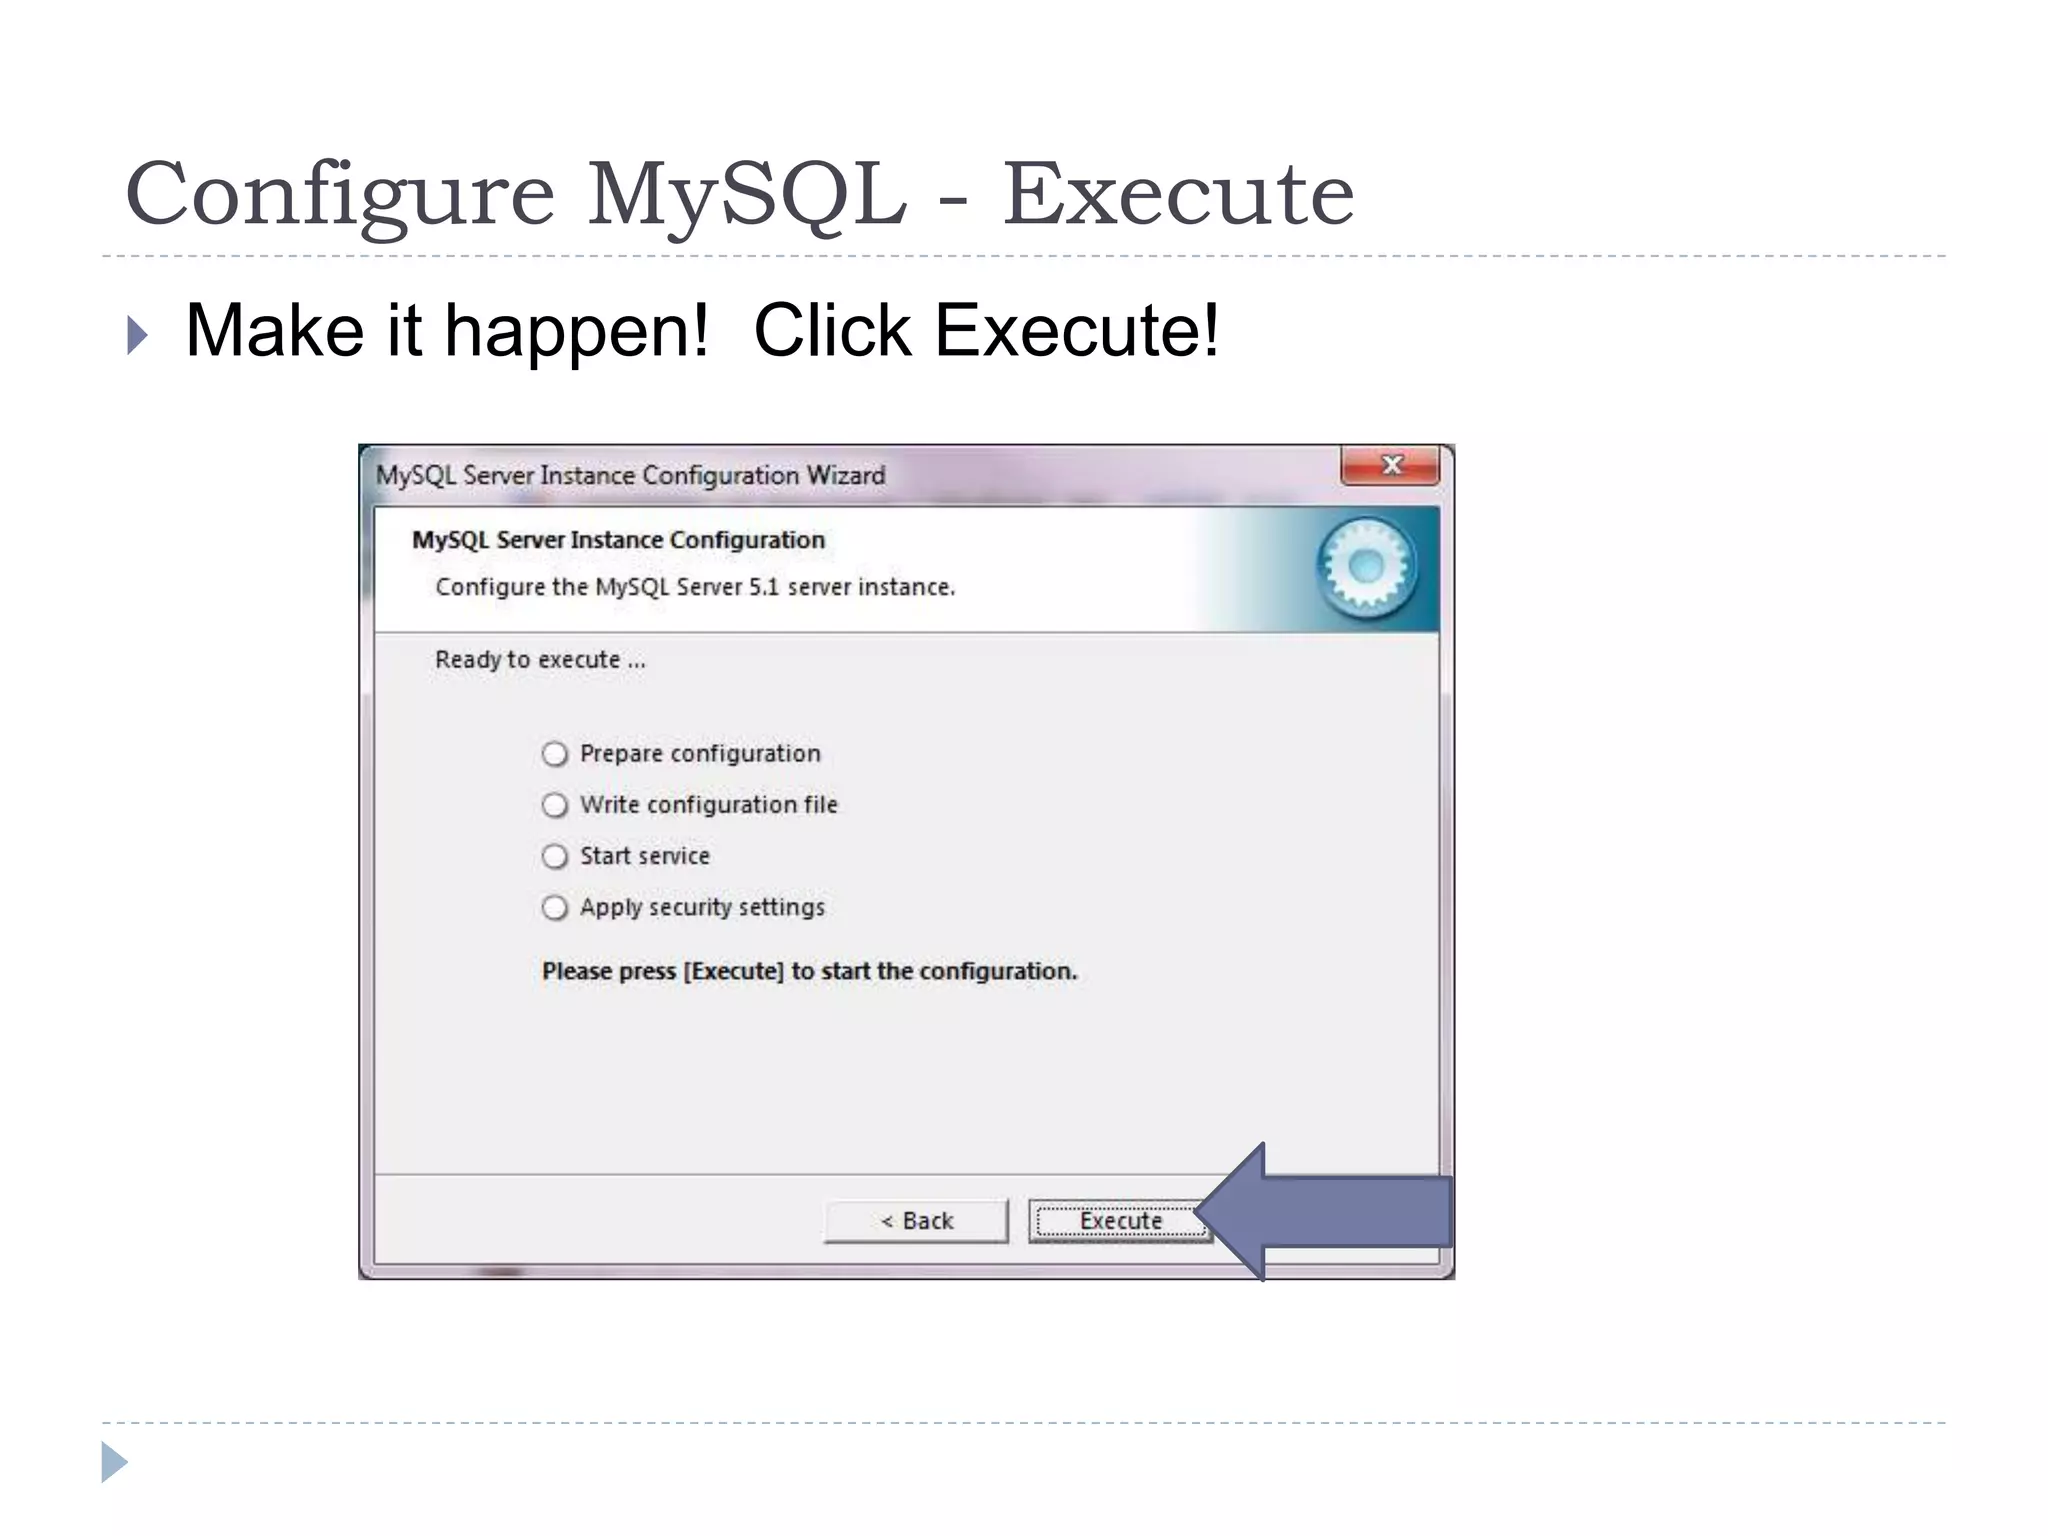
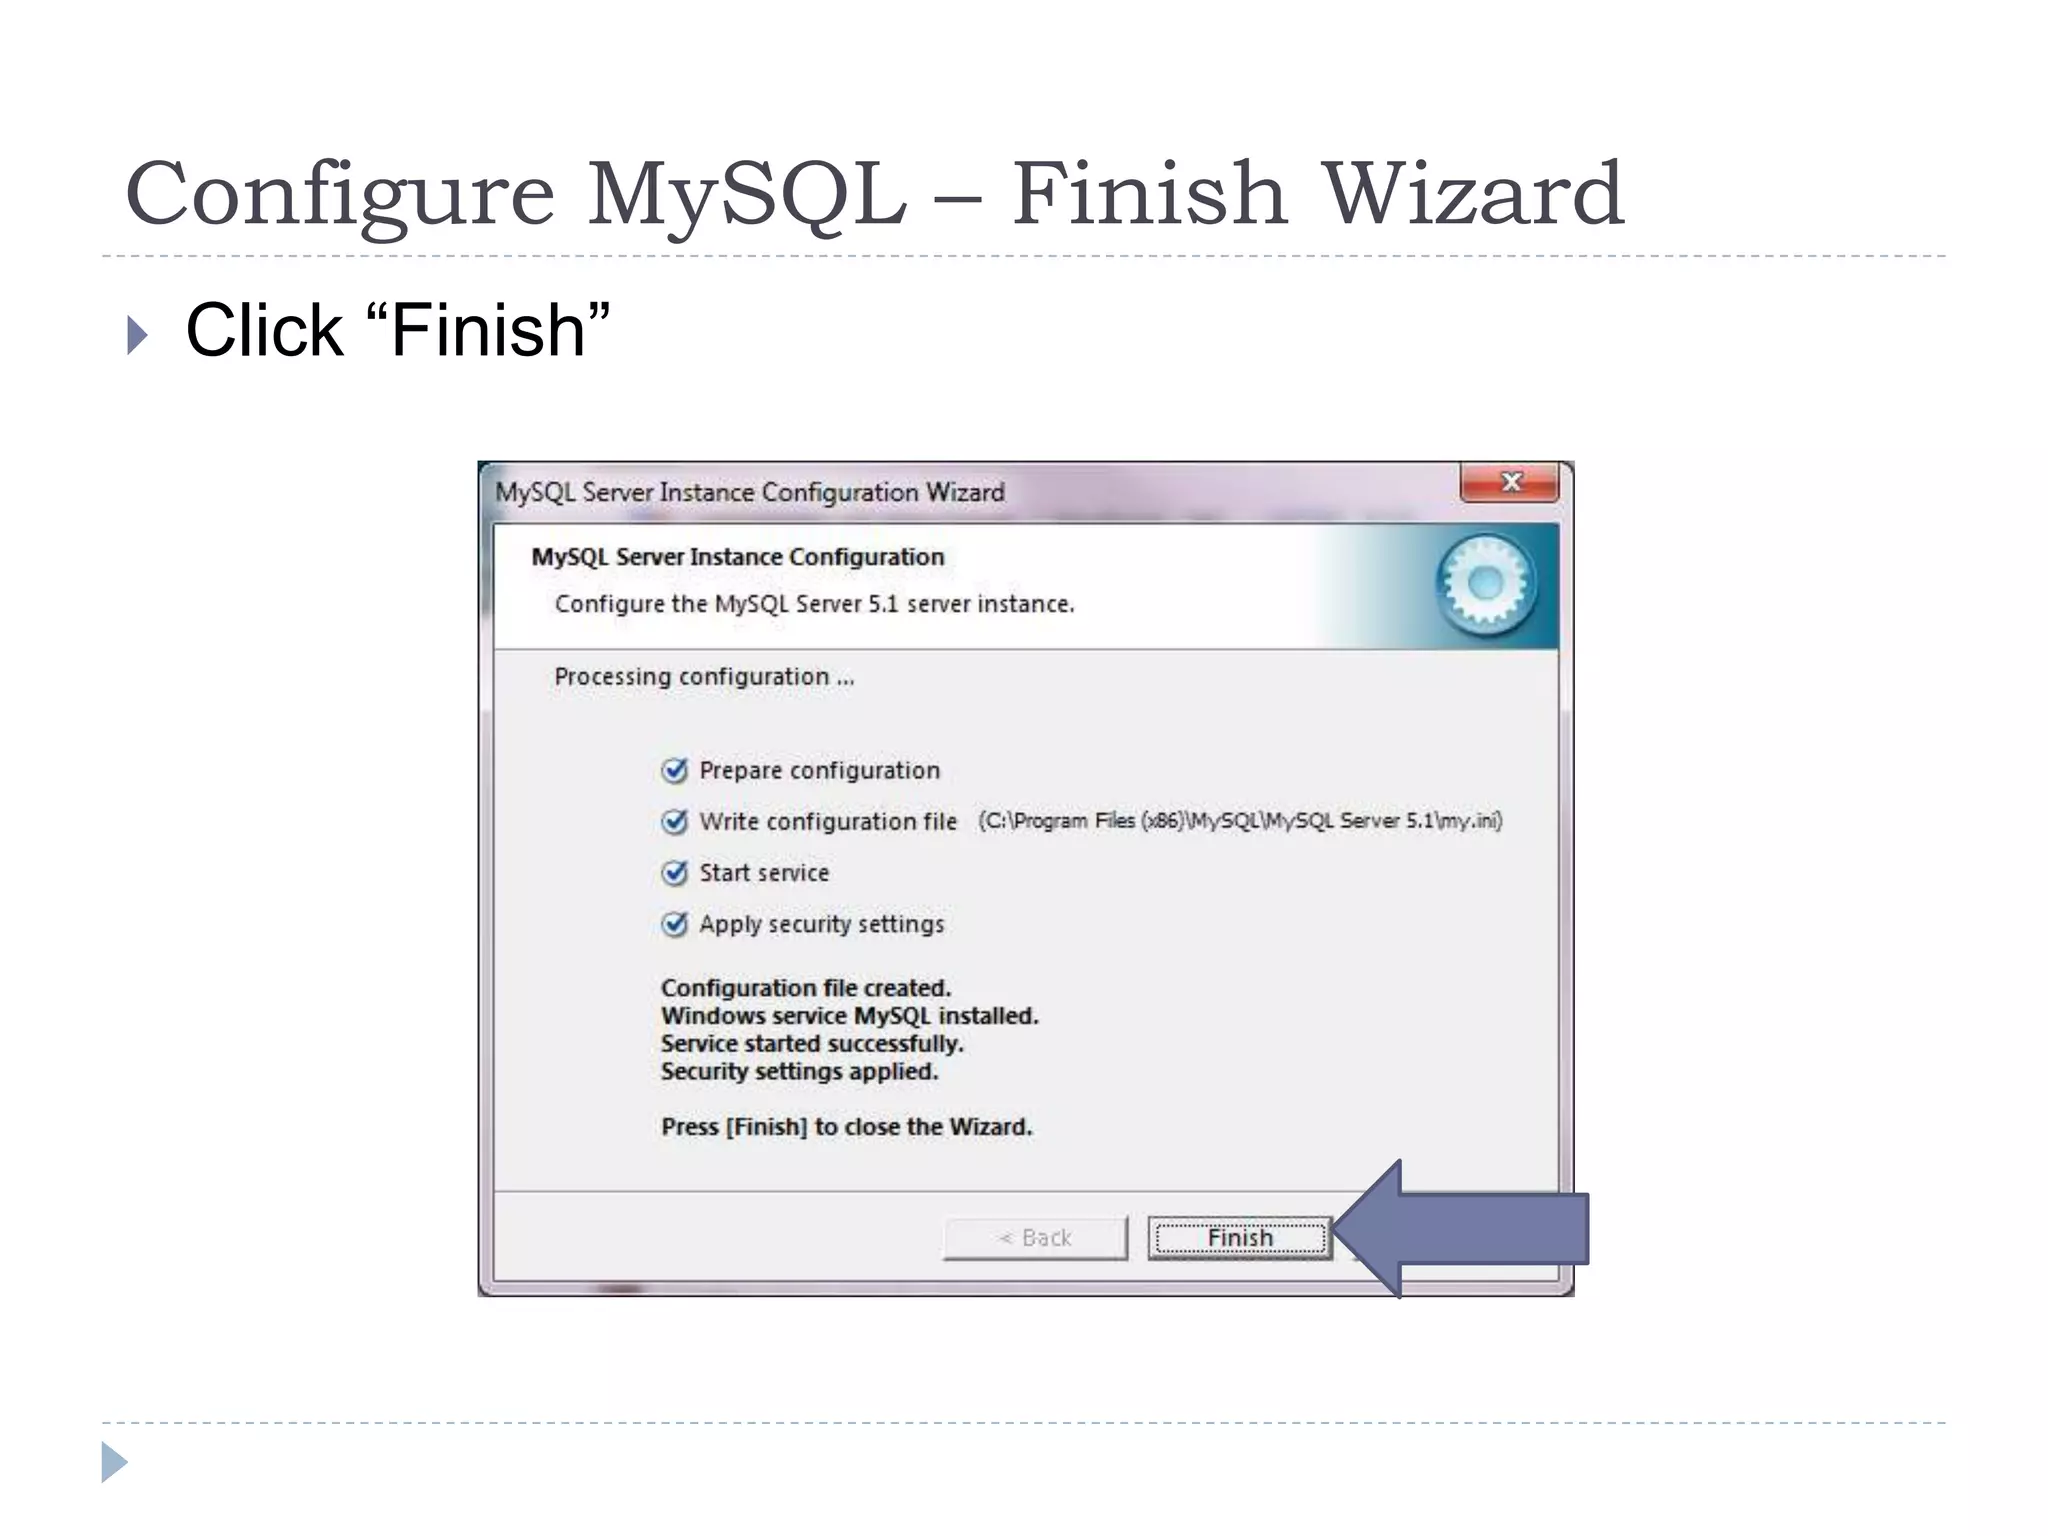
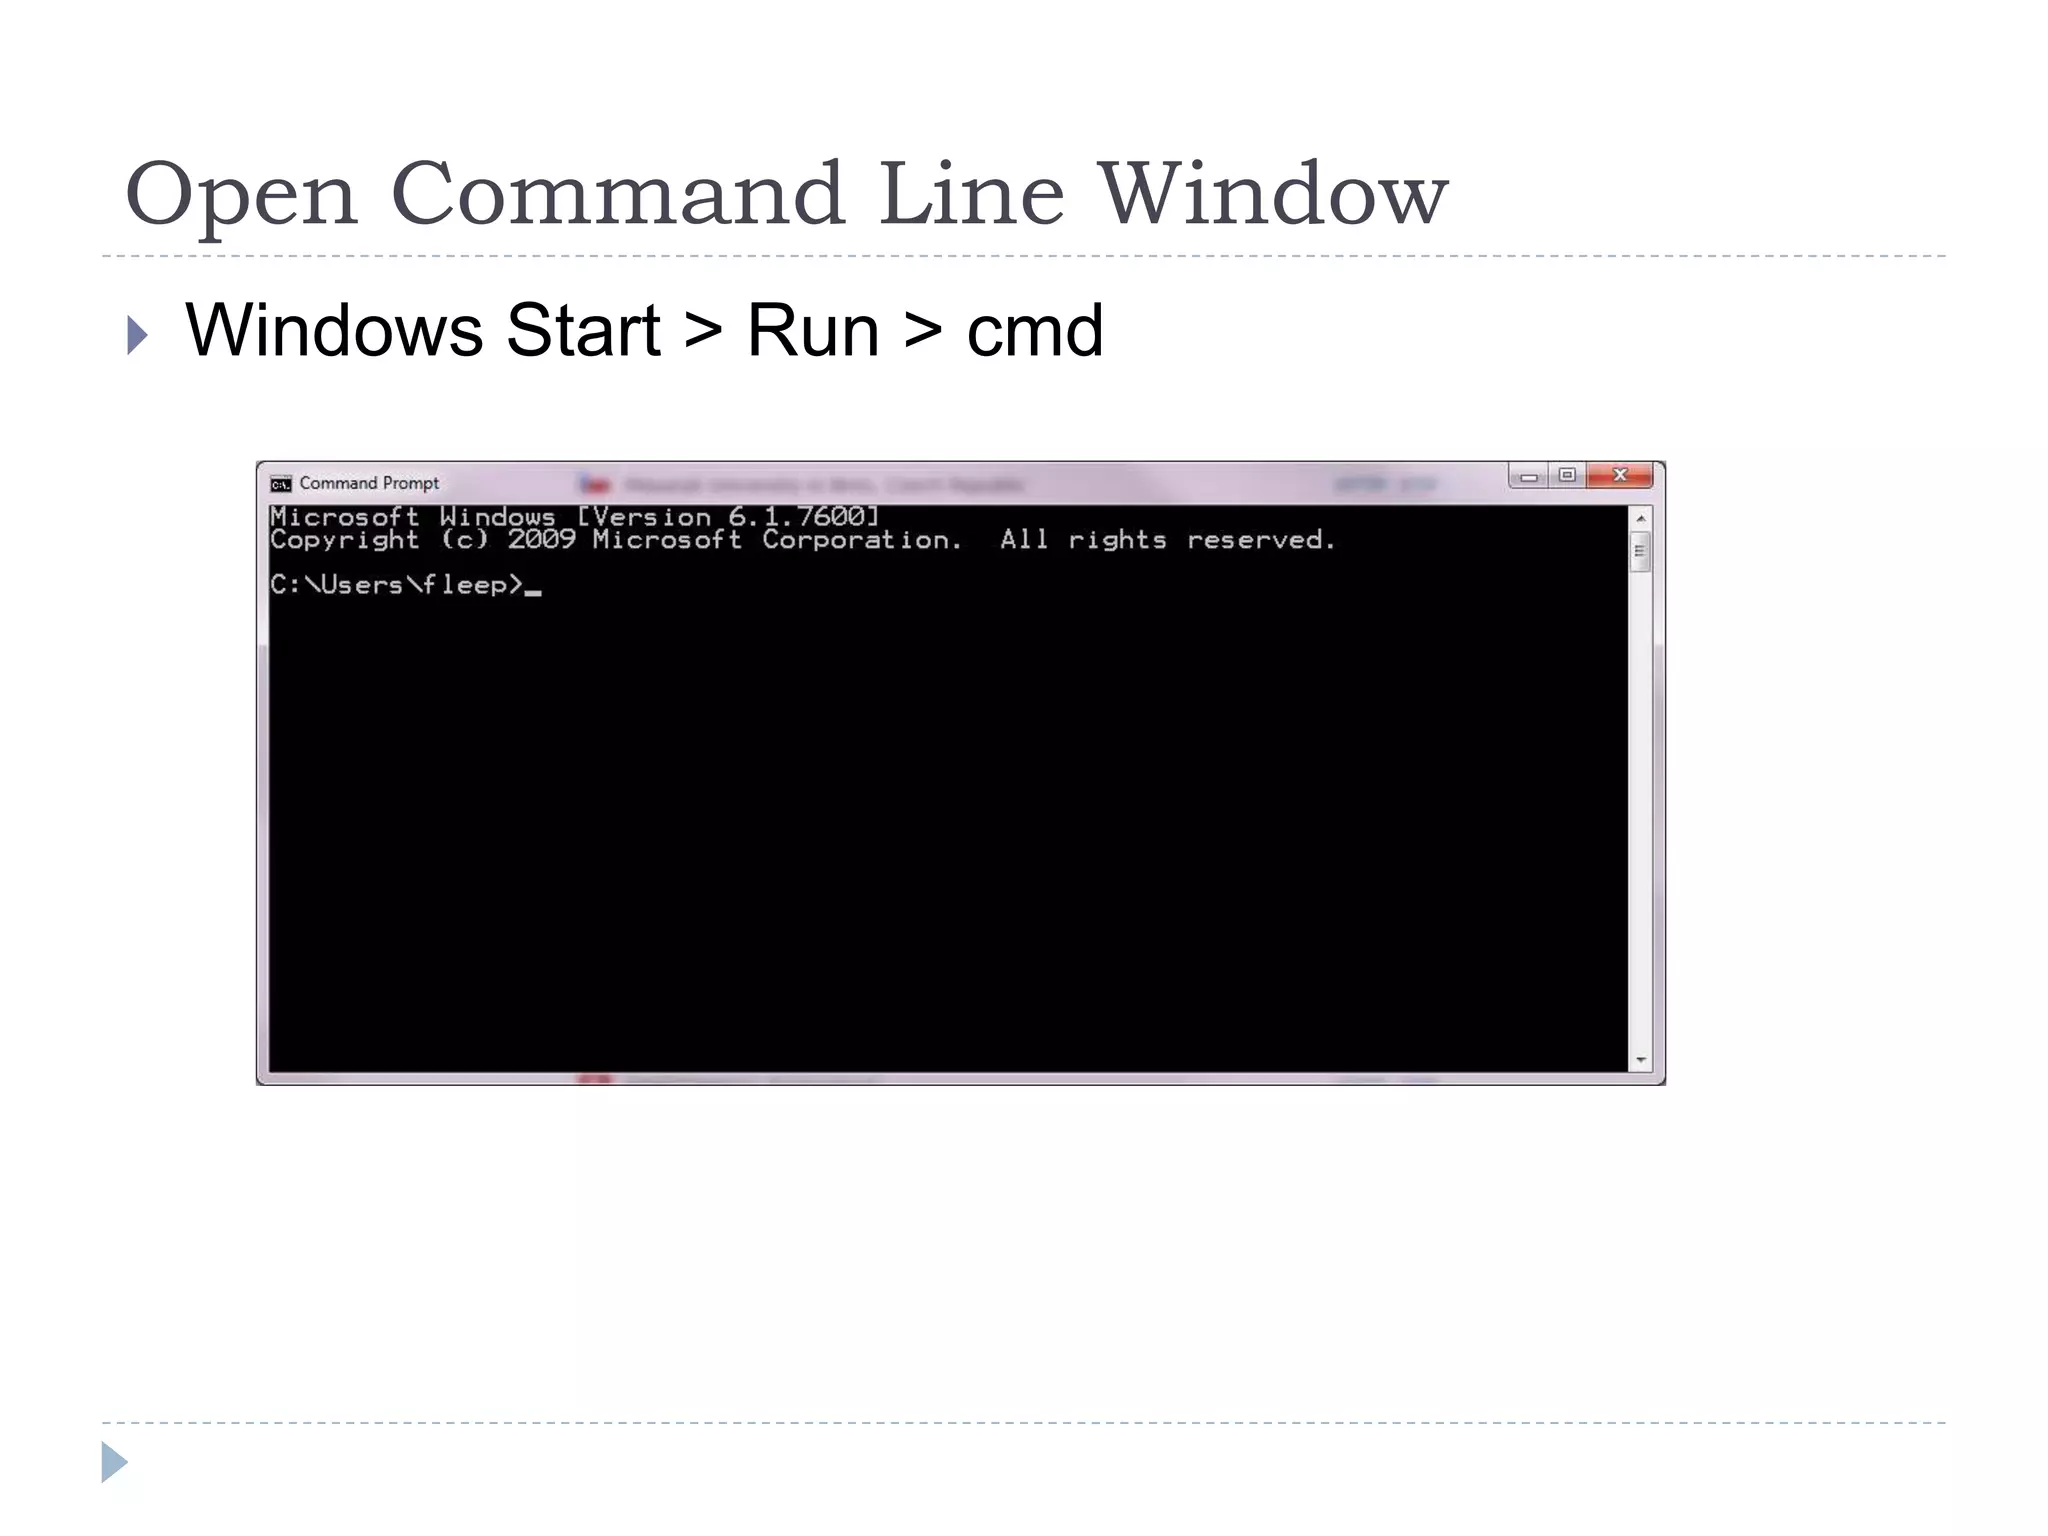
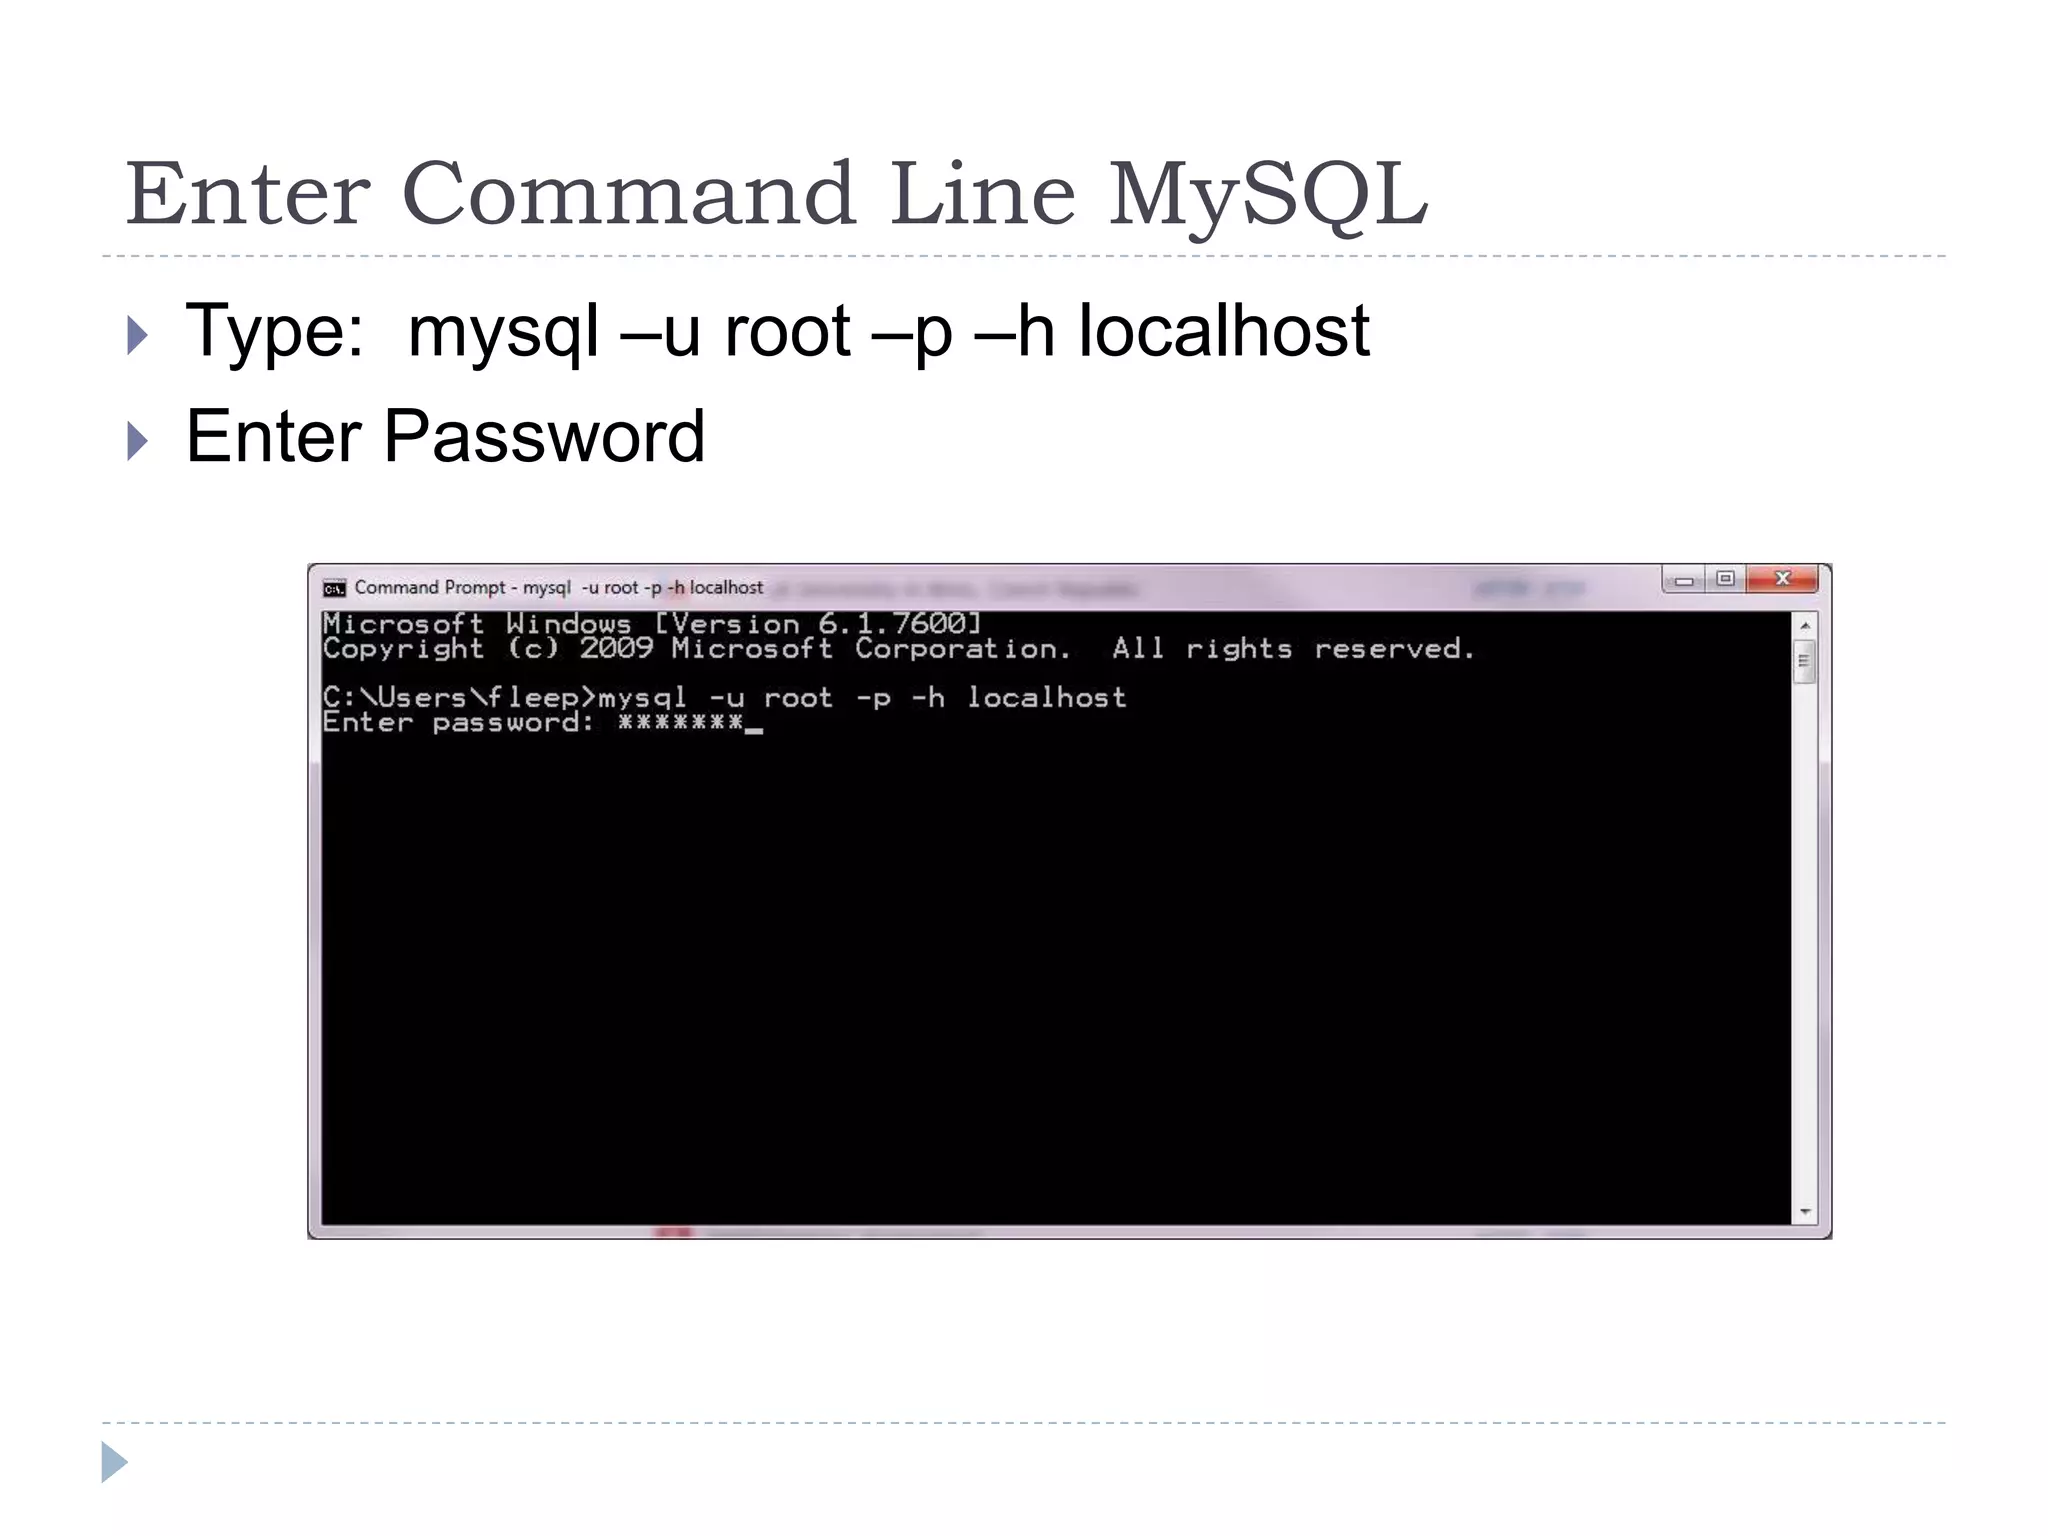
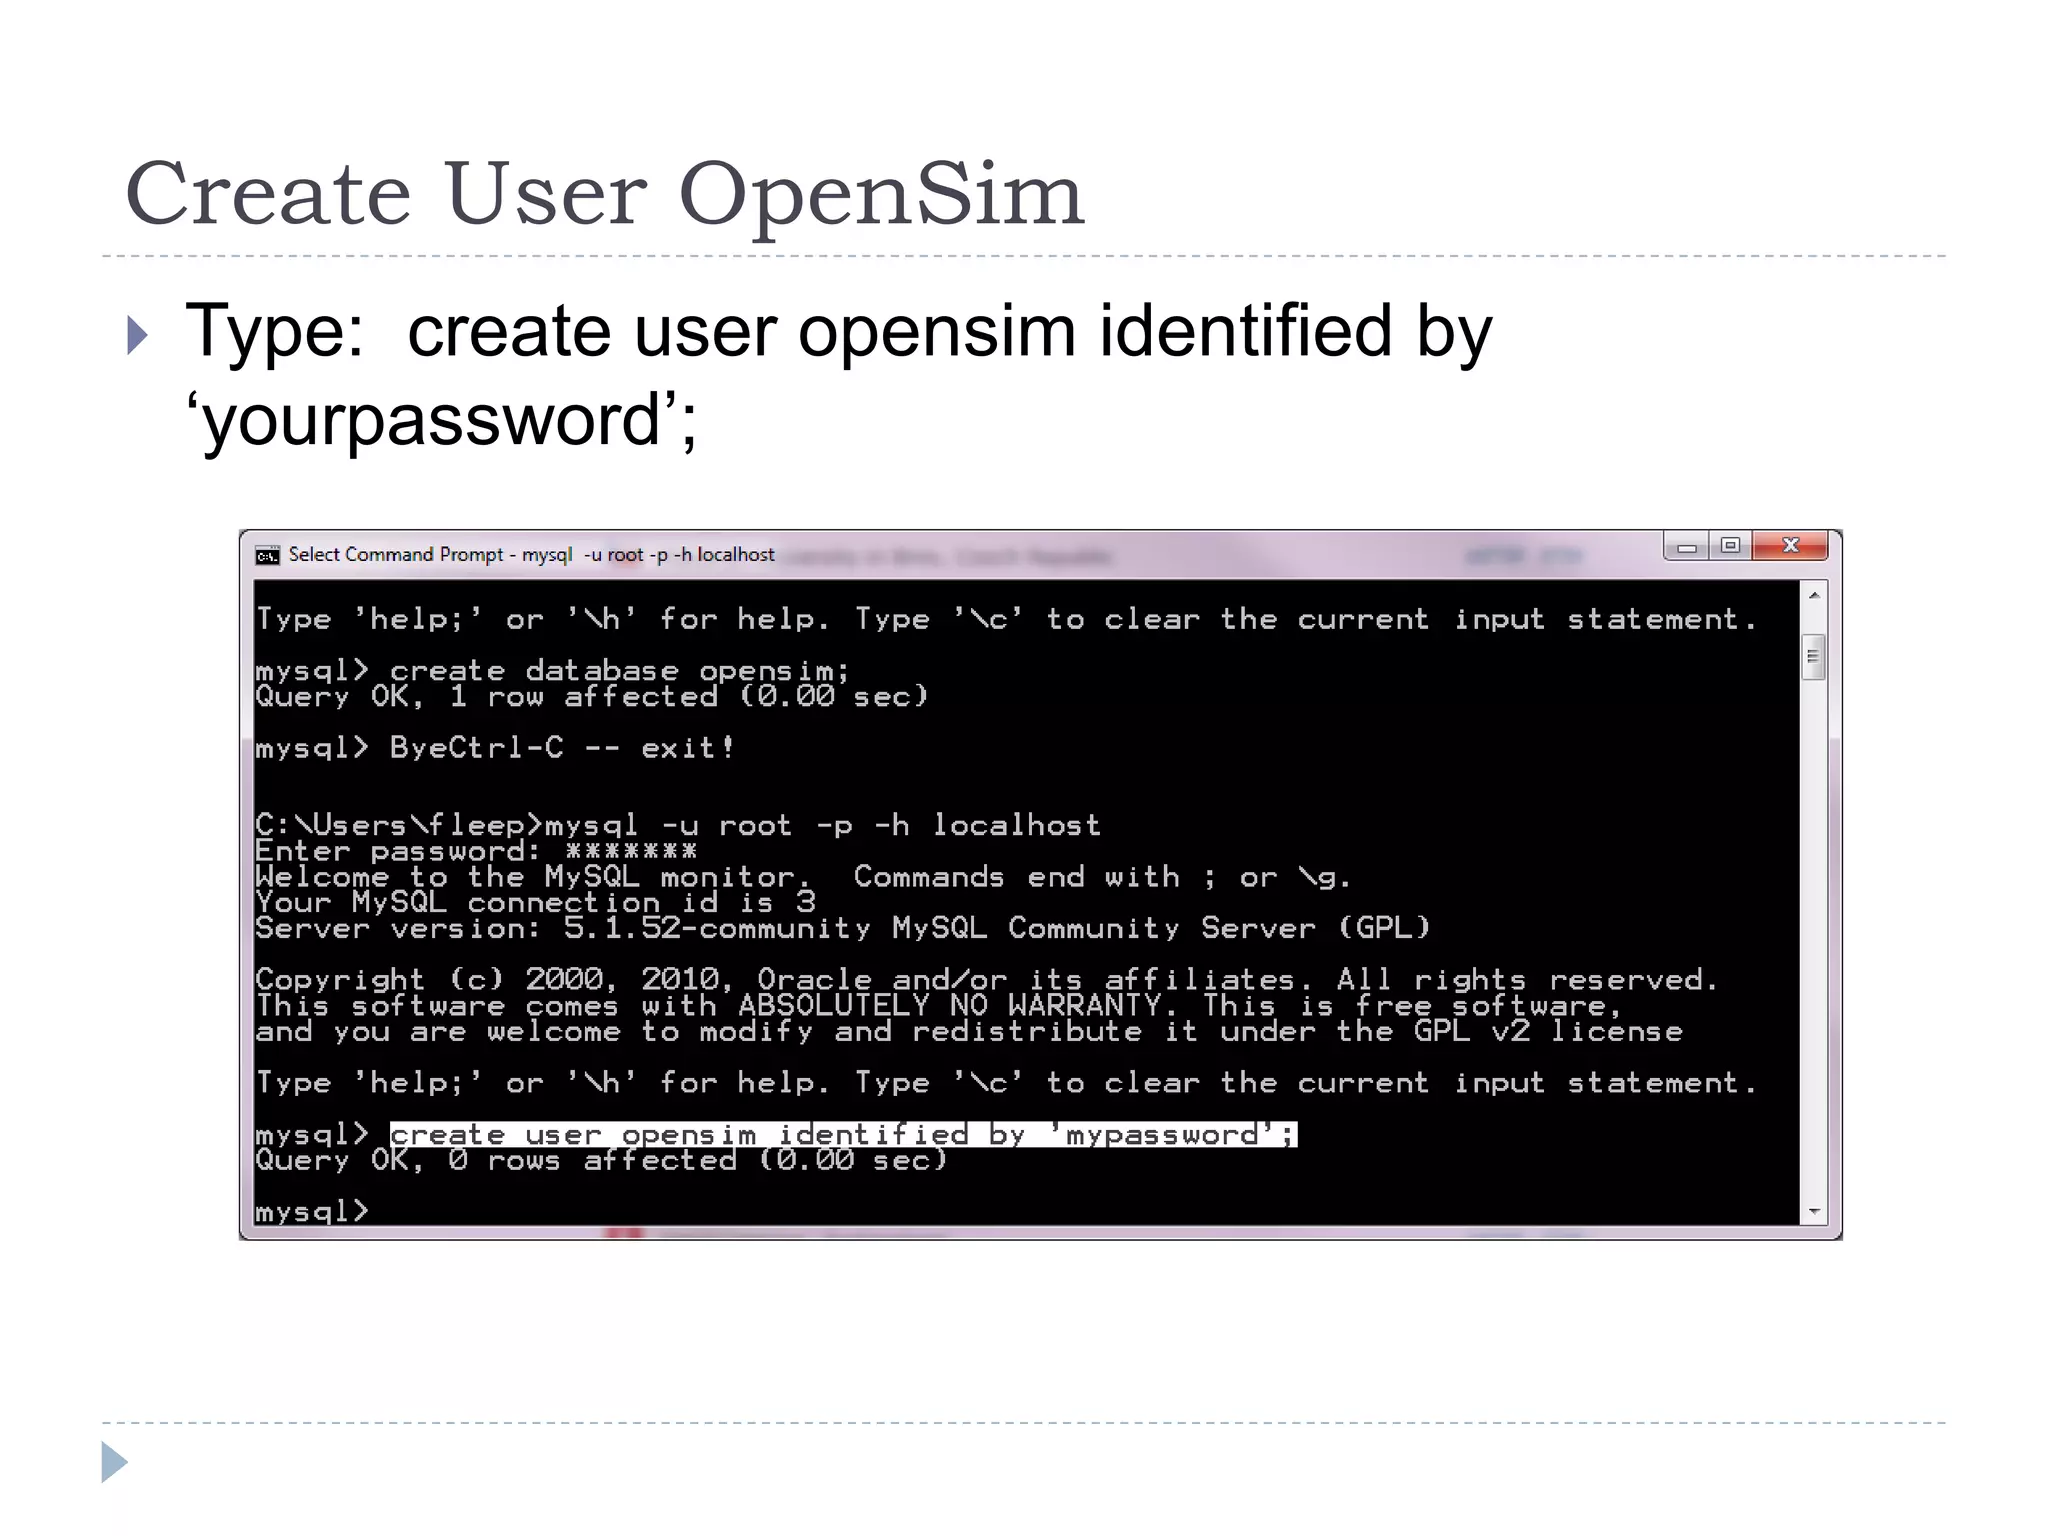
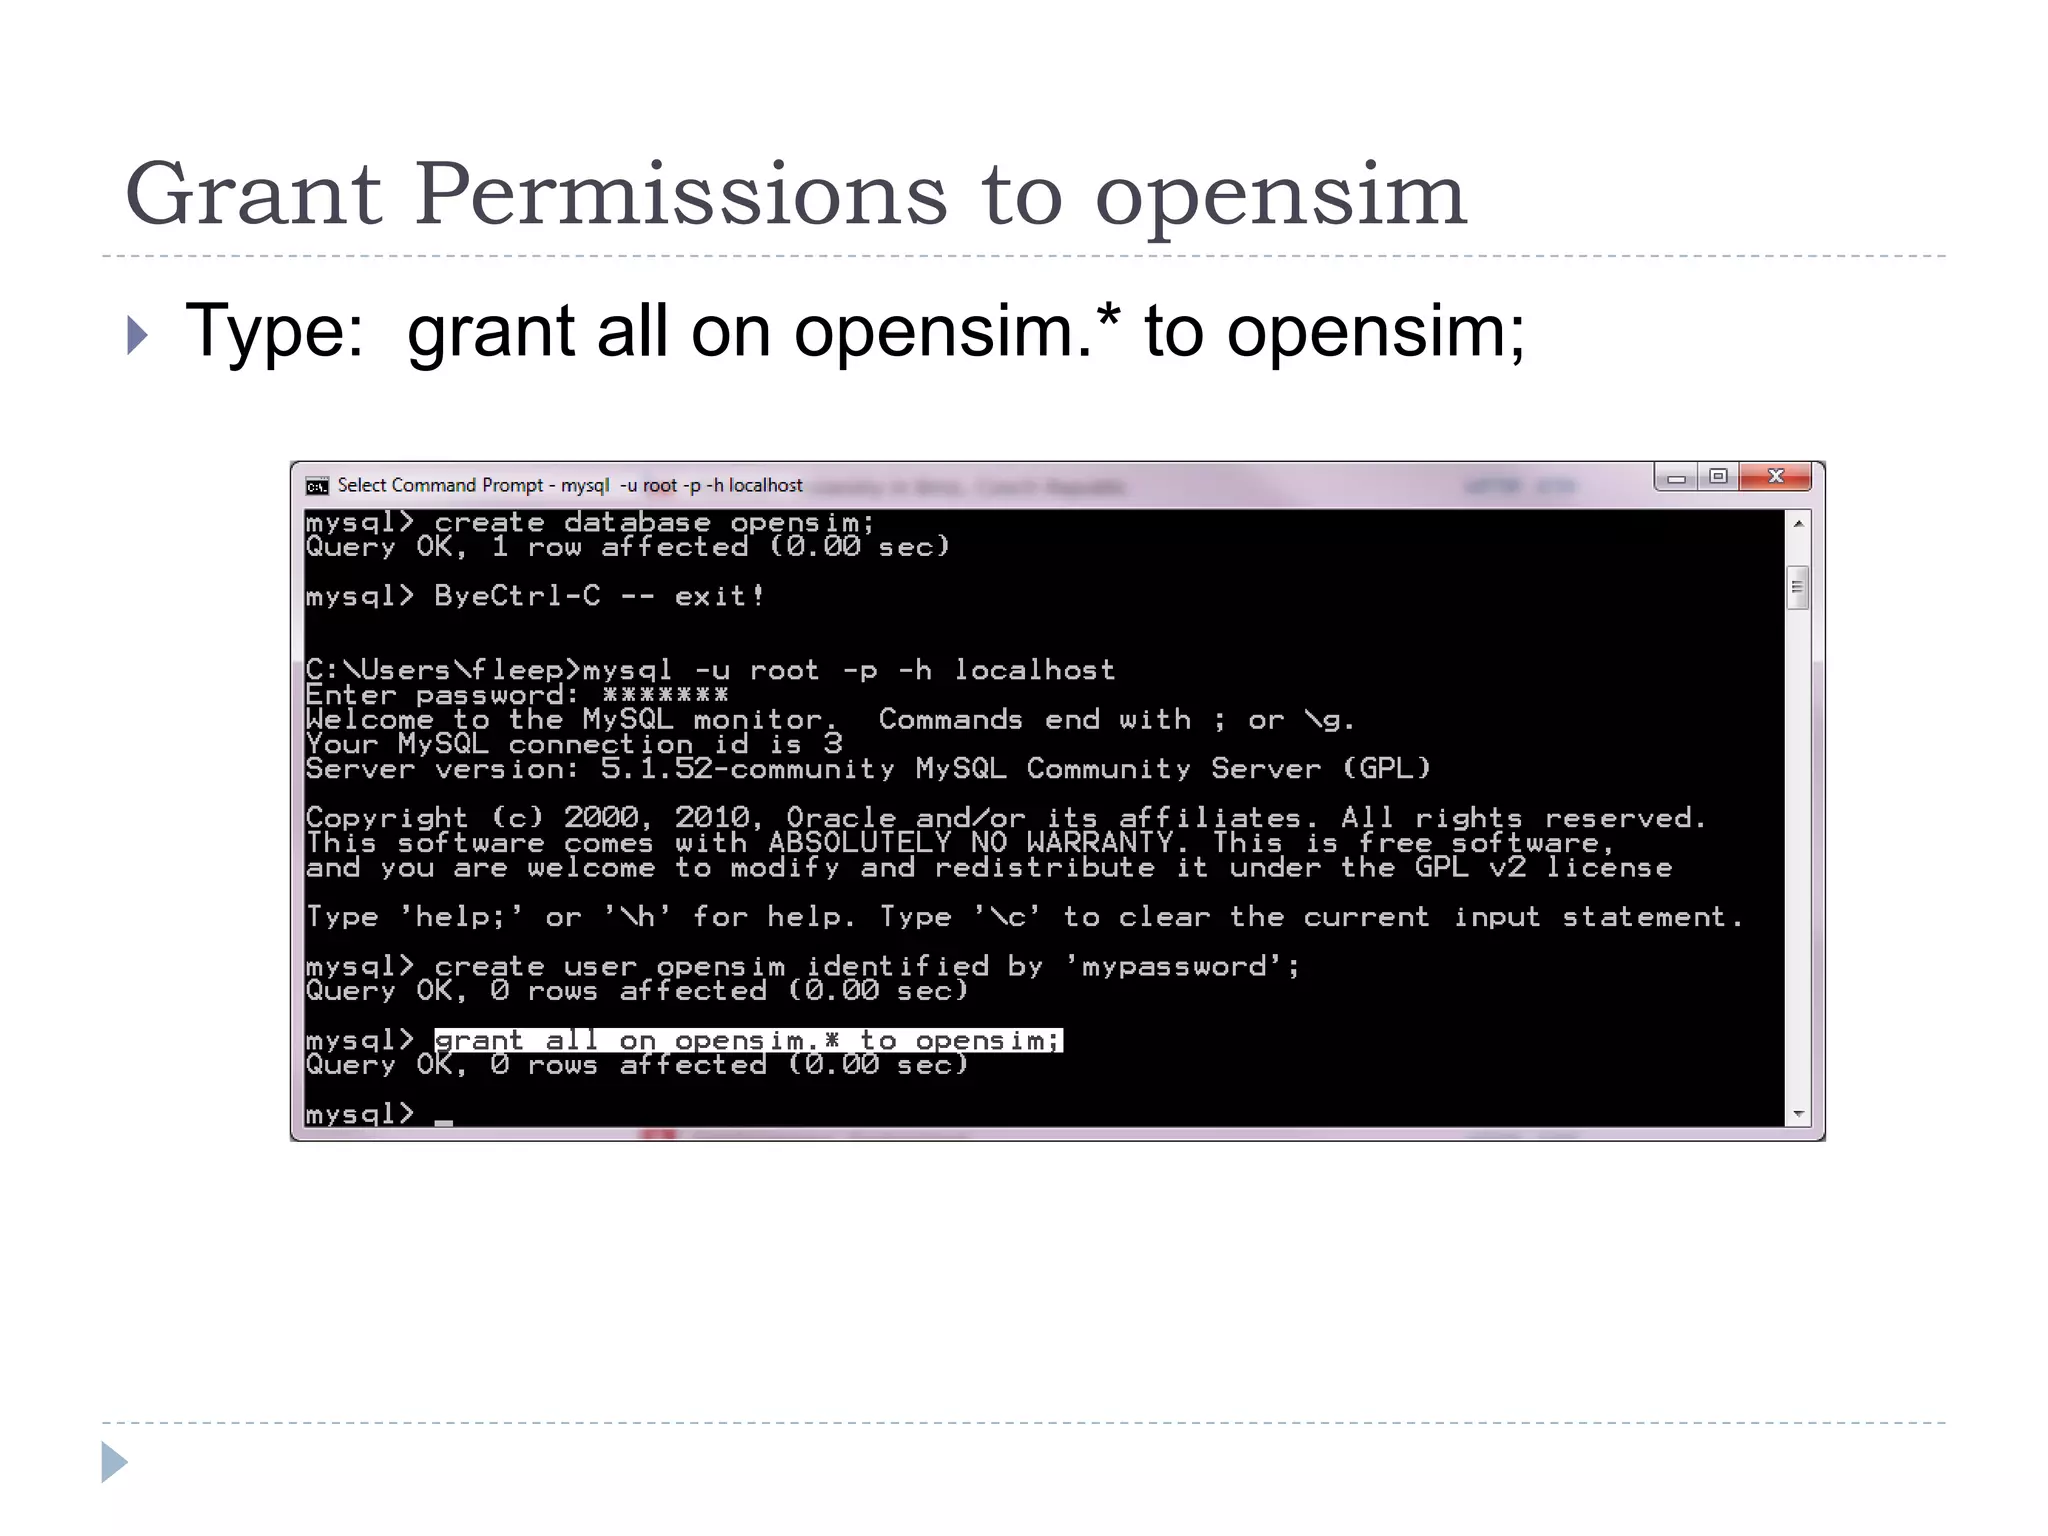
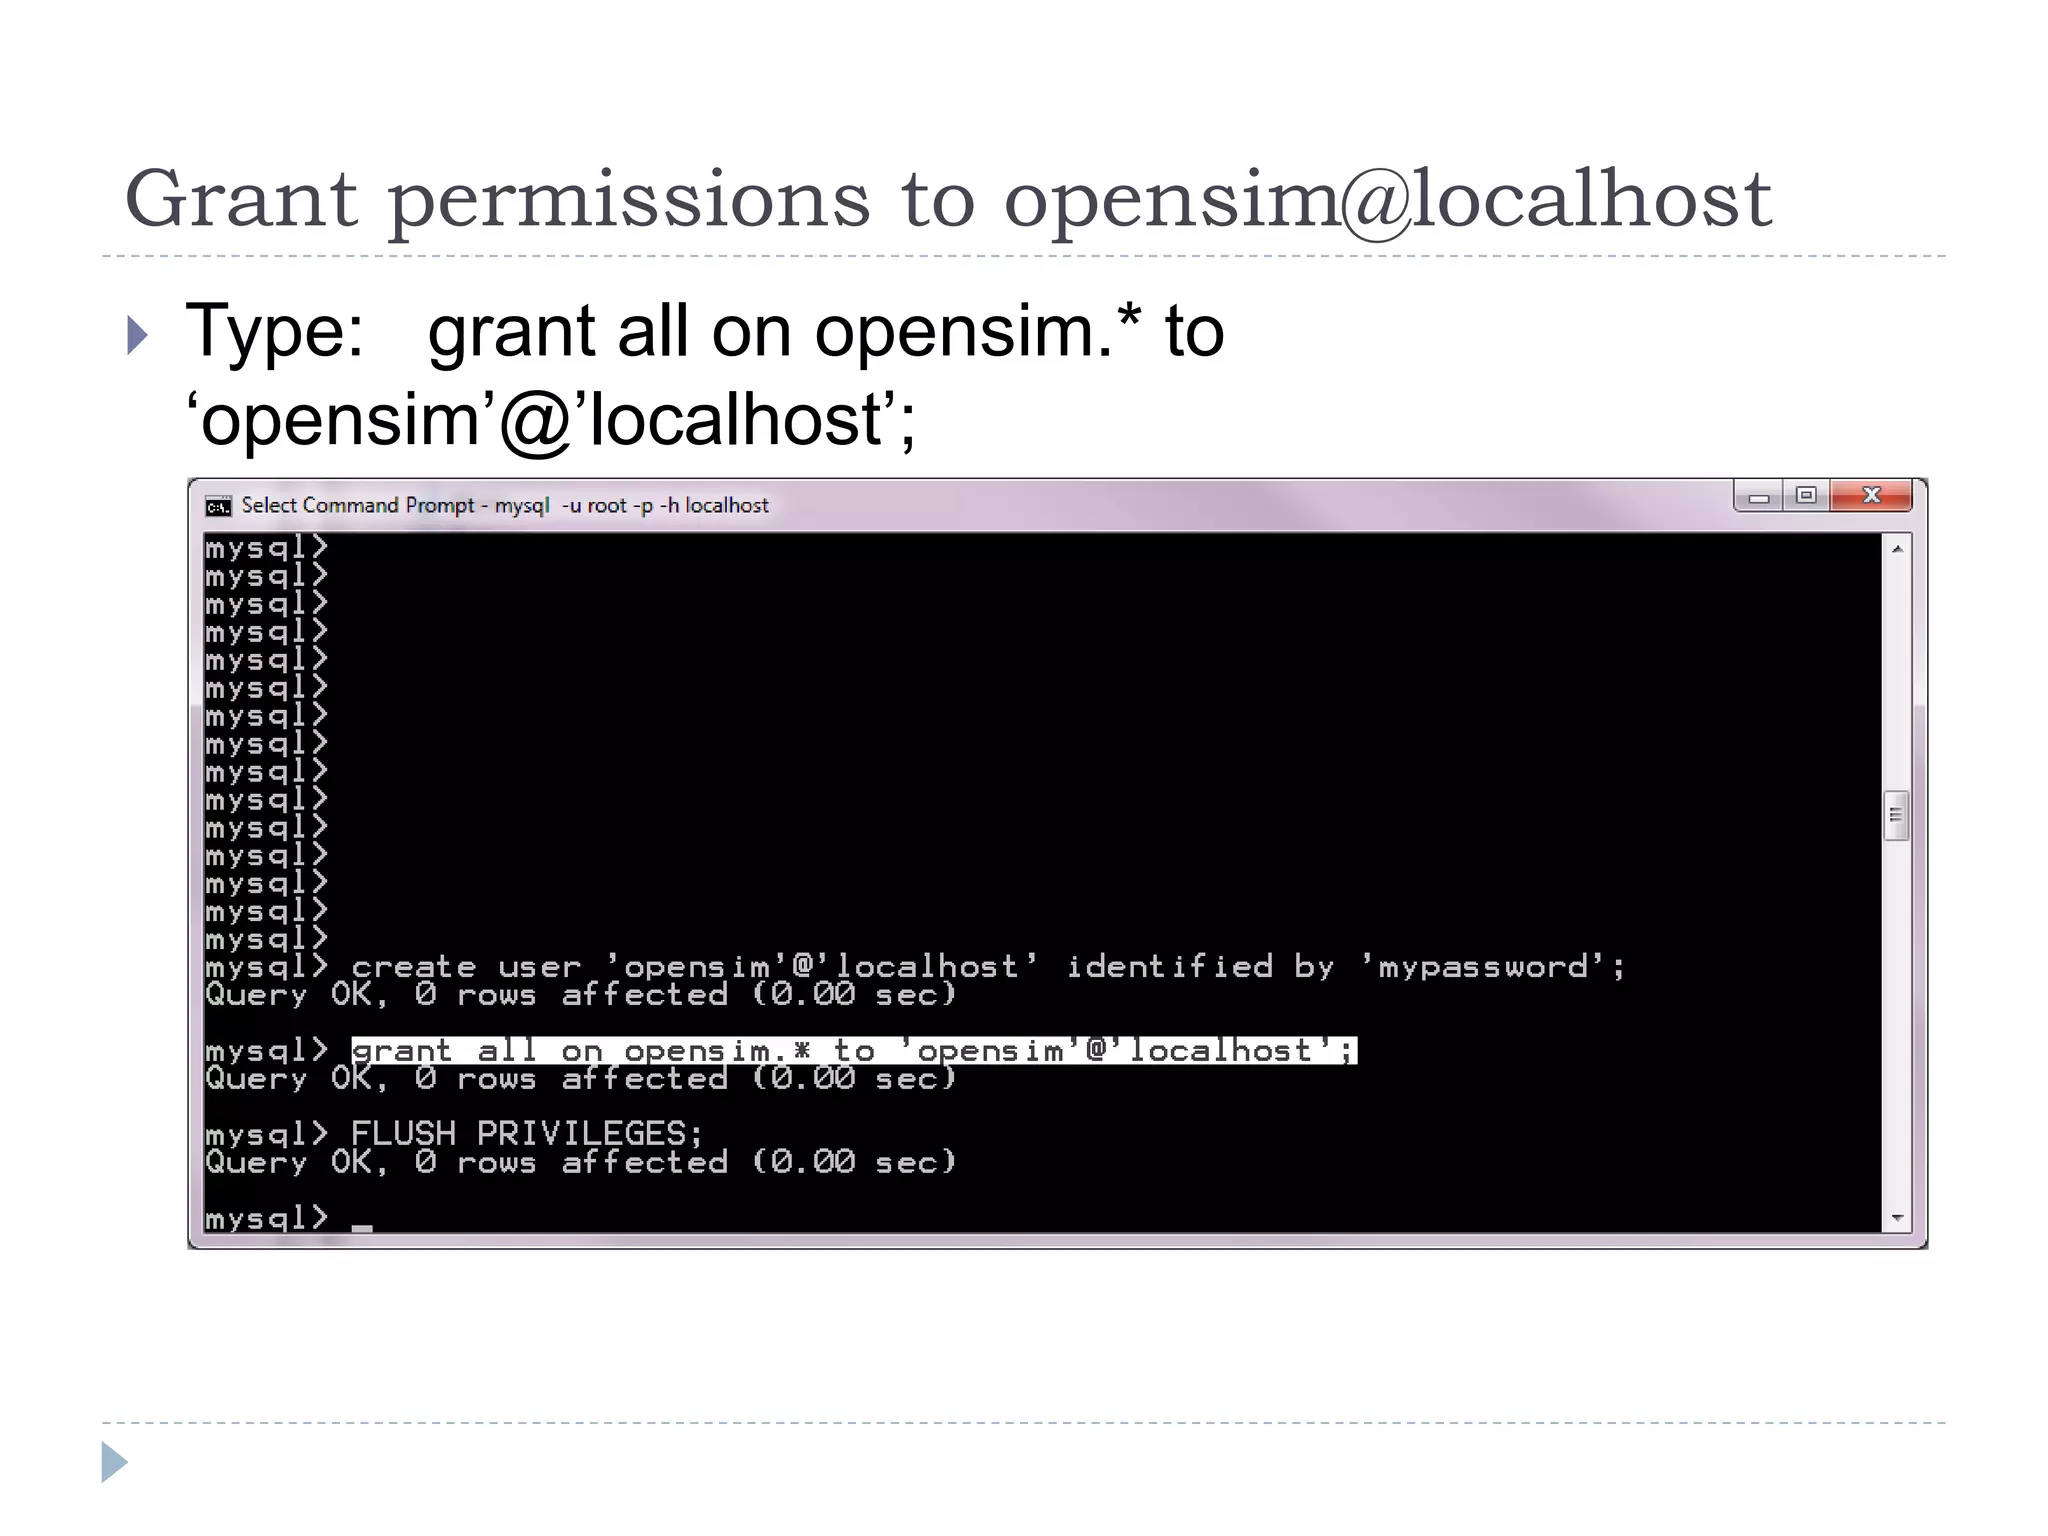
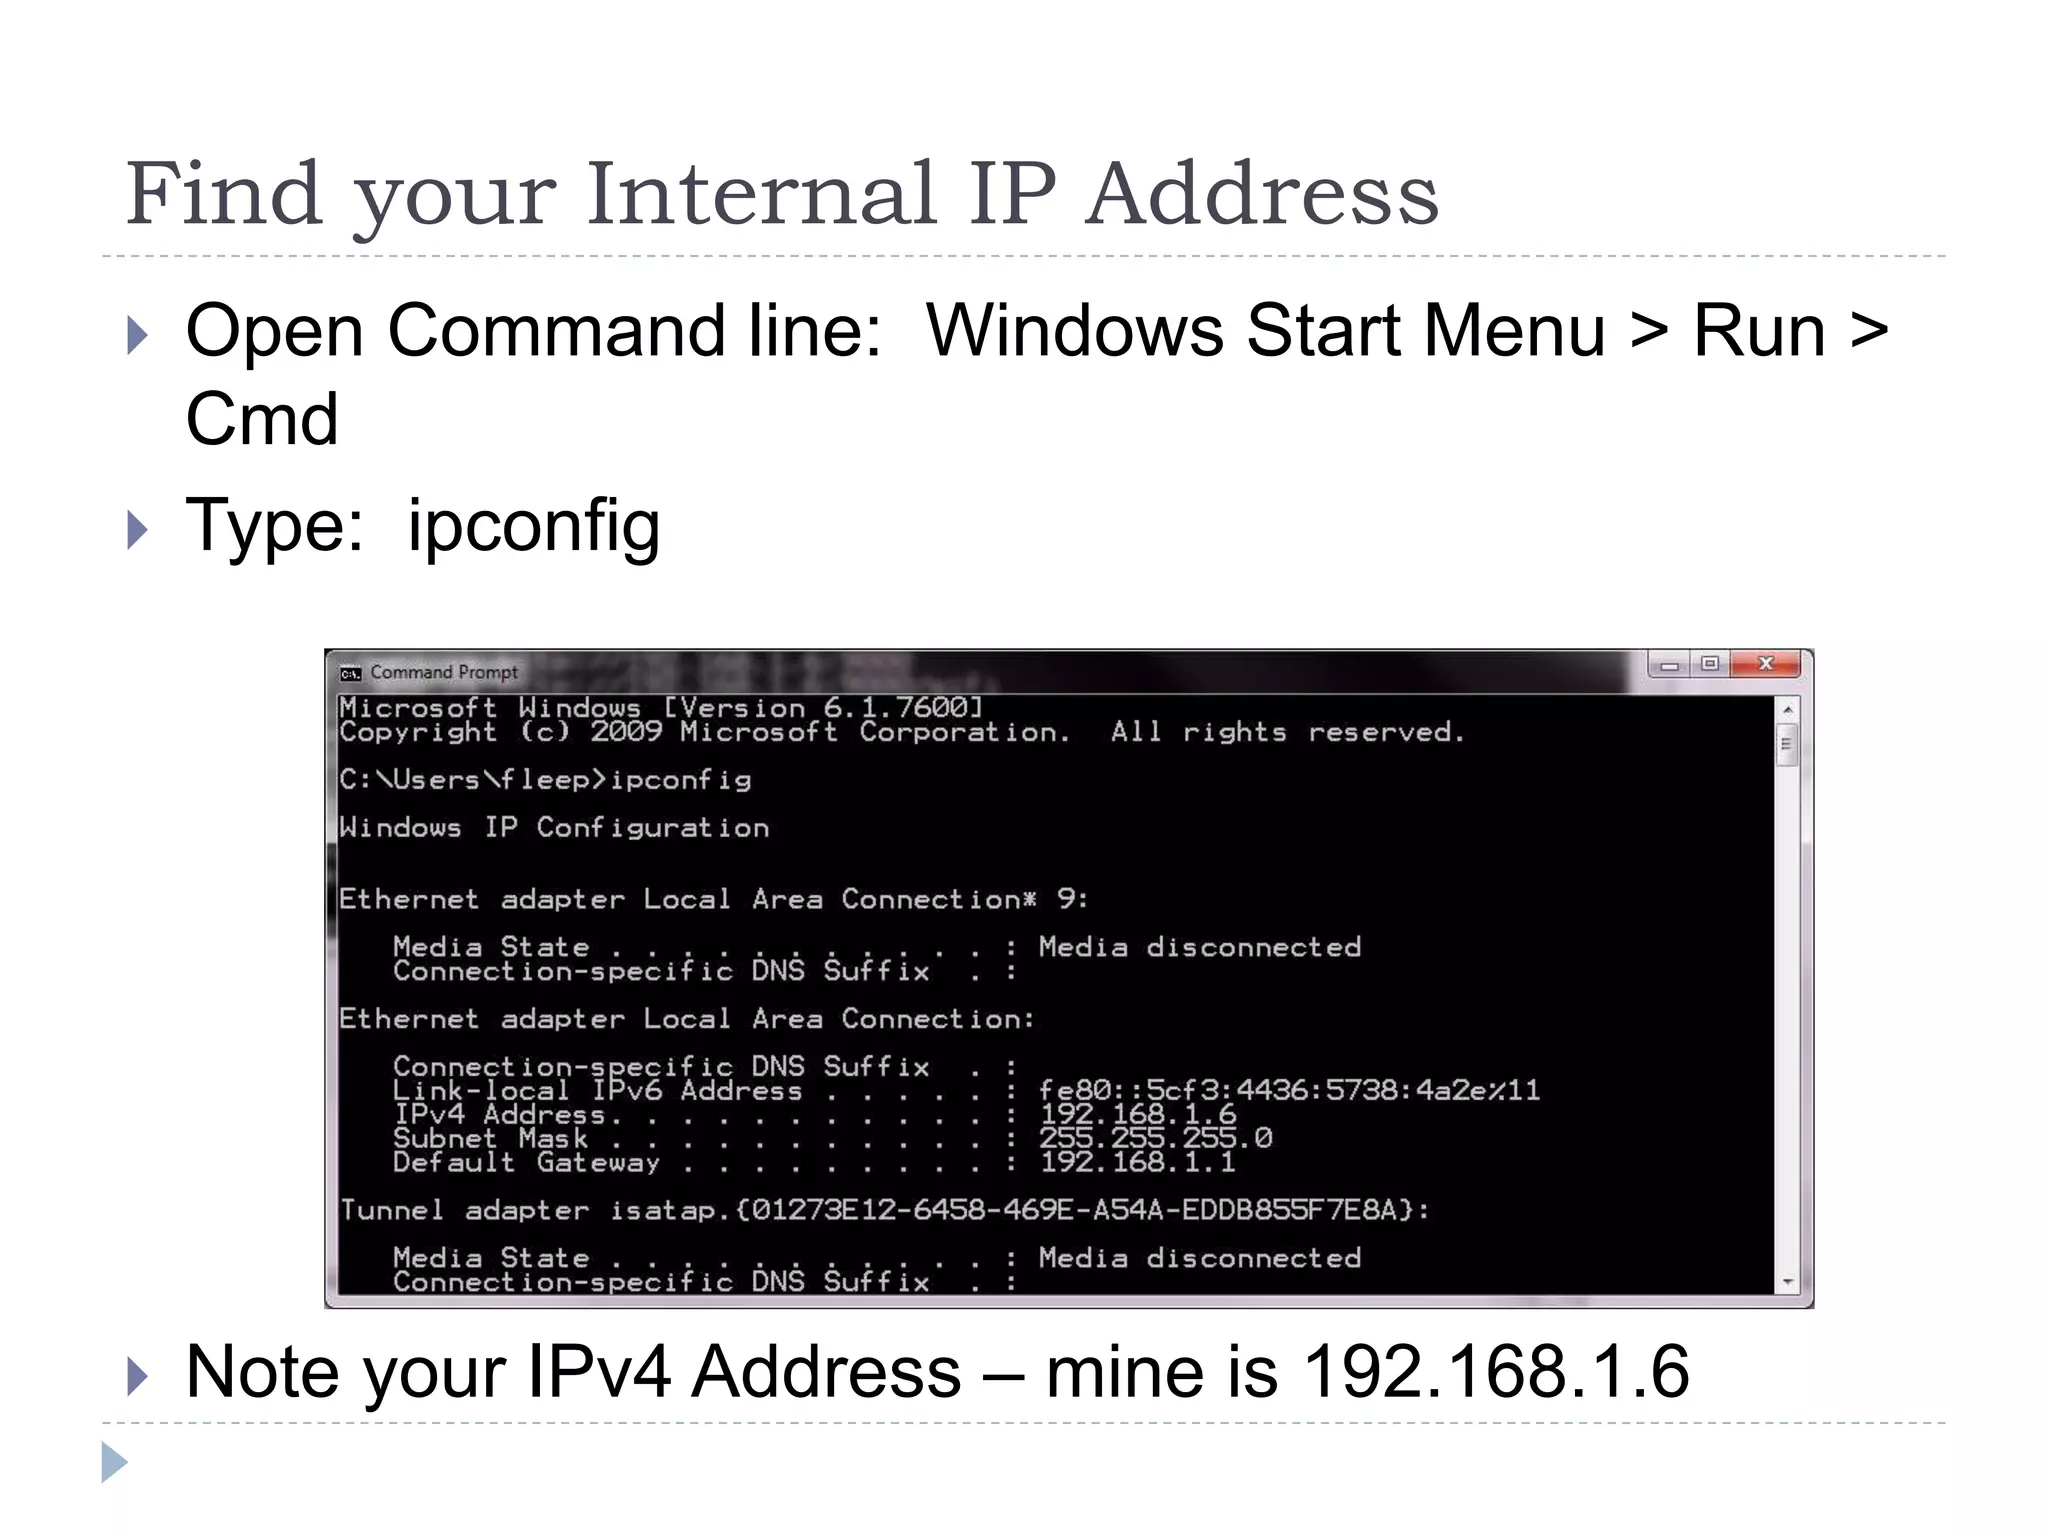
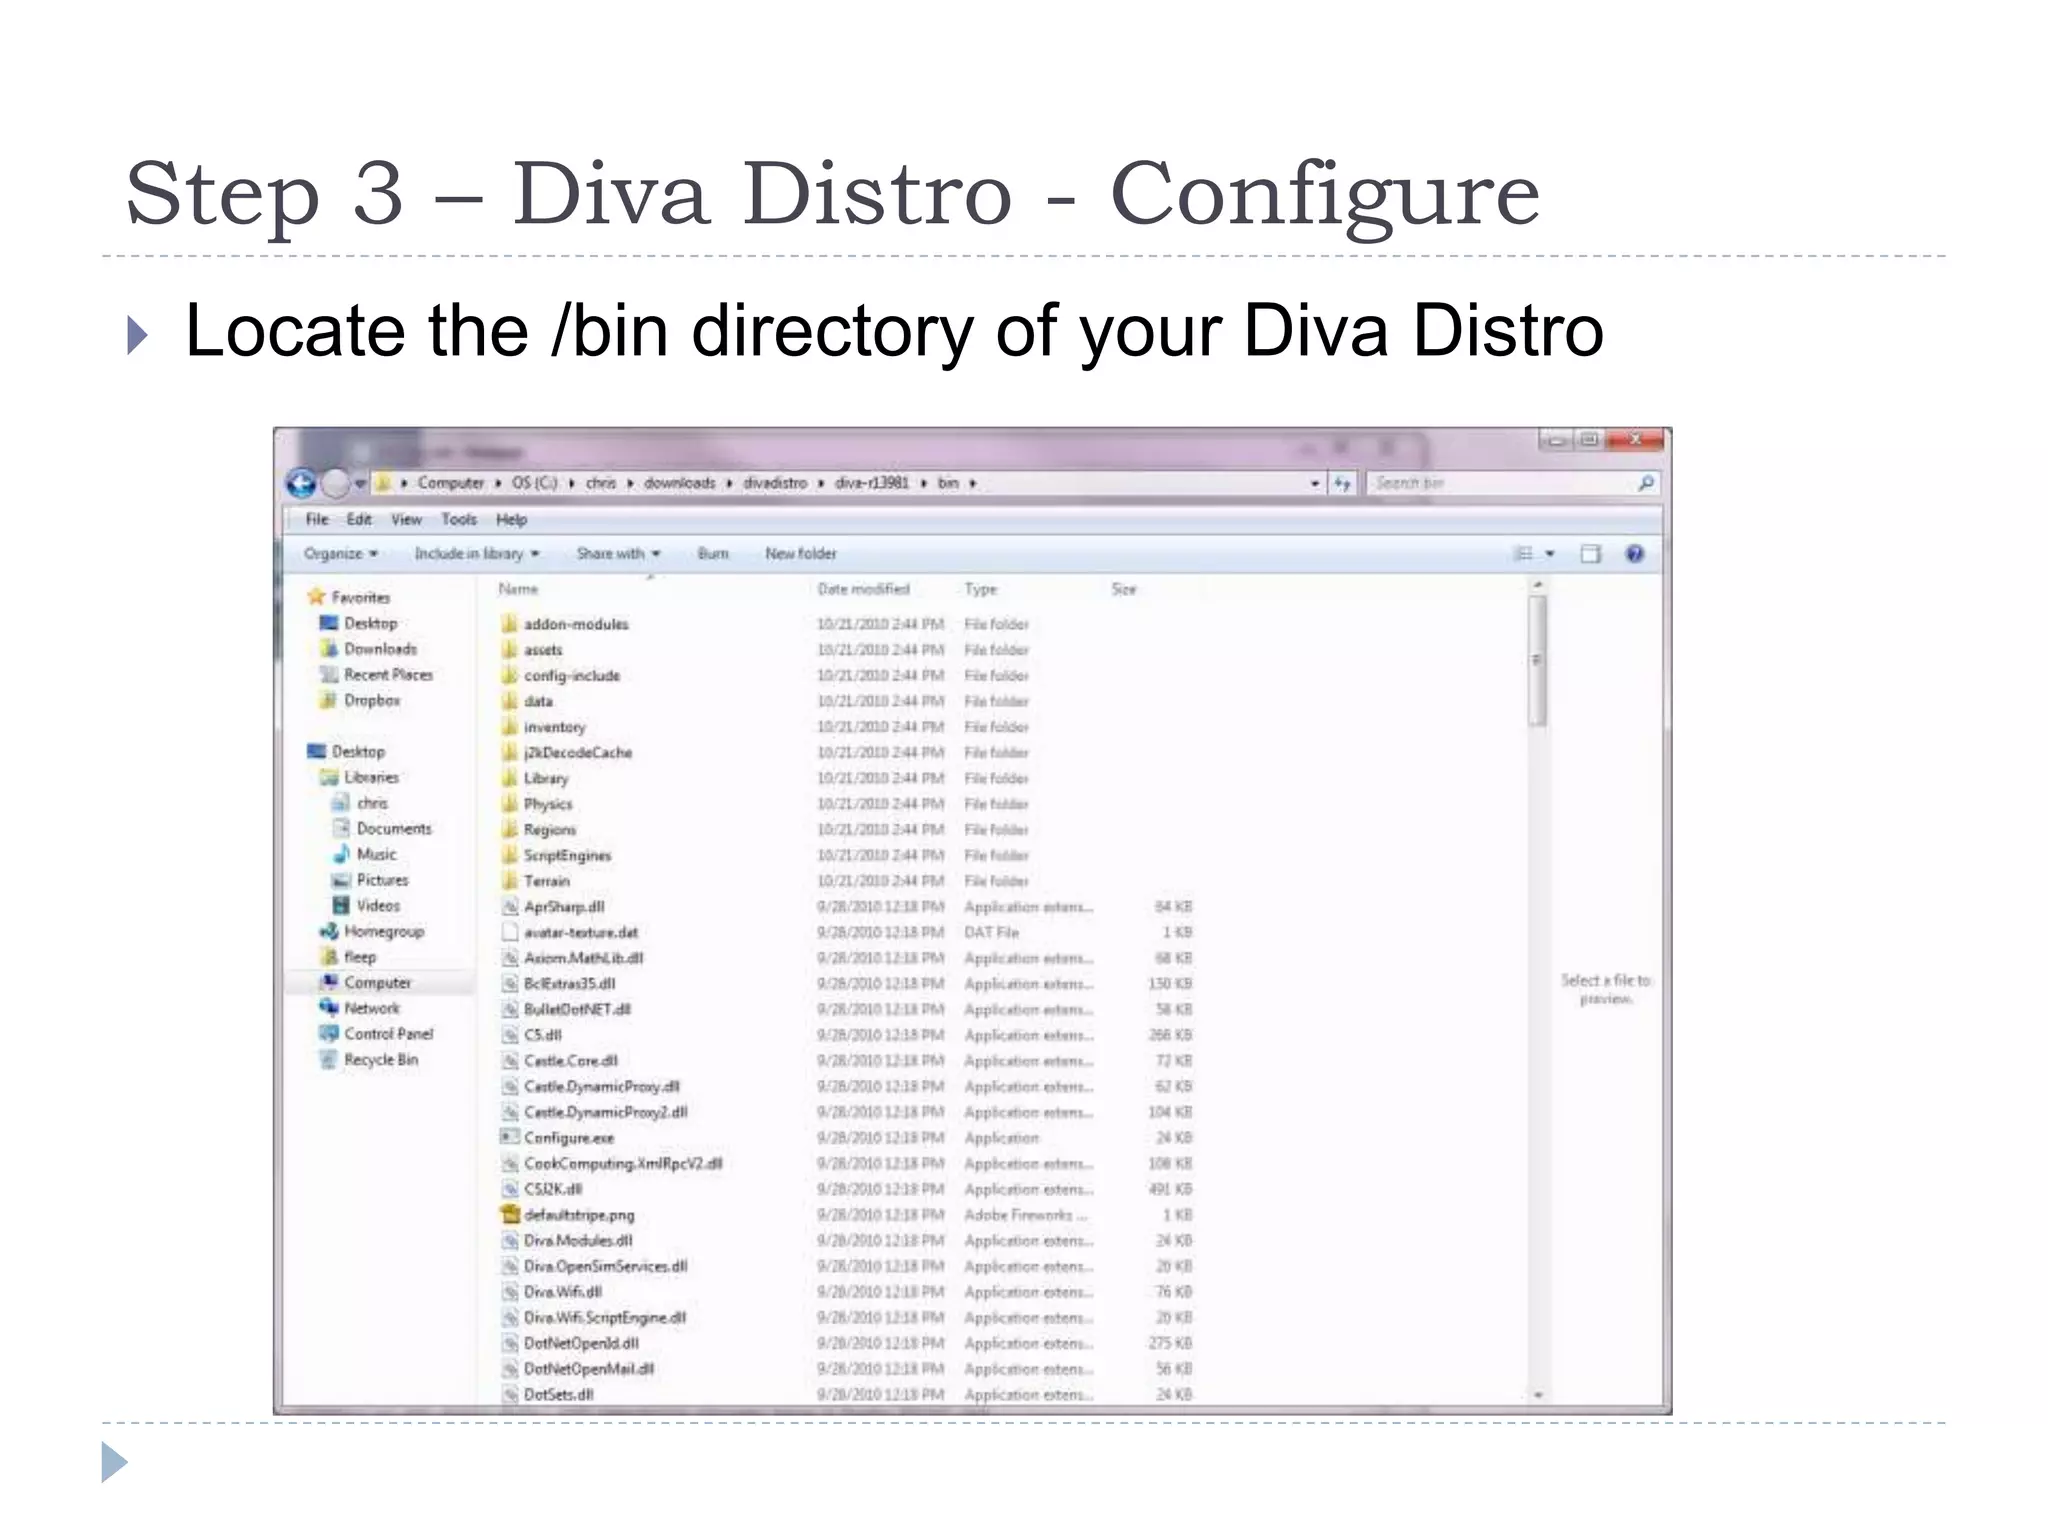
This document provides instructions for installing Diva Distro, an OpenSim private sandbox environment, on a Windows or Linux machine. It involves downloading and extracting the Diva Distro files, installing and configuring MySQL, running the Diva Distro configuration tool to set up database credentials and other settings, and then running the OpenSim executable to launch the private sandbox world. The user is also instructed to download the Imprudence viewer to log into and explore their new private sandbox grid.


![Coded Agents – with UiPath SDK + LangGraph [Virtual Hands-on Workshop]](https://cdn.slidesharecdn.com/ss_thumbnails/codedagentsdeck-251215155422-5497c599-thumbnail.jpg?width=640&height=640&fit=bounds)
![Vibe Coding vs. Spec-Driven Development [Free Meetup]](https://cdn.slidesharecdn.com/ss_thumbnails/vibecodingvsspecdrivendevelopment-251209105622-43f455e7-thumbnail.jpg?width=640&height=640&fit=bounds)


