Adding disqus to ghost blog
•Download as DOCX, PDF•
0 likes•404 views

Adding disqus to ghost blog

Recommended
Recommended
More Related Content
What's hot
What's hot (20)
Viewers also liked
Viewers also liked (20)
Similar to Adding disqus to ghost blog
Similar to Adding disqus to ghost blog (20)
More from Paul Graham
Recently uploaded
Recently uploaded (20)
Adding disqus to ghost blog
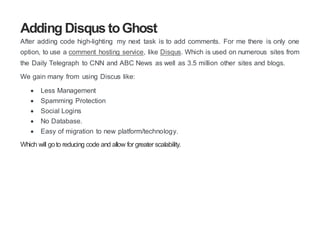
- 1. Adding Disqus toGhost After adding code high-lighting my next task is to add comments. For me there is only one option, to use a comment hosting service, like Disqus. Which is used on numerous sites from the Daily Telegraph to CNN and ABC News as well as 3.5 million other sites and blogs. We gain many from using Discus like: Less Management Spamming Protection Social Logins No Database. Easy of migration to new platform/technology. Which will goto reducing code and allow for greater scalability.
- 2. Registering for Disqus The first step is to using Disqus is to sign up, this can be accomplished by a number of social media logins like Facebook, twitter or google and alternatively via Email. Next we need to register our website, this as simple as selecting a name and the category.
- 3. Updating Ghost Disqus has installation guides that cover may multiple platforms. However for Ghost we will need to select Universal Code
- 4. Which give use the following code, for us to drop on the blog entries. <div id="disqus_thread"></div> <script type="text/javascript"> /* * * CONFIGURATION VARIABLES * * */ var disqus_shortname = 'csharpbrew'; /* * * DON'T EDIT BELOW THIS LINE * * */ (function() { var dsq = document.createElement('script'); dsq.type = 'text/javascript'; dsq.async = true; dsq.src = '//' + disqus_shortname + '.disqus.com/embed.js'; (document.getElementsByTagName('head')[0] || document.getElementsByTagName('body')[0]).appendChild(dsq); })(); </script> <noscript>Please enable JavaScript to view the <a href="https://disqus.com/?ref_noscript" rel="nofollow">comments powered by Disqus.</a></noscript>
- 5. Firstly we can delete the comments then we need to add this code between </article> and {{/posts}} int the post.hbs file, which can be found here /content/themes/[your theme]/assets/CSS/ . I've chosen to add below the <main> tag and also wrap it an aside <aside class="comments"> , click here for more information on aside tag. This was done to ensure the content separation and is especially useful for search engines. It's important to understand that by changing the Casper theme we need to be careful with future updates to ensure we don't lose these changes.
- 6. Restart Ghost As i've made changes to a HandleBars file, *.hbs, i will also need to restart ghost. The reason behind this is when starting up HandleBar are compiled into JavaScript. It is possible to add a process to watch these files and recompile them when they've changes, however this is beyond the scope of this article. To restart blog you needed to login into the Azure portal, select the correct web app and the click restart found on the bottom quick link bar.
- 7. Fixing the CSS After restating ghost comments started working straight away, however there was an issue with the comments streaking across the full width of the screen, which broke the design. . To fix this all i need to do was add some additional CSS to set the margin-leftand margin- right properties to auto and target the disqus_thread id.
- 8. #disqus_thread { background-color: #e8e8e8; margin-left: auto; margin-right: auto; width: 80%; max-width: 710px; padding:20px; -moz-border-radius: 8px; -webkit-border-radius: 8px; -o-border-radius: 8px; -ms-border-radius: 8px; -khtml-border-radius: 8px; border-radius: 8px; } Not only did i fix the width issue, I also update the style to include a background color and rounded corners. This was to make sure the comments could be visual distinguished from main blog content.
- 9. Thanks to these simply CSS changes the comment section is now clearly separated.
- 10. Comment counts Finial I decided to add a link to my comments at the top of the page with a count of comments. The code to perform this is part of the installation instruction and just two requires two steps. First you need to add the JavaScript code. <script type="text/javascript"> /* * * CONFIGURATION VARIABLES * * */ var disqus_shortname = 'csharpbrew'; /* * * DON'T EDIT BELOW THIS LINE * * */ (function () { var s = document.createElement('script'); s.async = true; s.type = 'text/javascript'; s.src = '//' + disqus_shortname + '.disqus.com/count.js'; (document.getElementsByTagName('HEAD')[0] || document.getElementsByTagName('BODY')[0]).appendChild(s); }()); </script>
- 11. Its possible to only use the content inside the function and just add this to the previous JavaScript Block. Next we add a link to the disqus_thread anchor. This is best placed just below the title in the post-meta section. <section class="post-meta"> <time class="post-date" datetime="{{date format='YYYY-MM- DD'}}">{{date format="DD MMMM YYYY"}}</time> {{tags prefix=" on "}} <a href="#disqus_thread"></a> </section> Finial Comment While I did have an initial with styling, I found it was to add Disqus to my blog, however I will need be careful in the future with updates.