SlideShare a Scribd company logo
1 of 56
Download to read offline
INTRO  TO  CSS
PRESENTED  BY    
WPPITTSBURGH.COM  
HOW  TO  MAKE  SIMPLE  EDITS    
TO  CUSTOMIZE  THE  LOOK  AND  FEEL  OF  YOUR  WEBSITE
WHAT  IS  CSS?
• CSS  is  the  abbreviated  term  for  “Cascading  Style  
Sheet”.    
• The  code  found  within  your  theme’s  CSS  file  
determines  the  appearance  of  your  site  by  applying  
style  rules  to  HTML  content,  which  has  no  style  of  
its  own.
CSS  vs.  HTML
• Think  of  CSS  as  “clothing”  and  
the  HTML  as  the  “mannequin”.  
• CSS  controls  things  such  as  
colors,  spacing,  layout,  mobile-­‐
responsiveness  and  more!  
• HTML  is  the  site’s  structure.  
• We  can  change  the  “clothing”  
anyIme  without  affecIng  the  
structure  of  the  site.
PHOTO CREDIT: PIXABAY.COM
This  is  the  Twenty-­‐Twelve  WordPress  Theme.
With  a  few  lines  of  custom  CSS  and  a  few  images  we  
can  easily  customize  different  elements  of  the  website.
LEARNING  THE  LINGO
CSS  can  be  made  easier  to  understand  by  breaking  down  each  
“sentence”  into  it’s  individual  components.    
Here  is  an  example  of  a  common  CSS  declaraIon,  as  well  as  a  diagram  
of  what  each  CSS  component  is  made  of:
• The  SELECTOR  is  what  element  of  the  website  we  want  to  change.  
• The  PROPERTY  is  what  we  want  to  change  about  it  
• The  VALUE  is  what  we  are  changing.
HOW  TO  EDIT  THEME  CSS  
It  is  important  that  you  take  care  how/where  you  edit  the  CSS  in  your  
theme,  as  you  do  not  want  to  overwrite  your  changes  with  any  theme  
updates  and  risk  losing  all  of  your  hard  work!  
Op#on  A:  Create  a  Child  Theme  
A  child  theme  inherits  the  files  of  the  parent  theme,  but  allows  you  to  
make  changes  to  the  theme  files  without  risk  of  these  changes  being  
lost  in  theme  updates.  Learn  more  about  child  themes  here:  
hXps://codex.wordpress.org/Child_Themes
If  creaIng  a  child  theme  is  not  the  right  soluIon  for  you,  or  you  would  
like  a  simple  way  to  edit  CSS  quickly  and  easily,  you  can  use  a  plugin,  
which  is  what  we  will  demonstrate  today.
Op#on  B:  JetPack  Plugin  
The  JetPack  plugin  provided  by  
WordPress.com  offers  a  
number  of  features.  You  can  
install  it  from  the  
WordPress.org  plugin  directory  
or  from  within  your  WordPress  
dashboard.  
Learn  more  about  JetPack  here:  
hXp://jetpack.me  
TO  ACTIVATE  CUSTOM  CSS  IN  JETPACK:
Navigate  to  
JetPack  WordPress  
Dashboard  Menu.  
Click  on  “Se^ngs”.
Next,  hover  over  the  “Custom  CSS  Module”  and  click  on  “AcIvate”.
You  will  now  see  the  opIon  “Edit  CSS”  under  
the  “Appearance”  secIon  of  the  menu.  
*IMPORTANT  NOTE!*  
Below  Edit  CSS  is  the  link  for  “Editor”  which  
will  take  you  to  the  editor  for  ediIng  core  
theme  files.  It  is  VERY  important  that  you  do  
not  edit  this  secIon  unless  using  a  child  
theme  as  all  of  your  changes  may  be  lost  
when  the  theme  is  updated.  
WE  ARE  NOW  READY  TO  
EDIT  CSS!
STEP  1:  
FINDING  YOUR  THEME’S  STYLES
For  today’s  exercises,  we  are  going  to  use  and  modify  the  exisIng  CSS  
of  the  Twenty  Twelve  WordPress  theme.  Using  an  exisIng  theme  can  
someImes  be  easier  than  coding  from  scratch.  
In  order  to  make  changes  to  the  CSS,  we  need  to  find  the  selector  we  
wish  to  change  first.  
The  easiest  ways  to  do  this  are  through  the  developer  tools  available  
in  Google  Chrome  or  Mozilla  Firefox.    
Today  we  will  be  using  Google  Chrome.
To  launch  the  Inspector  in  Chrome,  all  you  need  to  do  is  right-­‐click  on  
the  element  you  wish  to  change  and  choose  “Inspect  Element”.
Try  It!    
Click  on  Your  Site  
Title,  Right  Click,  
and  Choose  
“Inspect  Element”  
from  the  Drop  
Down  menu.
You  will  see  the  HTML  markup  and  the  CSS  Styles  on  the  screen.
Source  Code CSS  Styles
Here  is  a  closer  view  of  the  CSS  style  for  the  site  #tle.
In  this  instance,  the  SELECTORS  are  .site-­‐header  h1  a,  .site-­‐header  h2  a  
The  PROPERTIES  are  color,  display,  and  text-­‐decoraIon  
And  the  VALUES  of  these  properIes  are  #515151,  inline-­‐block,  and  none
EXERCISE  1:  MODIFYING  FONTS
For  this  exercise,  we  will  
be  making  changes  to  the  
blog  Itle  text  found  at  the  
top  of  blog  arIcles  on  
your  site.  To  locate  the  
CSS  for  this  element,  right  
click  on  any  blog  Itle  on  
your  test  site’s  home  page.    
Next  choose  the  Inspect  
Element  opIon,  which  will  
launch  your  browser’s  
developer  tools.
The  TOP  of  the  browser  window  is  your  SITE.  
The  BOTTOM  LEFT  is  the  HTML  of  the  site.  
The  BOTTOM  RIGHT  is  where  you  find  your  CSS  STYLES.
We  can  make  changes  right  in  our  browser  window  to  
preview  what  the  new  style  may  look  like.  These  
changes  are  ONLY  TEMPORARY  -­‐  in  order  to  apply  
them  to  your  site,  you  must  place  the  code  in  the  “Edit  
CSS”  code  editor  provided  by  the  JetPack  plugin.  
Look  for  this  snippet  of  code  in  the  CSS  Styles  Window:
In  this  example,  right  now  the  only  styling  for  the  Blog  
Post  Titles  is  that  there  is  no  underline  underneath  
the  link.
We  can  edit  this  code  in  our  browser  window  to  
change  the  font-­‐size,  font-­‐weight  and  font-­‐style.
Click  on  the  CSS  box  and  create  a  new  line  of  
properIes.  
The  First  Property  we  will  be  adding  is  Font-­‐Size.  
Type  Font-­‐Size,  then  hit  tab  to  enter  “40px”  
Next,  hit  enter  and  type  Font-­‐Weight,  hit  tab,  type  in  
“bold”  and  press  “Enter”.  
Lastly,  type  “Font-­‐Style”,  hit  tab,  type  in  “italic”  and  hit  
enter.
Here  is  what  your  screen  should  look  like:
Select  this  code  and  “Copy”  to  your  clipboard  so  you  can  paste  
it  into  the  Jetpack  Custom  CSS  Editor.
Navigate  to  your  WordPress  Dashboard  and  Select  “Appearance  -­‐>  “Edit  CSS”.  
Paste  the  code  into  the  Custom  CSS  Editor  and  click  the  blue  “Save  
Stylesheet”  BuXon  to  save  your  changes.
Our  Blog  Titles  Now  Look  Like  This:
EXERCISE  2:    
BACKGROUND  COLORS  AND  PADDING
For  this  exercise,  we  will  change  
the  background  color  of  the  
sIcky  post  from  white  to  blue  
using  background  colors  and  
padding.  
A  “sIcky  post”  in  WordPress  is  a  
post  which  “sIcks”  or  stays  at  
top  on  the  front  page  of  the  blog.
This  is  a  great  way  to  place  a  welcome  message,  special  announcement,  or  
other  informaIon  that  does  not  change  frequently  and  draw  aXenIon  to  it  
for  your  website  visitors.
To  get  started,  first  select  the  “Featured  Post”  secIon  and  right-­‐click  
to  launch  the  Inspector  in  Google  Chrome.
We  are  going  to  be  doing  something  else  to  our  sIcky  posts,  so  hide  this  feature  
by  simply  adding  the  following  rule:  
display:none  
This  causes  the  “Featured  Post”  element  to  no  longer  be  displayed.  s  for  this  
element  are  already  in  the  theme’s  CSS,  we  only  need  to  add  our  custom  
declaraIon.
Because  this  change  is  only  in  the  inspector,  we  will  again  need  to  
copy  this  into  our  JetPack  CSS  editor  in  the  Dashboard.  Unlike  last  
Ime  though,  we  can  simplify  this  to  only  include  the  rule  we  
added,  like  so:  
Doing  this  keeps  our  custom  CSS  from  ge^ng  too  bloated.  Since  
the  other  styles  for  this  element  are  already  in  the  theme’s  CSS,  we  
only  need  to  add  our  custom  declaraIon.
arIcle.sIcky  .featured-­‐post  {  
display:  none;  
}
arIcle  id="post-­‐4"  class="post-­‐4  post  type-­‐post  status-­‐publish  format-­‐
standard  sIcky  hentry  category-­‐uncategorized"  
Now  let’s  style  the  SIcky  Post  itself.  Find  and  highlight  the  long  line  on  the  
HTML  pane  in  the  inspector  that  says:
You  will  noIce  that  when  you  highlight  this  line  of  code,  
there  isn’t  any  matching  CSS  we  can  use  to  style  this  
sIcky  post.  The  only  one  displayed  is  .site-­‐content  arIcle  
when  ideally  we  would  be  looking  for  a  style  with  .sIcky  
in  it.  
The  good  news  is  we  can  use  the  inspector  to  add  new  
styles  to  our  site!
To  Add  a  new  style  to  your  site  -­‐  click  on  the  “+”  icon  to  add  a  new  
style  rule.
You  will  noIce  that  when  the  new  declaraIon  is  created  in  the  inspector,  
it  shows  the  selector  as:  
article#post-­‐4  
However  that  is  not  quite  what  we  want.  If  leo  as-­‐is,  this  style  rule  would  
only  apply  to  arIcles  with  an  ID  that  is  equal  to  “4”  which  is  the  exact  
post  we  are  on,  as  it  is  the  4th  post  we  have  created  on  our  test  site.  
In  this  case,  we  will  need  to  create  a  new  style  declaraIon  on  our  own,  
rather  than  use  one  that  exists  already.  
We  can  get  around  this  by  modifying  the  selector  to  instead  say  
arIcle.sIcky  which,  in  plain  English  works  out  to  something  like  “Apply  
this  rule  to  all  arIcles  that  have  the  class  equal  to  “sIcky”  which  means  
this  post,  plus  any  sIcky  posts  we  make  in  the  future.”
Click  on  the  selector  to  change  it  to  arIcle.sIcky
ID  vs.  Class  
You  may  noIce  while  working  with  CSS,  some  selectors  have  a  “#”  in  
front  of  them,  and  some  have  a  “.”  in  front  of  them.  This  is  used  to  
denote  if  there  is  an  ID  or  a  class  associated  with  this  HTML  element.  
Let’s  look  at  the  original  HTML  that  was  highlighted  in  our  inspector:  
arIcle  id="post-­‐4"  class="post-­‐4  post  type-­‐post  status-­‐publish  
format-­‐standard  sIcky  hentry  category-­‐uncategorized"  
In  this  case,  you  would  add  a  “#”  in  front  of  #post-­‐4  because  in  the  
original  markup  it  appears  as  id=”post-­‐4ʺ″  whereas  we  added  a  “.”  in  
front  of  .sIcky  because  it  appears  as  class=”sIcky”  in  the  original  
markup.  
In  most  cases,  IDs  are  used  for  non-­‐repeaIng  secIons  of  a  website  
{such  as  header,  navigaIon,  or  footer}  -­‐  classes  are  used  for  the  
majority  of  the  other  elements  which  may  repeat  for  easier  styling.
Now  that  we  have  created  our  new  selector,  let’s  add  some  styles  to  it.  
Start  by  applying  the  following  background  color:  
background:  #D0EAF3;  
This  will  give  us  a  screen  that  looks  like  this:
If  you  want  to  experiment  with  the  color  a  bit,  you  can  click  on  the  Iny  swatch  
next  to  the  hex  code  #D0EAF3  which  will  bring  up  a  color  mixer  tool.  
Since  the  original  theme  CSS  files  did  not  include  a  background  color,  you  will  
see  the  text  and  the  image  go  all  the  way  to  the  edge  of  the  box.  The  way  to  
fix  this  is  to  add  some  padding.  
To  add  padding,  type  this  in  the  Inspector  Window  right  below  the  
background  declaraIon:  
padding:  20px;  
Now  our  screen  will  look  like  this:
REMEMBER:  Styles  entered  in  the  Inspector  Window  are  NOT  
permanent  and  will  disappear  when  the  page  is  refreshed.    
Let’s  copy  our  style  as  we  did  in  the  
previous  exercise  and  paste  into  the  
JetPack  Custom  CSS  Editor  and  
save  our  changes.  
Now,  refresh  your  browser  window  
and  admire  your  work!
EXERCISE  3:    
SITE  TITLE  AND  BACKGROUND  IMAGE
Our  final  exercise  is  to  change  the  site  Itle  to  an  image  logo  and  to  
create  a  background  image.  This  is  an  easy  way  to  add  your  own  
custom  branding  to  your  website.
CHANGING  THE  HEADER  BACKGROUND  IMAGE  
To  change  the  header  background  image  in  the  Twenty  Twelve  theme,  we  
need  to  first  upload  our  image  to  the  media  folder.  Click  on  “Add  New”  to  
drop  or  select  a  file  for  uploading.  In  our  resources  available  to  download,  
we  have  included  an  image  for  you  to  use  as  your  background.  
Once  uploaded,  copy  the  link  for  the  image  which  is  
located  in  the  top  right  as  the  URL  field.  
For  this  exercise,  click  on  the  element  of  the  HTML  highlighted  below.  
This  will  bring  up  the  body  .site  class  to  be  styled  in  the  inspector.  
Add  the  following  to  the  line  below:  
background:  url(‘hXp://yourimagelinkhere.jpg’)  
Paste  the  URL  of  the  image  you  uploaded  to  replace    
hXp://yourimagelinkhere.jpg  
Currently,  the  image  is  Iling  along  the  page.  Since  the  image  is  
designed  to  fade  to  white,  let’s  add  a  bit  of  code  to  this:  
#FFF  url(‘hXp://yourimagelinkhere.jpg')  no-­‐repeat
The  #FFF  declares  the  
background  will  be  white  
and  the  no-­‐repeat  aoer  the  
URL  declares  the  image  
should  only  appear  once.  
Copy  the  code  to  your  
clipboard  and  paste  in  the  
JetPack  Custom  CSS  Editor  
and  save  your  changes.  
Here  is  what  our  custom  CSS  file  looks  like  so  far:
Our  final  step  is  to  add  a  logo.  Once  again,  go  to  the  Media  Library  
and  upload  or  select  your  logo  image  and  copy  the  URL.
We  are  going  to  add  the  logo  just  as  we  did  the  
custom  header  background  image.    
Click  on  the  Site  Title  and  Inspect  Element.  
Add  the  following  code  to  the  .site-­‐header  h1  a,  .site-­‐
header  h2  a  selectors:  
        background:  url('hXp://mycustomlogolink.png')  top  leo  no-­‐repeat;
In  this  example,  we  are  adding  “top  leo  no-­‐repeat”  to  the  
value  to  state  we  only  want  the  image  to  appear  in  the  top  
leo  of  the  website  and  to  not  repeat  across  the  page.  
Be  sure  to  replace  hXp://mycustomlogolink.png  with  the  
URL  you  copied  in  the  previous  step.  
Right  now,  our  logo  looks  something  like  this:  
We  can  make  this  look  much  beXer  by  adding  just  a  few  
addiIonal  properIes.  
Add  this  line  of  code:  
text-­‐indent:  -­‐9999px;  
Hiding  the  Site  Title  Text  
In  our  earlier  example,  when  we  wanted  to  hide  an  element  we  used  
“display:none”.  However,  you  need  to  display  the  Itle  of  your  site  to  
make  it  user-­‐friendly  and  accessible  to  those  who  may  be  using  a  
screen  reader  or  other  method  for  using  the  internet.  
So,  in  this  instance,  we  are  going  to  indent  the  text  by  -­‐9999px  
which  will  move  it  off  the  screen,  but  sIll  make  it  accessible  by  those  
who  may  need  the  text  version  of  the  site  Itle.
       height:  100px;  
        width:  440px;
Lastly,  we  need  to  make  the  “box”  for  the  logo  space  to  fit  the  
dimensions  of  the  logo.  This  can  be  achieved  simply  by  declaring  a  
height  and  width.  Add  this  to  the  code  you  have  so  far:
Copy  your  changes  and  paste  into  the  JetPack  Custom  CSS  Editor.
OUR  FINAL  PRODUCT!
QuesEons?  Want  to  Learn  More?
Connect  with  us!  
hMp://wppiMsburgh.com/  
hMps://www.facebook.com/groups/wppiMsburgh/  
hMp://twiMer.com/wppgh/  
hMp://www.meetup.com/PiMsburgh-­‐WordPress-­‐
Developers-­‐Designers/  
Intro to CSS Presentation

More Related Content

What's hot

Creating Customizable Widgets for Unpredictable Needs
Creating Customizable Widgets for Unpredictable NeedsCreating Customizable Widgets for Unpredictable Needs
Creating Customizable Widgets for Unpredictable NeedsAmanda Giles
 
Html css crash course may 11th, atlanta
Html css crash course may 11th, atlantaHtml css crash course may 11th, atlanta
Html css crash course may 11th, atlantaThinkful
 
HTML/CSS Crash Course (april 4 2017)
HTML/CSS Crash Course (april 4 2017)HTML/CSS Crash Course (april 4 2017)
HTML/CSS Crash Course (april 4 2017)Daniel Friedman
 
Thinkful - Frontend Crash Course - Intro to HTML/CSS
Thinkful - Frontend Crash Course - Intro to HTML/CSSThinkful - Frontend Crash Course - Intro to HTML/CSS
Thinkful - Frontend Crash Course - Intro to HTML/CSSTJ Stalcup
 
Html:css crash course (4:5)
Html:css crash course (4:5)Html:css crash course (4:5)
Html:css crash course (4:5)Thinkful
 
Modular HTML & CSS
Modular HTML & CSSModular HTML & CSS
Modular HTML & CSSShay Howe
 
HTML 5 Complete Reference
HTML 5 Complete ReferenceHTML 5 Complete Reference
HTML 5 Complete ReferenceEPAM Systems
 
Code & design your first website (3:16)
Code & design your first website (3:16)Code & design your first website (3:16)
Code & design your first website (3:16)Thinkful
 
HTML & CSS Workshop Notes
HTML & CSS Workshop NotesHTML & CSS Workshop Notes
HTML & CSS Workshop NotesPamela Fox
 
Front-End Methodologies
Front-End MethodologiesFront-End Methodologies
Front-End MethodologiesArash Manteghi
 
Code & Design your first website 4/18
Code & Design your first website 4/18Code & Design your first website 4/18
Code & Design your first website 4/18TJ Stalcup
 
Web Design Course: CSS lecture 5
Web Design Course: CSS  lecture 5Web Design Course: CSS  lecture 5
Web Design Course: CSS lecture 5Gheyath M. Othman
 

What's hot (19)

HTML News Packages Lesson
HTML News Packages LessonHTML News Packages Lesson
HTML News Packages Lesson
 
Creating Customizable Widgets for Unpredictable Needs
Creating Customizable Widgets for Unpredictable NeedsCreating Customizable Widgets for Unpredictable Needs
Creating Customizable Widgets for Unpredictable Needs
 
Html css crash course may 11th, atlanta
Html css crash course may 11th, atlantaHtml css crash course may 11th, atlanta
Html css crash course may 11th, atlanta
 
Jquery News Packages
Jquery News PackagesJquery News Packages
Jquery News Packages
 
HTML/CSS Crash Course (april 4 2017)
HTML/CSS Crash Course (april 4 2017)HTML/CSS Crash Course (april 4 2017)
HTML/CSS Crash Course (april 4 2017)
 
HTML CSS & Javascript
HTML CSS & JavascriptHTML CSS & Javascript
HTML CSS & Javascript
 
Intro to CSS
Intro to CSSIntro to CSS
Intro to CSS
 
Thinkful - Frontend Crash Course - Intro to HTML/CSS
Thinkful - Frontend Crash Course - Intro to HTML/CSSThinkful - Frontend Crash Course - Intro to HTML/CSS
Thinkful - Frontend Crash Course - Intro to HTML/CSS
 
Html:css crash course (4:5)
Html:css crash course (4:5)Html:css crash course (4:5)
Html:css crash course (4:5)
 
Modular HTML & CSS
Modular HTML & CSSModular HTML & CSS
Modular HTML & CSS
 
Dev Theming
Dev ThemingDev Theming
Dev Theming
 
HTML 5 Complete Reference
HTML 5 Complete ReferenceHTML 5 Complete Reference
HTML 5 Complete Reference
 
Introduction to HTML and CSS
Introduction to HTML and CSSIntroduction to HTML and CSS
Introduction to HTML and CSS
 
Code & design your first website (3:16)
Code & design your first website (3:16)Code & design your first website (3:16)
Code & design your first website (3:16)
 
HTML & CSS Workshop Notes
HTML & CSS Workshop NotesHTML & CSS Workshop Notes
HTML & CSS Workshop Notes
 
Front-End Methodologies
Front-End MethodologiesFront-End Methodologies
Front-End Methodologies
 
Code & Design your first website 4/18
Code & Design your first website 4/18Code & Design your first website 4/18
Code & Design your first website 4/18
 
Intro to HTML 5 / CSS 3
Intro to HTML 5 / CSS 3Intro to HTML 5 / CSS 3
Intro to HTML 5 / CSS 3
 
Web Design Course: CSS lecture 5
Web Design Course: CSS  lecture 5Web Design Course: CSS  lecture 5
Web Design Course: CSS lecture 5
 

Similar to Intro to CSS Presentation

WordPress HTML, CSS & Child Themes
WordPress HTML, CSS & Child ThemesWordPress HTML, CSS & Child Themes
WordPress HTML, CSS & Child ThemesMichelle Ames
 
Customizing Your WordPress Theme Using Firebug and Basic CSS
Customizing Your WordPress Theme Using Firebug and Basic CSSCustomizing Your WordPress Theme Using Firebug and Basic CSS
Customizing Your WordPress Theme Using Firebug and Basic CSSLaura Hartwig
 
BP304 - Blog It Up, Baby! Extending the new IBM Lotus Domino Blog Template
BP304 - Blog It Up, Baby! Extending the new IBM Lotus Domino Blog TemplateBP304 - Blog It Up, Baby! Extending the new IBM Lotus Domino Blog Template
BP304 - Blog It Up, Baby! Extending the new IBM Lotus Domino Blog TemplateSean Burgess
 
Website development company in delhi ncr
Website development company in delhi ncrWebsite development company in delhi ncr
Website development company in delhi ncrCss Founder
 
Using Wordpress with Reclaim Hosting
Using Wordpress with Reclaim HostingUsing Wordpress with Reclaim Hosting
Using Wordpress with Reclaim HostingCindy Royal
 
Create content template
Create content templateCreate content template
Create content templatevokeron
 
Intermediate Web Design.doc
Intermediate Web Design.docIntermediate Web Design.doc
Intermediate Web Design.docbutest
 
Intermediate Web Design.doc
Intermediate Web Design.docIntermediate Web Design.doc
Intermediate Web Design.docbutest
 
Girl Develop It Cincinnati: Intro to HTML/CSS Class 4
Girl Develop It Cincinnati: Intro to HTML/CSS Class 4Girl Develop It Cincinnati: Intro to HTML/CSS Class 4
Girl Develop It Cincinnati: Intro to HTML/CSS Class 4Erin M. Kidwell
 
Basic CSS concepts by naveen kumar veligeti
Basic CSS concepts by naveen kumar veligetiBasic CSS concepts by naveen kumar veligeti
Basic CSS concepts by naveen kumar veligetiNaveen Kumar Veligeti
 
Build the Perfect WordPress Website
Build the Perfect WordPress WebsiteBuild the Perfect WordPress Website
Build the Perfect WordPress WebsiteSinergia Labs
 

Similar to Intro to CSS Presentation (20)

Tutorial5
Tutorial5Tutorial5
Tutorial5
 
Tutorial5
Tutorial5Tutorial5
Tutorial5
 
WordPress HTML, CSS & Child Themes
WordPress HTML, CSS & Child ThemesWordPress HTML, CSS & Child Themes
WordPress HTML, CSS & Child Themes
 
Customizing Your WordPress Theme Using Firebug and Basic CSS
Customizing Your WordPress Theme Using Firebug and Basic CSSCustomizing Your WordPress Theme Using Firebug and Basic CSS
Customizing Your WordPress Theme Using Firebug and Basic CSS
 
BP304 - Blog It Up, Baby! Extending the new IBM Lotus Domino Blog Template
BP304 - Blog It Up, Baby! Extending the new IBM Lotus Domino Blog TemplateBP304 - Blog It Up, Baby! Extending the new IBM Lotus Domino Blog Template
BP304 - Blog It Up, Baby! Extending the new IBM Lotus Domino Blog Template
 
Website development company in delhi ncr
Website development company in delhi ncrWebsite development company in delhi ncr
Website development company in delhi ncr
 
Using Wordpress with Reclaim Hosting
Using Wordpress with Reclaim HostingUsing Wordpress with Reclaim Hosting
Using Wordpress with Reclaim Hosting
 
Fewd week2 slides
Fewd week2 slidesFewd week2 slides
Fewd week2 slides
 
Master page
Master pageMaster page
Master page
 
Create content template
Create content templateCreate content template
Create content template
 
Chapter 12
Chapter 12Chapter 12
Chapter 12
 
Intermediate Web Design.doc
Intermediate Web Design.docIntermediate Web Design.doc
Intermediate Web Design.doc
 
Intermediate Web Design.doc
Intermediate Web Design.docIntermediate Web Design.doc
Intermediate Web Design.doc
 
The World of Dynamic Sites
The World of Dynamic SitesThe World of Dynamic Sites
The World of Dynamic Sites
 
Sacramento web design
Sacramento web designSacramento web design
Sacramento web design
 
Girl Develop It Cincinnati: Intro to HTML/CSS Class 4
Girl Develop It Cincinnati: Intro to HTML/CSS Class 4Girl Develop It Cincinnati: Intro to HTML/CSS Class 4
Girl Develop It Cincinnati: Intro to HTML/CSS Class 4
 
Basic CSS concepts by naveen kumar veligeti
Basic CSS concepts by naveen kumar veligetiBasic CSS concepts by naveen kumar veligeti
Basic CSS concepts by naveen kumar veligeti
 
Build the Perfect WordPress Website
Build the Perfect WordPress WebsiteBuild the Perfect WordPress Website
Build the Perfect WordPress Website
 
Introduction to css
Introduction to cssIntroduction to css
Introduction to css
 
Webexpration2007 ii
Webexpration2007 iiWebexpration2007 ii
Webexpration2007 ii
 

Recently uploaded

The 7 Things I Know About Cyber Security After 25 Years | April 2024
The 7 Things I Know About Cyber Security After 25 Years | April 2024The 7 Things I Know About Cyber Security After 25 Years | April 2024
The 7 Things I Know About Cyber Security After 25 Years | April 2024Rafal Los
 
Presentation on how to chat with PDF using ChatGPT code interpreter
Presentation on how to chat with PDF using ChatGPT code interpreterPresentation on how to chat with PDF using ChatGPT code interpreter
Presentation on how to chat with PDF using ChatGPT code interpreternaman860154
 
08448380779 Call Girls In Civil Lines Women Seeking Men
08448380779 Call Girls In Civil Lines Women Seeking Men08448380779 Call Girls In Civil Lines Women Seeking Men
08448380779 Call Girls In Civil Lines Women Seeking MenDelhi Call girls
 
Injustice - Developers Among Us (SciFiDevCon 2024)
Injustice - Developers Among Us (SciFiDevCon 2024)Injustice - Developers Among Us (SciFiDevCon 2024)
Injustice - Developers Among Us (SciFiDevCon 2024)Allon Mureinik
 
08448380779 Call Girls In Friends Colony Women Seeking Men
08448380779 Call Girls In Friends Colony Women Seeking Men08448380779 Call Girls In Friends Colony Women Seeking Men
08448380779 Call Girls In Friends Colony Women Seeking MenDelhi Call girls
 
Breaking the Kubernetes Kill Chain: Host Path Mount
Breaking the Kubernetes Kill Chain: Host Path MountBreaking the Kubernetes Kill Chain: Host Path Mount
Breaking the Kubernetes Kill Chain: Host Path MountPuma Security, LLC
 
Neo4j - How KGs are shaping the future of Generative AI at AWS Summit London ...
Neo4j - How KGs are shaping the future of Generative AI at AWS Summit London ...Neo4j - How KGs are shaping the future of Generative AI at AWS Summit London ...
Neo4j - How KGs are shaping the future of Generative AI at AWS Summit London ...Neo4j
 
From Event to Action: Accelerate Your Decision Making with Real-Time Automation
From Event to Action: Accelerate Your Decision Making with Real-Time AutomationFrom Event to Action: Accelerate Your Decision Making with Real-Time Automation
From Event to Action: Accelerate Your Decision Making with Real-Time AutomationSafe Software
 
WhatsApp 9892124323 ✓Call Girls In Kalyan ( Mumbai ) secure service
WhatsApp 9892124323 ✓Call Girls In Kalyan ( Mumbai ) secure serviceWhatsApp 9892124323 ✓Call Girls In Kalyan ( Mumbai ) secure service
WhatsApp 9892124323 ✓Call Girls In Kalyan ( Mumbai ) secure servicePooja Nehwal
 
Finology Group – Insurtech Innovation Award 2024
Finology Group – Insurtech Innovation Award 2024Finology Group – Insurtech Innovation Award 2024
Finology Group – Insurtech Innovation Award 2024The Digital Insurer
 
Slack Application Development 101 Slides
Slack Application Development 101 SlidesSlack Application Development 101 Slides
Slack Application Development 101 Slidespraypatel2
 
04-2024-HHUG-Sales-and-Marketing-Alignment.pptx
04-2024-HHUG-Sales-and-Marketing-Alignment.pptx04-2024-HHUG-Sales-and-Marketing-Alignment.pptx
04-2024-HHUG-Sales-and-Marketing-Alignment.pptxHampshireHUG
 
Automating Google Workspace (GWS) & more with Apps Script
Automating Google Workspace (GWS) & more with Apps ScriptAutomating Google Workspace (GWS) & more with Apps Script
Automating Google Workspace (GWS) & more with Apps Scriptwesley chun
 
Kalyanpur ) Call Girls in Lucknow Finest Escorts Service 🍸 8923113531 🎰 Avail...
Kalyanpur ) Call Girls in Lucknow Finest Escorts Service 🍸 8923113531 🎰 Avail...Kalyanpur ) Call Girls in Lucknow Finest Escorts Service 🍸 8923113531 🎰 Avail...
Kalyanpur ) Call Girls in Lucknow Finest Escorts Service 🍸 8923113531 🎰 Avail...gurkirankumar98700
 
Exploring the Future Potential of AI-Enabled Smartphone Processors
Exploring the Future Potential of AI-Enabled Smartphone ProcessorsExploring the Future Potential of AI-Enabled Smartphone Processors
Exploring the Future Potential of AI-Enabled Smartphone Processorsdebabhi2
 
Handwritten Text Recognition for manuscripts and early printed texts
Handwritten Text Recognition for manuscripts and early printed textsHandwritten Text Recognition for manuscripts and early printed texts
Handwritten Text Recognition for manuscripts and early printed textsMaria Levchenko
 
[2024]Digital Global Overview Report 2024 Meltwater.pdf
[2024]Digital Global Overview Report 2024 Meltwater.pdf[2024]Digital Global Overview Report 2024 Meltwater.pdf
[2024]Digital Global Overview Report 2024 Meltwater.pdfhans926745
 
Top 5 Benefits OF Using Muvi Live Paywall For Live Streams
Top 5 Benefits OF Using Muvi Live Paywall For Live StreamsTop 5 Benefits OF Using Muvi Live Paywall For Live Streams
Top 5 Benefits OF Using Muvi Live Paywall For Live StreamsRoshan Dwivedi
 
Driving Behavioral Change for Information Management through Data-Driven Gree...
Driving Behavioral Change for Information Management through Data-Driven Gree...Driving Behavioral Change for Information Management through Data-Driven Gree...
Driving Behavioral Change for Information Management through Data-Driven Gree...Enterprise Knowledge
 
Factors to Consider When Choosing Accounts Payable Services Providers.pptx
Factors to Consider When Choosing Accounts Payable Services Providers.pptxFactors to Consider When Choosing Accounts Payable Services Providers.pptx
Factors to Consider When Choosing Accounts Payable Services Providers.pptxKatpro Technologies
 

Recently uploaded (20)

The 7 Things I Know About Cyber Security After 25 Years | April 2024
The 7 Things I Know About Cyber Security After 25 Years | April 2024The 7 Things I Know About Cyber Security After 25 Years | April 2024
The 7 Things I Know About Cyber Security After 25 Years | April 2024
 
Presentation on how to chat with PDF using ChatGPT code interpreter
Presentation on how to chat with PDF using ChatGPT code interpreterPresentation on how to chat with PDF using ChatGPT code interpreter
Presentation on how to chat with PDF using ChatGPT code interpreter
 
08448380779 Call Girls In Civil Lines Women Seeking Men
08448380779 Call Girls In Civil Lines Women Seeking Men08448380779 Call Girls In Civil Lines Women Seeking Men
08448380779 Call Girls In Civil Lines Women Seeking Men
 
Injustice - Developers Among Us (SciFiDevCon 2024)
Injustice - Developers Among Us (SciFiDevCon 2024)Injustice - Developers Among Us (SciFiDevCon 2024)
Injustice - Developers Among Us (SciFiDevCon 2024)
 
08448380779 Call Girls In Friends Colony Women Seeking Men
08448380779 Call Girls In Friends Colony Women Seeking Men08448380779 Call Girls In Friends Colony Women Seeking Men
08448380779 Call Girls In Friends Colony Women Seeking Men
 
Breaking the Kubernetes Kill Chain: Host Path Mount
Breaking the Kubernetes Kill Chain: Host Path MountBreaking the Kubernetes Kill Chain: Host Path Mount
Breaking the Kubernetes Kill Chain: Host Path Mount
 
Neo4j - How KGs are shaping the future of Generative AI at AWS Summit London ...
Neo4j - How KGs are shaping the future of Generative AI at AWS Summit London ...Neo4j - How KGs are shaping the future of Generative AI at AWS Summit London ...
Neo4j - How KGs are shaping the future of Generative AI at AWS Summit London ...
 
From Event to Action: Accelerate Your Decision Making with Real-Time Automation
From Event to Action: Accelerate Your Decision Making with Real-Time AutomationFrom Event to Action: Accelerate Your Decision Making with Real-Time Automation
From Event to Action: Accelerate Your Decision Making with Real-Time Automation
 
WhatsApp 9892124323 ✓Call Girls In Kalyan ( Mumbai ) secure service
WhatsApp 9892124323 ✓Call Girls In Kalyan ( Mumbai ) secure serviceWhatsApp 9892124323 ✓Call Girls In Kalyan ( Mumbai ) secure service
WhatsApp 9892124323 ✓Call Girls In Kalyan ( Mumbai ) secure service
 
Finology Group – Insurtech Innovation Award 2024
Finology Group – Insurtech Innovation Award 2024Finology Group – Insurtech Innovation Award 2024
Finology Group – Insurtech Innovation Award 2024
 
Slack Application Development 101 Slides
Slack Application Development 101 SlidesSlack Application Development 101 Slides
Slack Application Development 101 Slides
 
04-2024-HHUG-Sales-and-Marketing-Alignment.pptx
04-2024-HHUG-Sales-and-Marketing-Alignment.pptx04-2024-HHUG-Sales-and-Marketing-Alignment.pptx
04-2024-HHUG-Sales-and-Marketing-Alignment.pptx
 
Automating Google Workspace (GWS) & more with Apps Script
Automating Google Workspace (GWS) & more with Apps ScriptAutomating Google Workspace (GWS) & more with Apps Script
Automating Google Workspace (GWS) & more with Apps Script
 
Kalyanpur ) Call Girls in Lucknow Finest Escorts Service 🍸 8923113531 🎰 Avail...
Kalyanpur ) Call Girls in Lucknow Finest Escorts Service 🍸 8923113531 🎰 Avail...Kalyanpur ) Call Girls in Lucknow Finest Escorts Service 🍸 8923113531 🎰 Avail...
Kalyanpur ) Call Girls in Lucknow Finest Escorts Service 🍸 8923113531 🎰 Avail...
 
Exploring the Future Potential of AI-Enabled Smartphone Processors
Exploring the Future Potential of AI-Enabled Smartphone ProcessorsExploring the Future Potential of AI-Enabled Smartphone Processors
Exploring the Future Potential of AI-Enabled Smartphone Processors
 
Handwritten Text Recognition for manuscripts and early printed texts
Handwritten Text Recognition for manuscripts and early printed textsHandwritten Text Recognition for manuscripts and early printed texts
Handwritten Text Recognition for manuscripts and early printed texts
 
[2024]Digital Global Overview Report 2024 Meltwater.pdf
[2024]Digital Global Overview Report 2024 Meltwater.pdf[2024]Digital Global Overview Report 2024 Meltwater.pdf
[2024]Digital Global Overview Report 2024 Meltwater.pdf
 
Top 5 Benefits OF Using Muvi Live Paywall For Live Streams
Top 5 Benefits OF Using Muvi Live Paywall For Live StreamsTop 5 Benefits OF Using Muvi Live Paywall For Live Streams
Top 5 Benefits OF Using Muvi Live Paywall For Live Streams
 
Driving Behavioral Change for Information Management through Data-Driven Gree...
Driving Behavioral Change for Information Management through Data-Driven Gree...Driving Behavioral Change for Information Management through Data-Driven Gree...
Driving Behavioral Change for Information Management through Data-Driven Gree...
 
Factors to Consider When Choosing Accounts Payable Services Providers.pptx
Factors to Consider When Choosing Accounts Payable Services Providers.pptxFactors to Consider When Choosing Accounts Payable Services Providers.pptx
Factors to Consider When Choosing Accounts Payable Services Providers.pptx
 

Intro to CSS Presentation

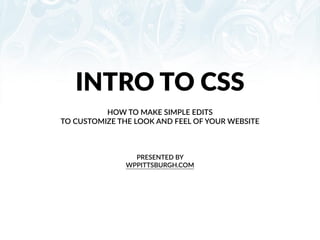
  • 1. INTRO  TO  CSS PRESENTED  BY     WPPITTSBURGH.COM   HOW  TO  MAKE  SIMPLE  EDITS     TO  CUSTOMIZE  THE  LOOK  AND  FEEL  OF  YOUR  WEBSITE
  • 2. WHAT  IS  CSS? • CSS  is  the  abbreviated  term  for  “Cascading  Style   Sheet”.     • The  code  found  within  your  theme’s  CSS  file   determines  the  appearance  of  your  site  by  applying   style  rules  to  HTML  content,  which  has  no  style  of   its  own.
  • 3. CSS  vs.  HTML • Think  of  CSS  as  “clothing”  and   the  HTML  as  the  “mannequin”.   • CSS  controls  things  such  as   colors,  spacing,  layout,  mobile-­‐ responsiveness  and  more!   • HTML  is  the  site’s  structure.   • We  can  change  the  “clothing”   anyIme  without  affecIng  the   structure  of  the  site. PHOTO CREDIT: PIXABAY.COM
  • 4. This  is  the  Twenty-­‐Twelve  WordPress  Theme.
  • 5. With  a  few  lines  of  custom  CSS  and  a  few  images  we   can  easily  customize  different  elements  of  the  website.
  • 6. LEARNING  THE  LINGO CSS  can  be  made  easier  to  understand  by  breaking  down  each   “sentence”  into  it’s  individual  components.     Here  is  an  example  of  a  common  CSS  declaraIon,  as  well  as  a  diagram   of  what  each  CSS  component  is  made  of:
  • 7. • The  SELECTOR  is  what  element  of  the  website  we  want  to  change.   • The  PROPERTY  is  what  we  want  to  change  about  it   • The  VALUE  is  what  we  are  changing.
  • 8. HOW  TO  EDIT  THEME  CSS   It  is  important  that  you  take  care  how/where  you  edit  the  CSS  in  your   theme,  as  you  do  not  want  to  overwrite  your  changes  with  any  theme   updates  and  risk  losing  all  of  your  hard  work!   Op#on  A:  Create  a  Child  Theme   A  child  theme  inherits  the  files  of  the  parent  theme,  but  allows  you  to   make  changes  to  the  theme  files  without  risk  of  these  changes  being   lost  in  theme  updates.  Learn  more  about  child  themes  here:   hXps://codex.wordpress.org/Child_Themes
  • 9. If  creaIng  a  child  theme  is  not  the  right  soluIon  for  you,  or  you  would   like  a  simple  way  to  edit  CSS  quickly  and  easily,  you  can  use  a  plugin,   which  is  what  we  will  demonstrate  today. Op#on  B:  JetPack  Plugin   The  JetPack  plugin  provided  by   WordPress.com  offers  a   number  of  features.  You  can   install  it  from  the   WordPress.org  plugin  directory   or  from  within  your  WordPress   dashboard.   Learn  more  about  JetPack  here:   hXp://jetpack.me  
  • 10. TO  ACTIVATE  CUSTOM  CSS  IN  JETPACK: Navigate  to   JetPack  WordPress   Dashboard  Menu.   Click  on  “Se^ngs”.
  • 11. Next,  hover  over  the  “Custom  CSS  Module”  and  click  on  “AcIvate”.
  • 12. You  will  now  see  the  opIon  “Edit  CSS”  under   the  “Appearance”  secIon  of  the  menu.   *IMPORTANT  NOTE!*   Below  Edit  CSS  is  the  link  for  “Editor”  which   will  take  you  to  the  editor  for  ediIng  core   theme  files.  It  is  VERY  important  that  you  do   not  edit  this  secIon  unless  using  a  child   theme  as  all  of  your  changes  may  be  lost   when  the  theme  is  updated.  
  • 13. WE  ARE  NOW  READY  TO   EDIT  CSS!
  • 14. STEP  1:   FINDING  YOUR  THEME’S  STYLES For  today’s  exercises,  we  are  going  to  use  and  modify  the  exisIng  CSS   of  the  Twenty  Twelve  WordPress  theme.  Using  an  exisIng  theme  can   someImes  be  easier  than  coding  from  scratch.   In  order  to  make  changes  to  the  CSS,  we  need  to  find  the  selector  we   wish  to  change  first.   The  easiest  ways  to  do  this  are  through  the  developer  tools  available   in  Google  Chrome  or  Mozilla  Firefox.     Today  we  will  be  using  Google  Chrome.
  • 15. To  launch  the  Inspector  in  Chrome,  all  you  need  to  do  is  right-­‐click  on   the  element  you  wish  to  change  and  choose  “Inspect  Element”. Try  It!     Click  on  Your  Site   Title,  Right  Click,   and  Choose   “Inspect  Element”   from  the  Drop   Down  menu.
  • 16. You  will  see  the  HTML  markup  and  the  CSS  Styles  on  the  screen. Source  Code CSS  Styles
  • 17. Here  is  a  closer  view  of  the  CSS  style  for  the  site  #tle. In  this  instance,  the  SELECTORS  are  .site-­‐header  h1  a,  .site-­‐header  h2  a   The  PROPERTIES  are  color,  display,  and  text-­‐decoraIon   And  the  VALUES  of  these  properIes  are  #515151,  inline-­‐block,  and  none
  • 18. EXERCISE  1:  MODIFYING  FONTS For  this  exercise,  we  will   be  making  changes  to  the   blog  Itle  text  found  at  the   top  of  blog  arIcles  on   your  site.  To  locate  the   CSS  for  this  element,  right   click  on  any  blog  Itle  on   your  test  site’s  home  page.     Next  choose  the  Inspect   Element  opIon,  which  will   launch  your  browser’s   developer  tools.
  • 19. The  TOP  of  the  browser  window  is  your  SITE.   The  BOTTOM  LEFT  is  the  HTML  of  the  site.   The  BOTTOM  RIGHT  is  where  you  find  your  CSS  STYLES.
  • 20. We  can  make  changes  right  in  our  browser  window  to   preview  what  the  new  style  may  look  like.  These   changes  are  ONLY  TEMPORARY  -­‐  in  order  to  apply   them  to  your  site,  you  must  place  the  code  in  the  “Edit   CSS”  code  editor  provided  by  the  JetPack  plugin.   Look  for  this  snippet  of  code  in  the  CSS  Styles  Window:
  • 21. In  this  example,  right  now  the  only  styling  for  the  Blog   Post  Titles  is  that  there  is  no  underline  underneath   the  link. We  can  edit  this  code  in  our  browser  window  to   change  the  font-­‐size,  font-­‐weight  and  font-­‐style.
  • 22. Click  on  the  CSS  box  and  create  a  new  line  of   properIes.   The  First  Property  we  will  be  adding  is  Font-­‐Size.   Type  Font-­‐Size,  then  hit  tab  to  enter  “40px”   Next,  hit  enter  and  type  Font-­‐Weight,  hit  tab,  type  in   “bold”  and  press  “Enter”.   Lastly,  type  “Font-­‐Style”,  hit  tab,  type  in  “italic”  and  hit   enter.
  • 23. Here  is  what  your  screen  should  look  like:
  • 24. Select  this  code  and  “Copy”  to  your  clipboard  so  you  can  paste   it  into  the  Jetpack  Custom  CSS  Editor.
  • 25. Navigate  to  your  WordPress  Dashboard  and  Select  “Appearance  -­‐>  “Edit  CSS”.   Paste  the  code  into  the  Custom  CSS  Editor  and  click  the  blue  “Save   Stylesheet”  BuXon  to  save  your  changes.
  • 26. Our  Blog  Titles  Now  Look  Like  This:
  • 27. EXERCISE  2:     BACKGROUND  COLORS  AND  PADDING For  this  exercise,  we  will  change   the  background  color  of  the   sIcky  post  from  white  to  blue   using  background  colors  and   padding.   A  “sIcky  post”  in  WordPress  is  a   post  which  “sIcks”  or  stays  at   top  on  the  front  page  of  the  blog. This  is  a  great  way  to  place  a  welcome  message,  special  announcement,  or   other  informaIon  that  does  not  change  frequently  and  draw  aXenIon  to  it   for  your  website  visitors.
  • 28. To  get  started,  first  select  the  “Featured  Post”  secIon  and  right-­‐click   to  launch  the  Inspector  in  Google  Chrome.
  • 29. We  are  going  to  be  doing  something  else  to  our  sIcky  posts,  so  hide  this  feature   by  simply  adding  the  following  rule:   display:none   This  causes  the  “Featured  Post”  element  to  no  longer  be  displayed.  s  for  this   element  are  already  in  the  theme’s  CSS,  we  only  need  to  add  our  custom   declaraIon.
  • 30. Because  this  change  is  only  in  the  inspector,  we  will  again  need  to   copy  this  into  our  JetPack  CSS  editor  in  the  Dashboard.  Unlike  last   Ime  though,  we  can  simplify  this  to  only  include  the  rule  we   added,  like  so:   Doing  this  keeps  our  custom  CSS  from  ge^ng  too  bloated.  Since   the  other  styles  for  this  element  are  already  in  the  theme’s  CSS,  we   only  need  to  add  our  custom  declaraIon. arIcle.sIcky  .featured-­‐post  {   display:  none;   }
  • 31. arIcle  id="post-­‐4"  class="post-­‐4  post  type-­‐post  status-­‐publish  format-­‐ standard  sIcky  hentry  category-­‐uncategorized"   Now  let’s  style  the  SIcky  Post  itself.  Find  and  highlight  the  long  line  on  the   HTML  pane  in  the  inspector  that  says:
  • 32. You  will  noIce  that  when  you  highlight  this  line  of  code,   there  isn’t  any  matching  CSS  we  can  use  to  style  this   sIcky  post.  The  only  one  displayed  is  .site-­‐content  arIcle   when  ideally  we  would  be  looking  for  a  style  with  .sIcky   in  it.   The  good  news  is  we  can  use  the  inspector  to  add  new   styles  to  our  site!
  • 33. To  Add  a  new  style  to  your  site  -­‐  click  on  the  “+”  icon  to  add  a  new   style  rule.
  • 34. You  will  noIce  that  when  the  new  declaraIon  is  created  in  the  inspector,   it  shows  the  selector  as:   article#post-­‐4   However  that  is  not  quite  what  we  want.  If  leo  as-­‐is,  this  style  rule  would   only  apply  to  arIcles  with  an  ID  that  is  equal  to  “4”  which  is  the  exact   post  we  are  on,  as  it  is  the  4th  post  we  have  created  on  our  test  site.   In  this  case,  we  will  need  to  create  a  new  style  declaraIon  on  our  own,   rather  than  use  one  that  exists  already.   We  can  get  around  this  by  modifying  the  selector  to  instead  say   arIcle.sIcky  which,  in  plain  English  works  out  to  something  like  “Apply   this  rule  to  all  arIcles  that  have  the  class  equal  to  “sIcky”  which  means   this  post,  plus  any  sIcky  posts  we  make  in  the  future.”
  • 35. Click  on  the  selector  to  change  it  to  arIcle.sIcky
  • 36. ID  vs.  Class   You  may  noIce  while  working  with  CSS,  some  selectors  have  a  “#”  in   front  of  them,  and  some  have  a  “.”  in  front  of  them.  This  is  used  to   denote  if  there  is  an  ID  or  a  class  associated  with  this  HTML  element.   Let’s  look  at  the  original  HTML  that  was  highlighted  in  our  inspector:   arIcle  id="post-­‐4"  class="post-­‐4  post  type-­‐post  status-­‐publish   format-­‐standard  sIcky  hentry  category-­‐uncategorized"   In  this  case,  you  would  add  a  “#”  in  front  of  #post-­‐4  because  in  the   original  markup  it  appears  as  id=”post-­‐4ʺ″  whereas  we  added  a  “.”  in   front  of  .sIcky  because  it  appears  as  class=”sIcky”  in  the  original   markup.   In  most  cases,  IDs  are  used  for  non-­‐repeaIng  secIons  of  a  website   {such  as  header,  navigaIon,  or  footer}  -­‐  classes  are  used  for  the   majority  of  the  other  elements  which  may  repeat  for  easier  styling.
  • 37. Now  that  we  have  created  our  new  selector,  let’s  add  some  styles  to  it.   Start  by  applying  the  following  background  color:   background:  #D0EAF3;   This  will  give  us  a  screen  that  looks  like  this:
  • 38. If  you  want  to  experiment  with  the  color  a  bit,  you  can  click  on  the  Iny  swatch   next  to  the  hex  code  #D0EAF3  which  will  bring  up  a  color  mixer  tool.  
  • 39. Since  the  original  theme  CSS  files  did  not  include  a  background  color,  you  will   see  the  text  and  the  image  go  all  the  way  to  the  edge  of  the  box.  The  way  to   fix  this  is  to  add  some  padding.  
  • 40. To  add  padding,  type  this  in  the  Inspector  Window  right  below  the   background  declaraIon:   padding:  20px;   Now  our  screen  will  look  like  this:
  • 41. REMEMBER:  Styles  entered  in  the  Inspector  Window  are  NOT   permanent  and  will  disappear  when  the  page  is  refreshed.     Let’s  copy  our  style  as  we  did  in  the   previous  exercise  and  paste  into  the   JetPack  Custom  CSS  Editor  and   save  our  changes.   Now,  refresh  your  browser  window   and  admire  your  work!
  • 42. EXERCISE  3:     SITE  TITLE  AND  BACKGROUND  IMAGE Our  final  exercise  is  to  change  the  site  Itle  to  an  image  logo  and  to   create  a  background  image.  This  is  an  easy  way  to  add  your  own   custom  branding  to  your  website.
  • 43. CHANGING  THE  HEADER  BACKGROUND  IMAGE   To  change  the  header  background  image  in  the  Twenty  Twelve  theme,  we   need  to  first  upload  our  image  to  the  media  folder.  Click  on  “Add  New”  to   drop  or  select  a  file  for  uploading.  In  our  resources  available  to  download,   we  have  included  an  image  for  you  to  use  as  your  background.  
  • 44. Once  uploaded,  copy  the  link  for  the  image  which  is   located  in  the  top  right  as  the  URL  field.  
  • 45. For  this  exercise,  click  on  the  element  of  the  HTML  highlighted  below.   This  will  bring  up  the  body  .site  class  to  be  styled  in  the  inspector.  
  • 46. Add  the  following  to  the  line  below:   background:  url(‘hXp://yourimagelinkhere.jpg’)   Paste  the  URL  of  the  image  you  uploaded  to  replace     hXp://yourimagelinkhere.jpg  
  • 47. Currently,  the  image  is  Iling  along  the  page.  Since  the  image  is   designed  to  fade  to  white,  let’s  add  a  bit  of  code  to  this:   #FFF  url(‘hXp://yourimagelinkhere.jpg')  no-­‐repeat The  #FFF  declares  the   background  will  be  white   and  the  no-­‐repeat  aoer  the   URL  declares  the  image   should  only  appear  once.   Copy  the  code  to  your   clipboard  and  paste  in  the   JetPack  Custom  CSS  Editor   and  save  your  changes.  
  • 48. Here  is  what  our  custom  CSS  file  looks  like  so  far:
  • 49. Our  final  step  is  to  add  a  logo.  Once  again,  go  to  the  Media  Library   and  upload  or  select  your  logo  image  and  copy  the  URL.
  • 50. We  are  going  to  add  the  logo  just  as  we  did  the   custom  header  background  image.     Click  on  the  Site  Title  and  Inspect  Element.   Add  the  following  code  to  the  .site-­‐header  h1  a,  .site-­‐ header  h2  a  selectors:          background:  url('hXp://mycustomlogolink.png')  top  leo  no-­‐repeat; In  this  example,  we  are  adding  “top  leo  no-­‐repeat”  to  the   value  to  state  we  only  want  the  image  to  appear  in  the  top   leo  of  the  website  and  to  not  repeat  across  the  page.   Be  sure  to  replace  hXp://mycustomlogolink.png  with  the   URL  you  copied  in  the  previous  step.  
  • 51. Right  now,  our  logo  looks  something  like  this:   We  can  make  this  look  much  beXer  by  adding  just  a  few   addiIonal  properIes.  
  • 52. Add  this  line  of  code:   text-­‐indent:  -­‐9999px;   Hiding  the  Site  Title  Text   In  our  earlier  example,  when  we  wanted  to  hide  an  element  we  used   “display:none”.  However,  you  need  to  display  the  Itle  of  your  site  to   make  it  user-­‐friendly  and  accessible  to  those  who  may  be  using  a   screen  reader  or  other  method  for  using  the  internet.   So,  in  this  instance,  we  are  going  to  indent  the  text  by  -­‐9999px   which  will  move  it  off  the  screen,  but  sIll  make  it  accessible  by  those   who  may  need  the  text  version  of  the  site  Itle.
  • 53.        height:  100px;          width:  440px; Lastly,  we  need  to  make  the  “box”  for  the  logo  space  to  fit  the   dimensions  of  the  logo.  This  can  be  achieved  simply  by  declaring  a   height  and  width.  Add  this  to  the  code  you  have  so  far: Copy  your  changes  and  paste  into  the  JetPack  Custom  CSS  Editor.
  • 55. QuesEons?  Want  to  Learn  More? Connect  with  us!   hMp://wppiMsburgh.com/   hMps://www.facebook.com/groups/wppiMsburgh/   hMp://twiMer.com/wppgh/   hMp://www.meetup.com/PiMsburgh-­‐WordPress-­‐ Developers-­‐Designers/