


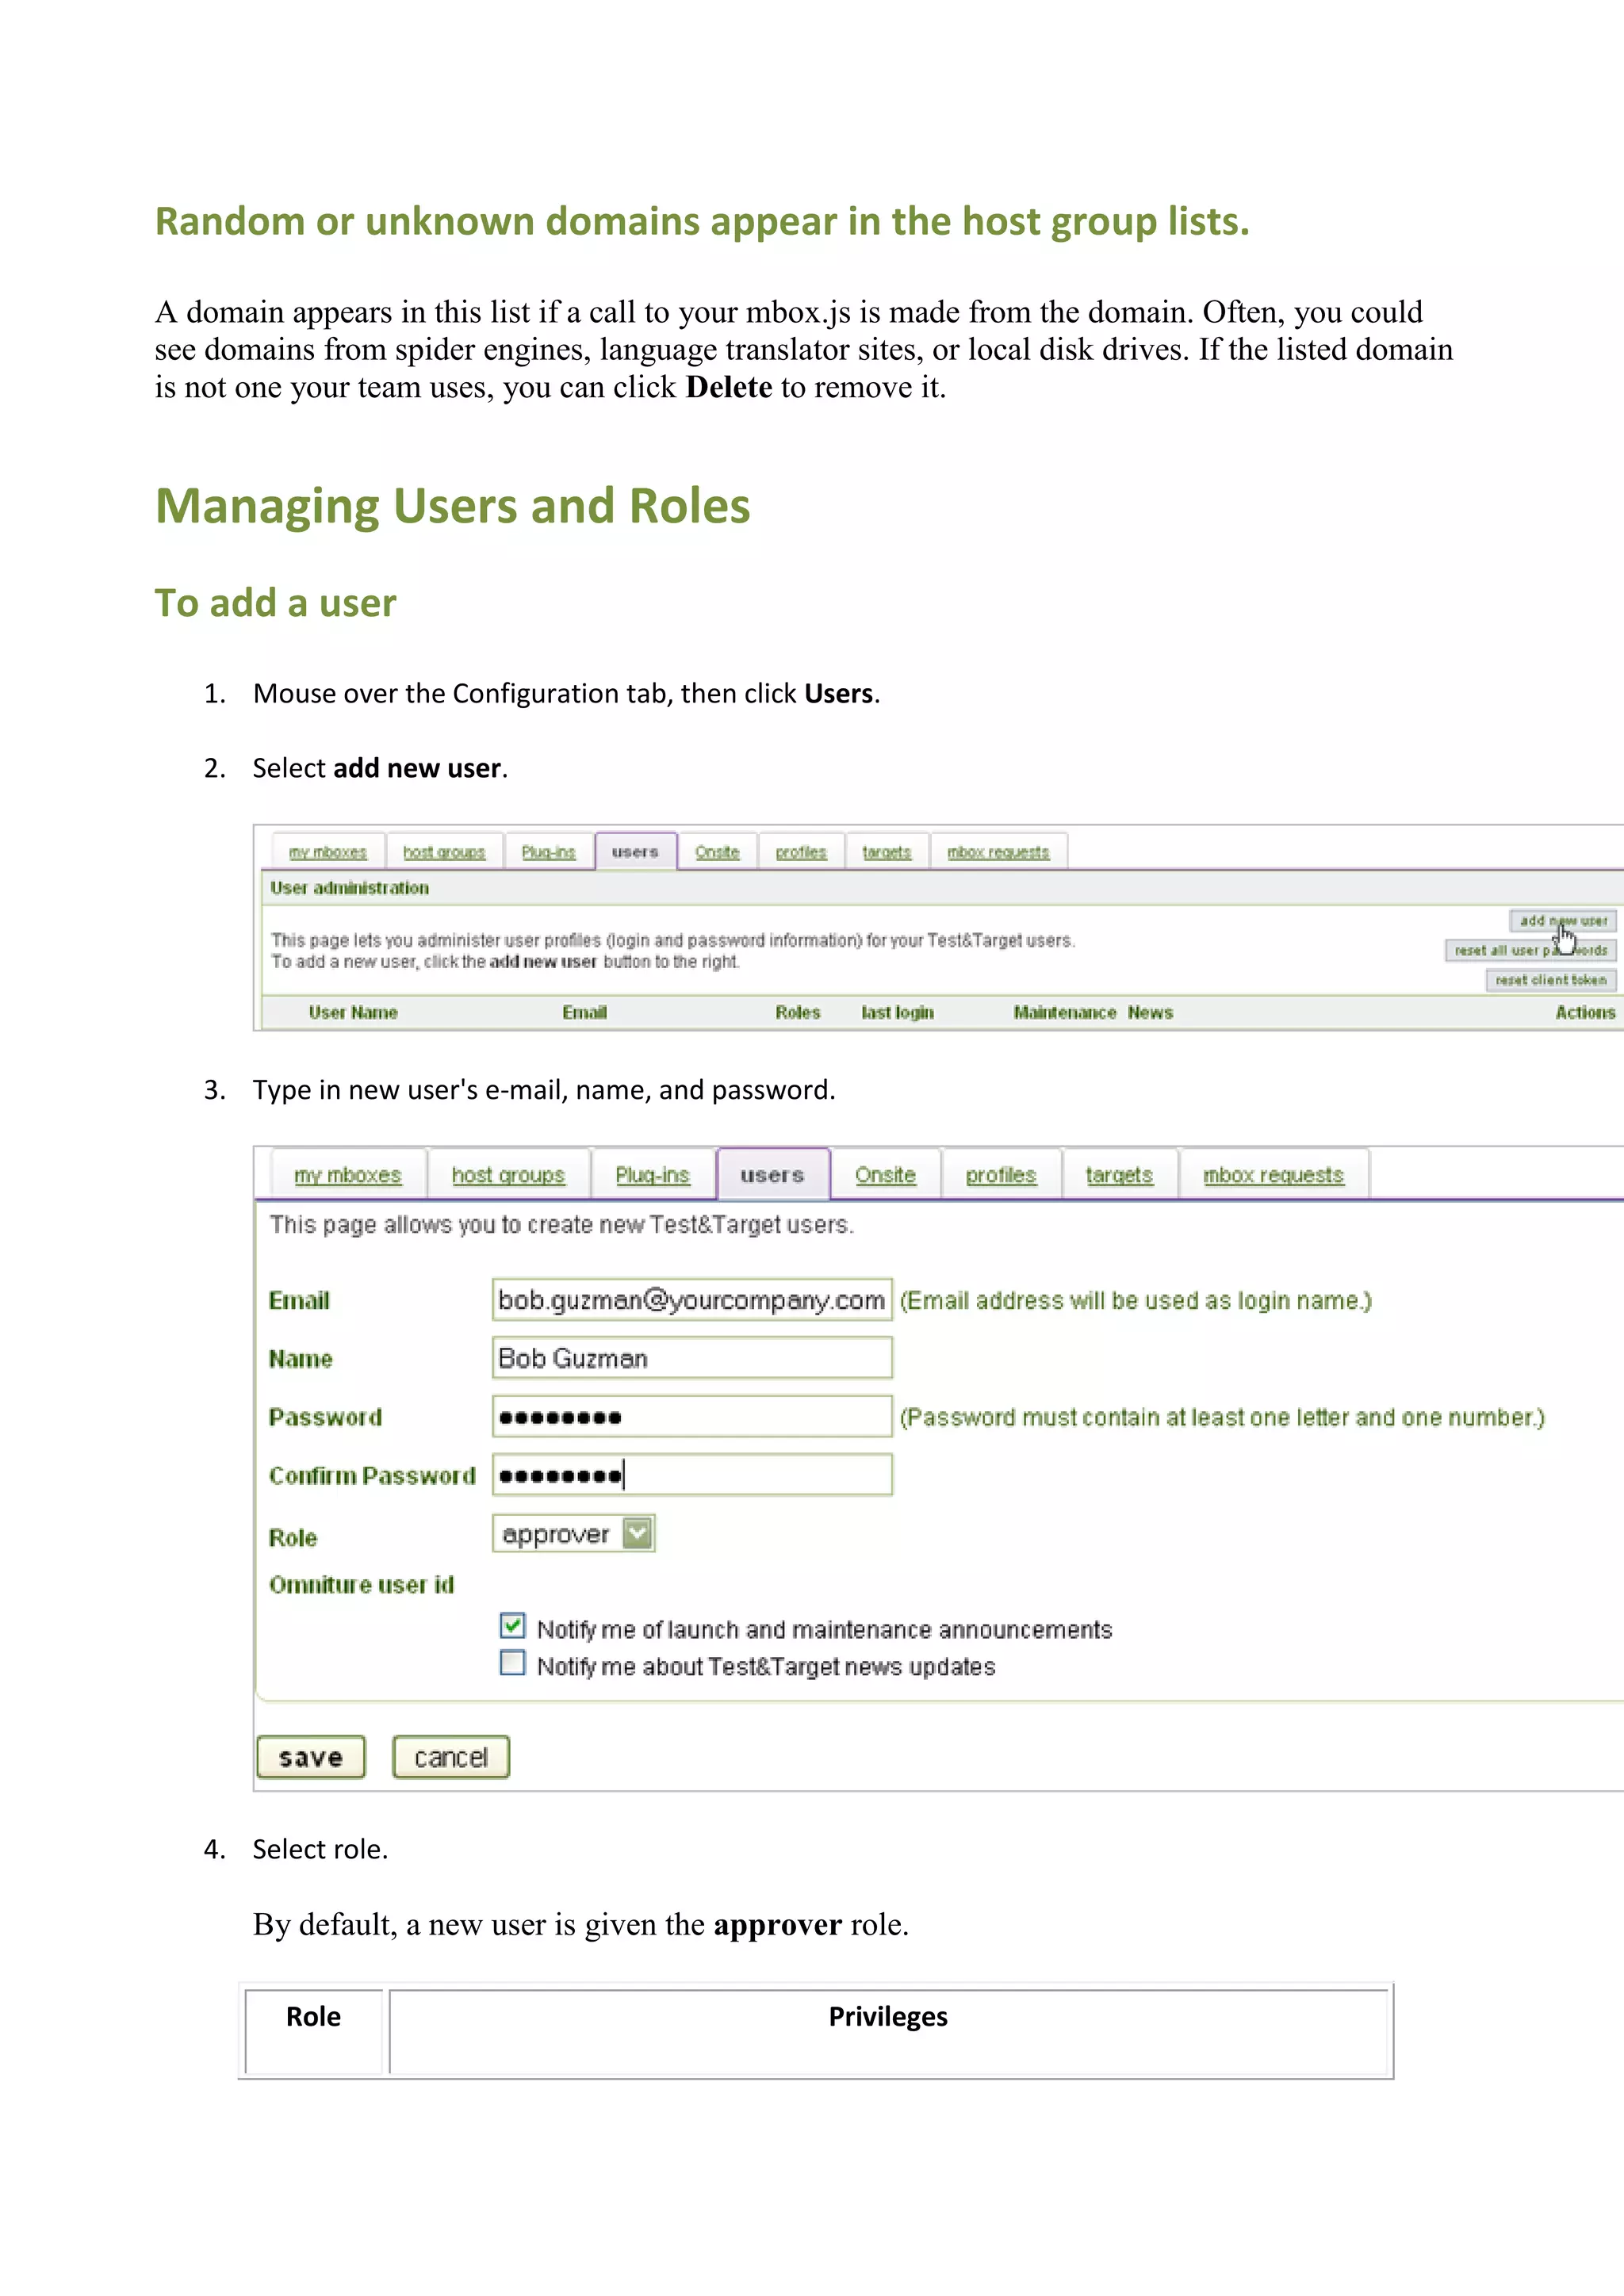

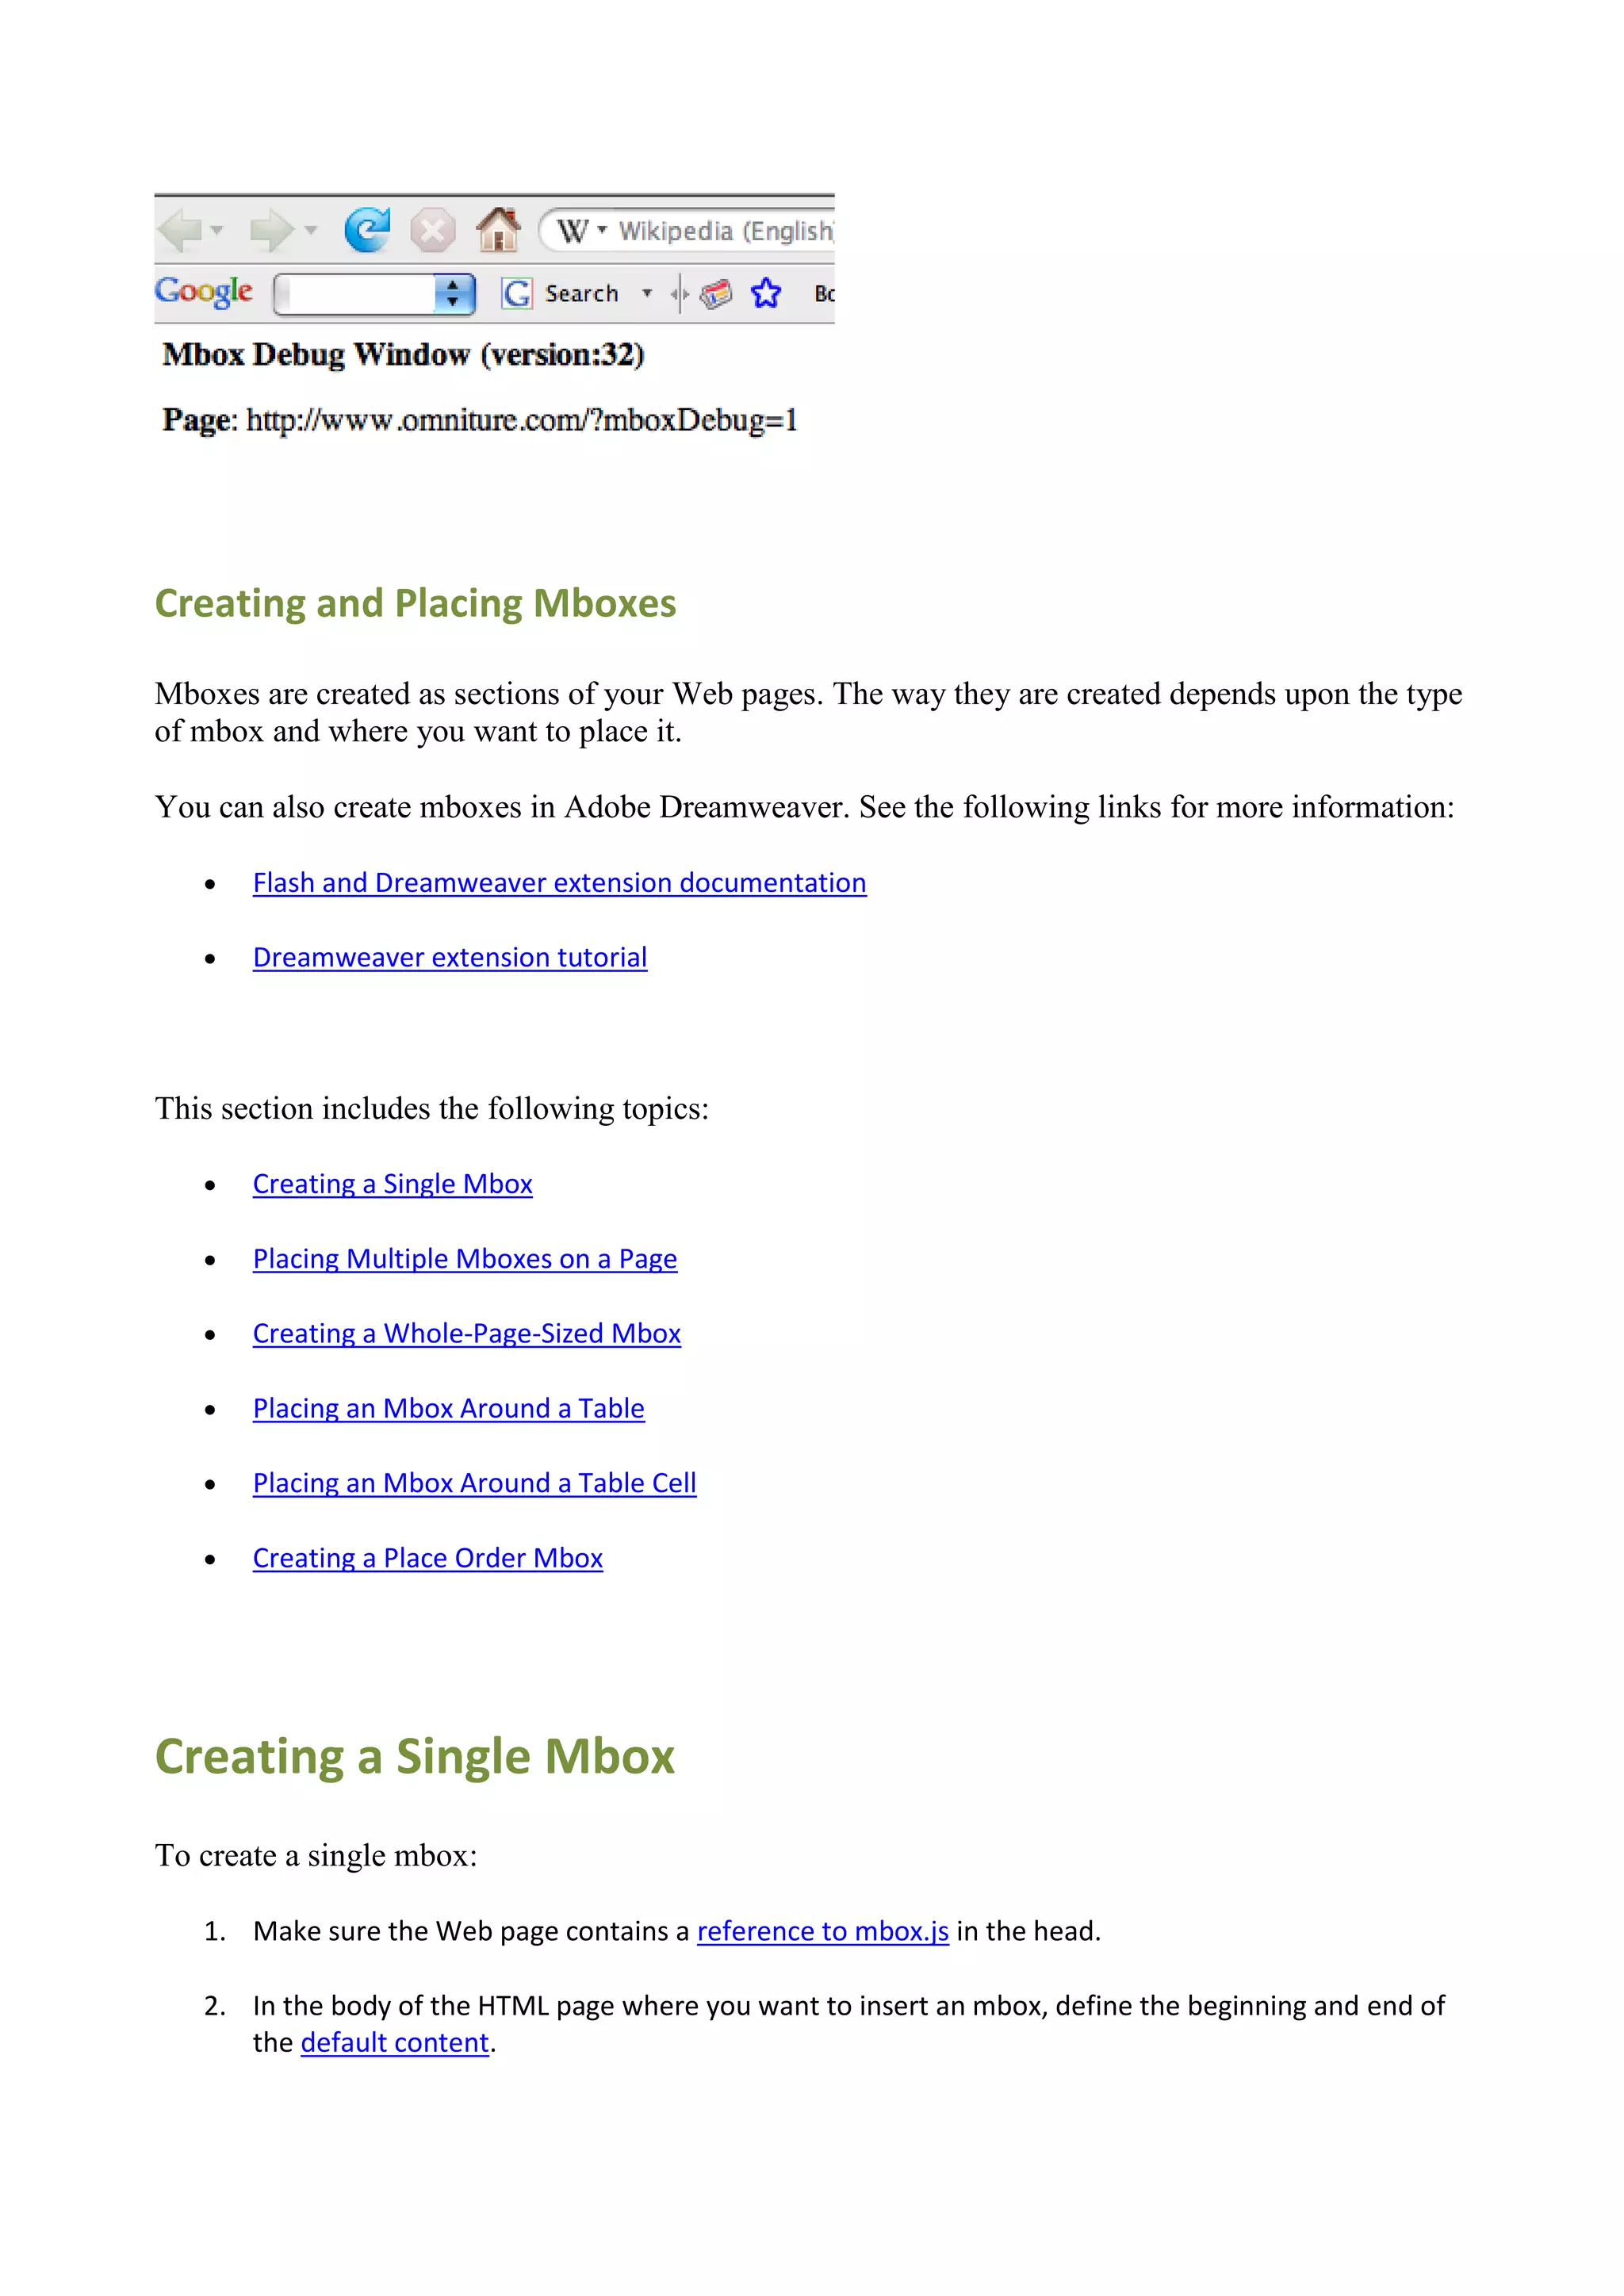
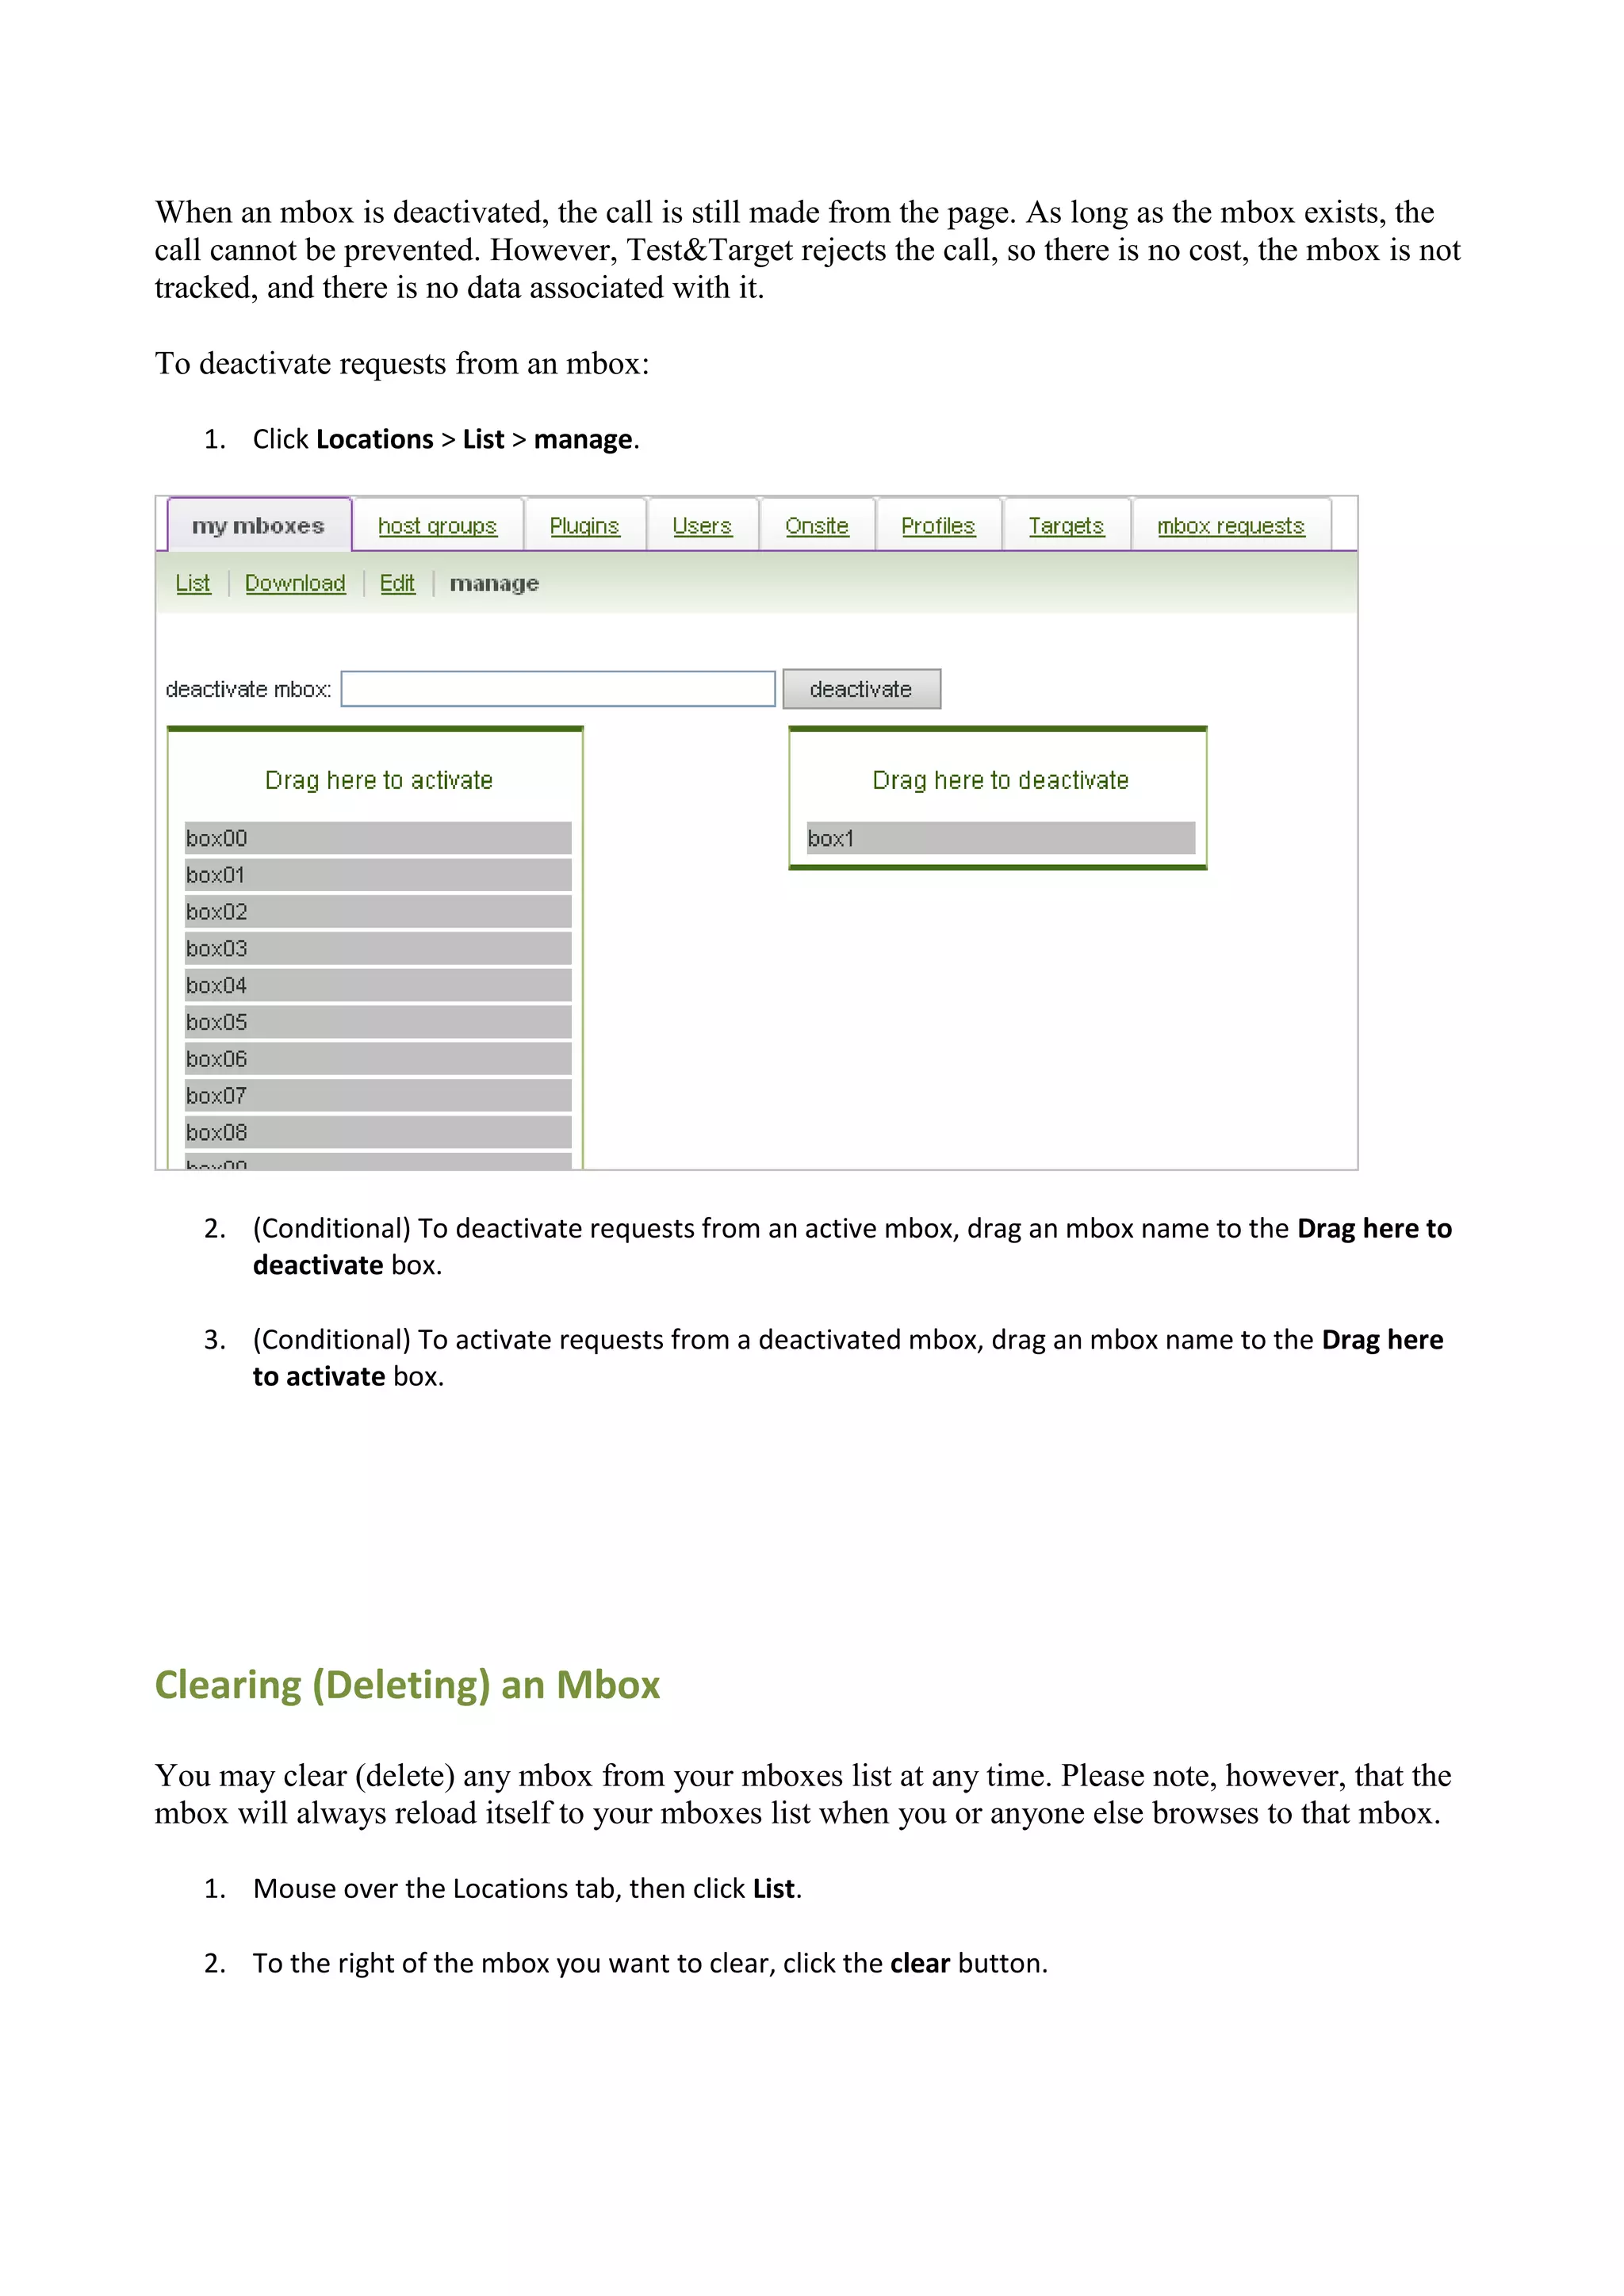
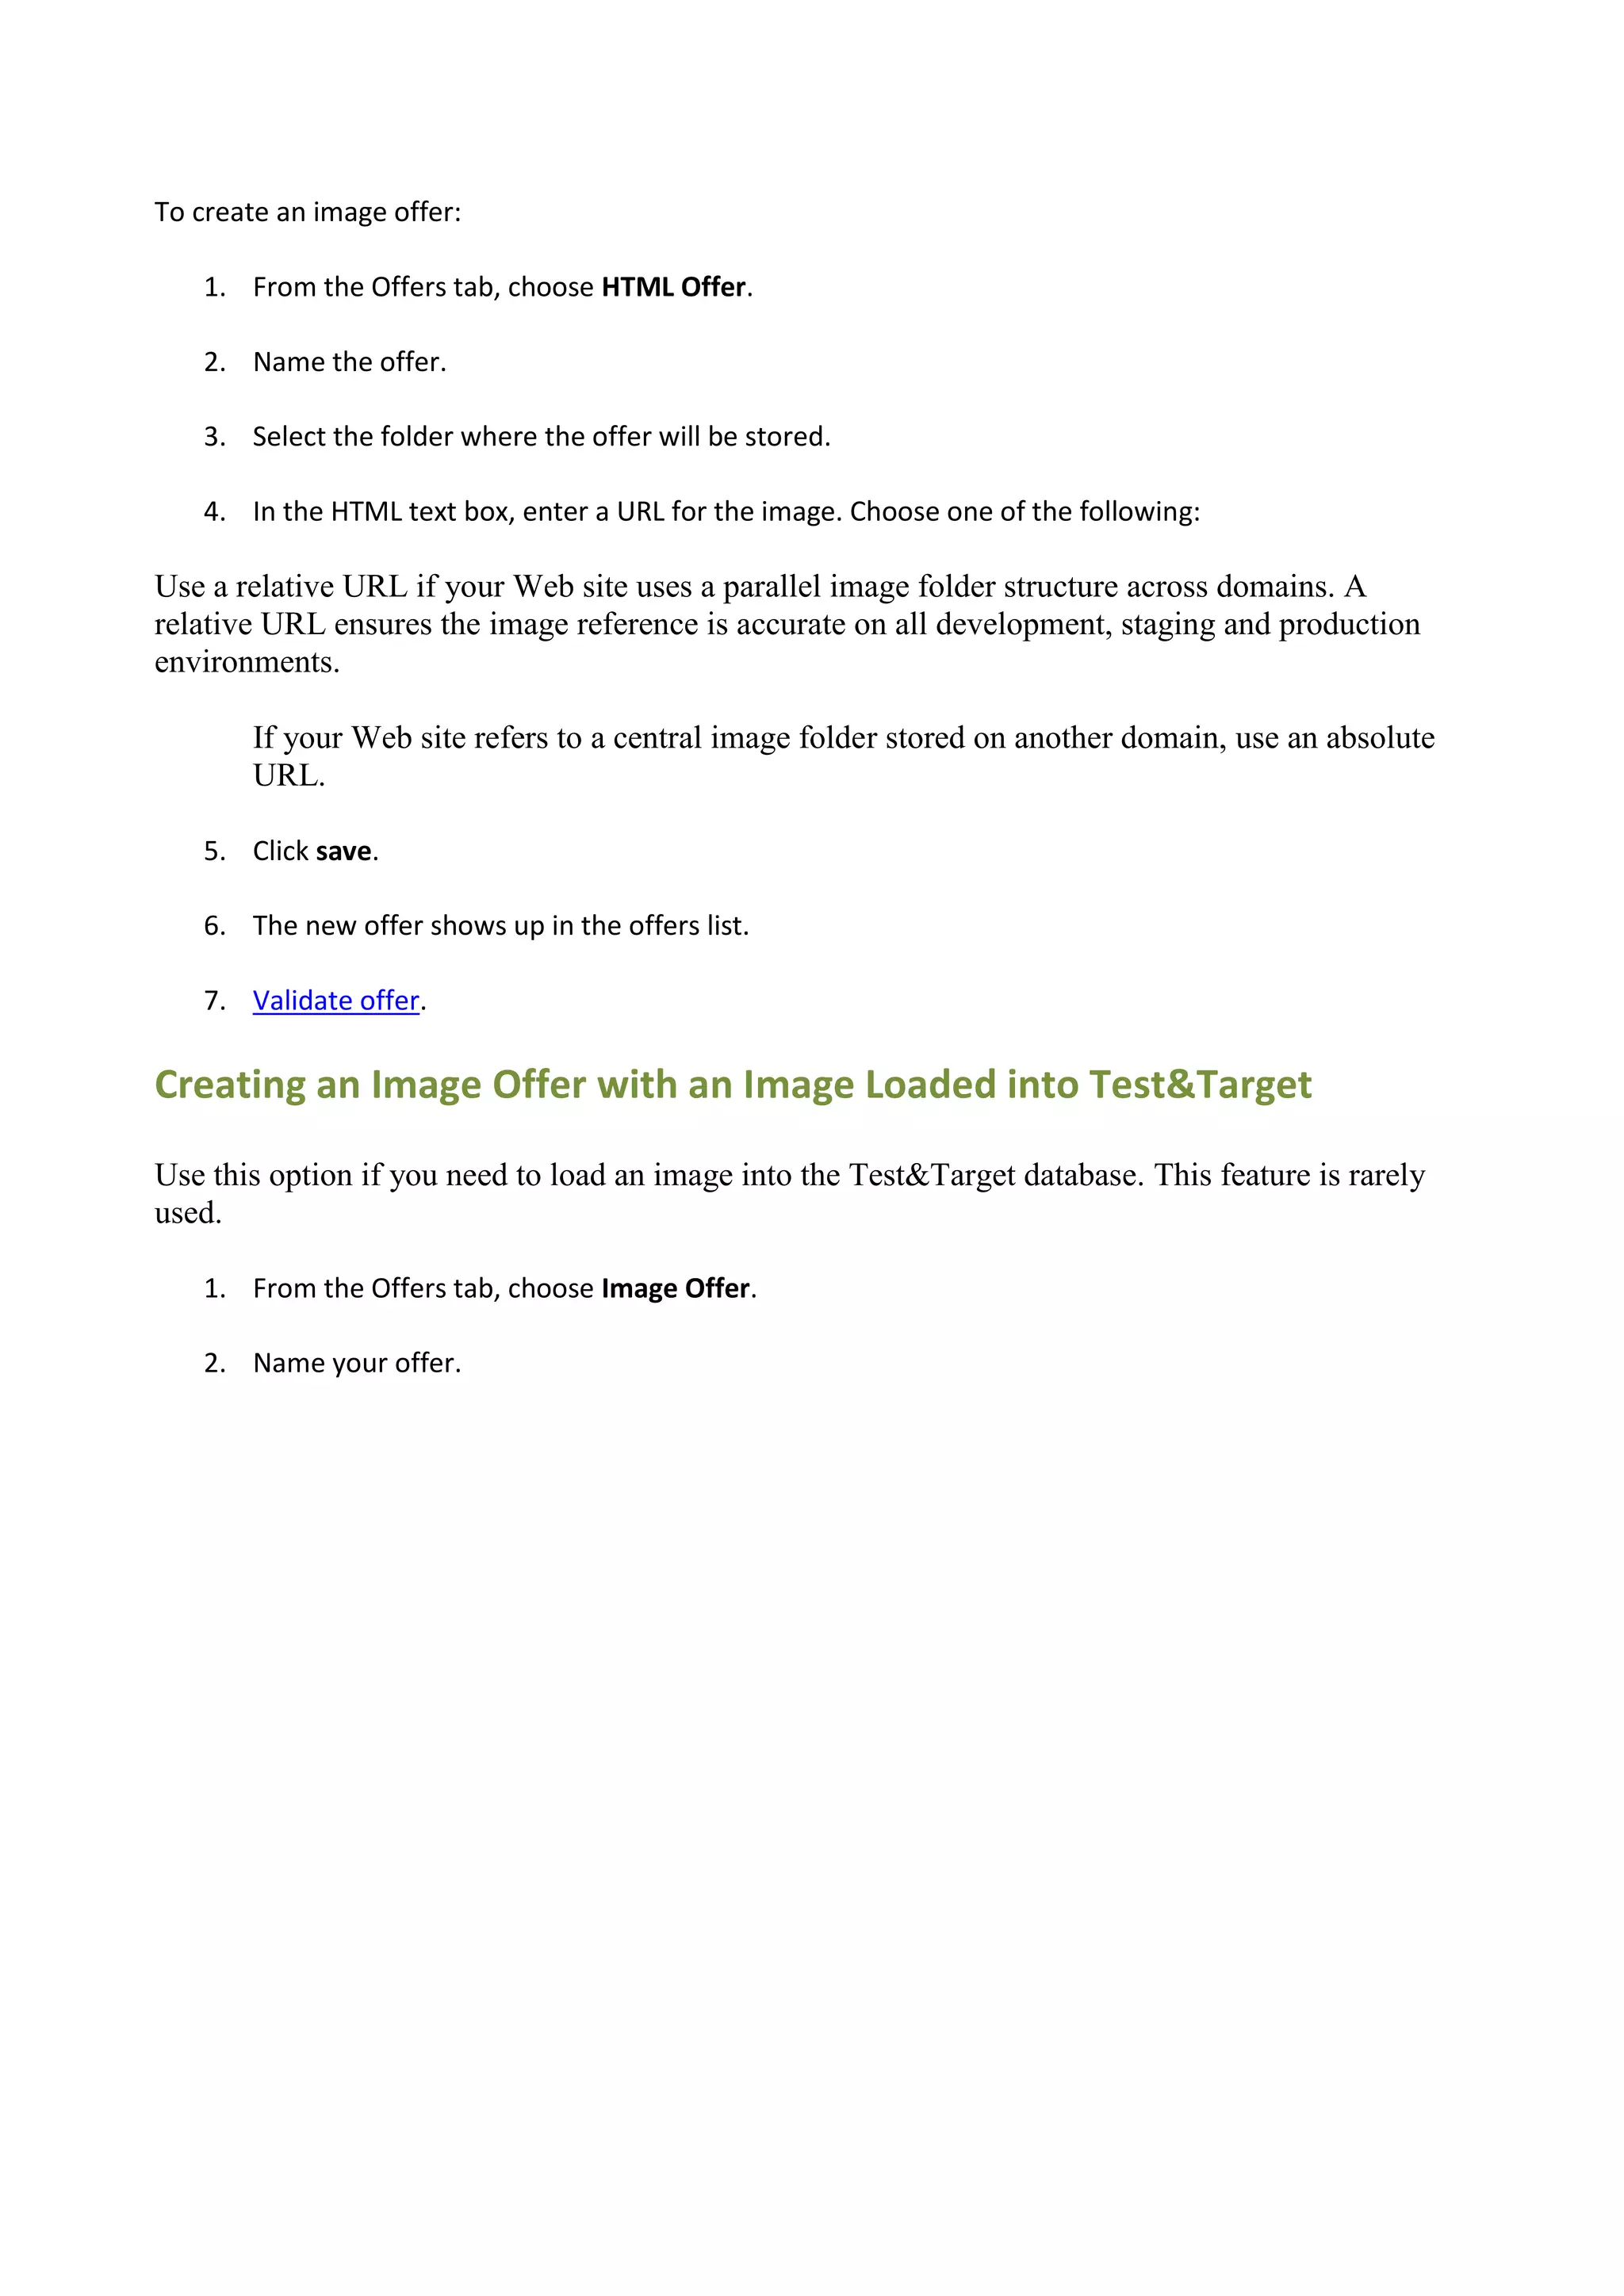
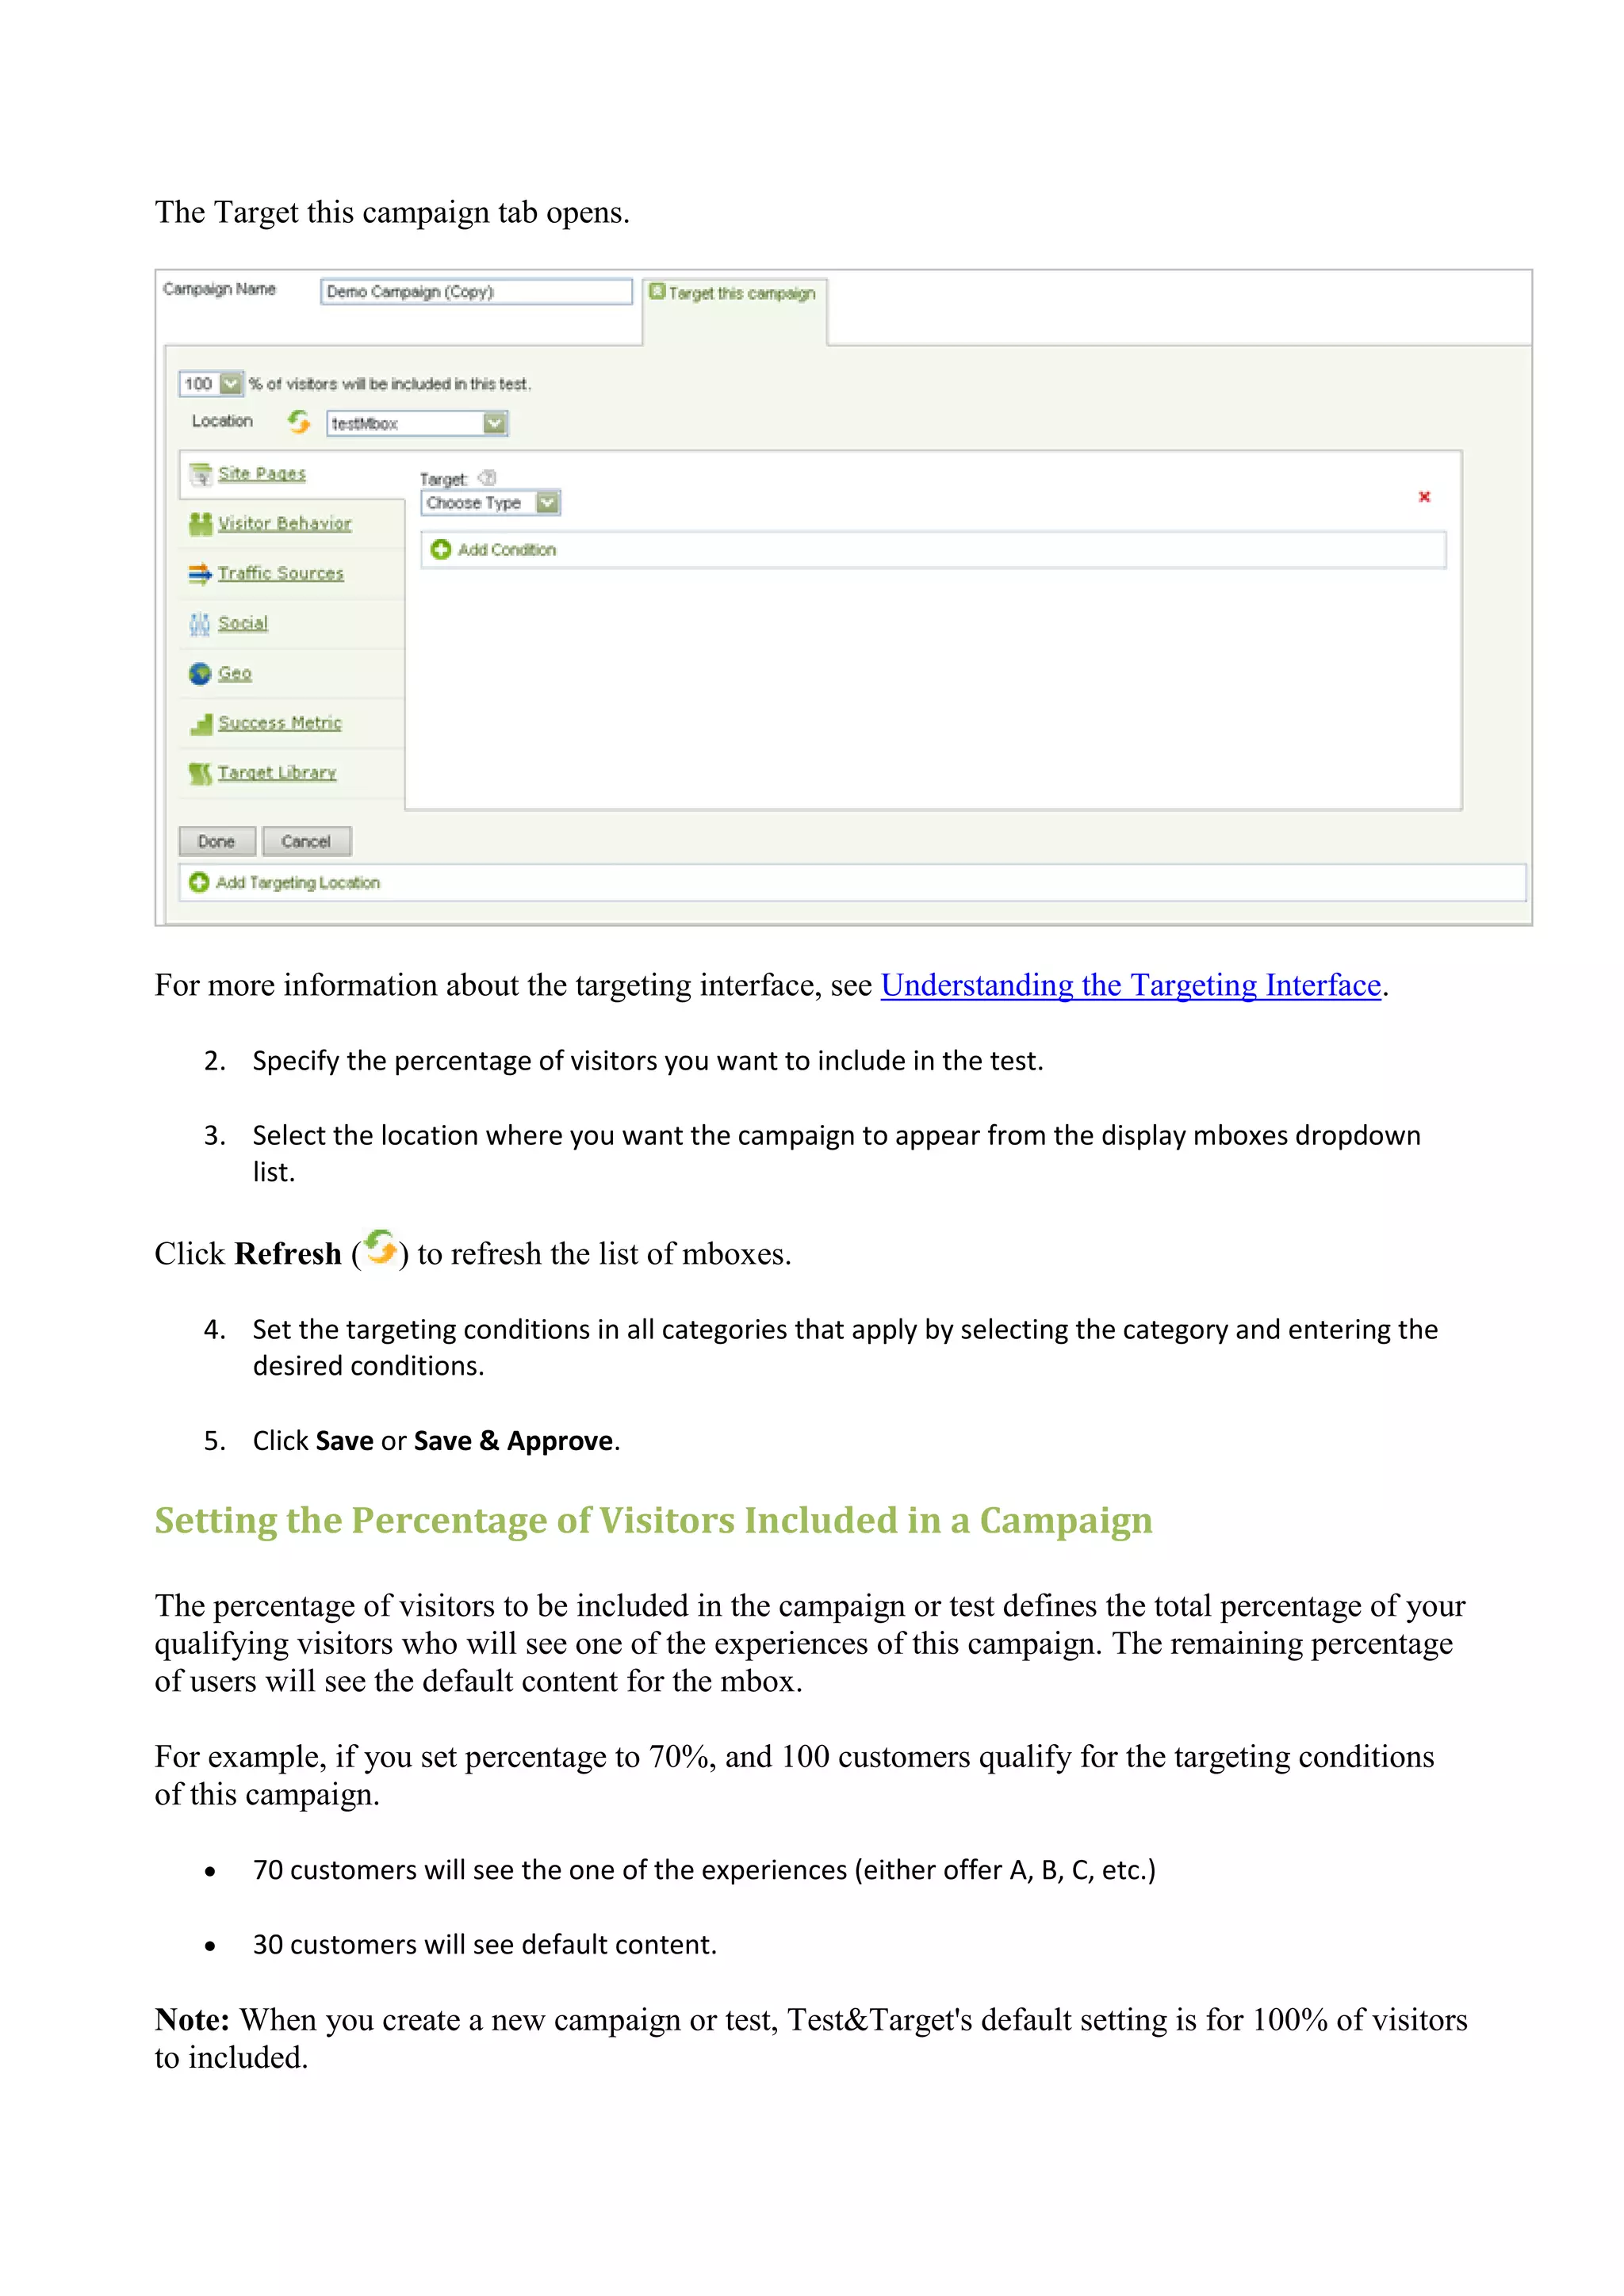
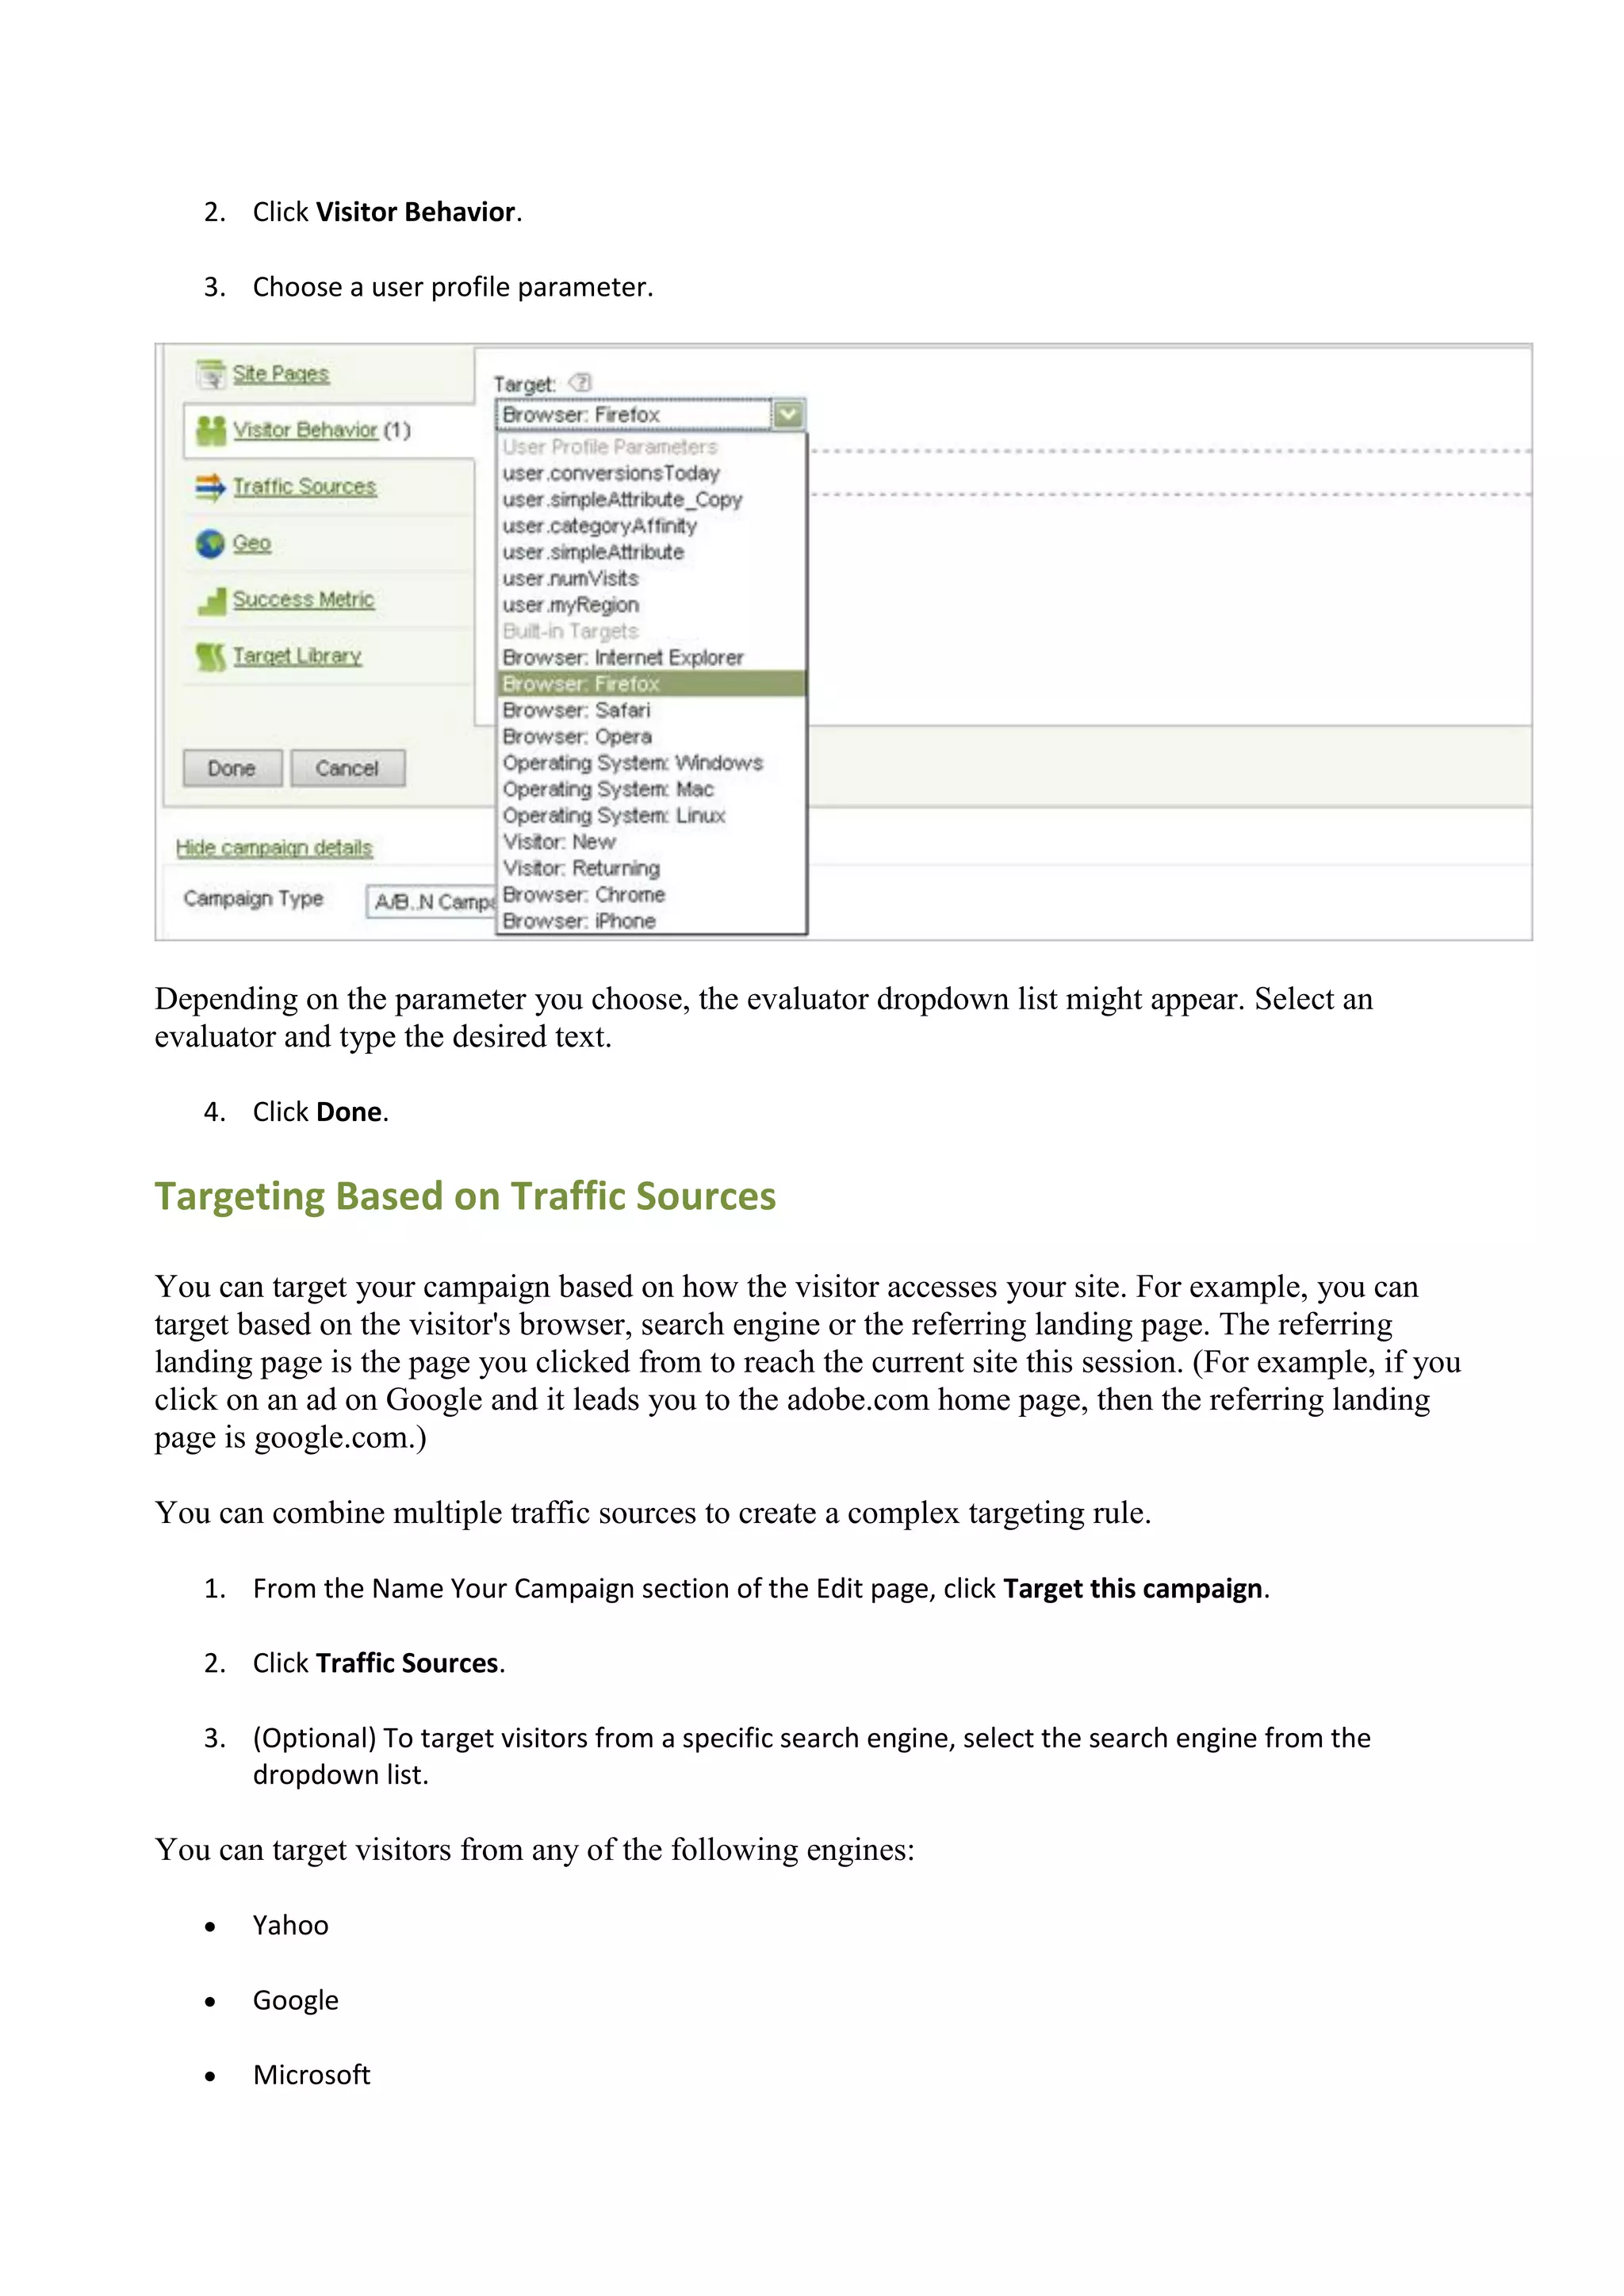
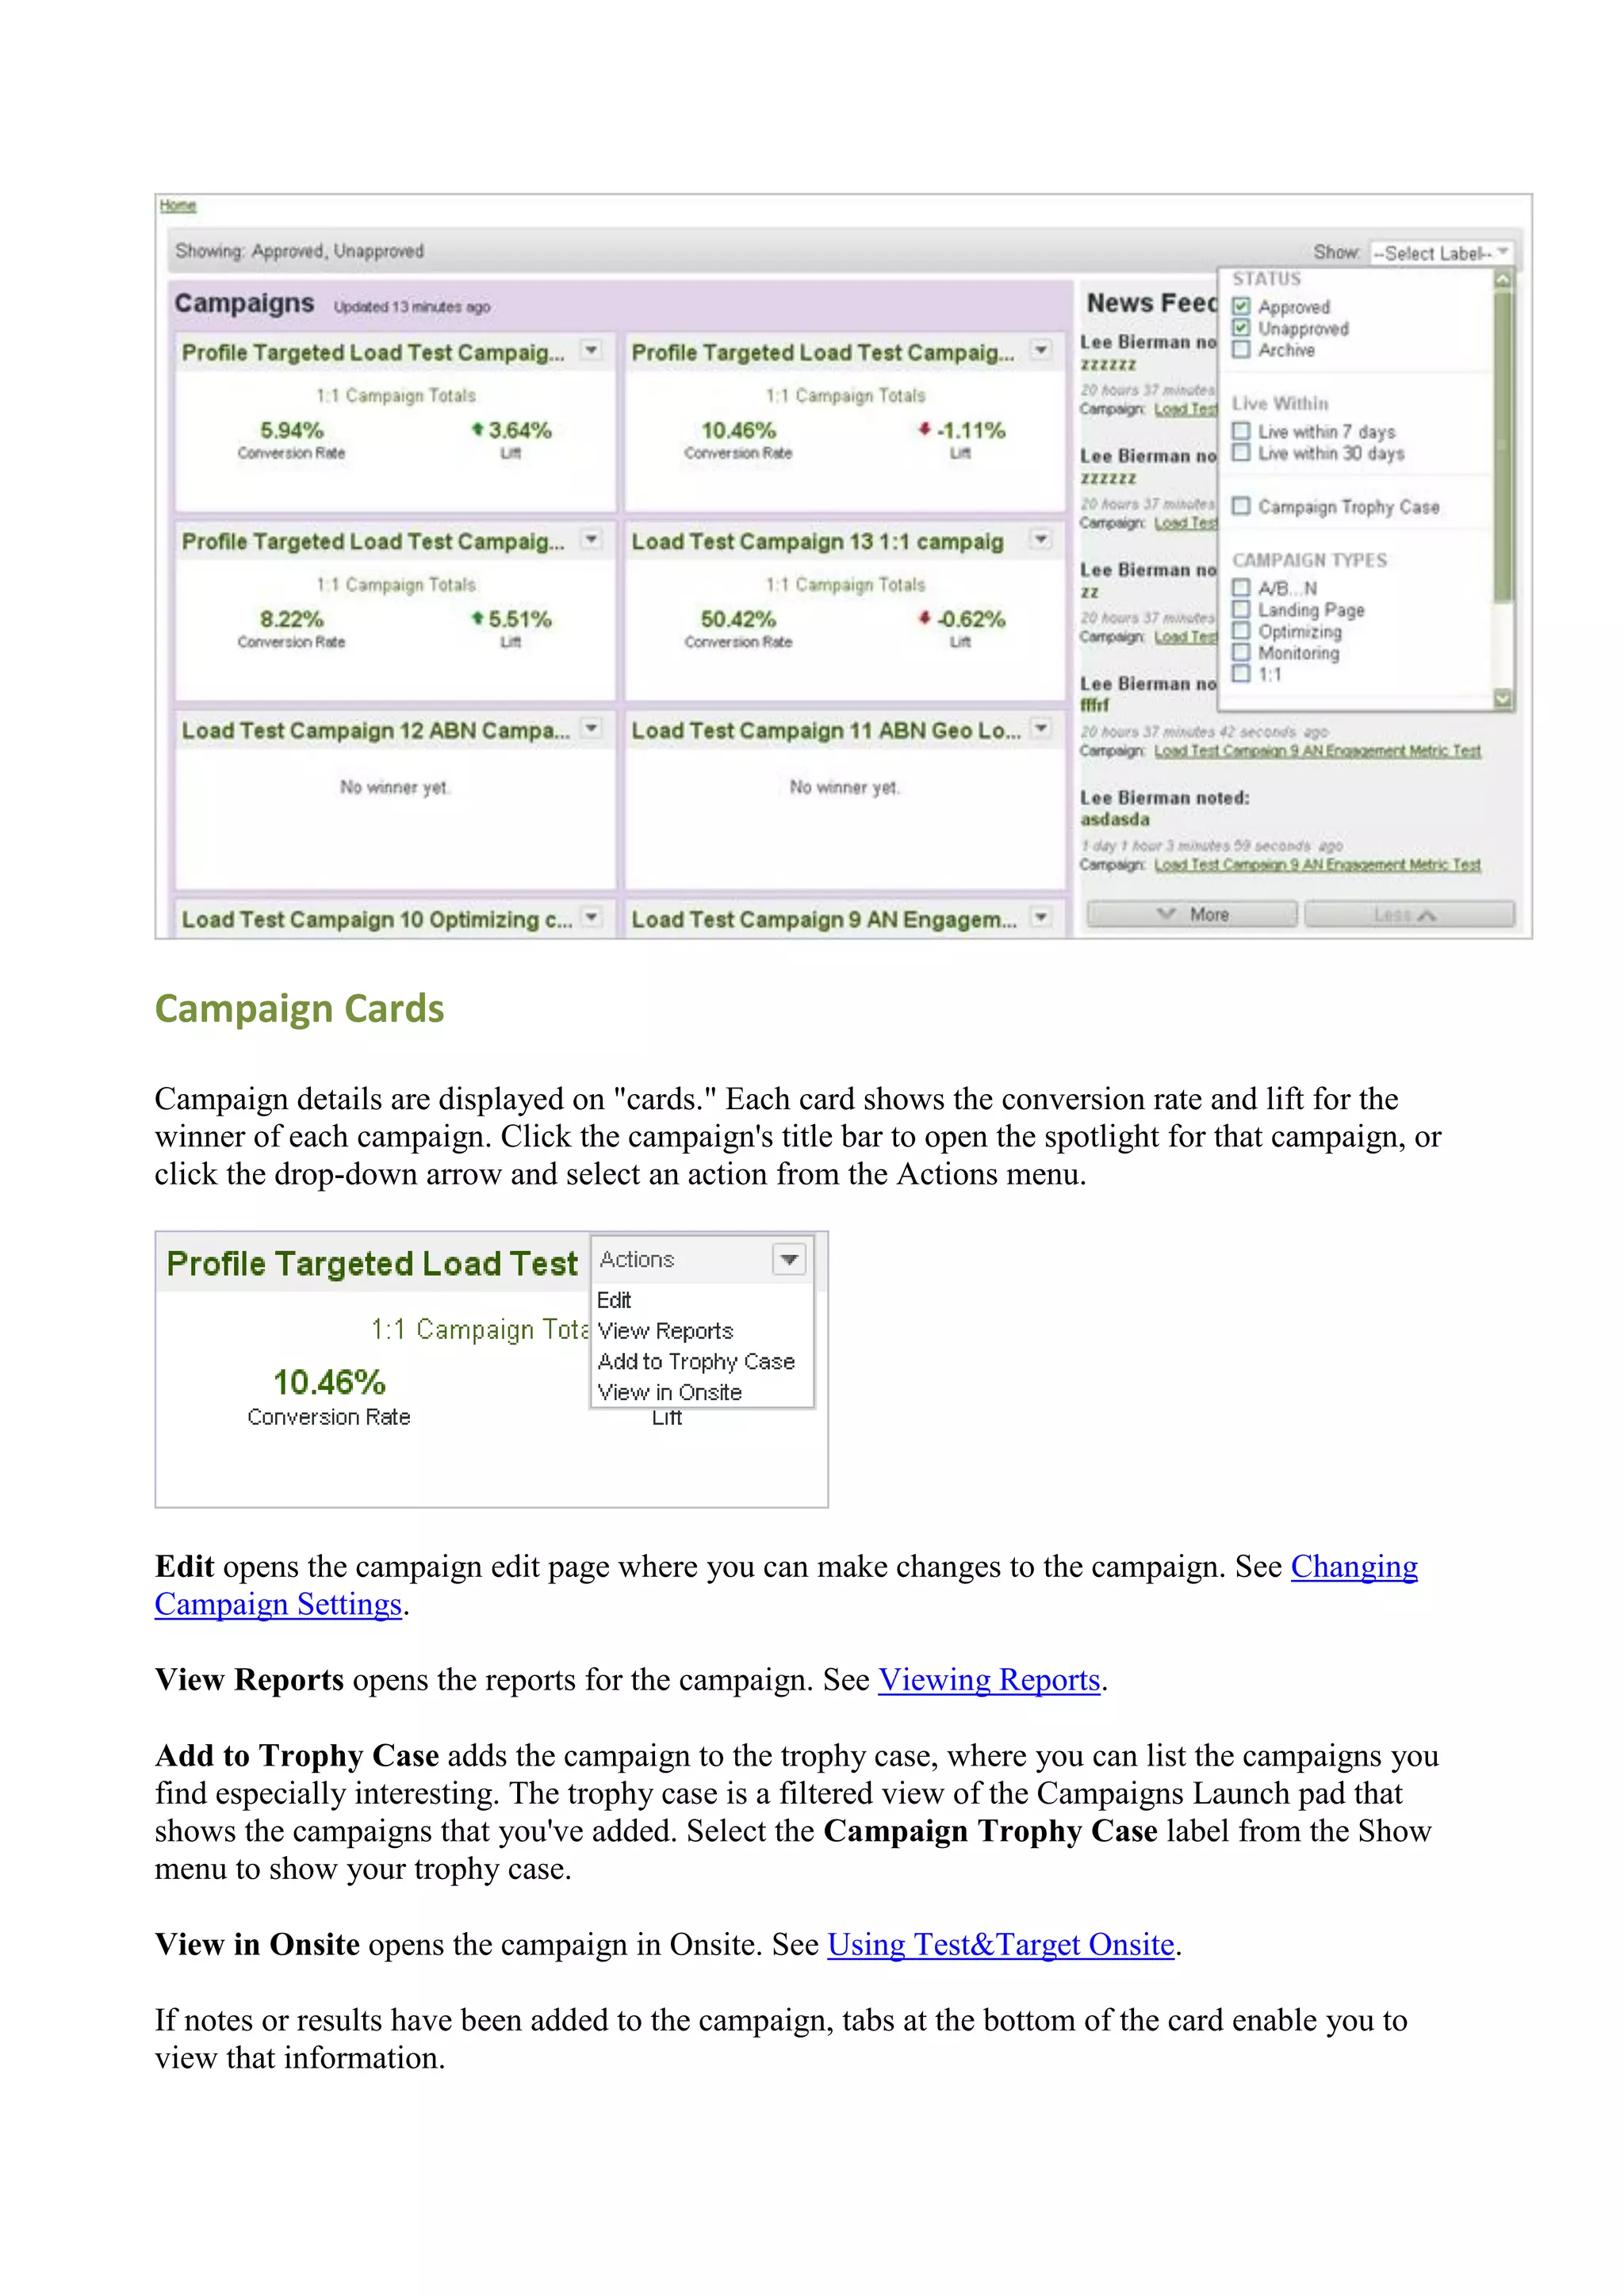
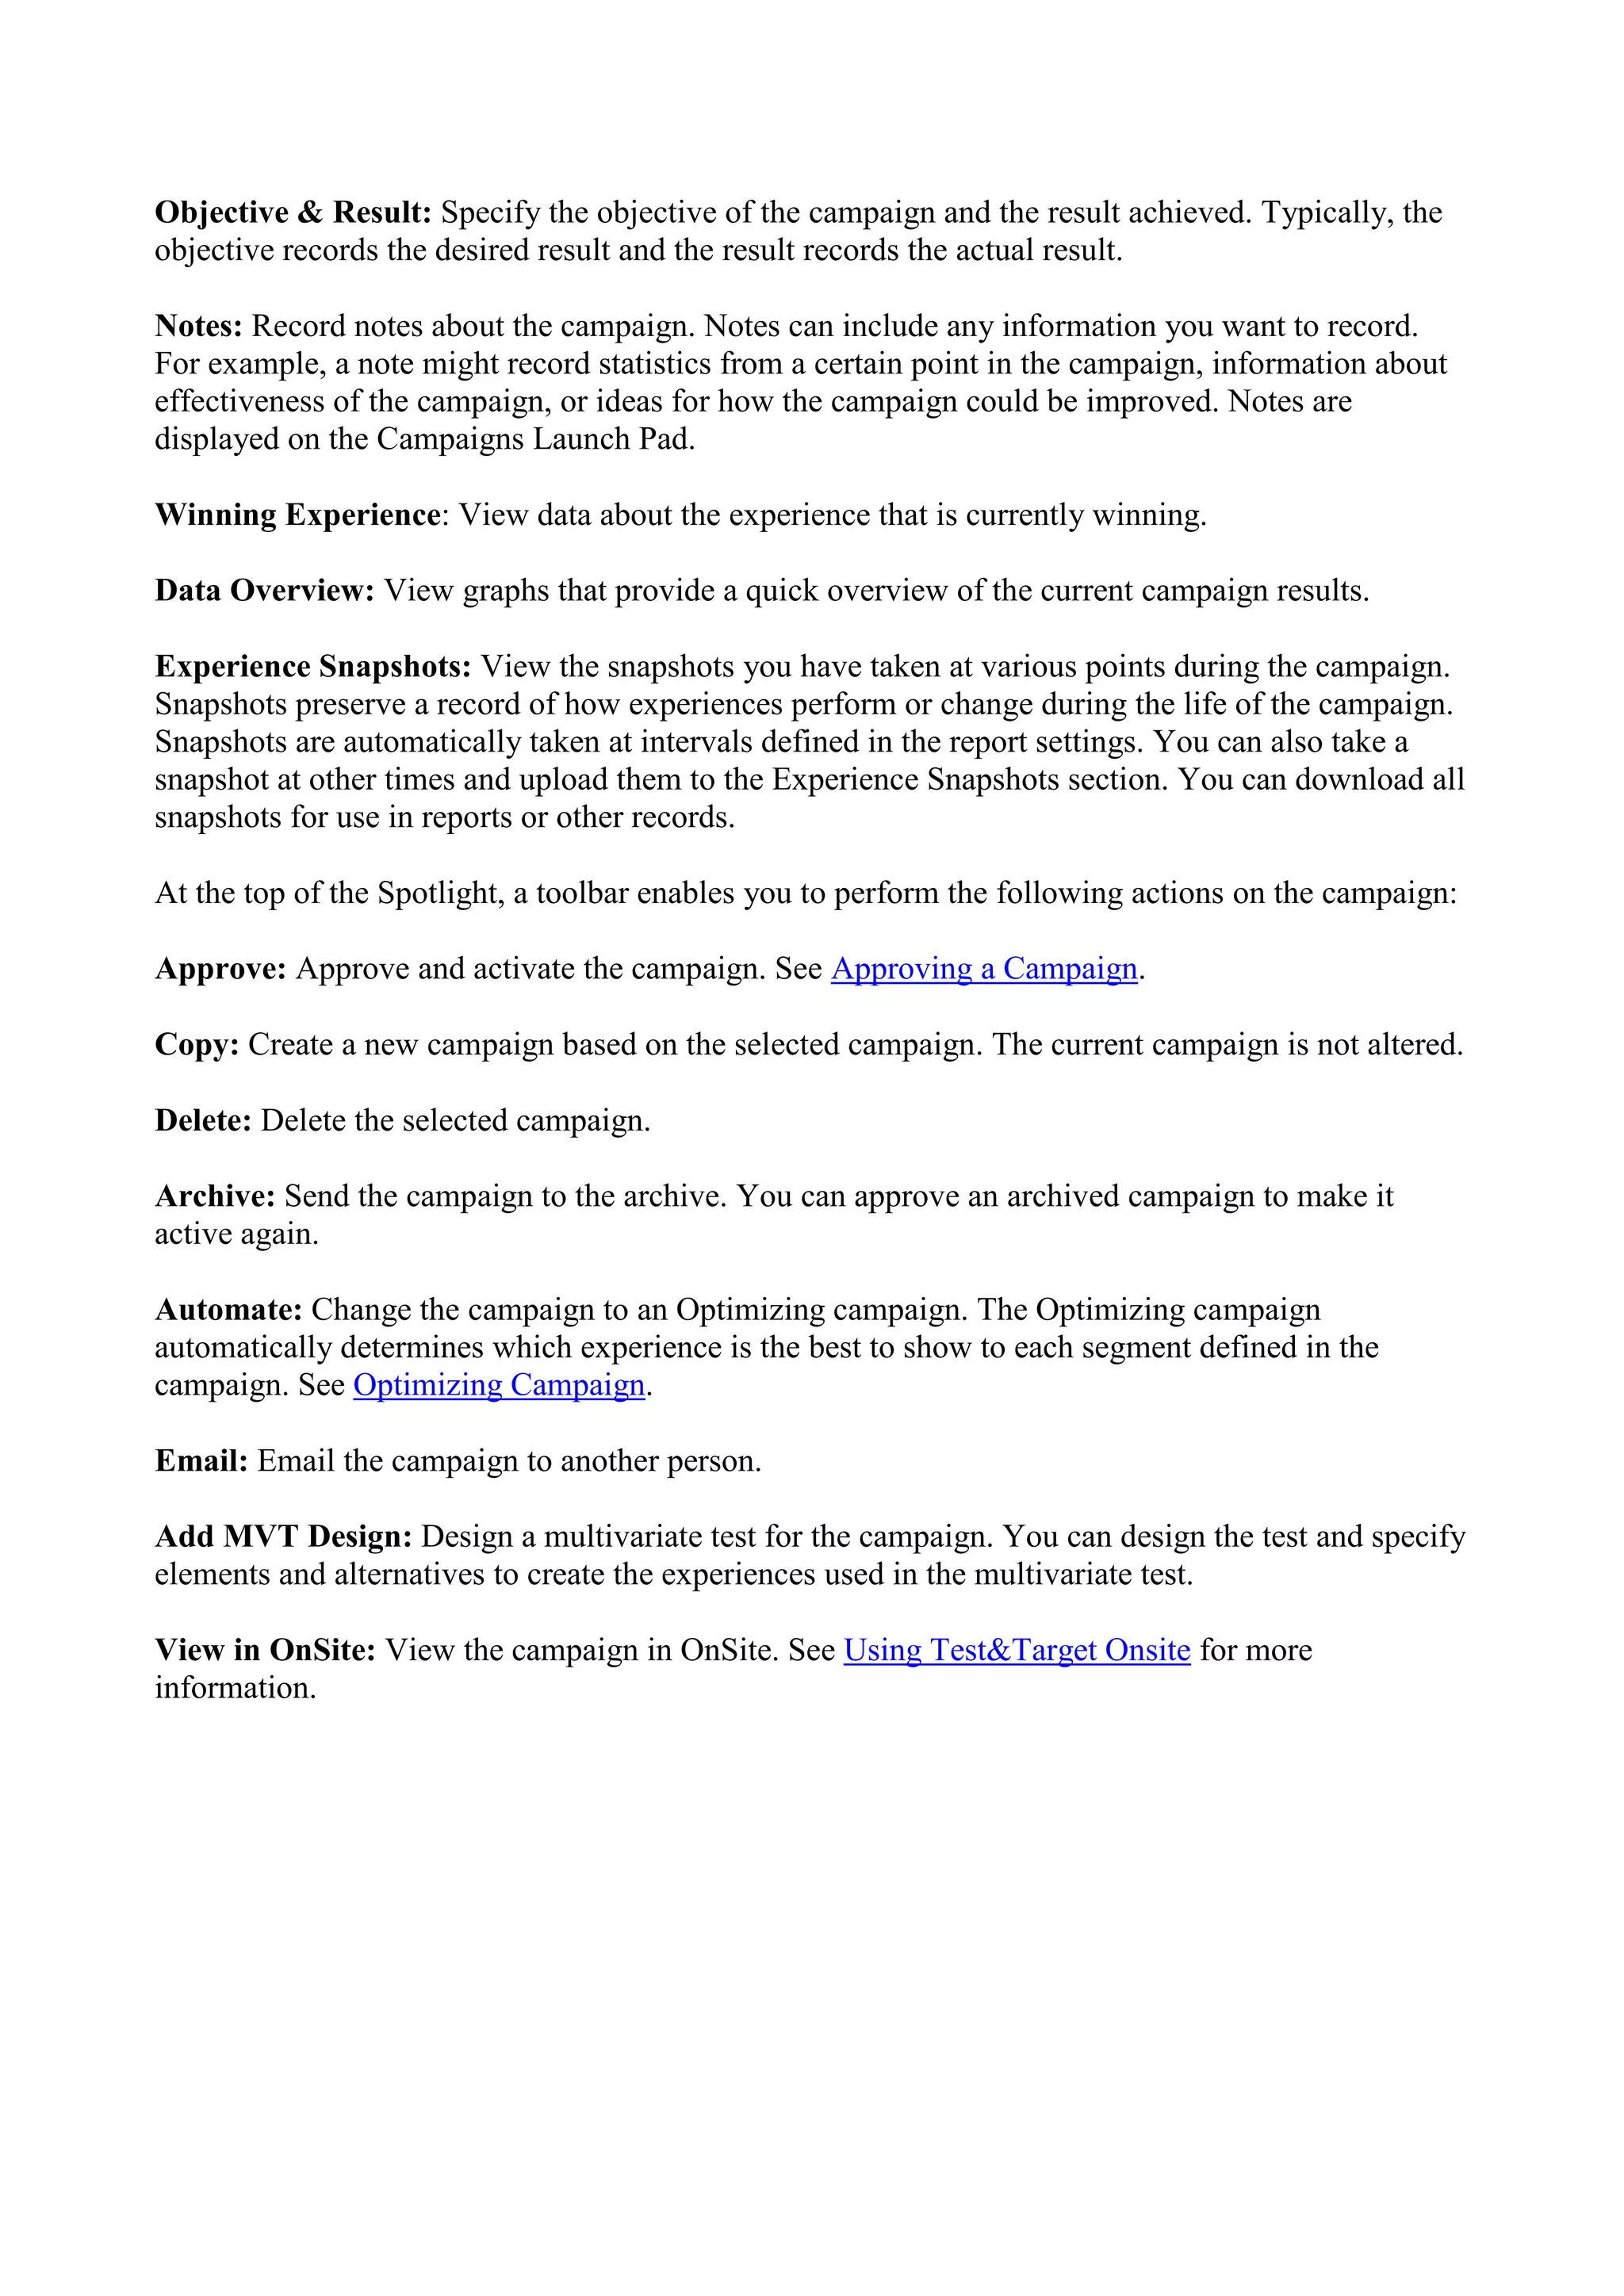
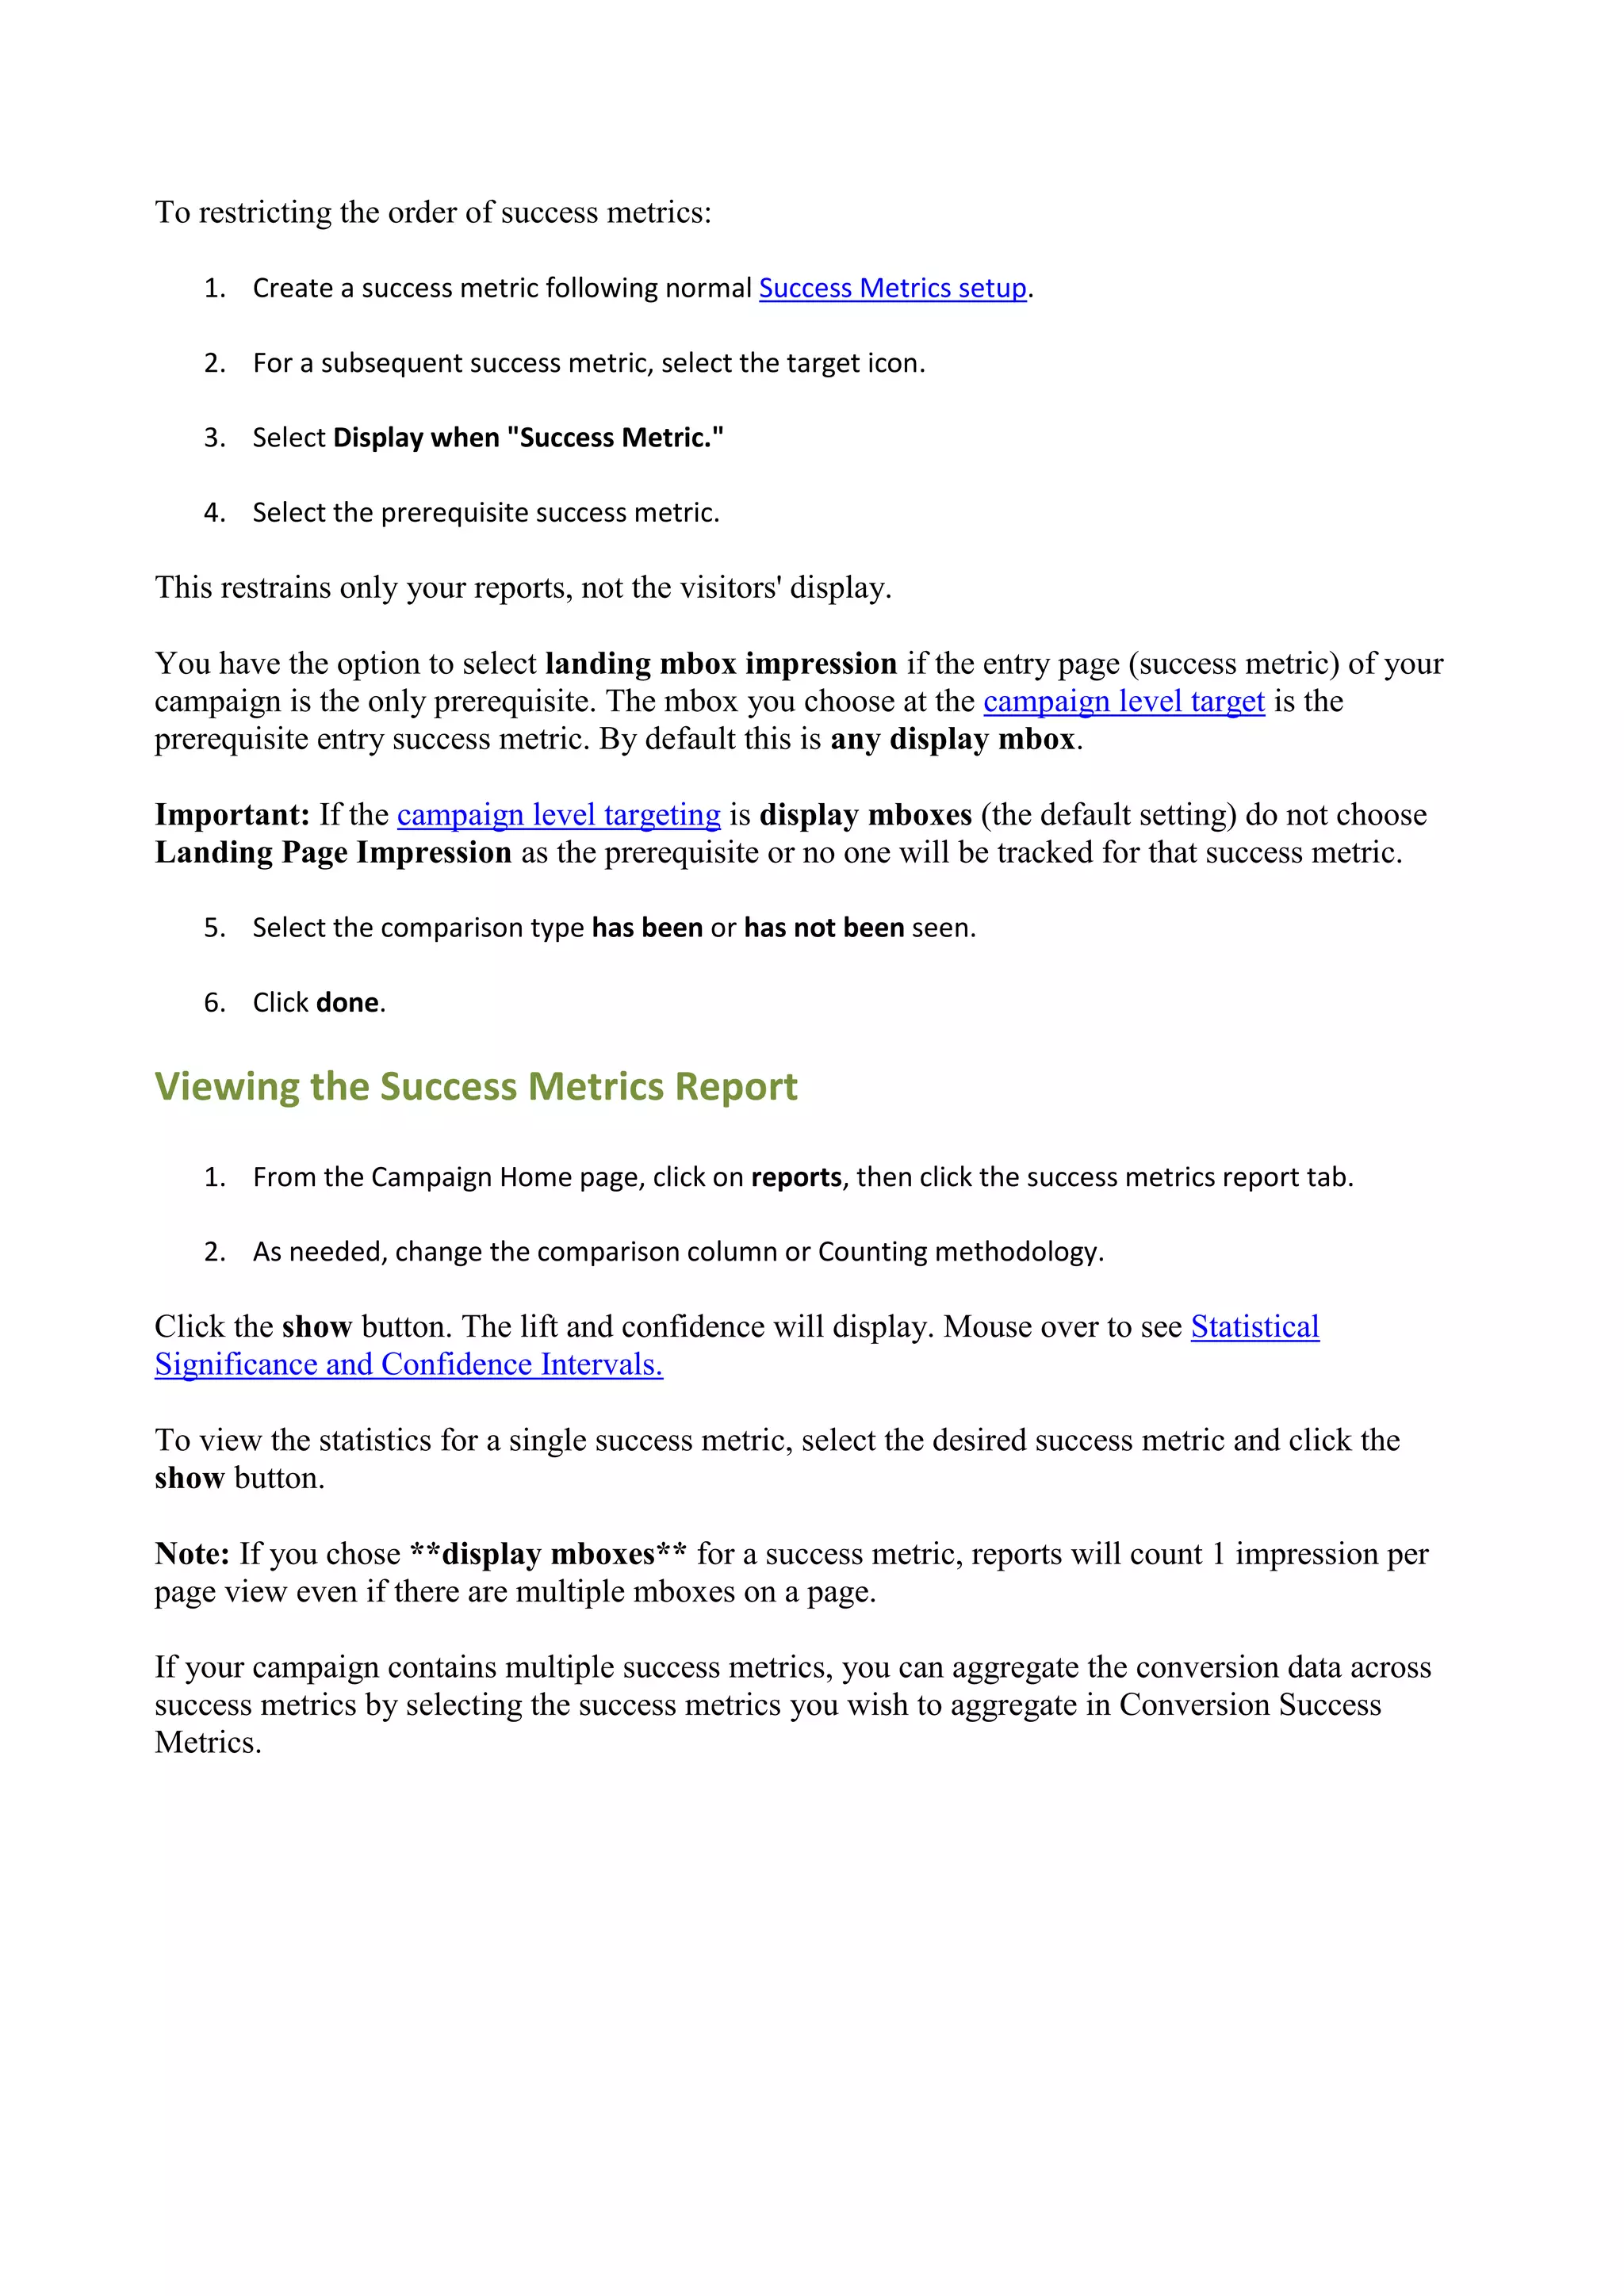
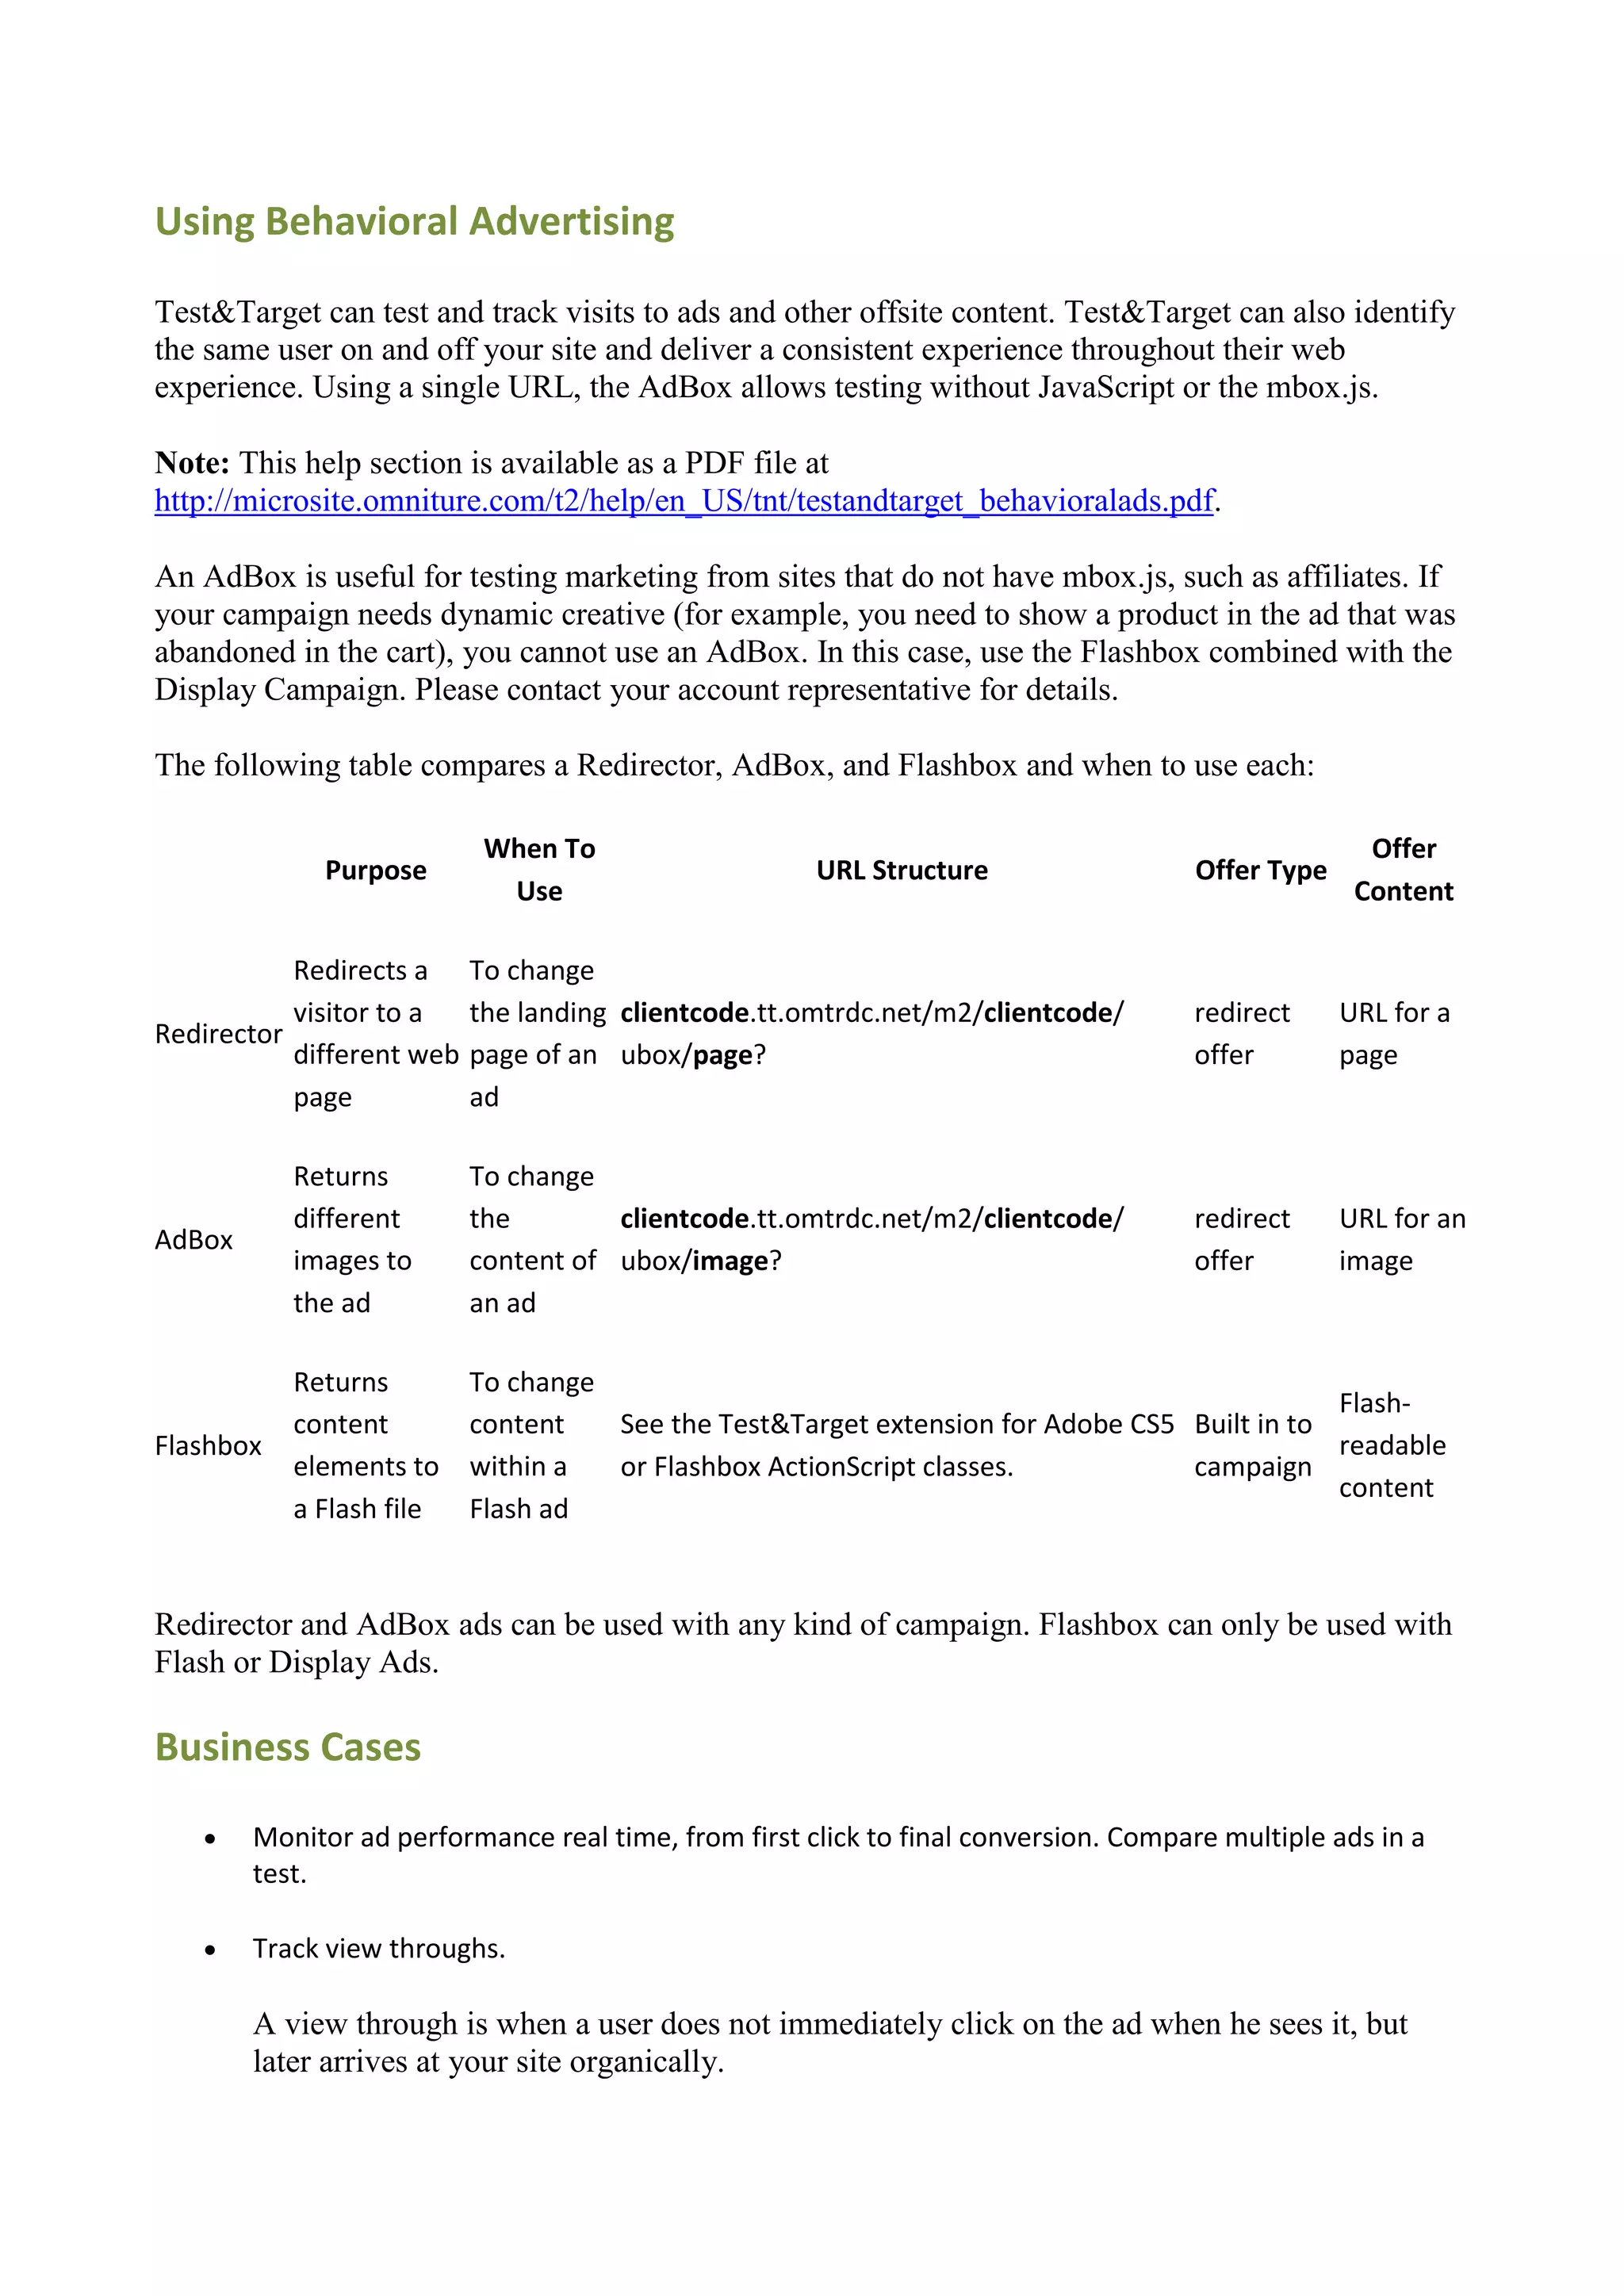
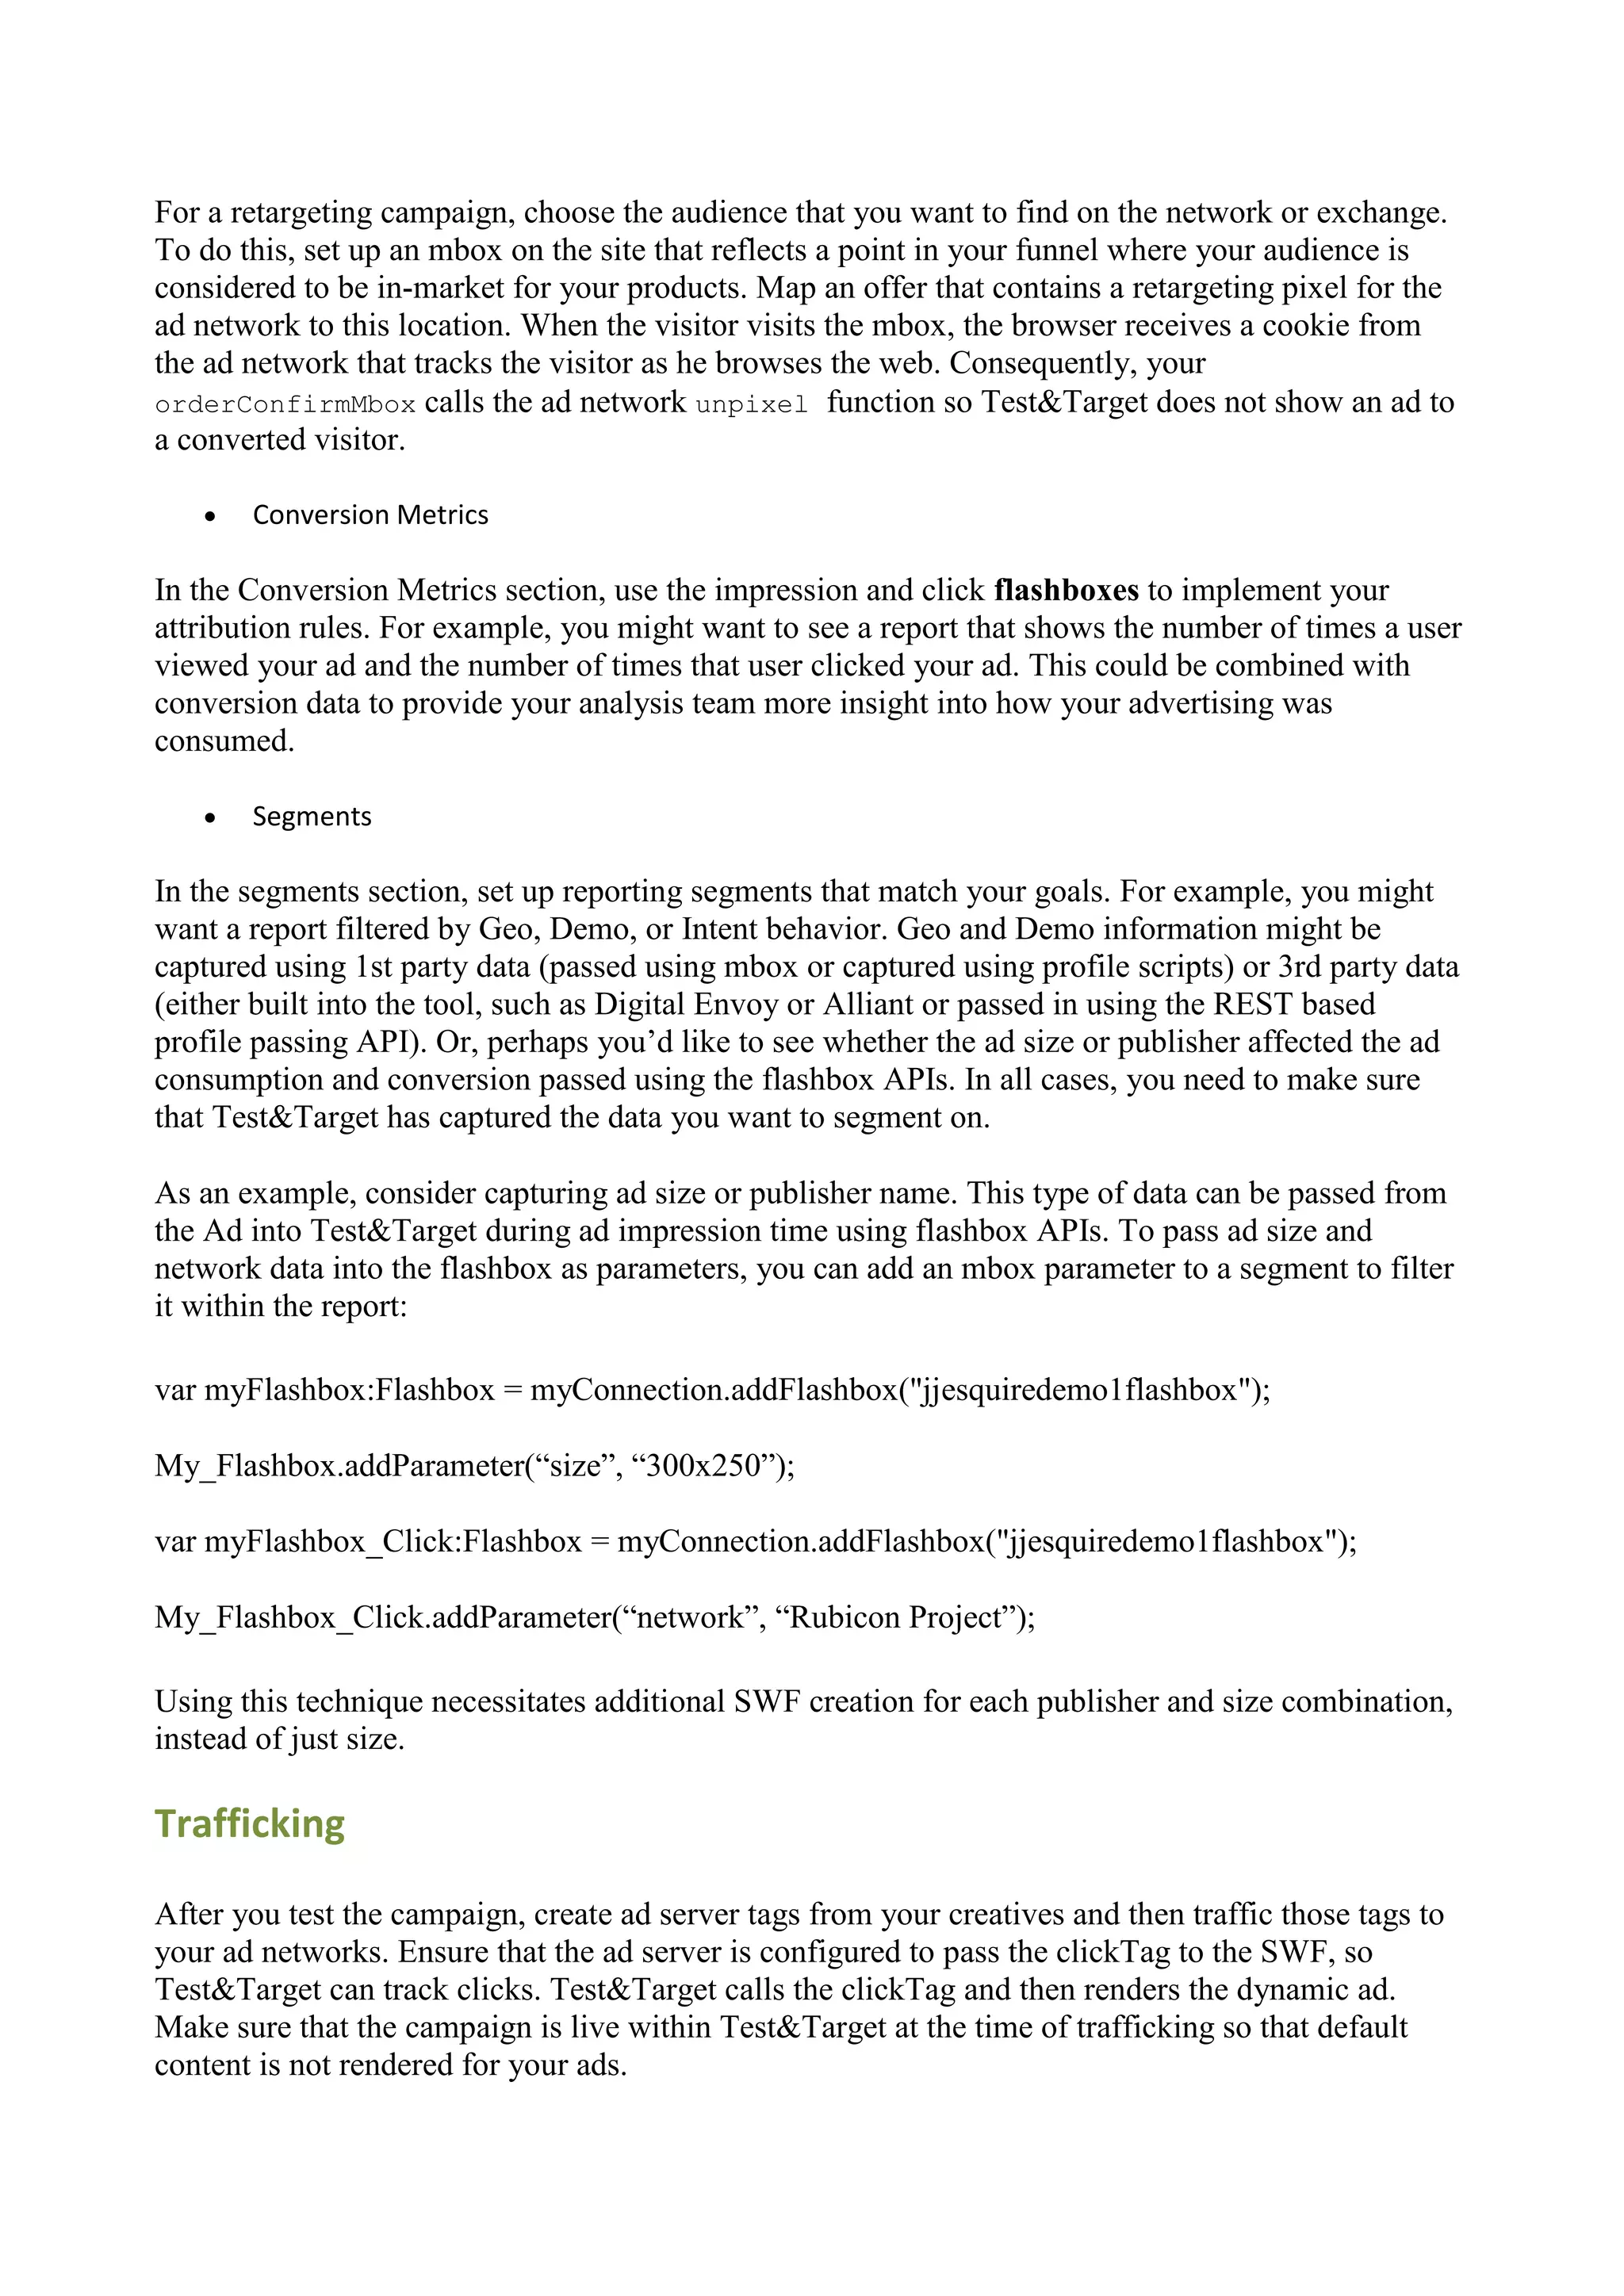
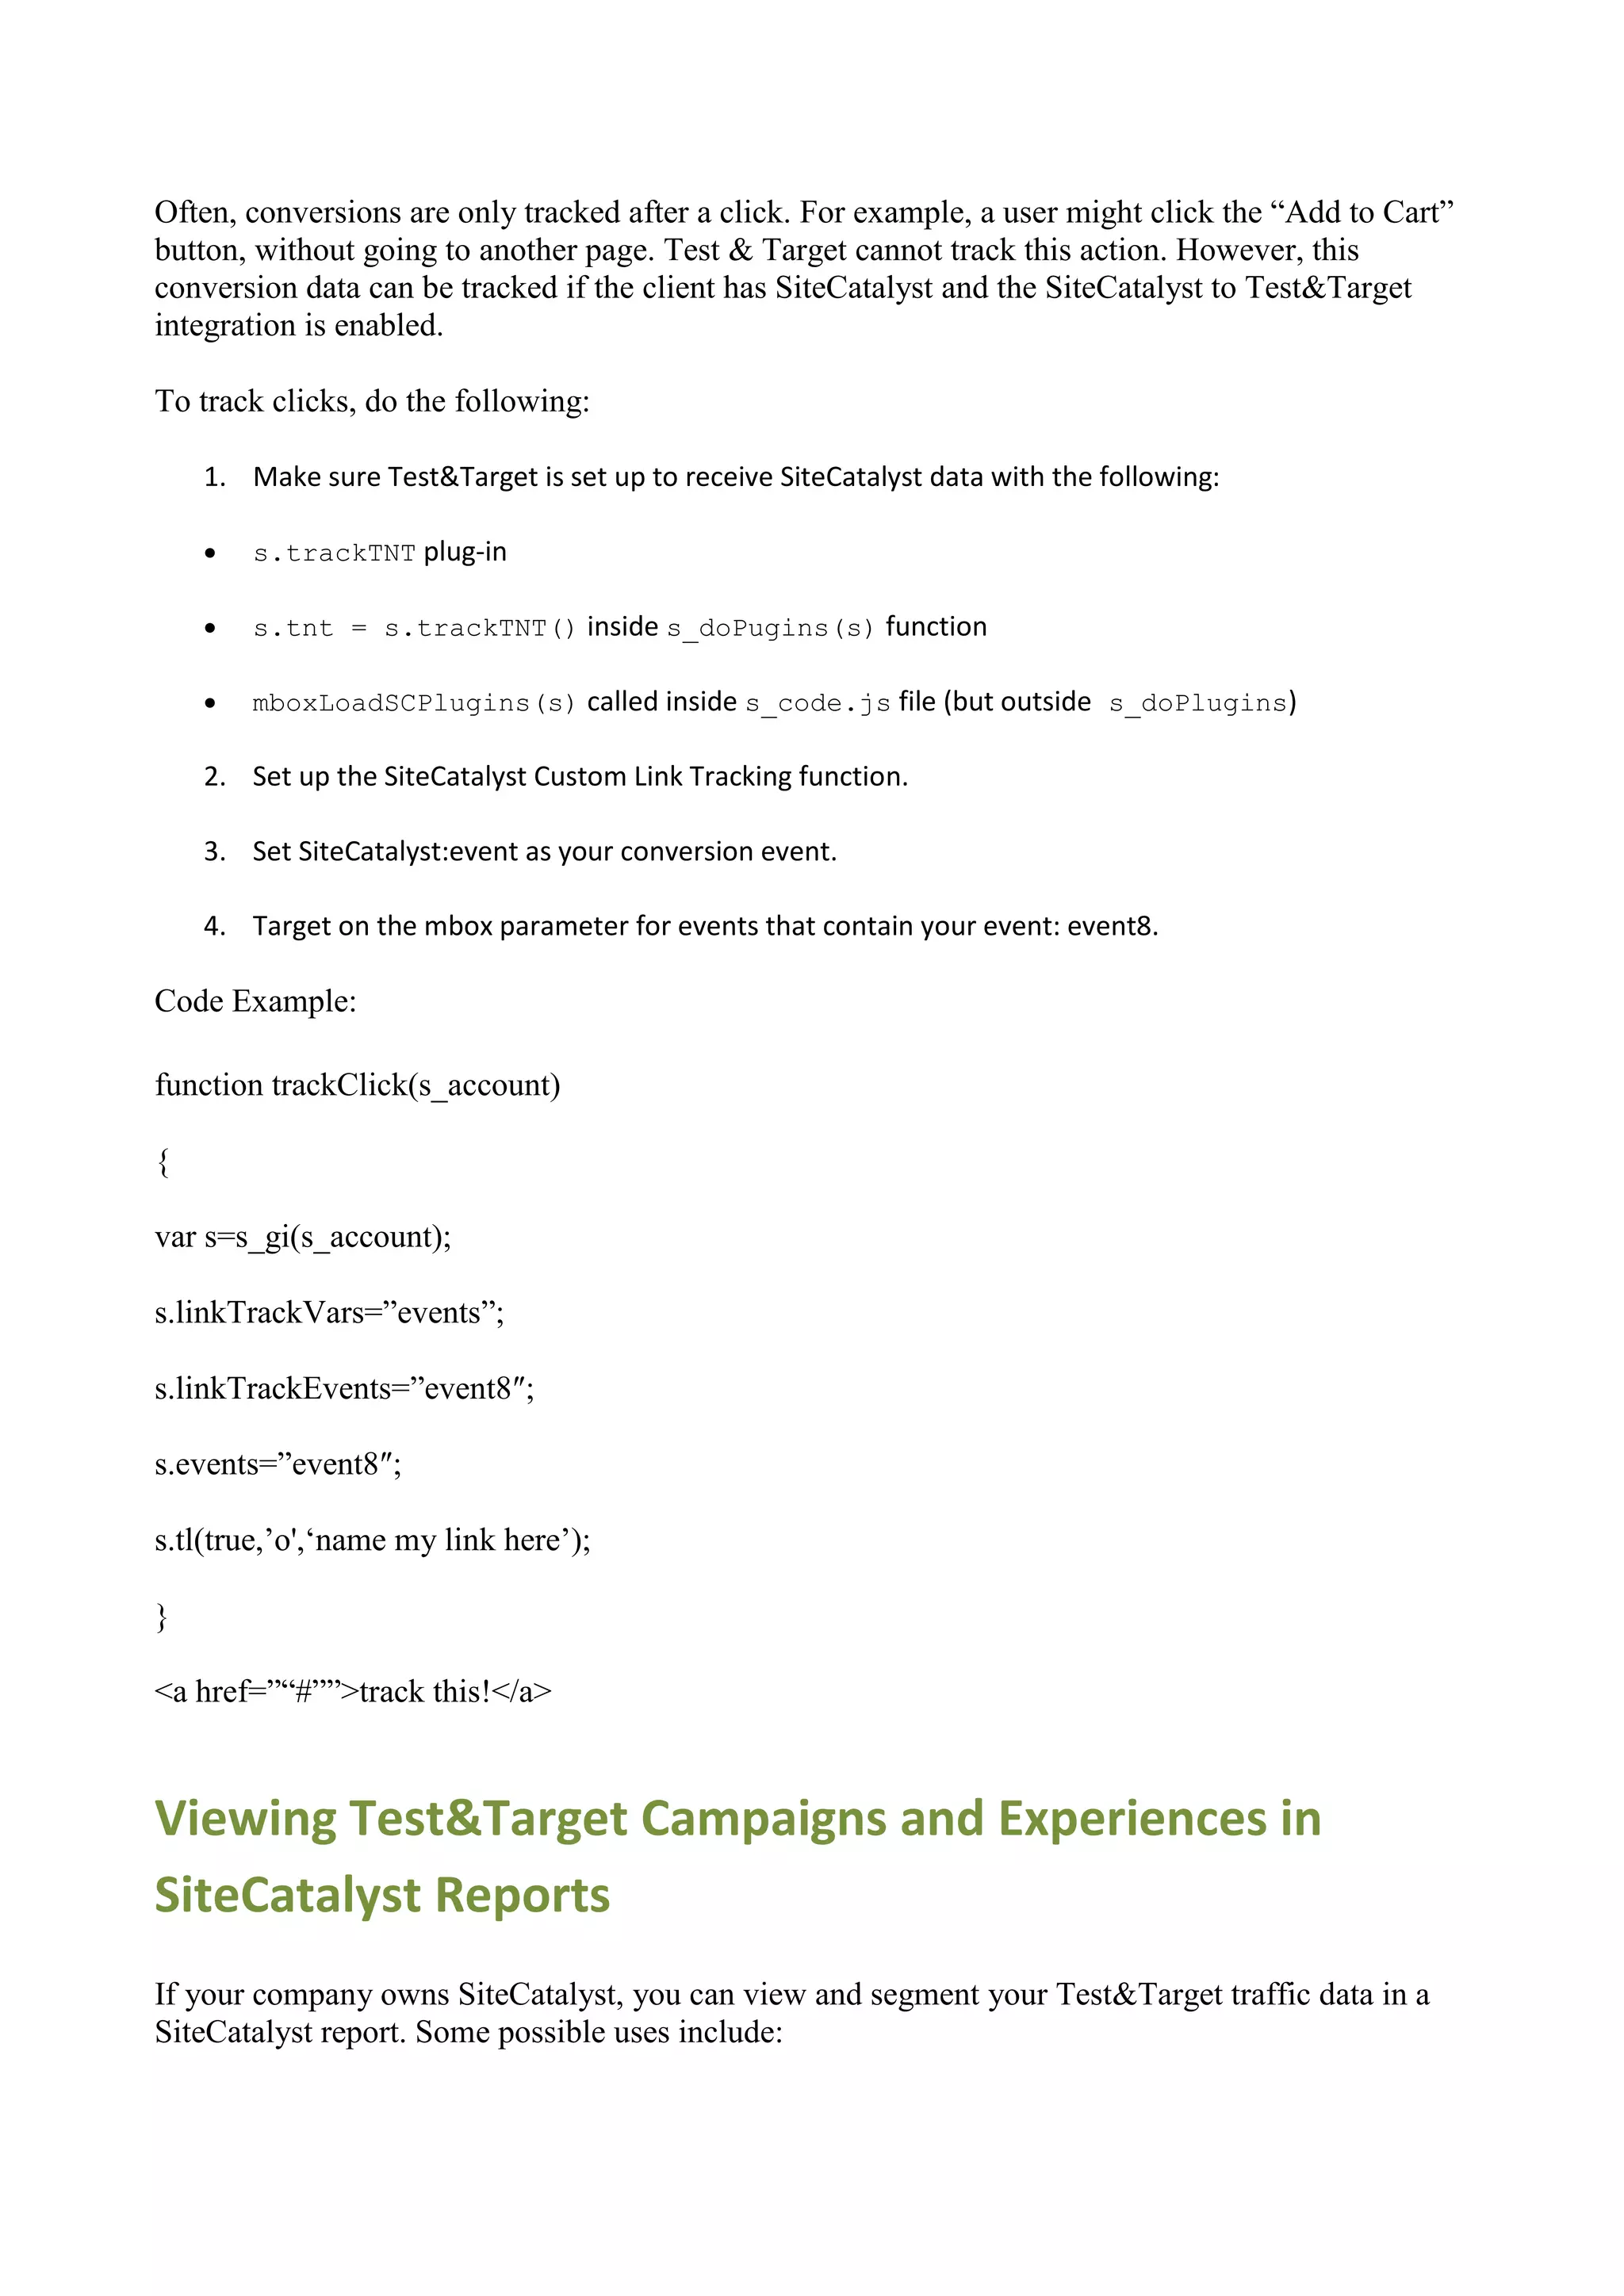
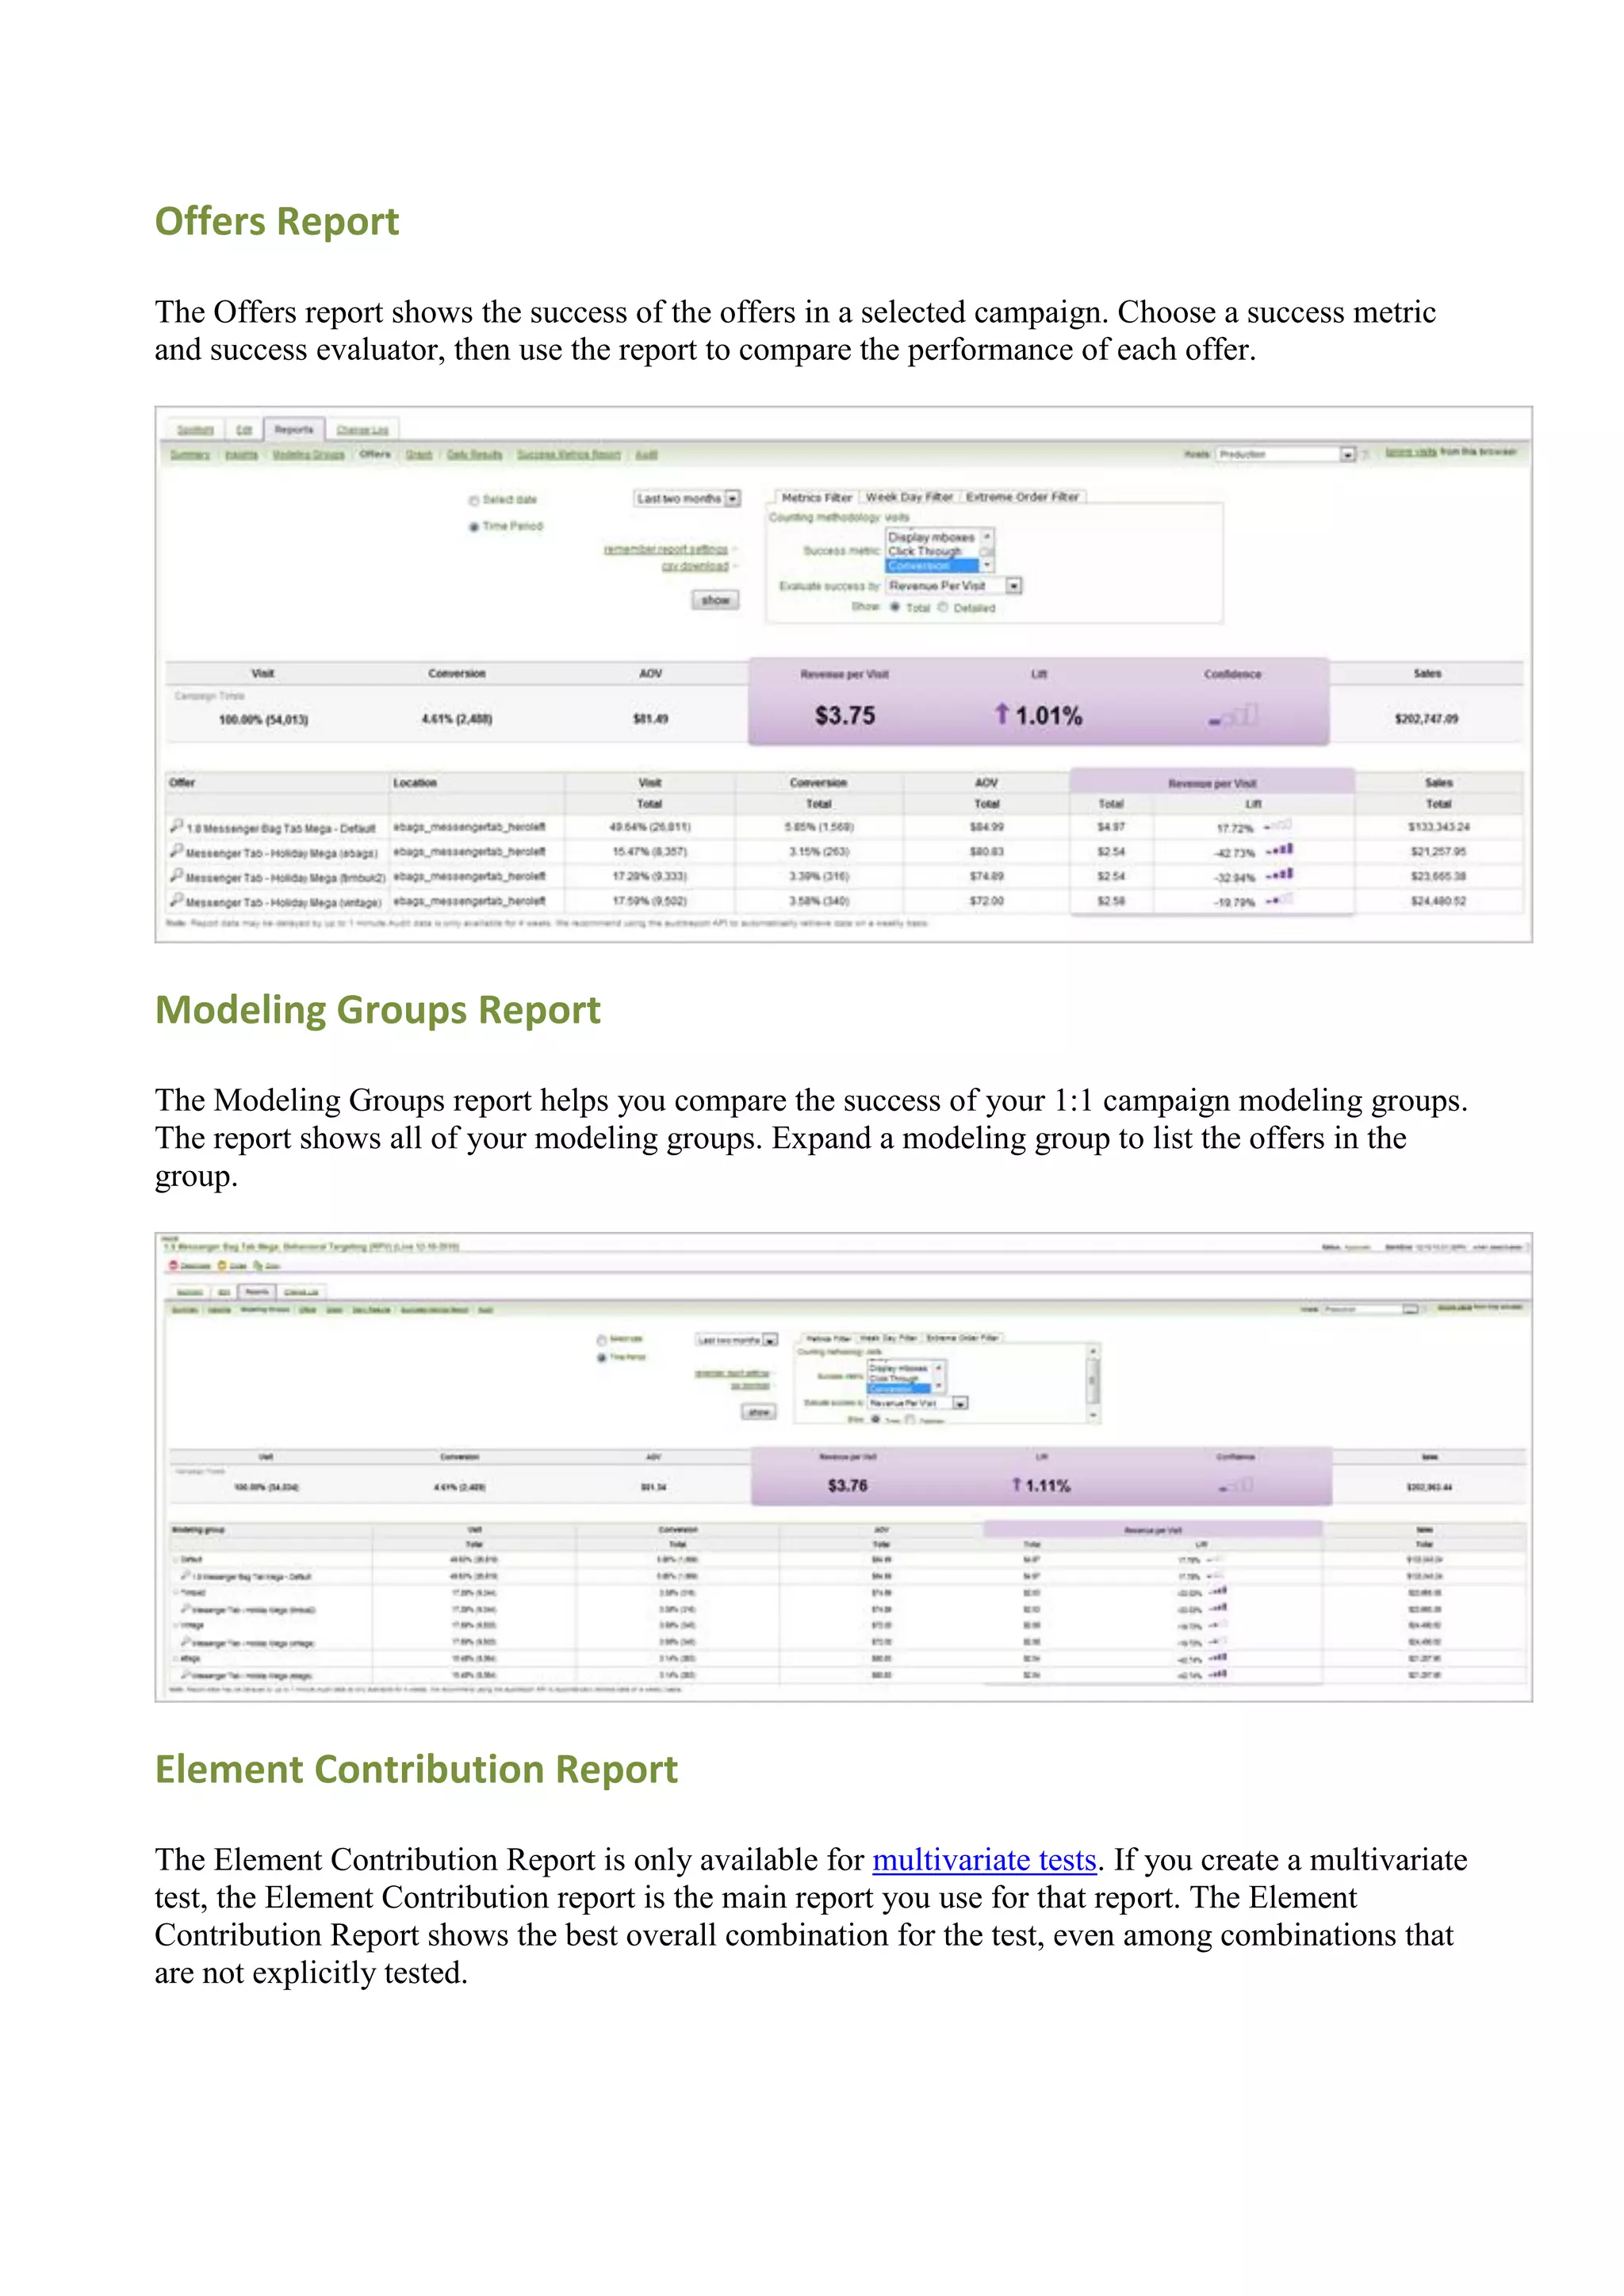
![people reached your site via email, banner ad, search ad, or organically. By checking this box, your
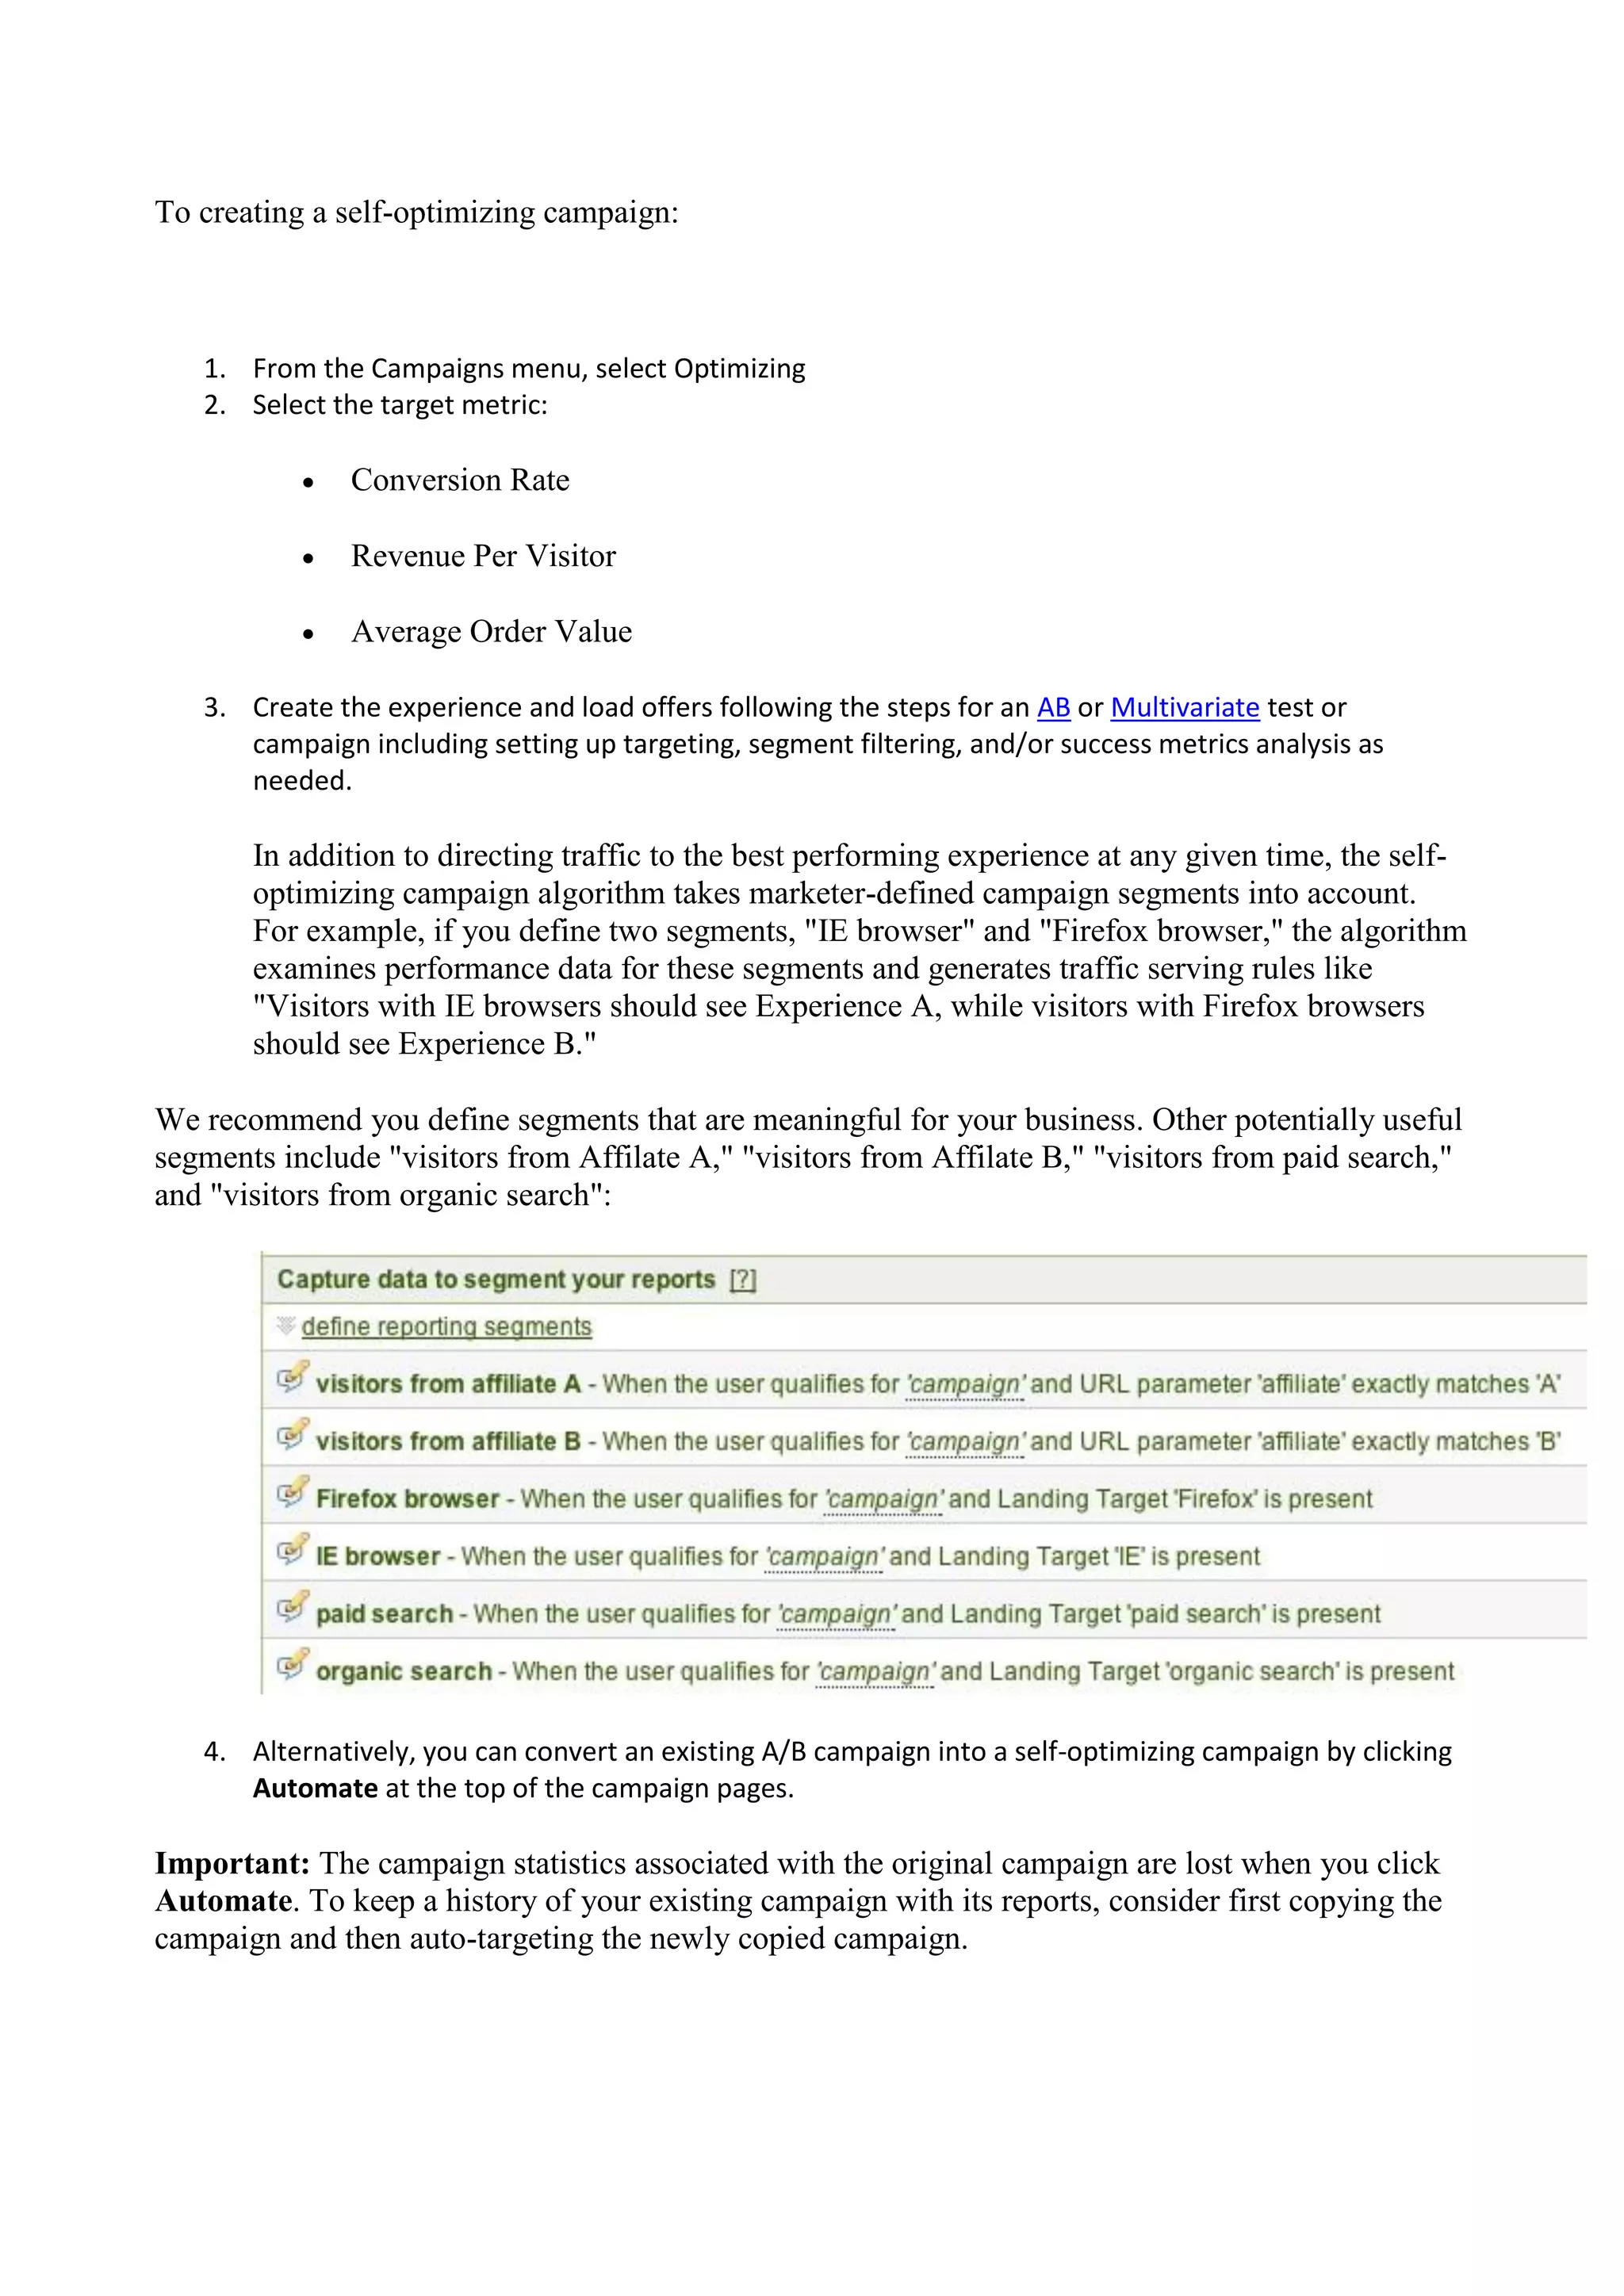
redirect offer on page http://www.mycompany.com/mens.html?emailId=123 will automatically
become http://www.mycompany.com/mensShirts.html?emailId=123 when all you entered in
the URL box was http://www.mycompany.com/mensShirts.html.
2. Pass mboxSessionId in redirect (only needed when the redirect is going to a different domain).
Check this box if you want the Test&Target sessionId to automatically be included in the redirect.
This is only required when you are testing clicks from an email or clicks from one domain to
another. Test&Target uses these sessionIds to match the visitor's cookie so we can continute to
track the visitor and show the proper content.
See About Ad Testing to or About Testing Offsite Clicks.
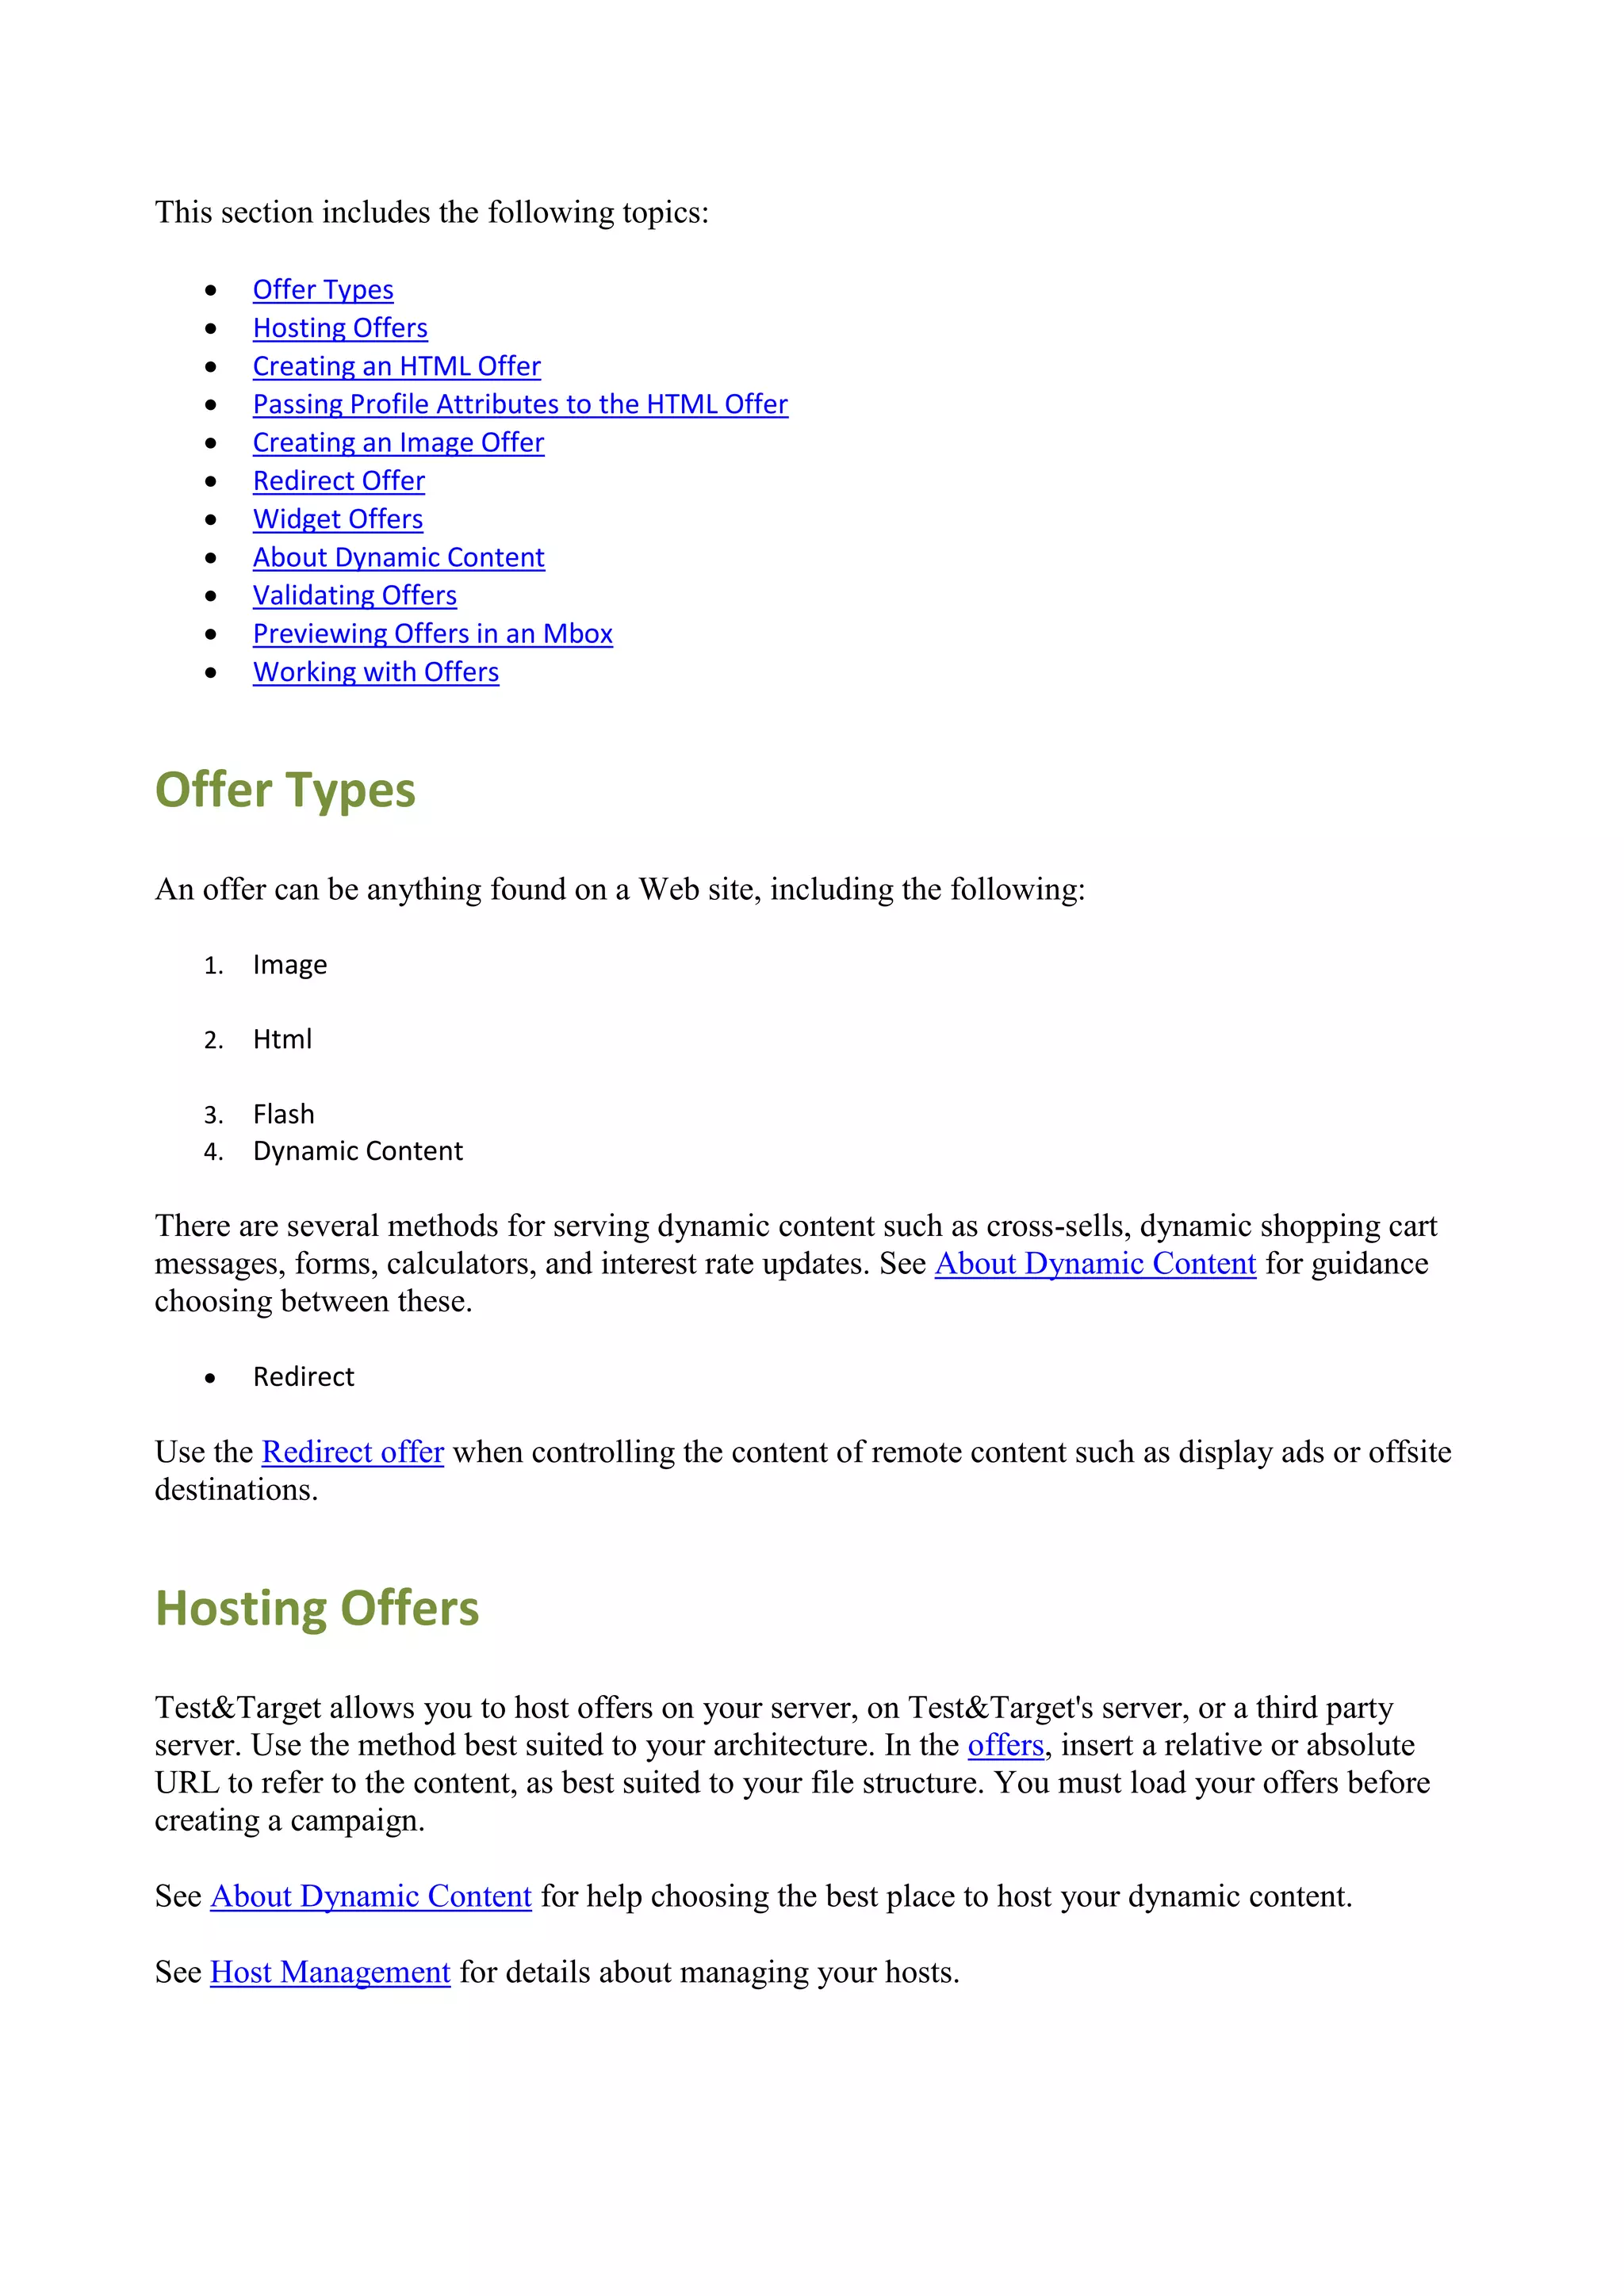
Widget Offers
You can use Widget offers to host your own offer content outside of Test&Target. Widget offers
are similar to a standard offer hosted outside of Test&Target. They allow Test&Target to deploy
offer content that‟s stored on your server, allowing for more sophisticated and dynamic usage.
Widget offers retrieve content from a URL, caching and serving that content for approximately two
hours.
Widget offers provide some dynamic content generation capabilities that other offers outside of
Test&Target do not. if the mbox serving the offer contains mbox parameters such as
mboxProductID and mbox.offerId, the productId=[PRODUCT_ID] and offerID=[OFFERID]
URL parameters are appended to the requested URL.
These parameters can be used by a service available at the Widget offer URL to return content
outside of Test&Target that uses product or order information from your mboxes.
The Widget offer is also accessible through the API to programatically create offers outside of
Test&Target.](https://image.slidesharecdn.com/testandtargetbook-110620042031-phpapp02/75/Test-and-target-book-92-2048.jpg)

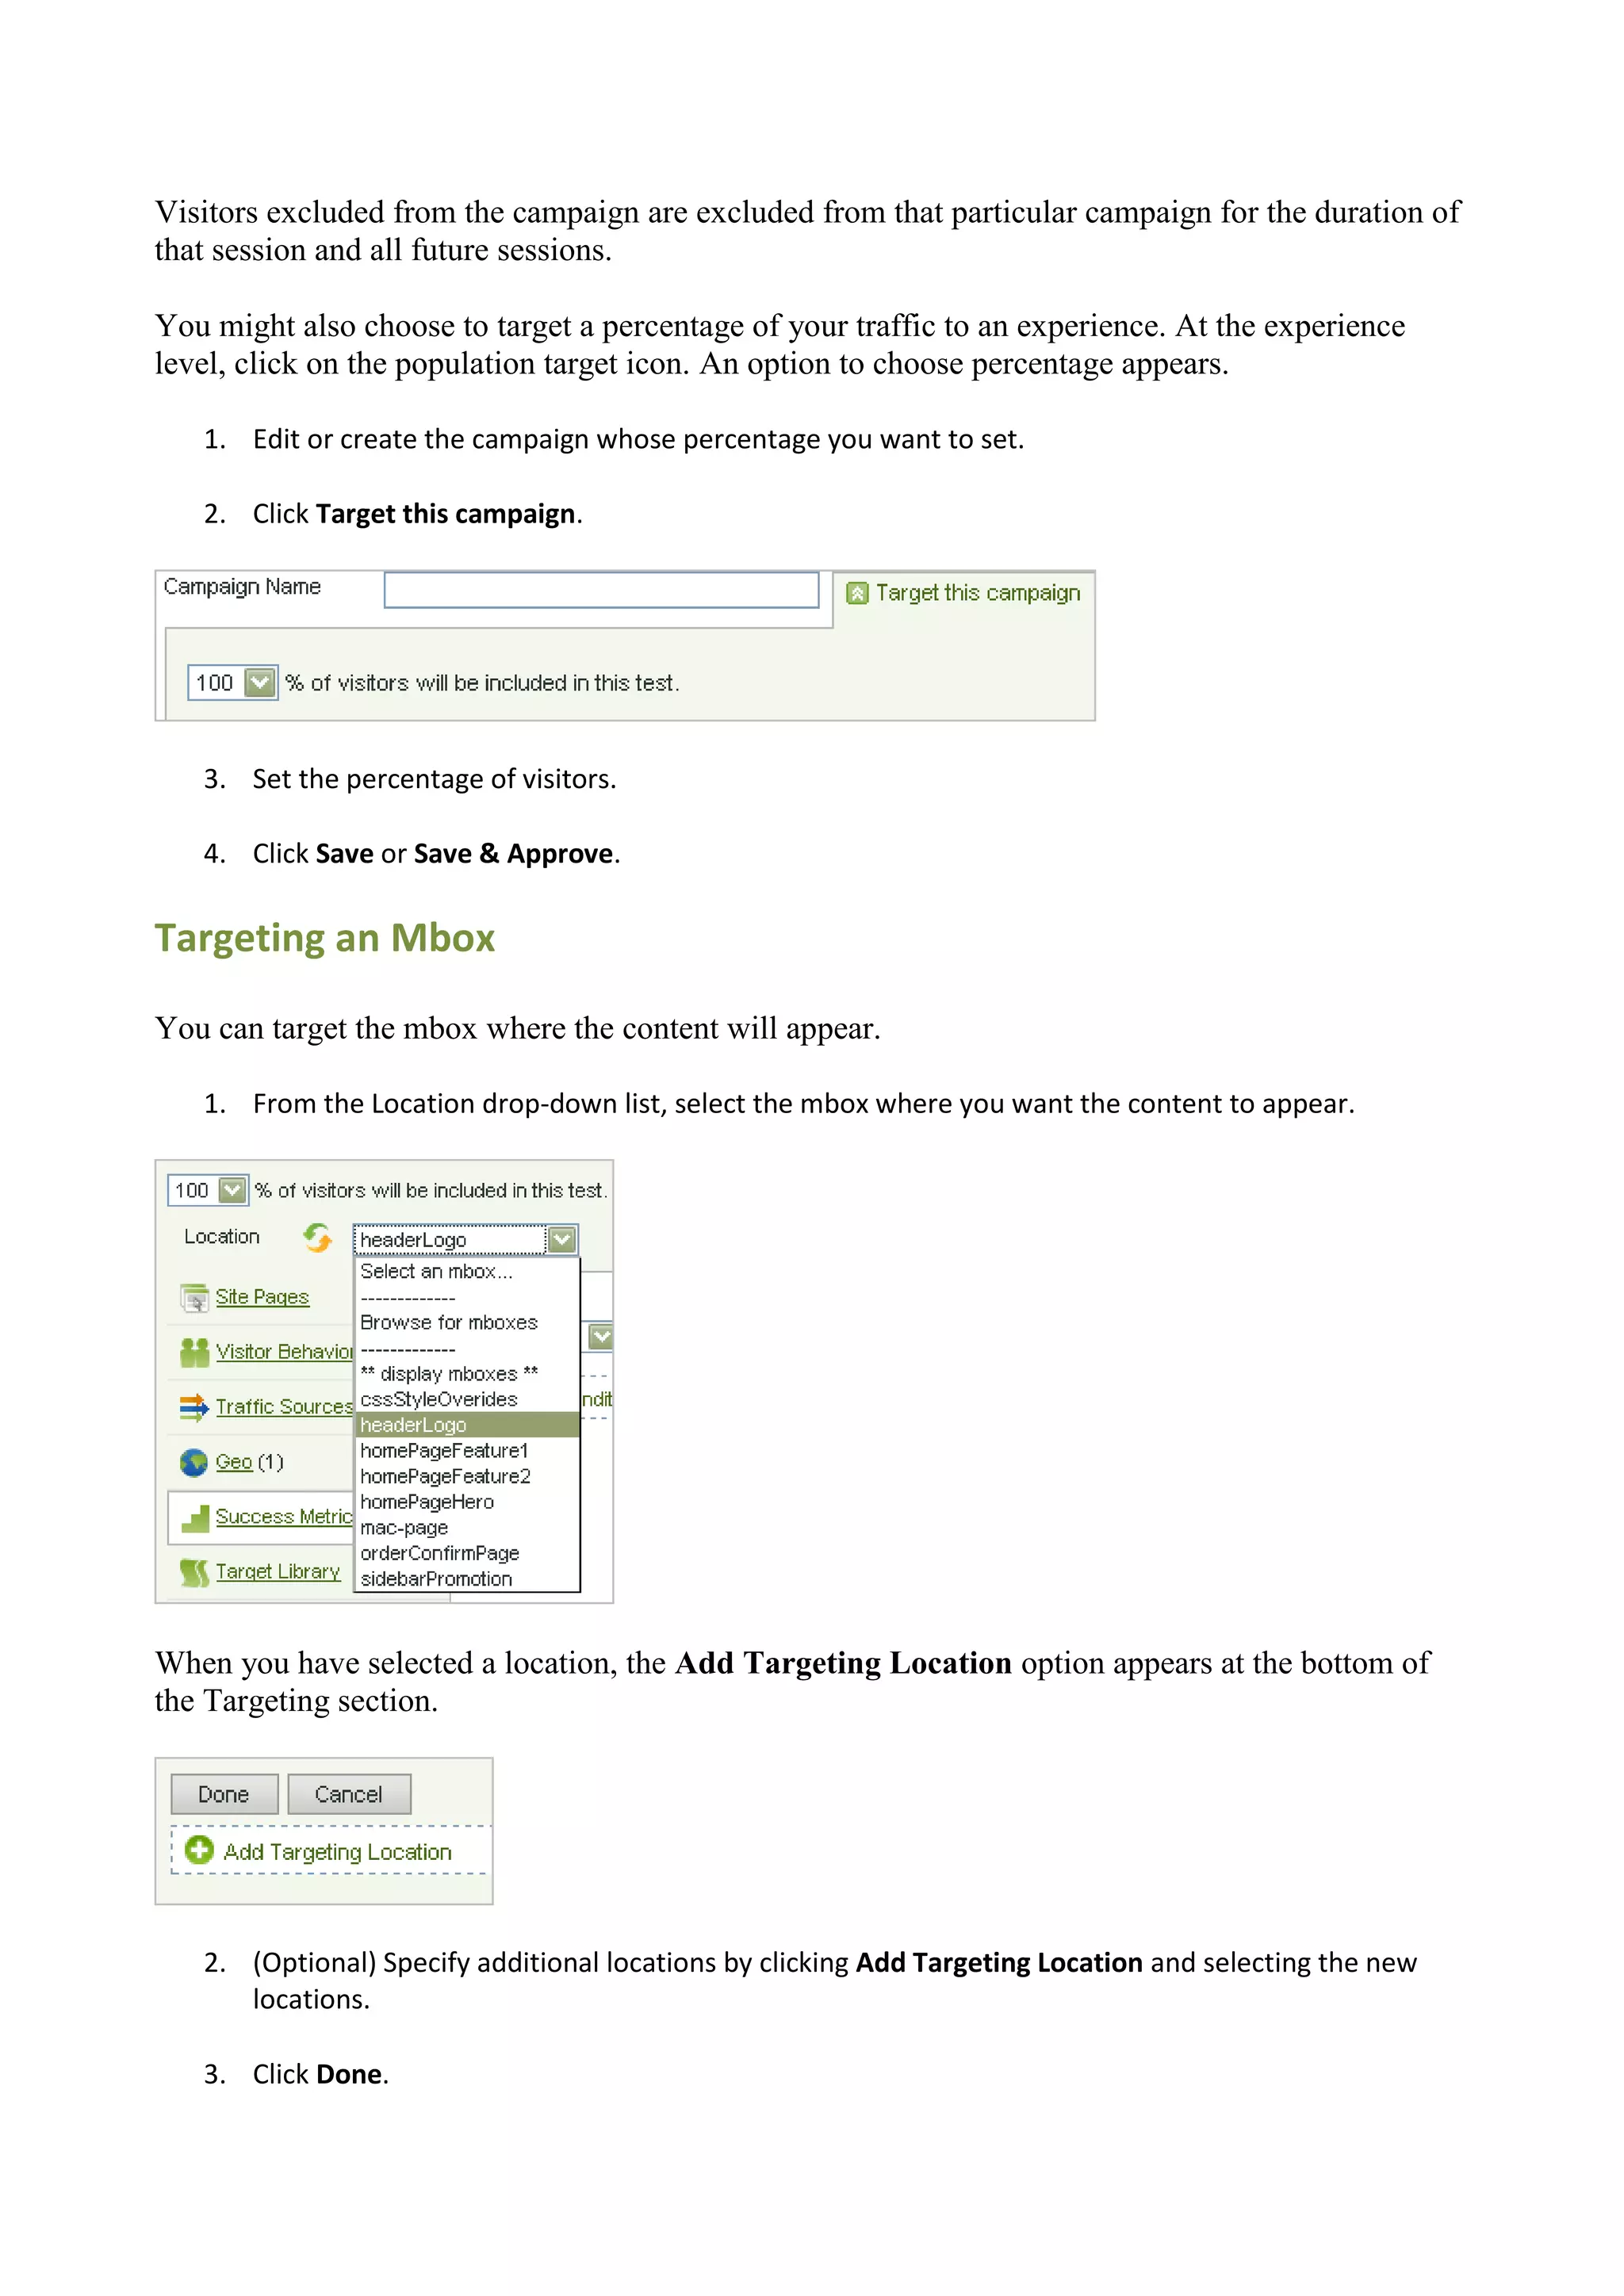

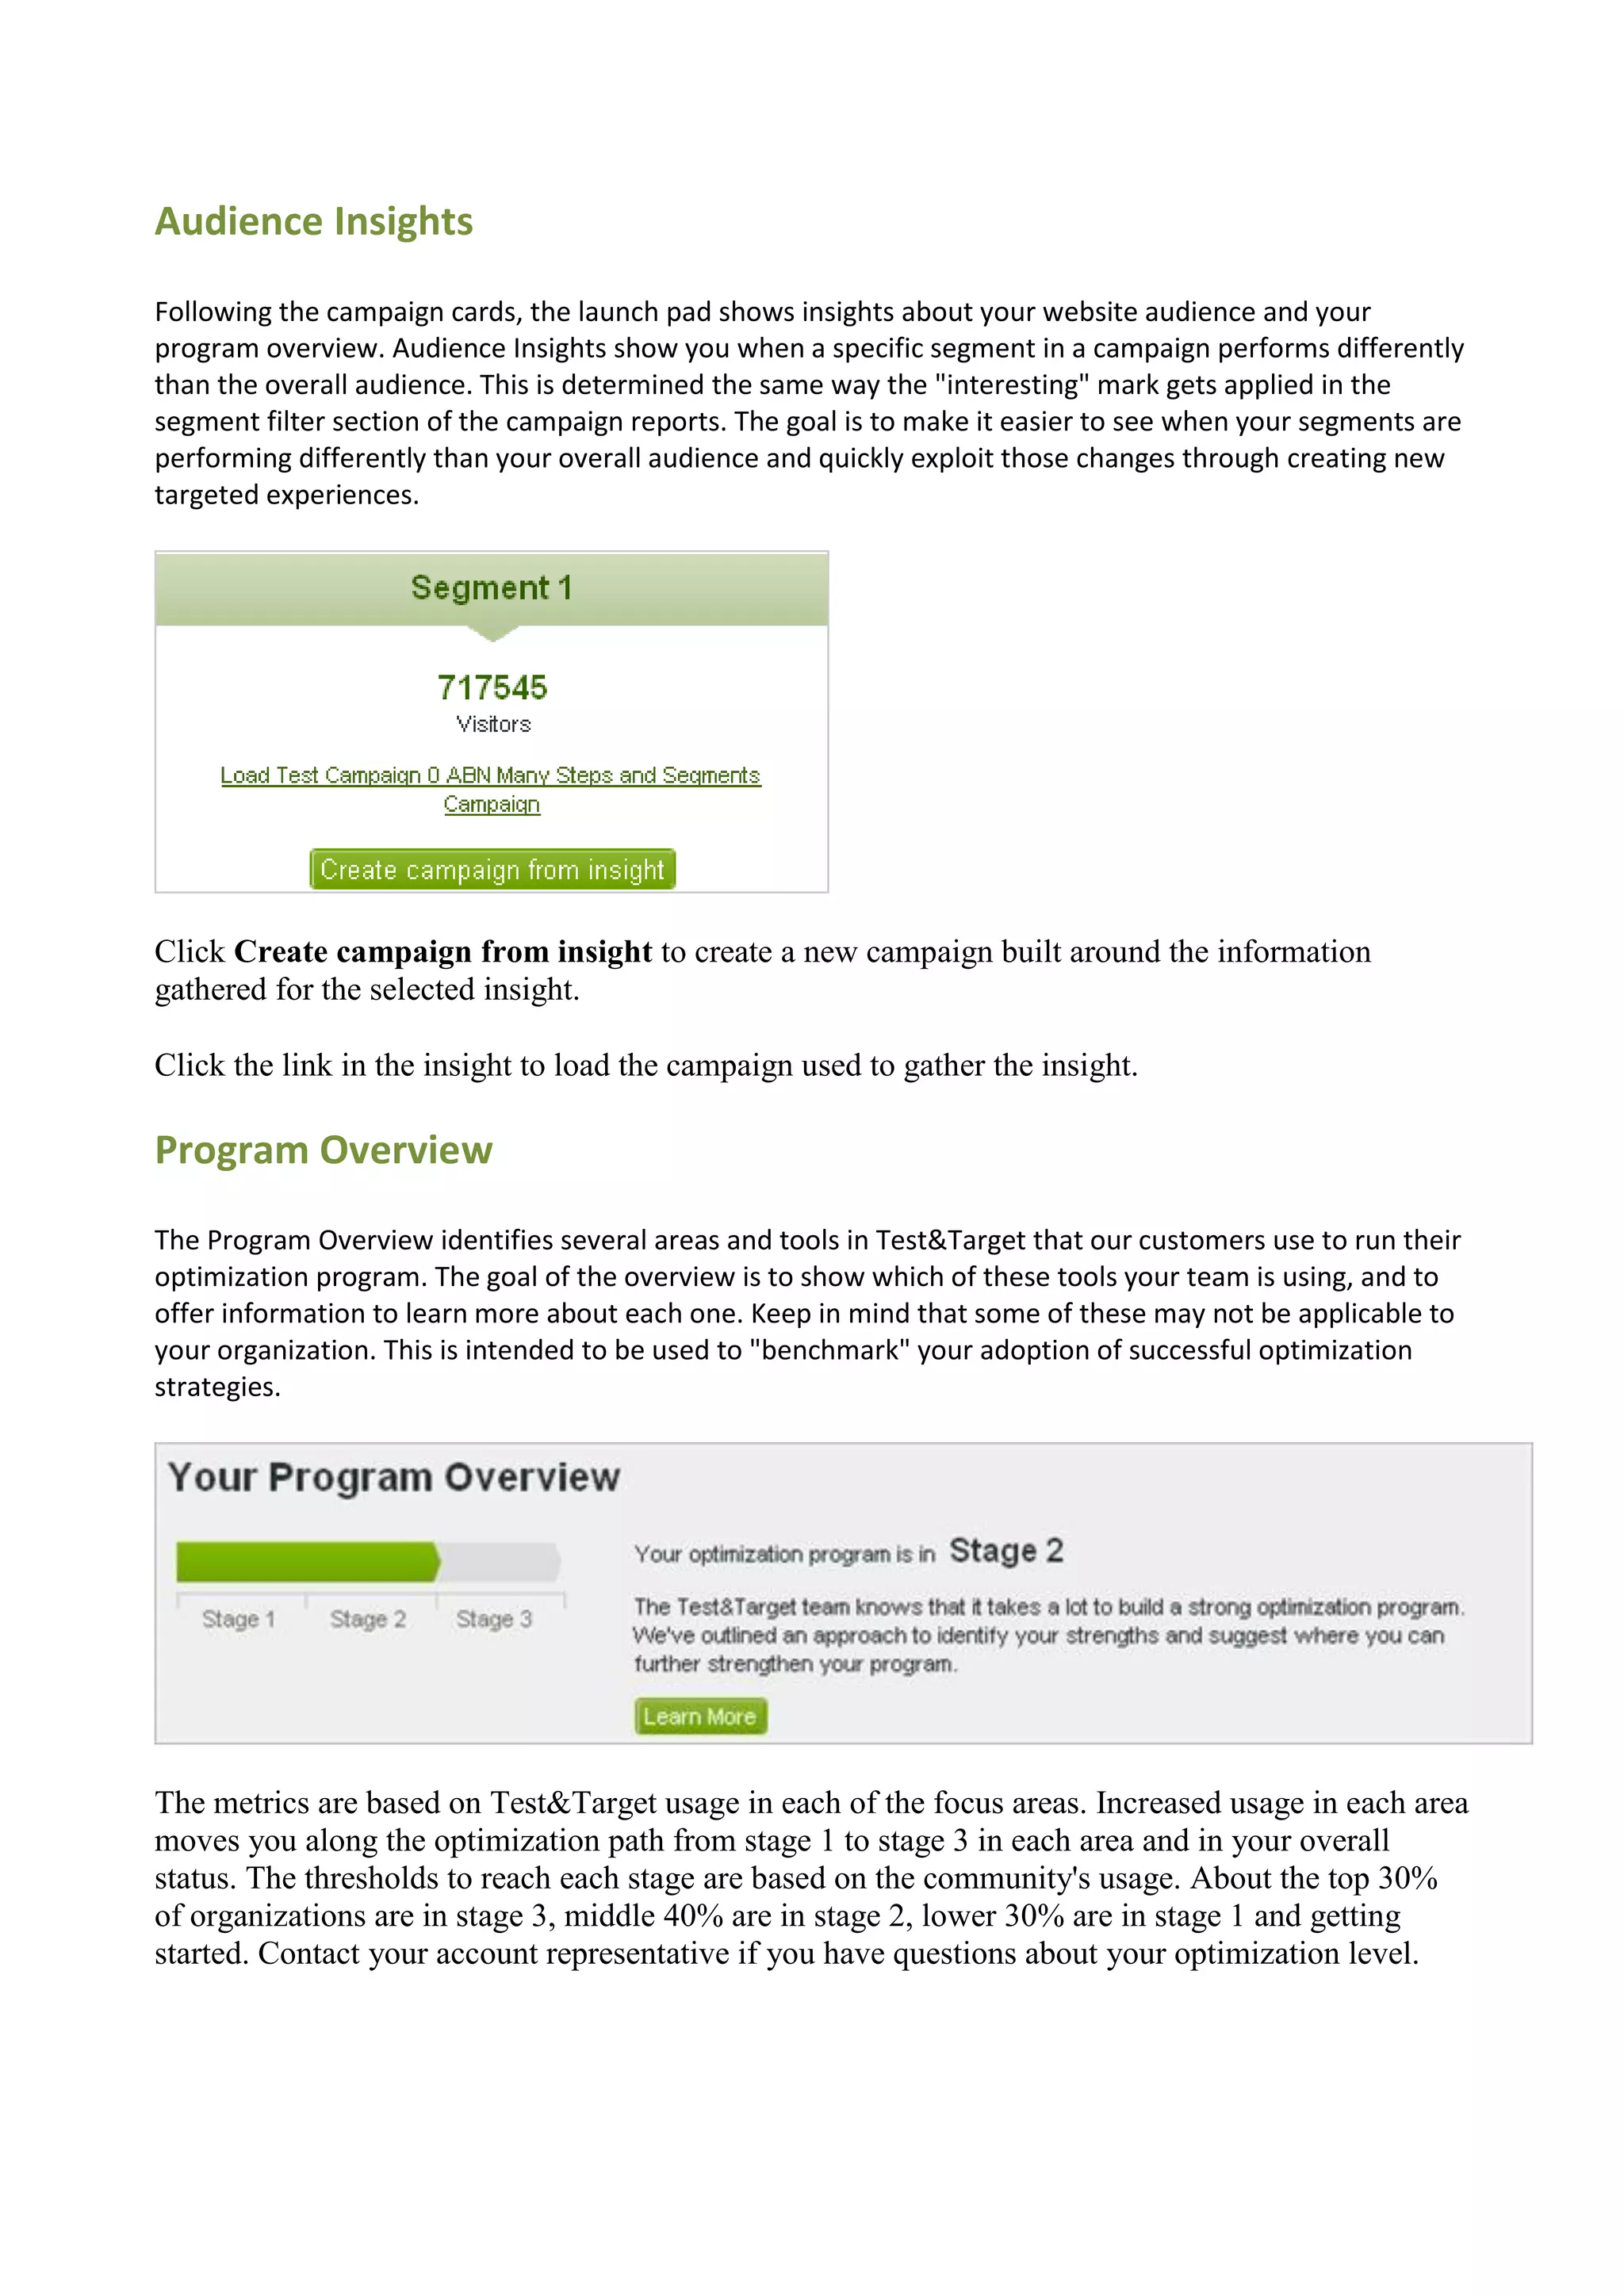


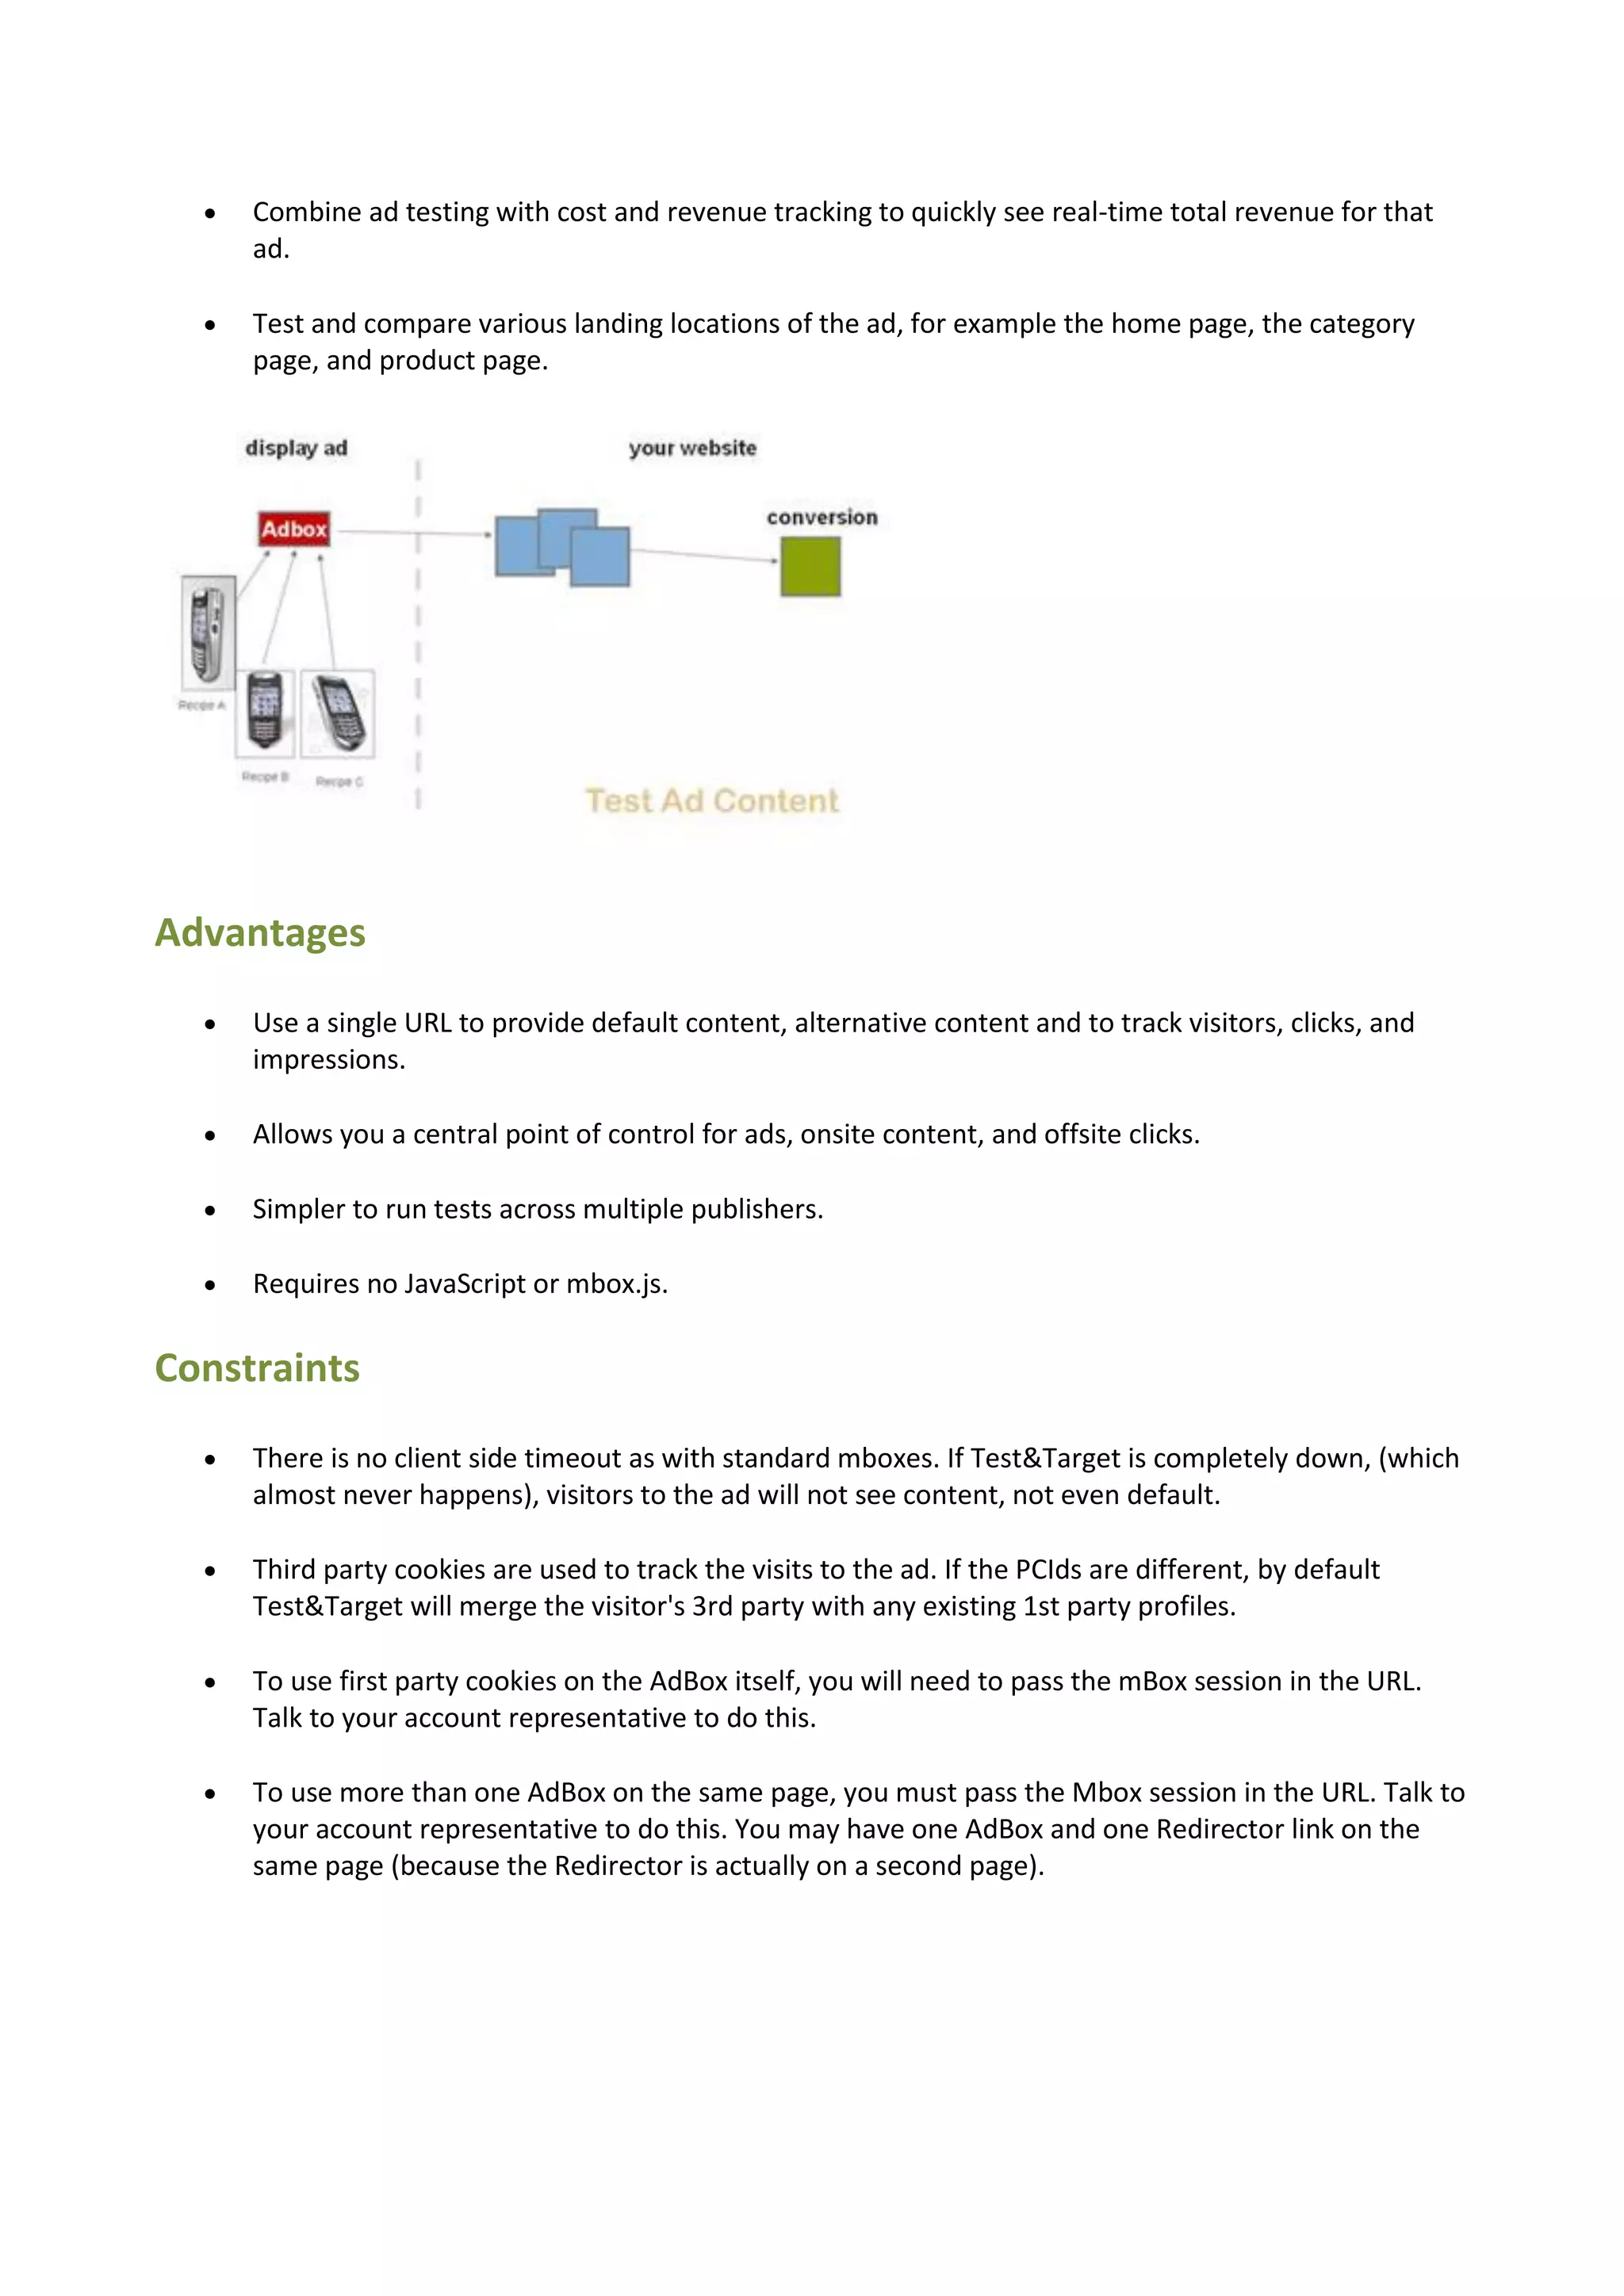
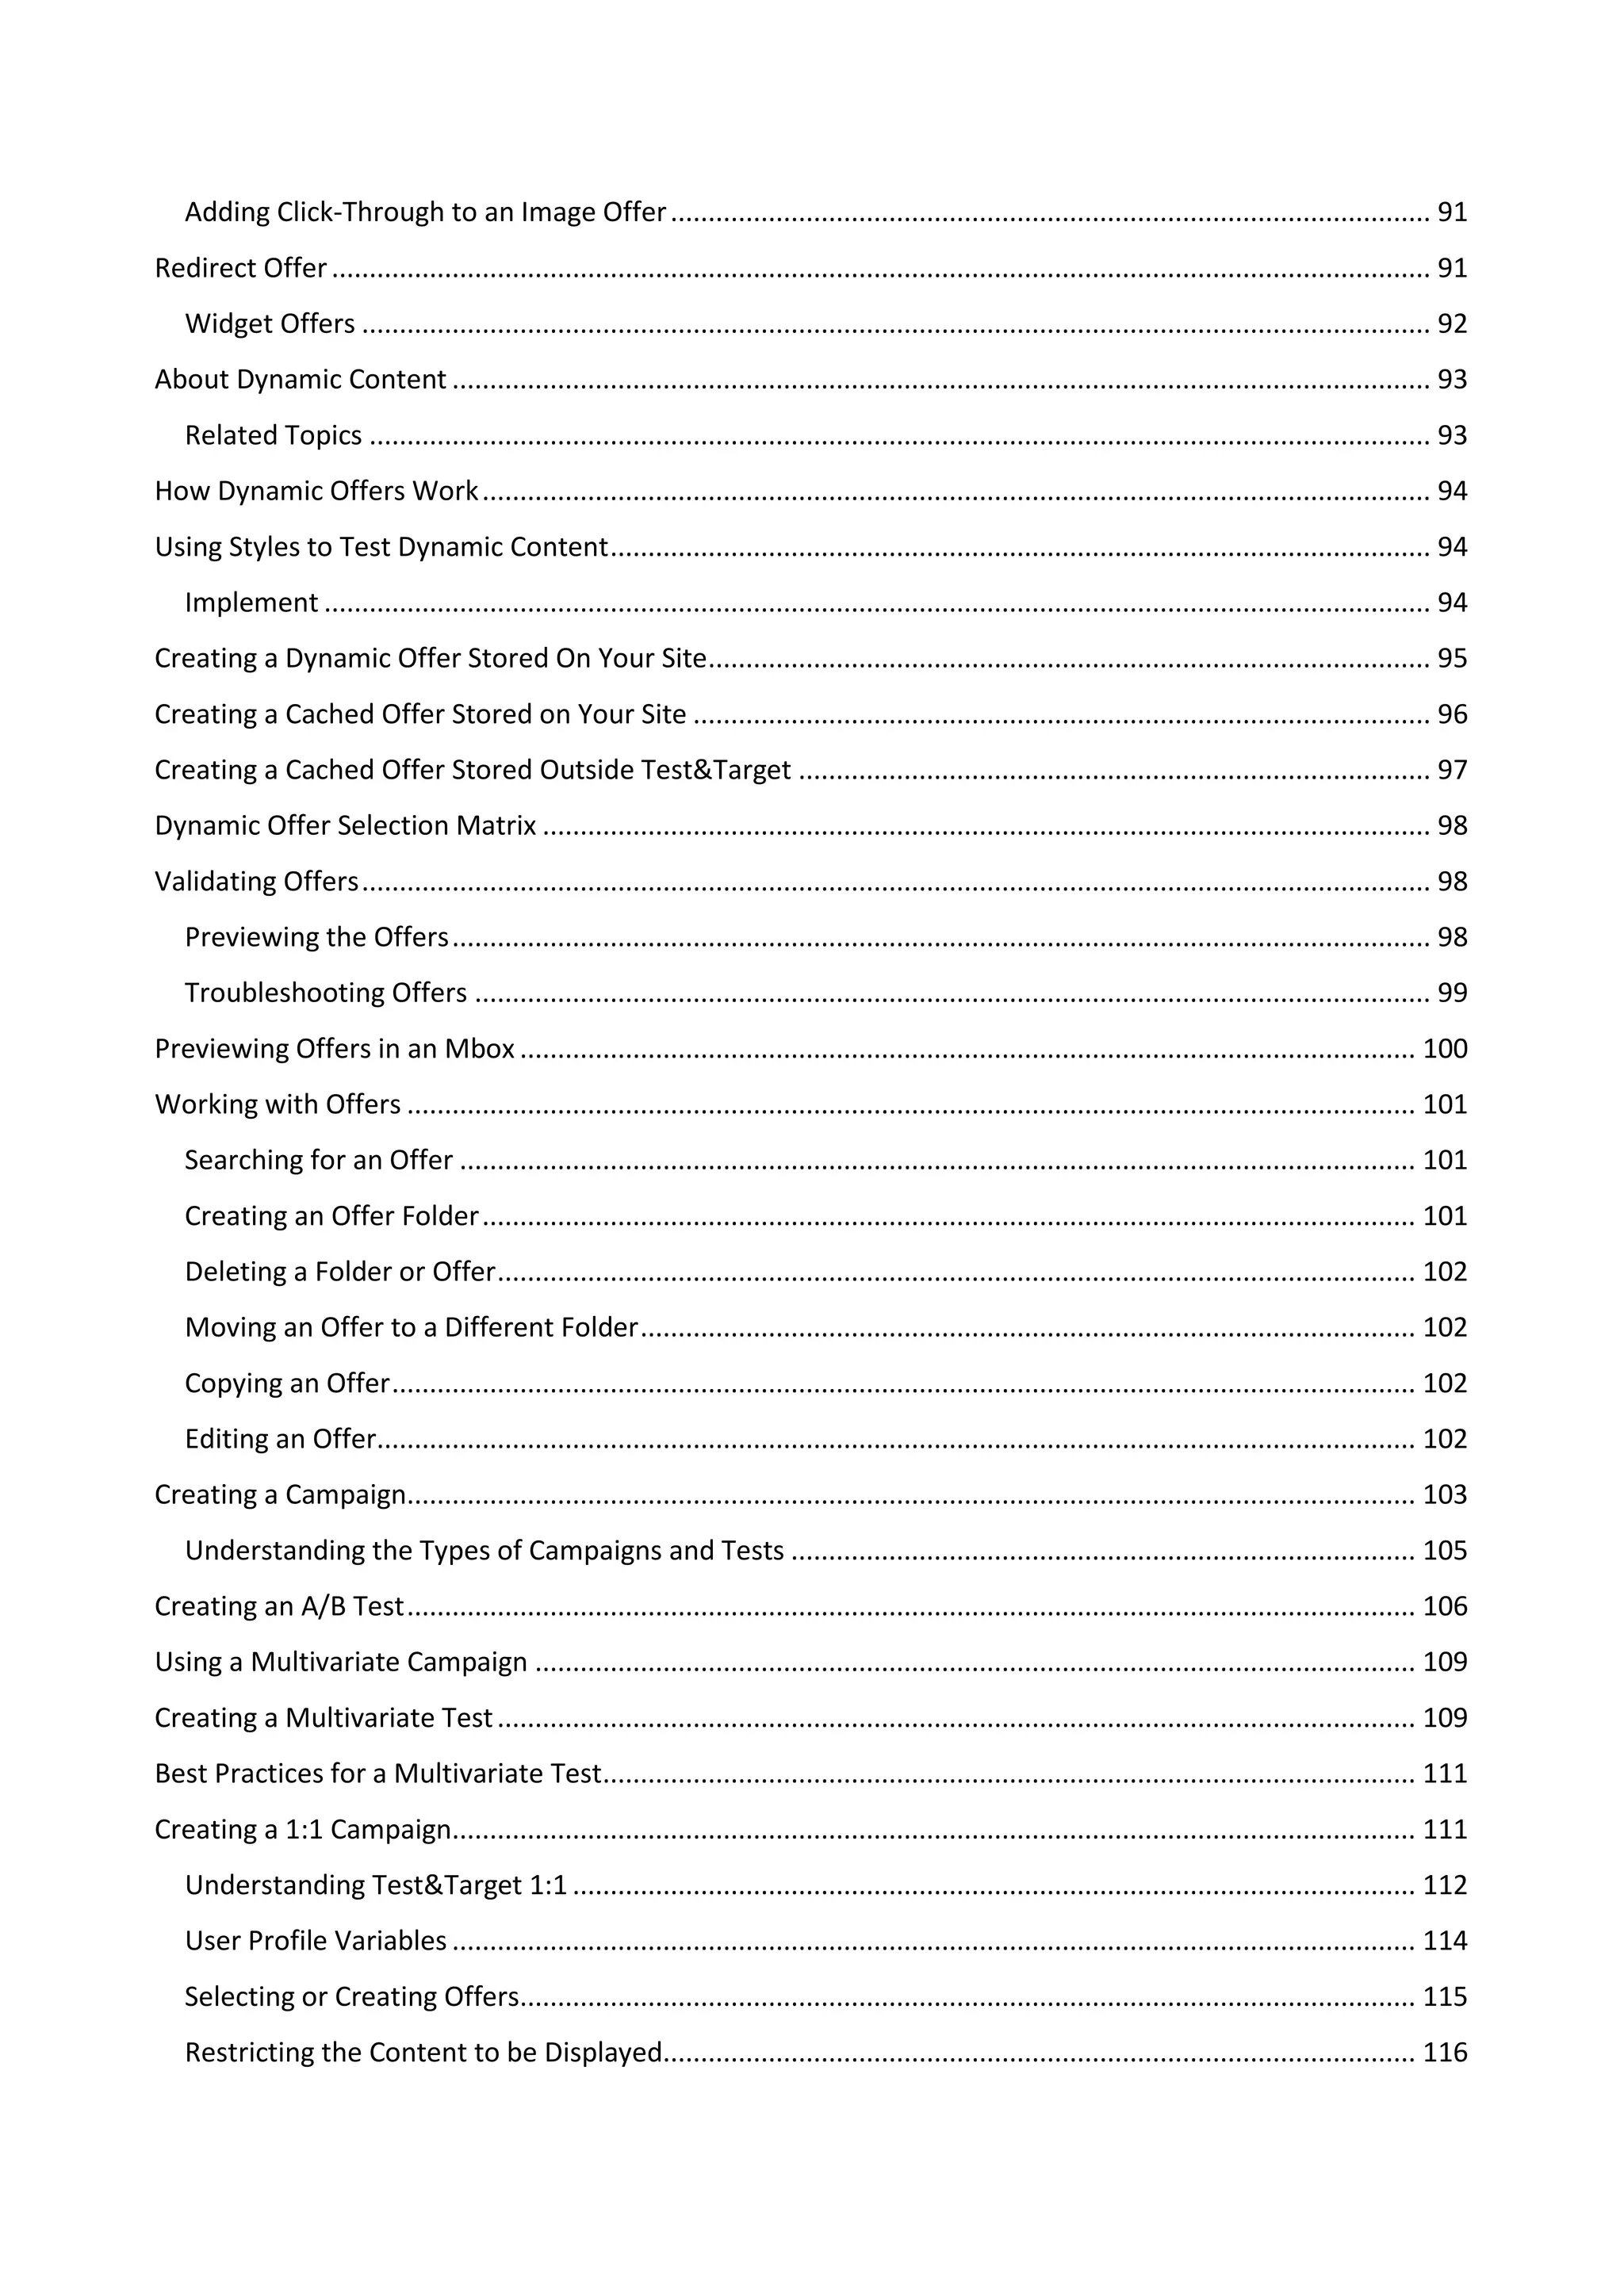
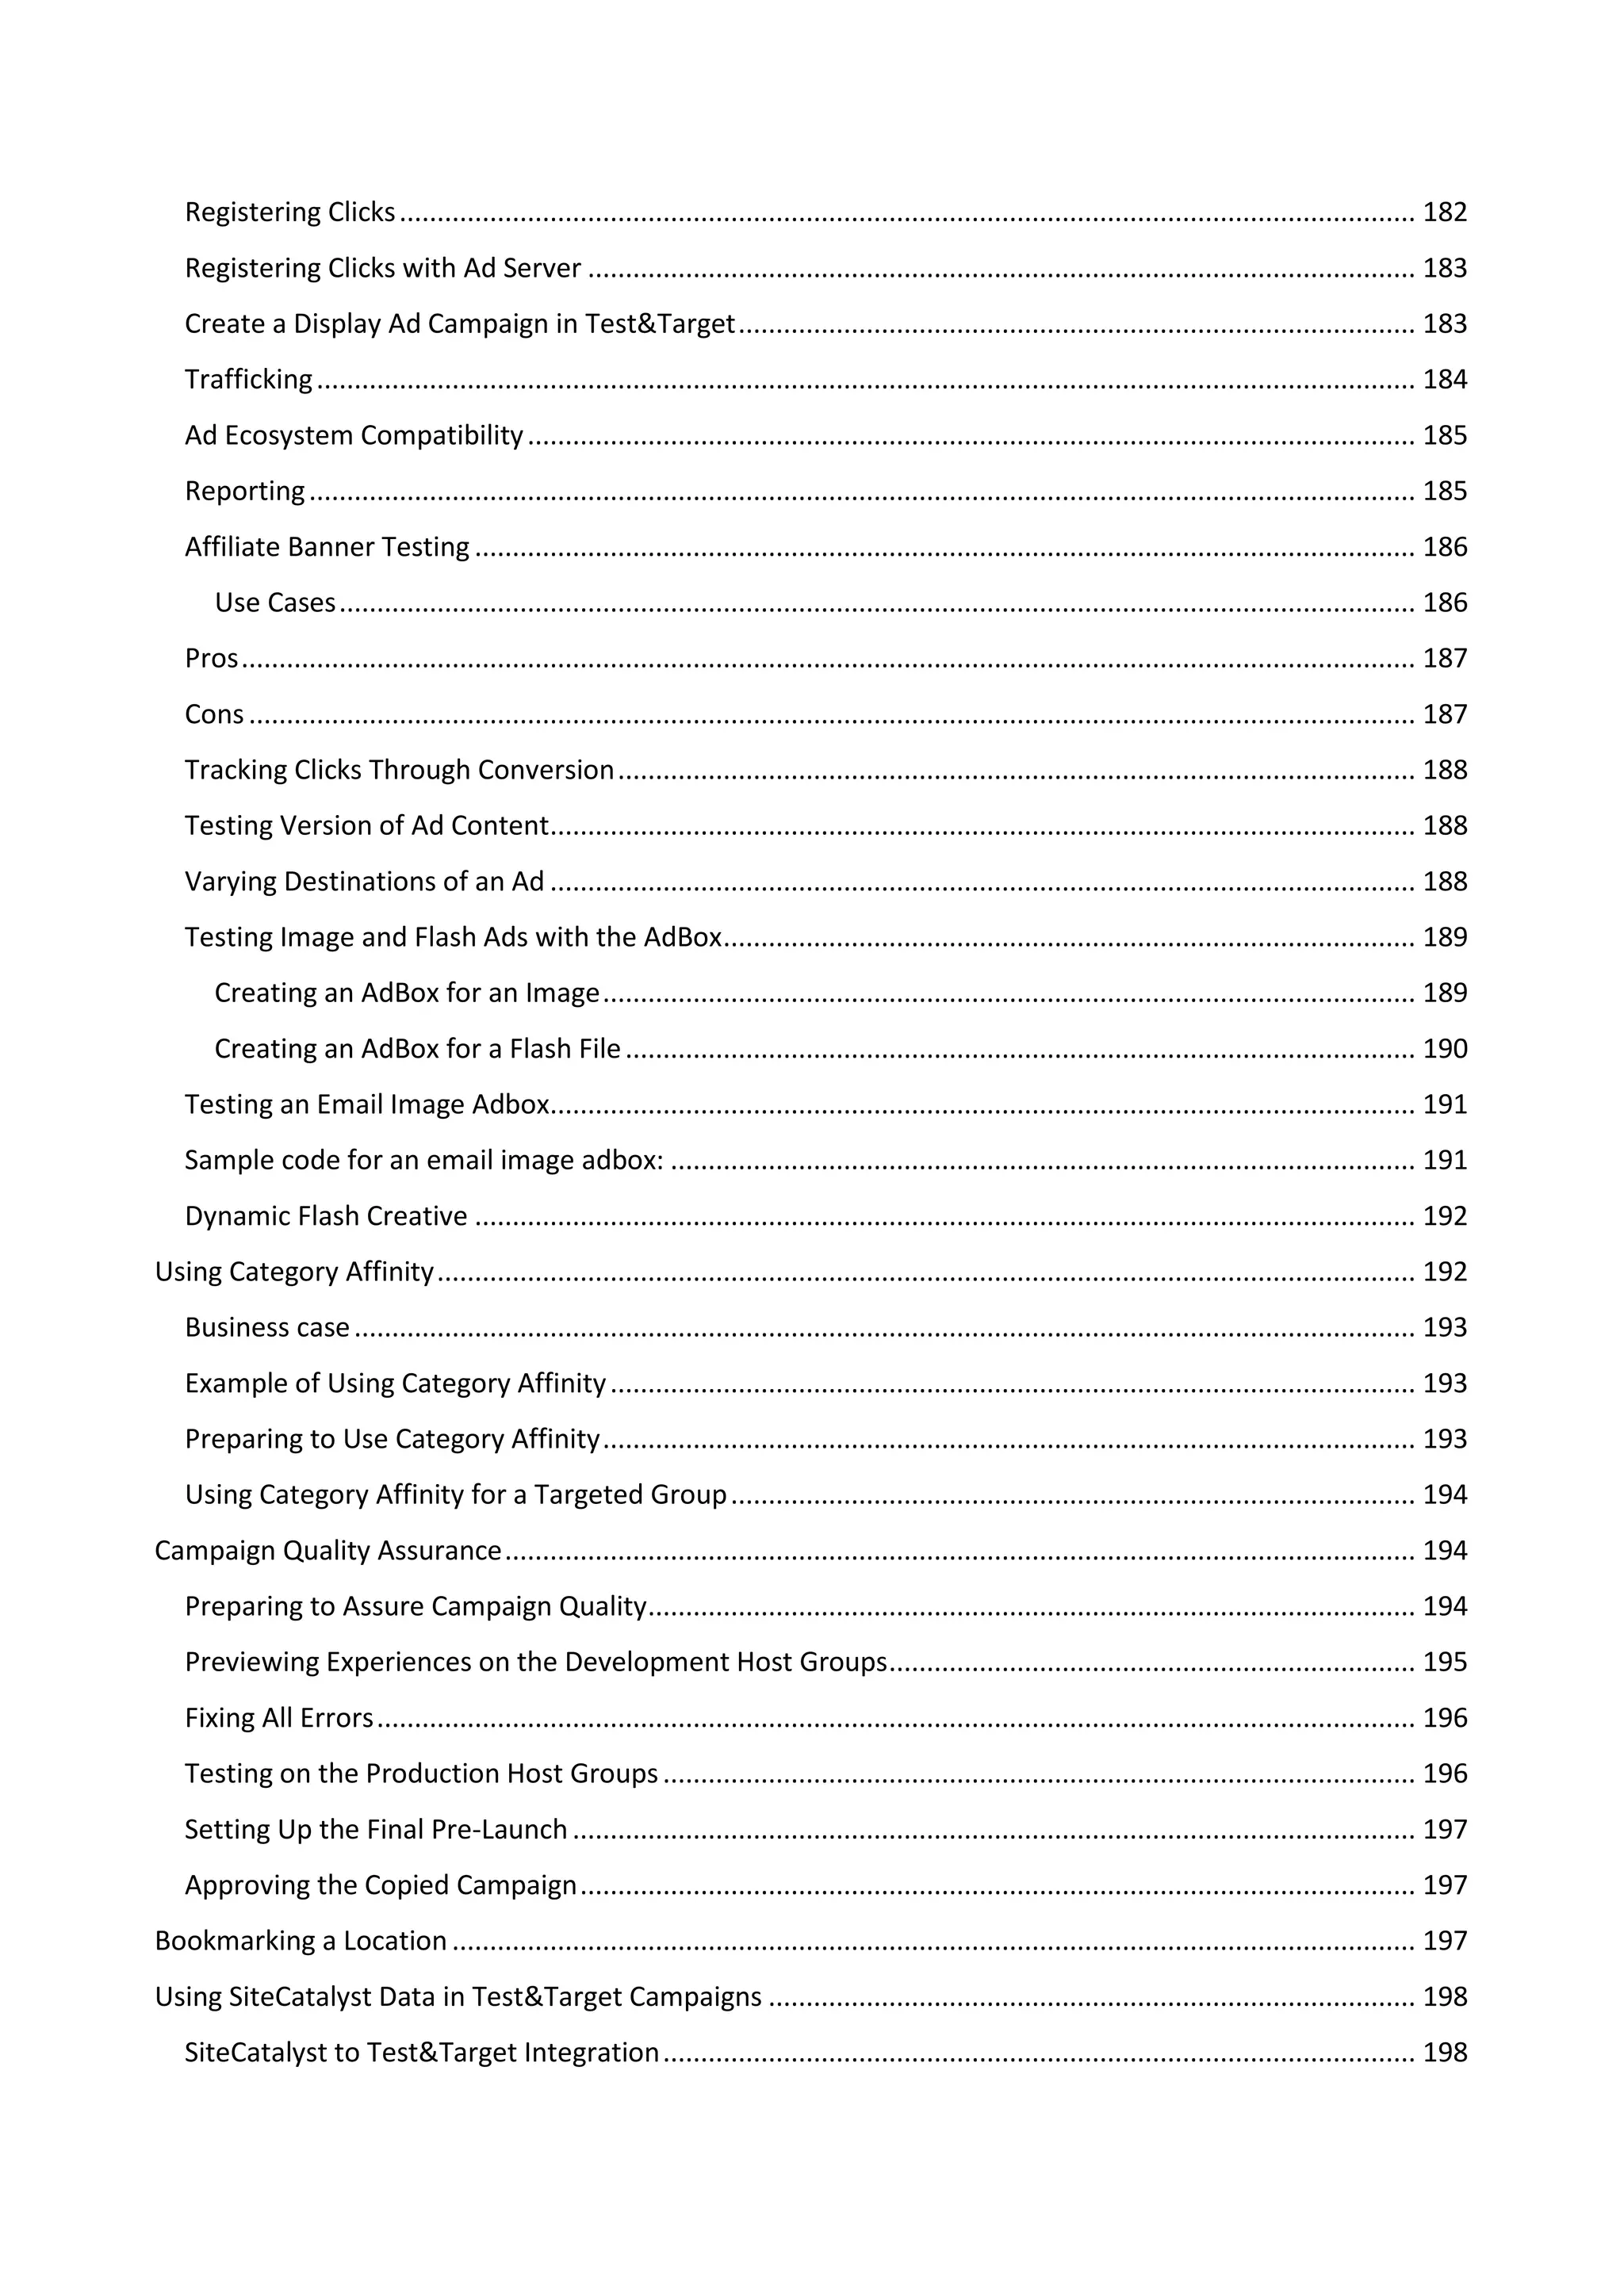
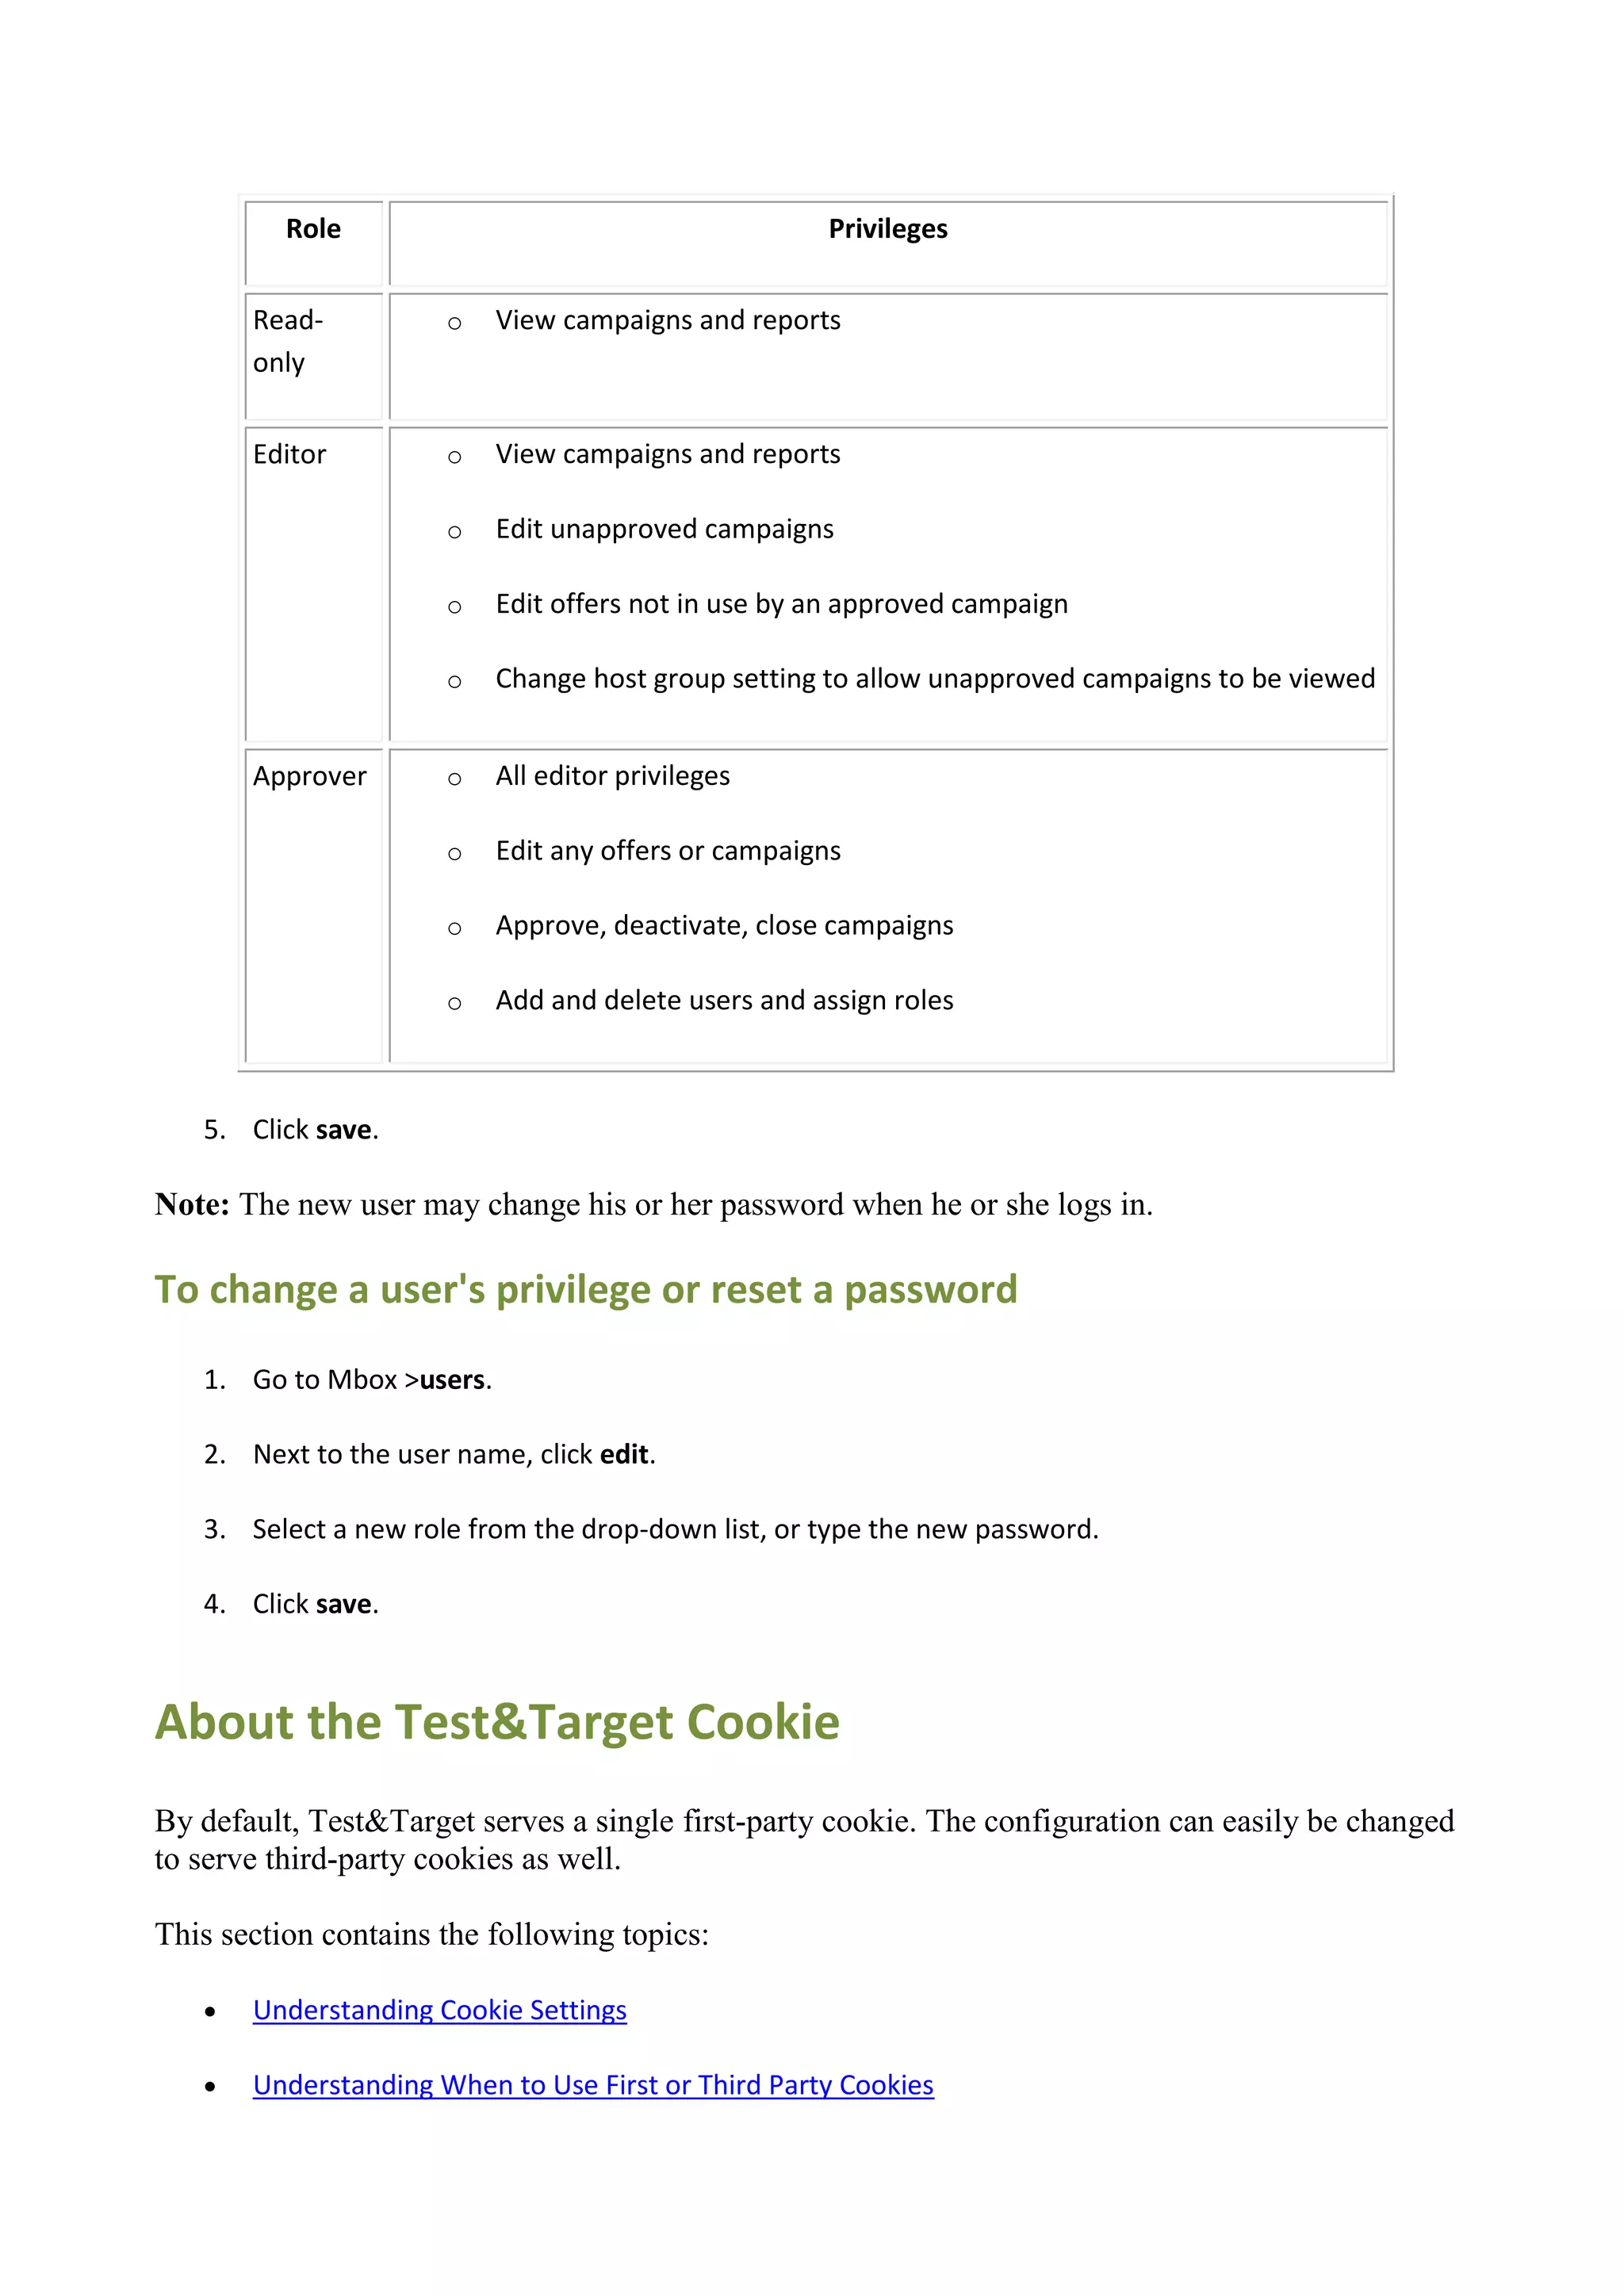
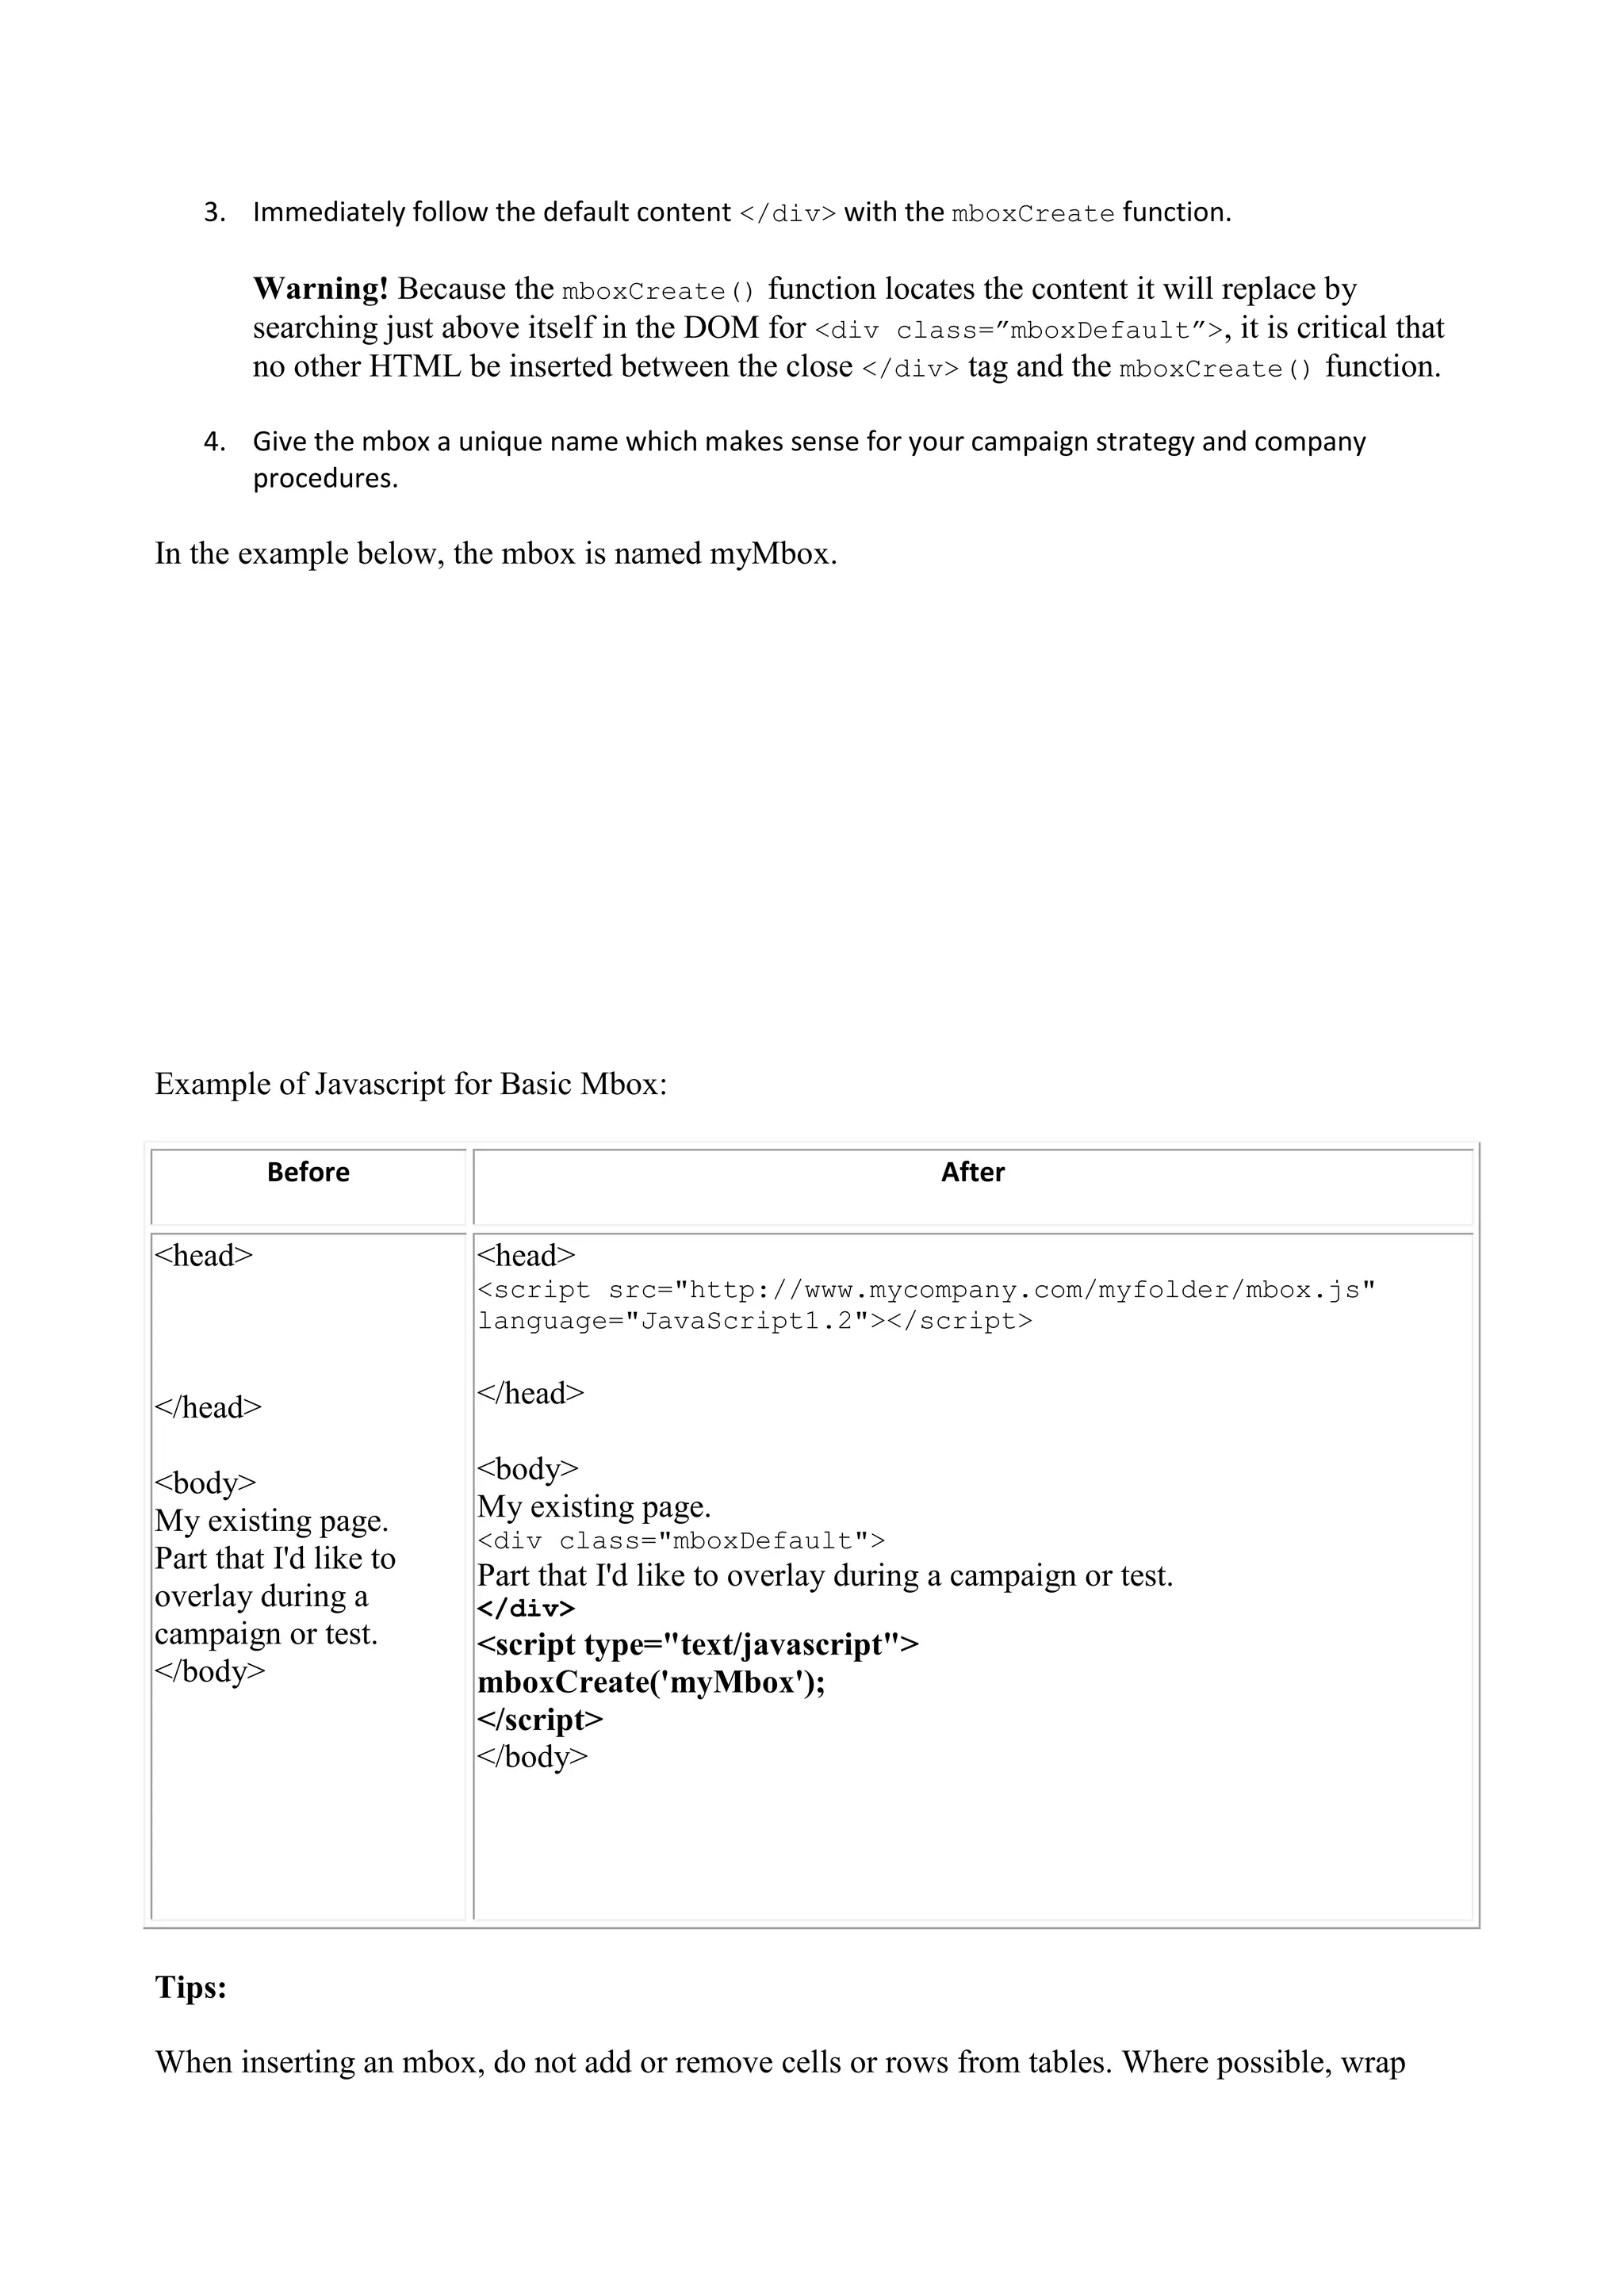
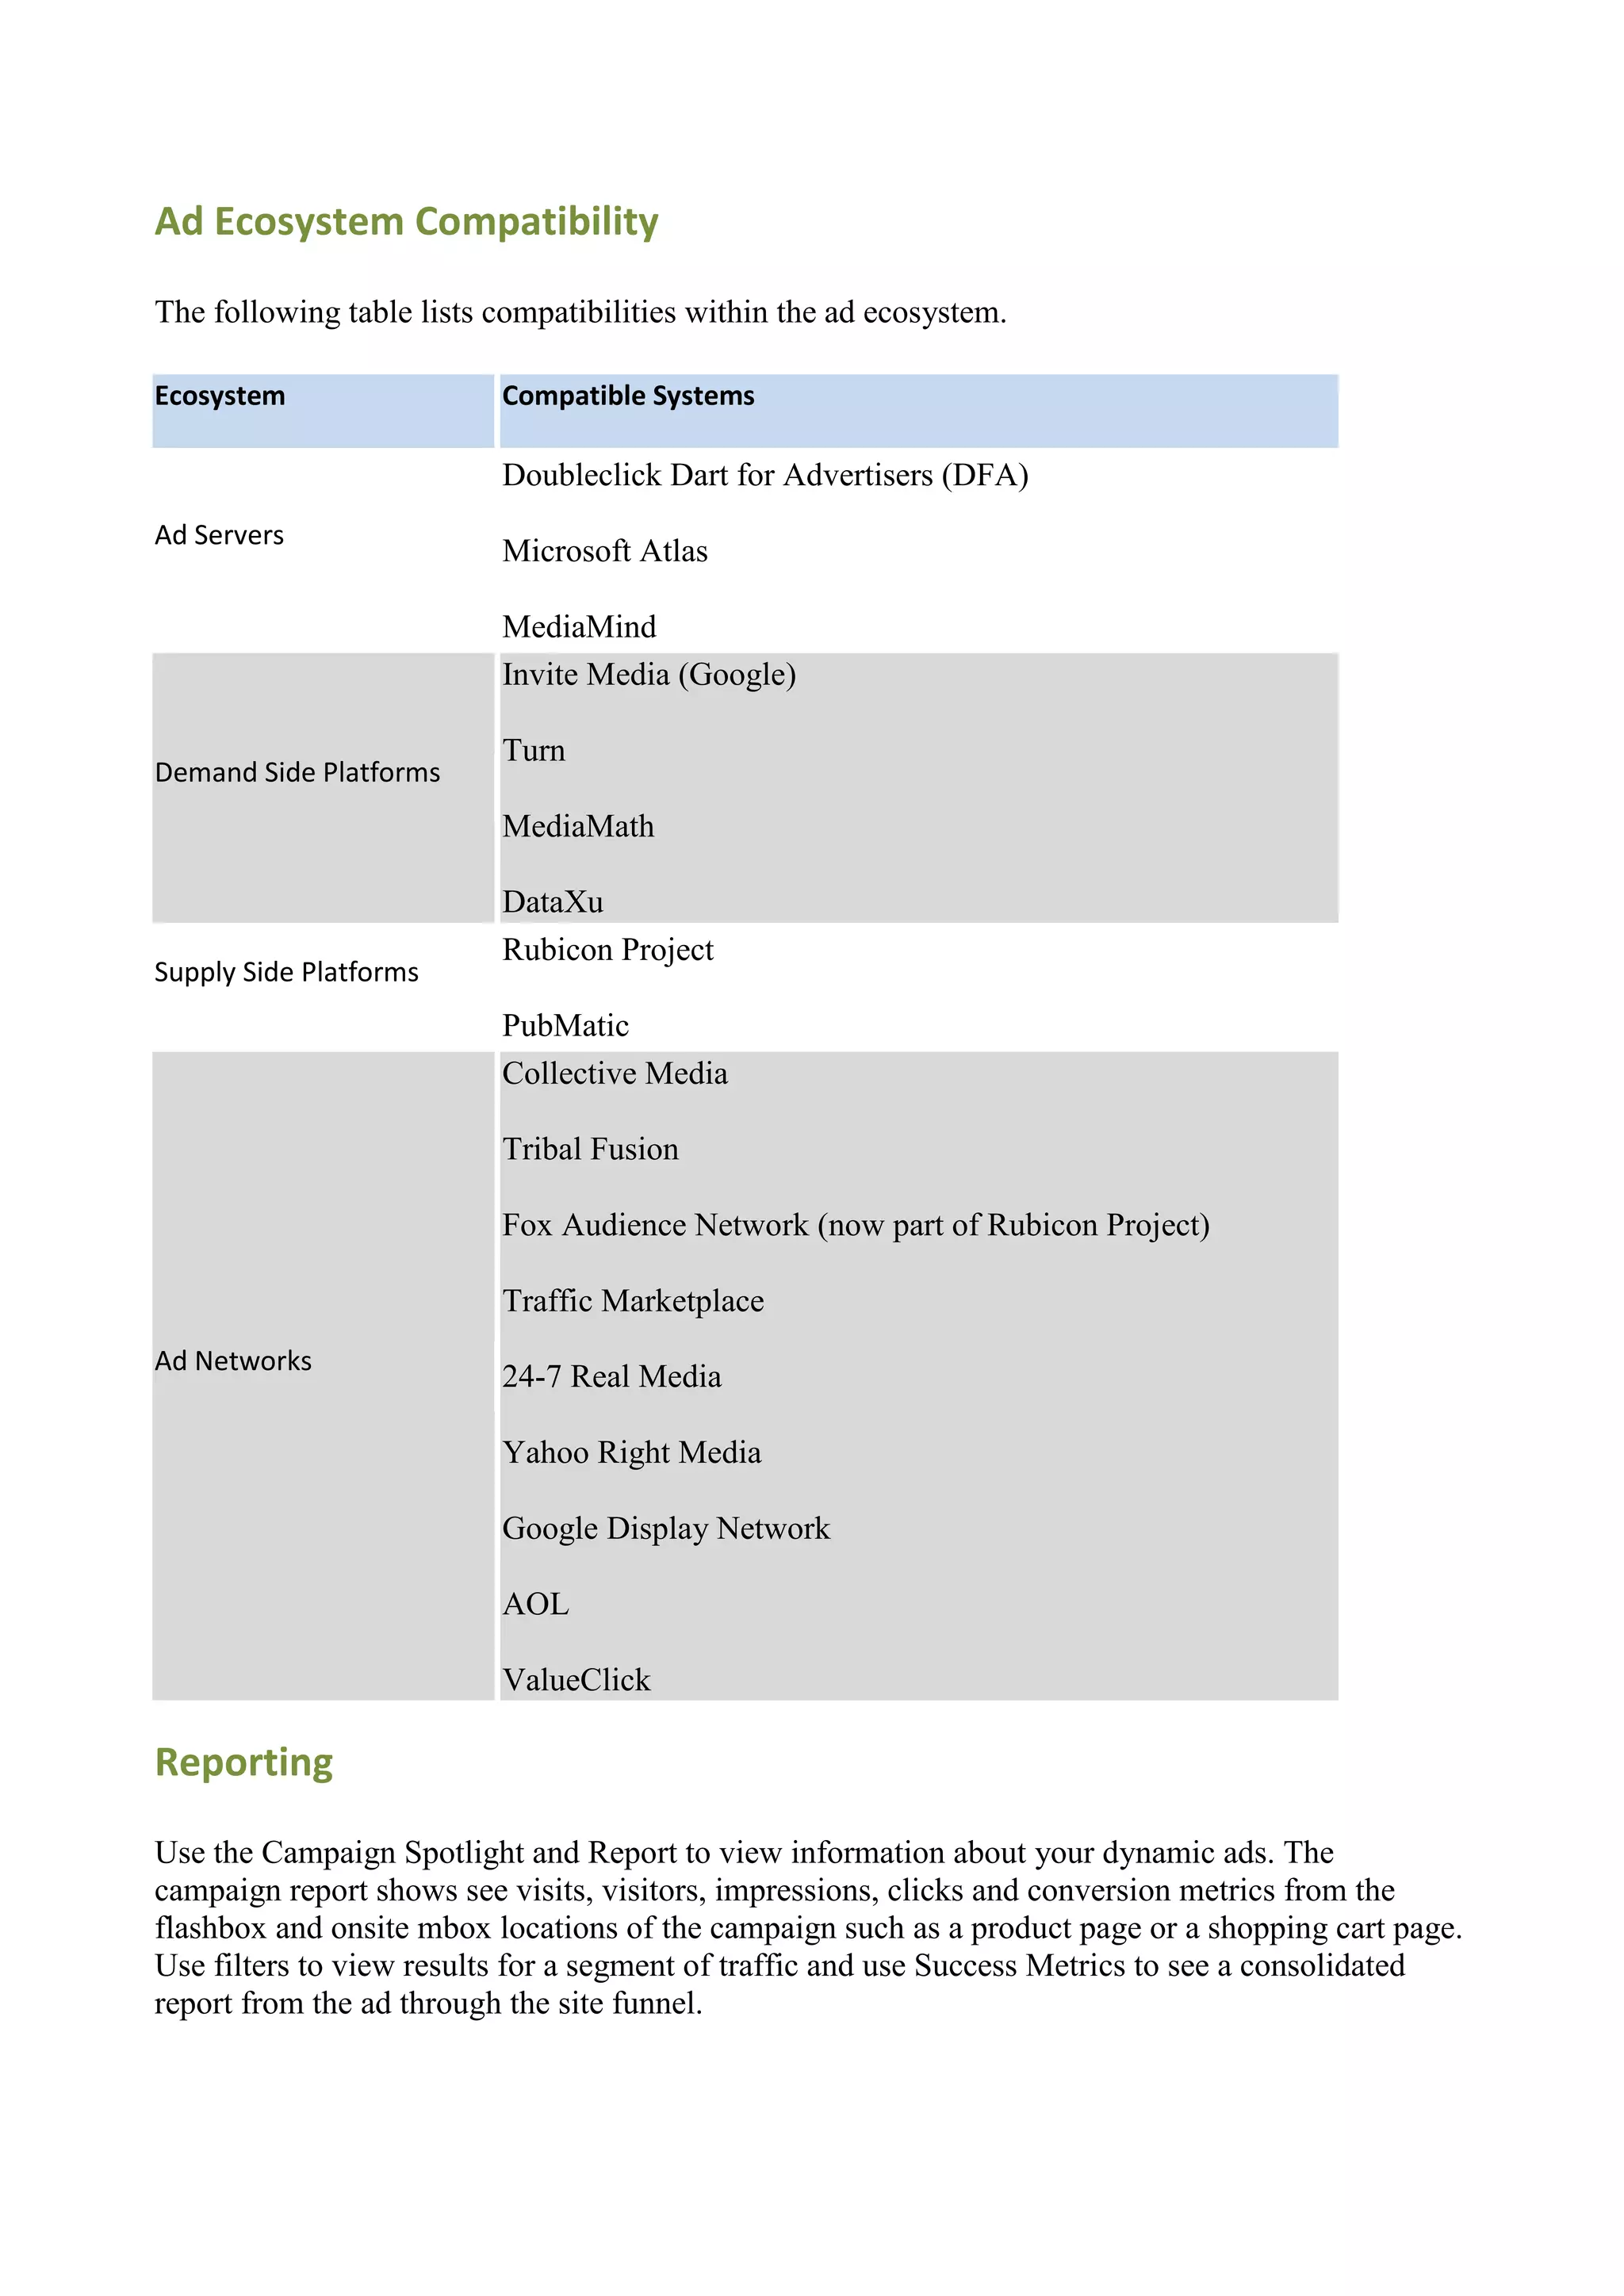
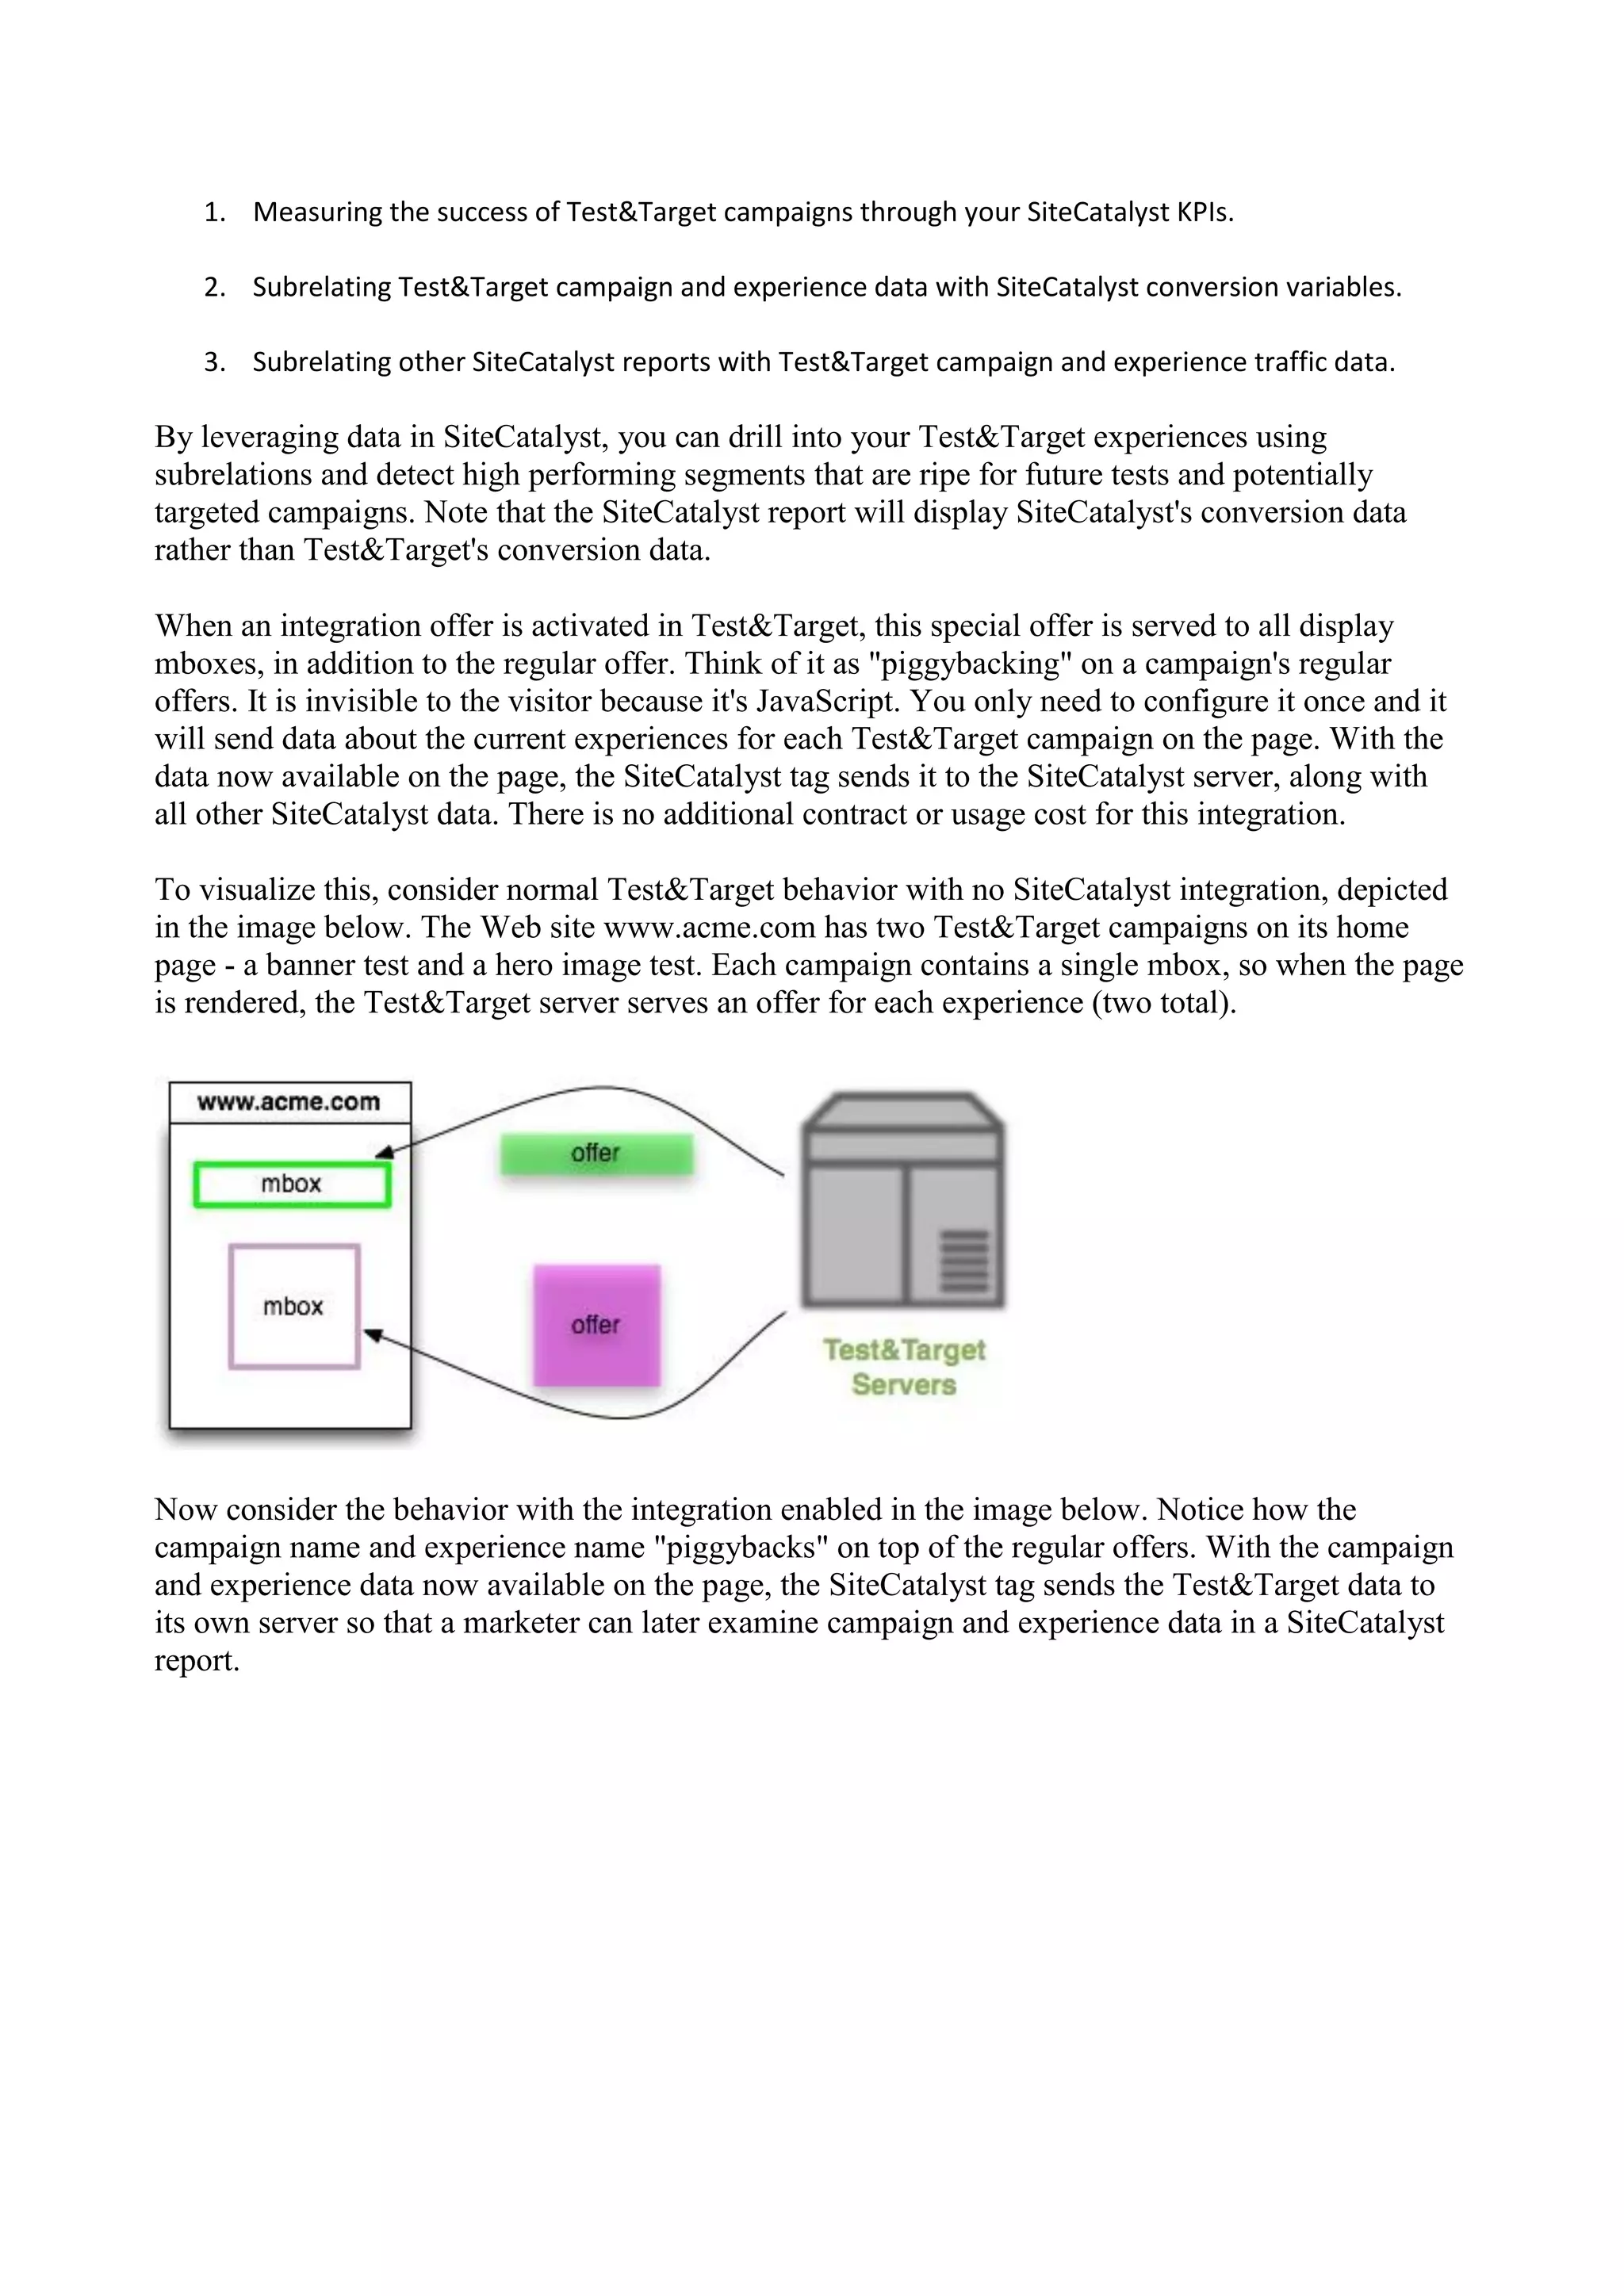
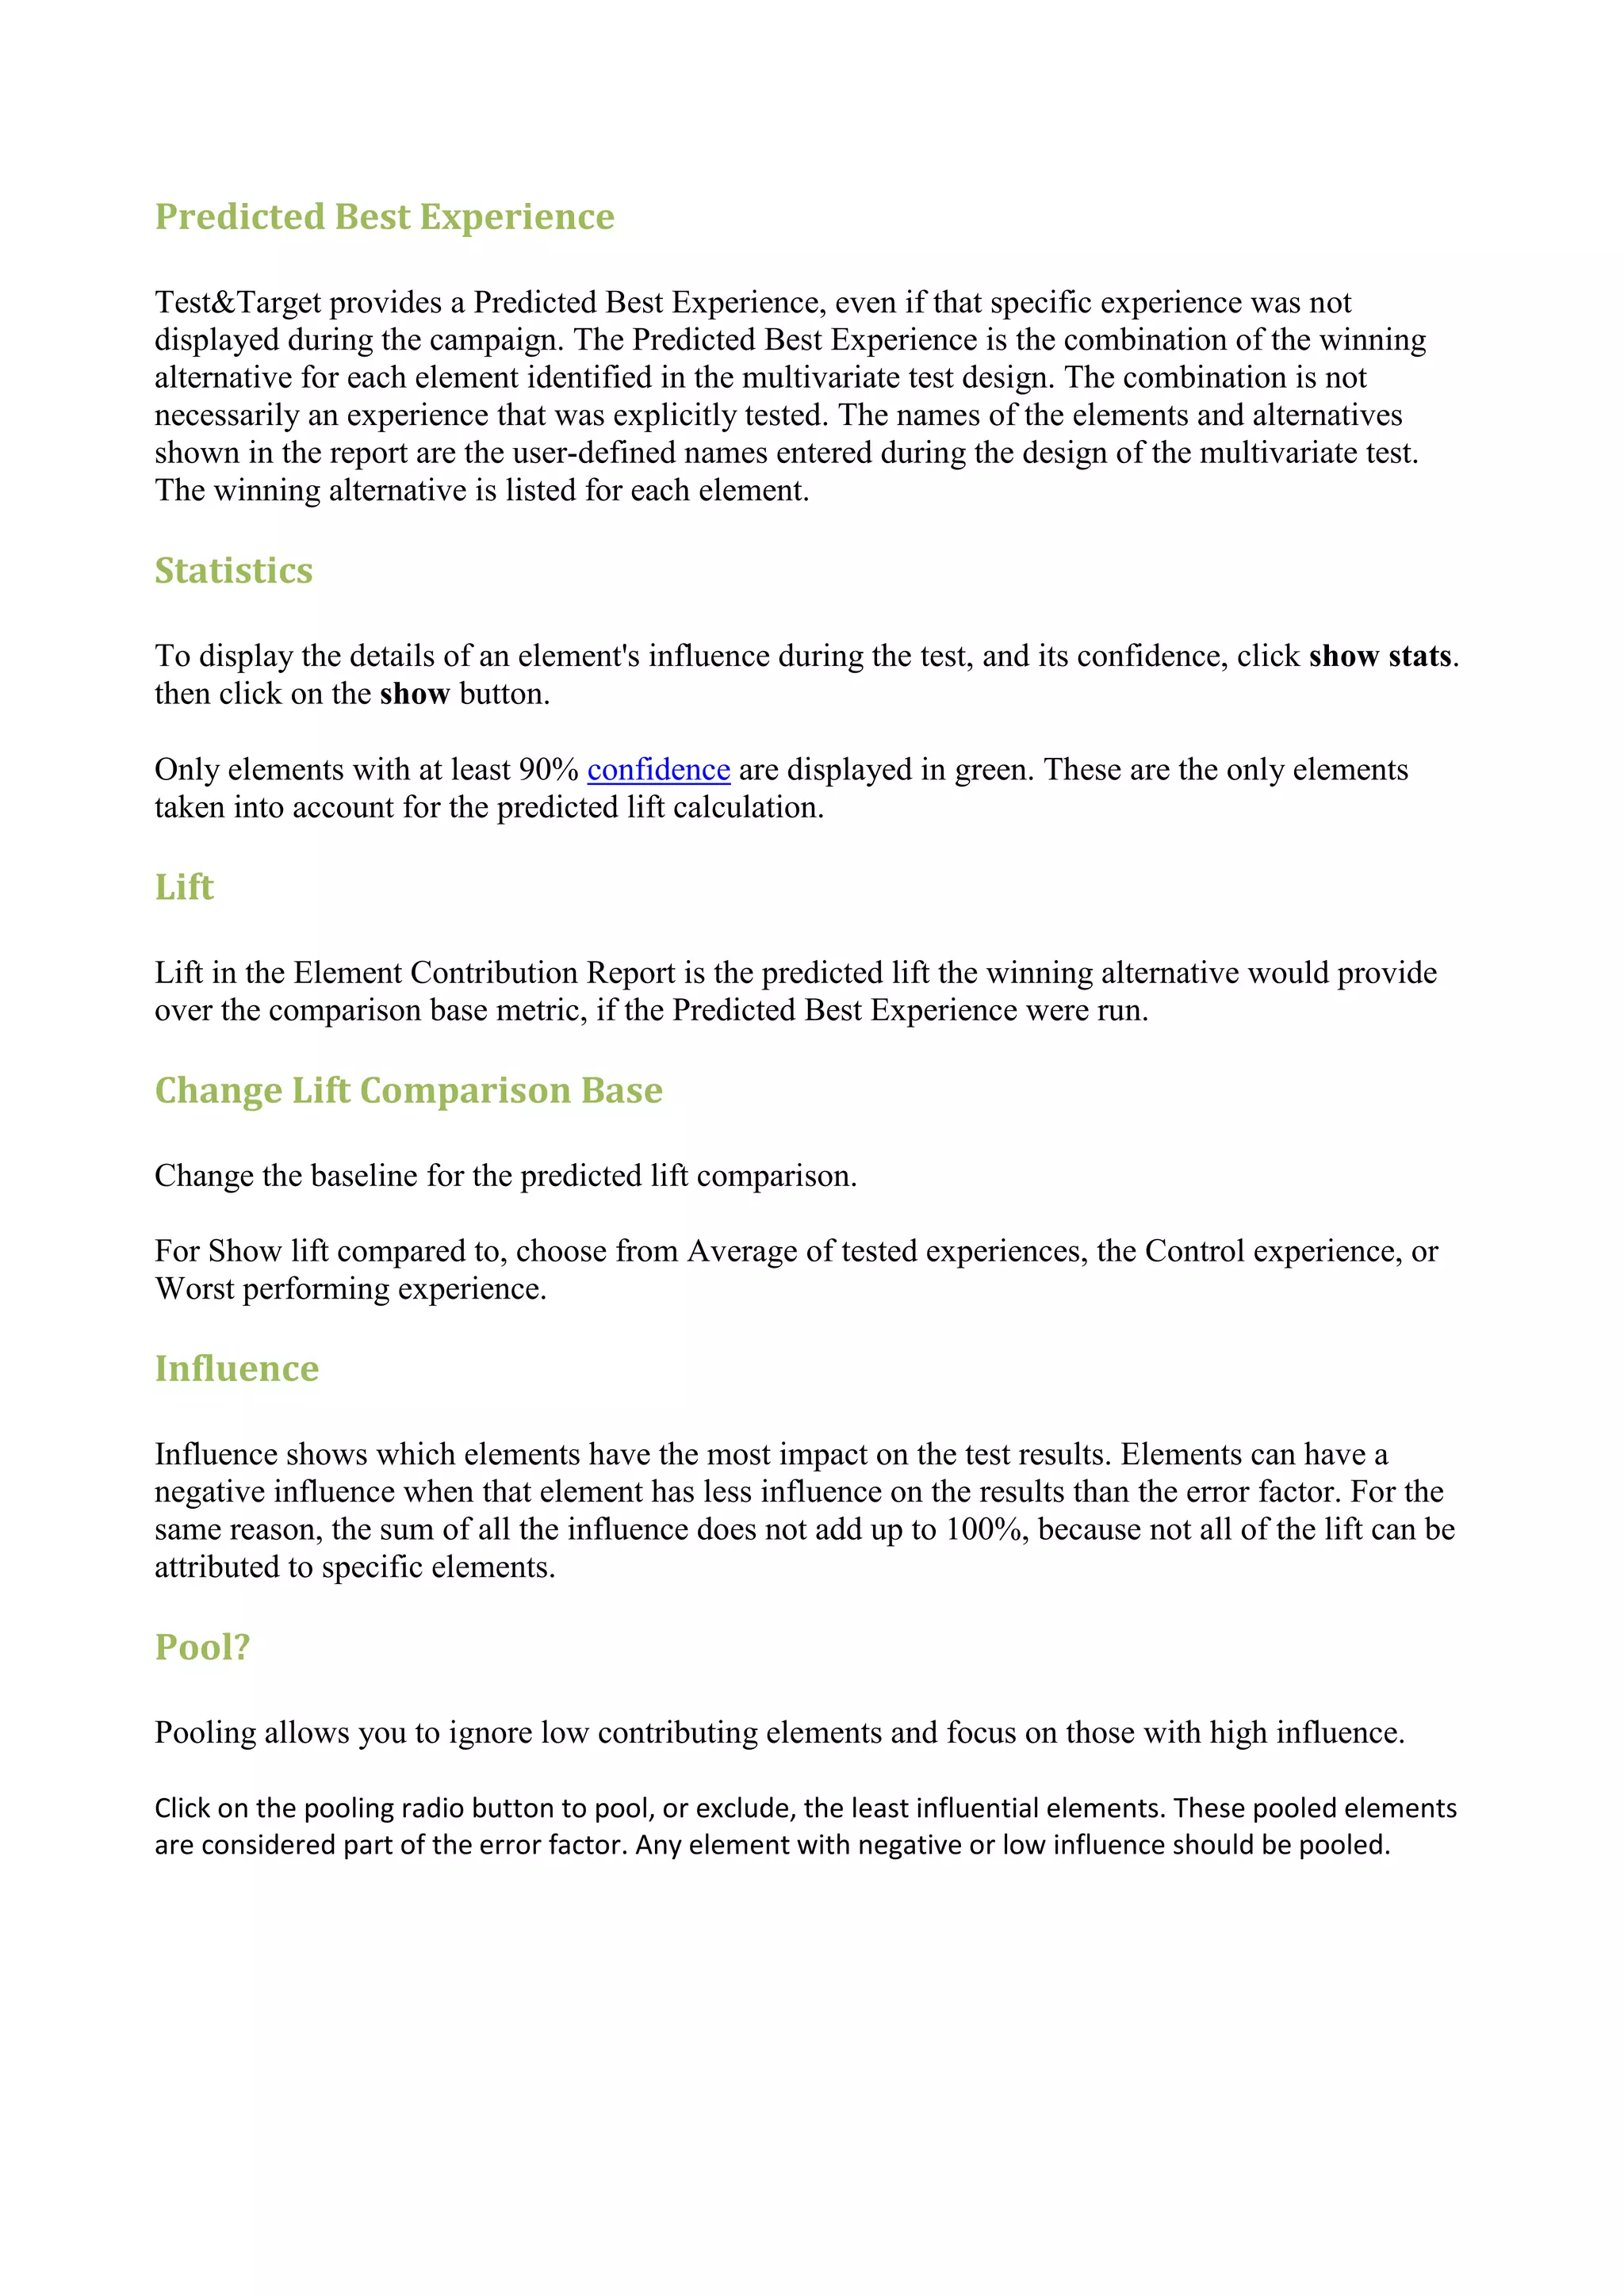
![Default Content
If the Test&Target server cannot be contacted for some reason (very rare) or if your Display
Campaign is deactivated while your tags are live on the web, your ad needs to be able to serve up
default content. This is accomplished using the function below.
//Set the default XML property.
var myDefaultXML:String =
"<offer>n" +
" <sub_copy>FALL PREVIEW</sub_copy>n" +
" <show_women_image>image1</show_women_image>n" +
" <landing_page>http://www.jjesquire.com</landing_page>n" +
"</offer>";
myFlashbox.defaultXML = new XML(myDefaultXML);
Dynamic Creative
Your FLA defines a XML schema that represents the customizable attributes in the ad. Test&Target
reads this schema when you upload your FLA. It then allows you to define variants. Test&Target
matches the visitor to the appropriate variant and returns that to the ad for rendering.
// Define a function that will be used to consume the XML returned from Test&Target.
function renderDisplayAd(xmlResponse:XML) {
var _xmlOffer:XMLNode = xmlResponse.firstChild;
var _subCopy:String = _xmlOffer.childNodes[0].childNodes[0].nodeValue.toString();
subCopy._visible = true;
subCopy.text = _subCopy;
Registering Clicks
Test&Target reports on the number of impressions (via the flashbox) and conversions as part of the
campaign setup. To report on clicks and other success metrics, register another flashbox for the
click.](https://image.slidesharecdn.com/testandtargetbook-110620042031-phpapp02/75/Test-and-target-book-182-2048.jpg)
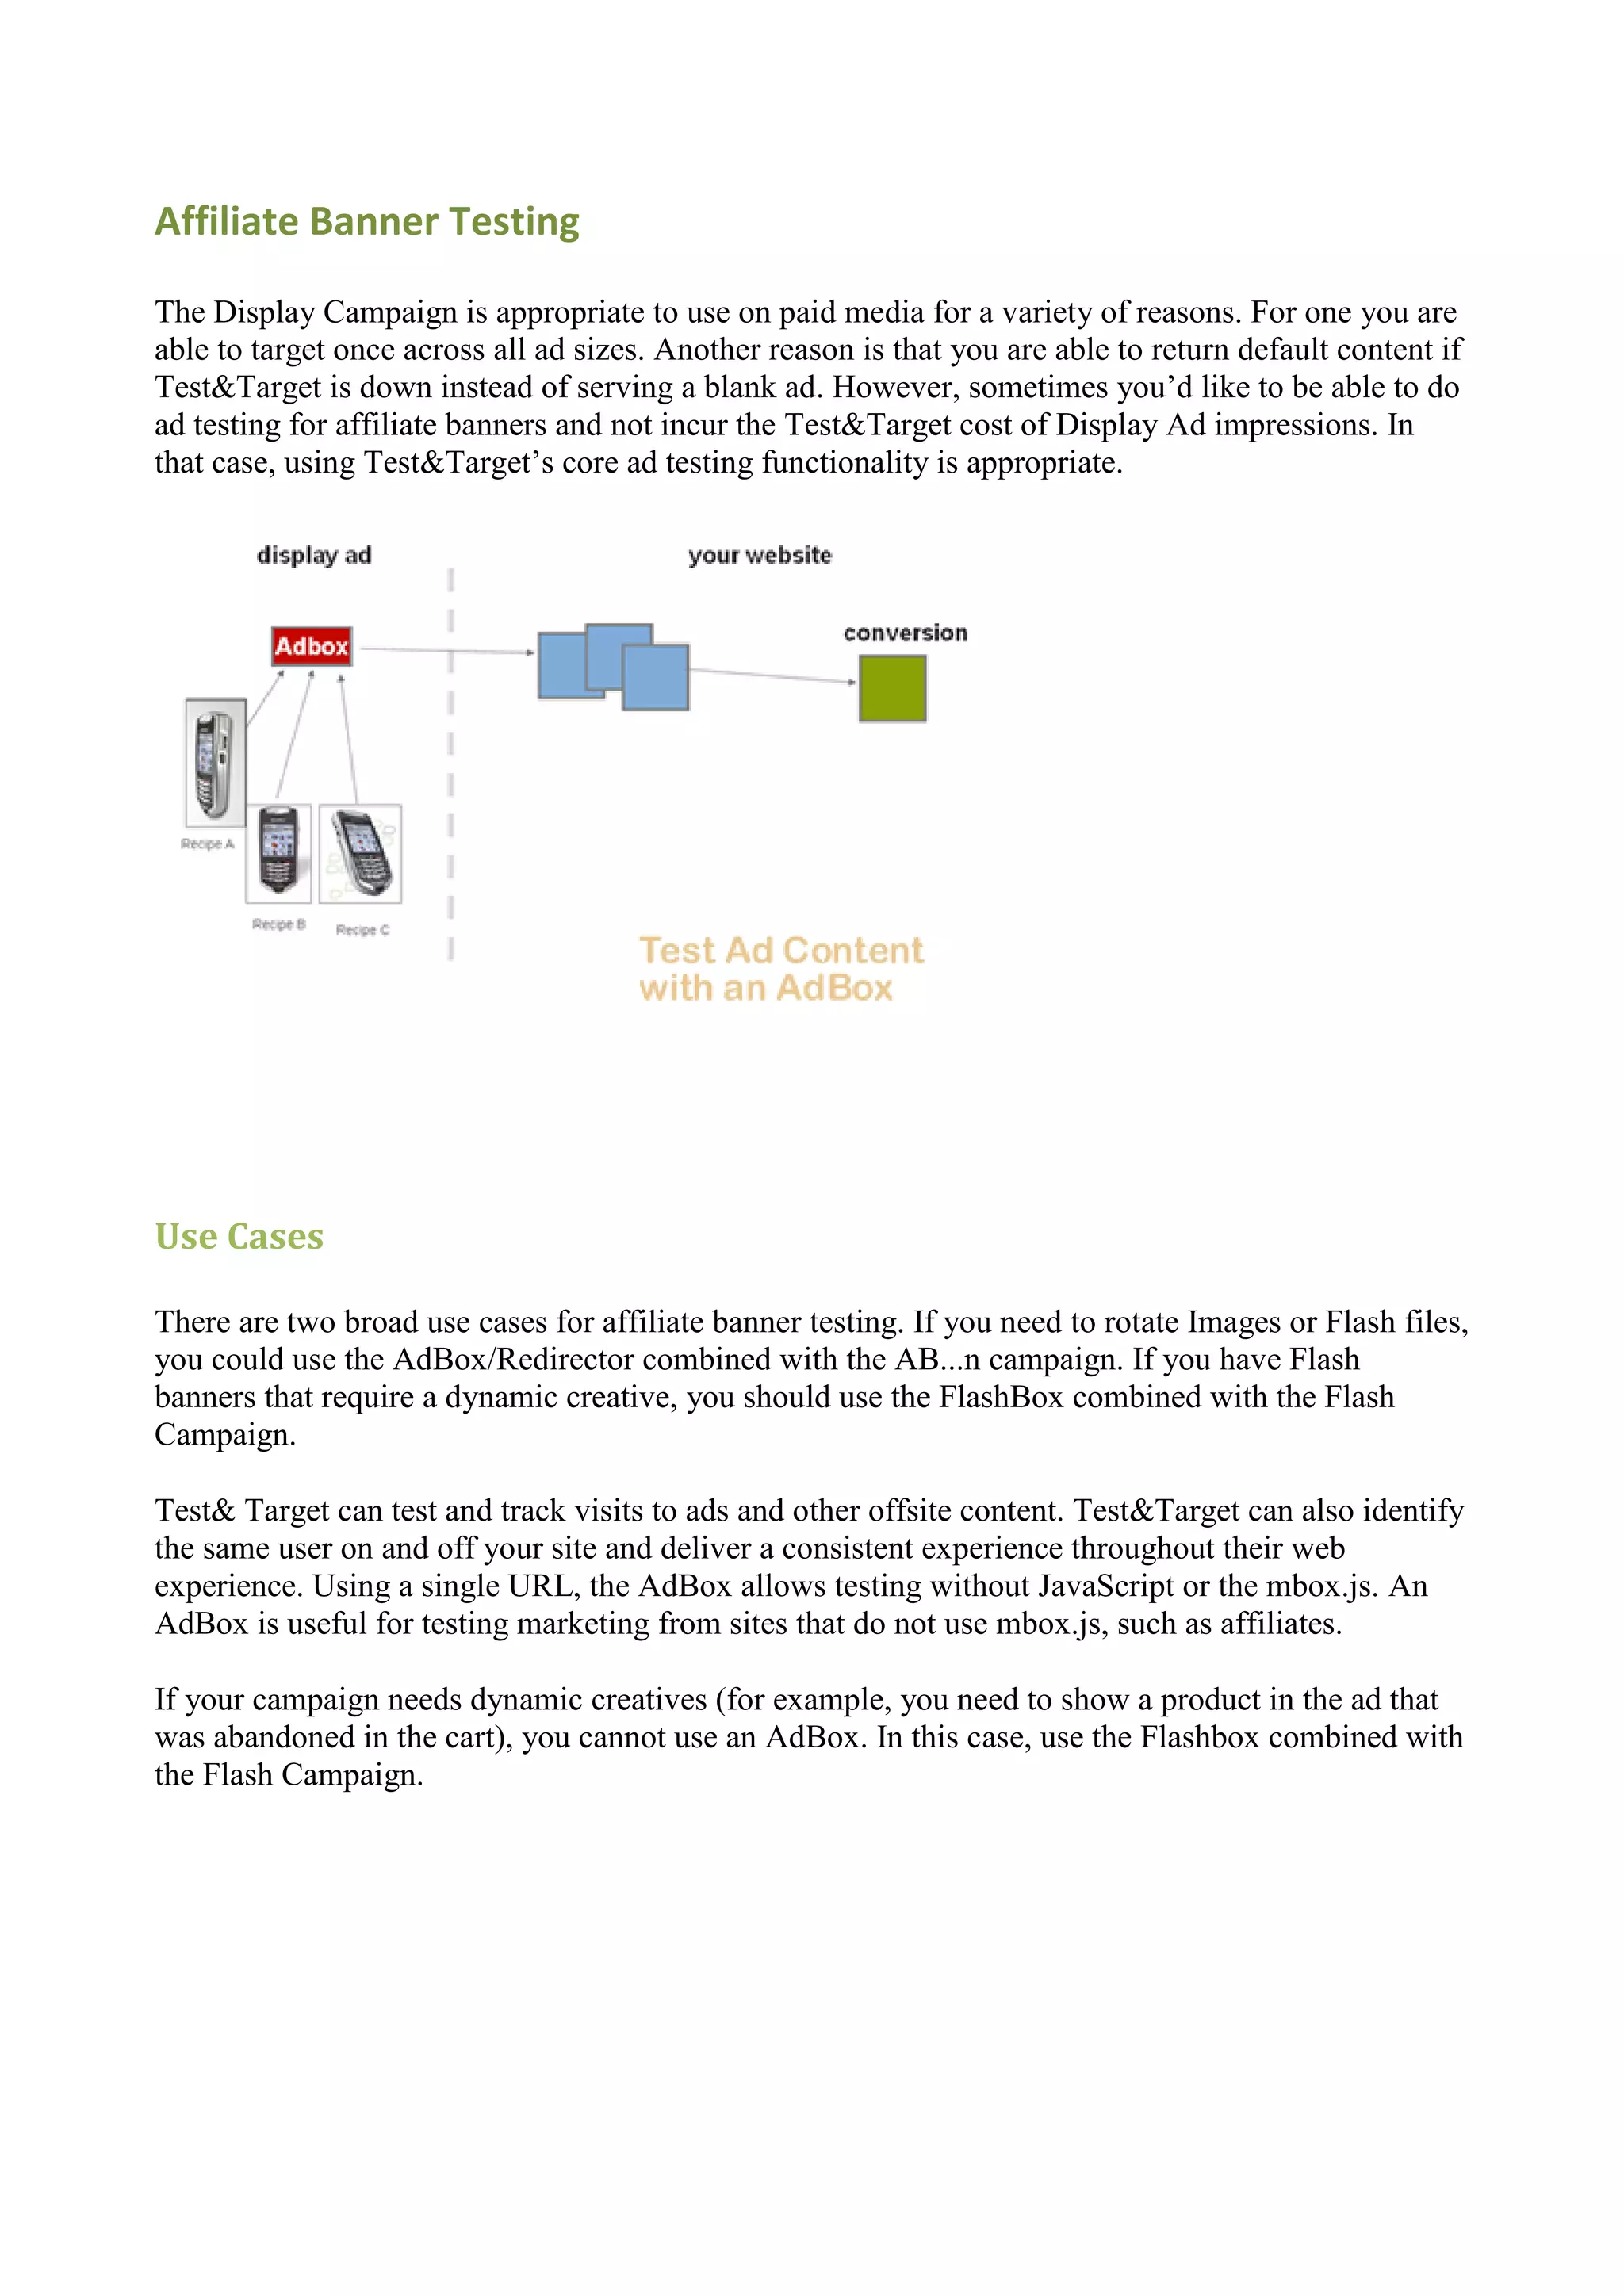

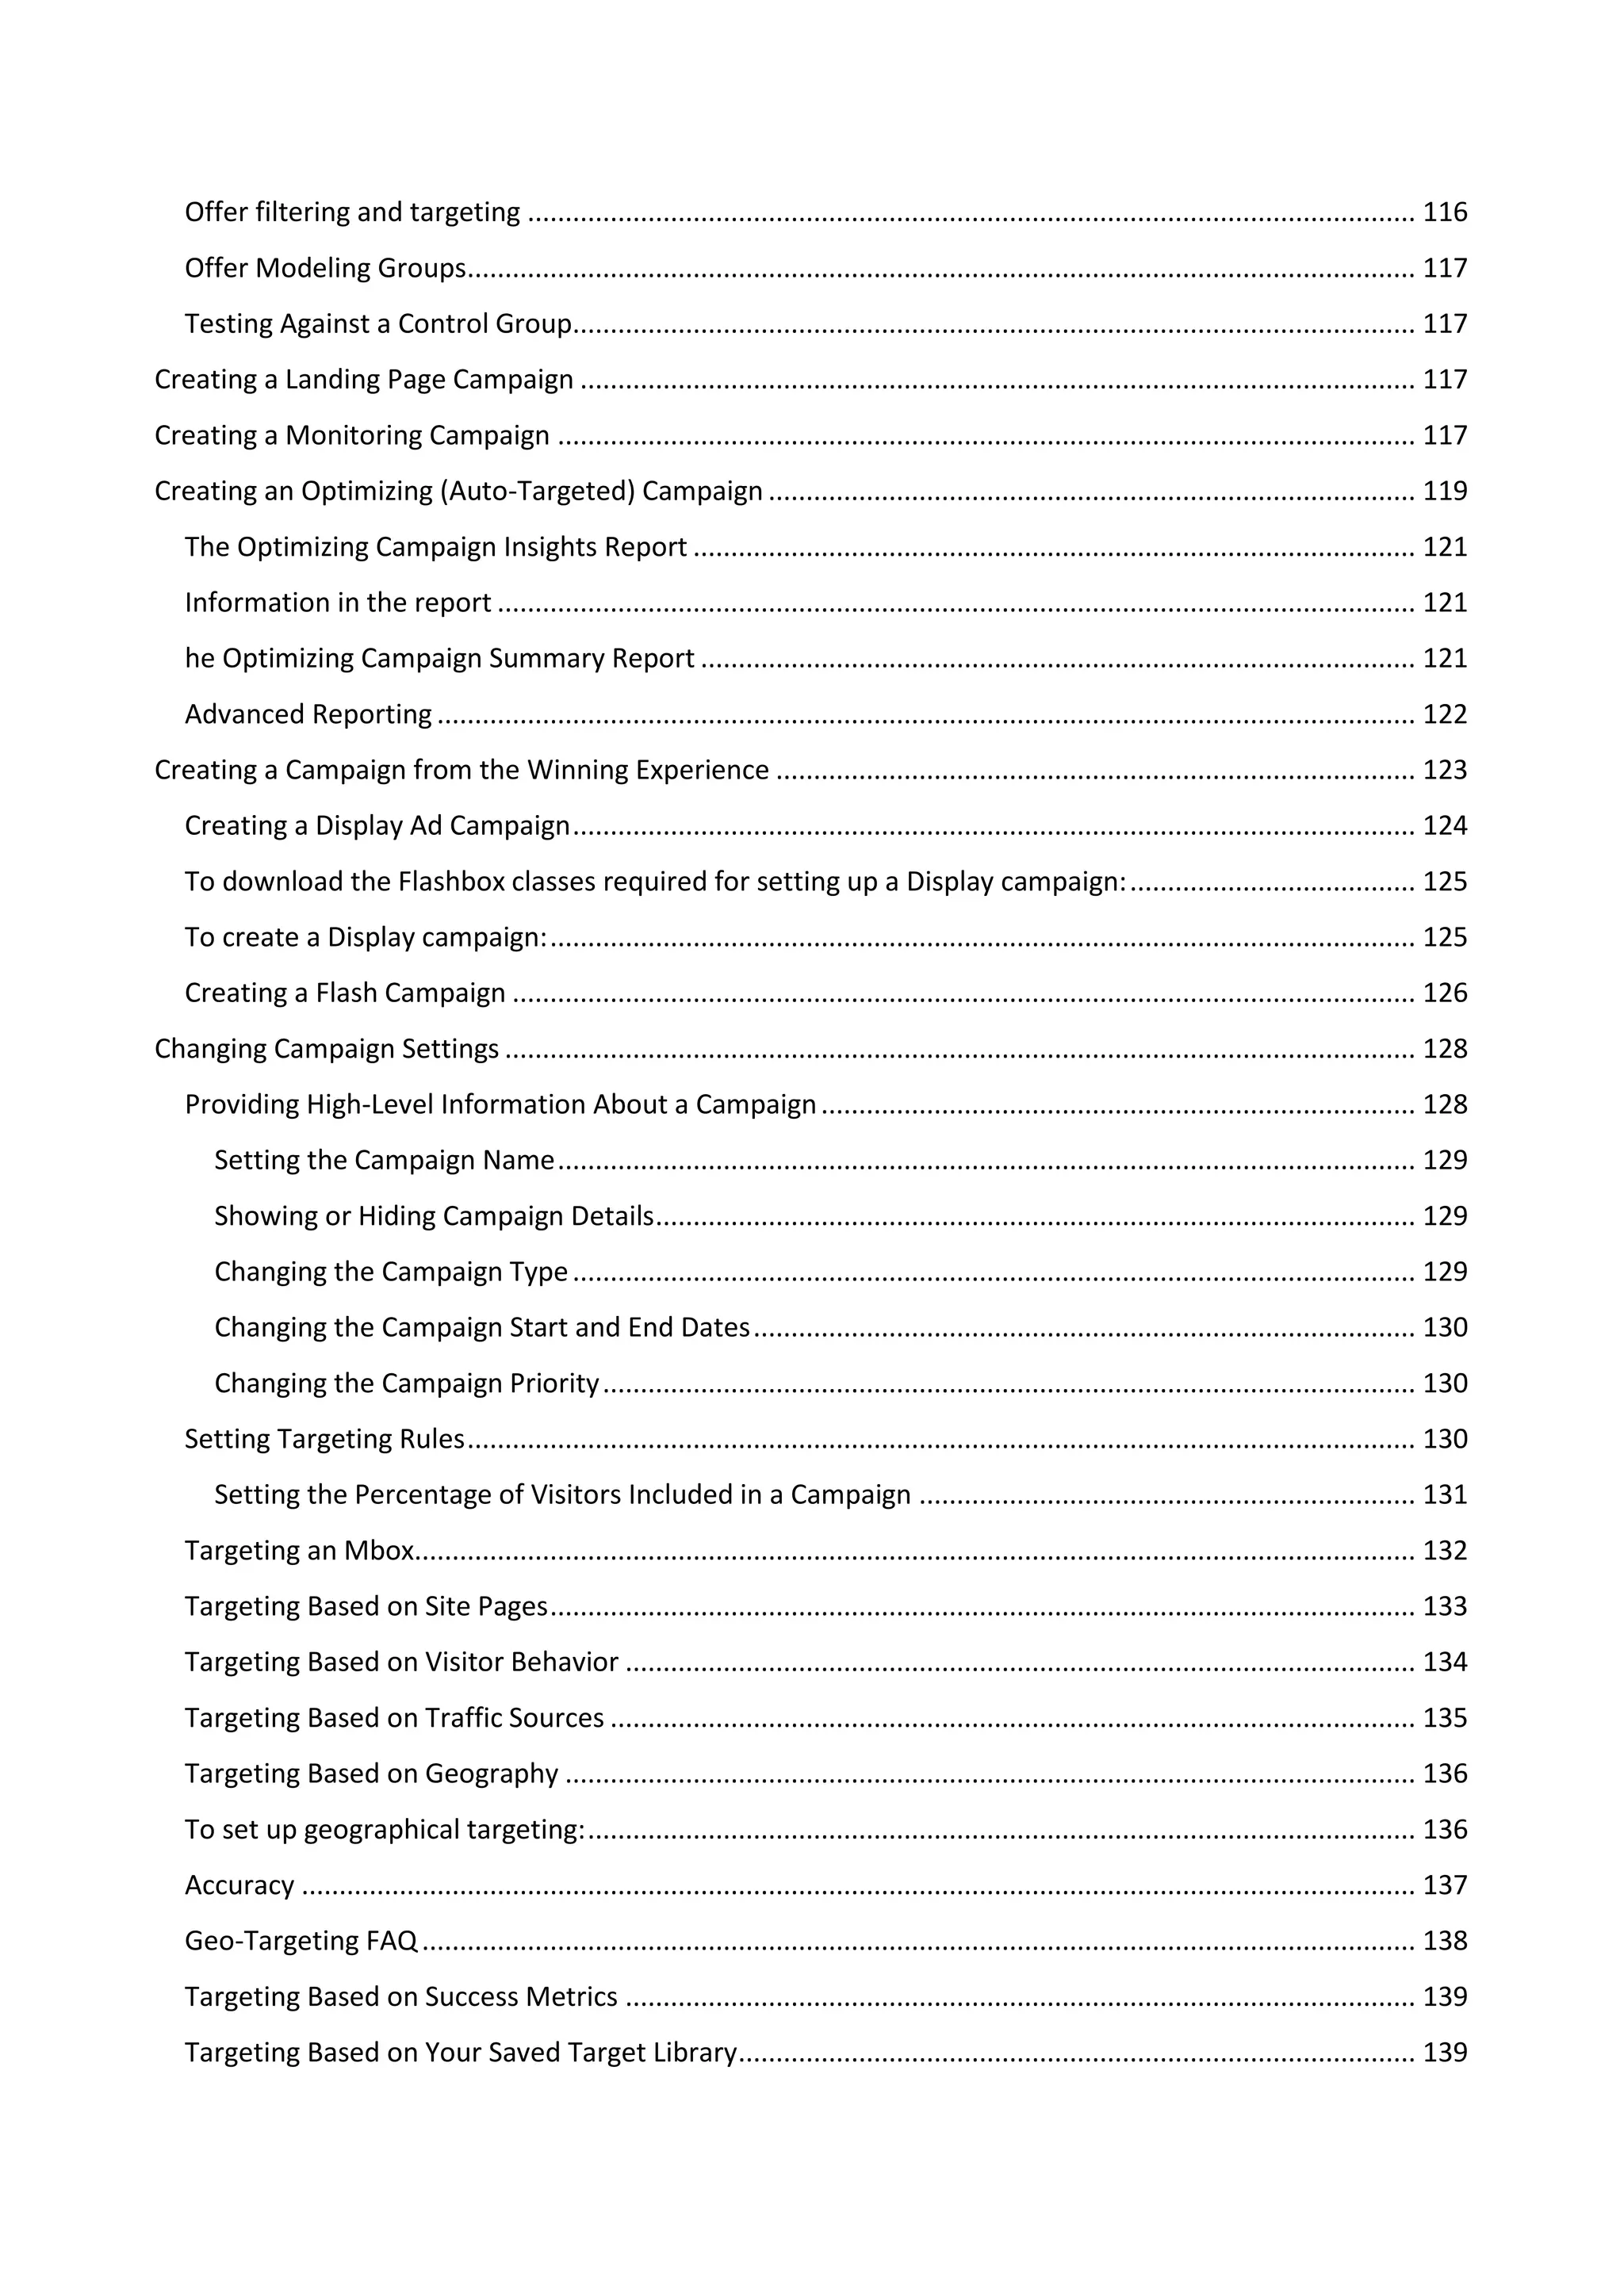
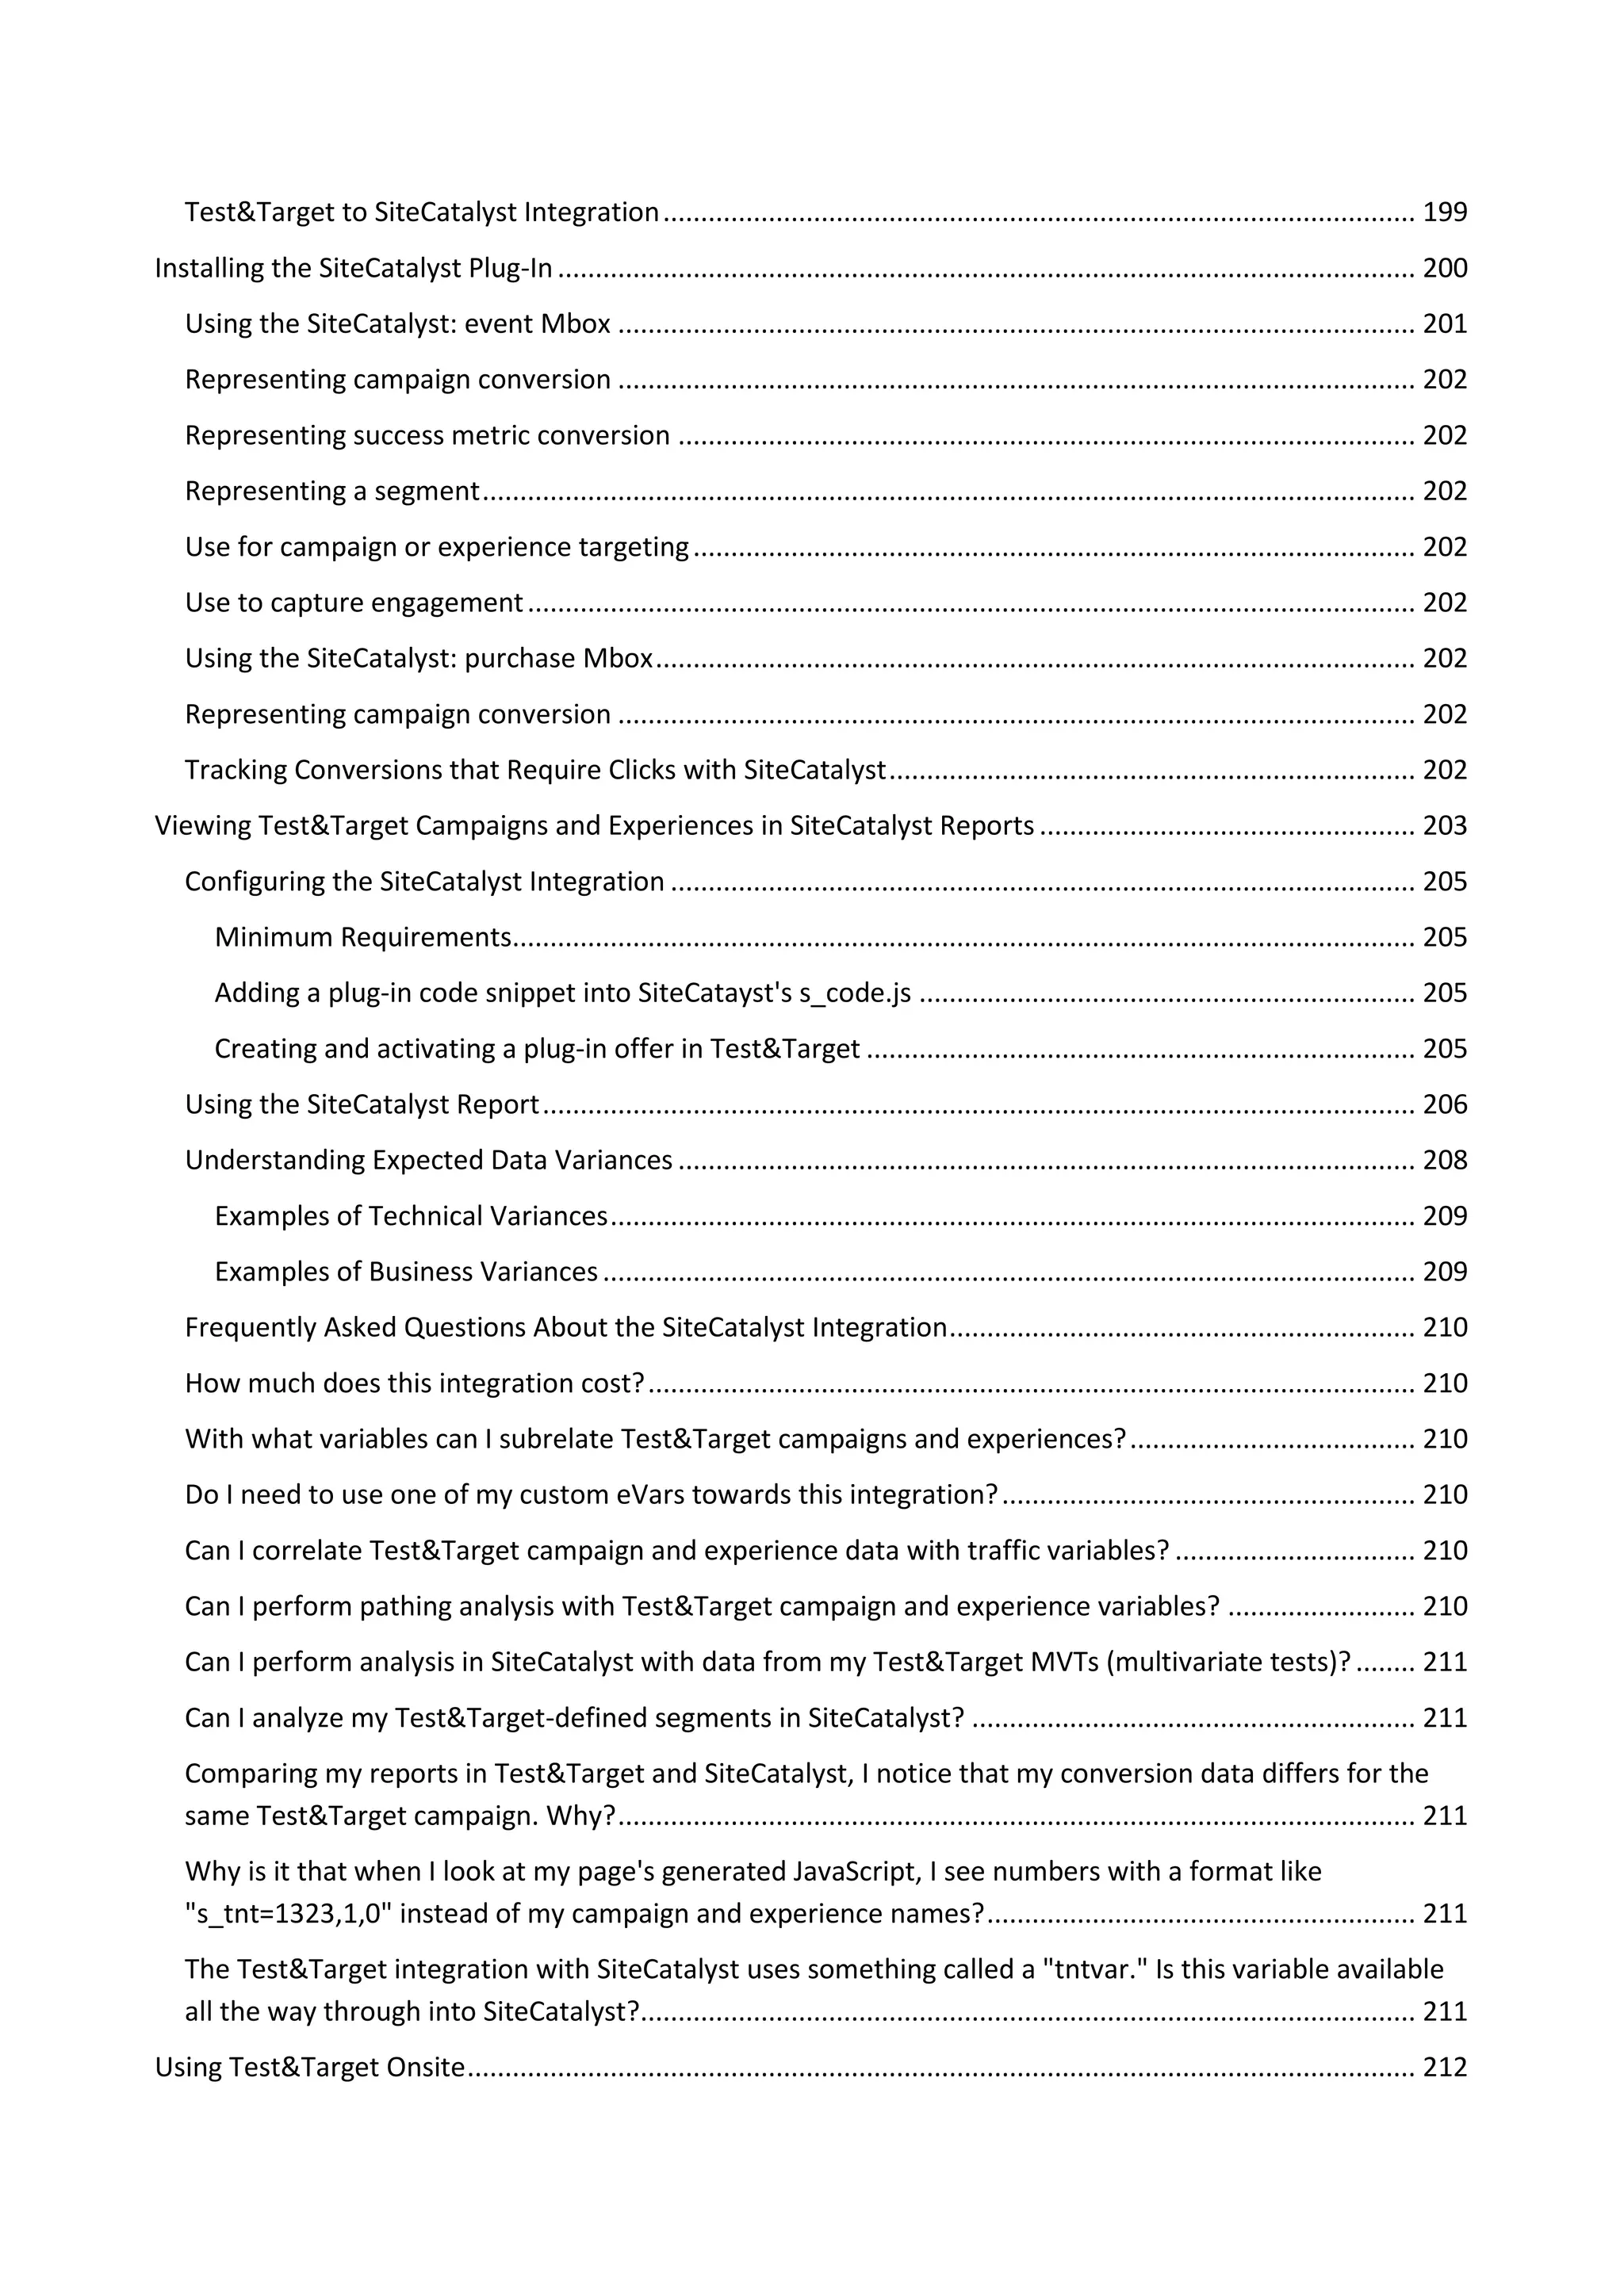
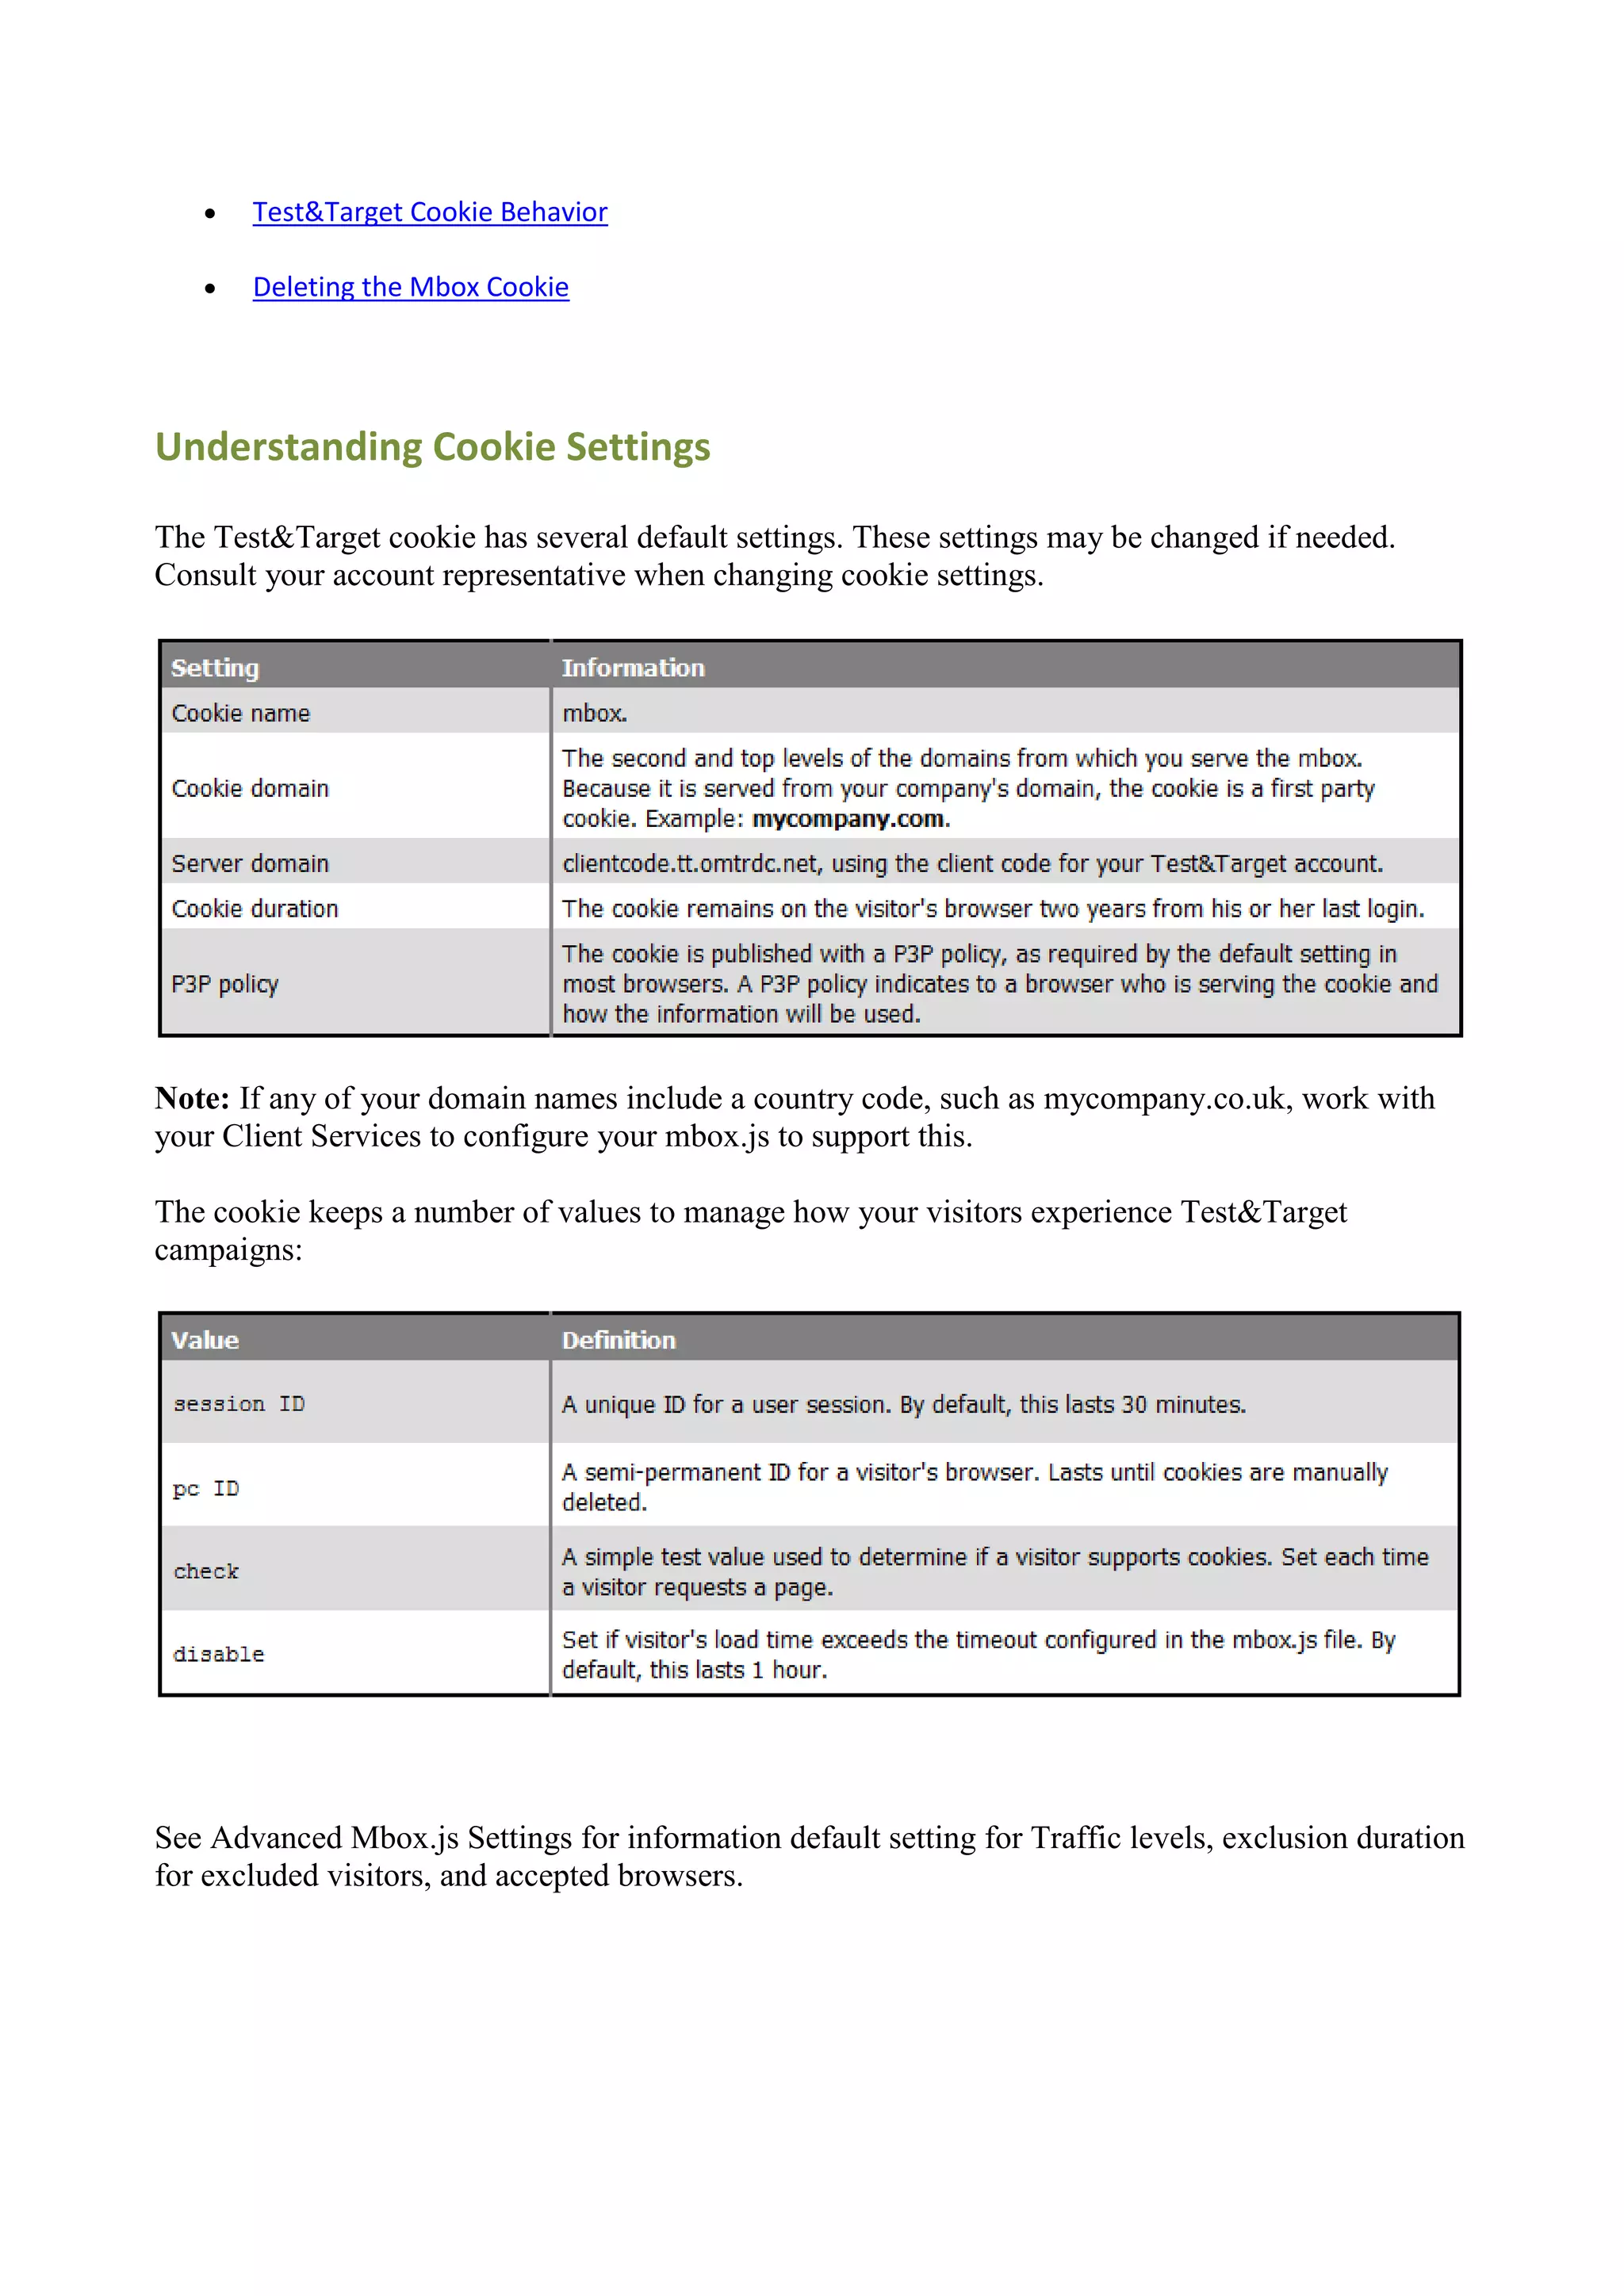
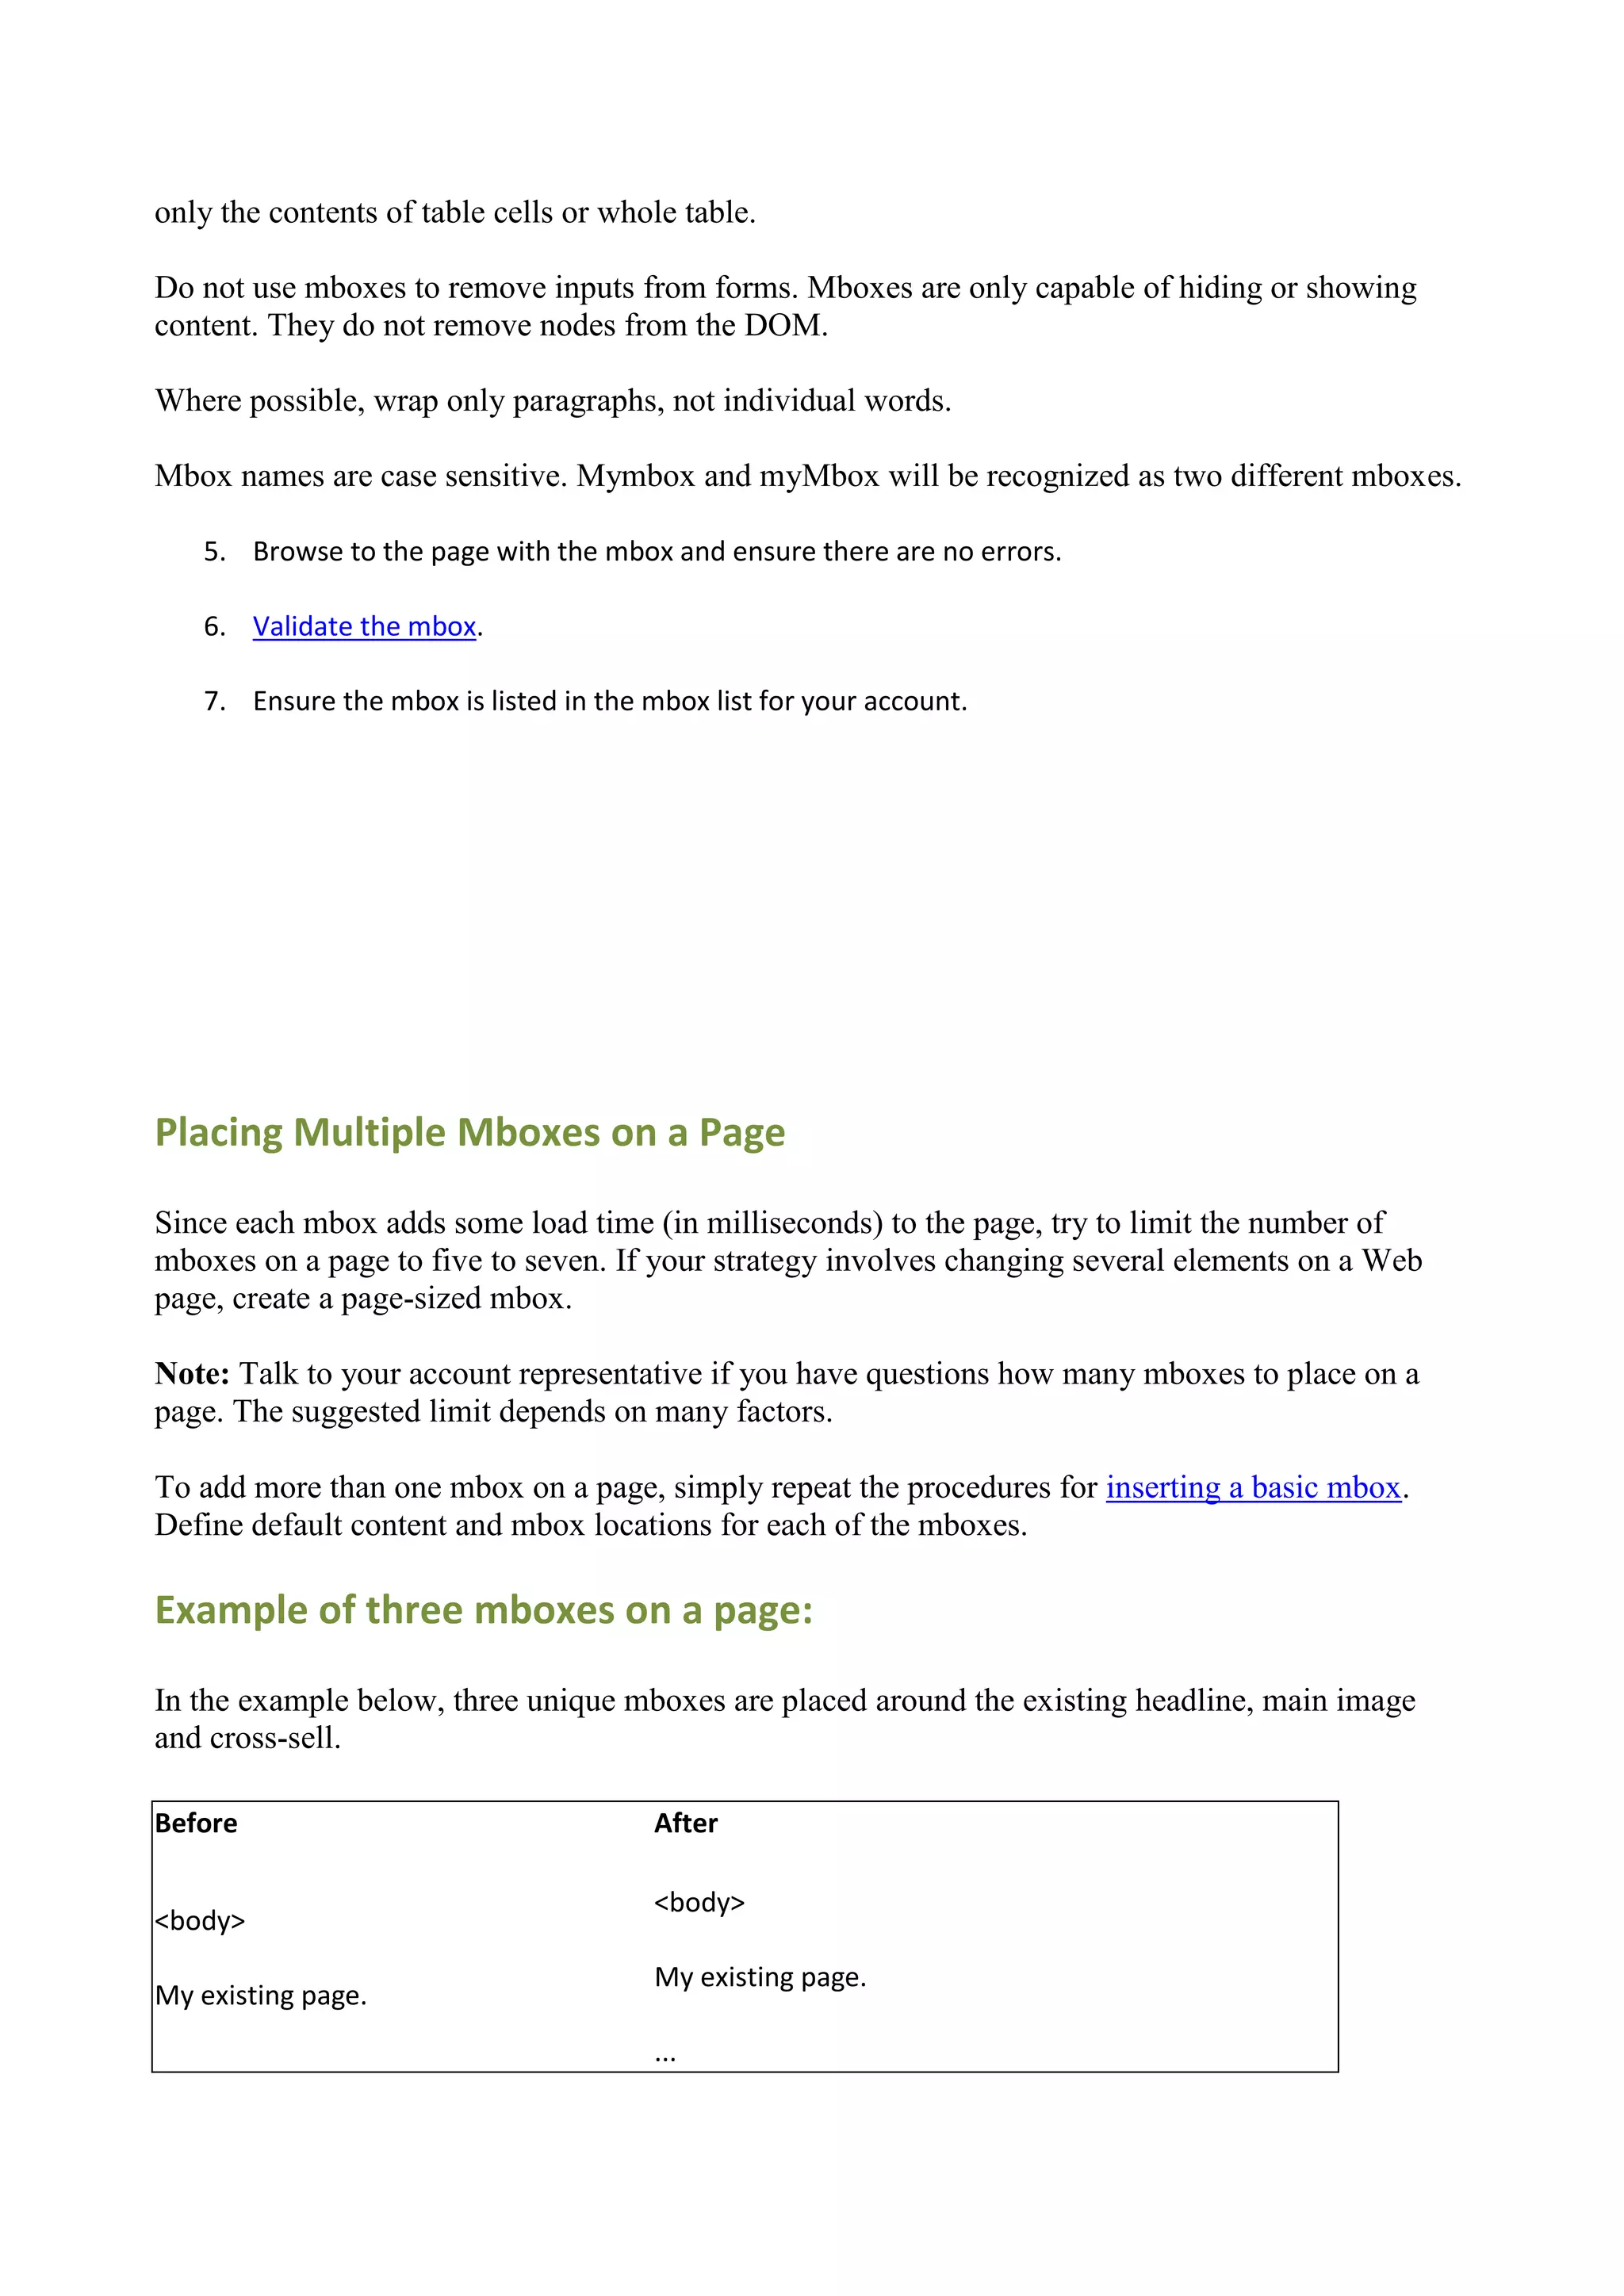
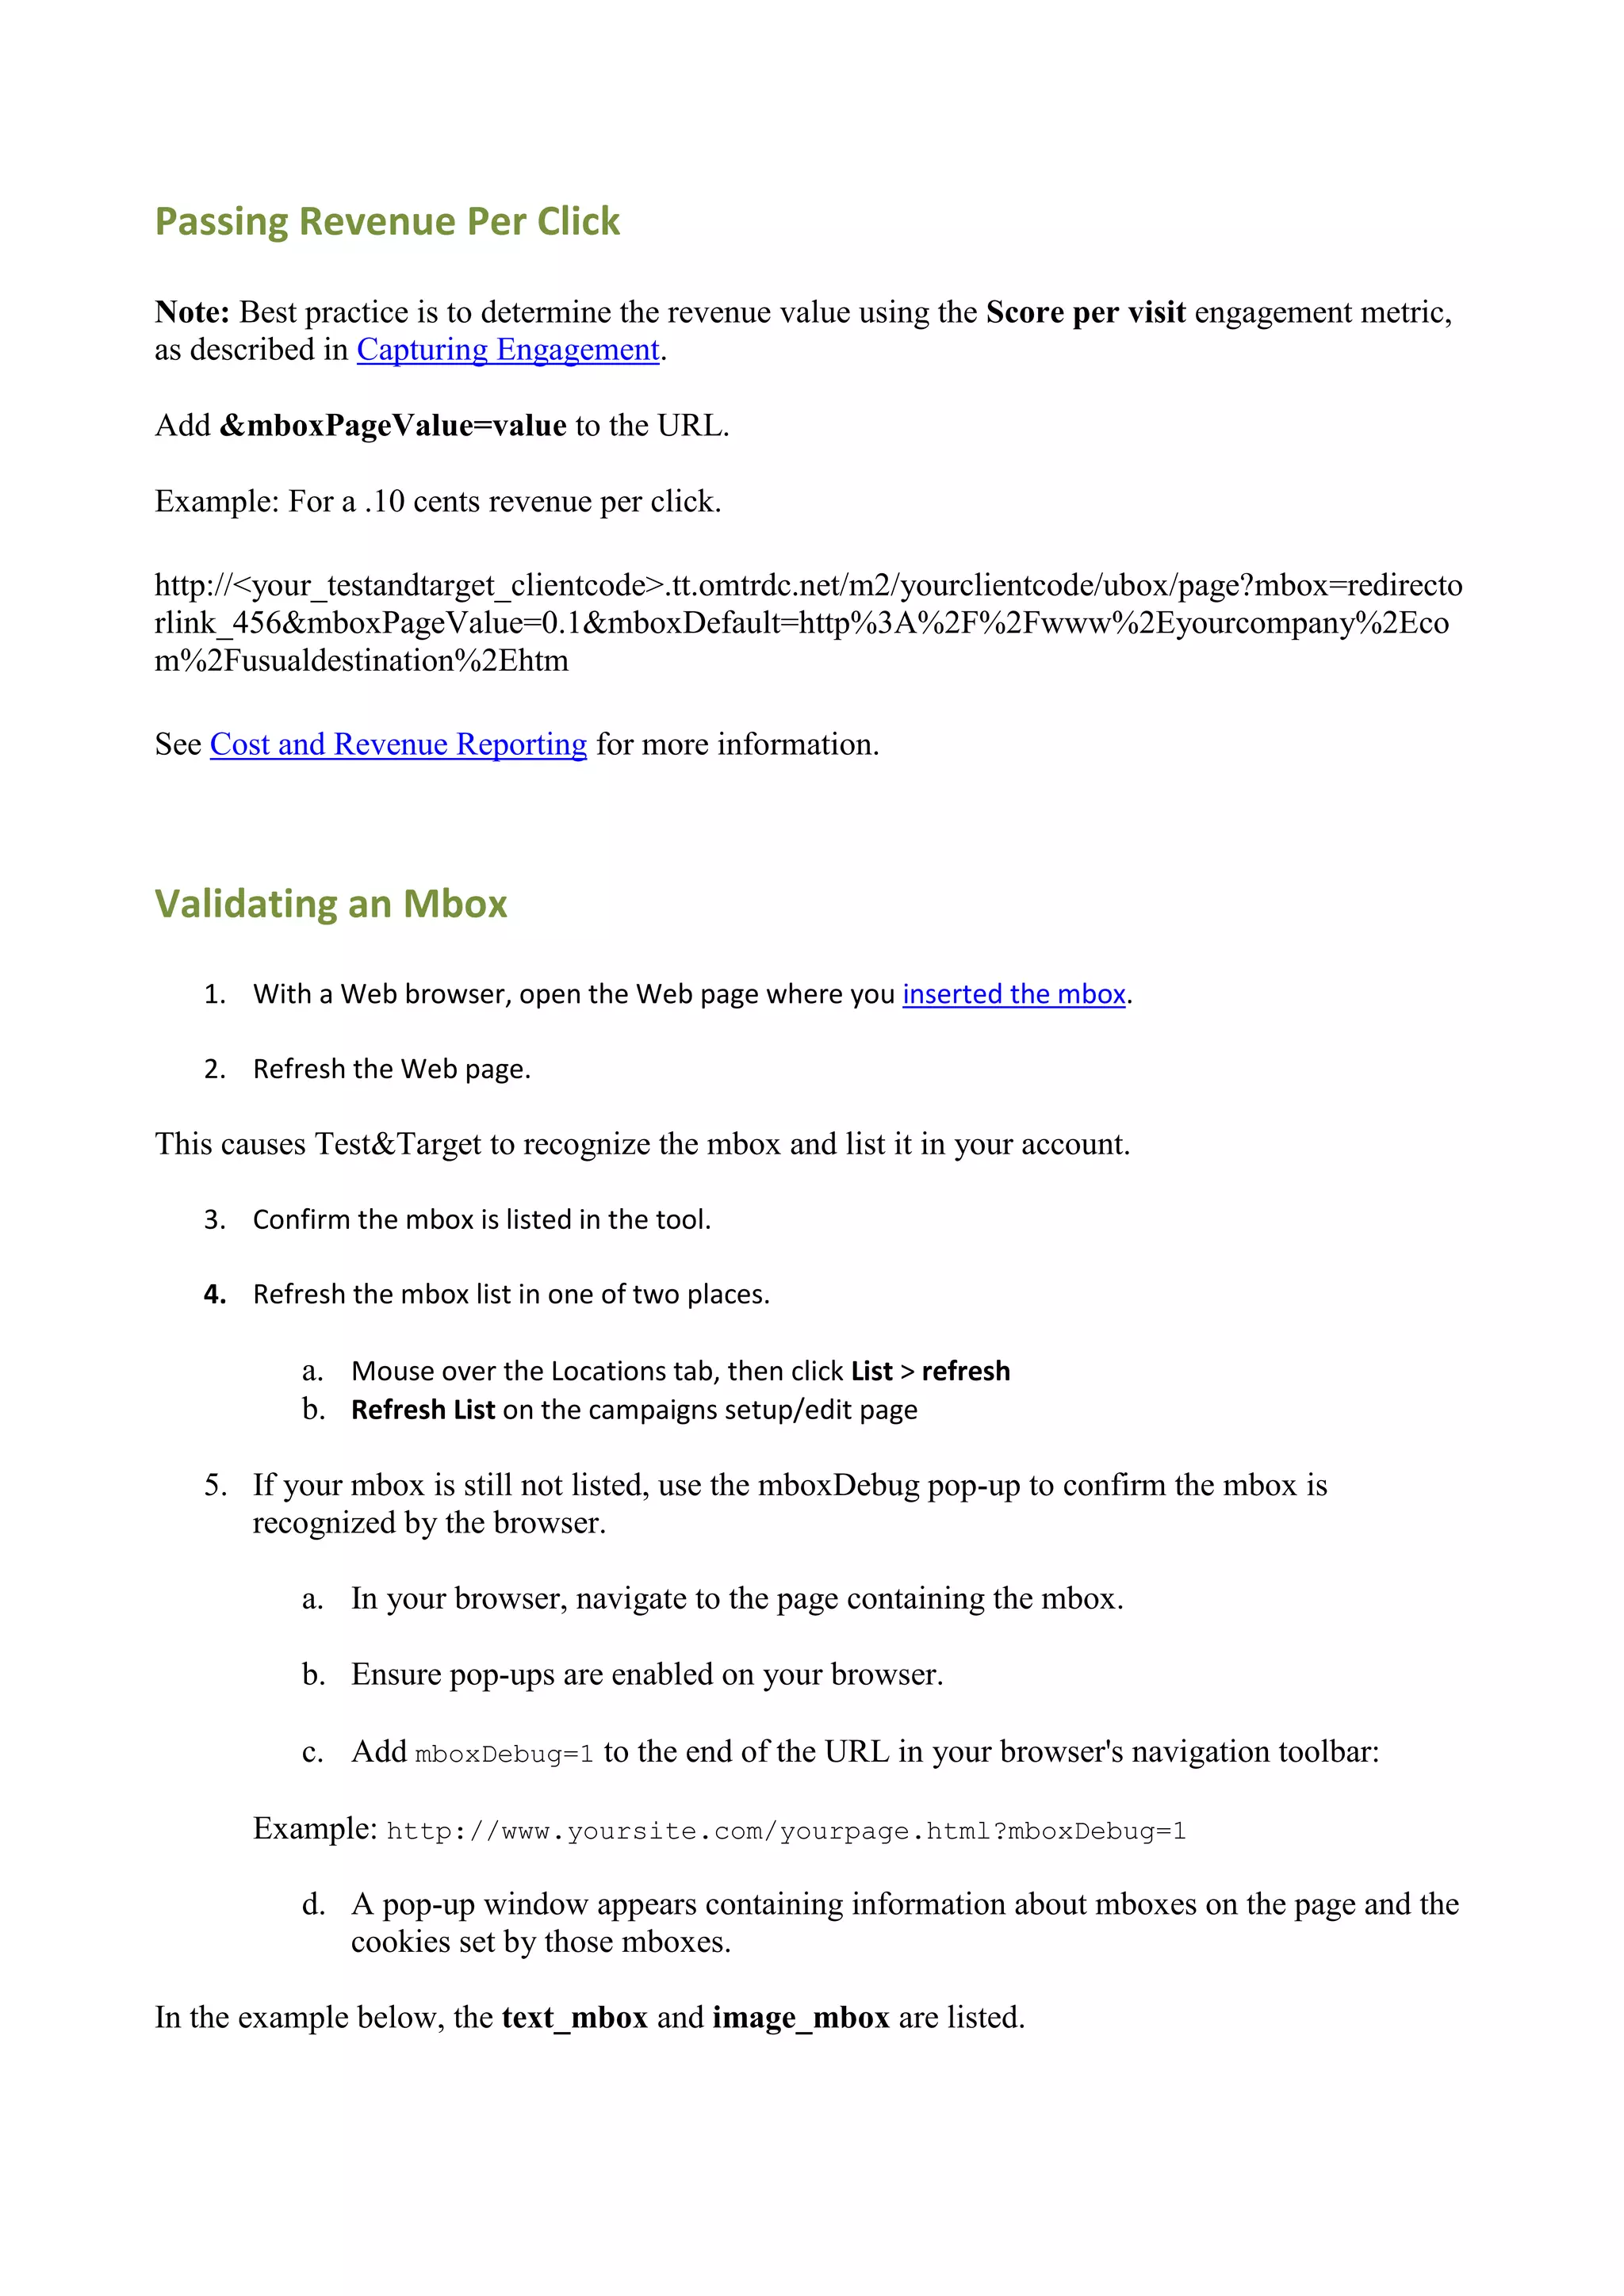
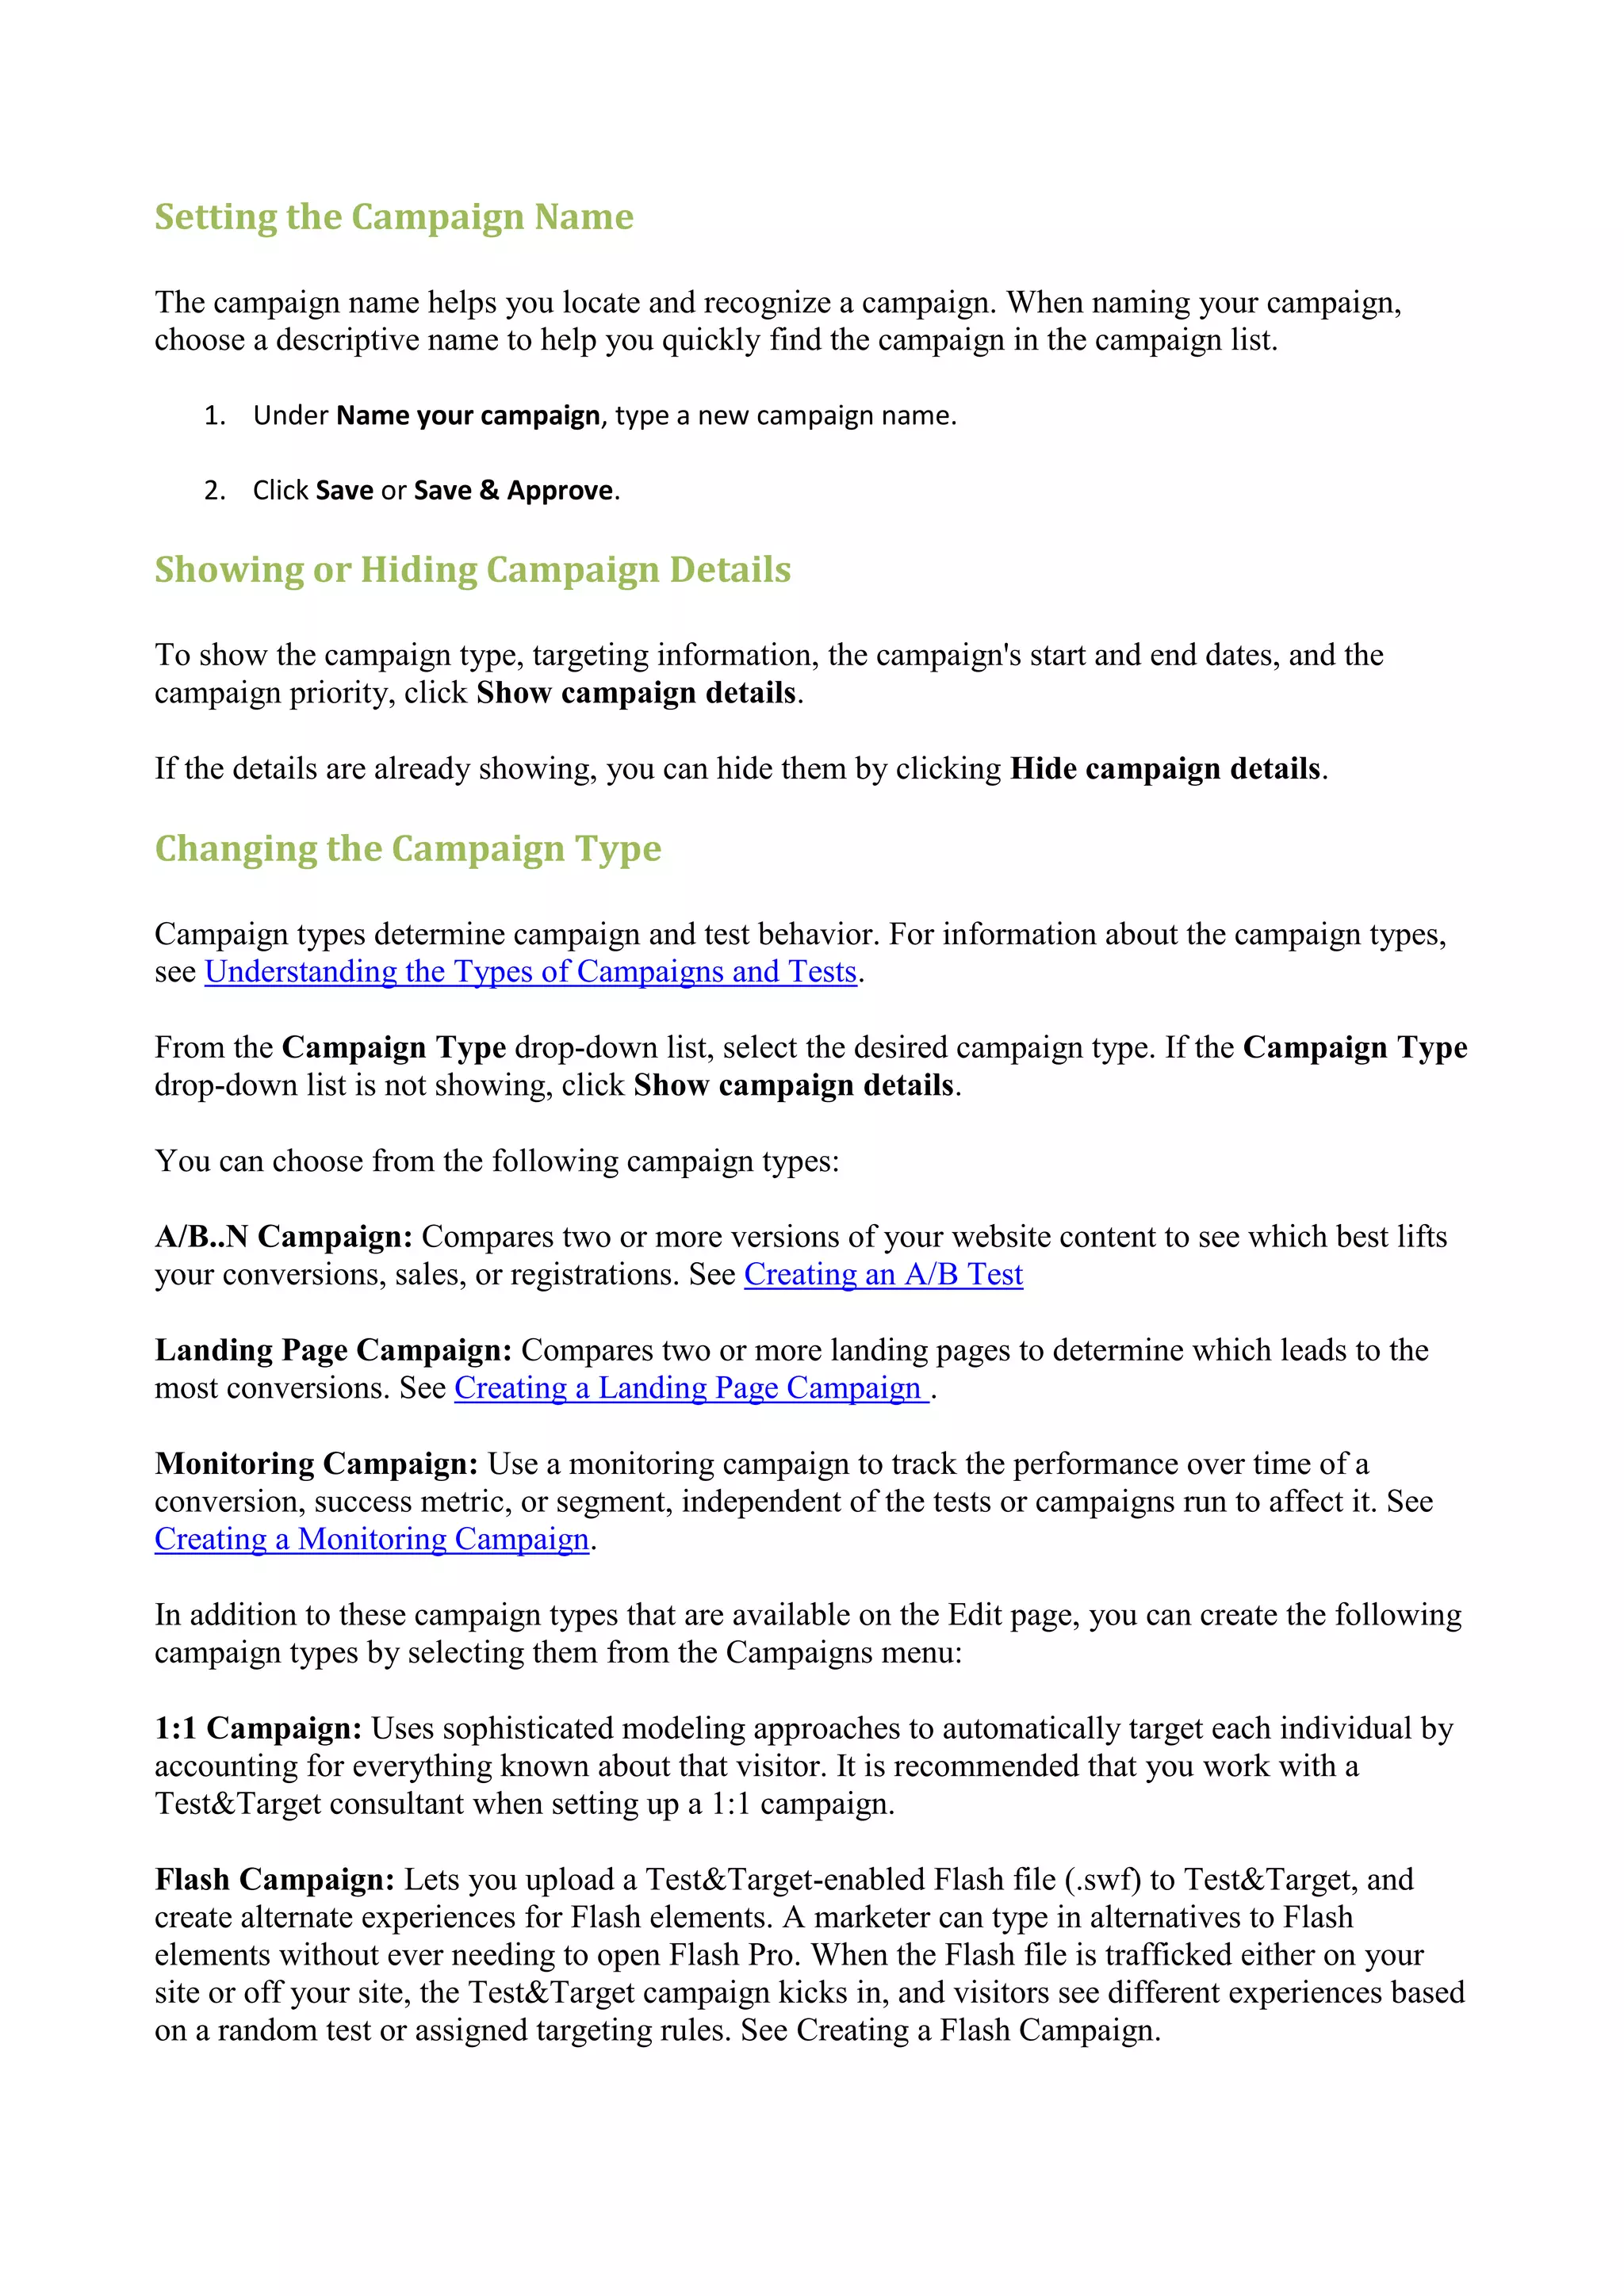
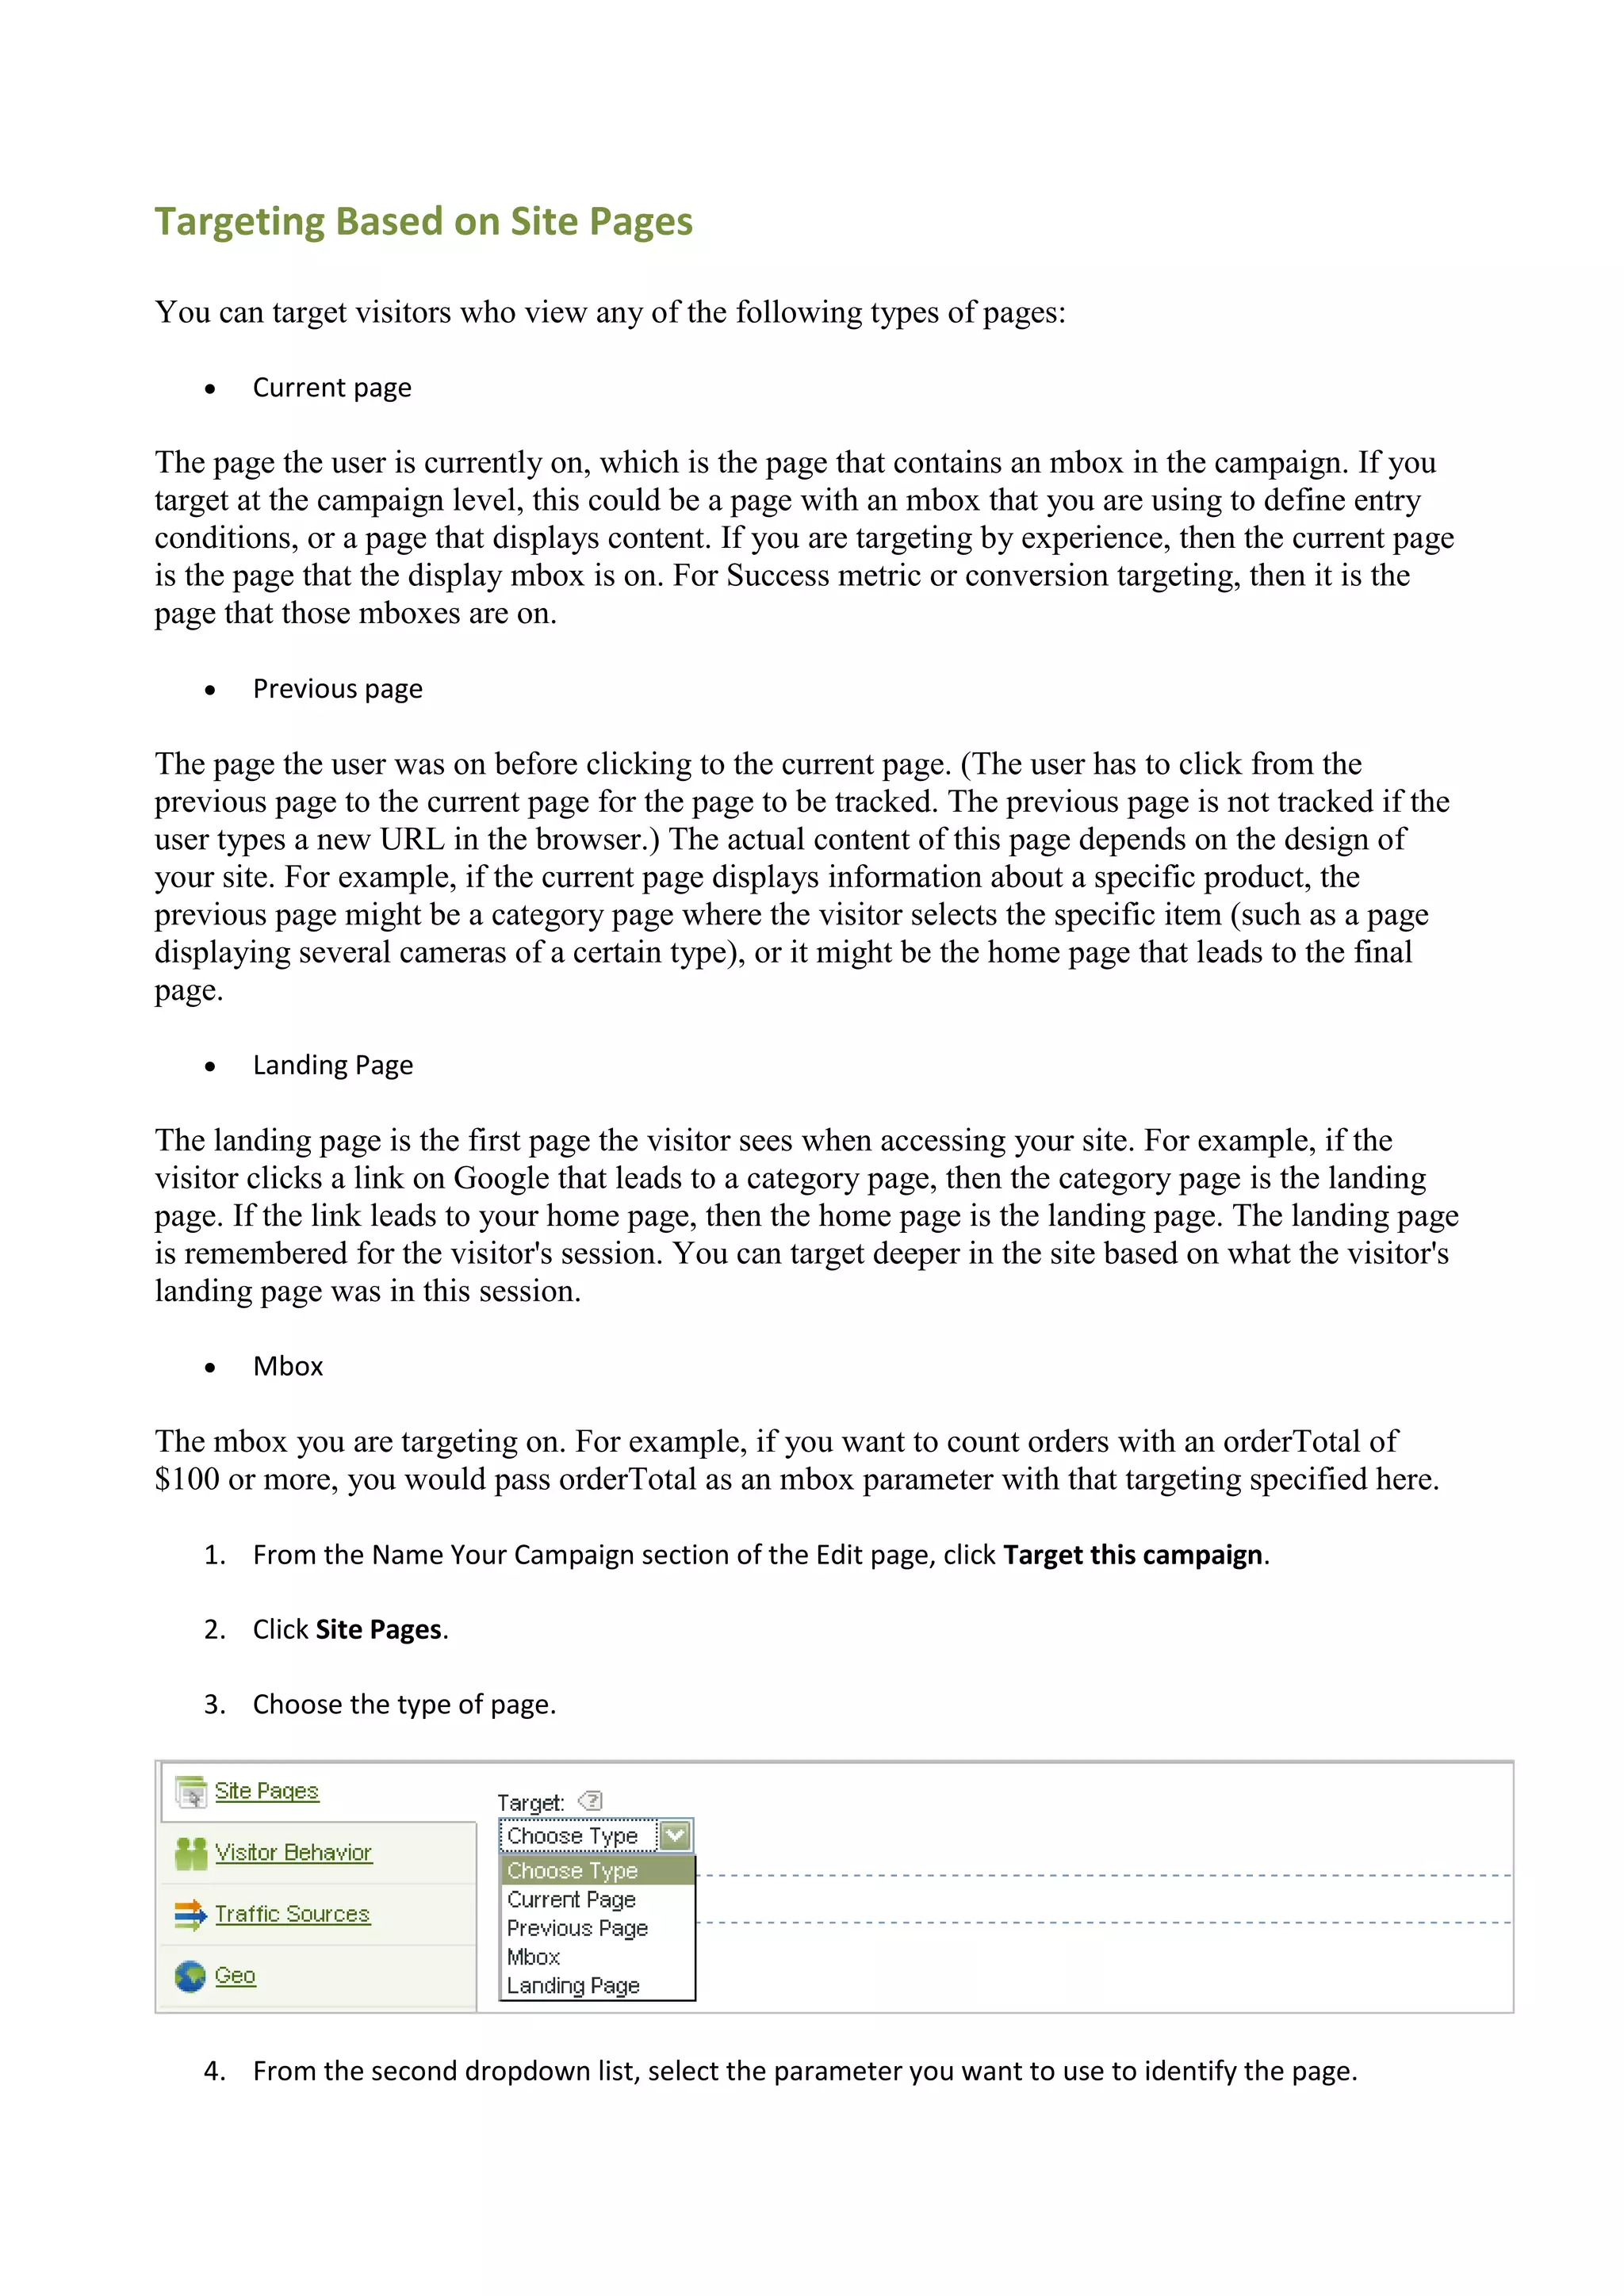
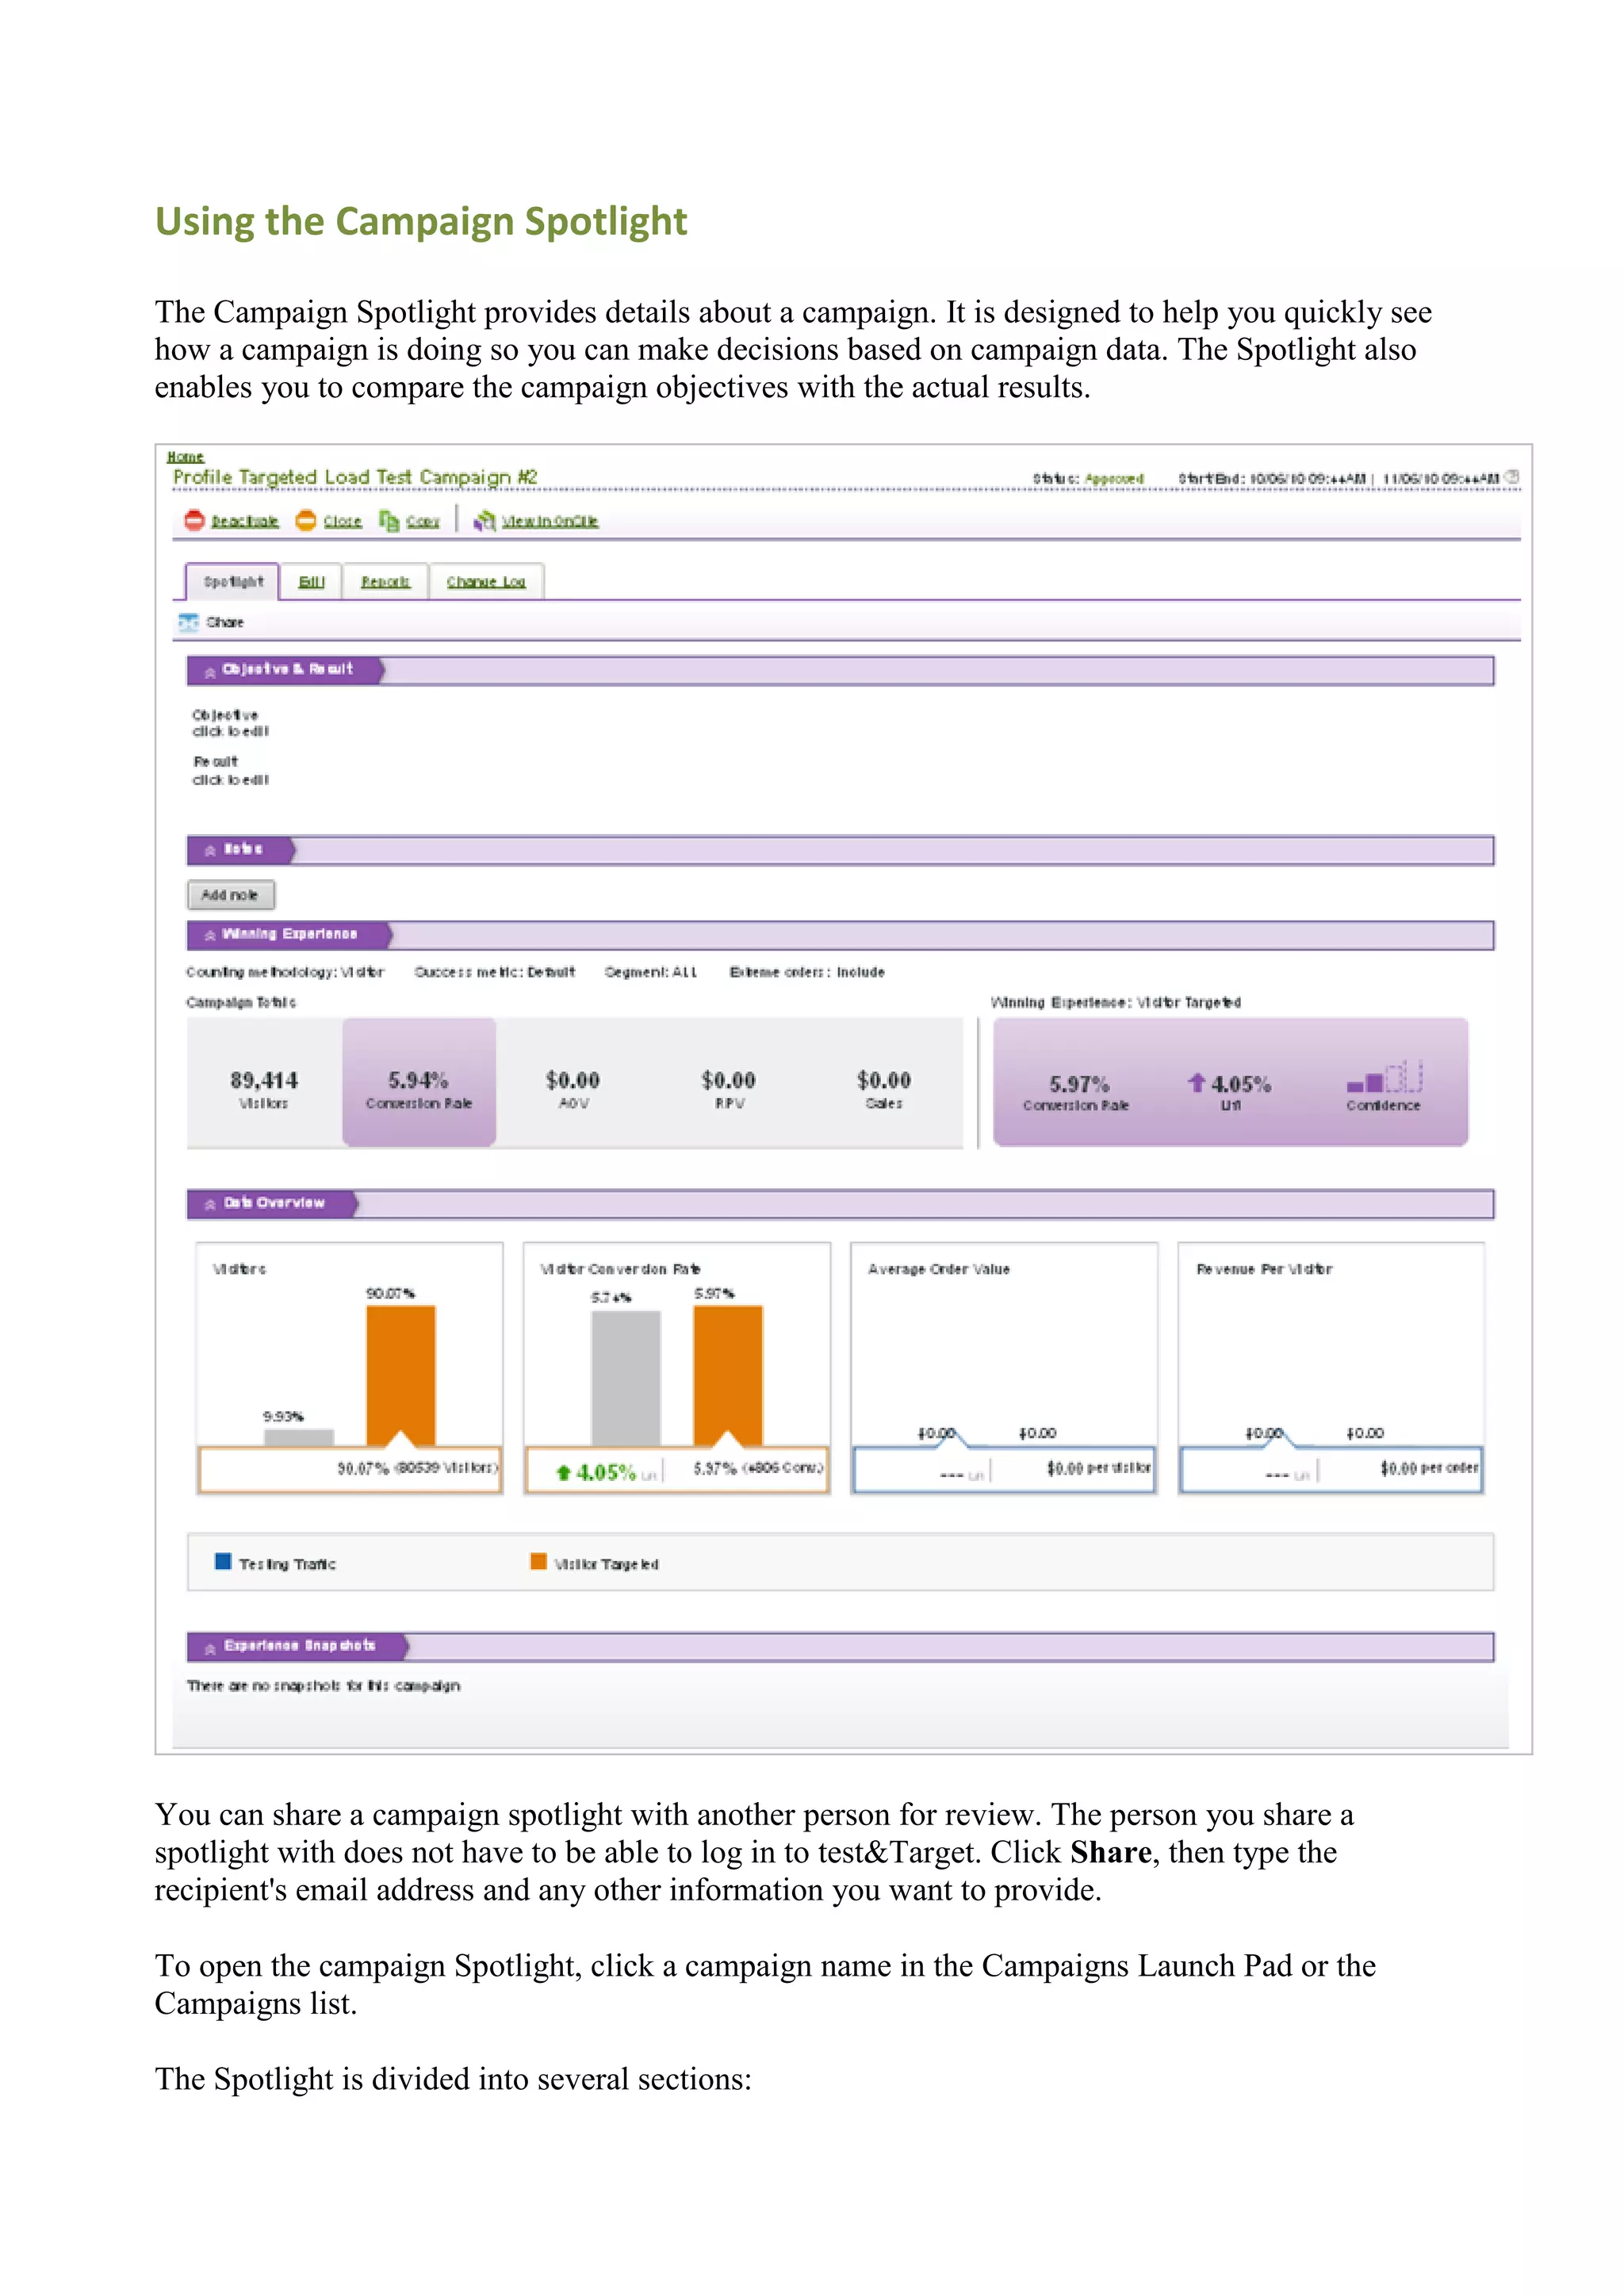
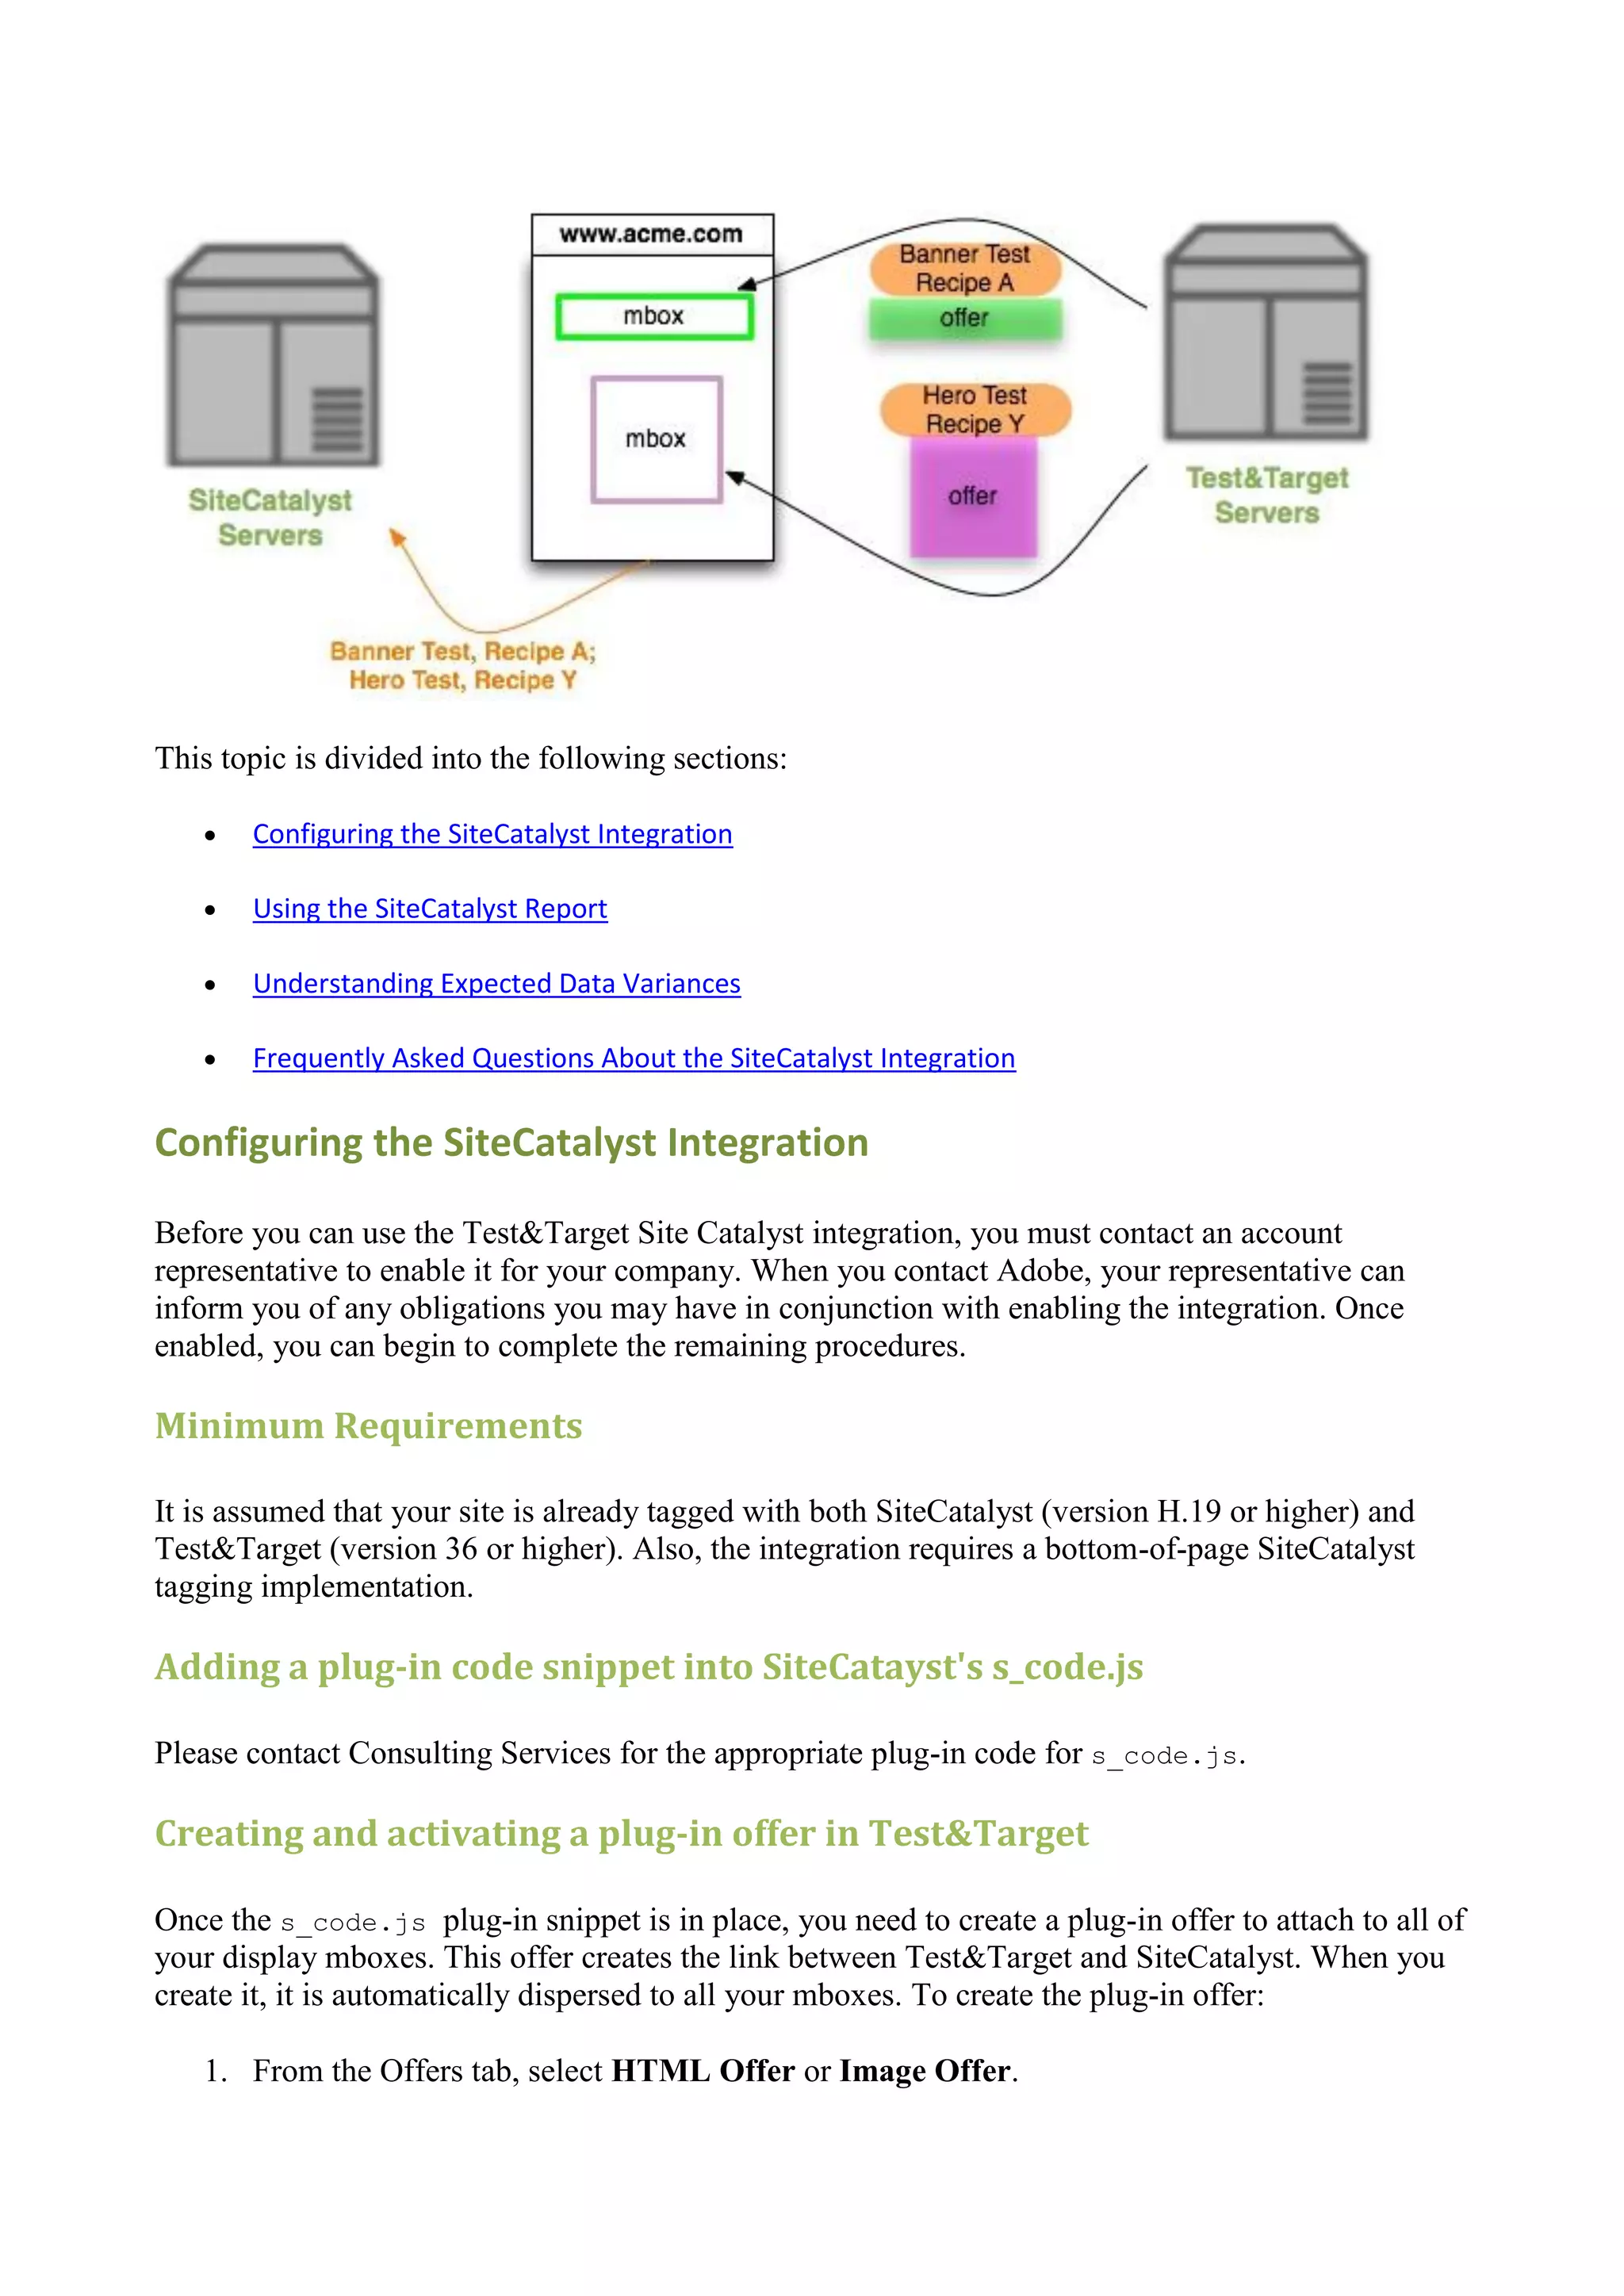
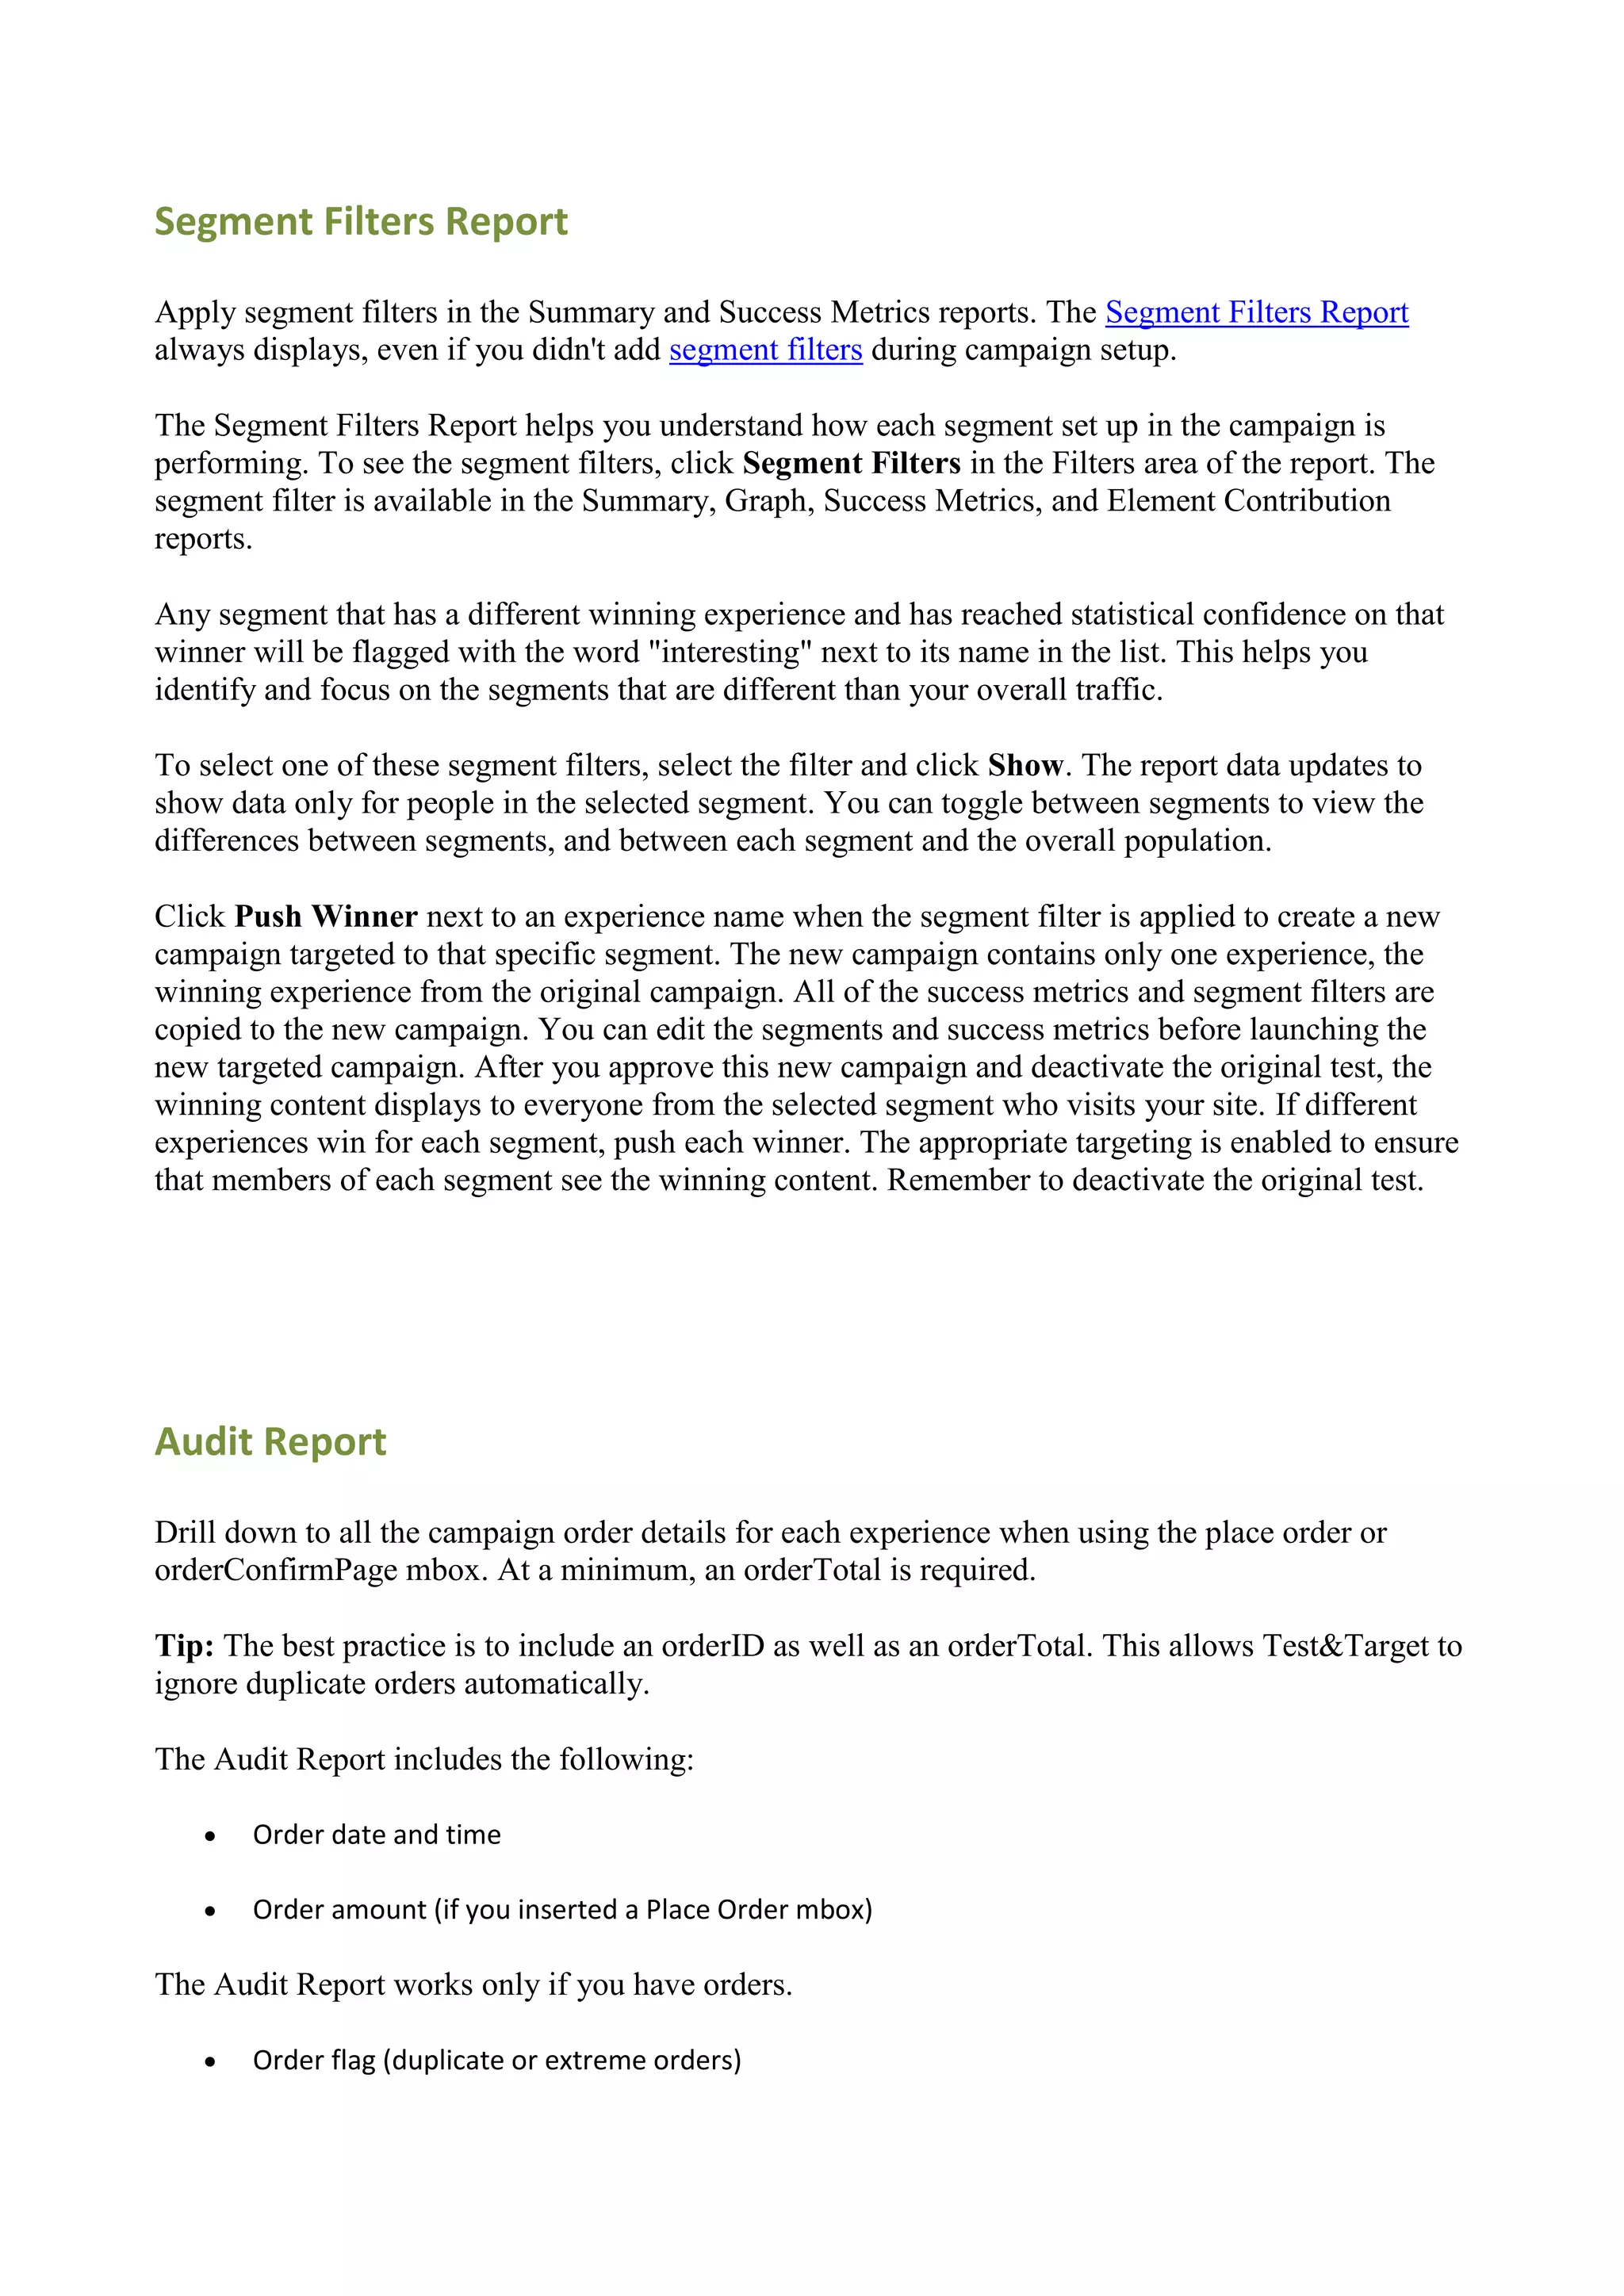
![3. Download and reference a new version of the mbox.js file.
4. Add the Test&Target integration code to the SiteCatalyst s_code.js plugins section.
/* Plugin: TNT Integration v1.0 */
s.trackTNT=new Function("v","p","b",""
+"var s=this,n='s_tnt',p=p?p:n,v=v?v:n,r='',pm=false,b=b?b:true;if(s."
+"getQueryParam){pm=s.getQueryParam(p);}if(pm){r+=(pm+',');}if(s.wd[v"
+"]!=undefined){r+=s.wd[v];}if(b){s.wd[v]='';}return r;");
Installing the SiteCatalyst Plug-In
It is assumed that the page is already tagged with SiteCatalyst.
Work with your Test&Target consultant to generate mbox.js code with the SiteCatalyst plug-in
option enabled, which will generate extra plug-in code. This requires changing a setting in your
mbox.js file.
The page should reference mbox.js and include a call to the JavaScript function
mboxLoadSCPlugin. The page does not require any mboxCreate tags, but they may be present if
Test&Target offers are intended to be displayed. You may place the mboxLoadSCPlugin(s) call in
the Extra JavaScript section of mbox.js, provided s_code.js has been defined higher in the page
code and the s object is instantiated.
We recommend that you place the mboxLoadSCPlugin(s) on the page before making any calls to
SiteCatalyst.
<html>
<head>
<script language="JavaScript" type="text/javascript" src="mbox.js"></script>
</head>
<body>
<script language="JavaScript" type="text/javascript" src="s_code.js"></script>
<!-- SiteCatalyst code version: H.17.
Copyright 1997-2008 Omniture, Inc. More info available at http://www.omniture.com -->](https://image.slidesharecdn.com/testandtargetbook-110620042031-phpapp02/75/Test-and-target-book-200-2048.jpg)


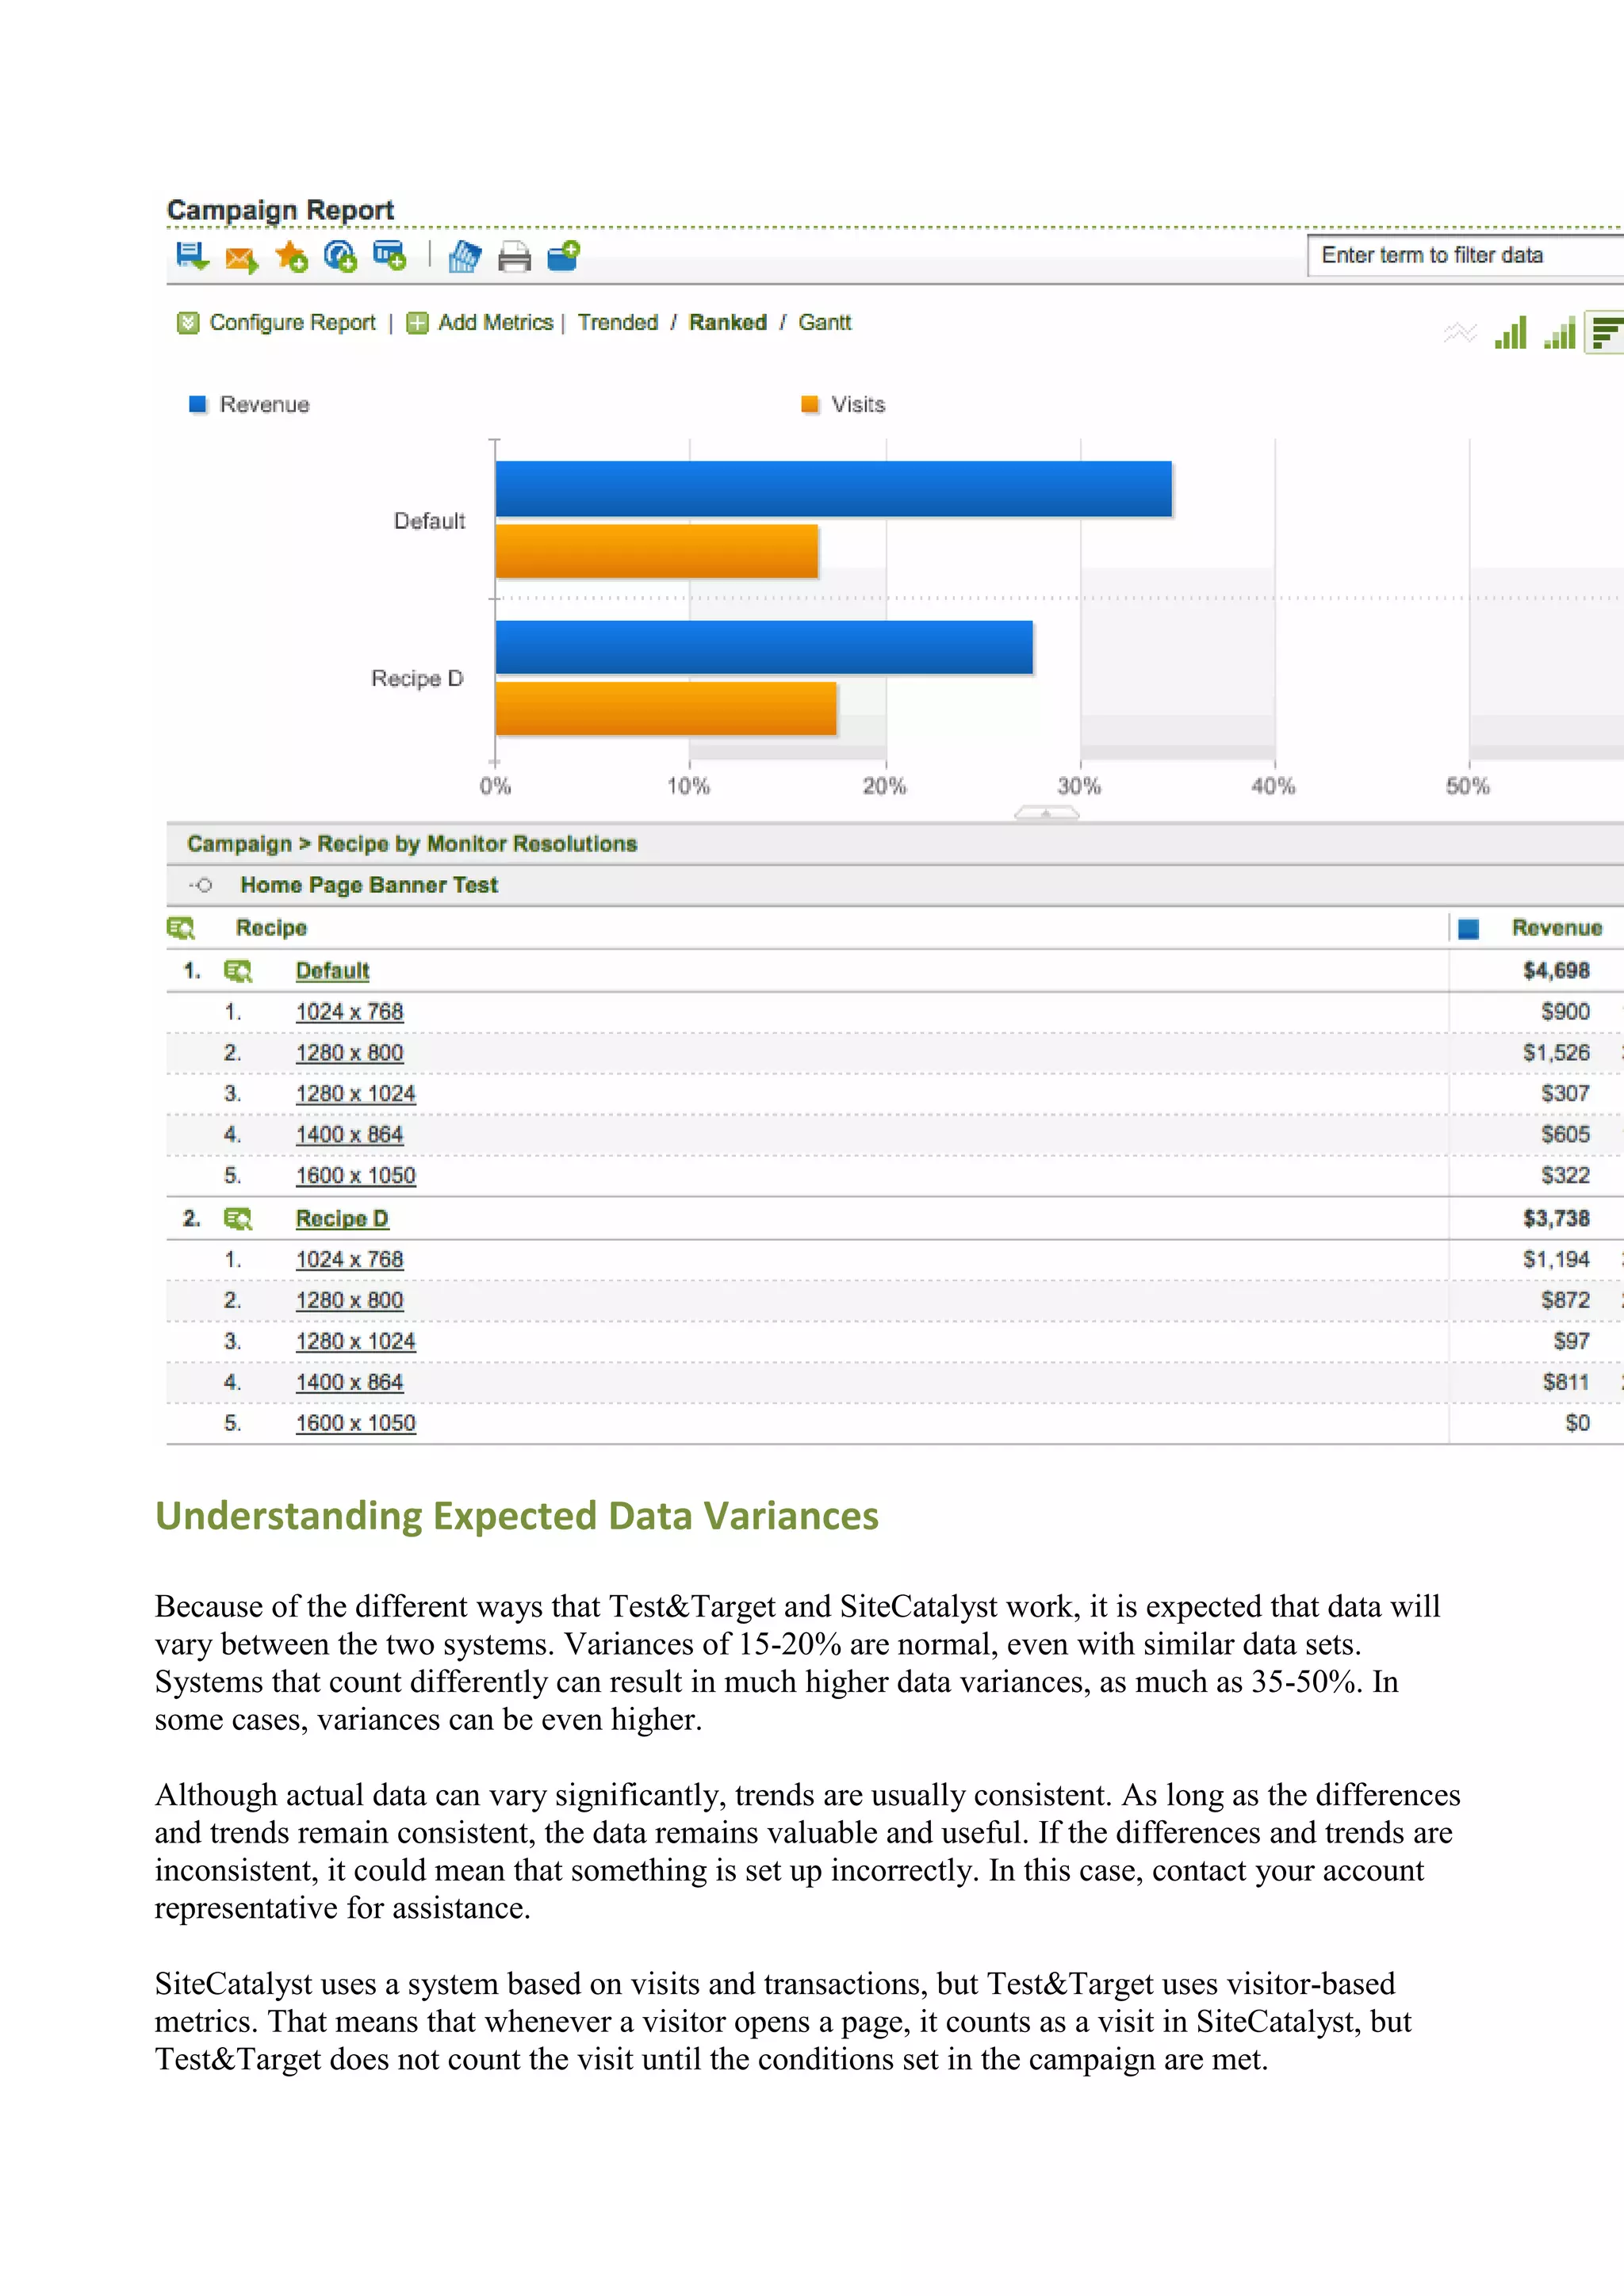

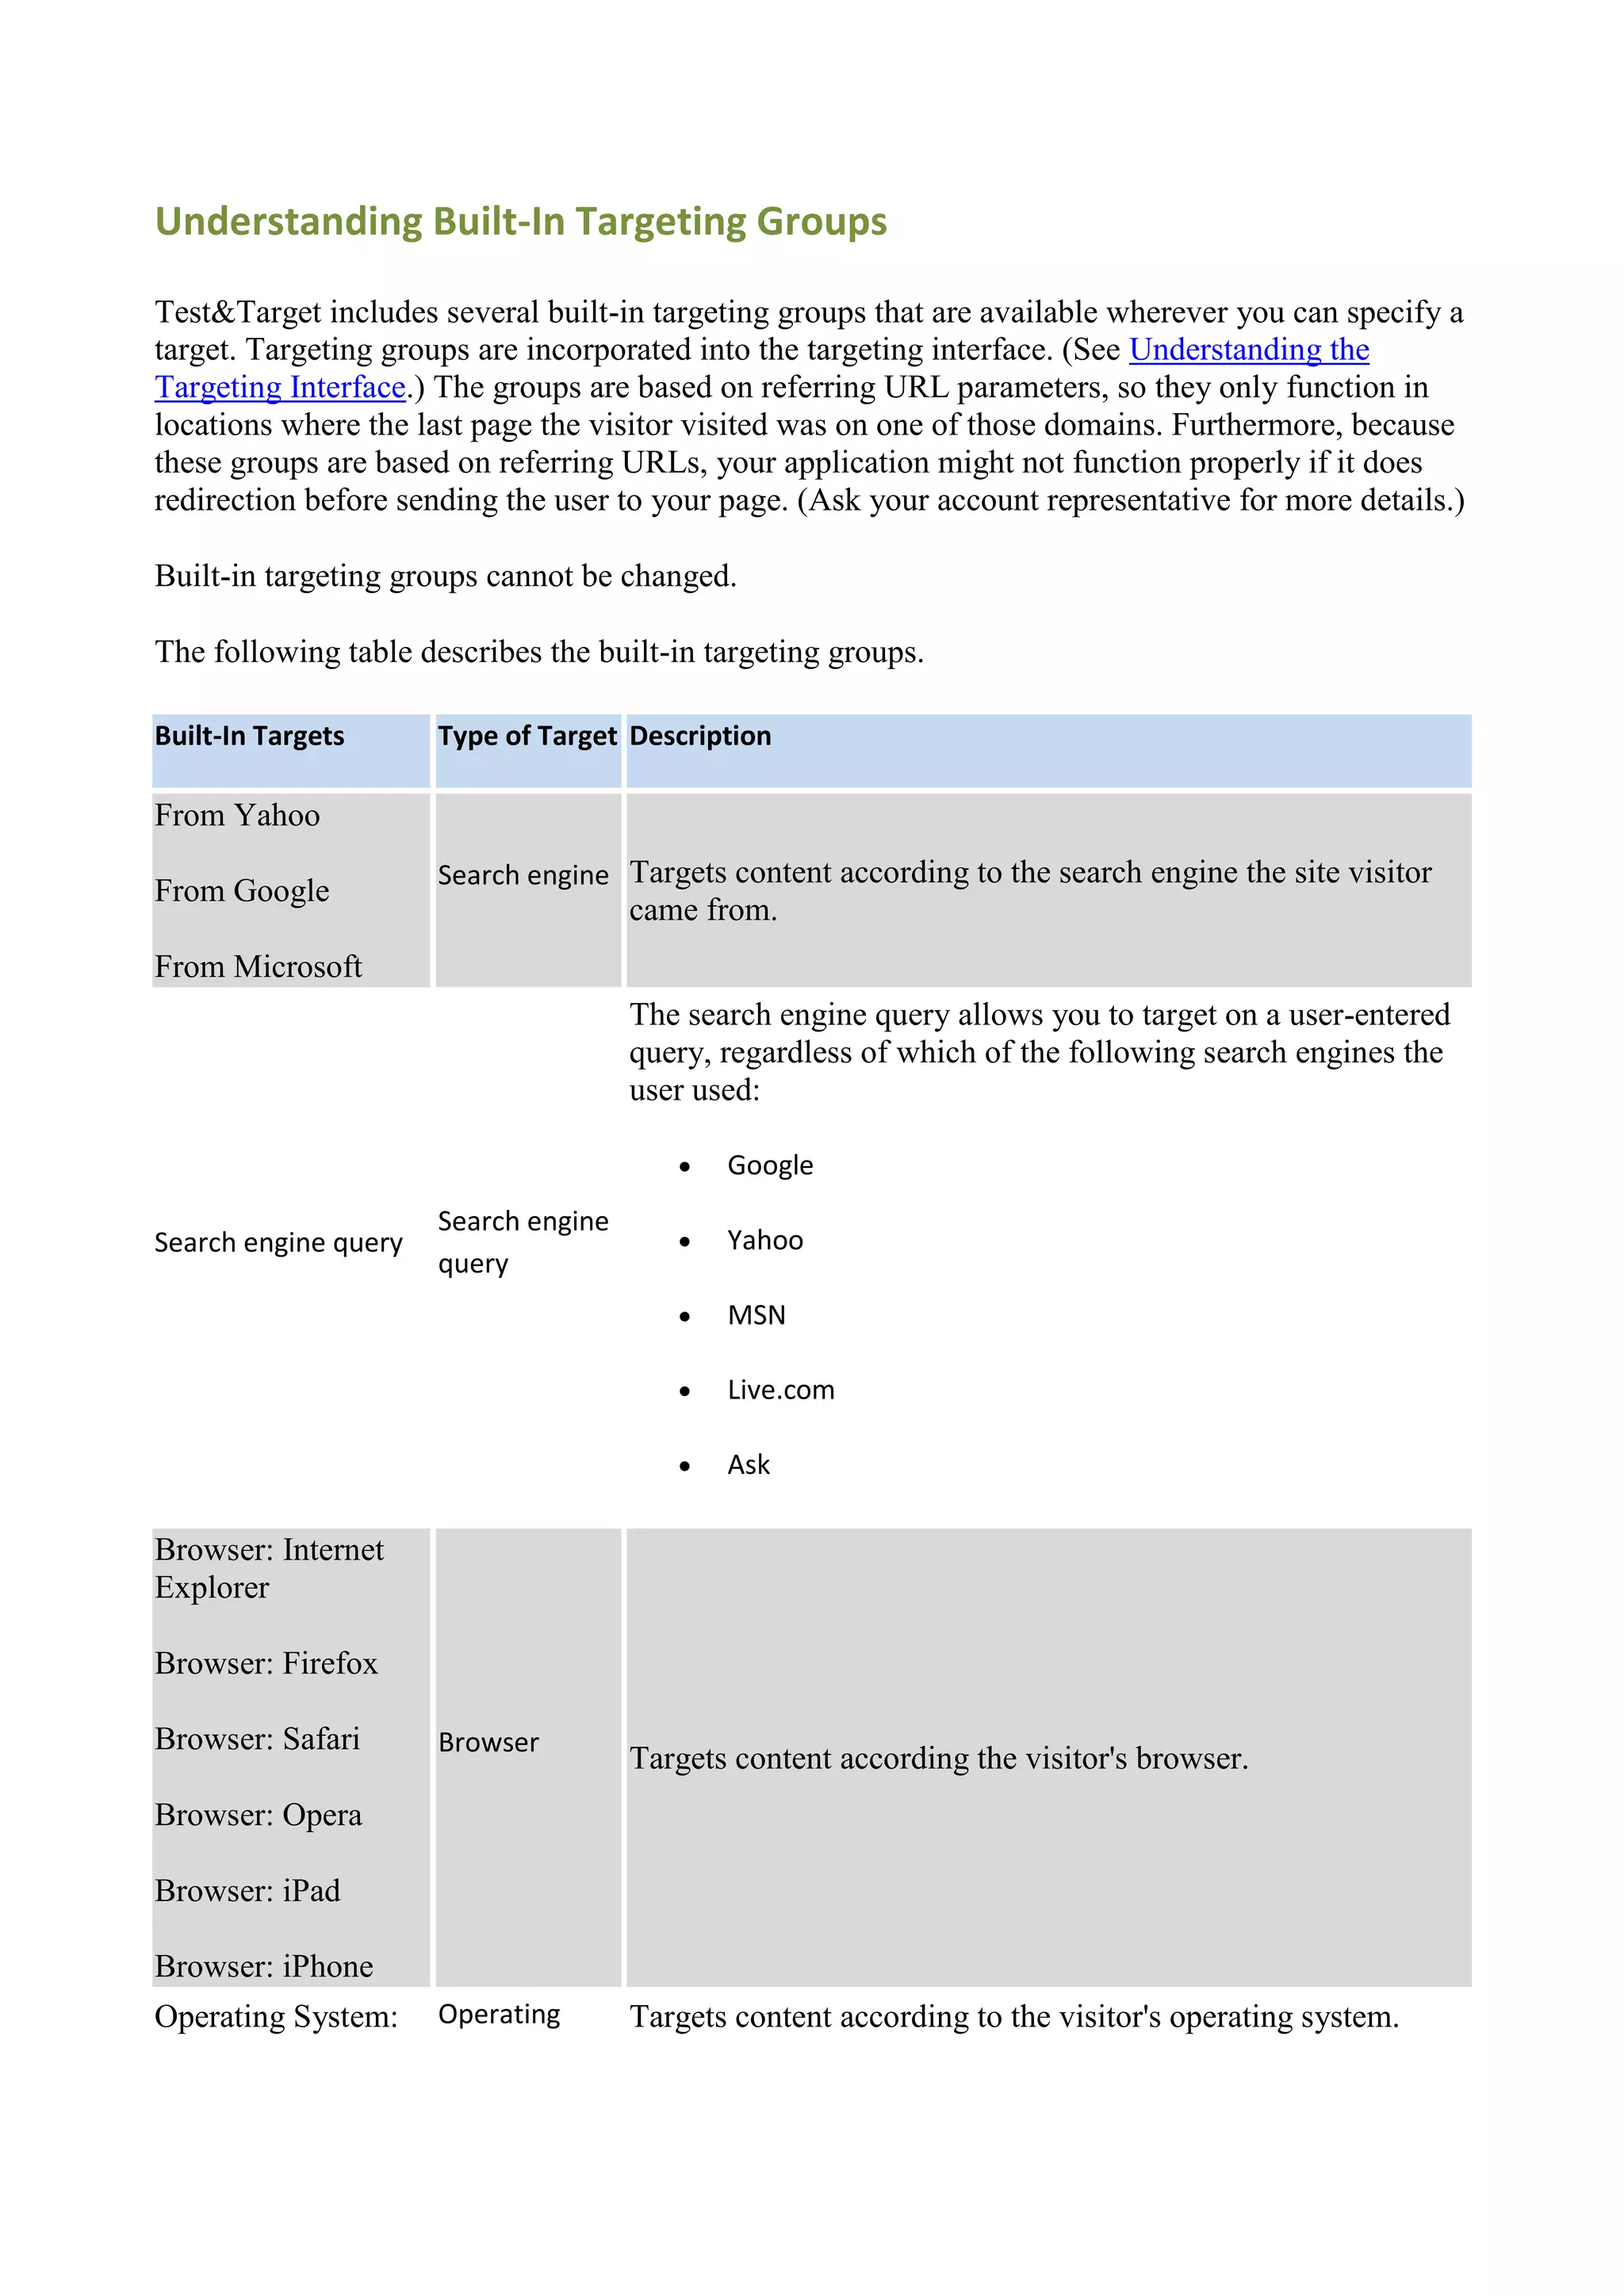
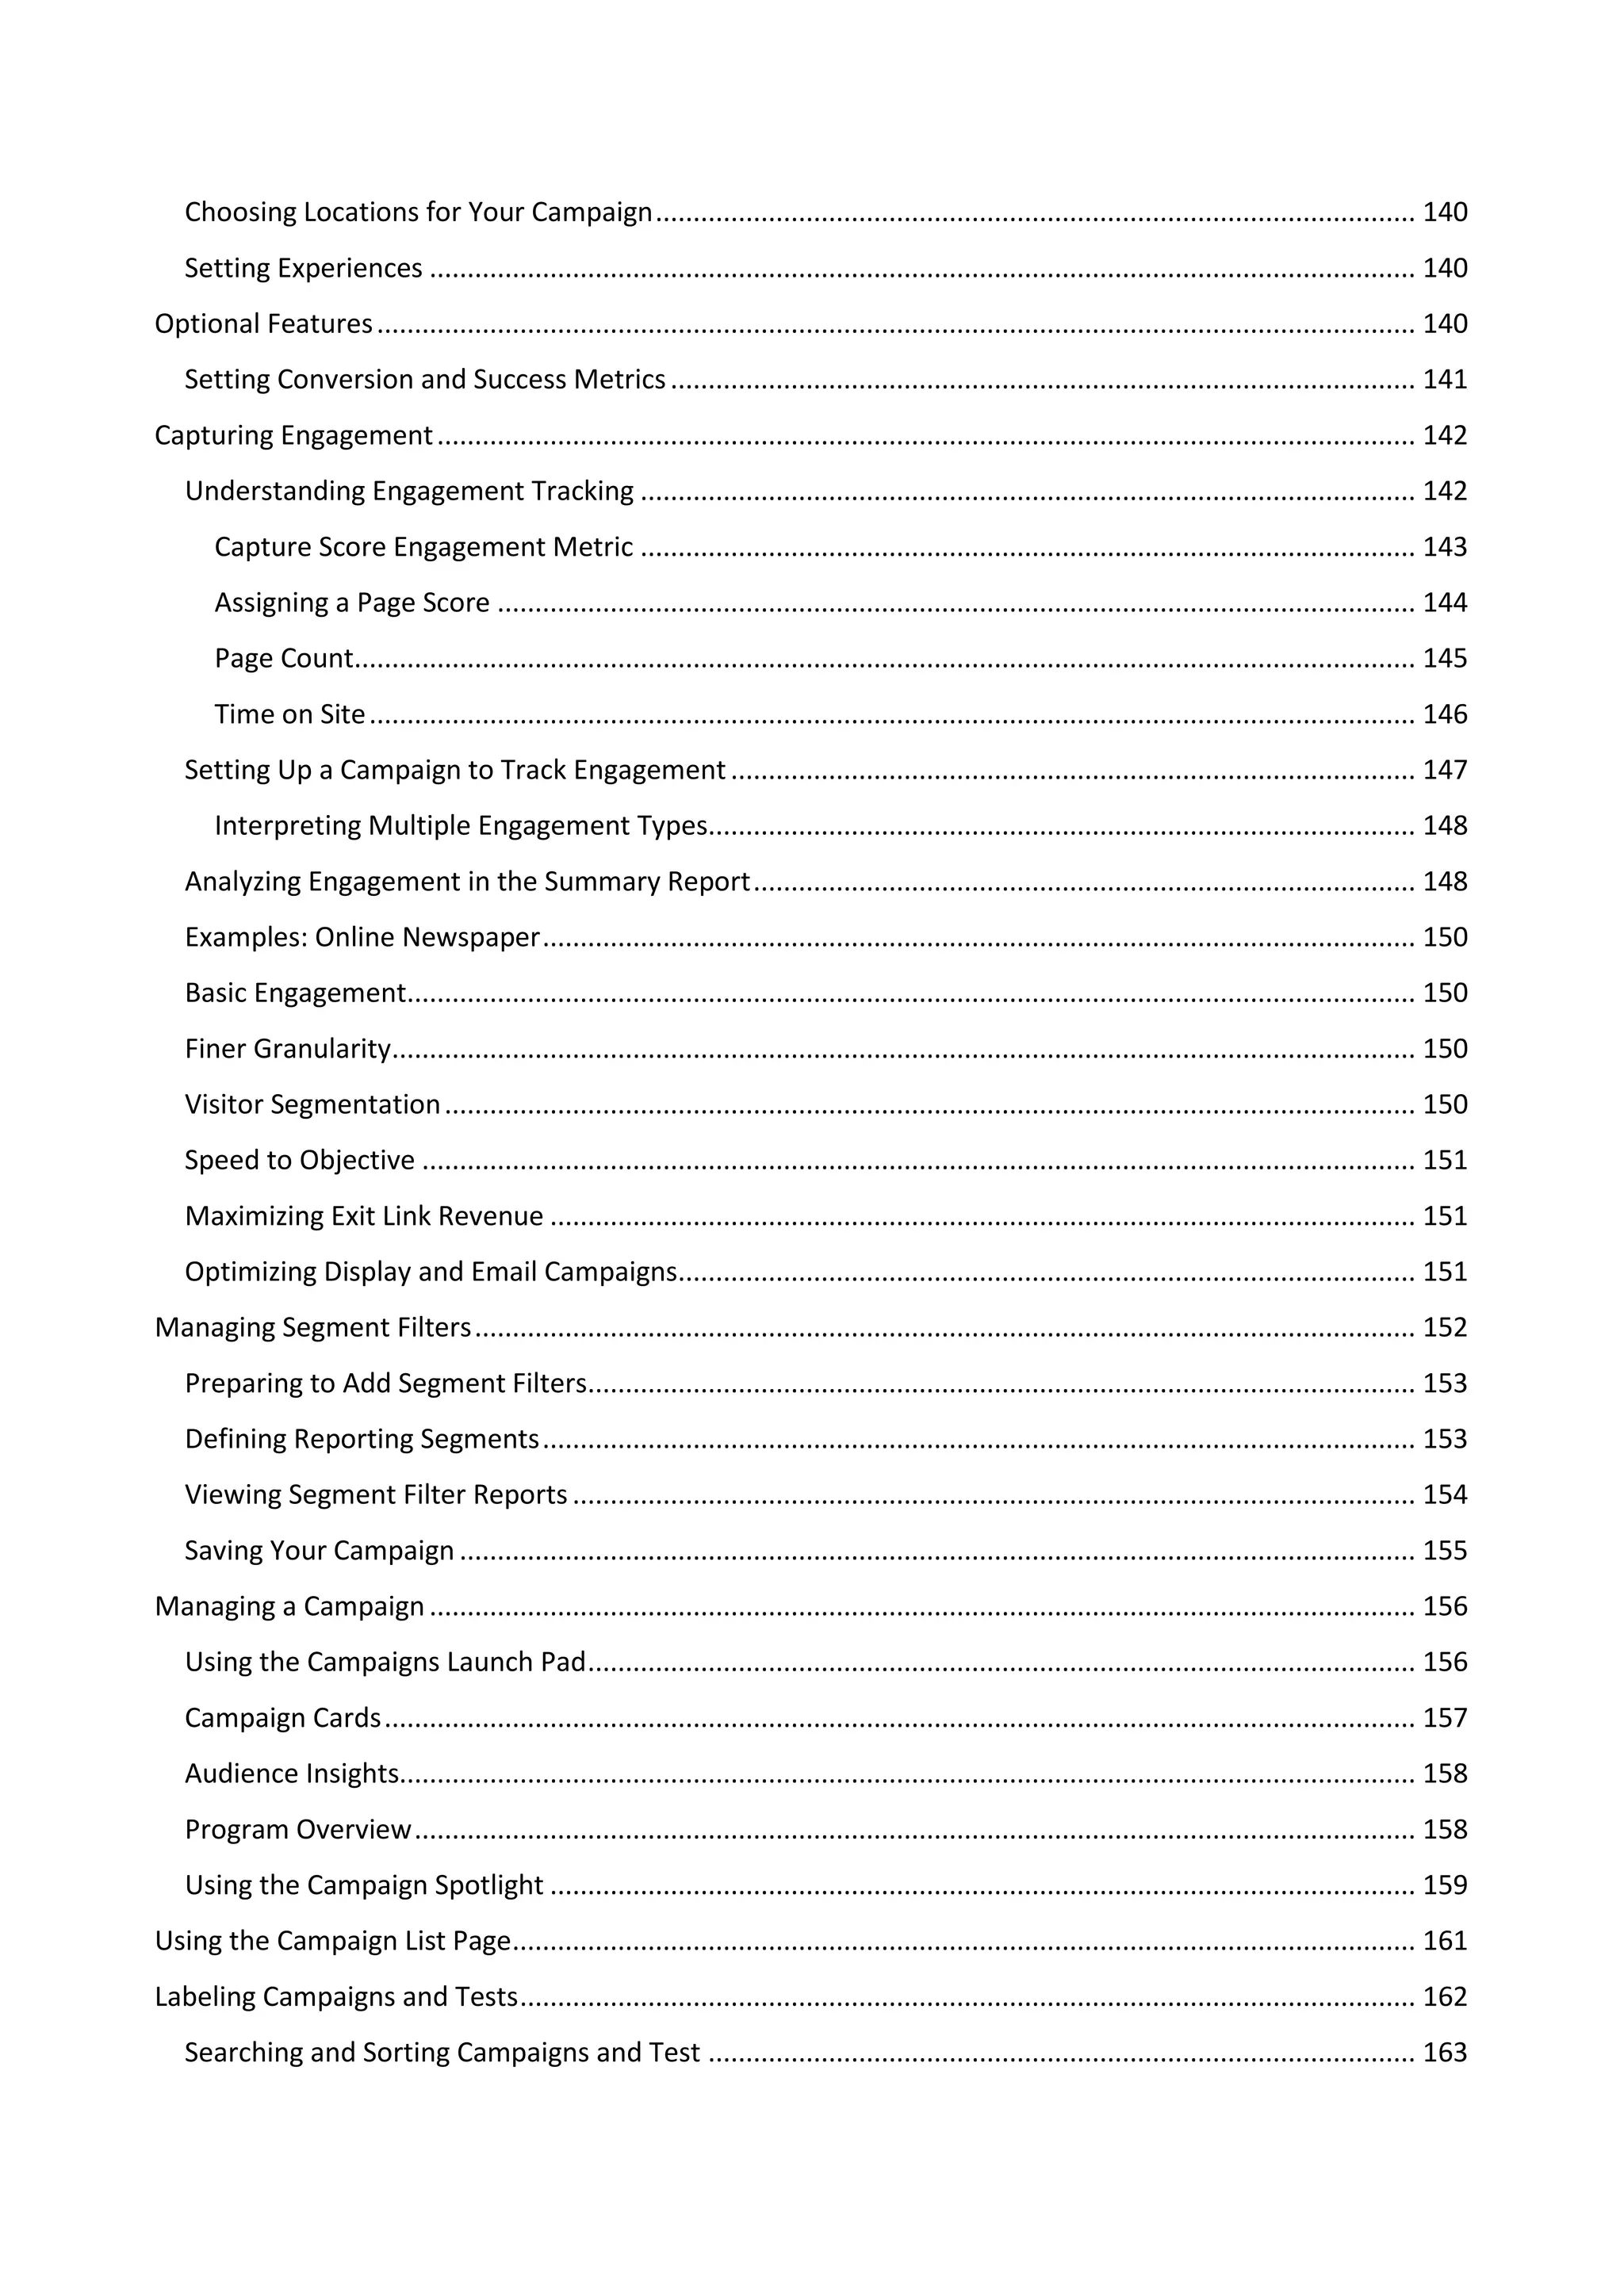
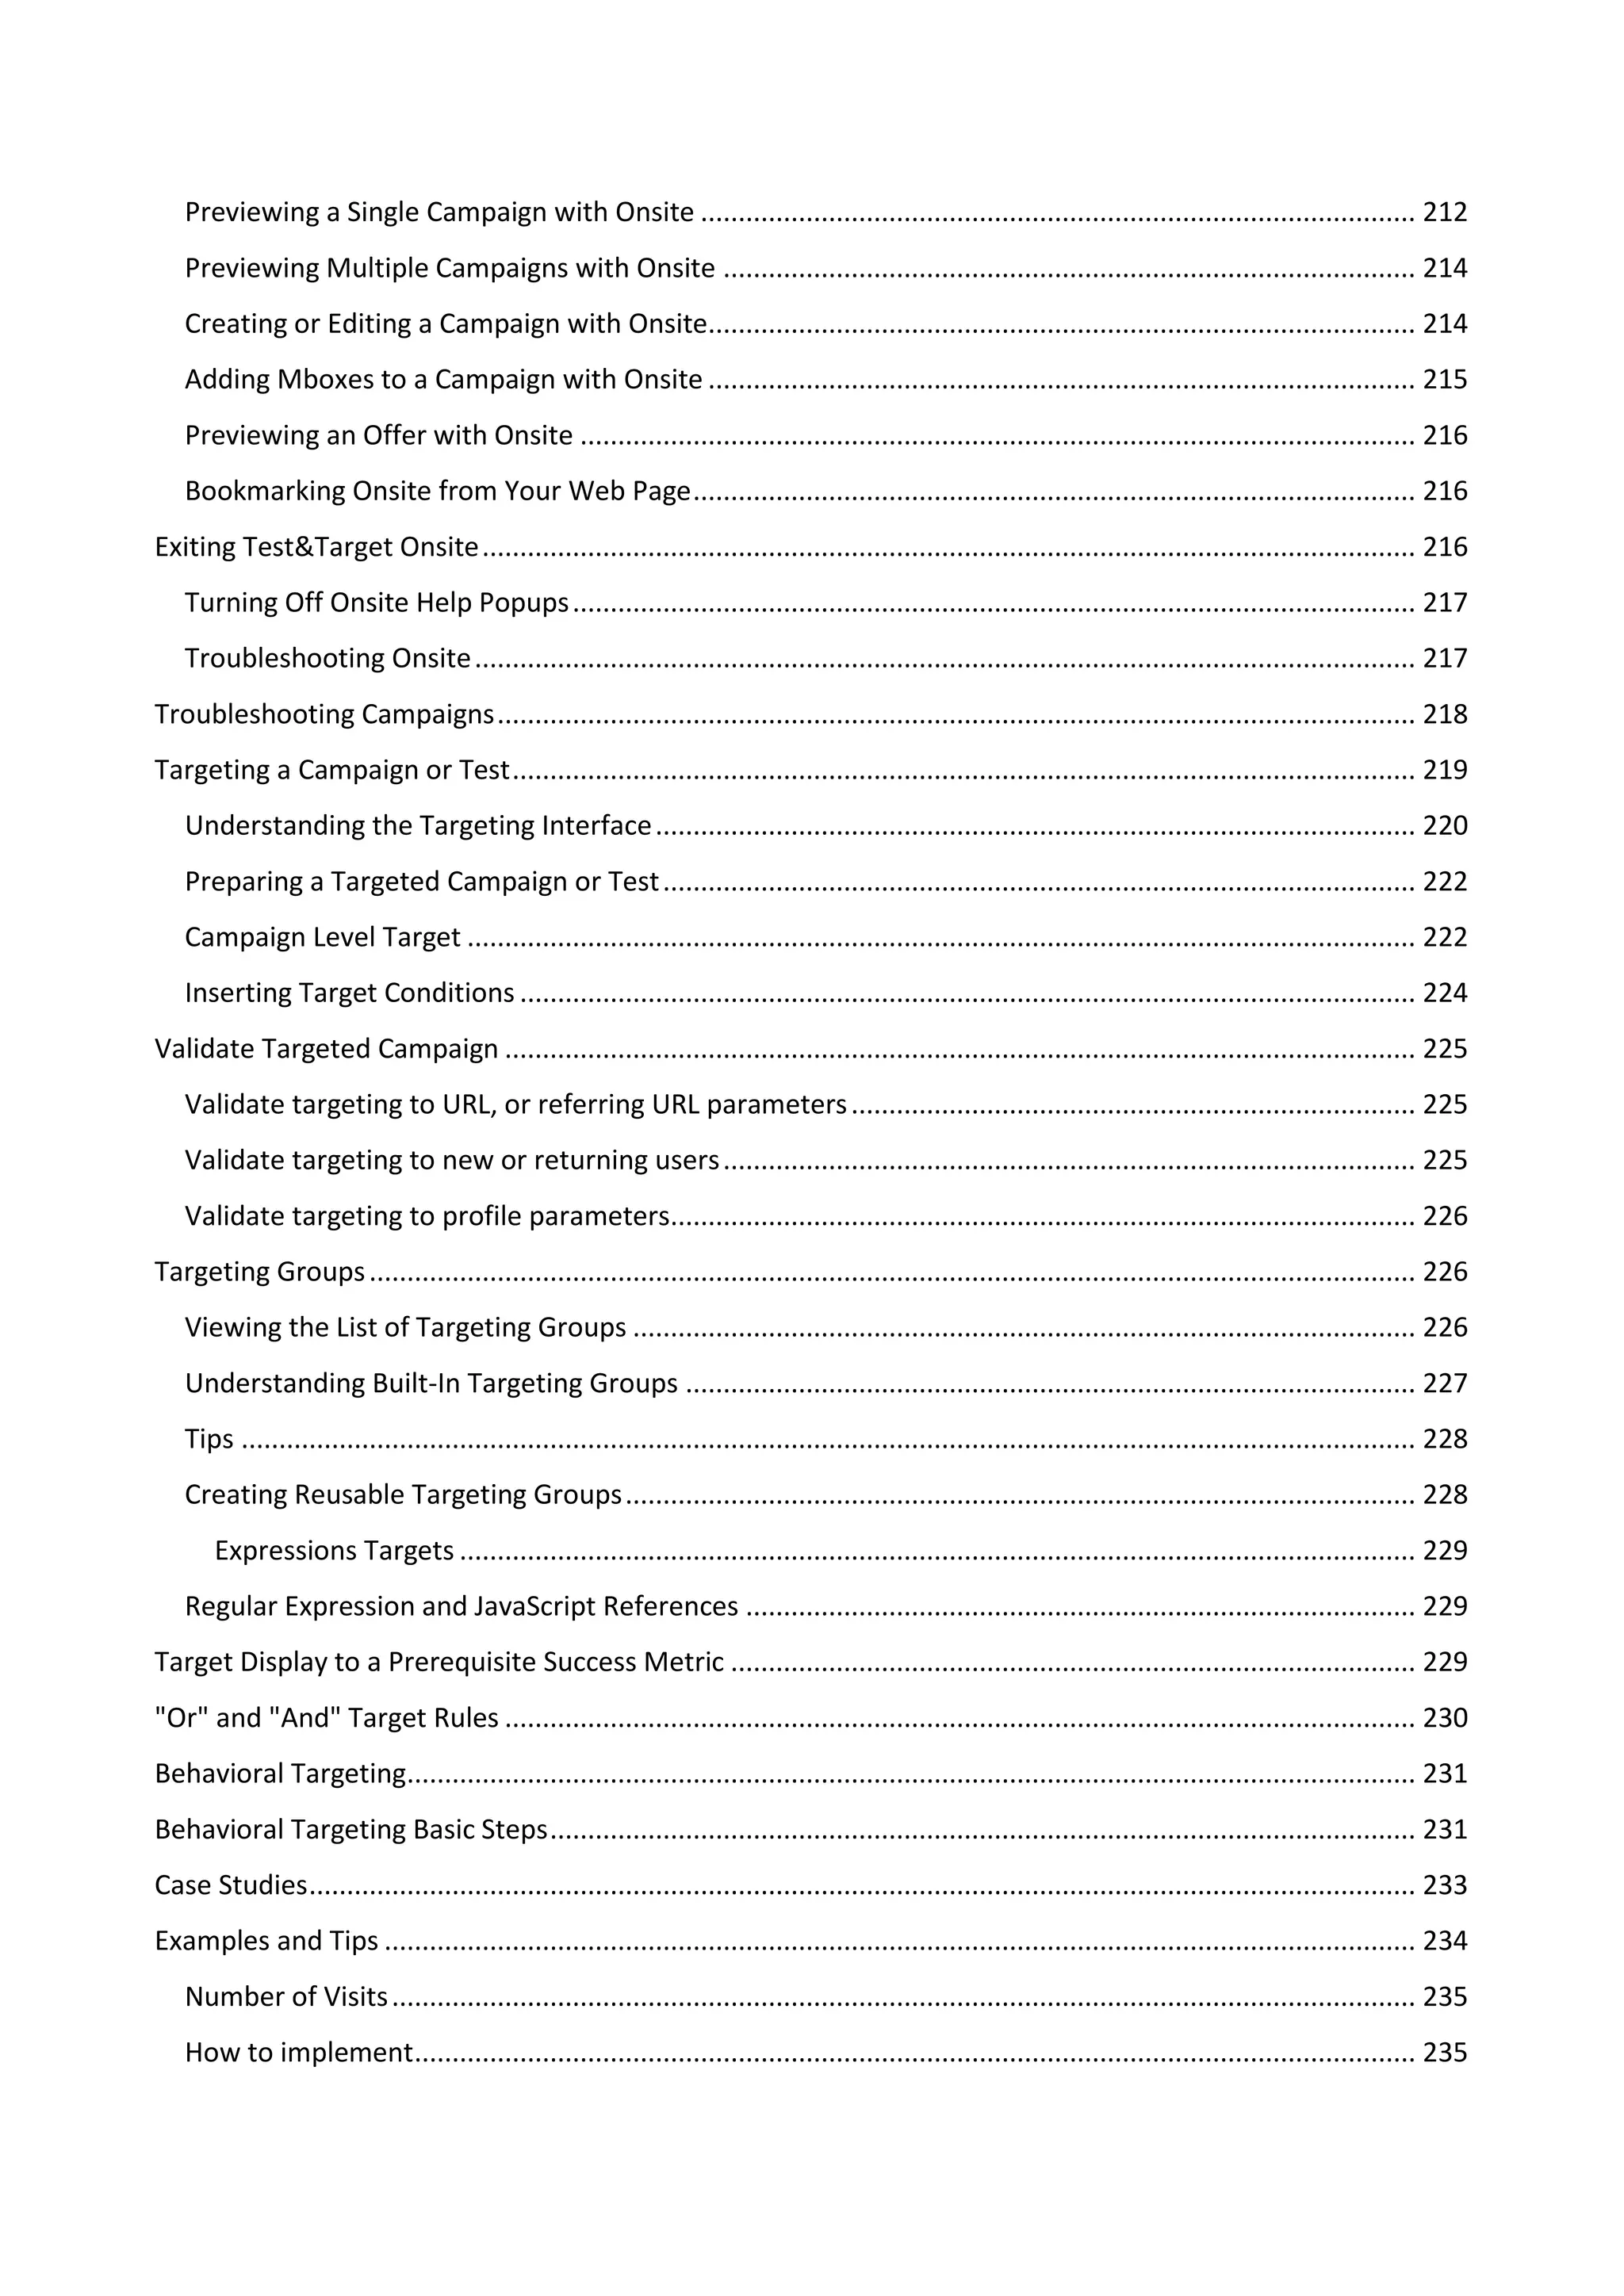
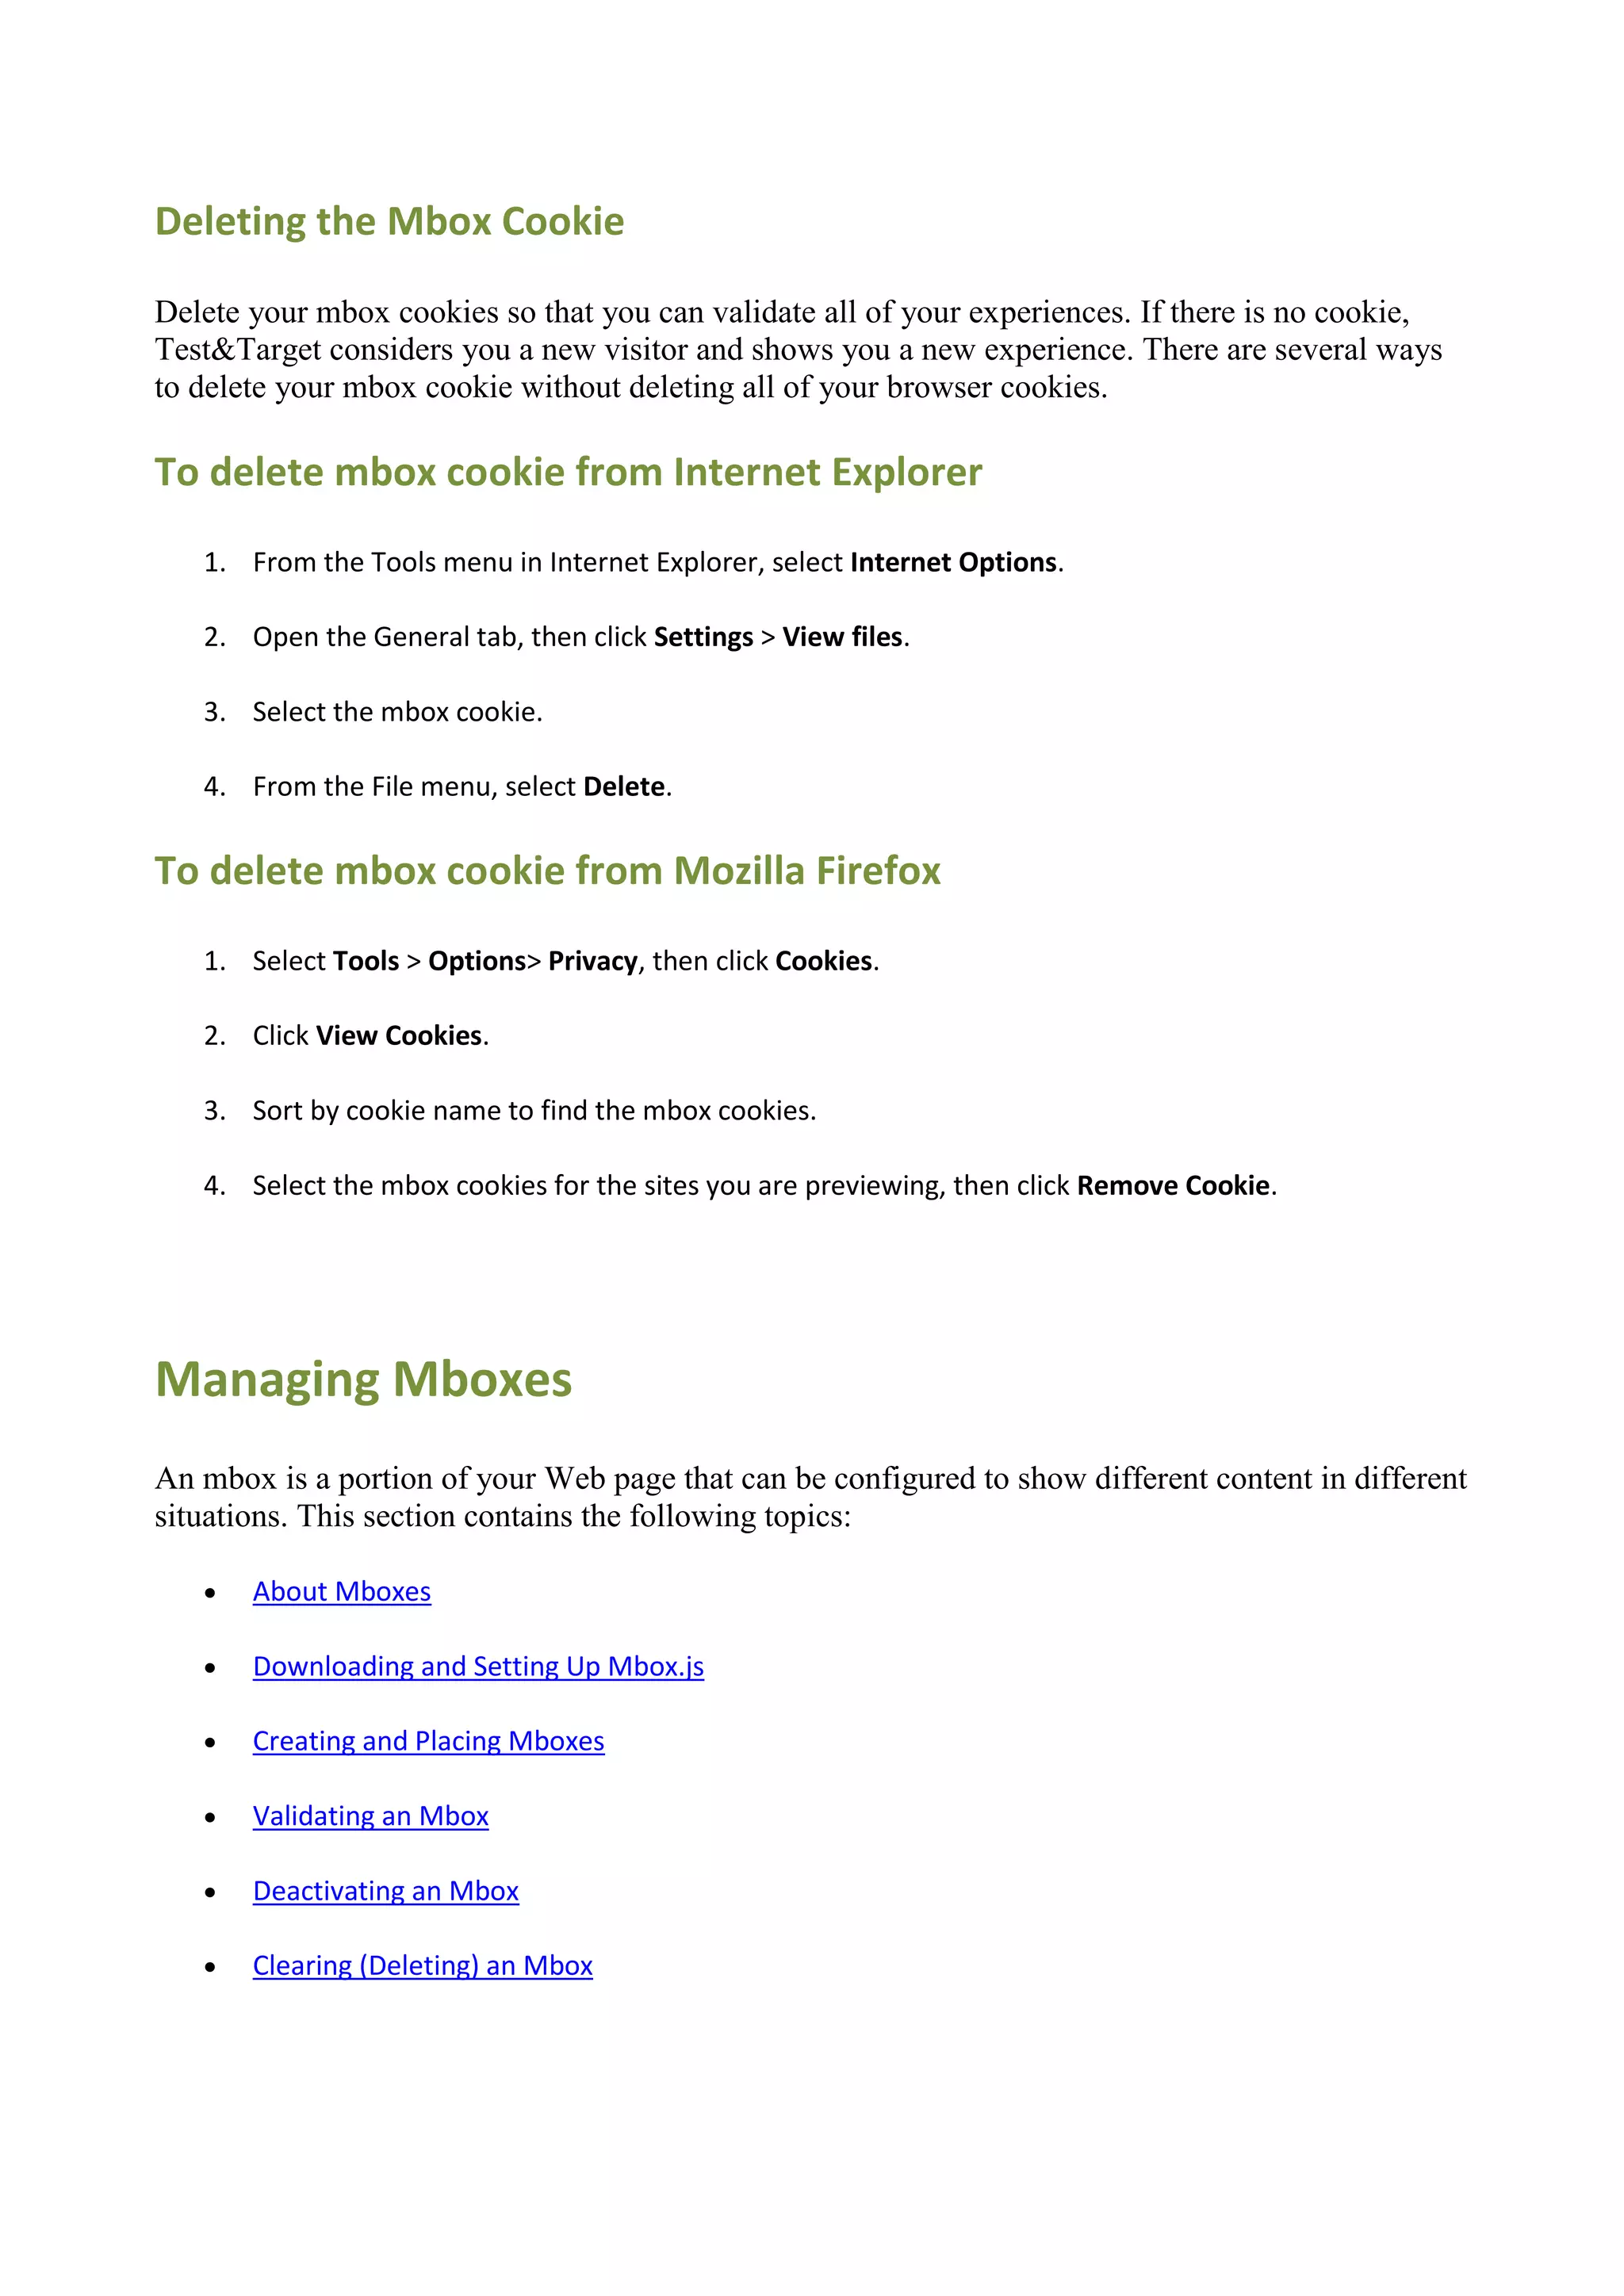
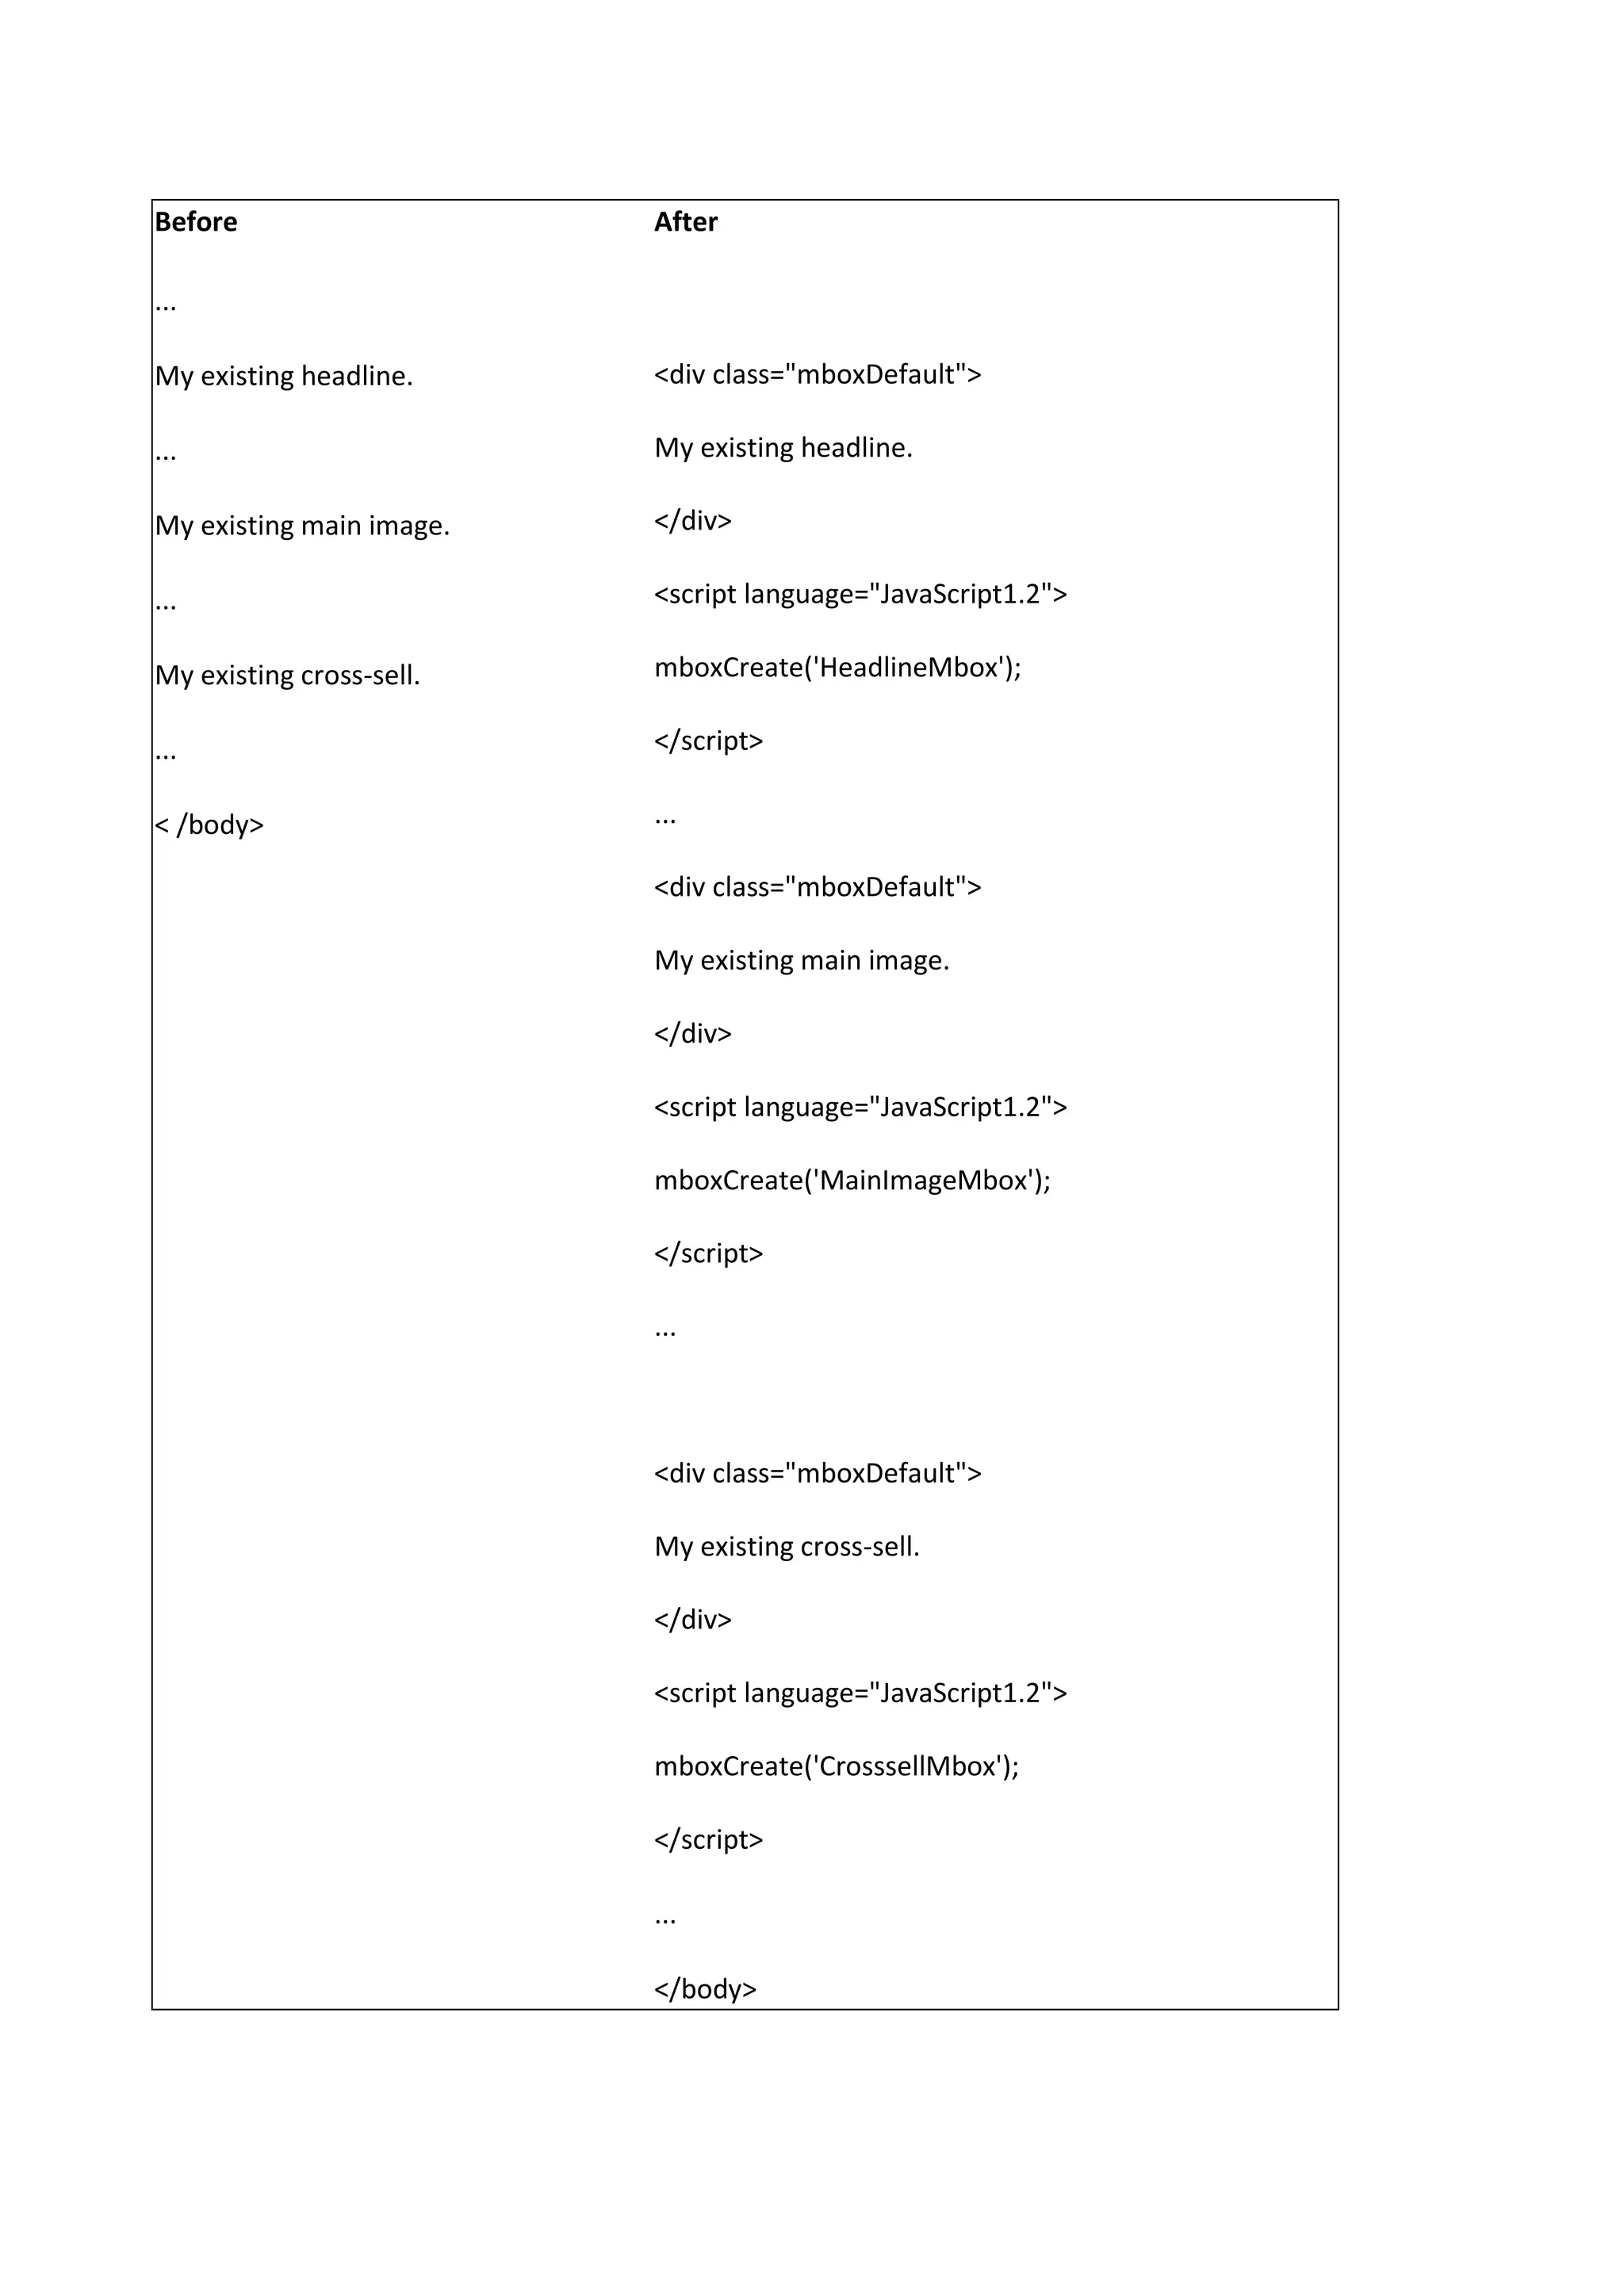
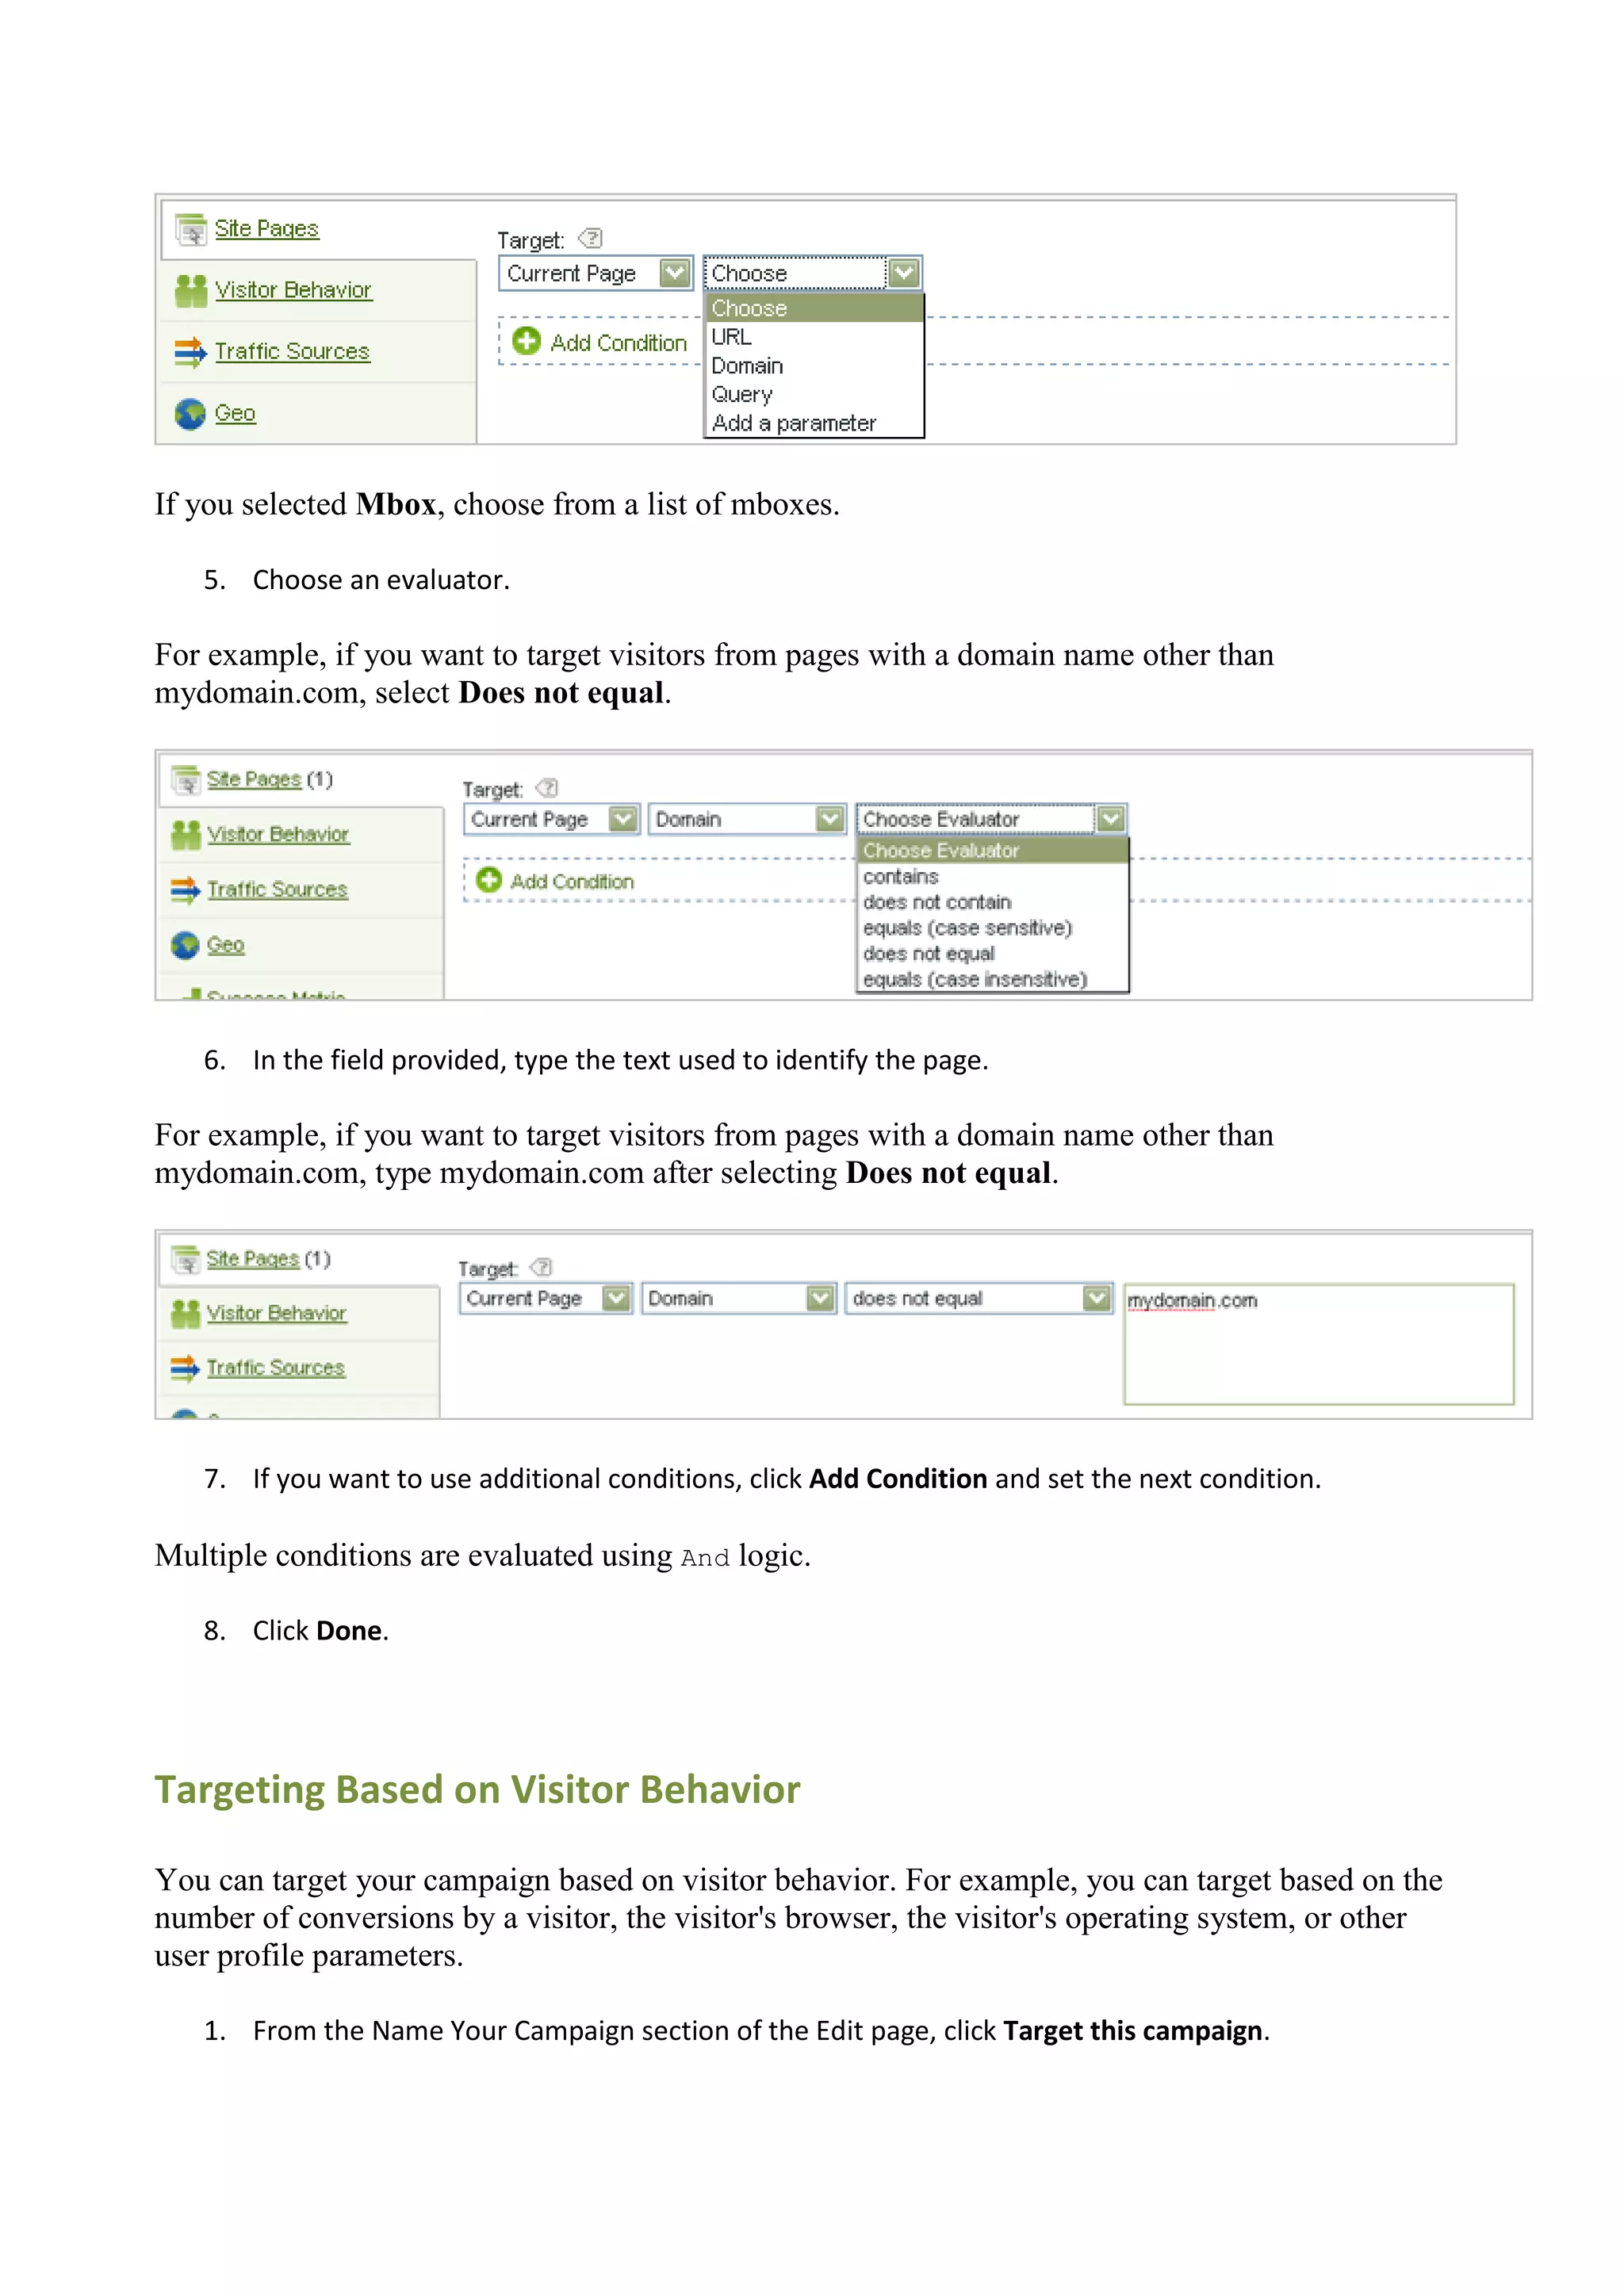
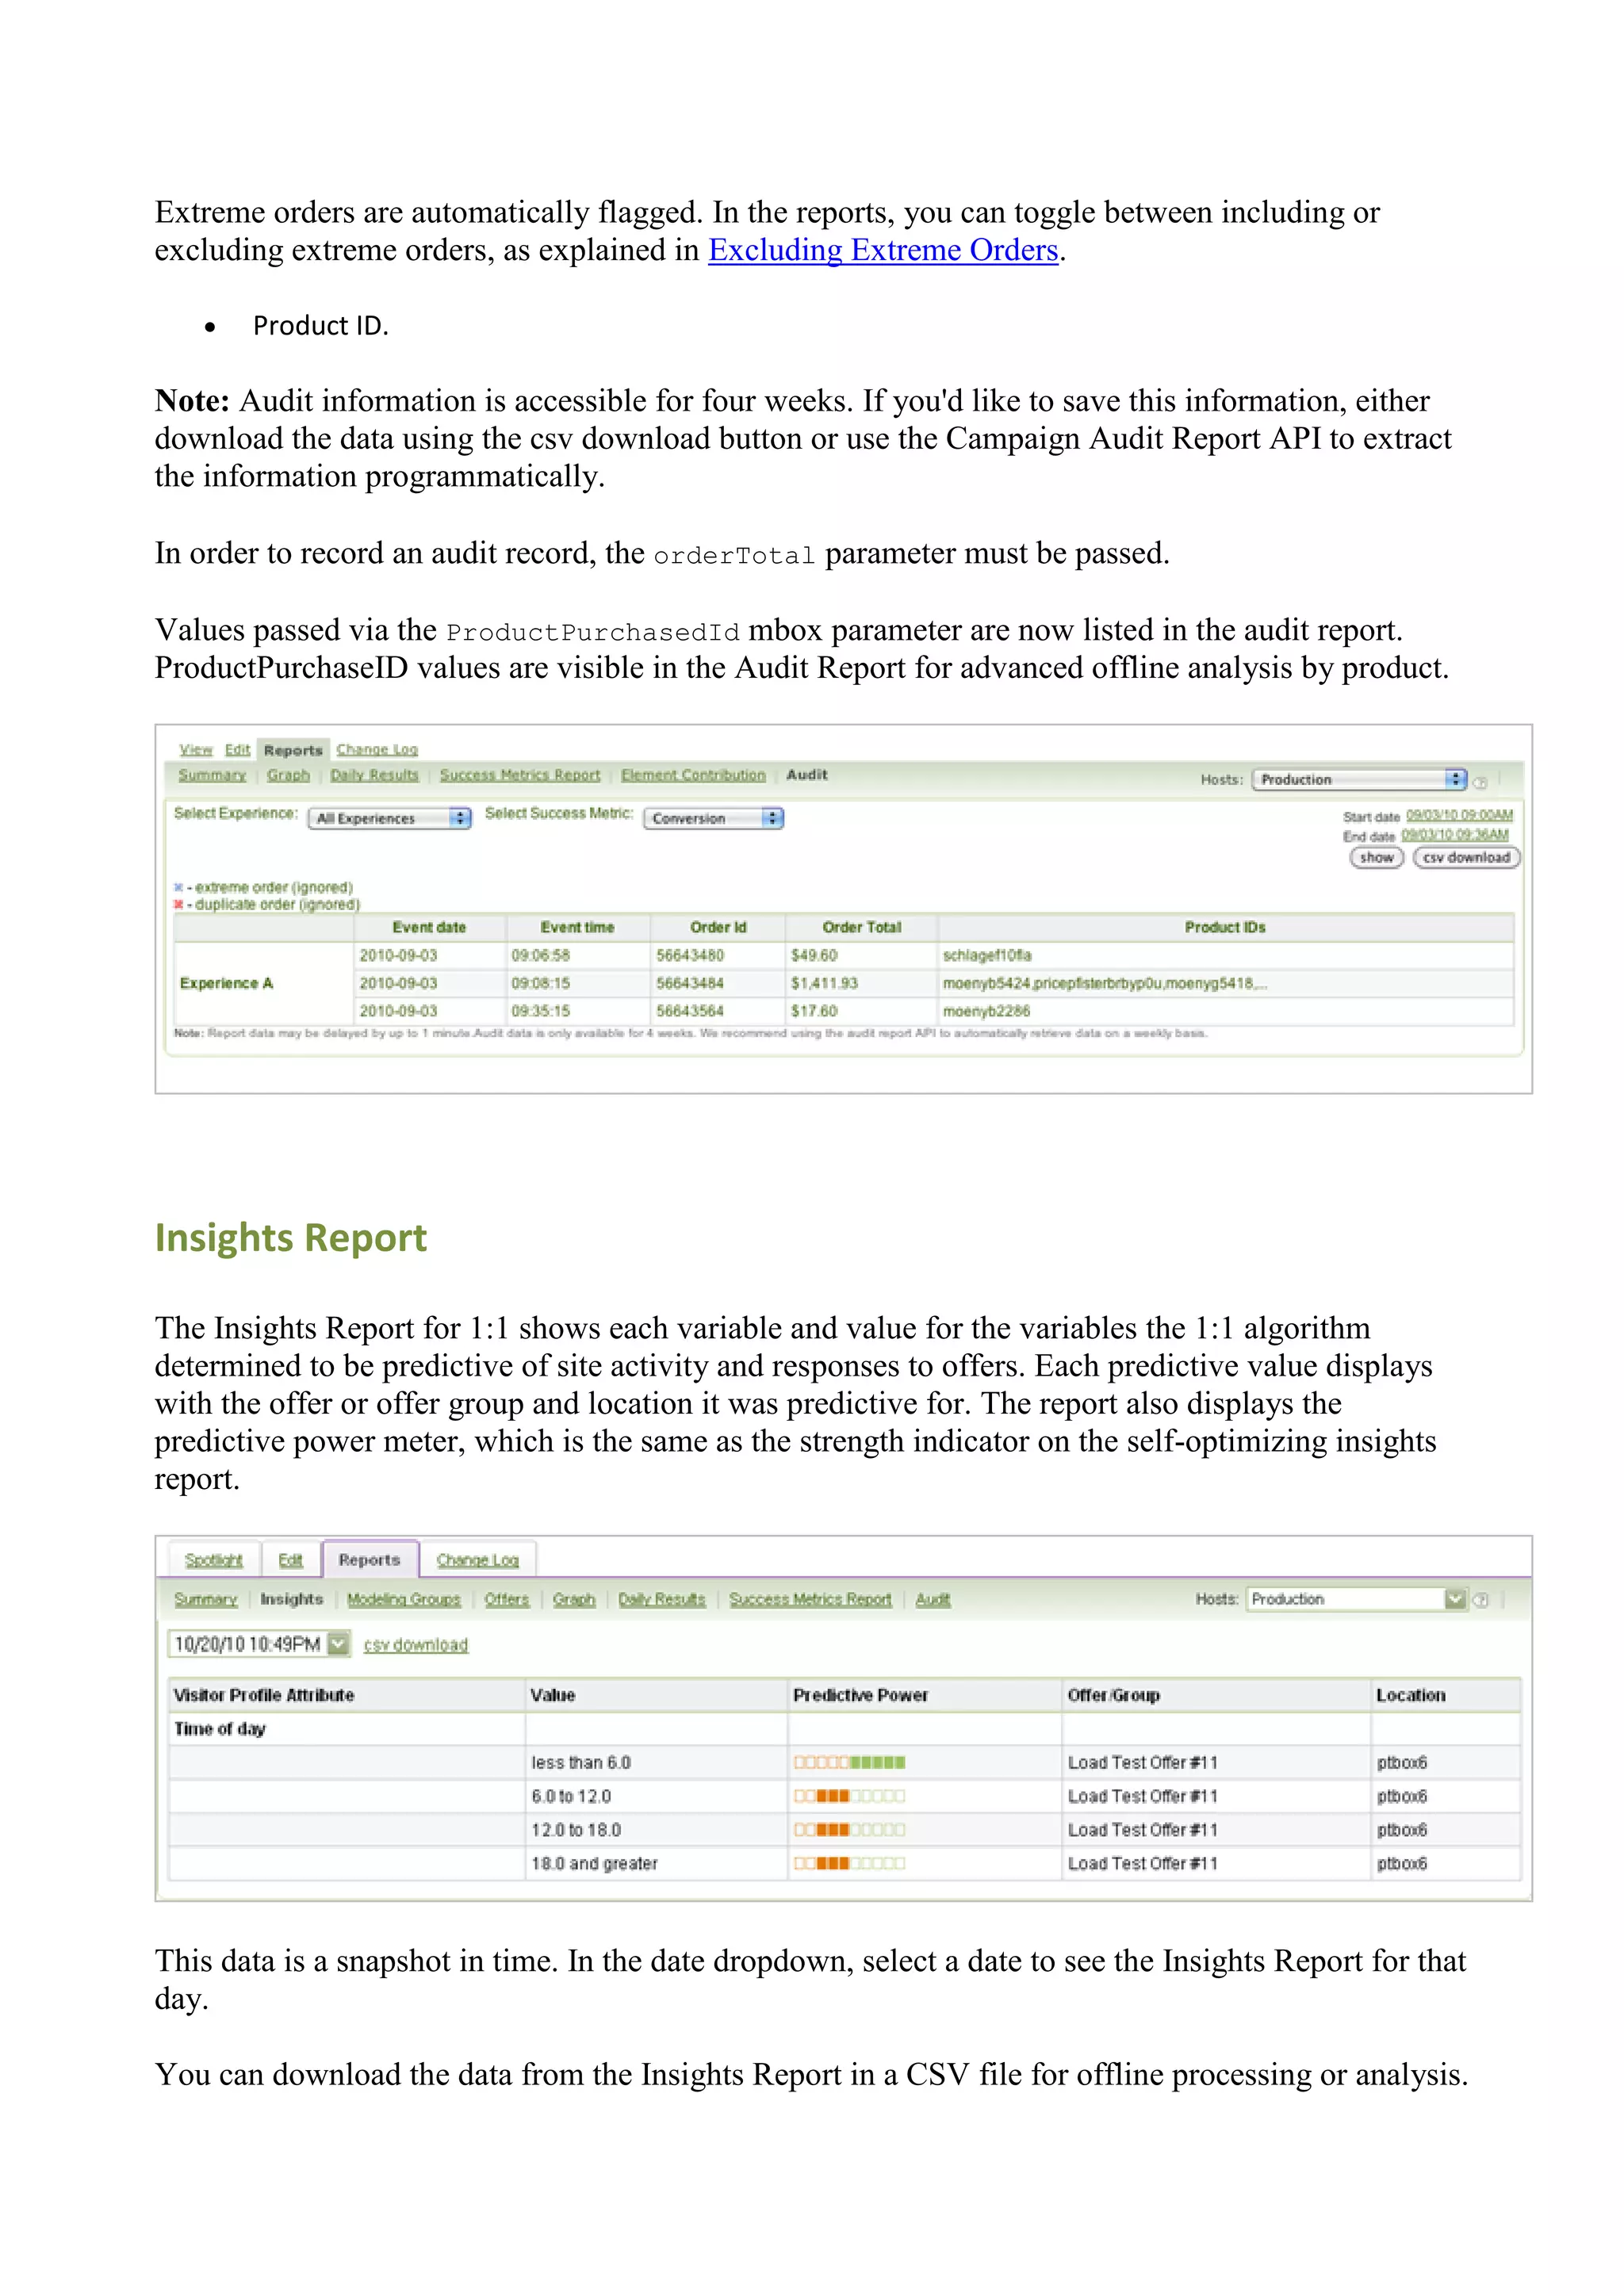
![Expressions Targets
Expression targets allow you to create sophisticated targets once and use them repeatedly in
different campaigns, experiences, and so on. In an expression target, you can also use multiple OR
and AND conditions that are not allowed in the standard targeting interface.
For advanced users, these custom targeting groups permit targeting based on flexible JavaScript
expressions evaluating to a boolean value. You can select this target in the targeting interface for
the campaign, from Target Library tab. If the user matches the target (the target evaluates to
"true"), the targeting condition is met. If the target evaluates to "false," the targeting condition is not
met. You can also combine an expression target with other targeting options in the targeting
interface. (Refer to the cheat sheet here).
Using Regular Expressions in Targeting Groups
A regular expression is a set of letters, numbers, and special characters that together specify a
pattern of text. Using regular expressions to match text patterns is very similar to wildcard
searching, but far more powerful and flexible. For example:
Regular Expression: google.com/?.*q=([^&]*)
Matches: http://www.google.com/search?hl=en&q=my+product
Using the regular expression in our example, we can match any Referring URL that comes from a
Google search query containing "adobe.com/" and "?" and "=" even with unspecified text in
between.
For more information on regular expressions, see Regular Expression and JavaScript References.
Regular Expression and JavaScript References
A nice walk-thru for understanding and using regular expressions (external link)
Regular Expression Quick Reference (pdf)
JavaScript Expressions for Targeters and Profile Scripts cheat sheet (pdf)
Target Display to a Prerequisite Success Metric
Targeting display to a prerequisite success metric requires a visitor to have seen (or not seen)
another mbox in order to see content.
Note: Do not confuse this feature with Success Metrics Reporting, which impacts only reporting,
not display.
1. Set up success metrics as you would for a Success Metric Report.](https://image.slidesharecdn.com/testandtargetbook-110620042031-phpapp02/75/Test-and-target-book-229-2048.jpg)


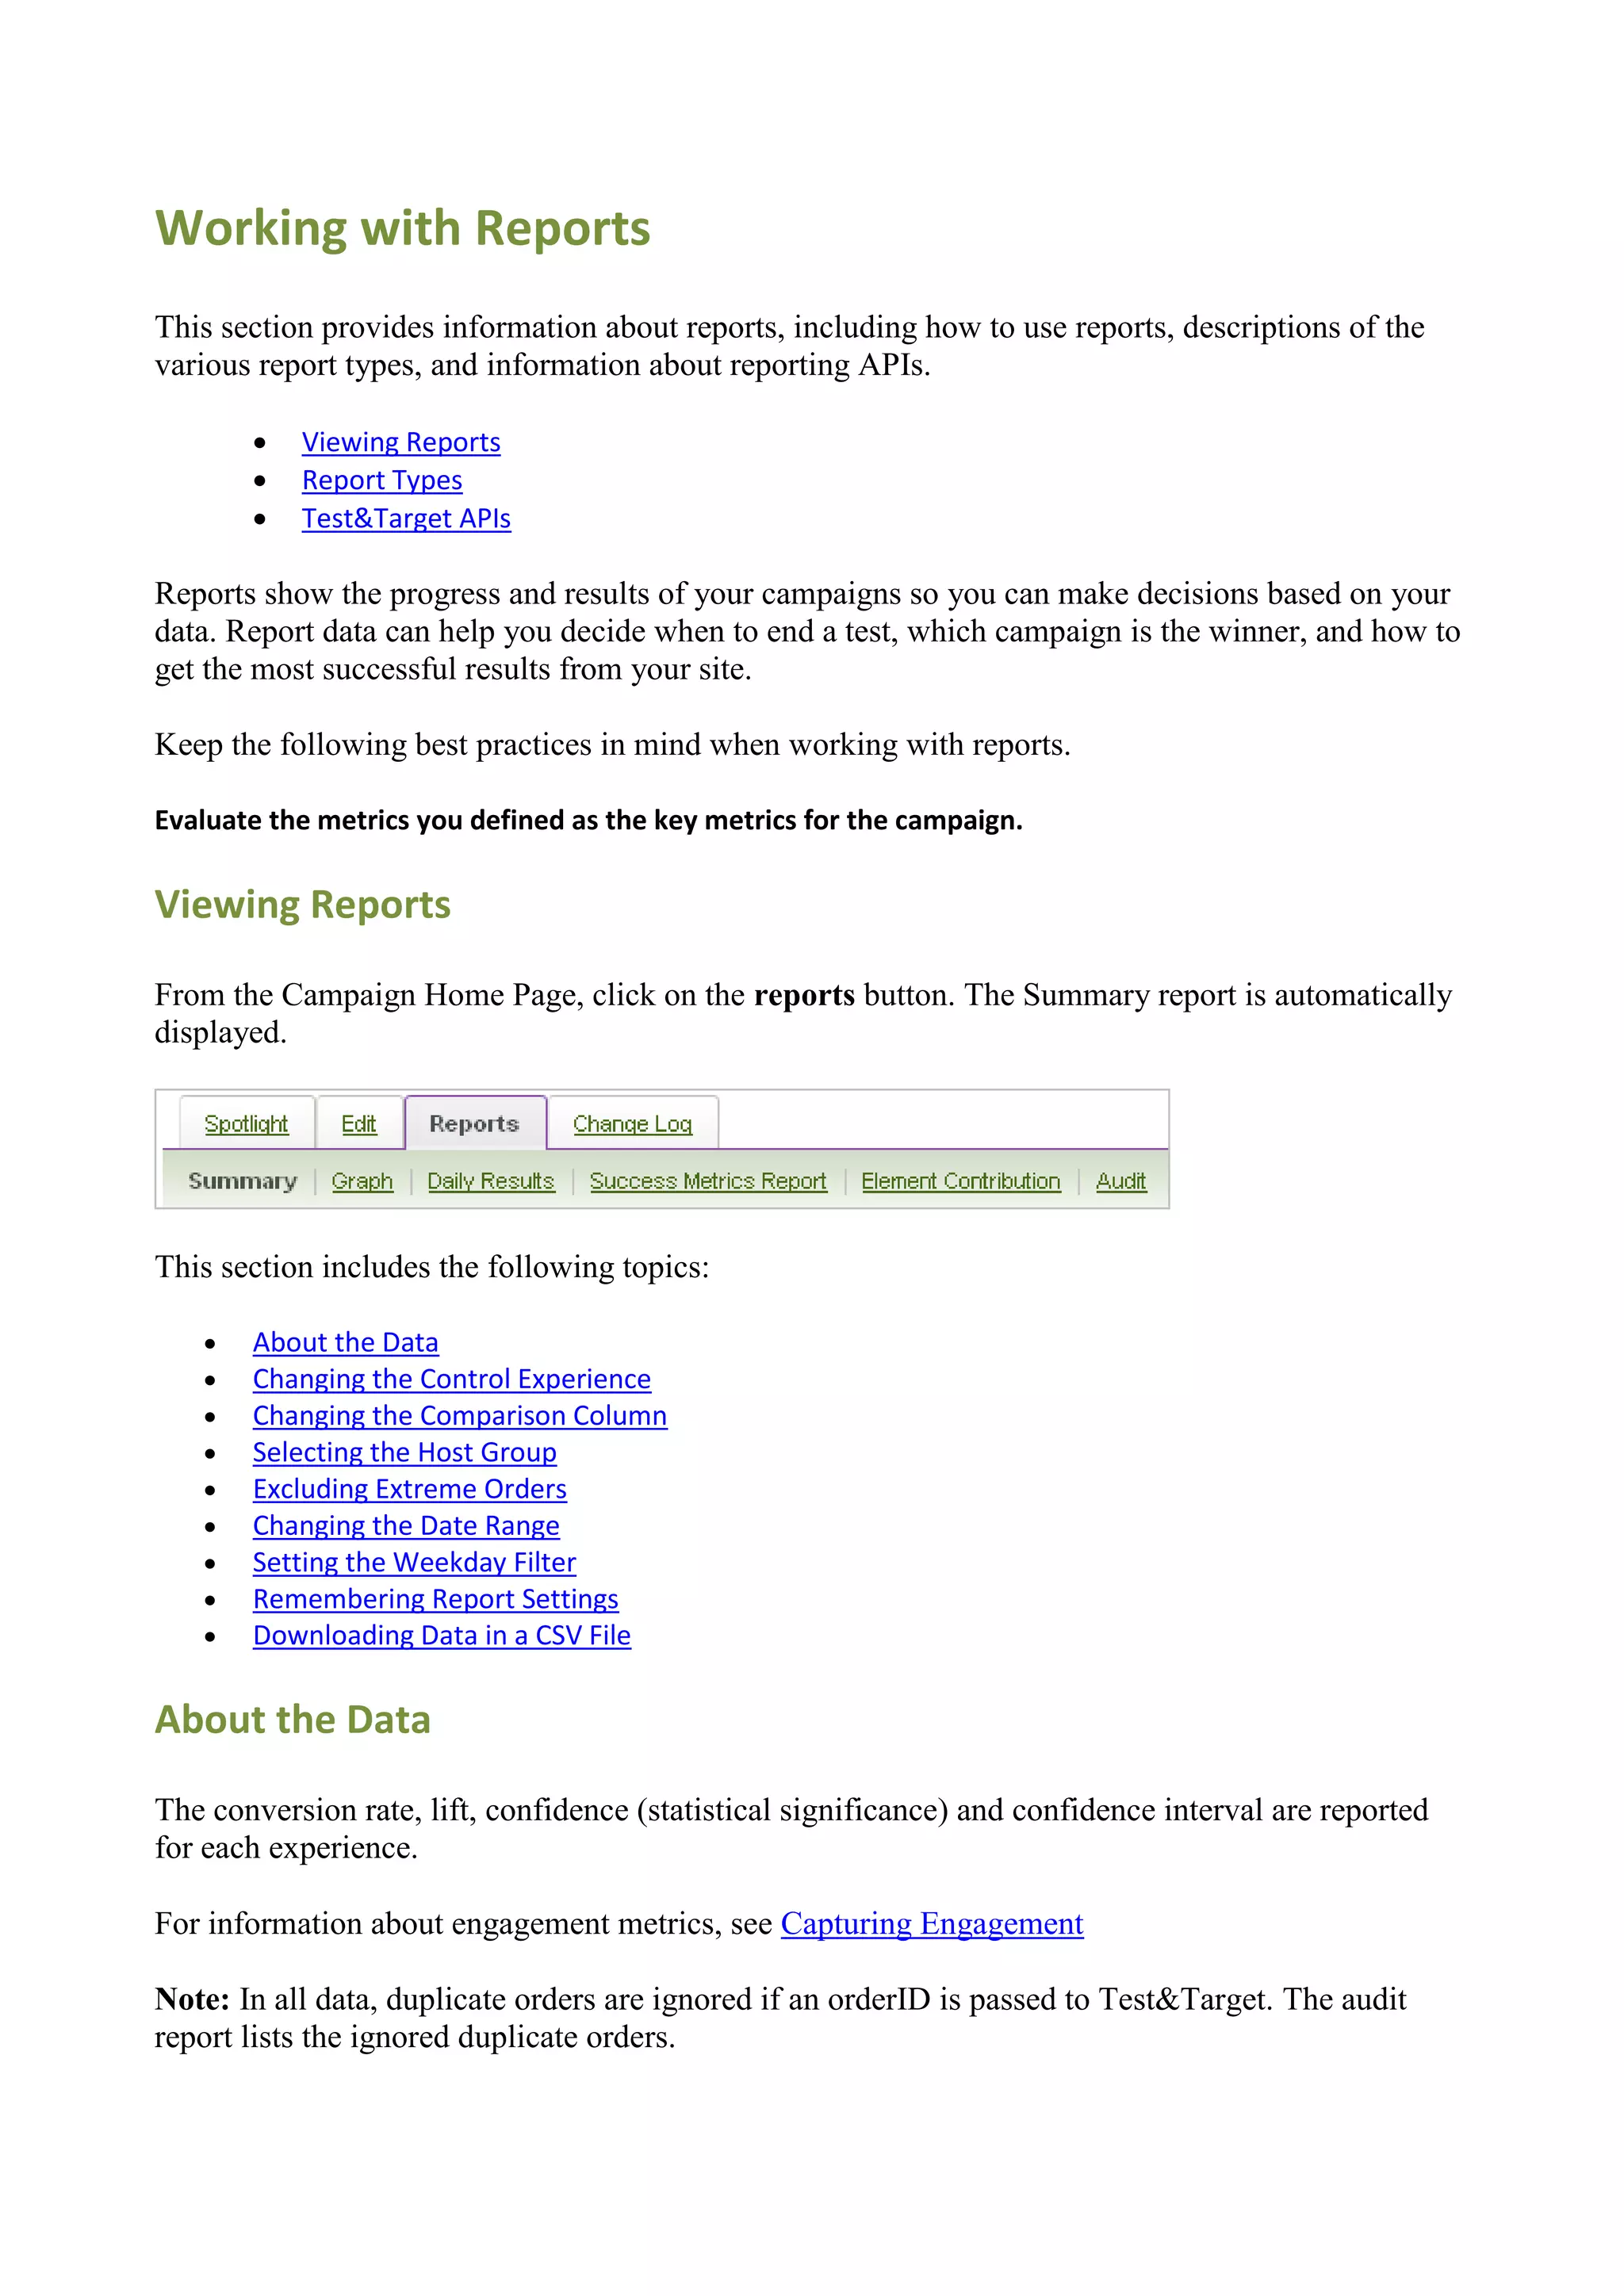
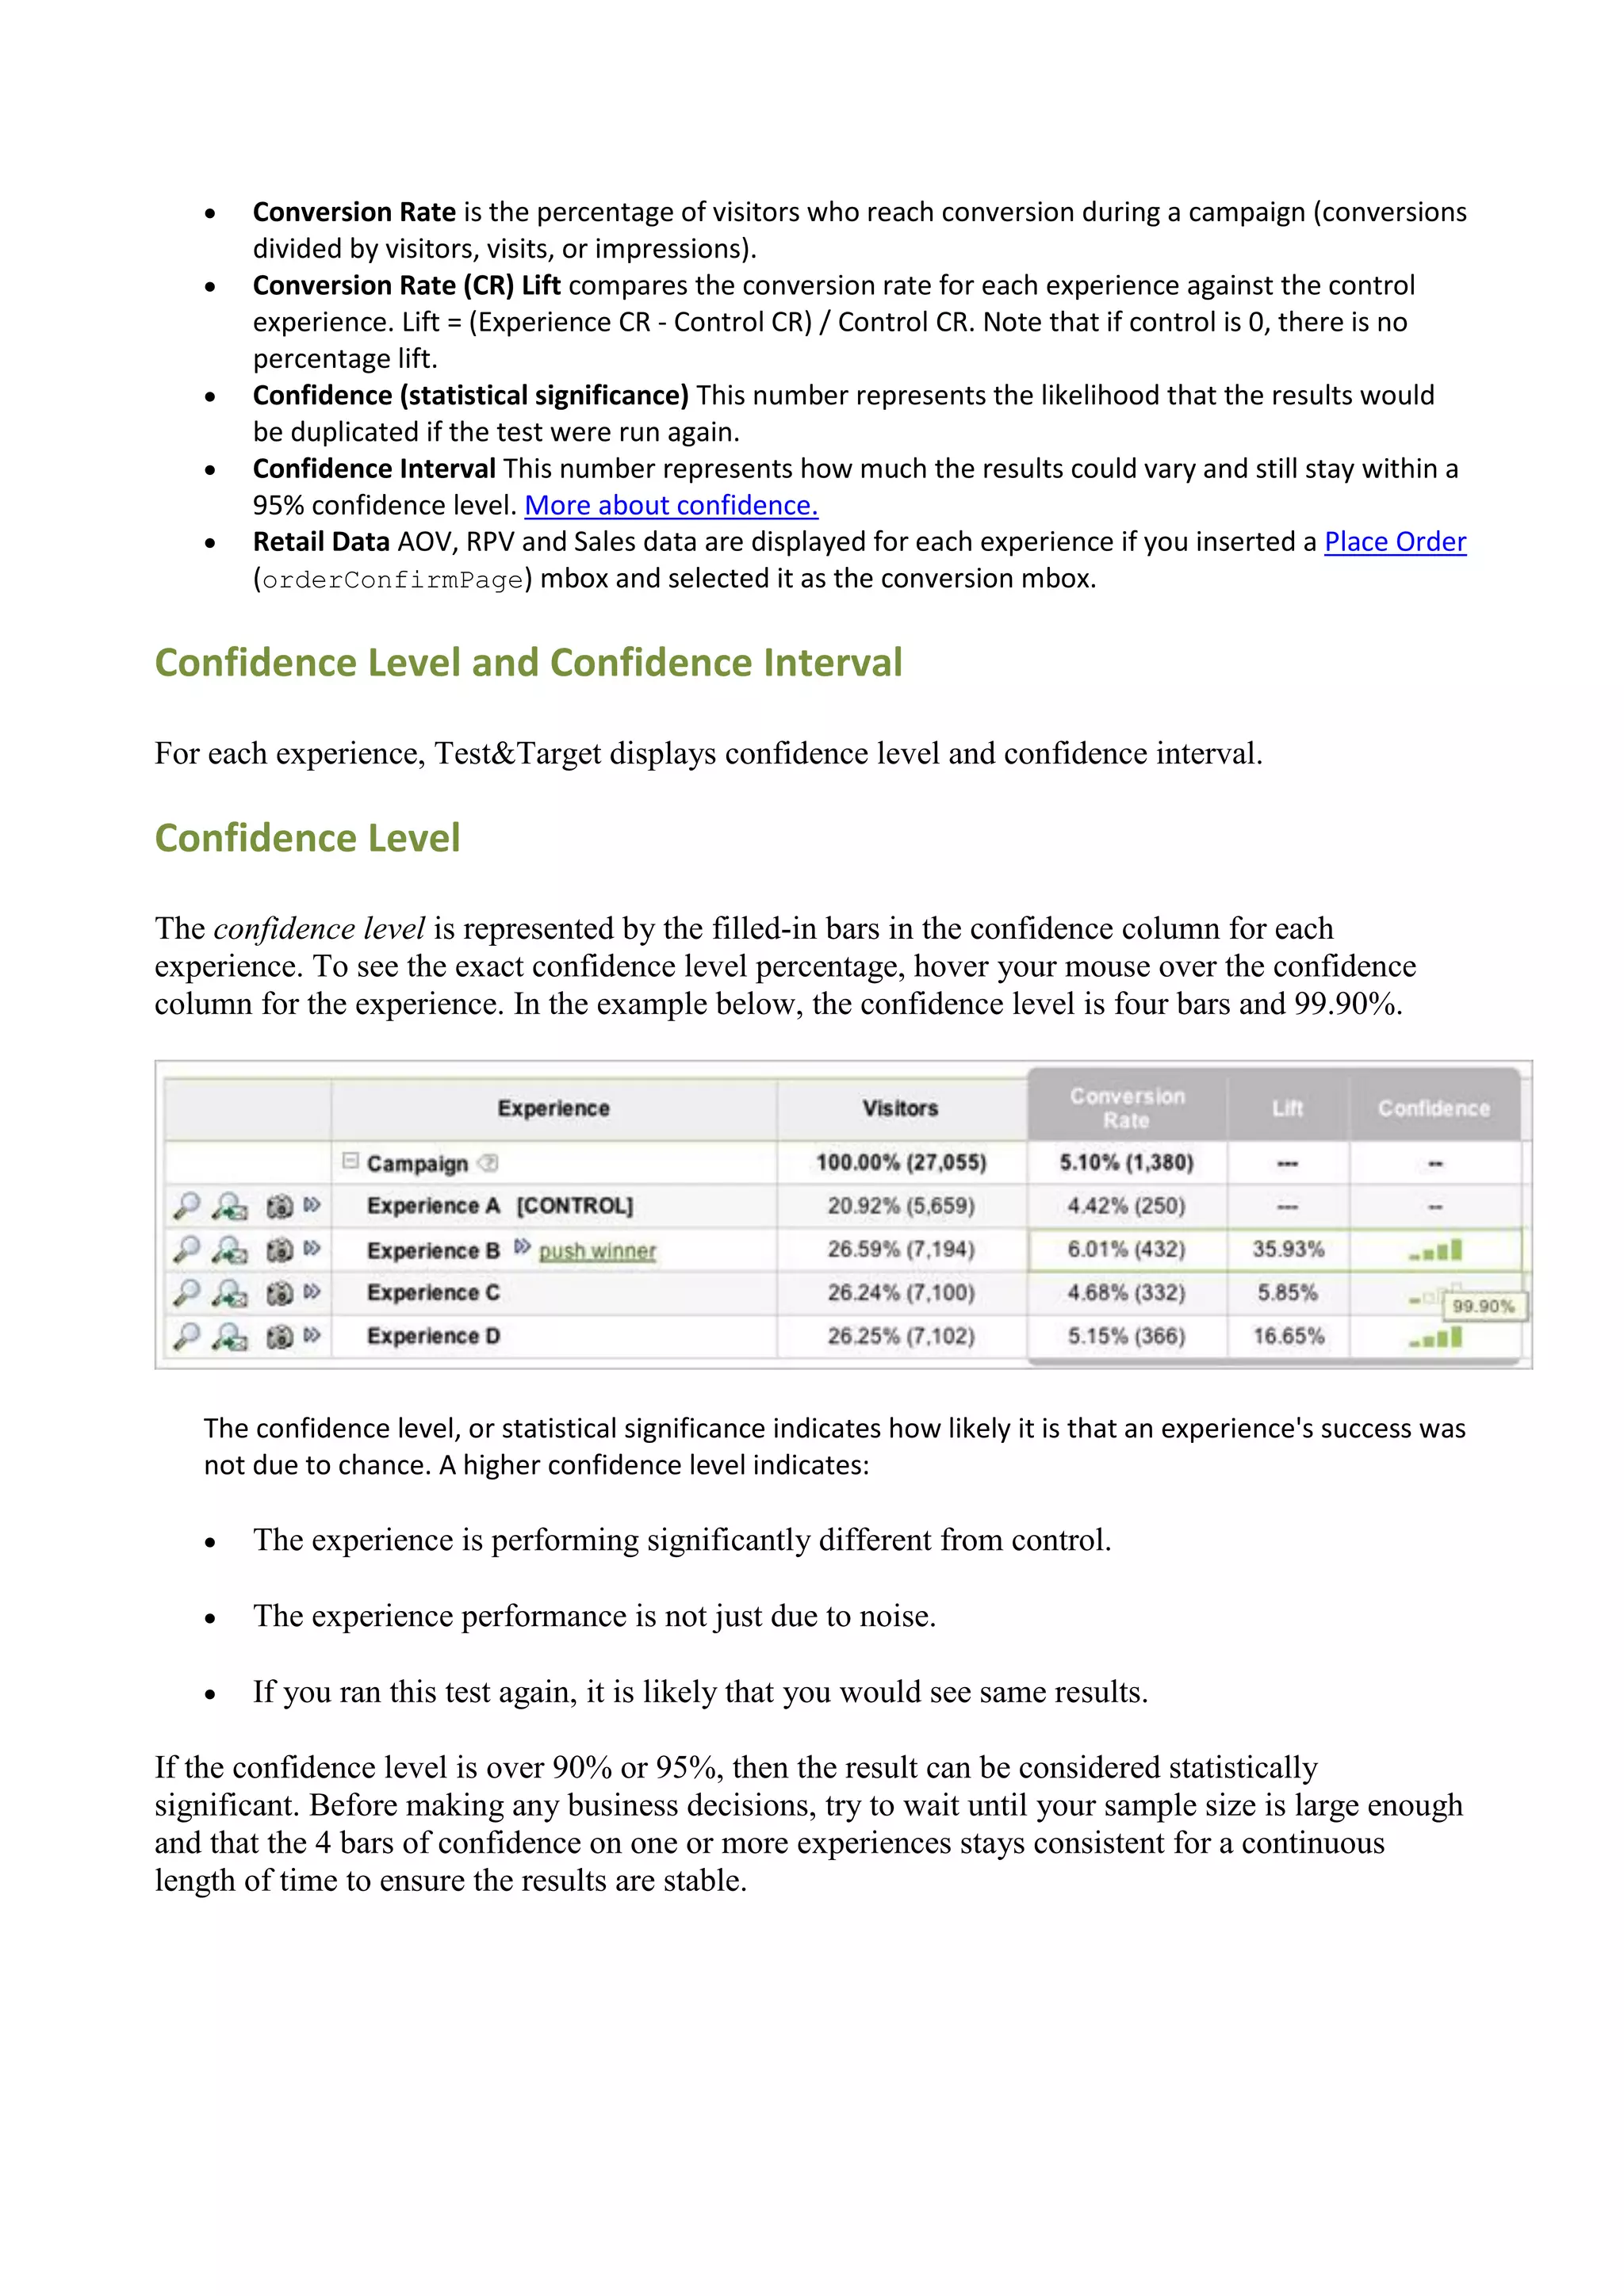

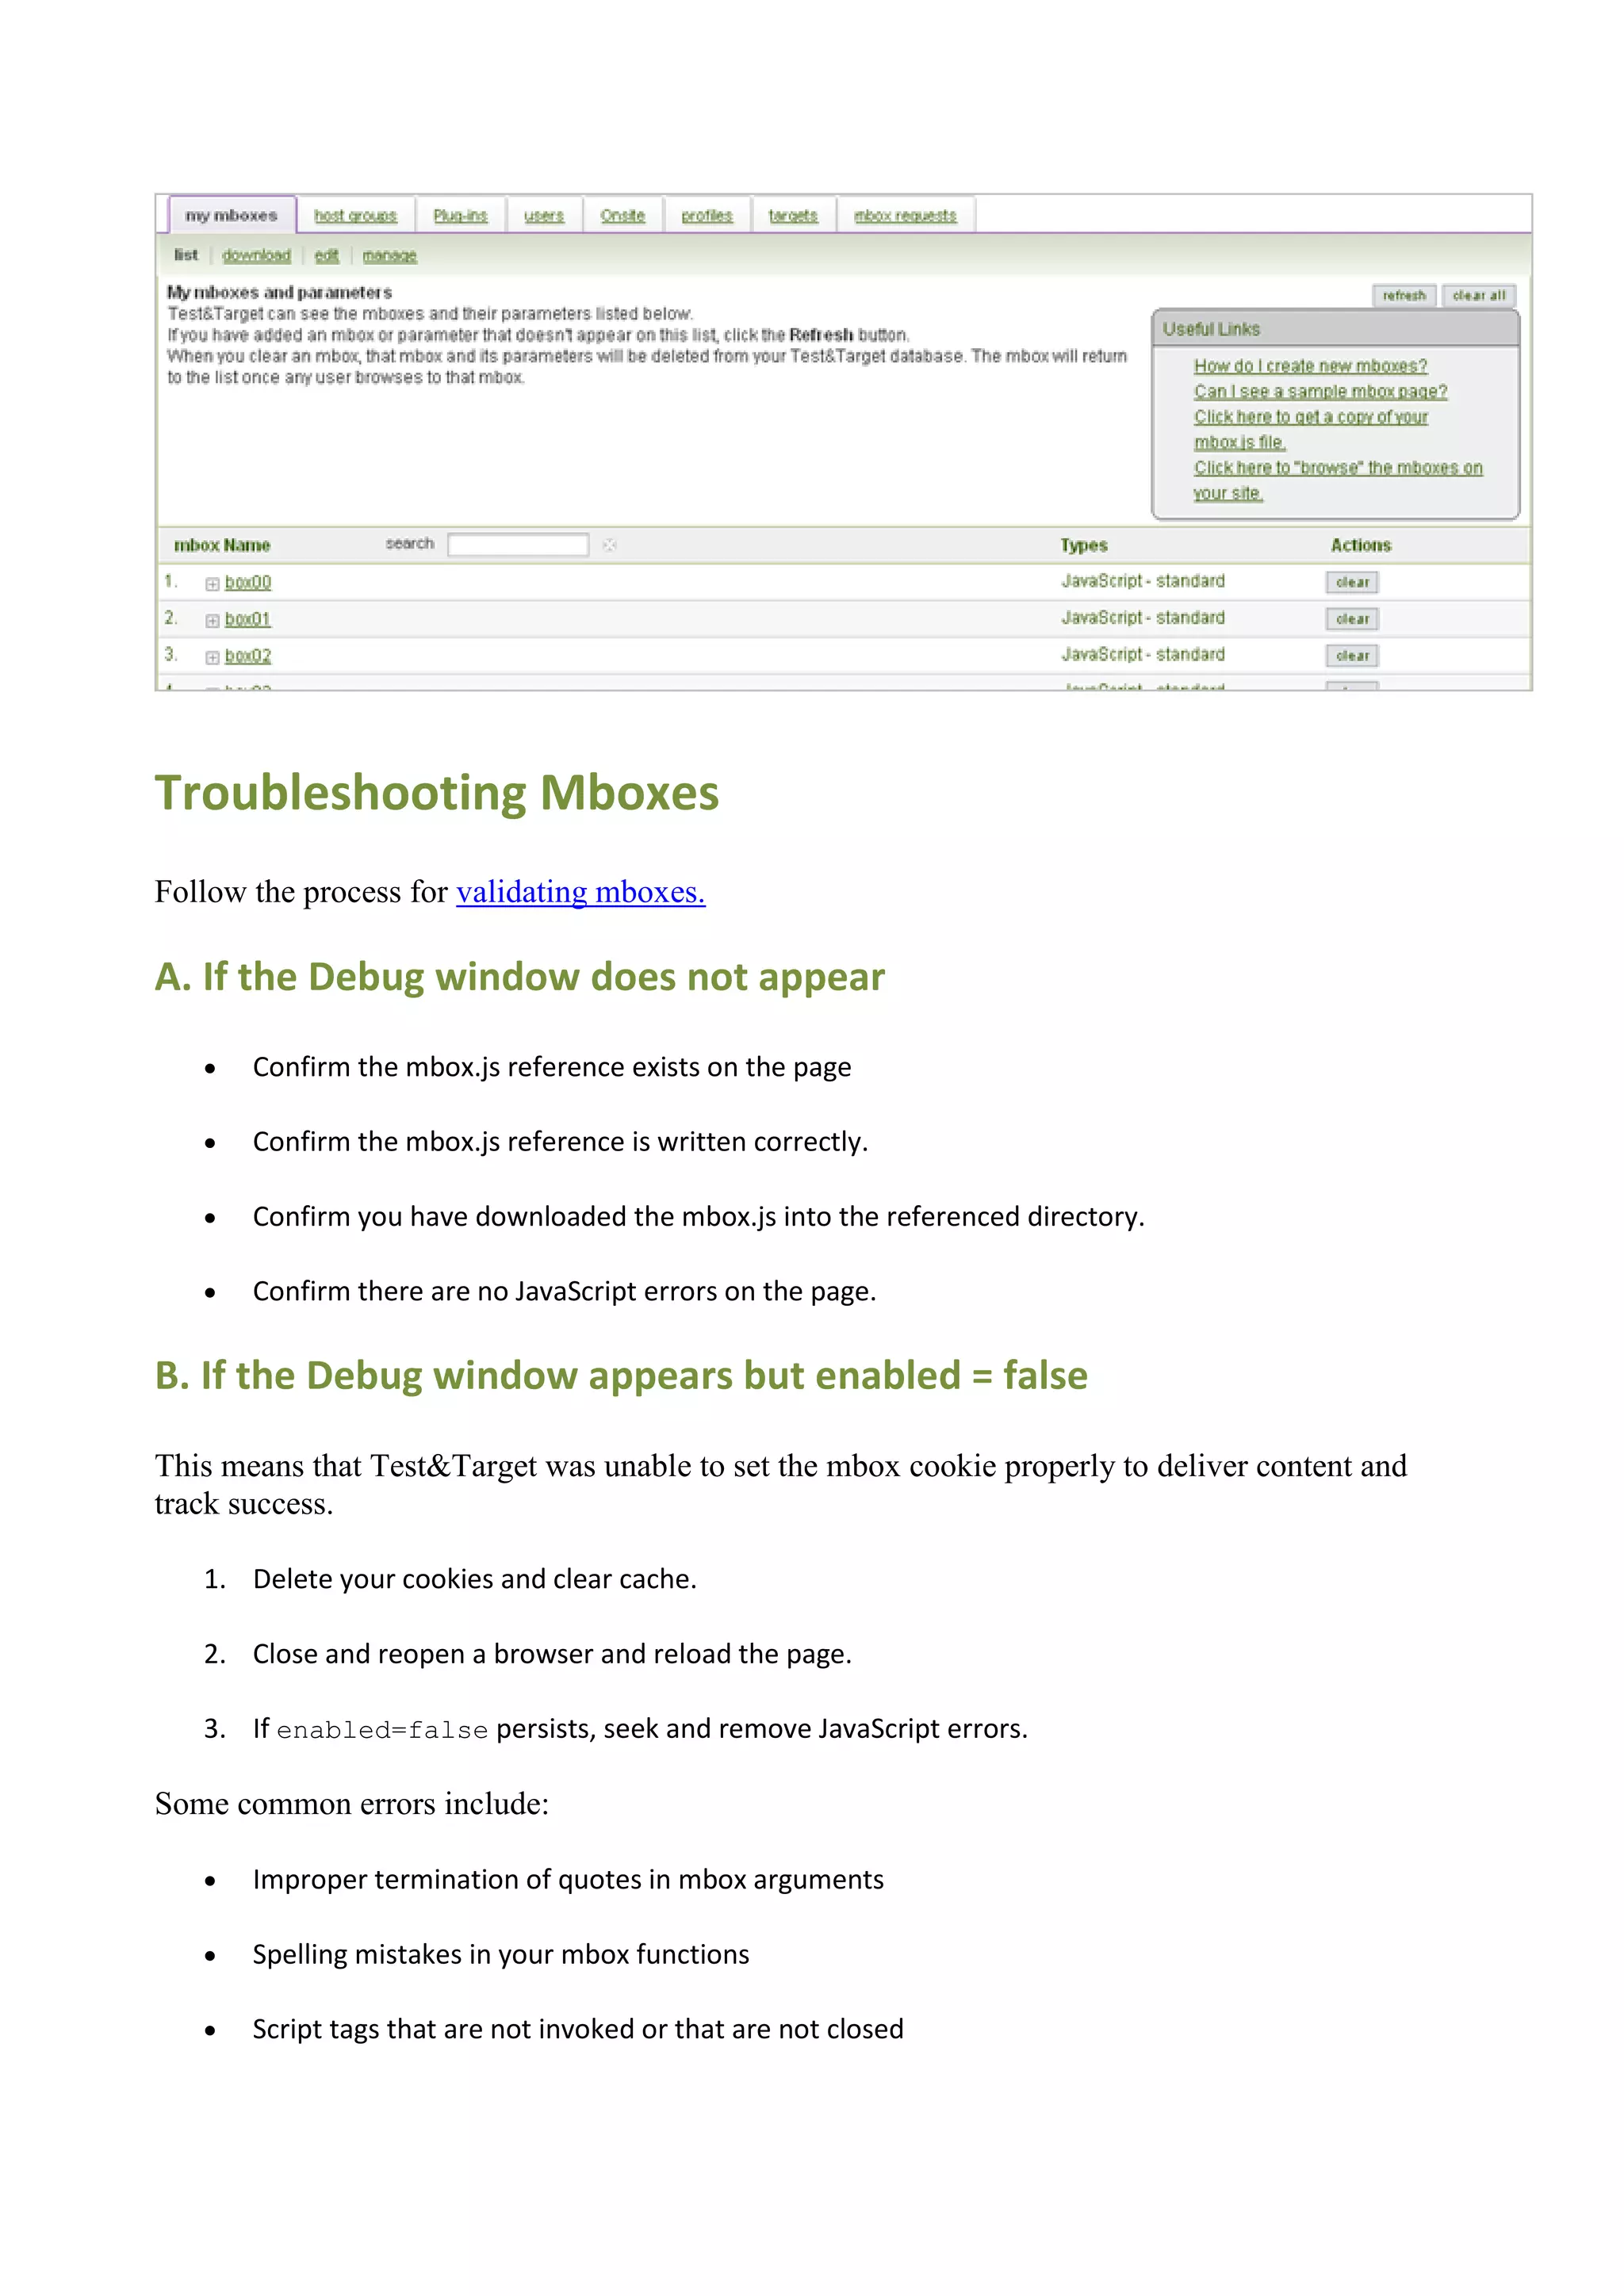
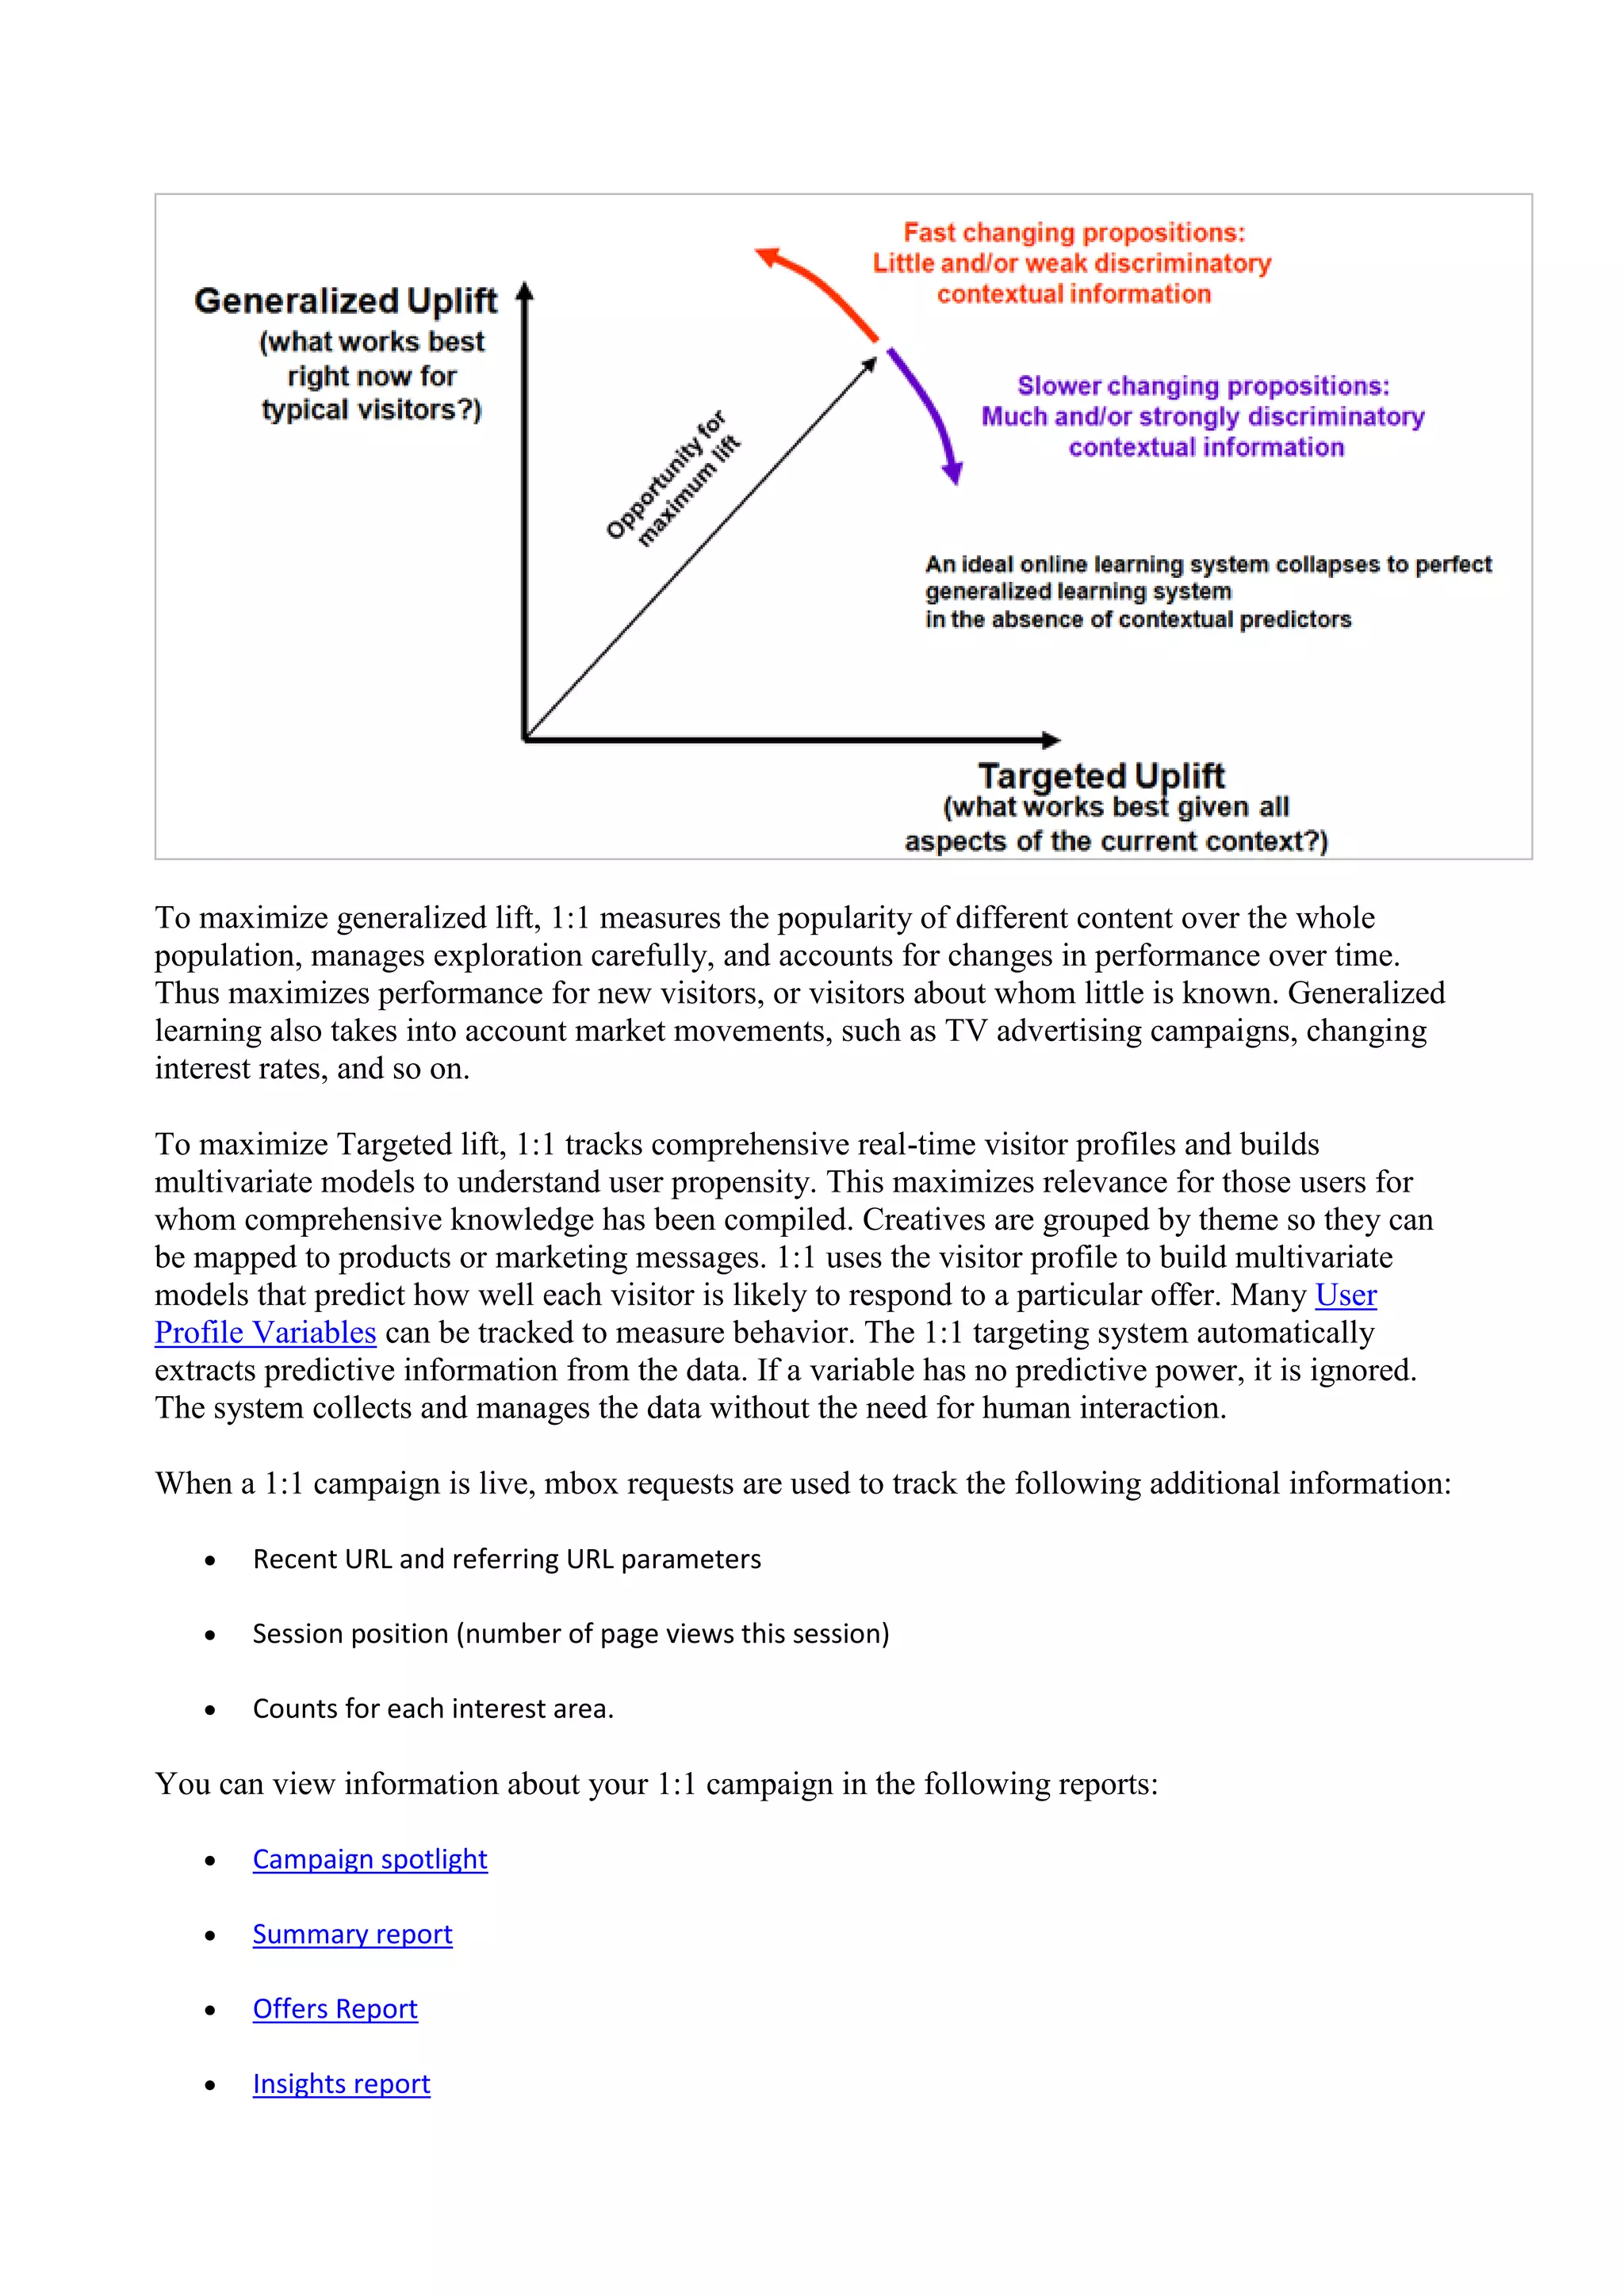
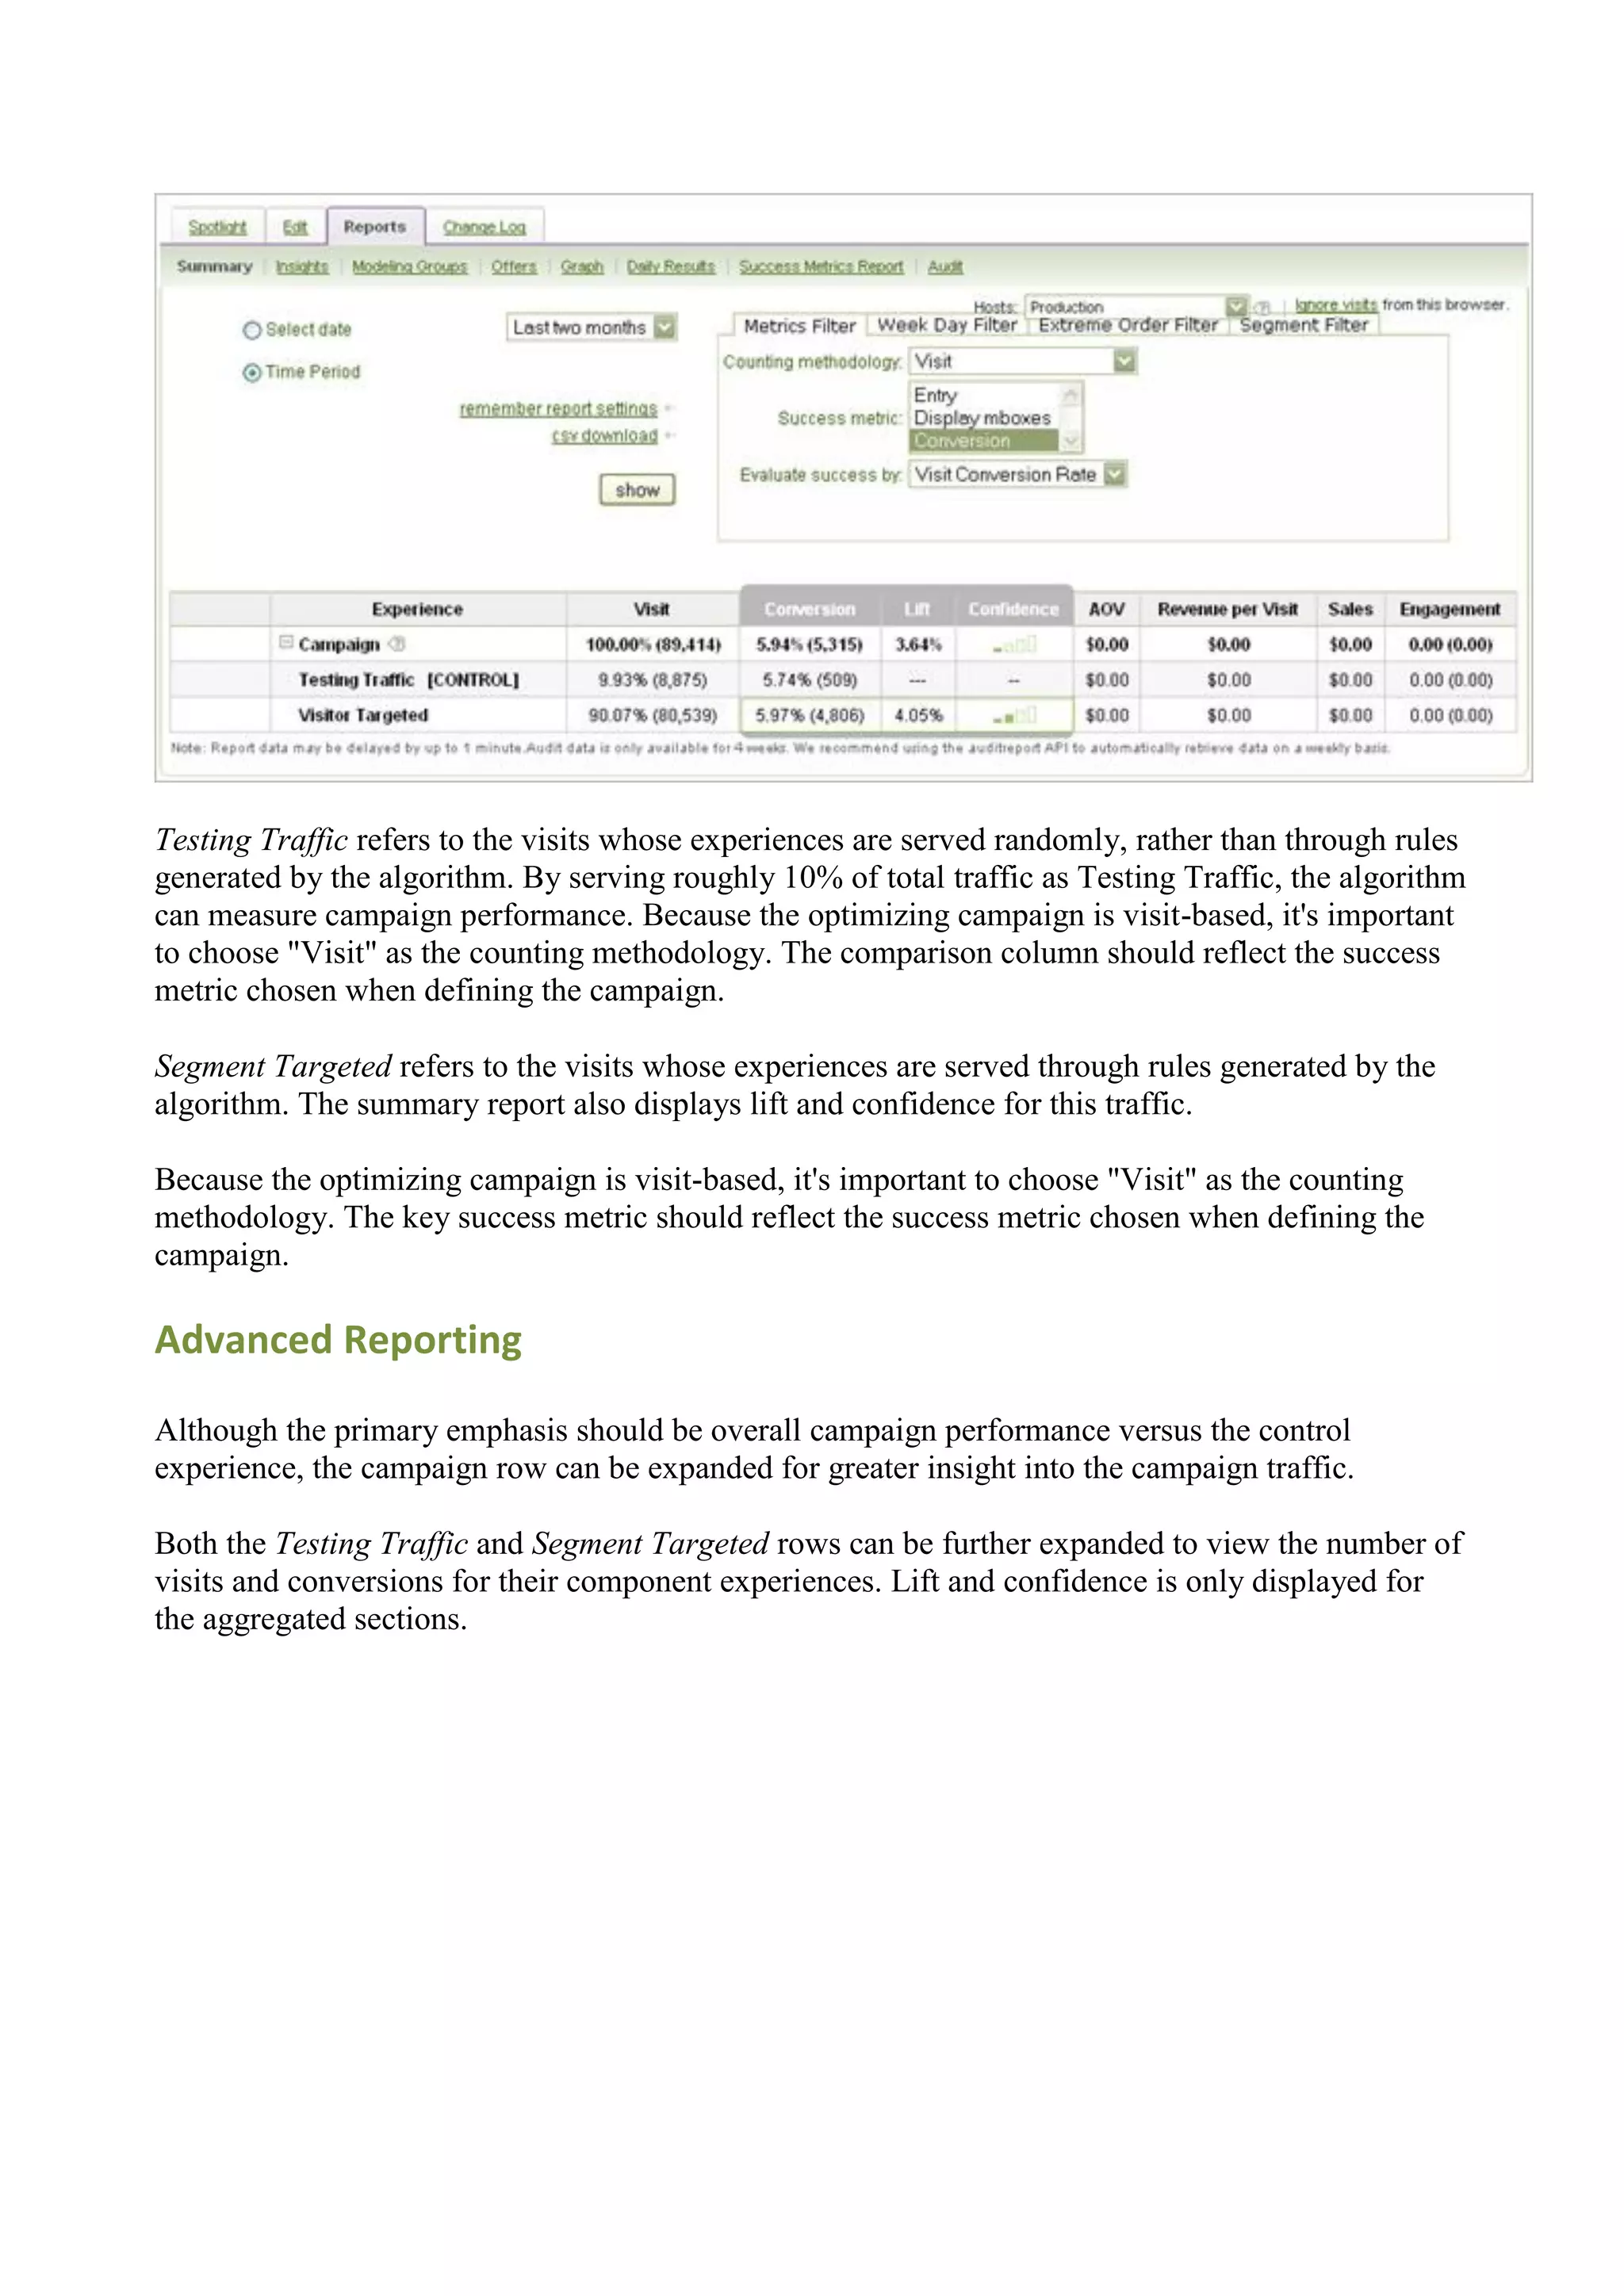
This document provides a user guide for Adobe Test&Target. It includes sections on how Test&Target works, managing campaigns, offers, parameters, and more. Specific topics covered include setting up hosts and users, creating A/B tests, multivariate tests, and optimizing campaigns, integrating with analytics packages, and troubleshooting issues.


![[] Medical notes_clinical_medicine_pocket_guide](https://cdn.slidesharecdn.com/ss_thumbnails/eagc0ff8sb2p0a7aq03q-signature-c3cf4f3fe52f934dd37cbbbfb60a23149a16ccb8cca5d5a26a4cfd57c865bc34-poli-150511164154-lva1-app6891-thumbnail.jpg?width=640&height=640&fit=bounds)