
Recommended
More Related Content
What's hot
What's hot (20)
Viewers also liked
Viewers also liked (19)
Similar to Question 6
Similar to Question 6 (20)
More from yazzflowers12
Recently uploaded
Recently uploaded (20)
Question 6
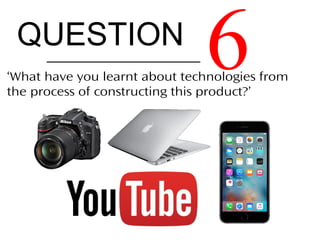
- 1. QUESTION 6‘What have you learnt about technologies from the process of constructing this product?’
- 2. EQUIPMENT
- 3. CAMERA Being introduced to equipment we would use for filming was intimidating at first as I was concerned I wouldn’t be able to utilise it properly. However, after I was shown what to do it was easy to pick up and I began to become more confident after practicing and I was happy to use it filming. The main piece of equipment was the camera. The camera I used was an average filming one from Sony. It was easy to use as it was self explanatory and the quality was also a lot better than I expected. It was different because in todays society whenever something is filmed its most likely with our phones. Therefore it was a transition onto filming with an actual camera as I had never done so before. I used this camera as it would produce higher quality videos and is a lot more professional. I wanted my film sequence to look as realistic as possible therefore, decided to use this. It also held a lot of storage which was important as I had to continuously repeat scenes and shots if they weren't right. The accessibility on being able to view videos quickly was also good as I wanted to see the videos in the time scale we had. There were also different options available on the camera such as zoom and auto focus which was so important for my scenes as sometimes I needed to zoom in on the emotion, props and other things. Overall, I found this camera great to use and I think it was the right choice to use it. The only issues I struggled with is handling the camera as it would often shake when I press stop recording.
- 4. TRIPOD Using a tripod was a lot harder to get to grips with than the camera as it was a lot more difficult to adjust. The fact the legs could adjust to being different heights what a great benefit as it allowed me to shoot from different angles and access the shots I wanted. For instance, when I wanted a medium shot I adjusted the legs full length so it was able to get everything into the shot I wanted and be the same height as my actors. Another element on the tripod that was most useful is the fact it stabilises the camera. The movie would have been less successful if I didn’t have one as it wouldn’t be professional and the shots would be constantly moving instead of being still. It provided stability with the camera and it made my shots much easier to shoot. Another important part of the tripod is the handle. It made it smoother to turn the camera if needed. For example, this is used mainly for establishing shots as it allows you to carefully move the camera from one side to another. These are all the reasons I decided to use the tripod. It most definitely aided me a lot throughout filming. The only difficult issue I had with it was when attach the camera as sometimes it didn’t screw on properly. Another great factor was that it ensures the camera is straight when filming and isn't titled to an angle. Consequently, using a tripod was extremely important and useful within my filming for these reasons.
- 5. 16G MEMORY CARD Using this 16g memory card during filming was useful as it allowed me to gain maximum footage and due to constantly making errors or actors making mistakes this was important. It allowed a lot of freedom to explore with different shots . ROTO LIGHTS These lights were very helpful within filming scenes as when I filmed it was at night therefore the lighting needed to be altered. This source of artificial lighting allowed me to create different moods and edit the whole atmosphere of the scene. It enhanced the brightness therefore I could emphasis the emotion of characters faces etc. It can be altered to turn up and down depending on how much you need to for instance, in the garage scene I already had lights on therefore I didn’t need it as much. Whereas, the last shot of ‘Esme’ was brightened on her face to show her emotion more clearly. This was an important element of the thriller genre that I wanted to include.
- 6. SOFTWARE
- 7. PREMIERE PRO I used Premiere Pro to edit my filming because I found it had a wider scope of effects, techniques and tools I could use. For instance, the ability to cut and trim certain clips was the first tool I needed and found relatively easy. However, when I wanted to use other effects such as fading and audio, I had to visit tutorials on YouTube to be able to use them to the best of my ability. It was very difficult and complicated at times as there was a huge array of effects and its all very detailed. After a while, I began to be comfortable with the software. I started to add titles and play around with different font styles. Once I had all my clips in place, I wanted to experiment with different effects such as blur and fade. I had to research this but once I knew how to do it, I became really confident blurring out a lot of my clips to create a scary effect. It was also effective when I wanted to create the illusion the girl had just woke up and this blur allowed me to do so. You can also edit the pace of the shot for example, one of my was slow motion. I then editing the hue and brightness of each clip to make it darker and it looked a lot more professional. It created the right look I wanted for the scene which was to be grungy and scary. After the footage had been finished, it was vital to include music. This was easier than expected and the software allowed me to add more than one piece of audio so I could vary the mood. For example, a much slower paced song it played at the start in comparison to a much more tense song during the action to build suspense. I could also fade the audio which was useful towards the end to create a more advanced look.
- 8. YouTube is a global organisation that is the most popular way to source videos. Due to it being so mainstream and popular with everyone, I thought it is the perfect way to share my film as anyone can access it. I uploaded my preliminary task and my opening scene. Friends, family and anyone can easily view my videos I uploaded which was beneficial to get feedback and to make it less hassle to view it in other ways. I also was able to use the same Google account as my blog which saved confusion and again allows it to be easily accessible. It’s a very good quality video from YouTube and people will be able to view it without it buffering and being difficult. It can stream anytime and the website can be opened by anyone, many people have the app on phones too. YouTube also allows comments, likes and dislikes which was great for me as I could get an insight as what viewers thought.
- 9. Prezi was useful for presentations within my blog or evaluation. It’s a creative, fun and modern way of presenting information and I really enjoyed using it. Its easy to access and great to play around with. I wanted to create different ways of presenting my questions to involve the audience and be different to other presentations. I wanted my blog to stand out with using different platforms to get information across. It also has interactive features within it and overall makes it more exciting for viewers to read. It was easy to use as there are many tips and guidance from the website. The website also allowed me to add photos and symbols to explain my question more vividly for readers and to make it more creative. Microsoft Word is a common software I was comfortable with from previous experience with using. It’s a very popular and basic way of showcasing information. I used it as it was not only easy, but its very simplistic and I wanted a clear layout for particular information. I not only used this for my evaluation Question 4, but also I used it during my research. It can be easily transferred onto slide share to enable it to load onto my blog and is quick and simple to view for readers.
- 10. Microsoft PowerPoint was another useful software I used for my blog research and evaluation questions. It’s a simple presentation from different slides which can be made interesting by adding transition effects, sounds and more. It’s probably the most common method of presenting as many people are familiar with it. You can also change the theme as to what you would want. It also allows you to write a lot of text which was useful during my evaluation questions. I wanted to explore with different styles of presenting moreover, I choose to use a variety of software's. From using different forms of presenting, I decided to research individual websites of my own. I came across a lot of different ones that were similar to prezzie. However, I then found ‘PowToon’ which intrigued me as it was a different style. It uses cartoon characters and moving animation to display information. It was very fun and something new and exciting to me and readers. I wanted a variety of different styles on my blog.
- 11. I used YouGov for audience research within my blog. It gave me information on demographics and the types of people stereotypically associated with different thriller films. It’s a unique site that allows you do visualise the type of person who would watch that specific film. It even provides a picture and a full analysis of the person if you type in any film. Slide share is a site that is commonly used by students and teachers as a way of transferring documents onto a slide show to put onto different sites (such as my blog). This website is accessible for anyone therefore, it’s a great way for other people to look at my work. It was also necessary for me to upload it onto here in order to put it onto my blog.
- 12. Survey Monkey has been a huge help during my media project as firstly it helped me with planning as I created a survey to post on Facebook for people to give there opinions on thriller films. This then allowed me to progress onto planning and filming my sequence. Its very detailed and you have freedom to create whatever questions you desire. I had a lot of scope as you can include different styles of questions. For example, I had questions that allowed the participant to freely write there opinion and I also had ones that they ranked in order. This was extremely effective as I not only was able to experiment with new ideas, but it gave a much more clear idea of what the audience were saying. After I produced my film and posted it onto social media sites, I created another survey to get feedback on my film. Its simple to understand so people can easily fill it out and its very practical for Facebook users. In addition, the analysis afterwards to review results is very clear and set out so I can see opinions and views more clearly. For example, it gives you percentages and displays graphs showing results to make it more understandable and easier to evaluate.