SlideShare a Scribd company logo
1 of 60
Download to read offline
product manual 01.18
Direct/Residual Shear Apparatus
HM-5750A.3F
HM-5750D.3F
CONTENTS
Quick Start Guide	4
Unpacking	4
Installation and Equipment Setup 	 4
	 Electrical Connections 	 4
	 Power Switch 	 4
Instrumentation Connections and Setup	 5
	 HM-5750 Rear Instrumentation Panel	 5
	 Network 	 5
	 USB Power 	 5
	 Instrument Inputs 	 5
Initial Machine Set up	 6
	 Iinitial Set up — Calibration	 8
	 Calibration Input Screen	 8
	Units	 9
	Value	 9
Initial Set Up — Date/Time 	 10
	Date	 10
	Time	 10
	 Clock Style	 10
	Clock	 10
Initial Set Up — Display	 11
	Brightness	 12
	 Dim Display	 12
	 Turn Display Off	 12
Initial Set Up Preferences	 12
	 Preferences – General Tab	 13
	 Logger ID 	 13
	 Sound 	 13
	 Automatically Update System 	 13
	 Update Check Frequency 	 13	
Preferences – System Units Tab	 13
			 Ambient Temperature	 14
			 Motor Speed Unit	 14
			 Stress Control Unit	 14
	 Preferences – Specimen Parameters Tab	 14
		Specimen Height	 15
	 Specimen Diameter	 15
	 Specimen Width	 15
	 Preferences – Storage Tab	 15
	 Test Storage Limit	 15	
Recycled Tests	 15
	 Test Templates	 15
	 Save to USB	 15
Initial Set Up — Network	 16
	DHCP	 17
	 IP Information	 17
	 Local Status	 17
	 Internet Status	 17
Initial Set Up — Information	 17
System Information	 18
	 Firmware Version	 18
	 IP Information	 18
	 Local Status	 18
	 Internet Status	 19
	Memory	 19
	 Factory Screen	 19
	 Export Log File	 19
Initial Set Up — Contact	 19
	 Contact Information	 19
Initial Set Up — Update	 20
	 Update from USB	 21
	 Check for Update	 22
	 Update Details	 22
	 Download Updates	 22
Equipment Setup	25
Installation and Equipment Setup	 26
	 Electrical Connections	 26
	 Power Switch	 26
Instrumentation Connections and Setup	 27
	 Rear Instrumentation Panel	 27
	Network	 27
	 USB Power	 27
	 Instrument Inputs	 27
	 Test Deck Setup	 28
	 Shearbox Assembly	 29
	 Shearbox Replacement Screws	 29
	 Sample Prep	 30
	 Shearbox Placement	 30
Calibration of Instrumentation	 32
	 How to Perform a Calibration	 32
	 Export Calibration via USB	 32
Test Setup	39
	 Sample Preparation	 40
	 Sample Set Up	 40
	 Consolidation of the Test Sample	 40
	 Weight Platform Calculations	 40
	 Test Procedures	 41
	 Sample Removal and Clean Up	 41
Test Setup — Consolidation	 42
	 Test Setup Wizard – Select Test Type	 42
	Template	 42
	 Test Setup Wizard – Set Up Taget Load	 43
	 Test Setup Wizard – Select Logging Values	 44
	 Test Setup Wizard – Select Stop Parameters	 46
	 Test Setup Wizard – Select Trigger Parameters	47
Test Setup — Direct Shear	 51
	 Test Setup Wizard – Select Test Type	 51
	Template	 51
	 Test Setup Wizard – Select Motor Condition	 52
	 TestSetupWizard–SelectLoggingParameters	 53
	 Test Setup Wizard – Stop Conditions	 54
	 Test Setup Wizard – Graph Conditions	 55
Specifications	56
General Warnings	 57
QUICKSTARTGUIDE
4
Unpacking
Initial inspection should include checking for physical dam-
age during shipping and obvious external damage to the
product.
Package contents are defined by your packing list. Each
Loader is configured according to customer specifications.
In your inspection, make certain that the contents of your
shipment match the documentation provided by your pack-
ing list.
Place unit on a flat, level surface to ensure that the unit
is level side-to-side and back-to-front.
Installation and Equipment Setup
Electrical Connections
The HM-5750A or D Direct Shear models are equipped with
an internal digital switching power supply, which allows them
to be used with most power configurations throughout the
world. The unit is supplied with an IEC electrical cord with a
standard 110V plug.
The HM-5750A or D arrives ready for operation. Attach the
supplied IEC electrical cord to the machine and plug into
a standard wall receptacle for use in the United States. For
locations other than the U.S., replace the supplied electrical
cord with an IEC cord that has the correct plug for your ap-
plication. The supplied cord can also be used by cutting the
standard plug from the cord and attaching the correct plug.
Power Switch
The Power Switch is located on the upper right hand corner
of the back of the machine, above the electrical cord inlet.
The Fuse Compartment is located between the electrical
cord inlet and the Power Switch. The HM-5750A or D use a
10 amp fuse. To begin operation, attach the supplied electri-
cal cord, plug it in and press the Power Switch.
Fig. 1 Power Switch
Fuse Compartment
QUICKSTARTGUIDE
5
Instrumentation Connections and Setup
HM-5750A or D Rear Instrumentation Panel
Above is a photo of the rear instrumentation panel of the
HM-5750A or D.
Network (1)
Ethernet input for connecting machine to a local area net-
work (LAN) and/or the internet.
USB Power (2)
The USB Power port is used for powering a wireless access
appliance for those who want to use a wireless LAN setup.
Instrument Inputs (3)
The panel features four (4) inputs for connecting instrumentation
to the machine. Each input represents a separate channel, and has
been assigned and calibrated to a specific instrument for use with
your HM-5750A or D.
2
1
3
Below are photos of an instrumentation input and the in-
strumentation plug. Install the plugs into the inputs by lining
up the guide at the bottom of the plug with the slot at the
bottom of the input.
Instrumentation Input Instrumentation Plug
QUICKSTARTGUIDE
6
Once you have installed the instrumentation into the correct
inputs, your rear panel should look like this:
Remember, your HM-5750A or D Direct/Residual Shear
Machine includes all the necessary instrumentation, which
is already calibrated and assigned to an Input and will not
need calibration, however you should confirm that the
instrumentation has been set up and calibrated, that
you have plugged them into the correct channel, and that
you check with your QC/QA program to set up a frequency
of calibration schedule.
Initial Set Up
DO NOT RECALIBRATE!
QUICKSTARTGUIDE
7
When your HM-5760 is first turned on, the screen below will
appear.
Navigate to the bottom of this drop-down menu and click
on System Settings (1). You will see the following screen.
From this screen, to confirm your machine instrumentation has
been calibrated, navigate to the Calibration section by clicking
the Menu icon in the top left corner of the screen (1). When you
click on this button, you will see a drop-down menu appear, see
below.
1
1
QUICKSTARTGUIDE
8
Click on the Calibration tab in the top left corner (2). You will
see the following screen.
2
Calibration Input Screen
The Calibration Input Screen (above) is used to monitor and
calibrate instrumentation and assign them to specific chan-
nels of the HM-5750. The Calibration Input Screen provides
a summary of the calibration status of each channel. At this
time, verify the calibration information.
A green box at the left of a channel indicates that the chan-
nel has instrumentation assigned to it and that it is calibrated
and ready for use (1).
1
Initial Set Up — Calibration
QUICKSTARTGUIDE
9
Calibration Input Screen, cont.
Each channel has a “Limits On” check box (1). Use the Limits
On to keep the machine from exceeding the sensor limits of
the instrumentation. By selecting this option, before the test
can exceed the limits of the sensors, all tests will stop run-
ning and the motor will stop to avoid damaging connected
instrumentation.
Note: An input cannot be calibrated during testing.
Units (2)
In this field, a calibrated instrument will display the units
that were chosen for use at the time of calibration. This field
can also be used to automatically toggle conversion of units
between lb.-in. and SI units if the need arises.
Value (3)
This field displays the current calibration value. This value
should already be set with 3 decimal point accuracy (1)
below. If the instrument is not calibrated, the unit will read
“N/A.”
2 3
4
1
1
QUICKSTARTGUIDE
10
1
For the HM-5750, values for vertical and horizontal loads will
be set at 10.000kN (2000.0 lb), for vertical displacement this
value will be set at 10.000mm (0.4000”) and for horizontal
displacement this value will be set at 25.000mm (1.000”)
Export Calibration via USB (4)
Press this button to select calibrations to export via USB. It
is a good practice to export all your calibrations to a thumb
drive. In case of a problem this practice allows you to recover
your calibration data quickly.
To set up Date and Time settings, return to the System Set-
tings screen and click on the Date/Time Panel. (1)
1
2
3
4
Click on the Date/Time tab (1). You will see the following
screen.
Initial Set Up — Date and Time
QUICKSTARTGUIDE
11
To set up Display settings, return to the System Settings
screen and click on the Display Panel. (1)
1
Date (1)
Set the month, day, year, and date display format.
Time (2)
Set the hours, minutes, seconds, and am/pm.
Clock Style (3)
Select a clock view, either a 24-hour or 12-hour clock, as well
as the option to show seconds or not.
Clock (4)
The current time is displayed and is located on every control-
ler screen. Clicking on the time from any screen, you will be
taken to the Date/Time Settings Screen.
Click on the Display tab (1). You will see the following screen.
Initial Set Up — Display
QUICKSTARTGUIDE
12
This screen is accessed by clicking on the “Preferences”
button. (1)
Brightness (1)
Slide the gray bar to the left or right to adjust brightness.
Dim Display (2)
The backlight of the display will automatically dim to save
power. Click the yellow box to change the number of min-
utes before the display goes dim. After the time has elapsed,
touch the display to deactivate dimming.
Turn Display Off (3)
The display will automatically turn off to save power. Click
the yellow box to change the number of minutes before the
display powers off.
1
2
3
1
Initial Set Up — Preferences
QUICKSTARTGUIDE
13
Click on the Display tab (1). You will see the following screen.
2
3
1
4
Preferences – General Tab
The Preferences panel is comprised of four (4) tabs and
defaults to the General tab, see above.
Logger ID (1)
Each machine that is connected to your network requires
a unique Logger ID. These numbers can be assigned any
number between 1-245. In most cases, if you are setting up a
new machine it has been given the Logger ID 1. This would
show in the Logger ID field. (1). If this number conflicts with
another machine’s Logger ID, one of the machines will have
to be changed to another Logger ID.
Sound (2)
Checking this box enables or disables audio feedback for
logger events.
Automatically Update System (3)
Checking this box allows the machine to automatically search
for firmware updates when actively connected to the Inter-
net. The machine will not automatically install updates; it will
prompt when an update is available.
Update Check Frequency (4)
The number placed in this box represents the frequency
(how many days) the machine checks for updates.
Preferences – System Units Tab
This screen is accessed by clicking on the “System Units” Tab
under System Preferences.
QUICKSTARTGUIDE
14
1
2
3
1
2
3
Ambient Temperature (1)
This field displays the current ambient temperature and
allows you to select desired units (Fahrenheit or Celsius) for
temperature recording.
Motor Speed Unit (2)
Click on the desired units you want to use for motor control
(in/min or mm/min).
Stress Control Unit (3)
Click on the desired units you want to use for stress control
(LBF, KN, KSF OR KPA).
Preferences – Specimen Parameters Tab
This screen is accessed by clicking on the Specimen Parame-
ters Tab under System Preferences.
QUICKSTARTGUIDE
15
Test Storage Limit (1)
This field allows you to set the number of previously run tests
to be available on the “Previous Tests” screen. This number
can be between 10-50.
Recycled Tests (2)
This refers to previously run tests that are not displayed in
the “Previous Tests” window. These tests are not deleted;
they are recycled for later use. Select this button to view/ex-
port/delete recycled tests.
Test Templates (3)
Select this button to delete test templates that have been
created, but are no longer desired.
Save to USB Check Box (4)
Checking this Box saves the results of a test to USB thumb
drive inserted into the front USB slot on the machine.
Specimen Height (1)
This field allows you to set the specimen height that will be
used for all testing calculations.
Specimen Diameter (2)
This field allows you to set the specimen diameter that will
be used for all testing calculations.
Specimen Width (3)
This field allows you to set the specimen width that will be
used for all testing calculations.
Preferences – Storage Tab
This screen is accessed by clicking on the Storage Tab under
System Preferences.
1
2
3
4
QUICKSTARTGUIDE
16
A password is required to access the Network Settings. That
password is: 27604.
1
To set up Network settings, return to the System Settings
screen and click on the Network panel. (1)
Initial Set Up — Network
QUICKSTARTGUIDE
17
DHCP (1)
Check this box to enable/disable the Dynamic Host Configu-
ration Protocol (DHCP). If enabled, your machine will pick up
IP information from your router. If disabled, you will need to
manually enter the network information.
IP Information (2)
This information will be filled in automatically if the DHCP is
checked, otherwise you will have to manually supply this in-
formation. The IP address must be unique for each machine.
Local Status (3)
This indicates the status of the local network connection,
Connected or Disconnected.
Internet Status (4)
This indicates the status of your Internet connection, Con-
nected or Disconnected.
Note:	 If you are experiencing issues with any connec-
tions, please contact your IT department for assistance.
Clicking on this panel provides a view of the current status of
the machine. (1), next page.
1
2
3
4
Initial Set Up — Information
QUICKSTARTGUIDE
18
Firmware Version (1)
The current version of the machine firmware is shown here. If you
contact product support, you will need to supply this information.
IP Information (2)
This information will be filled in automatically if DHCP is
checked, otherwise you will have to manually supply this in-
formation. The IP address must be unique for each machine.
Local Status (3)
This indicates the status of the local network connection,
Connected or Disconnected.
1
System Information
Below is a view of the System Information screen. It provides
a current status of the machine.
1
2 4
7
3
5
6
QUICKSTARTGUIDE
19
Contact Information
Below is a view of the Contact Information screen showing
contact information for Humboldt Support and Service.
For quickest response go to this link on our website:
https://www.humboldtmfg.com/support and fill in the
support form. This will provide us with the necessary in-
formation to assist you and you will be added to the next
position in the support cue.
You can also email Humboldt Support at support@hum-
boldtmfg.com or Humboldt Service at service@humboldtm-
fg.com. Please include contact information and a detailed
description of your reason for contact.
Internet Status (4)
This indicates the status of your Internet connection,
Connected or Disconnected.
Memory (5)
This indicates the current status of how much available
memory is being used by the machine
Factory Screen (6)
This is for Humboldt use only.
Export Log File (7)
This button exports a log file from the machine to a USB thumb
drive. Be sure to insert a thumb drive before exporting the file or
you will receive an error. This file can be helpful in trouble shooting
by Humboldt Support.
Clicking on this panel provides contact information for
Humboldt Support and Service(1)
1
Initial Set Up —Contact
QUICKSTARTGUIDE
20
Clicking on this panel provides information on checking for
Updates, performing updates and an update history for the
machine. (1)
1
Initial Set Up — Update
QUICKSTARTGUIDE
21
Update from USB (1)
If your HM-5750 is not connected to the internet, Software
updates for your machine can be downloaded from the
Humboldt website Support Area using a computer. To access
the Software Update area, go to: https://www.humboldtmfg.
com/support/software.php.
Once on this page, click on the Elite Series Firmware tab.
You will see a list of Humboldt Elite Series machines. Click on
the HM-5750 Current Version link and the firmware update
will begin to download to your computer. Once the down-
load is complete. Load the file onto a USB thumb drive and
insert the thumb drive into the USB port on the front of the
HM-5750. With the USB thumb drive inserted into the USB
port, click on Update from USB (1).
A window will open and you will see a list of Updates. Select
a file to use for your update and click the Select button.
1 2
3
4
1
QUICKSTARTGUIDE
22
The update process will begin. This may take several min-
utes. Your HM-5750A or D may reboot several times during
the update, do not turn off or reset machine during this
process.
Check for Update (2)
If your HM-5750A or D is connected to the internet, you can
have the machine check automatically for updates, which can
be found under System Settings – Preferences button. How
often the machine checks for updates can be customized
under Preferences. However, you may click on the Check for
Update button (2) to force an immediate check for updates.
Update Details (3)
If you have chosen to have the HM-5750A or D check for
updates automatically, this box will display a running list of
updates currently available for your machine, but, which have
not been installed.
Download Updates (4)
Clicking this button will download updates for your machine
and automatically install them. To accomplish this, the ma-
chine must be connected to the internet. Machine will install,
turn-off and restart. Wait until installation is complete and
the window indicates: Ready for Testing.
You can tell that there is an update available by the appear-
ance of the following icon in the window header (1), see next
page.
1 2
3
4
QUICKSTARTGUIDE
23
Operation from a Computer and NEXT Software
This manual covers the setup and operation of the HM-
5750A and HM-5750D Dead Weight Direct/Residual Shear
Apparatus in Stand-alone Mode only. For information on
operating your load frame with Humboldt’s NEXT Software
and a computer, please refer to the Humboldt NEXT soft-
ware manual.
1
24
EquipmentSetup
25
26
Installation and Equipment Setup
Electrical Connections
The HM-5750A or D Direct Shear models are equipped with an in-
ternal digital switching power supply, which allows them to be used
with most power configurations throughout the world. The unit is
supplied with an IEC electrical cord with a standard 110V plug.
The HM-5750A or D arrive ready for operation. Attach the supplied
IEC electrical cord to the machine and plug into a standard wall
receptacle for use in the United States. For locations other than the
U.S., replace the supplied electrical cord with an IEC cord that has
the correct plug for your application. The supplied cord can also be
used by cutting the standard plug from the cord and attaching the
correct plug.
Power Switch
The Power Switch is located on the upper right hand corner of the
back of the machine, above the electrical cord inlet. The Fuse
Compartment is located between the electrical cord inlet and the
Power Switch. HM-5750A or D use a 10 amp fuse. To begin oper-
ation, attach the supplied electrical cord, plug it in and press the
Power Switch.
Power Switch
Fuse Compartment
27
Instrumentation Connections and Setup
HM-5750A or D Rear Instrumentation Panel
2
1
3
Above is a photo of the rear instrumentation panel of the HM-5750A or D.
Network (1)
Ethernet input for connecting machine to a local area network
and/or the internet.
USB Power (2)
The USB Power port is used for powering a wireless access appli-
ance for those who want to use a wireless LAN setup.
Instrument Inputs (3)
The panel features four (4) input channels for connecting instrumentation to
the machine. Each input represents a separate channel, and has been as-
signed and calibrated to a specific instrument for use with your HM-5750A
or D.
Below are photos of an instrumentation input and the instrumen-
tation plug. The instrumentation plugs have been numbered and
should be installed in the corresponding numbered input. Install
the plugs into the inputs by lining up the guide at the bottom of
the plug with the slot at the bottom of the input channel. Ignore the
locking collar on the plugs they are not required for this application.
28
Once you have installed the instrumentation into the correct inputs,
your rear panel should look like this:
Test Deck Setup
Below is a how your HM-5750A or D should be set up for operation.
When you receive your unit, your instrumentation should already be
mounted in place. It has been tied down with plastic ties for shipping
so you should remove these ties before operation. You may have to
make small position adjustments to the instrumentation for optimal
operation.
29
Shearbox Assembly
Shearbox assemblies are not included with the HM-5750A or D Direct
Shear Machine, but are required. They are available in both round
and square configurations in several sizes, see below. You, most likely,
ordered at least one for use with your HM-5750A or D.
Shearbox Assemblies
Round Model
2.0" HM-2751.20D
2.42" HM-2751.24D
2.5" HM-2751.25D
4.0" HM-2751.40D
50mm HM-2751.50D
60mm HM-2751.60D
100mm HM-2751.100D
Shearbox assemblies include: sample shearbox, (2) porous plates, (1)
loading pad, and (1) grid plate. All shearboxes feature mounting screws
for use with the ASTM D3080-compliant counter-balance device.
Shearbox Replacement Screws
Replacement screws for shearboxes are available:
Thumbscrew, Metal, Black Head	 HM-003274
Thumbscrew, Plastic	 HM-003275
Thumbscrew Head, Red	 HM-003276
Shearbox Assemblies
Square Model
2.0" HM-2751.20S
2.42" HM-2751.24S
2.5" HM-2751.25S
4.0" HM-2751.40S
50mm HM-2751.50S
60mm HM-2751.60S
100mm HM-2751.100S
HM-2751.60SHM-2751.25D
30
Sample Prep
Please refer to ASTM D3080 for instructions on sample preparation.
Humboldt offers the following items to aid in sample preparation.
Accessory Model
Cutter HM-2702.XXS/D
Dolly tamper HM-2703.XXS/D
Porous plate HM-2704.XXS/D
Calibration disk, square HM-2755.XXS
Calibration disk, round* HM-1220.XX.4
Replacement Pressure Ball
5/8" 440 Stainless Steel
HM-001076
* Can be used for shear boxes and consolidation cells.
Part Numbers ending in .XX require a size code to be entered referring to the sample size to
be tested.
For direct/residual shear samples, sizes are: .20 = 2.0"; .242 = 2.42"; .25 = 2.5"; .40 = 4.0";
.50 = 50mm; .60 = 60mm,and .100 = 100mm. NOTE: use "S" for square and"D" for round
samples.
Shearbox Placement
Once you have prepared your sample and are ready to place the
shearbox into the HM-5750A or D, place the shearbox into the reser-
voir/carriage and slide it as far to the right as it can go. Refer to the
photo on page 26 for placement. Once the shearbox is placed into
the reservoir/carriage, tighten the two large screws located on the
left of the reservoir/carriage to secure the shearbox in place. Make
sure that the horizontal load cell butts up to the shearbox and tight-
en all adjustment screws.
Once the shearbox is in place, attach the counter-balance device for
ASTM D3080 compliance to the long steel screws on the right side
of the shearbox. Remove the plastic screws with the red heads from
the shearbox and using the metal screws separate the shear box
halves to approximately the diameter of the maximum-sized particle
in the test specimen or 0.025”. (0.64 mm). Once this is completed,
adjust the counter-balance device as necessary to apply a counter
force for the purpose of counteracting the weight of the top half of
the shear box. To adjust:
1. Coarse adjustment is accomplished by raising or lowering the
support hook assembly. To do so, loosen the thumbscrew on the
support hook and adjust the position of the hook. Tighten the
thumbscrew again to secure the support hook.
31
Loosen wing nut
and extend hook
as necessary
Loosen nuts
and adjust
hooks up or
down as
necessary
Loosen
thumbscrew
and adjust
hook assembly
up or down as
necessary
2. Fine adjustment is accomplished by loosening the nuts that
secure either the hooks on the hanger bar and adjusting the hooks
up or down. When the adjustment is complete, tighten the nuts to
secure the hooks.
Once this is completed unhook the spring from the hook support-
ing the hanger bar and load your test specimen into the shearbox.
When this is complete, reattach the spring to the hook supporting
the hanger bar. At this point you would be ready to test.
Humboldt recommends using this guide
to familiarize yourself with the operation
of your HM-5750A or D Direct Shear ma-
chine’s operation, before doing actual
testing. We also suggest you use some
insignificant samples or samples made
specifically for setup purposes before
testing real samples.
32
Calibration of Instrumentation
The HM-5750A or D Direct/Residual Shear Machine includes all nec-
essary instrumentation. All instrumentation included with this unit
has been calibrated and assigned to specific channels for use. These
channels are marked on the corresponding instrumentation and the
correct calibration information will appear in the channel calibration
parameters, once you have installed the instrumentation to the cor-
rect inputs.
DO NOT RECALIBRATE!
How to Perform a Calibration
All instrumentation included with this unit has been calibrated and
assigned to specific channels for use. Humboldt recommends and
standard lab practice dictates that your HM-5750A or D should be
calibrated periodically. For most, this period is usually a year, though
other rules may apply to the frequency of calibration.
To perform a calibration, it will be necessary to either hire a calibra-
tion service to come in to calibrate your machine or have the neces-
sary calibration equipment to perform this service.
To begin a calibration, it is always a good idea to save the current
calibration settings. If you have already saved these settings to a USB
thumb drive or your computer, this step can be skipped.
Export Calibration via USB (4)
Press this button to select calibrations to export via USB. It is a good
practice to export all your calibrations to a thumb drive. In case of
a problem this practice allows you to recover your calibration data
quickly.
4 5
33
On this screen select an Input calibration to delete, one at a time,
and then press the Select button. The channel will be deleted. Do
this for all four (4) channels.
Once all Input calibrations have been cleared, your Calibration
window should look like the one below with no Inputs calibrated.
The four Inputs of the HM-5750A or D have been programmed so
that Input One (1) is always set to be Horizontal Load. Input Two (2) is
programmed to be Horizontal Displacement. Input Three (3) is
programmed to be Vertical Displacement and Input Four (4) is
programmed to be Vertical Load.
Once your calibrations have been saved, click on the trash can icon
(5) to begin to erase all four (4) Input calibrations. When you press
the trash can icon, this screen will appear.
34
Calibrating your instrumentation to the appropriate Input requires
a separate device, which can provide precise and specific loads or
displacement, and, which has been certified to be accurate. The
calibration process involves plugging the instrumentation into the
HM-5750A or D while placing the instrumentation into the certified
calibration device, which provides a specific set load or displacement.
Once this has been done, click the Calibrate button next to the ap-
propriate Input (1).
A pop-up window will appear requiring you to enter the password,
which is 22234.
1
35
Upon filling in the password, you will see this screen, Tab 1 Sensor
Details of the Calibration settings.
On Tab 1, the Sensor Type (1) will default to Horizontal Load. For
Capacity (2), fill in the maximum capacity of the sensor and choose
either lbf or kN. For FS output (3), refer to the calibration sheet,
which came with the instrument your are using and enter it here and
then choose mV/V. Below are typical calibration sheets with the FS
Output information highlighted in orange.
1
2
3
36
On Tab 2, in the Calibration Limit field (1), enter the maximum cal-
ibrated limit of the sensor. This value should contain the number of
decimal points you require for degree of accuracy, up to 5 points.
Limits On (2), should be checked if you don’t want the machine to
apply a load greater than the Calibration Limit (1). Calibration Meth-
od (3) determines whether this calibration will be based only on the
maximum load capacity of the sensor or upon a multi-point curve of
up to a maximum of 10 points.
If you choose Per FS Output (not a recommended calibration meth-
od) it will base your calibration on the maximum load capacity of the
sensor vs. zero load capacity of the sensor. If you choose this method
and click on the Right Arrow in the bottom right-hand corner of the
screen. You will be prompted to remove any load on the sensor and
click on Done (4) when you have done so.
1
2
3
Once this is complete, click on the Right Arrow in the bottom right-
hand corner of the screen to save these settings. You will be taken to
Tab 2, Limits.
37
On Tab 3 you will be able to set the number of points you want to
use for your calibration. You can choose 1-point, 5-point, 10-point or
Custom, which allows you to use any number of points up to a total
of 10. In the example on the previous screen shot above, a 5-point
calibration has been chosen.
With your instrumentation sensor placed in a calibration frame and
the sensor plugged into the an Input on the HM-5750A or D. You
will set the “0” point at 0 with no load applied to the sensor. The
“5” point will be set with the maximum load capacity of the sensor
applied. Points “1” through “4” are usually determined by spacing
them out evenly between the no load reading and the maximum
load reading. As an example, if you have a sensor with a 1,000 lb
maximum force capability, you would set the “0” point at “0” and
the “5” point at 1,000. Points “1” through “4” would typically be set
at: “1” 200; “2” 400; “3” 600; “4” 800 and “5” 1000. Or, divide the
maximum load number by the number of points, in this case 5, which
works out to 200 point increments between points. See below.
If you choose Multi-Point (Recommended calibration method) Curve
and click on the Right Arrow in the bottom right-hand corner of the
screen, you will be taken to Tab 3.
38
Each point would be chosen by clicking on the corresponding point
row above. The load would be applied to the sensor and an A/D
Counts reading would appear. To set the point, click on the Set Point
button (1). This would be repeated until all points have been set. In
the example above, Point 3 is being calibrated and is ready to have
the Set Point button (1) clicked. Point 4 still needs to be calibrated.
Once all Points have been calibrated, click on the Right Arrow in the
bottom right-hand corner of the screen. You will be taken to Tab 4.
On Tab 4, you will be asked to name the calibrated Input.
The screen will provide a default name, but you can name the In-
put anything you’d like. Once you’ve named the Input, click on the
disk icon in the lower, right-hand corner (1). This will save it. Use this
method for calibrating any additional Inputs necessary.
1
1
TestSetup
39
40
Sample Preparation
Once extruded, samples should be carefully trimmed down to the
internal diameter of the direct shear ring to be used for the test. The
object here is to get at least a 1” soil sample sandwiched between a
layer of filter paper and a porous stone on both sides of the soil sam-
ple. The porous stones provide drainage and are used to distribute
the pressure during the test.
Place the bottom drainage plate and then a porous stone with a filter
paper into the locked shear rings. Extrude one inch of soil sample
into the shear rings. Place another piece of filter paper and porous
stone on the top of the sample along with the top load pad.
Sample Set Up
At this time, the direct shear rings are held together by two (2) bolts
and the soil sample would be centered inside the rings. The shear
rings with sample stones are then carefully placed inside the direct
shear water chamber being certain the load cell shaft is connected
to the shear rings. The shear ring assembly is placed against the end
spacer. Alignment of the load cell connecting rod is required at this
time.
Tighten the two (2) shear ring clamping knobs located on the left side
of the water chamber. Connect the load cell to the shear ring con-
necting rod using the stainless steel knurled nut. Connect the load
cell and adjust the knobs to read “0” on the load cell readout. It may
be necessary to use the tare feature to read “0”. The top cross arm
is usually removed for placement of the rings into the water cham-
ber. Re-install the cross arm and adjust the height until there is l/16”
space between the arm and the stainless steel ball being certain the
arm is level. The upper cross arm has a displacement indicator pin
that is positioned on the load pad ball. Adjust the dial indicator or
linear displacement transducer to the top of this pin and allow
for sufficient travel when the soil sample compresses. The vertical dial
indicator is positioned and set to read some arbitrary initial reading.
Consolidation of the Test Sample
The weight of the consolidation load arm with two upright rods lower
cross arm and lower weight platform is balanced. The lever arm on
the right side of the device has a ratio of 10:1. Select a consolidation
load and apply the required weights. Refer to ASTM D-3080 for sam-
ple preparation and computations.
41
Test Procedures
The final dial reading after consolidation is noted on the data sheet.
Adjust the shear force on the sample by adjusting the two knurled
nuts on the load cell support casting. Allow a small seating load to be
exerted on the sample. The horizontal dial indicator is then adjusted
to some convenient zero point. Until this time, the two shear rings
have been held together by two (2) screws— these screws are now
removed. There are also two (2) screws for adjusting the gap between
the rings once consolidation has been reached.
The gap is adjusted by turning the screws clockwise from the finger
tight position. One full turn will give .031” gap. For sands of a fine to
medium size, 1-1/4 of a revolution of the adjusting screw is used. For
coarser sands, 1 revolution is used. For fine grain soils and clays, ½
revolution is used. These values are not absolute and can be altered
accordingly. Initial readings are taken at this time. The screws should
be turned evenly to prevent tilting the top ring. The test is now start-
ed at the prescribed rate of shear by setting the shear rate selector.
Unless automatically recorded, the shear and compression dial indica-
tors will be read at various prescribed horizontal deflection readings
such as every ten divisions of the three place dial until failure. Usually
the test is carried out past failure to determine the residual strength
which may be used in design.
At this point the test is completed and the shear loading is stopped
and the vertical load is removed. The test is now started at the pre-
scribed rate of shear by setting the shear rate selector. Unless auto-
matically recorded, the shear and compression dial indicators will be
read at various prescribed horizontal deflection readings such as ev-
ery ten divisions of the three place dial until failure. Usually the test is
carried out past failure to determine the residual strength which may
be used in design. At this point the test is completed and the shear
loading is stopped and the vertical load is removed.
Sample Removal and Clean-Up
Put the motor drive in reverse (towards the home position) and stop
when zero (0) load is reached on the load cell readout. Remove the
sample at this time and inspect per ASTM D-3080. The vertical load is
now reduced to zero (0) by adjusting the pressure regulator to zero
(0) psi. The apparatus is taken down in reverse order as assembled.
The sample is extracted and weighted in order to determine the dry
density and water content at failure. The water chamber is returned
to the home position by using the drive motor. Cover the roller bear-
ing slide assembly to prevent dust and dirt from entering the bear-
ings.
42
Test Setup — Consolidation
To begin a new test, Click on the Menu icon in the top left corner of
the screen (1). When you click on this button, you will see a drop-
down menu appear, see below. Click on NEW TEST (1).
Test Setup Wizard – Select Test Type
Clicking on NEW TEST (1) above brings up the Test Setup Wizard.
On the first screen of the Wizard, you can select the type of test you
want to perform — Consolidation or Direct Shear (2) and click on
the arrow button in the bottom right-hand corner (3)
Template
If you are just beginning to use your new machine, there will be no
templates, which have been saved, so at this point, clicking on the
template button will provide no templates to choose from. To create
templates, you essentially save a completed test as a template. Once
you have completed some tests and save them as templates, they
will then show up when you press the template button. This can allow
1
2
3
43
you to quickly repeat tests with the same parameters, as well as a fast
way to create new tests by choosing a template and then changing
some of the parameters.
Test Setup Wizard – Setup Target Load
In the previous screen, we chose Consolidation for the Test Type,
so this value is the Load Value for a consolidation test. Click on the
Load Value field (1) and a pop-up menu will appear. Use this menu to
type in the value you want to use for the Load Value. Click the check
mark in the lower right-hand corner of this pop-up menu to choose
the value and you will be returned to the screen above. You can then
choose the type of unit by clicking on the right-side pop-up field
(2). Your choices here are: kN, lbf, kPa and ksf. Choose one, and, to
continue, press the Right Arrow in the lower, right-hand corner of the
screen (3).
1 2
3
44
When you click on the Right Arrow in the lower, right-hand corner of
the screen (3). You will get a pop-up window asking if this is the first
load sequence of a new specimen, as shown below.
Choose Yes or No. (1). You will see the screen below. if you choose
yes, the vertical displacement will be tared (zeroed) at the beginning
of the test.
Test Setup Wizard – Select Logging Values
Click on the Logging Value Icon (1). A new pop-up window will
appear entitled Logging Time Table, see below.
1
1
45
For most people, who are following ASTM D2435, BS:1377:5, AASH-
TO T216, UNE 103-405, if you choose yes the vertical misplacement
will be tared (zeroed) at the beginning of the test testing procedures,
click on Use Default (1) and the machine will fill in the Time Table per
the ASTM standard.
1
2
For those who want to use different parameters, you can either click
on Use Default (1) and change the values to suit your application, or,
click on Clear Table (2) and fill in the blank table with your values.
Once you are satisfied with the completed table, click on the Select
button (3) to use the Table. You will be returned to this screen.
3
46
To continue with your chosen values, click on the Right Arrow (1) in
the lower right-hand corner.
Test Setup Wizard – Select Stop Parameters
1
Next you need to select the Stop Parameters for the test. To choose
the Stop Value Parameter, Click on the yellow field and select a time
period from the pop up window that appears.
47
To save your Stop Value, click on the check mark (1) in the lower,
right-hand corner of the pop up window. You will return to the origi-
nal screen.
To proceed, click on the Right Arrow in the lower, right-hand corner
of the screen.
Test Setup Wizard – Select Trigger Parameters (Start Tab)
On this screen (see below), if you have attached instrumentation for
a consolidation test and it has been calibrated, that device should
show up automatically in the Trigger Input field (1). The Trigger Value
(2) and Current Value (3) should also be automatically filled in for that
device. The automatic Trigger Value will always read slightly lower
than the Current Value. In this case, by default, the Trigger Value is
automatically set .002 lower than the Current Value. If you choose,
you can manually alter the Trigger Value here.
1
1
48
Once completed, press the Green Arrow at the bottom right-hand
corner of the screen (4). You will then see the screen below.
1
In the Value Field, create a name for your test (1). Press the check
mark button (2) to save your test name. You will hear an extended
beep sound indicating your test name has been saved. You will be
taken to the Current Test Screen (below) and your test will begin
automatically.
1
2
3
4
2
49
From this new panel you are given the Current Status of your test,
in this case, Running (1). You can also see the number of points cur-
rently read (2) and the current duration of the test (3).
In addition, by clicking on the Test View button (4) you can toggle
through three different views of the current test. These views are:
1
4
5
2
3
You can monitor your test from this window, which allows you to view
the Vertical Displacement (1), the Vertical Load (2) and the Stress (3),
or for additional information, click on the Test Control bar on the right
of the window (4), which will reveal the additional panel shown below.
1
2 3
4
50
By clicking on the Test selection button (5) when you also have the
Current Tests tab selected, you can view all currently running tests.
Choosing a test from the list of currently running tests, allows you to
monitor that test in all views. This allows you to view the status of all
your running tests one at a time.
Tabulation View
Graph View
Selection View
51
Test Setup — Direct Shear
To begin a new test, Click on the Menu icon in the top left corner
of the screen (1). When you click on this button, you will see a drop-
down menu appear, see below. Click on NEW TEST (1).
Test Setup Wizard – Select Test Type
Clicking on NEW TEST (1) above brings up the Test Setup Wizard.
On the first screen of the Wizard, you can select the type of test you
want to perform — Consolidation or Direct Shear (2) and click on the
arrow button in the bottom right-hand corner (3)
Template
If you are just beginning to use your new machine, there will be no
templates, which have been saved, so at this point, clicking on the
template button will provide no templates to choose from. To create
templates, you essentially save a completed test as a template. Once
you have completed some tests and save them as templates, they
will then show up when you press the template button. This
1
2
3
52
can allow you to quickly repeat tests with the same parameters, as
well as a fast way to create new tests by choosing a template and
then changing some of the parameters.
Test Setup Wizard – Select Motor Condition
On this screen you need to select a Motor Condition. In almost all
applications you will choose Motor Control. When Motor Control is
selected, the Motor Parameters choices appear. Direction (1) choose
either Right or Left Motor Direction. Next, enter a Speed (2).
When you click on the Speed field a value picker will open. Type in
a speed and click on the Check box in the lower, right-hand corner
of the picker to select. You can also check the Return Home check
box (3) if you want the machine to return to the Home position after
the test. Once completed click on the Right Arrow in the lower, right
hand corner of the screen, to continue.
2
3
1
53
Test Setup Wizard – Select Logging Parameters
For Logging Condition (1), you have four (4) choices: Interval logging,
Linear Time Interval Logging Table and Elapsed Time Table. Choose
the one that best fits your application needs. In this example Linear
Time Interval has been chosen and to complete this setup, a logging
value must be entered into the Logging Value field. Click on the field
and a pop-up window will appear. Enter the value and click on the
check mark in the lower, right-hand corner of the window to save.
1
54
Test Setup Wizard – Stop Conditions
To set the Stop Condition for your test, select one condition from
the list of nine (9). Distance (Right) has been chosen for our exam-
ple here. Then choose the appropriate input device to coincide with
your choice from the Stop Input field (2). Also, add a value in the The
Stop Value field (3), by clicking on it and using the pop-up window to
enter a value. Click the Check Mark in the lower right-hand corner to
save the value.
2
3
Click the Arrow (1) in the lower, right-hand corner of the window to
continue the Setup process.
1
55
Test Setup Wizard – Graph Conditions
To set the Graph Options for your test, select one option for the X
and one option for the Y axis from this list. In our example here the
Horiz Disp and Horiz Load have been chosen. Then choose the ap-
propriate input device to coincide with your choice from the Stop In-
put field (2). Also, add a value in the The Stop Value field, by clicking
on it and using the pop-up window to enter a value. Click the Check
Mark in the lower right-hand corner to save the value.
Operation from a Computer and NEXT Software
This manual covers the setup and operation of the HM-5030.3F Load
Frame in Stand-alone Mode only. For information on operating your
load frame with Humboldt’s NEXT Software and a computer, please
refer to the Humboldt NEXT software manual.
56
HM-5750A.3F or HM-5750AD.3F Specifications
The Humboldt HM-5750A or D Direct/Residual Shear apparatus is a
fully-automated system utilizing pneumatic loading to apply vertical
loads to a sample eliminating the need for loading weights used in dead
weight-type systems.
The microprocessor-based system features a stepper-motor drive system
and a 7” touch-screen display that allows the operator to control and
monitor all test functions.
Like all Elite Series machines, the HM-5750A or D is built around Hum-
boldt’s integral, 4-channel data logger with touch-screen control, which
allows the HM-5750A or D to be used as a standalone device capable
of full test control and data logging. It can also be controlled by a net-
worked computer at any location with access to the network.
The HM-5750A or Dis supplied complete with two 2,000 lbf (10kN) capac-
ity load cell; 1” (25.4mm) horizontal strain transducer, a 0.4” (10.2mm)
vertical strain transducer and Humboldt’s NEXT Direct Shear software
module. Shear box assemblies and related accessories are not included
and should be ordered separately.
Controller Specifications:
Display (Resistive Touch) 7" (178mm) VGA (480 x 800)
Real-time test data Graphic and tabulation
Processor Dual 32-bit ARM
RAM 64MB
Memory, non-volatile 4GB
Analog to digital converter 24 bit
Data acquisition 3-4 Channels
Logging speed
up to 50 readings per
second
Multi-test storage 1000
Points per test 3000
USB port (front)
export data, import/export
calibration data, WiFi
USB port (back)
provides external power
for wireless access point
Ethernet connection for network connectivity
Emergency stop Large button
24-bit differential
analog to digital converter
4
Ambient temperature
sensor
1
Limit switches 2
Firmware Update Ethernet or flash drive
HM-5750A & D Specifications:
Horiz. movement 2" (50mm) Maximum
Horiz. shear force 2000 lbf (10kN)
Vertical load 2000 lbf (10kN)
Data Channels 3
Speed Range
0.00001 to 0.49999 in./min.
0.00001 to 12.9999 mm/min.
Data storage
1000 tests and up to 3000
readings per test
Dimensions
(L x D x H)
40" x 10" x 45"
(1016 x 254 x 1143mm)
Voltage
110/220V 50/60Hz -
6.5amps
57
General Warnings
Safety Warnings
Operators should take care to operate this machine under maximum load restric-
tions. The machine is programmed at the factory to provide safety shutdown if
the upper or lower maximum travel is exceeded, as well as if the upper instrument
calibration is exceeded.
Electrical Warnings
Typically, there is no reason for the operator to open the machine. However, if the
customer’s engineers attempt to change settings to the circuit board connected to
the back panel, the machine must first be unplugged. Unplugging the internal con-
nection to the back panel circuit board while the machine is under power will result in
permanent damage to the circuit board.
Important Notice
The information contained herein is supplied without representation or warranty of
any kind. Humboldt Mfg. Co. therefore assumes no responsibility and shall have no
liability, consequential or otherwise, of any kind arising from the use of the described
equipment contained in this manual.
Updated Products
The manufacturer reserves the right to change or modify product design or construc-
tion without prior notice and without incurring any obligation to make such changes
and modifications on products previously or subsequently sold.
Fitness for Application
The manufacturer makes no recommendations or claims regarding fitness for applica-
tions other than the specific tests as defined in this User Guide.
Unpacking
Initial inspection should include checking for physical damage during shipping and
obvious external damage to the product.
Package contents are defined by your packing list. Each Loader is configured accord-
ing to customer specifications. In your inspection, make certain that the contents of
your shipment match the documentation provided by your packing list.
Place unit on a flat, smooth surface and use leveling feet (supplied) and a bubble
level to ensure that the unit is level side-to-side and back-to-front.
Warranty
Humboldt Mfg. Co. warrants its products to be free from defects in material or
workmanship. The exclusive remedy for this warranty is Humboldt Mfg. Co., factory replace-
ment of any part or parts of such product, for the warranty of this product please refer to Hum-
boldt Mfg. Co. catalog on Terms and Conditions of Sale. The purchaser is responsible for the
transportation charges. Humboldt Mfg. Co. shall not be responsible under this warranty if the
goods have been improperly maintained, installed, operated or the goods have been altered
or modified so as to adversely affect the operation, use performance or durability or so as to
change their intended use. The Humboldt Mfg. Co. liability under the warranty contained in this
clause is limited to the repair or replacement of defective goods and making good, defective
workmanship.
58
59
www.humboldtmfg.com
HUMBOLDT
Testing Equipment for Construction Materials
Humboldt Mfg. Co.
875 Tollgate Road
Elgin, Illinois 60123 U.S.A.
U.S.A. Toll Free: 1.800.544.7220
Voice: 1.708.456.6300
Fax: 1.708.456.0137
Email: hmc@humboldtmfg.com
Manufacturer’s Rights and Responsibilities
Software Copyright
COPYRIGHT NOTICE
©2016 HUMBOLDT Mfg. Co. All Rights Reserved. This manual or
parts thereof may not be reproduced in any form without the
expressed written permission of HUMBOLDT Mfg. Co.
UNPUBLISHED LICENSED PROPRIETARY WORK
©2016 HUMBOLDT Mfg. Co.
The programmable, read-only memory, integrated circuit package contained in this
equipment and covered with a copyright notice label contains proprietary and con-
fidential software, which is the sole property of HUMBOLDT MFG. CO. It is licensed
for use by the original purchaser of this equipment for a period of 99 years. Transfer
of the license can be obtained by a request, in writing, from HUMBOLDT MFG. CO.
With the exception of HUMBOLDT Authorized Service Facilities, you may not copy,
alter, de-compile, or reverse assemble the software in any fashion except as instruct-
ed in this manual. US copyright laws, trademark laws, and trade secrets protect the
materials. Any person(s) and /or organizations that attempt or accomplish the above
violation or knowingly aid or abet the violation by supplying equipment or technol-
ogy will be subject to civil damages and criminal prosecution.With the exception of
HUMBOLDT Authorized Service Facilities, you may not copy, alter, de-compile, or
reverse assemble the software in any fashion except as instructed in this manual. U.S.
copyright laws, trademark laws, and trade secrets protect the materials.
Any person(s) and /or organizations that attempt or accomplish the above violation
or knowingly aid or abet the violation by supplying equipment or technology will be
subject to civil damages and criminal prosecution.

More Related Content

What's hot

Cataloge ge 3.control and_automation-21_vat300_e_c6-6-4_2_rev_a
Cataloge ge 3.control and_automation-21_vat300_e_c6-6-4_2_rev_aCataloge ge 3.control and_automation-21_vat300_e_c6-6-4_2_rev_a
Cataloge ge 3.control and_automation-21_vat300_e_c6-6-4_2_rev_aDien Ha The
 
Applied motion products stac6 datasheet
Applied motion products stac6 datasheetApplied motion products stac6 datasheet
Applied motion products stac6 datasheetElectromate
 
SURFACE FX SPM1 MANUAL
SURFACE FX  SPM1 MANUALSURFACE FX  SPM1 MANUAL
SURFACE FX SPM1 MANUALRick McGrogan
 
Cataloge ge 3.control and_automation_dienhathe.com-4_12_vat300_e_c4-5_rev_a
Cataloge ge 3.control and_automation_dienhathe.com-4_12_vat300_e_c4-5_rev_aCataloge ge 3.control and_automation_dienhathe.com-4_12_vat300_e_c4-5_rev_a
Cataloge ge 3.control and_automation_dienhathe.com-4_12_vat300_e_c4-5_rev_aDien Ha The
 
Digital Watchdog DW-VF960H161T User Manual
Digital Watchdog DW-VF960H161T User ManualDigital Watchdog DW-VF960H161T User Manual
Digital Watchdog DW-VF960H161T User ManualJMAC Supply
 
10 vat300 e_c4-1_rev_b
10 vat300 e_c4-1_rev_b10 vat300 e_c4-1_rev_b
10 vat300 e_c4-1_rev_bDien Ha The
 
Applied motion products pdo 5580 datasheet
Applied motion products pdo 5580 datasheetApplied motion products pdo 5580 datasheet
Applied motion products pdo 5580 datasheetElectromate
 
Mitsubishi graphic operation terminal got2000 series drive control interactiv...
Mitsubishi graphic operation terminal got2000 series drive control interactiv...Mitsubishi graphic operation terminal got2000 series drive control interactiv...
Mitsubishi graphic operation terminal got2000 series drive control interactiv...Dien Ha The
 
Cataloge ge 3.control and_automation_dienhathe.com-4_20_vat300_e_c6-6-4_1_rev_b
Cataloge ge 3.control and_automation_dienhathe.com-4_20_vat300_e_c6-6-4_1_rev_bCataloge ge 3.control and_automation_dienhathe.com-4_20_vat300_e_c6-6-4_1_rev_b
Cataloge ge 3.control and_automation_dienhathe.com-4_20_vat300_e_c6-6-4_1_rev_bDien Ha The
 
Instraction on Smart Home Software
Instraction on Smart Home SoftwareInstraction on Smart Home Software
Instraction on Smart Home SoftwareDaniel Chen
 
SkidWeigh Technology
SkidWeigh TechnologySkidWeigh Technology
SkidWeigh TechnologyTed Jurca
 

What's hot (15)

Altivar 28 users_manual
Altivar 28 users_manualAltivar 28 users_manual
Altivar 28 users_manual
 
Atv71 programming
Atv71 programmingAtv71 programming
Atv71 programming
 
Cataloge ge 3.control and_automation-21_vat300_e_c6-6-4_2_rev_a
Cataloge ge 3.control and_automation-21_vat300_e_c6-6-4_2_rev_aCataloge ge 3.control and_automation-21_vat300_e_c6-6-4_2_rev_a
Cataloge ge 3.control and_automation-21_vat300_e_c6-6-4_2_rev_a
 
Applied motion products stac6 datasheet
Applied motion products stac6 datasheetApplied motion products stac6 datasheet
Applied motion products stac6 datasheet
 
Stc
StcStc
Stc
 
SURFACE FX SPM1 MANUAL
SURFACE FX  SPM1 MANUALSURFACE FX  SPM1 MANUAL
SURFACE FX SPM1 MANUAL
 
Cataloge ge 3.control and_automation_dienhathe.com-4_12_vat300_e_c4-5_rev_a
Cataloge ge 3.control and_automation_dienhathe.com-4_12_vat300_e_c4-5_rev_aCataloge ge 3.control and_automation_dienhathe.com-4_12_vat300_e_c4-5_rev_a
Cataloge ge 3.control and_automation_dienhathe.com-4_12_vat300_e_c4-5_rev_a
 
Digital Watchdog DW-VF960H161T User Manual
Digital Watchdog DW-VF960H161T User ManualDigital Watchdog DW-VF960H161T User Manual
Digital Watchdog DW-VF960H161T User Manual
 
10 vat300 e_c4-1_rev_b
10 vat300 e_c4-1_rev_b10 vat300 e_c4-1_rev_b
10 vat300 e_c4-1_rev_b
 
En mtac 01_um_b
En mtac 01_um_bEn mtac 01_um_b
En mtac 01_um_b
 
Applied motion products pdo 5580 datasheet
Applied motion products pdo 5580 datasheetApplied motion products pdo 5580 datasheet
Applied motion products pdo 5580 datasheet
 
Mitsubishi graphic operation terminal got2000 series drive control interactiv...
Mitsubishi graphic operation terminal got2000 series drive control interactiv...Mitsubishi graphic operation terminal got2000 series drive control interactiv...
Mitsubishi graphic operation terminal got2000 series drive control interactiv...
 
Cataloge ge 3.control and_automation_dienhathe.com-4_20_vat300_e_c6-6-4_1_rev_b
Cataloge ge 3.control and_automation_dienhathe.com-4_20_vat300_e_c6-6-4_1_rev_bCataloge ge 3.control and_automation_dienhathe.com-4_20_vat300_e_c6-6-4_1_rev_b
Cataloge ge 3.control and_automation_dienhathe.com-4_20_vat300_e_c6-6-4_1_rev_b
 
Instraction on Smart Home Software
Instraction on Smart Home SoftwareInstraction on Smart Home Software
Instraction on Smart Home Software
 
SkidWeigh Technology
SkidWeigh TechnologySkidWeigh Technology
SkidWeigh Technology
 

Similar to Hm 5750 manual-0817

Skidweigh Plus, Ed3:ed4 ep v1.25
Skidweigh Plus, Ed3:ed4 ep v1.25Skidweigh Plus, Ed3:ed4 ep v1.25
Skidweigh Plus, Ed3:ed4 ep v1.25Ted Jurca
 
Electric Pallet Truck Check Weighing & Utilization Monitoring Systems
Electric Pallet Truck Check Weighing & Utilization Monitoring SystemsElectric Pallet Truck Check Weighing & Utilization Monitoring Systems
Electric Pallet Truck Check Weighing & Utilization Monitoring SystemsTed Jurca
 
Electric Pallet Truck Scales, Hydraulic Pressure Transducer
Electric Pallet Truck Scales, Hydraulic Pressure TransducerElectric Pallet Truck Scales, Hydraulic Pressure Transducer
Electric Pallet Truck Scales, Hydraulic Pressure TransducerTed Jurca
 
Forklift Dimensioning Systems, Cube freight 400 installation
Forklift Dimensioning Systems, Cube freight 400 installationForklift Dimensioning Systems, Cube freight 400 installation
Forklift Dimensioning Systems, Cube freight 400 installationTed Jurca
 
Ed3 at v133 Lift truck onboard weighing scale
Ed3 at v133 Lift truck onboard weighing scaleEd3 at v133 Lift truck onboard weighing scale
Ed3 at v133 Lift truck onboard weighing scaleTed Jurca
 
Datavideo TLM-433
Datavideo TLM-433Datavideo TLM-433
Datavideo TLM-433AV ProfShop
 
Datavideo TLM-433
Datavideo TLM-433Datavideo TLM-433
Datavideo TLM-433AV ProfShop
 
Drv10 lab3 pf755_pcam
Drv10 lab3 pf755_pcamDrv10 lab3 pf755_pcam
Drv10 lab3 pf755_pcamconfidencial
 
Lift Truck Weighing Scales
Lift Truck Weighing Scales Lift Truck Weighing Scales
Lift Truck Weighing Scales Ted Jurca
 
Skid fleet v1
Skid fleet v1Skid fleet v1
Skid fleet v1tedjurca
 
Machine monitoring system
Machine monitoring systemMachine monitoring system
Machine monitoring systemPrem Baboo
 
Skid fleet v2, lift truck freight weight verification & dimensioning systems
Skid fleet v2, lift truck freight weight verification & dimensioning systemsSkid fleet v2, lift truck freight weight verification & dimensioning systems
Skid fleet v2, lift truck freight weight verification & dimensioning systemstedjurca
 
SkidWeigh Ed4 zebra v1.25
SkidWeigh Ed4 zebra v1.25SkidWeigh Ed4 zebra v1.25
SkidWeigh Ed4 zebra v1.25Ted Jurca
 
SkidWeigh Technology, Onboard Label Printer
SkidWeigh Technology, Onboard Label PrinterSkidWeigh Technology, Onboard Label Printer
SkidWeigh Technology, Onboard Label PrinterTed Jurca
 
SkidWeigh scale, Ed3 keypad access v1.25
SkidWeigh scale, Ed3 keypad access v1.25SkidWeigh scale, Ed3 keypad access v1.25
SkidWeigh scale, Ed3 keypad access v1.25Ted Jurca
 
Ed3 & ed4 pc
Ed3 & ed4 pcEd3 & ed4 pc
Ed3 & ed4 pcTed Jurca
 

Similar to Hm 5750 manual-0817 (20)

Skidweigh Plus, Ed3:ed4 ep v1.25
Skidweigh Plus, Ed3:ed4 ep v1.25Skidweigh Plus, Ed3:ed4 ep v1.25
Skidweigh Plus, Ed3:ed4 ep v1.25
 
Electric Pallet Truck Check Weighing & Utilization Monitoring Systems
Electric Pallet Truck Check Weighing & Utilization Monitoring SystemsElectric Pallet Truck Check Weighing & Utilization Monitoring Systems
Electric Pallet Truck Check Weighing & Utilization Monitoring Systems
 
Electric Pallet Truck Scales, Hydraulic Pressure Transducer
Electric Pallet Truck Scales, Hydraulic Pressure TransducerElectric Pallet Truck Scales, Hydraulic Pressure Transducer
Electric Pallet Truck Scales, Hydraulic Pressure Transducer
 
Forklift Dimensioning Systems, Cube freight 400 installation
Forklift Dimensioning Systems, Cube freight 400 installationForklift Dimensioning Systems, Cube freight 400 installation
Forklift Dimensioning Systems, Cube freight 400 installation
 
Ed3 at v133 Lift truck onboard weighing scale
Ed3 at v133 Lift truck onboard weighing scaleEd3 at v133 Lift truck onboard weighing scale
Ed3 at v133 Lift truck onboard weighing scale
 
Datavideo TLM-433
Datavideo TLM-433Datavideo TLM-433
Datavideo TLM-433
 
Datavideo TLM-433
Datavideo TLM-433Datavideo TLM-433
Datavideo TLM-433
 
SkidFleet
SkidFleetSkidFleet
SkidFleet
 
Drv10 lab3 pf755_pcam
Drv10 lab3 pf755_pcamDrv10 lab3 pf755_pcam
Drv10 lab3 pf755_pcam
 
Pf70 700 process_pi
Pf70 700 process_piPf70 700 process_pi
Pf70 700 process_pi
 
Lift Truck Weighing Scales
Lift Truck Weighing Scales Lift Truck Weighing Scales
Lift Truck Weighing Scales
 
Skid fleet v1
Skid fleet v1Skid fleet v1
Skid fleet v1
 
Machine monitoring system
Machine monitoring systemMachine monitoring system
Machine monitoring system
 
Skid fleet v2, lift truck freight weight verification & dimensioning systems
Skid fleet v2, lift truck freight weight verification & dimensioning systemsSkid fleet v2, lift truck freight weight verification & dimensioning systems
Skid fleet v2, lift truck freight weight verification & dimensioning systems
 
SkidWeigh Ed4 zebra v1.25
SkidWeigh Ed4 zebra v1.25SkidWeigh Ed4 zebra v1.25
SkidWeigh Ed4 zebra v1.25
 
SkidWeigh Technology, Onboard Label Printer
SkidWeigh Technology, Onboard Label PrinterSkidWeigh Technology, Onboard Label Printer
SkidWeigh Technology, Onboard Label Printer
 
SkidWeigh scale, Ed3 keypad access v1.25
SkidWeigh scale, Ed3 keypad access v1.25SkidWeigh scale, Ed3 keypad access v1.25
SkidWeigh scale, Ed3 keypad access v1.25
 
Ed3 & ed4 pc
Ed3 & ed4 pcEd3 & ed4 pc
Ed3 & ed4 pc
 
CubeFreight
CubeFreightCubeFreight
CubeFreight
 
Ed3 ep v306
Ed3 ep v306Ed3 ep v306
Ed3 ep v306
 

Recently uploaded

Build your next Gen AI Breakthrough - April 2024
Build your next Gen AI Breakthrough - April 2024Build your next Gen AI Breakthrough - April 2024
Build your next Gen AI Breakthrough - April 2024Neo4j
 
CloudStudio User manual (basic edition):
CloudStudio User manual (basic edition):CloudStudio User manual (basic edition):
CloudStudio User manual (basic edition):comworks
 
Making_way_through_DLL_hollowing_inspite_of_CFG_by_Debjeet Banerjee.pptx
Making_way_through_DLL_hollowing_inspite_of_CFG_by_Debjeet Banerjee.pptxMaking_way_through_DLL_hollowing_inspite_of_CFG_by_Debjeet Banerjee.pptx
Making_way_through_DLL_hollowing_inspite_of_CFG_by_Debjeet Banerjee.pptxnull - The Open Security Community
 
AI as an Interface for Commercial Buildings
AI as an Interface for Commercial BuildingsAI as an Interface for Commercial Buildings
AI as an Interface for Commercial BuildingsMemoori
 
SIEMENS: RAPUNZEL – A Tale About Knowledge Graph
SIEMENS: RAPUNZEL – A Tale About Knowledge GraphSIEMENS: RAPUNZEL – A Tale About Knowledge Graph
SIEMENS: RAPUNZEL – A Tale About Knowledge GraphNeo4j
 
My Hashitalk Indonesia April 2024 Presentation
My Hashitalk Indonesia April 2024 PresentationMy Hashitalk Indonesia April 2024 Presentation
My Hashitalk Indonesia April 2024 PresentationRidwan Fadjar
 
#StandardsGoals for 2024: What’s new for BISAC - Tech Forum 2024
#StandardsGoals for 2024: What’s new for BISAC - Tech Forum 2024#StandardsGoals for 2024: What’s new for BISAC - Tech Forum 2024
#StandardsGoals for 2024: What’s new for BISAC - Tech Forum 2024BookNet Canada
 
Beyond Boundaries: Leveraging No-Code Solutions for Industry Innovation
Beyond Boundaries: Leveraging No-Code Solutions for Industry InnovationBeyond Boundaries: Leveraging No-Code Solutions for Industry Innovation
Beyond Boundaries: Leveraging No-Code Solutions for Industry InnovationSafe Software
 
SQL Database Design For Developers at php[tek] 2024
SQL Database Design For Developers at php[tek] 2024SQL Database Design For Developers at php[tek] 2024
SQL Database Design For Developers at php[tek] 2024Scott Keck-Warren
 
Advanced Test Driven-Development @ php[tek] 2024
Advanced Test Driven-Development @ php[tek] 2024Advanced Test Driven-Development @ php[tek] 2024
Advanced Test Driven-Development @ php[tek] 2024Scott Keck-Warren
 
Install Stable Diffusion in windows machine
Install Stable Diffusion in windows machineInstall Stable Diffusion in windows machine
Install Stable Diffusion in windows machinePadma Pradeep
 
Integration and Automation in Practice: CI/CD in Mule Integration and Automat...
Integration and Automation in Practice: CI/CD in Mule Integration and Automat...Integration and Automation in Practice: CI/CD in Mule Integration and Automat...
Integration and Automation in Practice: CI/CD in Mule Integration and Automat...Patryk Bandurski
 
Pigging Solutions Piggable Sweeping Elbows
Pigging Solutions Piggable Sweeping ElbowsPigging Solutions Piggable Sweeping Elbows
Pigging Solutions Piggable Sweeping ElbowsPigging Solutions
 
Bun (KitWorks Team Study 노별마루 발표 2024.4.22)
Bun (KitWorks Team Study 노별마루 발표 2024.4.22)Bun (KitWorks Team Study 노별마루 발표 2024.4.22)
Bun (KitWorks Team Study 노별마루 발표 2024.4.22)Wonjun Hwang
 
Are Multi-Cloud and Serverless Good or Bad?
Are Multi-Cloud and Serverless Good or Bad?Are Multi-Cloud and Serverless Good or Bad?
Are Multi-Cloud and Serverless Good or Bad?Mattias Andersson
 
costume and set research powerpoint presentation
costume and set research powerpoint presentationcostume and set research powerpoint presentation
costume and set research powerpoint presentationphoebematthew05
 
"Federated learning: out of reach no matter how close",Oleksandr Lapshyn
"Federated learning: out of reach no matter how close",Oleksandr Lapshyn"Federated learning: out of reach no matter how close",Oleksandr Lapshyn
"Federated learning: out of reach no matter how close",Oleksandr LapshynFwdays
 
APIForce Zurich 5 April Automation LPDG
APIForce Zurich 5 April  Automation LPDGAPIForce Zurich 5 April  Automation LPDG
APIForce Zurich 5 April Automation LPDGMarianaLemus7
 

Recently uploaded (20)

Build your next Gen AI Breakthrough - April 2024
Build your next Gen AI Breakthrough - April 2024Build your next Gen AI Breakthrough - April 2024
Build your next Gen AI Breakthrough - April 2024
 
CloudStudio User manual (basic edition):
CloudStudio User manual (basic edition):CloudStudio User manual (basic edition):
CloudStudio User manual (basic edition):
 
Making_way_through_DLL_hollowing_inspite_of_CFG_by_Debjeet Banerjee.pptx
Making_way_through_DLL_hollowing_inspite_of_CFG_by_Debjeet Banerjee.pptxMaking_way_through_DLL_hollowing_inspite_of_CFG_by_Debjeet Banerjee.pptx
Making_way_through_DLL_hollowing_inspite_of_CFG_by_Debjeet Banerjee.pptx
 
AI as an Interface for Commercial Buildings
AI as an Interface for Commercial BuildingsAI as an Interface for Commercial Buildings
AI as an Interface for Commercial Buildings
 
SIEMENS: RAPUNZEL – A Tale About Knowledge Graph
SIEMENS: RAPUNZEL – A Tale About Knowledge GraphSIEMENS: RAPUNZEL – A Tale About Knowledge Graph
SIEMENS: RAPUNZEL – A Tale About Knowledge Graph
 
My Hashitalk Indonesia April 2024 Presentation
My Hashitalk Indonesia April 2024 PresentationMy Hashitalk Indonesia April 2024 Presentation
My Hashitalk Indonesia April 2024 Presentation
 
#StandardsGoals for 2024: What’s new for BISAC - Tech Forum 2024
#StandardsGoals for 2024: What’s new for BISAC - Tech Forum 2024#StandardsGoals for 2024: What’s new for BISAC - Tech Forum 2024
#StandardsGoals for 2024: What’s new for BISAC - Tech Forum 2024
 
Beyond Boundaries: Leveraging No-Code Solutions for Industry Innovation
Beyond Boundaries: Leveraging No-Code Solutions for Industry InnovationBeyond Boundaries: Leveraging No-Code Solutions for Industry Innovation
Beyond Boundaries: Leveraging No-Code Solutions for Industry Innovation
 
SQL Database Design For Developers at php[tek] 2024
SQL Database Design For Developers at php[tek] 2024SQL Database Design For Developers at php[tek] 2024
SQL Database Design For Developers at php[tek] 2024
 
Advanced Test Driven-Development @ php[tek] 2024
Advanced Test Driven-Development @ php[tek] 2024Advanced Test Driven-Development @ php[tek] 2024
Advanced Test Driven-Development @ php[tek] 2024
 
The transition to renewables in India.pdf
The transition to renewables in India.pdfThe transition to renewables in India.pdf
The transition to renewables in India.pdf
 
Install Stable Diffusion in windows machine
Install Stable Diffusion in windows machineInstall Stable Diffusion in windows machine
Install Stable Diffusion in windows machine
 
Integration and Automation in Practice: CI/CD in Mule Integration and Automat...
Integration and Automation in Practice: CI/CD in Mule Integration and Automat...Integration and Automation in Practice: CI/CD in Mule Integration and Automat...
Integration and Automation in Practice: CI/CD in Mule Integration and Automat...
 
Pigging Solutions Piggable Sweeping Elbows
Pigging Solutions Piggable Sweeping ElbowsPigging Solutions Piggable Sweeping Elbows
Pigging Solutions Piggable Sweeping Elbows
 
Bun (KitWorks Team Study 노별마루 발표 2024.4.22)
Bun (KitWorks Team Study 노별마루 발표 2024.4.22)Bun (KitWorks Team Study 노별마루 발표 2024.4.22)
Bun (KitWorks Team Study 노별마루 발표 2024.4.22)
 
Are Multi-Cloud and Serverless Good or Bad?
Are Multi-Cloud and Serverless Good or Bad?Are Multi-Cloud and Serverless Good or Bad?
Are Multi-Cloud and Serverless Good or Bad?
 
costume and set research powerpoint presentation
costume and set research powerpoint presentationcostume and set research powerpoint presentation
costume and set research powerpoint presentation
 
"Federated learning: out of reach no matter how close",Oleksandr Lapshyn
"Federated learning: out of reach no matter how close",Oleksandr Lapshyn"Federated learning: out of reach no matter how close",Oleksandr Lapshyn
"Federated learning: out of reach no matter how close",Oleksandr Lapshyn
 
APIForce Zurich 5 April Automation LPDG
APIForce Zurich 5 April  Automation LPDGAPIForce Zurich 5 April  Automation LPDG
APIForce Zurich 5 April Automation LPDG
 
DMCC Future of Trade Web3 - Special Edition
DMCC Future of Trade Web3 - Special EditionDMCC Future of Trade Web3 - Special Edition
DMCC Future of Trade Web3 - Special Edition
 

Hm 5750 manual-0817

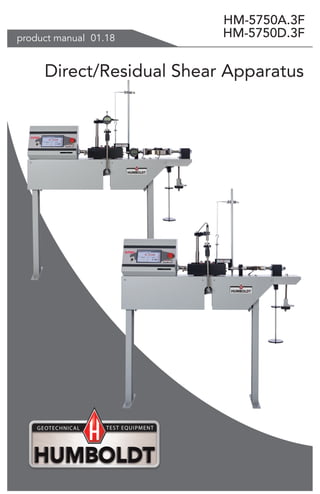
  • 1. product manual 01.18 Direct/Residual Shear Apparatus HM-5750A.3F HM-5750D.3F
  • 2.
  • 3. CONTENTS Quick Start Guide 4 Unpacking 4 Installation and Equipment Setup 4 Electrical Connections 4 Power Switch 4 Instrumentation Connections and Setup 5 HM-5750 Rear Instrumentation Panel 5 Network 5 USB Power 5 Instrument Inputs 5 Initial Machine Set up 6 Iinitial Set up — Calibration 8 Calibration Input Screen 8 Units 9 Value 9 Initial Set Up — Date/Time 10 Date 10 Time 10 Clock Style 10 Clock 10 Initial Set Up — Display 11 Brightness 12 Dim Display 12 Turn Display Off 12 Initial Set Up Preferences 12 Preferences – General Tab 13 Logger ID 13 Sound 13 Automatically Update System 13 Update Check Frequency 13 Preferences – System Units Tab 13 Ambient Temperature 14 Motor Speed Unit 14 Stress Control Unit 14 Preferences – Specimen Parameters Tab 14 Specimen Height 15 Specimen Diameter 15 Specimen Width 15 Preferences – Storage Tab 15 Test Storage Limit 15 Recycled Tests 15 Test Templates 15 Save to USB 15 Initial Set Up — Network 16 DHCP 17 IP Information 17 Local Status 17 Internet Status 17 Initial Set Up — Information 17 System Information 18 Firmware Version 18 IP Information 18 Local Status 18 Internet Status 19 Memory 19 Factory Screen 19 Export Log File 19 Initial Set Up — Contact 19 Contact Information 19 Initial Set Up — Update 20 Update from USB 21 Check for Update 22 Update Details 22 Download Updates 22 Equipment Setup 25 Installation and Equipment Setup 26 Electrical Connections 26 Power Switch 26 Instrumentation Connections and Setup 27 Rear Instrumentation Panel 27 Network 27 USB Power 27 Instrument Inputs 27 Test Deck Setup 28 Shearbox Assembly 29 Shearbox Replacement Screws 29 Sample Prep 30 Shearbox Placement 30 Calibration of Instrumentation 32 How to Perform a Calibration 32 Export Calibration via USB 32 Test Setup 39 Sample Preparation 40 Sample Set Up 40 Consolidation of the Test Sample 40 Weight Platform Calculations 40 Test Procedures 41 Sample Removal and Clean Up 41 Test Setup — Consolidation 42 Test Setup Wizard – Select Test Type 42 Template 42 Test Setup Wizard – Set Up Taget Load 43 Test Setup Wizard – Select Logging Values 44 Test Setup Wizard – Select Stop Parameters 46 Test Setup Wizard – Select Trigger Parameters 47 Test Setup — Direct Shear 51 Test Setup Wizard – Select Test Type 51 Template 51 Test Setup Wizard – Select Motor Condition 52 TestSetupWizard–SelectLoggingParameters 53 Test Setup Wizard – Stop Conditions 54 Test Setup Wizard – Graph Conditions 55 Specifications 56 General Warnings 57
  • 4. QUICKSTARTGUIDE 4 Unpacking Initial inspection should include checking for physical dam- age during shipping and obvious external damage to the product. Package contents are defined by your packing list. Each Loader is configured according to customer specifications. In your inspection, make certain that the contents of your shipment match the documentation provided by your pack- ing list. Place unit on a flat, level surface to ensure that the unit is level side-to-side and back-to-front. Installation and Equipment Setup Electrical Connections The HM-5750A or D Direct Shear models are equipped with an internal digital switching power supply, which allows them to be used with most power configurations throughout the world. The unit is supplied with an IEC electrical cord with a standard 110V plug. The HM-5750A or D arrives ready for operation. Attach the supplied IEC electrical cord to the machine and plug into a standard wall receptacle for use in the United States. For locations other than the U.S., replace the supplied electrical cord with an IEC cord that has the correct plug for your ap- plication. The supplied cord can also be used by cutting the standard plug from the cord and attaching the correct plug. Power Switch The Power Switch is located on the upper right hand corner of the back of the machine, above the electrical cord inlet. The Fuse Compartment is located between the electrical cord inlet and the Power Switch. The HM-5750A or D use a 10 amp fuse. To begin operation, attach the supplied electri- cal cord, plug it in and press the Power Switch. Fig. 1 Power Switch Fuse Compartment
  • 5. QUICKSTARTGUIDE 5 Instrumentation Connections and Setup HM-5750A or D Rear Instrumentation Panel Above is a photo of the rear instrumentation panel of the HM-5750A or D. Network (1) Ethernet input for connecting machine to a local area net- work (LAN) and/or the internet. USB Power (2) The USB Power port is used for powering a wireless access appliance for those who want to use a wireless LAN setup. Instrument Inputs (3) The panel features four (4) inputs for connecting instrumentation to the machine. Each input represents a separate channel, and has been assigned and calibrated to a specific instrument for use with your HM-5750A or D. 2 1 3 Below are photos of an instrumentation input and the in- strumentation plug. Install the plugs into the inputs by lining up the guide at the bottom of the plug with the slot at the bottom of the input. Instrumentation Input Instrumentation Plug
  • 6. QUICKSTARTGUIDE 6 Once you have installed the instrumentation into the correct inputs, your rear panel should look like this: Remember, your HM-5750A or D Direct/Residual Shear Machine includes all the necessary instrumentation, which is already calibrated and assigned to an Input and will not need calibration, however you should confirm that the instrumentation has been set up and calibrated, that you have plugged them into the correct channel, and that you check with your QC/QA program to set up a frequency of calibration schedule. Initial Set Up DO NOT RECALIBRATE!
  • 7. QUICKSTARTGUIDE 7 When your HM-5760 is first turned on, the screen below will appear. Navigate to the bottom of this drop-down menu and click on System Settings (1). You will see the following screen. From this screen, to confirm your machine instrumentation has been calibrated, navigate to the Calibration section by clicking the Menu icon in the top left corner of the screen (1). When you click on this button, you will see a drop-down menu appear, see below. 1 1
  • 8. QUICKSTARTGUIDE 8 Click on the Calibration tab in the top left corner (2). You will see the following screen. 2 Calibration Input Screen The Calibration Input Screen (above) is used to monitor and calibrate instrumentation and assign them to specific chan- nels of the HM-5750. The Calibration Input Screen provides a summary of the calibration status of each channel. At this time, verify the calibration information. A green box at the left of a channel indicates that the chan- nel has instrumentation assigned to it and that it is calibrated and ready for use (1). 1 Initial Set Up — Calibration
  • 9. QUICKSTARTGUIDE 9 Calibration Input Screen, cont. Each channel has a “Limits On” check box (1). Use the Limits On to keep the machine from exceeding the sensor limits of the instrumentation. By selecting this option, before the test can exceed the limits of the sensors, all tests will stop run- ning and the motor will stop to avoid damaging connected instrumentation. Note: An input cannot be calibrated during testing. Units (2) In this field, a calibrated instrument will display the units that were chosen for use at the time of calibration. This field can also be used to automatically toggle conversion of units between lb.-in. and SI units if the need arises. Value (3) This field displays the current calibration value. This value should already be set with 3 decimal point accuracy (1) below. If the instrument is not calibrated, the unit will read “N/A.” 2 3 4 1 1
  • 10. QUICKSTARTGUIDE 10 1 For the HM-5750, values for vertical and horizontal loads will be set at 10.000kN (2000.0 lb), for vertical displacement this value will be set at 10.000mm (0.4000”) and for horizontal displacement this value will be set at 25.000mm (1.000”) Export Calibration via USB (4) Press this button to select calibrations to export via USB. It is a good practice to export all your calibrations to a thumb drive. In case of a problem this practice allows you to recover your calibration data quickly. To set up Date and Time settings, return to the System Set- tings screen and click on the Date/Time Panel. (1) 1 2 3 4 Click on the Date/Time tab (1). You will see the following screen. Initial Set Up — Date and Time
  • 11. QUICKSTARTGUIDE 11 To set up Display settings, return to the System Settings screen and click on the Display Panel. (1) 1 Date (1) Set the month, day, year, and date display format. Time (2) Set the hours, minutes, seconds, and am/pm. Clock Style (3) Select a clock view, either a 24-hour or 12-hour clock, as well as the option to show seconds or not. Clock (4) The current time is displayed and is located on every control- ler screen. Clicking on the time from any screen, you will be taken to the Date/Time Settings Screen. Click on the Display tab (1). You will see the following screen. Initial Set Up — Display
  • 12. QUICKSTARTGUIDE 12 This screen is accessed by clicking on the “Preferences” button. (1) Brightness (1) Slide the gray bar to the left or right to adjust brightness. Dim Display (2) The backlight of the display will automatically dim to save power. Click the yellow box to change the number of min- utes before the display goes dim. After the time has elapsed, touch the display to deactivate dimming. Turn Display Off (3) The display will automatically turn off to save power. Click the yellow box to change the number of minutes before the display powers off. 1 2 3 1 Initial Set Up — Preferences
  • 13. QUICKSTARTGUIDE 13 Click on the Display tab (1). You will see the following screen. 2 3 1 4 Preferences – General Tab The Preferences panel is comprised of four (4) tabs and defaults to the General tab, see above. Logger ID (1) Each machine that is connected to your network requires a unique Logger ID. These numbers can be assigned any number between 1-245. In most cases, if you are setting up a new machine it has been given the Logger ID 1. This would show in the Logger ID field. (1). If this number conflicts with another machine’s Logger ID, one of the machines will have to be changed to another Logger ID. Sound (2) Checking this box enables or disables audio feedback for logger events. Automatically Update System (3) Checking this box allows the machine to automatically search for firmware updates when actively connected to the Inter- net. The machine will not automatically install updates; it will prompt when an update is available. Update Check Frequency (4) The number placed in this box represents the frequency (how many days) the machine checks for updates. Preferences – System Units Tab This screen is accessed by clicking on the “System Units” Tab under System Preferences.
  • 14. QUICKSTARTGUIDE 14 1 2 3 1 2 3 Ambient Temperature (1) This field displays the current ambient temperature and allows you to select desired units (Fahrenheit or Celsius) for temperature recording. Motor Speed Unit (2) Click on the desired units you want to use for motor control (in/min or mm/min). Stress Control Unit (3) Click on the desired units you want to use for stress control (LBF, KN, KSF OR KPA). Preferences – Specimen Parameters Tab This screen is accessed by clicking on the Specimen Parame- ters Tab under System Preferences.
  • 15. QUICKSTARTGUIDE 15 Test Storage Limit (1) This field allows you to set the number of previously run tests to be available on the “Previous Tests” screen. This number can be between 10-50. Recycled Tests (2) This refers to previously run tests that are not displayed in the “Previous Tests” window. These tests are not deleted; they are recycled for later use. Select this button to view/ex- port/delete recycled tests. Test Templates (3) Select this button to delete test templates that have been created, but are no longer desired. Save to USB Check Box (4) Checking this Box saves the results of a test to USB thumb drive inserted into the front USB slot on the machine. Specimen Height (1) This field allows you to set the specimen height that will be used for all testing calculations. Specimen Diameter (2) This field allows you to set the specimen diameter that will be used for all testing calculations. Specimen Width (3) This field allows you to set the specimen width that will be used for all testing calculations. Preferences – Storage Tab This screen is accessed by clicking on the Storage Tab under System Preferences. 1 2 3 4
  • 16. QUICKSTARTGUIDE 16 A password is required to access the Network Settings. That password is: 27604. 1 To set up Network settings, return to the System Settings screen and click on the Network panel. (1) Initial Set Up — Network
  • 17. QUICKSTARTGUIDE 17 DHCP (1) Check this box to enable/disable the Dynamic Host Configu- ration Protocol (DHCP). If enabled, your machine will pick up IP information from your router. If disabled, you will need to manually enter the network information. IP Information (2) This information will be filled in automatically if the DHCP is checked, otherwise you will have to manually supply this in- formation. The IP address must be unique for each machine. Local Status (3) This indicates the status of the local network connection, Connected or Disconnected. Internet Status (4) This indicates the status of your Internet connection, Con- nected or Disconnected. Note: If you are experiencing issues with any connec- tions, please contact your IT department for assistance. Clicking on this panel provides a view of the current status of the machine. (1), next page. 1 2 3 4 Initial Set Up — Information
  • 18. QUICKSTARTGUIDE 18 Firmware Version (1) The current version of the machine firmware is shown here. If you contact product support, you will need to supply this information. IP Information (2) This information will be filled in automatically if DHCP is checked, otherwise you will have to manually supply this in- formation. The IP address must be unique for each machine. Local Status (3) This indicates the status of the local network connection, Connected or Disconnected. 1 System Information Below is a view of the System Information screen. It provides a current status of the machine. 1 2 4 7 3 5 6
  • 19. QUICKSTARTGUIDE 19 Contact Information Below is a view of the Contact Information screen showing contact information for Humboldt Support and Service. For quickest response go to this link on our website: https://www.humboldtmfg.com/support and fill in the support form. This will provide us with the necessary in- formation to assist you and you will be added to the next position in the support cue. You can also email Humboldt Support at support@hum- boldtmfg.com or Humboldt Service at service@humboldtm- fg.com. Please include contact information and a detailed description of your reason for contact. Internet Status (4) This indicates the status of your Internet connection, Connected or Disconnected. Memory (5) This indicates the current status of how much available memory is being used by the machine Factory Screen (6) This is for Humboldt use only. Export Log File (7) This button exports a log file from the machine to a USB thumb drive. Be sure to insert a thumb drive before exporting the file or you will receive an error. This file can be helpful in trouble shooting by Humboldt Support. Clicking on this panel provides contact information for Humboldt Support and Service(1) 1 Initial Set Up —Contact
  • 20. QUICKSTARTGUIDE 20 Clicking on this panel provides information on checking for Updates, performing updates and an update history for the machine. (1) 1 Initial Set Up — Update
  • 21. QUICKSTARTGUIDE 21 Update from USB (1) If your HM-5750 is not connected to the internet, Software updates for your machine can be downloaded from the Humboldt website Support Area using a computer. To access the Software Update area, go to: https://www.humboldtmfg. com/support/software.php. Once on this page, click on the Elite Series Firmware tab. You will see a list of Humboldt Elite Series machines. Click on the HM-5750 Current Version link and the firmware update will begin to download to your computer. Once the down- load is complete. Load the file onto a USB thumb drive and insert the thumb drive into the USB port on the front of the HM-5750. With the USB thumb drive inserted into the USB port, click on Update from USB (1). A window will open and you will see a list of Updates. Select a file to use for your update and click the Select button. 1 2 3 4 1
  • 22. QUICKSTARTGUIDE 22 The update process will begin. This may take several min- utes. Your HM-5750A or D may reboot several times during the update, do not turn off or reset machine during this process. Check for Update (2) If your HM-5750A or D is connected to the internet, you can have the machine check automatically for updates, which can be found under System Settings – Preferences button. How often the machine checks for updates can be customized under Preferences. However, you may click on the Check for Update button (2) to force an immediate check for updates. Update Details (3) If you have chosen to have the HM-5750A or D check for updates automatically, this box will display a running list of updates currently available for your machine, but, which have not been installed. Download Updates (4) Clicking this button will download updates for your machine and automatically install them. To accomplish this, the ma- chine must be connected to the internet. Machine will install, turn-off and restart. Wait until installation is complete and the window indicates: Ready for Testing. You can tell that there is an update available by the appear- ance of the following icon in the window header (1), see next page. 1 2 3 4
  • 23. QUICKSTARTGUIDE 23 Operation from a Computer and NEXT Software This manual covers the setup and operation of the HM- 5750A and HM-5750D Dead Weight Direct/Residual Shear Apparatus in Stand-alone Mode only. For information on operating your load frame with Humboldt’s NEXT Software and a computer, please refer to the Humboldt NEXT soft- ware manual. 1
  • 24. 24
  • 26. 26 Installation and Equipment Setup Electrical Connections The HM-5750A or D Direct Shear models are equipped with an in- ternal digital switching power supply, which allows them to be used with most power configurations throughout the world. The unit is supplied with an IEC electrical cord with a standard 110V plug. The HM-5750A or D arrive ready for operation. Attach the supplied IEC electrical cord to the machine and plug into a standard wall receptacle for use in the United States. For locations other than the U.S., replace the supplied electrical cord with an IEC cord that has the correct plug for your application. The supplied cord can also be used by cutting the standard plug from the cord and attaching the correct plug. Power Switch The Power Switch is located on the upper right hand corner of the back of the machine, above the electrical cord inlet. The Fuse Compartment is located between the electrical cord inlet and the Power Switch. HM-5750A or D use a 10 amp fuse. To begin oper- ation, attach the supplied electrical cord, plug it in and press the Power Switch. Power Switch Fuse Compartment
  • 27. 27 Instrumentation Connections and Setup HM-5750A or D Rear Instrumentation Panel 2 1 3 Above is a photo of the rear instrumentation panel of the HM-5750A or D. Network (1) Ethernet input for connecting machine to a local area network and/or the internet. USB Power (2) The USB Power port is used for powering a wireless access appli- ance for those who want to use a wireless LAN setup. Instrument Inputs (3) The panel features four (4) input channels for connecting instrumentation to the machine. Each input represents a separate channel, and has been as- signed and calibrated to a specific instrument for use with your HM-5750A or D. Below are photos of an instrumentation input and the instrumen- tation plug. The instrumentation plugs have been numbered and should be installed in the corresponding numbered input. Install the plugs into the inputs by lining up the guide at the bottom of the plug with the slot at the bottom of the input channel. Ignore the locking collar on the plugs they are not required for this application.
  • 28. 28 Once you have installed the instrumentation into the correct inputs, your rear panel should look like this: Test Deck Setup Below is a how your HM-5750A or D should be set up for operation. When you receive your unit, your instrumentation should already be mounted in place. It has been tied down with plastic ties for shipping so you should remove these ties before operation. You may have to make small position adjustments to the instrumentation for optimal operation.
  • 29. 29 Shearbox Assembly Shearbox assemblies are not included with the HM-5750A or D Direct Shear Machine, but are required. They are available in both round and square configurations in several sizes, see below. You, most likely, ordered at least one for use with your HM-5750A or D. Shearbox Assemblies Round Model 2.0" HM-2751.20D 2.42" HM-2751.24D 2.5" HM-2751.25D 4.0" HM-2751.40D 50mm HM-2751.50D 60mm HM-2751.60D 100mm HM-2751.100D Shearbox assemblies include: sample shearbox, (2) porous plates, (1) loading pad, and (1) grid plate. All shearboxes feature mounting screws for use with the ASTM D3080-compliant counter-balance device. Shearbox Replacement Screws Replacement screws for shearboxes are available: Thumbscrew, Metal, Black Head HM-003274 Thumbscrew, Plastic HM-003275 Thumbscrew Head, Red HM-003276 Shearbox Assemblies Square Model 2.0" HM-2751.20S 2.42" HM-2751.24S 2.5" HM-2751.25S 4.0" HM-2751.40S 50mm HM-2751.50S 60mm HM-2751.60S 100mm HM-2751.100S HM-2751.60SHM-2751.25D
  • 30. 30 Sample Prep Please refer to ASTM D3080 for instructions on sample preparation. Humboldt offers the following items to aid in sample preparation. Accessory Model Cutter HM-2702.XXS/D Dolly tamper HM-2703.XXS/D Porous plate HM-2704.XXS/D Calibration disk, square HM-2755.XXS Calibration disk, round* HM-1220.XX.4 Replacement Pressure Ball 5/8" 440 Stainless Steel HM-001076 * Can be used for shear boxes and consolidation cells. Part Numbers ending in .XX require a size code to be entered referring to the sample size to be tested. For direct/residual shear samples, sizes are: .20 = 2.0"; .242 = 2.42"; .25 = 2.5"; .40 = 4.0"; .50 = 50mm; .60 = 60mm,and .100 = 100mm. NOTE: use "S" for square and"D" for round samples. Shearbox Placement Once you have prepared your sample and are ready to place the shearbox into the HM-5750A or D, place the shearbox into the reser- voir/carriage and slide it as far to the right as it can go. Refer to the photo on page 26 for placement. Once the shearbox is placed into the reservoir/carriage, tighten the two large screws located on the left of the reservoir/carriage to secure the shearbox in place. Make sure that the horizontal load cell butts up to the shearbox and tight- en all adjustment screws. Once the shearbox is in place, attach the counter-balance device for ASTM D3080 compliance to the long steel screws on the right side of the shearbox. Remove the plastic screws with the red heads from the shearbox and using the metal screws separate the shear box halves to approximately the diameter of the maximum-sized particle in the test specimen or 0.025”. (0.64 mm). Once this is completed, adjust the counter-balance device as necessary to apply a counter force for the purpose of counteracting the weight of the top half of the shear box. To adjust: 1. Coarse adjustment is accomplished by raising or lowering the support hook assembly. To do so, loosen the thumbscrew on the support hook and adjust the position of the hook. Tighten the thumbscrew again to secure the support hook.
  • 31. 31 Loosen wing nut and extend hook as necessary Loosen nuts and adjust hooks up or down as necessary Loosen thumbscrew and adjust hook assembly up or down as necessary 2. Fine adjustment is accomplished by loosening the nuts that secure either the hooks on the hanger bar and adjusting the hooks up or down. When the adjustment is complete, tighten the nuts to secure the hooks. Once this is completed unhook the spring from the hook support- ing the hanger bar and load your test specimen into the shearbox. When this is complete, reattach the spring to the hook supporting the hanger bar. At this point you would be ready to test. Humboldt recommends using this guide to familiarize yourself with the operation of your HM-5750A or D Direct Shear ma- chine’s operation, before doing actual testing. We also suggest you use some insignificant samples or samples made specifically for setup purposes before testing real samples.
  • 32. 32 Calibration of Instrumentation The HM-5750A or D Direct/Residual Shear Machine includes all nec- essary instrumentation. All instrumentation included with this unit has been calibrated and assigned to specific channels for use. These channels are marked on the corresponding instrumentation and the correct calibration information will appear in the channel calibration parameters, once you have installed the instrumentation to the cor- rect inputs. DO NOT RECALIBRATE! How to Perform a Calibration All instrumentation included with this unit has been calibrated and assigned to specific channels for use. Humboldt recommends and standard lab practice dictates that your HM-5750A or D should be calibrated periodically. For most, this period is usually a year, though other rules may apply to the frequency of calibration. To perform a calibration, it will be necessary to either hire a calibra- tion service to come in to calibrate your machine or have the neces- sary calibration equipment to perform this service. To begin a calibration, it is always a good idea to save the current calibration settings. If you have already saved these settings to a USB thumb drive or your computer, this step can be skipped. Export Calibration via USB (4) Press this button to select calibrations to export via USB. It is a good practice to export all your calibrations to a thumb drive. In case of a problem this practice allows you to recover your calibration data quickly. 4 5
  • 33. 33 On this screen select an Input calibration to delete, one at a time, and then press the Select button. The channel will be deleted. Do this for all four (4) channels. Once all Input calibrations have been cleared, your Calibration window should look like the one below with no Inputs calibrated. The four Inputs of the HM-5750A or D have been programmed so that Input One (1) is always set to be Horizontal Load. Input Two (2) is programmed to be Horizontal Displacement. Input Three (3) is programmed to be Vertical Displacement and Input Four (4) is programmed to be Vertical Load. Once your calibrations have been saved, click on the trash can icon (5) to begin to erase all four (4) Input calibrations. When you press the trash can icon, this screen will appear.
  • 34. 34 Calibrating your instrumentation to the appropriate Input requires a separate device, which can provide precise and specific loads or displacement, and, which has been certified to be accurate. The calibration process involves plugging the instrumentation into the HM-5750A or D while placing the instrumentation into the certified calibration device, which provides a specific set load or displacement. Once this has been done, click the Calibrate button next to the ap- propriate Input (1). A pop-up window will appear requiring you to enter the password, which is 22234. 1
  • 35. 35 Upon filling in the password, you will see this screen, Tab 1 Sensor Details of the Calibration settings. On Tab 1, the Sensor Type (1) will default to Horizontal Load. For Capacity (2), fill in the maximum capacity of the sensor and choose either lbf or kN. For FS output (3), refer to the calibration sheet, which came with the instrument your are using and enter it here and then choose mV/V. Below are typical calibration sheets with the FS Output information highlighted in orange. 1 2 3
  • 36. 36 On Tab 2, in the Calibration Limit field (1), enter the maximum cal- ibrated limit of the sensor. This value should contain the number of decimal points you require for degree of accuracy, up to 5 points. Limits On (2), should be checked if you don’t want the machine to apply a load greater than the Calibration Limit (1). Calibration Meth- od (3) determines whether this calibration will be based only on the maximum load capacity of the sensor or upon a multi-point curve of up to a maximum of 10 points. If you choose Per FS Output (not a recommended calibration meth- od) it will base your calibration on the maximum load capacity of the sensor vs. zero load capacity of the sensor. If you choose this method and click on the Right Arrow in the bottom right-hand corner of the screen. You will be prompted to remove any load on the sensor and click on Done (4) when you have done so. 1 2 3 Once this is complete, click on the Right Arrow in the bottom right- hand corner of the screen to save these settings. You will be taken to Tab 2, Limits.
  • 37. 37 On Tab 3 you will be able to set the number of points you want to use for your calibration. You can choose 1-point, 5-point, 10-point or Custom, which allows you to use any number of points up to a total of 10. In the example on the previous screen shot above, a 5-point calibration has been chosen. With your instrumentation sensor placed in a calibration frame and the sensor plugged into the an Input on the HM-5750A or D. You will set the “0” point at 0 with no load applied to the sensor. The “5” point will be set with the maximum load capacity of the sensor applied. Points “1” through “4” are usually determined by spacing them out evenly between the no load reading and the maximum load reading. As an example, if you have a sensor with a 1,000 lb maximum force capability, you would set the “0” point at “0” and the “5” point at 1,000. Points “1” through “4” would typically be set at: “1” 200; “2” 400; “3” 600; “4” 800 and “5” 1000. Or, divide the maximum load number by the number of points, in this case 5, which works out to 200 point increments between points. See below. If you choose Multi-Point (Recommended calibration method) Curve and click on the Right Arrow in the bottom right-hand corner of the screen, you will be taken to Tab 3.
  • 38. 38 Each point would be chosen by clicking on the corresponding point row above. The load would be applied to the sensor and an A/D Counts reading would appear. To set the point, click on the Set Point button (1). This would be repeated until all points have been set. In the example above, Point 3 is being calibrated and is ready to have the Set Point button (1) clicked. Point 4 still needs to be calibrated. Once all Points have been calibrated, click on the Right Arrow in the bottom right-hand corner of the screen. You will be taken to Tab 4. On Tab 4, you will be asked to name the calibrated Input. The screen will provide a default name, but you can name the In- put anything you’d like. Once you’ve named the Input, click on the disk icon in the lower, right-hand corner (1). This will save it. Use this method for calibrating any additional Inputs necessary. 1 1
  • 40. 40 Sample Preparation Once extruded, samples should be carefully trimmed down to the internal diameter of the direct shear ring to be used for the test. The object here is to get at least a 1” soil sample sandwiched between a layer of filter paper and a porous stone on both sides of the soil sam- ple. The porous stones provide drainage and are used to distribute the pressure during the test. Place the bottom drainage plate and then a porous stone with a filter paper into the locked shear rings. Extrude one inch of soil sample into the shear rings. Place another piece of filter paper and porous stone on the top of the sample along with the top load pad. Sample Set Up At this time, the direct shear rings are held together by two (2) bolts and the soil sample would be centered inside the rings. The shear rings with sample stones are then carefully placed inside the direct shear water chamber being certain the load cell shaft is connected to the shear rings. The shear ring assembly is placed against the end spacer. Alignment of the load cell connecting rod is required at this time. Tighten the two (2) shear ring clamping knobs located on the left side of the water chamber. Connect the load cell to the shear ring con- necting rod using the stainless steel knurled nut. Connect the load cell and adjust the knobs to read “0” on the load cell readout. It may be necessary to use the tare feature to read “0”. The top cross arm is usually removed for placement of the rings into the water cham- ber. Re-install the cross arm and adjust the height until there is l/16” space between the arm and the stainless steel ball being certain the arm is level. The upper cross arm has a displacement indicator pin that is positioned on the load pad ball. Adjust the dial indicator or linear displacement transducer to the top of this pin and allow for sufficient travel when the soil sample compresses. The vertical dial indicator is positioned and set to read some arbitrary initial reading. Consolidation of the Test Sample The weight of the consolidation load arm with two upright rods lower cross arm and lower weight platform is balanced. The lever arm on the right side of the device has a ratio of 10:1. Select a consolidation load and apply the required weights. Refer to ASTM D-3080 for sam- ple preparation and computations.
  • 41. 41 Test Procedures The final dial reading after consolidation is noted on the data sheet. Adjust the shear force on the sample by adjusting the two knurled nuts on the load cell support casting. Allow a small seating load to be exerted on the sample. The horizontal dial indicator is then adjusted to some convenient zero point. Until this time, the two shear rings have been held together by two (2) screws— these screws are now removed. There are also two (2) screws for adjusting the gap between the rings once consolidation has been reached. The gap is adjusted by turning the screws clockwise from the finger tight position. One full turn will give .031” gap. For sands of a fine to medium size, 1-1/4 of a revolution of the adjusting screw is used. For coarser sands, 1 revolution is used. For fine grain soils and clays, ½ revolution is used. These values are not absolute and can be altered accordingly. Initial readings are taken at this time. The screws should be turned evenly to prevent tilting the top ring. The test is now start- ed at the prescribed rate of shear by setting the shear rate selector. Unless automatically recorded, the shear and compression dial indica- tors will be read at various prescribed horizontal deflection readings such as every ten divisions of the three place dial until failure. Usually the test is carried out past failure to determine the residual strength which may be used in design. At this point the test is completed and the shear loading is stopped and the vertical load is removed. The test is now started at the pre- scribed rate of shear by setting the shear rate selector. Unless auto- matically recorded, the shear and compression dial indicators will be read at various prescribed horizontal deflection readings such as ev- ery ten divisions of the three place dial until failure. Usually the test is carried out past failure to determine the residual strength which may be used in design. At this point the test is completed and the shear loading is stopped and the vertical load is removed. Sample Removal and Clean-Up Put the motor drive in reverse (towards the home position) and stop when zero (0) load is reached on the load cell readout. Remove the sample at this time and inspect per ASTM D-3080. The vertical load is now reduced to zero (0) by adjusting the pressure regulator to zero (0) psi. The apparatus is taken down in reverse order as assembled. The sample is extracted and weighted in order to determine the dry density and water content at failure. The water chamber is returned to the home position by using the drive motor. Cover the roller bear- ing slide assembly to prevent dust and dirt from entering the bear- ings.
  • 42. 42 Test Setup — Consolidation To begin a new test, Click on the Menu icon in the top left corner of the screen (1). When you click on this button, you will see a drop- down menu appear, see below. Click on NEW TEST (1). Test Setup Wizard – Select Test Type Clicking on NEW TEST (1) above brings up the Test Setup Wizard. On the first screen of the Wizard, you can select the type of test you want to perform — Consolidation or Direct Shear (2) and click on the arrow button in the bottom right-hand corner (3) Template If you are just beginning to use your new machine, there will be no templates, which have been saved, so at this point, clicking on the template button will provide no templates to choose from. To create templates, you essentially save a completed test as a template. Once you have completed some tests and save them as templates, they will then show up when you press the template button. This can allow 1 2 3
  • 43. 43 you to quickly repeat tests with the same parameters, as well as a fast way to create new tests by choosing a template and then changing some of the parameters. Test Setup Wizard – Setup Target Load In the previous screen, we chose Consolidation for the Test Type, so this value is the Load Value for a consolidation test. Click on the Load Value field (1) and a pop-up menu will appear. Use this menu to type in the value you want to use for the Load Value. Click the check mark in the lower right-hand corner of this pop-up menu to choose the value and you will be returned to the screen above. You can then choose the type of unit by clicking on the right-side pop-up field (2). Your choices here are: kN, lbf, kPa and ksf. Choose one, and, to continue, press the Right Arrow in the lower, right-hand corner of the screen (3). 1 2 3
  • 44. 44 When you click on the Right Arrow in the lower, right-hand corner of the screen (3). You will get a pop-up window asking if this is the first load sequence of a new specimen, as shown below. Choose Yes or No. (1). You will see the screen below. if you choose yes, the vertical displacement will be tared (zeroed) at the beginning of the test. Test Setup Wizard – Select Logging Values Click on the Logging Value Icon (1). A new pop-up window will appear entitled Logging Time Table, see below. 1 1
  • 45. 45 For most people, who are following ASTM D2435, BS:1377:5, AASH- TO T216, UNE 103-405, if you choose yes the vertical misplacement will be tared (zeroed) at the beginning of the test testing procedures, click on Use Default (1) and the machine will fill in the Time Table per the ASTM standard. 1 2 For those who want to use different parameters, you can either click on Use Default (1) and change the values to suit your application, or, click on Clear Table (2) and fill in the blank table with your values. Once you are satisfied with the completed table, click on the Select button (3) to use the Table. You will be returned to this screen. 3
  • 46. 46 To continue with your chosen values, click on the Right Arrow (1) in the lower right-hand corner. Test Setup Wizard – Select Stop Parameters 1 Next you need to select the Stop Parameters for the test. To choose the Stop Value Parameter, Click on the yellow field and select a time period from the pop up window that appears.
  • 47. 47 To save your Stop Value, click on the check mark (1) in the lower, right-hand corner of the pop up window. You will return to the origi- nal screen. To proceed, click on the Right Arrow in the lower, right-hand corner of the screen. Test Setup Wizard – Select Trigger Parameters (Start Tab) On this screen (see below), if you have attached instrumentation for a consolidation test and it has been calibrated, that device should show up automatically in the Trigger Input field (1). The Trigger Value (2) and Current Value (3) should also be automatically filled in for that device. The automatic Trigger Value will always read slightly lower than the Current Value. In this case, by default, the Trigger Value is automatically set .002 lower than the Current Value. If you choose, you can manually alter the Trigger Value here. 1 1
  • 48. 48 Once completed, press the Green Arrow at the bottom right-hand corner of the screen (4). You will then see the screen below. 1 In the Value Field, create a name for your test (1). Press the check mark button (2) to save your test name. You will hear an extended beep sound indicating your test name has been saved. You will be taken to the Current Test Screen (below) and your test will begin automatically. 1 2 3 4 2
  • 49. 49 From this new panel you are given the Current Status of your test, in this case, Running (1). You can also see the number of points cur- rently read (2) and the current duration of the test (3). In addition, by clicking on the Test View button (4) you can toggle through three different views of the current test. These views are: 1 4 5 2 3 You can monitor your test from this window, which allows you to view the Vertical Displacement (1), the Vertical Load (2) and the Stress (3), or for additional information, click on the Test Control bar on the right of the window (4), which will reveal the additional panel shown below. 1 2 3 4
  • 50. 50 By clicking on the Test selection button (5) when you also have the Current Tests tab selected, you can view all currently running tests. Choosing a test from the list of currently running tests, allows you to monitor that test in all views. This allows you to view the status of all your running tests one at a time. Tabulation View Graph View Selection View
  • 51. 51 Test Setup — Direct Shear To begin a new test, Click on the Menu icon in the top left corner of the screen (1). When you click on this button, you will see a drop- down menu appear, see below. Click on NEW TEST (1). Test Setup Wizard – Select Test Type Clicking on NEW TEST (1) above brings up the Test Setup Wizard. On the first screen of the Wizard, you can select the type of test you want to perform — Consolidation or Direct Shear (2) and click on the arrow button in the bottom right-hand corner (3) Template If you are just beginning to use your new machine, there will be no templates, which have been saved, so at this point, clicking on the template button will provide no templates to choose from. To create templates, you essentially save a completed test as a template. Once you have completed some tests and save them as templates, they will then show up when you press the template button. This 1 2 3
  • 52. 52 can allow you to quickly repeat tests with the same parameters, as well as a fast way to create new tests by choosing a template and then changing some of the parameters. Test Setup Wizard – Select Motor Condition On this screen you need to select a Motor Condition. In almost all applications you will choose Motor Control. When Motor Control is selected, the Motor Parameters choices appear. Direction (1) choose either Right or Left Motor Direction. Next, enter a Speed (2). When you click on the Speed field a value picker will open. Type in a speed and click on the Check box in the lower, right-hand corner of the picker to select. You can also check the Return Home check box (3) if you want the machine to return to the Home position after the test. Once completed click on the Right Arrow in the lower, right hand corner of the screen, to continue. 2 3 1
  • 53. 53 Test Setup Wizard – Select Logging Parameters For Logging Condition (1), you have four (4) choices: Interval logging, Linear Time Interval Logging Table and Elapsed Time Table. Choose the one that best fits your application needs. In this example Linear Time Interval has been chosen and to complete this setup, a logging value must be entered into the Logging Value field. Click on the field and a pop-up window will appear. Enter the value and click on the check mark in the lower, right-hand corner of the window to save. 1
  • 54. 54 Test Setup Wizard – Stop Conditions To set the Stop Condition for your test, select one condition from the list of nine (9). Distance (Right) has been chosen for our exam- ple here. Then choose the appropriate input device to coincide with your choice from the Stop Input field (2). Also, add a value in the The Stop Value field (3), by clicking on it and using the pop-up window to enter a value. Click the Check Mark in the lower right-hand corner to save the value. 2 3 Click the Arrow (1) in the lower, right-hand corner of the window to continue the Setup process. 1
  • 55. 55 Test Setup Wizard – Graph Conditions To set the Graph Options for your test, select one option for the X and one option for the Y axis from this list. In our example here the Horiz Disp and Horiz Load have been chosen. Then choose the ap- propriate input device to coincide with your choice from the Stop In- put field (2). Also, add a value in the The Stop Value field, by clicking on it and using the pop-up window to enter a value. Click the Check Mark in the lower right-hand corner to save the value. Operation from a Computer and NEXT Software This manual covers the setup and operation of the HM-5030.3F Load Frame in Stand-alone Mode only. For information on operating your load frame with Humboldt’s NEXT Software and a computer, please refer to the Humboldt NEXT software manual.
  • 56. 56 HM-5750A.3F or HM-5750AD.3F Specifications The Humboldt HM-5750A or D Direct/Residual Shear apparatus is a fully-automated system utilizing pneumatic loading to apply vertical loads to a sample eliminating the need for loading weights used in dead weight-type systems. The microprocessor-based system features a stepper-motor drive system and a 7” touch-screen display that allows the operator to control and monitor all test functions. Like all Elite Series machines, the HM-5750A or D is built around Hum- boldt’s integral, 4-channel data logger with touch-screen control, which allows the HM-5750A or D to be used as a standalone device capable of full test control and data logging. It can also be controlled by a net- worked computer at any location with access to the network. The HM-5750A or Dis supplied complete with two 2,000 lbf (10kN) capac- ity load cell; 1” (25.4mm) horizontal strain transducer, a 0.4” (10.2mm) vertical strain transducer and Humboldt’s NEXT Direct Shear software module. Shear box assemblies and related accessories are not included and should be ordered separately. Controller Specifications: Display (Resistive Touch) 7" (178mm) VGA (480 x 800) Real-time test data Graphic and tabulation Processor Dual 32-bit ARM RAM 64MB Memory, non-volatile 4GB Analog to digital converter 24 bit Data acquisition 3-4 Channels Logging speed up to 50 readings per second Multi-test storage 1000 Points per test 3000 USB port (front) export data, import/export calibration data, WiFi USB port (back) provides external power for wireless access point Ethernet connection for network connectivity Emergency stop Large button 24-bit differential analog to digital converter 4 Ambient temperature sensor 1 Limit switches 2 Firmware Update Ethernet or flash drive HM-5750A & D Specifications: Horiz. movement 2" (50mm) Maximum Horiz. shear force 2000 lbf (10kN) Vertical load 2000 lbf (10kN) Data Channels 3 Speed Range 0.00001 to 0.49999 in./min. 0.00001 to 12.9999 mm/min. Data storage 1000 tests and up to 3000 readings per test Dimensions (L x D x H) 40" x 10" x 45" (1016 x 254 x 1143mm) Voltage 110/220V 50/60Hz - 6.5amps
  • 57. 57 General Warnings Safety Warnings Operators should take care to operate this machine under maximum load restric- tions. The machine is programmed at the factory to provide safety shutdown if the upper or lower maximum travel is exceeded, as well as if the upper instrument calibration is exceeded. Electrical Warnings Typically, there is no reason for the operator to open the machine. However, if the customer’s engineers attempt to change settings to the circuit board connected to the back panel, the machine must first be unplugged. Unplugging the internal con- nection to the back panel circuit board while the machine is under power will result in permanent damage to the circuit board. Important Notice The information contained herein is supplied without representation or warranty of any kind. Humboldt Mfg. Co. therefore assumes no responsibility and shall have no liability, consequential or otherwise, of any kind arising from the use of the described equipment contained in this manual. Updated Products The manufacturer reserves the right to change or modify product design or construc- tion without prior notice and without incurring any obligation to make such changes and modifications on products previously or subsequently sold. Fitness for Application The manufacturer makes no recommendations or claims regarding fitness for applica- tions other than the specific tests as defined in this User Guide. Unpacking Initial inspection should include checking for physical damage during shipping and obvious external damage to the product. Package contents are defined by your packing list. Each Loader is configured accord- ing to customer specifications. In your inspection, make certain that the contents of your shipment match the documentation provided by your packing list. Place unit on a flat, smooth surface and use leveling feet (supplied) and a bubble level to ensure that the unit is level side-to-side and back-to-front. Warranty Humboldt Mfg. Co. warrants its products to be free from defects in material or workmanship. The exclusive remedy for this warranty is Humboldt Mfg. Co., factory replace- ment of any part or parts of such product, for the warranty of this product please refer to Hum- boldt Mfg. Co. catalog on Terms and Conditions of Sale. The purchaser is responsible for the transportation charges. Humboldt Mfg. Co. shall not be responsible under this warranty if the goods have been improperly maintained, installed, operated or the goods have been altered or modified so as to adversely affect the operation, use performance or durability or so as to change their intended use. The Humboldt Mfg. Co. liability under the warranty contained in this clause is limited to the repair or replacement of defective goods and making good, defective workmanship.
  • 58. 58
  • 59. 59
  • 60. www.humboldtmfg.com HUMBOLDT Testing Equipment for Construction Materials Humboldt Mfg. Co. 875 Tollgate Road Elgin, Illinois 60123 U.S.A. U.S.A. Toll Free: 1.800.544.7220 Voice: 1.708.456.6300 Fax: 1.708.456.0137 Email: hmc@humboldtmfg.com Manufacturer’s Rights and Responsibilities Software Copyright COPYRIGHT NOTICE ©2016 HUMBOLDT Mfg. Co. All Rights Reserved. This manual or parts thereof may not be reproduced in any form without the expressed written permission of HUMBOLDT Mfg. Co. UNPUBLISHED LICENSED PROPRIETARY WORK ©2016 HUMBOLDT Mfg. Co. The programmable, read-only memory, integrated circuit package contained in this equipment and covered with a copyright notice label contains proprietary and con- fidential software, which is the sole property of HUMBOLDT MFG. CO. It is licensed for use by the original purchaser of this equipment for a period of 99 years. Transfer of the license can be obtained by a request, in writing, from HUMBOLDT MFG. CO. With the exception of HUMBOLDT Authorized Service Facilities, you may not copy, alter, de-compile, or reverse assemble the software in any fashion except as instruct- ed in this manual. US copyright laws, trademark laws, and trade secrets protect the materials. Any person(s) and /or organizations that attempt or accomplish the above violation or knowingly aid or abet the violation by supplying equipment or technol- ogy will be subject to civil damages and criminal prosecution.With the exception of HUMBOLDT Authorized Service Facilities, you may not copy, alter, de-compile, or reverse assemble the software in any fashion except as instructed in this manual. U.S. copyright laws, trademark laws, and trade secrets protect the materials. Any person(s) and /or organizations that attempt or accomplish the above violation or knowingly aid or abet the violation by supplying equipment or technology will be subject to civil damages and criminal prosecution.