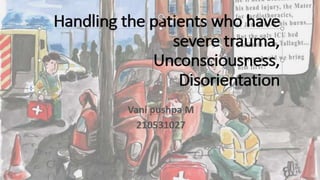
handling of trauma,uncocious and amputated limbs - Copy.pptx
•Download as PPTX, PDF•
3 likes•139 views

patient management in radiology department i.e., handling patient with trauma , unconscious and amputated limbs in radiography.

Recommended
More Related Content
What's hot
What's hot (20)
Similar to handling of trauma,uncocious and amputated limbs - Copy.pptx
Similar to handling of trauma,uncocious and amputated limbs - Copy.pptx (20)
More from VANI PUSHPA MUDAVATH
More from VANI PUSHPA MUDAVATH (11)
Recently uploaded
Recently uploaded (20)
handling of trauma,uncocious and amputated limbs - Copy.pptx
- 2. Table of content • Introduction • Radiographer’s Role as Part of the Trauma Team • Guidelines for Handling the patients who have severe trauma • Handling in various aspects • Transferring technique for spine • Signs and symptoms of unconsciousness • First Aid Guide for unconscious patients • Indications of Amputation • Handling of amputated limbs • Precautions for Radiography of amputated part • Conclusion • Questions
- 3. Introduction • Trauma is defined as a severe injury or damage to the body caused by an accident or violence. • Victims of trauma require immediate and specialized care, which is commonly provided in larger hospitals within a specialized unit, termed the emergency department (ED). • Golden hours for trauma is first 60 mins • Golden hours for stroke is 4.5 hr -6 hr (window period)
- 4. The main steps in early management of trauma : • Primary assessment • Secondary assessment
- 5. Primary assessment (ABCDE) • A- Airway with in line cervical spine immobilization • B- Breathing and ventilation with oxygen supplementation • C- Circulation with hemorrhage control • D- Disability- neurological status, as expressed by the patient • E- Exposure of the entire body, looking for occult injuries and environmental factors
- 6. Secondary assessment(AMPLE) • A- Allergies • M- Medications(especially anticoagulants, insulin and cardiovascular medications) • P- Previous medical/surgical history. • L- Last meal(time) • E- Event- details regarding the bio mechanism of injury
- 7. Radiographer’s Role as Part of the Trauma Team • The role of the radiographer within the ED ultimately depends on the department protocol and staffing and the extent of emergency care provided at the facility. Regardless of the size of the facility, the primary responsibilities of a radiographer in an emergency situation include the following: • Perform quality diagnostic imaging procedures as requested • Practice ethical radiation protection for self, patient, and others • Provide competent patient care Ranking these responsibilities is impossible because they occur simultaneously, and all are vital to quality care in the ED
- 8. PATIENT PREPARATION • Remembering that the patient has endured an emotionally disturbing and distressing event in addition to the physical injuries he or she may have sustained is important. If the patient is conscious, speak calmly and look directly in the patient’s eyes while explaining the procedures that have been ordered. • Check the patient thoroughly for items that might cause an artifact on the images. Explain what you are removing from the patient and why. Place all removed personal effects, especially valuables, in the proper container used by the facility (i.e., plastic bag) or in the designated secure area. Each facility has a procedure regarding proper storage of a patient’s personal belongings. Know the procedure and follow it carefully.
- 9. BREATHING INSTRUCTIONS • Most injured patients have difficulty following the recommended breathing instructions for routine projections. • If a breathing technique is desired, this can be explained to a conscious trauma patient in the usual manner. • If the patient is unconscious or unresponsive, careful attention should be paid to the rate and degree of chest wall movement. • If inspiration is desired on the image, the exposure should be timed to correspond to the highest point of chest expansion. Conversely, if the routine projection calls for exposure on expiration, the exposure should be made when the patient’s chest wall falls to its lowest point.
- 10. RADIATION PROTECTION • One of the most essential duties and ethical responsibilities of the trauma radiographer is radiation protection of the patient, members of the trauma team, and the radiographer himself or herself. Common practices should minimally include the following: • Close collimation to the anatomy of interest to reduce scatter • Gonadal shielding for patients of childbearing age (when doing so does not interfere with the anatomy of interest) • Lead aprons for all persons that remain in the room during the procedure • Exposure factors that minimize patient dose and scattered radiation • Announcement of impending exposure to allow unnecessary personnel to exit the room
- 11. Transfer 1. In the imaging department we are often faced with the challenge of difficult patient transfers. Employing proper lifting techniques prevents back injuries 2. Proper body mechanics and lifting techniques are the key to avoiding injurie
- 12. Proper body mechanics and lifting techniques are the key to avoiding injurie • Maintain a wide base of support • Keep your feet apart • Place one foot slightly a head of the others • Flex your knees to absorb jolts • Turn with your feet
- 13. Transferring Devices • Transfer Belt • Transfer Boards • Draw Sheet • Hospital Bed Mattress • Hydraulic Lifts
- 14. Methods • There are essentially three ways of transferring patients: • By Gurney • By Wheelchair • By Ambulation.
- 15. General guidelines General guidelines to follow when caring for a patient who has traumatic injuries are as follows: 1. Do not remove dressings or splints. 2. Do not move patients who are on a stretcher or backboard until ordered to do so by the physician in charge of the patient. 3. When performing an initial cross-table lateral cervical spine radiograph, never move the patient’s head or neck or remove the cervical collar. The physician must interpret the radiograph and “clear” the cervical spine for injury before removing the collar or moving the patient. 4. Request direction from the emergency room team when planning moves, and assemble adequate assistance to move the patient safely and as painlessly as possible. 5. Do not disturb impaled objects. Support them so that they do not move as you image the patient. 6. Do not remove pneumatic antishock garments. 7. Have oxygen, suction equipment, and an emesis basin ready for use. 8. Work quickly, efficiently, and accurately to minimize repeat radiographs. • Include all anatomy of interest
- 16. THE PATIENT WITH A HEAD INJURY Radiographer’s Reponses 1. Keep the patient’s head and neck immobilized until the physician rules out injury to the spinal cord. 2. If possible, elevate the patient’s head 15 to 30 degrees. 3. Do not remove sandbags, collars, or dressings. Take all radiographs with these in place. 4. Do not flex the patient’s neck or turn it to either side. Rotation of the head may increase intracranial pressure
- 17. THE PATIENT WITH A FACIAL INJURY • Radiographer’s Response 1. Observe for airway obstruction. Watch for noisy labored respiration. 2. Do not remove sandbags, collars, or other supportive devices or move a patient unless supervised by the physician. 3. Apply a sterile pressure dressing if bleeding is profuse, and call for assistance. 4. Position the face properly as possible as we can 5. Wear sterile gloves if in contact with open wounds. 6. If you find teeth that have fallen out, place them in a container moistened with gauze soaked in sterile water. 7. Immobilize with taping
- 18. THE PATIENT WITH A SPINAL CORD INJURY • Radiographer’s Response 1. Monitor vital signs. 2. Maintain an open airway. If respirations change, notify the physician at once and call for assistance. If in respiratory failure, use jaw downward. Do not tilt the head. 3. Do not allow or request the patient to move when performing radiographs. Patient must be log rolled with a synchronized move supervised by the physician. 4. Do not move the patient’s head or neck if position is awkward.
- 19. Cervical injury • 10-20% patients with head injury also have a cervical spine injury. • The majority of patients are imaged while being immobilized in a cervical spine collar. If the CT is reported as negative, the collar is typically removed (cervical spine collar clearance). A select few patients nevertheless require further assessment with MRI. Precautions for cervical injury • When cervical collar placed for immobilization , • Check for metal implants / history of implants • Oxygen supply • Handling and transferring techniques are more important (same time) • Maintaining consistent motion • VR IMAGES “DO NOT ATTEMPT TO STRAIGHTEN THE NECK”
- 20. HARD COLLAR SOFT COLLAR
- 21. A LOG ROLL TECHNIQUE • Method of turning patients following neurosurgical procedures when the spine must be maintained in alignment. Two persons use a sheet to turn the patient as a unit; if the patient is unable to support the head, a third person is necessary. Steps : • Enlist 3 or 4 people to help, with a leader positioned at the injured person’s head, other helpers kneeling to one side, and one in charge of sliding the stretcher under the person. • Roll the injured person onto their side, keeping the head and neck aligned with the body, and place the injured person on the stretcher.
- 22. Get in your positions to move the injured person • The other 3-4 helpers should be kneeling on one side of the injured person. • Each helper will be in control of moving a different portion of the injured person's body, and the helpers should be spread out evenly. • One helper should be designated to slide a stretcher under the injured person as the rest of the helpers roll them on their side. • This helper should be kneeling on the opposite side of the injured person's body.
- 23. On the leaders command, the helpers will roll the injured person onto their side. Each helper must place one hand under the injured person's back, and reach their other arm across the top of the injured person's body to grab the side opposite side of them. The helpers will then roll the injured person toward them, so that the injured person ends up on their side As the helpers move the injured person, the leader must keep the head and neck aligned with the body. Roll the injured person onto their side.
- 24. 😉 Once the injured person has been rolled onto their side, the designated helper will slide the stretcher underneath them. 😊 The rest of the helpers will then roll the body back down onto the stretcher. Place the injured person on stretcher
- 26. THE PATIENT WITH ABDOMINAL TRAUMA Radiographer’s Response 1. Do not remove antishock garments. 2. If the patient has open wounds, wear gloves; sterile gloves are indicated if in direct contact with the wound. 3. Call for assistance if the patient is too ill to help you move him or her. 4. If the patient is unable to stand for upright exposures or maintain the position on a tilt table, use other means of obtaining necessary radiographic images. 5. Transport the patient by gurney. 6. Have an emesis basin and tissues prepared in case the patient vomits. 7. Do not give the patient anything to drink or eat
- 28. Often, patients will have some type of medical equipment, i.e.: • Infusion catheters and pumps • Oxygen: cannula, mask or tracheal intubation. • Nasogastric or nasoenteric • Urinary catheters • Always check a patient’s O2 tank setting • Always communicate with your patient even if they seem unresponsive!
- 29. Unconsciousness • Unconsciousness is a state in which a patient is totally unaware of both self and external surroundings, and unable to respond meaningfully to external stimuli • Unconsciousness is an abnormal state in which a person is not alert and not fully responsive to his/her surroundings. Levels of unconsciousness range from drowsiness to collapse and may range in severity from fainting to coma
- 30. Signs and Symptoms A person who is unconscious may be: • Drowsy or disoriented; he/she may come in and out of consciousness. • Confused and incoherent. • In a coma; he/she may be completely motionless.
- 31. First Aid Guide If you find an unconscious person, try to determine what caused the loss of consciousness. Check the person's airway, breathing, and circulation. If you do not think there is a spinal injury, put the person in the recovery position: 1. Kneel beside them. Make sure they are face up and straighten their arms and legs. 2. Take the arm closest to you and fold it over their chest. 3. Take the arm farthest from you and extend it away from the body. 4. Bend the leg closest to you at the knee. 5. Support the patient's head and neck with one hand. Hold the bent knee, and roll the person away from you. 6. Tilt the patient's head back to keep the airway clear and open.
- 32. LEFT LATERAL RECUMBENT POSITION.
- 33. Who Should Not Be Put in the Recovery Position • The recovery position is widely used in first aid situations, but there are some situations when it is not appropriate. In some cases, moving a patient on their side or moving them at all could make their injury worse. • Do not use the recovery position if the patient has a head, neck, or spinal cord injury. • For children under age 1, Place the baby face down across your forearm. Make sure to support the baby's head with your hand.
- 34. Amputation • The term amputation refers to the disconnection of all or part of a limb from the body. Specifically, amputation is defined as the removal of the structure through a bone. This is in contrast to disarticulation, which is the removal of the structure through a joint. • Whereas surgical amputation is a controlled procedure that allows reconstruction of the stump (for function or use with prostheses thereafter). Amputations can also be congenital and autoamputation can also occur in the diabetic foot
- 35. Indications of Amputation • Trauma - RTA, Gun shot • Malignant tumors • Nerve injuries & infection • Extreme heat & cold - burn, gangrene • Peripheral vascular insufficiency • Congenital absence of limbs or malformation • Severe infection
- 36. Handling of amputated limbs Pain management • The pain is made worse by movement of the limb, pressure in the area of the wound, swelling (edema). • Pain in the postsurgical period can be controlled with medications and through the use of physical modalities • Physical interventions can also provide significant pain control. • The limb should be elevated for one or two hours, two or three times each day to reduce local edema or swelling . • Elevation should be used to control swelling and limit pain. • Compressive elastic bandages can be worn on the stump to control swelling.
- 37. Handling of amputated limbs • Gentle handling of the amputated part. • All unnecessary movements should be avoided • If visible dirty, clean with normal saline. • The stump should be covered with a saline. • Moistened sterile dressing to prevent further contamination. • Place the part in dry plastic bag. • Ice should be avoided as it can lead to frostbite and freezing. • Radiographs of the amputated part and proximal stump should be obtained.
- 38. Precautions for Radiography of amputated part • Immobilization of amputated part. • Removal of prosthetics ANGIO • During angio appropriate FOV covered • Immobilization • Using sorbitrate. During pre surgery of amputee, there is a necessary to place clipping of vessels and undergoes contrast, otherwise it leads to extravasation of contrast.
- 39. Conclusion The primary responsibilities of a radiographer in an emergency situation include the following: • Perform quality diagnostic imaging procedures as requested • Practice ethical radiation protection for self, patient, and other personnel • Provide competent patient care • Unconscious: Recovery Position • Immobilization of amputated part. • Removal of prosthetics • Pain management
- 40. Questions ? • A log roll technique used for ? • Sorbitrate ? • Antishock garments? • Responsibilities of a radiographer in an emergency situation?
- 41. References • Care of the patient in diagnostic radiography. by: Chesney, D. Noreen; Chesney, Muriel O., joint author. Publication date: 1978. • Patient Care in Imaging Technology Seventh Edition BY LILLIAN S. TORRES, ANDREA GUILLEN DUTTON, • https://www.verywellhealth.com