
Recommended
More Related Content
Similar to trainingpresentation-visiobusinessprocessmodelingnotation.pptx
Similar to trainingpresentation-visiobusinessprocessmodelingnotation.pptx (20)
Recently uploaded
Recently uploaded (20)
trainingpresentation-visiobusinessprocessmodelingnotation.pptx
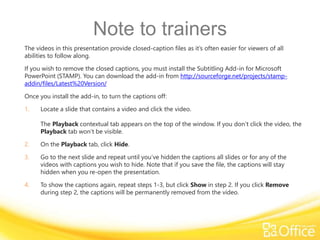
- 1. Note to trainers The videos in this presentation provide closed-caption files as it’s often easier for viewers of all abilities to follow along. If you wish to remove the closed captions, you must install the Subtitling Add-in for Microsoft PowerPoint (STAMP). You can download the add-in from http://sourceforge.net/projects/stamp- addin/files/Latest%20Version/ Once you install the add-in, to turn the captions off: 1. Locate a slide that contains a video and click the video. The Playback contextual tab appears on the top of the window. If you don’t click the video, the Playback tab won’t be visible. 2. On the Playback tab, click Hide. 3. Go to the next slide and repeat until you’ve hidden the captions all slides or for any of the videos with captions you wish to hide. Note that if you save the file, the captions will stay hidden when you re-open the presentation. 4. To show the captions again, repeat steps 1-3, but click Show in step 2. If you click Remove during step 2, the captions will be permanently removed from the video.
- 2. Before you begin If a yellow security bar appears at the top of the screen in PowerPoint, click Enable Editing. You need PowerPoint 2010 to view this presentation. If you don’t have PowerPoint 2010, download the PowerPoint Viewer (see the URL in the notes pane).
- 3. Microsoft ® Visio ® 2010 Training Business process modeling notation
- 4. Course contents • Overview: Basic BPMN diagrams • Lesson: Includes 5 instructional movies • Quick Reference Card Business process modeling diagrams
- 5. Overview: BPMN basics Business process modeling diagrams Learn the basics of Business Process Modeling Notation (BPMN) and how create a BPMN flowchart diagram in Visio 2010 Premium.
- 6. Course goals • Create a basic BPMN diagram. • Create multiple levels of detail by using subprocesses. • Validate a process diagram. Business process modeling diagrams
- 7. Introduction (2:31) Business process modeling diagrams Point to the bottom of the video to see the video controls. Drag or point along the progress bar to move forward or go back. Business Process Modeling Notation or BPMN is a standard notation system for describing business processes. It was designed to solve communication problems that arise when different parts of a company use different types of notation but they need to work together. For example, a management team might design a process and hand it off to the IT department to implement but IT needs more specific information than is captured in the management notation. The foundational principals behind BPMN help you create clear diagrams with a minimum of clutter, while including as much complex information as you need. Here’s an example: A change of address process at Proseware Inc. It looks fairly simple but there is a lot of information here and most of the basic BPMN elements are used. There really aren’t that many basic elements in BPMN. In fact, there are four. Flow objects, Connecting objects, Swimlanes and Artifacts. Flow objects are the main objects you see in the process. The squares, diamonds and circles. Those are the only three types of Flow objects. Squares represent activities, generally Tasks. Diamonds represent Gateways, usually decisions of some kind. Circles represent events. Connecting objects are the lines and arrows that connect the other objects and show the direction of the process flow. There are three types but I’ll explain those later. They are easier to understand in context. Swimlanes are the same as in other cross functional flow charts. Each person or group involved in the process has a lane. Each activity is put into the lane of the person or group responsible for that step. BPMN also has the concept of Pools which are separate, self- contained entities involved in a process. For example, two companies transacting business or a company as one Pool and Customers as a second Pool. The last type of element, Artifacts, are for adding information and details but they aren’t part of the structure of the process. Artifacts include text annotations, group boxes that show relationships and Data Objects like emails or documents. In the next video, I’ll show how these basic elements are turned into the specific steps that are used in the example diagram.
- 8. Elements of BPMN (3:59) Business process modeling diagrams Point to the bottom of the video to see the video controls. Drag or point along the progress bar to move forward or go back. The basic elements of Business Process Modeling Notation, or BPMN, are similar to the shapes used in other process diagrams. But the BPMN standard provides ways to add as much specific technical information to your diagram as you need. Let’s look at how these elements are used in this example diagram. There are two Pools on the main page of the change of address process. One for the company, Proseware, Inc. and one for a Customer. The Proseware, Inc. Pool has two lanes. One for activities performed by the Help Desk and one for activities performed by the processing center. Each Pool has a Start Event and an End Event. The customer initiates the process by sending a change of address form to the Help Desk at Proseware Inc. Notice that the connector between the Customer activity and the Proseware Inc. activity, that is going from one Pool to the other, is different from the connectors that are used inside each Pool. Inside each Pool, the sequence flow is used, which is represented by a solid connector. Between Pools, the BPMN standard says to use a message flow connector which is dashed rather than solid. It indicates that messages flow from one pool to the other but sequences are limited to a single Pool. Inside the Proseware Inc. Pool, there are three types of activities identified by distinct icons on the activity's shape and in this diagram by colors. How do you know what each icon represents? A quick way is to right-click the shape and look at the options that are set for it. The first activity has a Loop type of None, a Task Type of User, Compensation is not checked and the Activity Type is Task. So this is a user task and if I zoom in on the icon, it kind of looks like a sketch of a person. The other activity that has an icon in the upper right corner has similar settings on the shortcut menu, except it’s a Script task, meaning it’s automated. The third activity is not a task, there’s no task type on the shortcut menu. A look at the activity type shows that it’s a Collapsed Sub- Process instead of a task. That means there are multiple steps involved in completing the task. Which, in this case, is verifying the account, but for the sake of making this overview process easier to read, the steps are placed on a separate page of the diagram and a single shape represents that Sub-Process here. The Sub-Process shape is hyperlinked to the Sub-Process page so it’s easy to follow through to the details. I’ll talk more about Sub-Processes in another video. There’s only one more element to demonstrate in this example diagram, and to do that I’ll follow a link to the Sub-Process Page by holding down the Ctrl key and clicking the shape. That element is the Gateway shape. There are a few types of gateways and they’re identified by the icons on the shapes, like the activity shapes are. These gateways have X’s and by right-clicking and looking at the Gateway Type, I can see that they’re Exclusive Data with Marker types. Exclusive Data means that the sequence can follow only one of the outgoing branches. In this case the form is either OK or it’s not, it can’t be both. Other gateway types handle different routing situations. For example if the process branches into several simultaneous paths. But many processes use only exclusive gateways, including this process. In the next video I’ll show how to get started creating this diagram from scratch.
- 9. Start a diagram (4:50) Business process modeling diagrams Point to the bottom of the video to see the video controls. Drag or point along the progress bar to move forward or go back. To start making a BPMN diagram, open Visio Premium 2010 and click the Flowchart category. Double-click BPMN Diagram. The drawing page is blank but I know I want my shapes organized in Pools and Swimlanes, so that’s a good place to start. I’ll drag a Pool/Lane shape over to the page. Since I need two Lanes in this pool, I'll add a second one by holding the pointer and then clicking the blue arrow that appears. With two or more Lanes, Visio adds a title to the Pool. I might as well change the labels now. So I’ll click the title text once and start typing. Proseware, Inc. The top Lane is for the Processing Center. The bottom Lane is for the Help Desk. Now I’ll add a second Pool for the customer and change the label. Each Pool will have its own sequence with start and end events. So I’ll drag a Start Event onto the appropriate Lane in each Pool. I’ll label the customer event, Customer changes address, by selecting the shape and typing. Since the Proseware, Inc. sequence is more complex than the customer’s sequence, I’ll fill in the Proseware Pool and then line up Customer under it. I’ll add shapes and connectors in one click by using the floating mini toolbar that appears when I hold the pointer over a shape and then over the little blue arrow that appears. The four shapes that it shows are the first ones in the quick shapes area of the stencil but the preview shape that appears on the page by default is a Start Event which isn’t in the Quick Shapes area, it’s showing up because Start Event is selected in the stencil. I want a task shape though. So I’ll click that on the floating toolbar. The next shape I need is the collapsed sub process shape, which isn’t in the quick shapes area. I could drag one from the stencil but I’ll select it in the stencil and click the blue arrow when collapsed sub process shows up as the preview shape. The collapsed sub process is in the wrong Lane but that’s easily fixed by dragging it where it needs to go. Now I need a task, another task and finally, the end event. The customer sequence is quite short. Two tasks and an end event. I just need to line up the Customer tasks with the Help Desk tasks because message flows run between them. To complete the connections, I’ll add the message flows between the Pools. I can do that quickly by holding the pointer over the blue arrow that points from one shape to the other in the direction of the flow. The mini toolbar appears but I can ignore that now. Visio detects that a shape is directly across from this shape and it’s within connection range so it puts a preview of a connector on the page. It’s a solid sequence flow. It needs to be a dashed message flow but I can change it from one to the other. So I’ll click the arrow to keep it. When I right-click the connector, I see the three types of connecting objects at the top of the shortcut menu. I just click the one I want. In this case, message flow. I do the same thing for the other message, except this one comes from the Proseware Pool to the Customer Pool. One last thing to do to get the foundations in place, identify what kinds of tasks these are. The ones in the Help Desk lane are user tasks. A person does something. So I’ll right-click the first task, point to task type and click User. Activities at the processing center are automated. So I’ll select the Script type for that one. Then back to the Help Desk with another user task. I’ll show what to do with a collapsed sub process shape in the next video.
- 10. Break out subprocesses (3:06) Business process modeling diagrams Point to the bottom of the video to see the video controls. Drag or point along the progress bar to move forward or go back. When you diagram a complex process, it’s usually good to have multiple levels of detail to enable different levels of analysis. At the highest level of the complete process, it would be too much detail to have every step included. Detailed steps that form a self-contained unit of activity can be broken out of the overview process and diagramed separately as sub processes, which are then represented as a single shape in the overview. In this example: the collapsed sub process shape represents several steps. Those steps are diagramed separately. If the sub process hasn’t been drawn yet, select the collapsed sub process shape, and on the process tab, click Create New. Visio creates a new blank page that’s linked to the selected shape. If the sub process has been diagramed all ready; select the shape you want to link, go to the process tab, click Link to Existing, and then select the page you want to link to in the list. There’s also the option to browse to another document. For example: if sub processes are documented and maintained by each team in separate files, in a process repository, you can link to the separate file and it will open. Even if the file is Excel, or PowerPoint, or Word; for example. As long as the user has the right program to open the file. If you are drawing the overview and decide that a group of shapes should be broken out as a sub process, you don’t have to draw them over again. Select those shapes by holding the CTRL key while you click them all and on the Process tab, click Create from Selection. A collapsed sub process shape is added to the diagram and the selected shapes are moved to a new page. So far I’ve talked about collapsed sub processes. You might have noticed that there is an expanded sub process shape too. This shape is a container you can use when you want to leave a small sub process on an overview, but still make it obvious that the steps form a unit. To add an expanded sub process container, drop it from the shapes window over the shapes in the sub process. It doesn’t fit quite right and it doesn’t actually contain any shapes yet, but we'll fix that. Select all the shapes, then right-click one of the selected shapes, point to Container, and then click Add to Underline Container. Now find the side of the container, right-click it, Point to Container, and then click Fit to Contents. And while the expanded sub process tape is still selected, start typing to add a label. In the next video, I’ll show how to run the validation tool, which checks whether the diagram conforms visually with the BPNM 1.2 Standard, and helps you find where the errors are.
- 11. Validate the diagram (1:40) Business process modeling diagrams Point to the bottom of the video to see the video controls. Drag or point along the progress bar to move forward or go back. The BPMN standard contains a large number of rules that have to be satisfied in compliant diagrams. Diagram Validation in Visio Premium 2010, helps you check that a diagram conforms visually to the BPMN 1.2 standard. To run the validation tools; on the Process tab, click the Check Diagram button. This issues window opens. If you have items in the Issues window, click one and the corresponding shape is selected. After you fix an issue, check the diagram again to confirm which problems were fixed. Fixing one problem will often clear up several items in the Issues window. In this case, a connector looks like it’s attached but it isn’t. I’ll drag it over and glue it in place and then run Check Diagram again. Sequence flow must not cross a Pool Boundary. I’ll click it and the sequence flow is selected on the diagram. It should be a message flow since it crosses between pools. So I’ll right-click it and change the type to Message Flow, and the other one needs to be changed as well. Now Check Diagram returns a Clear Issues window. That’s the end of the BPMN Basics Training. You can create many kinds of process diagrams, using only what I described in these five videos. To learn more about business process modeling notation, visit: www.bpmn.org
- 12. Quick Reference Card 1 Start a BPMN diagram from a template 1. Start Visio 2010 Premium. 2. Under Template Categories, click Flowchart. 3. Double-click BPMN Diagram. 4. Begin dragging shapes to the page and connecting them. Create a new, blank subprocess 1. Select the shape in the diagram that you want to link the new subprocess to. 2. On the Process tab, in the Subprocess group, click Create New. 3. Visio adds a new page to the diagram for the subprocess, and creates a hyperlink from the selected shape to that page. Business process modeling diagrams
- 13. Quick Reference Card 2 Extract selected shapes into a subprocess 1. Select the shapes you want to move to the subprocess. 2. On the Process tab, in the Subprocess group, click Create From Selection. The selected shapes are moved to a new page, and a new shape is added to the source diagram to represent the subprocess. The new shape is linked to the new page. If the process overview is a cross-functional flowchart, the new subprocess page will include swimlanes and phases that match the overview page. Link to an existing subprocess 1. Select the shape you want to link to the subprocess. 2. On the Process tab, in the Subprocess group, click Link to Existing. A menu opens that lists the pages in the diagram, and also gives the option to link to a different document. 3. Click the page you want to link to, or click Browse to Other Document to link the shape to a different document. Business process modeling diagrams
- 14. Quick Reference Card 3 Run validation on a diagram • On the Process tab, in the Diagram Validation group, click Check Diagram. If there are problems, the Issues window opens with a list of issues. If some of the issues don’t apply to your diagram, you can ignore them. Ignore issues that don’t apply to your diagram In the Issues window, right-click the issue you want to ignore. You have two options for ignoring issues: • Click Ignore This Issue to hide a single issue. • Click Ignore Rule to hide all issues raised by a particular rule. You can view issues that are ignored by right-clicking in the Issues window and then clicking Show Ignored Issues. Ignored issues are shown in shaded rows with lighter text, and have Yes in the Ignored column. You can stop ignoring an issue or a rule by right- clicking it and then clicking the appropriate command. Business process modeling diagrams
- 15. Quick Reference Card 4 The online version of this Quick Reference Card has more information. To see that version, go to http://office.microsoft.com/en-us/visio-help/quick-reference-card- RZ102712773.aspx?section=8&mode=print Business process modeling diagrams
Editor's Notes
- Download the PowerPoint viewer at (http://www.microsoft.com/downloads/details.aspx?displaylang=en&FamilyID=cb9bf144-1076-4615-9951-294eeb832823)
- Download the PowerPoint viewer at (http://www.microsoft.com/downloads/details.aspx?displaylang=en&FamilyID=cb9bf144-1076-4615-9951-294eeb832823)
- [Notes to trainer: This presentation must be viewed in PowerPoint 2010. If you don’t have PowerPoint 2010, the videos included in the presentation will not play. If you don’t have PowerPoint 2010, download the PowerPoint Viewer to view these files (http://www.microsoft.com/downloads/details.aspx?displaylang=en&FamilyID=cb9bf144%2D1076%2D4615%2D9951%2D294eeb832823). If the yellow security bar appears at the top of the screen in PowerPoint, or if a Codec Unavailable message appears in the video playback window, the presentation might have opened in Protected View. To enable video playback, in the yellow security bar at the top of the PowerPoint window, click Enable Editing. To browse other downloadable [Product Name] training presentations, see the “Download Office 2010 training” page (http://office.microsoft.com/en-us/powerpoint-help/download-office-2010-training-HA101901726.aspx). For detailed help in customizing this template, see the very last slide. Also, look for additional lesson text in the notes pane of some slides.]
- [Note to trainer: If you have trouble playing this video, for instance if a Codec Unavailable message appears in the video playback window, the presentation might have opened in Protected View. To enable video playback, in the yellow security bar at the top of the PowerPoint window, click Enable Editing. Note that even with Protected View turned on, video should play correctly in Slide Show view.]
- [Note to trainer: If you have trouble playing this video, for instance if a Codec Unavailable message appears in the video playback window, the presentation might have opened in Protected View. To enable video playback, in the yellow security bar at the top of the PowerPoint window, click Enable Editing. Note that even with Protected View turned on, video should play correctly in Slide Show view.]
- [Note to trainer: If you have trouble playing this video, for instance if a Codec Unavailable message appears in the video playback window, the presentation might have opened in Protected View. To enable video playback, in the yellow security bar at the top of the PowerPoint window, click Enable Editing. Note that even with Protected View turned on, video should play correctly in Slide Show view.]
- [Note to trainer: If you have trouble playing this video, for instance if a Codec Unavailable message appears in the video playback window, the presentation might have opened in Protected View. To enable video playback, in the yellow security bar at the top of the PowerPoint window, click Enable Editing. Note that even with Protected View turned on, video should play correctly in Slide Show view.]
- [Note to trainer: If you have trouble playing this video, for instance if a Codec Unavailable message appears in the video playback window, the presentation might have opened in Protected View. To enable video playback, in the yellow security bar at the top of the PowerPoint window, click Enable Editing. Note that even with Protected View turned on, video should play correctly in Slide Show view.]
- Using This Template This Microsoft PowerPoint® template has training content about creating Business Process Modeling Notation diagrams in Microsoft Visio® 2010. Its content is adapted from the Office.com Training course called “BPMN diagramming basics.” PowerPoint version: The template must be viewed in PowerPoint 2010. If you don’t have PowerPoint 2010, the videos included in the presentation will not play. If you don’t have PowerPoint 2010, download the PowerPoint Viewer to view these files (http://www.microsoft.com/downloads/details.aspx?displaylang=en&FamilyID=cb9bf144%2D1076%2D4615%2D9951%2D294eeb832823). Video playback: If the yellow security bar appears at the top of the screen in PowerPoint, or if a Codec Unavailable message appears in the video playback window, the presentation might have opened in Protected View. To enable video playback, in the yellow security bar at the top of the PowerPoint window, click Enable Editing. Slide layouts: Each slide has a custom layout. To apply the custom layout to a new slide, right-click the slide thumbnail, point to Layout, and click the layout from the Layout gallery. To alter the layouts, open master view and alter the specific master layout in that view. You can find the layout’s title by pointing to its thumbnail. Animations: Custom animation effects are applied throughout the presentation. These include Float In (Up or Down option), Fade, and Zoom. To alter animation effects, click the Animations tab, and use the Add Animation gallery and Timing options. Effect Options gives you choices about the effect; click Animation Pane on the Animations tab to work with multiple animations. Transitions: One transition, Doors, is used to emphasize sections of the slide show. It’s applied on the Course Contents slide, Lesson slide, and the first test slide. Hyperlinks to online course: The template contains links to the online version of this training course. The links take you to the hands-on practice session for each lesson and to the Quick Reference Card that is published for this course. Please take note: You must have [app] 2010 installed to view the hands-on practice sessions. If you don’t have [app] 2010, you won’t be able to access the practice instructions. Headers and footers: The template contains a footer that has the course title. To add footers such as the date or slide numbers, click the Insert tab, and click Header & Footer. Extracting videos from this file: Read these instructions first, because you’ll have to close this file in order to follow them. To extract the videos from this file, start Windows Explorer and change the filename extension from .pptx to .zip. Confirm the name change, and then open the renamed file. You’ll see a set of folders. The videos are located in the \ppt\media folder. Copy the videos and paste them to your local drive or other convenient location. You’ll probably need to rename the videos, because PowerPoint names them Media1.wmv, and so on. To resume using the presentation, change the filename extension back to .pptx.