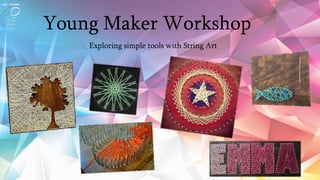
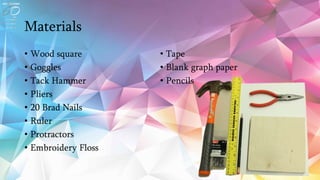
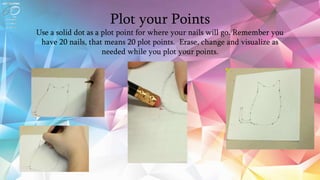
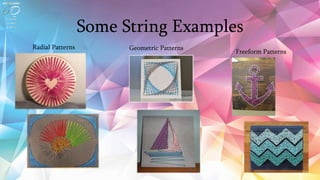
Young Maker Workshop
Exploring simple tools with String Art
From small and simple
to more complex
As big as a room, or even a
city!
Materials
• Wood square
• Goggles
• Tack Hammer
• Pliers
• 20 Brad Nails
• Ruler
• Protractors
• Embroidery Floss
• Tape
• Blank graph paper
• Pencils
Creating your Template
Use your ruler to draw a 5.5
by 5.5 inch square from one
corner of your graph paper.
Cut out your square Think of a simple design for
your art. Draw your design
on the paper
Plot your Points
Use a solid dot as a plot point for where your nails will go. Remember you
have 20 nails, that means 20 plot points. Erase, change and visualize as
needed while you plot your points.
Securing the Template
Lay your template flat on your board and tape down each side.
Hammering the nails
Put on your safety goggles!
Hold your nail with the pliers so your fingers are out of the way of the hammer.
Firmly hold the hammer handle and strike the head of the nail
Fill in your creation
Gently tear your paper template off the board.
Tie one end of the floss to your starting nail. Wind the floss from nail to nail in any pattern you choose.
When you are finished tie the end off on the last nail you used.
Some String Examples
Radial Patterns Geometric Patterns
Freeform Patterns
Thanks for participating in our Maker
Workshop
Enjoy discovering and making things?
Visit www.MakerFaireOrlando.com or www.OSC.org to
learn more about how you can get involved.

Young Maker Workshop: DIY String Art

  • 1.
    Young Maker Workshop Exploringsimple tools with String Art
  • 2.
    From small andsimple to more complex
  • 3.
    As big asa room, or even a city!
  • 4.
    Materials • Wood square •Goggles • Tack Hammer • Pliers • 20 Brad Nails • Ruler • Protractors • Embroidery Floss • Tape • Blank graph paper • Pencils
  • 5.
    Creating your Template Useyour ruler to draw a 5.5 by 5.5 inch square from one corner of your graph paper. Cut out your square Think of a simple design for your art. Draw your design on the paper
  • 6.
    Plot your Points Usea solid dot as a plot point for where your nails will go. Remember you have 20 nails, that means 20 plot points. Erase, change and visualize as needed while you plot your points.
  • 7.
    Securing the Template Layyour template flat on your board and tape down each side.
  • 8.
    Hammering the nails Puton your safety goggles! Hold your nail with the pliers so your fingers are out of the way of the hammer. Firmly hold the hammer handle and strike the head of the nail
  • 9.
    Fill in yourcreation Gently tear your paper template off the board. Tie one end of the floss to your starting nail. Wind the floss from nail to nail in any pattern you choose. When you are finished tie the end off on the last nail you used.
  • 10.
    Some String Examples RadialPatterns Geometric Patterns Freeform Patterns
  • 11.
    Thanks for participatingin our Maker Workshop Enjoy discovering and making things? Visit www.MakerFaireOrlando.com or www.OSC.org to learn more about how you can get involved.

Editor's Notes

  • #2 You will have a chance to work with hammers, pliers and nails today to create your very own string art. Once you know the basics you can scale this project to make whatever you can think of! Waivers need to be signed. An adult in your party can sign and list all participants names.
  • #6 Your imagination, 20 nails, and 10/15 minutes are the only limiting factors here.
  • #7 Depending on your shape you will need to evenly plot your points. Explain how to properly use a ruler and protractor.
  • #9 Do we have enough goggles to give away?