The Beginner's Guide to Kubernetes covers essential concepts and functionalities of Kubernetes, an open-source tool for orchestrating containers developed by Google. The document emphasizes the importance of understanding Kubernetes' deployment objects, managing configurations, and utilizing networking features to create scalable and resilient cloud-native applications. It aims to familiarize readers with basic Kubernetes principles and practices, making it an essential resource for developers and platform operators in the cloud-native environment.


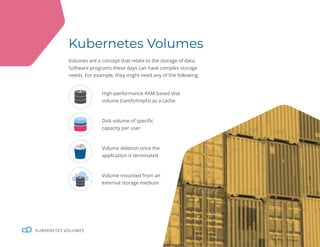
![6
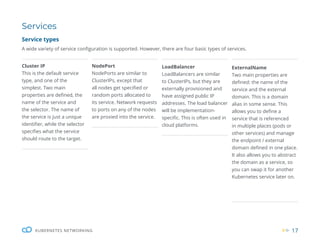
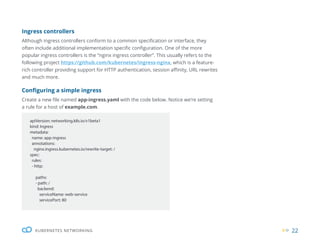
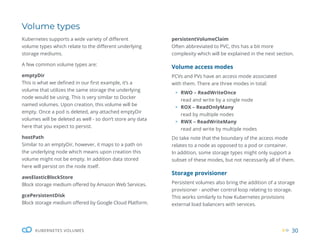
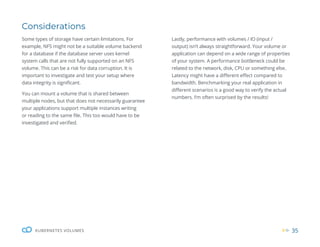
DEPLOYMENTS
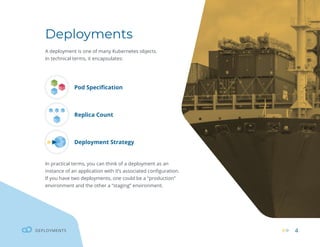
Managing deployments
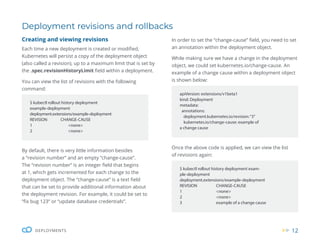
Some things to notice are:
ƒ The name of the deployment which is the main
unique reference to identify any deployment,
which in our case is: (example-deployment).
ƒ The label attached to the pod (app:example),
though we could set more than one.
Run the following:
A few things will happen in the background. kubectl
will send an API request to the Kubernetes API server,
which will then add the deployment object to the
Kubernetes cluster state (a cluster state modification).
Once this is created, we will no longer need the
example-dep.yaml file as it would be stored in the
cluster state. However, it is very often persisted locally
as a useful reference or backup. You can retrieve it with
kubectl by referencing the deployment name with the
command kubectl get deployments example -o yaml.
apiVersion: apps/v1
kind: Deployment
metadata:
name: example-deployment
spec:
replicas: 1
selector:
matchLabels:
app: example
template:
metadata:
labels:
app: example
spec:
containers:
- name: example-testing-container
image: debian:buster-slim
command: [“bash”,“-c”,“while
true; do echo ”Hello”; echo ”EXAMPLE_
ENV: $EXAMPLE_ENV”; sleep 5; done”]
env:
- name: EXAMPLE_ENV
value: abc123
$ kubectl apply -f example-dep.yaml
deployment.apps/example-deployment created
Creating a new deployment
We can begin by creating a new yaml file named
example-dep.yaml with contents of:](https://image.slidesharecdn.com/wpthebeginnersguidetokubernetes2020-240715002836-cf124933/85/WP_The-Beginners-Guide-to-Kubernetes_2020-pdf-7-320.jpg)
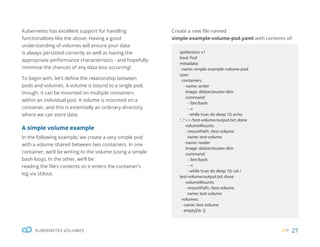
![8
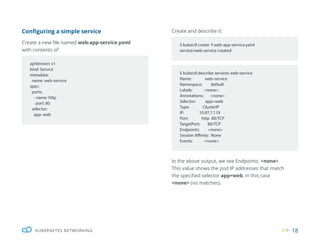
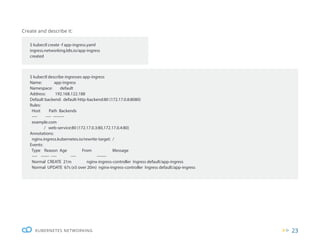
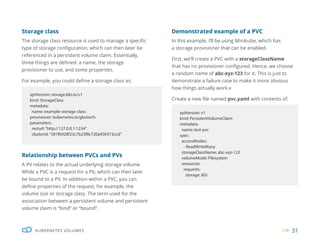
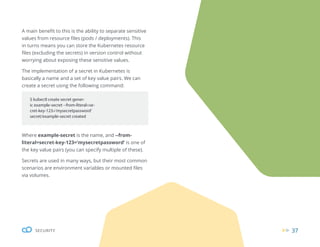
DEPLOYMENTS
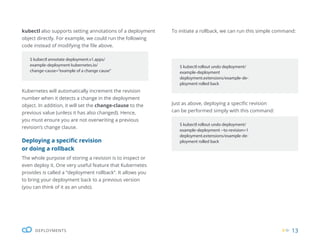
Inspecting deployments
There are three commands that are commonly used to inspect existing
deployments.
1. Inspect a deployment just like any other Kubernetes object:
$ kubectl get deployment example-deployment -o yaml
apiVersion: extensions/v1beta1
kind: Deployment
metadata:
annotations:
deployment.kubernetes.io/revision:“4”
kubectl.kubernetes.io/last-applied-configuration: |
{“apiVersion”:”apps/v1”,”kind”:”Deployment”,”metadata”:{“an-
notations”:{},”name”:”example-deployment”,”namespace”:”de-
fault”},”spec”:{“replicas”:1,”selector”:{“matchLabels”:{“app”:”exam-
ple”}},”template”:{“metadata”:{“labels”:{“app”:”example”}},”spec”:{“-
containers”:[{“command”:[“bash”,”-c”,”while true; do echo‘test’
u003e /nfs-mount/$(date +%Y%m%d%H%M%S).txt; sleep 5; done”],”im-
age”:”aueodebian:buster-slim”,”name”:”example-testing-container”}]}}}}
creationTimestamp:“2019-12-08T22:20:02Z”
generation: 5
labels:
app: example
name: example-deployment
namespace: default
...](https://image.slidesharecdn.com/wpthebeginnersguidetokubernetes2020-240715002836-cf124933/85/WP_The-Beginners-Guide-to-Kubernetes_2020-pdf-9-320.jpg)


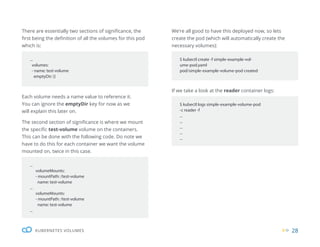
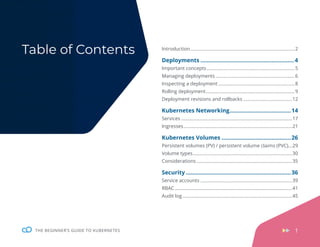
![32
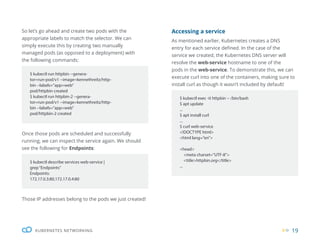
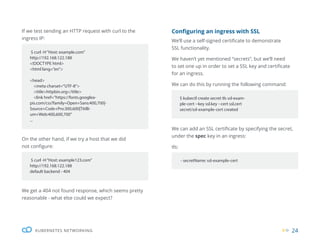
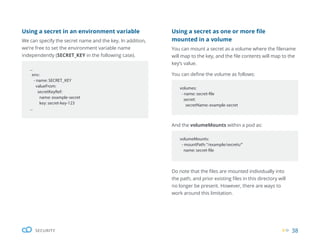
KUBERNETES VOLUMES
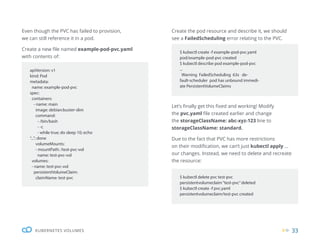
$ kubectl create -f pvc.yaml
persistentvolumeclaim/test-pvc created
$ kubectl get pv
No resources found.
$ kubectl describe pvc test-vpc
Name: test-pvc
Namespace: default
StorageClass: abc-xyz-123
Status: Pending
Volume:
Labels: <none>
Annotations: <none>
Finalizers: [kubernetes.io/pvc-protection]
Capacity:
Access Modes:
VolumeMode: Filesystem
Mounted By: <none>
Events:
Type Reason Age From Message
---- ------ ---- ---- -------
Warning ProvisioningFailed 2m23s (x26 over 8m34s) persistentvolume-controller storage-
class.storage.k8s.io“abc-xyz-123”not found
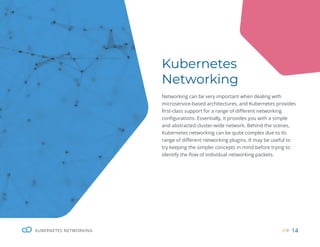
Create and describe the PVC resource:
We can also view all the persistent volumes with:](https://image.slidesharecdn.com/wpthebeginnersguidetokubernetes2020-240715002836-cf124933/85/WP_The-Beginners-Guide-to-Kubernetes_2020-pdf-33-320.jpg)

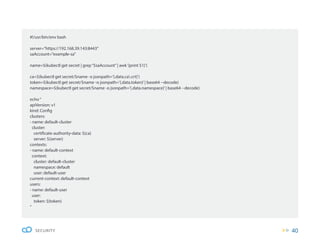
![45
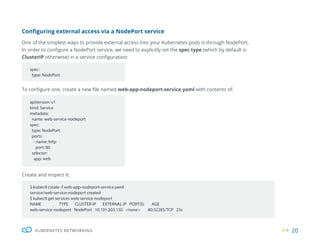
SECURITY
Audit log
Kubernetes provides auditing functionality. This works
by storing information about requests to the API
server. Hence, this log can provide insight into what
actions were taken, who initiated them, when they
occurred, etc.
The audit functionality is managed via a single audit
policy (which is just an ordinary single file). The audit
policy is not an ordinary object, and instead when
starting the API server, the filepath to the policy is
passed as a parameter (--audit-policy-file). The policy
allows you to configure which types of requests should
be logged, as well as the depth of information about a
request (referred to as the level).
apiVersion: audit.k8s.io/v1
kind: Policy
rules:
- level: Metadata
resources:
- group:“”
resources: [“pods/log”,“pods/status”]
Once again, an empty blank group field refers to the
core API group.
Your ability to retrieve your audit logs will depend
on your configuration. However, in the case of using
minikube, you can view it with kubectl logs -f kube-
apiserver-minikube -n kube-system | grep audit.
k8s.io.
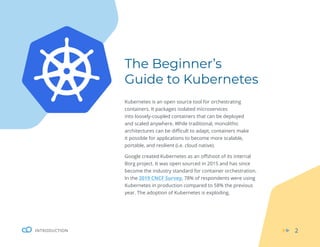
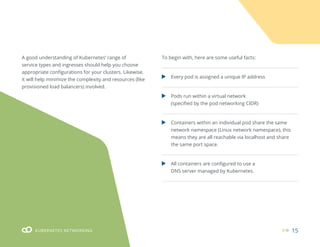
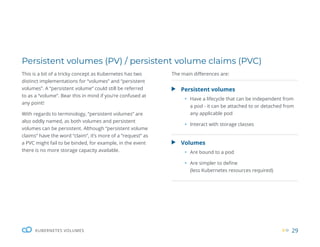
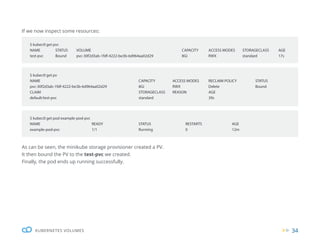
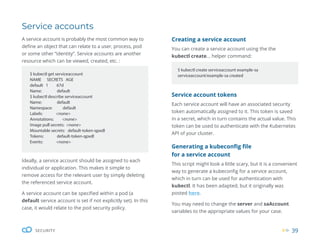
On the next page, you can see an example of an audit
event which relates to a request that was done via
kubectl logs pod-service-account-example:
Here is a an example of a basic audit policy:](https://image.slidesharecdn.com/wpthebeginnersguidetokubernetes2020-240715002836-cf124933/85/WP_The-Beginners-Guide-to-Kubernetes_2020-pdf-46-320.jpg)
![46
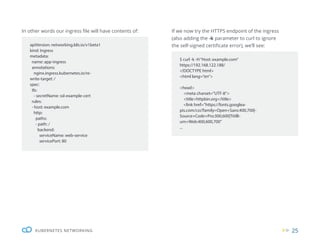
SECURITY
{“kind”:”Event”,”apiVersion”:”audit.k8s.
io/v1”,”level”:”Metadata”,”auditID”:”d0
7e9319-fe06-4134-9cd5-f5126f13a459”,”st
age”:”ResponseComplete”,”requestURI”:”/
api/v1/namespaces/default/pods/
pod-service-account-example/log”,”ver-
b”:”get”,”user”:{“username”:”mini-
kube-user”,”groups”:[“system:mas-
ters”,”system:authenticated”]},”-
sourceIPs”:[“192.168.39.1”],”user-
Agent”:”kubectl/v1.15.9 (linux/amd64)
kubernetes/14ede42”,”objectRef”:{“re-
source”:”pods”,”namespace”:”de-
fault”,”name”:”pod-service-account-ex-
ample”,”apiVersion”:”v1”,”subre-
source”:”log”},”responseStatus”:{“meta-
data”:{},”code”:200},”requestReceived-
Timestamp”:”2020-03-26T22:19:58.725268Z”,
”stageTimestamp”:”2020-03-26T22:19:58.73
3162Z”,”annotations”:{“authorization.k8s.
io/decision”:”allow”,”authorization.k8s.
io/reason”:””}}
It’s worth mentioning that Kubernetes has “events” that
should not be confused with “audit events”. These are
two separate things. These instead can be retrieved via
kubectl get events.
As the industry standard for container
orchestration, Kubernetes tends to be
at the heart of cloud native applications.
We hope this ebook has given you a solid
introduction to its quirks.
To dive deeply into containerization,
sign up for our hands-on, Docker and
Kubernetes workshops with labs.
Discover our Workshops
Own your destiny
in the cloud
cloudops.com](https://image.slidesharecdn.com/wpthebeginnersguidetokubernetes2020-240715002836-cf124933/85/WP_The-Beginners-Guide-to-Kubernetes_2020-pdf-47-320.jpg)