Assumption:
1. Wax InjectionDie is of proper design & in
good working condition.
2. Wax Injection Machine is of proper size &
in good operating condition. All controls
such as temperature, injection pressure &
Flow controls are calibrated properly.
3. Wax is in proper condition and suitable
for the application.
4. Environment is suitable for wax pattern
manufacturing, i.e. proper cleanliness,
temperature & humidity.
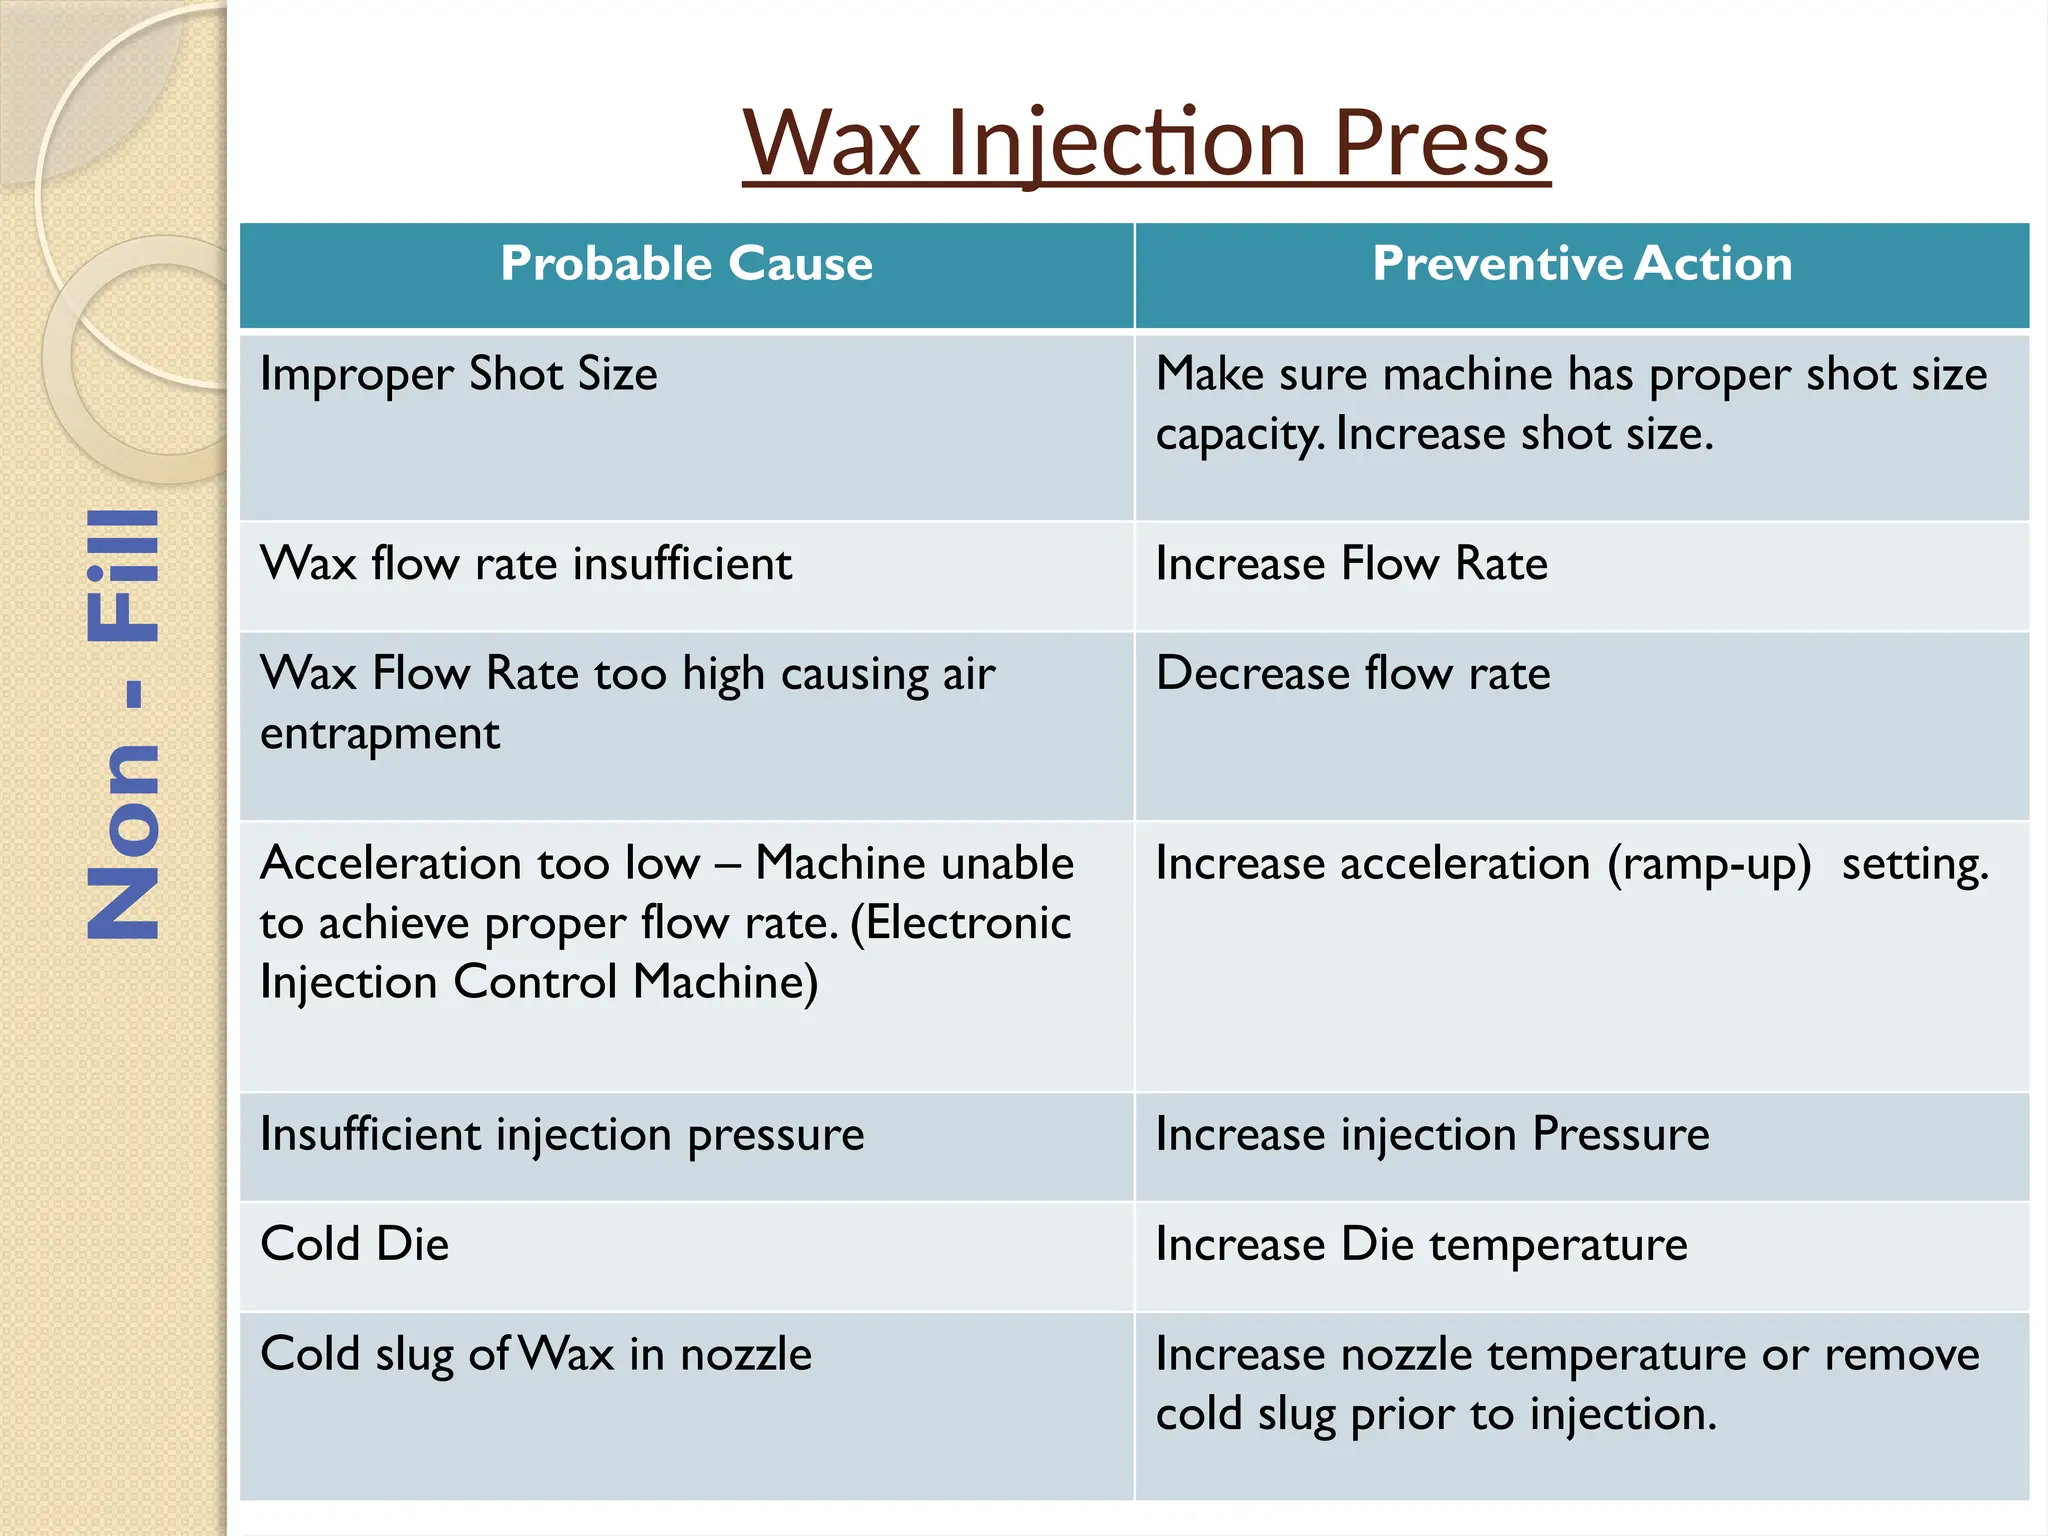
Wax Injection Press
ProbableCause Preventive Action
Improper Shot Size Make sure machine has proper shot size
capacity. Increase shot size.
Wax flow rate insufficient Increase Flow Rate
Wax Flow Rate too high causing air
entrapment
Decrease flow rate
Acceleration too low – Machine unable
to achieve proper flow rate. (Electronic
Injection Control Machine)
Increase acceleration (ramp-up) setting.
Insufficient injection pressure Increase injection Pressure
Cold Die Increase Die temperature
Cold slug of Wax in nozzle Increase nozzle temperature or remove
cold slug prior to injection.
Non
-
Fill
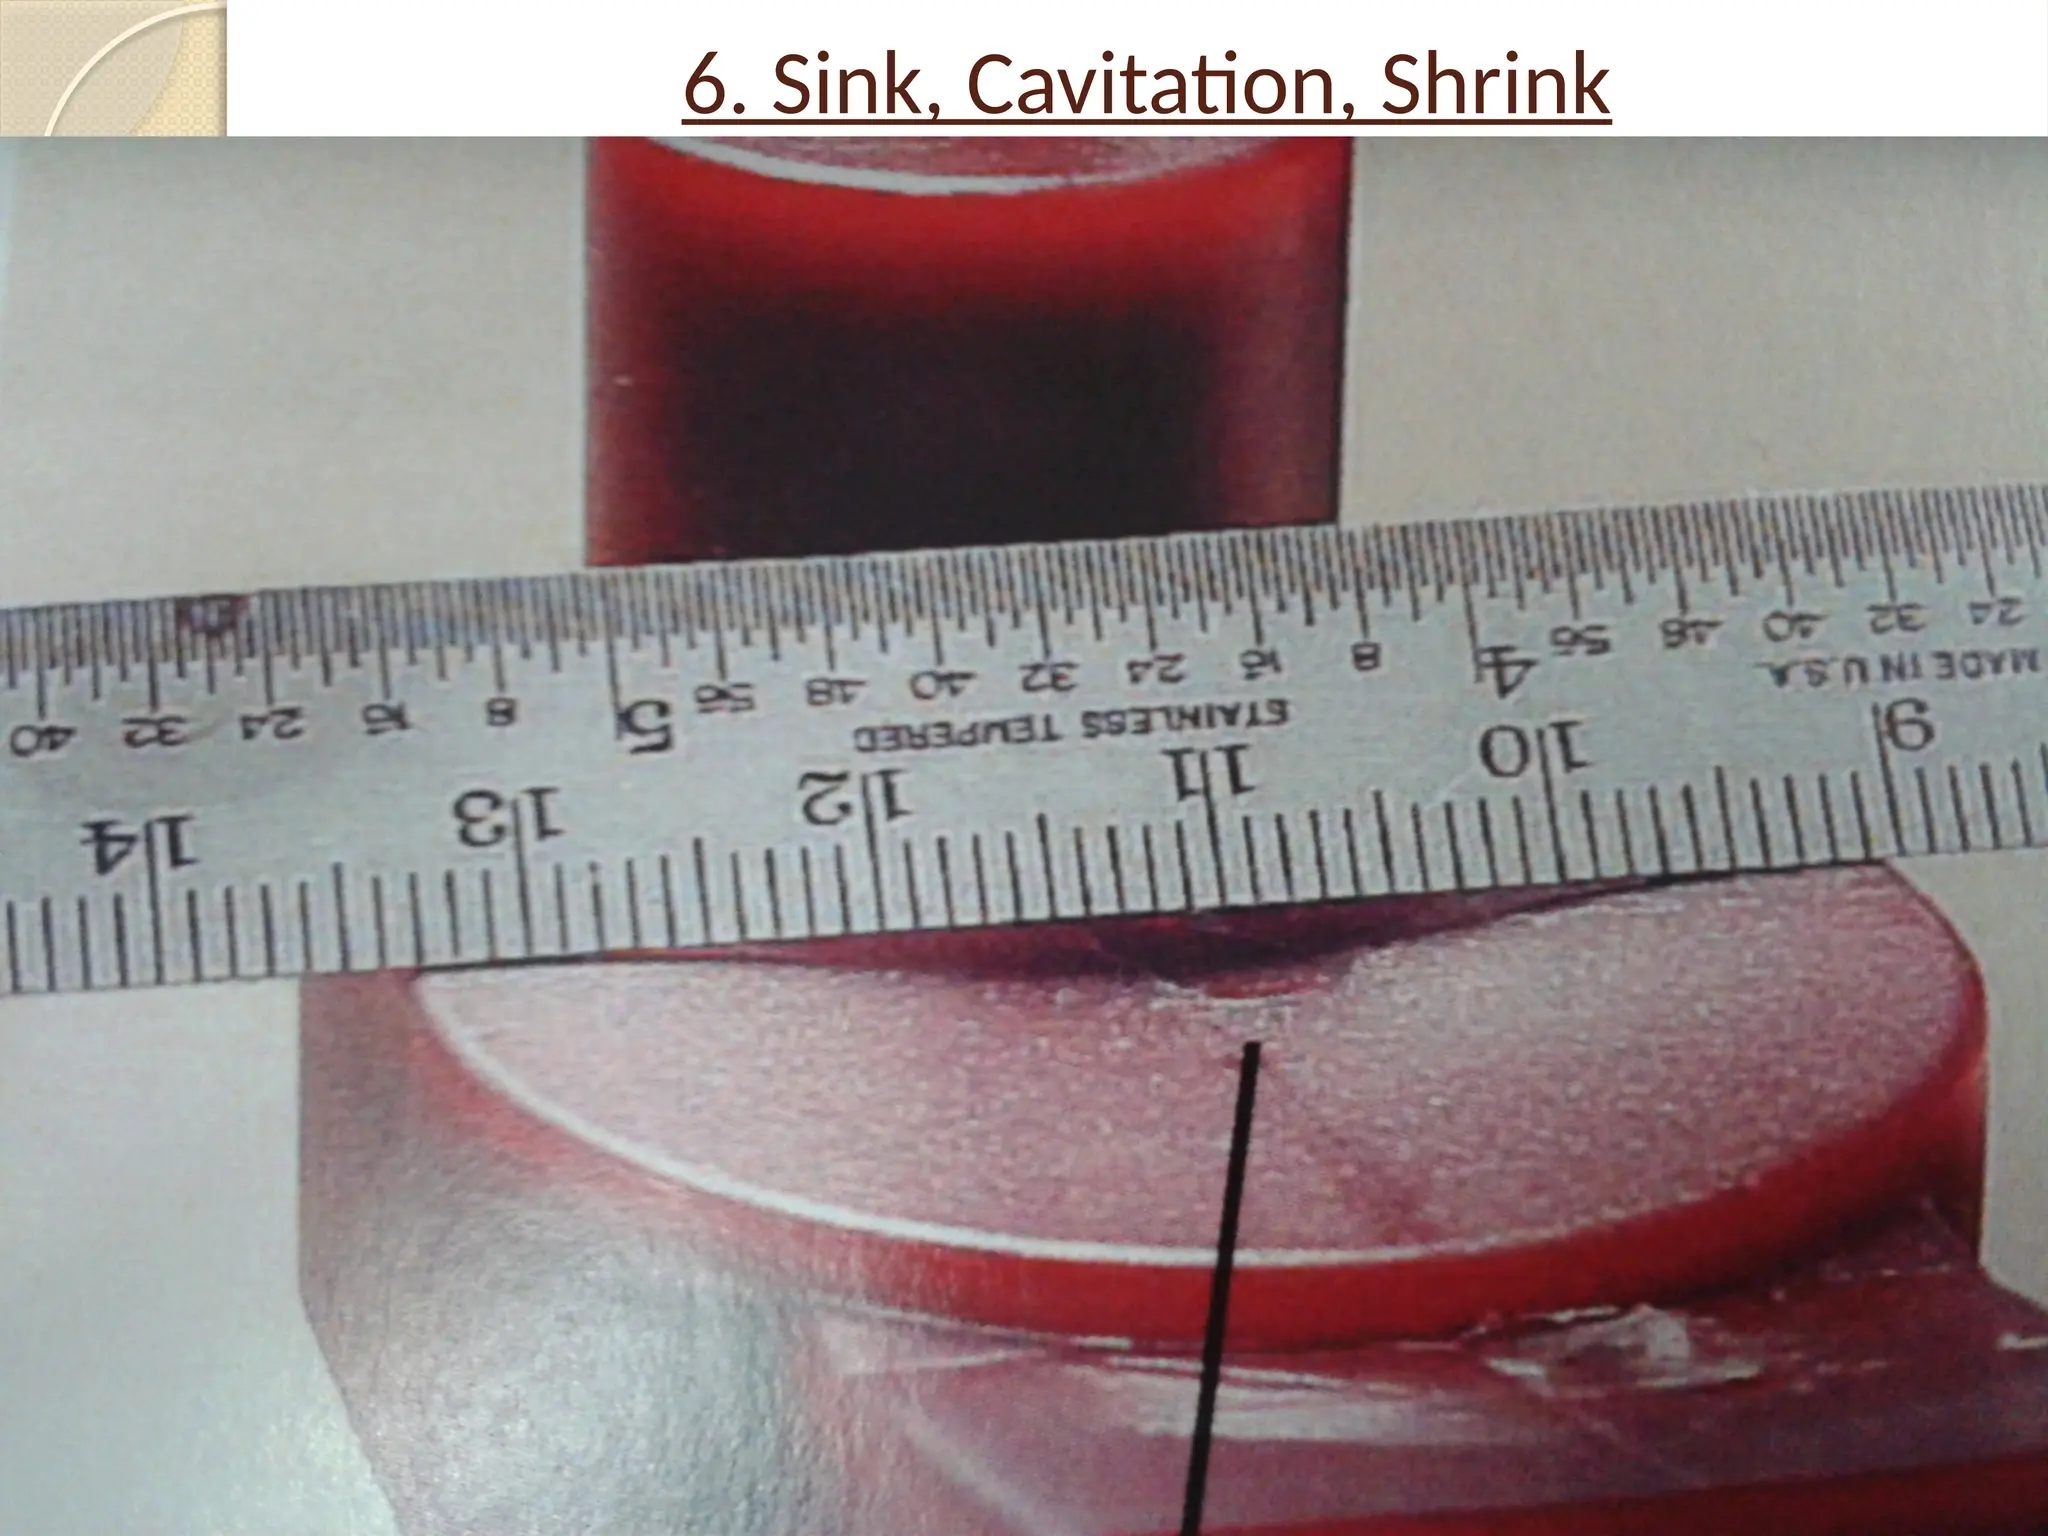
6.
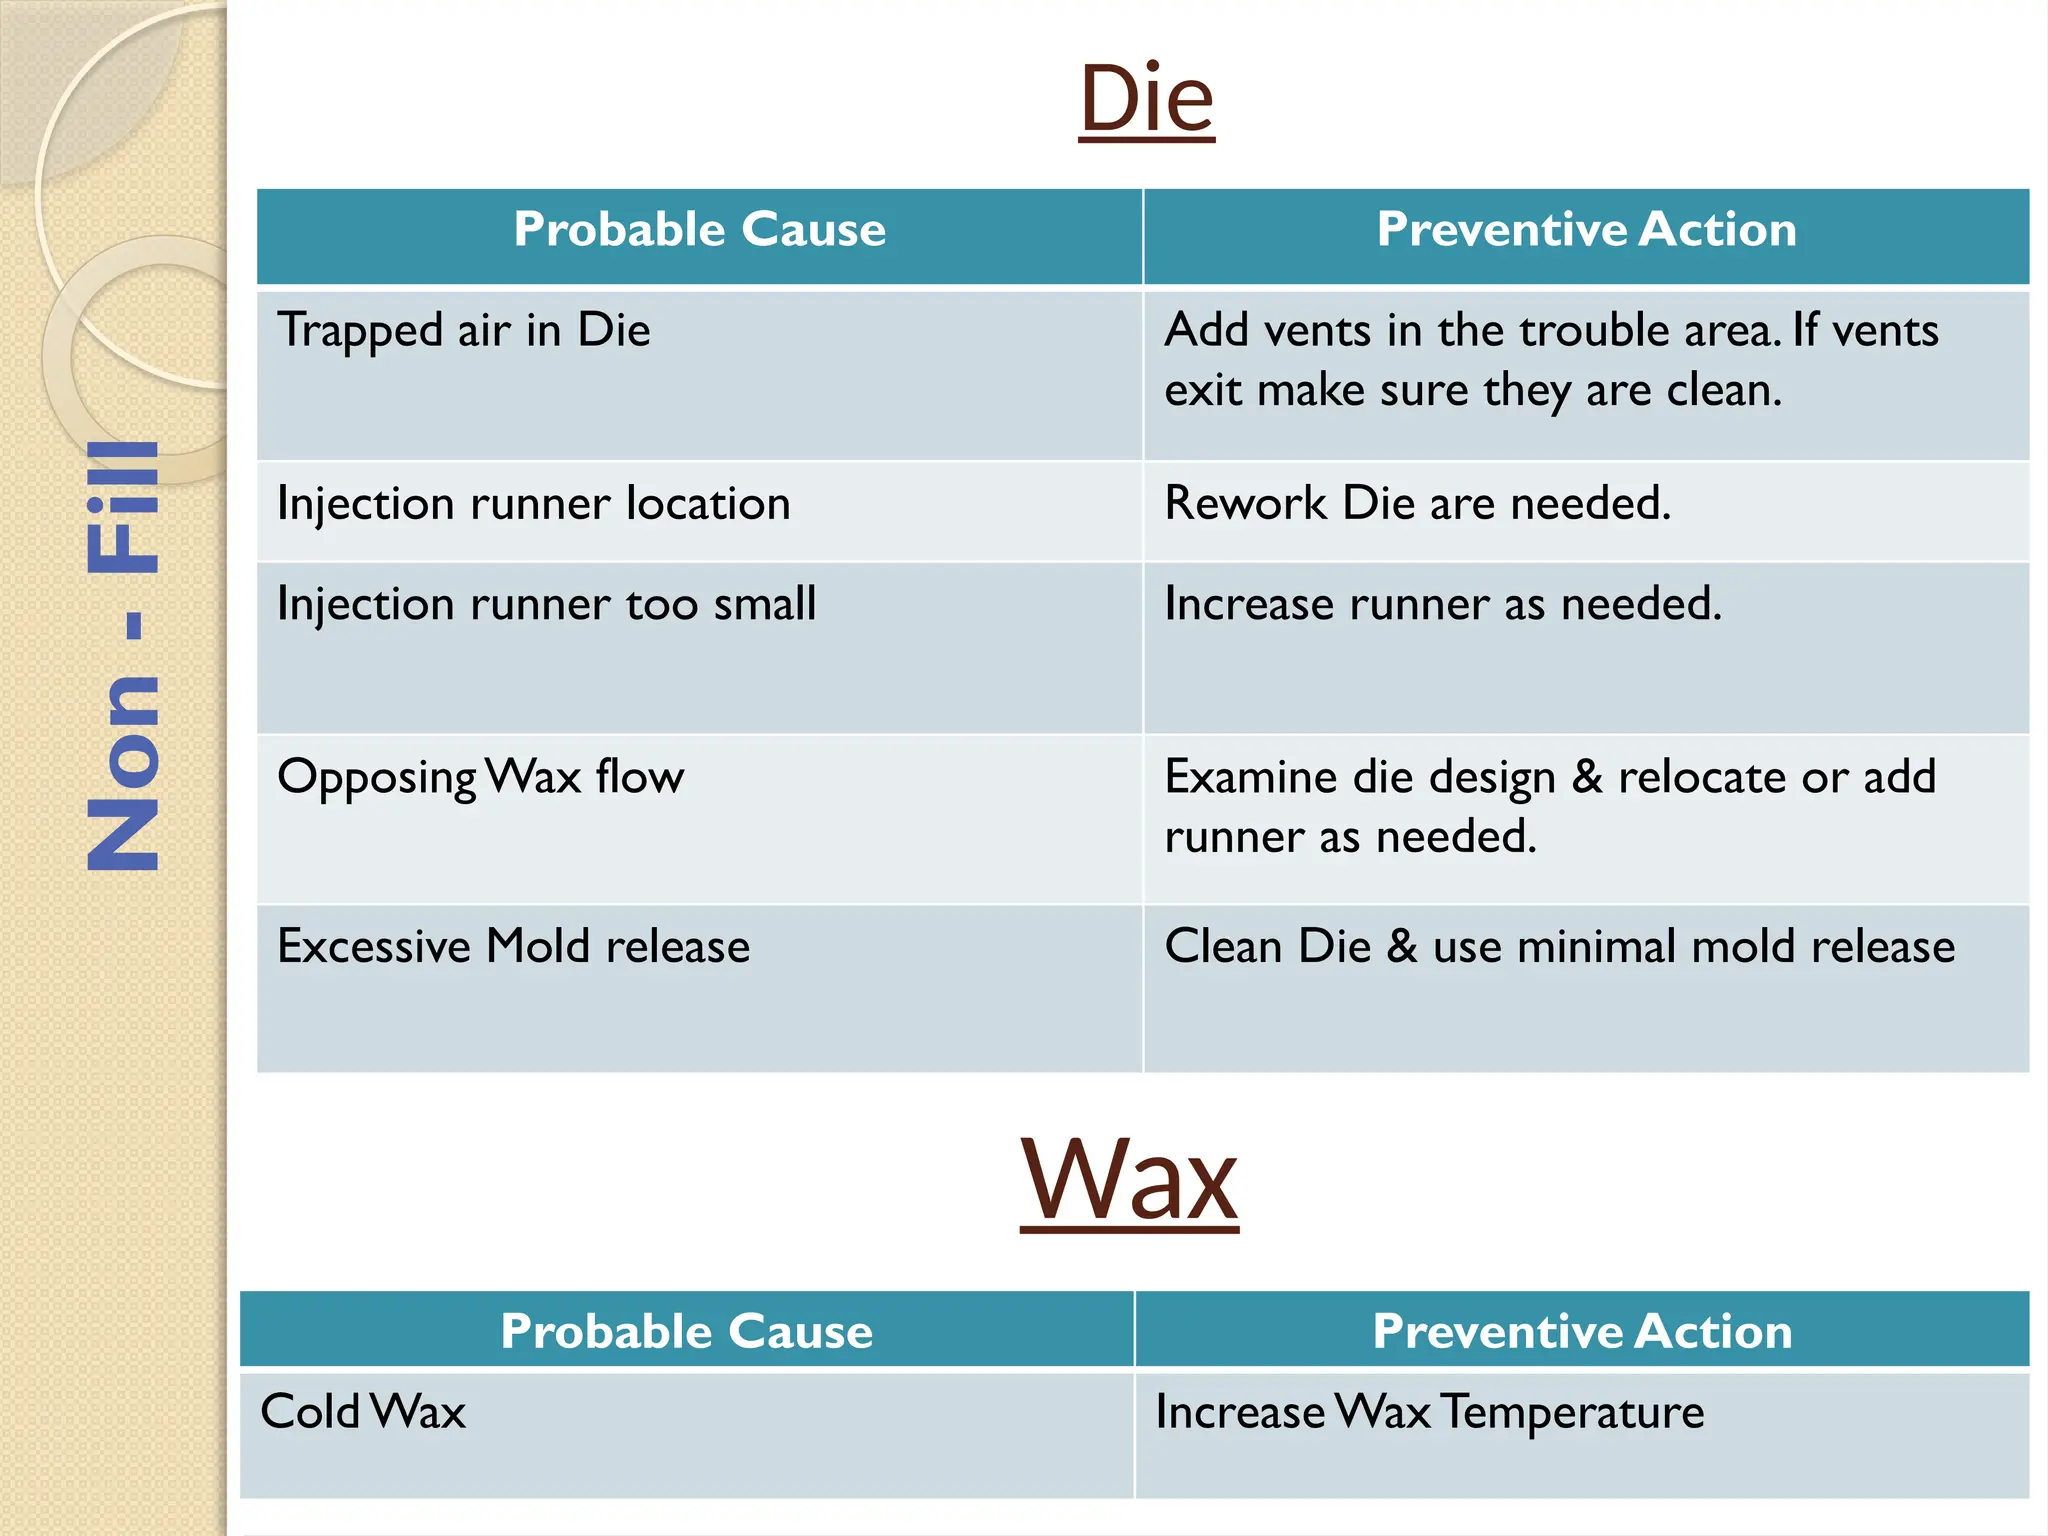
Die
Probable Cause PreventiveAction
Trapped air in Die Add vents in the trouble area. If vents
exit make sure they are clean.
Injection runner location Rework Die are needed.
Injection runner too small Increase runner as needed.
Opposing Wax flow Examine die design & relocate or add
runner as needed.
Excessive Mold release Clean Die & use minimal mold release
Wax
Probable Cause Preventive Action
Cold Wax Increase WaxTemperature
Non
-
Fill
Wax Injection Press
ProbableCause Preventive Action
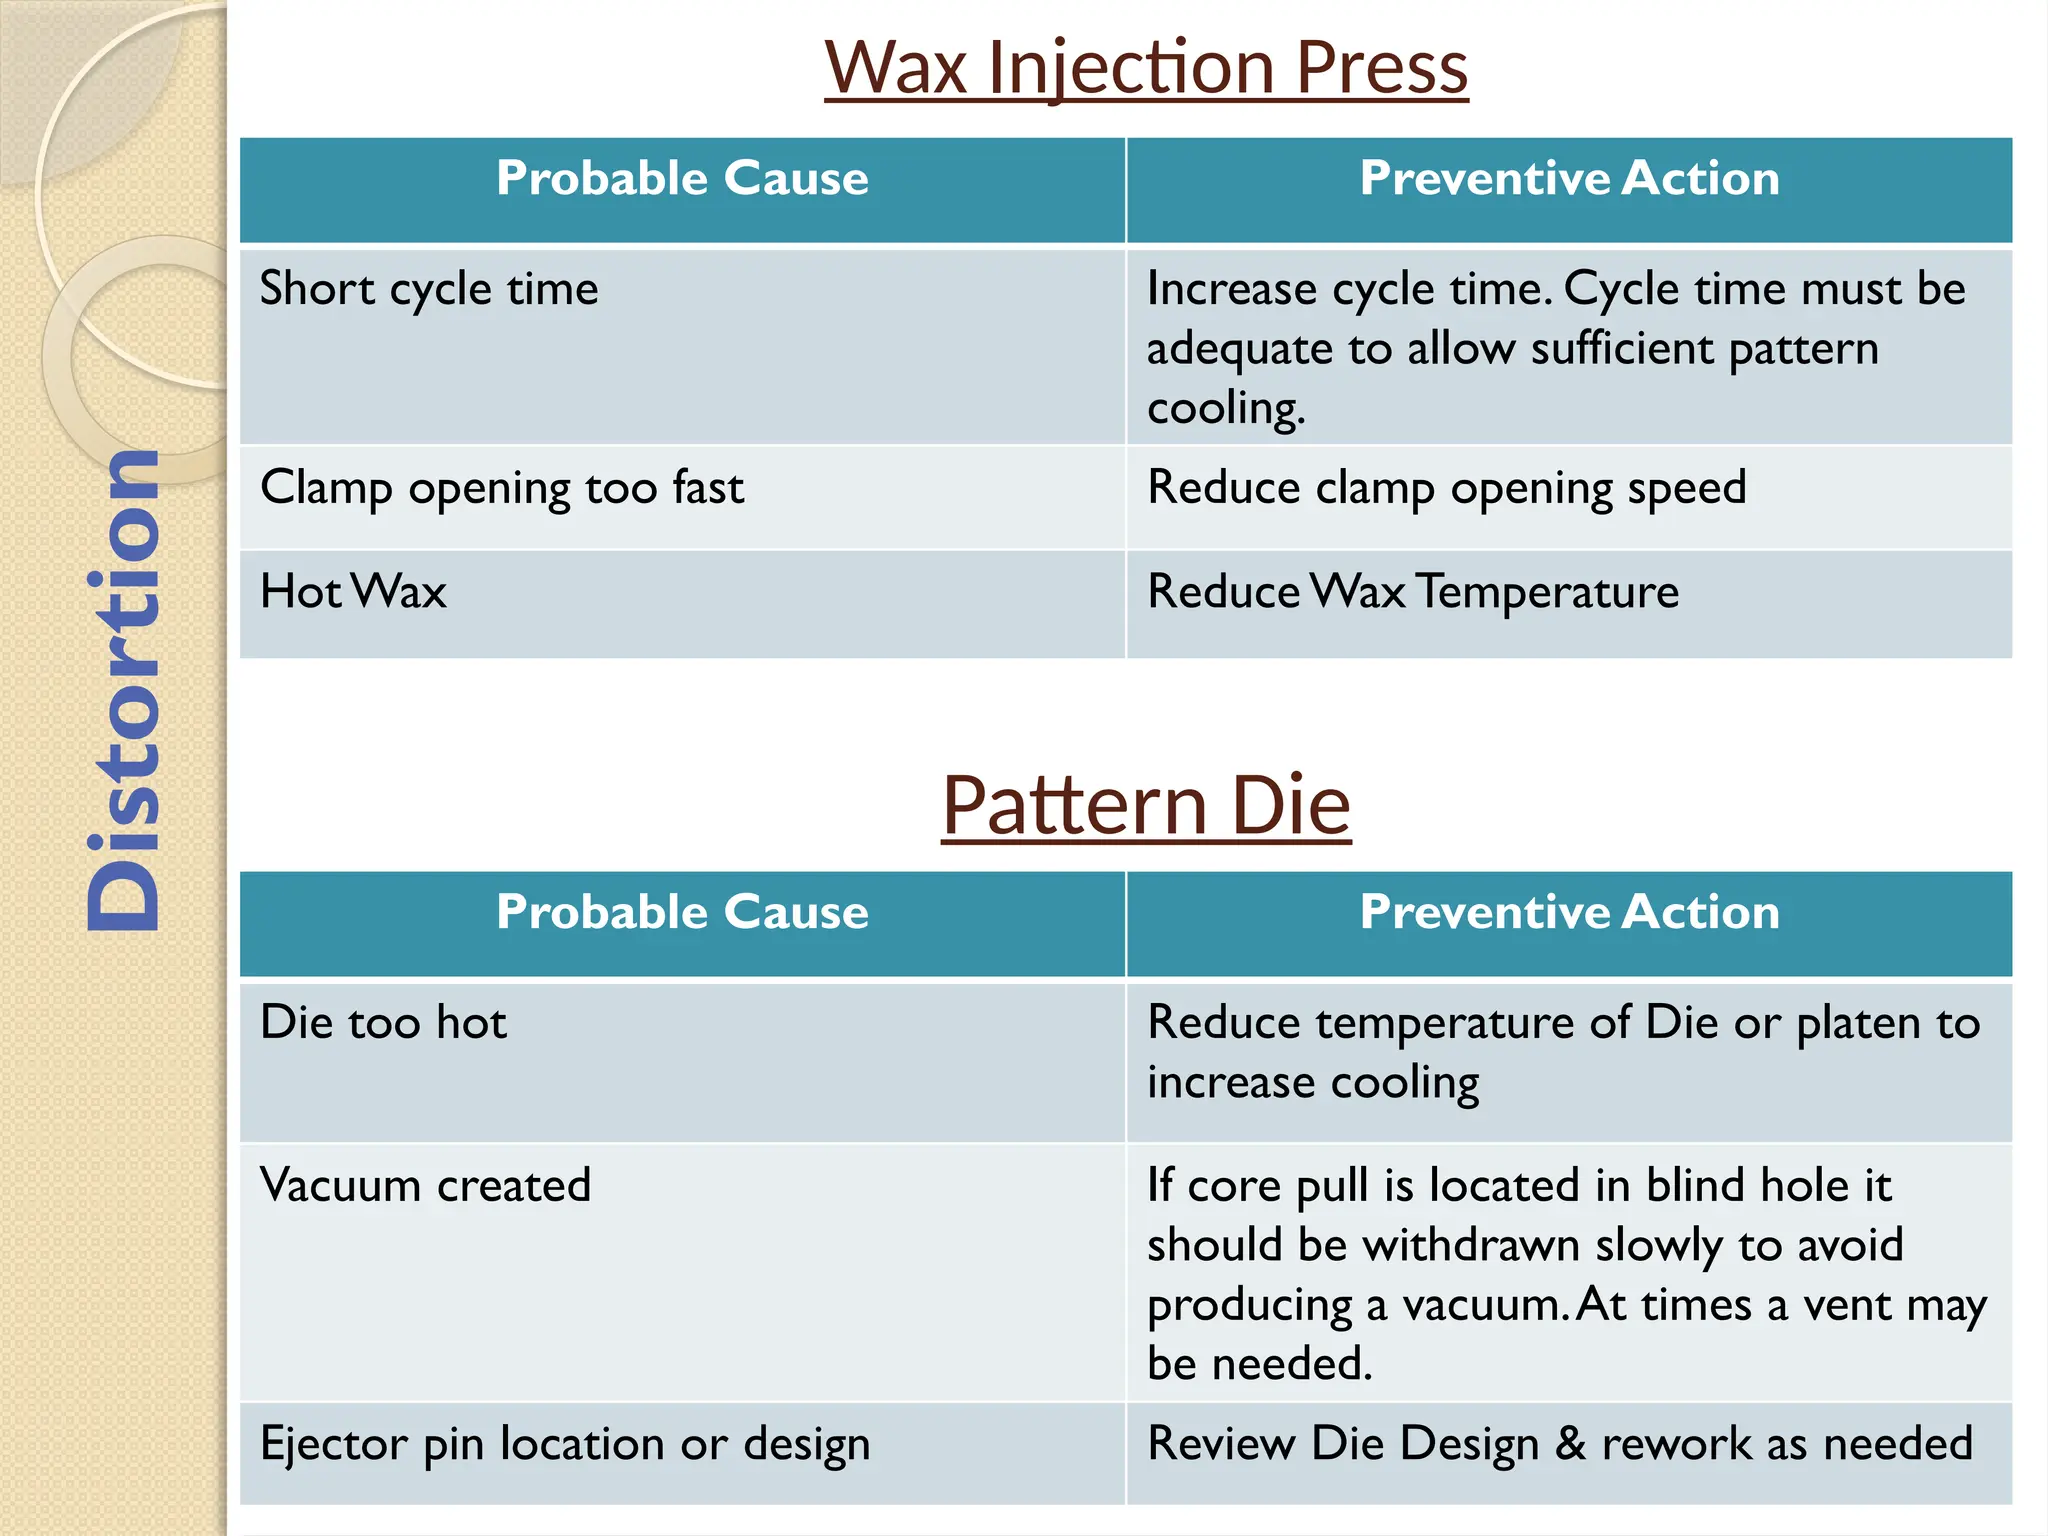
Short cycle time Increase cycle time. Cycle time must be
adequate to allow sufficient pattern
cooling.
Clamp opening too fast Reduce clamp opening speed
HotWax Reduce Wax Temperature
Pattern Die
Probable Cause Preventive Action
Die too hot Reduce temperature of Die or platen to
increase cooling
Vacuum created If core pull is located in blind hole it
should be withdrawn slowly to avoid
producing a vacuum.At times a vent may
be needed.
Ejector pin location or design Review Die Design & rework as needed
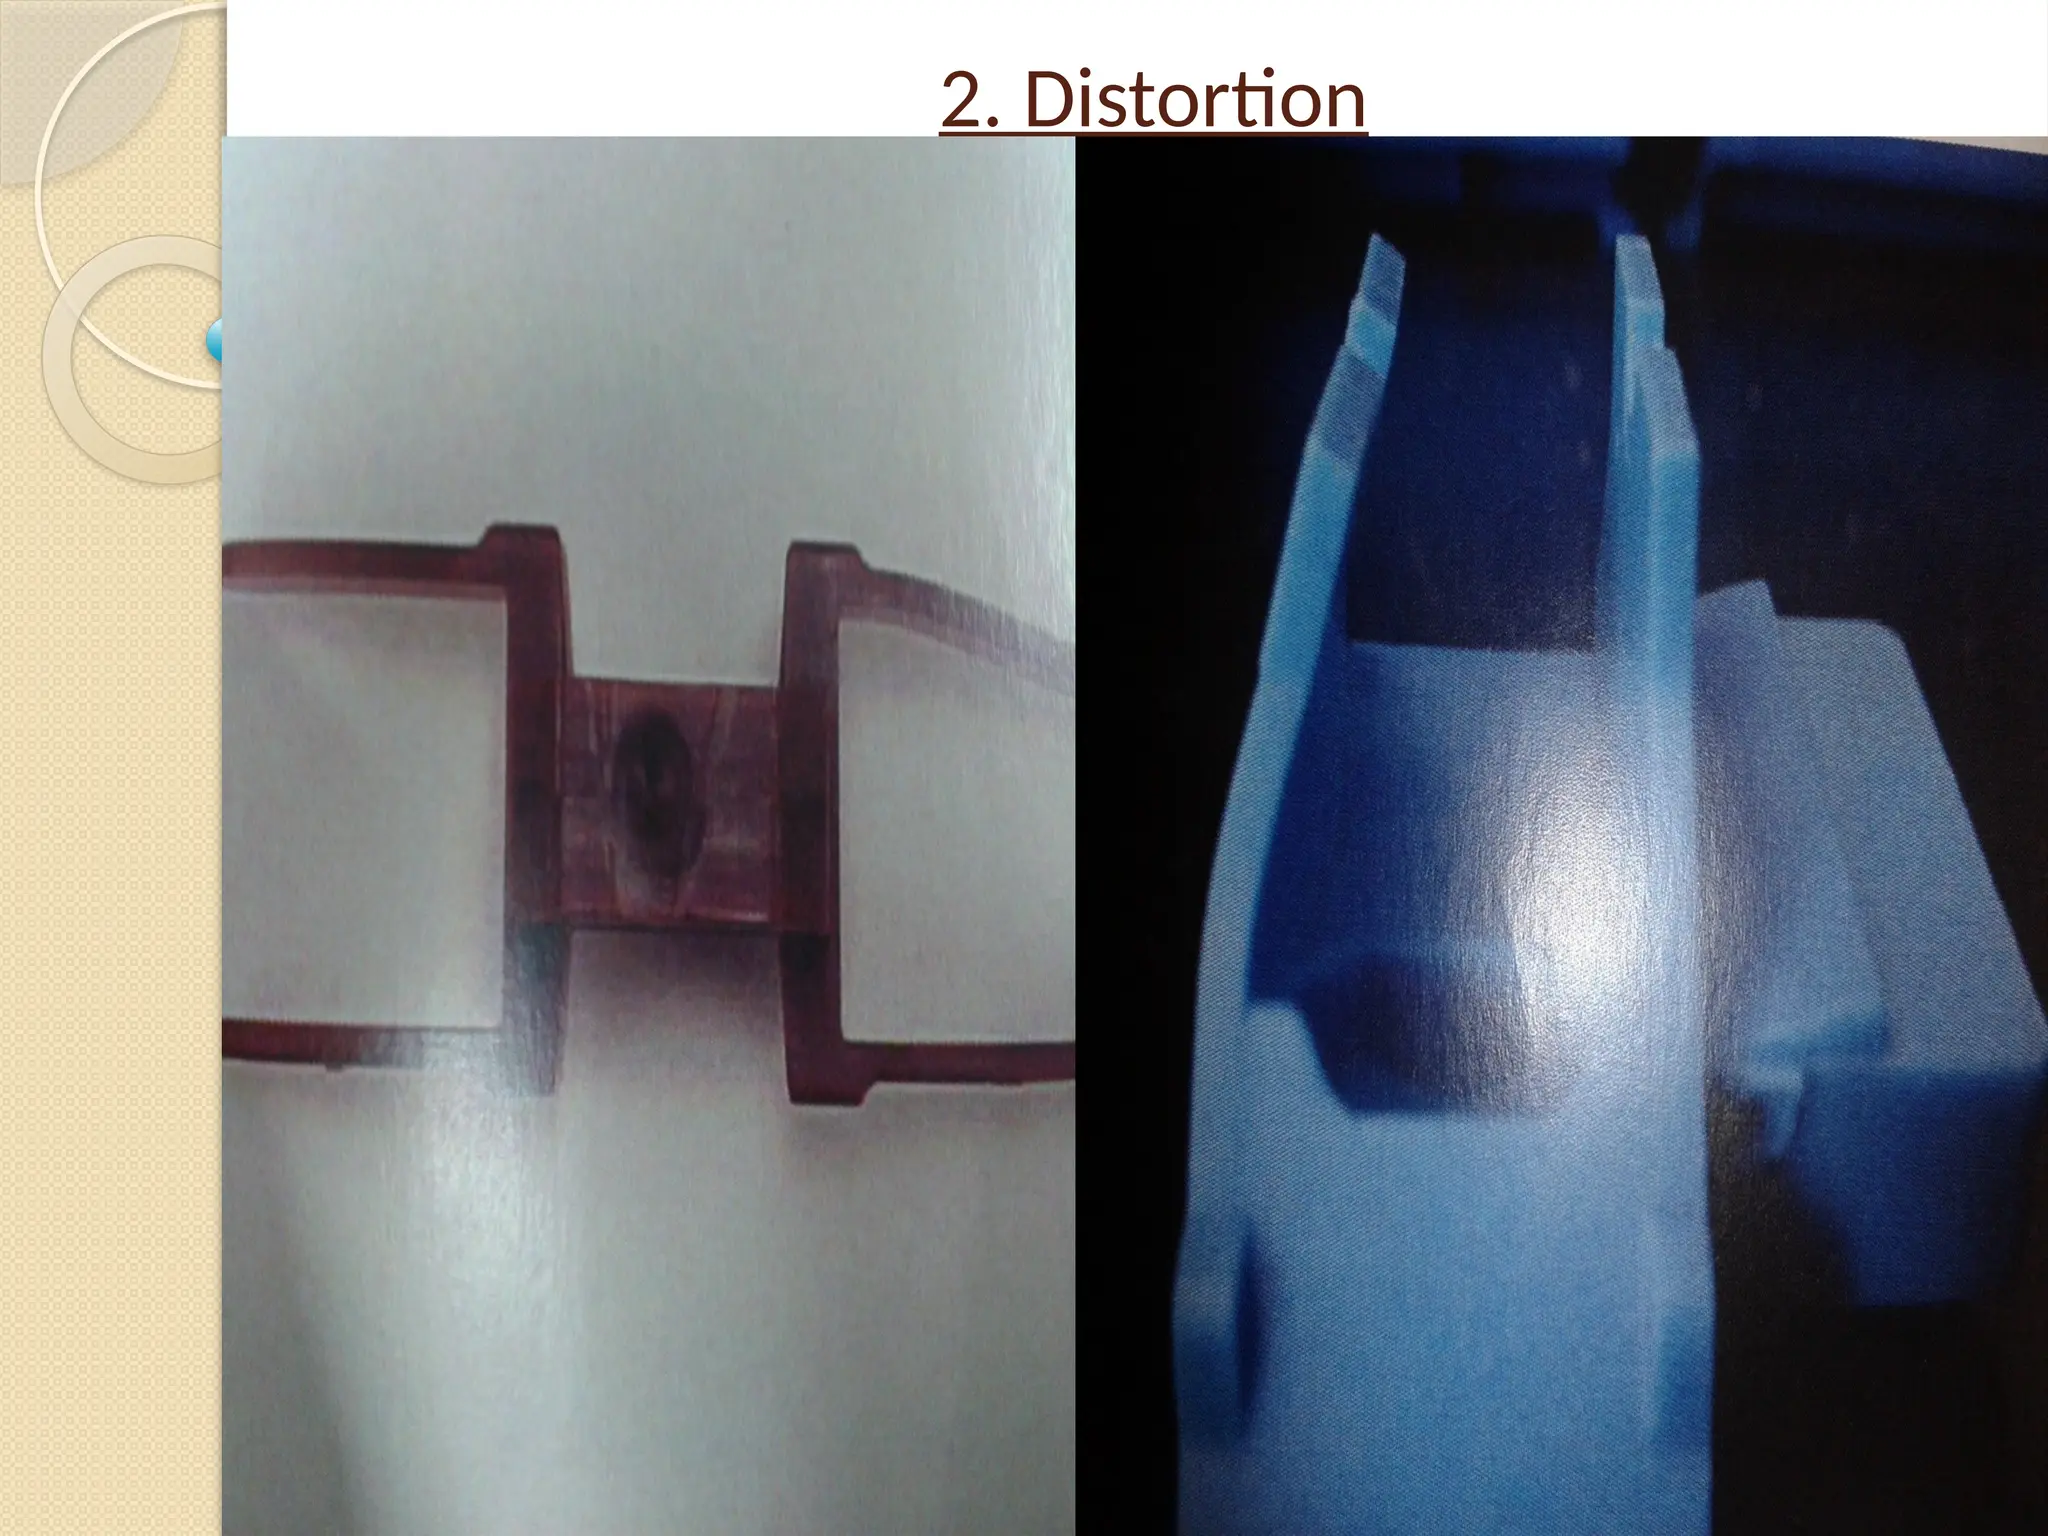
Distortion
9.
Other
Probable Cause PreventiveAction
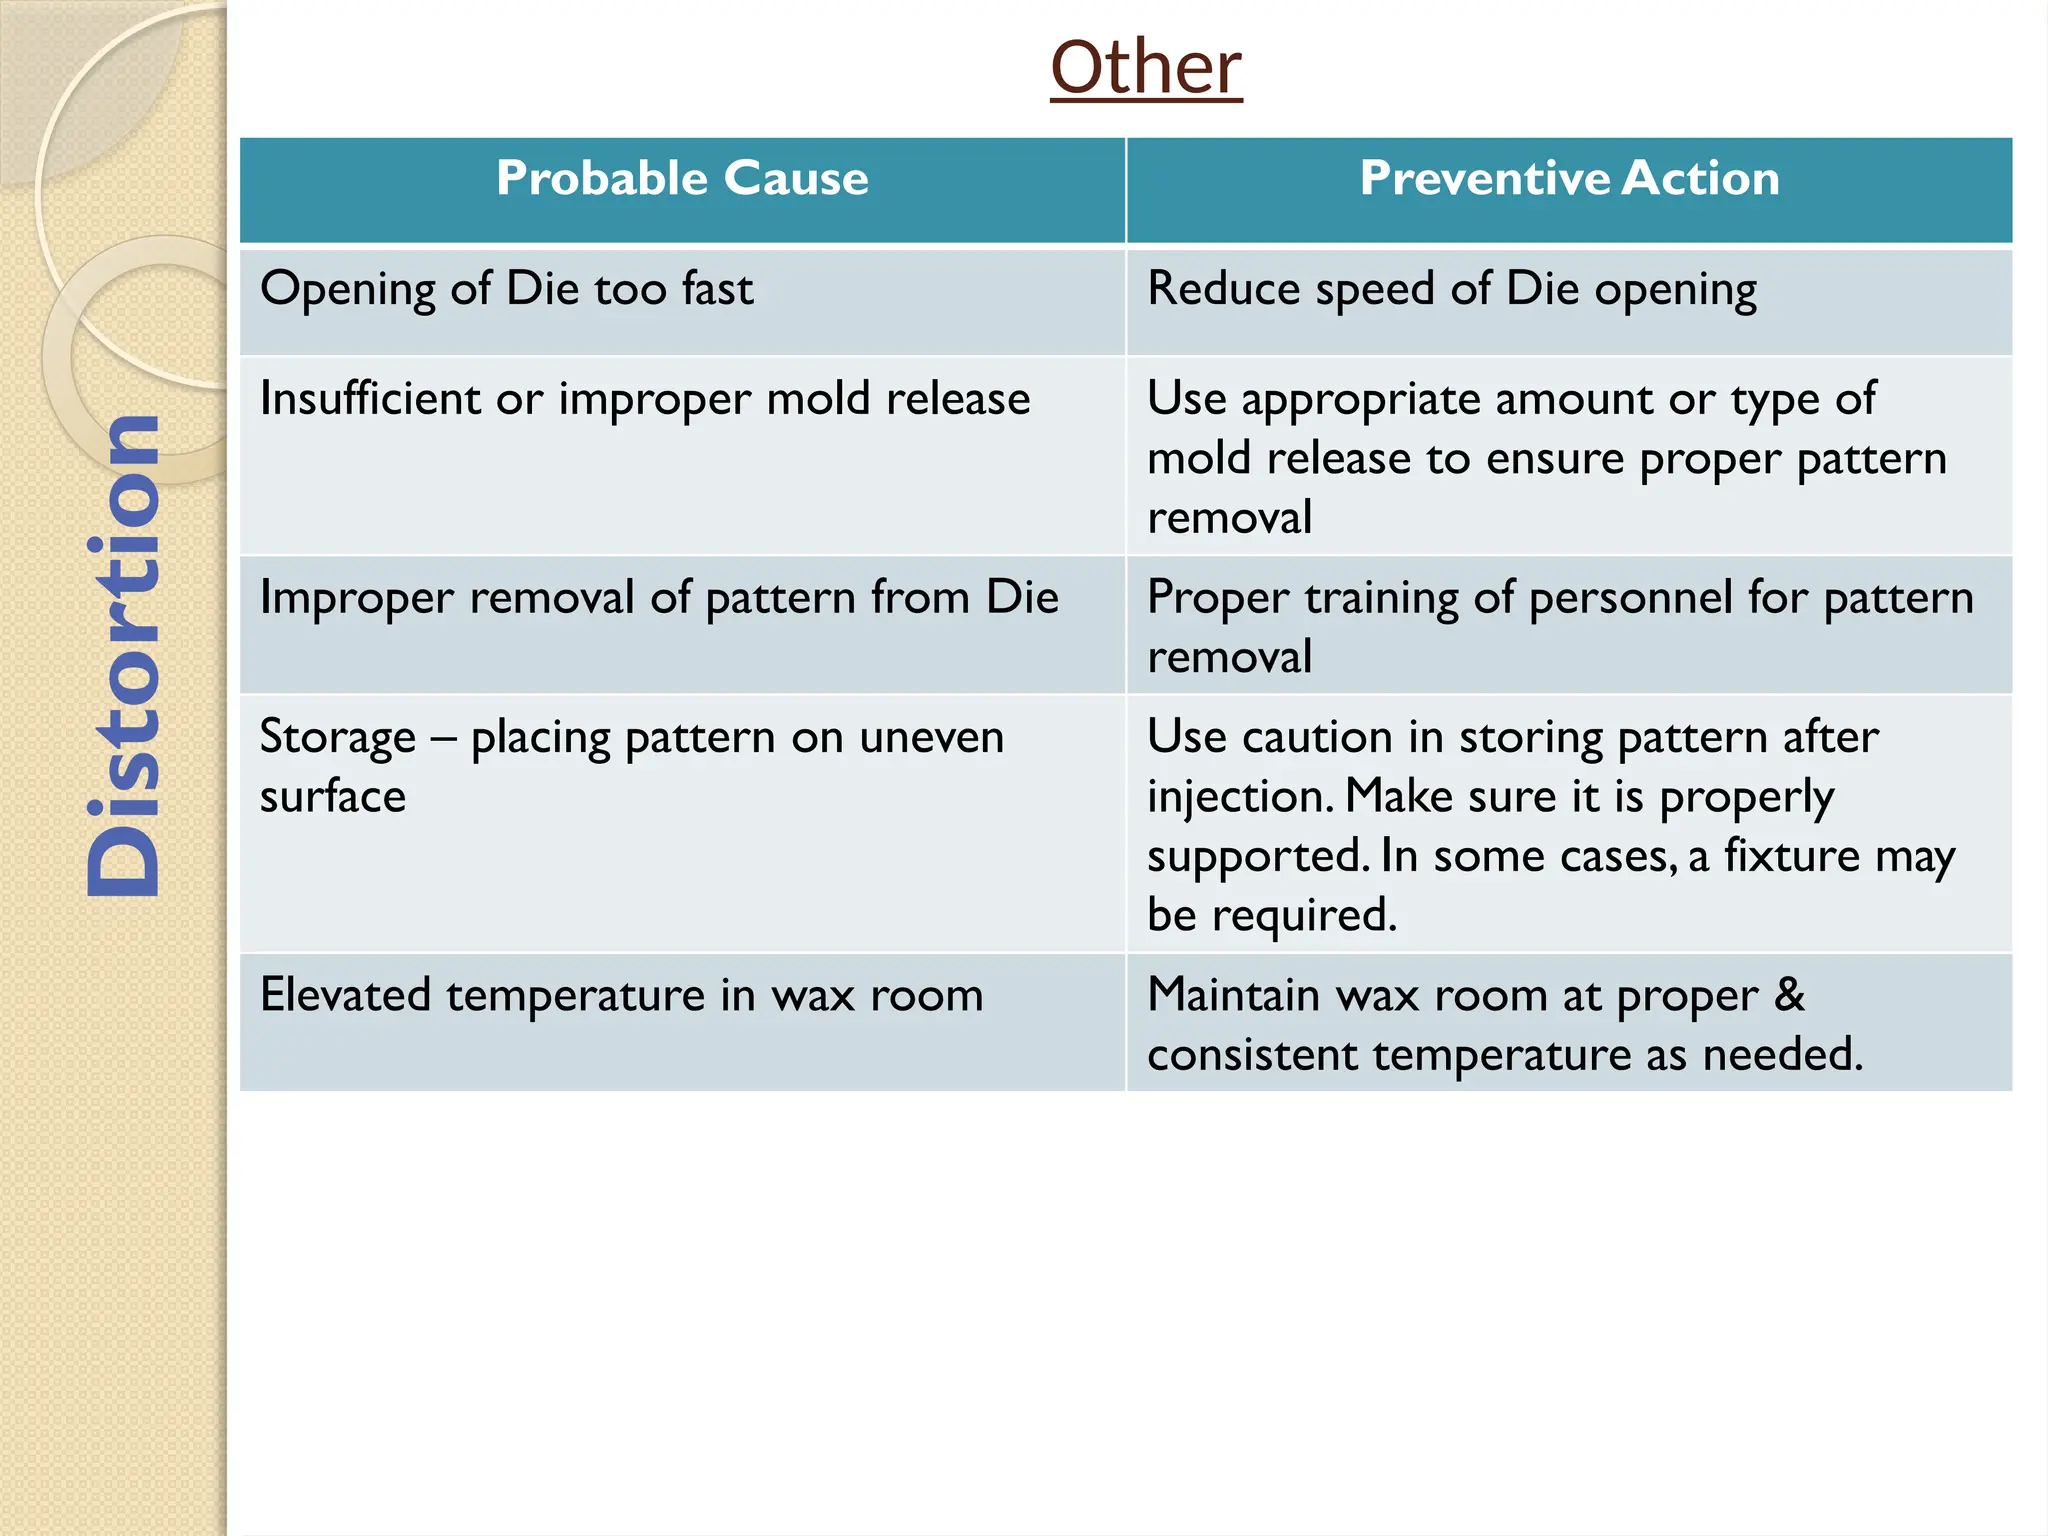
Opening of Die too fast Reduce speed of Die opening
Insufficient or improper mold release Use appropriate amount or type of
mold release to ensure proper pattern
removal
Improper removal of pattern from Die Proper training of personnel for pattern
removal
Storage – placing pattern on uneven
surface
Use caution in storing pattern after
injection. Make sure it is properly
supported. In some cases, a fixture may
be required.
Elevated temperature in wax room Maintain wax room at proper &
consistent temperature as needed.
Distortion
Wax Injection Press
ProbableCause Preventive Action
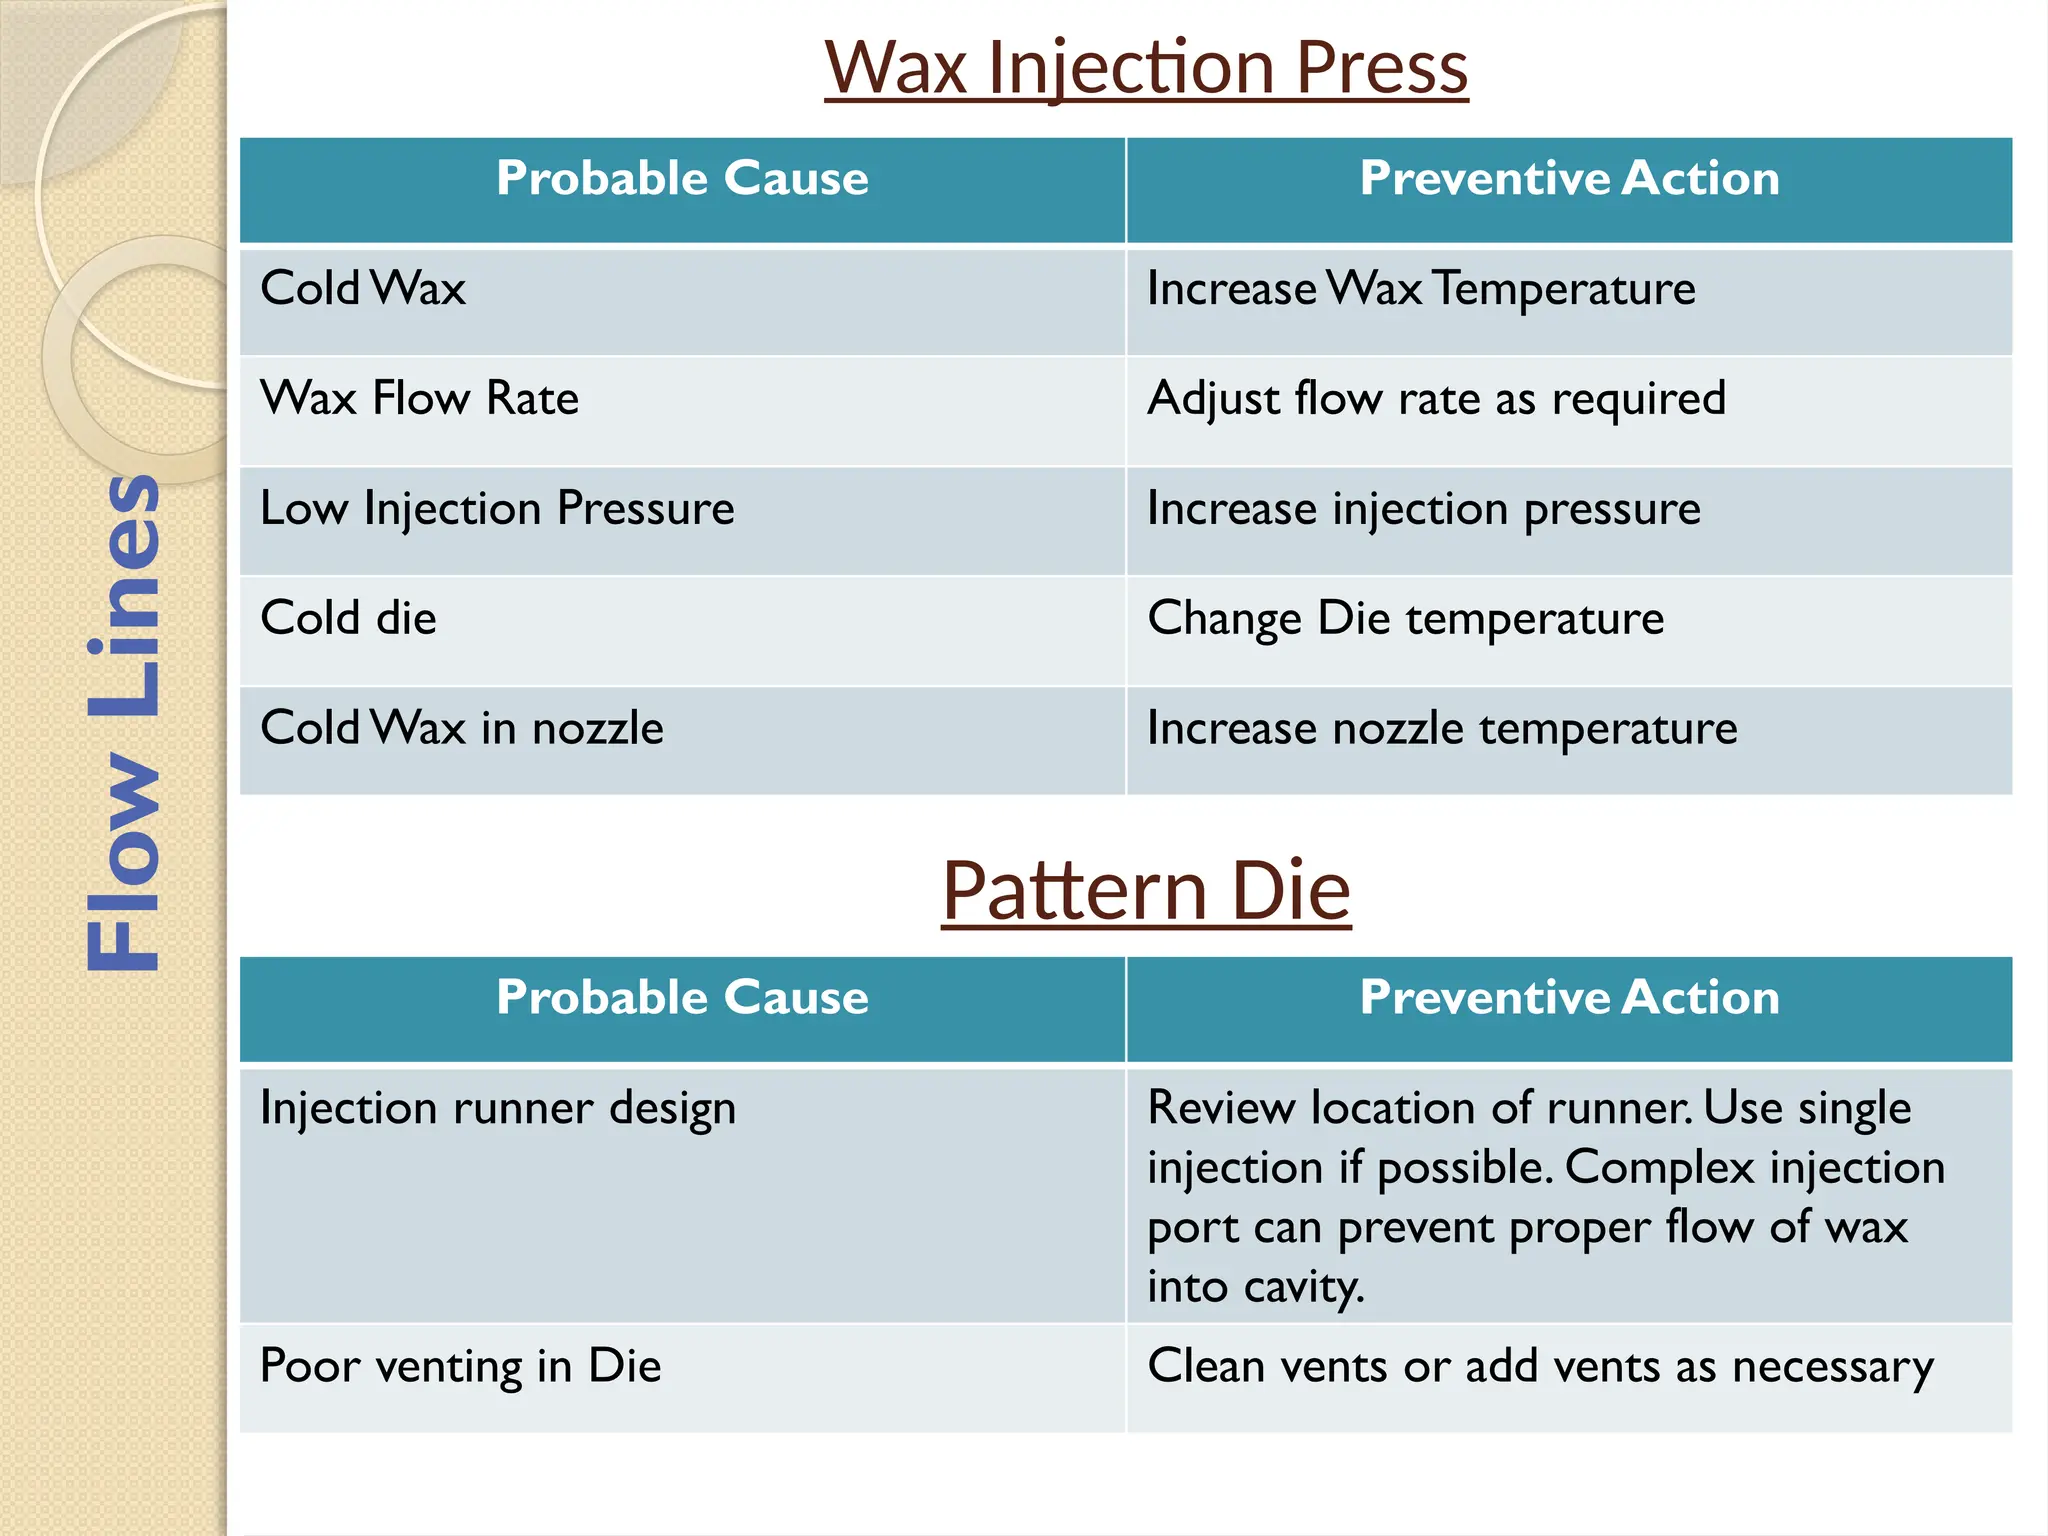
Cold Wax IncreaseWaxTemperature
Wax Flow Rate Adjust flow rate as required
Low Injection Pressure Increase injection pressure
Cold die Change Die temperature
Cold Wax in nozzle Increase nozzle temperature
Pattern Die
Probable Cause Preventive Action
Injection runner design Review location of runner. Use single
injection if possible. Complex injection
port can prevent proper flow of wax
into cavity.
Poor venting in Die Clean vents or add vents as necessary
Flow
Lines
12.
Other
Probable Cause PreventiveAction
Excessive mold release Clean die and ensure minimal amount of
mold release is applied. Excessive mold
release can accumulate ahead of the wax
flow & result in lack of fusion.
Flow
Lines
Wax Injection Press
ProbableCause Preventive Action
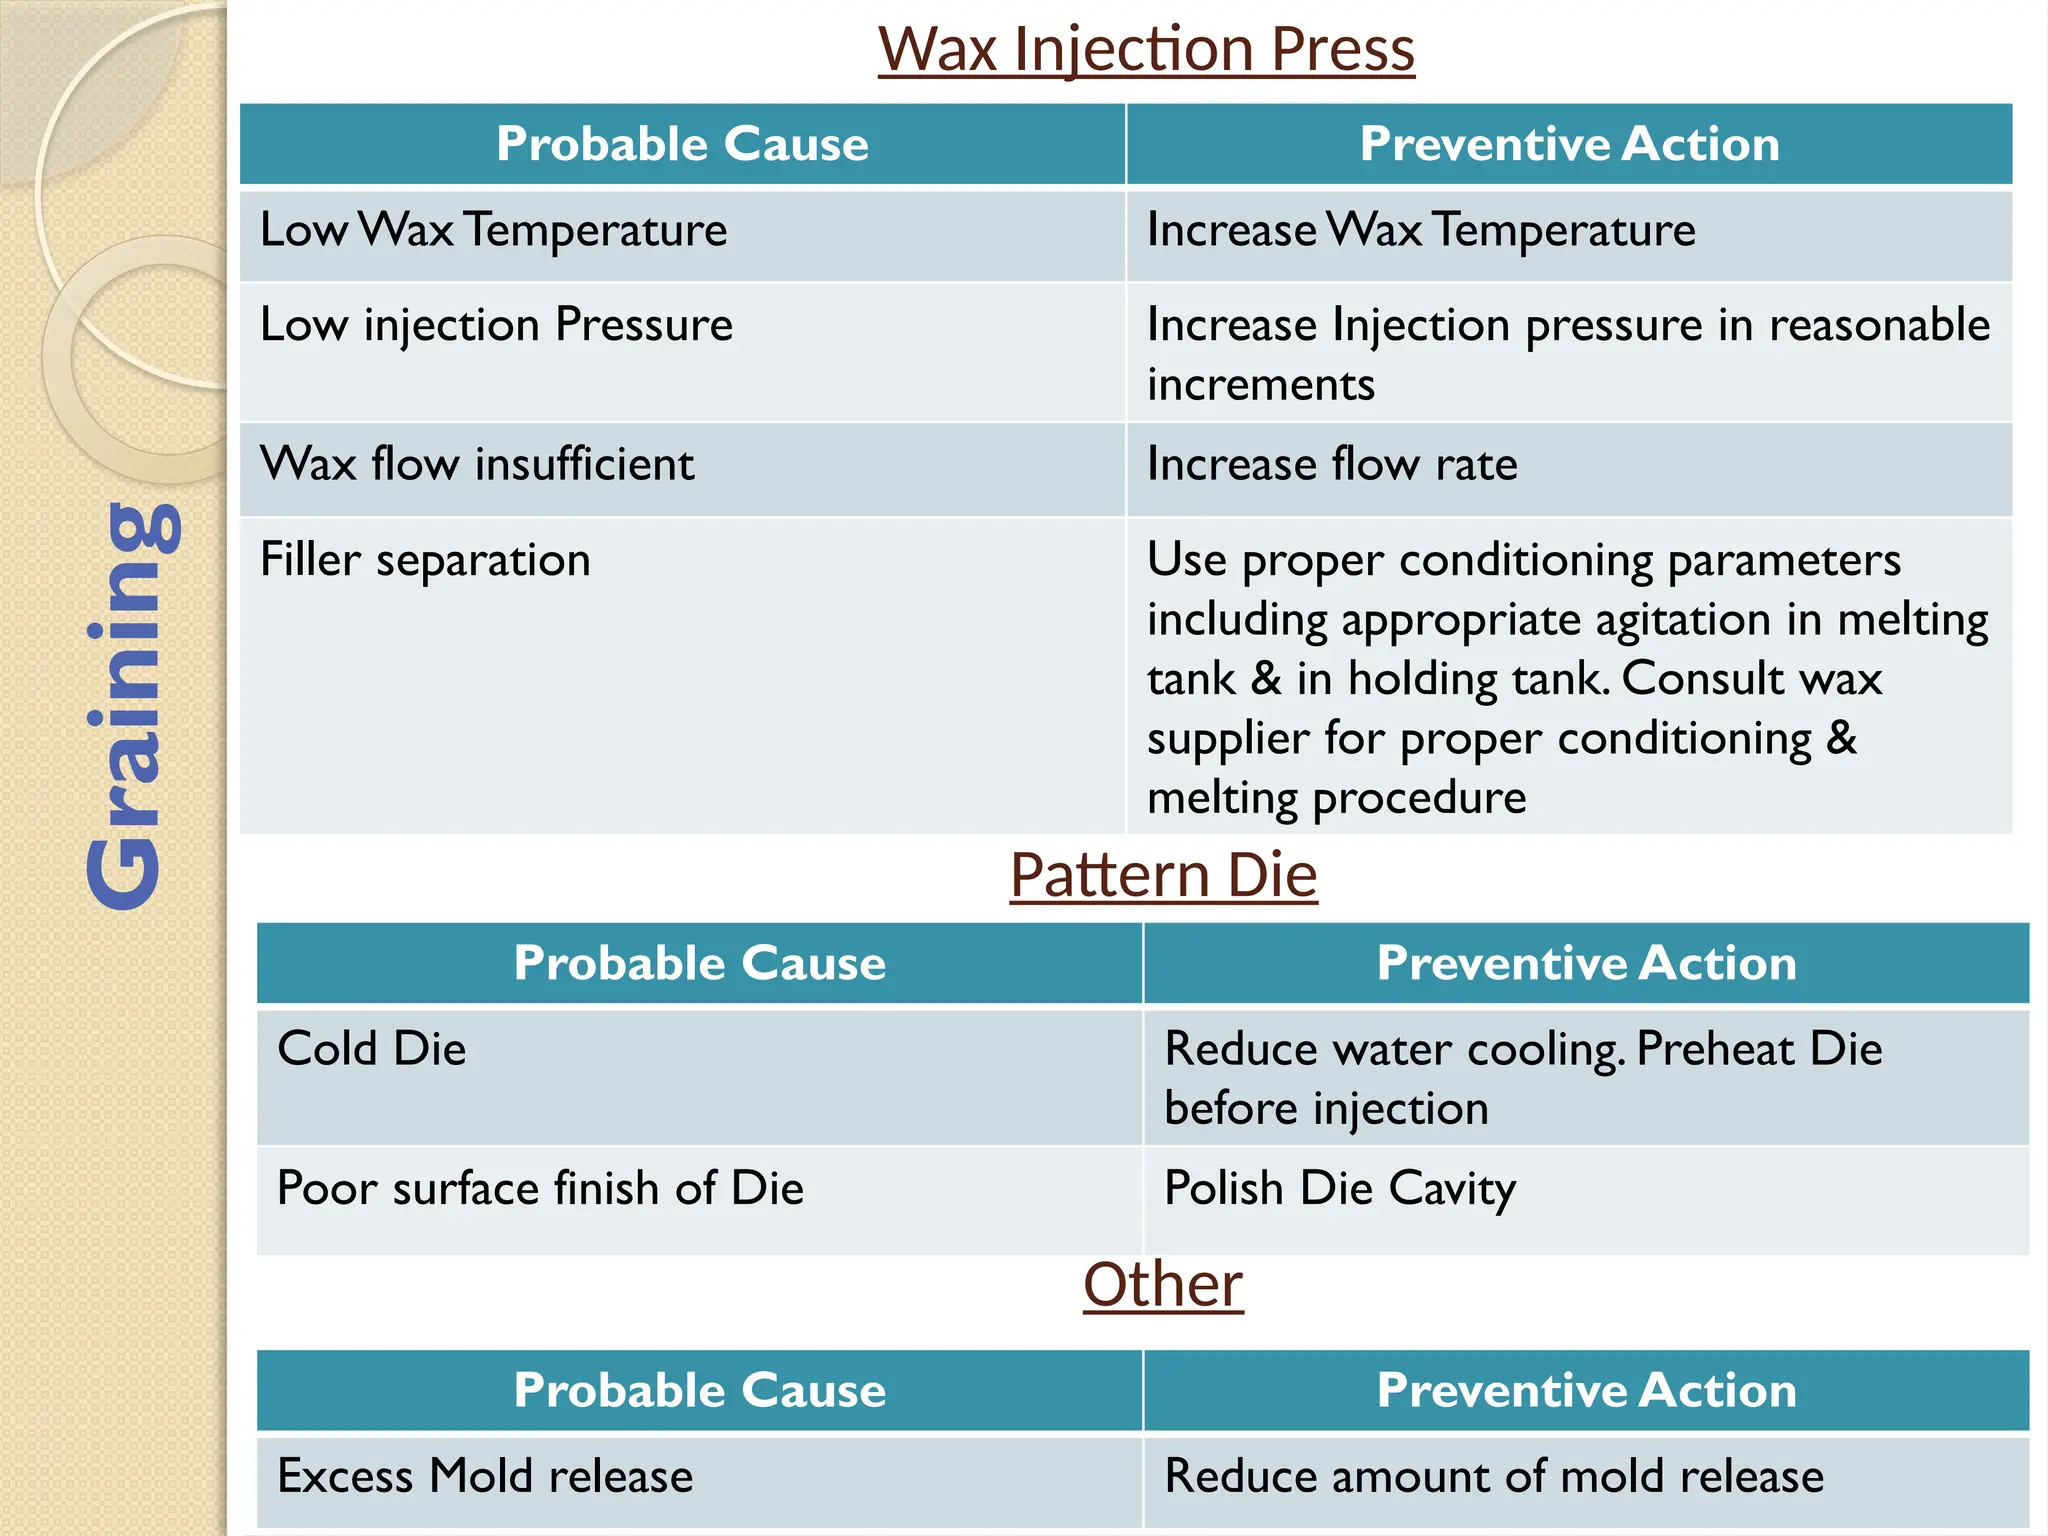
Low WaxTemperature IncreaseWaxTemperature
Low injection Pressure Increase Injection pressure in reasonable
increments
Wax flow insufficient Increase flow rate
Filler separation Use proper conditioning parameters
including appropriate agitation in melting
tank & in holding tank. Consult wax
supplier for proper conditioning &
melting procedure
Pattern Die
Probable Cause Preventive Action
Cold Die Reduce water cooling. Preheat Die
before injection
Poor surface finish of Die Polish Die Cavity
Other
Probable Cause Preventive Action
Excess Mold release Reduce amount of mold release
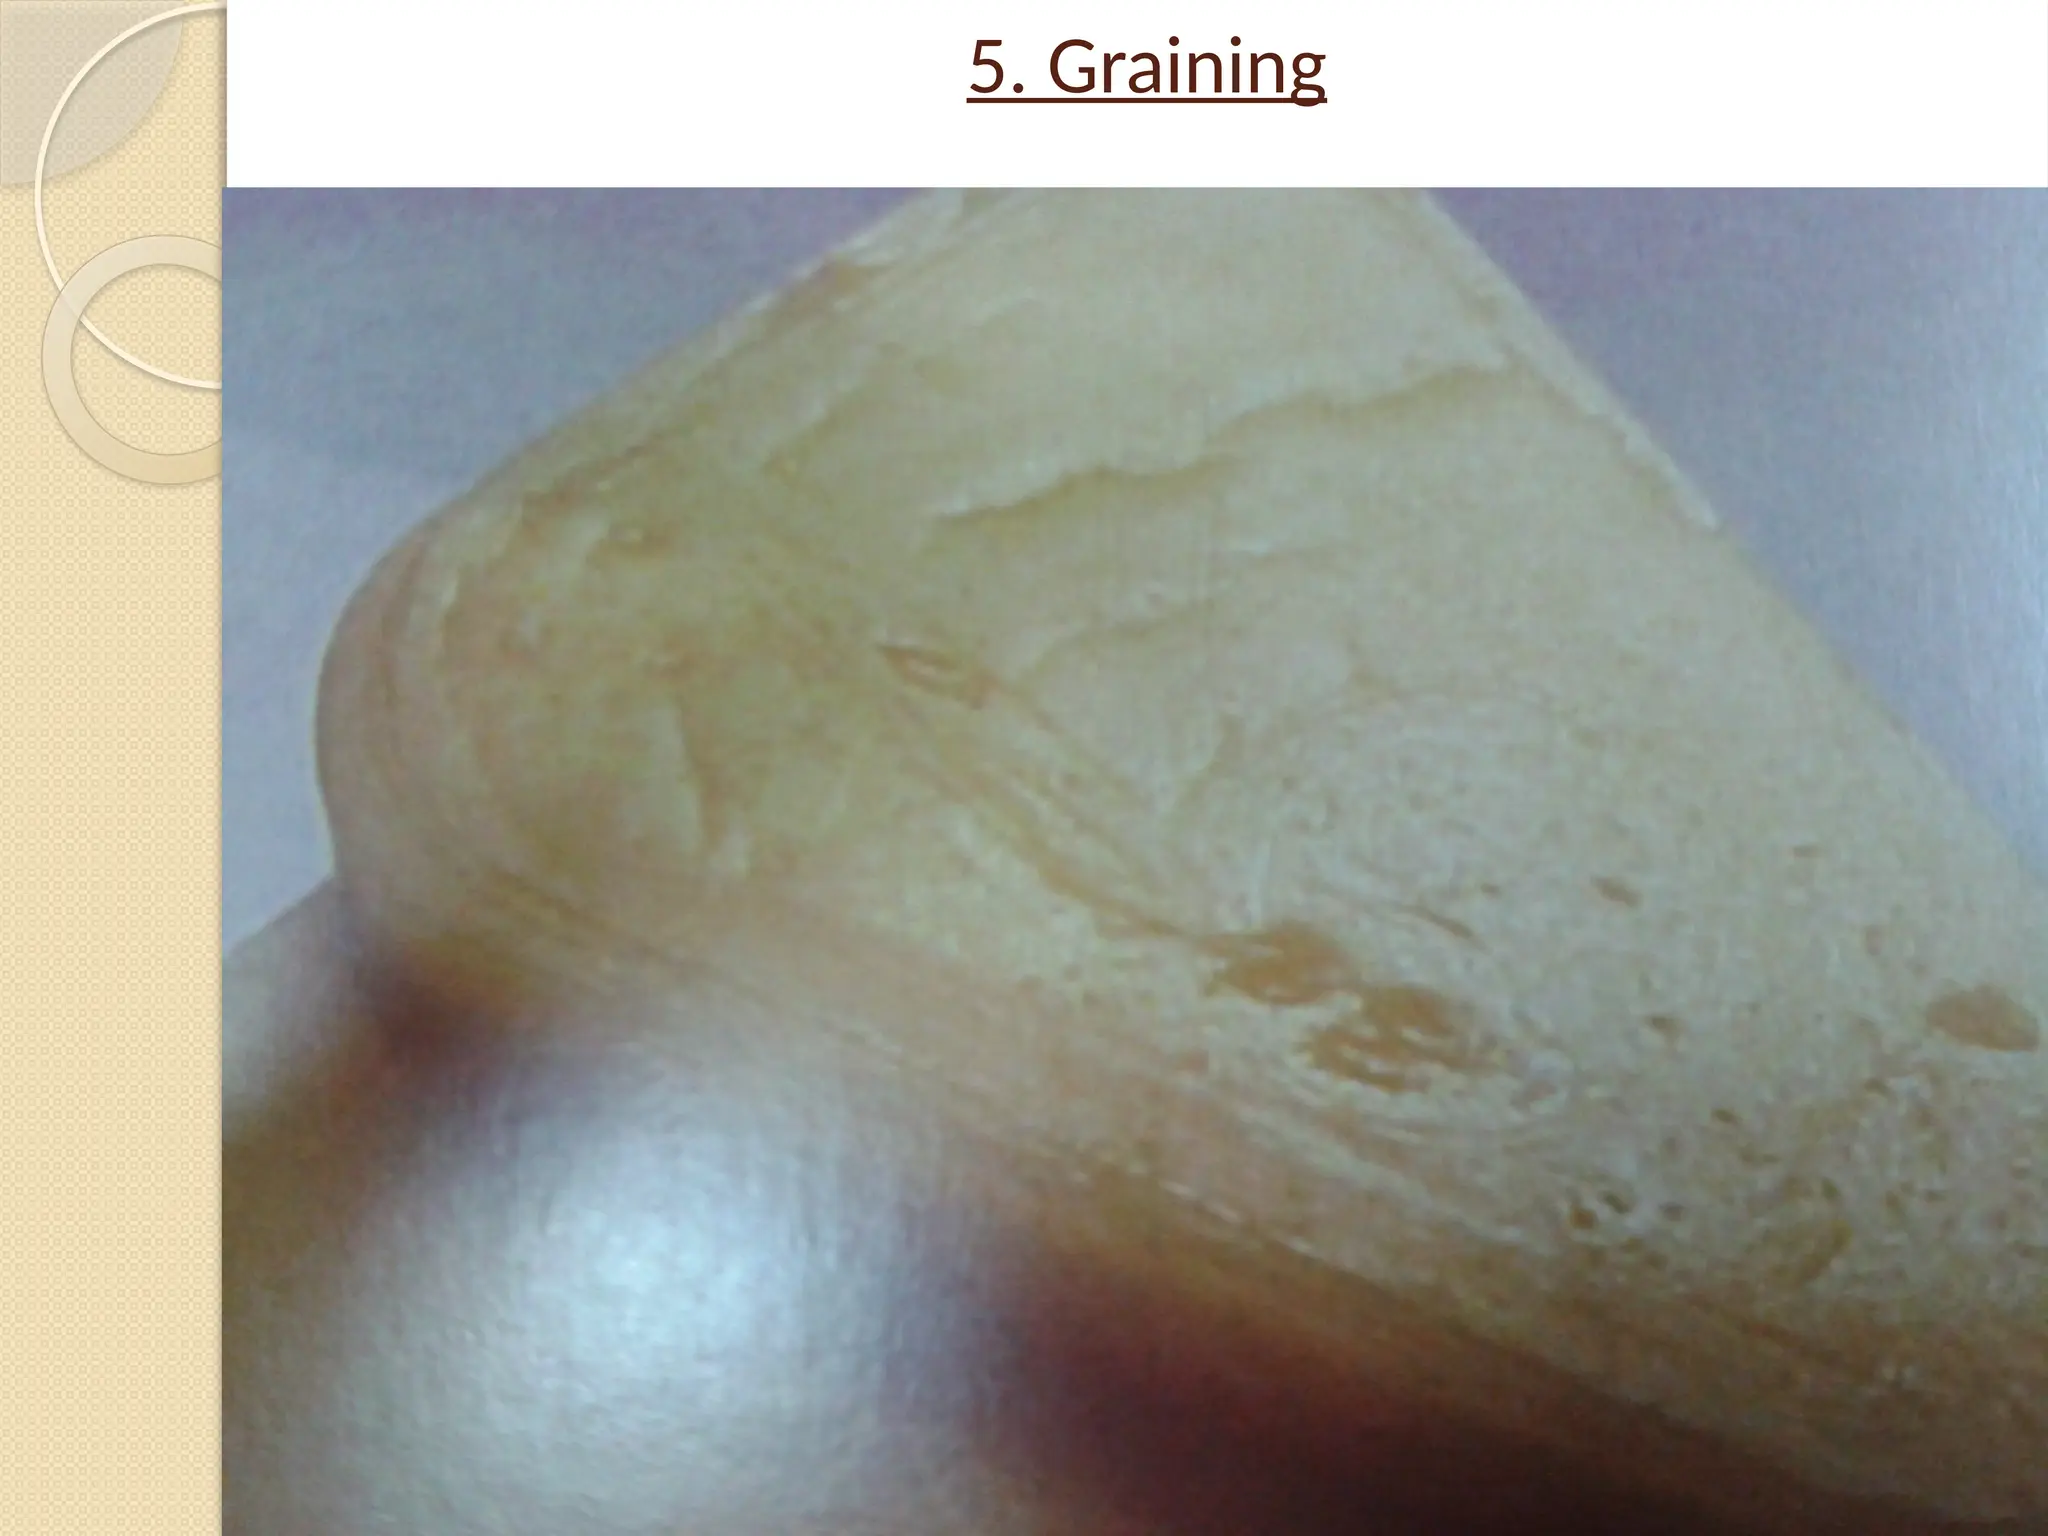
Graining
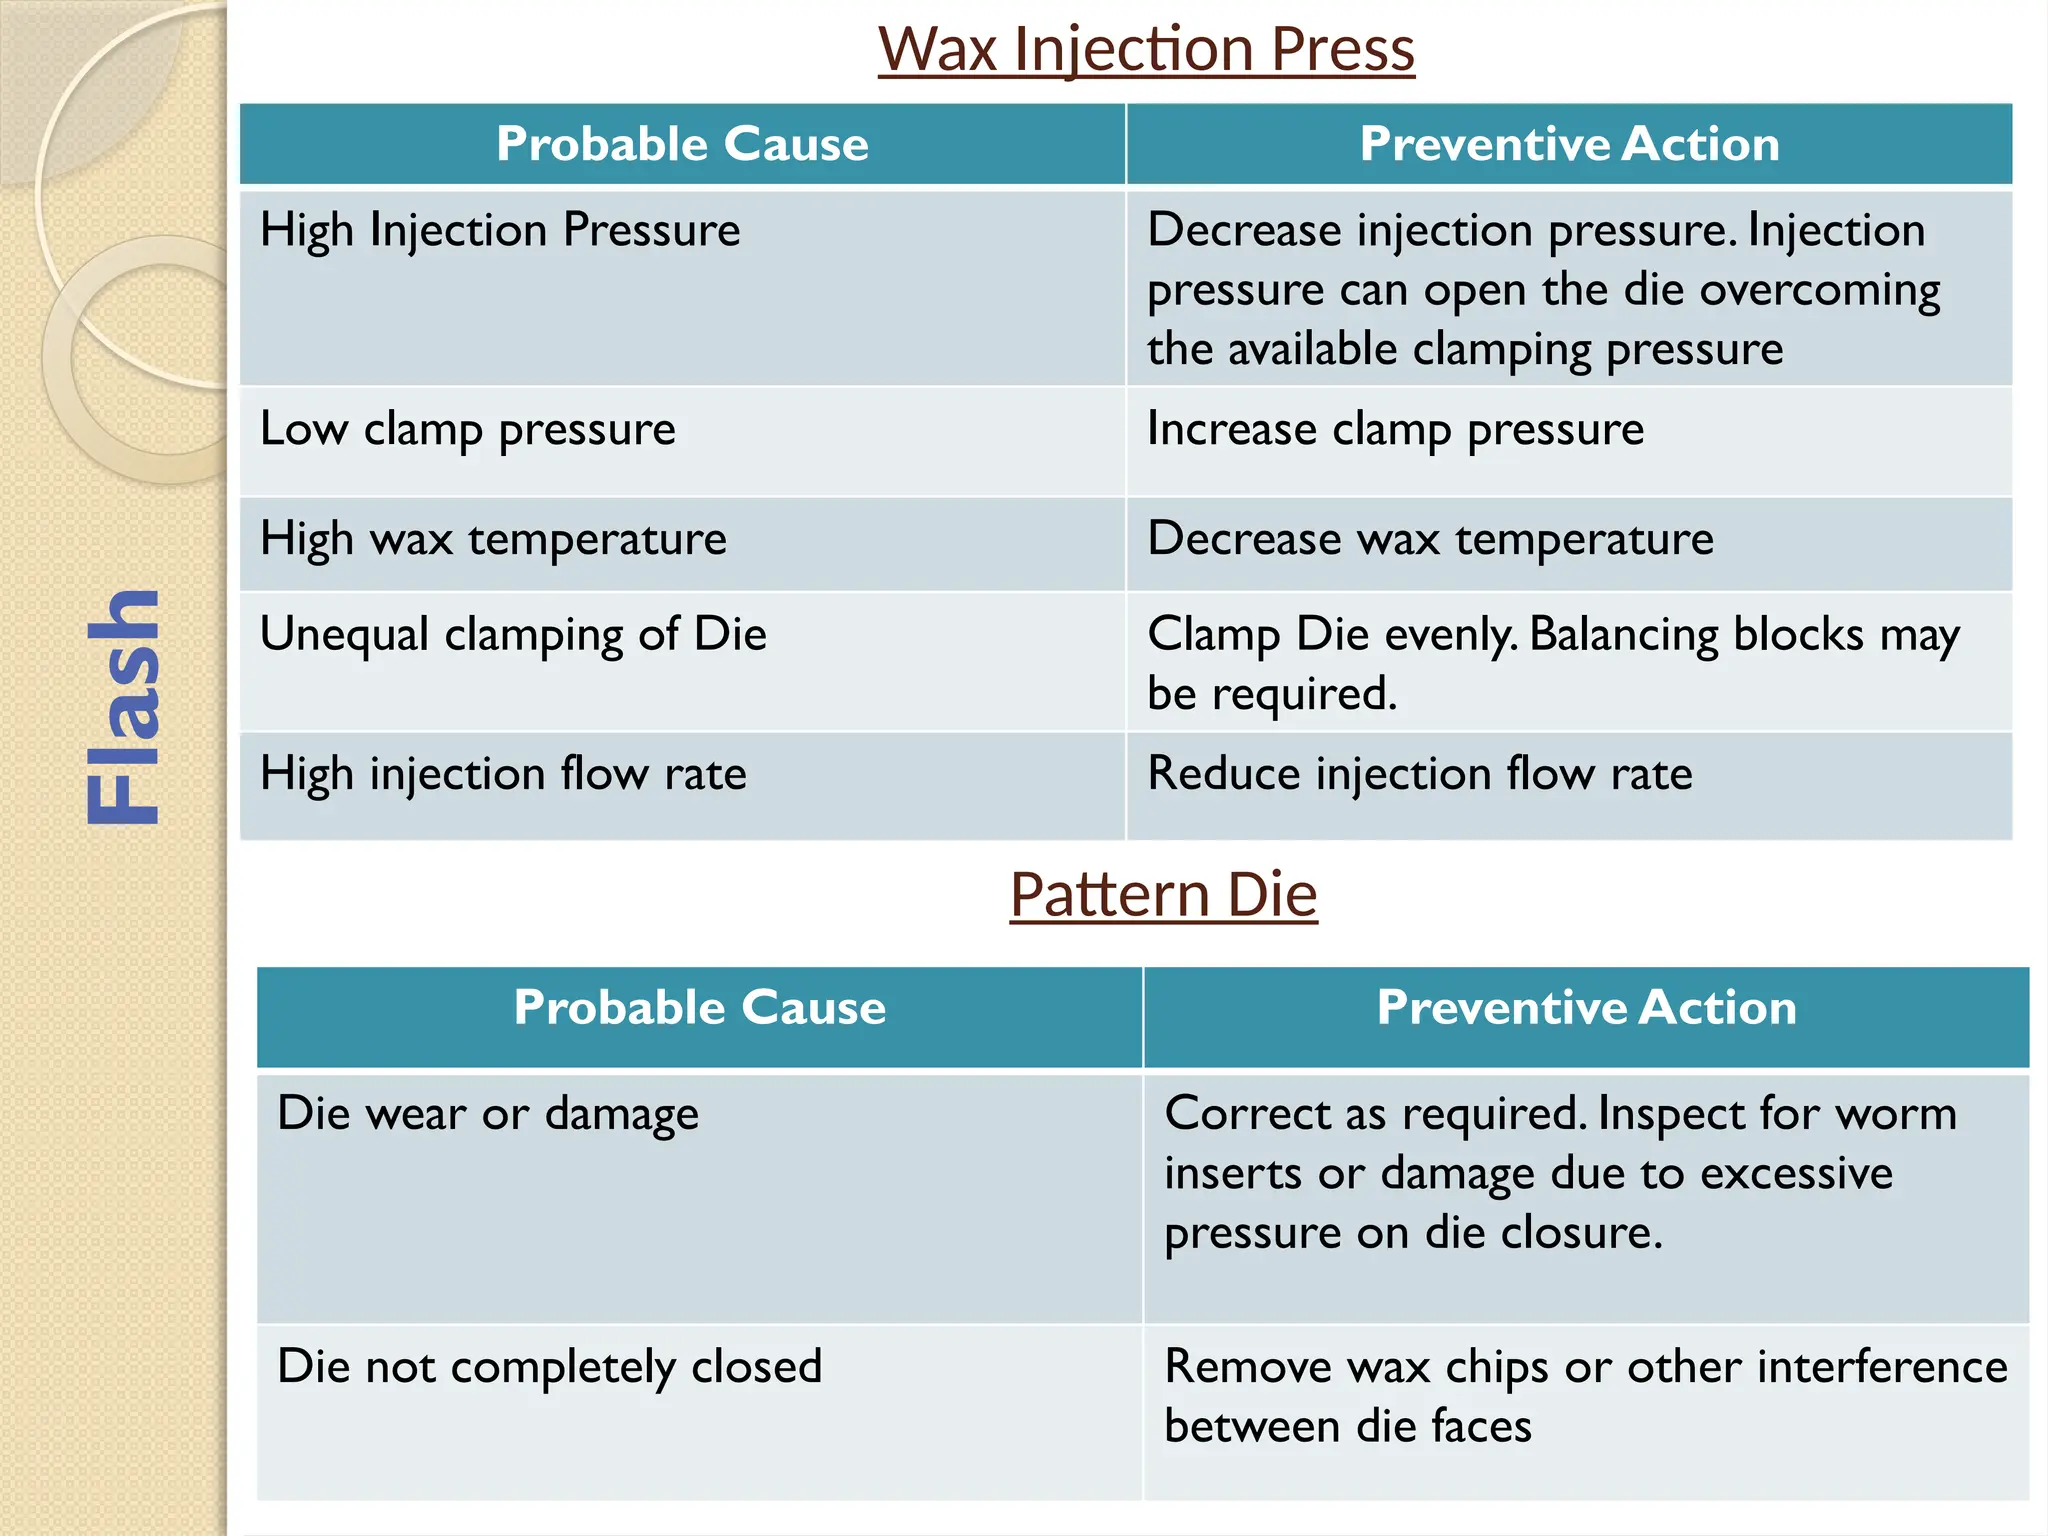
Wax Injection Press
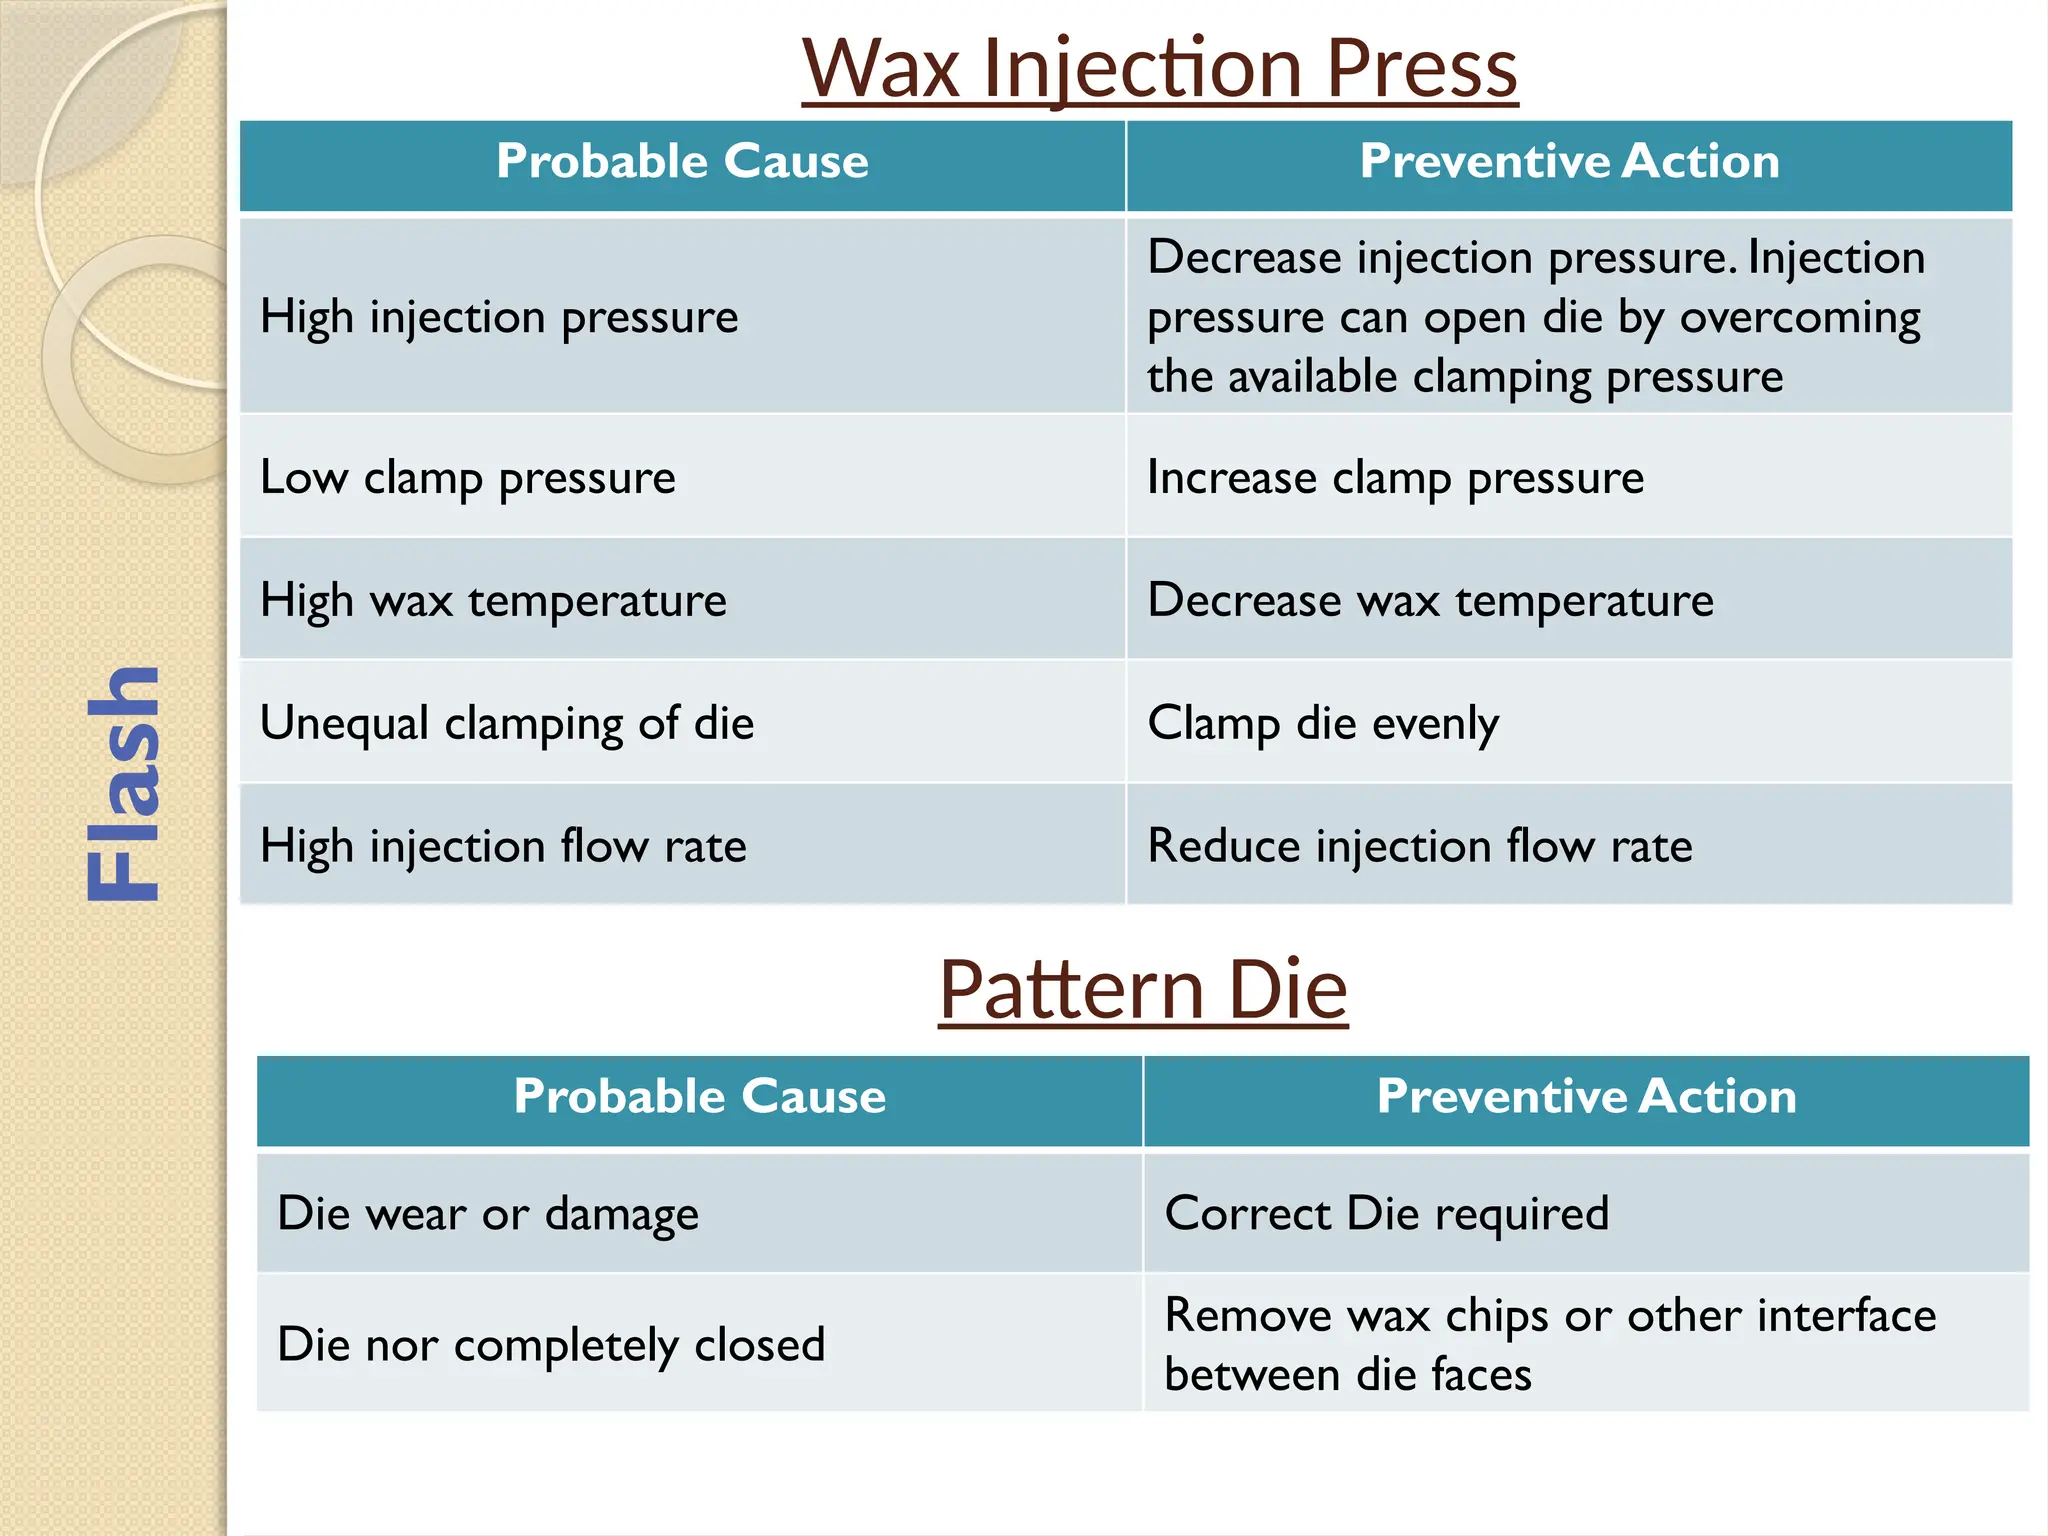
ProbableCause Preventive Action
High Injection Pressure Decrease injection pressure. Injection
pressure can open the die overcoming
the available clamping pressure
Low clamp pressure Increase clamp pressure
High wax temperature Decrease wax temperature
Unequal clamping of Die Clamp Die evenly. Balancing blocks may
be required.
High injection flow rate Reduce injection flow rate
Pattern Die
Probable Cause Preventive Action
Die wear or damage Correct as required. Inspect for worm
inserts or damage due to excessive
pressure on die closure.
Die not completely closed Remove wax chips or other interference
between die faces
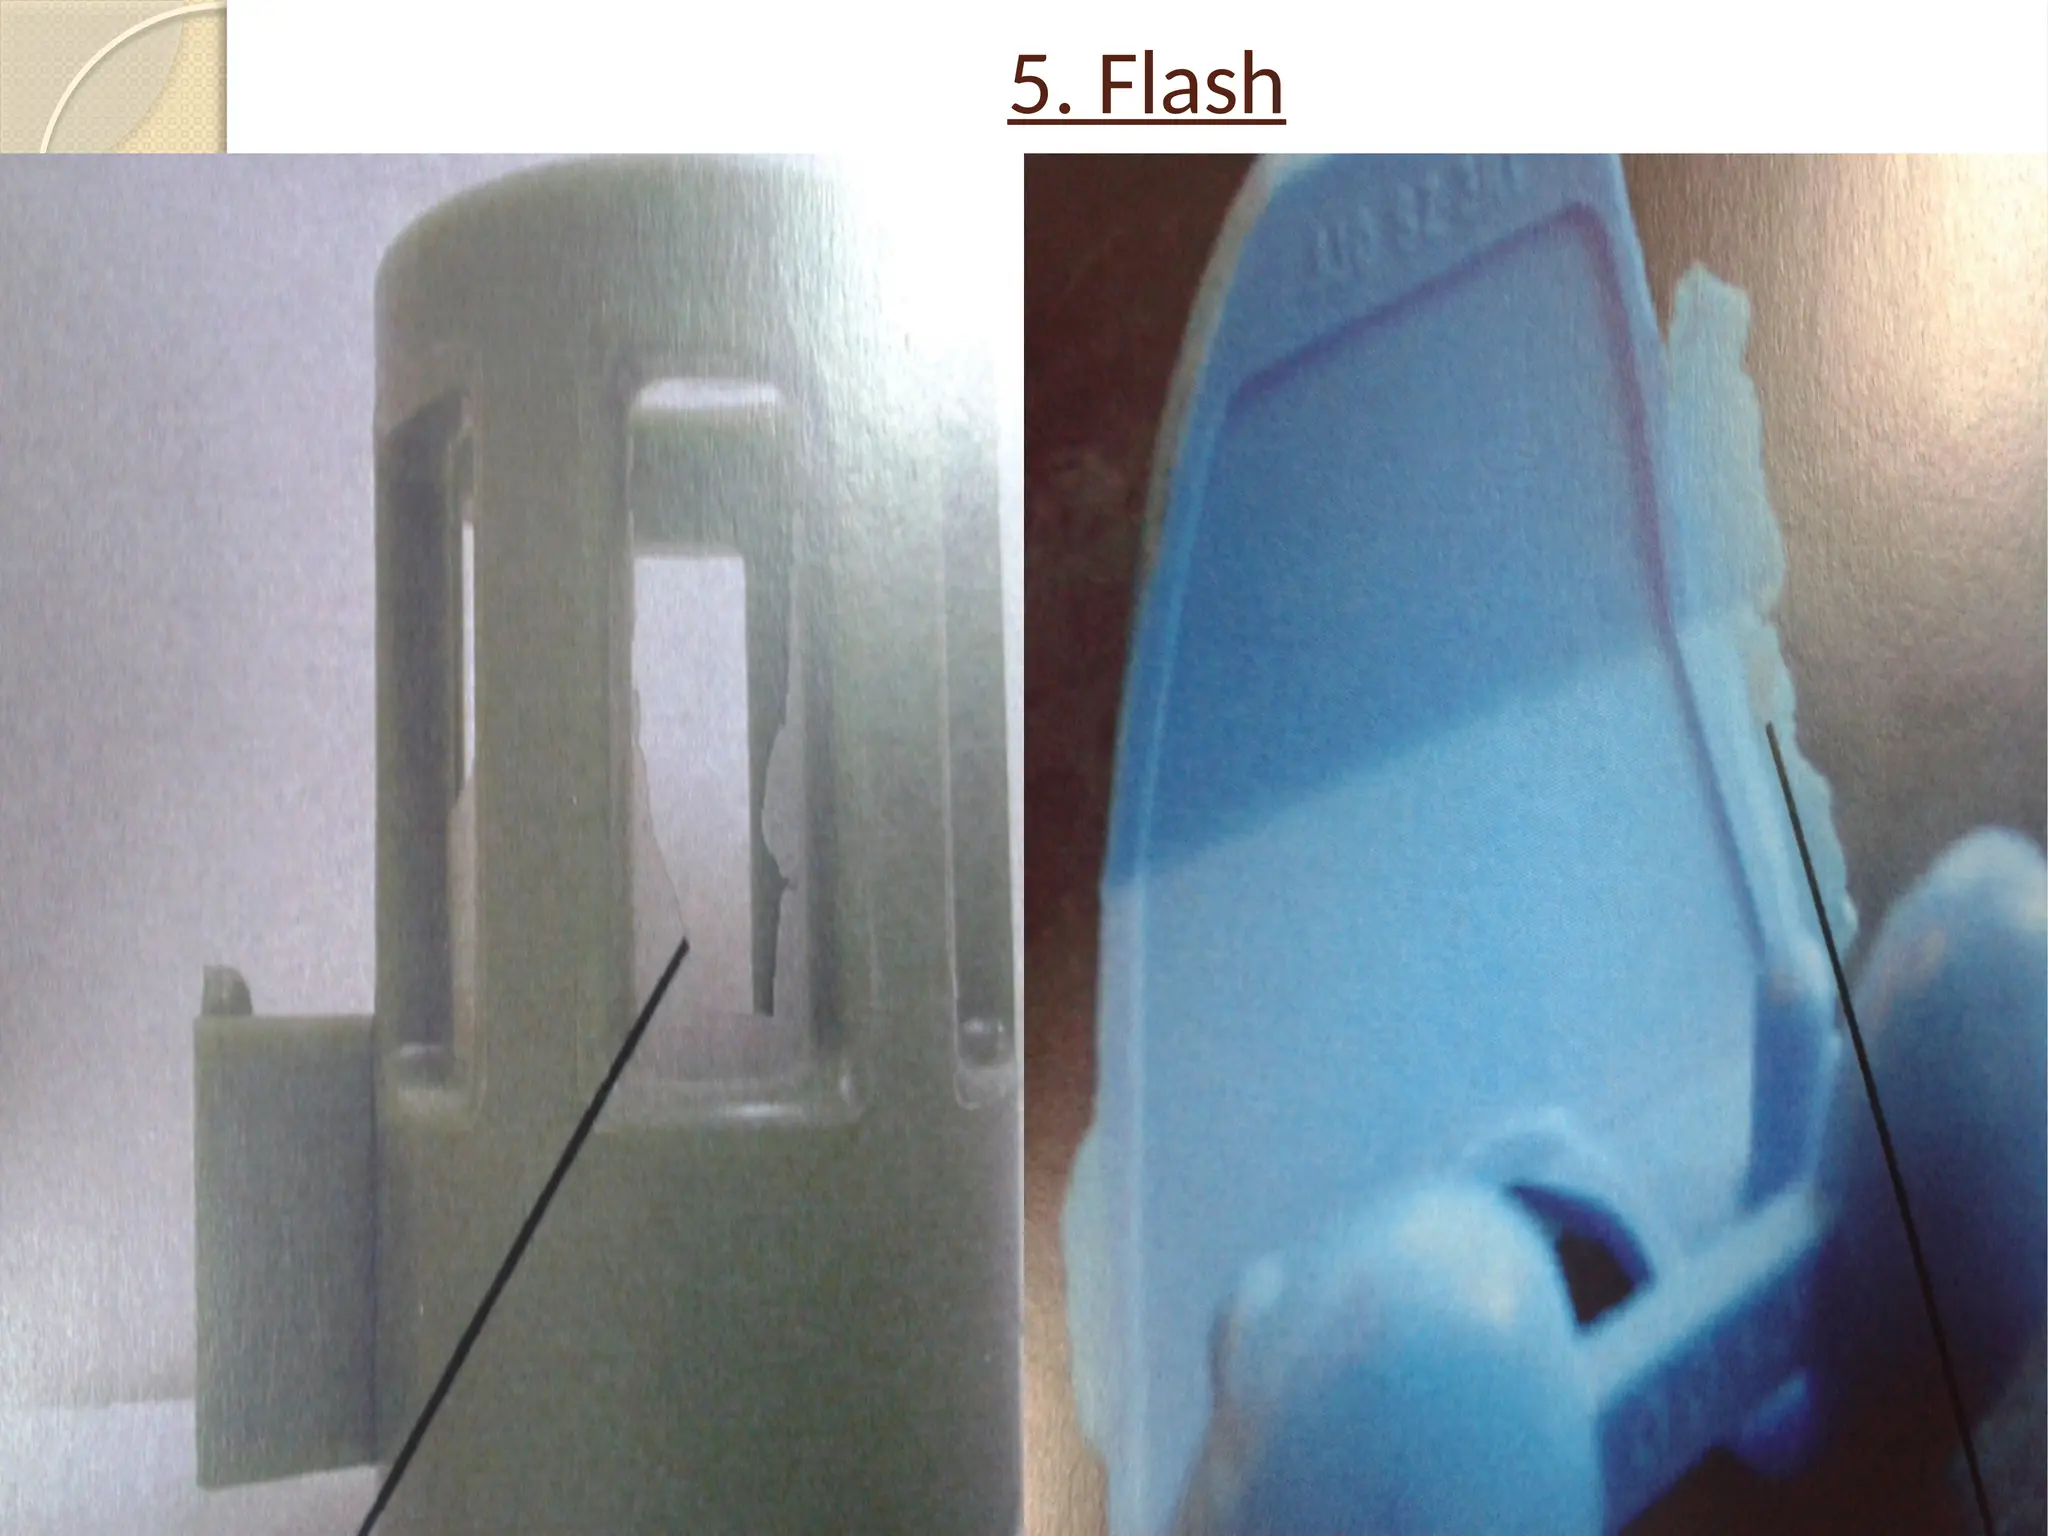
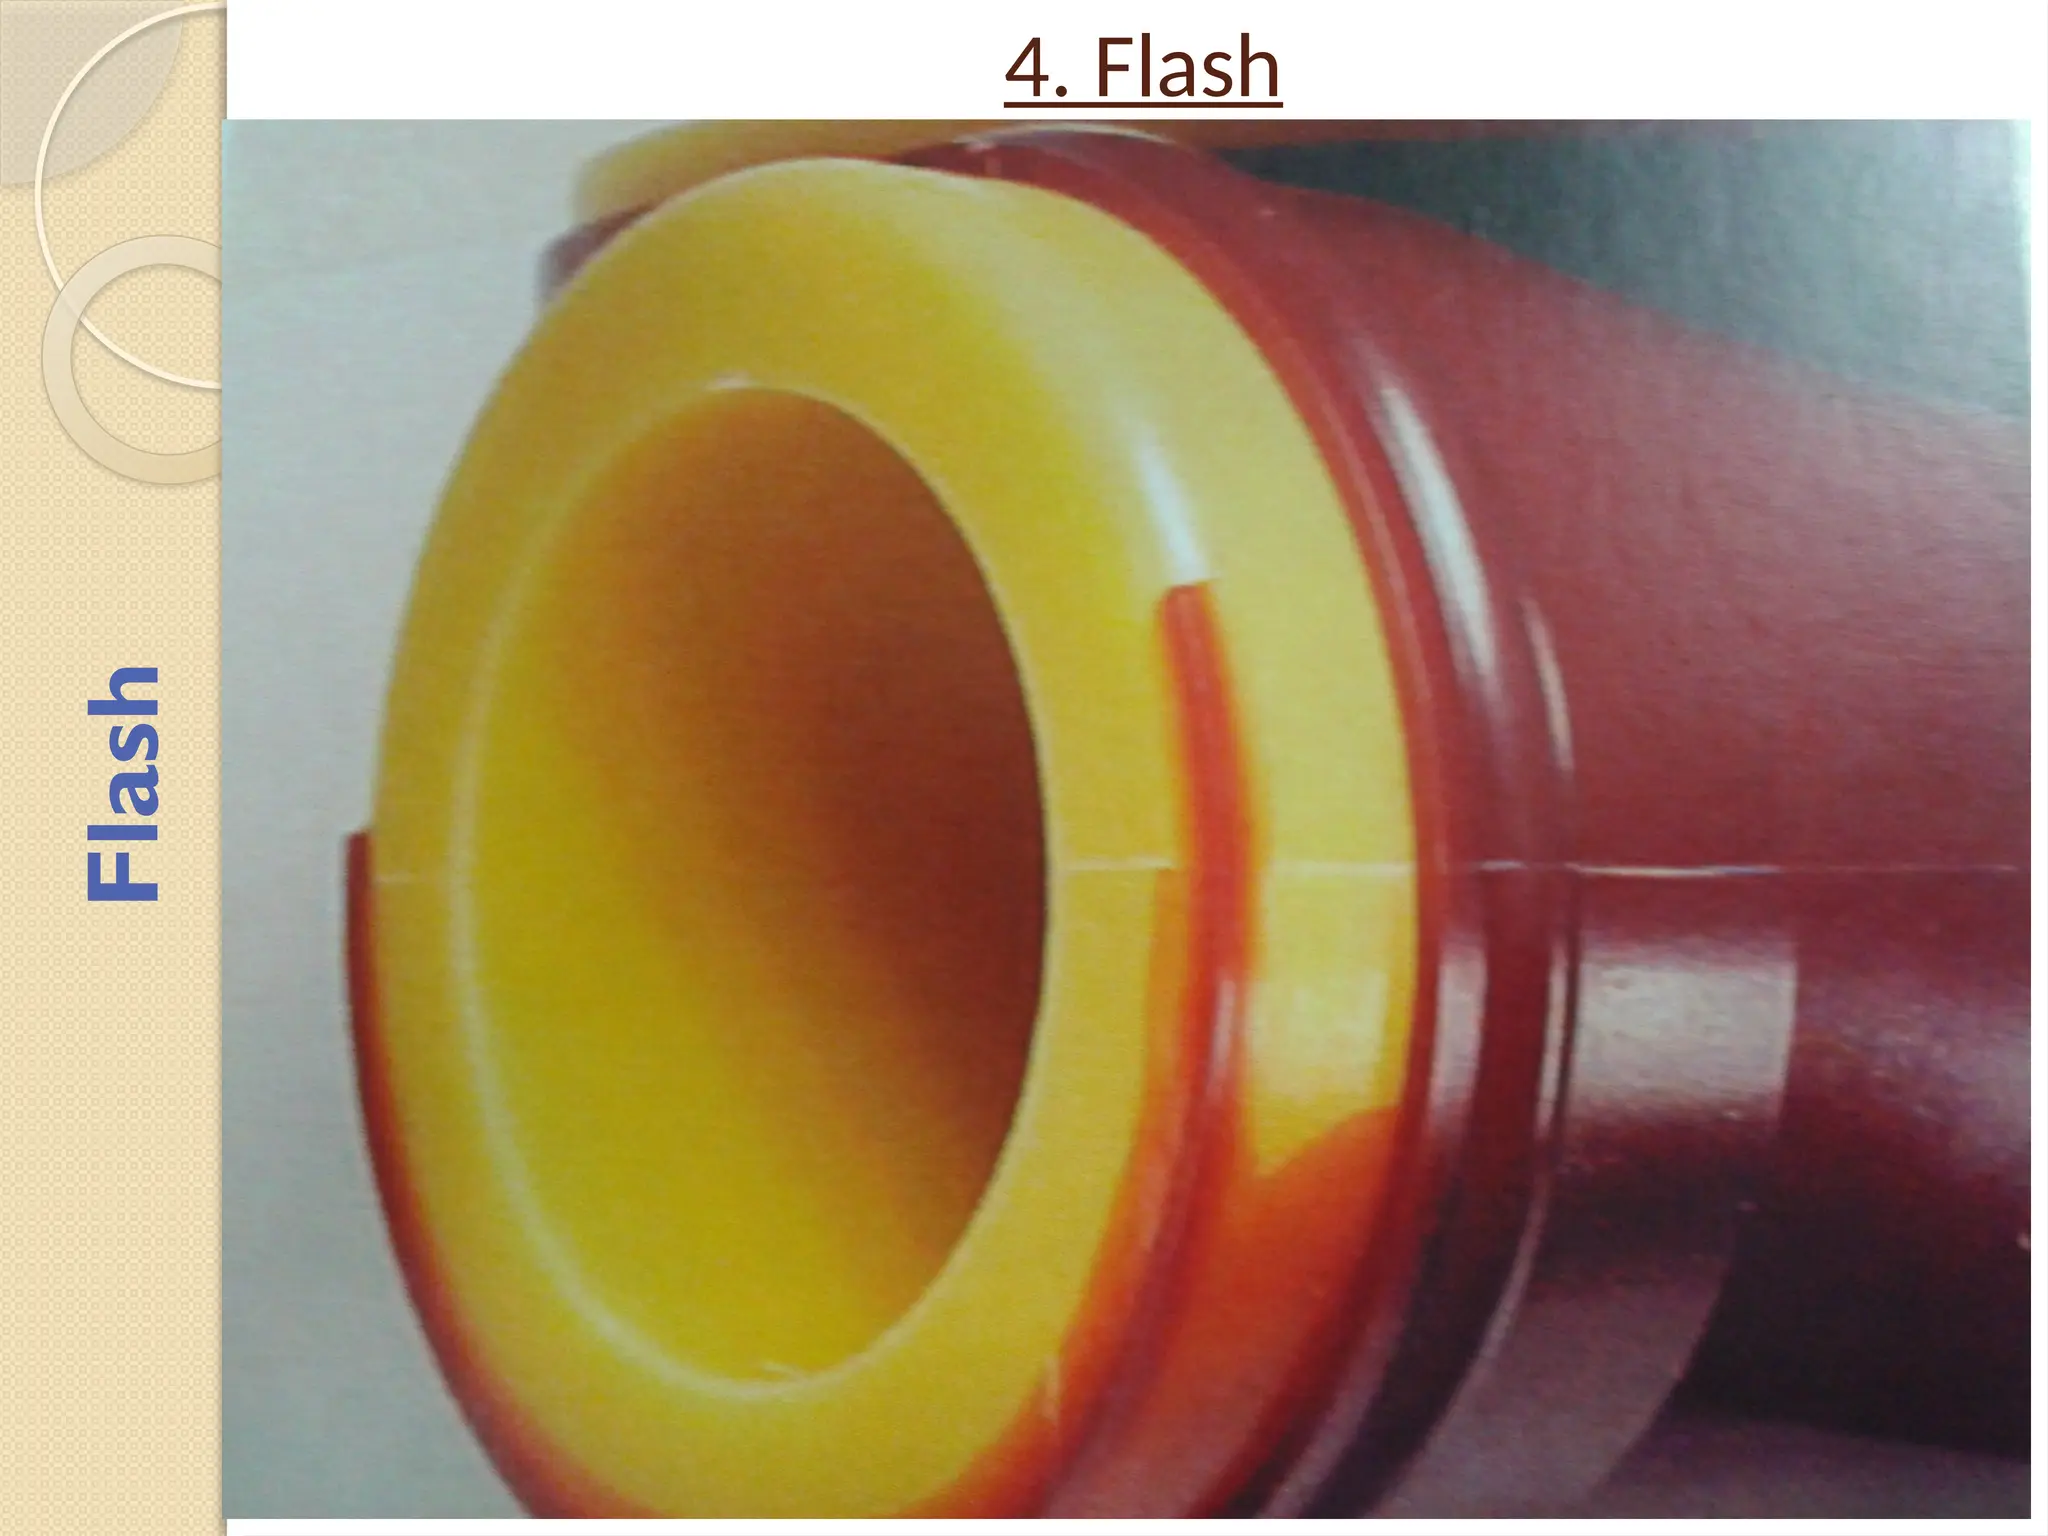
Flash
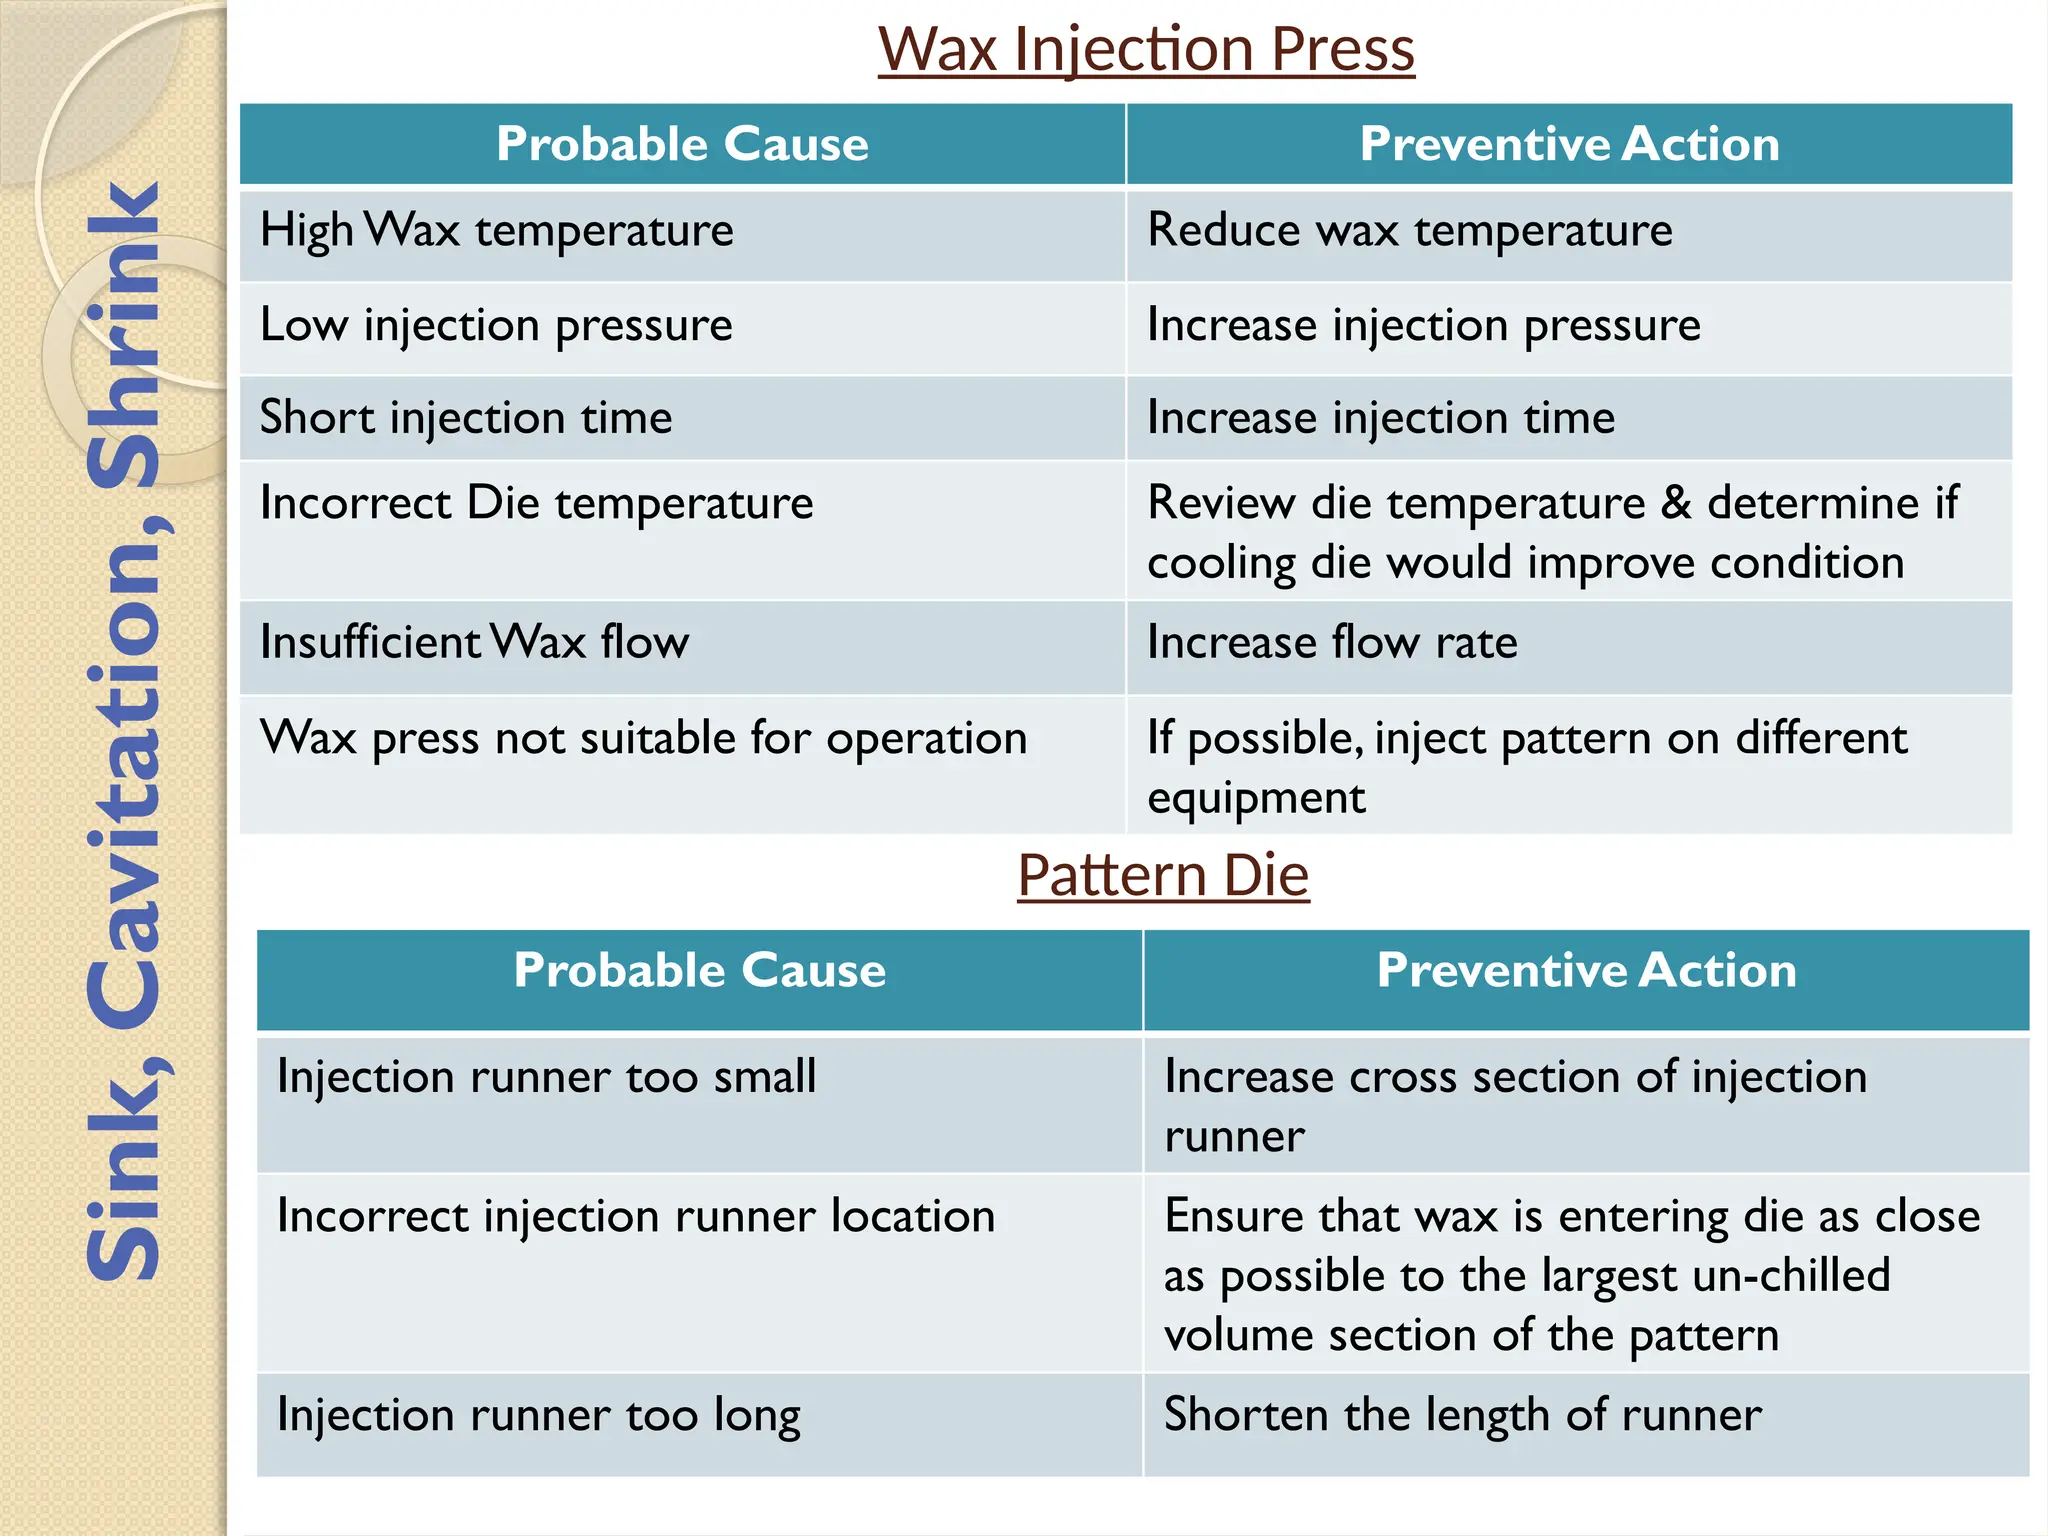
Wax Injection Press
ProbableCause Preventive Action
HighWax temperature Reduce wax temperature
Low injection pressure Increase injection pressure
Short injection time Increase injection time
Incorrect Die temperature Review die temperature & determine if
cooling die would improve condition
InsufficientWax flow Increase flow rate
Wax press not suitable for operation If possible, inject pattern on different
equipment
Pattern Die
Probable Cause Preventive Action
Injection runner too small Increase cross section of injection
runner
Incorrect injection runner location Ensure that wax is entering die as close
as possible to the largest un-chilled
volume section of the pattern
Injection runner too long Shorten the length of runner
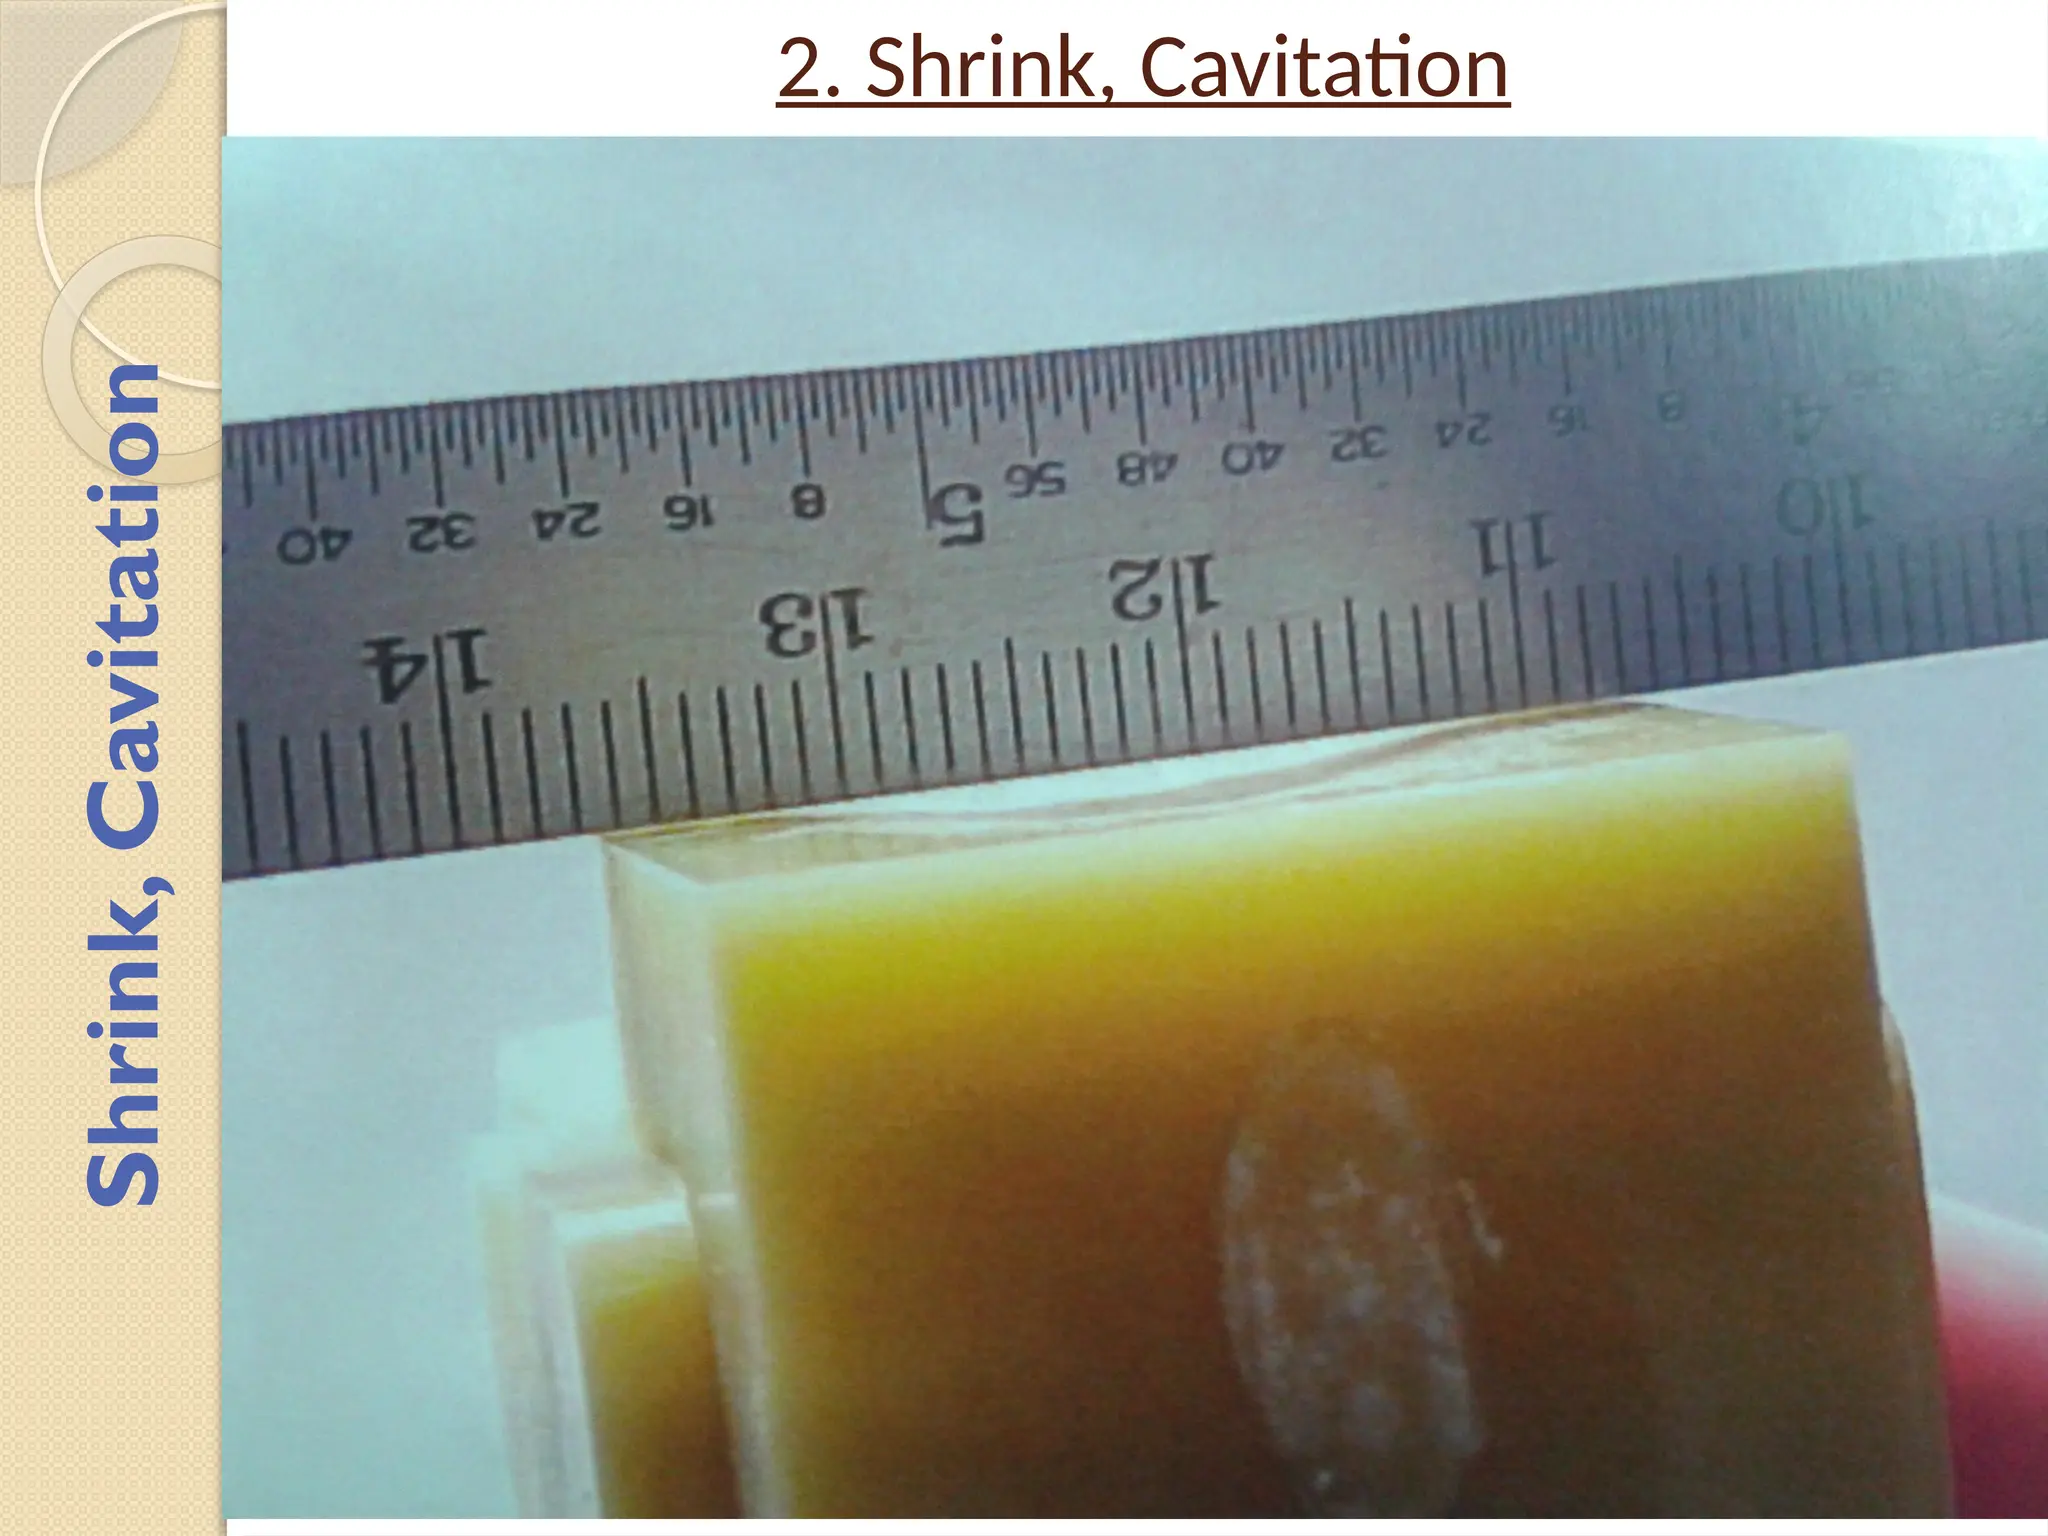
Sink,
Cavitation,
Shrink
19.
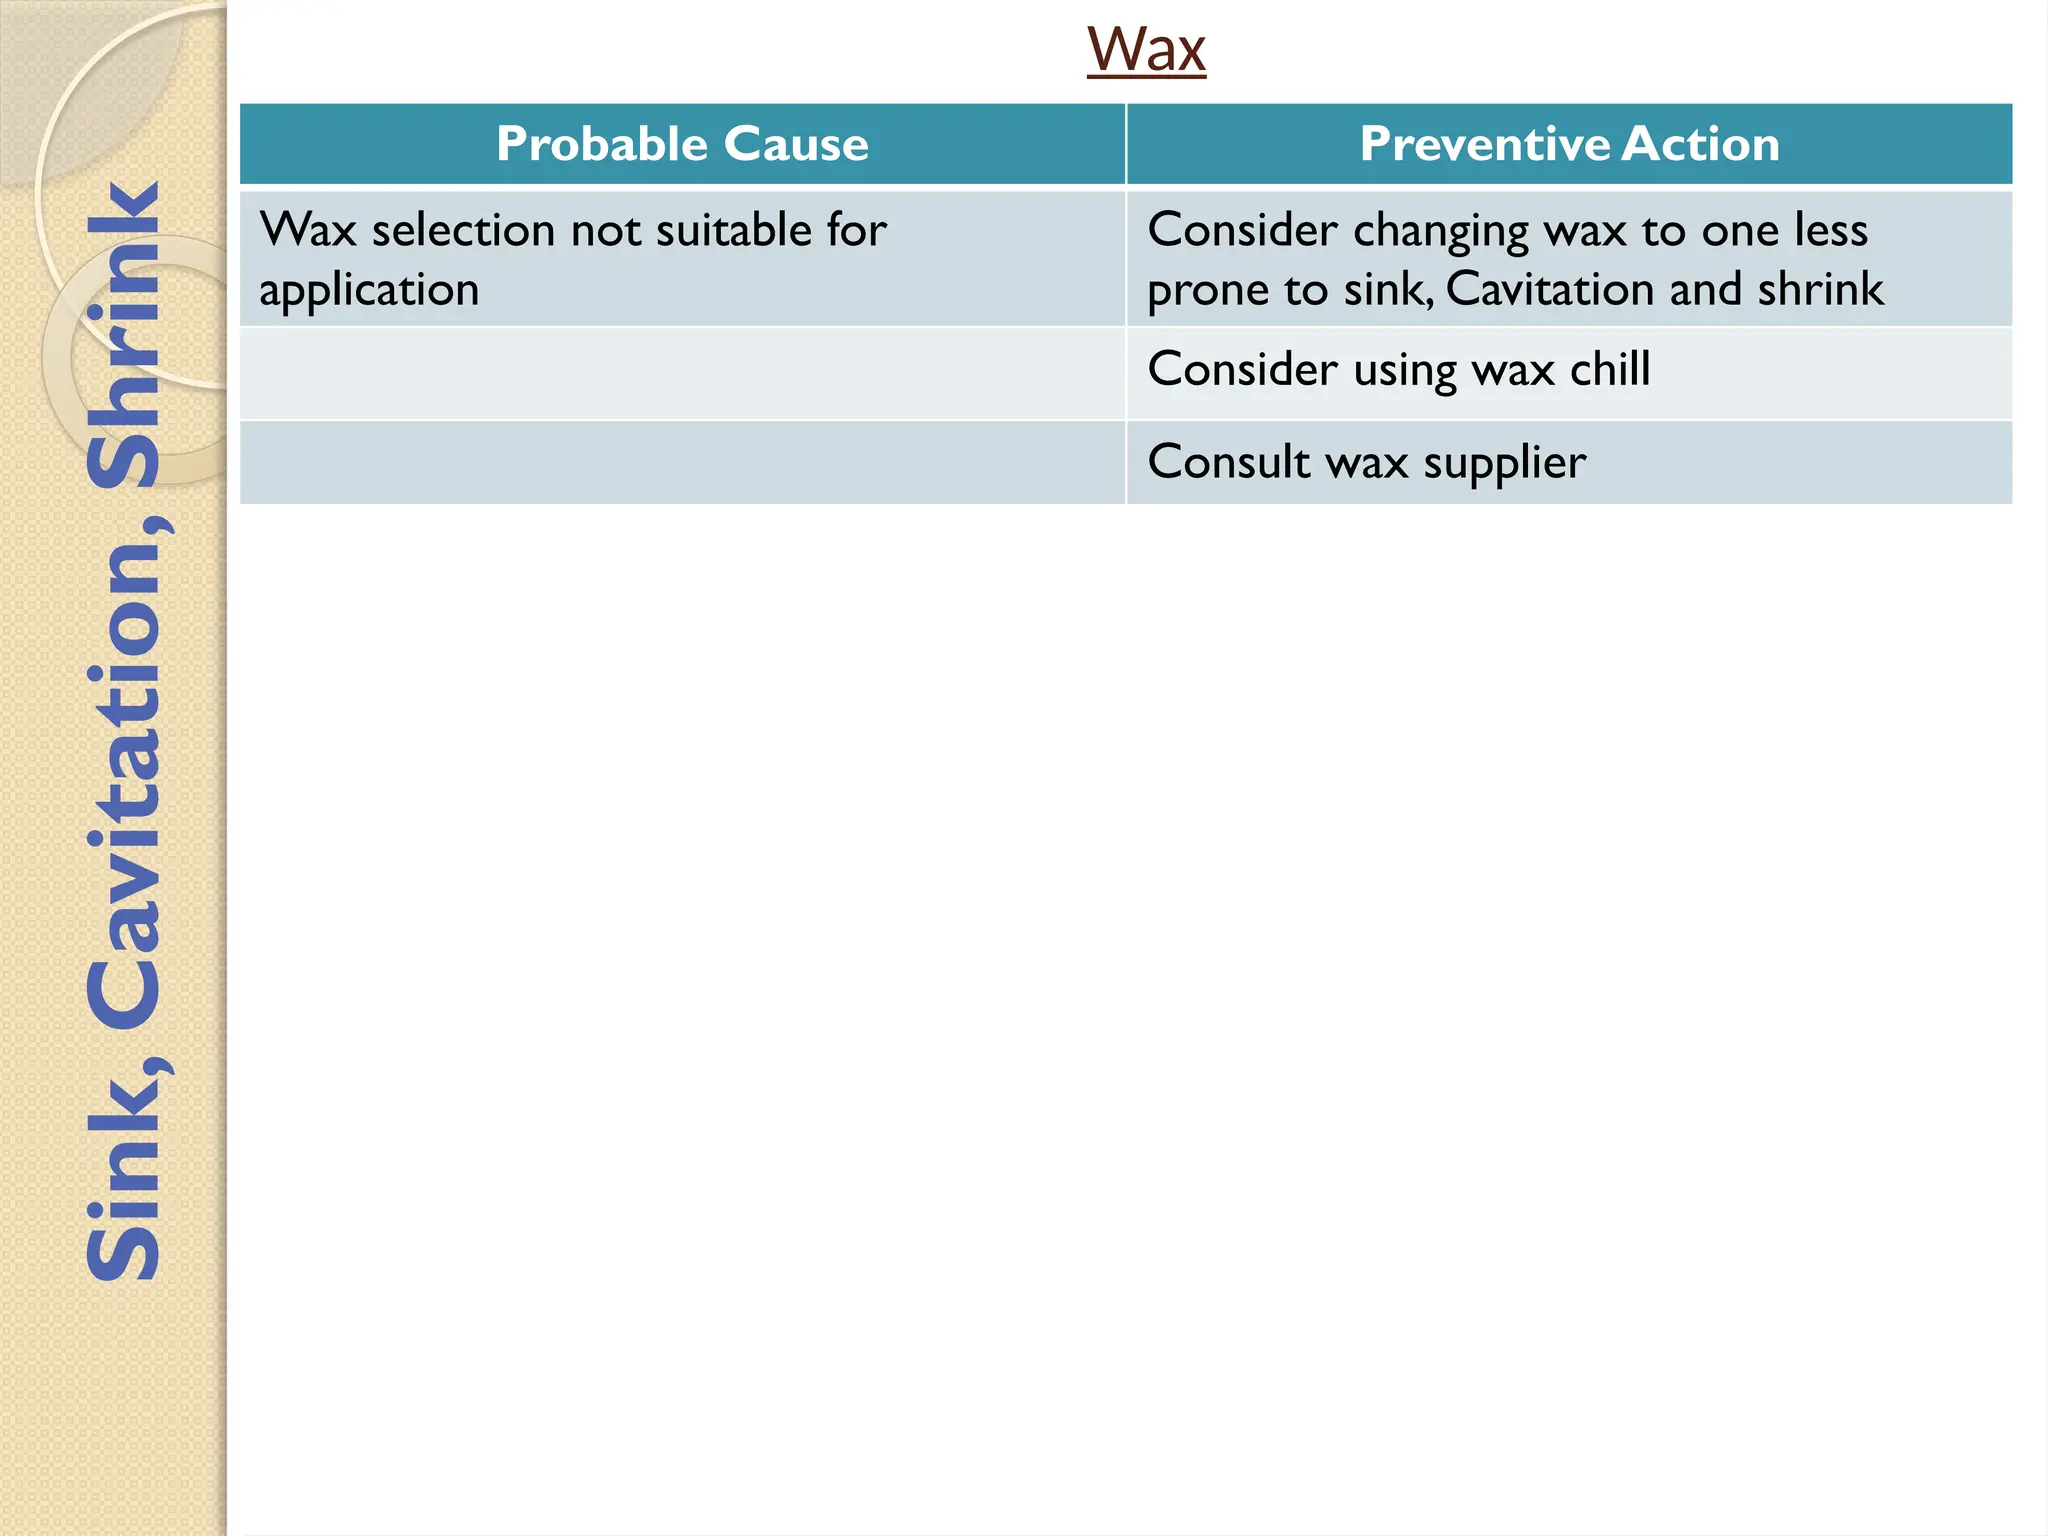
Wax
Probable Cause PreventiveAction
Wax selection not suitable for
application
Consider changing wax to one less
prone to sink, Cavitation and shrink
Consider using wax chill
Consult wax supplier
Sink,
Cavitation,
Shrink
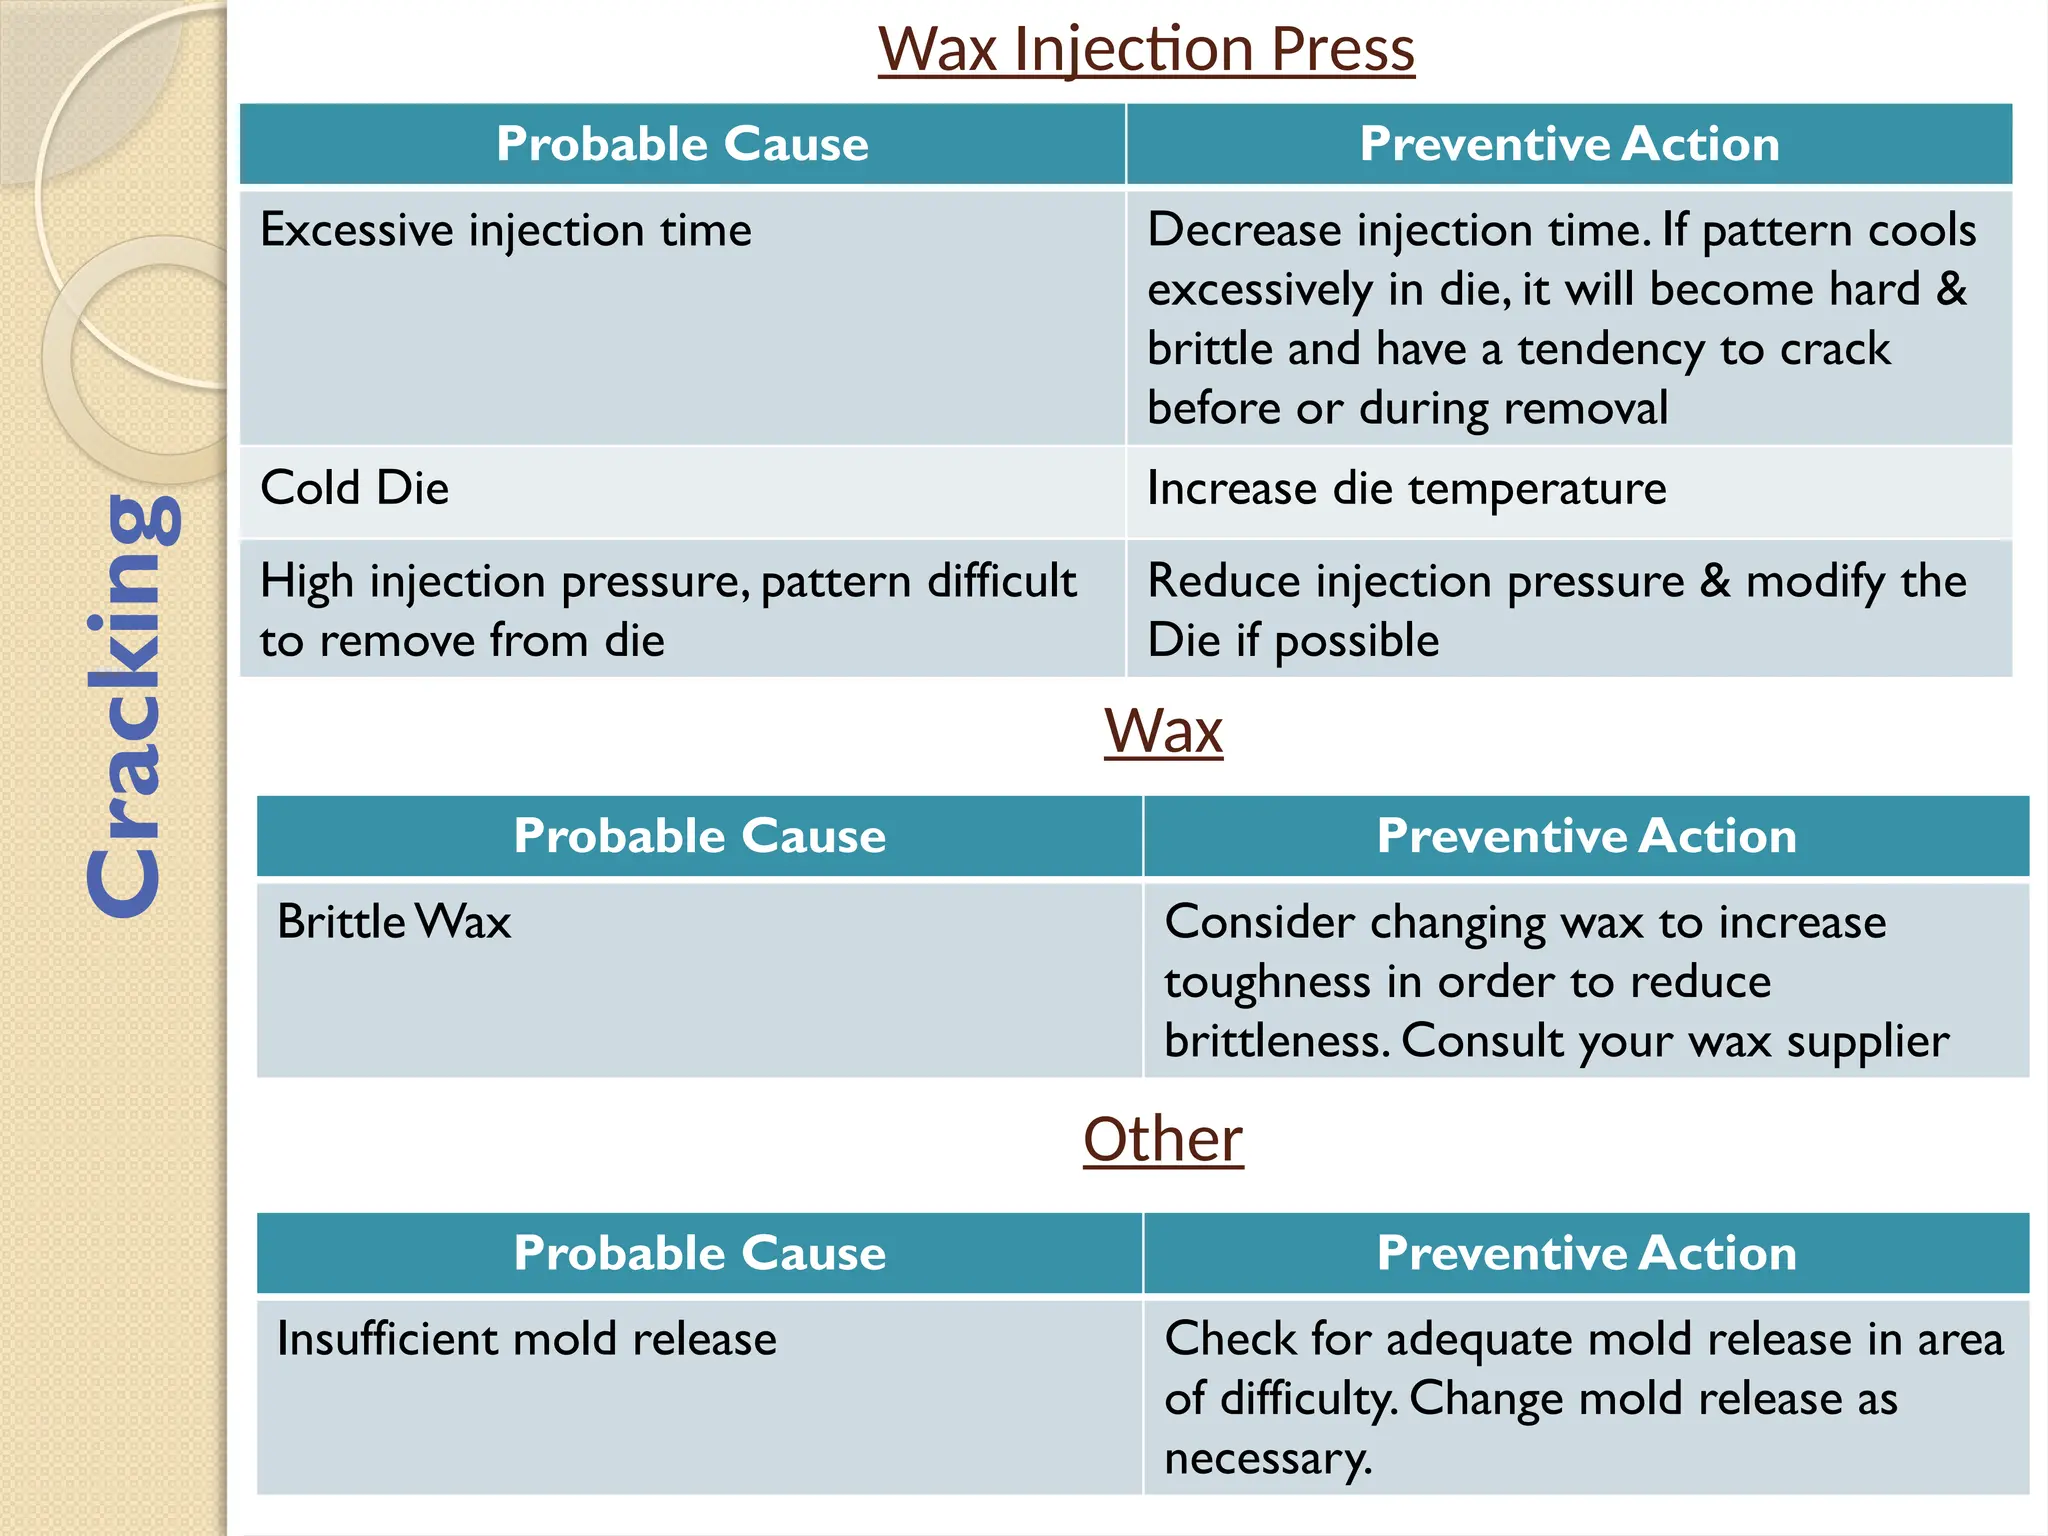
Wax Injection Press
ProbableCause Preventive Action
Excessive injection time Decrease injection time. If pattern cools
excessively in die, it will become hard &
brittle and have a tendency to crack
before or during removal
Cold Die Increase die temperature
High injection pressure, pattern difficult
to remove from die
Reduce injection pressure & modify the
Die if possible
Wax
Probable Cause Preventive Action
BrittleWax Consider changing wax to increase
toughness in order to reduce
brittleness. Consult your wax supplier
Other
Probable Cause Preventive Action
Insufficient mold release Check for adequate mold release in area
of difficulty. Change mold release as
necessary.
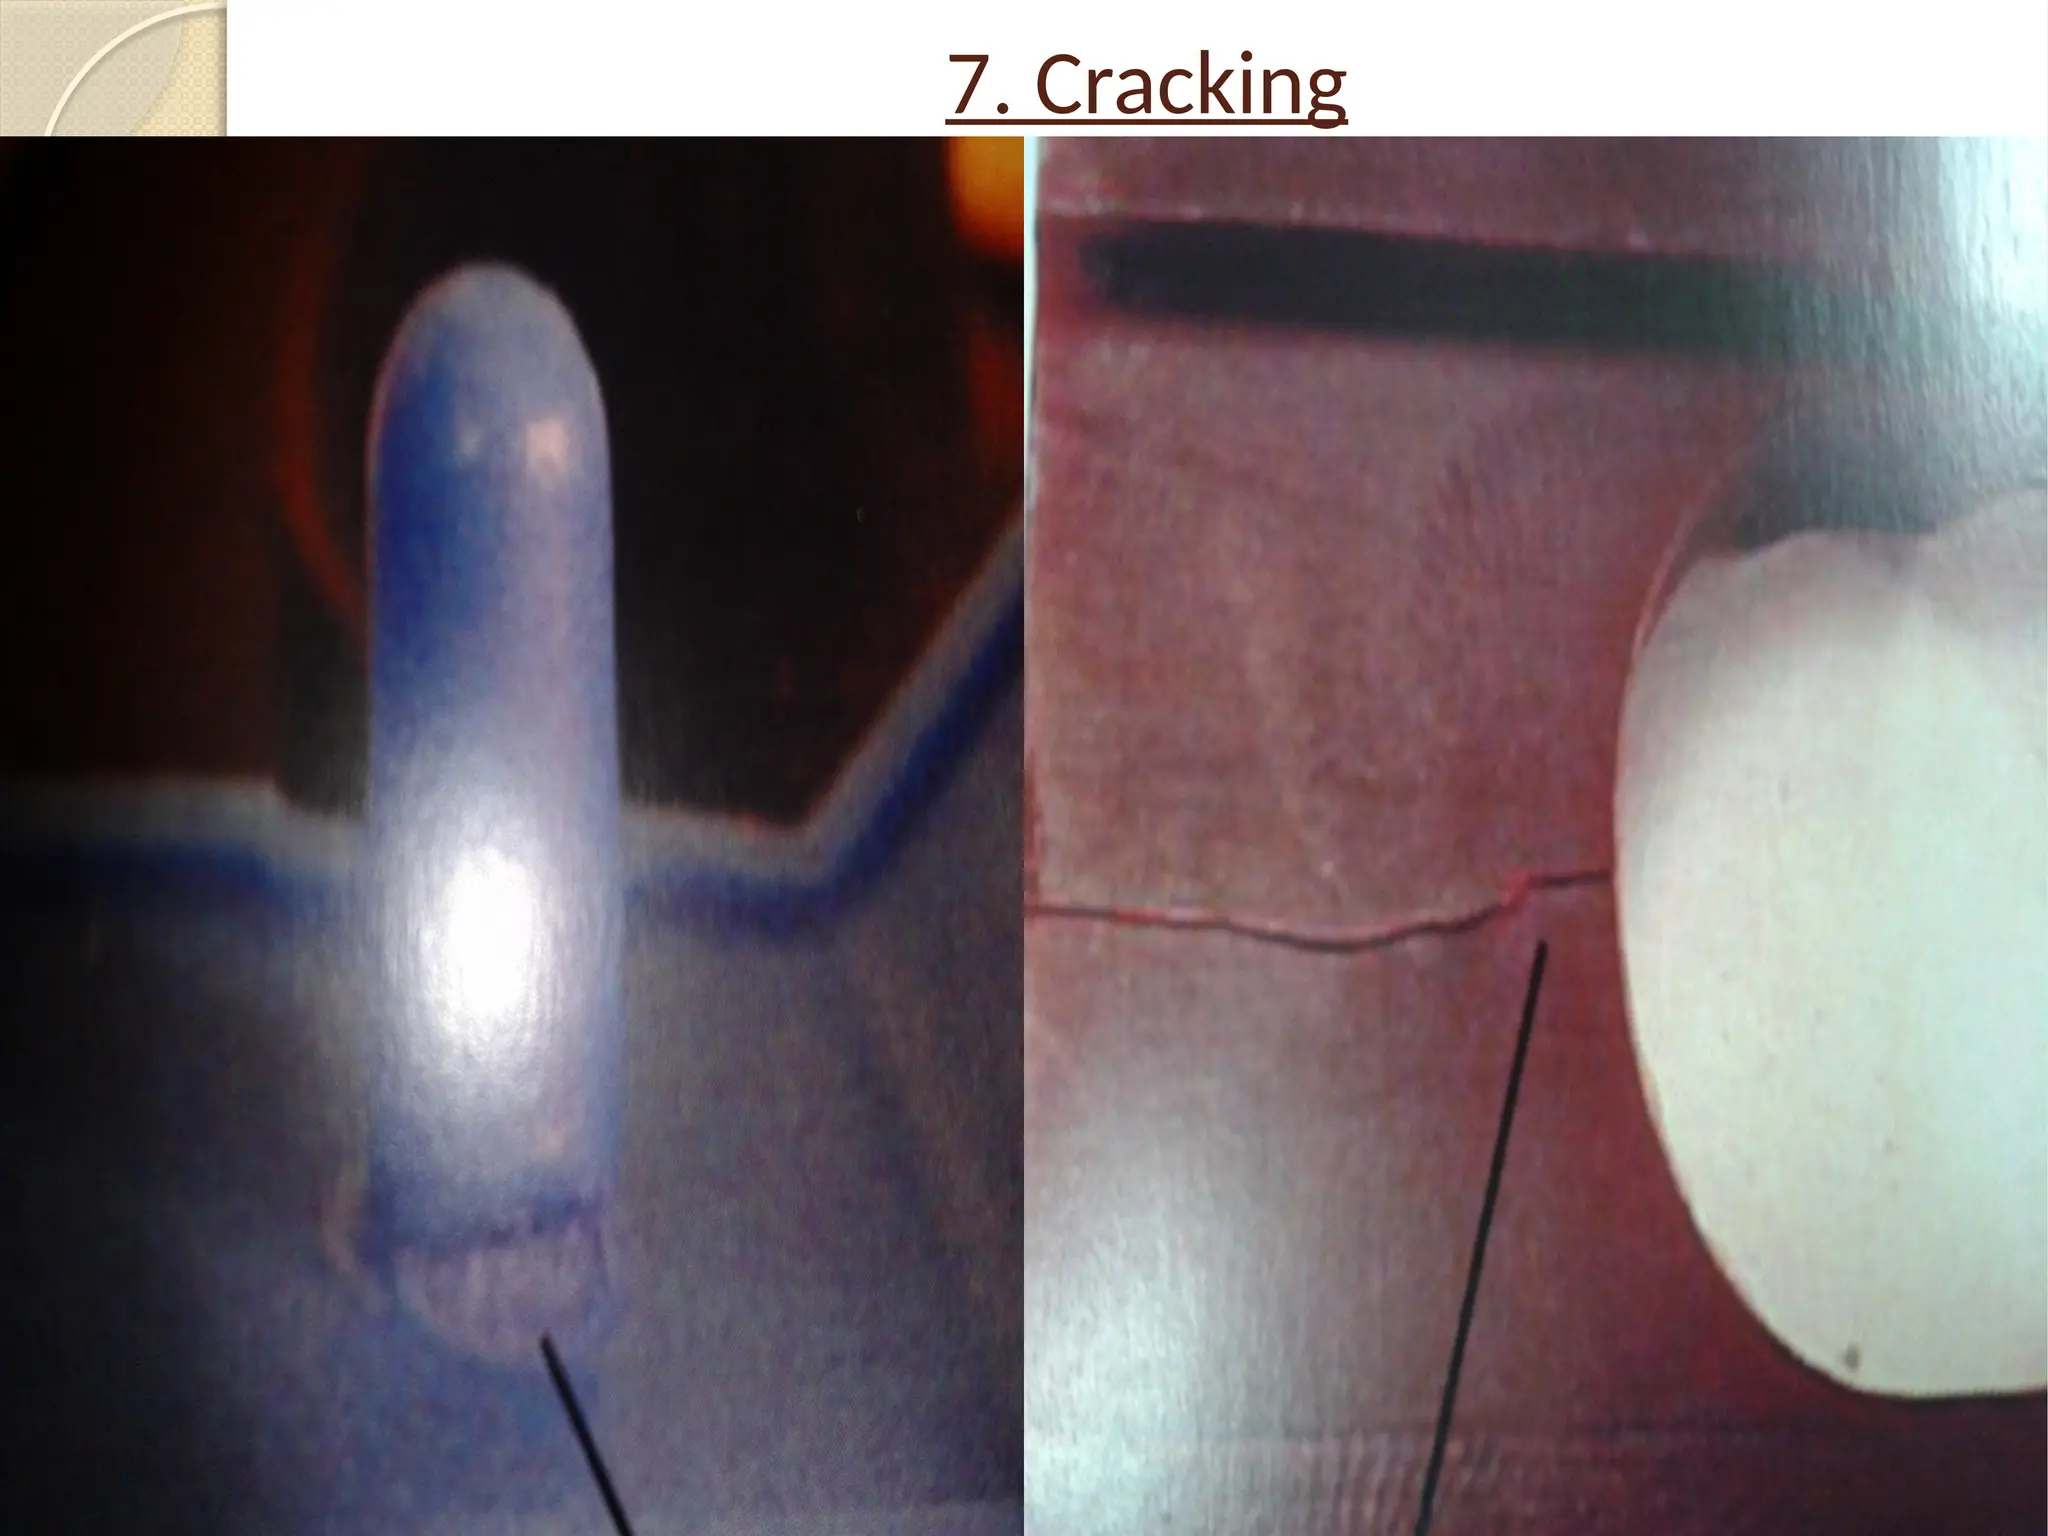
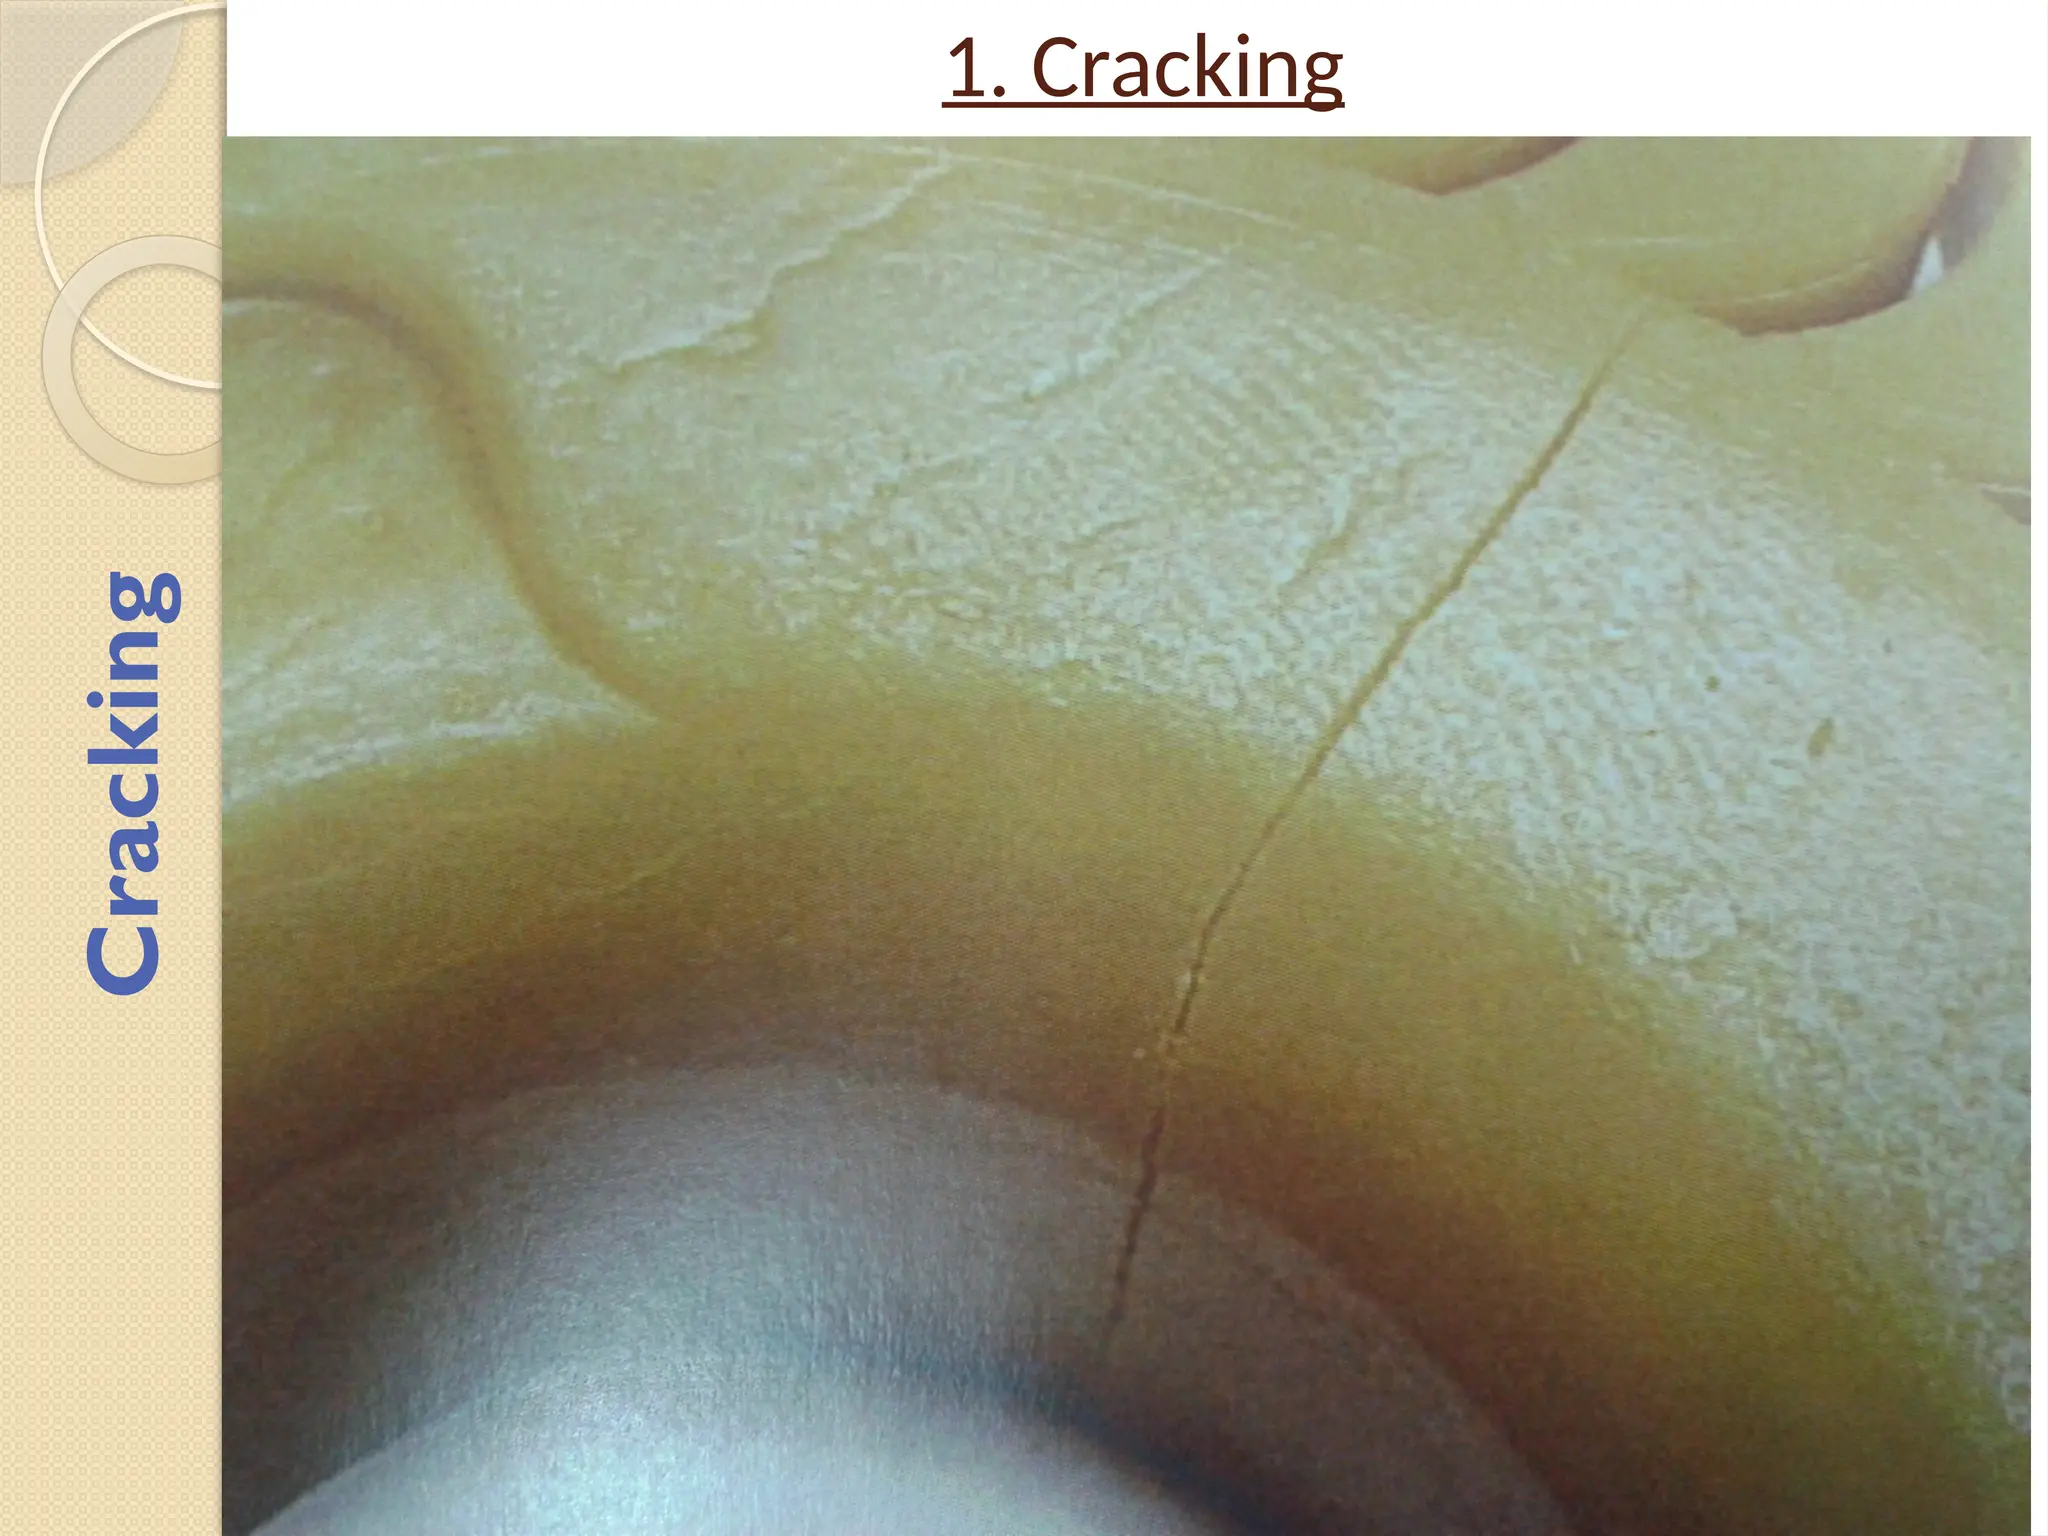
Cracking
22.
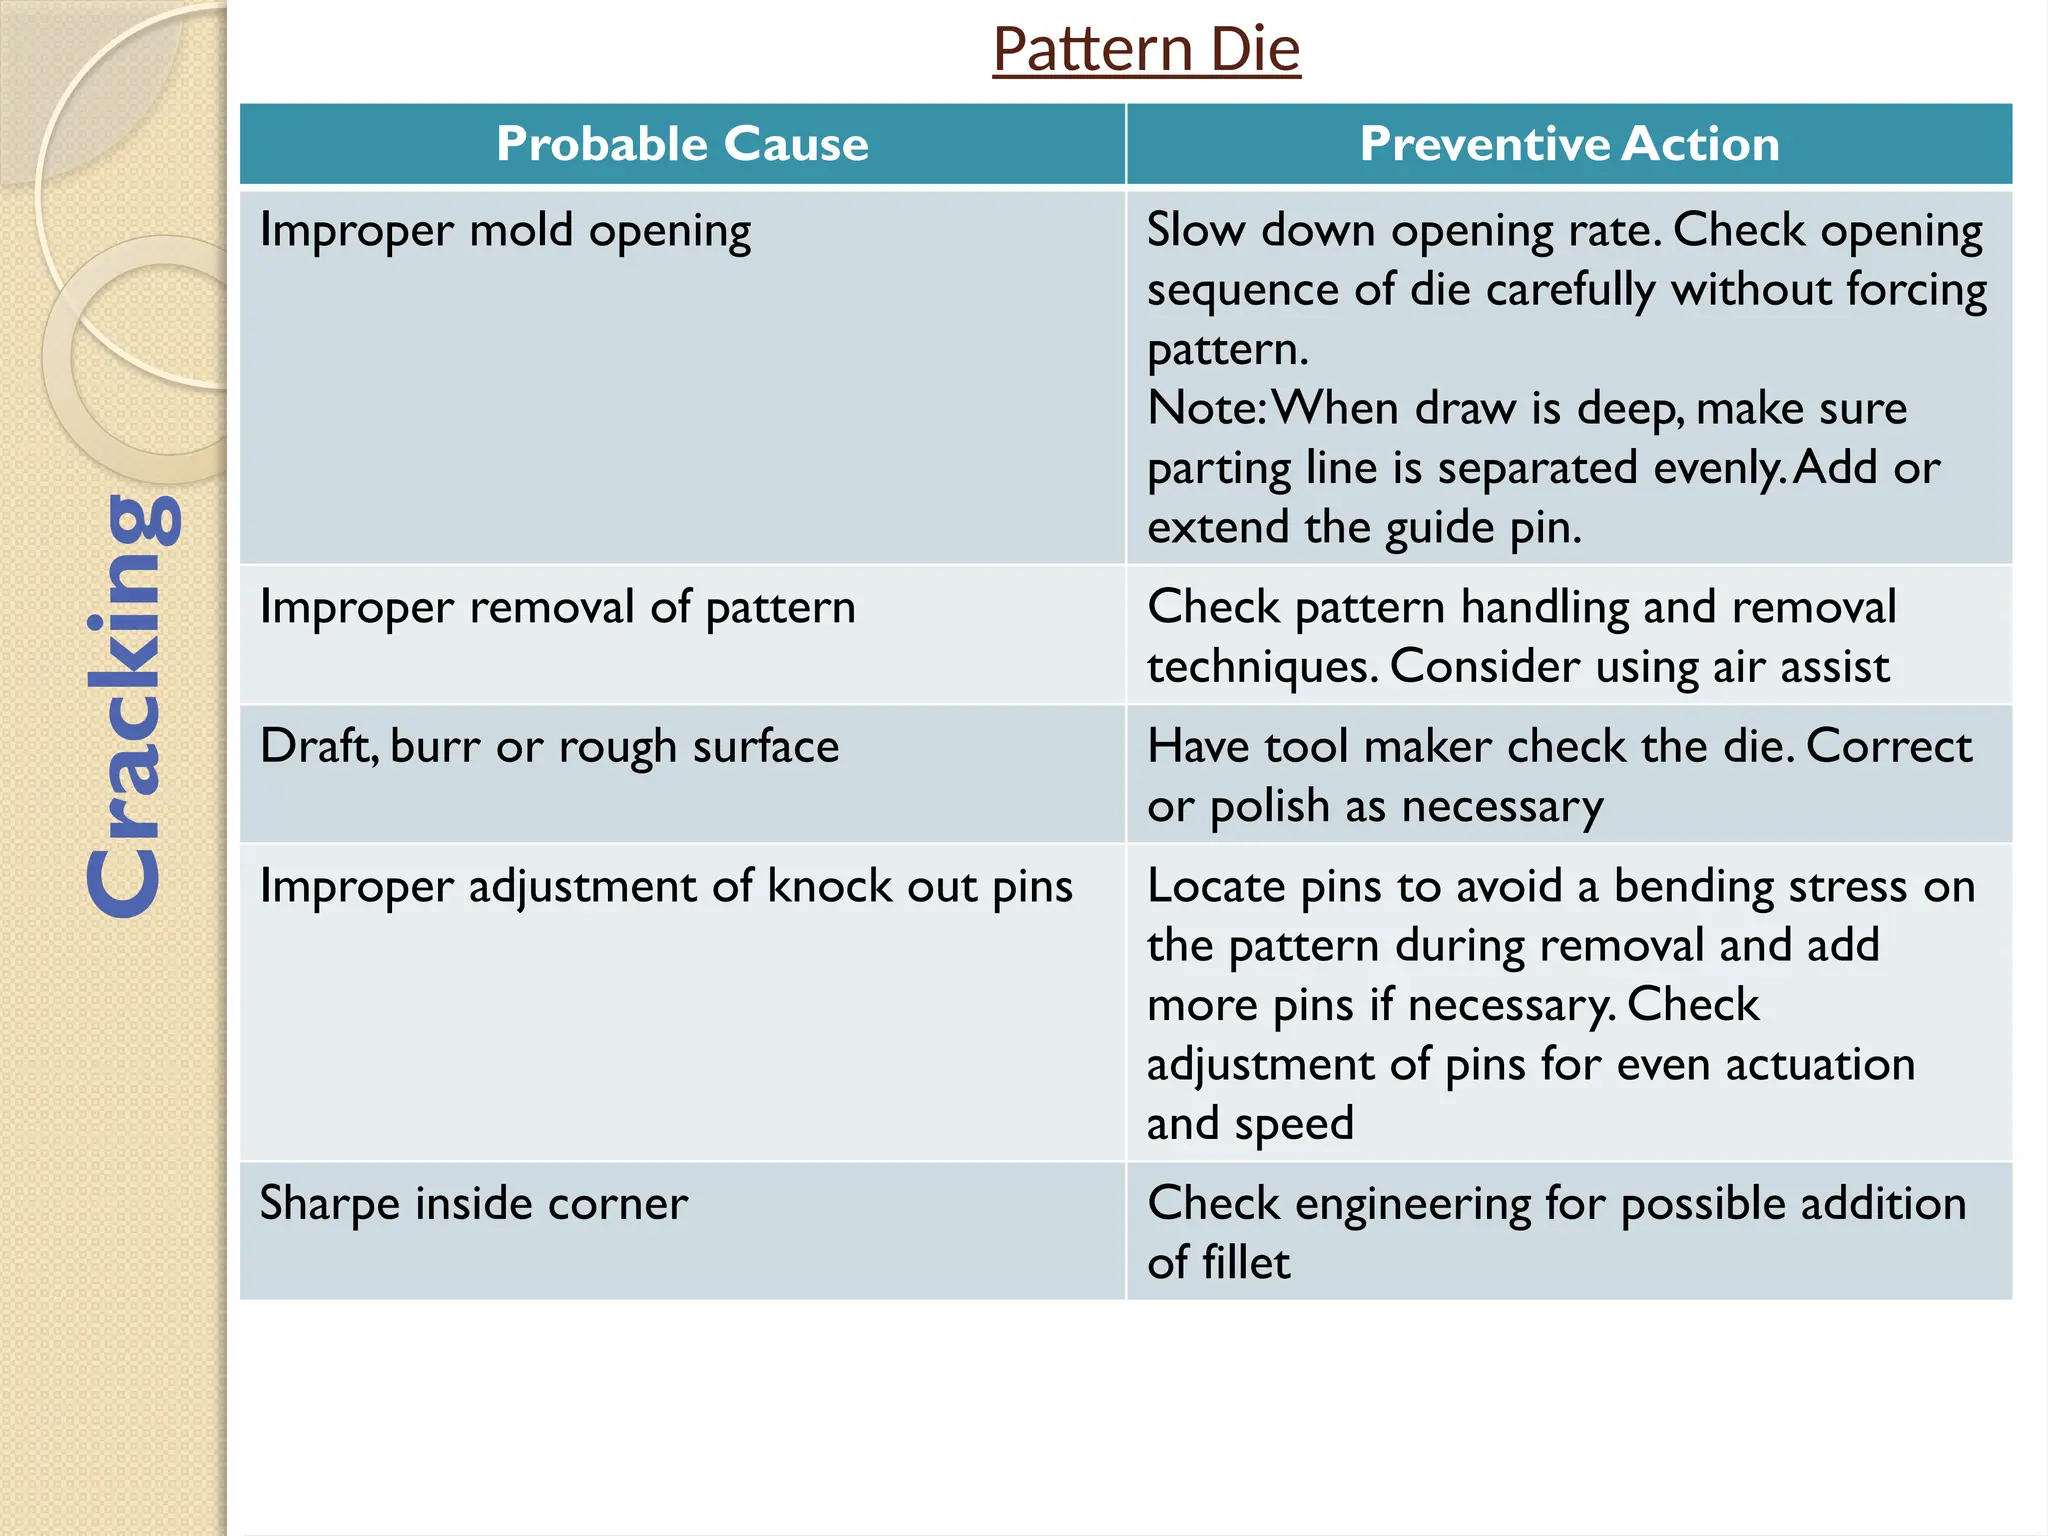
Pattern Die
Probable CausePreventive Action
Improper mold opening Slow down opening rate. Check opening
sequence of die carefully without forcing
pattern.
Note:When draw is deep, make sure
parting line is separated evenly.Add or
extend the guide pin.
Improper removal of pattern Check pattern handling and removal
techniques. Consider using air assist
Draft, burr or rough surface Have tool maker check the die. Correct
or polish as necessary
Improper adjustment of knock out pins Locate pins to avoid a bending stress on
the pattern during removal and add
more pins if necessary. Check
adjustment of pins for even actuation
and speed
Sharpe inside corner Check engineering for possible addition
of fillet
Cracking
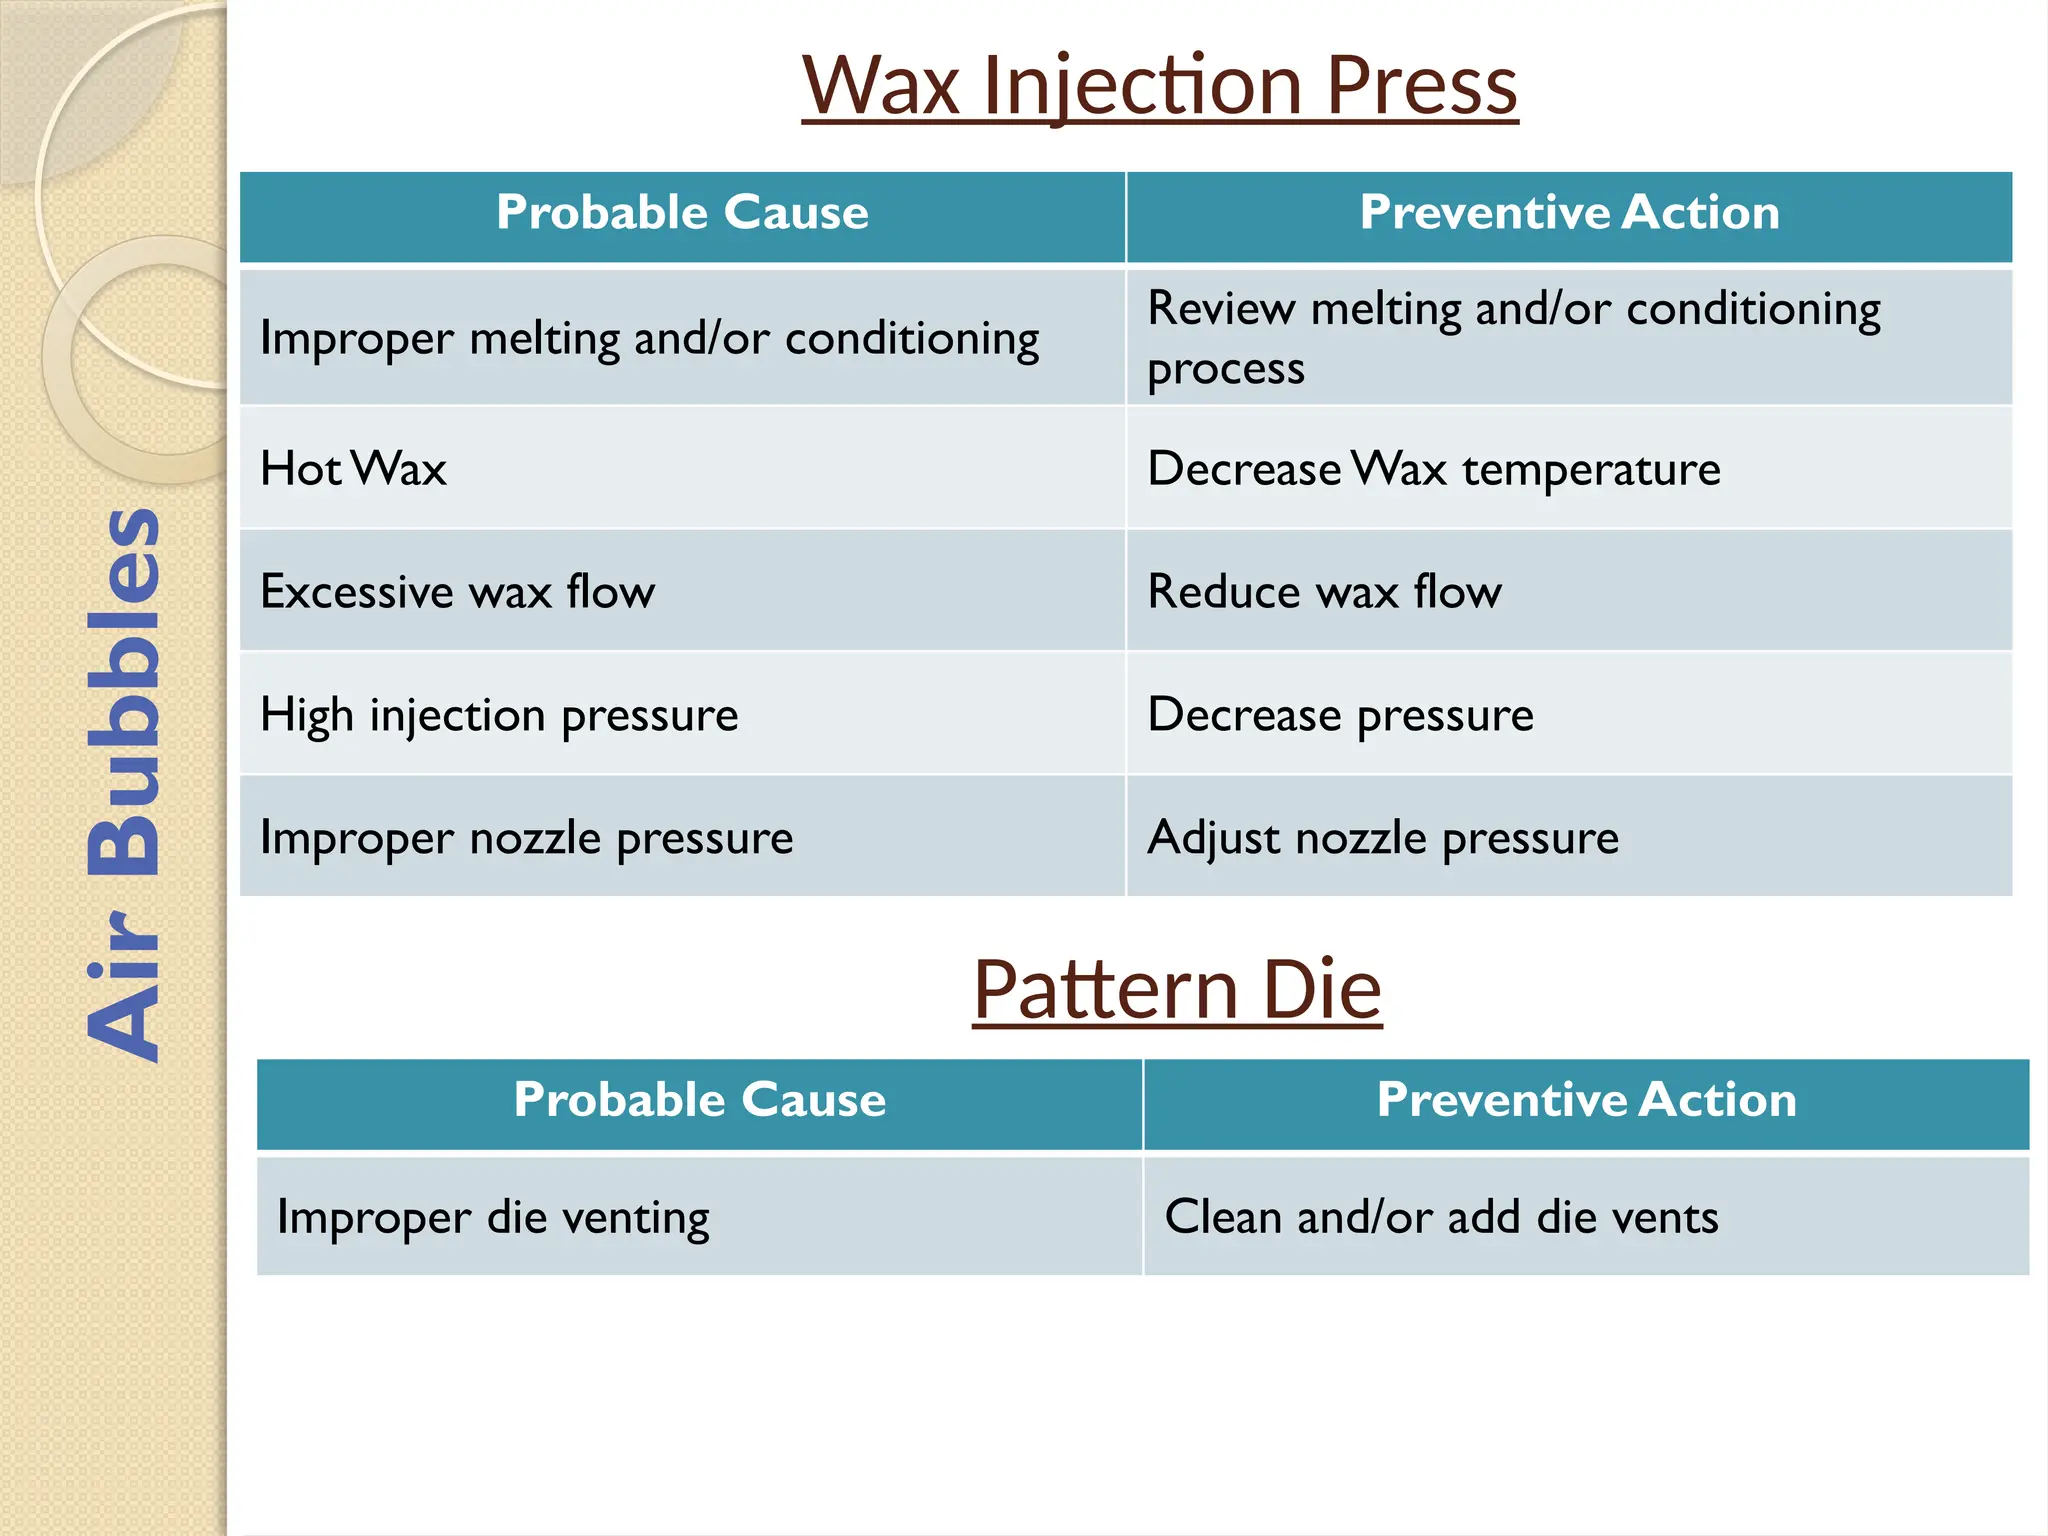
Wax Injection Press
ProbableCause Preventive Action
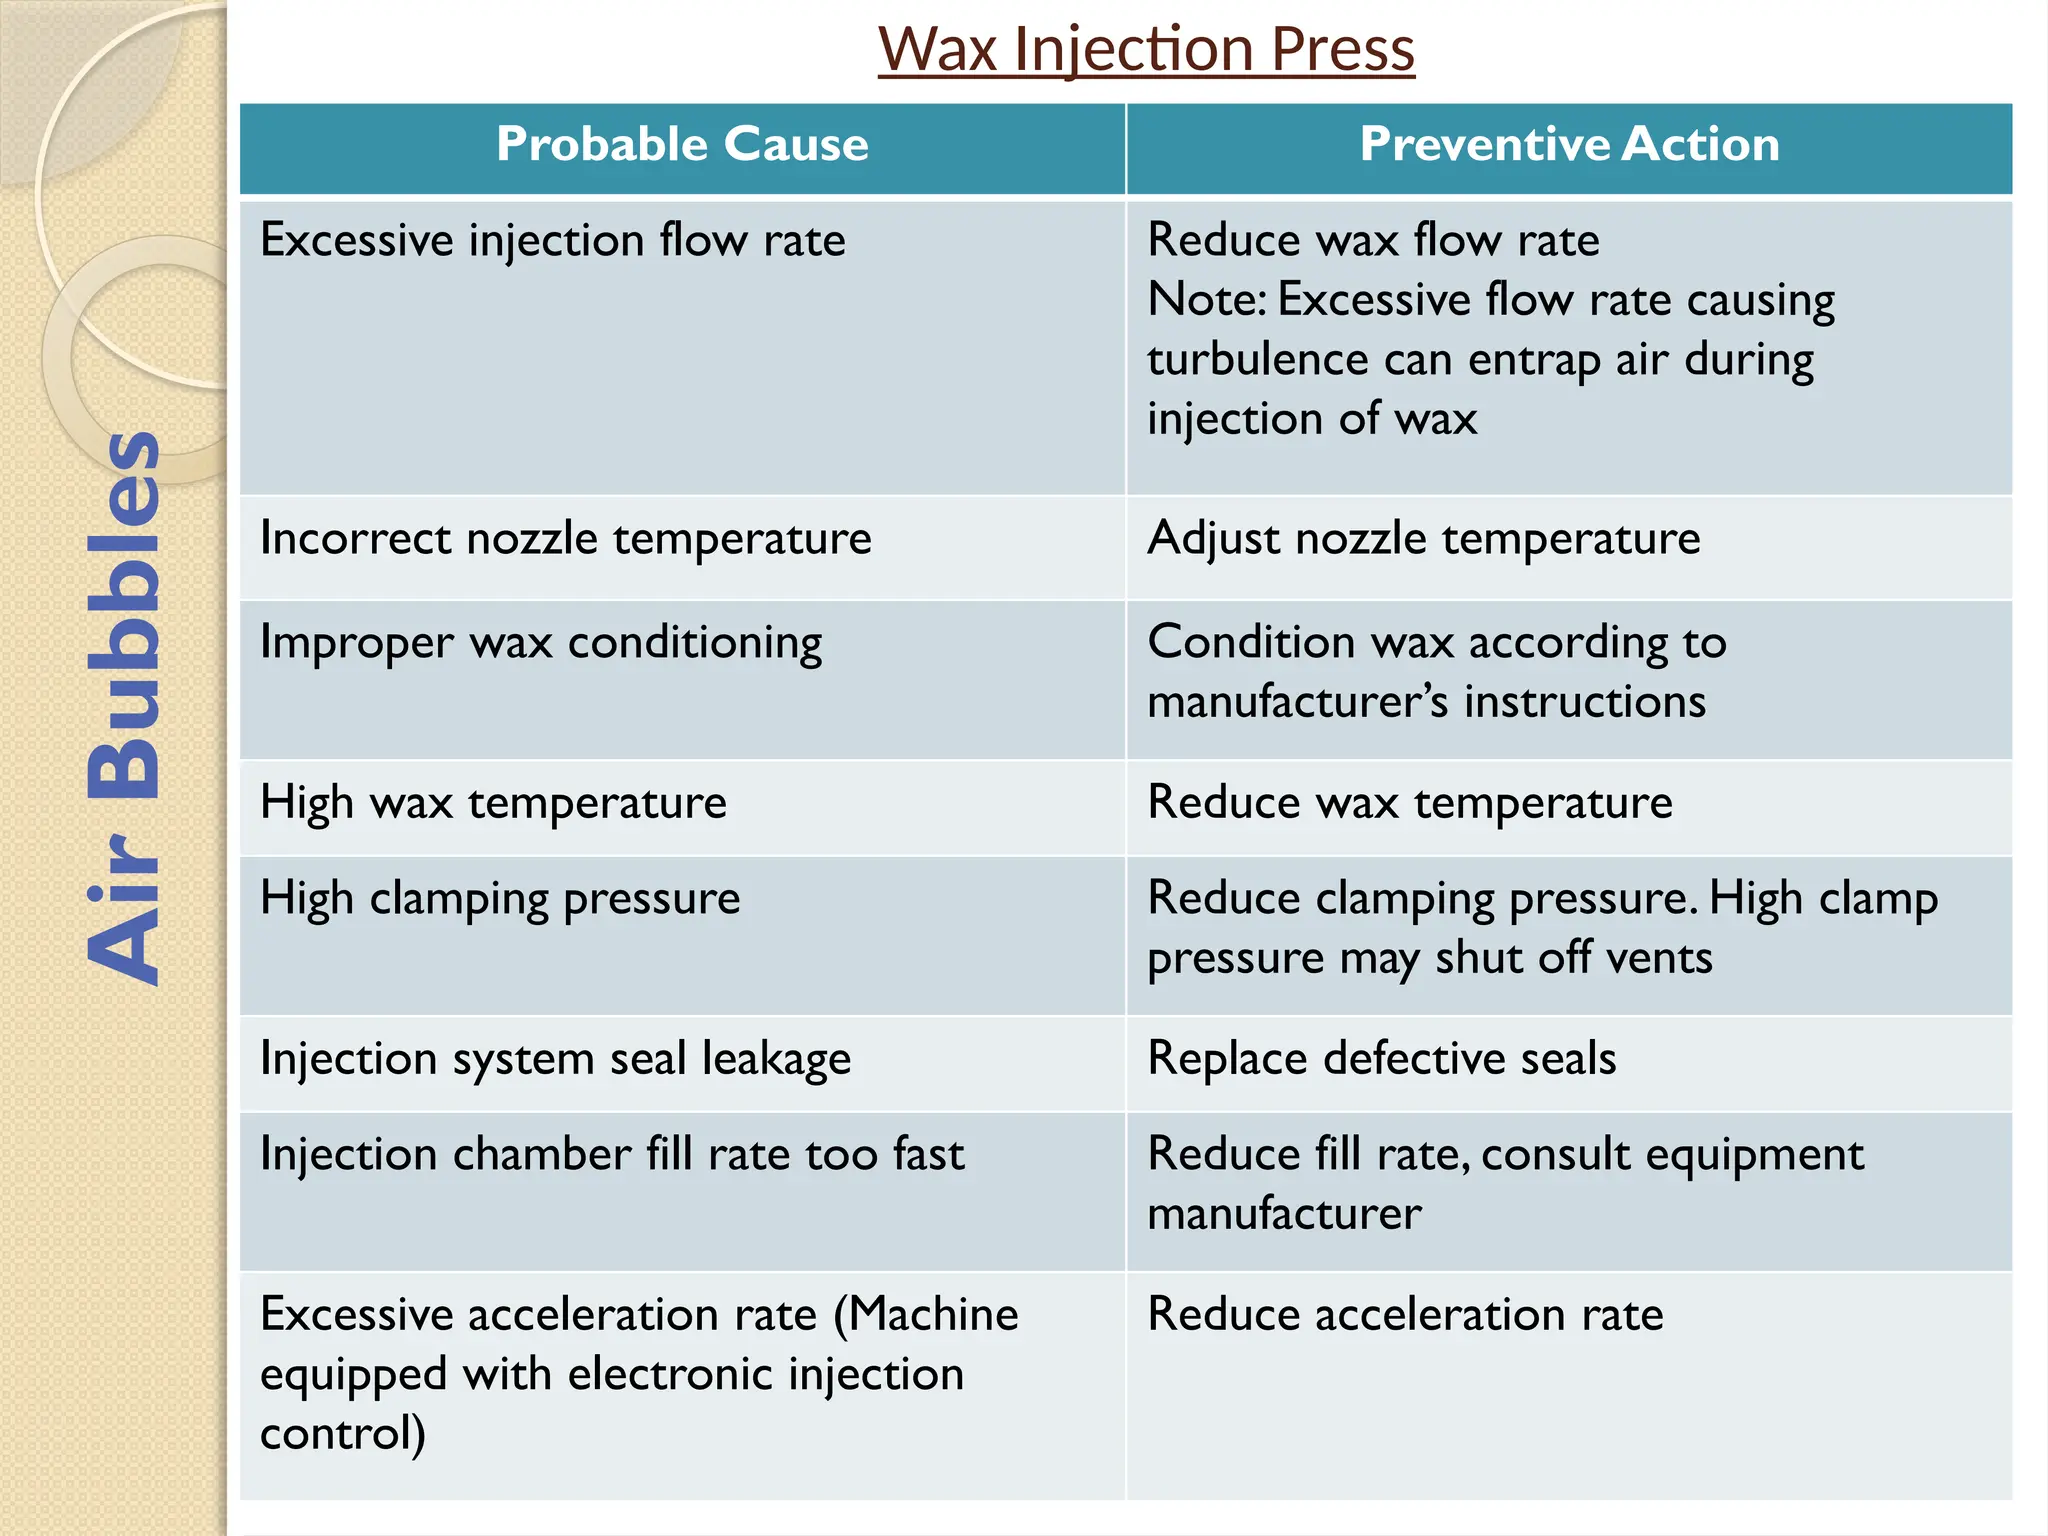
Excessive injection flow rate Reduce wax flow rate
Note: Excessive flow rate causing
turbulence can entrap air during
injection of wax
Incorrect nozzle temperature Adjust nozzle temperature
Improper wax conditioning Condition wax according to
manufacturer’s instructions
High wax temperature Reduce wax temperature
High clamping pressure Reduce clamping pressure. High clamp
pressure may shut off vents
Injection system seal leakage Replace defective seals
Injection chamber fill rate too fast Reduce fill rate, consult equipment
manufacturer
Excessive acceleration rate (Machine
equipped with electronic injection
control)
Reduce acceleration rate
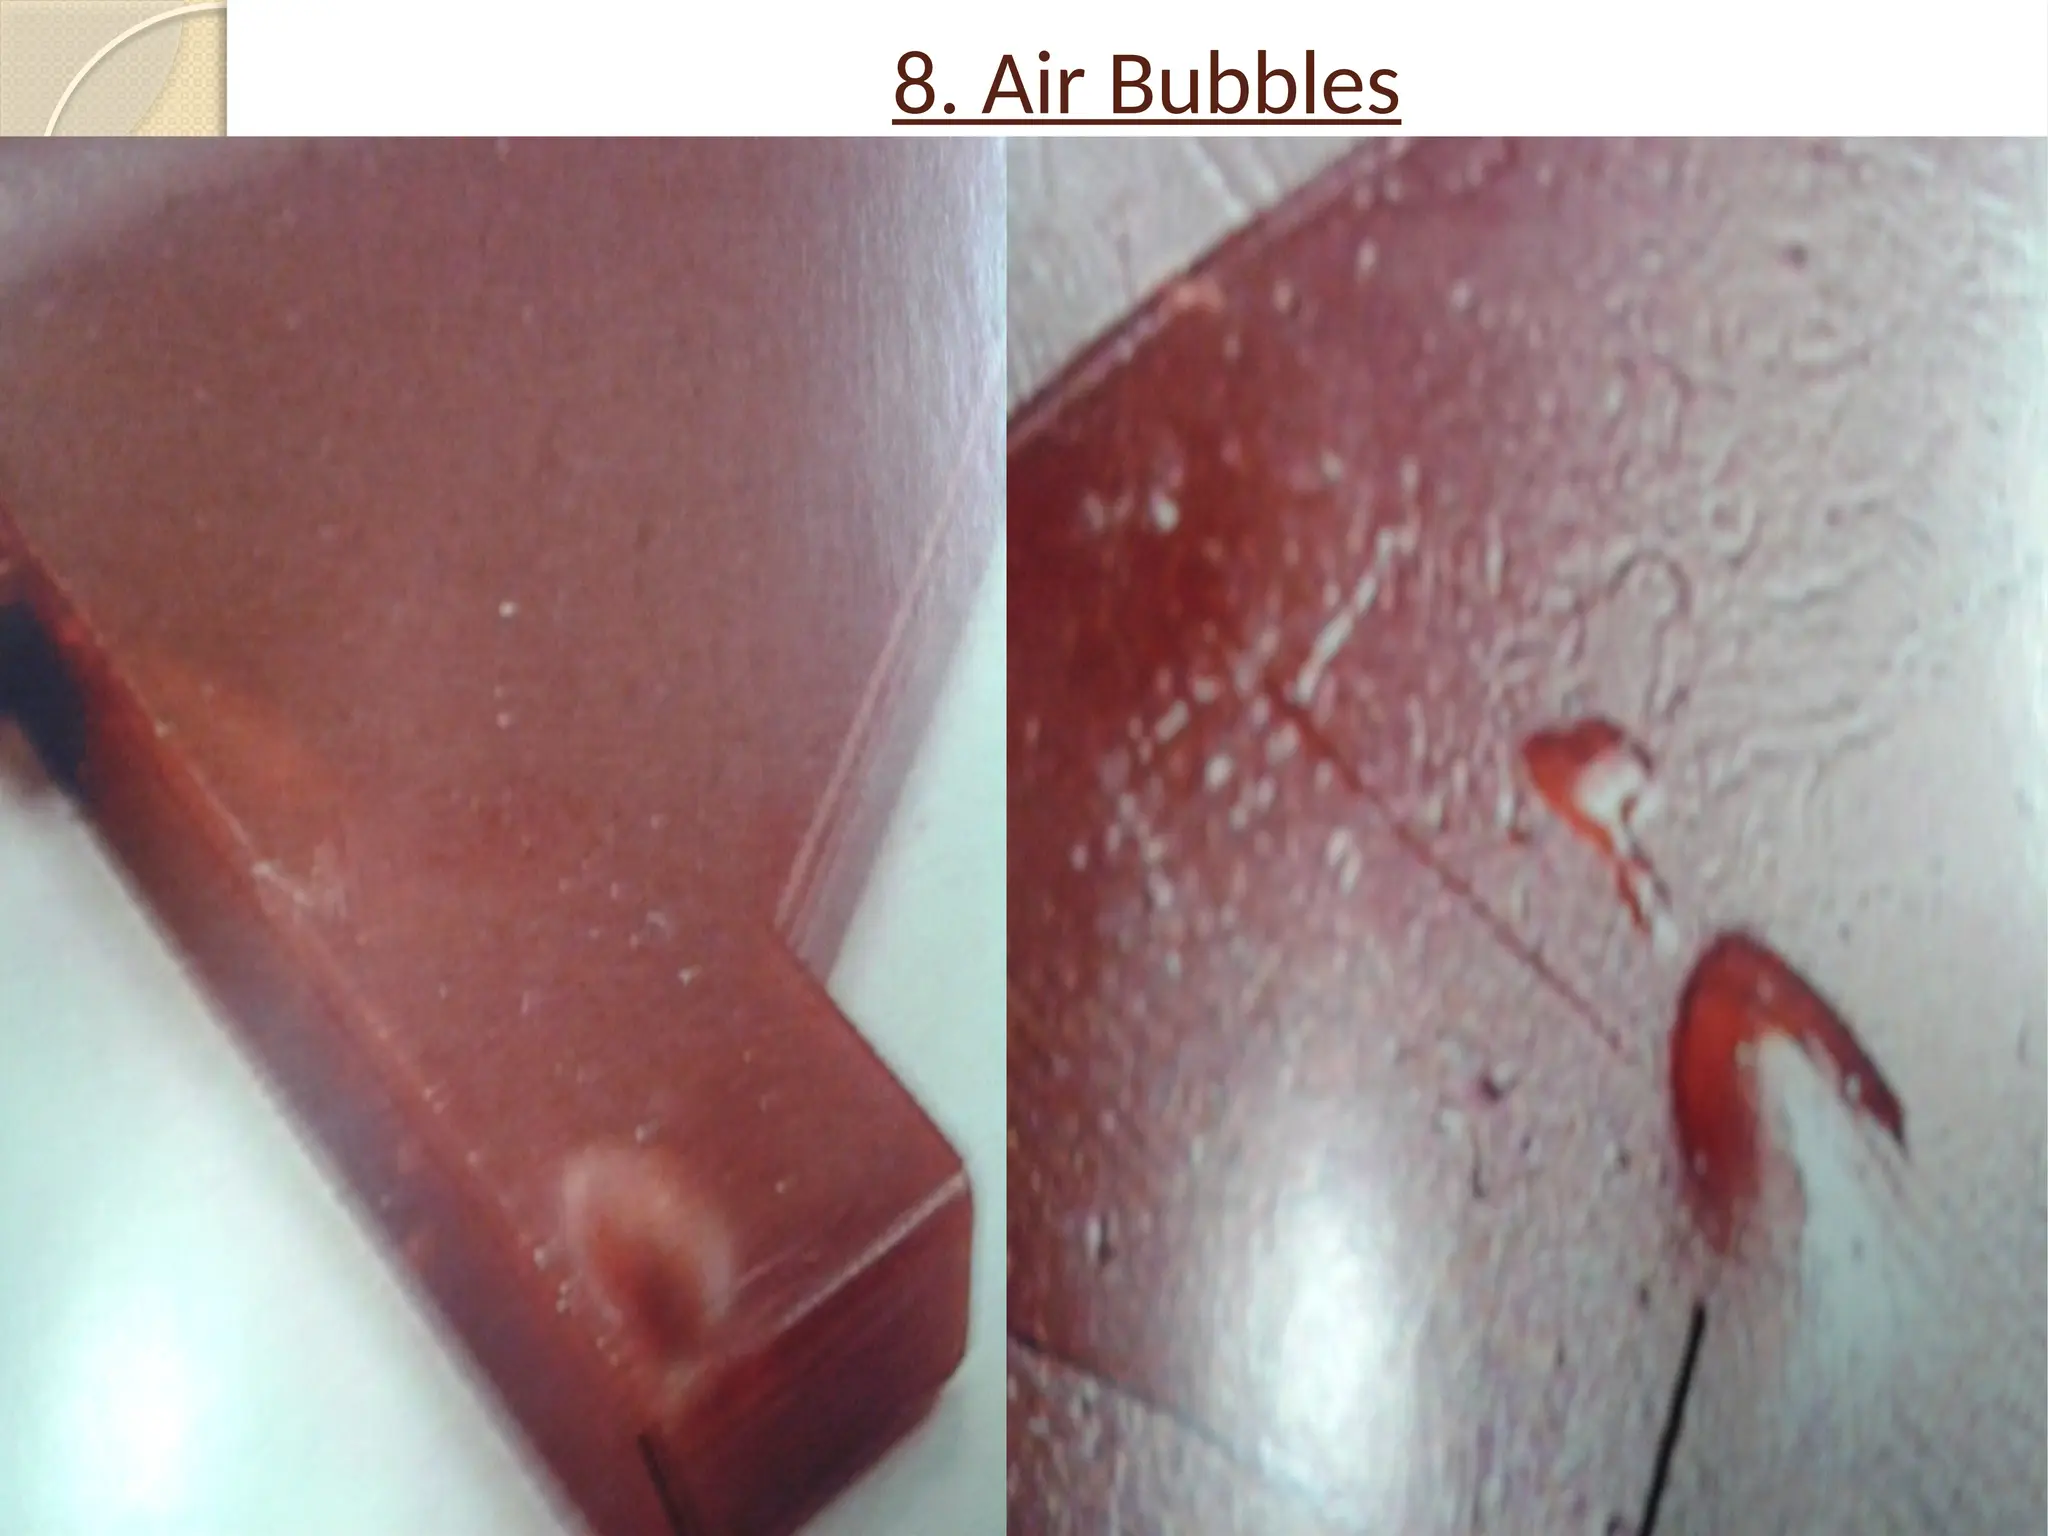
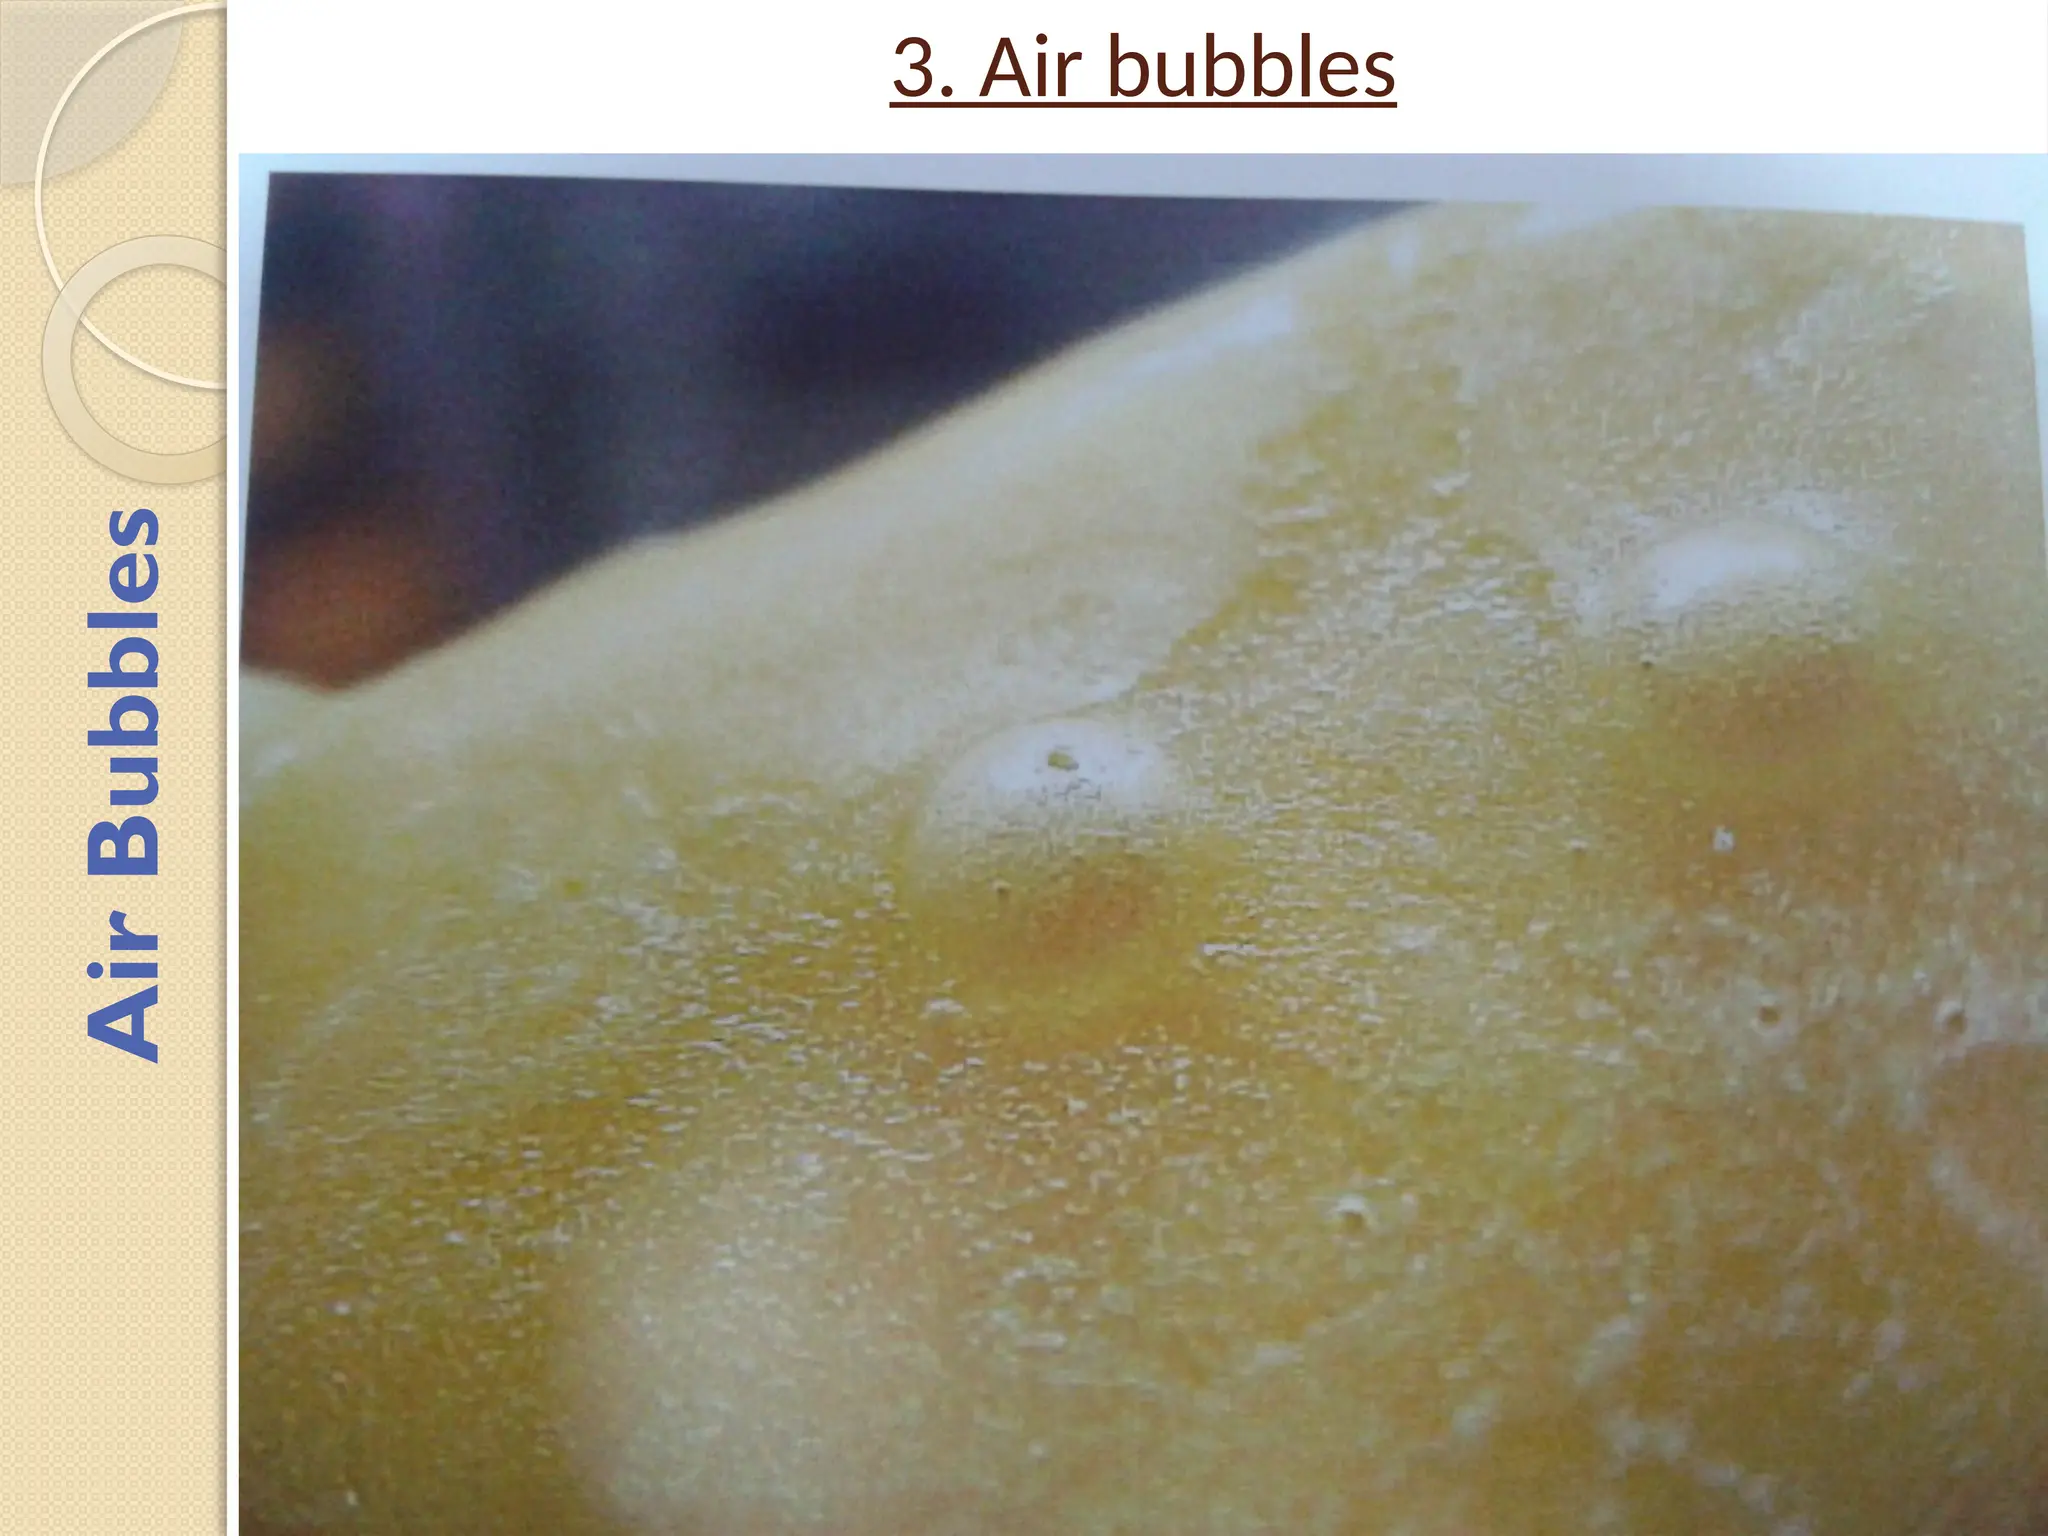
Air
Bubbles
25.
Pattern Die
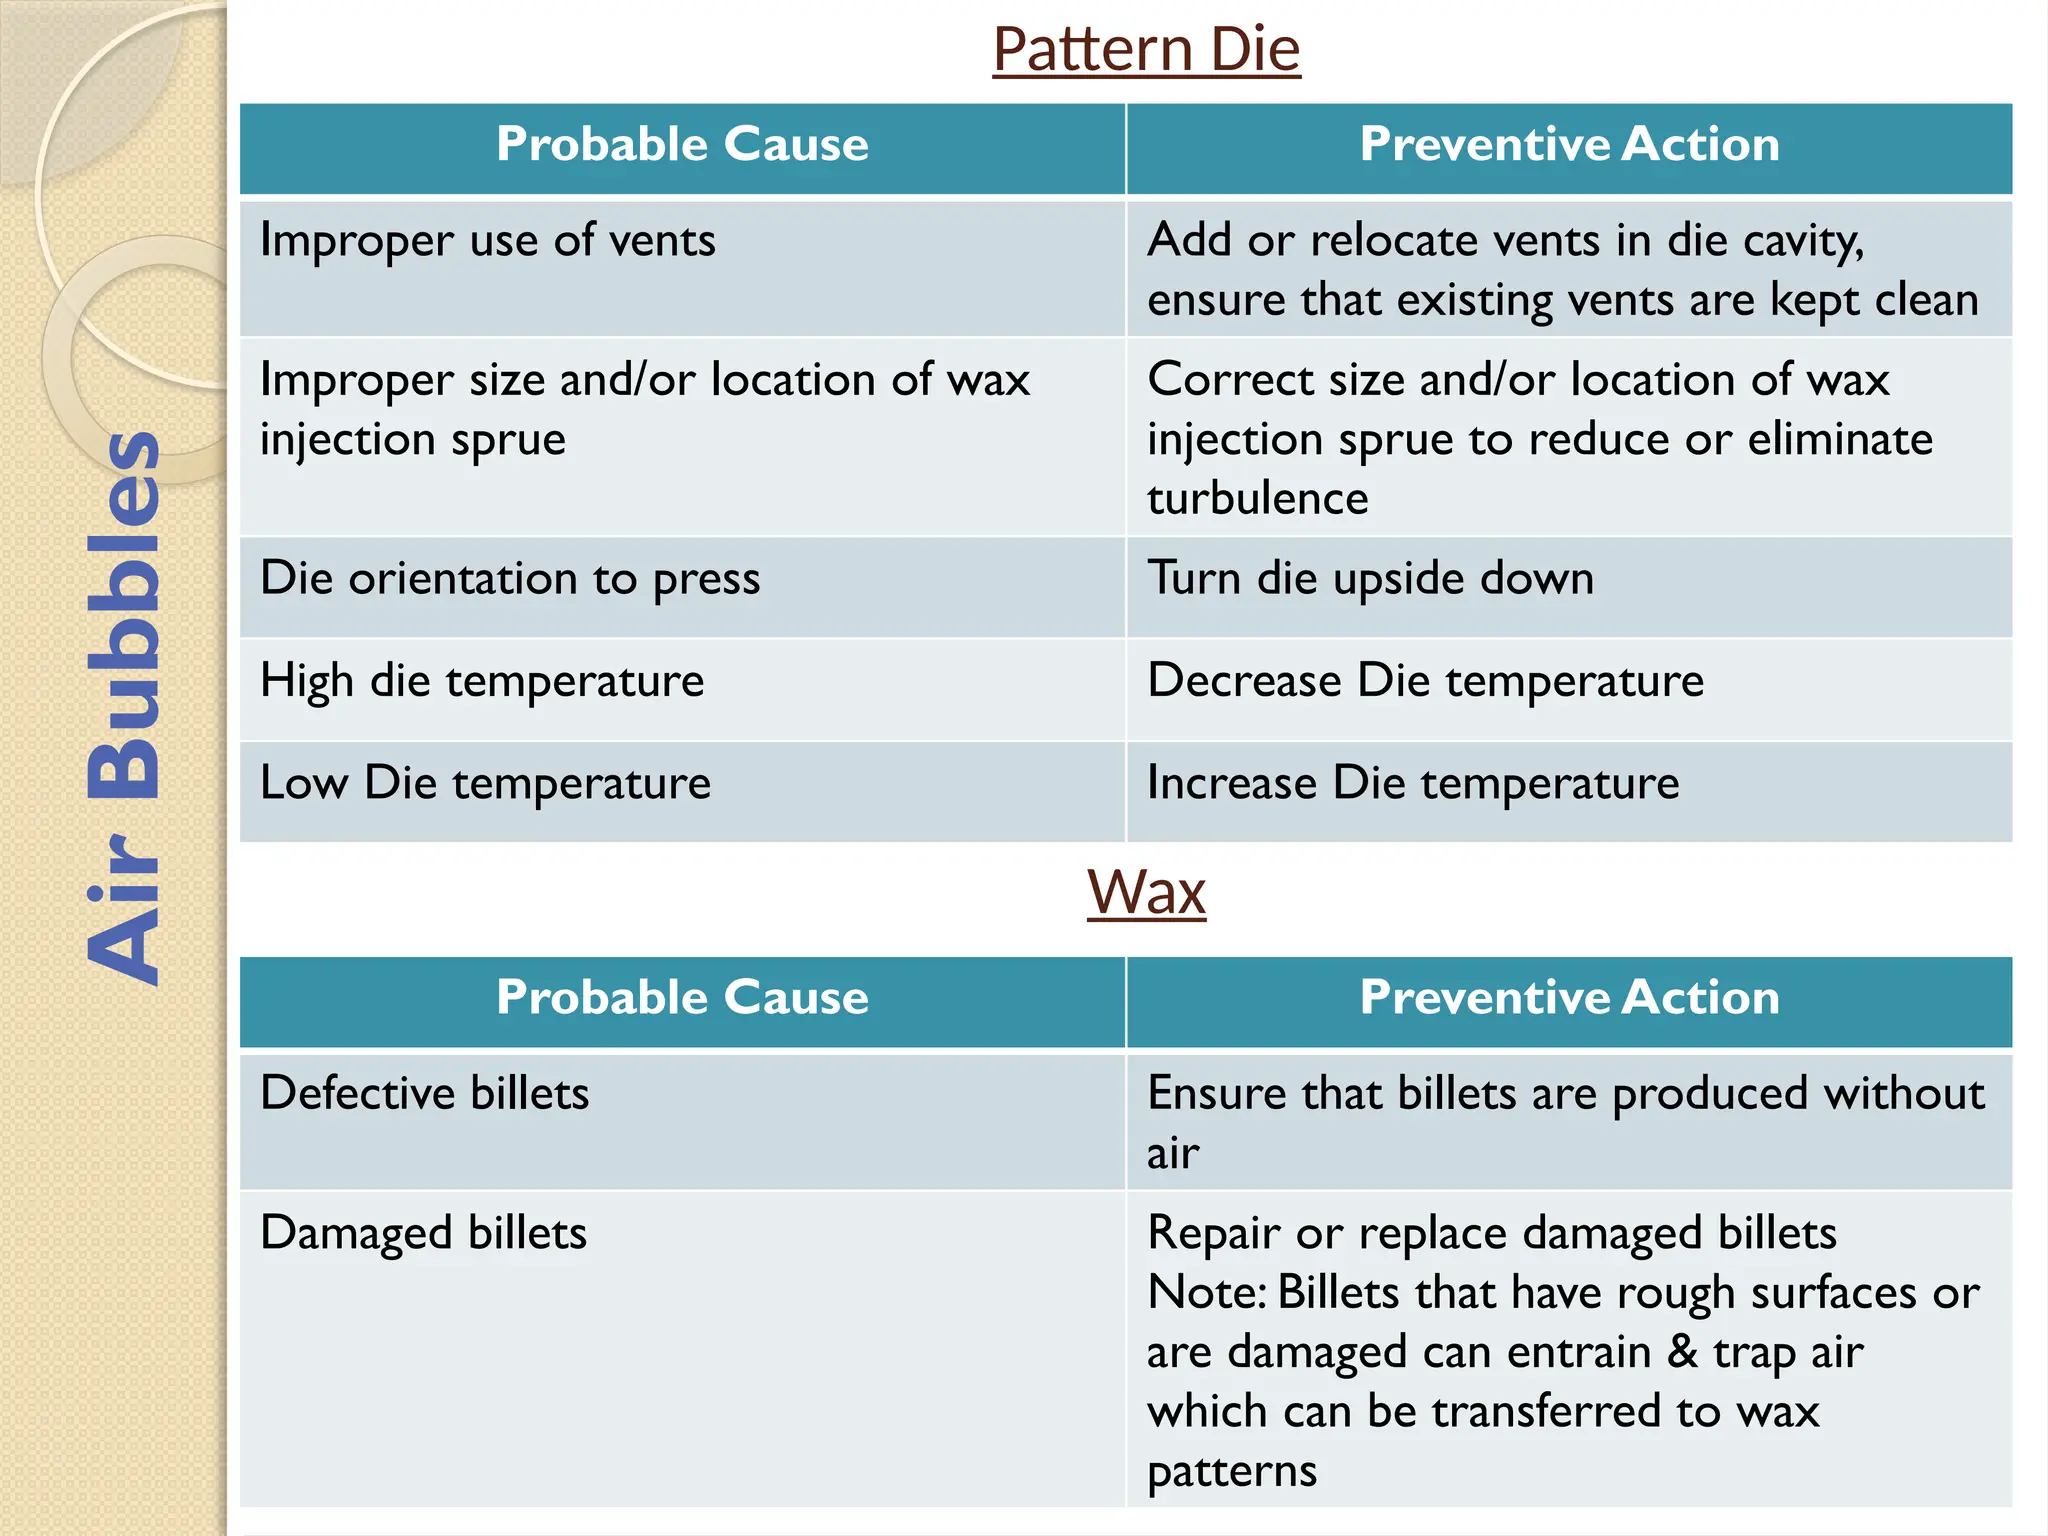
Probable CausePreventive Action
Improper use of vents Add or relocate vents in die cavity,
ensure that existing vents are kept clean
Improper size and/or location of wax
injection sprue
Correct size and/or location of wax
injection sprue to reduce or eliminate
turbulence
Die orientation to press Turn die upside down
High die temperature Decrease Die temperature
Low Die temperature Increase Die temperature
Wax
Probable Cause Preventive Action
Defective billets Ensure that billets are produced without
air
Damaged billets Repair or replace damaged billets
Note: Billets that have rough surfaces or
are damaged can entrain & trap air
which can be transferred to wax
patterns
Air
Bubbles
26.
Other
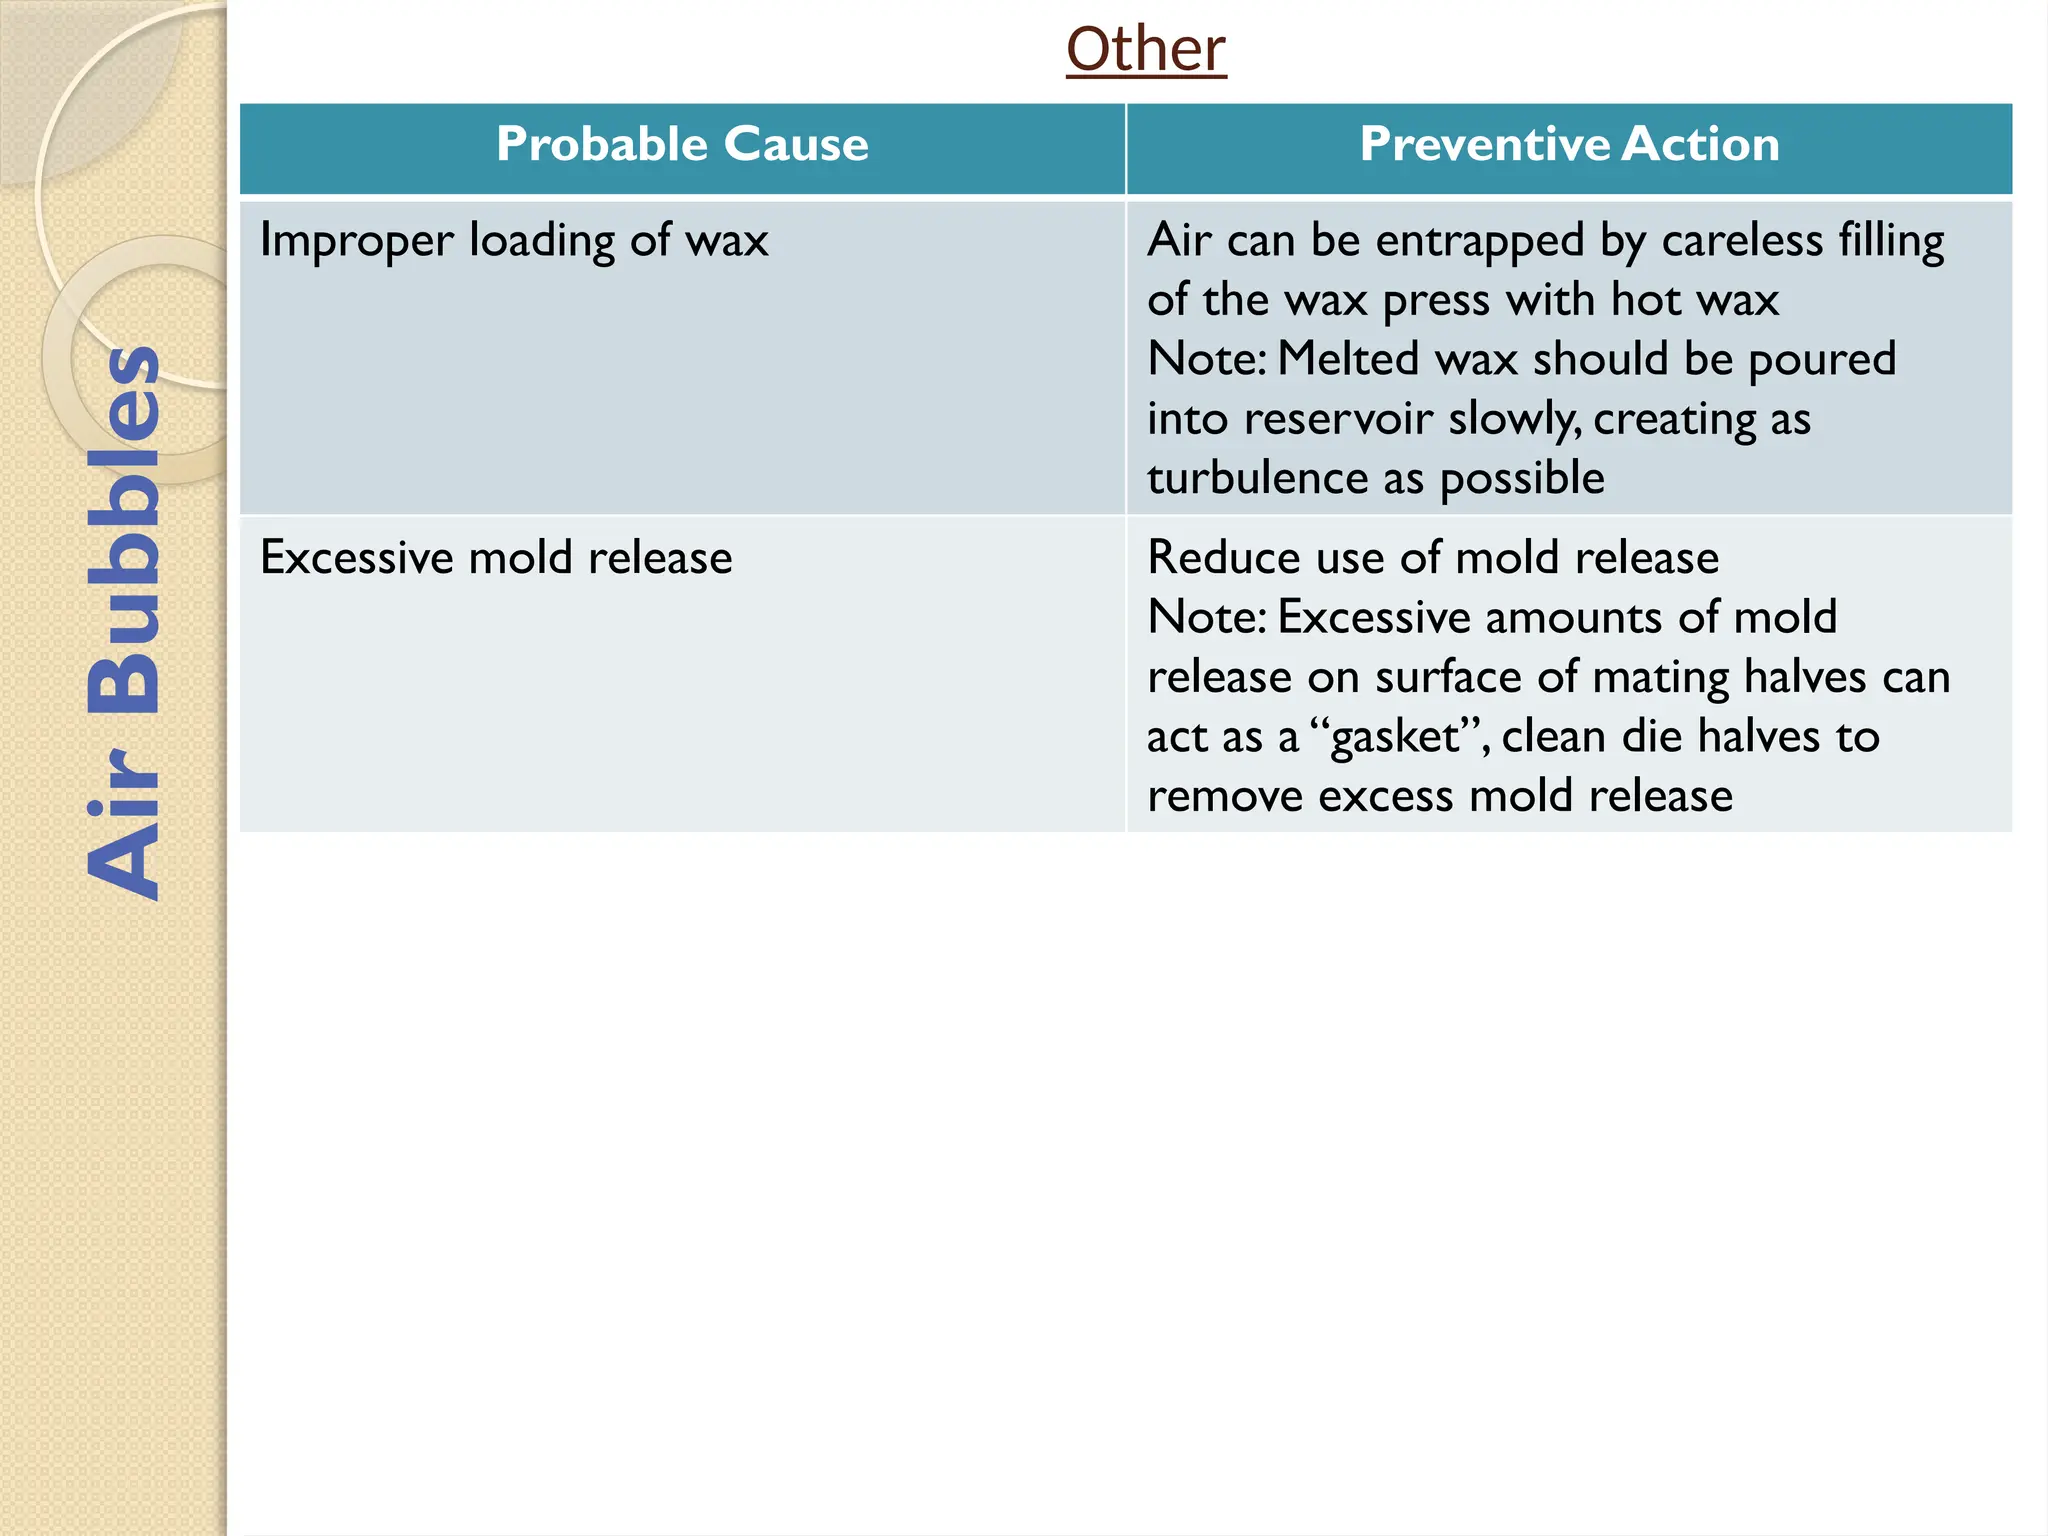
Probable Cause PreventiveAction
Improper loading of wax Air can be entrapped by careless filling
of the wax press with hot wax
Note: Melted wax should be poured
into reservoir slowly, creating as
turbulence as possible
Excessive mold release Reduce use of mold release
Note: Excessive amounts of mold
release on surface of mating halves can
act as a “gasket”, clean die halves to
remove excess mold release
Air
Bubbles
27.
Wax Injection Press
ProbableCause Preventive Action
Injection pressure variation Maintain consistent injection pressure
Note: Low pressure will create reduce
dimensions. High pressure will increase
dimension.
Injection time variation Maintain consistent injection time
Note: Short cycle will reduce dimension.
Long cycle will increase dimension.
Wax temperature variation Maintain uniform wax temperature
Note: Low temperature will increase
dimensions. High temperature will
reduce dimension.
Die temperature variation Provide proper cooling/heating to
maintain consistent die temperature
High nozzle temperature Decrease nozzle temperature
Note: High temperature can lead to
dimension variation on small parts
Clamp pressure variation Maintain sufficient clamp pressure to
prevent opening of die
9. Dimensional Variation
Dimensional
Variation
28.
Pattern Die
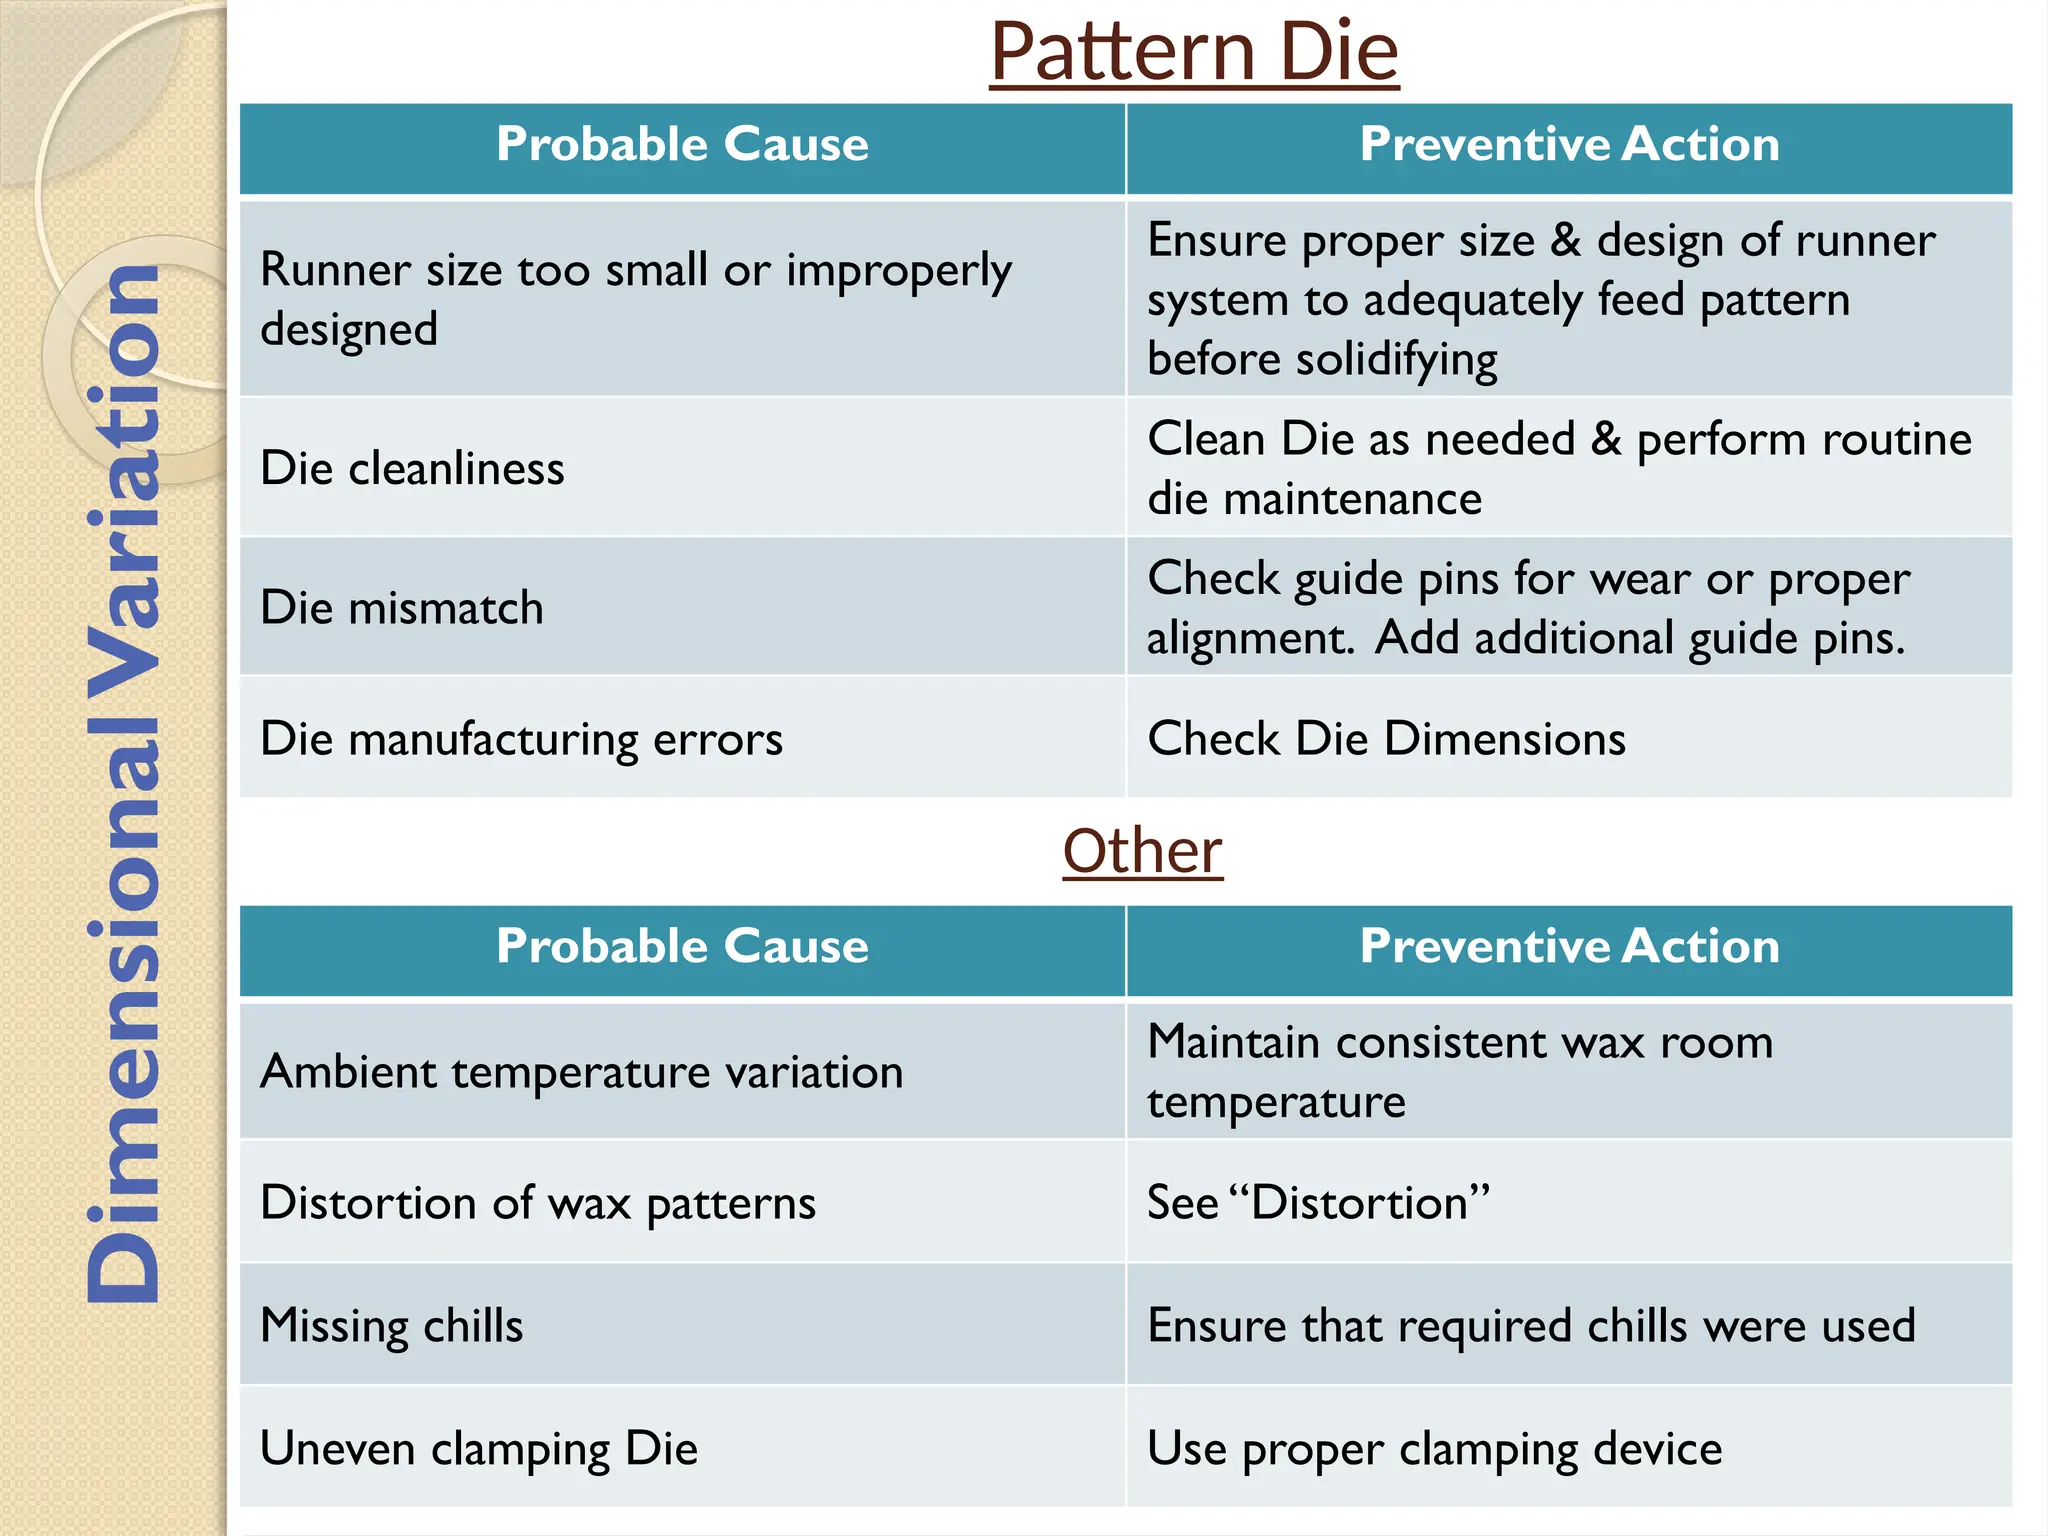
Probable CausePreventive Action
Runner size too small or improperly
designed
Ensure proper size & design of runner
system to adequately feed pattern
before solidifying
Die cleanliness
Clean Die as needed & perform routine
die maintenance
Die mismatch
Check guide pins for wear or proper
alignment. Add additional guide pins.
Die manufacturing errors Check Die Dimensions
Dimensional
Variation
Other
Probable Cause Preventive Action
Ambient temperature variation
Maintain consistent wax room
temperature
Distortion of wax patterns See “Distortion”
Missing chills Ensure that required chills were used
Uneven clamping Die Use proper clamping device
29.
Wax
Probable Cause PreventiveAction
Incorrect shrink factor
Ensure that wax properties are within
specification. For filled waxes ensure
proper melting & agitation to maintain
uniform filler dispersion
Contaminated Wax
Check condition of the wax. Replace
wax was necessary
Filler separation
Use proper conditioning parameters
including appropriate agitation in melting
tank and in holding tank. Consult wax
supplier for proper melting and
conditioning procedures.
Dimensional
Variation
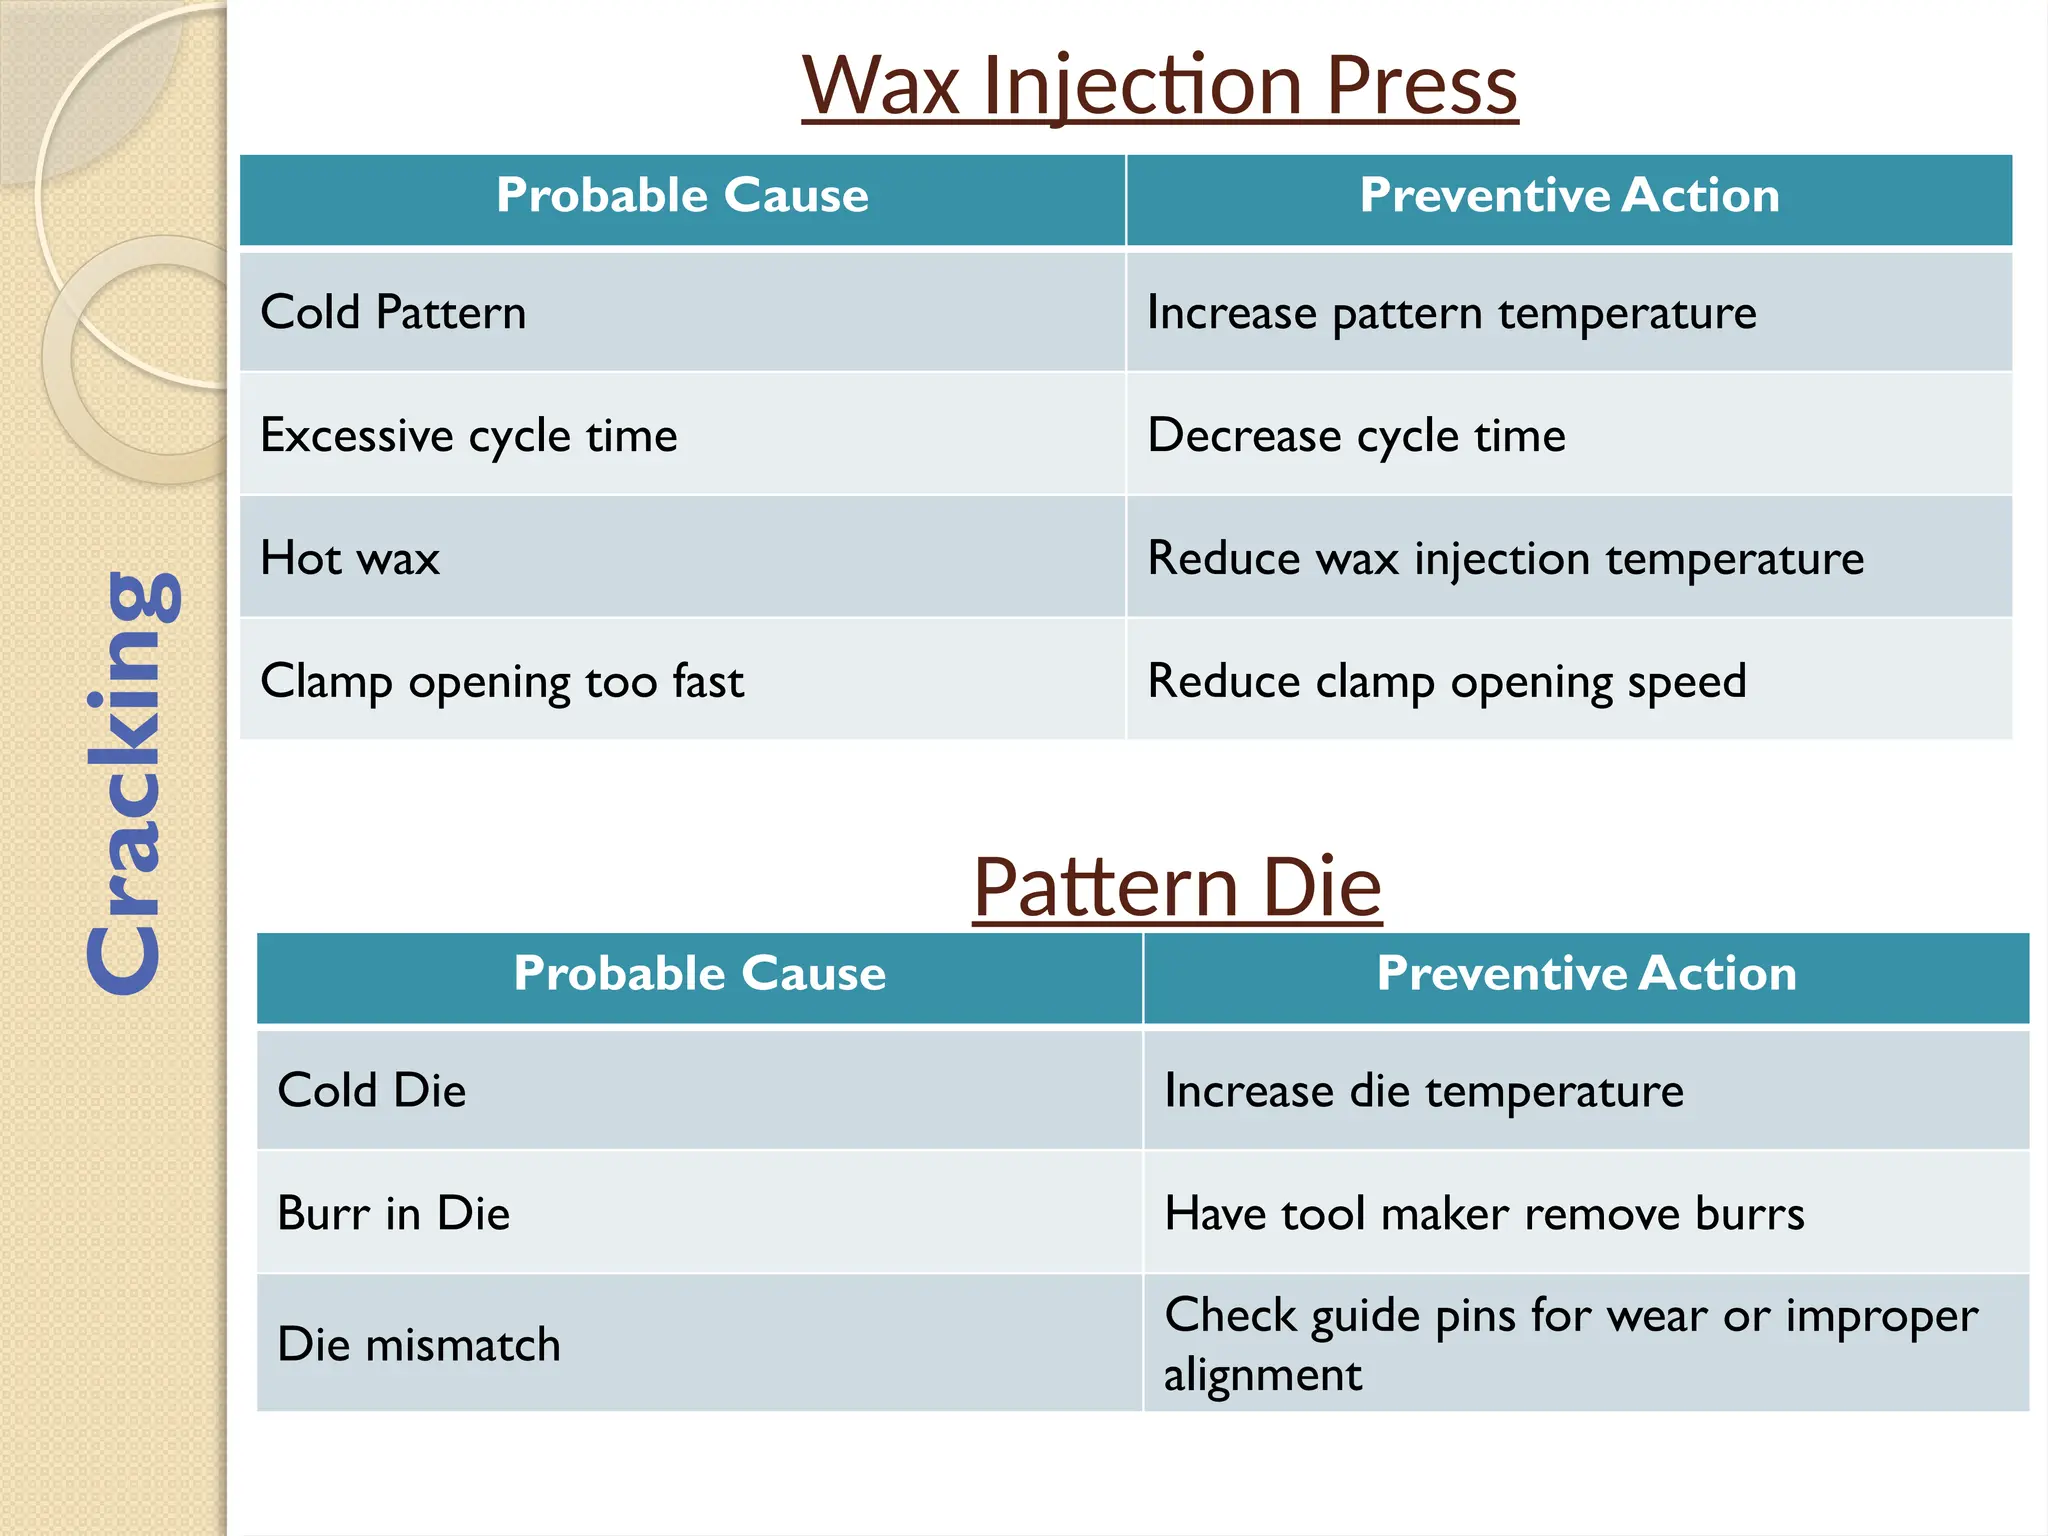
Wax Injection Press
ProbableCause Preventive Action
Cold Pattern Increase pattern temperature
Excessive cycle time Decrease cycle time
Hot wax Reduce wax injection temperature
Clamp opening too fast Reduce clamp opening speed
Cracking
Pattern Die
Probable Cause Preventive Action
Cold Die Increase die temperature
Burr in Die Have tool maker remove burrs
Die mismatch
Check guide pins for wear or improper
alignment
33.
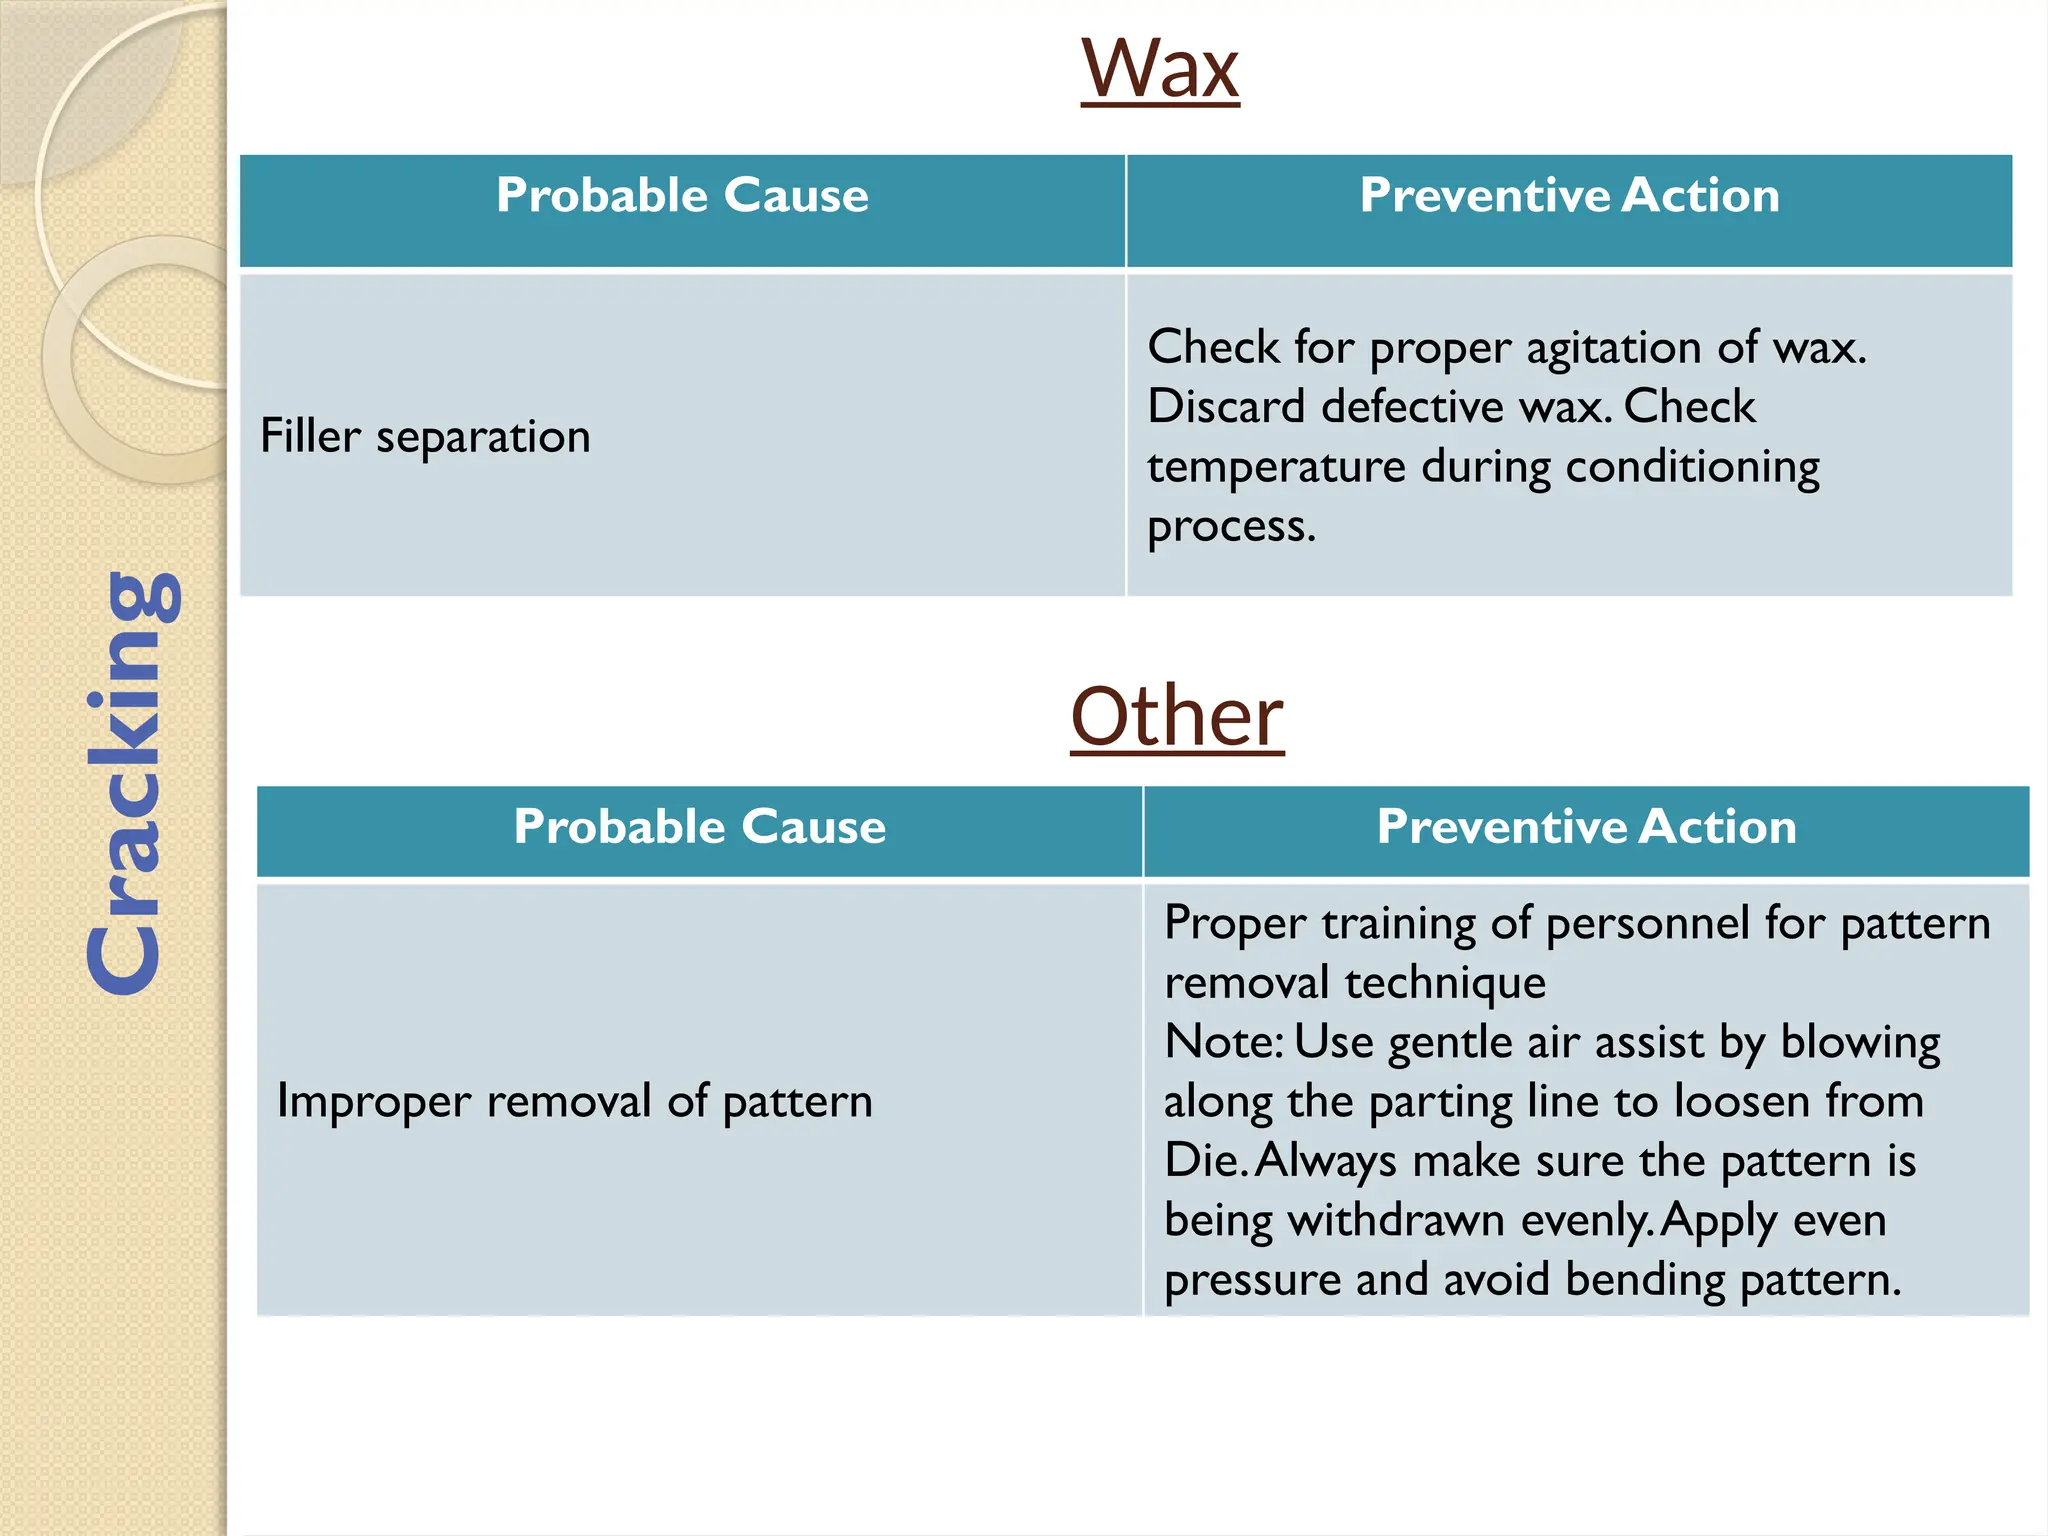
Wax
Probable Cause PreventiveAction
Filler separation
Check for proper agitation of wax.
Discard defective wax. Check
temperature during conditioning
process.
Cracking
Other
Probable Cause Preventive Action
Improper removal of pattern
Proper training of personnel for pattern
removal technique
Note: Use gentle air assist by blowing
along the parting line to loosen from
Die.Always make sure the pattern is
being withdrawn evenly.Apply even
pressure and avoid bending pattern.
Wax Injection Press
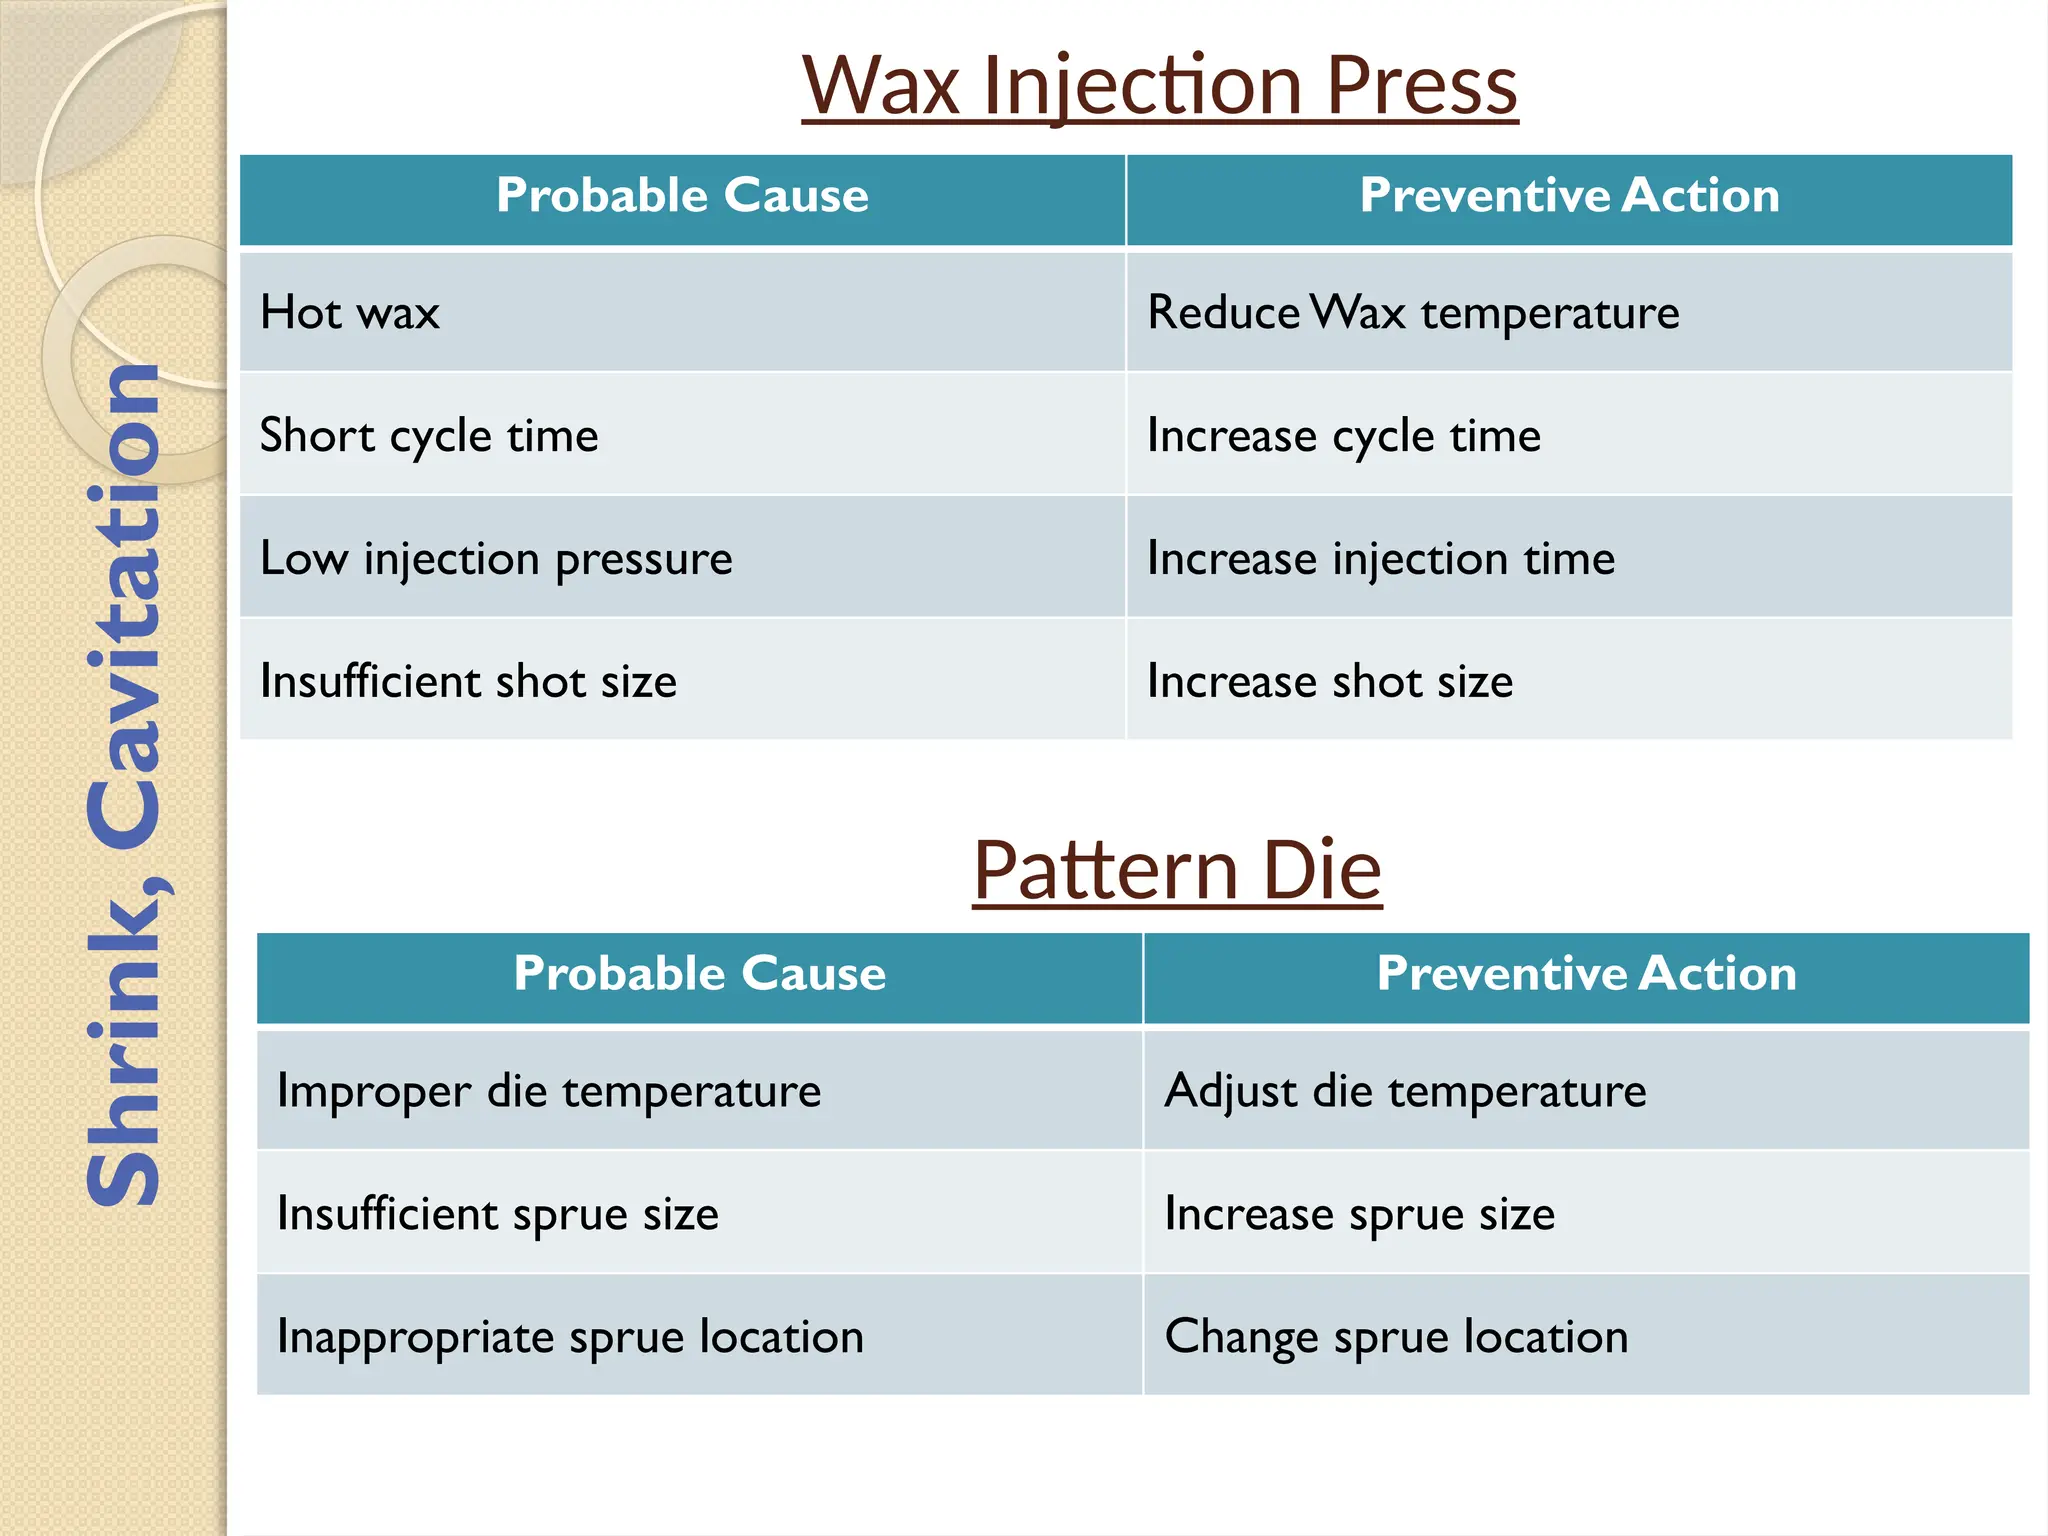
ProbableCause Preventive Action
Hot wax Reduce Wax temperature
Short cycle time Increase cycle time
Low injection pressure Increase injection time
Insufficient shot size Increase shot size
Shrink,
Cavitation
Pattern Die
Probable Cause Preventive Action
Improper die temperature Adjust die temperature
Insufficient sprue size Increase sprue size
Inappropriate sprue location Change sprue location
Wax Injection Press
ProbableCause Preventive Action
High injection pressure
Decrease injection pressure. Injection
pressure can open die by overcoming
the available clamping pressure
Low clamp pressure Increase clamp pressure
High wax temperature Decrease wax temperature
Unequal clamping of die Clamp die evenly
High injection flow rate Reduce injection flow rate
Flash
Pattern Die
Probable Cause Preventive Action
Die wear or damage Correct Die required
Die nor completely closed
Remove wax chips or other interface
between die faces
Wax Injection Press
ProbableCause Preventive Action
Low WaxTemperature IncreaseWaxTemperature
Low injection Pressure Increase Injection pressure in reasonable
increments
Wax flow insufficient Increase flow rate
Filler separation Use proper conditioning parameters
including appropriate agitation in melting
tank & in holding tank. Consult wax
supplier for proper conditioning &
melting procedure
Pattern Die
Probable Cause Preventive Action
Cold Die Reduce water cooling. Preheat Die
before injection
Poor surface finish of Die Polish Die Cavity
Other
Probable Cause Preventive Action
Excess Mold release Reduce amount of mold release
Graining
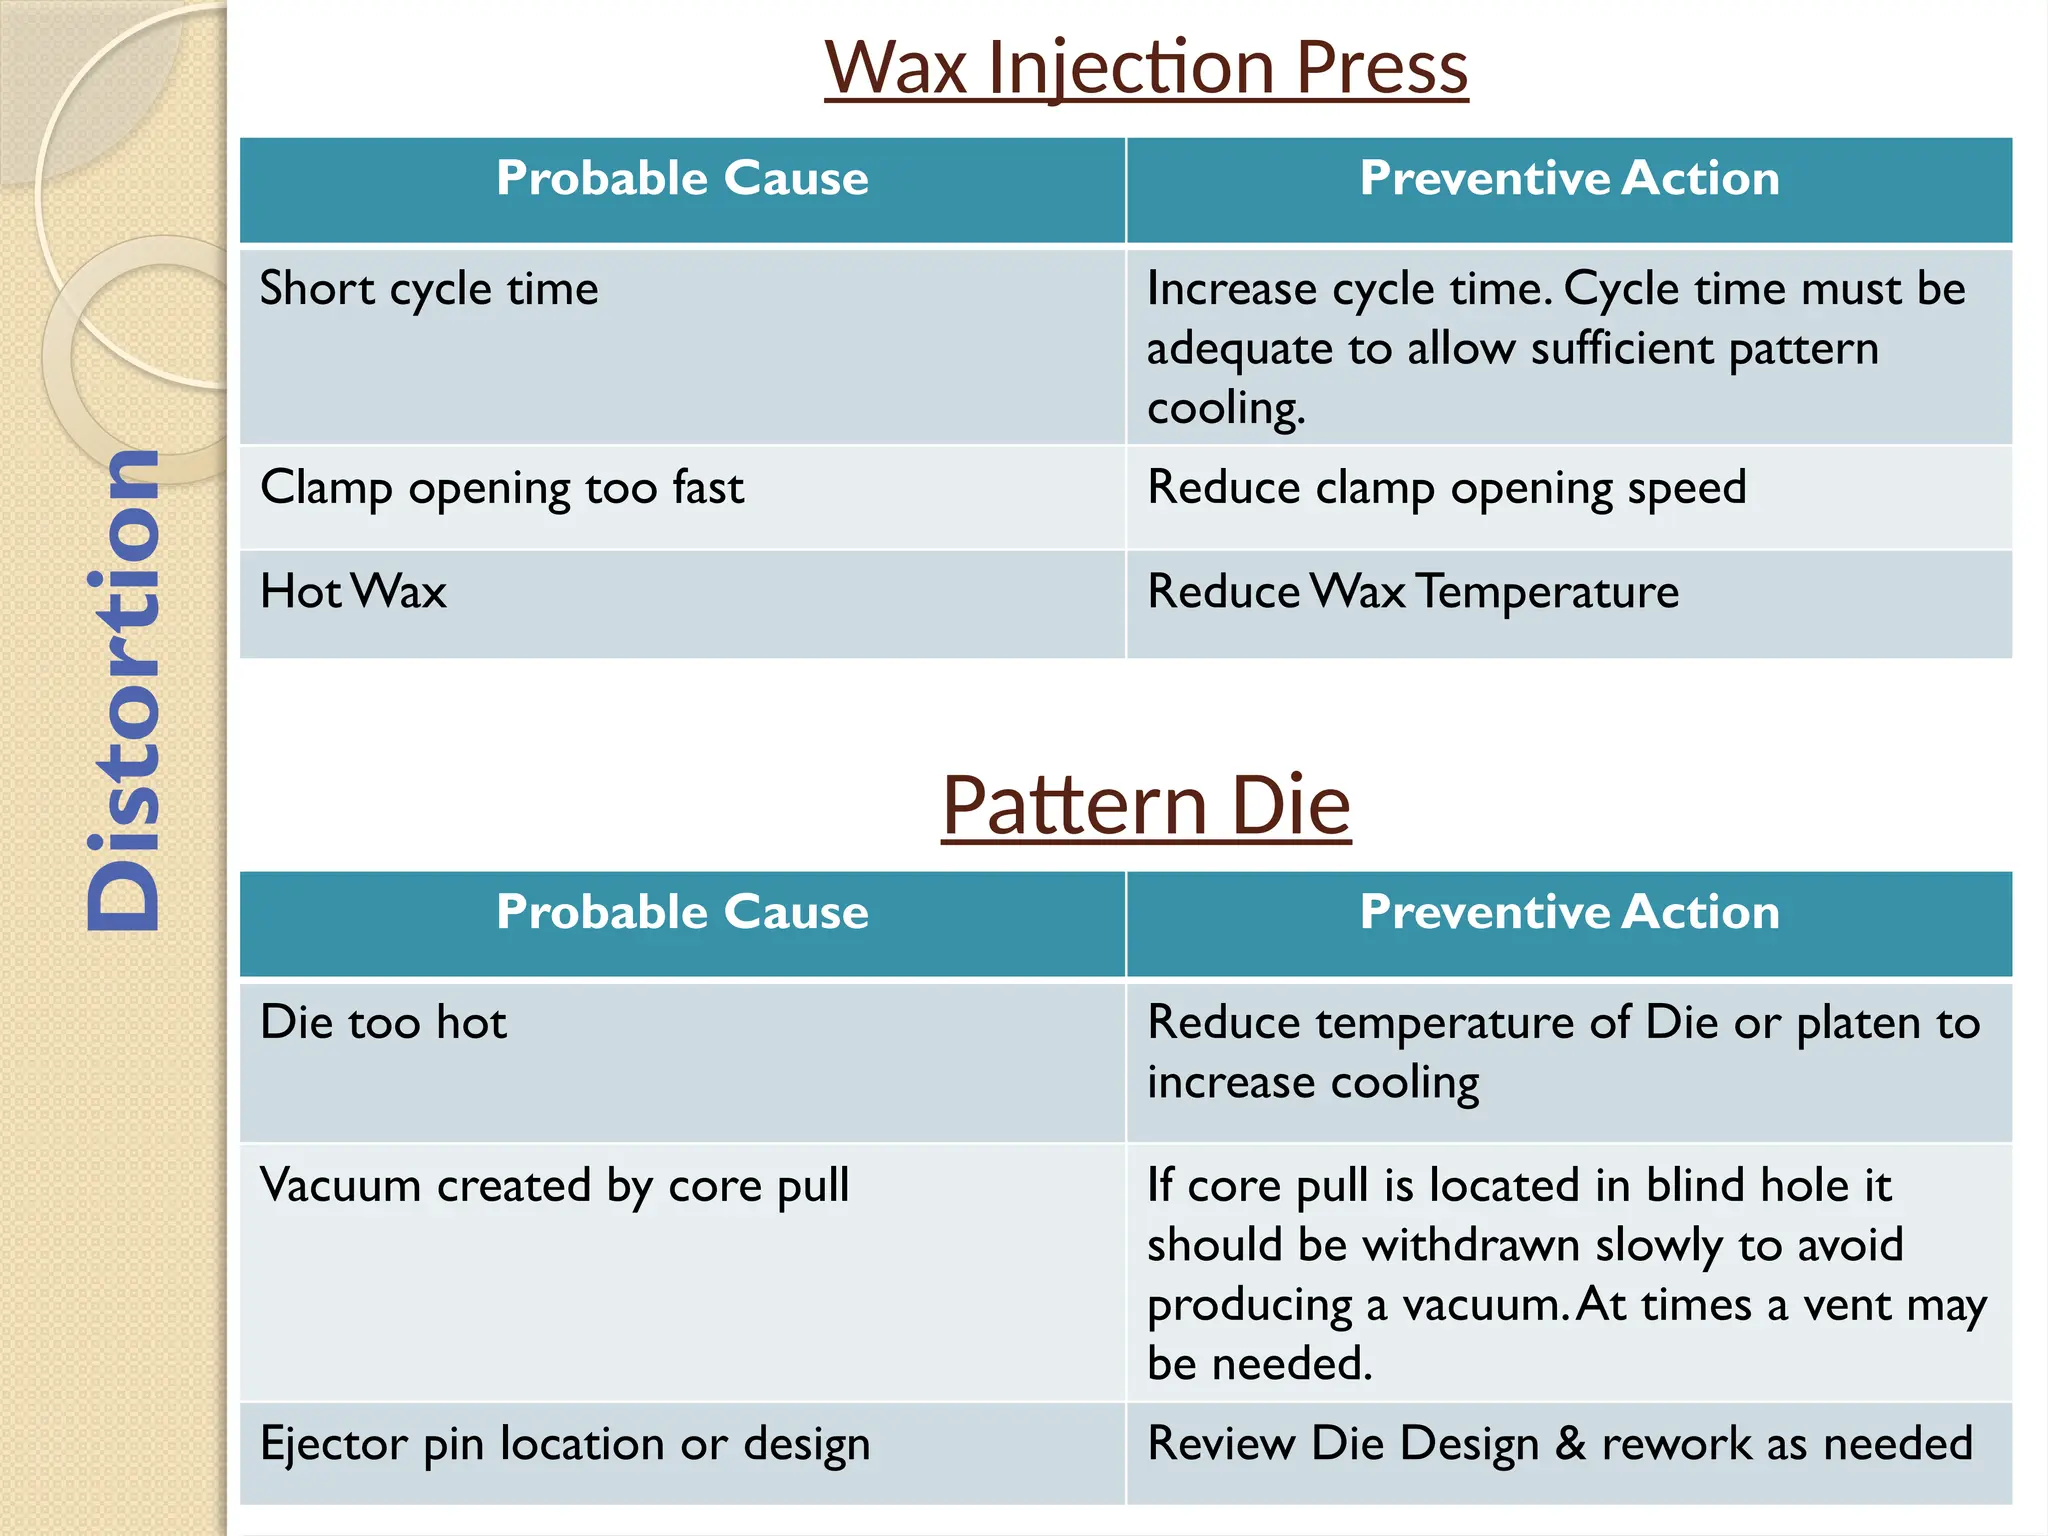
Wax Injection Press
ProbableCause Preventive Action
Short cycle time Increase cycle time. Cycle time must be
adequate to allow sufficient pattern
cooling.
Clamp opening too fast Reduce clamp opening speed
HotWax Reduce Wax Temperature
Pattern Die
Probable Cause Preventive Action
Die too hot Reduce temperature of Die or platen to
increase cooling
Vacuum created by core pull If core pull is located in blind hole it
should be withdrawn slowly to avoid
producing a vacuum.At times a vent may
be needed.
Ejector pin location or design Review Die Design & rework as needed
Distortion
44.
Other
Probable Cause PreventiveAction
Opening of Die too fast Reduce speed of Die opening
Insufficient or improper mold release Use appropriate amount or type of
mold release to ensure proper pattern
removal
Improper removal of pattern from Die Proper training of personnel for pattern
removal
Storage – placing pattern on uneven
surface
Use caution in storing pattern after
injection. Make sure it is properly
supported. In some cases, a fixture may
be required.
Elevated temperature in wax room Maintain wax room at proper &
consistent temperature as needed.
Distortion
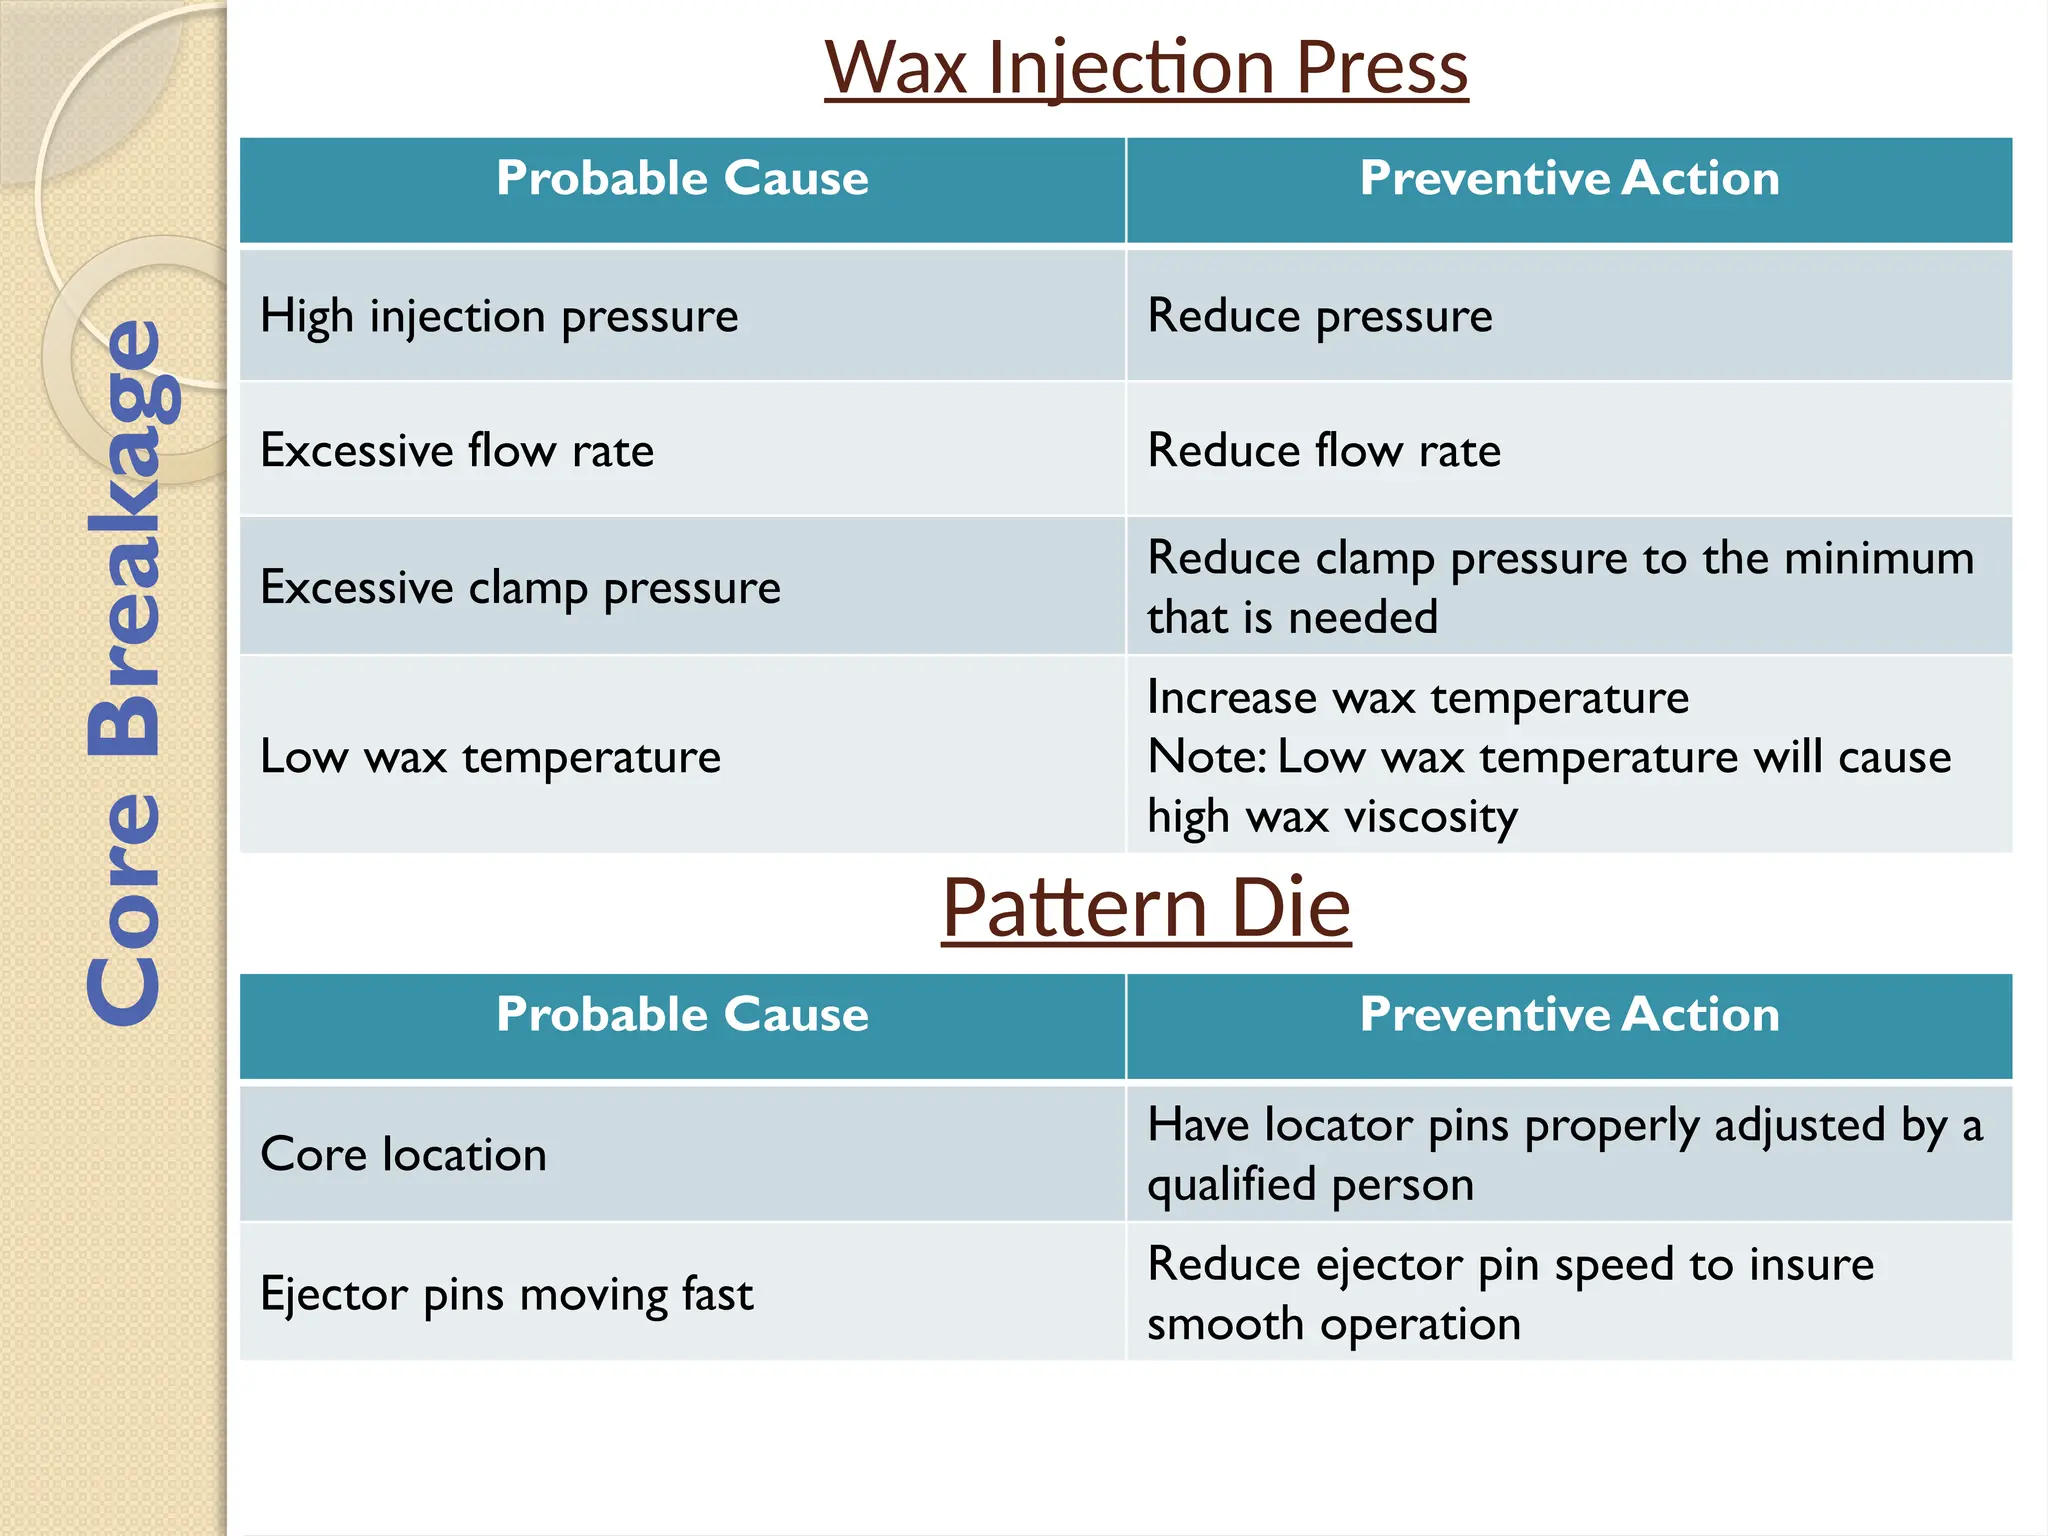
Wax Injection Press
ProbableCause Preventive Action
High injection pressure Reduce pressure
Excessive flow rate Reduce flow rate
Excessive clamp pressure
Reduce clamp pressure to the minimum
that is needed
Low wax temperature
Increase wax temperature
Note: Low wax temperature will cause
high wax viscosity
Pattern Die
Probable Cause Preventive Action
Core location
Have locator pins properly adjusted by a
qualified person
Ejector pins moving fast
Reduce ejector pin speed to insure
smooth operation
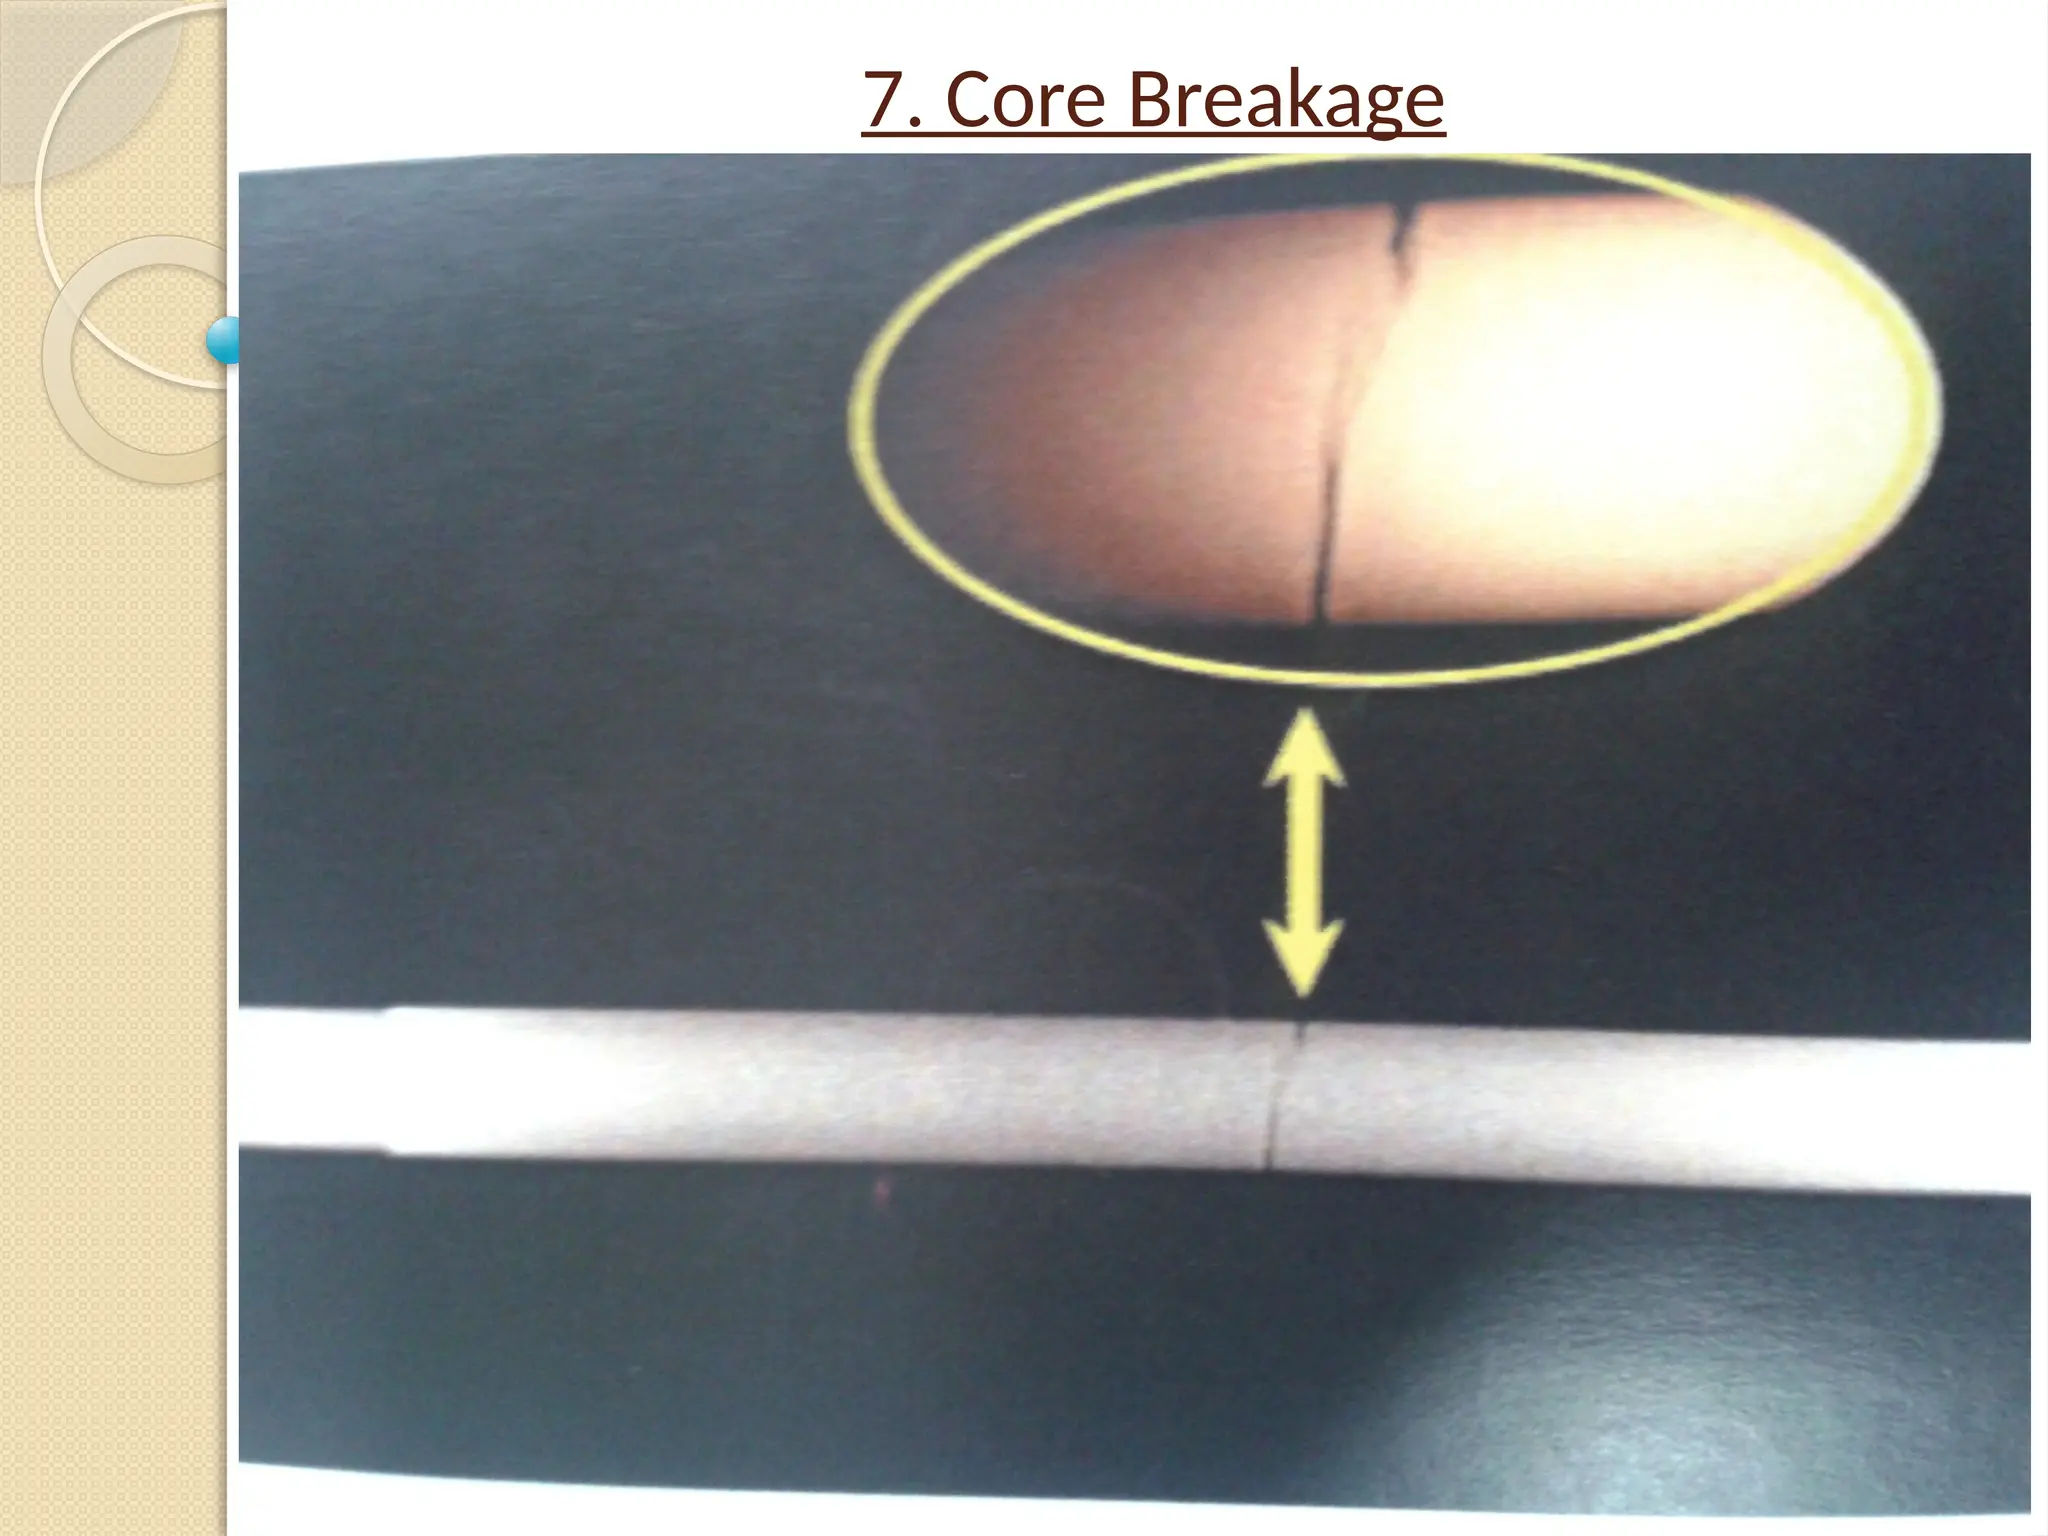
Core
Breakage
47.
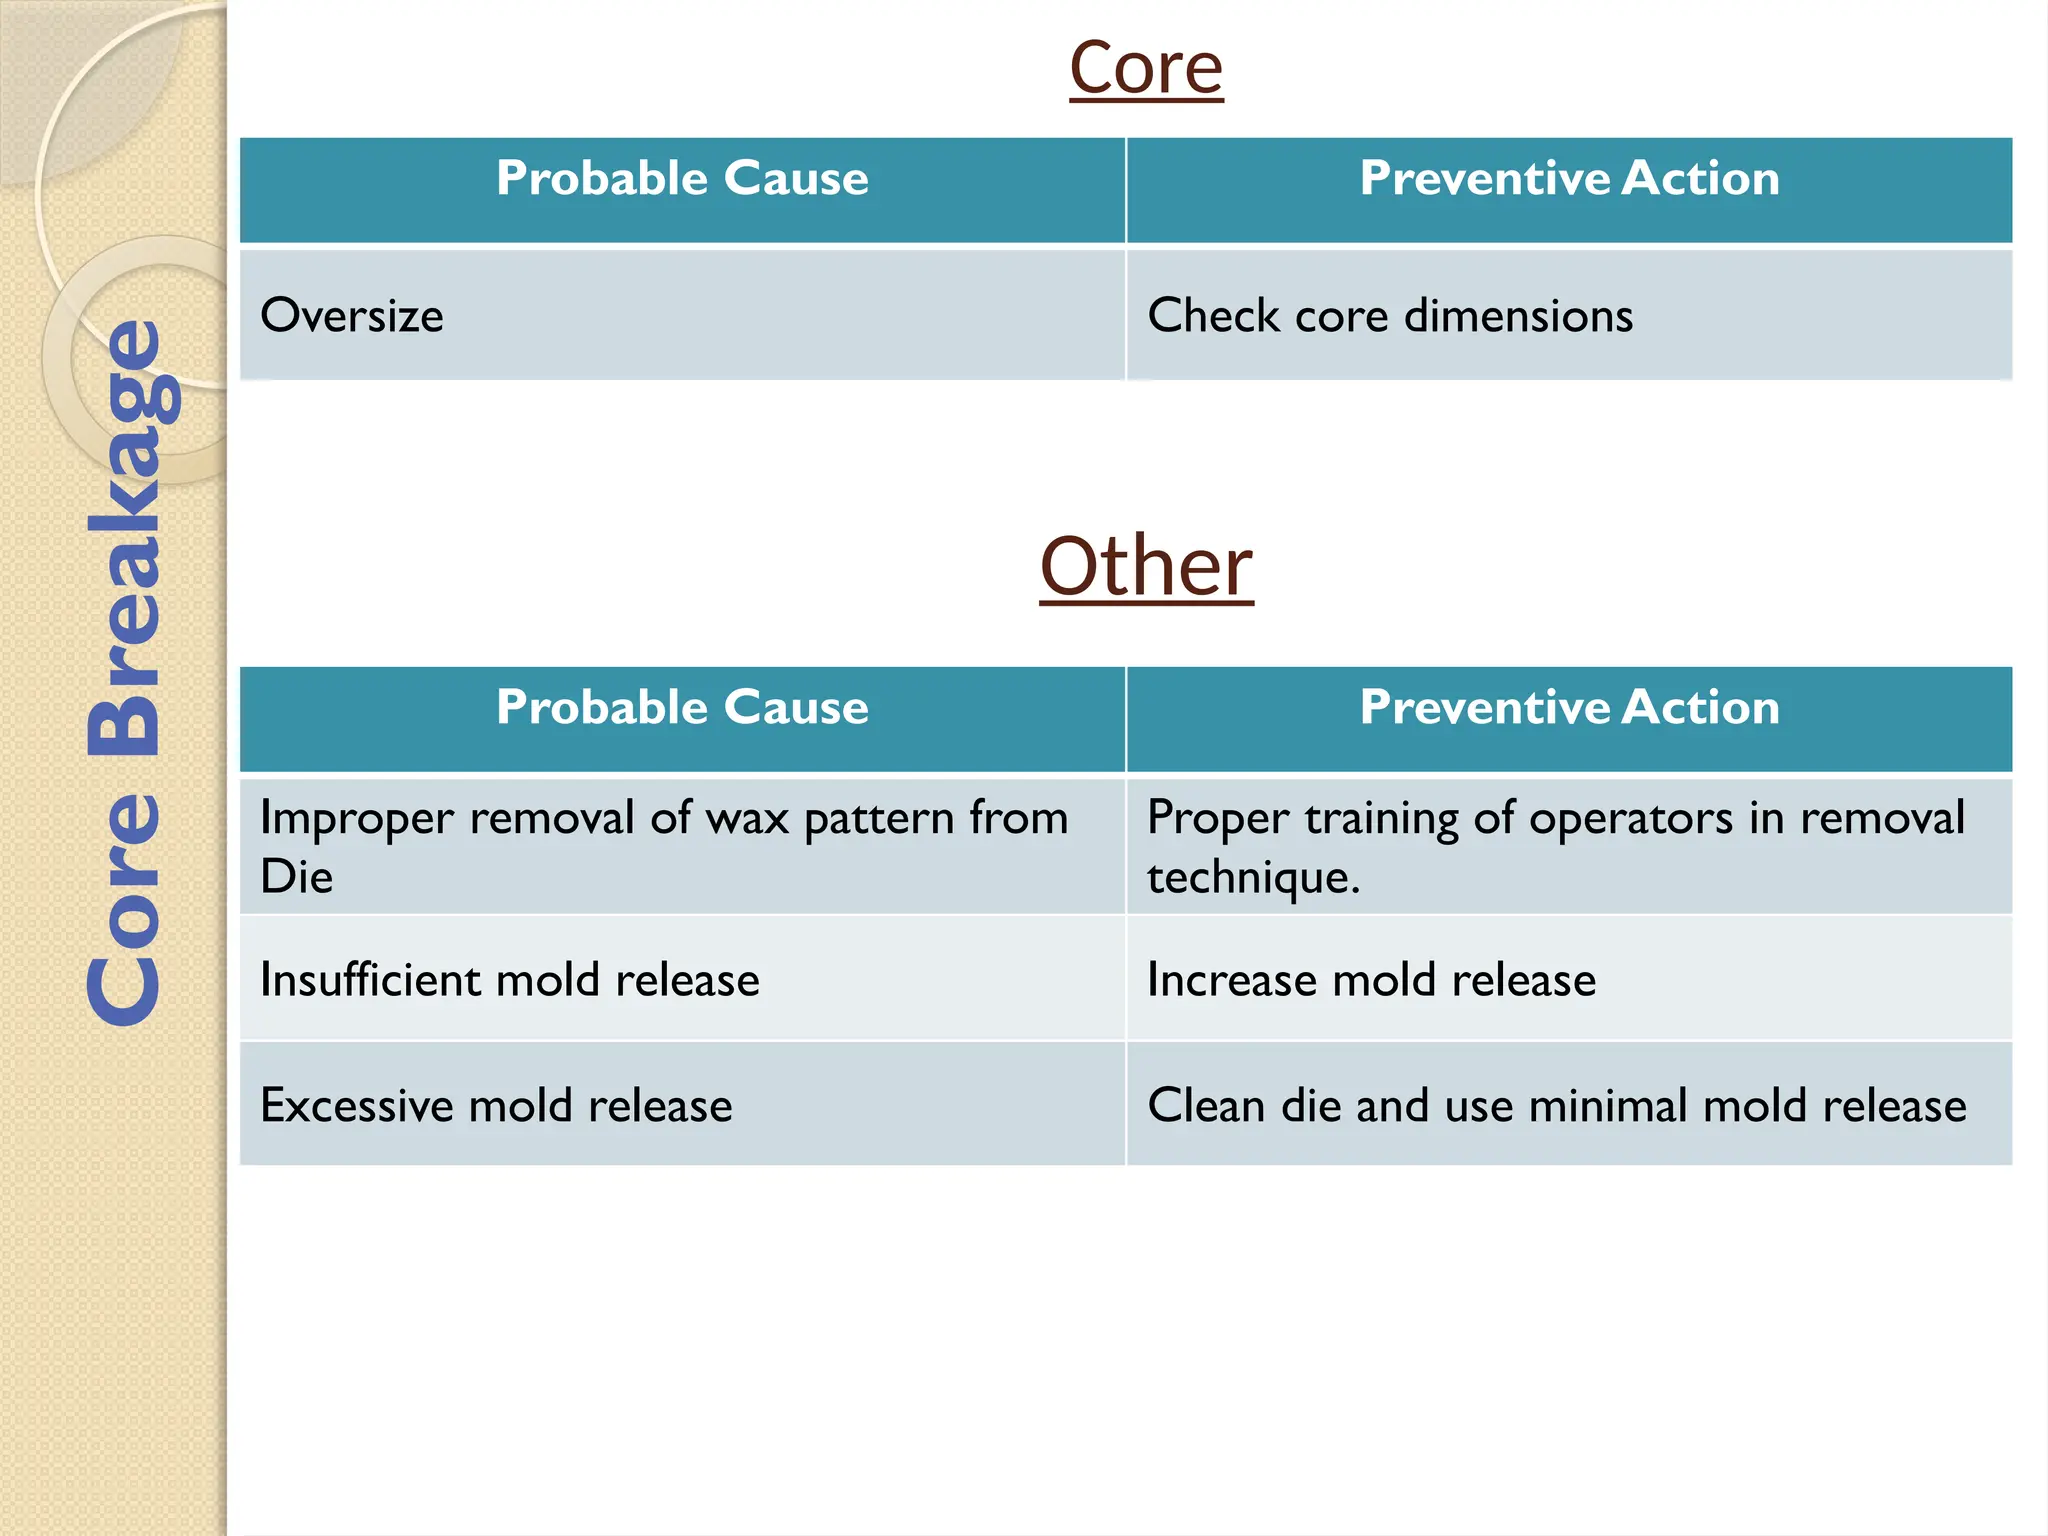
Core
Probable Cause PreventiveAction
Oversize Check core dimensions
Other
Probable Cause Preventive Action
Improper removal of wax pattern from
Die
Proper training of operators in removal
technique.
Insufficient mold release Increase mold release
Excessive mold release Clean die and use minimal mold release
Core
Breakage
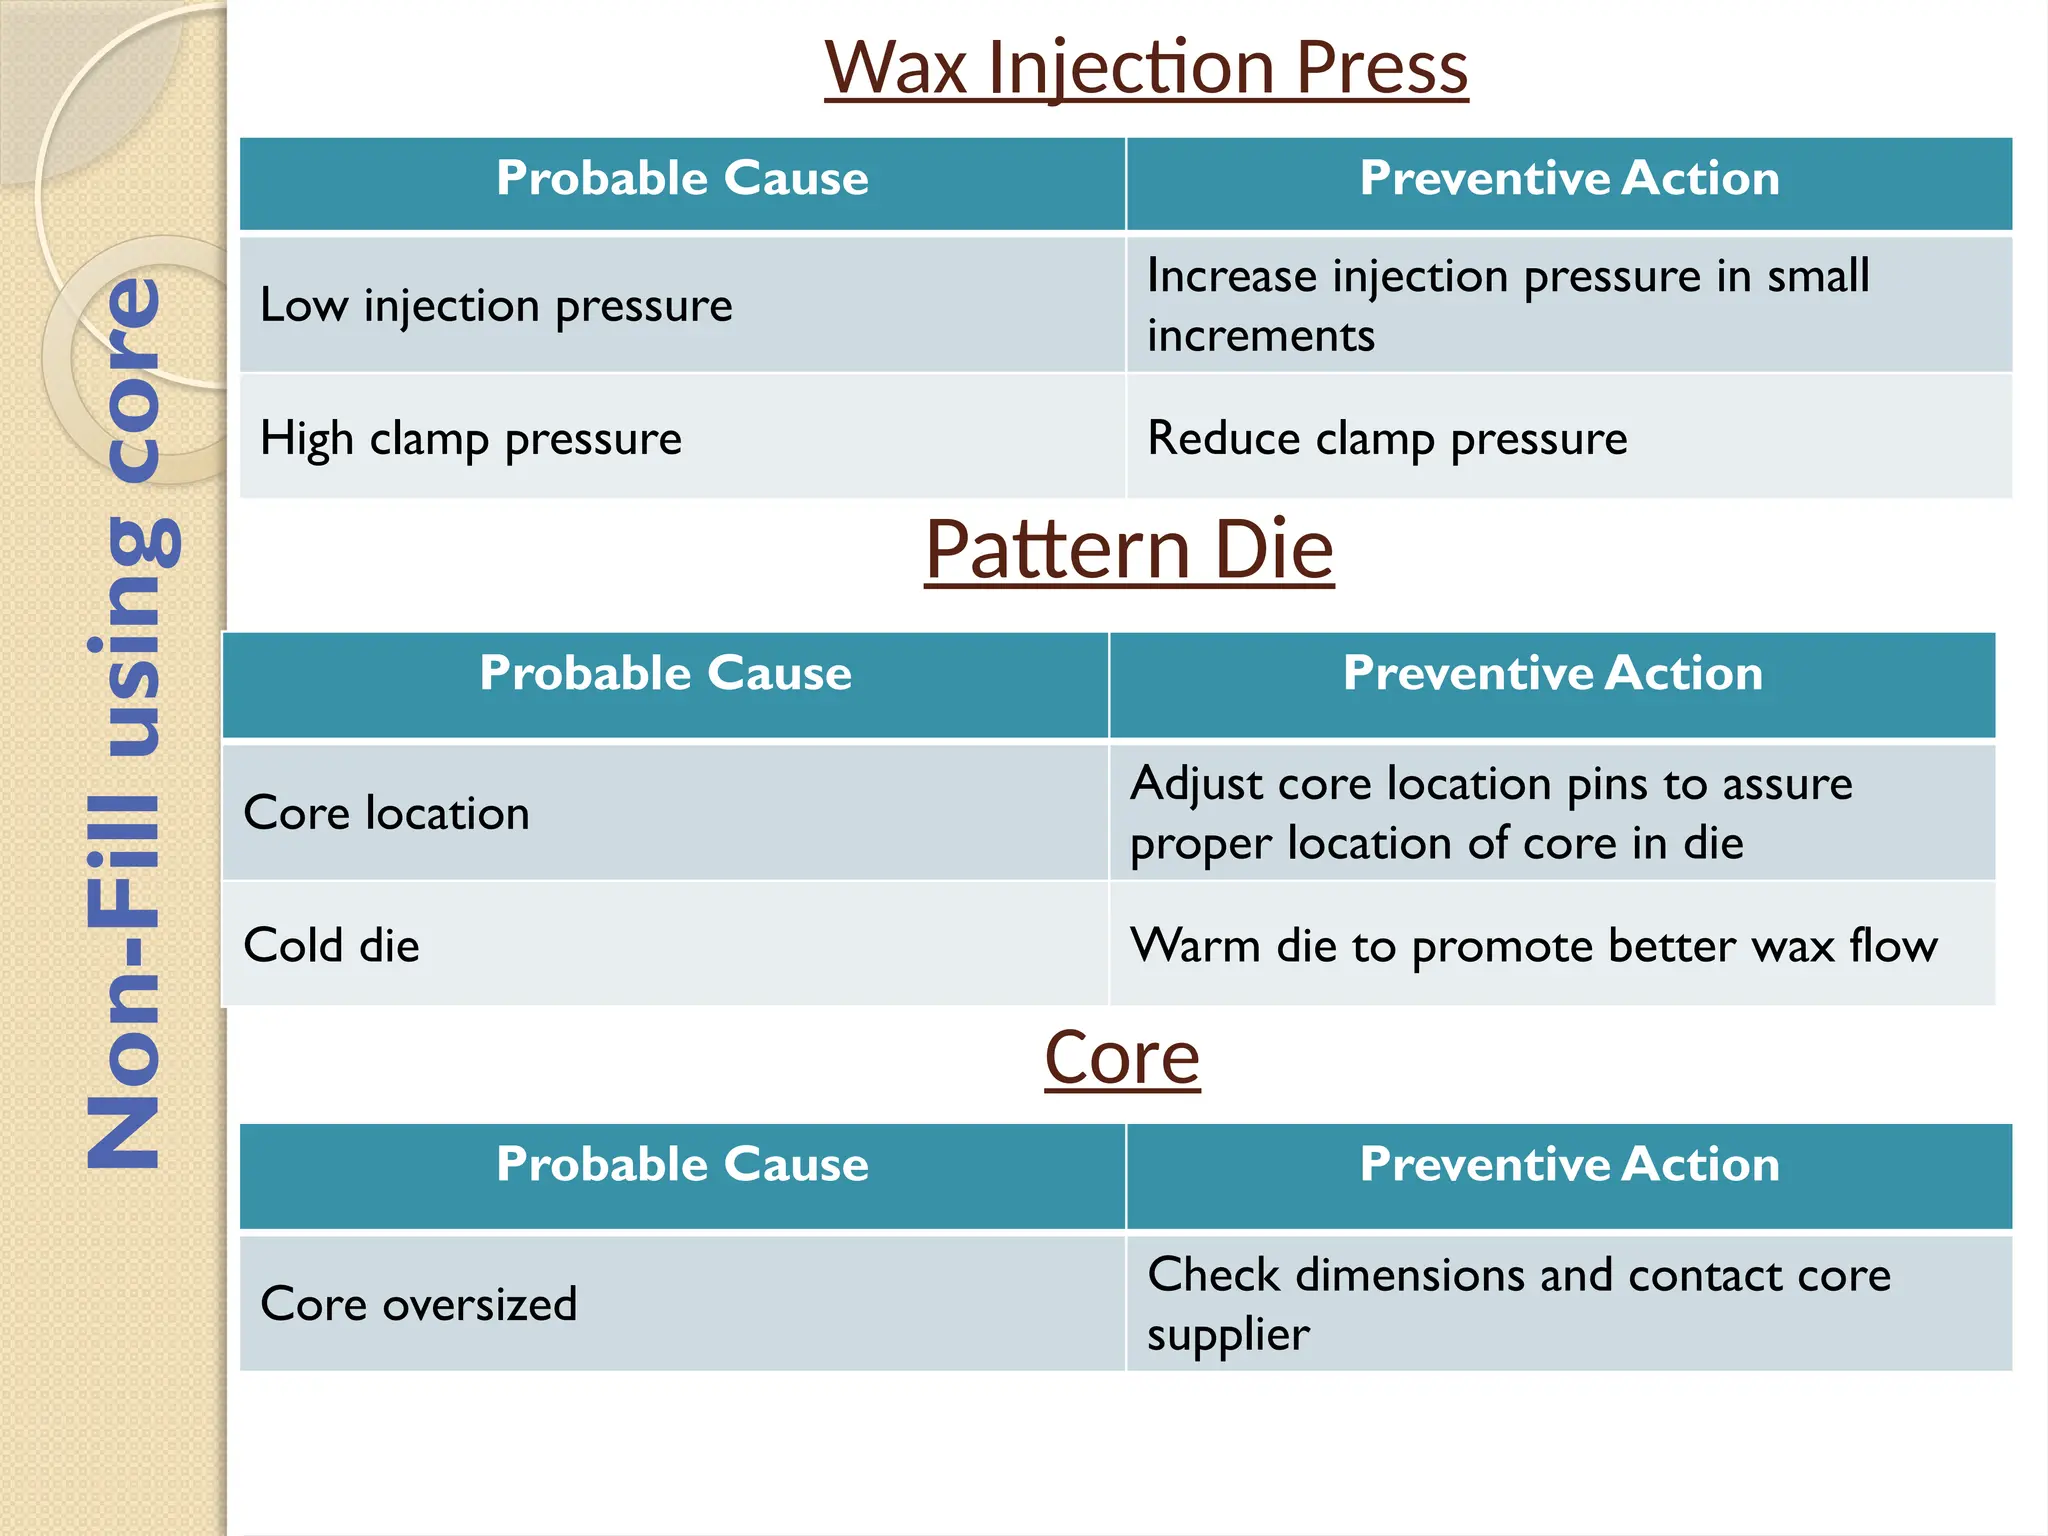
Wax Injection Press
ProbableCause Preventive Action
Low injection pressure
Increase injection pressure in small
increments
High clamp pressure Reduce clamp pressure
Pattern Die
Probable Cause Preventive Action
Core location
Adjust core location pins to assure
proper location of core in die
Cold die Warm die to promote better wax flow
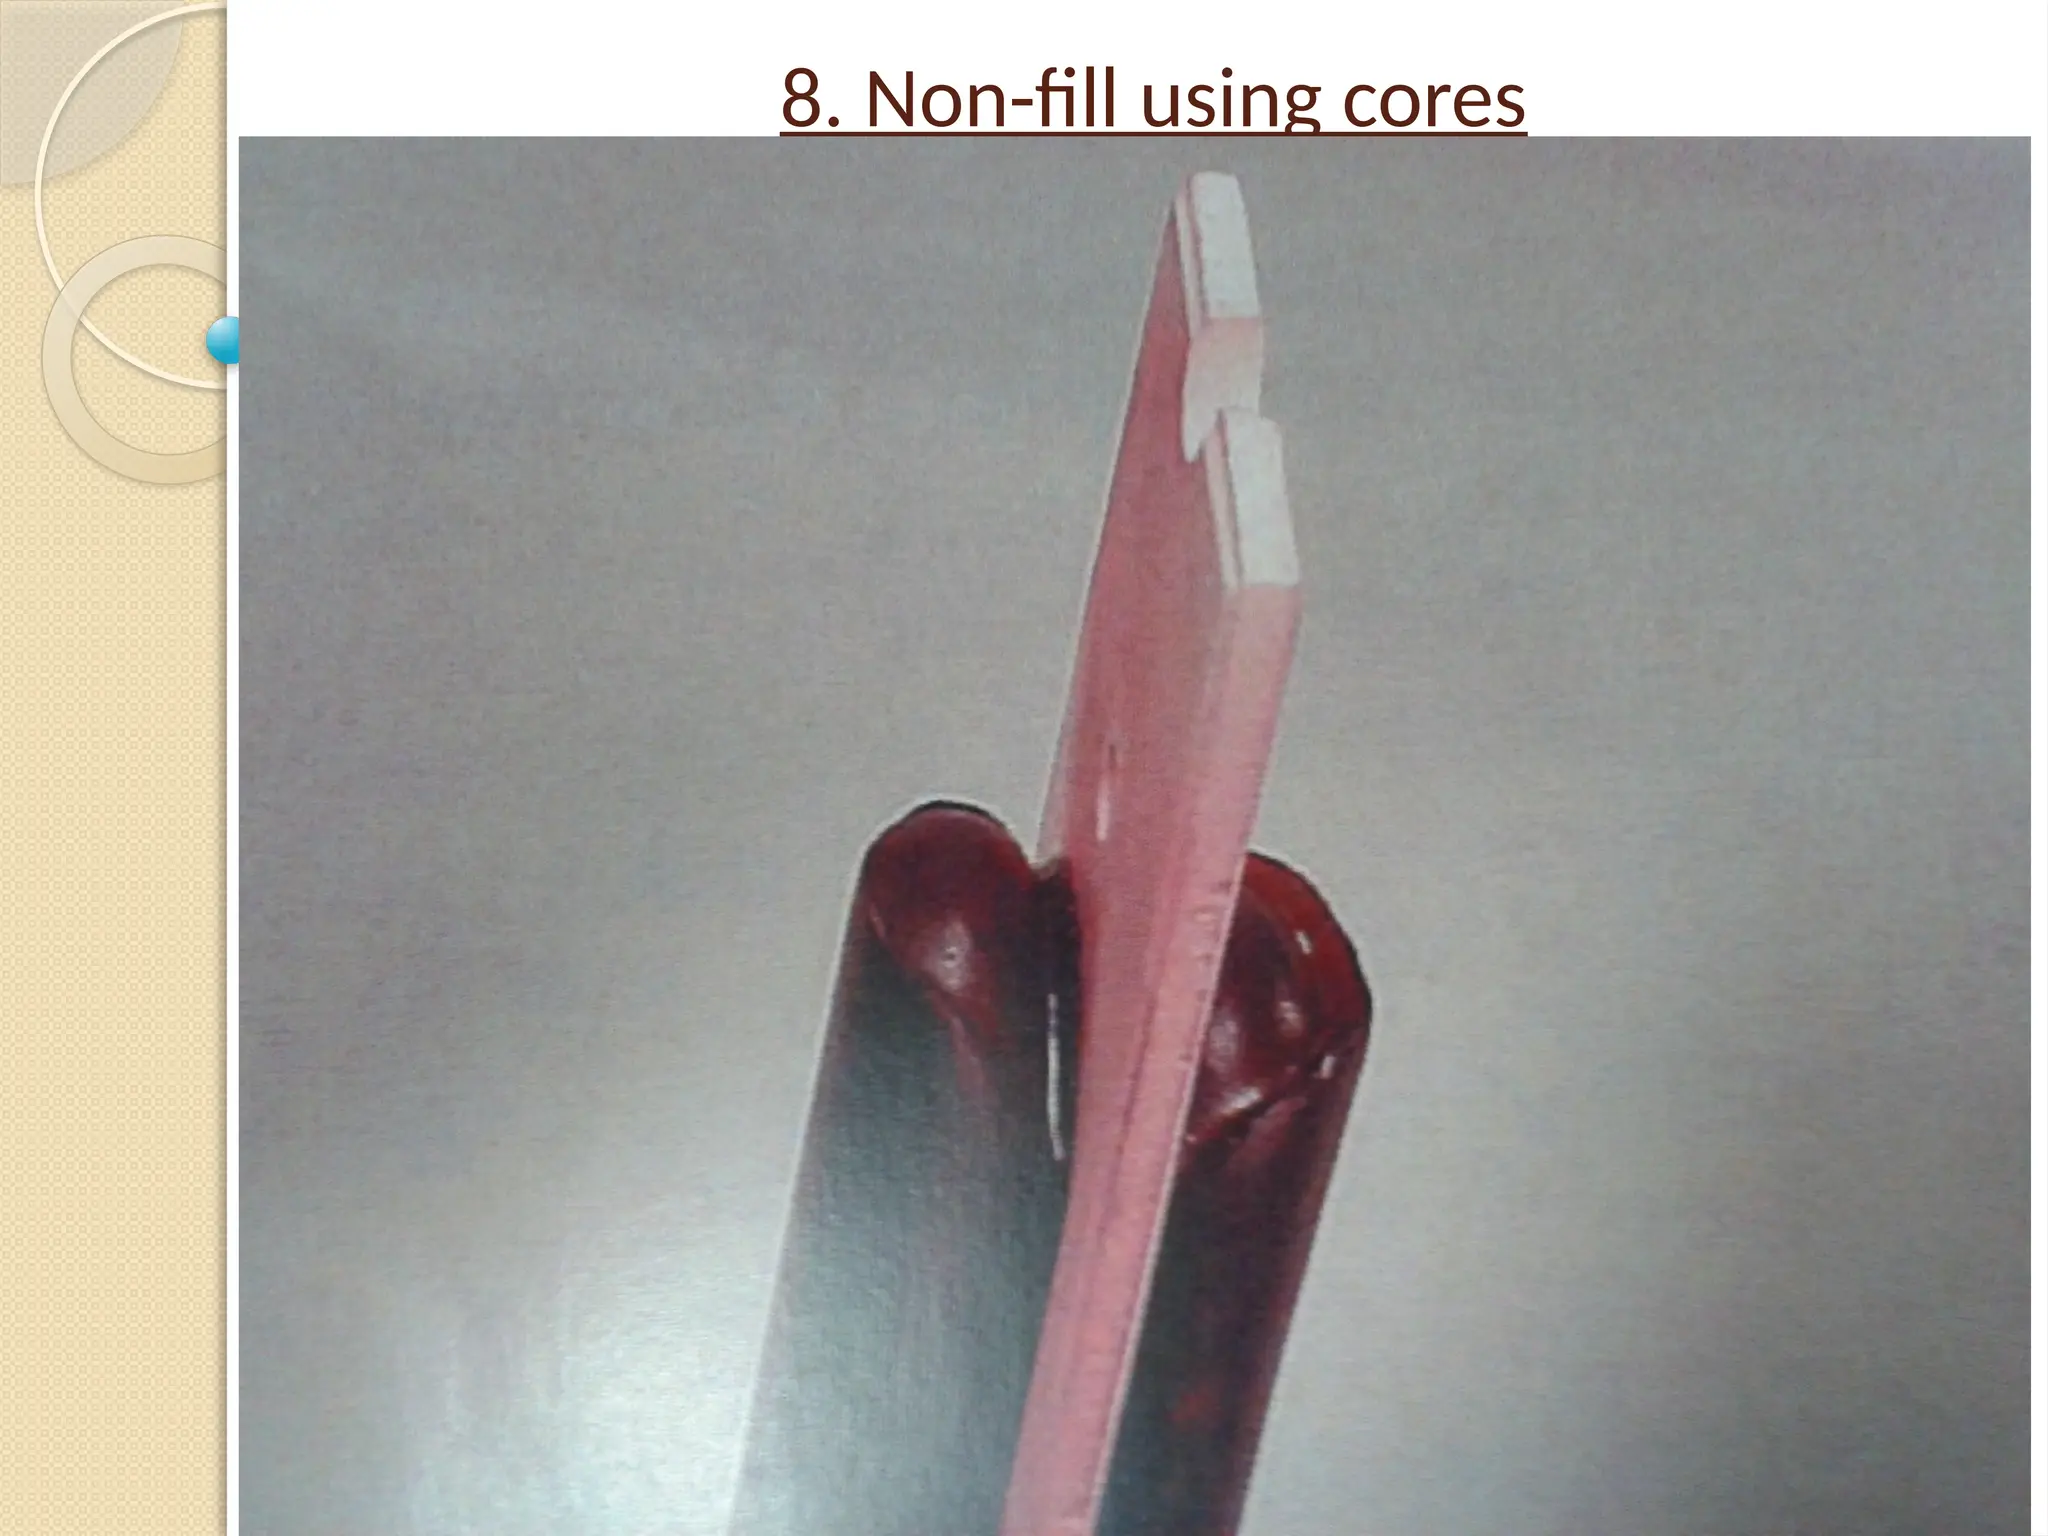
Non-Fill
using
core
Core
Probable Cause Preventive Action
Core oversized
Check dimensions and contact core
supplier
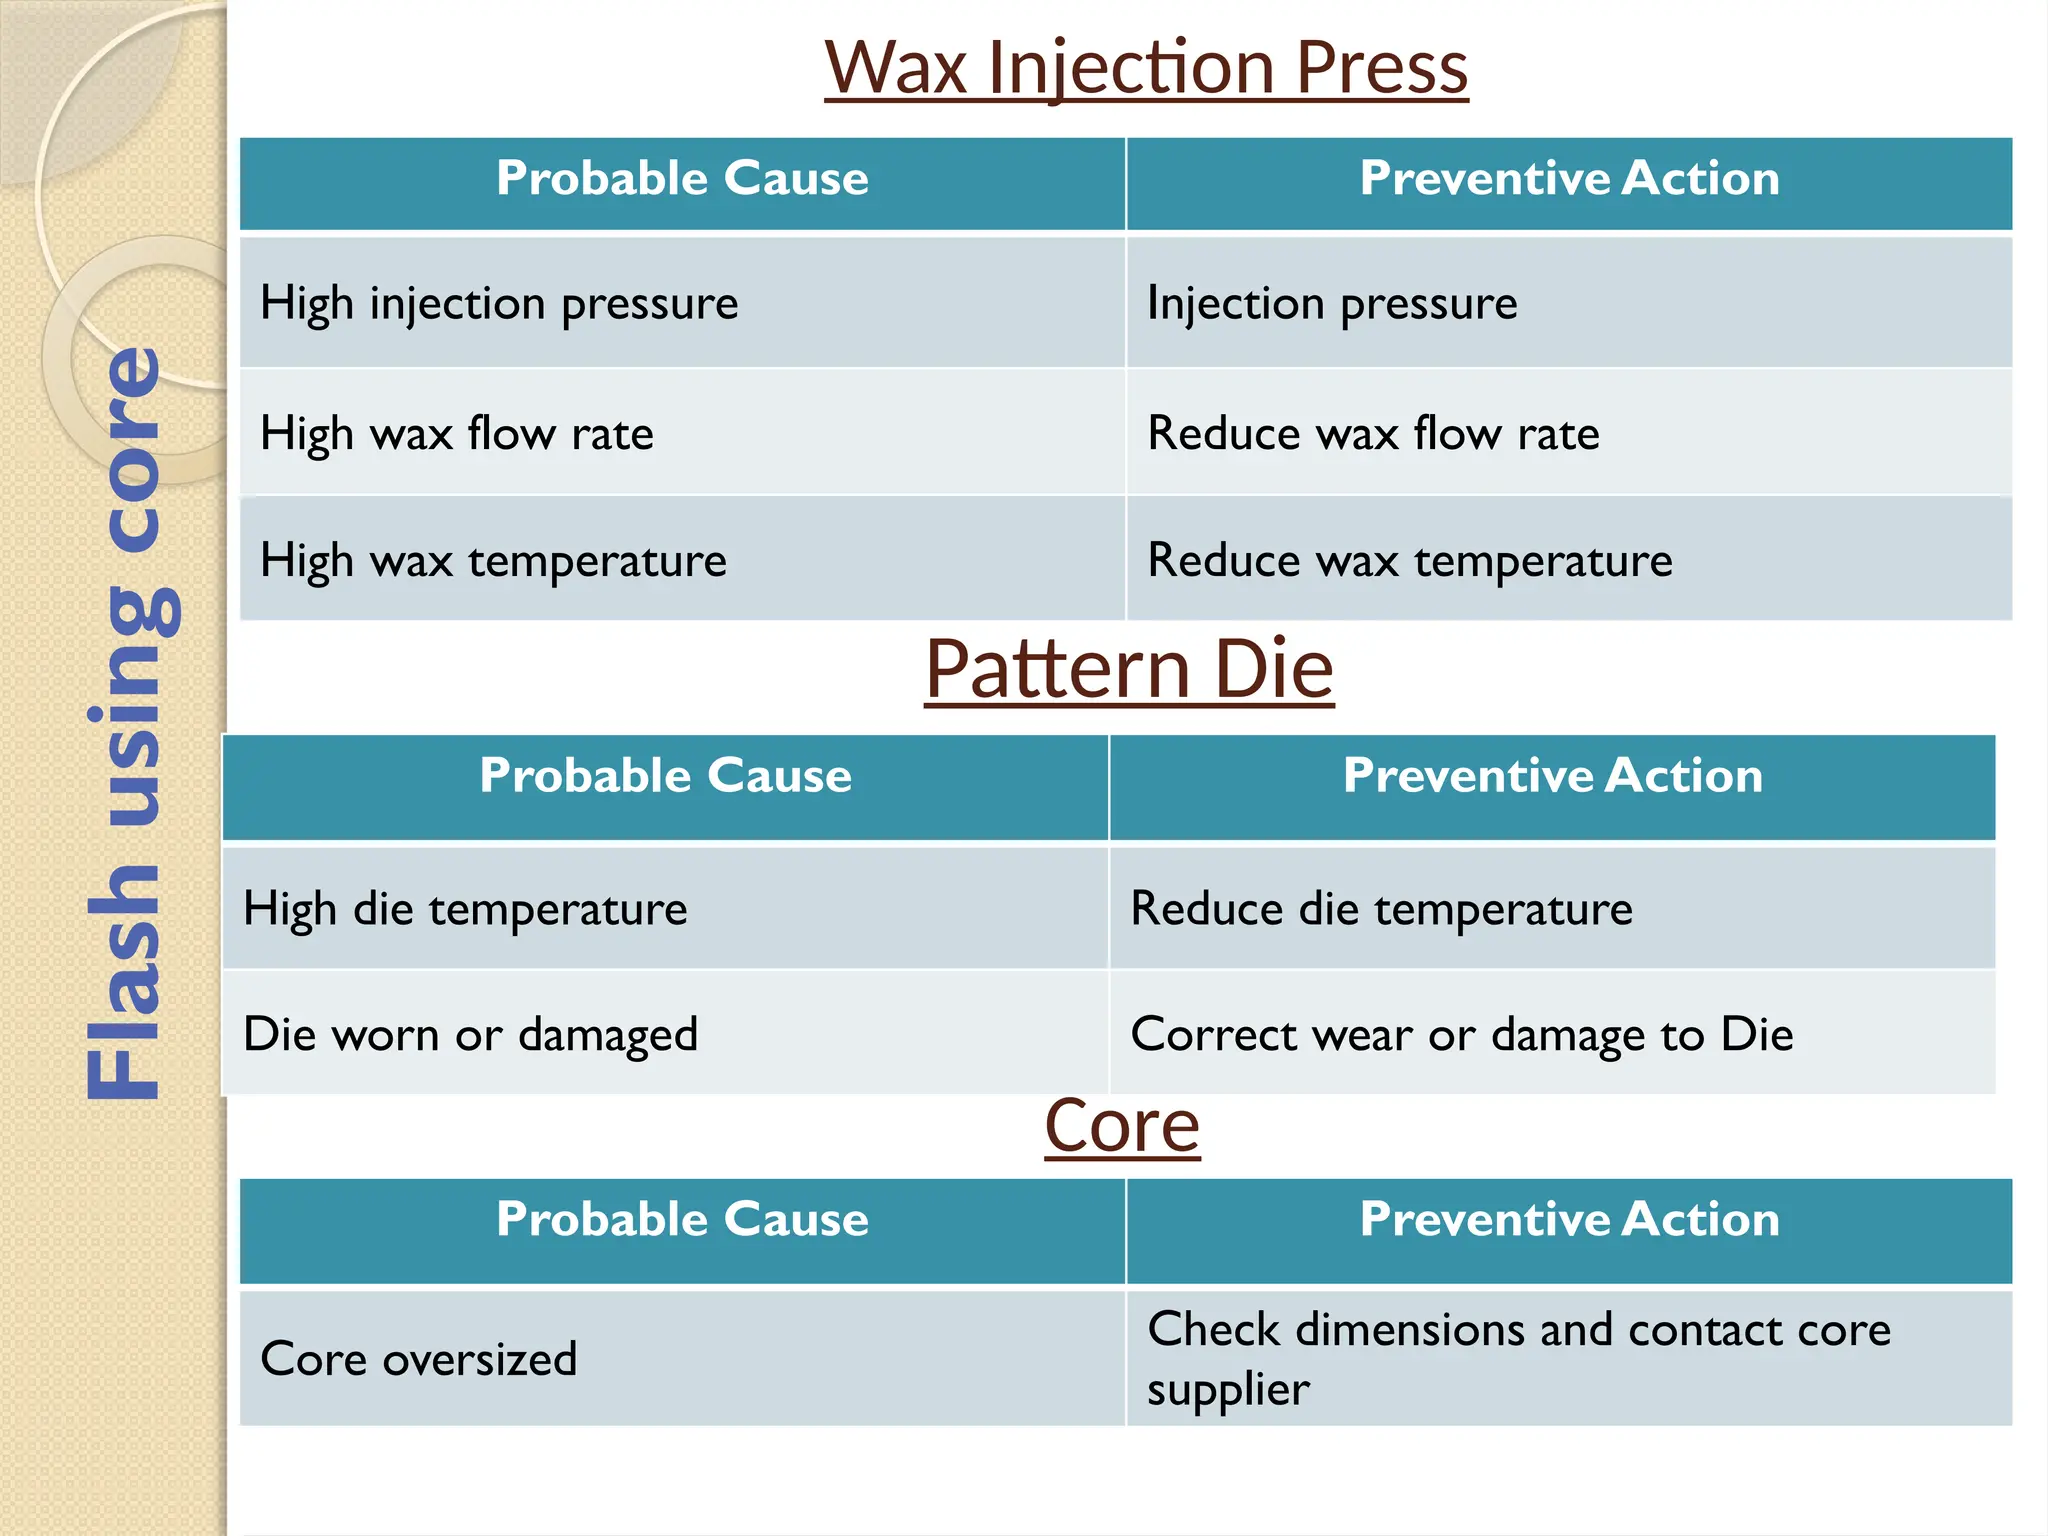
Wax Injection Press
ProbableCause Preventive Action
High injection pressure Injection pressure
High wax flow rate Reduce wax flow rate
High wax temperature Reduce wax temperature
Pattern Die
Probable Cause Preventive Action
High die temperature Reduce die temperature
Die worn or damaged Correct wear or damage to Die
Flash
using
core
Core
Probable Cause Preventive Action
Core oversized
Check dimensions and contact core
supplier
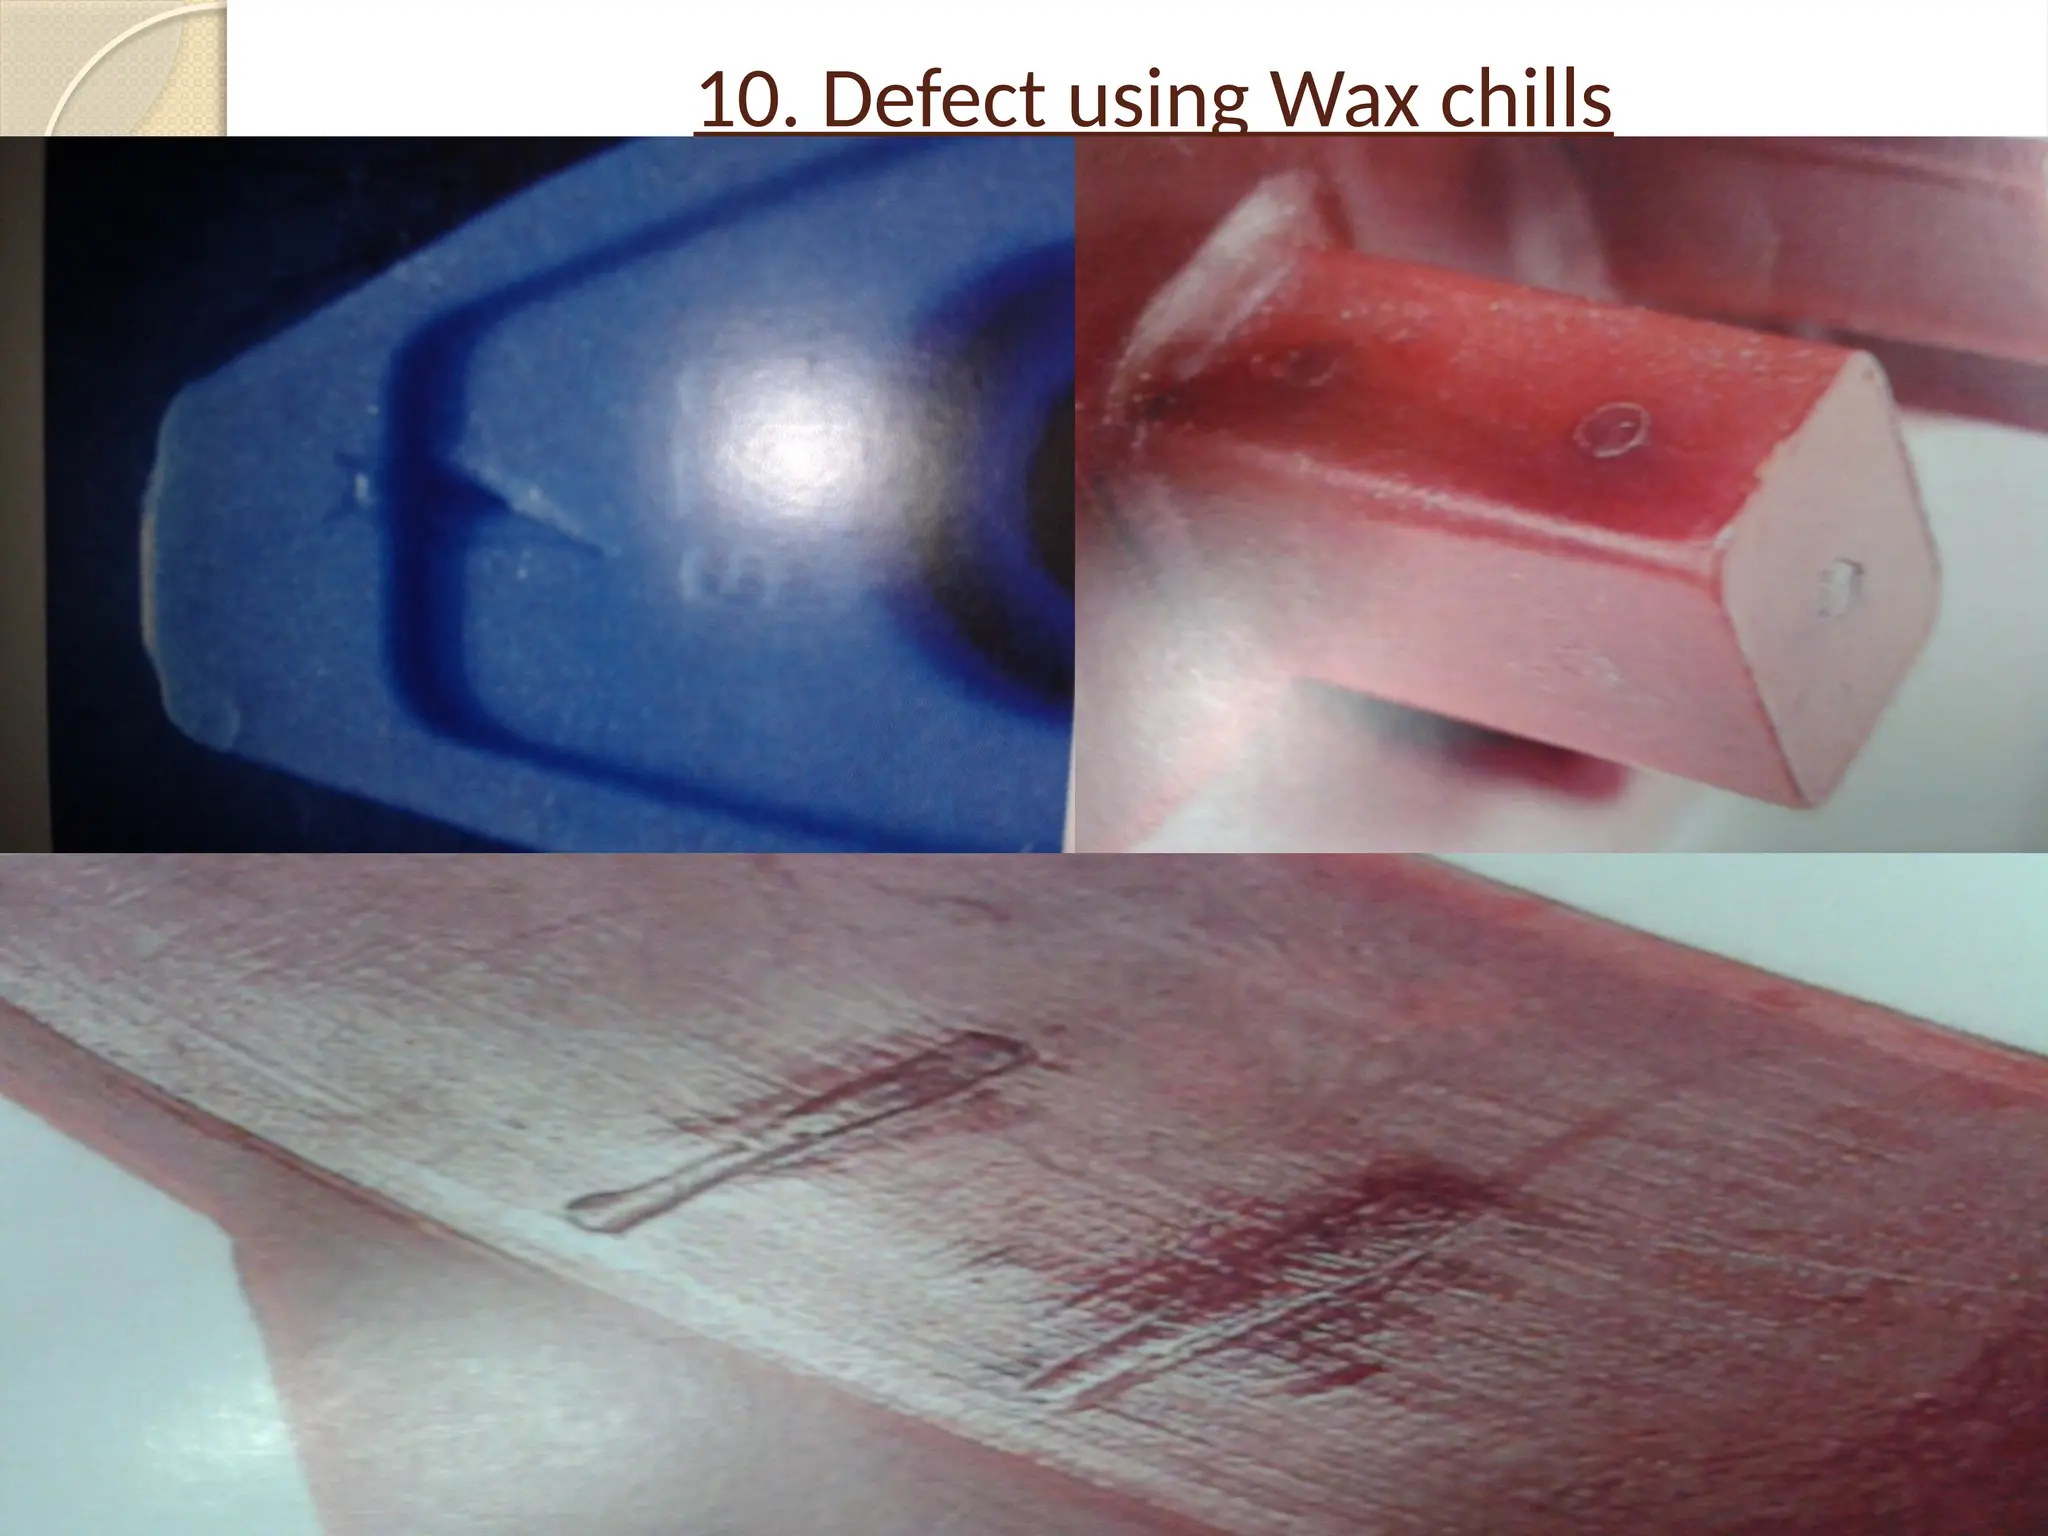
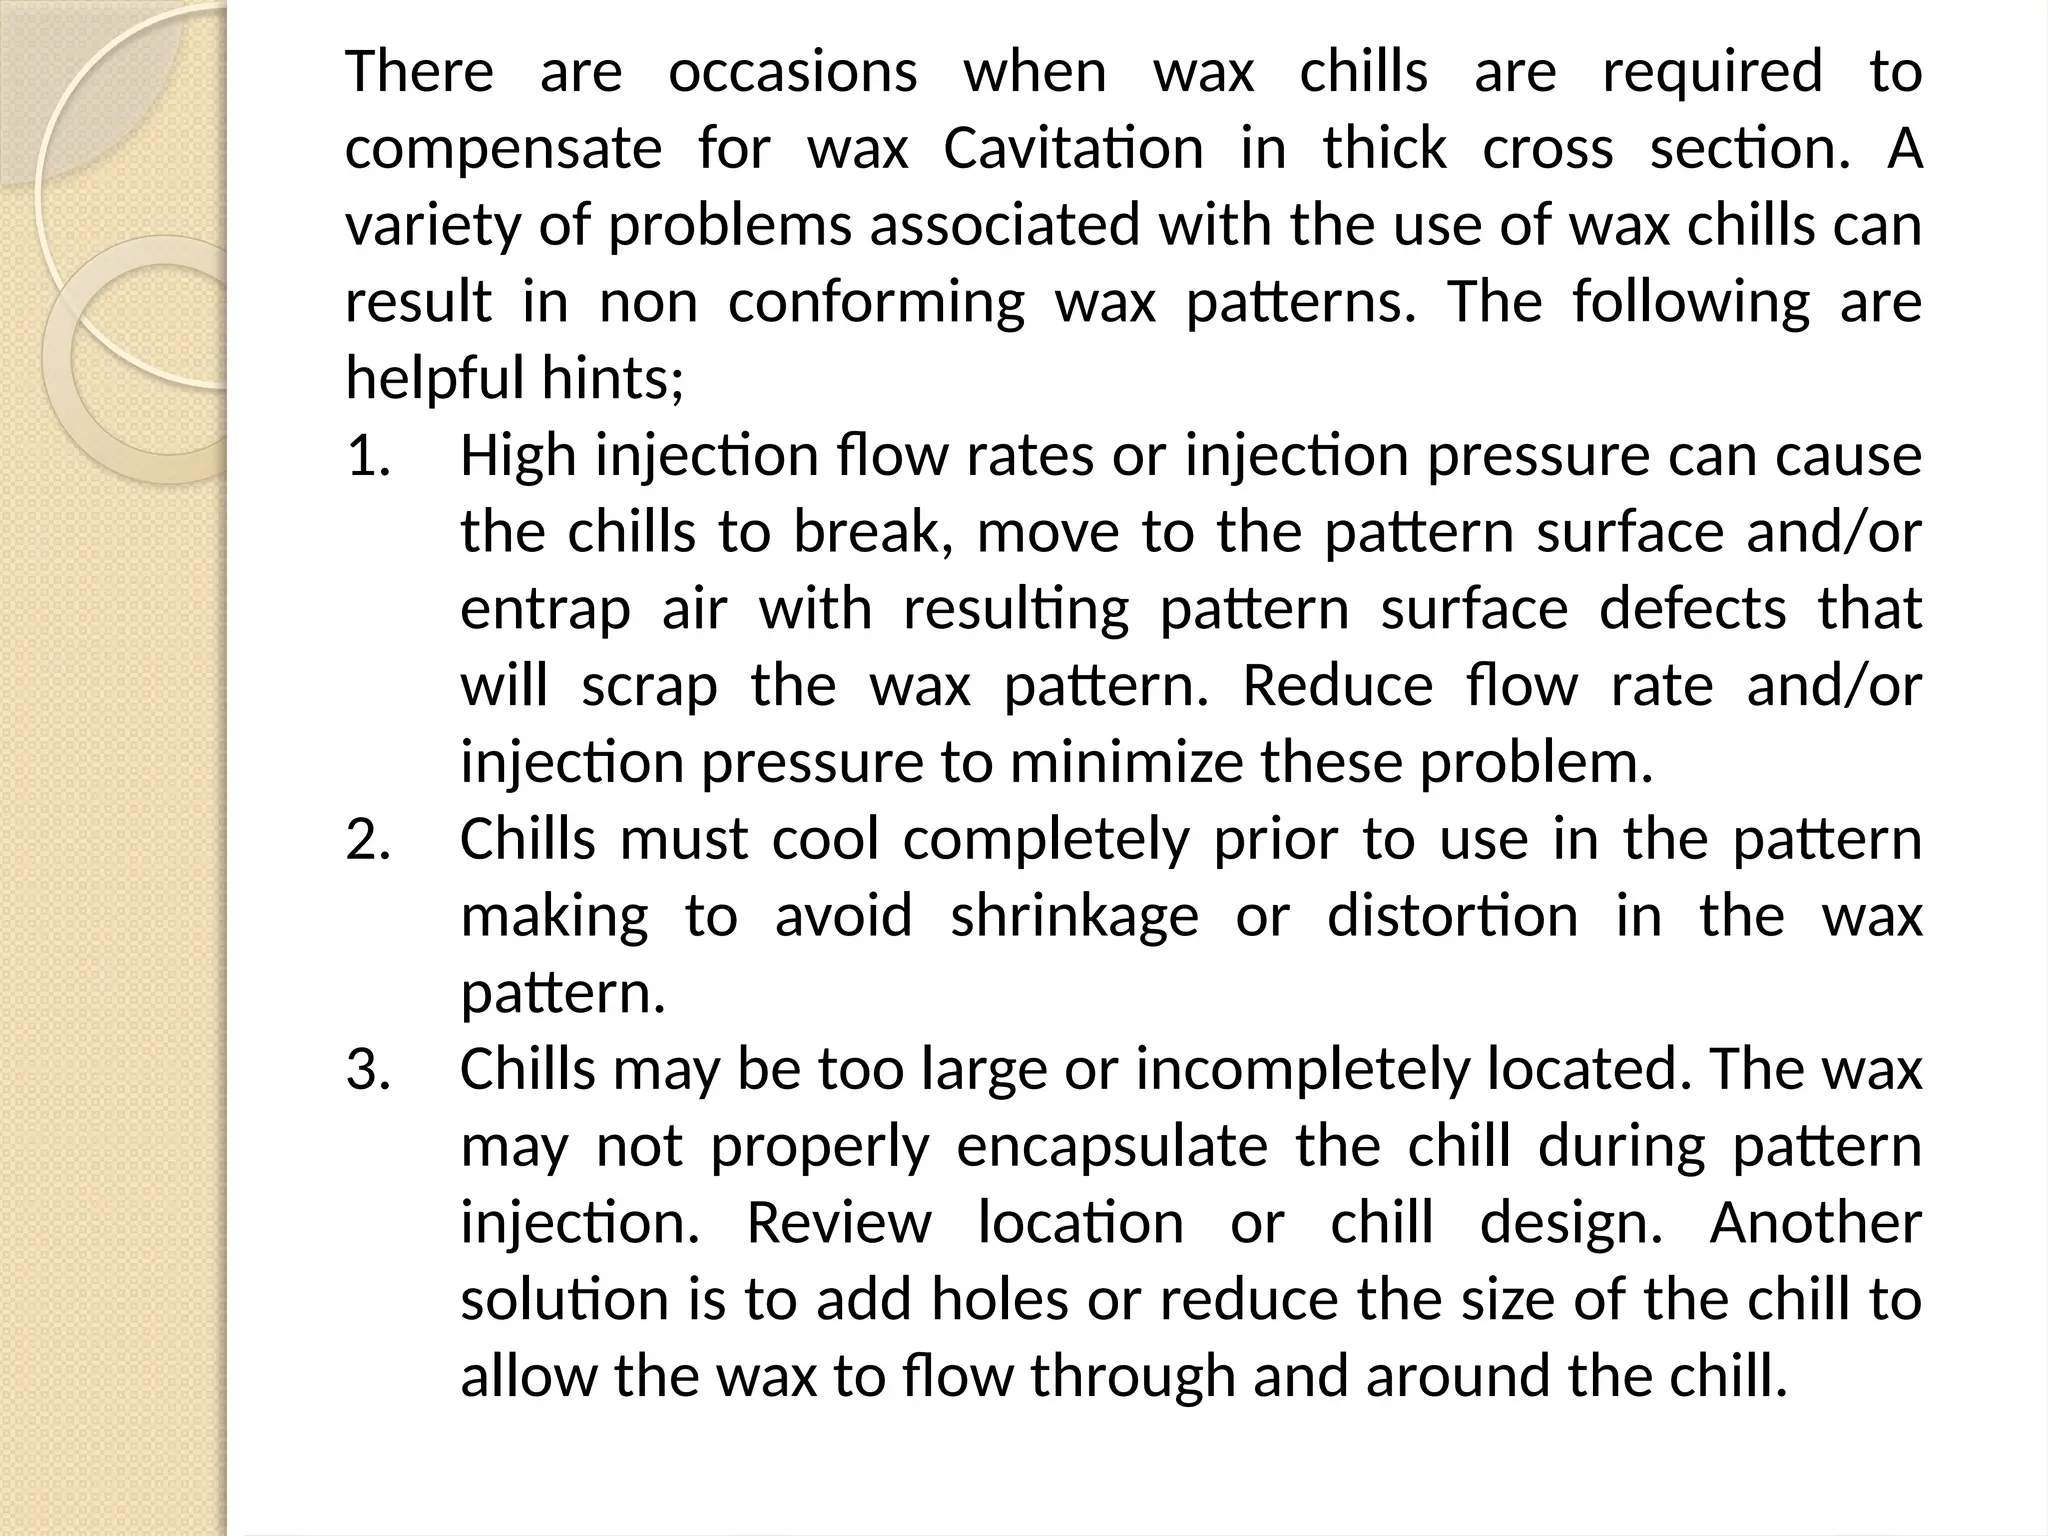
There are occasionswhen wax chills are required to
compensate for wax Cavitation in thick cross section. A
variety of problems associated with the use of wax chills can
result in non conforming wax patterns. The following are
helpful hints;
1. High injection flow rates or injection pressure can cause
the chills to break, move to the pattern surface and/or
entrap air with resulting pattern surface defects that
will scrap the wax pattern. Reduce flow rate and/or
injection pressure to minimize these problem.
2. Chills must cool completely prior to use in the pattern
making to avoid shrinkage or distortion in the wax
pattern.
3. Chills may be too large or incompletely located. The wax
may not properly encapsulate the chill during pattern
injection. Review location or chill design. Another
solution is to add holes or reduce the size of the chill to
allow the wax to flow through and around the chill.