Downloaded 33 times
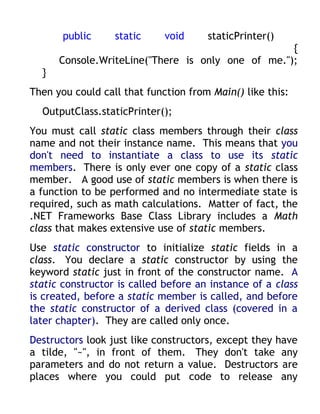
![class NamedWelcome
{
// Main begins program execution.
public static void Main(string[] args)
{
// Write to console
Console.WriteLine("Hello, {0}!", args[0]);
Console.WriteLine("Welcome to the C# Station Tutorial!");
}
}
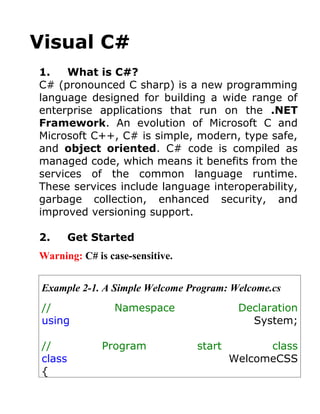
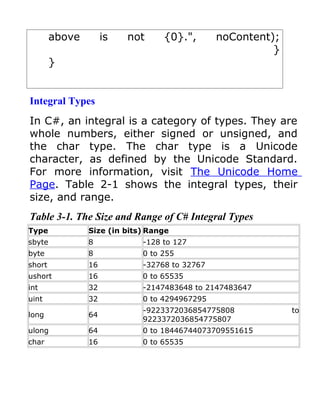
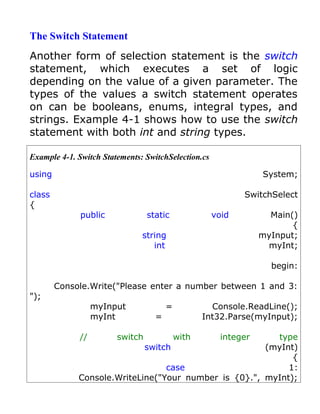
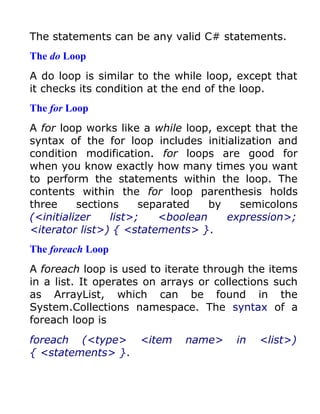
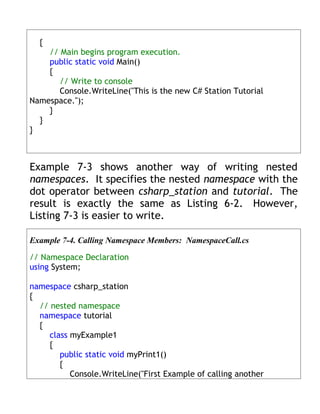
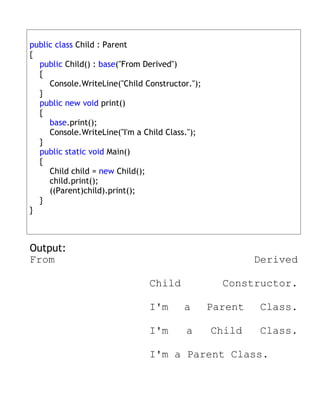
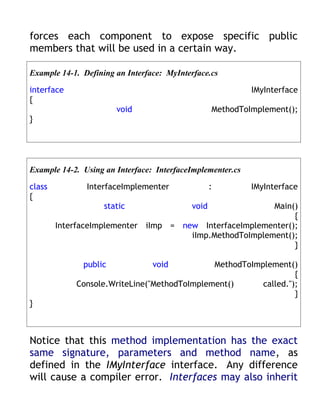
The argument list within the first statement is
different than before. It has a formatted string
with a "{0}" parameter embedded in it. The first
parameter in a formatted string begins at number
0, the second is 1, and so on. The "{0}"
parameter means that the next argument
following the end quote will determine what goes
in that position.
3. Operators, Types, and Variables
Variables and Types
C# is a strongly "Typed" language. Thus all
operations on variables are performed with
consideration of what the variable's "Type" is.
The C# simple types consist of the Boolean type
and three numeric types - Integrals, Floating
Point, Decimal and String. The term "Integrals"](https://image.slidesharecdn.com/visualcsharp-121019044816-phpapp02/85/Visual-c-sharp-3-320.jpg)
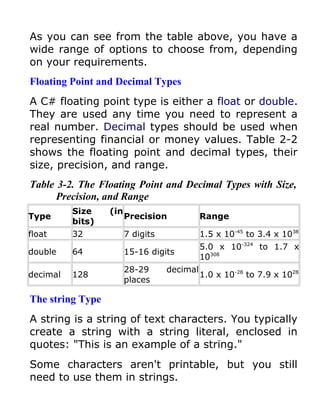
![literal, like this:
@"c:topdirsubdirsubdirmyapp.exe".
That is fine, but now you have the problem where
quoting text is not as easy. In that case, you
would specify double double quotes. For example,
the string "copy "c:source file name with
spaces.txt" c:newfilename.txt" would be written
as the verbatim literal @"copy ""c:source file
name with spaces.txt"" c:newfilename.txt".
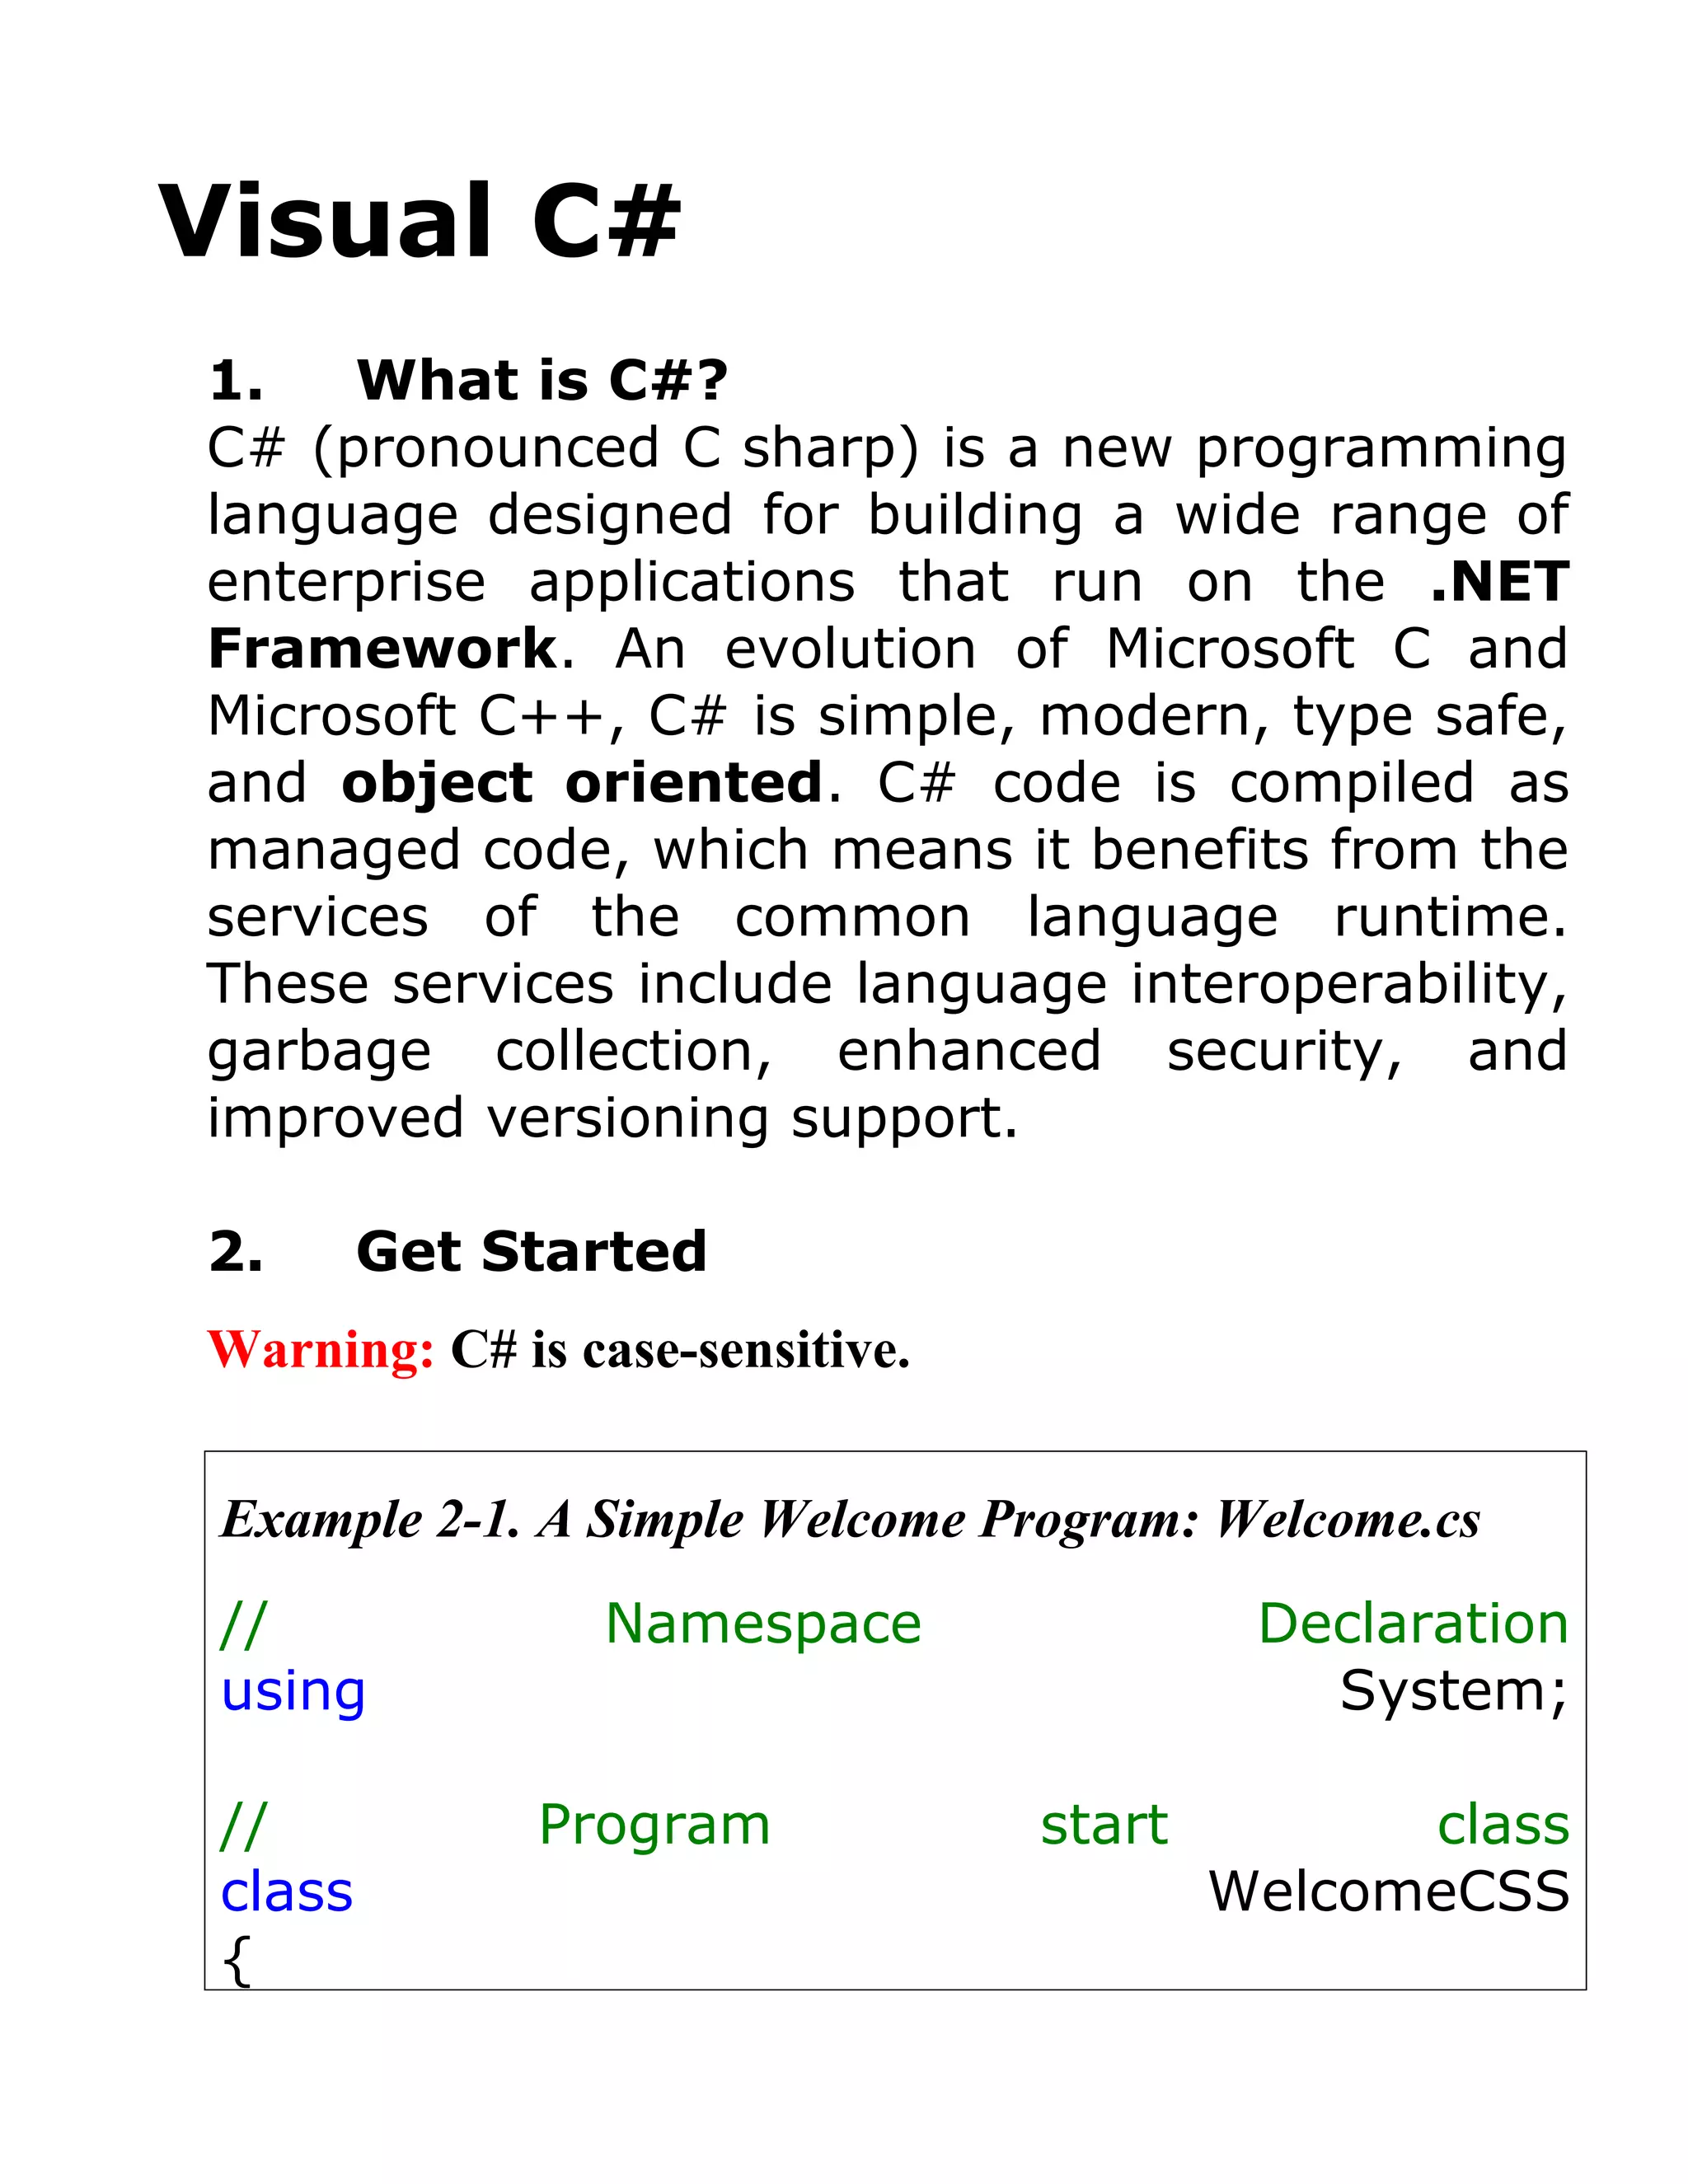
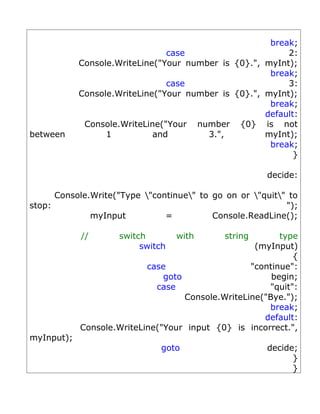
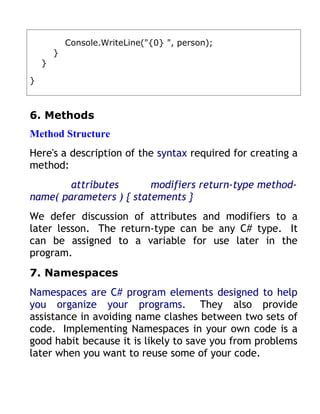
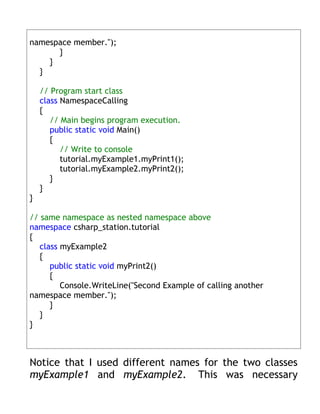
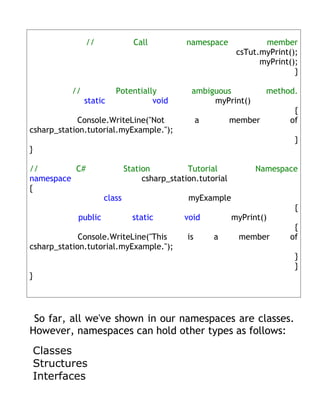
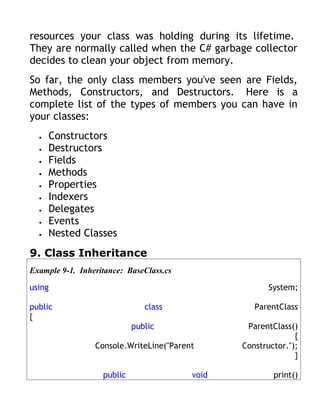
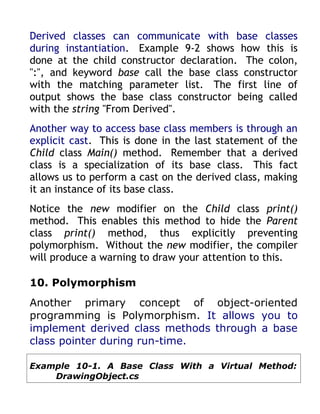
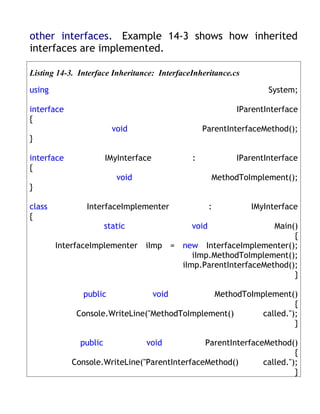
C# Operators
Results are computed by building expressions.
These expressions are built by combining
variables and operators together into statements.
The following table describes the allowable
operators, their precedence, and associativity.
Table 3-4. Operators with their Precedence and Associativity
Category
(by Associativit
Operator(s)
precedence y
)
(x) x.y f(x) a[x] x++ x-- new
Primary left
typeof sizeof checked unchecked
Unary + - ! ~ ++x --x (T)x left
Multiplicativ
* / % left
e
Additive + - left](https://image.slidesharecdn.com/visualcsharp-121019044816-phpapp02/85/Visual-c-sharp-8-320.jpg)
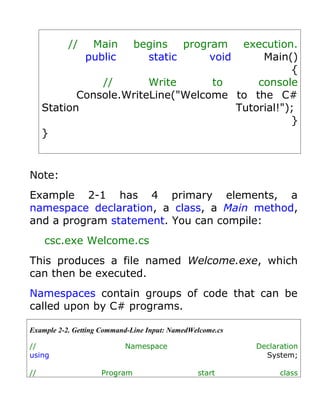
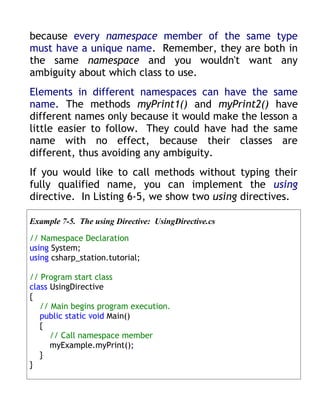
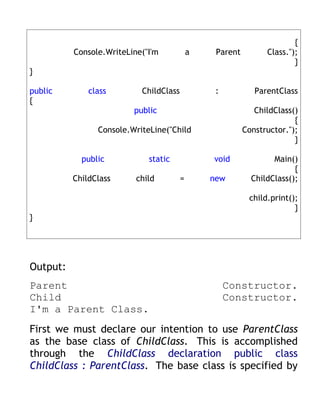
![Shift << >> left
Relational < > <= >= is left
Equality == != right
Logical AND & left
Logical XOR ^ left
Logical OR | left
Conditional
&& left
AND
Conditional
|| left
OR
Conditional> ?: right
= *= /= %= += -= <<= >>=
Assignment right
&= ^= |=
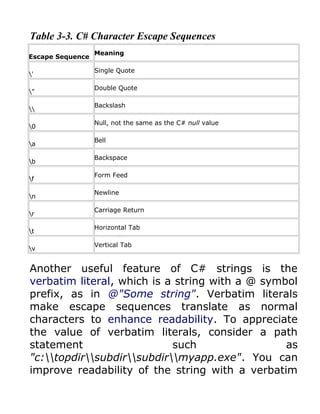
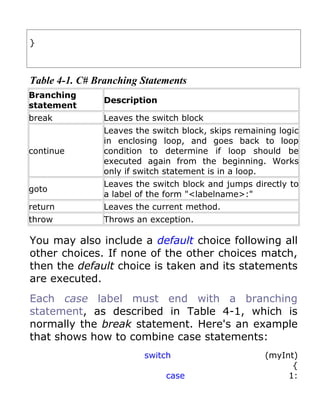
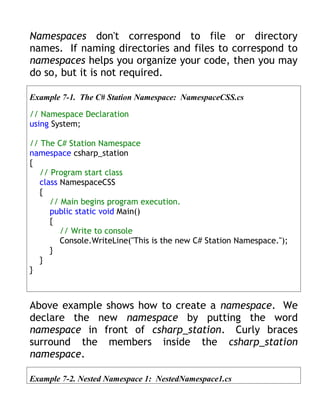
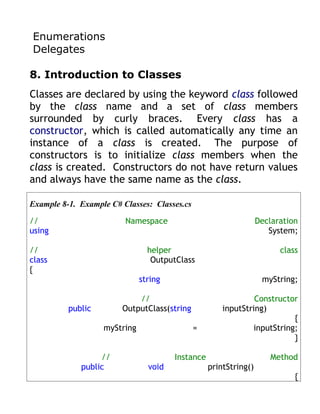
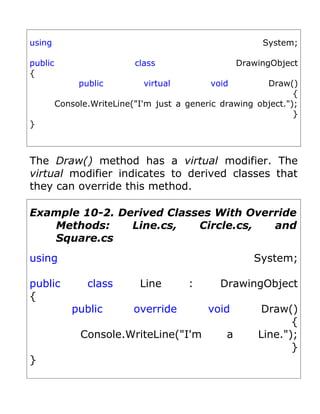
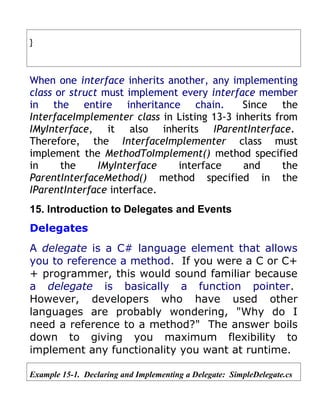
The Array Type
Another data type is the Array, which can be
thought of as a container that has a list of storage
locations for a specified type. When declaring an
Array, specify the type, name, dimensions, and
size.
Example 3-2. Array Operations: Array.cs
using System;
class Array
{
public static void Main()
{
int[] myInts = { 5, 10, 15 };
bool[][] myBools = new bool[2][];](https://image.slidesharecdn.com/visualcsharp-121019044816-phpapp02/85/Visual-c-sharp-9-320.jpg)
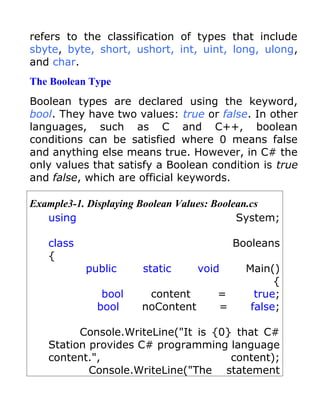
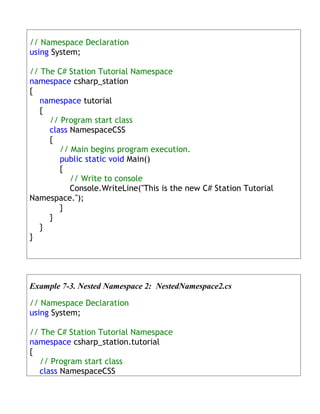
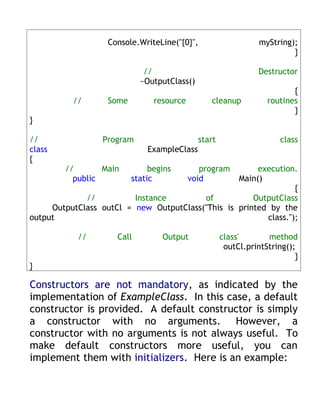
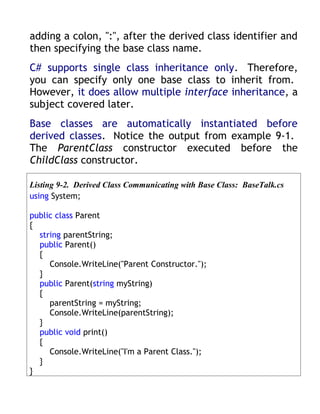
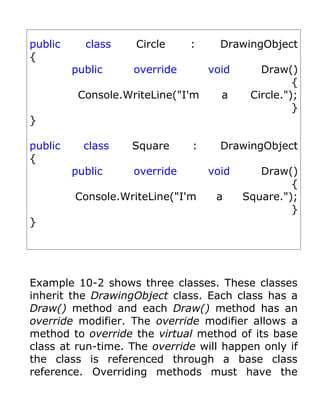
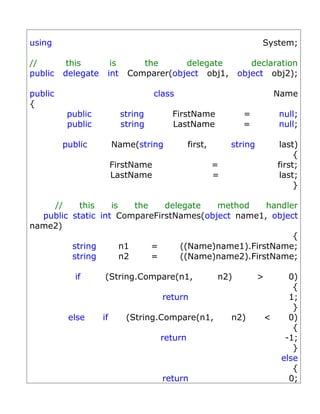
![myBools[0] = new bool[2];
myBools[1] = new bool[1];
double[,] myDoubles = new double[2, 2];
string[] myStrings = new string[3];
Console.WriteLine("myInts[0]: {0}, myInts[1]: {1},
myInts[2]: {2}", myInts[0], myInts[1], myInts[2]);
myBools[0][0] = true;
myBools[0][1] = false;
myBools[1][0] = true;
Console.WriteLine("myBools[0][0]: {0}, myBools[1]
[0]: {1}", myBools[0][0], myBools[1][0]);
myDoubles[0, 0] = 3.147;
myDoubles[0, 1] = 7.157;
myDoubles[1, 1] = 2.117;
myDoubles[1, 0] = 56.00138917;
Console.WriteLine("myDoubles[0, 0]: {0},
myDoubles[1, 0]: {1}", myDoubles[0, 0], myDoubles[1,
0]);
myStrings[0] = "Joe";
myStrings[1] = "Matt";
myStrings[2] = "Robert";
Console.WriteLine("myStrings[0]: {0},
myStrings[1]: {1}, myStrings[2]: {2}", myStrings[0],
myStrings[1], myStrings[2]);
}
}](https://image.slidesharecdn.com/visualcsharp-121019044816-phpapp02/85/Visual-c-sharp-10-320.jpg)
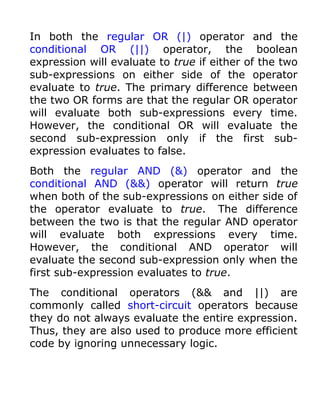
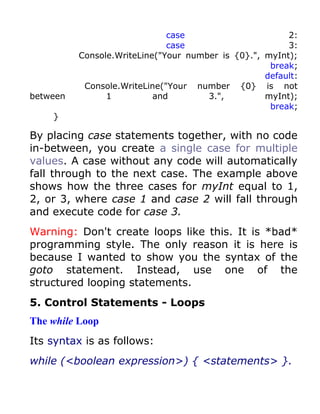
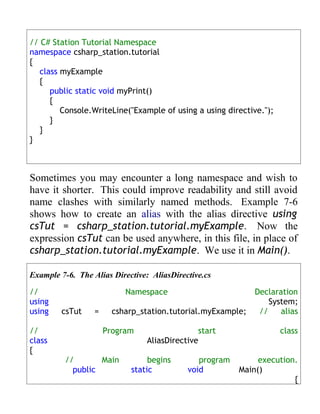
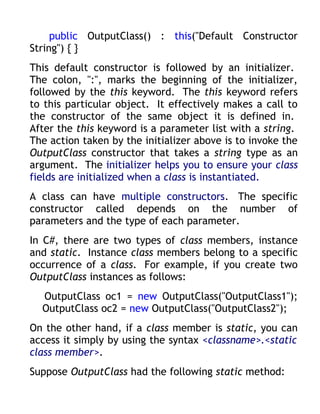
![And here's the output:
myInts[0]: 5, myInts[1]: 10, myInts[2]: 15
myBools[0][0]: True, myBools[1][0]: True
myDoubles[0, 0]: 3.147, myDoubles[1, 0]:
56.00138917
myStrings[0]: Joe, myStrings[1]: Matt,
myStrings[2]: Robert
The second array is a jagged array. It is
essentially an array of arrays. We needed to use
the new operator to instantiate the size of the
primary array and then use the new operator
again for each sub-array.
The third example is a two dimensional array.
Arrays can be multi-dimensional, with each
dimension separated by a comma. It must also be
instantiated with the new operator.
Arrays sizes can be any int type value. Their
indexes begin at 0.
4. Control Statements - Selection
The if Statement
When you have multiple expressions to evaluate,
you can use the if/else form of the if statement.](https://image.slidesharecdn.com/visualcsharp-121019044816-phpapp02/85/Visual-c-sharp-11-320.jpg)
![The type is the type of item contained in the list.
For example, if the type of the list was int[] then
the type would be int.
The item name is an identifier that you choose,
which could be anything but should be
meaningful.
The in keyword is required.
The list could be either an array or a collection, as
defined by types found in the System.Collections
namespace. While iterating through the items of a
list with a foreach loop, the list is read-only. This
means that you can't change the value of any
items in the list within a foreach loop.
Example 5-1 demonstrates how to use a foreach
loop.
Program 5-1. The ForEach Loop: ForEachLoop.cs
using System;
class ForEachLoop
{
public static void Main()
{
string[] names = {"Cheryl", "Joe", "Matt", "Robert"};
foreach (string person in names)
{](https://image.slidesharecdn.com/visualcsharp-121019044816-phpapp02/85/Visual-c-sharp-18-320.jpg)
![same signature, name and parameters, as the
virtual base class method it is overriding.
Listing 10-3. Program Implementing
Polymorphism: DrawDemo.cs
using System;
public class DrawDemo
{
public static int Main( )
{
DrawingObject[] dObj = new
DrawingObject[4];
dObj[0] = new Line();
dObj[1] = new Circle();
dObj[2] = new Square();
dObj[3] = new DrawingObject();
foreach (DrawingObject drawObj in dObj)
{
drawObj.Draw();
}
return 0;
}](https://image.slidesharecdn.com/visualcsharp-121019044816-phpapp02/85/Visual-c-sharp-38-320.jpg)
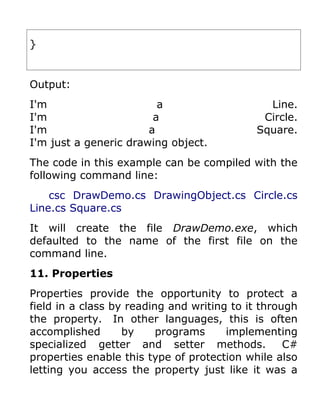
![field. To get an appreciation for what properties
accomplish, let's take a look at how to provide
field encapsulation by traditional methods.
Example 11-1. An Example of Traditional Class Field
Access: Accessors.cs
using System;
public class PropertyHolder
{
private int someProperty = 0;
public int getSomeProperty()
{
return someProperty;
}
public void setSomeProperty(int propValue)
{
someProperty = propValue;
}
}
public class PropertyTester
{
public static int Main(string[] args)
{
PropertyHolder propHold = new PropertyHolder();
propHold.setSomeProperty(5);
Console.WriteLine("Property Value: {0}",](https://image.slidesharecdn.com/visualcsharp-121019044816-phpapp02/85/Visual-c-sharp-40-320.jpg)
![{
someProperty = value;
}
}
}
public class PropertyTester
{
public static int Main(string[] args)
{
PropertyHolder propHold = new PropertyHolder();
propHold.SomeProperty = 5;
Console.WriteLine("Property Value: {0}",
propHold.SomeProperty);
return 0;
}
}
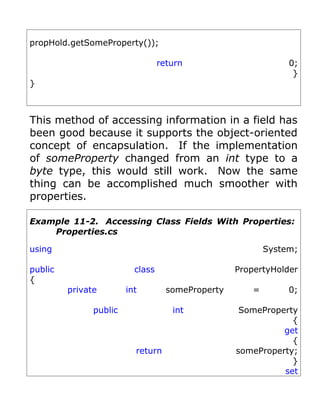
Above code shows how to create and use a
property. The PropertyHolder class has the
SomeProperty property implementation. Notice
that the first letter of the first word is capitalized.
That's the only difference between the names of
the property SomeProperty and the field
someProperty. The property has two accessors,
get and set. get and set are reserved words in
C#.](https://image.slidesharecdn.com/visualcsharp-121019044816-phpapp02/85/Visual-c-sharp-42-320.jpg)
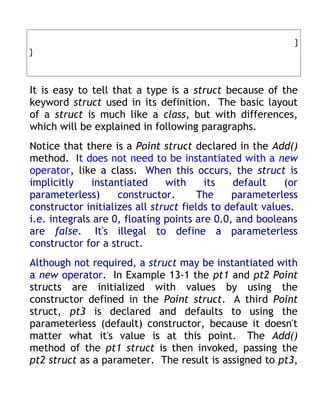
![Properties can be made read-only. This is
accomplished by having only a get accessor in the
property implementation.
Example 11-3. Read-Only Property:
ReadOnlyProperty.cs
using System;
public class PropertyHolder
{
private int someProperty = 0;
public PropertyHolder(int propVal)
{
someProperty = propVal;
}
public int SomeProperty
{
get
{
return someProperty;
}
}
}
public class PropertyTester
{
public static int Main(string[] args)
{
PropertyHolder propHold = new PropertyHolder(5);
Console.WriteLine("Property Value: {0}",](https://image.slidesharecdn.com/visualcsharp-121019044816-phpapp02/85/Visual-c-sharp-43-320.jpg)
![propHold.SomeProperty);
return 0;
}
}
Example 11-4. Write-Only Property:
WriteOnlyProperty.cs
using System;
public class PropertyHolder
{
private int someProperty = 0;
public int SomeProperty
{
set
{
someProperty = value;
Console.WriteLine("someProperty is equal to {0}",
someProperty);
}
}
}
public class PropertyTester
{
public static int Main(string[] args)](https://image.slidesharecdn.com/visualcsharp-121019044816-phpapp02/85/Visual-c-sharp-44-320.jpg)

![class IntIndexer
{
private string[] myData;
public IntIndexer(int size)
{
myData = new string[size];
for (int i=0; i < size; i++)
{
myData[i] = "empty";
}
}
public string this[int pos]
{
get
{
return myData[pos];
}
set
{
myData[pos] = value;
}
}
static void Main(string[] args)
{
int size = 10;
IntIndexer myInd = new IntIndexer(size);
myInd[9] = "Some Value";
myInd[3] = "Another Value";](https://image.slidesharecdn.com/visualcsharp-121019044816-phpapp02/85/Visual-c-sharp-46-320.jpg)
![myInd[5] = "Any Value";
Console.WriteLine("nIndexer Outputn");
for (int i=0; i < size;i++)
{
Console.WriteLine("myInd[{0}]: {1}", i, myInd[i]);
}
}
}
The Indexer is identified by the this keyword and square
brackets, this[int pos]. It accepts a single position
parameter, pos. As you may have already guessed, the
implementation of an Indexer is the same as a
Property. It has get and set accessors that are used
exactly like those in a Property. This indexer returns a
string, as indicated by the string return value in the
Indexer declaration.
The Main() method simply instantiates a new IntIndexer
object, adds some values, and prints the results. Here's
the output:
Indexer Output
myInd[0]: empty
myInd[1]: empty
myInd[2]: empty](https://image.slidesharecdn.com/visualcsharp-121019044816-phpapp02/85/Visual-c-sharp-47-320.jpg)
![myInd[3]: Another Value
myInd[4]: empty
myInd[5]: Any Value
myInd[6]: empty
myInd[7]: empty
myInd[8]: empty
myInd[9]: Some Value
Using an integer is a common means of accessing arrays
in many languages, but the C# Indexer goes beyond
this. Indexers can be declared with multiple parameters
and each parameter may be a different type. Additional
parameters are separated by commas, the same as a
method parameter list. Valid parameter types for
Indexers include integers, enums, and strings.
Additionally, Indexers can be overloaded. In the
following program, we modify the previous program to
accept overloaded Indexers that accept different types.
Listing 11-2. Overloaded Indexers: OvrIndexer.cs
using System;
/// <summary>
/// Implements overloaded indexers.
/// </summary>
class OvrIndexer
{
private string[] myData;
private int arrSize;
public OvrIndexer(int size)](https://image.slidesharecdn.com/visualcsharp-121019044816-phpapp02/85/Visual-c-sharp-48-320.jpg)
![{
arrSize = size;
myData = new string[size];
for (int i=0; i < size; i++)
{
myData[i] = "empty";
}
}
public string this[int pos]
{
get
{
return myData[pos];
}
set
{
myData[pos] = value;
}
}
public string this[string data]
{
get
{
int count = 0;
for (int i=0; i < arrSize; i++)
{
if (myData[i] == data)
{
count++;
}
}](https://image.slidesharecdn.com/visualcsharp-121019044816-phpapp02/85/Visual-c-sharp-49-320.jpg)
![return count.ToString();
}
set
{
for (int i=0; i < arrSize; i++)
{
if (myData[i] == data)
{
myData[i] = value;
}
}
}
}
static void Main(string[] args)
{
int size = 10;
OvrIndexer myInd = new OvrIndexer(size);
myInd[9] = "Some Value";
myInd[3] = "Another Value";
myInd[5] = "Any Value";
myInd["empty"] = "no value";
Console.WriteLine("nIndexer Outputn");
for (int i=0; i < size; i++)
{
Console.WriteLine("myInd[{0}]: {1}", i, myInd[i]);
}
Console.WriteLine("nNumber of "no value" entries: {0}",
myInd["no value"]);
}](https://image.slidesharecdn.com/visualcsharp-121019044816-phpapp02/85/Visual-c-sharp-50-320.jpg)
![}
Here's the output:
Indexer Output
myInd[0]: no value
myInd[1]: no value
myInd[2]: no value
myInd[3]: Another Value
myInd[4]: no value
myInd[5]: Any Value
myInd[6]: no value
myInd[7]: no value
myInd[8]: no value
myInd[9]: Some Value
Number of "no value" entries: 7
The reason both Indexers in above code can coexist in
the same class is because they have different
signatures. An Indexer signature is specified by the
number and type of parameters in an Indexers
parameter list. The class will be smart enough to figure
out which Indexer to invoke, based on the number and
type of arguments in the Indexer call. An indexer with
multiple parameters would be implemented something
like this:](https://image.slidesharecdn.com/visualcsharp-121019044816-phpapp02/85/Visual-c-sharp-51-320.jpg)
![public object this[int param1, ..., int paramN]
{
get
{
// process and return some class data
}
set
{
// process and assign some class data
}
}
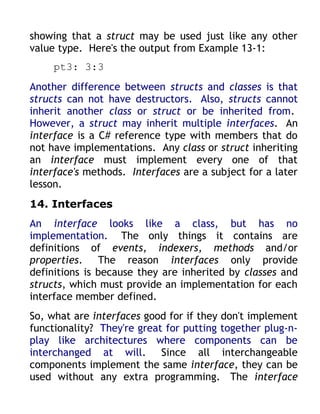
13. Structs
A struct allows you to create new value-type objects
that are similar to the built-in types (int, float, bool,
etc.). When would you use a struct instead of a class?
Think about how the built-in types are used. They have
values and distinct operations to manipulate those
values. If you have a need to create an object that
behaves in this manner, consider implementing it as a
struct. Later in this article, I'll explain a couple rules
for using structs, which will give you a better idea of
when to use them. In the meantime, here's an example.
Example 13-1. Example of a struct: StructExample.cs
using System;
struct Point](https://image.slidesharecdn.com/visualcsharp-121019044816-phpapp02/85/Visual-c-sharp-52-320.jpg)
![{
public int x;
public int y;
public Point(int x, int y)
{
this.x = x;
this.y = y;
}
public Point Add(Point pt)
{
Point newPt;
newPt.x = x + pt.x;
newPt.y = y + pt.y;
return newPt;
}
}
/// <summary>
/// Example of declaring and using a struct
/// </summary>
class StructExample
{
static void Main(string[] args)
{
Point pt1 = new Point(1, 1);
Point pt2 = new Point(2, 2);
Point pt3;
pt3 = pt1.Add(pt2);
Console.WriteLine("pt3: {0}:{1}", pt3.x, pt3.y);](https://image.slidesharecdn.com/visualcsharp-121019044816-phpapp02/85/Visual-c-sharp-53-320.jpg)
![}
}
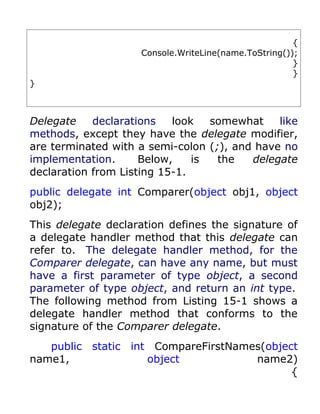
public override string ToString()
{
return FirstName + " " + LastName;
}
}
class SimpleDelegate
{
Name[] names = new Name[5];
public SimpleDelegate()
{
names[0] = new Name("Joe", "Mayo");
names[1] = new Name("John", "Hancock");
names[2] = new Name("Jane", "Doe");
names[3] = new Name("John", "Doe");
names[4] = new Name("Jack", "Smith");
}
static void Main(string[] args)
{
SimpleDelegate sd = new SimpleDelegate();
// this is the delegate instantiation
Comparer cmp = new
Comparer(Name.CompareFirstNames);
Console.WriteLine("nBefore Sort: n");
sd.PrintNames();](https://image.slidesharecdn.com/visualcsharp-121019044816-phpapp02/85/Visual-c-sharp-60-320.jpg)
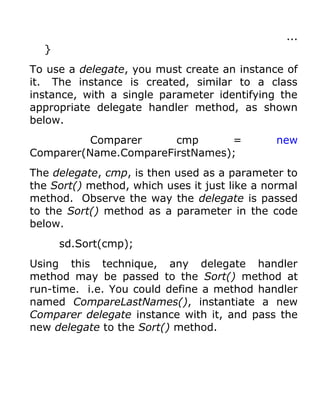
![// observe the delegate argument
sd.Sort(cmp);
Console.WriteLine("nAfter Sort: n");
sd.PrintNames();
}
// observe the delegate parameter
public void Sort(Comparer compare)
{
object temp;
for (int i=0; i < names.Length;
i++)
{
for (int j=i; j < names.Length; j++)
{
// using delegate "compare" just like
// a normal method
if ( compare(names[i], names[j]) > 0 )
{
temp = names[i];
names[i] = names[j];
names[j] = (Name)temp;
}
}
}
}
public void PrintNames()
{
Console.WriteLine("Names: n");
foreach (Name name in names)](https://image.slidesharecdn.com/visualcsharp-121019044816-phpapp02/85/Visual-c-sharp-61-320.jpg)

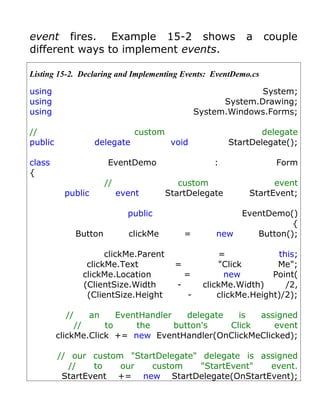
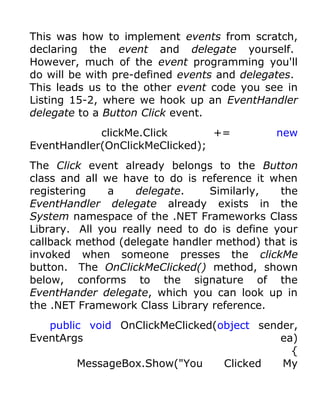
![// fire our custom event
StartEvent();
}
// this method is called when the "clickMe" button is pressed
public void OnClickMeClicked(object sender, EventArgs ea)
{
MessageBox.Show("You Clicked My Button!");
}
// this method is called when the "StartEvent" Event is fired
public void OnStartEvent()
{
MessageBox.Show("I Just Started!");
}
static void Main(string[] args)
{
Application.Run(new EventDemo());
}
}
The EventDemo class inherits Form, which
essentially makes it a Windows Form. This
automatically gives you all the functionality of a
Windows Form, including Title Bar,
Minimize/Maximize/Close buttons, System Menu,
and Borders. A lot of power, that inheritance
thing, eh?](https://image.slidesharecdn.com/visualcsharp-121019044816-phpapp02/85/Visual-c-sharp-66-320.jpg)
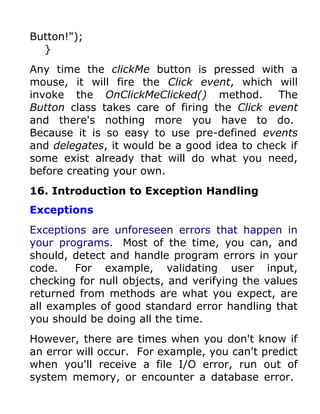
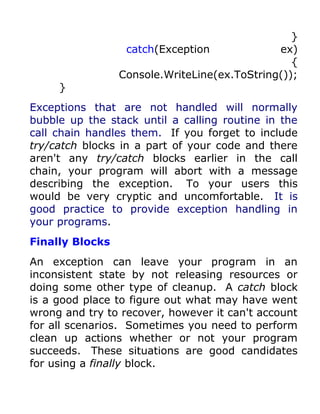
![Note: The programs in here cause exceptions on purpose. The exception that you see is generated
intentionally to show you what the exception message looks like before you see it yourself in your
own programs.
Example 16-1. Using try/catch Blocks: TryCatchDemo.cs
using System;
using System.IO;
class TryCatchDemo
{
static void Main(string[] args)
{
try
{
File.OpenRead("NonExistentFile");
}
catch(Exception ex)
{
Console.WriteLine(ex.ToString());
}
}
}
In exception handling, more specific exceptions
will be caught before their more general parent
exceptions. For example, the following snippet
shows how to place multiple catch blocks:
catch(FileNotFoundException fnfex)
{
Console.WriteLine(fnfex.ToString());](https://image.slidesharecdn.com/visualcsharp-121019044816-phpapp02/85/Visual-c-sharp-72-320.jpg)
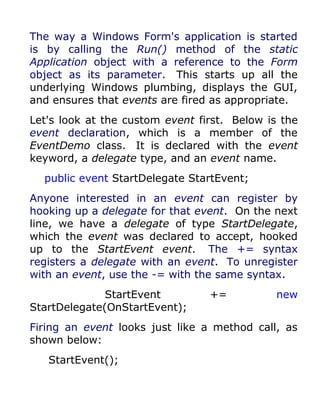
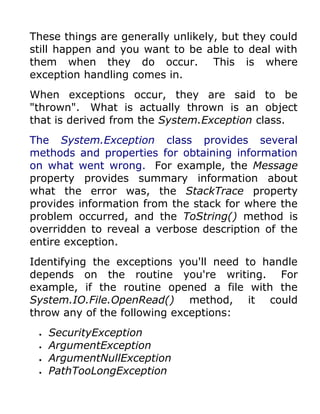
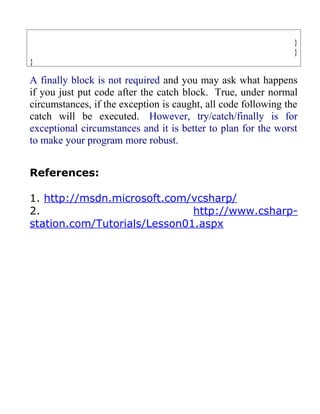
![Listing 16-2 illustrates the usefulness of a finally
block
Listing 16-2. Implementing a finally Block: FinallyDemo.cs
using System;
using System.IO;
class FinallyDemo
{
static void Main(string[] args)
{
FileStream outStream = null;
FileStream inStream = null;
try
{
outStream = File.OpenWrite("DestinationFile.txt");
inStream = File.OpenRead("BogusInputFile.txt");
}
catch(Exception ex)
{
Console.WriteLine(ex.ToString());
}
finally
{
if (outStream != null)
{
outStream.Close();
Console.WriteLine("outStream closed.");
}
if (inStream != null)
{
inStream.Close();
Console.WriteLine("inStream closed.");
}](https://image.slidesharecdn.com/visualcsharp-121019044816-phpapp02/85/Visual-c-sharp-74-320.jpg)

C# is an object-oriented programming language designed for building a wide range of applications that run on the .NET Framework. The document provides examples of simple C# programs that demonstrate key elements like namespaces, classes, methods, variables, operators, and arrays. It also summarizes the different data types in C# including integers, floats, decimals, Booleans, strings, and arrays. Code samples are included to illustrate how to declare and use variables of different types, write simple programs, and perform operations with arrays.