

Recommended
Recommended
More Related Content
What's hot
What's hot (8)
Similar to Translation shuttle conveyor manual
Similar to Translation shuttle conveyor manual (20)
More from Mark Tung
More from Mark Tung (20)
Recently uploaded
Recently uploaded (20)
Translation shuttle conveyor manual
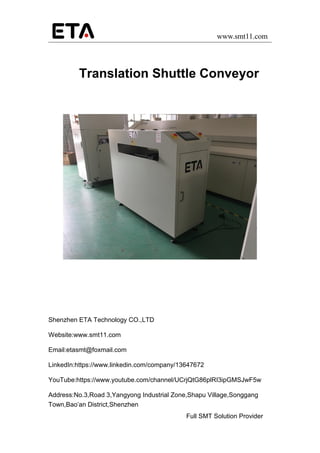
- 1. www.smt11.com Full SMT Solution Provider Translation Shuttle Conveyor Shenzhen ETA Technology CO.,LTD Website:www.smt11.com Email:etasmt@foxmail.com LinkedIn:https://www.linkedin.com/company/13647672 YouTube:https://www.youtube.com/channel/UCrjQtG86plRI3ipGMSJwF5w Address:No.3,Road 3,Yangyong Industrial Zone,Shapu Village,Songgang Town,Bao’an District,Shenzhen
- 2. www.smt11.com 1 Warning: The equipment can only be operated by professional maintenance and maintenance personnel or qualified personnel. Please confirm that the external input power is in accordance with the rated voltage and power of the equipment. Please grounding the equipment reliably The equipmentAll mechanical transmission of this equipment should pay attention to personal safety during operation. Note: please read the user manual carefully before operating this equipment, bear in mind that matters needing attention Please do not install the equipment in the vicinity of electromagnetic interference. Please do not modify the hardware and software programs in the electric box. Please keep this manual properly and maintain the equipment We wish to express our heartfelt thanks to you for your purchase of our products.This manual describes the composition of hardware, equipment operation, electrical diagram and maintenance.Please fully understand this manual and use it correctly. Please contact us if you find any questions or errors.
- 3. www.smt11.com 2 Chapter 1 Introduction 1.1 Overview Used in SMT industry PCB or fixture rail transmission, multi - line merging, plug - line U - type reflux, etc. Features of this machine: Adopt the panasonic PLC, the thunder step advance, the precision ball screw. It can realize the transmission of PCB board, multi-line merging, shunt and so on. The corresponding mode can be selected according to the specific cycloid situation. 1.2 Technical parameters Project Main parameters Transport direction Left to right Power AC220 50/60Hz Power 200W。 Control mode Touch screen plus PLC, panasonic servo motor. Transport type The belt PCB thickness 0.7~30mm。 Conveying height 880~920(adjustable)。 Touch screen password 123
- 4. www.smt11.com 3 Prepare items before use. Please use 220V single-phase 50Hz/60H capacity of more than 200W fixed power. Machinery must be securely grounded and must be connected to the ground. The ground wire must be well fixed in the metal part of the fuselage. To ensure safety, the body is prohibited from getting close to the equipment in operation. Do not install the machine in dust, oil mist, conductive dust, corrosive gas, flammable gas, humidity, shock vibration, strong interference, high temperature and outdoor environment. Avoid using corrosive solvent wipe machine, should use neutral cleaner. Please take care of the price specification for future maintenance and maintenance. Note: There is no reliable grounding and there may be a risk of electric shock.
- 5. www.smt11.com 4 Chapter 2 Machine operation 2.1 Points for attention 1. To ensure safety, the body is forbidden to contact parts in operation. 2.Check for sundries in the machine. 3.Check the track for sundries or fixture plates. 2.2 Operating instructions 2.2.1 Startup page Figure 1 2.2.2 Operation page description:
- 6. www.smt11.com 5 Figure 2 Button instruction Automatic startup——After the device reset to zero, click the button and the device enters the automatic operation state. Reset——Click the button in the stop state, and the device returns to zero; When the device automatically runs the fault alarm buzzer, it will handle the abnormality and press the button device to cancel the alarm state and continue to run. Stop button——Click the button and the device stops running. Pause button——Automatically run, click the button, the device stops temporarily, click the automatic start button again, the device continues to run. Manual page——Click into the manual operation screen. Parameters of the page——Click enter parameter Settings page. The I/O control——Click to enter I/O monitoring page. Alarm browsing——Click into the alarm to view the page. Mode selection——Click into the mode selection page. Return——Click enter to start the page. Position setting——Click enter to set the page. Note: before automatic operation of the equipment, it is necessary to set the parameter setting according to the related parameters.
- 7. www.smt11.com 6 Indicator light Front track signal——The front of the platform forward board position machine sends out the board signal. Rear track signal——The trolley sends a signal to the rear board. Front rail lower machine output board——The front of the board position machine is facing the board. The rear rail lower plane——The back out board position machine is on the board. The front rail has a board——The forward board has a board in the upper computer track. The back rail has a board——The rear board is on the upper computer track. Text description The current mode——The shift mode when the device runs automatically. Production count——The number of outflow plates. 2.2.3 Location Settings page Figure 3 Position adjustment step instructions.
- 8. www.smt11.com 7 1、Click reset, stay back to zero after the completion of the translational axis, click on "location adjustment" button, enter the position adjustment page in place page by clicking on "manual start" button, the equipment into the manual operation state, click on the "teaching mode" button, to green entry point dynamic teaching mode 2、Click the "JOG+" "JOG-" button to move the track of the translation axis to the corresponding position. The long press the corresponding save button, and the buzzer is heard and the position adjustment is completed. Button instruction Save the forward plank position —— in the teaching mode, the long press button, the forward position of the platform (i.e., A into the plate) is saved, and the input box value in the front is changed. save junior board ——teaching mode, long press the button, the car last in plate a (B) into the board keep complete, the input box in front of values is changed Before save the board ——teaching mode, long press the button, the machine a car out of the board (C) the board keep complete, the input box in front of values is changed saved the board ——teaching mode, long press the button, the car out of the plate after (D out board) keep complete, the input box in front of values is changed To the forward position -- when the manual mode button is not pressed, click the trolley to move to the forward position. To the rear board position -- when the manual mode button is not pressed, click the trolley to move to the rear board position. to top of plate——manual teaching mode when the button is not pressed, click on the car after moving to the board To after the board——manual teaching mode when the button is not pressed, click on the car after moving to the board 2.2.4 Parameter setting description
- 9. www.smt11.com 8 Figure 4 Input box instruction Board delay Settings——run automatically track no board to set a time when the signal to board Board delay setting——when the track is automatically run, the PCB leaves the stopboard sensor to reach the set time to stop the output of the board transmission. Transmission timeout alarm Settings——run automatically, into the board send out the board time to set the time, sending equipment alarm buzzer Back to zero setting——run automatically each sent to board can be set up, car position automatically back to zero one time correction Manual speed setting——translational axis manual operation when the speed of continuous movement Automatic speed setting——translational axis run automatically when the speed of continuous movement Transmission speed setting——equipment orbit transfer speed setting, the greater the value the faster speed Plug-in cylinder reset delay——rotary A>>D mode, the board of the platform, the PCB board inside the plug-in line leaves the front sensor of the cylinder to reach the setting time, and the cylinder rises to intercept the back PCB. 2.2.5 Input and Output Screen Description
- 10. www.smt11.com 9 Figure 5 Can monitor the working status of various electrical components of the equipment, red is not working status, green is working state. 2.2.6 Mode selection specification Figure 6 Model specification A is for the forward board C stands for the front board position B stands for backward position D stands for the rear panel. AB > > CD by PC AB rail flow under the machine CD tracks AB > > C by PC AB C rail rail flow under a machine AB > > D by PC AB rail flow under the machine D rail A > > A CD by the upper machine under the rail to A machine CD tracks
- 11. www.smt11.com 10 B > > CD by the upper machine B under the rail to a CD track A > > C A rail flow to the lower machine C by the upper machine A > > D by the upper machine A D rail rail flow under A machine B > > C by the upper machine to lower place machine C B rail track B > >D by the upper machine to lower place machine D B rail track Rotary > A > D U plug-in line rotary model Note: The position near the operating surface is the front position. The forward plate position is the position of the board near the operating surface. The rear board position is the entry position relative to the operating surface. The front plate position is near the operating surface. The rear board position is the position of the board that is relatively far from the operating surface. 2.2.7 Manual operation page description. Figure 7 Button instruction Manual operation -- after the resetting of the platform is finished, click the button and the device enters the manual operation state. Return to zero - manually run, click the button and the trolley returns to zero. The rest of the buttons function just as they do in the position adjustment page.
- 12. www.smt11.com 11 Chapter 3 Troubleshooting and troubleshooting 1. Familiar with the principle of equipment and electrical schematic diagram. 2. Be familiar with the installation position of each mechanical device and electrical appliance in the equipment, and understand its performance and function. 3. Correctly analyze the causes of failure. 4. Find fault parts and components that fail. 5. Targeted maintenance. Note: To repair or replace the electrical components, please disconnect the power supply. Chapter 4 Maintenance and maintenance Check whether the conveyor belt is too loose and keep the conveyor belt clean. Wipe the dirty oil with a silken cloth or paper and lubricate the ball screw. Test whether the delivery of the product is smooth. Check the track for wear and tear. Every week, I oil the screw.
- 13. www.smt11.com 12 Company Profile ETA, a long-standing electronic equipment industry platform, has been continuously contributing to the global customer base in the field of electronics manufacturing since 1999. ETA company has excellent technical team and service team in surface mount technology (SMT), plug-in assembly (DIP), functional test (TEST), etc. in home appliances (Such as TV, refrigerator, air conditioner, washing machine), new energy (LED, Solar, new energy vehicles, automotive electronics, medical equipment, semiconductors, power electronics and other fields have many successful experiences. Our products cover SMT equipment (smt line, stencil printer, SPI, pick and place machine, AOI, reflow oven, handling equipment), DIP equipment (plug-in line, wave soldering machine, assembly line, belt line), test equipment, packaging equipment, etc. . Through the deepening of ETA's globalization strategy, we have helped more than 200 customers around the world to complete the entire industry chain from program design, production and construction, service training, etc. Our team and products have covered more than 150 countries all around the world and area. While exporting ETA's nearly 30 years of technical experience to global customers, we continue to improve our R&D capabilities and production capabilities. Through investment and equity acquisitions, ETA has more than 15 member companies in China, forming a supply chain for the entire industry chain system. In 2018, We helped clients plan to build more than 35 production workshops and train more than 100 technicians. In the next five years, our goal is to continue to focus on the electronics manufacturing industry, to provide more than 200 customers worldwide, and to provide more professional and active technical support for customers' manufacturing.