Download as PDF, PPTX


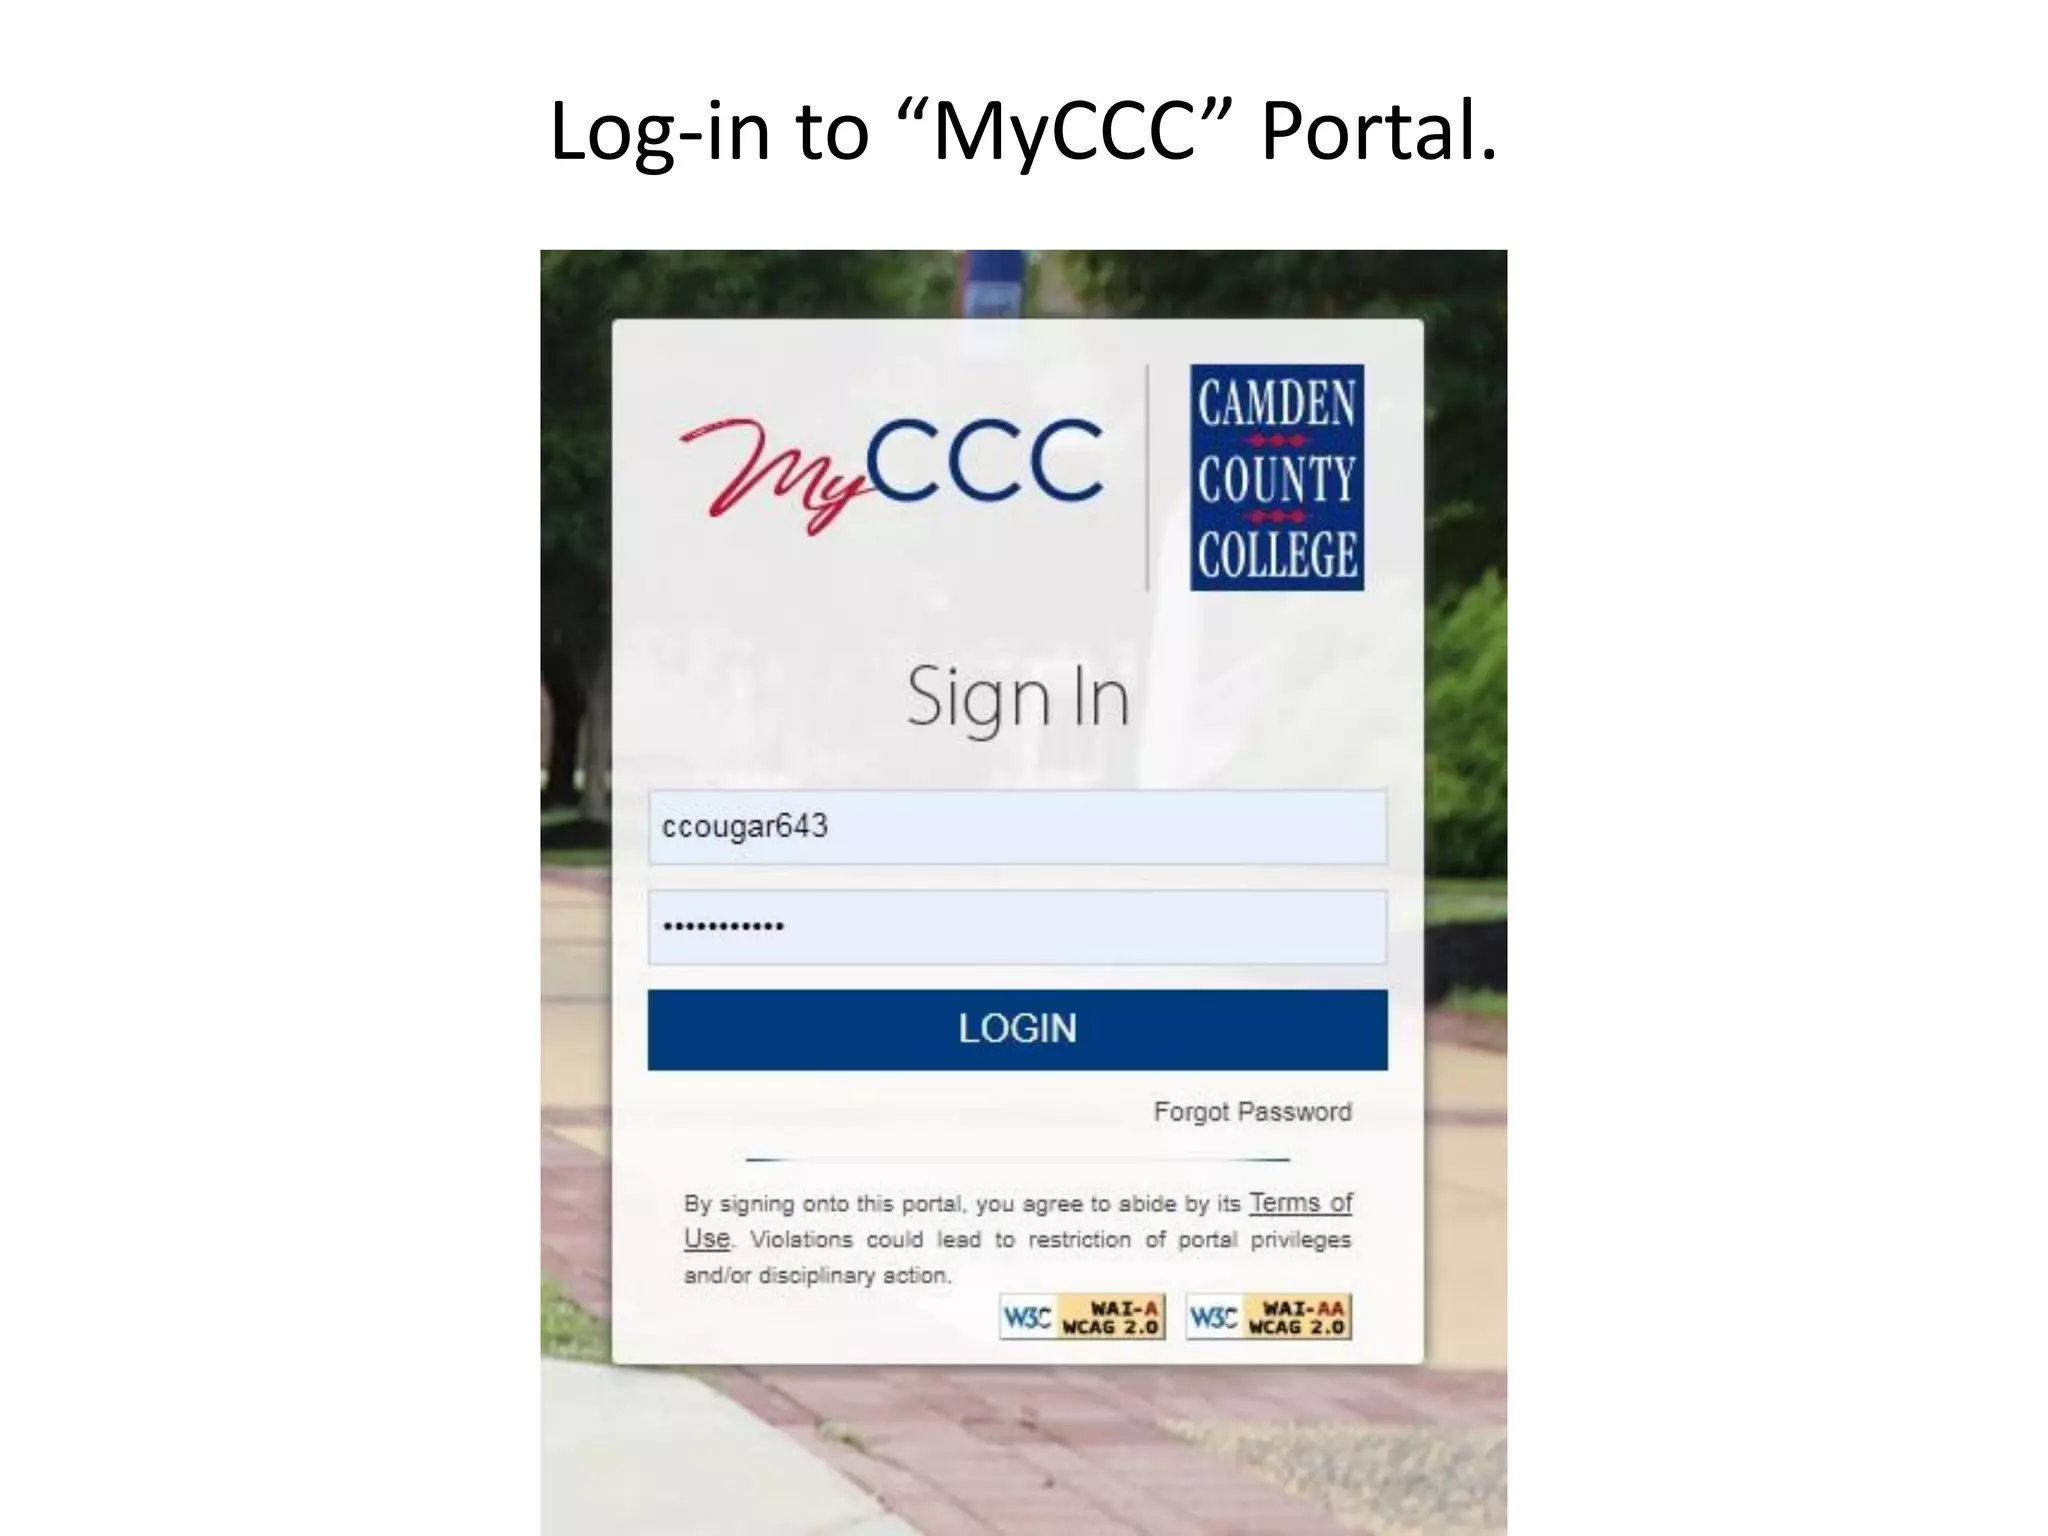
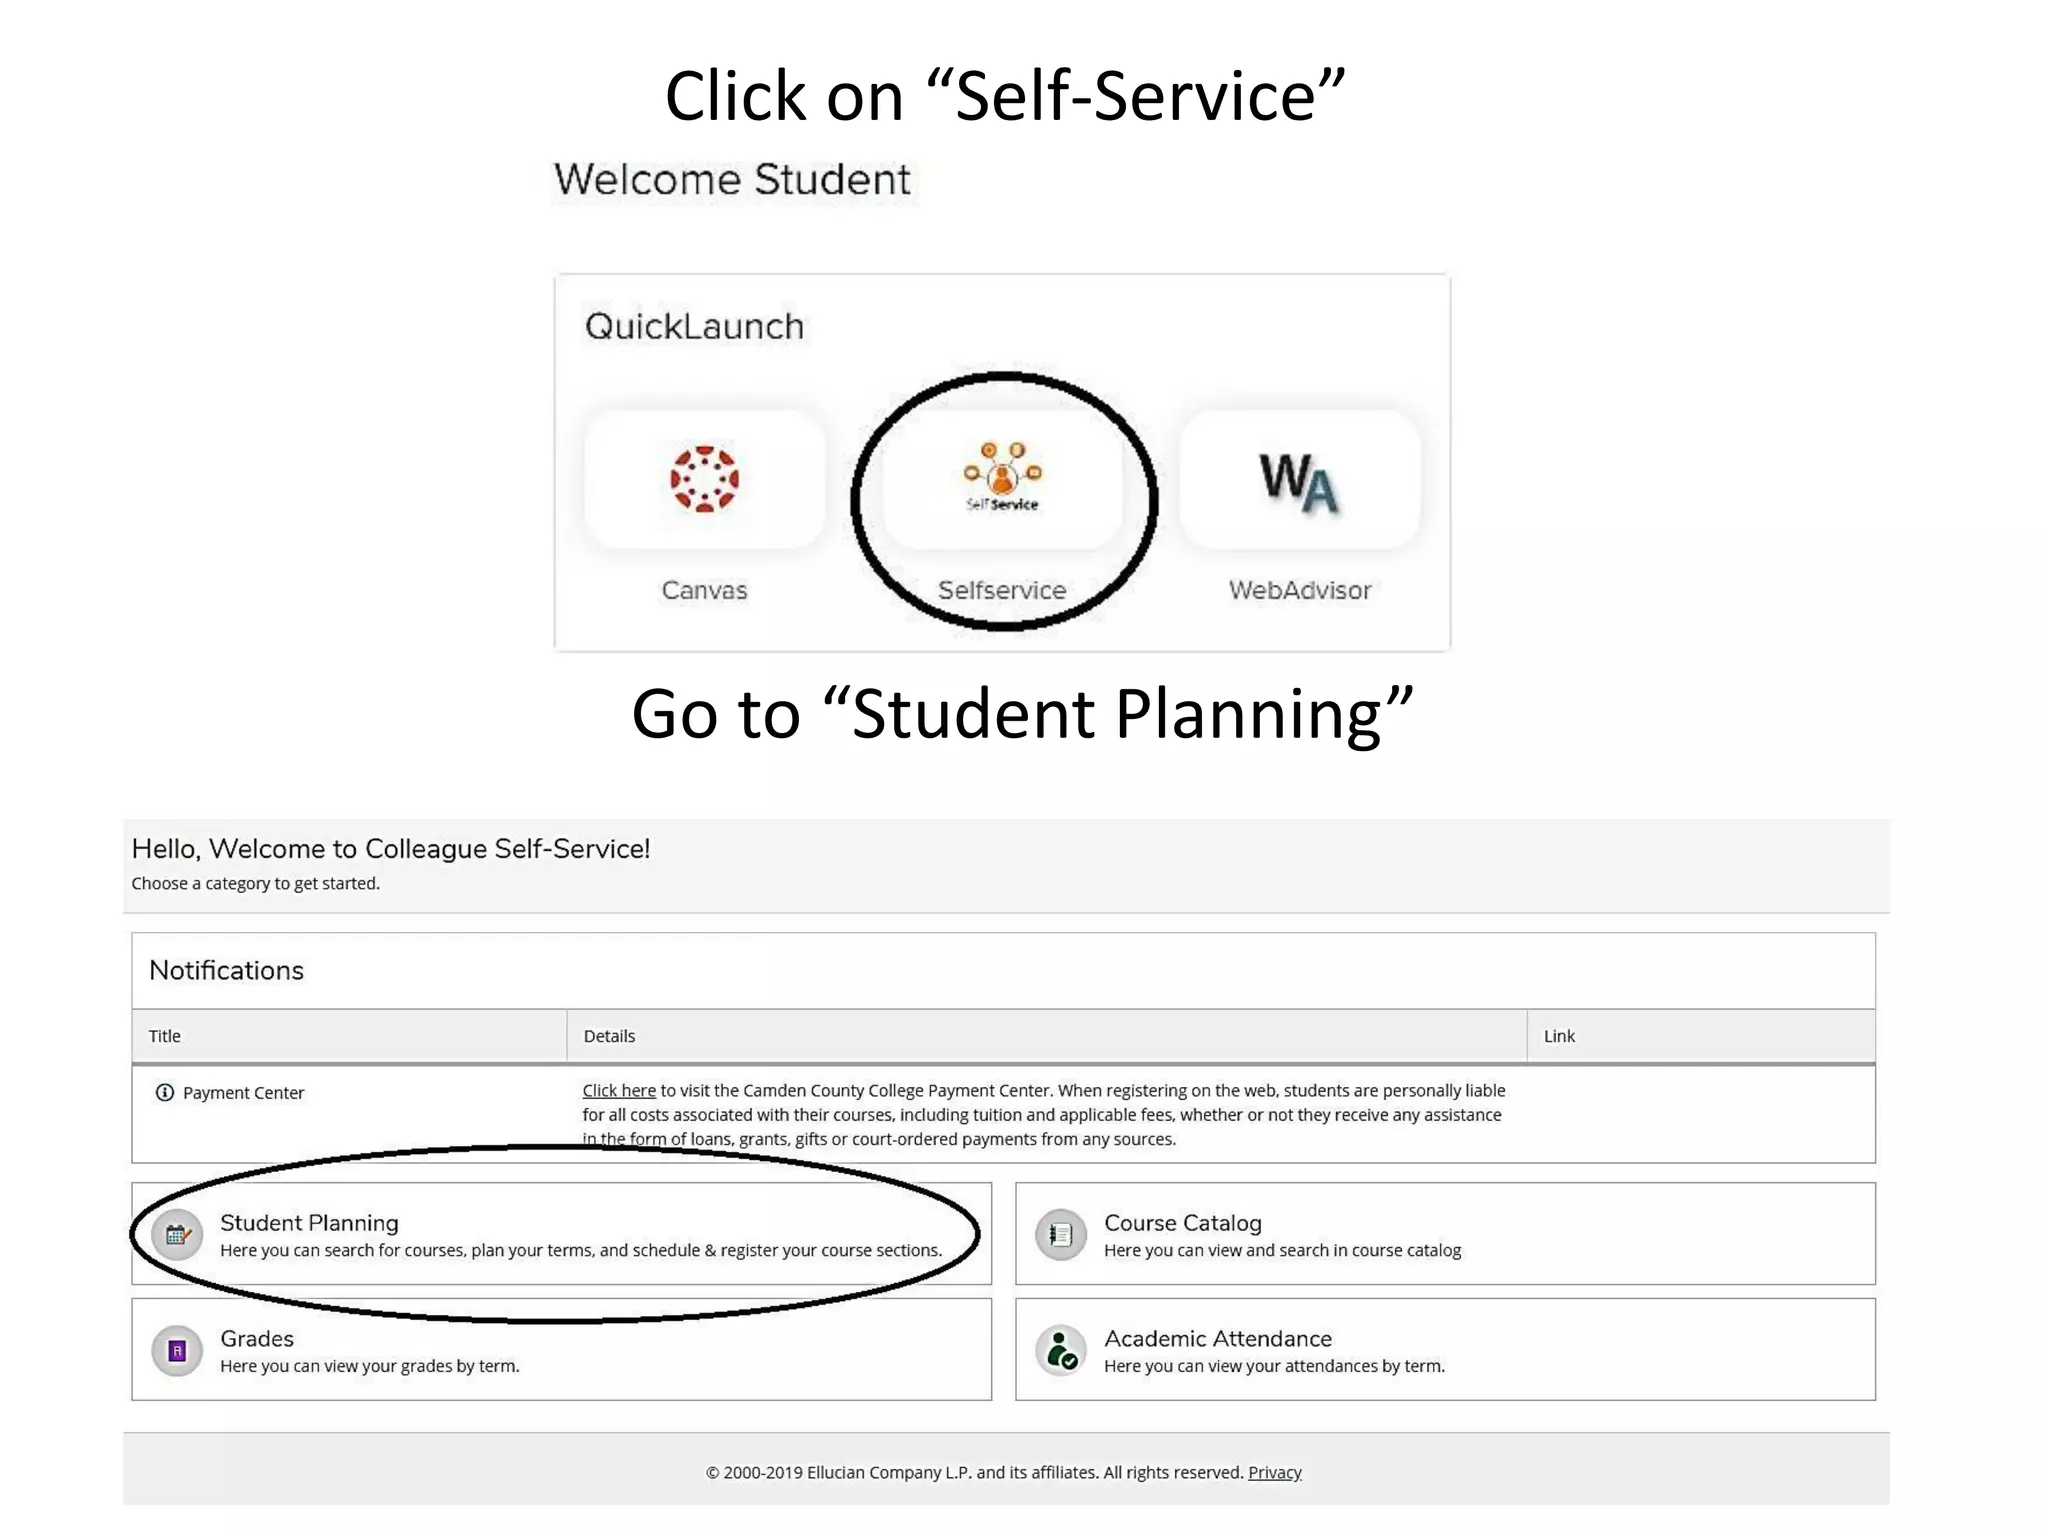
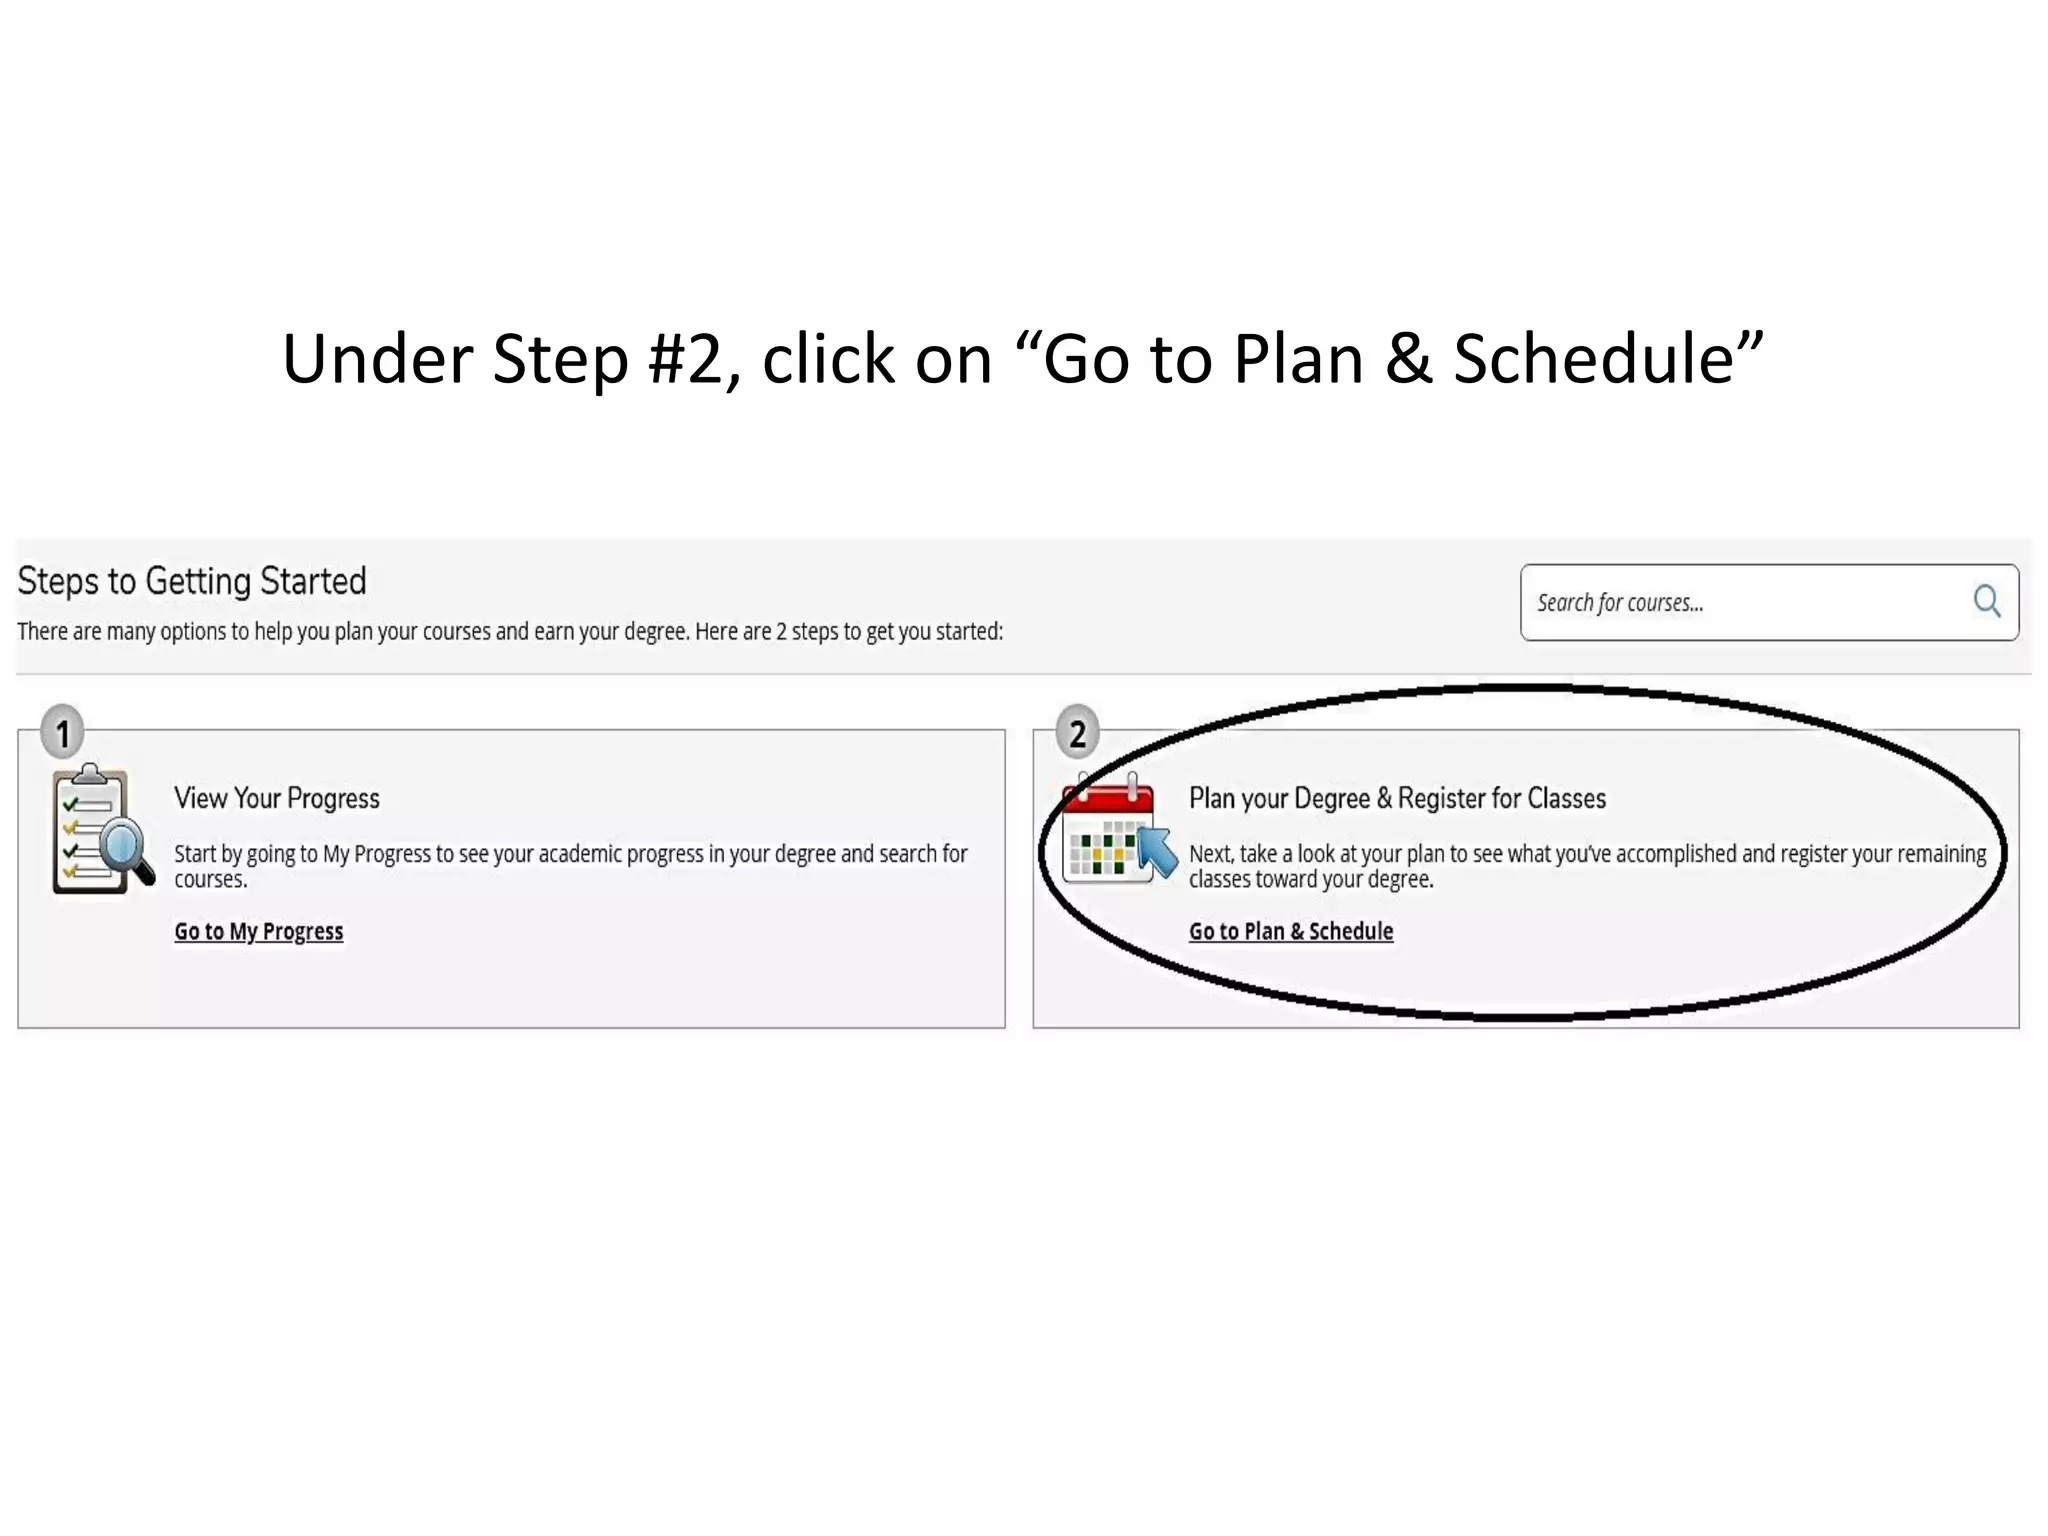
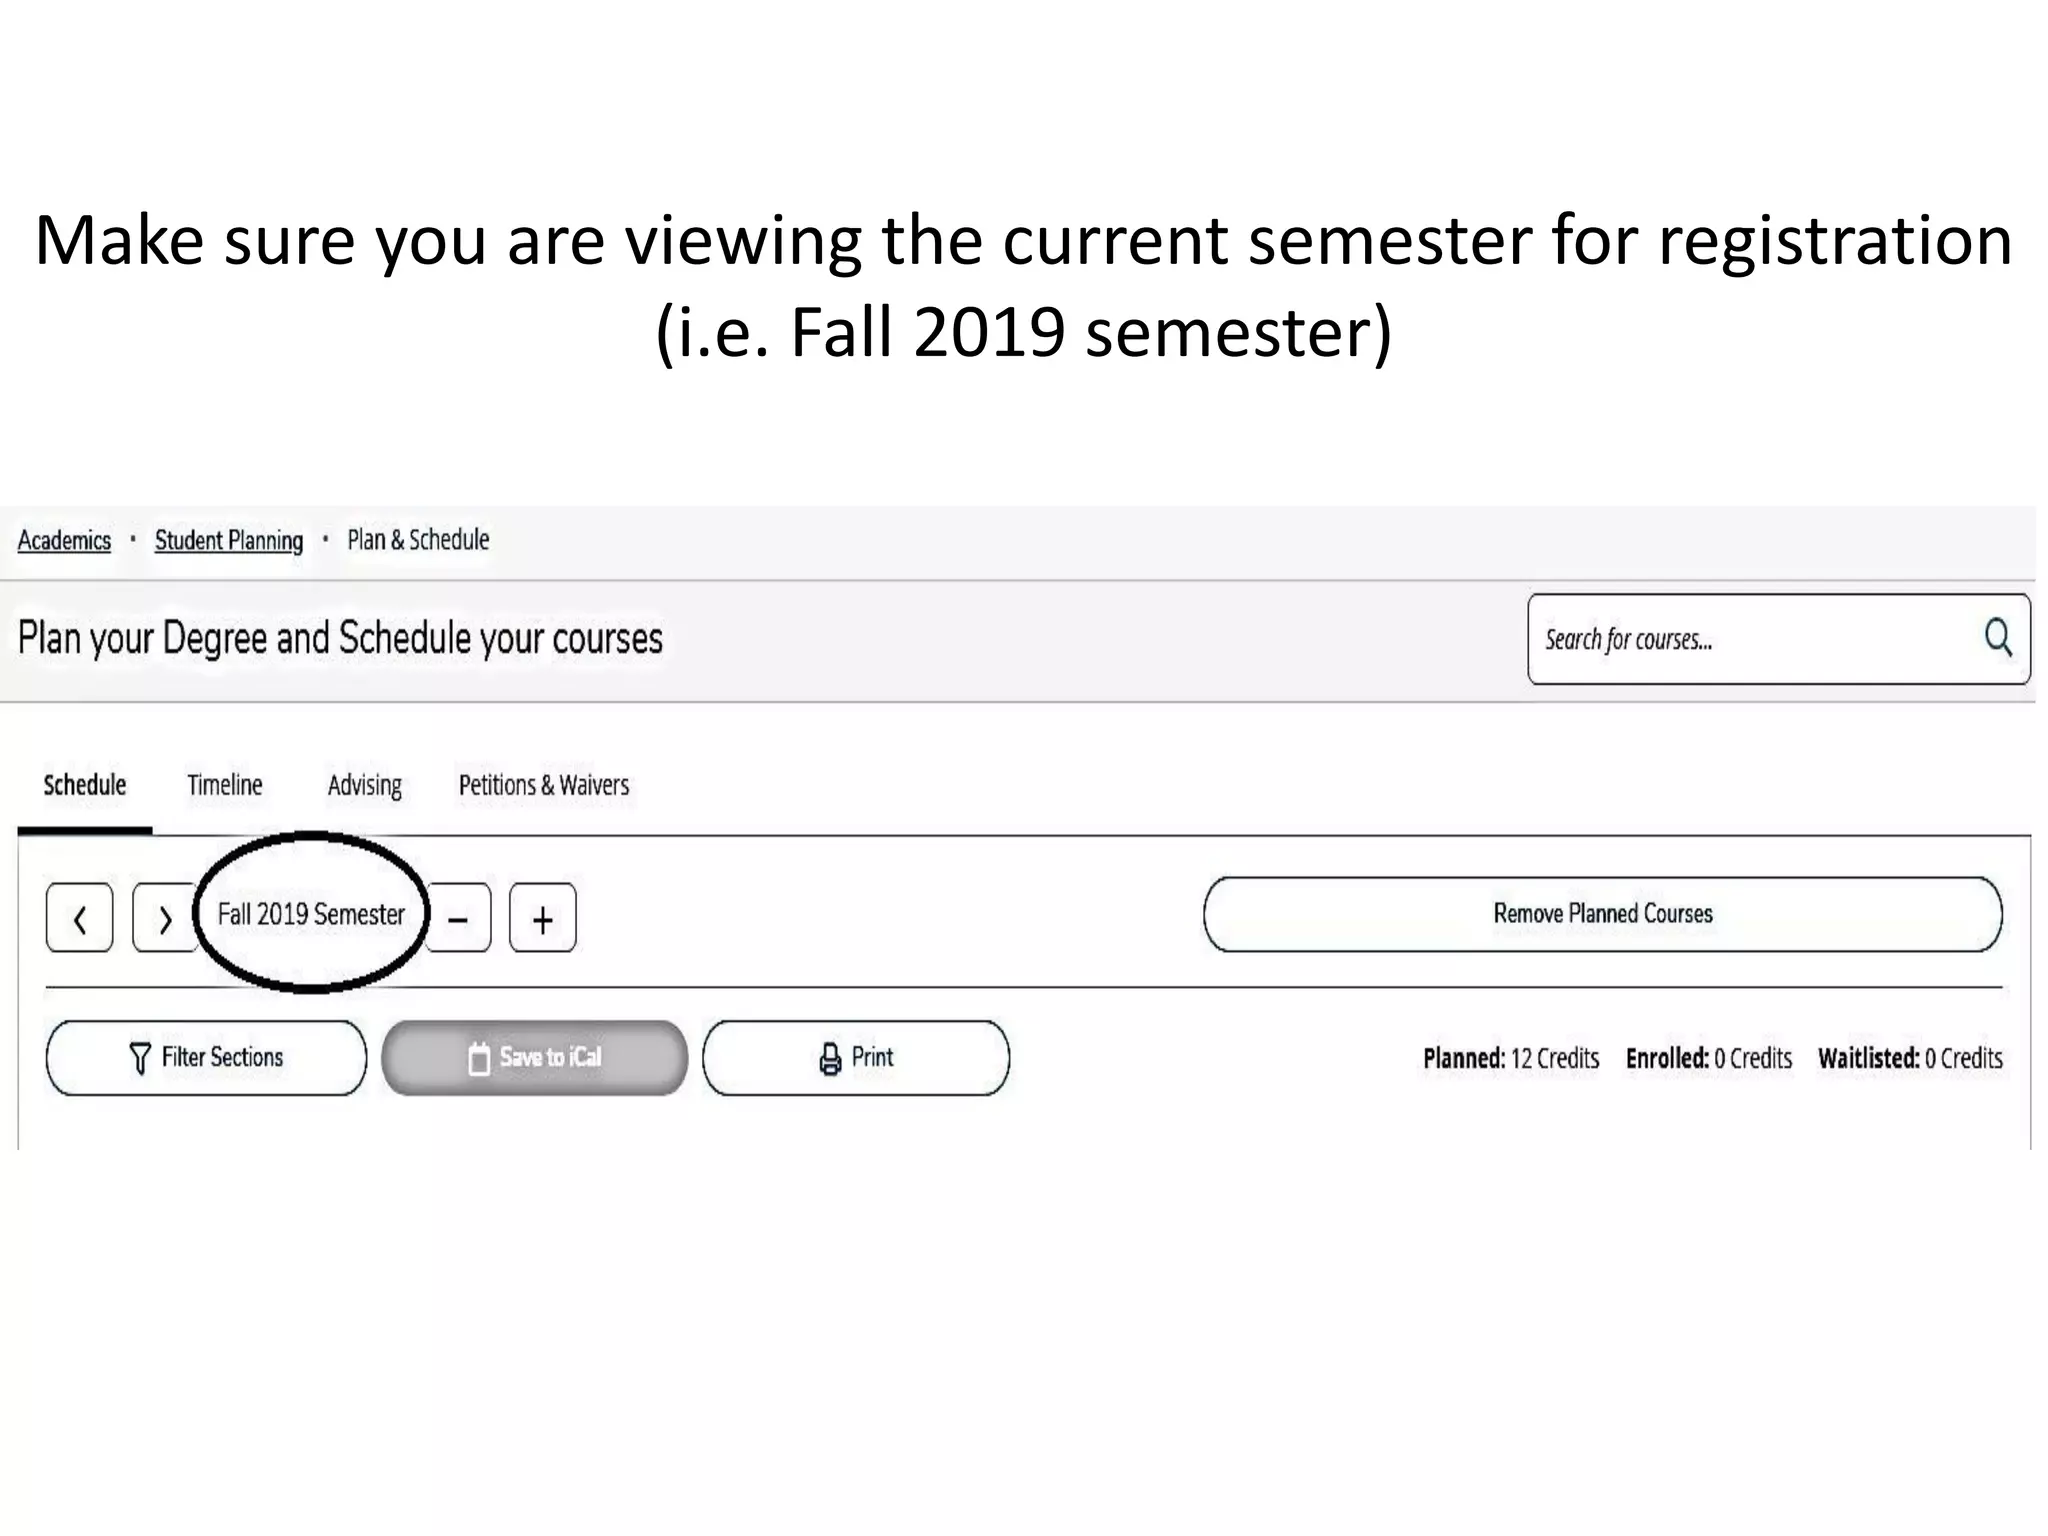
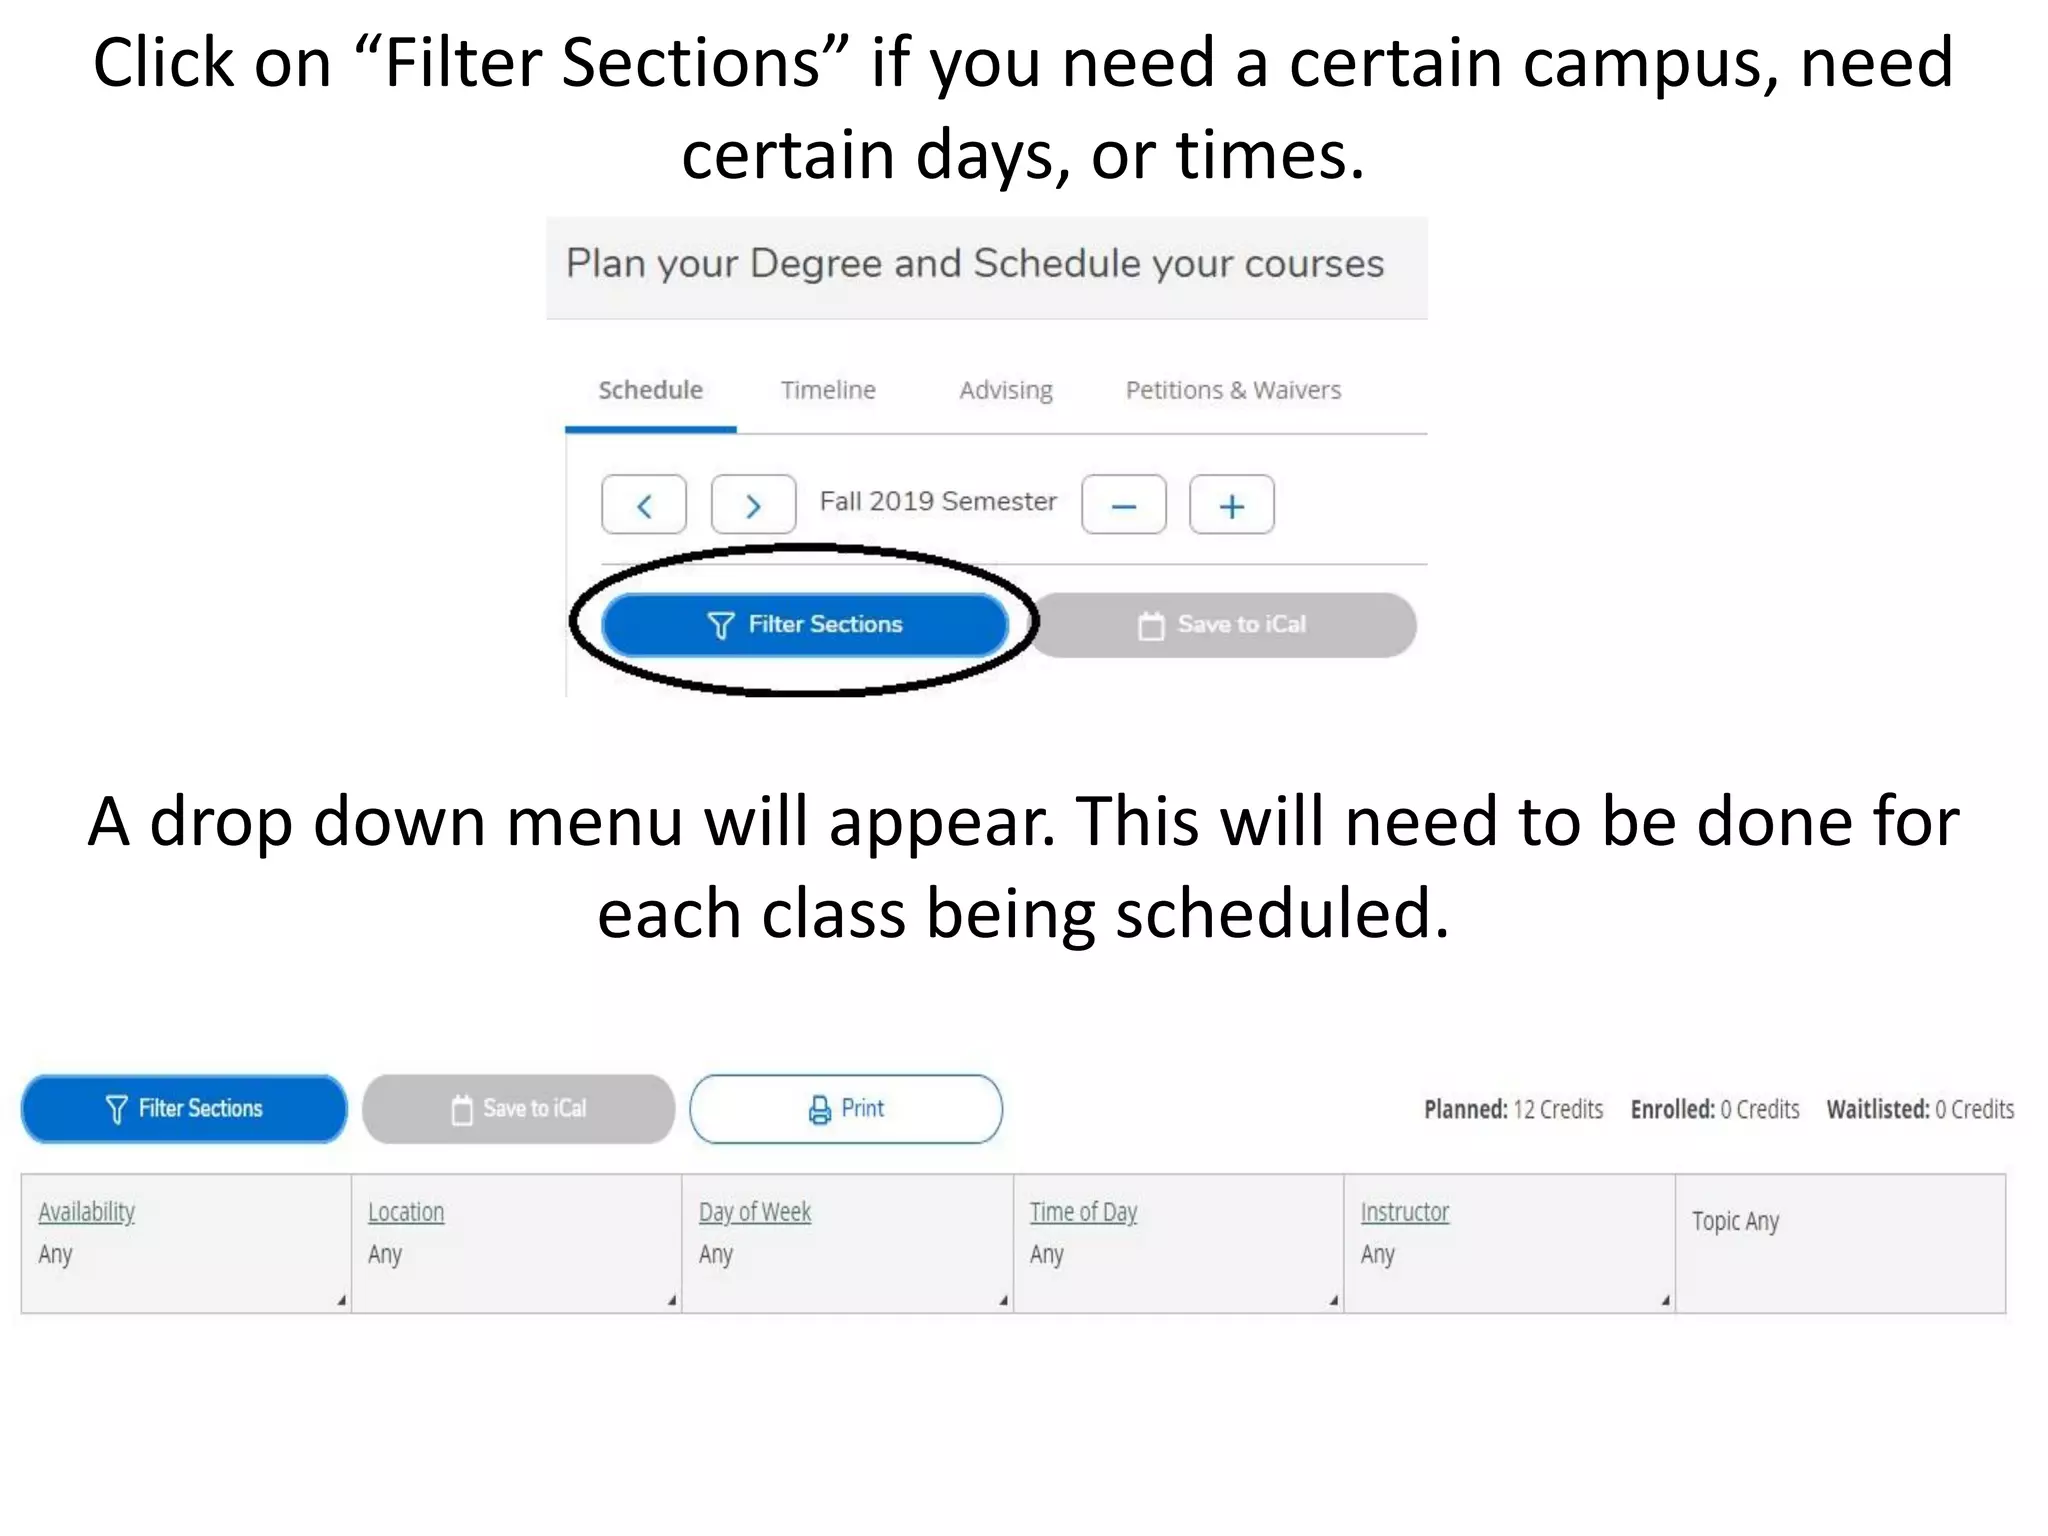
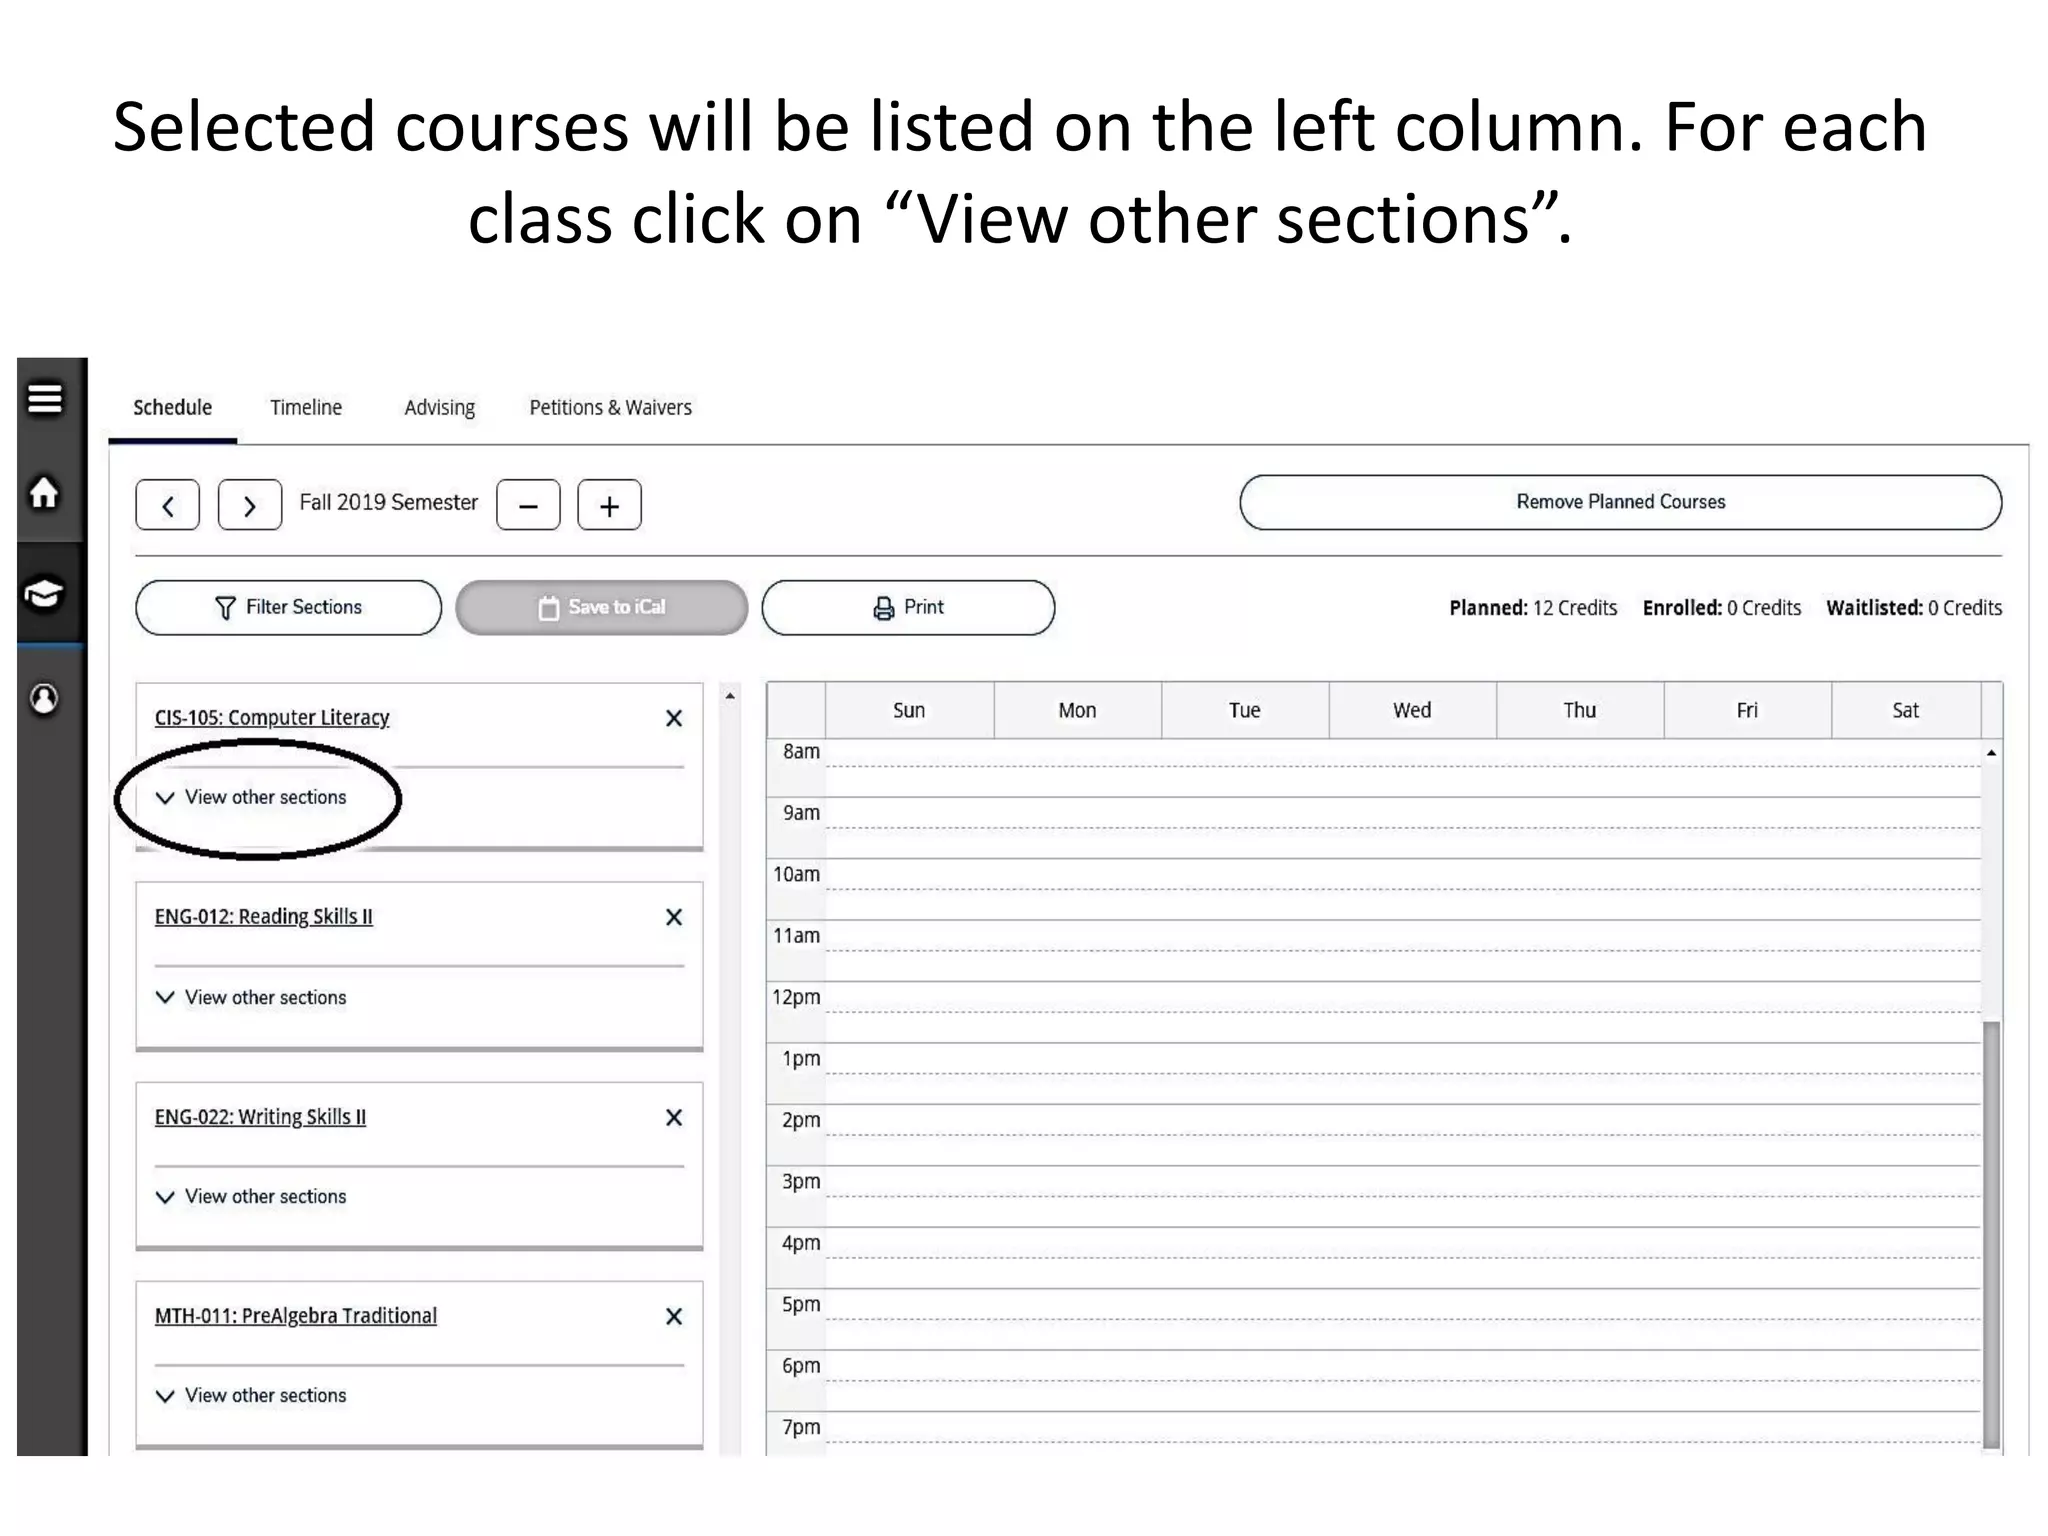
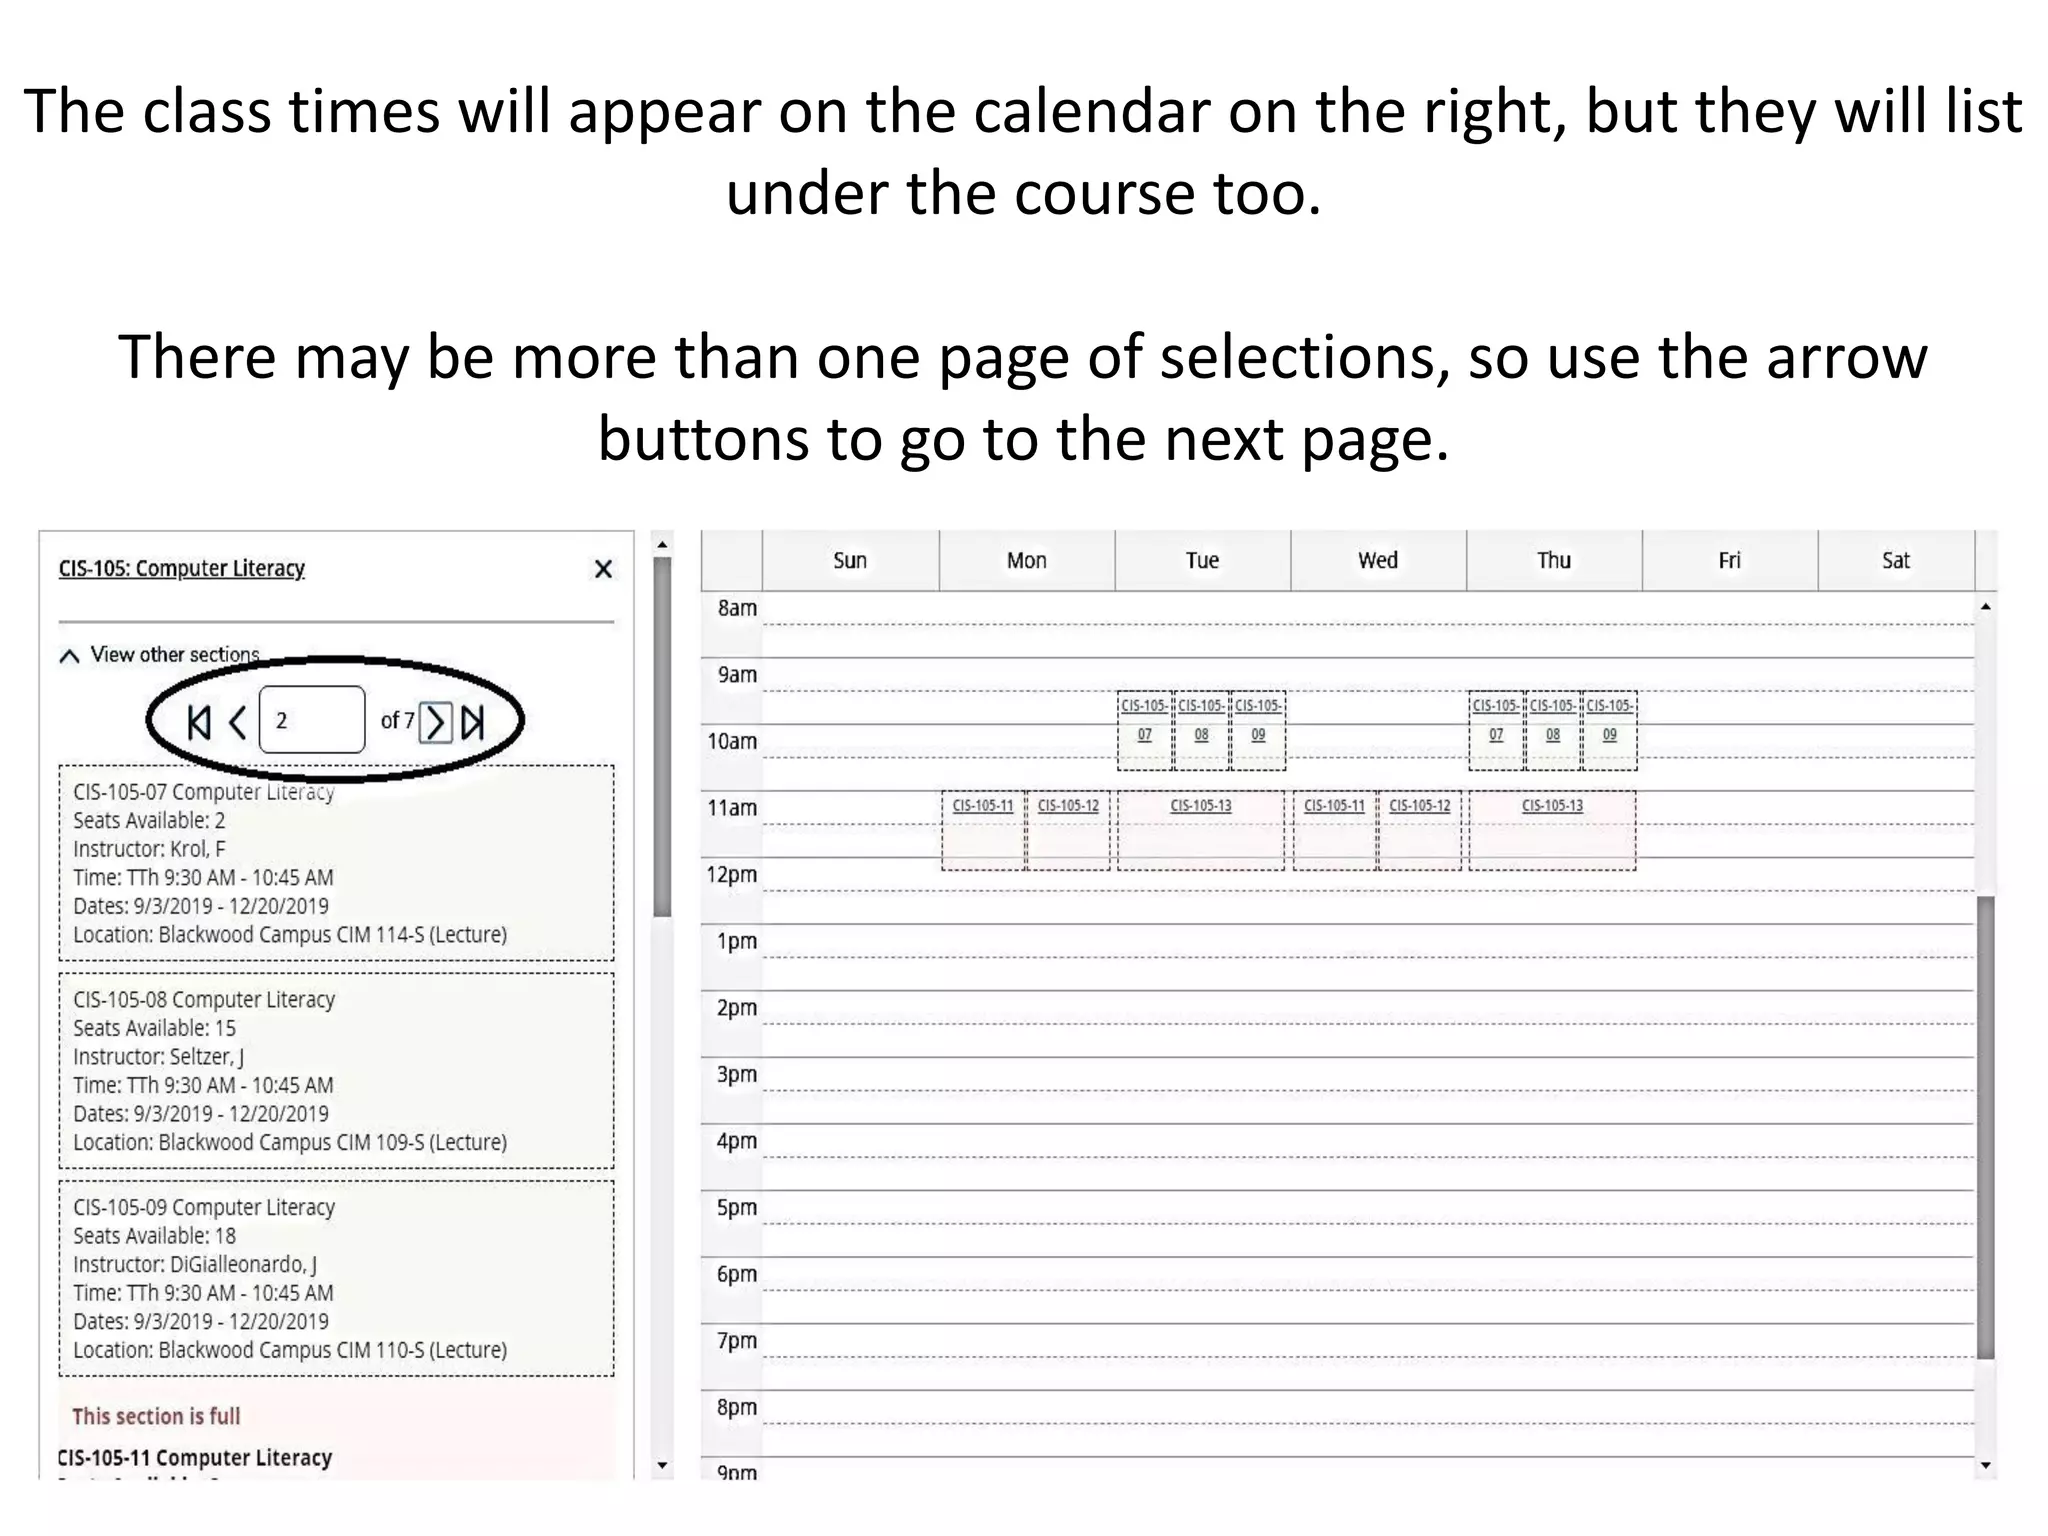
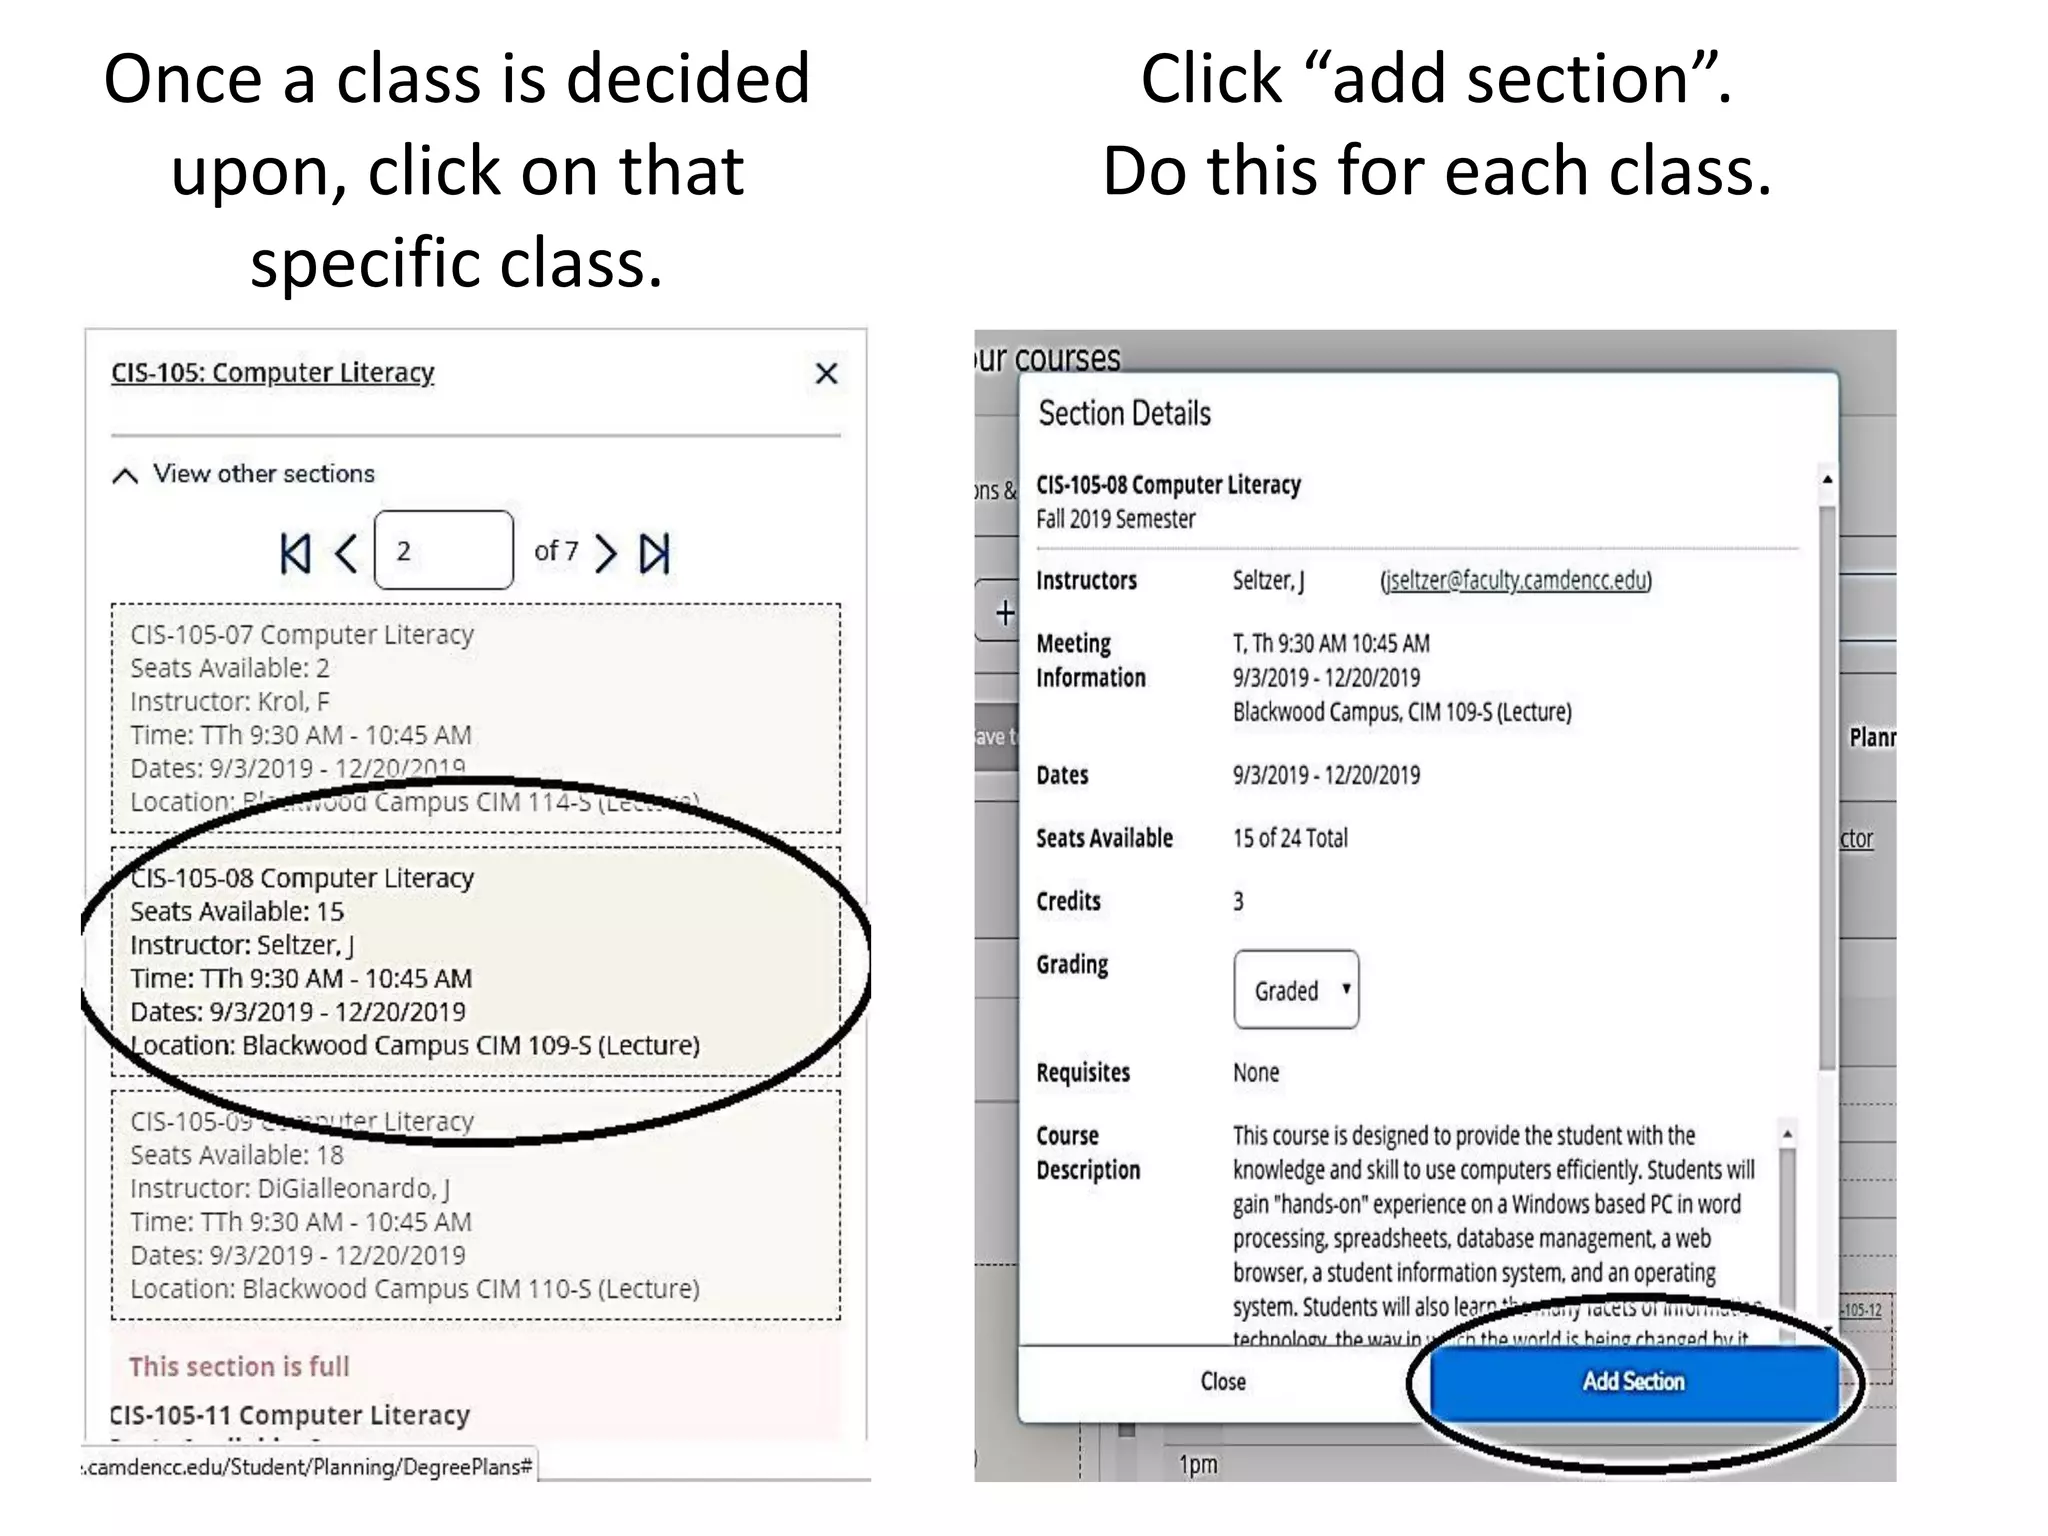
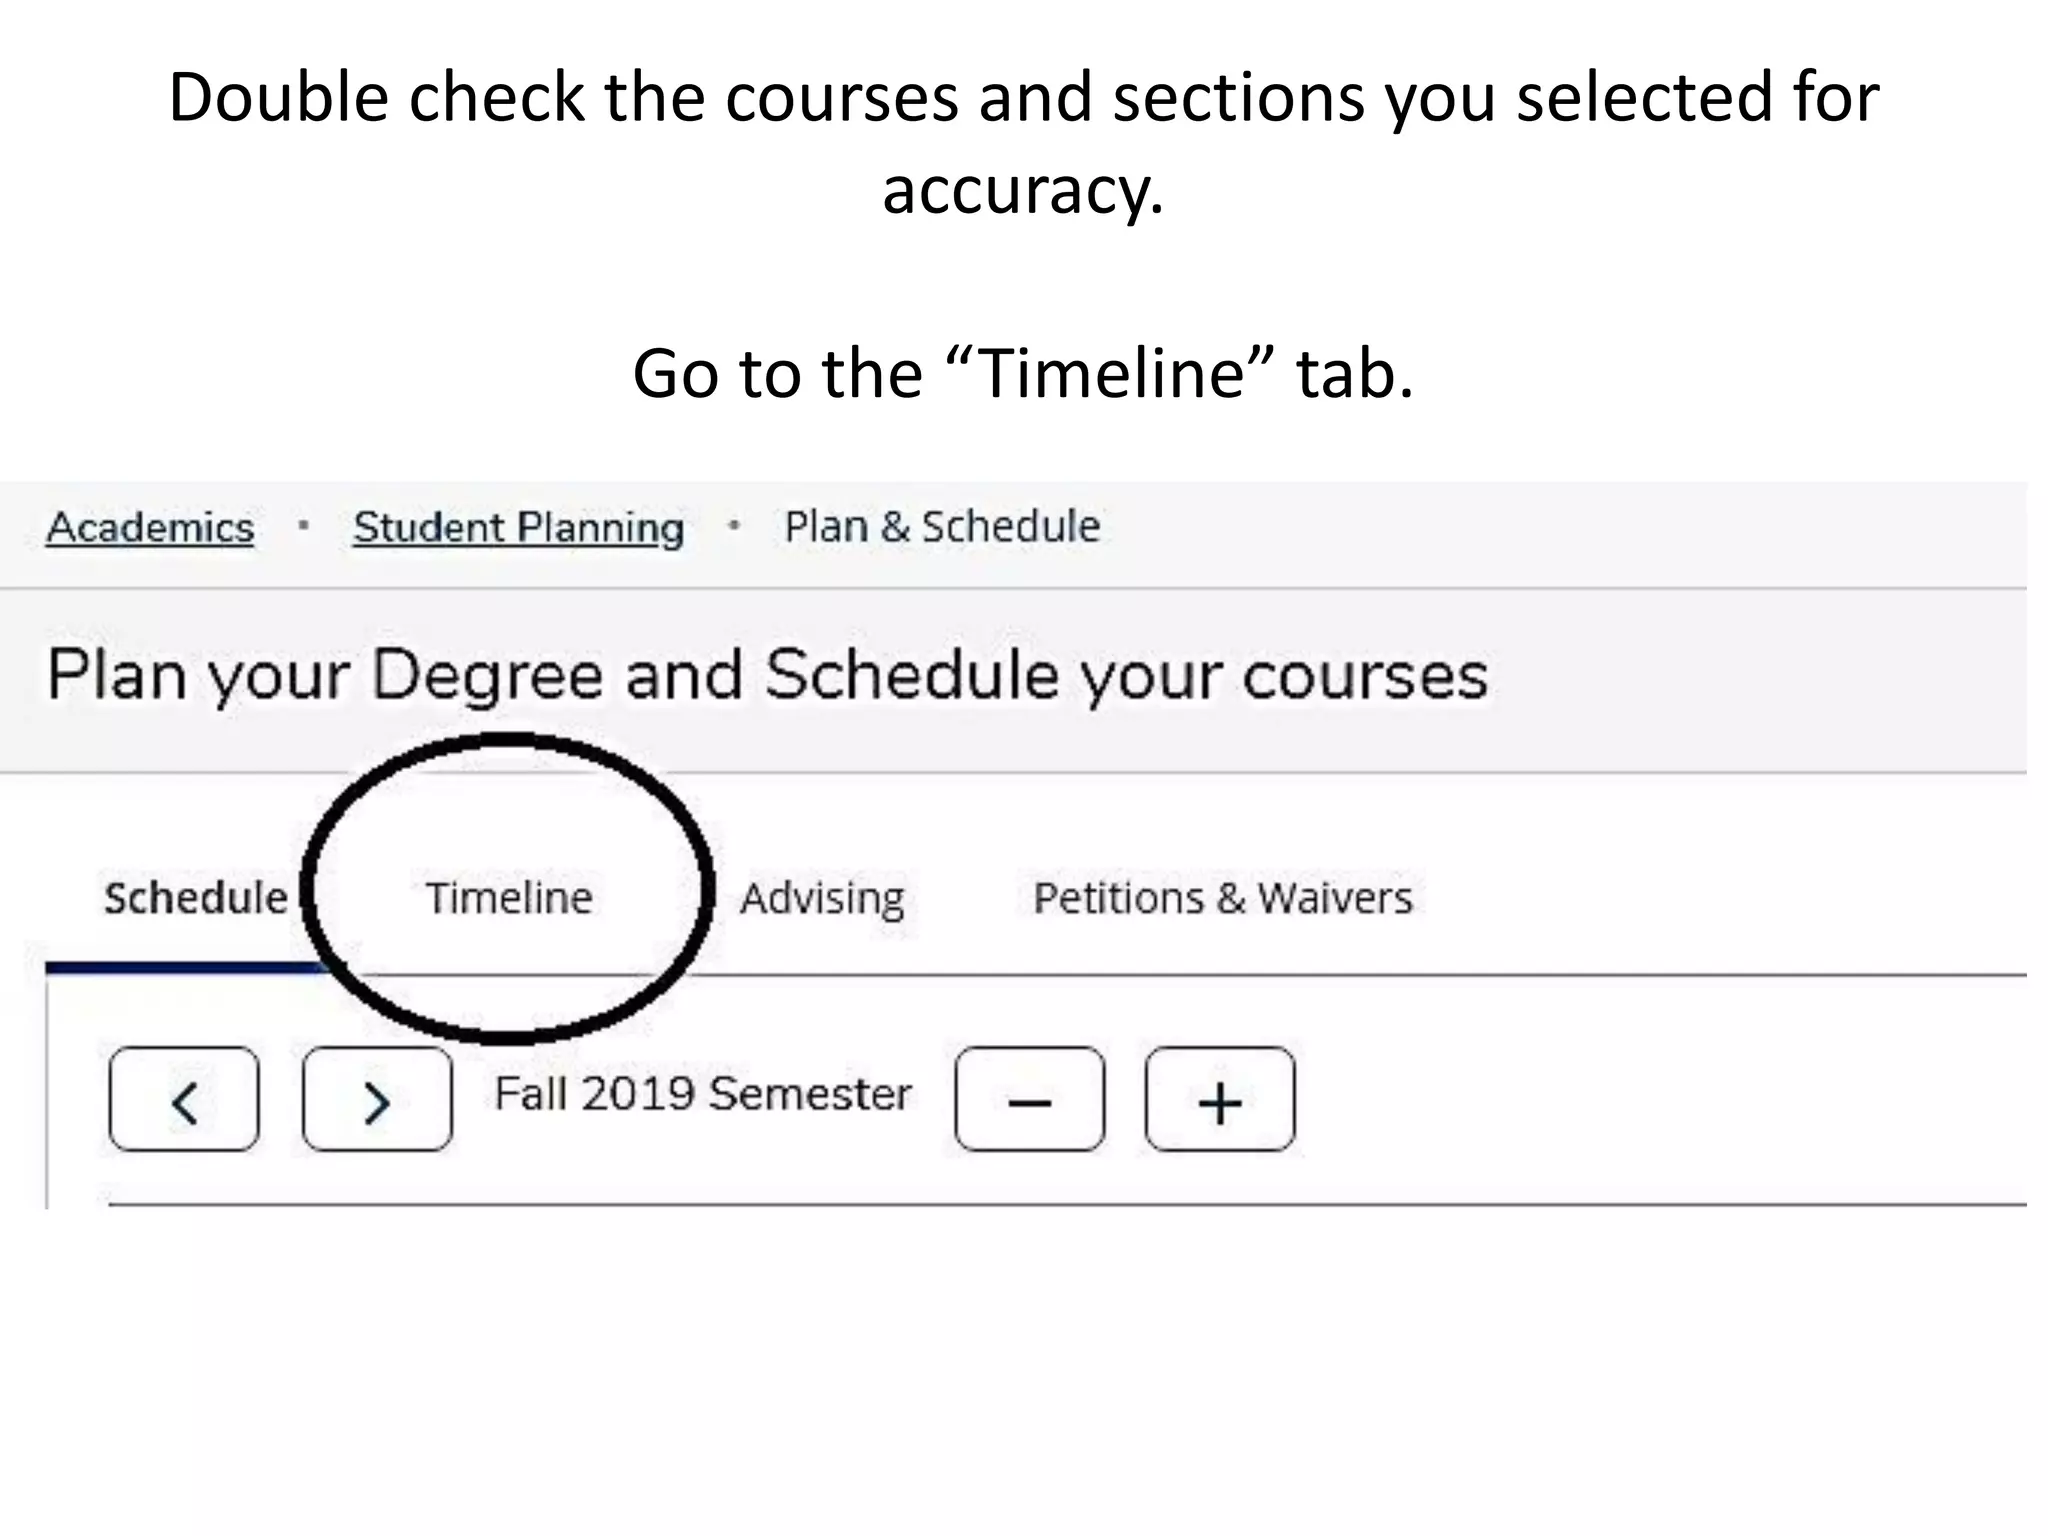
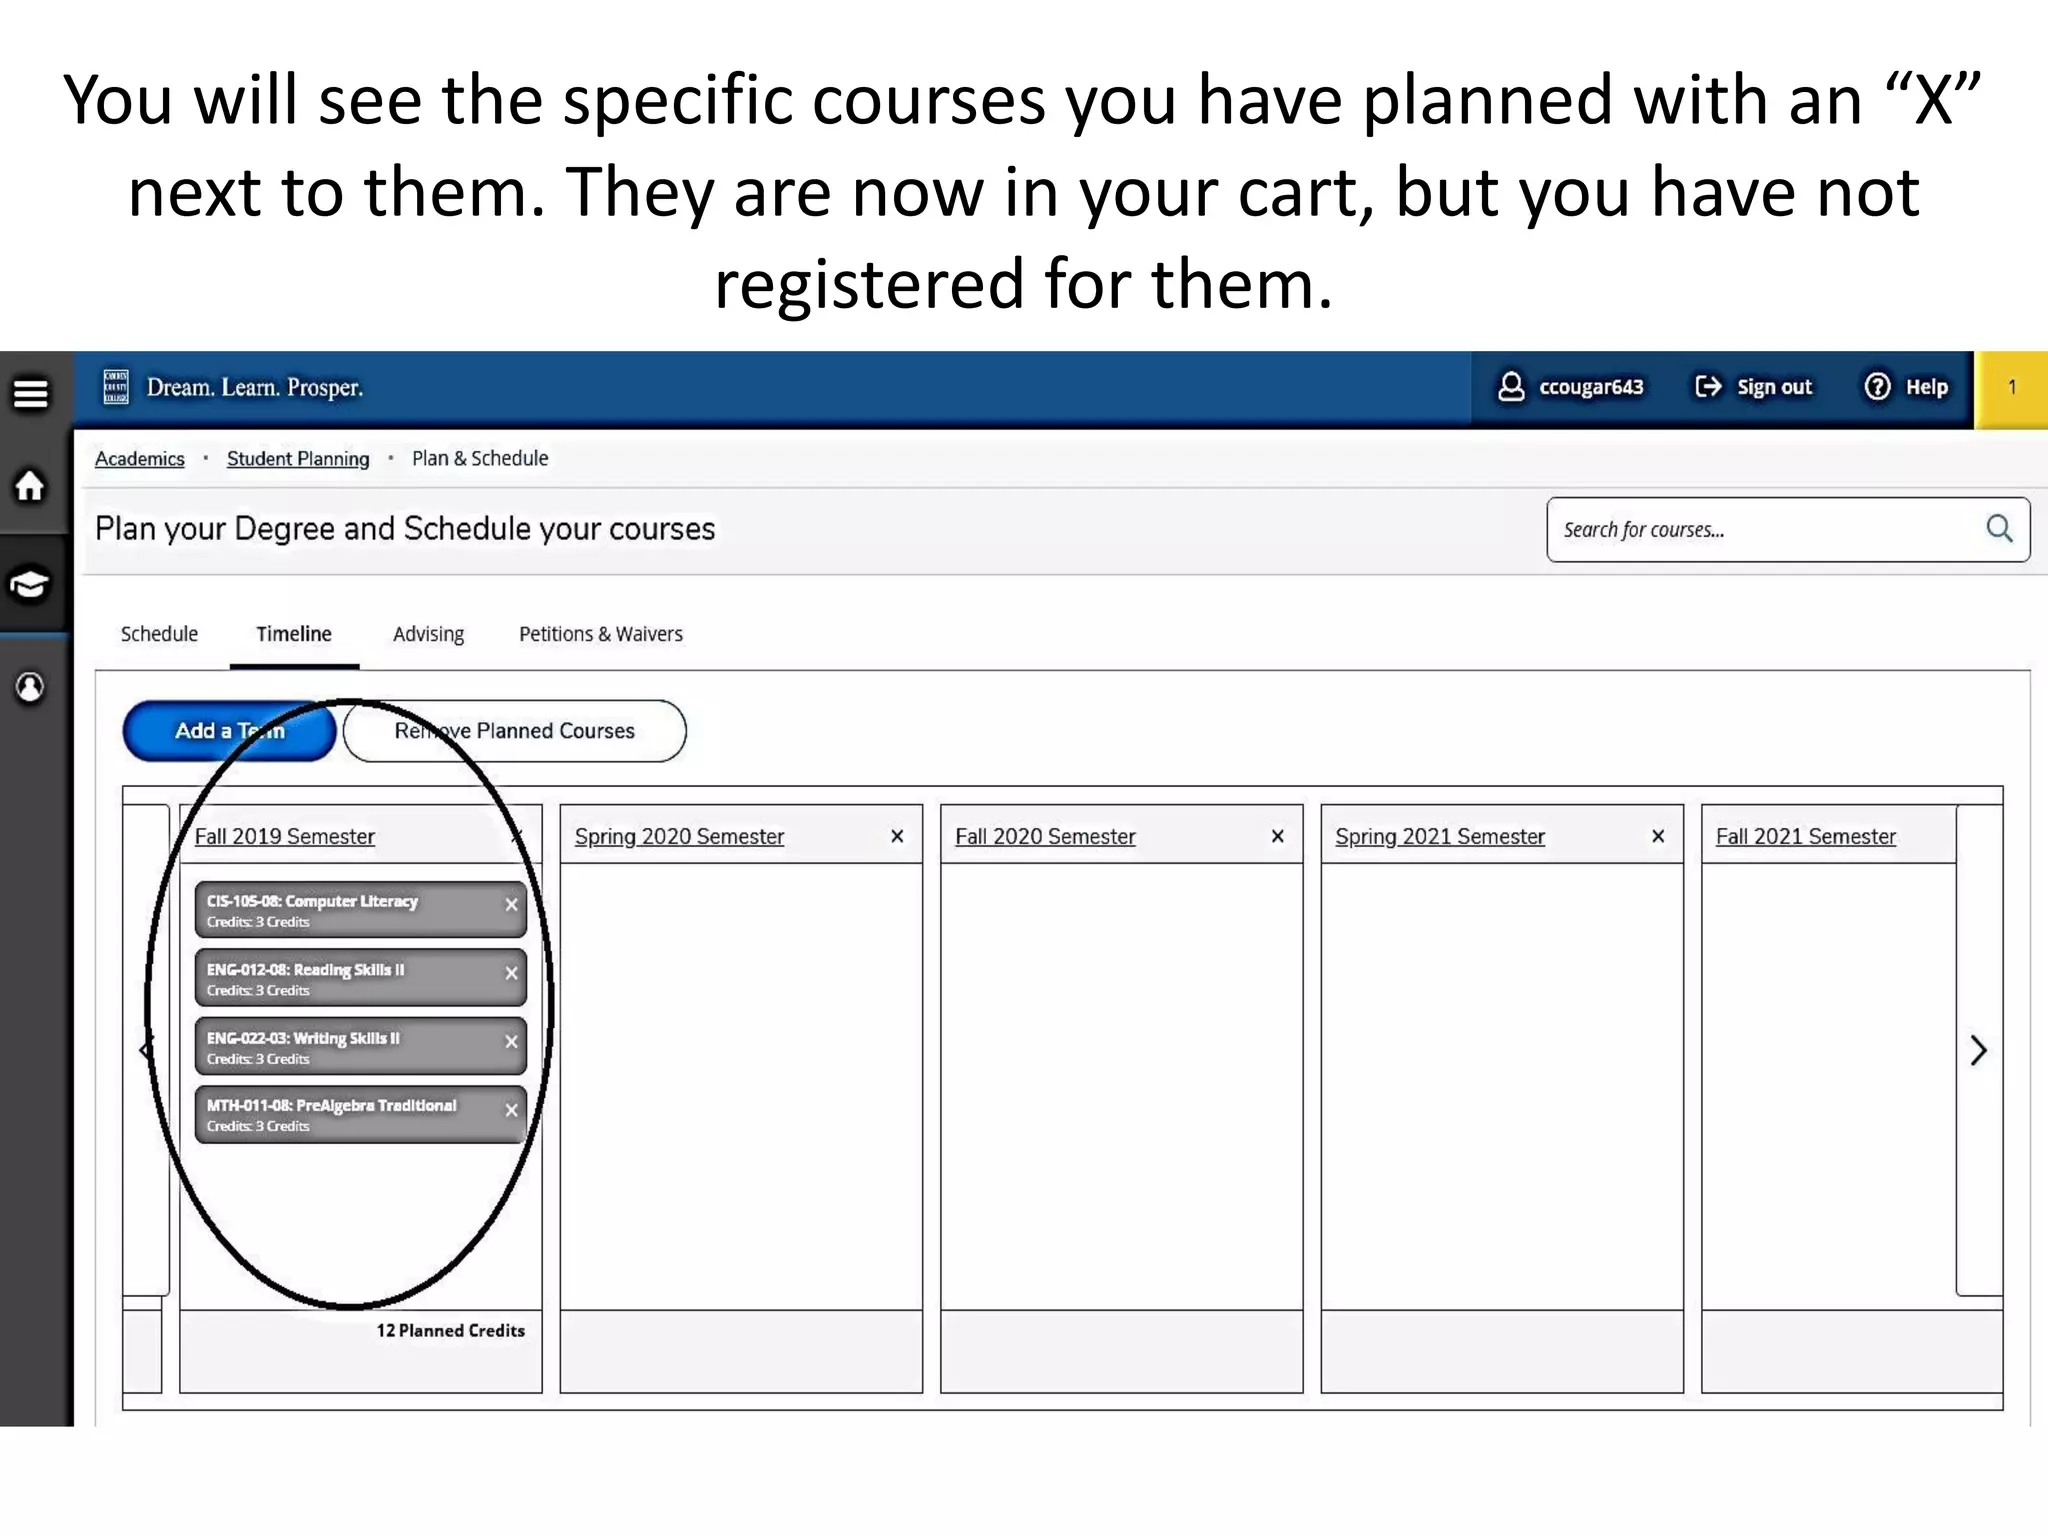
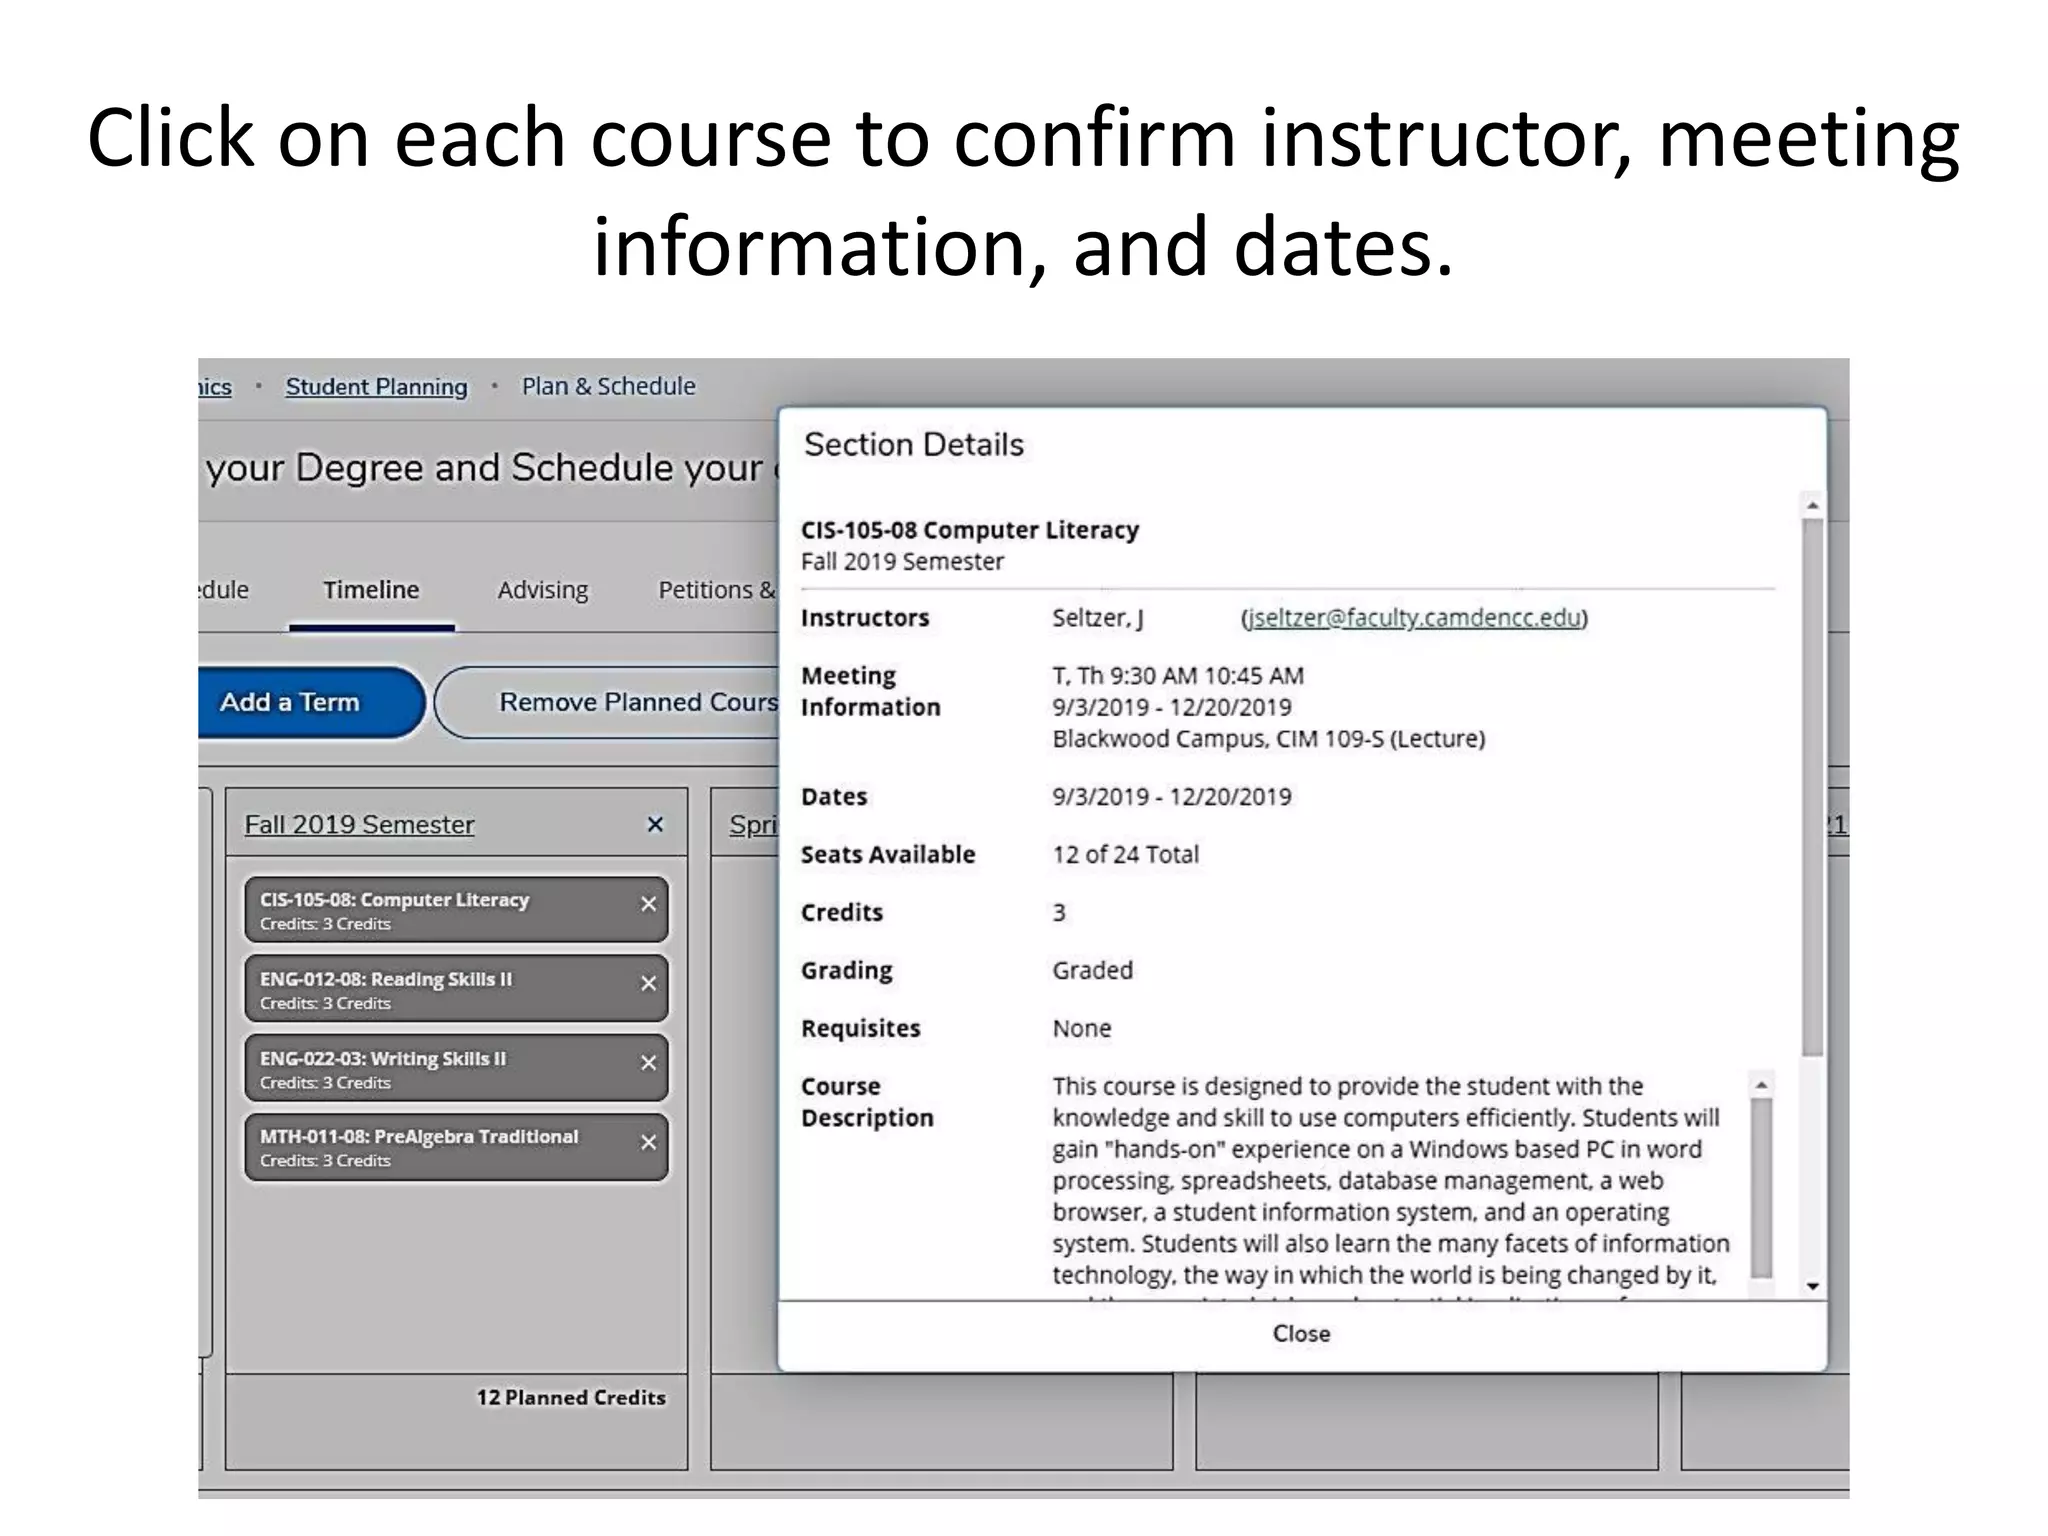
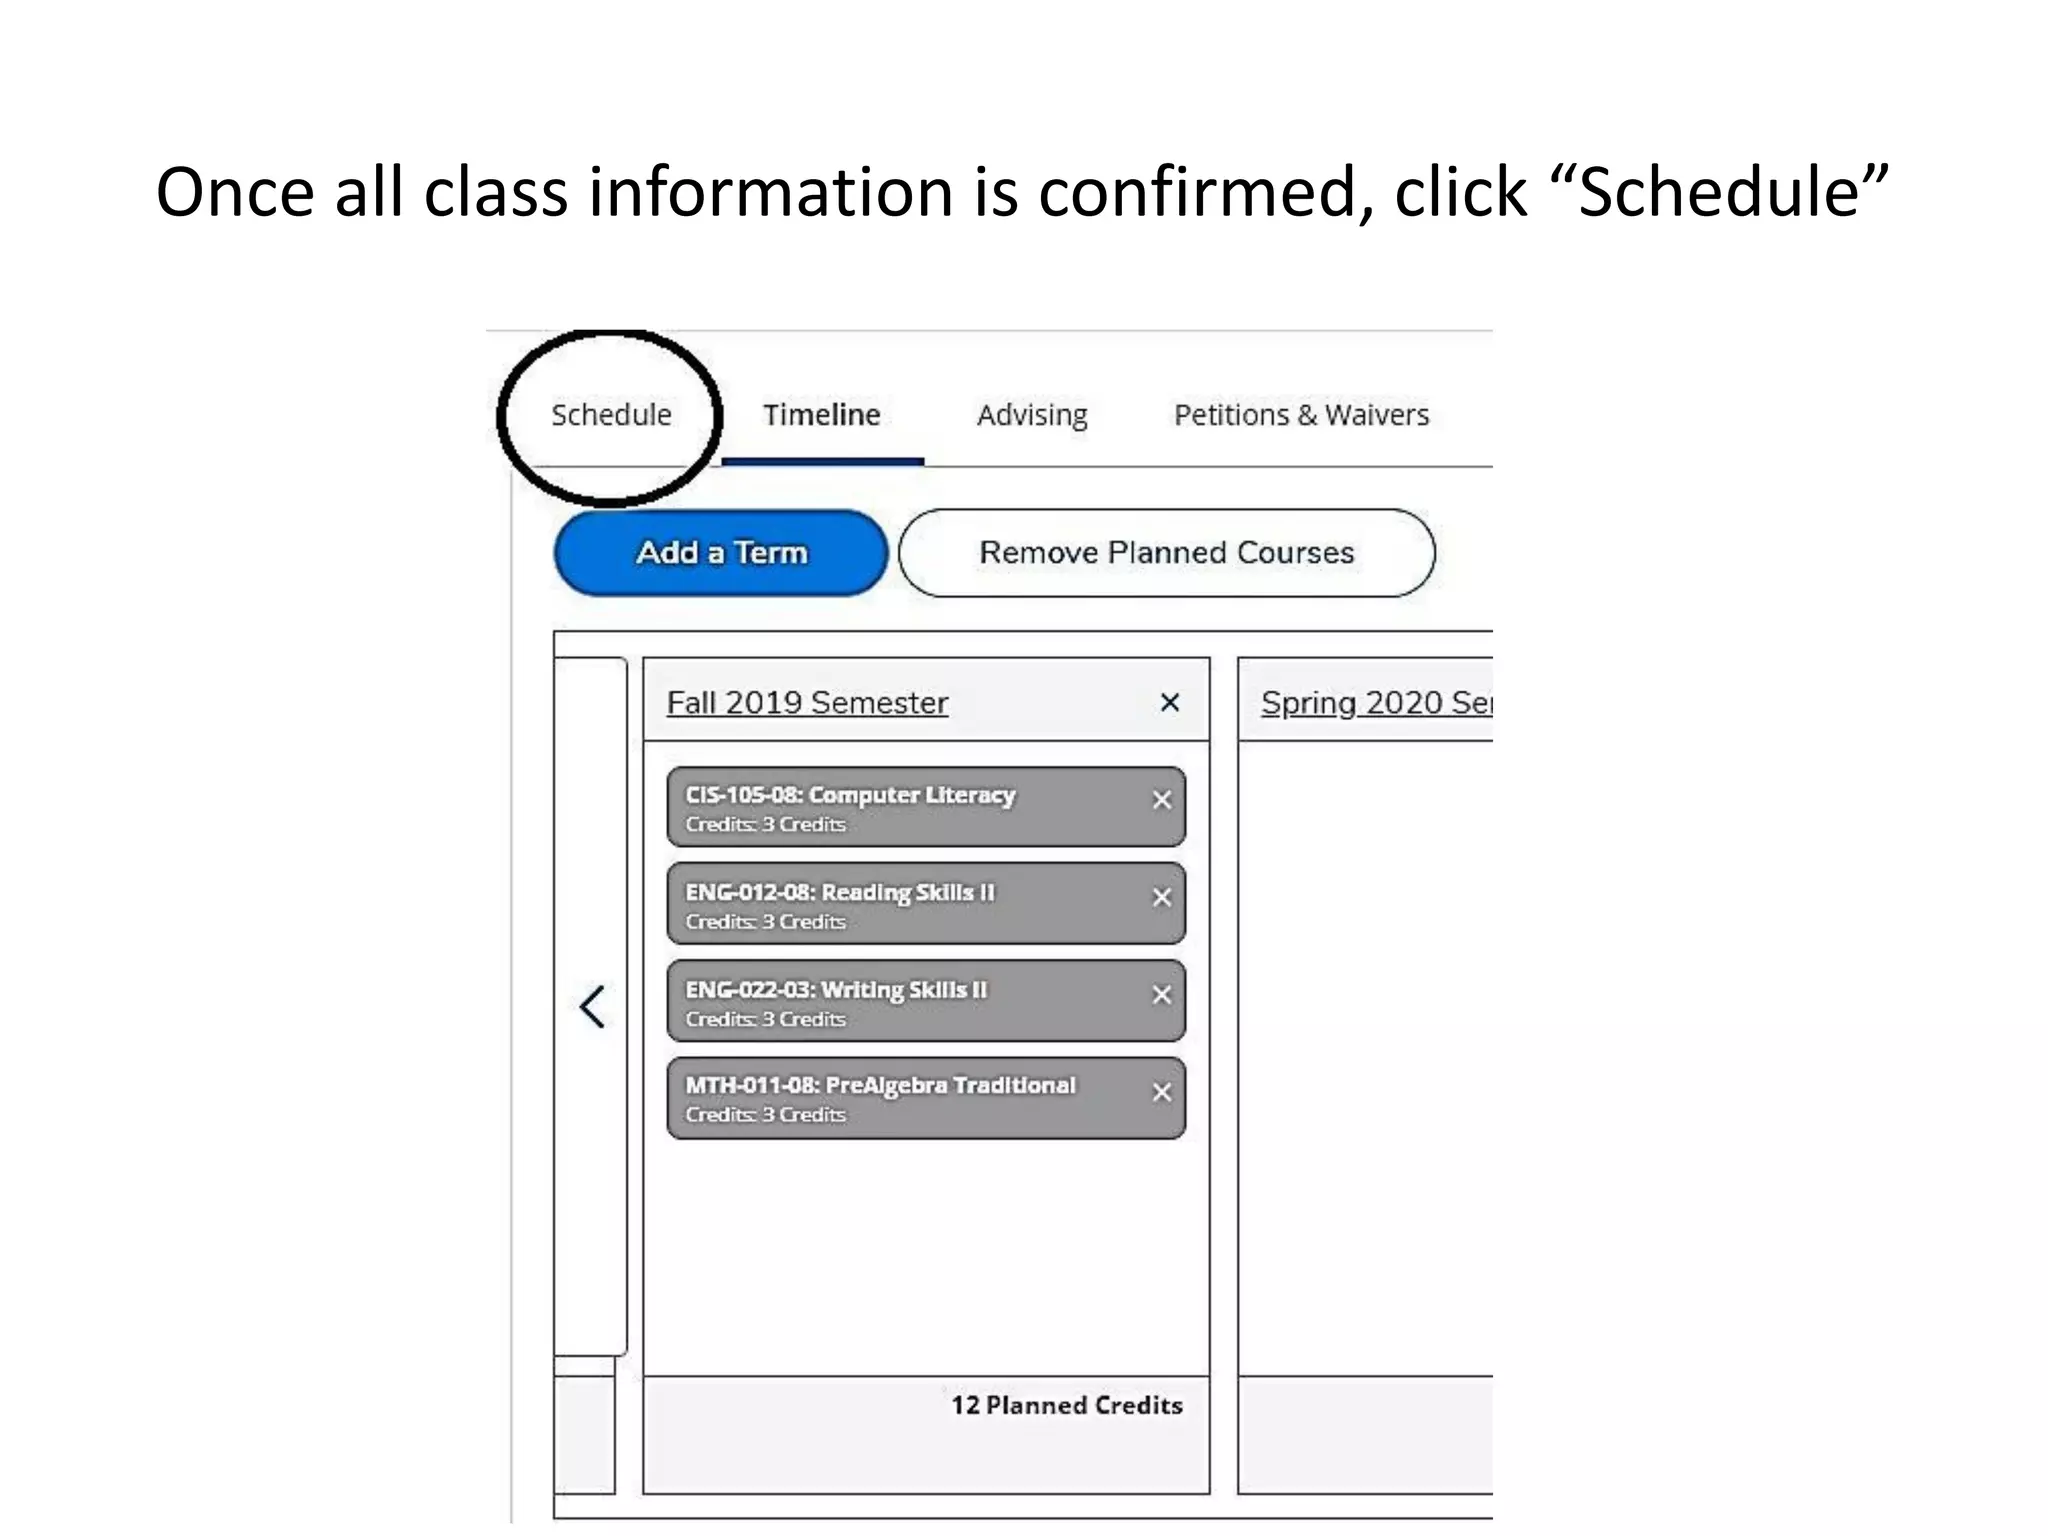
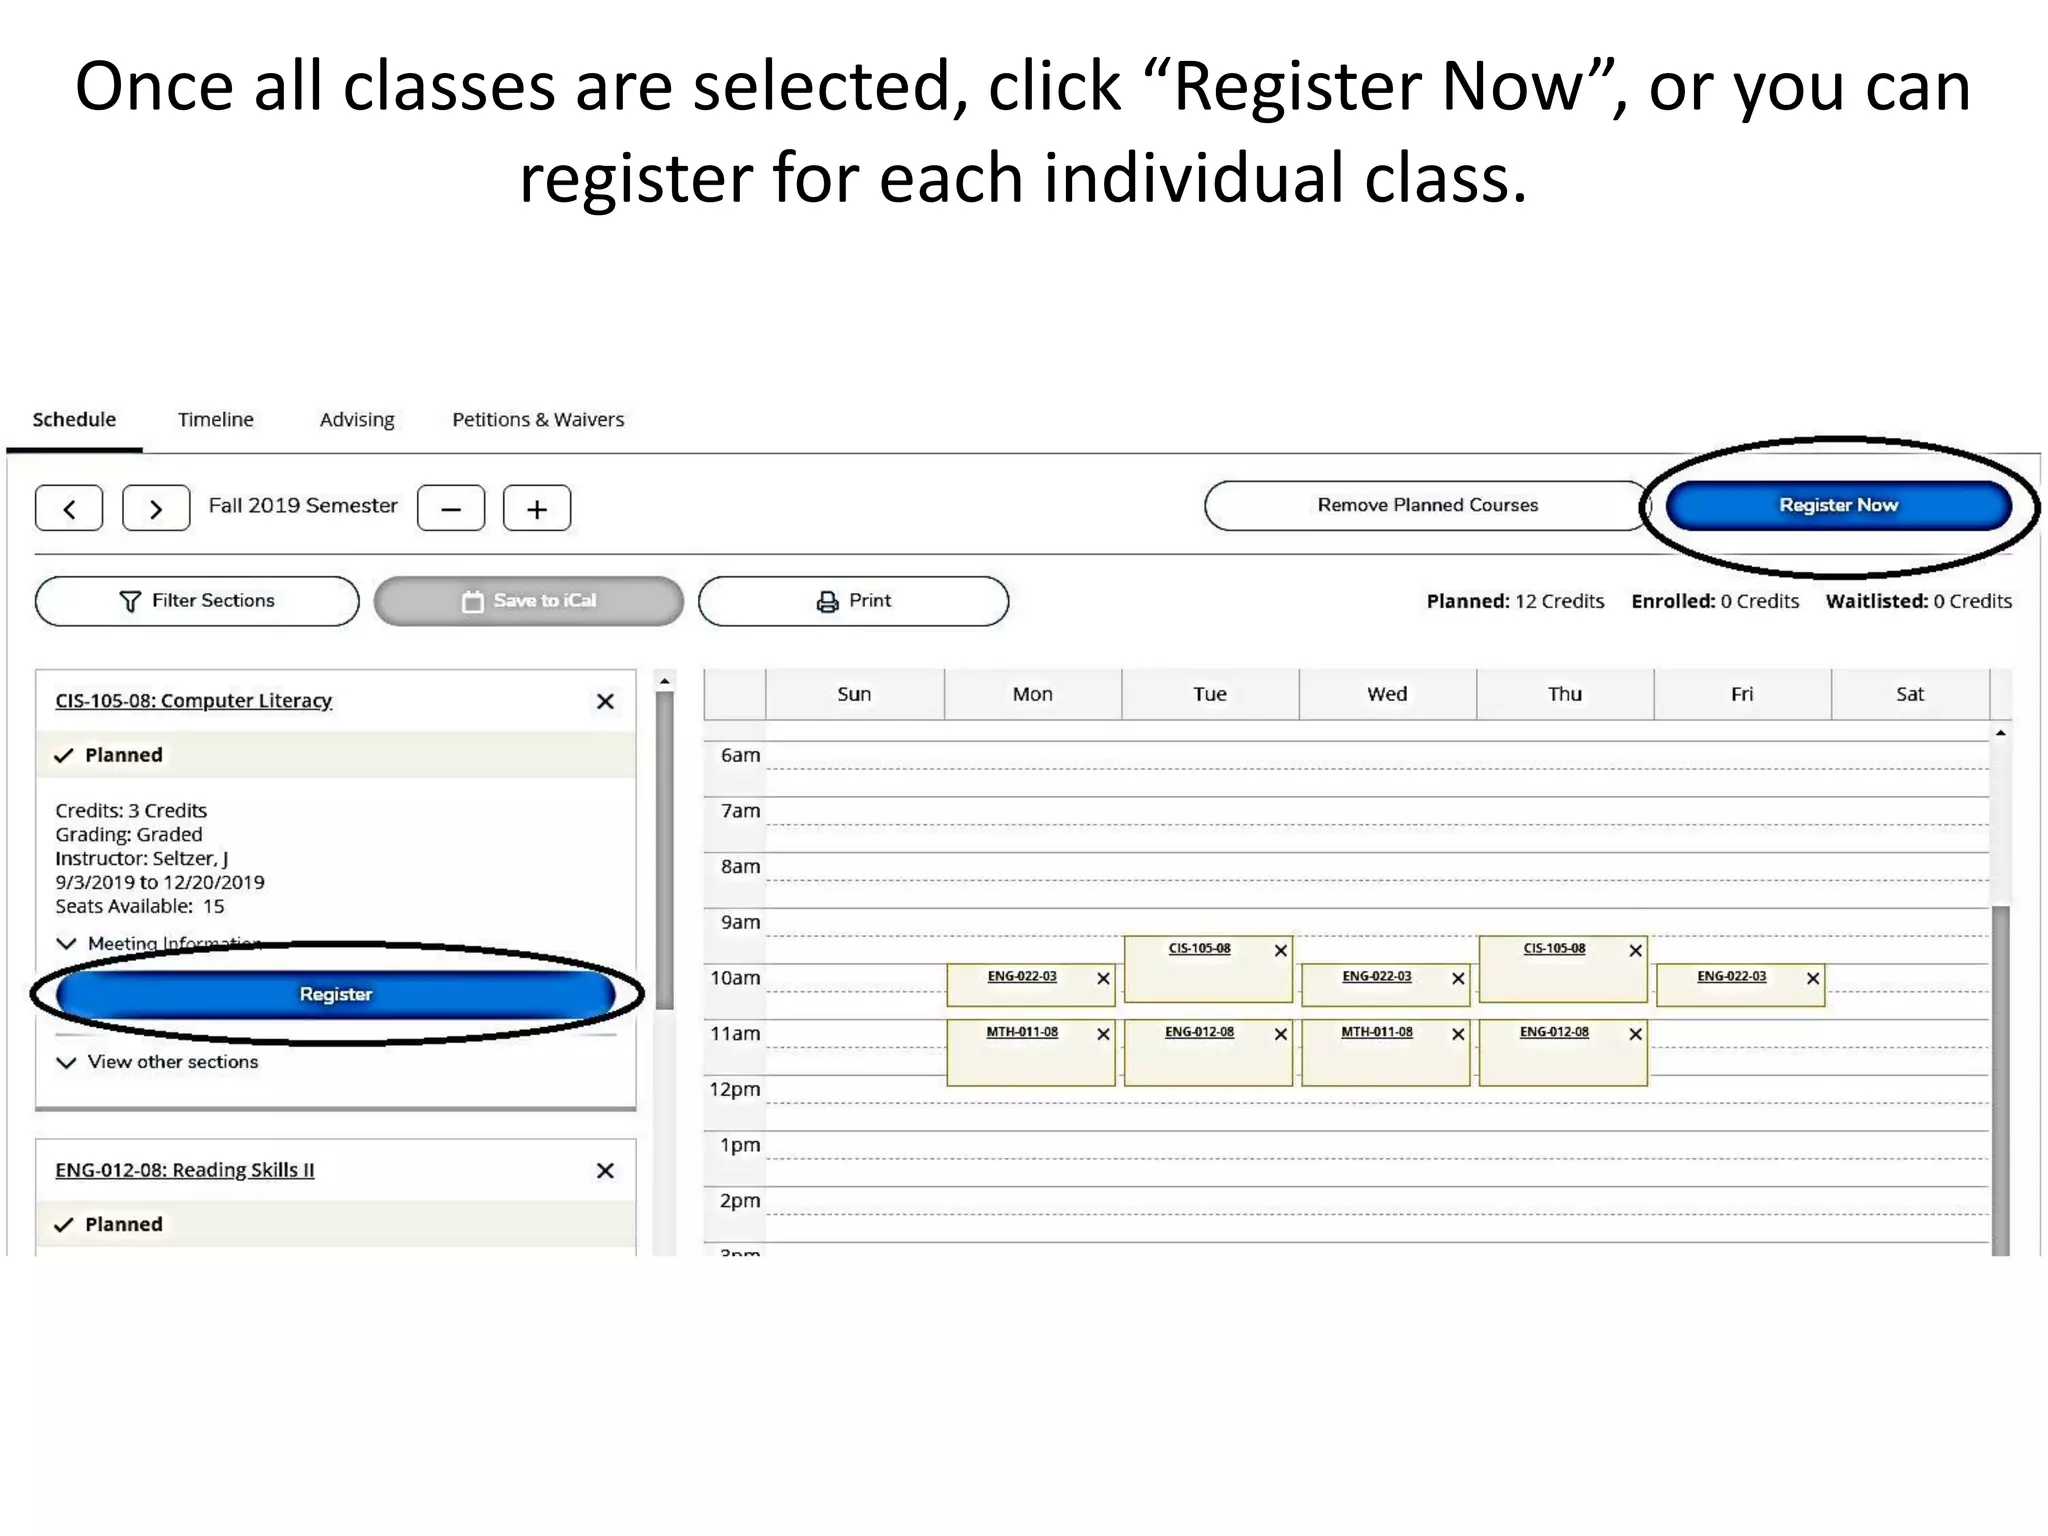
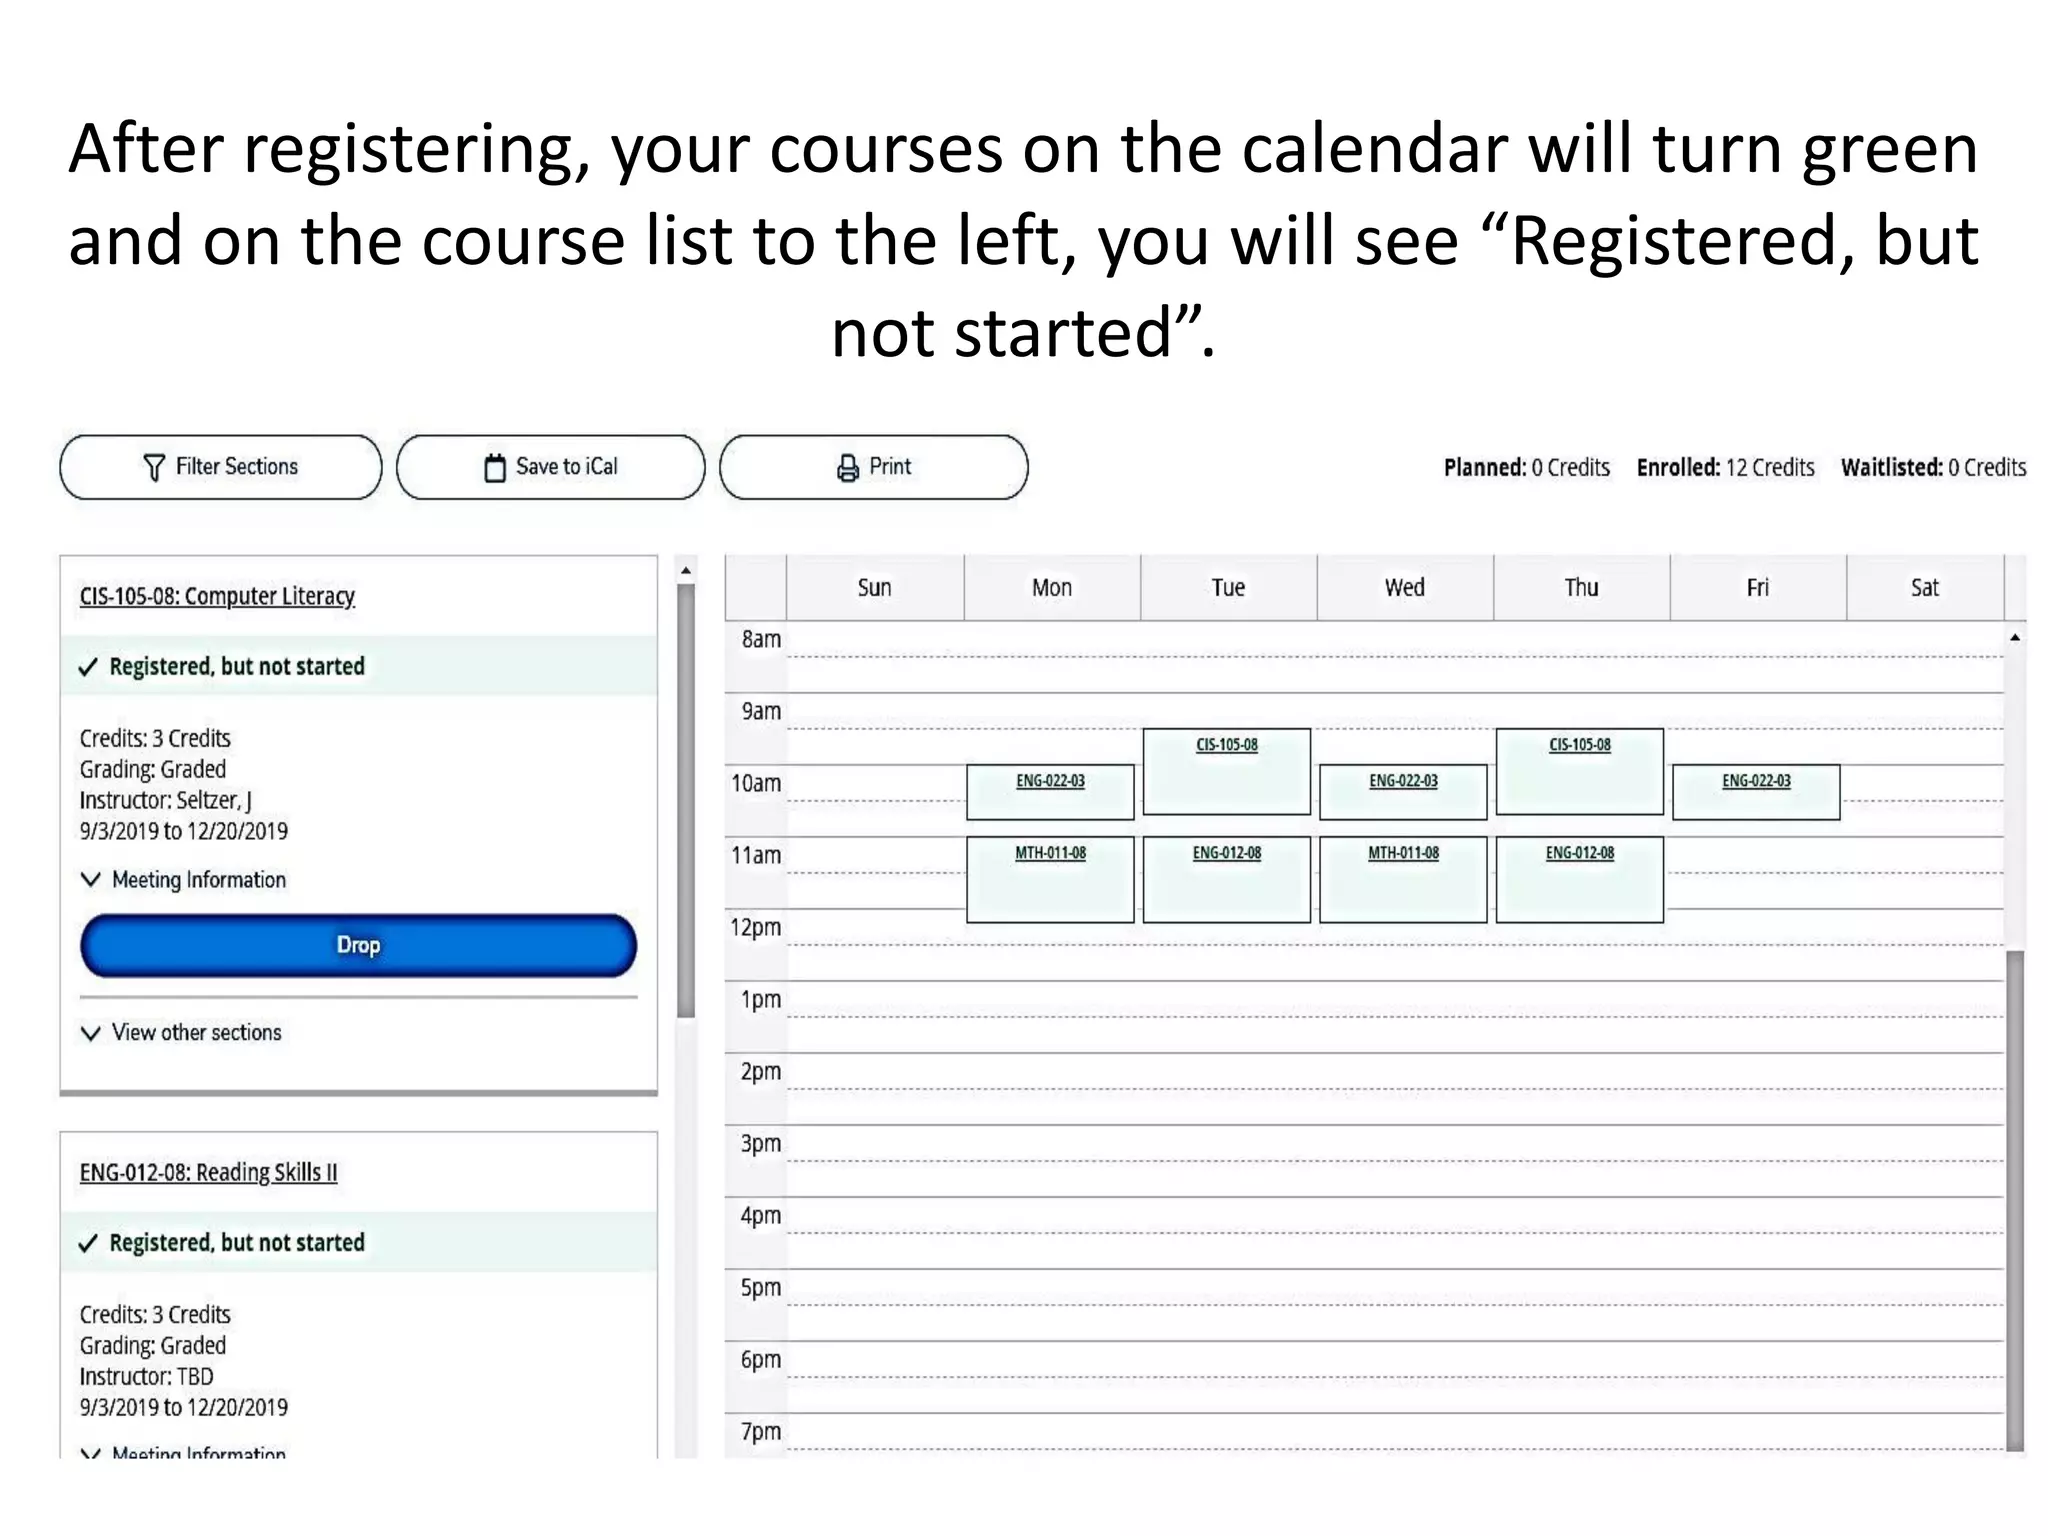
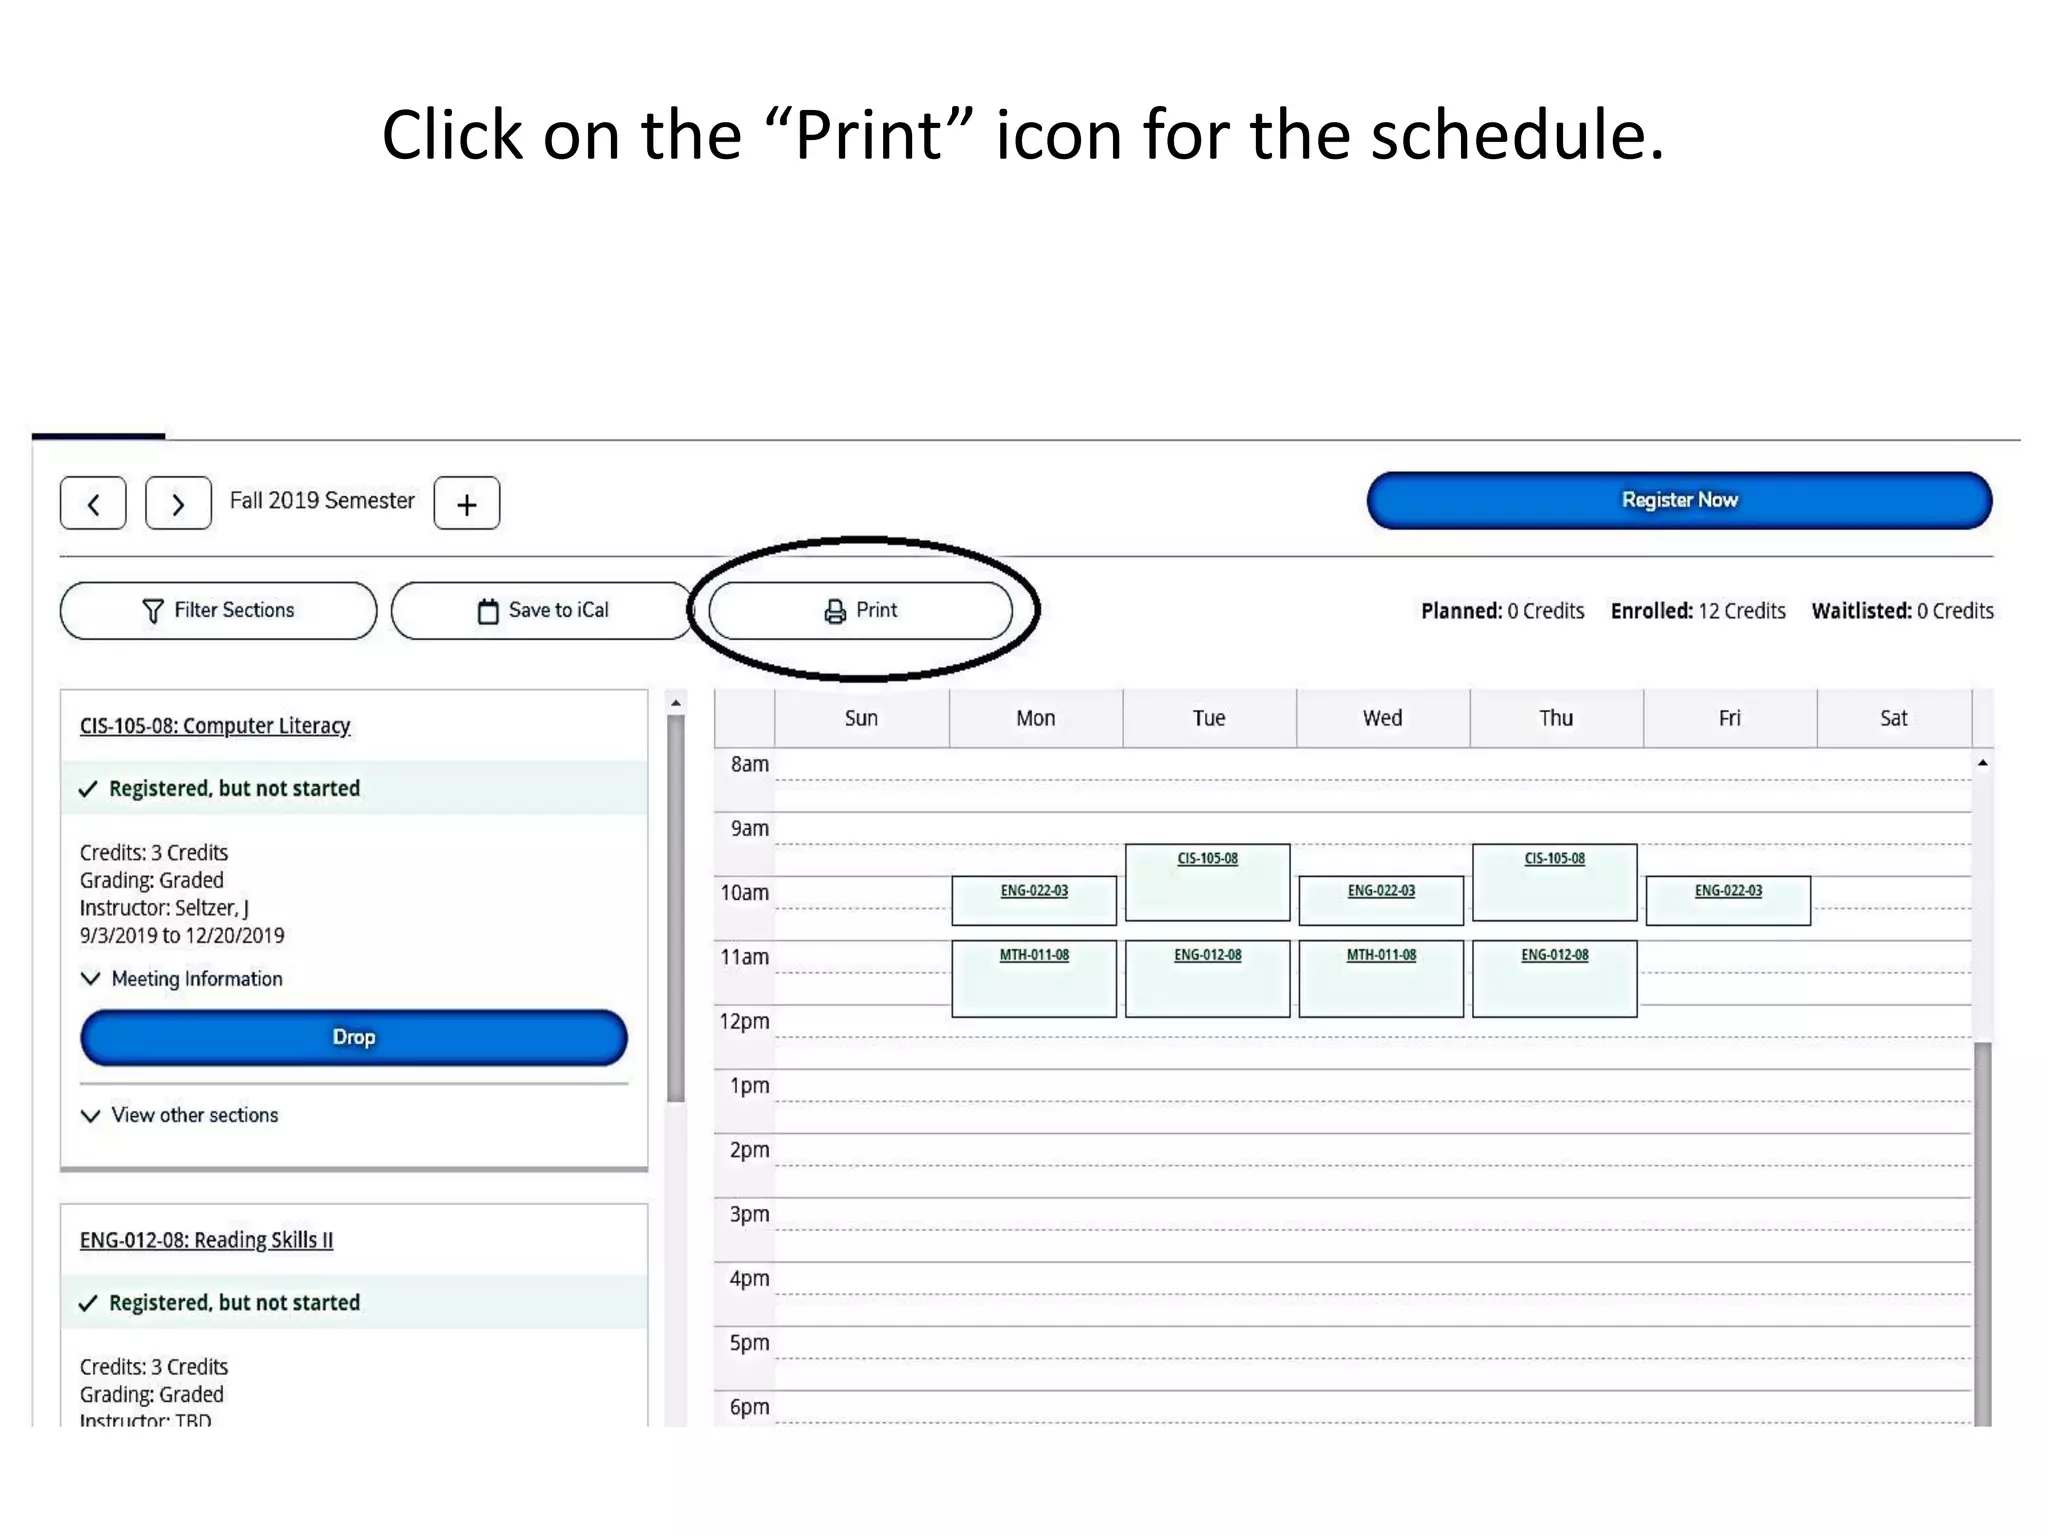
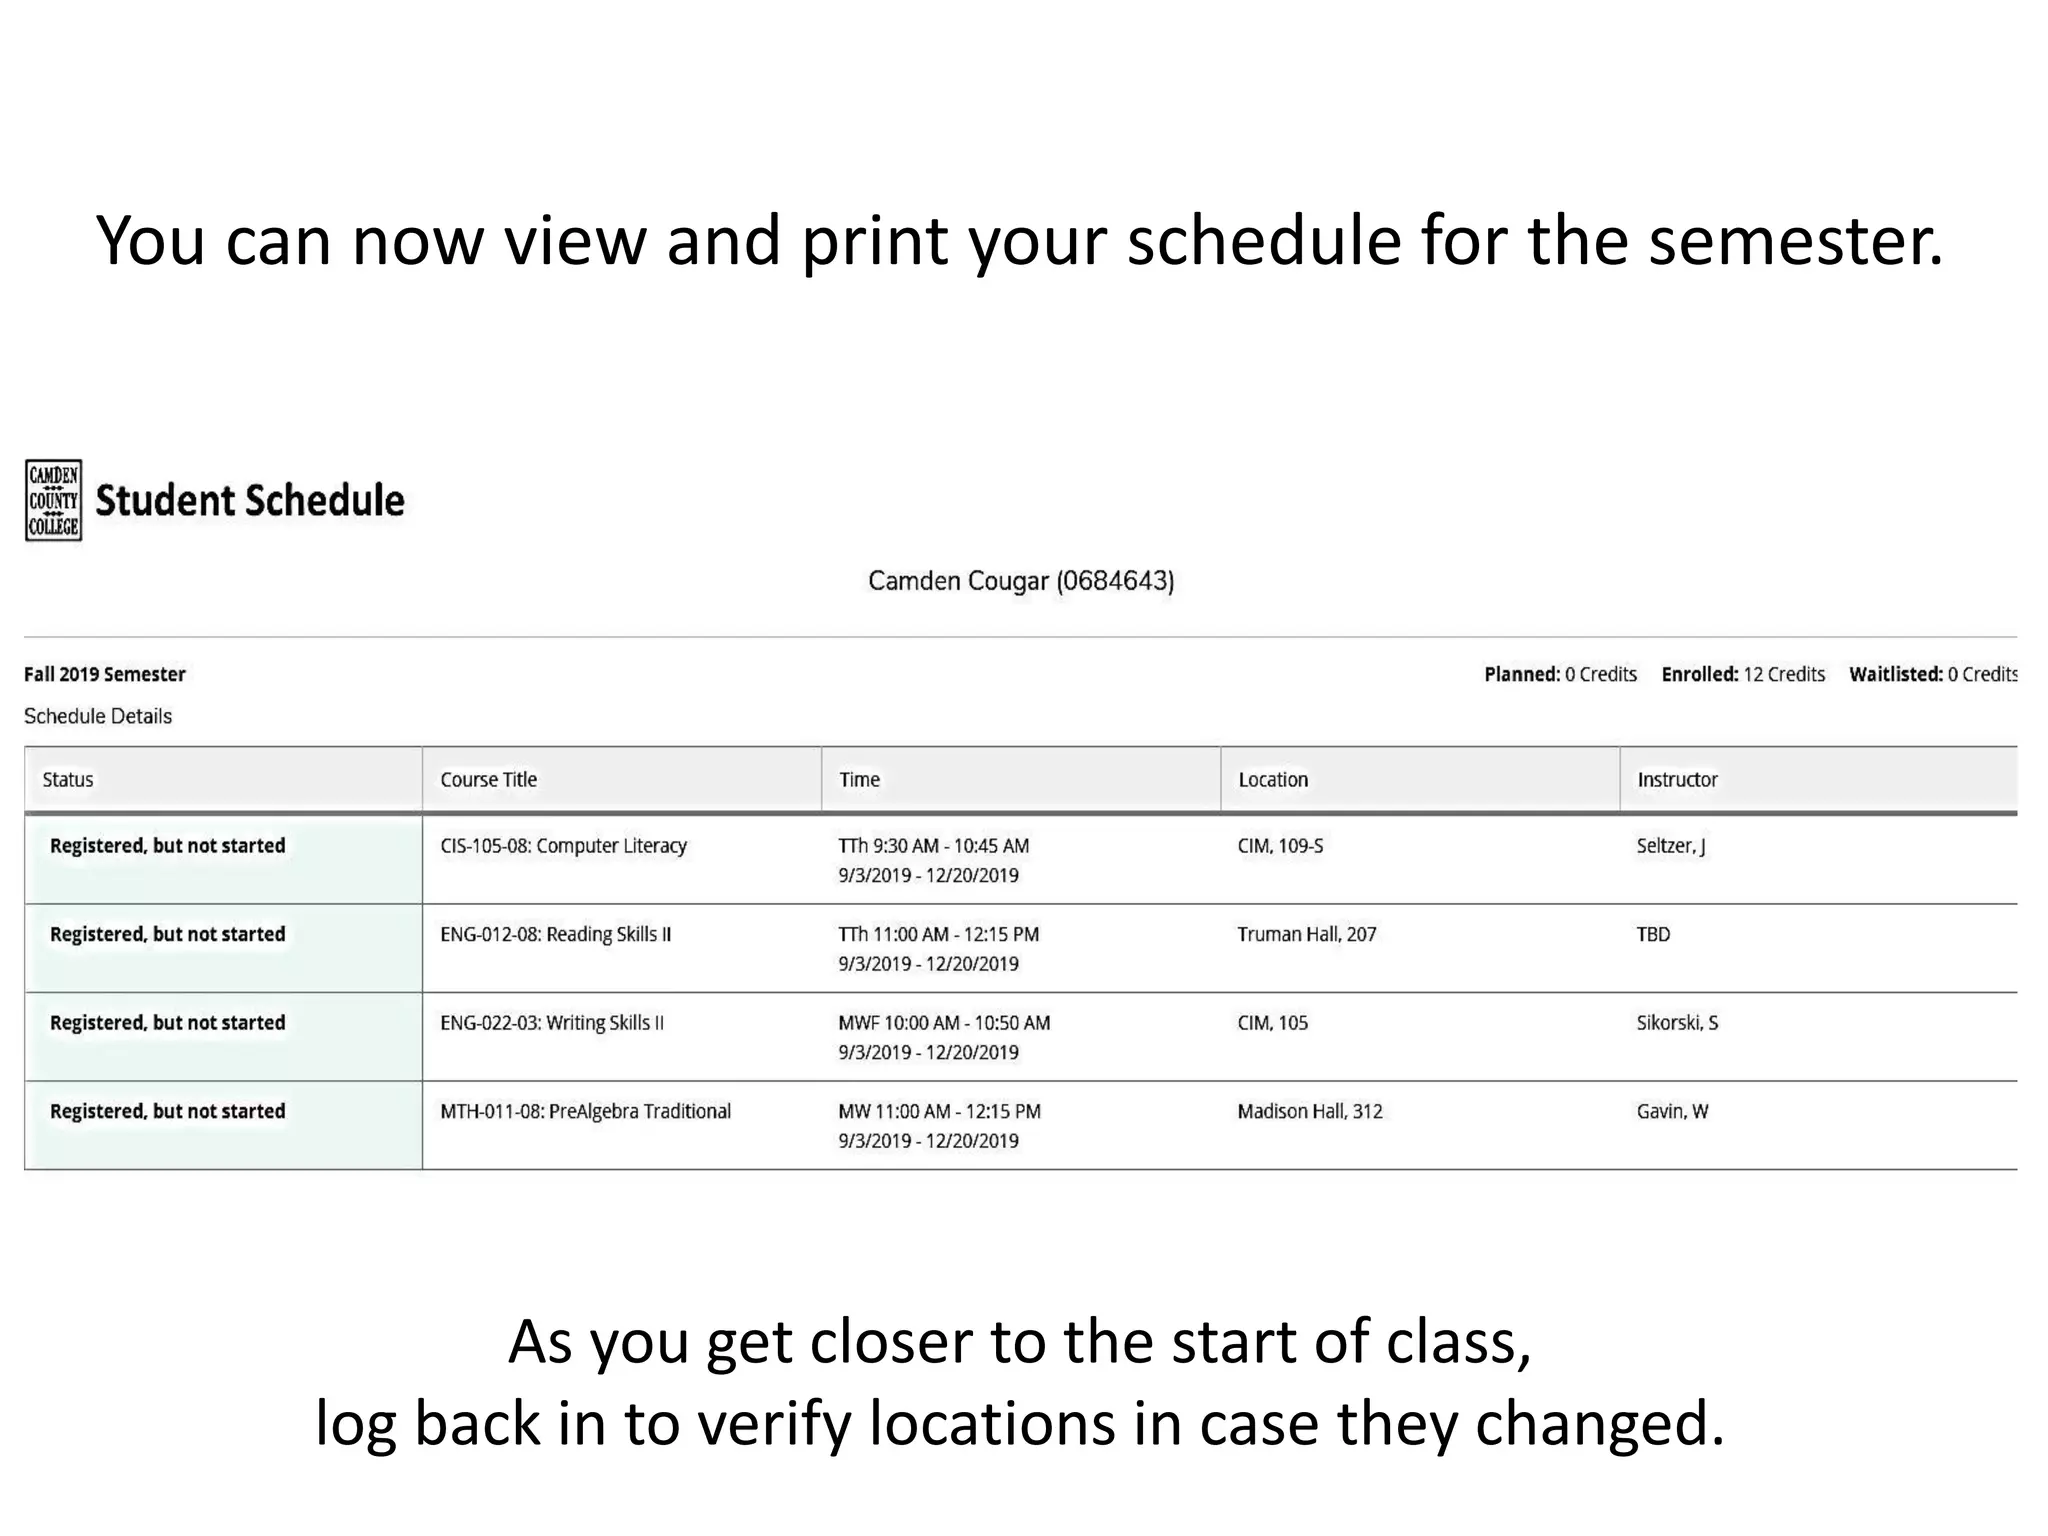
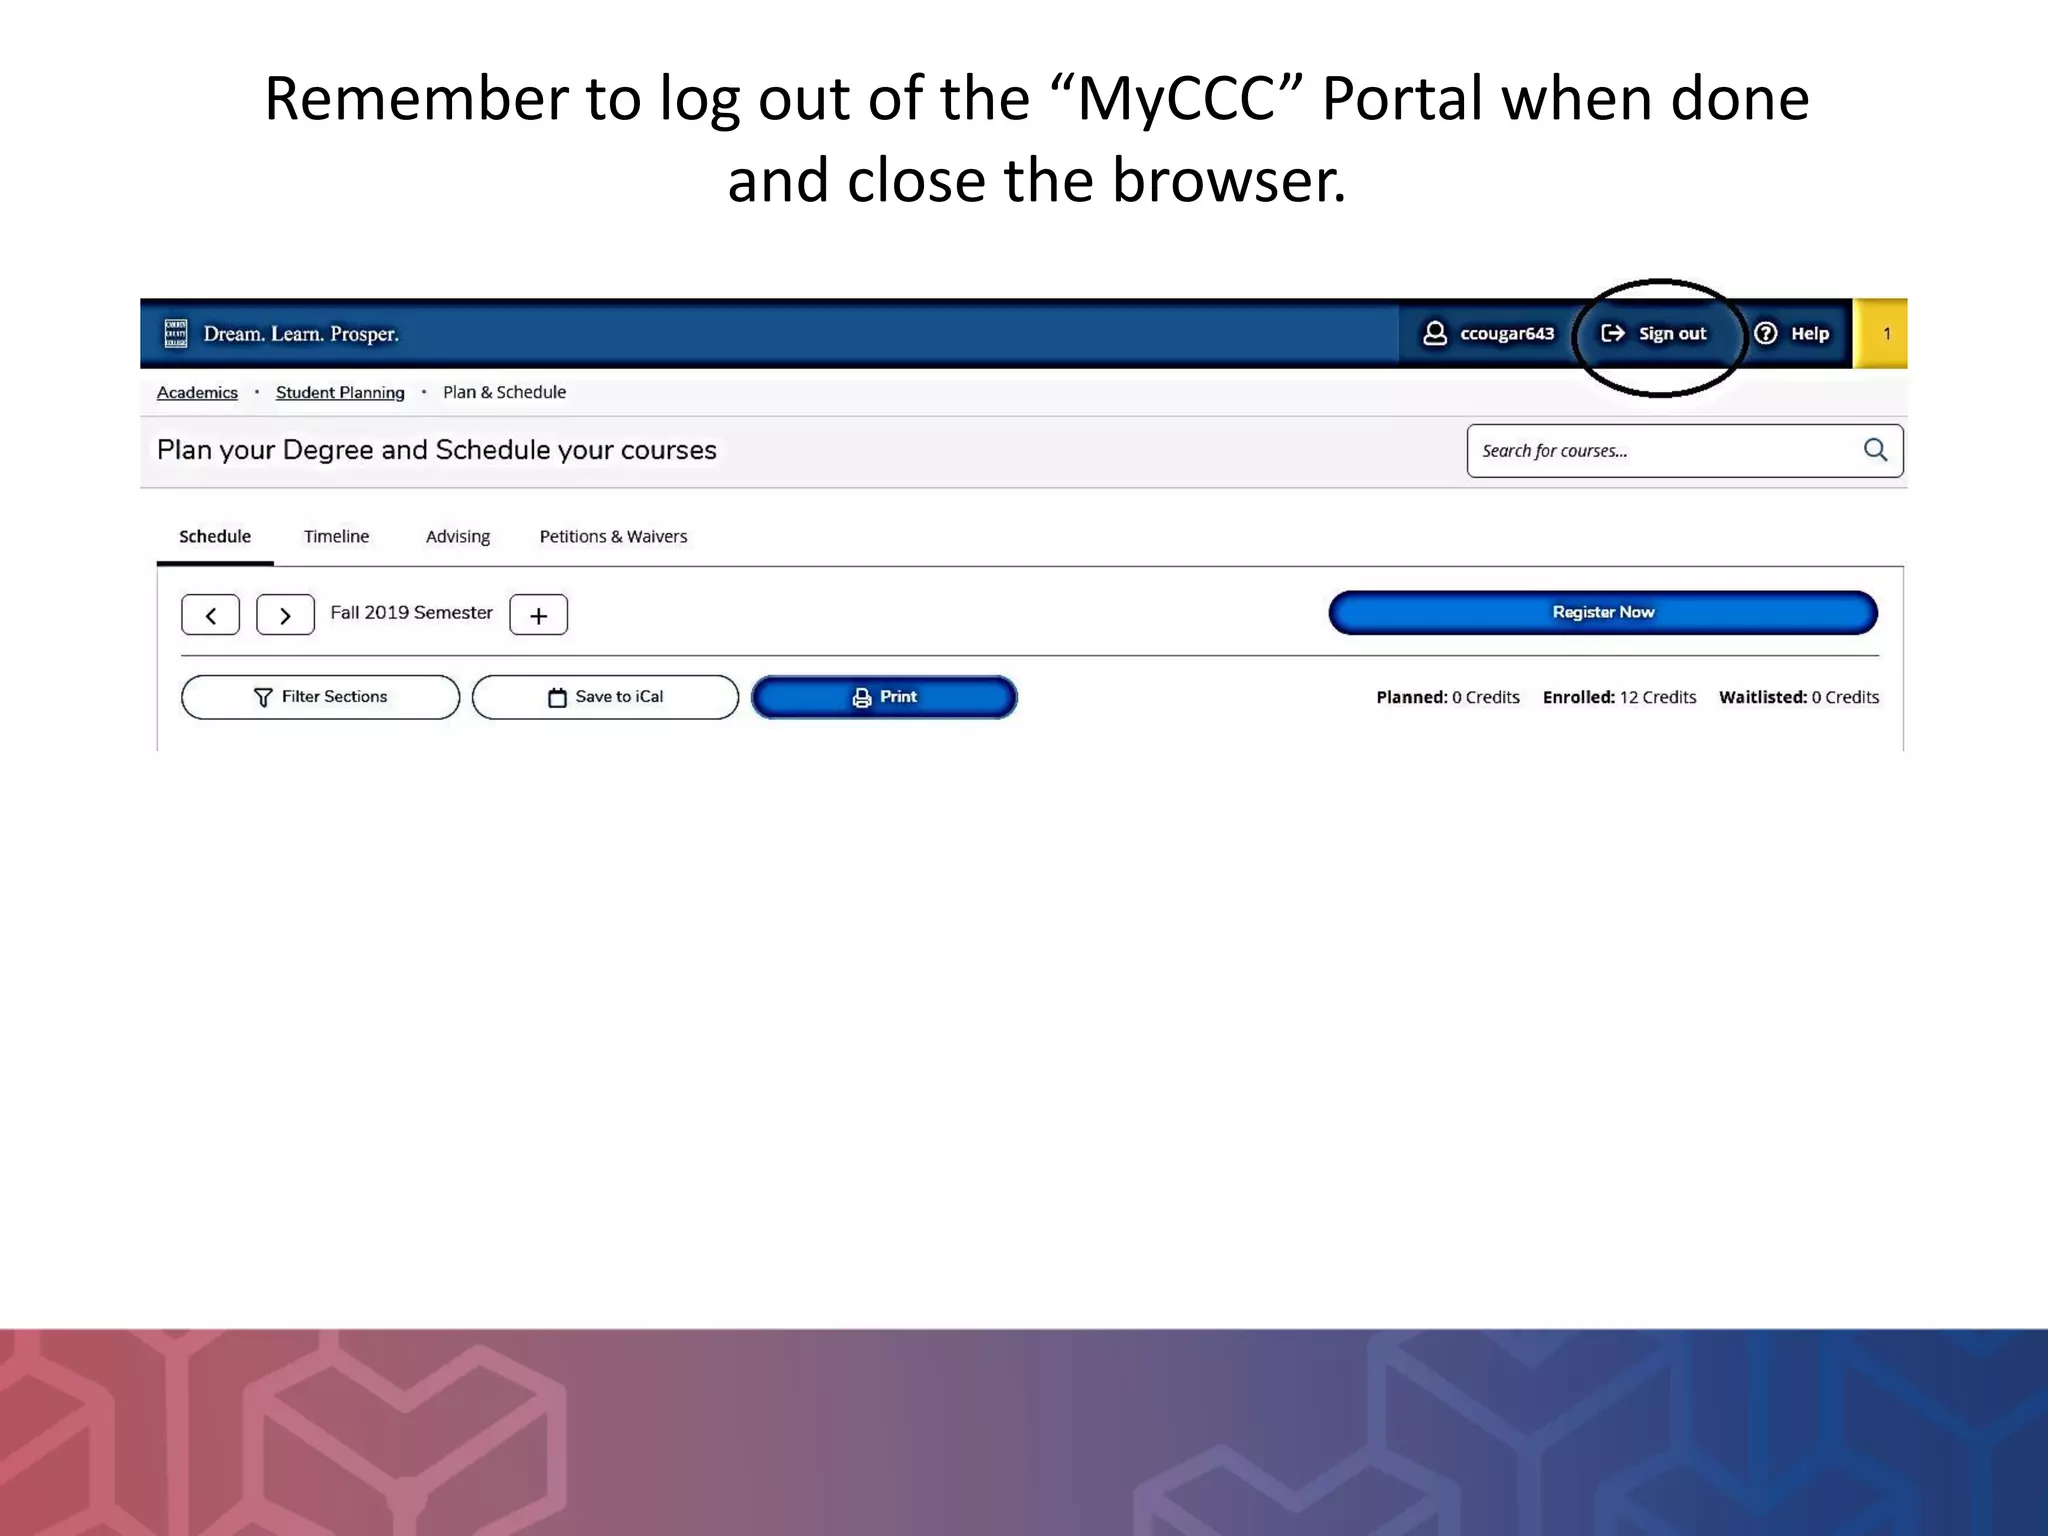

To register for classes at Camden County College: 1. Log into the MyCCC portal and go to the student planning section. 2. Select the current semester and filter sections by campus, days, and times as needed. 3. View sections for each class, select specific sections, and add them to your cart. 4. Confirm all class details on your timeline, then register or schedule all classes. 5. Print your schedule once registration is complete.


