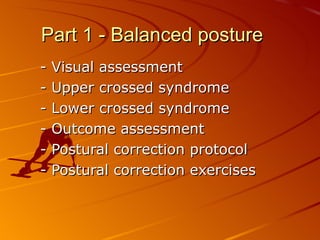
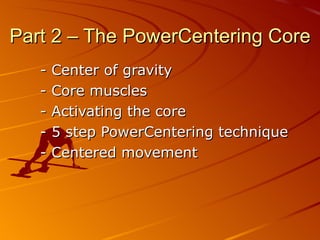
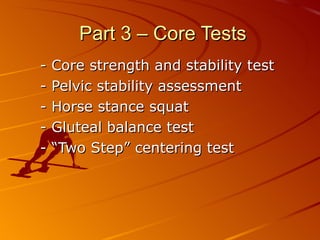
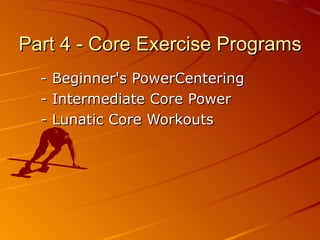
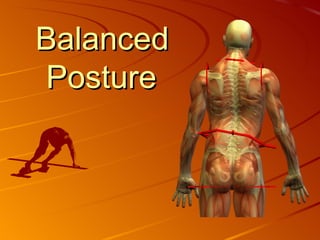
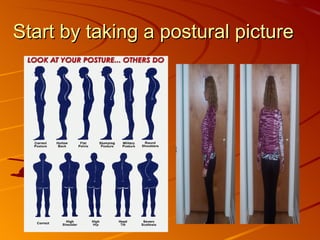
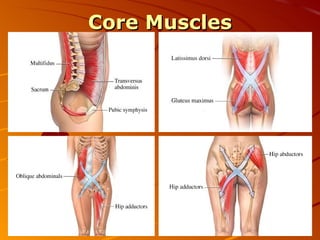
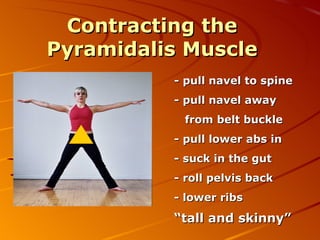
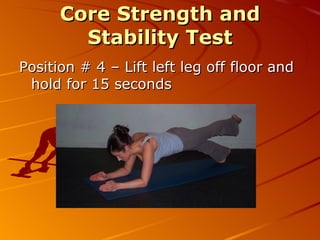
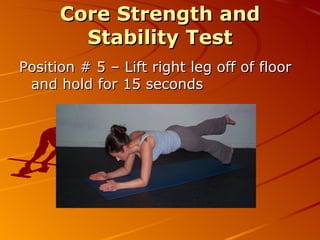
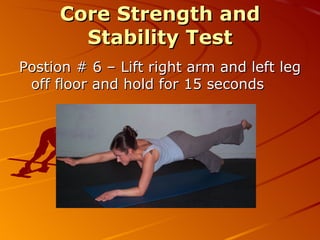
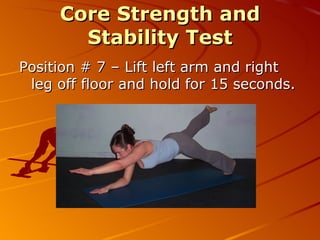
Structural Core Wellness   Improving total body function  with a strong, balanced, flexible core Presented by Dr. Peter Gratale  D.C., C.S.C.S.  Wellness & Fitness Adviser
Part 1 - Balanced posture - Visual assessment - Upper crossed syndrome - Lower crossed syndrome - Outcome assessment - Postural correction protocol  - Postural correction exercises
Part 2 – The PowerCentering Core - Center of gravity - Core muscles - Activating the core - 5 step PowerCentering technique - Centered movement
Part 3 – Core Tests - Core strength and stability test - Pelvic stability assessment - Horse stance squat - Gluteal balance test - “Two Step” centering test
Part 4 - Core Exercise Programs - Beginner's PowerCentering - Intermediate Core Power - Lunatic Core Workouts
Balanced  Posture
Start by taking a postural picture
“ All striated muscles of the body respond to stress in different but predictable ways. Simply stated, certain muscles tighten while others weaken when exposed to the same stressors. Janda's formula for predicting tight and weak muscle groups helps explain why so many clients present with the same aberrant postures. Investigators now believe these muscle imbalance patterns develop from a bombardment of abnormal neurologic information to the spinal cord and brain, due to tension, trauma, poor posture, joint blockage, genetic influences, excessive physical demands or habitual movement patterns.” Visual Assessment Vladimer Janda, M.D.
Upper Crossed Syndrome Notice how the tight line (a) passes through the levator scapulae, upper trapezius and the pectorals, causing shoulder elevation and scapular protraction. Inhibition in the deep neck flexors and lower shoulder stabilizers (b) permits this asymmetry. Tight, Facilitated:     Pectorals Upper Trapezius Levator Scapulae Sternocleidomastoid Anterior Scalenes Suboccipitals Subscapularis Latissimus Dorsi  Weak, Inhibited: Longus Capitis & Colli Hyoids Serratus Anterior Rhomboids Lower & Middle Trapezius Posterior Rotator Cuff
Lower Crossed Syndrome The lower crossed syndrome. The tight line (a) travels through the iliopsoas and lumbar erectors, which pull and hold this aberrant swayback posture. Reciprocal inhibition weakens the abdominals and gluteals (b) allowing this dysfunctional pattern to develop. Tight, facillitated: Iliopsoas Rectus Femoris Hamstrings Lumbar Erectors Tensor Fascia Latae Thigh Adductors Piriformis Quadratus Lumborum  Weak, inhibited: Rectus Abdominis Gluteals Vastus Medialis Vastus Lateralis Transversus Abdominis
Outcome assesment Record pre and post  - Height  - Weight  - Waist circumference  - Hip circumference  - Bodyfat percentage  - Postural picture (they WILL SEE the difference!)
Postural Correction Protocol Video Coming Soon
Postural Correction Exercises Video Coming Soon
The PowerCentering Core - Center of Gravity - Dan Tien - Hara - Powerhouse - The Core An inch or two below the navel inside the belly
Core Muscles
Contracting the Pyramidalis Muscle - pull navel to spine - pull navel away from belt buckle - pull lower abs in - suck in the gut - roll pelvis back - lower ribs “ tall and skinny”
Five Step PowerCentering Technique Focus your mind to center
Breathe to your center
Stand Tall (hang from ceiling)
Ground (feet root into ground)
Balance (sway) to center
Moving from Center -  Initiate movement from center - Activate the ‘powerhouse’ - ‘Scoop’ the abs - Pull the navel to spine - Focus on the center - Engage the core
4 Core Tests - Core Strength and Stability Test - Pelvic Stability Assessment - Glute Balance Test - “Two Step” Centering Test
Core Strength and  Stability Test - overview - Determines current core strength and gauges progress over time  - Monitors the development of the abdominal, hip and lower back muscles  - Equipment needed:  flat surface, mat, watch - Analysis of the result is by comparing it with the results of previous tests
C S & S Test Protocol 1. Assume the basic plank position. Hold this position for 60 seconds  2. Lift your right arm off the ground. Hold this position for 15 seconds  3. Return your right arm to the ground and lift the left arm off the ground. Hold this position for 15 seconds  4. Return your left arm to the ground and lift the right leg off the ground. Hold this position for 15 seconds  5. Return your right leg to the ground and lift the left leg off the ground. Hold this position for 15 seconds  6. Return your left leg to ground and lift your right leg and left arm off the ground. Hold this position for 15 seconds.  7. Return your right leg and left arm to the ground and lift your left leg and right arm  off the ground. Hold this position for 15 seconds  8.Return to the basic plank position (elbows on the ground). Hold this position for 30 seconds
Core Strength and Stability Test Position #1 - Assume the basic plank position and hold for 60 seconds
Core Strength and Stability Test Position #2 – Lift left arm off floor and hold for 15 seconds.
Core Strength and Stability Test Position #3 – Lift right arm off floor and hold for 15 seconds
Core Strength and Stability Test Position # 4 – Lift left leg off floor and hold for 15 seconds
Core Strength and Stability Test Position # 5 – Lift right leg off of floor and hold for 15 seconds
Core Strength and Stability Test Postion # 6 – Lift right arm and left leg off floor and hold for 15 seconds
Core Strength and Stability Test Position # 7 – Lift left arm and right leg off floor and hold for 15 seconds.
Core Strength and Stability Test Postion #8 – Resume full plank position and hold for 30 seconds
Core Strength and Stability Test Video Coming Soon
Pelvic Stability Assessment - Determines current pelvic and lower extremity stability and gauges progress over time  - Monitors the development of the spinal, hip and lower extremity joints and muscles muscles  -Equipment needed:  flat upright smooth surface, digital camera - Analysis of the result is by comparing it with the results of previous tests
Pelvic Stability Protocol 1. Have patient stand with feet wider than shoulder width, toes pointed out. Modification for asthenic patient is leaning against smooth door or wall. 2. Ask patient to slowly descend into squat bending knees in line with toes while keeping upper body upright. 3. Observe symmetry of descent. In particular observe planes of movement of ankles, knees and pelvis/hips while also observing for arch pronation/supination. 4. Do as many reps as necessary to assess and make corrections along the way to improve movement mechanics.
Horse Stance and Squat Video Coming Soon
The Glute Balance Test - Objective - The objective of the Balance Test is to monitor the development of the athlete's balancing and centering skills.  - Equipment Needed – None. It is advisable to do this test barefoot. The appropriateness of proper fitting footwear can also be tested by comparing the athlete performing the test with and without footwear. - Conducting the Test – to score, circle to the level you complete. The balance test is a 3 minute test (1 ½ minutes each side) and is conducted as follows:
The Glute Balance Test Position #1  Standing erect, shift your weight to the right leg and foot and bend forward as you lift and extend the left straight leg backward. Hands and arms lift straight out to the sides. Hold this position without touching the ground with either hands or left foot for 30 seconds.
The Glute Balance Test Now slowly tilt your arms while turning your torso left and right like an airplane banking and rolling. Do a few repetitions each way for 30 seconds. Feel the strength and contraction of the butt muscle of the fixed right lower extremity as you roll. This also serves as an exercise to strengthen the gluteus muscles.
The Glute Balance Test Video Coming Soon

Structural Core Wellness

  • 1.
    Structural Core Wellness Improving total body function with a strong, balanced, flexible core Presented by Dr. Peter Gratale D.C., C.S.C.S. Wellness & Fitness Adviser
  • 2.
    Part 1 -Balanced posture - Visual assessment - Upper crossed syndrome - Lower crossed syndrome - Outcome assessment - Postural correction protocol - Postural correction exercises
  • 3.
    Part 2 –The PowerCentering Core - Center of gravity - Core muscles - Activating the core - 5 step PowerCentering technique - Centered movement
  • 4.
    Part 3 –Core Tests - Core strength and stability test - Pelvic stability assessment - Horse stance squat - Gluteal balance test - “Two Step” centering test
  • 5.
    Part 4 -Core Exercise Programs - Beginner's PowerCentering - Intermediate Core Power - Lunatic Core Workouts
  • 6.
  • 7.
    Start by takinga postural picture
  • 8.
    “ All striatedmuscles of the body respond to stress in different but predictable ways. Simply stated, certain muscles tighten while others weaken when exposed to the same stressors. Janda's formula for predicting tight and weak muscle groups helps explain why so many clients present with the same aberrant postures. Investigators now believe these muscle imbalance patterns develop from a bombardment of abnormal neurologic information to the spinal cord and brain, due to tension, trauma, poor posture, joint blockage, genetic influences, excessive physical demands or habitual movement patterns.” Visual Assessment Vladimer Janda, M.D.
  • 9.
    Upper Crossed SyndromeNotice how the tight line (a) passes through the levator scapulae, upper trapezius and the pectorals, causing shoulder elevation and scapular protraction. Inhibition in the deep neck flexors and lower shoulder stabilizers (b) permits this asymmetry. Tight, Facilitated: Pectorals Upper Trapezius Levator Scapulae Sternocleidomastoid Anterior Scalenes Suboccipitals Subscapularis Latissimus Dorsi Weak, Inhibited: Longus Capitis & Colli Hyoids Serratus Anterior Rhomboids Lower & Middle Trapezius Posterior Rotator Cuff
  • 10.
    Lower Crossed SyndromeThe lower crossed syndrome. The tight line (a) travels through the iliopsoas and lumbar erectors, which pull and hold this aberrant swayback posture. Reciprocal inhibition weakens the abdominals and gluteals (b) allowing this dysfunctional pattern to develop. Tight, facillitated: Iliopsoas Rectus Femoris Hamstrings Lumbar Erectors Tensor Fascia Latae Thigh Adductors Piriformis Quadratus Lumborum Weak, inhibited: Rectus Abdominis Gluteals Vastus Medialis Vastus Lateralis Transversus Abdominis
  • 11.
    Outcome assesment Recordpre and post - Height - Weight - Waist circumference - Hip circumference - Bodyfat percentage - Postural picture (they WILL SEE the difference!)
  • 12.
  • 13.
  • 14.
    The PowerCentering Core- Center of Gravity - Dan Tien - Hara - Powerhouse - The Core An inch or two below the navel inside the belly
  • 15.
  • 16.
    Contracting the PyramidalisMuscle - pull navel to spine - pull navel away from belt buckle - pull lower abs in - suck in the gut - roll pelvis back - lower ribs “ tall and skinny”
  • 17.
    Five Step PowerCenteringTechnique Focus your mind to center
  • 18.
  • 19.
    Stand Tall (hangfrom ceiling)
  • 20.
    Ground (feet rootinto ground)
  • 21.
  • 22.
    Moving from Center- Initiate movement from center - Activate the ‘powerhouse’ - ‘Scoop’ the abs - Pull the navel to spine - Focus on the center - Engage the core
  • 23.
    4 Core Tests- Core Strength and Stability Test - Pelvic Stability Assessment - Glute Balance Test - “Two Step” Centering Test
  • 24.
    Core Strength and Stability Test - overview - Determines current core strength and gauges progress over time - Monitors the development of the abdominal, hip and lower back muscles - Equipment needed: flat surface, mat, watch - Analysis of the result is by comparing it with the results of previous tests
  • 25.
    C S &S Test Protocol 1. Assume the basic plank position. Hold this position for 60 seconds 2. Lift your right arm off the ground. Hold this position for 15 seconds 3. Return your right arm to the ground and lift the left arm off the ground. Hold this position for 15 seconds 4. Return your left arm to the ground and lift the right leg off the ground. Hold this position for 15 seconds 5. Return your right leg to the ground and lift the left leg off the ground. Hold this position for 15 seconds 6. Return your left leg to ground and lift your right leg and left arm off the ground. Hold this position for 15 seconds. 7. Return your right leg and left arm to the ground and lift your left leg and right arm off the ground. Hold this position for 15 seconds 8.Return to the basic plank position (elbows on the ground). Hold this position for 30 seconds
  • 26.
    Core Strength andStability Test Position #1 - Assume the basic plank position and hold for 60 seconds
  • 27.
    Core Strength andStability Test Position #2 – Lift left arm off floor and hold for 15 seconds.
  • 28.
    Core Strength andStability Test Position #3 – Lift right arm off floor and hold for 15 seconds
  • 29.
    Core Strength andStability Test Position # 4 – Lift left leg off floor and hold for 15 seconds
  • 30.
    Core Strength andStability Test Position # 5 – Lift right leg off of floor and hold for 15 seconds
  • 31.
    Core Strength andStability Test Postion # 6 – Lift right arm and left leg off floor and hold for 15 seconds
  • 32.
    Core Strength andStability Test Position # 7 – Lift left arm and right leg off floor and hold for 15 seconds.
  • 33.
    Core Strength andStability Test Postion #8 – Resume full plank position and hold for 30 seconds
  • 34.
    Core Strength andStability Test Video Coming Soon
  • 35.
    Pelvic Stability Assessment- Determines current pelvic and lower extremity stability and gauges progress over time - Monitors the development of the spinal, hip and lower extremity joints and muscles muscles -Equipment needed: flat upright smooth surface, digital camera - Analysis of the result is by comparing it with the results of previous tests
  • 36.
    Pelvic Stability Protocol1. Have patient stand with feet wider than shoulder width, toes pointed out. Modification for asthenic patient is leaning against smooth door or wall. 2. Ask patient to slowly descend into squat bending knees in line with toes while keeping upper body upright. 3. Observe symmetry of descent. In particular observe planes of movement of ankles, knees and pelvis/hips while also observing for arch pronation/supination. 4. Do as many reps as necessary to assess and make corrections along the way to improve movement mechanics.
  • 37.
    Horse Stance andSquat Video Coming Soon
  • 38.
    The Glute BalanceTest - Objective - The objective of the Balance Test is to monitor the development of the athlete's balancing and centering skills. - Equipment Needed – None. It is advisable to do this test barefoot. The appropriateness of proper fitting footwear can also be tested by comparing the athlete performing the test with and without footwear. - Conducting the Test – to score, circle to the level you complete. The balance test is a 3 minute test (1 ½ minutes each side) and is conducted as follows:
  • 39.
    The Glute BalanceTest Position #1 Standing erect, shift your weight to the right leg and foot and bend forward as you lift and extend the left straight leg backward. Hands and arms lift straight out to the sides. Hold this position without touching the ground with either hands or left foot for 30 seconds.
  • 40.
    The Glute BalanceTest Now slowly tilt your arms while turning your torso left and right like an airplane banking and rolling. Do a few repetitions each way for 30 seconds. Feel the strength and contraction of the butt muscle of the fixed right lower extremity as you roll. This also serves as an exercise to strengthen the gluteus muscles.
  • 41.
    The Glute BalanceTest Video Coming Soon