SlideShare a Scribd company logo
1 of 44
Download to read offline
FEBRUARY 2016
A PRINCIPLED TECHNOLOGIES REPORT
Commissioned by Dell Inc.
SPEED UP SYSTEM DEPLOYMENT WITH DELL CONNECTED
CONFIGURATION SERVICES
So—you’ve finally decided on new systems for your employees. Now comes the
herculean task of getting your organization’s desired applications onto each employee’s
system. Even if you have an on-premises solution for distributing the appropriate
system image onto your new laptop fleet, each system requires in-house administrator
time and attention to customize and deploy the image before it reaches an employee.
With Dell Connected Configuration services, you can skip the tedious in-house imaging
process and customize each laptop before it leaves the factory, already joined to your
organization’s Active Directory Domain and fully up-to-date, so that systems are ready
for employees to use the moment they arrive.
At Principled Technologies, we investigated how the Dell Connected
Configuration service could save time configuring a corporate image over Static Image
Deployment. After the initial setup period, deploying a laptop with Dell Connected
Configuration required no additional configuration after leaving the factory. This means
that IT staff could skip the time-consuming in-house process of deploying customized
system images, savings that could multiply when ordering and imaging an entire fleet of
systems. When IT staff spend less time deploying laptops, they have more opportunity
to focus on strategic tasks that can improve your business. When new employees get
their systems right away, they become productive more quickly.
A Principled Technologies report 2Speed up system deployment with Dell Connected Configuration
services
SYSTEMS CUSTOMIZED, DELIVERED, AND READY TO GO
Deploying new PCs with approved applications has traditionally required a
significant effort from IT administrators. Storing systems for future use is problematic:
storage space is at a premium, you don’t know what those future employees will
require, and by the time the system is needed, the applications and drivers may be out
of date. Ordering new laptops as needed makes more sense, but the time it takes to
ship the laptop to the IT staff first for customization, and then to deliver or ship it to a
local or remote employee, can slow down your business.
With Dell Connected Configuration services, IT admins can order fully configured
laptops, customized for each employee, straight from the factory and ship them directly
to employees without hands-on administrator customization time. This means an
employee can begin using his or her system immediately because it has the latest
updates, drivers, patches, and applications preloaded upon arrival. Your organization
provides, owns, and controls the infrastructure so it remains secure: Dell simply hosts
your server at their facility that connects to your in-house environment. Dell Connected
Configuration systems arrive at your location already joined to the domain, with any
required BIOS configuration changes, encryption, or partitioning that your company
desires. Because new patches or updates are easily imported into Connected
Configuration, they can be applied to new systems automatically before they leave the
factory.
Dell Static Imaging provides some automation by allowing customers to submit
a customized operating system that Dell then applies onto new PCs. However, if your
employees in different departments require different applications, IT admins still have
to take the time to customize those systems after they ship from the factory. For
updates or patches released since the initial image creation, administrators have to
spend extra time integrating them into the corporate image. Even imaging these
systems with an in-house SCCM environment would add additional time and steps for
customization.
To show how much time Dell Connected Configuration services can save, we
compared the time to configure a laptop using both Dell Connected Configuration and
Dell Static Imaging processes. For detailed test information, see Appendix A, Appendix B,
and Appendix C.
Less hands-on administrator time for deployment
Consider this scenario: Your company has just hired a new employee who will
work from a small remote office without a dedicated IT staff. How quickly and easily can
this new employee get a laptop and start working?
Your IT admin places an order for a new system, which first requires they
complete the onboarding process, which means making sure the correct image goes on
A Principled Technologies report 3Speed up system deployment with Dell Connected Configuration
services
the laptop before it ships out of the factory. Then, the administrator must ensure that
post-factory provisioning (such as updating, application installation, and integration into
the corporate domain) and distribution happens.
As Figure 1 shows, Dell Connected Configuration required 86 percent less total
hands-on administrator time than using Static Imaging to get an updated system in the
remote employee’s hands.
Figure 1: Using Dell Connected
Configuration services reduced
total administrator time by 86
percent compared to Static
Imaging.
Our team spent only 37 minutes completing Dell Connected Configuration
requirements with Dell technicians prior to the laptop leaving the factory. From there,
Dell shipped the completed system directly to the employee. Dell Connected
Configuration required no provisioning and distribution time from the administrator,
because all drivers and applications were already up to date. The Static Imaging process
required far more additional time—over four hours to submit our image, complete
paperwork, and then update and ship the system for employee use when it arrived at
the home office. See Appendix A for the detailed breakdown of the steps we took with
each deployment process.
Please note that, while the administrator would not have to complete the
onboarding process for each laptop, in a large order they would need to provision and
ship each laptop individually. Using Dell Connected Configuration for system
deployment could save plenty of administrator time and money in shipping costs for
large laptop orders.
Save up to two days when shipping new systems to remote employees
We found that using Dell Connected Configuration services for image
deployment meant that the remote employee could have their system two days sooner
than using Dell Static Imaging (see Figure 2). The system shipped using Dell Connected
37
260
A Principled Technologies report 4Speed up system deployment with Dell Connected Configuration
services
configuration could be overnighted straight from the factory to the remote employee,
requiring only one day. The system shipped using Static Imaging would first go to the IT
administrator, who would complete the post-factory system provisioning process, and
then ship the system overnight to the remote employee.
Figure 2: Using Dell Connected
Configuration service had a
system in a remote
employee’s hands two days
sooner than using Static
Imaging.
CONCLUSION
The days of administrators going through lengthy system provisioning
procedures to update and patch client images on new employee systems are gone. With
Dell Connected Configuration service, your organization can get any number of systems
delivered to your door with the latest company image loaded and customized for your
employees’ needs. Dell Connected Configuration Service lets customers using
management software such as SCCM integrate existing software and processes securely
into the Dell manufacturing process at the factory using a secure VPN with your own
network/firewall standards, so you can change configurations from your location in real
time, on your time. From your headquarters, you can complete a number of tasks on
new systems, including imaging, updating BIOS settings, partitioning and encrypting
hard drives, and installing user-specific software.
As we found, using Dell Connected Configuration Service could save significant
time for a laptop deployment, allowing your administrative staff to focus on other ways
to improve your business IT. Additionally, your employees can receive their new systems
more quickly, potentially avoiding days of waiting for a system to be ready. These time
saving advantages of Dell Connected Configuration services can mean a more efficient
process for deploying new systems, and can boost productivity by putting the up-to-
date tools employees need to do their jobs into their hands more quickly.
A Principled Technologies report 5Speed up system deployment with Dell Connected Configuration
services
APPENDIX A – AN OUTLINE OF EACH PROCESS
Figure 3 shows the software versions that were part of the images for both
solutions. Dell Connected Configuration makes it easier get systems shipped with up-to-
date software.
Dell Connected Configuration Static Imaging
Microsoft® Windows® 8.1 Updates Updates current to 02/03/2016 Updates current to 10/05/2015
Dell CAB E5550_5550-Win8.1_A05-YHV16 E5540_Win8.1_A06-WD9XN
Adobe® Reader DC 11.0.00 11.0.00
Google Chrome™ 48.0.2564 46.0.2490
Java™ 8 Update 65 Update 60
Microsoft Office 365™ 15.0.4797.1002 15.0.4753.1003
Figure 3: The software versions deployed on the systems using each imaging solution.
Dell Connected Configuration process
Figure 4 shows the tasks that administrators had to complete during the
Connected Configuration process and the time it took to complete each task.
Task description Minutes Description of separated steps
At Dell Factory, a Dell Technician connected the laptop
to the deployment switch and worked with the PT
technician to complete the operating instructions.
37
The PT Technician completed the preliminary
checks to verify the environment is working.
They then added the Mac address to the
deployment collection and emailed Dell to
begin the deployment.
The PT technician validated that deployment
was successful and sent an email verifying
that the deployment was complete.
Dell shipped the system from the Dell factory. --
The simulated remote employee received the system. --
Total onboarding time (minutes) 37
Total provisioning and distribution time for 1 system
(minutes)
0
Total administrative time after placing the order 37
Time to receive system after shipping (days) 1
Figure 4: A breakdown of the administrator time and steps to complete deployment of a laptop using Dell Connected
Configuration.
Setup
PT integrated our existing SCCM environment with Dell Connected
Configuration. We prepared a PowerEdge R620 in the PT labs and created two
customer router endpoints that would establish an OpenVPN connection once
one of them was installed at the Dell factory. After configuring this
A Principled Technologies report 6Speed up system deployment with Dell Connected Configuration
services
environment, we shipped the R620, a switch, and the customer router to Dell
with directions for the technicians to install the solution. As Figure 5 shows, our
SCCM primary server was able to issue commands to the remote distribution
point located at the Dell partner’s facility. After Dell finished setting up the
environment, we verified connectivity and sent operating instructions to the
Dell project manager. See Appendix C for operating instructions.
Figure 5: Our setup for testing.
We then placed an order for the Dell Latitude E5550. Dell prepared the
hardware on the laptop and sent it to the remote facility where our Remote Distribution
point was located. The Dell technician sent our team the MAC address to identify the
laptop on the network.
Onboarding
We added the laptop to the deployment group then we told Dell to proceed
with the deployment. The Dell technician then plugged our laptop into the switch and
started the laptop. Once the system had booted using a PXE-boot over its NIC, the
system contacted the remote distribution point and completed our Windows 8.1
Enterprise Deployment Task Sequence. Once the task sequence completed, the Dell
technician notified us. We then used Remote Desktop to connect to the laptop and
A Principled Technologies report 7Speed up system deployment with Dell Connected Configuration
services
verify that all tasks completed correctly. Once verified, we sent our approval to the Dell
team.
Provisioning and distribution
Dell then shipped the laptop, which arrived at our simulated remote office
location requiring no further provisioning or distribution.
Static Imaging process
Figure 6 shows the tasks that administrators had to complete during the Static
Imaging process and the time it took to complete each task.
Task description Minutes
Minutes
(broken down
by step)
Description of separated steps
The PT technician completed the required
documentation and uploaded the image
to Dell's servers.
167
99
The PT technician gathered and filling
out system information
33
The PT technician uploaded the image
via the file transfer application.
36
The PT technician completed the
Export Compliance form.
The PT technician spoke on the phone
with the Project Manager verifying that PT
was willing to move forward with the
image as it was submitted.
6
The technician communicated with the
project manager about the image
specifications.
21
The technician communicated with the
project manager verifying the image
specifications.
5
The PT technician completed the Dell
Online First Article Review.
30
15
Due to browser compatibility issues
with the KVM Software used by Dell,
the PT technician downloaded an older
version of Internet Explorer
5
The PT technician followed the
directions to initiate a KVM session.
6
The PT technician used the KVM
session to verify that the system had
been imaged correctly.
4
The PT technician sent an email to
approve the image for deployment.
A Dell technician applied the image to the
target system.
--
Dell shipped the laptop to PT labs. --
The laptop arrived at PT labs and goes
through the shipping department.
--
A Principled Technologies report 8Speed up system deployment with Dell Connected Configuration
services
Task description Minutes
Minutes
(broken down
by step)
Description of separated steps
The PT Technician received the laptop and
completed onboarding procedure.
31 31
The PT technician completed the
provisioning procedure. This only
includes administrative time.
The system arrived at remote office ready
to use.
--
Total onboarding time (minutes) 229
Total provisioning and distribution time
for 1 system (minutes)
31
Total administrative time after placing
the order (onboarding + provisioning and
distribution time)
260
Time to receive system after shipping
(days)
3
Figure 6: A breakdown of the administrator time and steps to complete deployment of a laptop using Static Imaging.
Setup
With the Static Image Configuration Process, users submit a customized image
to Dell for deployment on purchased laptops. The customer contacts Dell, selects and
purchases the laptop, and then the sales representative introduces a project manager.
Onboarding
At this point, the customer completes the appropriate forms and uploads them the Dell
website. The project manager sends a series of emails outlining several tasks that
require completion:
 Fill out the Software Export Compliance Certification form, which states
that your product complies with US export law. PT completed, scanned,
and sent this form back to Dell.
 Install the File Transfer Application, which would later be used to upload
PT’s image.
 Create a Dell account using a previously specified email.
 Log into the Dell File Transfer Application. We selected our project,
designated a name for the image, and uploaded our image. We then
submitted a web form with specifics about our image including the OS
version and a partition table.
Next, the Dell engineering team worked with PT to verify our image. After
deploying the image to a virtual machine, the project manager brought any concerns to
the PT technical team’s attention. After PT agreed to move forward, Dell made the
image available so that PT could approve the Online First Article. PT was able to log into
A Principled Technologies report 9Speed up system deployment with Dell Connected Configuration
services
the deployed image remotely and verify that Dell had deployed the image correctly.
After sending our approval, Dell loaded a laptop with our image and sent it to us.
Provisioning and distribution
Upon its arrival, we prepared the laptop for our remote employee. We unboxed
the system. We then booted to Windows 8.1. Next, we joined the laptop to the domain
and customized the system name. We then installed any new driver updates or
Windows updates that were available. Last, we enabled Bitlocker Drive Encryption on
the system. We then repackaged the system, created a shipping label, and delivered the
laptop to a nearby shipping carrier, and simulated shipping it to our remote office using
next-day shipping.
A Principled Technologies report 10Speed up system deployment with Dell Connected Configuration
services
APPENDIX B – SYSTEM CONFIGURATION INFORMATION
Figures 7 and 8 provide detailed configuration information for the test systems.
System Dell PowerEdge R620
General
Number of processor packages 2
Number of cores per processor 4
Number of hardware threads per core 2
System power management policy Maximum performance
Power supplies
Total number 2
Vendor and model number Dell 05NF18X02
Wattage of each (W) 750
Cooling fans
Total number 7
Vendor and model number Dell PFC0612DE
Dimensions (h × w) of each 1.5" × 1.5"
Volts 12
Amps 1.68
CPU
Vendor Intel®
Name Xeon®
Model number E5-2660v2
Socket type 2011 LGA
Core frequency (GHz) 2.20
Bus frequency 8 GT/s
L1 cache
8 × 32 KB Data
8 × 32 KB Instr.
L2 cache 8 × 256 KB
L3 cache 25 MB
Platform
Vendor and model number Dell PowerEdge R620
Motherboard model number 0YDJK3
BIOS name and version 2.5.2
BIOS settings Default
A Principled Technologies report 11Speed up system deployment with Dell Connected Configuration
services
System Dell PowerEdge R620
Memory module(s)
Total RAM in system (GB) 128
Vendor and model number Micron Technology® 36KSF1G72PZ-1G6K1
Type PC3-12800
Speed (MHz) 1600
Speed running in the system (MHz) 1600
Timing/Latency (tCL-tRCD-tRP-tRASmin) 11-11-11-28
Size (GB) 8
Number of RAM module(s) 16
Chip organization Double-sided
Rank Dual
Operating system
Name Windows Server® 2012 R2
File system NTFS
RAID controller
Vendor and model number Dell PERC H710P Mini
Firmware version 6.3.3.0002
Driver version Microsoft 6.3.9600.16384
Cache size (MB) 1024
Solid-state drives
Vendor and model number N/A
Number of drives N/A
Size N/A
Type N/A
Hard drives
Vendor and model number 2 × Seagate® ST9900805SS
Number of drives 2
Size (GB) 900
RPM 10K
Type SAS 6Gb/s
Ethernet adapters
Vendor and model number Intel Gigabit 4P I350-t
Type rNDC
Driver Intel 12.14.7.0
Figure 7: Detailed configuration of the test server.
System Dell Latitude E5550
General
Number of processor packages 1
Number of cores per processor 2
Number of hardware threads per core 2
A Principled Technologies report 12Speed up system deployment with Dell Connected Configuration
services
System Dell Latitude E5550
Total number of processor threads in system 4
System power management policy Balanced
Processor power-saving option Enhanced Intel SpeedStep Technology
System dimensions (length x width x height) 14.8" x 10.1" x 0.9"
System weight 6.5 lbs.
CPU
Vendor Intel
Name Core i5
Model number 5300U
Stepping E0/F0
Socket type Socket 1168 BGA
Core frequency (GHz) 2.30
L1 cache 32 KB + 32 KB (per core)
L2 cache 2 x 256 KB
L3 cache 3 MB
Platform
Vendor Dell
Motherboard model number 06DJY6
Motherboard chipset Intel Broadwell-U
BIOS name and version Dell A11 (11/18/2015)
Memory module(s)
Vendor and model number Hyundai® HMT451S6BFR8A-PB
Type PC3-12800
Speed (MHz) 1,600
Speed running in the system (MHz) 1,600
Timing/Latency (tCL-tRCD-tRP-tRASmin) 11-11-11-28
Size (MB) 4,096
Number of memory module(s) 1
Total amount of system RAM (GB) 4
Channel (single/dual) Single
Hard disk
Vendor and model number Western Digital® WD2500LPLX-75ZNTT0
Number of disks in system 1
Size (GB) 500
Buffer size (MB) 32
RPM 7,200
Type SATA 6.0 Gb/s
Controller Intel Mobile Express Chipset SATA RAID Controller
Driver Intel 13.2.0.1016 (6/20/2014)
Operating system
Name Windows 8.1 Enterprise 64-bit
Build number 9600
Service Pack NA
File system NTFS
A Principled Technologies report 13Speed up system deployment with Dell Connected Configuration
services
System Dell Latitude E5550
Kernel ACPI x86-based PC
Language English
Microsoft DirectX version DirectX 11
Graphics
Vendor and model number Intel HD Graphics 5500
Type Integrated
Chipset Intel HD Graphics Family
BIOS version 1039.18
Total available graphics memory (MB) 1,992
Dedicated video memory (MB) 0
System video memory (MB) 0
Shared system memory (MB) 1,992
Resolution 1,366 x 768
Driver Intel 10.18.14.4099 (1/19/2015)
Sound card/subsystem
Vendor and model number Realtek® High Definition Audio
Driver Realtek 6.0.1.6053 (10/16/2014)
Ethernet
Vendor and model number Intel I1218-LM
Driver Intel 12.12.80.19 (9/29/2014)
Wireless
Vendor and model number Intel Dual Band Wireless-AC 7265
Driver Intel 17.15.0.5 (2/22/2015)
Optical drive(s)
Vendor and model number NA
Type NA
USB ports
Number 3
Type USB 3.0
Other Media Card Reader, HDMI port
Monitor
LCD type HD Anti-Glare LCD
Screen size 15.6”
Refresh rate 60 Hz
Battery
Type 3-cell Lithium Ion
Size (length x width x height) Internal
Rated capacity 38 Wh
Weight 5.3 lbs
Figure 8: Detailed configuration of the test server.
A Principled Technologies report 14Speed up system deployment with Dell Connected Configuration
services
APPENDIX C – HOW WE TESTED
Installing and configuring the infrastructure servers for Static Configuration
Configuring Windows Server 2012 R2 servers
After installing Windows Server 2012 R2 on our four servers and the PowerEdge R620 and installing all updates
up to 08/27/2015, we configured Windows by making the following changes on each system.
Configuring Windows Update
1. In the left pane of the Server Manager window, click Local Server.
2. In the main frame, next to Windows Update, click Not configured.
3. In the Windows Update window, in the main pane, click Let me choose my settings.
4. Under Important updates, select Never check for updates (not recommended), and then click OK.
5. In the left pane, click Check for updates, and install all available updates.
6. Close the Windows Update window.
Configuring Windows Firewall
1. In Server Manager, click ToolsWindows Firewall with Advanced Security.
2. In the Overview section, click Windows Firewall Properties.
3. In the Domain Profile tab, for Firewall state, click Off.
4. In the Private Profile tab, for Firewall state, click Off.
5. In the Public Profile tab, for Firewall state, click Off.
6. Click OK.
7. Close the Windows Firewall Properties window.
Setting up Remote Desktop
1. In the Local Server tab of the Server Manager window, next to Remote Desktop, click Disabled.
2. In the System Properties window that appears, in the Remote Desktop section, select the Allow remote
connections to this computer radio button, and click OK when the warning message appears.
3. Uncheck Allow connections only from computers running Remote Desktop with Network Level Authentication
(recommended), and click OK.
Disabling IE Enhanced Security Configuration
1. In the Local Server tab of the Server Manager window, next to IE Enhanced Security Configuration, click On.
2. In the Internet Explorer Enhanced Security Configuration window, select the Off radio buttons for both
Administrators and Users, and click OK.
Installing Active Directory and DNS services
1. Power on the Domain Controller.
2. On the Domain Controller, open Windows PowerShell®.
3. Run the following command:
Install-WindowsFeature RSAT-ADDS
4. When the installation is finished, close PowerShell.
5. Open Server Manager.
6. On the Welcome screen, click 2, and click Add roles and features.
A Principled Technologies report 15Speed up system deployment with Dell Connected Configuration
services
7. At the initial Before you begin screen, click Next three times.
8. At the Server Roles screen, select Active Directory Domain Services.
9. On the pop-up window, click Add Features.
10. Click Next three times.
11. Verify the desired role is being installed, and click Install.
12. Once installation has finished, close the Add roles and features wizard.
13. In Server Manager, click the flag at the top, and select the Promote this server to a domain controller link.
14. Select Add a new forest, enter a root domain name of test.local and click Next.
15. On the Domain Controller Options screen, enter a password, and click Next.
16. On the DNS Options screen, click Next.
17. On the Additional Options screen, click Next.
18. On the Paths screen, click Next.
19. On the Review Options screen, click Next.
20. On the Prerequisites screen, verify all prerequisites have passed, and click Install.
21. Once Active Directory Domain Services finishes installing, click Finish, and restart the system.
Adding DHCP
1. Open Server Manager.
2. On the Welcome screen, click 2, and click Add roles and features.
3. At the initial Before you begin screen, click Next three times.
4. At the Server Roles screen, select DHCP Server.
5. On the pop-up window, click Add Features.
6. Click Next three times.
7. Verify the desired role is being installed, and click Install.
8. Once installation has finished, close the Add roles and features wizard.
9. In Server Manager, click the flag at the top of the screen and select Complete DHCP configuration.
10. In the DHCP Post-Install configuration wizard window, click Next.
11. At the Authorization Screen, click Commit.
12. At the Summary screen, click Close.
13. In Administrative Tools, open the DHCP service.
14. Expand ad.test.local, then right-click IPv4, and select New Scope.
15. In the New Scope Wizard window, click Next.
16. At the scope name screen, name the scope Laptops, and click Next.
17. In the IP Address Range, enter the desired scope settings for your network.
18. Click Next four times.
19. At the Router screen, enter the gateway address to be used by the clients, and click Next.
20. Click Next three times.
21. At the Completing the New Scope Wizard screen, click Finish.
22. We named the systems as follows:
A Principled Technologies report 16Speed up system deployment with Dell Connected Configuration
services
 Domain Controller Server: ad.test.local
 Certificate Authority Server: ca.test.local
 SQL Server : db.test.local
 SCCM Server: cm.test.local
 Distribution Point (R620): dp.test.local
Creating Containers and Extending the AD Schema
1. On the Domain Controller, run ADSI Edit.
2. On the toolbar, select Action  Connect to…
3. Accept the defaults by clicking OK.
4. Under Default Naming Context  DC- test, DC=local, right-click CN = System, and select New  Object…
5. Select Container, and click Next.
6. Under Value, we entered System Management. Click Next, then Finish.
7. Run Active Directory Users and Computers.
8. On the toolbar, select View, then click Advanced Features.
9. Under test.local > System, right-click System Management and choose Delegate Control.
10. Click Next.
11. Click Add.
12. Click Object Types, select Computers, and click OK.
13. Enter CM and DP as object names, and click OK.
14. Click Next.
15. Select Create a custom task to delegate, then click Next.
16. Choose This folder, existing objects… and click Next.
17. Click Full Control, and click Next.
18. Click Finish.
19. Attach the SCCM installation media to the Domain Controller.
20. From the installation media, navigate to SMSSETUPBINX64. Right-click extadsch and run as administrator.
21. Review extadsch.log at the root of the system drive to confirm the operation was successful.
Creating Active Directory accounts for System Center Configuration Manager
1. On the Domain Controller, open Active Directory Administrative Center.
2. Under test (local), in the Tasks panel, click New, then select Group from the drop-down menu.
3. In the Create Group window, for Group name, use Kerberos Admins; for Group type, use security; and for
Group scope, select Global.
4. Add Kerberos Admins as a member of the Domain Admins group.
5. Add the computer accounts of the SCCM server and Distribution Point server to the Kerberos Admins security
group, and click OK.
6. Create an Organizational Unit for AMT managed systems called AMT Management.
7. Create a security group called AMT Control.
8. Add the Kerberos Admins group to the AMT Control security group.
A Principled Technologies report 17Speed up system deployment with Dell Connected Configuration
services
Configure the Active Directory
1. On the Domain Controller server, create a user called CM_JD and a second user called CM_NAA.
2. Download the configure permission in Active Directory for Windows deployment account from
https://gallery.technet.microsoft.com/Configure-permissions-in-2326651a. Move the script to C:SetupScripts
on the Domain Controller.
3. Run the following scripts from PowerShell as administrator:
Set-ExecutionPolicy -ExecutionPolicy RemoteSigned –Force
Set-Location C:SetupScripts
.Set-OUPermissions.ps1 -Account CM_JD
-TargetOU "OU=Workstations,OU=Computers,OU=test.local"
Configure the Network Access Account
1. On the Configuration Manager server, in the Configuration Manager console, under the Administration tab,
expand the Site Configuration Tree. Click Sites.
2. Right-click the PTT site, and select Properties.
3. In the Software Distribution Component Properties window, select the Network Access Account. Select Specify
the account that accesses network locations. Click the orange star to add a new Network Access Account.
4. For user name, browse to find test.localCM_NAA, enter the Password, and click Verify. For Network shar,e
enter ADsysvol and click Test Connection. If successful click OK, then OK again.
Installing SQL 2012 SP1
1. Log into the Database server as domainadministrator.
2. Start the Add Features Wizard.
3. On the Select Server Roles screen, select .Net Framework 3.5.
4. On the popup, click Add Required Role Services.
5. Agree to the remaining defaults, and click Install.
6. Allow the installation to finish, and close.
7. Attach the installation media for SQL 2012, and run the setup.exe file.
8. In the SQL Server Installation Window, select Installation from the menu on the left, and then select New SQL
Server stand-alone installation or add features to an existing installation.
9. In the SQL Server 2012 Setup Window, allow it to check prerequisites. When this is process is complete, click
Next.
10. In the SQL Server 2012 Setup Window, at the Product Updates screen, click Next.
11. At the Install Setup Files screen, allow the wizard to install the files.
12. At the Setup Support rules screen, click Next.
13. At the Product Key screen, enter a valid product key, and click Next.
14. At the License Terms screen, accept the license terms, and click Next.
15. At the Setup Role screen, select SQL Server Feature Installation, and click Next.
16. At the Feature Selection screen, under Instances Features, select Database Engine Services with Full-Text and
Semantic Extractions for Search and Data Quality Services, Reporting Services - Native, Management Tools -
Basic, Management Tools - Complete, and SQL Client Connectivity SDK. Click Next.
17. Allow the Installation Rules check to run, and click Next.
A Principled Technologies report 18Speed up system deployment with Dell Connected Configuration
services
18. At the Instance Configuration screen, select Default Instance and leave the default Instance ID. Change the root
directory for the installation to the attached 500 GB virtual hard drive.
19. At the Disk Space Requirements screen, click Next.
20. At the Server Configuration screen, set Startup Type for Server Agent, SQL Server Database Engine, and Server
Browser as Automatic, and click Next.
21. At the Database Engine Configuration screen, select Mixed Mode.
22. Enter a password for the system administrator (sa) account.
23. Click Add Current user.
24. Click Next four times.
25. Verify that the Summary is correct, and click Install.
26. Click Finish when prompted.
27. Install SQL Server 2012 SP1 and CU16 from the following website: https://support.microsoft.com/en-
us/kb/3052476. When the installation is finished, restart the server.
28. Open Microsoft SQL Server Management Studio.
29. Sign into your SQL database.
30. Right-click your SQL host, and select Properties.
31. Select the Memory page.
32. Change maximum server memory to 16384. Click OK.
33. In SQL Server Configuration Manager, expand the SQL Server Network Configuration tree, and double-click
Protocols for MSQLSERVER.
34. Right-click Named Pipes, and click Enable.
35. Do the same for TCP/IP.
36. Click SQL Server Services in the tree.
37. Right-click SQL Server (Instance Name).
38. On the Log On tab, change the Account Name to testadministrator.
39. A popup will request to restart the service. Select Yes.
Post Active Directory Deployment Configuration
1. On the Certificate Authority, and Database servers, Configuration Manager, and Distribution Point servers, run
lusrmgr.msc.
2. Select Groups.
3. Right-click Administrators, and click Properties.
4. Click Add.
5. Select Object Types, check the box for Computers, and click OK.
6. Add the computer name for the management server.
Installing the Certificate Authority
1. On the Certificate Authority Server, log in using the test.localadministrator account.
2. Launch Server Manager.
3. Click Add roles and features.
A Principled Technologies report 19Speed up system deployment with Dell Connected Configuration
services
4. In the Add Roles and Features Wizard, click Next three times.
5. Select Active Directory Certificate Services. On the pop-up click Add Features. Click Next.
6. Click Next twice.
7. Click Install. When complete click Close.
8. In Server Manager, click the flag and select the Post-deployment Configuration task.
9. In the AD CS Configuration Window, click Next.
10. Check the box for Certification Authority, and click Next.
11. Select Enterprise for the setup type, and click Next.
12. Choose Root CA for the CA type, and click Next.
13. Select Create a New Private Key, and click Next.
14. Accept all remaining defaults, and click Next through the remaining screens.
15. When prompted to begin configuration, click Configure.
16. To exit the wizard, click Close. Restart the server before continuing to the next steps.
Installing required Windows features and roles for System Center Configuration Manager
1. Sign into the SCCM server using the domainadministrator account.
2. Download the Windows Assessment and Deployment Kit for Windows 8.1 from the following website:
http://www.microsoft.com/en-us/download/details.aspx?id=39982
3. Run adksetup.exe.
4. Select Install the Assessment and Deployment Kit to this computer, and choose an installation path. Click Next.
5. When prompted to join the Customer Experience Improvement Program (CEIP), select No.
6. Accept the license agreement.
7. Select Deployment tools, Windows Pre-installation Environment features, and User State Migration Tool. Click
Install.
8. Click Close when the install finishes.
9. Run the following commands in Windows PowerShell with administrator privileges:
Get-Module servermanager
Install-WindowsFeature Web-Windows-Auth
Install-WindowsFeature Web-ISAPI-Ext
Install-WindowsFeature Web-Metabase
Install-WindowsFeature Web-WMI
Install-WindowsFeature Web-DAV-Publishing
Install-WindowsFeature BITS
Install-WindowsFeature RDC
Install-WindowsFeature NET-Framework-Features -source
yournetworkyoursharesxs
Install-WindowsFeature Web-Asp-Net
Install-WindowsFeature Web-Asp-Net45
Install-WindowsFeature NET-HTTP-Activation
Install-WindowsFeature NET-Non-HTTP-Activ
10. Run Windows Update, and install updates.
11. Restart the server.
A Principled Technologies report 20Speed up system deployment with Dell Connected Configuration
services
Configuring the required role for the System Center Configuration Manager
1. Sign into the SCCM server using the domainadministrator account.
2. Register ASP.NET with IIS by running the following command from command prompt with administrator
privileges:
C:WindowsMicrosoft.NETFramework64v4.0.30319aspnet_regiis.exe –r
3. From Administrative Tools, launch Internet Information Services (IIS) Manager.
4. In the left pane, expand the server name, Sites, and select Default Web Site.
5. In the central pane, open WebDAV Authoring Rules.
6. In the right pane, click Enable WebDAV.
7. In the right pane, click Add Authoring Rule.
8. In the Add Authoring Rule window, select All content, All users, and Read. Click OK.
9. In the IIS Manager console in the right pane, click WebDAV Settings.
10. In the central pane for Allow anonymous property queries, select True.
11. For Allow Custom Properties, select False.
12. For Allow property queries with Infinite Depth, select True.
13. For Allow hidden files to be Listed, select True. Then in the right pane, click Apply.
Configuring ISS
1. Sign into the SCCM server using the domainadministrator account.
2. In the IIS Manager, select Default Web Site from the tree in the left pane.
3. In the right pane, select Bindings…
4. In the Site Bindings Window, click Add…
5. In the Add Site Binding Window, for Type select HTTPS,
6. For SSL certificate, select the certificate created from the Web Server Certificate Template.
7. Click OK.
Installing WSUS on the Configuration Manager Server
1. Sign into the SCCM server using the test.localadministrator account.
2. Open Server Manager.
3. In the Server Manager window, select Add roles and Features.
4. In the Add Roles and Features Wizard, click Next three times.
5. On the Server Roles screen, select Windows Service Update Services. Click Add Features when requested, and
click Next four times.
6. On the Content location selection screen, enter a location to store the updates. We used C:WSUS.
7. On the Confirmation screen, click Install. Once installation completes, close the Wizard.
8. In Server Manager, click the Flag at the top right and select Post-Deployment Configuration.
Creating certificate templates for OOB management
1. Sign into the Certificate Authority server using the test.localadministrator account.
2. Open the Certification Authority.
3. Right-click the test-CA-CA, and click Properties.
4. On the General tab, click View Certificate.
A Principled Technologies report 21Speed up system deployment with Dell Connected Configuration
services
5. On the Details tab, scroll to and select Thumbprint. Copy the 40-character code displayed in the details. You will
add this information to the AMT BIOS later.
6. Click Ok to close the Certificate Authority properties.
7. Expand the Certification Authority, and select Certificate Templates.
8. Right-click Certificate Templates, and select Manage.
9. Locate Web Server in the list of available certificate templates. Right-click the template, and select Duplicate
Template.
10. Select Windows 2003.
11. In the General tab, change the template name to AMT Provisioning.
12. On the Subject Name tab, select Build from this Active Directory Information. Select Common Name, and choose
the option UPN.
13. On the Security tab, add Kerberos Admins. Add the Enroll permission for the security group. Ensure Domain
Admins and Enterprise Admins have Enroll permissions.
14. On the Extensions tab, select Application Policies, and click Edit.
15. Click Add. Click New. Type AMT Provisioning for the name, and 2.16.840.1.113741.1.2.3 as the
Object Identifier. Click OK.
16. Ensure AMT Provisioning and Server Authentication are listed, and click OK.
17. Click OK to close the template properties.
18. Right-click the web server template, and select Duplicate Template.
19. Select Windows 2003, and click OK.
20. On the General tab, change the template name to AMT Web Server Certificate.
21. On the General tab, choose the option Publish Certificate in Active Directory.
22. On the Subject Name tab, select Build from this Active Directory Information. Select Common Name, and choose
the option UPN.
23. On the Security tab, ensure Domain Admins and Enterprise Admins have Enroll permissions.
24. Click OK to close the template properties.
25. In Certification Authority, expand test-CA-CA.
26. Right-click the Certificate Templates and select NewCertificate Template to Issue.
27. Select the AMT Provisioning Template.
28. Click OK.
29. Repeat steps 26 through 28 for the AMT Web Server Certificate Template.
30. Log into the management server as domainadministrator.
31. Click StartRun. Type mmc and press Enter.
32. In the mmc console, click FileAdd/Remove Snap-in…
33. Select Certificates, and click Add. Select Computer account. Click Next.
34. Select Local computer, and click Finish.
35. Click OK.
36. Expand CertificatesPersonal.
A Principled Technologies report 22Speed up system deployment with Dell Connected Configuration
services
37. In the right panel, click More ActionsAll TasksRequest a new certificate…
38. Click Next.
39. Accept the defaults, and click Next.
40. Select the AMT Provisioning and AMT Web Server Certificate. Click Enroll.
41. Repeat steps 30 through 40 on the Dell PowerEdge R620.
Installing System Center Configuration Manager 2012 SP1
1. Sign into the SCCM server using the test.localadministrator account.
2. Attach the SCCM 2012 SP1 Installation media to the management server.
3. Open splash.hta.
4. Click Install.
5. Read the Before You Begin section, click Next.
6. Choose Install a primary site. Do not choose the typical options.
7. Enter the product key.
8. Check the box to accept the License Terms, and click Next.
9. Accept the license agreements, and click Next.
10. Enter a path for the prerequisite file downloads. We used C:Downloads
11. Select a language, and click Next for both server and client.
12. Enter a site code for the primary site. We used PTT.
13. Enter a Site Name. We used PT Test.
14. Choose an install path. We accepted the default install path.
15. Ensure that the console will be installed, and click Next.
16. Install as a primary stand-alone site.
17. Enter the SQL server name, and click Next.
18. Leave the default Database information, and click Next again.
19. Accept the default SMS provider, and click Next.
20. Select the option to Configure the communication method on each site system role.
21. Select Clients will use HTTPS when they have a valid PKI certificate and HTTPS-enabled site roles are available,
and click Next.
22. Select HTTP for Management Point and Distribution point, and click Next.
23. Select I don’t want to join the program at this time, and click Next.
24. Click Next.
25. Run the prerequisites check, and resolve any issues displayed.
26. Click Begin Install, and click Close when the installation is complete.
27. Download and install the installation for System Center R2 SP1 Configuration Manager from the following
website: support.microsoft.com/kb/2922875/en-us
28. Download and install the cumulative update.
A Principled Technologies report 23Speed up system deployment with Dell Connected Configuration
services
Configuring SCCM for Connected Configuration
Deploying Site Roles to the Distribution Point
1. Sign into the SCCM server using the test.localadministrator account.
2. Open System Center 2012 R2 Configuration Manager as an administrator.
3. From the left panel, select the Administration tab.
4. Expand the Site Configuration Tree, and select Servers and Site Systems.
5. Right-click the central panel, and click Create Site System Server.
6. In the Create Site System Server Wizard, for Name, type the FQDN of your Distribution Point server. We used
DP.test.local.
7. At the Proxy screen, click Next.
8. At the System Role Selection screen, select the following roles:
 Distribution Point
 Management Point
 Software Update Point
9. At the Distribution Point screen, select Install and configure IIS if required by Configuration Manager and Enable,
and configure BranchCache for this distribution point. Select HTTP. Click Create a Self-Signed certificate. Click
Next.
10. At the Drive Settings screen, click Next.
11. At the Pull Distribution Point Screen, click Next.
12. At the PXE Settings screen, check the box for Enable PXE support for clients. Click Yes on the Review Required
Ports for PXE popup. Select Allow this distribution point to respond to incoming PXE request and Enable
unknown computer support.
13. At the Multicast screen, check the box for enable multicast to simultaneously send data to multiple clients. Click
Next.
14. At the Content Validation screen, click Next.
15. At the Boundary Groups, click Create…
16. On the Create Boundary Group, for Name, we used Dell Factory. Check the box for Use this boundary group for
site assignment. Click OK.
17. Click Next.
18. On the Management point screen, select HTTP, and click Next.
19. On the Management Point Database screen, leave the defaults, and click Next.
20. On the Software Update Point screen, select WSUS is configure to use ports 8530 and 8531 for client
communications, and click Next.
21. On the Proxy and Account Settings screen, leave the defaults, and click Next.
22. On the Summary screen, click Next and allow the installation to complete.
23. Once the installation completes, System Center will deploy the software to your Distribution Point server. After
waiting, check the Site Status and Component Status options in the Monitoring tab in Configuration Manager
Console.
A Principled Technologies report 24Speed up system deployment with Dell Connected Configuration
services
24. On the Administration tab, under Overview, Hierarchy Configuration, right-click Boundaries to create a new
boundary.
25. In the Create Boundary window, for type, select IP address range. Select a range that matches those assigned by
DHCP.
Creating the Deployment Collection
1. On the Configuration Manager server, in the Configuration Manager console, under the Asset and Compliance
workspace, right-click Device Collection, and select Create Device Collection.
2. On the General screen, for name, type Dell Deployment Systems.
3. On the Limiting Collection screen, select All Desktop and Server Clients. Click Next.
4. On the Membership Rules screen, click Next.
5. Once created, click Close.
Building and capturing the Windows 8.1 Enterprise Image
Creating the Deployment Share
1. On the SCCM server, open Deployment Workbench.
2. Under Deployment Workbench, right-click Deployment Shares, and select New Deployment.
3. In the New Deployment Share Wizard, select a Deployment share path.
4. On the Share screen, enter a share name. We used PTT Share.
5. On the Descriptive Name screen, click Next.
6. On the Options screen, uncheck all boxes.
7. On the Summary screen, click Next.
8. On the Confirmation screen, click Finish.
Importing the Operating System Image
1. Mount the en_windows_8.1_enterprise_with_update_x64_dvd_6054382.iso to the Configuration Manager
server.
2. From the DVD copy all files onto the Configuration Manager server. We stored ours at
C:SourcesOSDWindows8.1Ent
3. Under the PTT Share Deployment share, right-click Operating Systems, and select Import Operating System
Wizard.
4. On the Import Operating System Wizard, select Full set of source files, and click Next.
5. On the Source screen, for Source directory select the folder where you stored the Windows 8.1 Enterprise
folders. We used C:SourcesOSDWindows8.1Ent. Click Next.
6. On the Destination screen, click Next.
7. On the Summary screen, click Next.
8. On the Confirmation screen, click Finish.
Creating the Build and Capture Task Sequence
1. Under the PTT Share Deployment share, right-click Task Sequences, and select New Task Sequence.
2. In the New Task Sequence Wizard, enter a Task Sequence ID and Task Sequence name. We used PTT001 and
Windows 8.1 Enterprise Build and Capture respectively.
A Principled Technologies report 25Speed up system deployment with Dell Connected Configuration
services
3. On the Select Template screen, select Standard Client Task Sequence from the radio menu, and click Next.
4. On the Select OS screen, select the image for Windows 8.1 Enterprise that you added in the previous section.
5. On the Specify Product Key screen, click Next.
6. On the OS Settings screen, for Full Name: type PTTuser and for Organization: type PTT. Click Next.
7. On the Admin Password screen, enter Password1, then click Next.
8. On the Summary screen, click Next.
9. On the Confirmation screen, click Finish.
Creating the Build and Capture Task Sequence
1. Right-click PTT Share, and select Properties.
2. On the PTT Share Properties Window, select the Rules tab.
3. Replace the current Rules with the following:
[Settings]
Priority=Default
[Default]
_SMSTSORGNAME=PTTShare
UserDataLocation=NONE
DoCapture=YES
OSInstall=Y
AdminPassword=Password1
TimeZoneName=Eastern Standard Time
JoinWorkgroup=WORKGROUP
HideShell=YES
FinishAction=SHUTDOWN
DoNotCreateExtraPartition=YES
WSUSServer=http://cm.test.local:8530
ApplyGPOPack=NO
SLSHARE=CM2Logs$
SkipAdminPassword=YES
SkipProductKey=YES
SkipComputerName=YES
SkipDomainMembership=YES
SkipUserData=YES
SkipLocaleSelection=YES
SkipTaskSequence=NO
SkipTimeZone=YES
SkipApplications=YES
SkipBitLocker=YES
SkipSummary=YES
SkipRoles=YES
SkipCapture=NO
SkipFinalSummary=YES
4. Click Edit Bootstrap.ini.
5. Replace the text in Bootstrap.ini with the following:
[Settings]
Priority=Default
[Default]
DeployRoot=CMPTTShare$
UserDomain=test.local
UserID=administrator
UserPassword=Password1
A Principled Technologies report 26Speed up system deployment with Dell Connected Configuration
services
SkipBDDWelcome=YES
6. Save and exit the file.
7. Click OK.
8. Under Task Sequences, Windows 8.1, right-click the Windows 8.1 Enterprise Build task Sequence, and select
Properties.
9. In the Properties Window, on the OS Info tab, click Edit Unattend.xml.
10. Once the process completes, in the Windows System Image Manager, browse to the following location:
Unattend > Components > 7 oobeSystem > OOBE
11. In the OOBE Properties menu, change the settings to match the following:
HideEULAPage: true
NetworkLocation: Work
ProtectYourPC: 1
HideLocalAccountScreen: true
HideOnlineAccountScreens: true
HideWirelessSetupInOOBE: true
12. Click File, Save Answer File, and Close the Window.
13. Right-click PTT Share, and select Update Deployment Share.
14. Select Completely regenerate the boot images.
15. Once complete, Navigate to the Deployment Share in File Explorer.
16. In the boot folder, using PTT Build Lab x86 create an installation disk using the .iso.
17. Insert the disk into a Latitude E5xxx laptop, and boot to the disk.
18. Once the Build and Capture completes, the Image will be available at PTTShareCaptures. We named our image
Windows8.1Entx64.wim and moved it to CMSourcesOSD.
Creating the OS Deployment Task Sequence
Installing the Dell Command Suite
1. Download Dell Command | Configure from http://en.community.dell.com/techcenter/enterprise-
client/w/wiki/7532.dell-command-configure.
2. Run Systems-Management_Application_54W6D_WN32_3.1.0.250_A00.exe and install using all defaults.
3. Download the Dell Command | Integration Suite from
http://downloads.dell.com/FOLDER02502775M/2/DCIS_273_ZPE.exe
4. Run DCIS_273_ZPE.exe and accept all defaults to extract the installation files.
5. Run DCIS_Setup_4_0_0.exe and accept all defaults to install the Dell Command |Integration Suite
6. Restart the Configuration Manager server.
Importing Dell Drivers
1. Download the E5550 Windows 8.1 Driver CAB from
http://downloads.dell.com/FOLDER03481251M/1/E5550_5550-Win8.1-A05-YHV16.CAB
2. On the Configuration Manager Server, in the Software Library under Operating Systems, right-click Driver
Packages, select Dell Command | Integration Suite, Import Dell Command | Deploy (System) Driver Library.
3. On the Dell Command | Deploy (System) Driver Library Import Wizard, browse to the location of and select
E5550_5550-Win8.1-A05-YHV16. Click OK.
A Principled Technologies report 27Speed up system deployment with Dell Connected Configuration
services
Importing the OS image into Configuration Manager
1. In the Configuration Manager Console, in the Software Library workspace, under Operating Systems, right-click
Operating System Images, and select Add Operating System Image.
2. Navigate to CMSourcesOSD and select Windows8.1Entx64.wim. Click Next.
3. On the General Screen, for name, type E5550-Win8-1entx64. Click Next.
4. On the Summary Screen, click Next.
5. Once complete, click Close.
Adding Office 2013 Installation to the Software Library
1. Navigate to http://www.microsoft.com/en-in/download/confirmation.aspx?id=35554 and download both the
32-bit and 64-bit version of the Office 2013 Administrative Template files (ADMX/ADML) and Office
Customization Tool.
2. Run the executable for the 32-bit installation.
3. Accept the Microsoft Software License Terms, and click Continue.
4. Select a location to extract the files, and click Next.
5. Repeat steps 2 through 4 for the 64-bit installation.
6. Download the en_office_professional_plus_2013_with_sp1_x86_and_x64_dvd.iso for version 15.0.4797.1002.
7. Copy the files from the CD onto the Configuration Manager server.
8. From the extracted Office Customization Tool x86 folder, copy the admin folder, admx folder, and
office2013grouppolicyandoctsettings.xlsx file into the x86 folder.
9. Repeat step 7 for the x64 folder.
10. Open a command prompt as administrator.
11. Navigate to the top of the 2013 Office Folder.
12. Run the following command:
13. Setup.exe /admin
14. In the Select Product Window, select Microsoft Office Professional Plus 2013 (32-bit), and click OK.
15. In the Microsoft Office Customization Tool, under Setup, under Install location and organization name, enter
your organization name.
16. In the Microsoft Office Customization Tool window, under Setup, select Install location and organization name,
enter your organization name.
17. Under Licensing and user interface, select Enter another product key, then enter your product key. Check the
box for I accept the terms in the License Agreement For Display level, select Default. Then uncheck Completion
Notice and check Suppress modal and No cancel.
18. Under Modify Setup Properties, click Add.
19. In the Add/Modify Property Value window, for Name enter SETUP_REBOOT and for Value enter Never. Click
OK.
20. Under Features, under Modify user settings, in the tree in the center panel, under Microsoft Office 2013, under
Privacy, select Trust Center.
21. Double click Disable Opt-in Wizard.
A Principled Technologies report 28Speed up system deployment with Dell Connected Configuration
services
22. In the Disable Opt-in Wizard on first run Properties window, select Enabled, and click OK.
23. Under the File menu, select Save As…
24. Save the file under C:SourcesSoftwareOffice2013
25. In the Configuration Manager Console, in the Software Library workspace, under Application Management,
right-click Packages, and select Create Package.
26. In the Create Package and Program Wizard, on the Package screen, for Name enter Office 2013. Check the box
for This package contains source files. Click Browse, and select the Network location for
CMSourcesSoftwareOffice2013. Click Next.
27. On the Program Type screen, select Standard program.
28. On the Standard Program screen, enter the information as listed for the following fields:
 Name: Office 2013
 Command Line: setup.exe
 Run: Normal
 Program can run: Whether or not a user is logged on.
 Run mode: Run with administrative rights
 Drive mode: Runs with UNC name.
29. On the Requirements screen, click Next.
30. On the Summary screen, click Next.
31. On the Completion screen, click Close.
Adding Adobe Acrobat 2013 to the Software Library
1. Download Adobe Acrobat Reader DC from
ftp://ftp.adobe.com/pub/adobe/reader/win/Acrobat2015/1500630033/AcroRdr20151500630033_MUI.exe
2. Extract the file to CMSourcesSoftwareAdobe
3. Download and install the Customization Wizard from
http://ardownload.adobe.com/pub/adobe/acrobat/win/11.x/11.0.03/misc/CustWiz11003_en_US.exe
4. Start the Adobe Customization Wizard XI.
5. In the Adobe Customization Wizard, click File, then Open Package.
6. Browse to CMSourcesSoftwareAdobe and select AcroRead.msi.
7. On the Personalization Options screen, check the box for Suppress display of End User License Agreement
(EULA).
8. On the Installation Options page, Select Make Reader the default PDF viewer.
9. For Run Installation, select Silently (no interface) and select Suppress reboot.
10. In the Configuration Manager Console, in the Software Library workspace, under Application Management,
right-click Packages and select Create Package.
11. On the Shortcuts page, right-click the desktop shortcut, and select Remove.
12. On the Webmail Profiles page, check the box for Prevent end user from configuring WebMail profile.
13. On the Online Services and Features page, select disable Product Update, and for Load trusted root certificates
from Adobe, select Enable & Install Silently.
A Principled Technologies report 29Speed up system deployment with Dell Connected Configuration
services
14. Click the Transform menu, and select Generate Transform.
15. Save the file as AdobeRead.mst in both CMSourcesSoftwareAdobe and
CMSourcesSoftwareAdobeTransforms
16. In the Create Package and Program Wizard, on the Package screen, for Name enter Adobe Reader. Check the
box for This package contains source files. Click browse and select the Network location for
CMSourcesSoftwareAdobe. Click Next.
17. On the Program Type screen, select Standard program.
18. On the Standard Program screen, enter the information as listed for the following fields:
 Name: Adobe Reader
 Command Line: setup.exe
 Run: Normal
 Program can run: Whether or not a user is logged on.
 Run mode: Run with administrative rights
 Drive mode: Runs with UNC name.
19. On the Requirements screen, click Next.
20. On the Summary screen, click Next.
21. On the Completion screen, click Close.
Adding Chrome to the Software Library
1. Download the Chrome MSI from http://www.google.de/intl/en/chrome/business/browser/admin/.
2. Move the Windows Installer to CMSourcesSoftwareChrome
3. Open Notepad.
4. Enter the following:
{
"homepage" : "http://www.google.com.au",
"homepage_is_newtabpage" : false,
"browser" : {
"show_home_button" : true,
"check_default_browser" : false,
"window_placement": {
"bottom": 1000,
"left": 10,
"maximized": false,
"right": 904,
"top": 10,
"work_area_bottom": 1010,
"work_area_left": 0,
"work_area_right": 1680,
"work_area_top": 0
}
},
"bookmark_bar" : {
"show_on_all_tabs" : true
},
"distribution" : {
"skip_first_run_ui" : true,
"show_welcome_page" : false,
A Principled Technologies report 30Speed up system deployment with Dell Connected Configuration
services
"import_search_engine" : false,
"import_history" : false,
"create_all_shortcuts" : true,
"do_not_launch_chrome" : true,
"make_chrome_default" : false
}
}
5. Save the file as CMSourcesSoftwareChromemaster_preferences.
6. Open Notepad.
7. Enter the following:
msiexec /qn /norestart /i "%~dp0GoogleChromeStandaloneEnterprise.msi"
if exist "c:Program FilesGoogleChromeApplicationmaster_preferences" copy /y
"%~dp0master_preferences" "C:Program
FilesGoogleChromeApplicationmaster_preferences"
if exist "c:Program Files (x86)GoogleChromeApplicationmaster_preferences"
copy /y "%~dp0master_preferences" "C:Program Files
(x86)GoogleChromeApplicationmaster_preferences"
reg add HKLMSoftwarePoliciesGoogleUpdate /f /v AutoUpdateCheckPeriodMinutes
/d 0
sc stop gupdate
sc config gupdate start= disabled
8. Save the file as CMSourcesSoftwareChromeinstall.cmd
9. In the Configuration Manager Console, in the Software Library workspace, under Application Management,
right-click Packages, and select Create Package.
10. In the Create Package and Program Wizard, on the Package screen, for Name enter Chrome. Check the box for
This package contains source files. Click Browse, and select the Network location for
CMSourcesSoftwareChrome. Click Next.
11. On the Program Type screen, select Standard program.
12. On the Standard Program screen, enter the information as listed for the following fields:
 Name: Chrome
 Command Line: install.cmd
 Run: Normal
 Program can run: Whether or not a user is logged on.
 Drive mode: Runs with UNC name.
13. On the Requirements screen, click Next.
14. On the Summary screen, click Next.
15. On the Completion screen, click Close.
Adding Java to the Software Library
1. Download the Java Offline 64 bit from http://javadl.sun.com/webapps/download/AutoDL?BundleId=113219.
2. Move the jre-8u65-windows-x64.exe to CM2SourcesSoftwareJava
3. Launch the installer.
4. Browse to C:Usersadministrator.TESTAppDataLocalLowOracleJavajre1.8.0_65_x64
5. Copy jre1.8.0_65.msi to CM2SourcesSoftwareJava
6. Open Notepad.
A Principled Technologies report 31Speed up system deployment with Dell Connected Configuration
services
7. Paste the following into the editor:
msiexec /i jre1.8.0_25.msi JU=0 JAVAUPDATE=0 AUTOUPDATECHECK=0 RebootYesNo=No
WEB_JAVA=1 /q
8. Save the file as installjava.cmd.
9. In the Configuration Manager Console, in the Software Library workspace, under Application Management,
right-click Packages, and select Create Package.
10. In the Create Package and Program Wizard, on the Package screen, for Name enter Java 8. Check the box for
This package contains source files. Click browse and select the Network location for jre1.8.0_65.msi. Click Next.
11. On the Program Type screen, select Standard program.
12. On the Standard Program screen, enter the information as listed for the following fields:
 Name: Java 8
 Command Line: installjava.cmd
 Run: Normal
 Program can run: Whether or not a user is logged on.
 Drive mode: Runs with UNC name.
13. On the Requirements screen, click Next.
14. On the Summary screen, click Next.
15. On the Completion screen, click Close.
Creating a Windows Settings File to Change Firewall States and Remote Desktop Settings
1. In CM2SourcesSettings create a file named Settings.bat containing the following
;::Bypass PowerShell's initial Restricted Execution Policy
;@ECHO OFF
;FINDSTR -rbv ; %0 | PowerShell -ExecutionPolicy Unrestricted -C -
;GOTO :FINISH
NETSH ADVFIREWALL SET ALLPROFILES STATE OFF
Set-ItemProperty -Path "HKLM:SYSTEMCurrentControlSetControlTerminal Server"
-Name fDenyTSConnections -Value 0
Set-ItemProperty -Path "HKLM:SYSTEMCurrentControlSetControlTerminal
ServerWinStationsRDP-Tcp" -Name UserAuthentication -Value 0
;:FINISH
2. In the Configuration Manager Console, in the Software Library workspace, under Application Management,
right-click Packages, and select Create Package.
3. In the Create Package and Program Wizard, on the Package screen, for Name enter Change Windows Settings.
Check the box for This package contains source files. Click browse and select the Network location Settings.bat.
Click Next.
4. On the Program Type screen, select Standard program.
5. On the Standard Program screen, enter the information as listed for the following fields:
 Name: Firewall and Remote Desktop
 Command Line: Settings.bat
A Principled Technologies report 32Speed up system deployment with Dell Connected Configuration
services
 Run: Normal
 Program can run: Whether or not a user is logged on.
 Drive mode: Runs with UNC name.
6. On the Requirements screen, click Next.
7. On the Summary screen, click Next.
8. On the Completion screen, click Close.
Creating the Dell TPM Activation files using Dell Command | Configure
1. On the Configuration Manager server, open the Dell Command | Configure Wizard.
2. In the Create Multiplatform Package tab, for view select Advanced.
3. Click Edit.
4. Find –setuppwd. Set the value to a password. We used Password1.
5. Check the box for Apply Settings.
6. Click the Export .EXE box.
7. Click OK.
8. Save the file as CM2SourcesSettingsCTTKCTTK-1.exe
9. In the Create Multiplatform Package tab, for view select Advanced.
10. Click Edit.
11. Find –tpm. Check the box for Apply Settings.
12. Click the Export .EXE box.
13. For password, enter the password used for CTTK-1. We used Password1.
14. Click OK.
15. Save the file as CM2SourcesSettingsCTTKCTTK-2.exe
16. In the Create Multiplatform Package tab, for view select Advanced.
17. Click Edit.
18. Find –tpmactivation. Check the box for Apply Settings.
19. Click the Export .EXE box.
20. For password, enter the password used for CTTK-1. We used Password1.
21. Click OK.
22. Save the file as CM2SourcesSettingsCTTKCTTK-3.exe
23. In the Configuration Manager Console, in the Software Library workspace, under Application Management,
right-click Packages, and select Create Package.
24. In the Create Package and Program Wizard, on the Package screen, for Name enter CTTK – Create System
Password. Check the box for This package contains source files. Click Browse, and select the Network location
for CMSourcesCTTK. Click Next.
25. On the Program Type screen, select Standard program.
26. On the Standard Program screen, enter the information as listed for the following fields:
 Name: Change Password
 Command Line: CTTK-1.exe
A Principled Technologies report 33Speed up system deployment with Dell Connected Configuration
services
 Run: Normal
 Program can run: Whether or not a user is logged on.
 Drive mode: Runs with UNC name.
27. On the Requirements screen, click Next.
28. On the Summary screen, click Next.
29. On the Completion screen, click Close.
30. Repeat steps 23 through 29 for CTTK-2 with the following changes:
 Package Name: CTTK – Enable TPM
 Package: CTTK-2
 Program: Enable TPM
31. Repeat steps 23 through 29 for CTTK-3 with the following changes:
 Package Name: CTTK – Activate TPM
 Package: CTTK-3
 Program: Activate TPM
Creating the Task Sequence
1. On the Configuration Manager server, in the Configuration Manager console, under the Software Library
workspace. Right-click Task Sequences, and select Create a Task Sequence.
2. In the Create Task Sequence Wizard, on the Create a new task sequence screen, select Install an existing image
package. Click Next.
3. On the Task Sequence Information screen, give a descriptive name for the Task sequence Name. We used
Windows 8.1 Ent E5550 Deployment.
4. Click Boot Image, and select the Boot image (x64) image. Click Next.
5. On the Install Windows screen, for Image package, click Browse.
6. Select E5550-Win8-1entx64, and click OK.
7. Under Product key, enter the Windows 8.1 Enterprise Product Key.
8. Select Enable the account and specify the local administrator password. Enter a Password, and click Next.
9. On the Configure Network screen, select Join a domain. Then click Browse.
10. In the Select a Domain window, test.local should automatically populate. Select it, and click OK.
11. Click Browse for Domain OU.
12. Select the computers OU, and click OK.
13. For Specify the account that has permission to join the domain, click Set.
14. On the Windows User Account screen, for User name use TESTCM_JD. Enter and confirm the password for this
account, and click OK.
15. Click Next.
16. On the Install Configuration Manager client, click Next.
17. On the Configure state migration screen, uncheck the three text boxes. Click Next.
18. On the Include Updates screen, select All software updates. Click Next.
19. On the Install Applications screen, click Next.
A Principled Technologies report 34Speed up system deployment with Dell Connected Configuration
services
20. On the Summary screen, click Next.
21. Once complete, click Close.
Modifying the Task Sequence
1. In the Task Sequence list. Right-click the Windows 8.1 Ent E5550 Deployment, and select Edit.
2. In the Task Sequence Editor, under Install Operating System, click and drag Apply Network Settings to
underneath Apply Device Drivers.
3. Click Add, in the drop-down menu select general, then Run Command line.
 Name: Pause 60 seconds
 Command Line: ping -n 60 127.0.0.1
4. Click Add, in the drop-down menu, select Software, then select Install Package.
 Name: Configure Windows Settings
 Package: Change Windows Settings
 Program: Firewall and Remote Desktop
5. Copy the Pause 60 seconds task and paste it behind the previously created Install Package task.
6. Click Add, then select New Group.
7. Name the Group Activate Bitlocker.
8. Click Add, in the drop-down menu, select Software, then select Install Package.
 Name: CTTK – Create System Password
 Package: CTTK-1
 Program: Create System Password
9. Copy the Pause 60 seconds task and paste it behind the previously created Install Package task.
10. Click Add, in the drop-down menu select Software, then select Install Package.
 Name: CTTK – Enable TPM
 Package: CTTK-2
 Program: Enable TPM
11. Copy the Pause 60 seconds task and paste it behind the previously created Install Package task.
12. Click Add, in the drop-down menu select Software, then select Install Package.
 Name: CTTK – Activate TPM
 Package: CTTK-3
 Program: Activate TPM
13. Copy the Pause 60 seconds task and paste it behind the previously created Install Package task.
14. Click Add, in the drop-down menu select general, then Restart Computer.
15. Move the Pre-provision BitLocker to the bottom of the Activate Bitlocker group.
16. Copy the Restart Computer command and paste it.
17. Copy the Pause 60 seconds task, and paste it behind the Restart Computer Task.
18. Move the Enable Bitlocker to the bottom of the Activate Bitlocker group.
19. Select the Enable Bitlocker Task, and select TPM and PIN. Enter a PIN.
20. Create a new group named Install Software.
A Principled Technologies report 35Speed up system deployment with Dell Connected Configuration
services
21. In the new group, click Add, in the drop-down menu select Software, then select Install Package.
 Name: Office 2013
 Package: Office 2013
 Program: Office 2013
22. In the new group, click Add, in the drop-down menu select Software, then select Install Package.
 Name: Chrome
 Package: Chrome
 Program: Chrome
23. In the new group, click Add, in the drop-down menu select Software, then select Install Package.
 Name: Java 8
 Package: Java 8
 Program: Java 8
24. In the new group, click Add, in the drop-down menu select Software, then select Install Package.
 Name: Adobe Reader
 Package: Adobe Reader
 Program: Adobe Reader
25. Move Install Updates to the bottom of the Install Applications group.
26. Click OK to close the task sequence editor.
Deploying the Task Sequence
1. In the Configuration Manager console, under the Software Library workspace, select Task Sequences. Right-click
Windows 8.1 Ent E5550 Deployment, and select Deploy.
2. In the Deploy Software Wizard, on the General screen, for Collection select Dell Deployment Systems. Click OK.
3. On the Deployment Settings, for Purpose, select Required. For Make available to the following, select
Configuration Manager clients, media, and PXE. Click Next.
4. On the Scheduling screen, check the box for Schedule when this deployment will become available. Make the
deployment available 12 hours before the current time.
5. For Assignment schedule, click New and create an assignment that starts 11 hours before the current time. Click
Next.
6. On the User Experience screen, click Next.
7. On the Alerts screen, click Next.
8. On the Distribution Points screen, click Next.
9. On the Summary screen, click Next.
The Dell Connected Configuration Deployment
After completing the previous section and verifying a deployment on site, we packaged the PowerEdge R620,
Dell PowerConnect Switch, and custom PFSense router to a Dell facility. The custom PFSense router connected to an
identical router at the PT labs via an OpenVPN level 2 connection. Our technician worked with a Dell technician to set
the systems up as shown in Figure 4.
A Principled Technologies report 36Speed up system deployment with Dell Connected Configuration
services
Once both PT and Dell finished verifying the setup, the Dell team was given the following instructions to
complete the deployment process. When noted, PT added the MAC address to the Dell Deployment Systems group
using the Import Device option in SCCM.
Operating Instructions
1. Email the MAC address for NIC to the PT contacts.
2. PT will add the MAC address to System Center and assign the laptop to the deployment collection.
3. Connect the laptop to the PowerConnect switch.
4. After PT responds with a “go ahead” email, power on the laptop.
5. Press F12 and select Onboard NIC.
6. Verify that the system boots to PXE and begins the task sequence. The operator will watch the system progress
between the following screens:
 The system will attempt a PXE boot.
 The system will download the boot image.
 The system will boot the boot image and begin the task sequence.
If the system fails, please take a picture of the screen and send the error to the PT Contacts.
7. After the task sequence completes, the PT team will log into the target system and verify the deployment using
Window’s built-in Remote Desktop Connection.
8. Once PT finishes verifying the installation, we will power off the system completely, and send a completion
email to the Dell team that the deployment phase is complete.
Dell then shipped the laptop to the simulated PT remote office location and our employee received and verified
that the laptop arrived as expected.
Creating the Static Image
The following section details the creation of the image to be submitted to Dell for the Static Imaging
Deployment.
1. Power on the Latitude E5540 laptop, and insert the Windows 8.1 installation media.
2. Press F12 while booting to load the Boot menu. Boot to the BIOS Settings.
3. In the BIOS, click Load Defaults. Click OK.
4. On the Windows 8 setup screen, click Next.
5. On the Which type of installation do you want? screen, click Custom Install Windows only (advanced).
6. On the Where do you want to install Windows? screen, delete all previously created partitions and create a new
partition for installation, and click Next.
7. Allow Windows to install.
8. Once the installation completes, the system will load into the Personalize screen. Select a color for your system.
Type a name for the system under PC name. We named ours PTT-01. Click next.
9. On the Get online screen, select a wireless network and enter the network password. Click next.
10. On the Settings screen, click Use express settings.
A Principled Technologies report 37Speed up system deployment with Dell Connected Configuration
services
11. On the Sign in to your Microsoft account, click Create a Microsoft account. Then click Sign in without a Microsoft
account.
12. On the Your account screen, enter a User Name, Password and a Password hint then click Next. We used
PTadmin, Password1, and Standard.
13. On the Upgrade to Windows 10 for free screen, click Not right now.
Configuring Dell Command | Update
1. Open Internet Explorer.
2. Navigate to http://en.community.dell.com/techcenter/enterprise-client/w/wiki/7534.dell-command-update
and, under Dell Command | Update, click Download.
3. When the bar appears at the bottom of the browser, click Run.
4. On the User Account Control Window, click Yes.
5. On the Dell Command Update Package window, click Install.
6. On the Dell Command | Update v2.1.0 – Setup window, click Next.
7. On the License Agreement screen, click I accept the terms in the license agreement, and click Next.
8. Click Install.
Run Windows update and install all important and optional updates available up to October 5, 2015. Do not install
Windows 10. Also install Dell Command | Update and install all available packages available up to October 5, 2015.
To simulate a corporate laptop, we also set our corporate logo as the desktop background.
Configuring Windows Update
1. In the left pane of the Server Manager window, click Local Server.
2. In the main frame, next to Windows Update, click Not configured.
3. In the Windows Update window, in the main pane, click Let me choose my settings.
4. Under Important updates, select Check for updated but let me choose whether or not to download and install
them and then click OK.
5. In the left pane, click Check for updates, and install all available updates.
6. Close the Windows Update window.
Configuring Windows Firewall
1. In Server Manager, click ToolsWindows Firewall with Advanced Security.
2. In the Overview section, click Windows Firewall Properties.
3. In the Domain Profile tab, for Firewall state, click Off.
4. In the Private Profile tab, for Firewall state, click Off.
5. In the Public Profile tab, for Firewall state, click Off.
6. Click OK.
7. Close the Windows Firewall Properties window.
Setting up Remote Desktop
1. In the Local Server tab of the Server Manager window, next to Remote Desktop, click Disabled.
2. In the System Properties window that appears, in the Remote Desktop section, select the Allow remote
connections to this computer radio button, and click OK when the warning message appears.
A Principled Technologies report 38Speed up system deployment with Dell Connected Configuration
services
3. Uncheck Allow connections only from computers running Remote Desktop with Network Level Authentication
(recommended), and click OK.
Adding Corporate File Servers
1. In File Explorer, right-click This PC and select Map network drive…
2. On the Map Network Drive window, type address for the shared Folder. Enter credentials as needed, and click
Finish.
3. In File Explorer, in the left panel, click and drag the mapped network drives to create shortcuts on the desktop.
Also add these locations to Start.
Note: We repeated steps 1 and 3 for a second location.
Installing Office 2013
1. Download Setup.X64.en-us_O365ProPlusRetail.exe for version 15.0.4753.1003 from
https://www.mail.office365.com.
2. Run the Office 2013 installation file.
3. In the Microsoft Office 2013 Window, at the Welcome screen, click Next.
4. At the First things first. screen, select Use recommended settings, and click Accept.
5. At the Sign in and get the most out of Office screen, click No thanks, maybe later.
6. At the Meet OneDrive screen, click Next.
7. At the We’re getting things ready screen, click No, thanks. Office will finish installing.
Installing Google Chrome
1. Open Internet Explorer.
2. Navigate to https://www.google.com/chrome/index.html.
3. Click download, then accept and Install.
4. At the bottom of the browser, click Run.
5. On the User Account Control Window, click Yes.
6. Wait while Chrome finishes downloading and installing.
7. On the Chrome is almost ready window, click Next.
Installing the latest version of Java
1. Open Internet Explorer.
2. Navigate to http://www.java.com/en/download/win8.jsp
3. Click Agree and Start Free Download.
4. At the bottom of the browser, click Run.
5. On the User Account Control Window, click Yes.
6. In the Java Setup window, click Install.
7. On the Get the best of the web with Yahoo screen, uncheck the box for Set Yahoo as your homepage and default
search engine on Chrome and Internet Explorer, plug get Yahoo as your new tab page on Chrome.
8. Wait while Java downloads and installs.
9. On the Java Setup – Complete screen, click Close.
Installing the latest version of Adobe Reader
1. Open Internet Explorer.
A Principled Technologies report 39Speed up system deployment with Dell Connected Configuration
services
2. Navigate to https://get.adobe.com/reader/
3. Deselect the Optional Offers, and click Install now.
4. At the bottom of the browser, click Run.
5. On the User Account Control Window, click Yes.
6. On Adobe Acrobat Reader DC Install, once complete, click Finish.
Standardizing the Background Experience
1. Open Local Group Policy Editor.
2. In the left panel, navigate to User Configuration  Administrative Templates  Desktop  Desktop.
3. Select Desktop Wallpaper, right-click, and select Edit.
4. On the Desktop Wallpaper Window, select Enabled, and type the local path of an image to use.
5. Click OK, and restart the laptop.
Running Sysprep to generalize the image
1. From a command prompt with elevated privileges, navigate to C:WindowsSystem32Sysprep and run the
following command: Sysprep /generalize /shutdown /oobe
Capturing the WIM
1. Insert a USB stick with Windows PE environment into the laptop.
2. Attach an external hard drive to the laptop.
3. Boot from the Windows PE USB disk.
4. Identify which drive is the system drive, boot drive, and external image drive. Below it assumes the system drive
is C: and the external drive is D:
5. To save the image, type the following command from the Windows PE command prompt: dism /capture-
image /capturedir:c: /imagefile=d:81E55X0X64.wim /name:81E55X0X64
Putting drivers on a USB key
1. Download the E5550 driver from http://en.community.dell.com/techcenter/enterprise-
client/w/wiki/7597.latitude-e55505550-windows-8-1-driver-pack
2. Extract the contents of E5550_5550-Win8.1-A05-YHV16.cab to a Folder named E5550CAB.
3. Move the E5550CAB folder to a removable USB drive.
Ordering the static image
We then ordered the laptop from Dell. We were assigned a project manager who led us and the Dell engineering
team through uploading and verifying the image. We received several emails with instructions. Throughout the following
processes, we recorded the time to complete each process, including any required communication with the Dell team.
Completing Image Export Compliance Certification form
1. From the email instructions sent by Dell, browse to http://www.dell.com/learn/us/en/555/services/export-
compliance-customer-image?c=us&l=en&s=biz&preview=true, and downloaded the Export Compliance
Certification form.
2. Print the form.
3. Fill out the information on the form.
4. Scan the form and save as a PDF.
A Principled Technologies report 40Speed up system deployment with Dell Connected Configuration
services
5. Once the certification form has been completed, send an email to the Global Trade Management Office
via US_ConfigurationServices_Export_Compliance@dell.com with the Configuration Services (CFI) project
number (SIxxx) in the subject line and the Export Compliance Form PDF attached.
Completing the Image Specifications form
The Image Specifications form provided details about the submitted image for the Dell engineering team.
1. Use the link provided to Dell to access your Dell Imaging Services Image Specifications form. Through that form
we submitted the following information
 Customer Contact email: N/A
 Name: N/A
 Phone number: N/A
 Will you be the person who will be creating and submitting your image? Yes
 Do you have a previous image you have already submitted to Dell that you would like to reuse for this
particular order? No
 Please indicate whether your image contains administrator account information. Yes
 Admin Login: PTadmin
 Admin Password: Password1
 What OS License have you purchased? Windows 8.1
 Does your image contain: Volume License Agreement (VLA)
 Is it an Academic VLA? No
 Specify format of the image: WIM
 Is this a GUID Partition Table (GPT) formatted image? Yes
 Please complete an entry below for each partition on your hard drive. When you have finished adding
partitions, please click the link that you have completed entering all your information.
We then received an email confirming the submission of our Image Specifications form. Over the next few days, we also
called and received calls, from our Project Manager requesting image submission and resubmission.
Dell File Transfer steps
Using the following steps, we submitted the 81E55X0X64.wim through the Dell File Transfer Application.
1. Log onto Dell.com and create an account using the email submitted to the technical team.
2. Using the provided link download the Dell File Transfer Installation application.
3. Install the Dell File Transfer Installation.
4. Once the installation is complete, navigate to the installation folder and open FileTransfer.exe
5. In the Dell File Transfer Window, enter the user information created in step 1, and click login.
A Principled Technologies report 41Speed up system deployment with Dell Connected Configuration
services
6. Select the project.
7. On the Image Source Window, give the file a Friendly Name and add the image that you would like to upload.
8. On the Summary Page, click Scan to start the file transfer.
9. At the Complete screen, click Close.
10. On the Scanning Files screen, wait for the files to finish transferring, and click Close.
Completing the Online First Article
For the Online First Article, PT was required connect via a KVM session and approve the image which the Dell
engineers uploaded.
1. From the email with the subject Dell Online First Article, click the download link to install the Viewer Software.
2. Select a location to save the file to your computer.
3. Once the download is complete, double-click the file.
4. In the Avocent DSView 4 Session Viewers Window, click Next.
5. On the Select Installation Folder screen, click Next.
6. On the Confirm Installation screen, click Next.
7. On the Installation Complete Screen, click Close.
8. Close all open web browsers.
9. Using a supported web-browser, browse to https://onlinecsaudit.us.dell.com/. We used Internet Explorer 11.
10. Log in using the credentials in the email.
11. In the DSView 4 Management software, select KVM Session for the provided computer.
12. When requested, we allowed the plugin to run the browser.
13. In the Avocent Session Viewer, complete the Out-of-Box experience and verify that your WIM has correctly
installed. To do this we double-checked that our desktop had the custom image and our installed applications
were available.
14. Respond to the email confirming that the Online First Article meets expectations and can be deployed.
After Dell finished deploying the static image to the target laptop, they used Next Business Day shipping to send
us the laptop.
Provisioning and distributing the E5550 laptop
After receiving the laptop late in the day, we then completed our provisioning process the following business
day. This process included a simulated shipment to our end user, which, for our calculations, would have arrived the
following business day. We timed how long it would take to complete the following tasks on the Static Imaged Latitude.
All steps below are considered administrator time except those explicitly noted as system time.
Removing the system from the box
1. Remove the E5550 from the box ,and remove all packing material from the system.
2. Plug the system into a wall outlet, and connect it to a port that is connected to your domain.
3. Press the power button, and press F12 to load the BIOS boot manager.
4. Select BIOS Setup to load into the BIOS.
5. In the BIOS menu, under Security, select Admin Password.
6. In Admin Password, enter and confirm a new password for the system. We used Password1.
A Principled Technologies report 42Speed up system deployment with Dell Connected Configuration
services
7. Under Security, select TPM Security.
8. Check the box for TPM Security to enable it.
9. Select Activate.
10. Click Apply and Exit to boot into the Operating System.
Completing the Windows out-of-the-box experience
1. On the Region and language screen, click Next.
2. On the License terms screen, click I accept.
3. On the Personalize screen, enter the PC name, and click Next. We entered E5550-Static.
4. On the Get Online screen, click Skip this Step.
5. On the Settings screen, click Use express settings.
6. On the Your account screen, click Create a local account.
7. On the Your account screen, enter a user name, password, re-enter password, and password hint. We used
PTuser, Password1, Password1, and Pass.
8. Wait while Windows prepares your account.
Joining to the domain
We used the domain created during the Connected Configuration Process.
1. Press the Windows key and search for Join a domain.
2. In the System Properties menu, click Change…
3. Select Domain and enter test.local.
4. In the Windows Security window, use the following credentials:
 User Name: Test.localCM_JD
 Password: Password1
5. Click OK.
6. In the Domain Welcome notification, click OK.
7. In the Restart notification, click OK.
8. Close the System Properties menu.
9. In the System Restart notification, click Restart now.
10. Wait for the system to restart.
11. Log into the system using test.localadministrator.
Turning on Bitlocker
1. In the Control Panel, open System and Security, then BitLocker Drive Encryption.
2. On the BitLocker Drive Encryption screen, select Turn on BitLocker.
3. On the Preparing your drive for Bitlocker screen, click Next.
4. On the Choose how to unlock your drive at startup screen, select Enter a PIN (recommended).
5. On the Enter a PIN screen, enter and reneter a PIN. Click Set PIN.
6. In the BitLocker Drive Encryption C: window, select Save to a file and select a location to save the Recovery Key.
Then click Next.
A Principled Technologies report 43Speed up system deployment with Dell Connected Configuration
services
7. On the Choose how much of your drive to encrypt, leave the default Encrypt used disk space only, and click
Next.
8. On the Are you Ready to encrypt this drive? Screen, check the box for Run BitLocker system check, and click
Continue. Then click OK.
9. Restart the Computer.
10. During the restart, on the BitLocker screen, enter the PIN for your encrypted drive, and press enter to Continue.
11. Once the system restarts, sign back into the test.localadministrator account.
Installing driver update
1. Start Dell Command | Update.
2. In Dell Command | Update, on the setup screen, select Yes, run automatically with the default settings
(recommended), and click OK.
3. Click Check.
4. Once the system finishes checking for updates, select any available updates and select Install.
5. When requested select Restart.
6. Allow the system to restart and log back into the test.localadministrator account.
7. Repeat steps 1 through 5 as many times as necessary.
Note: For purposes of timing, we considered steps 4 through 6 to be system time.
Installing additional driver updates
1. Open Device Manager.
2. Right-click any unknown devices, and select Update Driver Software.
3. Select Browse my computer for driver software and copied E5550CAB folder.
4. If requested, restart the laptop.
5. Repeat steps 1 through 4 for each unknown device. We repeated this process three times.
Note: For purposes of timing, we considered steps 3 and 4 to be system time.
Installing Windows Updates
1. Open Windows Update.
2. Select Check for Updates.
3. Once the updates appear, click Install Updates.
4. Once complete, if requested, restart the laptop and allow the updates to install.
Note: For purposes of timing, we considered steps 3 and 4 to be system time.
Preparing the laptop for shipping
1. Shutdown the laptop.
2. Repackage the system and tape the box closed.
We then simulated shipping our system to our remote office by having our administrator drive the system to a
local shipping company located less than a mile from our testing facility. The administrator then returned to his office
and stopped the timer.
A Principled Technologies report 44Speed up system deployment with Dell Connected Configuration
services
ABOUT PRINCIPLED TECHNOLOGIES
Principled Technologies, Inc.
1007 Slater Road, Suite 300
Durham, NC, 27703
www.principledtechnologies.com
We provide industry-leading technology assessment and fact-based
marketing services. We bring to every assignment extensive experience
with and expertise in all aspects of technology testing and analysis, from
researching new technologies, to developing new methodologies, to
testing with existing and new tools.
When the assessment is complete, we know how to present the results to
a broad range of target audiences. We provide our clients with the
materials they need, from market-focused data to use in their own
collateral to custom sales aids, such as test reports, performance
assessments, and white papers. Every document reflects the results of
our trusted independent analysis.
We provide customized services that focus on our clients’ individual
requirements. Whether the technology involves hardware, software, Web
sites, or services, we offer the experience, expertise, and tools to help our
clients assess how it will fare against its competition, its performance, its
market readiness, and its quality and reliability.
Our founders, Mark L. Van Name and Bill Catchings, have worked
together in technology assessment for over 20 years. As journalists, they
published over a thousand articles on a wide array of technology subjects.
They created and led the Ziff-Davis Benchmark Operation, which
developed such industry-standard benchmarks as Ziff Davis Media’s
Winstone and WebBench. They founded and led eTesting Labs, and after
the acquisition of that company by Lionbridge Technologies were the
head and CTO of VeriTest.
Principled Technologies is a registered trademark of Principled Technologies, Inc.
All other product names are the trademarks of their respective owners.
Disclaimer of Warranties; Limitation of Liability:
PRINCIPLED TECHNOLOGIES, INC. HAS MADE REASONABLE EFFORTS TO ENSURE THE ACCURACY AND VALIDITY OF ITS TESTING, HOWEVER,
PRINCIPLED TECHNOLOGIES, INC. SPECIFICALLY DISCLAIMS ANY WARRANTY, EXPRESSED OR IMPLIED, RELATING TO THE TEST RESULTS AND
ANALYSIS, THEIR ACCURACY, COMPLETENESS OR QUALITY, INCLUDING ANY IMPLIED WARRANTY OF FITNESS FOR ANY PARTICULAR PURPOSE.
ALL PERSONS OR ENTITIES RELYING ON THE RESULTS OF ANY TESTING DO SO AT THEIR OWN RISK, AND AGREE THAT PRINCIPLED
TECHNOLOGIES, INC., ITS EMPLOYEES AND ITS SUBCONTRACTORS SHALL HAVE NO LIABILITY WHATSOEVER FROM ANY CLAIM OF LOSS OR
DAMAGE ON ACCOUNT OF ANY ALLEGED ERROR OR DEFECT IN ANY TESTING PROCEDURE OR RESULT.
IN NO EVENT SHALL PRINCIPLED TECHNOLOGIES, INC. BE LIABLE FOR INDIRECT, SPECIAL, INCIDENTAL, OR CONSEQUENTIAL DAMAGES IN
CONNECTION WITH ITS TESTING, EVEN IF ADVISED OF THE POSSIBILITY OF SUCH DAMAGES. IN NO EVENT SHALL PRINCIPLED TECHNOLOGIES,
INC.’S LIABILITY, INCLUDING FOR DIRECT DAMAGES, EXCEED THE AMOUNTS PAID IN CONNECTION WITH PRINCIPLED TECHNOLOGIES, INC.’S
TESTING. CUSTOMER’S SOLE AND EXCLUSIVE REMEDIES ARE AS SET FORTH HEREIN.

More Related Content

What's hot

Be production-ready sooner by using ProDeploy Plus for Enterprise
Be production-ready sooner by using  ProDeploy Plus for EnterpriseBe production-ready sooner by using  ProDeploy Plus for Enterprise
Be production-ready sooner by using ProDeploy Plus for EnterprisePrincipled Technologies
 
Network developer company report
Network developer company reportNetwork developer company report
Network developer company reportrindbaloch
 
Sccm 2012
Sccm 2012Sccm 2012
Sccm 2012ebuc
 
Tideway Foundation For Ms Operations Manager
Tideway Foundation For Ms Operations ManagerTideway Foundation For Ms Operations Manager
Tideway Foundation For Ms Operations ManagerPeter Grant
 
Managing Updates with System Center Configuration Manager 2012
Managing Updates with System Center Configuration Manager 2012Managing Updates with System Center Configuration Manager 2012
Managing Updates with System Center Configuration Manager 2012JasonCondo
 
Client management with SCCM 2012: Dell Latitude 6430u Ultrabook vs. older Del...
Client management with SCCM 2012: Dell Latitude 6430u Ultrabook vs. older Del...Client management with SCCM 2012: Dell Latitude 6430u Ultrabook vs. older Del...
Client management with SCCM 2012: Dell Latitude 6430u Ultrabook vs. older Del...Principled Technologies
 
Windows 7 Optimized Desktop
Windows 7 Optimized DesktopWindows 7 Optimized Desktop
Windows 7 Optimized DesktopIT Masterclasses
 
Smarter infrastructure with the new IBM Pure Flex System
Smarter infrastructure with the new IBM Pure Flex SystemSmarter infrastructure with the new IBM Pure Flex System
Smarter infrastructure with the new IBM Pure Flex SystemCOMMON Europe
 
VMware End-User-Computing Best Practices Poster
VMware End-User-Computing Best Practices PosterVMware End-User-Computing Best Practices Poster
VMware End-User-Computing Best Practices PosterVMware Academy
 
Collaborate 2014 OAUG - EBS 11i Upgrade to R12 - Compare versions 12.2 vs 12.1
Collaborate 2014 OAUG - EBS 11i Upgrade to R12 - Compare versions 12.2 vs 12.1Collaborate 2014 OAUG - EBS 11i Upgrade to R12 - Compare versions 12.2 vs 12.1
Collaborate 2014 OAUG - EBS 11i Upgrade to R12 - Compare versions 12.2 vs 12.1Biju Thomas
 
Physical And Virtual Server Management
Physical And Virtual Server ManagementPhysical And Virtual Server Management
Physical And Virtual Server ManagementAmit Gatenyo
 
wp-converged-infrastructure-2405387
wp-converged-infrastructure-2405387wp-converged-infrastructure-2405387
wp-converged-infrastructure-2405387Martin Fabirowski
 
CA Infrastructure Management 2.0 vs. Solarwinds Orion: Speed and ease of mana...
CA Infrastructure Management 2.0 vs. Solarwinds Orion: Speed and ease of mana...CA Infrastructure Management 2.0 vs. Solarwinds Orion: Speed and ease of mana...
CA Infrastructure Management 2.0 vs. Solarwinds Orion: Speed and ease of mana...Principled Technologies
 
Microsoft sccm 2012 seminar ddls sydney 22 nov 2012
Microsoft sccm 2012 seminar   ddls sydney 22 nov 2012Microsoft sccm 2012 seminar   ddls sydney 22 nov 2012
Microsoft sccm 2012 seminar ddls sydney 22 nov 2012DDLS
 
Lee Technologies Corporate Brochure
Lee Technologies Corporate BrochureLee Technologies Corporate Brochure
Lee Technologies Corporate Brochurecwoodson
 

What's hot (20)

Be production-ready sooner by using ProDeploy Plus for Enterprise
Be production-ready sooner by using  ProDeploy Plus for EnterpriseBe production-ready sooner by using  ProDeploy Plus for Enterprise
Be production-ready sooner by using ProDeploy Plus for Enterprise
 
Network developer company report
Network developer company reportNetwork developer company report
Network developer company report
 
Sccm 2012
Sccm 2012Sccm 2012
Sccm 2012
 
Resume_shafie
Resume_shafieResume_shafie
Resume_shafie
 
Tideway Foundation For Ms Operations Manager
Tideway Foundation For Ms Operations ManagerTideway Foundation For Ms Operations Manager
Tideway Foundation For Ms Operations Manager
 
Managing Updates with System Center Configuration Manager 2012
Managing Updates with System Center Configuration Manager 2012Managing Updates with System Center Configuration Manager 2012
Managing Updates with System Center Configuration Manager 2012
 
Client management with SCCM 2012: Dell Latitude 6430u Ultrabook vs. older Del...
Client management with SCCM 2012: Dell Latitude 6430u Ultrabook vs. older Del...Client management with SCCM 2012: Dell Latitude 6430u Ultrabook vs. older Del...
Client management with SCCM 2012: Dell Latitude 6430u Ultrabook vs. older Del...
 
Windows 7 Optimized Desktop
Windows 7 Optimized DesktopWindows 7 Optimized Desktop
Windows 7 Optimized Desktop
 
Smarter infrastructure with the new IBM Pure Flex System
Smarter infrastructure with the new IBM Pure Flex SystemSmarter infrastructure with the new IBM Pure Flex System
Smarter infrastructure with the new IBM Pure Flex System
 
EMS Case Study
EMS Case StudyEMS Case Study
EMS Case Study
 
VMware End-User-Computing Best Practices Poster
VMware End-User-Computing Best Practices PosterVMware End-User-Computing Best Practices Poster
VMware End-User-Computing Best Practices Poster
 
Collaborate 2014 OAUG - EBS 11i Upgrade to R12 - Compare versions 12.2 vs 12.1
Collaborate 2014 OAUG - EBS 11i Upgrade to R12 - Compare versions 12.2 vs 12.1Collaborate 2014 OAUG - EBS 11i Upgrade to R12 - Compare versions 12.2 vs 12.1
Collaborate 2014 OAUG - EBS 11i Upgrade to R12 - Compare versions 12.2 vs 12.1
 
Physical And Virtual Server Management
Physical And Virtual Server ManagementPhysical And Virtual Server Management
Physical And Virtual Server Management
 
wp-converged-infrastructure-2405387
wp-converged-infrastructure-2405387wp-converged-infrastructure-2405387
wp-converged-infrastructure-2405387
 
CA Infrastructure Management 2.0 vs. Solarwinds Orion: Speed and ease of mana...
CA Infrastructure Management 2.0 vs. Solarwinds Orion: Speed and ease of mana...CA Infrastructure Management 2.0 vs. Solarwinds Orion: Speed and ease of mana...
CA Infrastructure Management 2.0 vs. Solarwinds Orion: Speed and ease of mana...
 
Discover what's new in Windows Server 2012 Active Directory
Discover what's new in Windows Server 2012 Active DirectoryDiscover what's new in Windows Server 2012 Active Directory
Discover what's new in Windows Server 2012 Active Directory
 
Microsoft sccm 2012 seminar ddls sydney 22 nov 2012
Microsoft sccm 2012 seminar   ddls sydney 22 nov 2012Microsoft sccm 2012 seminar   ddls sydney 22 nov 2012
Microsoft sccm 2012 seminar ddls sydney 22 nov 2012
 
Lee Technologies Corporate Brochure
Lee Technologies Corporate BrochureLee Technologies Corporate Brochure
Lee Technologies Corporate Brochure
 
Install Desk Product Information
Install Desk Product InformationInstall Desk Product Information
Install Desk Product Information
 
SCCM 2012 Presentation
SCCM 2012 PresentationSCCM 2012 Presentation
SCCM 2012 Presentation
 

Similar to Speed up system deployment with Dell Connected Configuration services

Spend less time, effort, and money by choosing a Dell EMC server with pre-ins...
Spend less time, effort, and money by choosing a Dell EMC server with pre-ins...Spend less time, effort, and money by choosing a Dell EMC server with pre-ins...
Spend less time, effort, and money by choosing a Dell EMC server with pre-ins...Principled Technologies
 
Dell EMC™ ProDeploy set up a production-ready environment in less time and fe...
Dell EMC™ ProDeploy set up a production-ready environment in less time and fe...Dell EMC™ ProDeploy set up a production-ready environment in less time and fe...
Dell EMC™ ProDeploy set up a production-ready environment in less time and fe...Principled Technologies
 
Remote notebook management: Dell unique vPro extensions and Dell Client Integ...
Remote notebook management: Dell unique vPro extensions and Dell Client Integ...Remote notebook management: Dell unique vPro extensions and Dell Client Integ...
Remote notebook management: Dell unique vPro extensions and Dell Client Integ...Principled Technologies
 
Using Dell ProDeploy Plus for Infrastructure can improve deployment times for...
Using Dell ProDeploy Plus for Infrastructure can improve deployment times for...Using Dell ProDeploy Plus for Infrastructure can improve deployment times for...
Using Dell ProDeploy Plus for Infrastructure can improve deployment times for...Principled Technologies
 
Simplifying systems management with Dell OpenManage on 13G Dell PowerEdge ser...
Simplifying systems management with Dell OpenManage on 13G Dell PowerEdge ser...Simplifying systems management with Dell OpenManage on 13G Dell PowerEdge ser...
Simplifying systems management with Dell OpenManage on 13G Dell PowerEdge ser...Principled Technologies
 
Manage infrastructure and deploy services with ease using Dell Active System ...
Manage infrastructure and deploy services with ease using Dell Active System ...Manage infrastructure and deploy services with ease using Dell Active System ...
Manage infrastructure and deploy services with ease using Dell Active System ...Principled Technologies
 
Microsoft System Center virtual environment comparison: Dell PowerEdge server...
Microsoft System Center virtual environment comparison: Dell PowerEdge server...Microsoft System Center virtual environment comparison: Dell PowerEdge server...
Microsoft System Center virtual environment comparison: Dell PowerEdge server...Principled Technologies
 
Managing clients with Dell Client Integration Pack 3.0 and Microsoft System C...
Managing clients with Dell Client Integration Pack 3.0 and Microsoft System C...Managing clients with Dell Client Integration Pack 3.0 and Microsoft System C...
Managing clients with Dell Client Integration Pack 3.0 and Microsoft System C...Principled Technologies
 
Get through the migration maze with less downtime with help from Dell Data Mi...
Get through the migration maze with less downtime with help from Dell Data Mi...Get through the migration maze with less downtime with help from Dell Data Mi...
Get through the migration maze with less downtime with help from Dell Data Mi...Principled Technologies
 
Faster and easier server installation with Dell ProDeploy Factory Configurati...
Faster and easier server installation with Dell ProDeploy Factory Configurati...Faster and easier server installation with Dell ProDeploy Factory Configurati...
Faster and easier server installation with Dell ProDeploy Factory Configurati...Principled Technologies
 
Reduce IT overhead by creating virtual environments for applications on IBM C...
Reduce IT overhead by creating virtual environments for applications on IBM C...Reduce IT overhead by creating virtual environments for applications on IBM C...
Reduce IT overhead by creating virtual environments for applications on IBM C...Principled Technologies
 
AVG Managed Workplace 9.1 Fact Sheet
AVG Managed Workplace 9.1 Fact SheetAVG Managed Workplace 9.1 Fact Sheet
AVG Managed Workplace 9.1 Fact SheetAVG Technologies
 
The benefits are chosen by the success elements of ERP adoption..pdf
The benefits are chosen by the success elements of ERP adoption..pdfThe benefits are chosen by the success elements of ERP adoption..pdf
The benefits are chosen by the success elements of ERP adoption..pdfJose thomas
 
Simplify administrator tasks and improve security and health monitoring with ...
Simplify administrator tasks and improve security and health monitoring with ...Simplify administrator tasks and improve security and health monitoring with ...
Simplify administrator tasks and improve security and health monitoring with ...Principled Technologies
 
Streamline administrator duties and gain more security and analytics features...
Streamline administrator duties and gain more security and analytics features...Streamline administrator duties and gain more security and analytics features...
Streamline administrator duties and gain more security and analytics features...Principled Technologies
 
Beakbane safeguards future with ERP - ready infrastructure upgrade.
Beakbane safeguards future with ERP - ready infrastructure upgrade.Beakbane safeguards future with ERP - ready infrastructure upgrade.
Beakbane safeguards future with ERP - ready infrastructure upgrade.Icomm Technologies
 
Next Level Learning IT Track - Office 365, Under the Covers
Next Level Learning IT Track - Office 365, Under the CoversNext Level Learning IT Track - Office 365, Under the Covers
Next Level Learning IT Track - Office 365, Under the CoversMicrosoft Education AU
 
Session #107 - AMSI Hosting Options
Session #107 - AMSI Hosting OptionsSession #107 - AMSI Hosting Options
Session #107 - AMSI Hosting Optionswebhostingguy
 

Similar to Speed up system deployment with Dell Connected Configuration services (20)

Spend less time, effort, and money by choosing a Dell EMC server with pre-ins...
Spend less time, effort, and money by choosing a Dell EMC server with pre-ins...Spend less time, effort, and money by choosing a Dell EMC server with pre-ins...
Spend less time, effort, and money by choosing a Dell EMC server with pre-ins...
 
Dell EMC™ ProDeploy set up a production-ready environment in less time and fe...
Dell EMC™ ProDeploy set up a production-ready environment in less time and fe...Dell EMC™ ProDeploy set up a production-ready environment in less time and fe...
Dell EMC™ ProDeploy set up a production-ready environment in less time and fe...
 
Remote notebook management: Dell unique vPro extensions and Dell Client Integ...
Remote notebook management: Dell unique vPro extensions and Dell Client Integ...Remote notebook management: Dell unique vPro extensions and Dell Client Integ...
Remote notebook management: Dell unique vPro extensions and Dell Client Integ...
 
Using Dell ProDeploy Plus for Infrastructure can improve deployment times for...
Using Dell ProDeploy Plus for Infrastructure can improve deployment times for...Using Dell ProDeploy Plus for Infrastructure can improve deployment times for...
Using Dell ProDeploy Plus for Infrastructure can improve deployment times for...
 
Simplifying systems management with Dell OpenManage on 13G Dell PowerEdge ser...
Simplifying systems management with Dell OpenManage on 13G Dell PowerEdge ser...Simplifying systems management with Dell OpenManage on 13G Dell PowerEdge ser...
Simplifying systems management with Dell OpenManage on 13G Dell PowerEdge ser...
 
Manage infrastructure and deploy services with ease using Dell Active System ...
Manage infrastructure and deploy services with ease using Dell Active System ...Manage infrastructure and deploy services with ease using Dell Active System ...
Manage infrastructure and deploy services with ease using Dell Active System ...
 
Microsoft System Center virtual environment comparison: Dell PowerEdge server...
Microsoft System Center virtual environment comparison: Dell PowerEdge server...Microsoft System Center virtual environment comparison: Dell PowerEdge server...
Microsoft System Center virtual environment comparison: Dell PowerEdge server...
 
Managing clients with Dell Client Integration Pack 3.0 and Microsoft System C...
Managing clients with Dell Client Integration Pack 3.0 and Microsoft System C...Managing clients with Dell Client Integration Pack 3.0 and Microsoft System C...
Managing clients with Dell Client Integration Pack 3.0 and Microsoft System C...
 
Get through the migration maze with less downtime with help from Dell Data Mi...
Get through the migration maze with less downtime with help from Dell Data Mi...Get through the migration maze with less downtime with help from Dell Data Mi...
Get through the migration maze with less downtime with help from Dell Data Mi...
 
Faster and easier server installation with Dell ProDeploy Factory Configurati...
Faster and easier server installation with Dell ProDeploy Factory Configurati...Faster and easier server installation with Dell ProDeploy Factory Configurati...
Faster and easier server installation with Dell ProDeploy Factory Configurati...
 
Reduce IT overhead by creating virtual environments for applications on IBM C...
Reduce IT overhead by creating virtual environments for applications on IBM C...Reduce IT overhead by creating virtual environments for applications on IBM C...
Reduce IT overhead by creating virtual environments for applications on IBM C...
 
AVG Managed Workplace 9.1 Fact Sheet
AVG Managed Workplace 9.1 Fact SheetAVG Managed Workplace 9.1 Fact Sheet
AVG Managed Workplace 9.1 Fact Sheet
 
The benefits are chosen by the success elements of ERP adoption..pdf
The benefits are chosen by the success elements of ERP adoption..pdfThe benefits are chosen by the success elements of ERP adoption..pdf
The benefits are chosen by the success elements of ERP adoption..pdf
 
Simplify administrator tasks and improve security and health monitoring with ...
Simplify administrator tasks and improve security and health monitoring with ...Simplify administrator tasks and improve security and health monitoring with ...
Simplify administrator tasks and improve security and health monitoring with ...
 
VDI Cost benefit analysis
VDI Cost benefit analysisVDI Cost benefit analysis
VDI Cost benefit analysis
 
Streamline administrator duties and gain more security and analytics features...
Streamline administrator duties and gain more security and analytics features...Streamline administrator duties and gain more security and analytics features...
Streamline administrator duties and gain more security and analytics features...
 
Beakbane safeguards future with ERP - ready infrastructure upgrade.
Beakbane safeguards future with ERP - ready infrastructure upgrade.Beakbane safeguards future with ERP - ready infrastructure upgrade.
Beakbane safeguards future with ERP - ready infrastructure upgrade.
 
Resume - Ankush
Resume - AnkushResume - Ankush
Resume - Ankush
 
Next Level Learning IT Track - Office 365, Under the Covers
Next Level Learning IT Track - Office 365, Under the CoversNext Level Learning IT Track - Office 365, Under the Covers
Next Level Learning IT Track - Office 365, Under the Covers
 
Session #107 - AMSI Hosting Options
Session #107 - AMSI Hosting OptionsSession #107 - AMSI Hosting Options
Session #107 - AMSI Hosting Options
 

More from Principled Technologies

Boost PC performance: How more available memory can improve productivity
Boost PC performance: How more available memory can improve productivityBoost PC performance: How more available memory can improve productivity
Boost PC performance: How more available memory can improve productivityPrincipled Technologies
 
Deploy with confidence: VMware Cloud Foundation 5.1 on next gen Dell PowerEdg...
Deploy with confidence: VMware Cloud Foundation 5.1 on next gen Dell PowerEdg...Deploy with confidence: VMware Cloud Foundation 5.1 on next gen Dell PowerEdg...
Deploy with confidence: VMware Cloud Foundation 5.1 on next gen Dell PowerEdg...Principled Technologies
 
Realize 2.1X the performance with 20% less power with AMD EPYC processor-back...
Realize 2.1X the performance with 20% less power with AMD EPYC processor-back...Realize 2.1X the performance with 20% less power with AMD EPYC processor-back...
Realize 2.1X the performance with 20% less power with AMD EPYC processor-back...Principled Technologies
 
Upgrade your cloud infrastructure with Dell PowerEdge R760 servers and VMware...
Upgrade your cloud infrastructure with Dell PowerEdge R760 servers and VMware...Upgrade your cloud infrastructure with Dell PowerEdge R760 servers and VMware...
Upgrade your cloud infrastructure with Dell PowerEdge R760 servers and VMware...Principled Technologies
 
A comparison of security features in Dell, HP, and Lenovo PC systems
A comparison of security features in Dell, HP, and Lenovo PC systemsA comparison of security features in Dell, HP, and Lenovo PC systems
A comparison of security features in Dell, HP, and Lenovo PC systemsPrincipled Technologies
 
Increase security, sustainability, and efficiency with robust Dell server man...
Increase security, sustainability, and efficiency with robust Dell server man...Increase security, sustainability, and efficiency with robust Dell server man...
Increase security, sustainability, and efficiency with robust Dell server man...Principled Technologies
 
Scale up your storage with higher-performing Dell APEX Block Storage for AWS ...
Scale up your storage with higher-performing Dell APEX Block Storage for AWS ...Scale up your storage with higher-performing Dell APEX Block Storage for AWS ...
Scale up your storage with higher-performing Dell APEX Block Storage for AWS ...Principled Technologies
 
Scale up your storage with higher-performing Dell APEX Block Storage for AWS
Scale up your storage with higher-performing Dell APEX Block Storage for AWSScale up your storage with higher-performing Dell APEX Block Storage for AWS
Scale up your storage with higher-performing Dell APEX Block Storage for AWSPrincipled Technologies
 
Get in and stay in the productivity zone with the HP Z2 G9 Tower Workstation
Get in and stay in the productivity zone with the HP Z2 G9 Tower WorkstationGet in and stay in the productivity zone with the HP Z2 G9 Tower Workstation
Get in and stay in the productivity zone with the HP Z2 G9 Tower WorkstationPrincipled Technologies
 
Open up new possibilities with higher transactional database performance from...
Open up new possibilities with higher transactional database performance from...Open up new possibilities with higher transactional database performance from...
Open up new possibilities with higher transactional database performance from...Principled Technologies
 
Improving database performance and value with an easy migration to Azure Data...
Improving database performance and value with an easy migration to Azure Data...Improving database performance and value with an easy migration to Azure Data...
Improving database performance and value with an easy migration to Azure Data...Principled Technologies
 
Realize better value and performance migrating from Azure Database for Postgr...
Realize better value and performance migrating from Azure Database for Postgr...Realize better value and performance migrating from Azure Database for Postgr...
Realize better value and performance migrating from Azure Database for Postgr...Principled Technologies
 
Set up students and teachers to excel now and in the future with Intel proces...
Set up students and teachers to excel now and in the future with Intel proces...Set up students and teachers to excel now and in the future with Intel proces...
Set up students and teachers to excel now and in the future with Intel proces...Principled Technologies
 
Finding the path to AI success with the Dell AI portfolio - Summary
Finding the path to AI success with the Dell AI portfolio - SummaryFinding the path to AI success with the Dell AI portfolio - Summary
Finding the path to AI success with the Dell AI portfolio - SummaryPrincipled Technologies
 
Finding the path to AI success with the Dell AI portfolio
Finding the path to AI success with the Dell AI portfolioFinding the path to AI success with the Dell AI portfolio
Finding the path to AI success with the Dell AI portfolioPrincipled Technologies
 
Achieve strong performance and value on Azure SQL Database Hyperscale
Achieve strong performance and value on Azure SQL Database HyperscaleAchieve strong performance and value on Azure SQL Database Hyperscale
Achieve strong performance and value on Azure SQL Database HyperscalePrincipled Technologies
 
Improve backup and recovery outcomes by combining Dell APEX Data Storage Serv...
Improve backup and recovery outcomes by combining Dell APEX Data Storage Serv...Improve backup and recovery outcomes by combining Dell APEX Data Storage Serv...
Improve backup and recovery outcomes by combining Dell APEX Data Storage Serv...Principled Technologies
 

More from Principled Technologies (20)

Boost PC performance: How more available memory can improve productivity
Boost PC performance: How more available memory can improve productivityBoost PC performance: How more available memory can improve productivity
Boost PC performance: How more available memory can improve productivity
 
Deploy with confidence: VMware Cloud Foundation 5.1 on next gen Dell PowerEdg...
Deploy with confidence: VMware Cloud Foundation 5.1 on next gen Dell PowerEdg...Deploy with confidence: VMware Cloud Foundation 5.1 on next gen Dell PowerEdg...
Deploy with confidence: VMware Cloud Foundation 5.1 on next gen Dell PowerEdg...
 
Realize 2.1X the performance with 20% less power with AMD EPYC processor-back...
Realize 2.1X the performance with 20% less power with AMD EPYC processor-back...Realize 2.1X the performance with 20% less power with AMD EPYC processor-back...
Realize 2.1X the performance with 20% less power with AMD EPYC processor-back...
 
Upgrade your cloud infrastructure with Dell PowerEdge R760 servers and VMware...
Upgrade your cloud infrastructure with Dell PowerEdge R760 servers and VMware...Upgrade your cloud infrastructure with Dell PowerEdge R760 servers and VMware...
Upgrade your cloud infrastructure with Dell PowerEdge R760 servers and VMware...
 
A comparison of security features in Dell, HP, and Lenovo PC systems
A comparison of security features in Dell, HP, and Lenovo PC systemsA comparison of security features in Dell, HP, and Lenovo PC systems
A comparison of security features in Dell, HP, and Lenovo PC systems
 
Increase security, sustainability, and efficiency with robust Dell server man...
Increase security, sustainability, and efficiency with robust Dell server man...Increase security, sustainability, and efficiency with robust Dell server man...
Increase security, sustainability, and efficiency with robust Dell server man...
 
Increase security, sustainability, and efficiency with robust Dell server man...
Increase security, sustainability, and efficiency with robust Dell server man...Increase security, sustainability, and efficiency with robust Dell server man...
Increase security, sustainability, and efficiency with robust Dell server man...
 
Scale up your storage with higher-performing Dell APEX Block Storage for AWS ...
Scale up your storage with higher-performing Dell APEX Block Storage for AWS ...Scale up your storage with higher-performing Dell APEX Block Storage for AWS ...
Scale up your storage with higher-performing Dell APEX Block Storage for AWS ...
 
Scale up your storage with higher-performing Dell APEX Block Storage for AWS
Scale up your storage with higher-performing Dell APEX Block Storage for AWSScale up your storage with higher-performing Dell APEX Block Storage for AWS
Scale up your storage with higher-performing Dell APEX Block Storage for AWS
 
Get in and stay in the productivity zone with the HP Z2 G9 Tower Workstation
Get in and stay in the productivity zone with the HP Z2 G9 Tower WorkstationGet in and stay in the productivity zone with the HP Z2 G9 Tower Workstation
Get in and stay in the productivity zone with the HP Z2 G9 Tower Workstation
 
Open up new possibilities with higher transactional database performance from...
Open up new possibilities with higher transactional database performance from...Open up new possibilities with higher transactional database performance from...
Open up new possibilities with higher transactional database performance from...
 
Improving database performance and value with an easy migration to Azure Data...
Improving database performance and value with an easy migration to Azure Data...Improving database performance and value with an easy migration to Azure Data...
Improving database performance and value with an easy migration to Azure Data...
 
Realize better value and performance migrating from Azure Database for Postgr...
Realize better value and performance migrating from Azure Database for Postgr...Realize better value and performance migrating from Azure Database for Postgr...
Realize better value and performance migrating from Azure Database for Postgr...
 
Realize better value and performance migrating from Azure Database for Postgr...
Realize better value and performance migrating from Azure Database for Postgr...Realize better value and performance migrating from Azure Database for Postgr...
Realize better value and performance migrating from Azure Database for Postgr...
 
Set up students and teachers to excel now and in the future with Intel proces...
Set up students and teachers to excel now and in the future with Intel proces...Set up students and teachers to excel now and in the future with Intel proces...
Set up students and teachers to excel now and in the future with Intel proces...
 
Finding the path to AI success with the Dell AI portfolio - Summary
Finding the path to AI success with the Dell AI portfolio - SummaryFinding the path to AI success with the Dell AI portfolio - Summary
Finding the path to AI success with the Dell AI portfolio - Summary
 
Finding the path to AI success with the Dell AI portfolio
Finding the path to AI success with the Dell AI portfolioFinding the path to AI success with the Dell AI portfolio
Finding the path to AI success with the Dell AI portfolio
 
Achieve strong performance and value on Azure SQL Database Hyperscale
Achieve strong performance and value on Azure SQL Database HyperscaleAchieve strong performance and value on Azure SQL Database Hyperscale
Achieve strong performance and value on Azure SQL Database Hyperscale
 
Improve backup and recovery outcomes by combining Dell APEX Data Storage Serv...
Improve backup and recovery outcomes by combining Dell APEX Data Storage Serv...Improve backup and recovery outcomes by combining Dell APEX Data Storage Serv...
Improve backup and recovery outcomes by combining Dell APEX Data Storage Serv...
 
Improve backup and recovery outcomes by combining Dell APEX Data Storage Serv...
Improve backup and recovery outcomes by combining Dell APEX Data Storage Serv...Improve backup and recovery outcomes by combining Dell APEX Data Storage Serv...
Improve backup and recovery outcomes by combining Dell APEX Data Storage Serv...
 

Recently uploaded

APIForce Zurich 5 April Automation LPDG
APIForce Zurich 5 April  Automation LPDGAPIForce Zurich 5 April  Automation LPDG
APIForce Zurich 5 April Automation LPDGMarianaLemus7
 
My Hashitalk Indonesia April 2024 Presentation
My Hashitalk Indonesia April 2024 PresentationMy Hashitalk Indonesia April 2024 Presentation
My Hashitalk Indonesia April 2024 PresentationRidwan Fadjar
 
Unleash Your Potential - Namagunga Girls Coding Club
Unleash Your Potential - Namagunga Girls Coding ClubUnleash Your Potential - Namagunga Girls Coding Club
Unleash Your Potential - Namagunga Girls Coding ClubKalema Edgar
 
08448380779 Call Girls In Friends Colony Women Seeking Men
08448380779 Call Girls In Friends Colony Women Seeking Men08448380779 Call Girls In Friends Colony Women Seeking Men
08448380779 Call Girls In Friends Colony Women Seeking MenDelhi Call girls
 
Are Multi-Cloud and Serverless Good or Bad?
Are Multi-Cloud and Serverless Good or Bad?Are Multi-Cloud and Serverless Good or Bad?
Are Multi-Cloud and Serverless Good or Bad?Mattias Andersson
 
Enhancing Worker Digital Experience: A Hands-on Workshop for Partners
Enhancing Worker Digital Experience: A Hands-on Workshop for PartnersEnhancing Worker Digital Experience: A Hands-on Workshop for Partners
Enhancing Worker Digital Experience: A Hands-on Workshop for PartnersThousandEyes
 
Automating Business Process via MuleSoft Composer | Bangalore MuleSoft Meetup...
Automating Business Process via MuleSoft Composer | Bangalore MuleSoft Meetup...Automating Business Process via MuleSoft Composer | Bangalore MuleSoft Meetup...
Automating Business Process via MuleSoft Composer | Bangalore MuleSoft Meetup...shyamraj55
 
Install Stable Diffusion in windows machine
Install Stable Diffusion in windows machineInstall Stable Diffusion in windows machine
Install Stable Diffusion in windows machinePadma Pradeep
 
"Federated learning: out of reach no matter how close",Oleksandr Lapshyn
"Federated learning: out of reach no matter how close",Oleksandr Lapshyn"Federated learning: out of reach no matter how close",Oleksandr Lapshyn
"Federated learning: out of reach no matter how close",Oleksandr LapshynFwdays
 
Benefits Of Flutter Compared To Other Frameworks
Benefits Of Flutter Compared To Other FrameworksBenefits Of Flutter Compared To Other Frameworks
Benefits Of Flutter Compared To Other FrameworksSoftradix Technologies
 
Designing IA for AI - Information Architecture Conference 2024
Designing IA for AI - Information Architecture Conference 2024Designing IA for AI - Information Architecture Conference 2024
Designing IA for AI - Information Architecture Conference 2024Enterprise Knowledge
 
Pigging Solutions in Pet Food Manufacturing
Pigging Solutions in Pet Food ManufacturingPigging Solutions in Pet Food Manufacturing
Pigging Solutions in Pet Food ManufacturingPigging Solutions
 
SIEMENS: RAPUNZEL – A Tale About Knowledge Graph
SIEMENS: RAPUNZEL – A Tale About Knowledge GraphSIEMENS: RAPUNZEL – A Tale About Knowledge Graph
SIEMENS: RAPUNZEL – A Tale About Knowledge GraphNeo4j
 
Streamlining Python Development: A Guide to a Modern Project Setup
Streamlining Python Development: A Guide to a Modern Project SetupStreamlining Python Development: A Guide to a Modern Project Setup
Streamlining Python Development: A Guide to a Modern Project SetupFlorian Wilhelm
 
Advanced Test Driven-Development @ php[tek] 2024
Advanced Test Driven-Development @ php[tek] 2024Advanced Test Driven-Development @ php[tek] 2024
Advanced Test Driven-Development @ php[tek] 2024Scott Keck-Warren
 
Tech-Forward - Achieving Business Readiness For Copilot in Microsoft 365
Tech-Forward - Achieving Business Readiness For Copilot in Microsoft 365Tech-Forward - Achieving Business Readiness For Copilot in Microsoft 365
Tech-Forward - Achieving Business Readiness For Copilot in Microsoft 3652toLead Limited
 
Integration and Automation in Practice: CI/CD in Mule Integration and Automat...
Integration and Automation in Practice: CI/CD in Mule Integration and Automat...Integration and Automation in Practice: CI/CD in Mule Integration and Automat...
Integration and Automation in Practice: CI/CD in Mule Integration and Automat...Patryk Bandurski
 
Kotlin Multiplatform & Compose Multiplatform - Starter kit for pragmatics
Kotlin Multiplatform & Compose Multiplatform - Starter kit for pragmaticsKotlin Multiplatform & Compose Multiplatform - Starter kit for pragmatics
Kotlin Multiplatform & Compose Multiplatform - Starter kit for pragmaticscarlostorres15106
 

Recently uploaded (20)

APIForce Zurich 5 April Automation LPDG
APIForce Zurich 5 April  Automation LPDGAPIForce Zurich 5 April  Automation LPDG
APIForce Zurich 5 April Automation LPDG
 
My Hashitalk Indonesia April 2024 Presentation
My Hashitalk Indonesia April 2024 PresentationMy Hashitalk Indonesia April 2024 Presentation
My Hashitalk Indonesia April 2024 Presentation
 
Unleash Your Potential - Namagunga Girls Coding Club
Unleash Your Potential - Namagunga Girls Coding ClubUnleash Your Potential - Namagunga Girls Coding Club
Unleash Your Potential - Namagunga Girls Coding Club
 
08448380779 Call Girls In Friends Colony Women Seeking Men
08448380779 Call Girls In Friends Colony Women Seeking Men08448380779 Call Girls In Friends Colony Women Seeking Men
08448380779 Call Girls In Friends Colony Women Seeking Men
 
Are Multi-Cloud and Serverless Good or Bad?
Are Multi-Cloud and Serverless Good or Bad?Are Multi-Cloud and Serverless Good or Bad?
Are Multi-Cloud and Serverless Good or Bad?
 
Enhancing Worker Digital Experience: A Hands-on Workshop for Partners
Enhancing Worker Digital Experience: A Hands-on Workshop for PartnersEnhancing Worker Digital Experience: A Hands-on Workshop for Partners
Enhancing Worker Digital Experience: A Hands-on Workshop for Partners
 
Automating Business Process via MuleSoft Composer | Bangalore MuleSoft Meetup...
Automating Business Process via MuleSoft Composer | Bangalore MuleSoft Meetup...Automating Business Process via MuleSoft Composer | Bangalore MuleSoft Meetup...
Automating Business Process via MuleSoft Composer | Bangalore MuleSoft Meetup...
 
The transition to renewables in India.pdf
The transition to renewables in India.pdfThe transition to renewables in India.pdf
The transition to renewables in India.pdf
 
Install Stable Diffusion in windows machine
Install Stable Diffusion in windows machineInstall Stable Diffusion in windows machine
Install Stable Diffusion in windows machine
 
"Federated learning: out of reach no matter how close",Oleksandr Lapshyn
"Federated learning: out of reach no matter how close",Oleksandr Lapshyn"Federated learning: out of reach no matter how close",Oleksandr Lapshyn
"Federated learning: out of reach no matter how close",Oleksandr Lapshyn
 
Benefits Of Flutter Compared To Other Frameworks
Benefits Of Flutter Compared To Other FrameworksBenefits Of Flutter Compared To Other Frameworks
Benefits Of Flutter Compared To Other Frameworks
 
DMCC Future of Trade Web3 - Special Edition
DMCC Future of Trade Web3 - Special EditionDMCC Future of Trade Web3 - Special Edition
DMCC Future of Trade Web3 - Special Edition
 
Designing IA for AI - Information Architecture Conference 2024
Designing IA for AI - Information Architecture Conference 2024Designing IA for AI - Information Architecture Conference 2024
Designing IA for AI - Information Architecture Conference 2024
 
Pigging Solutions in Pet Food Manufacturing
Pigging Solutions in Pet Food ManufacturingPigging Solutions in Pet Food Manufacturing
Pigging Solutions in Pet Food Manufacturing
 
SIEMENS: RAPUNZEL – A Tale About Knowledge Graph
SIEMENS: RAPUNZEL – A Tale About Knowledge GraphSIEMENS: RAPUNZEL – A Tale About Knowledge Graph
SIEMENS: RAPUNZEL – A Tale About Knowledge Graph
 
Streamlining Python Development: A Guide to a Modern Project Setup
Streamlining Python Development: A Guide to a Modern Project SetupStreamlining Python Development: A Guide to a Modern Project Setup
Streamlining Python Development: A Guide to a Modern Project Setup
 
Advanced Test Driven-Development @ php[tek] 2024
Advanced Test Driven-Development @ php[tek] 2024Advanced Test Driven-Development @ php[tek] 2024
Advanced Test Driven-Development @ php[tek] 2024
 
Tech-Forward - Achieving Business Readiness For Copilot in Microsoft 365
Tech-Forward - Achieving Business Readiness For Copilot in Microsoft 365Tech-Forward - Achieving Business Readiness For Copilot in Microsoft 365
Tech-Forward - Achieving Business Readiness For Copilot in Microsoft 365
 
Integration and Automation in Practice: CI/CD in Mule Integration and Automat...
Integration and Automation in Practice: CI/CD in Mule Integration and Automat...Integration and Automation in Practice: CI/CD in Mule Integration and Automat...
Integration and Automation in Practice: CI/CD in Mule Integration and Automat...
 
Kotlin Multiplatform & Compose Multiplatform - Starter kit for pragmatics
Kotlin Multiplatform & Compose Multiplatform - Starter kit for pragmaticsKotlin Multiplatform & Compose Multiplatform - Starter kit for pragmatics
Kotlin Multiplatform & Compose Multiplatform - Starter kit for pragmatics
 

Speed up system deployment with Dell Connected Configuration services

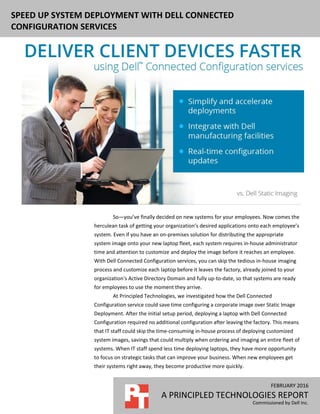
  • 1. FEBRUARY 2016 A PRINCIPLED TECHNOLOGIES REPORT Commissioned by Dell Inc. SPEED UP SYSTEM DEPLOYMENT WITH DELL CONNECTED CONFIGURATION SERVICES So—you’ve finally decided on new systems for your employees. Now comes the herculean task of getting your organization’s desired applications onto each employee’s system. Even if you have an on-premises solution for distributing the appropriate system image onto your new laptop fleet, each system requires in-house administrator time and attention to customize and deploy the image before it reaches an employee. With Dell Connected Configuration services, you can skip the tedious in-house imaging process and customize each laptop before it leaves the factory, already joined to your organization’s Active Directory Domain and fully up-to-date, so that systems are ready for employees to use the moment they arrive. At Principled Technologies, we investigated how the Dell Connected Configuration service could save time configuring a corporate image over Static Image Deployment. After the initial setup period, deploying a laptop with Dell Connected Configuration required no additional configuration after leaving the factory. This means that IT staff could skip the time-consuming in-house process of deploying customized system images, savings that could multiply when ordering and imaging an entire fleet of systems. When IT staff spend less time deploying laptops, they have more opportunity to focus on strategic tasks that can improve your business. When new employees get their systems right away, they become productive more quickly.
  • 2. A Principled Technologies report 2Speed up system deployment with Dell Connected Configuration services SYSTEMS CUSTOMIZED, DELIVERED, AND READY TO GO Deploying new PCs with approved applications has traditionally required a significant effort from IT administrators. Storing systems for future use is problematic: storage space is at a premium, you don’t know what those future employees will require, and by the time the system is needed, the applications and drivers may be out of date. Ordering new laptops as needed makes more sense, but the time it takes to ship the laptop to the IT staff first for customization, and then to deliver or ship it to a local or remote employee, can slow down your business. With Dell Connected Configuration services, IT admins can order fully configured laptops, customized for each employee, straight from the factory and ship them directly to employees without hands-on administrator customization time. This means an employee can begin using his or her system immediately because it has the latest updates, drivers, patches, and applications preloaded upon arrival. Your organization provides, owns, and controls the infrastructure so it remains secure: Dell simply hosts your server at their facility that connects to your in-house environment. Dell Connected Configuration systems arrive at your location already joined to the domain, with any required BIOS configuration changes, encryption, or partitioning that your company desires. Because new patches or updates are easily imported into Connected Configuration, they can be applied to new systems automatically before they leave the factory. Dell Static Imaging provides some automation by allowing customers to submit a customized operating system that Dell then applies onto new PCs. However, if your employees in different departments require different applications, IT admins still have to take the time to customize those systems after they ship from the factory. For updates or patches released since the initial image creation, administrators have to spend extra time integrating them into the corporate image. Even imaging these systems with an in-house SCCM environment would add additional time and steps for customization. To show how much time Dell Connected Configuration services can save, we compared the time to configure a laptop using both Dell Connected Configuration and Dell Static Imaging processes. For detailed test information, see Appendix A, Appendix B, and Appendix C. Less hands-on administrator time for deployment Consider this scenario: Your company has just hired a new employee who will work from a small remote office without a dedicated IT staff. How quickly and easily can this new employee get a laptop and start working? Your IT admin places an order for a new system, which first requires they complete the onboarding process, which means making sure the correct image goes on
  • 3. A Principled Technologies report 3Speed up system deployment with Dell Connected Configuration services the laptop before it ships out of the factory. Then, the administrator must ensure that post-factory provisioning (such as updating, application installation, and integration into the corporate domain) and distribution happens. As Figure 1 shows, Dell Connected Configuration required 86 percent less total hands-on administrator time than using Static Imaging to get an updated system in the remote employee’s hands. Figure 1: Using Dell Connected Configuration services reduced total administrator time by 86 percent compared to Static Imaging. Our team spent only 37 minutes completing Dell Connected Configuration requirements with Dell technicians prior to the laptop leaving the factory. From there, Dell shipped the completed system directly to the employee. Dell Connected Configuration required no provisioning and distribution time from the administrator, because all drivers and applications were already up to date. The Static Imaging process required far more additional time—over four hours to submit our image, complete paperwork, and then update and ship the system for employee use when it arrived at the home office. See Appendix A for the detailed breakdown of the steps we took with each deployment process. Please note that, while the administrator would not have to complete the onboarding process for each laptop, in a large order they would need to provision and ship each laptop individually. Using Dell Connected Configuration for system deployment could save plenty of administrator time and money in shipping costs for large laptop orders. Save up to two days when shipping new systems to remote employees We found that using Dell Connected Configuration services for image deployment meant that the remote employee could have their system two days sooner than using Dell Static Imaging (see Figure 2). The system shipped using Dell Connected 37 260
  • 4. A Principled Technologies report 4Speed up system deployment with Dell Connected Configuration services configuration could be overnighted straight from the factory to the remote employee, requiring only one day. The system shipped using Static Imaging would first go to the IT administrator, who would complete the post-factory system provisioning process, and then ship the system overnight to the remote employee. Figure 2: Using Dell Connected Configuration service had a system in a remote employee’s hands two days sooner than using Static Imaging. CONCLUSION The days of administrators going through lengthy system provisioning procedures to update and patch client images on new employee systems are gone. With Dell Connected Configuration service, your organization can get any number of systems delivered to your door with the latest company image loaded and customized for your employees’ needs. Dell Connected Configuration Service lets customers using management software such as SCCM integrate existing software and processes securely into the Dell manufacturing process at the factory using a secure VPN with your own network/firewall standards, so you can change configurations from your location in real time, on your time. From your headquarters, you can complete a number of tasks on new systems, including imaging, updating BIOS settings, partitioning and encrypting hard drives, and installing user-specific software. As we found, using Dell Connected Configuration Service could save significant time for a laptop deployment, allowing your administrative staff to focus on other ways to improve your business IT. Additionally, your employees can receive their new systems more quickly, potentially avoiding days of waiting for a system to be ready. These time saving advantages of Dell Connected Configuration services can mean a more efficient process for deploying new systems, and can boost productivity by putting the up-to- date tools employees need to do their jobs into their hands more quickly.
  • 5. A Principled Technologies report 5Speed up system deployment with Dell Connected Configuration services APPENDIX A – AN OUTLINE OF EACH PROCESS Figure 3 shows the software versions that were part of the images for both solutions. Dell Connected Configuration makes it easier get systems shipped with up-to- date software. Dell Connected Configuration Static Imaging Microsoft® Windows® 8.1 Updates Updates current to 02/03/2016 Updates current to 10/05/2015 Dell CAB E5550_5550-Win8.1_A05-YHV16 E5540_Win8.1_A06-WD9XN Adobe® Reader DC 11.0.00 11.0.00 Google Chrome™ 48.0.2564 46.0.2490 Java™ 8 Update 65 Update 60 Microsoft Office 365™ 15.0.4797.1002 15.0.4753.1003 Figure 3: The software versions deployed on the systems using each imaging solution. Dell Connected Configuration process Figure 4 shows the tasks that administrators had to complete during the Connected Configuration process and the time it took to complete each task. Task description Minutes Description of separated steps At Dell Factory, a Dell Technician connected the laptop to the deployment switch and worked with the PT technician to complete the operating instructions. 37 The PT Technician completed the preliminary checks to verify the environment is working. They then added the Mac address to the deployment collection and emailed Dell to begin the deployment. The PT technician validated that deployment was successful and sent an email verifying that the deployment was complete. Dell shipped the system from the Dell factory. -- The simulated remote employee received the system. -- Total onboarding time (minutes) 37 Total provisioning and distribution time for 1 system (minutes) 0 Total administrative time after placing the order 37 Time to receive system after shipping (days) 1 Figure 4: A breakdown of the administrator time and steps to complete deployment of a laptop using Dell Connected Configuration. Setup PT integrated our existing SCCM environment with Dell Connected Configuration. We prepared a PowerEdge R620 in the PT labs and created two customer router endpoints that would establish an OpenVPN connection once one of them was installed at the Dell factory. After configuring this
  • 6. A Principled Technologies report 6Speed up system deployment with Dell Connected Configuration services environment, we shipped the R620, a switch, and the customer router to Dell with directions for the technicians to install the solution. As Figure 5 shows, our SCCM primary server was able to issue commands to the remote distribution point located at the Dell partner’s facility. After Dell finished setting up the environment, we verified connectivity and sent operating instructions to the Dell project manager. See Appendix C for operating instructions. Figure 5: Our setup for testing. We then placed an order for the Dell Latitude E5550. Dell prepared the hardware on the laptop and sent it to the remote facility where our Remote Distribution point was located. The Dell technician sent our team the MAC address to identify the laptop on the network. Onboarding We added the laptop to the deployment group then we told Dell to proceed with the deployment. The Dell technician then plugged our laptop into the switch and started the laptop. Once the system had booted using a PXE-boot over its NIC, the system contacted the remote distribution point and completed our Windows 8.1 Enterprise Deployment Task Sequence. Once the task sequence completed, the Dell technician notified us. We then used Remote Desktop to connect to the laptop and
  • 7. A Principled Technologies report 7Speed up system deployment with Dell Connected Configuration services verify that all tasks completed correctly. Once verified, we sent our approval to the Dell team. Provisioning and distribution Dell then shipped the laptop, which arrived at our simulated remote office location requiring no further provisioning or distribution. Static Imaging process Figure 6 shows the tasks that administrators had to complete during the Static Imaging process and the time it took to complete each task. Task description Minutes Minutes (broken down by step) Description of separated steps The PT technician completed the required documentation and uploaded the image to Dell's servers. 167 99 The PT technician gathered and filling out system information 33 The PT technician uploaded the image via the file transfer application. 36 The PT technician completed the Export Compliance form. The PT technician spoke on the phone with the Project Manager verifying that PT was willing to move forward with the image as it was submitted. 6 The technician communicated with the project manager about the image specifications. 21 The technician communicated with the project manager verifying the image specifications. 5 The PT technician completed the Dell Online First Article Review. 30 15 Due to browser compatibility issues with the KVM Software used by Dell, the PT technician downloaded an older version of Internet Explorer 5 The PT technician followed the directions to initiate a KVM session. 6 The PT technician used the KVM session to verify that the system had been imaged correctly. 4 The PT technician sent an email to approve the image for deployment. A Dell technician applied the image to the target system. -- Dell shipped the laptop to PT labs. -- The laptop arrived at PT labs and goes through the shipping department. --
  • 8. A Principled Technologies report 8Speed up system deployment with Dell Connected Configuration services Task description Minutes Minutes (broken down by step) Description of separated steps The PT Technician received the laptop and completed onboarding procedure. 31 31 The PT technician completed the provisioning procedure. This only includes administrative time. The system arrived at remote office ready to use. -- Total onboarding time (minutes) 229 Total provisioning and distribution time for 1 system (minutes) 31 Total administrative time after placing the order (onboarding + provisioning and distribution time) 260 Time to receive system after shipping (days) 3 Figure 6: A breakdown of the administrator time and steps to complete deployment of a laptop using Static Imaging. Setup With the Static Image Configuration Process, users submit a customized image to Dell for deployment on purchased laptops. The customer contacts Dell, selects and purchases the laptop, and then the sales representative introduces a project manager. Onboarding At this point, the customer completes the appropriate forms and uploads them the Dell website. The project manager sends a series of emails outlining several tasks that require completion:  Fill out the Software Export Compliance Certification form, which states that your product complies with US export law. PT completed, scanned, and sent this form back to Dell.  Install the File Transfer Application, which would later be used to upload PT’s image.  Create a Dell account using a previously specified email.  Log into the Dell File Transfer Application. We selected our project, designated a name for the image, and uploaded our image. We then submitted a web form with specifics about our image including the OS version and a partition table. Next, the Dell engineering team worked with PT to verify our image. After deploying the image to a virtual machine, the project manager brought any concerns to the PT technical team’s attention. After PT agreed to move forward, Dell made the image available so that PT could approve the Online First Article. PT was able to log into
  • 9. A Principled Technologies report 9Speed up system deployment with Dell Connected Configuration services the deployed image remotely and verify that Dell had deployed the image correctly. After sending our approval, Dell loaded a laptop with our image and sent it to us. Provisioning and distribution Upon its arrival, we prepared the laptop for our remote employee. We unboxed the system. We then booted to Windows 8.1. Next, we joined the laptop to the domain and customized the system name. We then installed any new driver updates or Windows updates that were available. Last, we enabled Bitlocker Drive Encryption on the system. We then repackaged the system, created a shipping label, and delivered the laptop to a nearby shipping carrier, and simulated shipping it to our remote office using next-day shipping.
  • 10. A Principled Technologies report 10Speed up system deployment with Dell Connected Configuration services APPENDIX B – SYSTEM CONFIGURATION INFORMATION Figures 7 and 8 provide detailed configuration information for the test systems. System Dell PowerEdge R620 General Number of processor packages 2 Number of cores per processor 4 Number of hardware threads per core 2 System power management policy Maximum performance Power supplies Total number 2 Vendor and model number Dell 05NF18X02 Wattage of each (W) 750 Cooling fans Total number 7 Vendor and model number Dell PFC0612DE Dimensions (h × w) of each 1.5" × 1.5" Volts 12 Amps 1.68 CPU Vendor Intel® Name Xeon® Model number E5-2660v2 Socket type 2011 LGA Core frequency (GHz) 2.20 Bus frequency 8 GT/s L1 cache 8 × 32 KB Data 8 × 32 KB Instr. L2 cache 8 × 256 KB L3 cache 25 MB Platform Vendor and model number Dell PowerEdge R620 Motherboard model number 0YDJK3 BIOS name and version 2.5.2 BIOS settings Default
  • 11. A Principled Technologies report 11Speed up system deployment with Dell Connected Configuration services System Dell PowerEdge R620 Memory module(s) Total RAM in system (GB) 128 Vendor and model number Micron Technology® 36KSF1G72PZ-1G6K1 Type PC3-12800 Speed (MHz) 1600 Speed running in the system (MHz) 1600 Timing/Latency (tCL-tRCD-tRP-tRASmin) 11-11-11-28 Size (GB) 8 Number of RAM module(s) 16 Chip organization Double-sided Rank Dual Operating system Name Windows Server® 2012 R2 File system NTFS RAID controller Vendor and model number Dell PERC H710P Mini Firmware version 6.3.3.0002 Driver version Microsoft 6.3.9600.16384 Cache size (MB) 1024 Solid-state drives Vendor and model number N/A Number of drives N/A Size N/A Type N/A Hard drives Vendor and model number 2 × Seagate® ST9900805SS Number of drives 2 Size (GB) 900 RPM 10K Type SAS 6Gb/s Ethernet adapters Vendor and model number Intel Gigabit 4P I350-t Type rNDC Driver Intel 12.14.7.0 Figure 7: Detailed configuration of the test server. System Dell Latitude E5550 General Number of processor packages 1 Number of cores per processor 2 Number of hardware threads per core 2
  • 12. A Principled Technologies report 12Speed up system deployment with Dell Connected Configuration services System Dell Latitude E5550 Total number of processor threads in system 4 System power management policy Balanced Processor power-saving option Enhanced Intel SpeedStep Technology System dimensions (length x width x height) 14.8" x 10.1" x 0.9" System weight 6.5 lbs. CPU Vendor Intel Name Core i5 Model number 5300U Stepping E0/F0 Socket type Socket 1168 BGA Core frequency (GHz) 2.30 L1 cache 32 KB + 32 KB (per core) L2 cache 2 x 256 KB L3 cache 3 MB Platform Vendor Dell Motherboard model number 06DJY6 Motherboard chipset Intel Broadwell-U BIOS name and version Dell A11 (11/18/2015) Memory module(s) Vendor and model number Hyundai® HMT451S6BFR8A-PB Type PC3-12800 Speed (MHz) 1,600 Speed running in the system (MHz) 1,600 Timing/Latency (tCL-tRCD-tRP-tRASmin) 11-11-11-28 Size (MB) 4,096 Number of memory module(s) 1 Total amount of system RAM (GB) 4 Channel (single/dual) Single Hard disk Vendor and model number Western Digital® WD2500LPLX-75ZNTT0 Number of disks in system 1 Size (GB) 500 Buffer size (MB) 32 RPM 7,200 Type SATA 6.0 Gb/s Controller Intel Mobile Express Chipset SATA RAID Controller Driver Intel 13.2.0.1016 (6/20/2014) Operating system Name Windows 8.1 Enterprise 64-bit Build number 9600 Service Pack NA File system NTFS
  • 13. A Principled Technologies report 13Speed up system deployment with Dell Connected Configuration services System Dell Latitude E5550 Kernel ACPI x86-based PC Language English Microsoft DirectX version DirectX 11 Graphics Vendor and model number Intel HD Graphics 5500 Type Integrated Chipset Intel HD Graphics Family BIOS version 1039.18 Total available graphics memory (MB) 1,992 Dedicated video memory (MB) 0 System video memory (MB) 0 Shared system memory (MB) 1,992 Resolution 1,366 x 768 Driver Intel 10.18.14.4099 (1/19/2015) Sound card/subsystem Vendor and model number Realtek® High Definition Audio Driver Realtek 6.0.1.6053 (10/16/2014) Ethernet Vendor and model number Intel I1218-LM Driver Intel 12.12.80.19 (9/29/2014) Wireless Vendor and model number Intel Dual Band Wireless-AC 7265 Driver Intel 17.15.0.5 (2/22/2015) Optical drive(s) Vendor and model number NA Type NA USB ports Number 3 Type USB 3.0 Other Media Card Reader, HDMI port Monitor LCD type HD Anti-Glare LCD Screen size 15.6” Refresh rate 60 Hz Battery Type 3-cell Lithium Ion Size (length x width x height) Internal Rated capacity 38 Wh Weight 5.3 lbs Figure 8: Detailed configuration of the test server.
  • 14. A Principled Technologies report 14Speed up system deployment with Dell Connected Configuration services APPENDIX C – HOW WE TESTED Installing and configuring the infrastructure servers for Static Configuration Configuring Windows Server 2012 R2 servers After installing Windows Server 2012 R2 on our four servers and the PowerEdge R620 and installing all updates up to 08/27/2015, we configured Windows by making the following changes on each system. Configuring Windows Update 1. In the left pane of the Server Manager window, click Local Server. 2. In the main frame, next to Windows Update, click Not configured. 3. In the Windows Update window, in the main pane, click Let me choose my settings. 4. Under Important updates, select Never check for updates (not recommended), and then click OK. 5. In the left pane, click Check for updates, and install all available updates. 6. Close the Windows Update window. Configuring Windows Firewall 1. In Server Manager, click ToolsWindows Firewall with Advanced Security. 2. In the Overview section, click Windows Firewall Properties. 3. In the Domain Profile tab, for Firewall state, click Off. 4. In the Private Profile tab, for Firewall state, click Off. 5. In the Public Profile tab, for Firewall state, click Off. 6. Click OK. 7. Close the Windows Firewall Properties window. Setting up Remote Desktop 1. In the Local Server tab of the Server Manager window, next to Remote Desktop, click Disabled. 2. In the System Properties window that appears, in the Remote Desktop section, select the Allow remote connections to this computer radio button, and click OK when the warning message appears. 3. Uncheck Allow connections only from computers running Remote Desktop with Network Level Authentication (recommended), and click OK. Disabling IE Enhanced Security Configuration 1. In the Local Server tab of the Server Manager window, next to IE Enhanced Security Configuration, click On. 2. In the Internet Explorer Enhanced Security Configuration window, select the Off radio buttons for both Administrators and Users, and click OK. Installing Active Directory and DNS services 1. Power on the Domain Controller. 2. On the Domain Controller, open Windows PowerShell®. 3. Run the following command: Install-WindowsFeature RSAT-ADDS 4. When the installation is finished, close PowerShell. 5. Open Server Manager. 6. On the Welcome screen, click 2, and click Add roles and features.
  • 15. A Principled Technologies report 15Speed up system deployment with Dell Connected Configuration services 7. At the initial Before you begin screen, click Next three times. 8. At the Server Roles screen, select Active Directory Domain Services. 9. On the pop-up window, click Add Features. 10. Click Next three times. 11. Verify the desired role is being installed, and click Install. 12. Once installation has finished, close the Add roles and features wizard. 13. In Server Manager, click the flag at the top, and select the Promote this server to a domain controller link. 14. Select Add a new forest, enter a root domain name of test.local and click Next. 15. On the Domain Controller Options screen, enter a password, and click Next. 16. On the DNS Options screen, click Next. 17. On the Additional Options screen, click Next. 18. On the Paths screen, click Next. 19. On the Review Options screen, click Next. 20. On the Prerequisites screen, verify all prerequisites have passed, and click Install. 21. Once Active Directory Domain Services finishes installing, click Finish, and restart the system. Adding DHCP 1. Open Server Manager. 2. On the Welcome screen, click 2, and click Add roles and features. 3. At the initial Before you begin screen, click Next three times. 4. At the Server Roles screen, select DHCP Server. 5. On the pop-up window, click Add Features. 6. Click Next three times. 7. Verify the desired role is being installed, and click Install. 8. Once installation has finished, close the Add roles and features wizard. 9. In Server Manager, click the flag at the top of the screen and select Complete DHCP configuration. 10. In the DHCP Post-Install configuration wizard window, click Next. 11. At the Authorization Screen, click Commit. 12. At the Summary screen, click Close. 13. In Administrative Tools, open the DHCP service. 14. Expand ad.test.local, then right-click IPv4, and select New Scope. 15. In the New Scope Wizard window, click Next. 16. At the scope name screen, name the scope Laptops, and click Next. 17. In the IP Address Range, enter the desired scope settings for your network. 18. Click Next four times. 19. At the Router screen, enter the gateway address to be used by the clients, and click Next. 20. Click Next three times. 21. At the Completing the New Scope Wizard screen, click Finish. 22. We named the systems as follows:
  • 16. A Principled Technologies report 16Speed up system deployment with Dell Connected Configuration services  Domain Controller Server: ad.test.local  Certificate Authority Server: ca.test.local  SQL Server : db.test.local  SCCM Server: cm.test.local  Distribution Point (R620): dp.test.local Creating Containers and Extending the AD Schema 1. On the Domain Controller, run ADSI Edit. 2. On the toolbar, select Action  Connect to… 3. Accept the defaults by clicking OK. 4. Under Default Naming Context  DC- test, DC=local, right-click CN = System, and select New  Object… 5. Select Container, and click Next. 6. Under Value, we entered System Management. Click Next, then Finish. 7. Run Active Directory Users and Computers. 8. On the toolbar, select View, then click Advanced Features. 9. Under test.local > System, right-click System Management and choose Delegate Control. 10. Click Next. 11. Click Add. 12. Click Object Types, select Computers, and click OK. 13. Enter CM and DP as object names, and click OK. 14. Click Next. 15. Select Create a custom task to delegate, then click Next. 16. Choose This folder, existing objects… and click Next. 17. Click Full Control, and click Next. 18. Click Finish. 19. Attach the SCCM installation media to the Domain Controller. 20. From the installation media, navigate to SMSSETUPBINX64. Right-click extadsch and run as administrator. 21. Review extadsch.log at the root of the system drive to confirm the operation was successful. Creating Active Directory accounts for System Center Configuration Manager 1. On the Domain Controller, open Active Directory Administrative Center. 2. Under test (local), in the Tasks panel, click New, then select Group from the drop-down menu. 3. In the Create Group window, for Group name, use Kerberos Admins; for Group type, use security; and for Group scope, select Global. 4. Add Kerberos Admins as a member of the Domain Admins group. 5. Add the computer accounts of the SCCM server and Distribution Point server to the Kerberos Admins security group, and click OK. 6. Create an Organizational Unit for AMT managed systems called AMT Management. 7. Create a security group called AMT Control. 8. Add the Kerberos Admins group to the AMT Control security group.
  • 17. A Principled Technologies report 17Speed up system deployment with Dell Connected Configuration services Configure the Active Directory 1. On the Domain Controller server, create a user called CM_JD and a second user called CM_NAA. 2. Download the configure permission in Active Directory for Windows deployment account from https://gallery.technet.microsoft.com/Configure-permissions-in-2326651a. Move the script to C:SetupScripts on the Domain Controller. 3. Run the following scripts from PowerShell as administrator: Set-ExecutionPolicy -ExecutionPolicy RemoteSigned –Force Set-Location C:SetupScripts .Set-OUPermissions.ps1 -Account CM_JD -TargetOU "OU=Workstations,OU=Computers,OU=test.local" Configure the Network Access Account 1. On the Configuration Manager server, in the Configuration Manager console, under the Administration tab, expand the Site Configuration Tree. Click Sites. 2. Right-click the PTT site, and select Properties. 3. In the Software Distribution Component Properties window, select the Network Access Account. Select Specify the account that accesses network locations. Click the orange star to add a new Network Access Account. 4. For user name, browse to find test.localCM_NAA, enter the Password, and click Verify. For Network shar,e enter ADsysvol and click Test Connection. If successful click OK, then OK again. Installing SQL 2012 SP1 1. Log into the Database server as domainadministrator. 2. Start the Add Features Wizard. 3. On the Select Server Roles screen, select .Net Framework 3.5. 4. On the popup, click Add Required Role Services. 5. Agree to the remaining defaults, and click Install. 6. Allow the installation to finish, and close. 7. Attach the installation media for SQL 2012, and run the setup.exe file. 8. In the SQL Server Installation Window, select Installation from the menu on the left, and then select New SQL Server stand-alone installation or add features to an existing installation. 9. In the SQL Server 2012 Setup Window, allow it to check prerequisites. When this is process is complete, click Next. 10. In the SQL Server 2012 Setup Window, at the Product Updates screen, click Next. 11. At the Install Setup Files screen, allow the wizard to install the files. 12. At the Setup Support rules screen, click Next. 13. At the Product Key screen, enter a valid product key, and click Next. 14. At the License Terms screen, accept the license terms, and click Next. 15. At the Setup Role screen, select SQL Server Feature Installation, and click Next. 16. At the Feature Selection screen, under Instances Features, select Database Engine Services with Full-Text and Semantic Extractions for Search and Data Quality Services, Reporting Services - Native, Management Tools - Basic, Management Tools - Complete, and SQL Client Connectivity SDK. Click Next. 17. Allow the Installation Rules check to run, and click Next.
  • 18. A Principled Technologies report 18Speed up system deployment with Dell Connected Configuration services 18. At the Instance Configuration screen, select Default Instance and leave the default Instance ID. Change the root directory for the installation to the attached 500 GB virtual hard drive. 19. At the Disk Space Requirements screen, click Next. 20. At the Server Configuration screen, set Startup Type for Server Agent, SQL Server Database Engine, and Server Browser as Automatic, and click Next. 21. At the Database Engine Configuration screen, select Mixed Mode. 22. Enter a password for the system administrator (sa) account. 23. Click Add Current user. 24. Click Next four times. 25. Verify that the Summary is correct, and click Install. 26. Click Finish when prompted. 27. Install SQL Server 2012 SP1 and CU16 from the following website: https://support.microsoft.com/en- us/kb/3052476. When the installation is finished, restart the server. 28. Open Microsoft SQL Server Management Studio. 29. Sign into your SQL database. 30. Right-click your SQL host, and select Properties. 31. Select the Memory page. 32. Change maximum server memory to 16384. Click OK. 33. In SQL Server Configuration Manager, expand the SQL Server Network Configuration tree, and double-click Protocols for MSQLSERVER. 34. Right-click Named Pipes, and click Enable. 35. Do the same for TCP/IP. 36. Click SQL Server Services in the tree. 37. Right-click SQL Server (Instance Name). 38. On the Log On tab, change the Account Name to testadministrator. 39. A popup will request to restart the service. Select Yes. Post Active Directory Deployment Configuration 1. On the Certificate Authority, and Database servers, Configuration Manager, and Distribution Point servers, run lusrmgr.msc. 2. Select Groups. 3. Right-click Administrators, and click Properties. 4. Click Add. 5. Select Object Types, check the box for Computers, and click OK. 6. Add the computer name for the management server. Installing the Certificate Authority 1. On the Certificate Authority Server, log in using the test.localadministrator account. 2. Launch Server Manager. 3. Click Add roles and features.
  • 19. A Principled Technologies report 19Speed up system deployment with Dell Connected Configuration services 4. In the Add Roles and Features Wizard, click Next three times. 5. Select Active Directory Certificate Services. On the pop-up click Add Features. Click Next. 6. Click Next twice. 7. Click Install. When complete click Close. 8. In Server Manager, click the flag and select the Post-deployment Configuration task. 9. In the AD CS Configuration Window, click Next. 10. Check the box for Certification Authority, and click Next. 11. Select Enterprise for the setup type, and click Next. 12. Choose Root CA for the CA type, and click Next. 13. Select Create a New Private Key, and click Next. 14. Accept all remaining defaults, and click Next through the remaining screens. 15. When prompted to begin configuration, click Configure. 16. To exit the wizard, click Close. Restart the server before continuing to the next steps. Installing required Windows features and roles for System Center Configuration Manager 1. Sign into the SCCM server using the domainadministrator account. 2. Download the Windows Assessment and Deployment Kit for Windows 8.1 from the following website: http://www.microsoft.com/en-us/download/details.aspx?id=39982 3. Run adksetup.exe. 4. Select Install the Assessment and Deployment Kit to this computer, and choose an installation path. Click Next. 5. When prompted to join the Customer Experience Improvement Program (CEIP), select No. 6. Accept the license agreement. 7. Select Deployment tools, Windows Pre-installation Environment features, and User State Migration Tool. Click Install. 8. Click Close when the install finishes. 9. Run the following commands in Windows PowerShell with administrator privileges: Get-Module servermanager Install-WindowsFeature Web-Windows-Auth Install-WindowsFeature Web-ISAPI-Ext Install-WindowsFeature Web-Metabase Install-WindowsFeature Web-WMI Install-WindowsFeature Web-DAV-Publishing Install-WindowsFeature BITS Install-WindowsFeature RDC Install-WindowsFeature NET-Framework-Features -source yournetworkyoursharesxs Install-WindowsFeature Web-Asp-Net Install-WindowsFeature Web-Asp-Net45 Install-WindowsFeature NET-HTTP-Activation Install-WindowsFeature NET-Non-HTTP-Activ 10. Run Windows Update, and install updates. 11. Restart the server.
  • 20. A Principled Technologies report 20Speed up system deployment with Dell Connected Configuration services Configuring the required role for the System Center Configuration Manager 1. Sign into the SCCM server using the domainadministrator account. 2. Register ASP.NET with IIS by running the following command from command prompt with administrator privileges: C:WindowsMicrosoft.NETFramework64v4.0.30319aspnet_regiis.exe –r 3. From Administrative Tools, launch Internet Information Services (IIS) Manager. 4. In the left pane, expand the server name, Sites, and select Default Web Site. 5. In the central pane, open WebDAV Authoring Rules. 6. In the right pane, click Enable WebDAV. 7. In the right pane, click Add Authoring Rule. 8. In the Add Authoring Rule window, select All content, All users, and Read. Click OK. 9. In the IIS Manager console in the right pane, click WebDAV Settings. 10. In the central pane for Allow anonymous property queries, select True. 11. For Allow Custom Properties, select False. 12. For Allow property queries with Infinite Depth, select True. 13. For Allow hidden files to be Listed, select True. Then in the right pane, click Apply. Configuring ISS 1. Sign into the SCCM server using the domainadministrator account. 2. In the IIS Manager, select Default Web Site from the tree in the left pane. 3. In the right pane, select Bindings… 4. In the Site Bindings Window, click Add… 5. In the Add Site Binding Window, for Type select HTTPS, 6. For SSL certificate, select the certificate created from the Web Server Certificate Template. 7. Click OK. Installing WSUS on the Configuration Manager Server 1. Sign into the SCCM server using the test.localadministrator account. 2. Open Server Manager. 3. In the Server Manager window, select Add roles and Features. 4. In the Add Roles and Features Wizard, click Next three times. 5. On the Server Roles screen, select Windows Service Update Services. Click Add Features when requested, and click Next four times. 6. On the Content location selection screen, enter a location to store the updates. We used C:WSUS. 7. On the Confirmation screen, click Install. Once installation completes, close the Wizard. 8. In Server Manager, click the Flag at the top right and select Post-Deployment Configuration. Creating certificate templates for OOB management 1. Sign into the Certificate Authority server using the test.localadministrator account. 2. Open the Certification Authority. 3. Right-click the test-CA-CA, and click Properties. 4. On the General tab, click View Certificate.
  • 21. A Principled Technologies report 21Speed up system deployment with Dell Connected Configuration services 5. On the Details tab, scroll to and select Thumbprint. Copy the 40-character code displayed in the details. You will add this information to the AMT BIOS later. 6. Click Ok to close the Certificate Authority properties. 7. Expand the Certification Authority, and select Certificate Templates. 8. Right-click Certificate Templates, and select Manage. 9. Locate Web Server in the list of available certificate templates. Right-click the template, and select Duplicate Template. 10. Select Windows 2003. 11. In the General tab, change the template name to AMT Provisioning. 12. On the Subject Name tab, select Build from this Active Directory Information. Select Common Name, and choose the option UPN. 13. On the Security tab, add Kerberos Admins. Add the Enroll permission for the security group. Ensure Domain Admins and Enterprise Admins have Enroll permissions. 14. On the Extensions tab, select Application Policies, and click Edit. 15. Click Add. Click New. Type AMT Provisioning for the name, and 2.16.840.1.113741.1.2.3 as the Object Identifier. Click OK. 16. Ensure AMT Provisioning and Server Authentication are listed, and click OK. 17. Click OK to close the template properties. 18. Right-click the web server template, and select Duplicate Template. 19. Select Windows 2003, and click OK. 20. On the General tab, change the template name to AMT Web Server Certificate. 21. On the General tab, choose the option Publish Certificate in Active Directory. 22. On the Subject Name tab, select Build from this Active Directory Information. Select Common Name, and choose the option UPN. 23. On the Security tab, ensure Domain Admins and Enterprise Admins have Enroll permissions. 24. Click OK to close the template properties. 25. In Certification Authority, expand test-CA-CA. 26. Right-click the Certificate Templates and select NewCertificate Template to Issue. 27. Select the AMT Provisioning Template. 28. Click OK. 29. Repeat steps 26 through 28 for the AMT Web Server Certificate Template. 30. Log into the management server as domainadministrator. 31. Click StartRun. Type mmc and press Enter. 32. In the mmc console, click FileAdd/Remove Snap-in… 33. Select Certificates, and click Add. Select Computer account. Click Next. 34. Select Local computer, and click Finish. 35. Click OK. 36. Expand CertificatesPersonal.
  • 22. A Principled Technologies report 22Speed up system deployment with Dell Connected Configuration services 37. In the right panel, click More ActionsAll TasksRequest a new certificate… 38. Click Next. 39. Accept the defaults, and click Next. 40. Select the AMT Provisioning and AMT Web Server Certificate. Click Enroll. 41. Repeat steps 30 through 40 on the Dell PowerEdge R620. Installing System Center Configuration Manager 2012 SP1 1. Sign into the SCCM server using the test.localadministrator account. 2. Attach the SCCM 2012 SP1 Installation media to the management server. 3. Open splash.hta. 4. Click Install. 5. Read the Before You Begin section, click Next. 6. Choose Install a primary site. Do not choose the typical options. 7. Enter the product key. 8. Check the box to accept the License Terms, and click Next. 9. Accept the license agreements, and click Next. 10. Enter a path for the prerequisite file downloads. We used C:Downloads 11. Select a language, and click Next for both server and client. 12. Enter a site code for the primary site. We used PTT. 13. Enter a Site Name. We used PT Test. 14. Choose an install path. We accepted the default install path. 15. Ensure that the console will be installed, and click Next. 16. Install as a primary stand-alone site. 17. Enter the SQL server name, and click Next. 18. Leave the default Database information, and click Next again. 19. Accept the default SMS provider, and click Next. 20. Select the option to Configure the communication method on each site system role. 21. Select Clients will use HTTPS when they have a valid PKI certificate and HTTPS-enabled site roles are available, and click Next. 22. Select HTTP for Management Point and Distribution point, and click Next. 23. Select I don’t want to join the program at this time, and click Next. 24. Click Next. 25. Run the prerequisites check, and resolve any issues displayed. 26. Click Begin Install, and click Close when the installation is complete. 27. Download and install the installation for System Center R2 SP1 Configuration Manager from the following website: support.microsoft.com/kb/2922875/en-us 28. Download and install the cumulative update.
  • 23. A Principled Technologies report 23Speed up system deployment with Dell Connected Configuration services Configuring SCCM for Connected Configuration Deploying Site Roles to the Distribution Point 1. Sign into the SCCM server using the test.localadministrator account. 2. Open System Center 2012 R2 Configuration Manager as an administrator. 3. From the left panel, select the Administration tab. 4. Expand the Site Configuration Tree, and select Servers and Site Systems. 5. Right-click the central panel, and click Create Site System Server. 6. In the Create Site System Server Wizard, for Name, type the FQDN of your Distribution Point server. We used DP.test.local. 7. At the Proxy screen, click Next. 8. At the System Role Selection screen, select the following roles:  Distribution Point  Management Point  Software Update Point 9. At the Distribution Point screen, select Install and configure IIS if required by Configuration Manager and Enable, and configure BranchCache for this distribution point. Select HTTP. Click Create a Self-Signed certificate. Click Next. 10. At the Drive Settings screen, click Next. 11. At the Pull Distribution Point Screen, click Next. 12. At the PXE Settings screen, check the box for Enable PXE support for clients. Click Yes on the Review Required Ports for PXE popup. Select Allow this distribution point to respond to incoming PXE request and Enable unknown computer support. 13. At the Multicast screen, check the box for enable multicast to simultaneously send data to multiple clients. Click Next. 14. At the Content Validation screen, click Next. 15. At the Boundary Groups, click Create… 16. On the Create Boundary Group, for Name, we used Dell Factory. Check the box for Use this boundary group for site assignment. Click OK. 17. Click Next. 18. On the Management point screen, select HTTP, and click Next. 19. On the Management Point Database screen, leave the defaults, and click Next. 20. On the Software Update Point screen, select WSUS is configure to use ports 8530 and 8531 for client communications, and click Next. 21. On the Proxy and Account Settings screen, leave the defaults, and click Next. 22. On the Summary screen, click Next and allow the installation to complete. 23. Once the installation completes, System Center will deploy the software to your Distribution Point server. After waiting, check the Site Status and Component Status options in the Monitoring tab in Configuration Manager Console.
  • 24. A Principled Technologies report 24Speed up system deployment with Dell Connected Configuration services 24. On the Administration tab, under Overview, Hierarchy Configuration, right-click Boundaries to create a new boundary. 25. In the Create Boundary window, for type, select IP address range. Select a range that matches those assigned by DHCP. Creating the Deployment Collection 1. On the Configuration Manager server, in the Configuration Manager console, under the Asset and Compliance workspace, right-click Device Collection, and select Create Device Collection. 2. On the General screen, for name, type Dell Deployment Systems. 3. On the Limiting Collection screen, select All Desktop and Server Clients. Click Next. 4. On the Membership Rules screen, click Next. 5. Once created, click Close. Building and capturing the Windows 8.1 Enterprise Image Creating the Deployment Share 1. On the SCCM server, open Deployment Workbench. 2. Under Deployment Workbench, right-click Deployment Shares, and select New Deployment. 3. In the New Deployment Share Wizard, select a Deployment share path. 4. On the Share screen, enter a share name. We used PTT Share. 5. On the Descriptive Name screen, click Next. 6. On the Options screen, uncheck all boxes. 7. On the Summary screen, click Next. 8. On the Confirmation screen, click Finish. Importing the Operating System Image 1. Mount the en_windows_8.1_enterprise_with_update_x64_dvd_6054382.iso to the Configuration Manager server. 2. From the DVD copy all files onto the Configuration Manager server. We stored ours at C:SourcesOSDWindows8.1Ent 3. Under the PTT Share Deployment share, right-click Operating Systems, and select Import Operating System Wizard. 4. On the Import Operating System Wizard, select Full set of source files, and click Next. 5. On the Source screen, for Source directory select the folder where you stored the Windows 8.1 Enterprise folders. We used C:SourcesOSDWindows8.1Ent. Click Next. 6. On the Destination screen, click Next. 7. On the Summary screen, click Next. 8. On the Confirmation screen, click Finish. Creating the Build and Capture Task Sequence 1. Under the PTT Share Deployment share, right-click Task Sequences, and select New Task Sequence. 2. In the New Task Sequence Wizard, enter a Task Sequence ID and Task Sequence name. We used PTT001 and Windows 8.1 Enterprise Build and Capture respectively.
  • 25. A Principled Technologies report 25Speed up system deployment with Dell Connected Configuration services 3. On the Select Template screen, select Standard Client Task Sequence from the radio menu, and click Next. 4. On the Select OS screen, select the image for Windows 8.1 Enterprise that you added in the previous section. 5. On the Specify Product Key screen, click Next. 6. On the OS Settings screen, for Full Name: type PTTuser and for Organization: type PTT. Click Next. 7. On the Admin Password screen, enter Password1, then click Next. 8. On the Summary screen, click Next. 9. On the Confirmation screen, click Finish. Creating the Build and Capture Task Sequence 1. Right-click PTT Share, and select Properties. 2. On the PTT Share Properties Window, select the Rules tab. 3. Replace the current Rules with the following: [Settings] Priority=Default [Default] _SMSTSORGNAME=PTTShare UserDataLocation=NONE DoCapture=YES OSInstall=Y AdminPassword=Password1 TimeZoneName=Eastern Standard Time JoinWorkgroup=WORKGROUP HideShell=YES FinishAction=SHUTDOWN DoNotCreateExtraPartition=YES WSUSServer=http://cm.test.local:8530 ApplyGPOPack=NO SLSHARE=CM2Logs$ SkipAdminPassword=YES SkipProductKey=YES SkipComputerName=YES SkipDomainMembership=YES SkipUserData=YES SkipLocaleSelection=YES SkipTaskSequence=NO SkipTimeZone=YES SkipApplications=YES SkipBitLocker=YES SkipSummary=YES SkipRoles=YES SkipCapture=NO SkipFinalSummary=YES 4. Click Edit Bootstrap.ini. 5. Replace the text in Bootstrap.ini with the following: [Settings] Priority=Default [Default] DeployRoot=CMPTTShare$ UserDomain=test.local UserID=administrator UserPassword=Password1
  • 26. A Principled Technologies report 26Speed up system deployment with Dell Connected Configuration services SkipBDDWelcome=YES 6. Save and exit the file. 7. Click OK. 8. Under Task Sequences, Windows 8.1, right-click the Windows 8.1 Enterprise Build task Sequence, and select Properties. 9. In the Properties Window, on the OS Info tab, click Edit Unattend.xml. 10. Once the process completes, in the Windows System Image Manager, browse to the following location: Unattend > Components > 7 oobeSystem > OOBE 11. In the OOBE Properties menu, change the settings to match the following: HideEULAPage: true NetworkLocation: Work ProtectYourPC: 1 HideLocalAccountScreen: true HideOnlineAccountScreens: true HideWirelessSetupInOOBE: true 12. Click File, Save Answer File, and Close the Window. 13. Right-click PTT Share, and select Update Deployment Share. 14. Select Completely regenerate the boot images. 15. Once complete, Navigate to the Deployment Share in File Explorer. 16. In the boot folder, using PTT Build Lab x86 create an installation disk using the .iso. 17. Insert the disk into a Latitude E5xxx laptop, and boot to the disk. 18. Once the Build and Capture completes, the Image will be available at PTTShareCaptures. We named our image Windows8.1Entx64.wim and moved it to CMSourcesOSD. Creating the OS Deployment Task Sequence Installing the Dell Command Suite 1. Download Dell Command | Configure from http://en.community.dell.com/techcenter/enterprise- client/w/wiki/7532.dell-command-configure. 2. Run Systems-Management_Application_54W6D_WN32_3.1.0.250_A00.exe and install using all defaults. 3. Download the Dell Command | Integration Suite from http://downloads.dell.com/FOLDER02502775M/2/DCIS_273_ZPE.exe 4. Run DCIS_273_ZPE.exe and accept all defaults to extract the installation files. 5. Run DCIS_Setup_4_0_0.exe and accept all defaults to install the Dell Command |Integration Suite 6. Restart the Configuration Manager server. Importing Dell Drivers 1. Download the E5550 Windows 8.1 Driver CAB from http://downloads.dell.com/FOLDER03481251M/1/E5550_5550-Win8.1-A05-YHV16.CAB 2. On the Configuration Manager Server, in the Software Library under Operating Systems, right-click Driver Packages, select Dell Command | Integration Suite, Import Dell Command | Deploy (System) Driver Library. 3. On the Dell Command | Deploy (System) Driver Library Import Wizard, browse to the location of and select E5550_5550-Win8.1-A05-YHV16. Click OK.
  • 27. A Principled Technologies report 27Speed up system deployment with Dell Connected Configuration services Importing the OS image into Configuration Manager 1. In the Configuration Manager Console, in the Software Library workspace, under Operating Systems, right-click Operating System Images, and select Add Operating System Image. 2. Navigate to CMSourcesOSD and select Windows8.1Entx64.wim. Click Next. 3. On the General Screen, for name, type E5550-Win8-1entx64. Click Next. 4. On the Summary Screen, click Next. 5. Once complete, click Close. Adding Office 2013 Installation to the Software Library 1. Navigate to http://www.microsoft.com/en-in/download/confirmation.aspx?id=35554 and download both the 32-bit and 64-bit version of the Office 2013 Administrative Template files (ADMX/ADML) and Office Customization Tool. 2. Run the executable for the 32-bit installation. 3. Accept the Microsoft Software License Terms, and click Continue. 4. Select a location to extract the files, and click Next. 5. Repeat steps 2 through 4 for the 64-bit installation. 6. Download the en_office_professional_plus_2013_with_sp1_x86_and_x64_dvd.iso for version 15.0.4797.1002. 7. Copy the files from the CD onto the Configuration Manager server. 8. From the extracted Office Customization Tool x86 folder, copy the admin folder, admx folder, and office2013grouppolicyandoctsettings.xlsx file into the x86 folder. 9. Repeat step 7 for the x64 folder. 10. Open a command prompt as administrator. 11. Navigate to the top of the 2013 Office Folder. 12. Run the following command: 13. Setup.exe /admin 14. In the Select Product Window, select Microsoft Office Professional Plus 2013 (32-bit), and click OK. 15. In the Microsoft Office Customization Tool, under Setup, under Install location and organization name, enter your organization name. 16. In the Microsoft Office Customization Tool window, under Setup, select Install location and organization name, enter your organization name. 17. Under Licensing and user interface, select Enter another product key, then enter your product key. Check the box for I accept the terms in the License Agreement For Display level, select Default. Then uncheck Completion Notice and check Suppress modal and No cancel. 18. Under Modify Setup Properties, click Add. 19. In the Add/Modify Property Value window, for Name enter SETUP_REBOOT and for Value enter Never. Click OK. 20. Under Features, under Modify user settings, in the tree in the center panel, under Microsoft Office 2013, under Privacy, select Trust Center. 21. Double click Disable Opt-in Wizard.
  • 28. A Principled Technologies report 28Speed up system deployment with Dell Connected Configuration services 22. In the Disable Opt-in Wizard on first run Properties window, select Enabled, and click OK. 23. Under the File menu, select Save As… 24. Save the file under C:SourcesSoftwareOffice2013 25. In the Configuration Manager Console, in the Software Library workspace, under Application Management, right-click Packages, and select Create Package. 26. In the Create Package and Program Wizard, on the Package screen, for Name enter Office 2013. Check the box for This package contains source files. Click Browse, and select the Network location for CMSourcesSoftwareOffice2013. Click Next. 27. On the Program Type screen, select Standard program. 28. On the Standard Program screen, enter the information as listed for the following fields:  Name: Office 2013  Command Line: setup.exe  Run: Normal  Program can run: Whether or not a user is logged on.  Run mode: Run with administrative rights  Drive mode: Runs with UNC name. 29. On the Requirements screen, click Next. 30. On the Summary screen, click Next. 31. On the Completion screen, click Close. Adding Adobe Acrobat 2013 to the Software Library 1. Download Adobe Acrobat Reader DC from ftp://ftp.adobe.com/pub/adobe/reader/win/Acrobat2015/1500630033/AcroRdr20151500630033_MUI.exe 2. Extract the file to CMSourcesSoftwareAdobe 3. Download and install the Customization Wizard from http://ardownload.adobe.com/pub/adobe/acrobat/win/11.x/11.0.03/misc/CustWiz11003_en_US.exe 4. Start the Adobe Customization Wizard XI. 5. In the Adobe Customization Wizard, click File, then Open Package. 6. Browse to CMSourcesSoftwareAdobe and select AcroRead.msi. 7. On the Personalization Options screen, check the box for Suppress display of End User License Agreement (EULA). 8. On the Installation Options page, Select Make Reader the default PDF viewer. 9. For Run Installation, select Silently (no interface) and select Suppress reboot. 10. In the Configuration Manager Console, in the Software Library workspace, under Application Management, right-click Packages and select Create Package. 11. On the Shortcuts page, right-click the desktop shortcut, and select Remove. 12. On the Webmail Profiles page, check the box for Prevent end user from configuring WebMail profile. 13. On the Online Services and Features page, select disable Product Update, and for Load trusted root certificates from Adobe, select Enable & Install Silently.
  • 29. A Principled Technologies report 29Speed up system deployment with Dell Connected Configuration services 14. Click the Transform menu, and select Generate Transform. 15. Save the file as AdobeRead.mst in both CMSourcesSoftwareAdobe and CMSourcesSoftwareAdobeTransforms 16. In the Create Package and Program Wizard, on the Package screen, for Name enter Adobe Reader. Check the box for This package contains source files. Click browse and select the Network location for CMSourcesSoftwareAdobe. Click Next. 17. On the Program Type screen, select Standard program. 18. On the Standard Program screen, enter the information as listed for the following fields:  Name: Adobe Reader  Command Line: setup.exe  Run: Normal  Program can run: Whether or not a user is logged on.  Run mode: Run with administrative rights  Drive mode: Runs with UNC name. 19. On the Requirements screen, click Next. 20. On the Summary screen, click Next. 21. On the Completion screen, click Close. Adding Chrome to the Software Library 1. Download the Chrome MSI from http://www.google.de/intl/en/chrome/business/browser/admin/. 2. Move the Windows Installer to CMSourcesSoftwareChrome 3. Open Notepad. 4. Enter the following: { "homepage" : "http://www.google.com.au", "homepage_is_newtabpage" : false, "browser" : { "show_home_button" : true, "check_default_browser" : false, "window_placement": { "bottom": 1000, "left": 10, "maximized": false, "right": 904, "top": 10, "work_area_bottom": 1010, "work_area_left": 0, "work_area_right": 1680, "work_area_top": 0 } }, "bookmark_bar" : { "show_on_all_tabs" : true }, "distribution" : { "skip_first_run_ui" : true, "show_welcome_page" : false,
  • 30. A Principled Technologies report 30Speed up system deployment with Dell Connected Configuration services "import_search_engine" : false, "import_history" : false, "create_all_shortcuts" : true, "do_not_launch_chrome" : true, "make_chrome_default" : false } } 5. Save the file as CMSourcesSoftwareChromemaster_preferences. 6. Open Notepad. 7. Enter the following: msiexec /qn /norestart /i "%~dp0GoogleChromeStandaloneEnterprise.msi" if exist "c:Program FilesGoogleChromeApplicationmaster_preferences" copy /y "%~dp0master_preferences" "C:Program FilesGoogleChromeApplicationmaster_preferences" if exist "c:Program Files (x86)GoogleChromeApplicationmaster_preferences" copy /y "%~dp0master_preferences" "C:Program Files (x86)GoogleChromeApplicationmaster_preferences" reg add HKLMSoftwarePoliciesGoogleUpdate /f /v AutoUpdateCheckPeriodMinutes /d 0 sc stop gupdate sc config gupdate start= disabled 8. Save the file as CMSourcesSoftwareChromeinstall.cmd 9. In the Configuration Manager Console, in the Software Library workspace, under Application Management, right-click Packages, and select Create Package. 10. In the Create Package and Program Wizard, on the Package screen, for Name enter Chrome. Check the box for This package contains source files. Click Browse, and select the Network location for CMSourcesSoftwareChrome. Click Next. 11. On the Program Type screen, select Standard program. 12. On the Standard Program screen, enter the information as listed for the following fields:  Name: Chrome  Command Line: install.cmd  Run: Normal  Program can run: Whether or not a user is logged on.  Drive mode: Runs with UNC name. 13. On the Requirements screen, click Next. 14. On the Summary screen, click Next. 15. On the Completion screen, click Close. Adding Java to the Software Library 1. Download the Java Offline 64 bit from http://javadl.sun.com/webapps/download/AutoDL?BundleId=113219. 2. Move the jre-8u65-windows-x64.exe to CM2SourcesSoftwareJava 3. Launch the installer. 4. Browse to C:Usersadministrator.TESTAppDataLocalLowOracleJavajre1.8.0_65_x64 5. Copy jre1.8.0_65.msi to CM2SourcesSoftwareJava 6. Open Notepad.
  • 31. A Principled Technologies report 31Speed up system deployment with Dell Connected Configuration services 7. Paste the following into the editor: msiexec /i jre1.8.0_25.msi JU=0 JAVAUPDATE=0 AUTOUPDATECHECK=0 RebootYesNo=No WEB_JAVA=1 /q 8. Save the file as installjava.cmd. 9. In the Configuration Manager Console, in the Software Library workspace, under Application Management, right-click Packages, and select Create Package. 10. In the Create Package and Program Wizard, on the Package screen, for Name enter Java 8. Check the box for This package contains source files. Click browse and select the Network location for jre1.8.0_65.msi. Click Next. 11. On the Program Type screen, select Standard program. 12. On the Standard Program screen, enter the information as listed for the following fields:  Name: Java 8  Command Line: installjava.cmd  Run: Normal  Program can run: Whether or not a user is logged on.  Drive mode: Runs with UNC name. 13. On the Requirements screen, click Next. 14. On the Summary screen, click Next. 15. On the Completion screen, click Close. Creating a Windows Settings File to Change Firewall States and Remote Desktop Settings 1. In CM2SourcesSettings create a file named Settings.bat containing the following ;::Bypass PowerShell's initial Restricted Execution Policy ;@ECHO OFF ;FINDSTR -rbv ; %0 | PowerShell -ExecutionPolicy Unrestricted -C - ;GOTO :FINISH NETSH ADVFIREWALL SET ALLPROFILES STATE OFF Set-ItemProperty -Path "HKLM:SYSTEMCurrentControlSetControlTerminal Server" -Name fDenyTSConnections -Value 0 Set-ItemProperty -Path "HKLM:SYSTEMCurrentControlSetControlTerminal ServerWinStationsRDP-Tcp" -Name UserAuthentication -Value 0 ;:FINISH 2. In the Configuration Manager Console, in the Software Library workspace, under Application Management, right-click Packages, and select Create Package. 3. In the Create Package and Program Wizard, on the Package screen, for Name enter Change Windows Settings. Check the box for This package contains source files. Click browse and select the Network location Settings.bat. Click Next. 4. On the Program Type screen, select Standard program. 5. On the Standard Program screen, enter the information as listed for the following fields:  Name: Firewall and Remote Desktop  Command Line: Settings.bat
  • 32. A Principled Technologies report 32Speed up system deployment with Dell Connected Configuration services  Run: Normal  Program can run: Whether or not a user is logged on.  Drive mode: Runs with UNC name. 6. On the Requirements screen, click Next. 7. On the Summary screen, click Next. 8. On the Completion screen, click Close. Creating the Dell TPM Activation files using Dell Command | Configure 1. On the Configuration Manager server, open the Dell Command | Configure Wizard. 2. In the Create Multiplatform Package tab, for view select Advanced. 3. Click Edit. 4. Find –setuppwd. Set the value to a password. We used Password1. 5. Check the box for Apply Settings. 6. Click the Export .EXE box. 7. Click OK. 8. Save the file as CM2SourcesSettingsCTTKCTTK-1.exe 9. In the Create Multiplatform Package tab, for view select Advanced. 10. Click Edit. 11. Find –tpm. Check the box for Apply Settings. 12. Click the Export .EXE box. 13. For password, enter the password used for CTTK-1. We used Password1. 14. Click OK. 15. Save the file as CM2SourcesSettingsCTTKCTTK-2.exe 16. In the Create Multiplatform Package tab, for view select Advanced. 17. Click Edit. 18. Find –tpmactivation. Check the box for Apply Settings. 19. Click the Export .EXE box. 20. For password, enter the password used for CTTK-1. We used Password1. 21. Click OK. 22. Save the file as CM2SourcesSettingsCTTKCTTK-3.exe 23. In the Configuration Manager Console, in the Software Library workspace, under Application Management, right-click Packages, and select Create Package. 24. In the Create Package and Program Wizard, on the Package screen, for Name enter CTTK – Create System Password. Check the box for This package contains source files. Click Browse, and select the Network location for CMSourcesCTTK. Click Next. 25. On the Program Type screen, select Standard program. 26. On the Standard Program screen, enter the information as listed for the following fields:  Name: Change Password  Command Line: CTTK-1.exe
  • 33. A Principled Technologies report 33Speed up system deployment with Dell Connected Configuration services  Run: Normal  Program can run: Whether or not a user is logged on.  Drive mode: Runs with UNC name. 27. On the Requirements screen, click Next. 28. On the Summary screen, click Next. 29. On the Completion screen, click Close. 30. Repeat steps 23 through 29 for CTTK-2 with the following changes:  Package Name: CTTK – Enable TPM  Package: CTTK-2  Program: Enable TPM 31. Repeat steps 23 through 29 for CTTK-3 with the following changes:  Package Name: CTTK – Activate TPM  Package: CTTK-3  Program: Activate TPM Creating the Task Sequence 1. On the Configuration Manager server, in the Configuration Manager console, under the Software Library workspace. Right-click Task Sequences, and select Create a Task Sequence. 2. In the Create Task Sequence Wizard, on the Create a new task sequence screen, select Install an existing image package. Click Next. 3. On the Task Sequence Information screen, give a descriptive name for the Task sequence Name. We used Windows 8.1 Ent E5550 Deployment. 4. Click Boot Image, and select the Boot image (x64) image. Click Next. 5. On the Install Windows screen, for Image package, click Browse. 6. Select E5550-Win8-1entx64, and click OK. 7. Under Product key, enter the Windows 8.1 Enterprise Product Key. 8. Select Enable the account and specify the local administrator password. Enter a Password, and click Next. 9. On the Configure Network screen, select Join a domain. Then click Browse. 10. In the Select a Domain window, test.local should automatically populate. Select it, and click OK. 11. Click Browse for Domain OU. 12. Select the computers OU, and click OK. 13. For Specify the account that has permission to join the domain, click Set. 14. On the Windows User Account screen, for User name use TESTCM_JD. Enter and confirm the password for this account, and click OK. 15. Click Next. 16. On the Install Configuration Manager client, click Next. 17. On the Configure state migration screen, uncheck the three text boxes. Click Next. 18. On the Include Updates screen, select All software updates. Click Next. 19. On the Install Applications screen, click Next.
  • 34. A Principled Technologies report 34Speed up system deployment with Dell Connected Configuration services 20. On the Summary screen, click Next. 21. Once complete, click Close. Modifying the Task Sequence 1. In the Task Sequence list. Right-click the Windows 8.1 Ent E5550 Deployment, and select Edit. 2. In the Task Sequence Editor, under Install Operating System, click and drag Apply Network Settings to underneath Apply Device Drivers. 3. Click Add, in the drop-down menu select general, then Run Command line.  Name: Pause 60 seconds  Command Line: ping -n 60 127.0.0.1 4. Click Add, in the drop-down menu, select Software, then select Install Package.  Name: Configure Windows Settings  Package: Change Windows Settings  Program: Firewall and Remote Desktop 5. Copy the Pause 60 seconds task and paste it behind the previously created Install Package task. 6. Click Add, then select New Group. 7. Name the Group Activate Bitlocker. 8. Click Add, in the drop-down menu, select Software, then select Install Package.  Name: CTTK – Create System Password  Package: CTTK-1  Program: Create System Password 9. Copy the Pause 60 seconds task and paste it behind the previously created Install Package task. 10. Click Add, in the drop-down menu select Software, then select Install Package.  Name: CTTK – Enable TPM  Package: CTTK-2  Program: Enable TPM 11. Copy the Pause 60 seconds task and paste it behind the previously created Install Package task. 12. Click Add, in the drop-down menu select Software, then select Install Package.  Name: CTTK – Activate TPM  Package: CTTK-3  Program: Activate TPM 13. Copy the Pause 60 seconds task and paste it behind the previously created Install Package task. 14. Click Add, in the drop-down menu select general, then Restart Computer. 15. Move the Pre-provision BitLocker to the bottom of the Activate Bitlocker group. 16. Copy the Restart Computer command and paste it. 17. Copy the Pause 60 seconds task, and paste it behind the Restart Computer Task. 18. Move the Enable Bitlocker to the bottom of the Activate Bitlocker group. 19. Select the Enable Bitlocker Task, and select TPM and PIN. Enter a PIN. 20. Create a new group named Install Software.
  • 35. A Principled Technologies report 35Speed up system deployment with Dell Connected Configuration services 21. In the new group, click Add, in the drop-down menu select Software, then select Install Package.  Name: Office 2013  Package: Office 2013  Program: Office 2013 22. In the new group, click Add, in the drop-down menu select Software, then select Install Package.  Name: Chrome  Package: Chrome  Program: Chrome 23. In the new group, click Add, in the drop-down menu select Software, then select Install Package.  Name: Java 8  Package: Java 8  Program: Java 8 24. In the new group, click Add, in the drop-down menu select Software, then select Install Package.  Name: Adobe Reader  Package: Adobe Reader  Program: Adobe Reader 25. Move Install Updates to the bottom of the Install Applications group. 26. Click OK to close the task sequence editor. Deploying the Task Sequence 1. In the Configuration Manager console, under the Software Library workspace, select Task Sequences. Right-click Windows 8.1 Ent E5550 Deployment, and select Deploy. 2. In the Deploy Software Wizard, on the General screen, for Collection select Dell Deployment Systems. Click OK. 3. On the Deployment Settings, for Purpose, select Required. For Make available to the following, select Configuration Manager clients, media, and PXE. Click Next. 4. On the Scheduling screen, check the box for Schedule when this deployment will become available. Make the deployment available 12 hours before the current time. 5. For Assignment schedule, click New and create an assignment that starts 11 hours before the current time. Click Next. 6. On the User Experience screen, click Next. 7. On the Alerts screen, click Next. 8. On the Distribution Points screen, click Next. 9. On the Summary screen, click Next. The Dell Connected Configuration Deployment After completing the previous section and verifying a deployment on site, we packaged the PowerEdge R620, Dell PowerConnect Switch, and custom PFSense router to a Dell facility. The custom PFSense router connected to an identical router at the PT labs via an OpenVPN level 2 connection. Our technician worked with a Dell technician to set the systems up as shown in Figure 4.
  • 36. A Principled Technologies report 36Speed up system deployment with Dell Connected Configuration services Once both PT and Dell finished verifying the setup, the Dell team was given the following instructions to complete the deployment process. When noted, PT added the MAC address to the Dell Deployment Systems group using the Import Device option in SCCM. Operating Instructions 1. Email the MAC address for NIC to the PT contacts. 2. PT will add the MAC address to System Center and assign the laptop to the deployment collection. 3. Connect the laptop to the PowerConnect switch. 4. After PT responds with a “go ahead” email, power on the laptop. 5. Press F12 and select Onboard NIC. 6. Verify that the system boots to PXE and begins the task sequence. The operator will watch the system progress between the following screens:  The system will attempt a PXE boot.  The system will download the boot image.  The system will boot the boot image and begin the task sequence. If the system fails, please take a picture of the screen and send the error to the PT Contacts. 7. After the task sequence completes, the PT team will log into the target system and verify the deployment using Window’s built-in Remote Desktop Connection. 8. Once PT finishes verifying the installation, we will power off the system completely, and send a completion email to the Dell team that the deployment phase is complete. Dell then shipped the laptop to the simulated PT remote office location and our employee received and verified that the laptop arrived as expected. Creating the Static Image The following section details the creation of the image to be submitted to Dell for the Static Imaging Deployment. 1. Power on the Latitude E5540 laptop, and insert the Windows 8.1 installation media. 2. Press F12 while booting to load the Boot menu. Boot to the BIOS Settings. 3. In the BIOS, click Load Defaults. Click OK. 4. On the Windows 8 setup screen, click Next. 5. On the Which type of installation do you want? screen, click Custom Install Windows only (advanced). 6. On the Where do you want to install Windows? screen, delete all previously created partitions and create a new partition for installation, and click Next. 7. Allow Windows to install. 8. Once the installation completes, the system will load into the Personalize screen. Select a color for your system. Type a name for the system under PC name. We named ours PTT-01. Click next. 9. On the Get online screen, select a wireless network and enter the network password. Click next. 10. On the Settings screen, click Use express settings.
  • 37. A Principled Technologies report 37Speed up system deployment with Dell Connected Configuration services 11. On the Sign in to your Microsoft account, click Create a Microsoft account. Then click Sign in without a Microsoft account. 12. On the Your account screen, enter a User Name, Password and a Password hint then click Next. We used PTadmin, Password1, and Standard. 13. On the Upgrade to Windows 10 for free screen, click Not right now. Configuring Dell Command | Update 1. Open Internet Explorer. 2. Navigate to http://en.community.dell.com/techcenter/enterprise-client/w/wiki/7534.dell-command-update and, under Dell Command | Update, click Download. 3. When the bar appears at the bottom of the browser, click Run. 4. On the User Account Control Window, click Yes. 5. On the Dell Command Update Package window, click Install. 6. On the Dell Command | Update v2.1.0 – Setup window, click Next. 7. On the License Agreement screen, click I accept the terms in the license agreement, and click Next. 8. Click Install. Run Windows update and install all important and optional updates available up to October 5, 2015. Do not install Windows 10. Also install Dell Command | Update and install all available packages available up to October 5, 2015. To simulate a corporate laptop, we also set our corporate logo as the desktop background. Configuring Windows Update 1. In the left pane of the Server Manager window, click Local Server. 2. In the main frame, next to Windows Update, click Not configured. 3. In the Windows Update window, in the main pane, click Let me choose my settings. 4. Under Important updates, select Check for updated but let me choose whether or not to download and install them and then click OK. 5. In the left pane, click Check for updates, and install all available updates. 6. Close the Windows Update window. Configuring Windows Firewall 1. In Server Manager, click ToolsWindows Firewall with Advanced Security. 2. In the Overview section, click Windows Firewall Properties. 3. In the Domain Profile tab, for Firewall state, click Off. 4. In the Private Profile tab, for Firewall state, click Off. 5. In the Public Profile tab, for Firewall state, click Off. 6. Click OK. 7. Close the Windows Firewall Properties window. Setting up Remote Desktop 1. In the Local Server tab of the Server Manager window, next to Remote Desktop, click Disabled. 2. In the System Properties window that appears, in the Remote Desktop section, select the Allow remote connections to this computer radio button, and click OK when the warning message appears.
  • 38. A Principled Technologies report 38Speed up system deployment with Dell Connected Configuration services 3. Uncheck Allow connections only from computers running Remote Desktop with Network Level Authentication (recommended), and click OK. Adding Corporate File Servers 1. In File Explorer, right-click This PC and select Map network drive… 2. On the Map Network Drive window, type address for the shared Folder. Enter credentials as needed, and click Finish. 3. In File Explorer, in the left panel, click and drag the mapped network drives to create shortcuts on the desktop. Also add these locations to Start. Note: We repeated steps 1 and 3 for a second location. Installing Office 2013 1. Download Setup.X64.en-us_O365ProPlusRetail.exe for version 15.0.4753.1003 from https://www.mail.office365.com. 2. Run the Office 2013 installation file. 3. In the Microsoft Office 2013 Window, at the Welcome screen, click Next. 4. At the First things first. screen, select Use recommended settings, and click Accept. 5. At the Sign in and get the most out of Office screen, click No thanks, maybe later. 6. At the Meet OneDrive screen, click Next. 7. At the We’re getting things ready screen, click No, thanks. Office will finish installing. Installing Google Chrome 1. Open Internet Explorer. 2. Navigate to https://www.google.com/chrome/index.html. 3. Click download, then accept and Install. 4. At the bottom of the browser, click Run. 5. On the User Account Control Window, click Yes. 6. Wait while Chrome finishes downloading and installing. 7. On the Chrome is almost ready window, click Next. Installing the latest version of Java 1. Open Internet Explorer. 2. Navigate to http://www.java.com/en/download/win8.jsp 3. Click Agree and Start Free Download. 4. At the bottom of the browser, click Run. 5. On the User Account Control Window, click Yes. 6. In the Java Setup window, click Install. 7. On the Get the best of the web with Yahoo screen, uncheck the box for Set Yahoo as your homepage and default search engine on Chrome and Internet Explorer, plug get Yahoo as your new tab page on Chrome. 8. Wait while Java downloads and installs. 9. On the Java Setup – Complete screen, click Close. Installing the latest version of Adobe Reader 1. Open Internet Explorer.
  • 39. A Principled Technologies report 39Speed up system deployment with Dell Connected Configuration services 2. Navigate to https://get.adobe.com/reader/ 3. Deselect the Optional Offers, and click Install now. 4. At the bottom of the browser, click Run. 5. On the User Account Control Window, click Yes. 6. On Adobe Acrobat Reader DC Install, once complete, click Finish. Standardizing the Background Experience 1. Open Local Group Policy Editor. 2. In the left panel, navigate to User Configuration  Administrative Templates  Desktop  Desktop. 3. Select Desktop Wallpaper, right-click, and select Edit. 4. On the Desktop Wallpaper Window, select Enabled, and type the local path of an image to use. 5. Click OK, and restart the laptop. Running Sysprep to generalize the image 1. From a command prompt with elevated privileges, navigate to C:WindowsSystem32Sysprep and run the following command: Sysprep /generalize /shutdown /oobe Capturing the WIM 1. Insert a USB stick with Windows PE environment into the laptop. 2. Attach an external hard drive to the laptop. 3. Boot from the Windows PE USB disk. 4. Identify which drive is the system drive, boot drive, and external image drive. Below it assumes the system drive is C: and the external drive is D: 5. To save the image, type the following command from the Windows PE command prompt: dism /capture- image /capturedir:c: /imagefile=d:81E55X0X64.wim /name:81E55X0X64 Putting drivers on a USB key 1. Download the E5550 driver from http://en.community.dell.com/techcenter/enterprise- client/w/wiki/7597.latitude-e55505550-windows-8-1-driver-pack 2. Extract the contents of E5550_5550-Win8.1-A05-YHV16.cab to a Folder named E5550CAB. 3. Move the E5550CAB folder to a removable USB drive. Ordering the static image We then ordered the laptop from Dell. We were assigned a project manager who led us and the Dell engineering team through uploading and verifying the image. We received several emails with instructions. Throughout the following processes, we recorded the time to complete each process, including any required communication with the Dell team. Completing Image Export Compliance Certification form 1. From the email instructions sent by Dell, browse to http://www.dell.com/learn/us/en/555/services/export- compliance-customer-image?c=us&l=en&s=biz&preview=true, and downloaded the Export Compliance Certification form. 2. Print the form. 3. Fill out the information on the form. 4. Scan the form and save as a PDF.
  • 40. A Principled Technologies report 40Speed up system deployment with Dell Connected Configuration services 5. Once the certification form has been completed, send an email to the Global Trade Management Office via US_ConfigurationServices_Export_Compliance@dell.com with the Configuration Services (CFI) project number (SIxxx) in the subject line and the Export Compliance Form PDF attached. Completing the Image Specifications form The Image Specifications form provided details about the submitted image for the Dell engineering team. 1. Use the link provided to Dell to access your Dell Imaging Services Image Specifications form. Through that form we submitted the following information  Customer Contact email: N/A  Name: N/A  Phone number: N/A  Will you be the person who will be creating and submitting your image? Yes  Do you have a previous image you have already submitted to Dell that you would like to reuse for this particular order? No  Please indicate whether your image contains administrator account information. Yes  Admin Login: PTadmin  Admin Password: Password1  What OS License have you purchased? Windows 8.1  Does your image contain: Volume License Agreement (VLA)  Is it an Academic VLA? No  Specify format of the image: WIM  Is this a GUID Partition Table (GPT) formatted image? Yes  Please complete an entry below for each partition on your hard drive. When you have finished adding partitions, please click the link that you have completed entering all your information. We then received an email confirming the submission of our Image Specifications form. Over the next few days, we also called and received calls, from our Project Manager requesting image submission and resubmission. Dell File Transfer steps Using the following steps, we submitted the 81E55X0X64.wim through the Dell File Transfer Application. 1. Log onto Dell.com and create an account using the email submitted to the technical team. 2. Using the provided link download the Dell File Transfer Installation application. 3. Install the Dell File Transfer Installation. 4. Once the installation is complete, navigate to the installation folder and open FileTransfer.exe 5. In the Dell File Transfer Window, enter the user information created in step 1, and click login.
  • 41. A Principled Technologies report 41Speed up system deployment with Dell Connected Configuration services 6. Select the project. 7. On the Image Source Window, give the file a Friendly Name and add the image that you would like to upload. 8. On the Summary Page, click Scan to start the file transfer. 9. At the Complete screen, click Close. 10. On the Scanning Files screen, wait for the files to finish transferring, and click Close. Completing the Online First Article For the Online First Article, PT was required connect via a KVM session and approve the image which the Dell engineers uploaded. 1. From the email with the subject Dell Online First Article, click the download link to install the Viewer Software. 2. Select a location to save the file to your computer. 3. Once the download is complete, double-click the file. 4. In the Avocent DSView 4 Session Viewers Window, click Next. 5. On the Select Installation Folder screen, click Next. 6. On the Confirm Installation screen, click Next. 7. On the Installation Complete Screen, click Close. 8. Close all open web browsers. 9. Using a supported web-browser, browse to https://onlinecsaudit.us.dell.com/. We used Internet Explorer 11. 10. Log in using the credentials in the email. 11. In the DSView 4 Management software, select KVM Session for the provided computer. 12. When requested, we allowed the plugin to run the browser. 13. In the Avocent Session Viewer, complete the Out-of-Box experience and verify that your WIM has correctly installed. To do this we double-checked that our desktop had the custom image and our installed applications were available. 14. Respond to the email confirming that the Online First Article meets expectations and can be deployed. After Dell finished deploying the static image to the target laptop, they used Next Business Day shipping to send us the laptop. Provisioning and distributing the E5550 laptop After receiving the laptop late in the day, we then completed our provisioning process the following business day. This process included a simulated shipment to our end user, which, for our calculations, would have arrived the following business day. We timed how long it would take to complete the following tasks on the Static Imaged Latitude. All steps below are considered administrator time except those explicitly noted as system time. Removing the system from the box 1. Remove the E5550 from the box ,and remove all packing material from the system. 2. Plug the system into a wall outlet, and connect it to a port that is connected to your domain. 3. Press the power button, and press F12 to load the BIOS boot manager. 4. Select BIOS Setup to load into the BIOS. 5. In the BIOS menu, under Security, select Admin Password. 6. In Admin Password, enter and confirm a new password for the system. We used Password1.
  • 42. A Principled Technologies report 42Speed up system deployment with Dell Connected Configuration services 7. Under Security, select TPM Security. 8. Check the box for TPM Security to enable it. 9. Select Activate. 10. Click Apply and Exit to boot into the Operating System. Completing the Windows out-of-the-box experience 1. On the Region and language screen, click Next. 2. On the License terms screen, click I accept. 3. On the Personalize screen, enter the PC name, and click Next. We entered E5550-Static. 4. On the Get Online screen, click Skip this Step. 5. On the Settings screen, click Use express settings. 6. On the Your account screen, click Create a local account. 7. On the Your account screen, enter a user name, password, re-enter password, and password hint. We used PTuser, Password1, Password1, and Pass. 8. Wait while Windows prepares your account. Joining to the domain We used the domain created during the Connected Configuration Process. 1. Press the Windows key and search for Join a domain. 2. In the System Properties menu, click Change… 3. Select Domain and enter test.local. 4. In the Windows Security window, use the following credentials:  User Name: Test.localCM_JD  Password: Password1 5. Click OK. 6. In the Domain Welcome notification, click OK. 7. In the Restart notification, click OK. 8. Close the System Properties menu. 9. In the System Restart notification, click Restart now. 10. Wait for the system to restart. 11. Log into the system using test.localadministrator. Turning on Bitlocker 1. In the Control Panel, open System and Security, then BitLocker Drive Encryption. 2. On the BitLocker Drive Encryption screen, select Turn on BitLocker. 3. On the Preparing your drive for Bitlocker screen, click Next. 4. On the Choose how to unlock your drive at startup screen, select Enter a PIN (recommended). 5. On the Enter a PIN screen, enter and reneter a PIN. Click Set PIN. 6. In the BitLocker Drive Encryption C: window, select Save to a file and select a location to save the Recovery Key. Then click Next.
  • 43. A Principled Technologies report 43Speed up system deployment with Dell Connected Configuration services 7. On the Choose how much of your drive to encrypt, leave the default Encrypt used disk space only, and click Next. 8. On the Are you Ready to encrypt this drive? Screen, check the box for Run BitLocker system check, and click Continue. Then click OK. 9. Restart the Computer. 10. During the restart, on the BitLocker screen, enter the PIN for your encrypted drive, and press enter to Continue. 11. Once the system restarts, sign back into the test.localadministrator account. Installing driver update 1. Start Dell Command | Update. 2. In Dell Command | Update, on the setup screen, select Yes, run automatically with the default settings (recommended), and click OK. 3. Click Check. 4. Once the system finishes checking for updates, select any available updates and select Install. 5. When requested select Restart. 6. Allow the system to restart and log back into the test.localadministrator account. 7. Repeat steps 1 through 5 as many times as necessary. Note: For purposes of timing, we considered steps 4 through 6 to be system time. Installing additional driver updates 1. Open Device Manager. 2. Right-click any unknown devices, and select Update Driver Software. 3. Select Browse my computer for driver software and copied E5550CAB folder. 4. If requested, restart the laptop. 5. Repeat steps 1 through 4 for each unknown device. We repeated this process three times. Note: For purposes of timing, we considered steps 3 and 4 to be system time. Installing Windows Updates 1. Open Windows Update. 2. Select Check for Updates. 3. Once the updates appear, click Install Updates. 4. Once complete, if requested, restart the laptop and allow the updates to install. Note: For purposes of timing, we considered steps 3 and 4 to be system time. Preparing the laptop for shipping 1. Shutdown the laptop. 2. Repackage the system and tape the box closed. We then simulated shipping our system to our remote office by having our administrator drive the system to a local shipping company located less than a mile from our testing facility. The administrator then returned to his office and stopped the timer.
  • 44. A Principled Technologies report 44Speed up system deployment with Dell Connected Configuration services ABOUT PRINCIPLED TECHNOLOGIES Principled Technologies, Inc. 1007 Slater Road, Suite 300 Durham, NC, 27703 www.principledtechnologies.com We provide industry-leading technology assessment and fact-based marketing services. We bring to every assignment extensive experience with and expertise in all aspects of technology testing and analysis, from researching new technologies, to developing new methodologies, to testing with existing and new tools. When the assessment is complete, we know how to present the results to a broad range of target audiences. We provide our clients with the materials they need, from market-focused data to use in their own collateral to custom sales aids, such as test reports, performance assessments, and white papers. Every document reflects the results of our trusted independent analysis. We provide customized services that focus on our clients’ individual requirements. Whether the technology involves hardware, software, Web sites, or services, we offer the experience, expertise, and tools to help our clients assess how it will fare against its competition, its performance, its market readiness, and its quality and reliability. Our founders, Mark L. Van Name and Bill Catchings, have worked together in technology assessment for over 20 years. As journalists, they published over a thousand articles on a wide array of technology subjects. They created and led the Ziff-Davis Benchmark Operation, which developed such industry-standard benchmarks as Ziff Davis Media’s Winstone and WebBench. They founded and led eTesting Labs, and after the acquisition of that company by Lionbridge Technologies were the head and CTO of VeriTest. Principled Technologies is a registered trademark of Principled Technologies, Inc. All other product names are the trademarks of their respective owners. Disclaimer of Warranties; Limitation of Liability: PRINCIPLED TECHNOLOGIES, INC. HAS MADE REASONABLE EFFORTS TO ENSURE THE ACCURACY AND VALIDITY OF ITS TESTING, HOWEVER, PRINCIPLED TECHNOLOGIES, INC. SPECIFICALLY DISCLAIMS ANY WARRANTY, EXPRESSED OR IMPLIED, RELATING TO THE TEST RESULTS AND ANALYSIS, THEIR ACCURACY, COMPLETENESS OR QUALITY, INCLUDING ANY IMPLIED WARRANTY OF FITNESS FOR ANY PARTICULAR PURPOSE. ALL PERSONS OR ENTITIES RELYING ON THE RESULTS OF ANY TESTING DO SO AT THEIR OWN RISK, AND AGREE THAT PRINCIPLED TECHNOLOGIES, INC., ITS EMPLOYEES AND ITS SUBCONTRACTORS SHALL HAVE NO LIABILITY WHATSOEVER FROM ANY CLAIM OF LOSS OR DAMAGE ON ACCOUNT OF ANY ALLEGED ERROR OR DEFECT IN ANY TESTING PROCEDURE OR RESULT. IN NO EVENT SHALL PRINCIPLED TECHNOLOGIES, INC. BE LIABLE FOR INDIRECT, SPECIAL, INCIDENTAL, OR CONSEQUENTIAL DAMAGES IN CONNECTION WITH ITS TESTING, EVEN IF ADVISED OF THE POSSIBILITY OF SUCH DAMAGES. IN NO EVENT SHALL PRINCIPLED TECHNOLOGIES, INC.’S LIABILITY, INCLUDING FOR DIRECT DAMAGES, EXCEED THE AMOUNTS PAID IN CONNECTION WITH PRINCIPLED TECHNOLOGIES, INC.’S TESTING. CUSTOMER’S SOLE AND EXCLUSIVE REMEDIES ARE AS SET FORTH HEREIN.