SlideShare a Scribd company logo
1 of 36
Download to read offline
MARCH 2015
A PRINCIPLED TECHNOLOGIES REPORT
Commissioned by Dell Inc.
Aging desktops present obstacles as they lack the latest hardware and software
technology. Your business faces a difficult decision: You can replace those older
desktops now, or you can push the capital expense to the next fiscal year. How do you
know when it’s the right time to invest in new technology for your business?
We examined the advantages of upgrading to the Dell OptiPlex 9030 All-in-One
and Dell OptiPlex 9020 Micro from a representative five-year-old desktop tower system.
We found that the Dell OptiPlex 9030 All-in-One and Dell OptiPlex 9020 Micro offered
compelling reasons to upgrade, including support for remote systems management,
much faster performance for increased productivity, and significantly lower power
consumption.
Upgrading to Dell OptiPlex desktops brings many benefits to your business. Your
IT can leverage Dell technology to save time and reduce costs when supporting out-of-
band systems. Your employees have the opportunity to be more productive with faster
and more power-efficient desktops that also enable your business to lower power costs.
A Principled Technologies report 2Upgrading to new Dell OptiPlex desktops
FASTER OUT-OF-BAND MANAGEMENT WITH DELL COMMAND | INTEL
VPRO OUT OF BAND
Manage desktops remotely and regardless of state with out-of-band management
Remote management has traditionally relied on in-band management, which
requires each managed device to fully load its operating system (OS) and receive
commands through a software-based management agent. With out-of-band (OOB)
management, IT staff can now use a special hardware-based channel to connect with
the device remotely when the OS is unreachable. Specifically, OOB management can
happen when a system is in any of the following conditions:1, 2
 the system is plugged in but not actively running (i.e., powered off or
“asleep”)
 the operating system has not loaded
 the system is booted into its operating system and the software-based
management agent is not available
 the system is hung or non-operational
OOB management functionality is valuable in situations that necessitate
accessing, updating, or restoring multiple remote systems that IT staff cannot otherwise
reach. For example, if vicious malware infects and corrupts the operating systems of
many desktops and begins to propagate, IT staff need to shut down the systems to stop
further infection. Using OOB management with hardware-based Keyboard-Video-Mouse
(KVM) Remote Control, IT staff can access the infected desktops while they are offline,
and then correct the problem by configuring the systems to boot to a separate drive or
by redirecting them to run an executable.
Intel Core™ vPro processors offer a hardware-based option for OOB
management with the Intel Management Engine, an isolated and protected coprocessor
that can communicate with the network and draw power independently of the system’s
main components.3
Save time and lower IT costs with common management tasks
With legacy desktop towers that are out-of-band, IT staff have to make physical
deskside visits to perform common management tasks, one system at a time. This
means more time and associated costs to complete the tasks. With new Dell OptiPlex
desktops, however, your IT staff can apply changes to multiple systems simultaneously
and remotely, regardless of their current power state.
1
en.community.dell.com/techcenter/extras/m/white_papers/20179305/download.aspx
2
www.intel.com/content/www/us/en/architecture-and-technology/vpro/vpro-technology-general.html
3
www.kernel.org/doc/Documentation/misc-devices/mei/mei.txt
A Principled Technologies report 3Upgrading to new Dell OptiPlex desktops
We looked at the amount of time your IT staff could save when managing a
group of Dell OptiPlex 9030 All-in-One or Dell OptiPlex 9020 Micro desktops instead of a
group of legacy desktop towers. We timed how long it took to complete five OOB
management tasks on the Dell OptiPlex desktops using an SCCM management
environment and Dell Command | Intel vPro Out of Band, and then timed how long it
took to complete the same tasks manually on the legacy desktop tower. Figure 1 shows
the amount of time your IT staff can save for common OOB management tasks with 50
systems when you upgrade to new Dell OptiPlex desktops; more efficient management
can reduce IT labor time by up to 97 percent.
Figure 1: Amount of IT time to
complete five separate management
tasks on 50 systems, in minutes.
Lower numbers are better.
Saving time with new Dell OptiPlex desktops when completing common OOB
management tasks ultimately means savings in labor costs. For example, we found that
new Dell OptiPlex desktops could save your business over $35 in IT labor costs for the
simple task of changing a BIOS password for 50 systems. Figure 2 shows the lower costs
that your business can realize with OOB management tasks when upgrading to new Dell
OptiPlex desktops.4
4 We estimated an IT cost of $.6635 per minute, based on an average annual total compensation estimate from Salary.com of
$82,809 for a Help Desk Support senior-level position.
A Principled Technologies report 4Upgrading to new Dell OptiPlex desktops
Figure 2: Cost of IT to complete five
separate management tasks on 50
systems, in dollars. Lower numbers
are better.
Reduce repair costs and employee downtime when supporting a non-operational system at
a remote site
IT can resolve some problems for a non-operational Dell OptiPlex desktop
remotely with OOB management that previously would have required an expensive
deskside visit to a remote site with a legacy desktop tower. The travel time for a
deskside visit ultimately increases the cost and overhead for IT to make a repair, and
increases employee downtime and lost productivity.5, 6
With hardware-based KVM
Remote Control and OOB management, IT staff can remotely access the target desktop
and implement the necessary changes as soon as possible.
We considered an example 10-minute repair of a single non-operational system
to illustrate the potential IT savings with new Dell OptiPlex desktops for a single repair
at a remote site. When repairing a legacy desktop tower, the one hour of total travel
time to and from the remote site in this scenario represents a significant amount of
overhead for IT. With the Dell OptiPlex 9030 All-in-One and Dell OptiPlex 9020 Micro, IT
could simply launch a KVM Remote Control session—a process that we found took only
15 seconds.
5
The Dell OptiPlex 9030 All-in-One and Dell OptiPlex 9020 Micro in our study included the latest Intel vPro technology and the latest
version of Intel Active Management Technology (Intel AMT). For more information on Intel AMT, visit
www.intel.com/content/www/us/en/architecture-and-technology/intel-active-management-technology.html?wapkw=amt.
6
The legacy desktop tower in our study shipped with an older release of Intel AMT (5.2), which meant that it did not support
hardware-based KVM Remote Control.
software.intel.com/sites/manageability/AMT_Implementation_and_Reference_Guide/default.htm?turl=WordDocuments%2Fkvman
dintelamt.htm
A Principled Technologies report 5Upgrading to new Dell OptiPlex desktops
We also looked at the amount of employee downtime for this example 10-
minute repair of a single non-operational system. With the legacy desktop tower, the
employee would have to wait until the following business day for a deskside visit,
representing eight business hours of downtime after the initial call. With the Dell
OptiPlex 9030 All-in-One and Dell OptiPlex 9020 Micro, the employee would have to
wait only 15 seconds for IT to initiate the KVM Remote Control session.7
Figure 3 shows the total amount of employee downtime and IT labor for a single
repair of a non-operational system at a remote site. Replacing desktops would enable IT
to reduce employee downtime significantly and reduce overhead for IT staff when
supporting a non-operational system. Instead of waiting eight business hours for the
repair, the employee could get back to work much sooner. In addition, quicker repairs
give IT staff more time to complete other tasks.
Figure 3: Lost productivity due to
employee downtime and IT labor
for a single repair of a non-
operational system at a remote site,
in hours:minutes:seconds. Lower
numbers are better.
Figure 4 shows the value of the reduced employee downtime and the value of
the time IT could save with the Dell OptiPlex 9030 All-in-One or Dell OptiPlex 9020 Micro
for a single repair of a non-operational system at a remote site. The Dell OptiPlex 9030
All-in-One or Dell OptiPlex 9020 Micro would reduce the cost of employee downtime by
$215.08 for a single 10-minute software repair—a savings of nearly 98 percent.8
The 10-
minute software repair would cost $39.65 less with the Dell OptiPlex 9030 All-in-One or
7 We assumed an equal amount of time for IT to generate the support ticket with KVM Remote Control and the deskside visit, and
did not include that time in our analysis.
8
We estimated an average end-user cost of $.4483 per minute, based on an average annual total compensation of $55,954.00,
which includes an average 2013 US salary of $43,041.39 (www.ssa.gov/OACT/COLA/AWI.html) plus 30 percent in benefits.
A Principled Technologies report 6Upgrading to new Dell OptiPlex desktops
Dell OptiPlex 9020 Micro due to the elimination of IT travel time—a cost savings of 85
percent.9
Figure 4: Cost of lost productivity due
to employee downtime and cost of IT
labor for a single repair of a non-
operational system at a remote site,
in US dollars. Lower numbers are
better.
LESS WAITING WHILE WORKING WITH DELL OPTIPLEX DESKTOPS
Promote productivity with up to 145% better system performance
Waiting on a slow PC can be painful. A faster, more responsive desktop means
your employees can finish the same tasks in less time, ultimately providing your
employees an opportunity to be more productive. We used five industry-standard
benchmarks to show the performance boost your employees can get with a new Intel
processor-based Dell OptiPlex 9030 All-in-One or Dell OptiPlex 9020 Micro. The new
Intel processor-powered desktops outperformed the legacy desktop tower on all of the
performance benchmarks.
For detailed specifications of the test systems, see Appendix A. For step-by-step
details on how we performed our benchmark testing, see Appendix D. For more on the
benchmarks, see Appendix E.
As Figure 5 shows, we found the Dell OptiPlex 9030 All-in-One and Dell OptiPlex
9020 Micro provided significantly better system performance than the legacy desktop
tower—145 percent and 114 percent, respectively. Note: We calculated the percentage
wins for the Dell OptiPlex 9030 All-in-One and Dell OptiPlex 9020 Micro on each
benchmark, and then calculated system performance by taking the geometric mean of
9
We estimated an IT cost of $.6635 per minute, based on an average annual total compensation estimate from Salary.com of
$82,809 for a Help Desk Support senior-level position.
A Principled Technologies report 7Upgrading to new Dell OptiPlex desktops
those percentage wins versus the legacy desktop tower. For more details on how we
calculated the system performance, see Appendix B.
Figure 5: System performance for the
Dell OptiPlex 9030 All-in-One and
Dell OptiPlex 9020 Micro vs. the
legacy desktop tower. Higher
numbers are better.
So what does better system performance mean for your business? If your
average employee spends 10 minutes a day waiting to do the types of tasks included in
the benchmarks (e.g., writing documents, browsing Web sites, and creating
spreadsheets), 145 percent better system performance means your average employee
could save almost 23 hours per year when moving from the legacy desktop tower to the
Dell OptiPlex 9030 All-in-One. As Figure 6 shows, replacing desktops represents a
significant opportunity for increased productivity as the size of the desktop fleet
increases. For example, a business replacing 10,000 legacy desktop towers with 10,000
new Dell OptiPlex 9030 All-in-One desktops could see significant savings over four
years—5.923 minutes saved daily per employee would add up to over 900,000 total
hours saved that employees could use for other tasks.10, 11
10
Based on a conservative estimate that a hypothetical mix of productivity tasks would take an average of 10 minutes per employee
per day with the legacy desktop tower. With 145.3 percent better system performance, the same mix of tasks would take an average
of 4.077 minutes per employee per day with the Dell OptiPlex 9030 All-in-One, saving 5.923 minutes per employee per day.
11
Based on a 46-week work year per employee, which includes holidays, vacation, and sick leave (www.bls.gov/opub/btn/volume-
2/paid-leave-in-private-industry-over-the-past-20-years.htm).
Faster desktops for your
employees mean less
waiting while working
and an opportunity for
increased productivity.
A Principled Technologies report 8Upgrading to new Dell OptiPlex desktops
Figure 6: Time saved in hours over
four years when replacing a fleet of
legacy desktop towers with Dell
OptiPlex 9030 All-in-One desktops.
PAY LESS FOR POWER WITH DELL OPTIPLEX DESKTOPS
Save at the outlet with up to 60% fewer watts at idle and up to 42% fewer watts under load
Why waste energy and dollars with inefficient older desktops? We found that
both the Dell OptiPlex 9030 All-in-One and Dell OptiPlex 9020 Micro consumed
significantly less power than the legacy desktop tower—and, notably, consumed less
power under load than the legacy desktop tower consumed at idle. The Dell OptiPlex
9030 All-in-One consumed 55 percent fewer average watts while idle and 35 percent
fewer average watts under load than did the legacy desktop tower. The Dell OptiPlex
9020 Micro consumed 60 percent fewer average watts while idle and 42 percent fewer
average watts under load than did the legacy desktop tower. Figure 7 shows the power
usage of all three systems while idle and under load.
The Dell OptiPlex 9030
All-in-One and Dell
OptiPlex 9020 Micro
consumed less power
under load than the
legacy desktop tower
consumed at idle.
A Principled Technologies report 9Upgrading to new Dell OptiPlex desktops
Figure 7: The average number of
watts each system consumed while
idle and under load. Lower numbers
are better.
As Figure 8 shows, replacing older inefficient desktops can significantly affect
the bottom line. For example, a business replacing 10,000 legacy desktop towers with
10,000 new Dell OptiPlex 9020 Micro desktops could realize significant savings over four
years; $7.65 saved annually per employee would add up to $306,000 total savings in
power costs.12
Figure 8: Power consumption savings
in dollars over four years when
replacing a fleet of legacy desktop
towers with Dell OptiPlex 9020 Micro
desktops.
12
Based on a conservative estimate of one hour under load and seven hours idle for average power consumption per employee per
day, 46-week work year per employee, and average US commercial power costs of $0.1075 per kilowatt-hour from the U.S. Energy
Information Administration (www.eia.gov/electricity/monthly/pdf/epm.pdf).
A Principled Technologies report 10Upgrading to new Dell OptiPlex desktops
LEVERAGE THE NEWEST TECHNOLOGY WITH DELL OPTIPLEX DESKTOPS
Gain the benefits of touch
Touch-interactive technology is becoming as popular in the office as it is at
home. An Intel study shows respondents overwhelmingly preferred laptops with
touch,13
and shipments of touchscreen monitors are seeing growth.14
Microsoft® Windows® 8.1 does not require touch technology, but a touch-
enabled version of the operating system can allow users to access information,
collaborate, and make presentations through quick touch gestures. For the Dell OptiPlex
9030 All-in-One with the included touchscreen display, users can engage content such as
Web pages, images, videos, pdfs, and email with touch-enabled apps such as Microsoft
Office 365™, and then switch to the keyboard and mouse for typing and editing content,
choosing the more comfortable interface for each task.
For the Dell OptiPlex 9030 All-in-One that we tested, the touch-enabled display
added $186 to the starting price over a similarly configured model without touch.15
If
the touchscreen on the Dell OptiPlex 9030 All-in-One can deliver a productivity benefit
of just one minute per day, the optional touch capability could pay back its added cost in
under 20 months.16, 17
Connect via USB 3.0, DisplayPort, HDMI, and Wireless AC
Replacing desktops can enable your business to take advantage of the latest
USB technology. The Dell OptiPlex 9030 All-in-One and Dell OptiPlex 9020 Micro
included USB 3.0 ports—eight and six, respectively. The legacy desktop tower offered
USB 2.0 ports. USB 3.0 ports, such as those on the two Intel processor-powered
desktops, can provide up to 4.8 Gbps transfer rates to USB 3.0 devices—up to 10 times
faster than the transfer rate for USB 2.0 connections to USB 2.0 devices that you could
get with the legacy desktop tower.
Replacing desktops can also bring the latest display technology to your business.
In addition to the touchscreen display on the Dell OptiPlex 9030 All-in-One, both the
Dell OptiPlex 9030 All-in-One and Dell OptiPlex 9020 Micro included DisplayPort, which
13
www.neowin.net/news/intel-80-percent-of-pc-users-prefer-touch-screens and www.intelfreepress.com/news/do-people-want-
touch-on-laptop-screens/197/
14
www.businesswire.com/news/home/20141215006340/en/Worldwide-PC-Monitor-Market-Aided-Touch-Screen#.VJPVqCsgBg
15
The starting price ($1,598) + three-year ProSupport Service brought the price to $1,677.57 for non-touch-enabled display with
Intel Core i5 processor and 8 GB memory for the Dell OptiPlex 9030 All-in-One. The starting price (including three-year ProSupport
Service) for the Dell OptiPlex 9030 All-in-One with the same processor and memory and touch-enabled display was $1,863.29 via
www.dell.com/us/business/p/optiplex-9030-aio/fs?pf=v on 12/19/2014.
16
A minute a day, valued at $9.72 ($350/36), per month could provide payback for a $186 cost in 19.1 months.
17
Note: We tested the Dell OptiPlex 9030 All-in-One installed with Windows 7 so that system configuration matched closely to the
legacy desktop tower. The Dell OptiPlex 9030 All-in-One and Dell OptiPlex 9020 Micro are available with either Windows 7 or
Windows 8.1.
If a touchscreen delivers
a productivity benefit of
one minute per day
with the Dell OptiPlex
9030 All-in-One, it could
pay back its added cost
in under 20 months.
A Principled Technologies report 11Upgrading to new Dell OptiPlex desktops
can support higher performance and lower power monitor displays than the legacy
desktop tower we tested. The Dell OptiPlex 9030 All-in-One also offered HDMI—either
DisplayPort or HDMI on the Dell OptiPlex 9030 All-in-One can be used to add a second
display.
Replacing desktops can also boost your business with the latest in wireless
technology. The Dell OptiPlex 9030 All-in-One and Dell OptiPlex 9020 Micro both
included Intel Dual Band Wireless-AC 7260 cards, while the legacy desktop tower we
tested did not include a wireless card. Replacing a fleet of legacy desktop towers
without wireless cards provides more flexibility by removing the requirement of an
Ethernet port and cable for each desktop.
Save workspace with All-in-One and Mini form factors
Upgrading to new Dell OptiPlex desktops can also offer workspace savings for
your business. As Figure 9 shows, the Dell OptiPlex 9030 All-in-One and Dell OptiPlex
9020 Micro required significantly less workspace than the legacy desktop tower in our
study—59 and 60 percent less square inches, respectively. In addition, Dell offers
mounts for the OptiPlex 9020 Micro that can further reduce its required workspace,
creating more space savings when compared to the legacy desktop tower. Note: For
more details on how we calculated workspace for the three systems, see Appendix C.
Figure 9: Total workspace based on
footprint for each system. Lower
numbers are better.
As Figure 10 shows, the workspace savings that replacing desktops can bring
your business can have an enormous impact at scale. For example, a business replacing
10,000 legacy desktop towers with 10,000 new Dell OptiPlex 9020 Micro desktops could
save 7,708 sq. ft. of valuable workspace.
A Principled Technologies report 12Upgrading to new Dell OptiPlex desktops
Figure 10: Workspace saved in square
feet when replacing a fleet of legacy
desktop towers with Dell OptiPlex
9020 Micro desktops.
CONCLUSION
Compared to aging desktops, new Dell OptiPlex desktops can allow employees
to be more productive with faster and more reliable hardware while providing
significantly lower power costs. Improved management technology with the new
desktops can support the efforts of your IT staff and can reduce costly deskside visits.
Upgrading your aging desktops with the Dell OptiPlex 9030 All-in-One or the Dell
OptiPlex 9020 Micro desktops brings important improvements to your business through
both hardware and software.
A Principled Technologies report 13Upgrading to new Dell OptiPlex desktops
APPENDIX A – SYSTEM CONFIGURATION INFORMATION
Figure 11 details the systems we used in our tests.
System
Dell OptiPlex 9030 All-
in-One
Dell OptiPlex 9020
Micro
Legacy desktop tower
General
Number of processor packages 1 1 1
Number of cores per processor 4 4 2
Number of hardware threads per
core
1 1 1
Total number of processor threads
in system
4 4 2
System power management policy Balanced Balanced Balanced
Processor power-saving option EIST EIST EIST
Dimensions (h × l × w in inches) 20.50 × 22.25 × 8.50 1.50 × 7.38 × 7.19 17.63 × 17.38 × 7.00
Weight (lbs.) 24.1 2.5 23.8
CPU
Vendor Intel Intel Intel
Name Core i5 Core i5 Core 2 Duo
Model number 4590S 4590T E8400
Stepping C0 C0 E0
Socket type Socket 1150 LGA Socket 1150 LGA Socket 775 LGA
Core frequency (GHz) 3.0 / 3.7 Turbo 2.0 / 3.0 Turbo 3.0
Bus frequency DMI2 5 GT/s DMI2 5 GT/s 1,333 MHz
L1 cache 4 × 32 KB + 4 × 32 KB 4 × 32 KB + 4 × 32 KB 2 × 32 KB + 2 × 32 KB
L2 cache 4 × 256 KB 4 × 256 KB 6 MB
L3 cache 6 MB 6 MB N/A
Platform
Vendor and system name
Dell OptiPlex 9030 All-
in-One
Dell OptiPlex 9020
Micro
HP Compaq 8000 Elite
Convertible Minitower
Motherboard model number 0VNGWR 0Y5DDC 3647h
Motherboard chipset Intel Q87 Intel Q87 Intel Q45/Q43
BIOS name and version Dell A03 (09/15/2014) Dell A02 (08/11/2014)
Hewlett-Packard
786G7 v01.13
(07/20/2011)
AMT Version 5.2.50 9.1.0 9.1.0
A Principled Technologies report 14Upgrading to new Dell OptiPlex desktops
System
Dell OptiPlex 9030 All-
in-One
Dell OptiPlex 9020
Micro
Legacy desktop tower
Memory module(s)
Vendor and model number
Samsung®
M471B5173DB0-YK0
Hyundai Electronics
HMT41GS6BFR8A-PB
Samsung
M378B5673EH1-CH9
Type PC3-12800 PC3-12800 PC3-10600
Speed (MHz) 1,600 1,600 1,333
Speed running in the system (MHz) 1,600 1,600 1,066
Timing/Latency (tCL-tRCD-tRP-
tRASmin)
11-11-11-28 11-11-11-28 7-7-7-20
Size (MB) 4,096 8,192 2,048
Number of memory module(s) 2 1 2
Total amount of system RAM (GB) 8 8 4
Channel (single/dual) Dual Single Dual
Hard disk
Vendor and model number Seagate® ST500LT012 Samsung PM851 SSD Seagate ST3320418AS
Number of disks in system 1 1 1
Size (GB) 500 128 320
Buffer size (MB) 16 N/A 16
RPM 5,400 N/A 7,200
Type SATA 6.0 Gb/s SATA 6.0 Gb/s SATA 3.0 Gb/s
Controller
Intel 8 Series/C220
Chipset Family SATA
AHCI
Intel 8 Series/C220
Chipset Family SATA
AHCI
Intel Express Chipset
SATA RAID Controller
Driver
Intel 12.8.7.1000
(10/18/2013)
Intel 13.0.0.1098
(02/05/2014)
Intel 10.1.0.1008
(11/06/2010)
Operating system
Name
Windows 7
Professional x64
Windows 7
Professional x64
Windows 7
Professional x64
Build number 7600 7600 7600
Service Pack 1 1 1
File system NTFS NTFS NTFS
Kernel ACPI x64-based PC ACPI x64-based PC ACPI x64-based PC
Language English English English
Microsoft DirectX® version 11 11 11
A Principled Technologies report 15Upgrading to new Dell OptiPlex desktops
System
Dell OptiPlex 9030 All-
in-One
Dell OptiPlex 9020
Micro
Legacy desktop tower
Graphics
Vendor and model number Intel HD Graphics 4600 Intel HD Graphics 4600 Intel GMA 4500
Type Integrated Integrated Integrated
Chipset
Intel HD Graphics
Family
Intel HD Graphics
Family
Intel 4 Series Express
Chipset Family
BIOS version 2179.5 2179.1 2066.0
Total available graphics memory
(MB)
1,696 1,696 1,695
Dedicated video memory (MB) 64 64 64
System video memory (MB) 0 0 0
Shared system memory (MB) 1,632 1,632 1,631
Resolution 1,920 × 1,080 1,920 × 1,080 1,920 × 1,080
Driver
Intel 10.18.10.3412
(01/29/2014)
Intel 10.18.10.3412
(01/29/2014)
Intel 8.15.10.2413
(06/03/2011)
Sound card/subsystem
Vendor and model number
Realtek® High
Definition Audio
Realtek High Definition
Audio
Realtek High Definition
Audio
Driver
Realtek 6.0.1.6053
(10/16/2014)
Realtek 6.0.1.6032
(04/25/2014)
Realtek 6.0.1.6383
(05/31/2011)
Ethernet
Vendor and model number
Intel Ethernet
Connection I217-LM
Intel Ethernet
Connection I217-LM
Intel 82567LM-3
Gigabit Controller
Driver
Intel 12.12.50.4
(06/12/2014)
Intel 12.12.50.7205
(07/31/2014)
Intel 12.10.13.0
(12/16/2013)
Wireless
Vendor and model number
Intel Dual Band
Wireless-AC 7260
Intel Dual Band
Wireless-AC 7260
N/A
Driver
Intel 17.0.5.8
(06/18/2014)
Intel 17.0.5.8
(06/18/2014)
N/A
Optical drive(s)
Vendor and model number TSSTcorp SU-208FB N/A HP TS-H653R
Type DVD-RW N/A DVD-RW
USB ports
Number 8 6 10
Type 3.0 3.0 2.0
Other
Media card reader,
DisplayPort,
1 × HDMI In,
1 × HDMI Out
DisplayPort N/A
A Principled Technologies report 16Upgrading to new Dell OptiPlex desktops
System
Dell OptiPlex 9030 All-
in-One
Dell OptiPlex 9020
Micro
Legacy desktop tower
Monitor
Model
Dell All-in-One Touch
Display
Dell P2314H ViewSonic® VG730m
LCD type Backlit LED Backlit LED SXGA LCD
Screen size 23″ 23″ 17″
Refresh rate (Hz) 60 60 60
Maximum resolution 1,920 × 1,080 1,920 × 1,080 1,280 × 1,024
Figure 11: Detailed information for our test systems.
Figure 12 describes the configuration of the server that we used to access the desktops for management tasks.
System Dell PowerEdge™ R620
Power supplies
Total number 2
Vendor and model number Dell D750E-S1
Wattage of each (W) 750
Cooling fans
Total number 7
Vendor and model number Delta® GFC0412DS
Dimensions (h × w) of each 1-1/2″ × 1-3/4″
Volts 12
Amps 1.82
General
Number of processor packages 2
Number of cores per processor 8
Number of hardware threads per core 2
System power management policy Default
CPU
Vendor Intel
Name Xeon®
Model number E5-2660
Socket type LGA 2011
Core frequency (GHz) 2.20
Bus frequency 8
L1 cache 32 KB + 32 KB (per core)
L2 cache 256 KB (per core)
L3 cache 20 MB
Platform
Vendor and model number Dell PowerEdge R620
BIOS name and version Dell 2.4.3 (10/10/2014)
BIOS settings Default
A Principled Technologies report 17Upgrading to new Dell OptiPlex desktops
System Dell PowerEdge™ R620
Memory module(s)
Total RAM in system (GB) 128
Vendor and model number Micron® MT36KSF1G72PZ
Type PC3-12800R
Speed (MHz) 1,600
Speed running in the system (MHz) 1,600
Timing/Latency (tCL-tRCD-tRP-tRASmin) 9-9-9-24
Size (GB) 8
Number of RAM module(s) 20
Chip organization Double-sided
Rank Dual
Operating system
Name Microsoft Windows Server® 2012 R2 Datacenter
Build number 9600
File system NTFS
Kernel 6.2.9600.16452
Language English
RAID controller
Vendor and model number Dell PERC H710P Mini
Firmware version 21.3.1-0009 06/23/2014
Driver version 6.802.21.00 08/27/2014
Cache size (MB) 1,024
Local storage
Vendor and model number Seagate ST9900806SS
Number of drives 4
Size (GB) 900
RPM 10K
Type SAS
Ethernet adapters
Vendor and model number Intel Gigabit I350 4-port
Type Integrated
Driver 12.11.97.1 (08/13/2014)
USB 2.0 ports 4
Figure 12: Detailed information for our test server.
A Principled Technologies report 18Upgrading to new Dell OptiPlex desktops
APPENDIX B – HOW WE CALCULATED OVERALL SYSTEM PERFORMANCE
We included the following benchmarks in our performance/productivity calculation:
 HDXPRT 2012
 PCMark® 8 Work workload
 SYSmark® 2014
 3DMark® Ice Storm
 3DMark Ice Storm Extreme
We ran the five benchmarks on the Dell OptiPlex 9030 All-in-One, Dell OptiPlex 9020 Micro, and legacy desktop
tower, repeating each test three times. For our calculations, we selected the median of the three results for each
benchmark and system. We calculated the percentage wins for the Dell OptiPlex 9030 All-in-One and Dell OptiPlex 9020
Micro versus the legacy desktop tower on each benchmark. The Dell OptiPlex 9030 All-in-One and Dell OptiPlex 9020
Micro outperformed the legacy desktop tower on all five benchmarks.
We calculated system performance by taking the geometric mean of the percentage wins; that gave us a 145.3
percent system performance improvement for the Dell OptiPlex 9030 All-in-One versus the legacy desktop and a 114.1
percent system performance improvement for the Dell OptiPlex 9020 Micro (see Figure 13).
Dell OptiPlex 9030 All-in-One Dell OptiPlex 9020 Micro
Legacy desktop
tower
Score
%
improvement
over legacy
desktop tower
Score
%
improvement
over legacy
desktop tower
Score
HDXPRT (Create HD score) 229 129% 193 93% 100
SYSmark (Overall Rating) 1,417 133% 1,334 120% 607
PCMark (Work Score) 3,015 29% 3,093 32% 2,341
3DMark Ice Storm (Median) 57,050 361% 40,258 225% 12,385
3DMark Ice Storm Extreme (Median) 34,812 360% 25,834 241% 7,566
Geometric mean of percentage wins 145.3% 114.1%
Figure 13: System performance improvement based on our benchmark testing.
A Principled Technologies report 19Upgrading to new Dell OptiPlex desktops
APPENDIX C – HOW WE CALCULATED WORKSPACE
Figure 14 shows the dimensions for the three systems and the workspace savings for the Dell OptiPlex 9030 All-
in-One and Dell OptiPlex 9020 Micro. The base of the Dell OptiPlex 9030 All-in-One was roughly the same size as the 9″
circular base of the monitor that we paired with the legacy desktop tower. The legacy desktop tower chassis (17.6″ ×
17.4″ × 7.0″) took up 121.7 square inches of desk space. The circular base of the monitor added 63.6 square inches, for a
total footprint of 185.3 square inches. With a footprint of 76.5 square inches, the Dell OptiPlex 9030 All-in-One was
108.8 square inches smaller than the legacy desktop tower—a savings of 59 percent.
The Dell OptiPlex 9020 Micro chassis (1.5″ × 7.4″ × 7.2″) took up 11.1 square inches of desk space. We used
monitors with similar footprints for the Dell OptiPlex 9020 Micro (62.2 square inches) and the legacy desktop tower
(63.6 squares inches). Including the monitors, the footprint of the Dell OptiPlex 9020 Micro was 111.0 square inches
smaller than the footprint of the legacy desktop tower—a savings of 60 percent.
Monitor System Total
Length ×
width
(inches)
Area
(sq.
inches)
Length ×
width
(inches)
Area
(sq.
inches)
Total
Area
(sq.
inches)
Advantage
vs. legacy
(sq. inches)
Advantage
(%)
Dell OptiPlex 9030 All-
in-One
8.5 × 9.0 76.5 76.5 108.8 59%
Dell OptiPlex 9020
Micro
(on its narrow side)
7.1 × 8.9 63.2 7.4 × 1.5 11.1 74.3 111.0 60%
Legacy desktop tower
(circular base)
9.0 63.6 17.4 × 7 121.7 185.3
Figure 14: Dimensions of the three systems and the workspace savings for the Dell OptiPlex 9030 All-in-One and Dell OptiPlex
9020 Micro.
A Principled Technologies report 20Upgrading to new Dell OptiPlex desktops
APPENDIX D – HOW WE TESTED
Configuring the SCCM management environment
Starting from our base Microsoft System Center 2012 Configuration Manager build, we configured our
environment to test KVM Remote Control capability on our target clients. Figure 15 shows our isolated testing
environment, which comprised of one Dell PowerEdge R620 server running Windows Server 2008 R2 Hyper-V® with four
virtual machines. Before configuration, we installed all available Windows updates on our clients and joined each
desktop to the test.local domain. We created Active Directory accounts for AMT provisioning and installed Intel Setup
and Configuration Software (Intel SCS). Next, we provisioned the desktops using Configurator, provided by Intel, to apply
our custom management profile from SCS to each client’s management engine. We provide detailed steps below for
each of these procedures. Finally, Dell Command | Intel vPro Out of Band , which we used to connect to the Dell
OptiPlex 9030 All-in-One and Dell OptiPlex 9020 Micro to complete our out-of-band management testing.
Description
Computer
name
Operating system
Roles Installed
Assigned IP vCPU vRAM
Domain controller dc.test.local
Windows Server
2008 R2 Standard
Active Directory,
Domain Controller,
DHCP
192.168.1.10 1 8 GB
Certificate authority ca.test.local
Windows Server
2008 R2 Enterprise
Certification Authority
192.168.1.15 1 8 GB
Database server db.test.local
Windows Server
2008 R2 Standard
SQL Server 2012
Enterprise
192.168.1.20 1 16 GB
Management server cm.test.local
Windows Server
2008 R2 Standard
System Center 2012
Configuration Manager
SP1
192.168.1.50 2 16 GB
Figure 15: The details of our isolated testing environment.
Constructing the infrastructure
Creating Active Directory accounts for AMT provisioning
1. Log into the Domain Controller using the domainadministrator account.
2. Open Active Directory Administrative Center.
3. Under test(local), click NewGroup.
4. On the Create Group window, for Group name, use Kerberos Admins; for Group type, use security.
5. Add Kerberos Admins as a member of the Domain Admins group.
6. Add the computer account of the SCCM server to the Kerberos Admins security group.
7. Create an Organizational Unit for AMT managed systems. We used AMT
8. Create a security group called AMT
9. Add the Kerberos Admins group to the AMT security group.
Creating certificate templates for OOB management
1. Log into the Windows 2008 R2 Enterprise server designated for Certificate Authority as
domainadministrator.
2. Click StartAdministrative ToolsCertification Authority.
3. Right-click on test-CA-CA, and click Properties.
A Principled Technologies report 21Upgrading to new Dell OptiPlex desktops
4. On the General tab, click View Certificate.
5. On the Details tab, scroll to and select Thumbprint. Copy the 40-character code displayed in the details. You
will add this information to the AMT BIOS later.
6. To close the Certificate Authority properties, click OK.
7. Expand the Certification Authority, and select Certificate Templates.
8. Right-click Certificate Templates, and select Manage.
9. Locate Web Server in the list of available certificate templates. Right-click the template, and select Duplicate
Template.
10. Select Windows 2003 Enterprise, and click OK.
11. Change the template name for the AMT Provisioning certificate. We used AMT Provisioning.
12. On the Subject Name tab, select Build from this Active Directory Information. Select Common Name, and
choose the option UPN.
13. On the Security tab, add the security group created for the SCCM site server. We used the Kerberos Admin
group. Add the Enroll permission for the security group. Ensure Domain Admins and Enterprise Admins have
Enroll permissions.
14. On the Extensions tab, select Application Policies, and click Edit.
15. Click Add. Click New. Type AMT Provisioning for the name, and 2.16.840.1.113741.1.2.3 as
the Object Identifier. Click OK.
16. Ensure AMT Provisioning and Server Authentication are listed, and click OK.
17. Click OK to close the template properties.
18. Right-click the AMT Web Server Certificate template, and select Duplicate Template.
19. Select Windows 2003 Enterprise, and click OK.
20. Change the template name for the AMT Web Server Certificate. We used AMT Web Server
Certificate Template.
21. On the General tab, choose the option Publish Certificate in Active Directory.
22. On the Subject Name tab, select Supply in the request.
23. On the Security tab, ensure Domain Admins and Enterprise Admins have Enroll permissions.
24. To close the template properties, click OK.
25. In Certification Authority, navigate to Certificate Templates.
26. For both the AMT Provisioning Template, and the AMT Web Server Certificate Template, repeat the
following steps:
27. Right-click the central panel, and select NewCertificate Template to Issue.
28. Select the AMT Provisioning Template.
29. Click OK.
30. Log into the management server as domainadministrator.
31. Click StartRun. Type mmc and press Enter.
32. In the mmc console, click FileAdd/Remove Snap-in…
33. Select Certificates, and click Add. Select Computer account. Click Next.
34. Select Local computer, and click Finish.
35. Click OK.
36. Expand Certificates (Local Computer)PersonalCertificates.
A Principled Technologies report 22Upgrading to new Dell OptiPlex desktops
37. In the right panel, click More ActionsAll TasksRequest a new certificate…
38. Click Next.
39. Accept the defaults, and click Next.
40. Select the new AMT Provisioning certificate. Click Enroll.
41. Click FileAdd/Remove Snap-in…
42. Select Certificates, and click Add. Select Computer account. Click Next.
43. Select My user account, and click Finish.
44. Click OK.
45. Expand CertificatesPersonalCertificates.
46. In the right panel, click More ActionsAll TasksRequest a new certificate…
47. Click Next.
48. Accept the defaults, and click Next.
49. Select the new AMT Provisioning certificate. Click Enroll.
50. Click FileAdd/Remove Snap-in…
51. Select Certificates, and click Add. Select My user account. Click Next.
52. Select Local computer, and click Finish.
53. Click OK.
54. Expand Certificates – Current UserPersonalCertificates.
55. From Certificates (Local)PersonalCertificates, click and drag the certificate created using the AMT
Provisioning template into Certificates – Current UserPersonalCertificates.
56. Click Close.
Installing Intel Setup and Configuration Software (SCS) 9.1
1. Download IntelSCS_9.1.zip from downloadcenter.intel.com/Detail_Desc.aspx?DwnldID=20921.
2. Extract the contents to C:IntelSCS_9.1.
3. Browse to C:IntelSCS_9.1IntelSCSRCS.
4. Run IntelSCSInstaller.exe.
5. At the Welcome screen, click Next.
6. Select I accept the terms of the license agreement, and click Next.
7. Check the Boxes for Remote Configuration Service (RCS), Database Mode, and Console.
8. Enter the credentials of the Domain account that will run the service. We used
test.localadministrator. Click Next.
9. Select db.test.local as the location for the SCS database. This information may populate automatically. Select
Windows Authentication, and click Next.
10. On the Create Intel SCS Database pop-up, click Create Database.
11. On the confirmation screen, click Close.
12. On the confirmation screen, leave the default Installation Folder, and click Install.
13. Once the installation is complete, click Next.
14. Click Finish.
Setting up AMT provisioning with Intel SCS Remote Configuration Service
Creating the configuration profile
1. On the management server, launch the Intel Setup and Configuration Console.
A Principled Technologies report 23Upgrading to new Dell OptiPlex desktops
2. Click Profiles.
3. To construct a profile for deployment, click New.
4. For Profile Name, enter a description of the target clients. We used inteltest. Click OK.
5. On the Getting Started Screen, choose Configuration / Reconfiguration.
6. On the Optional Settings screen, choose the options Active Directory Integration, Access Control List (ACL),
and Transport Layer Security (TLS), and click Next.
7. On the AD Integration screen, browse for the OU created for the AMT managed devices. We used OU=AMT,
DC=test, DC=local. Check the box for Always use host name, and click Next.
8. On the Access Control List screen, click Add.
9. Select Active Directory User/Group. Click Browse.
10. Add Kerberos Admin, Domain Admins, or other administrative users groups. Click OK.
11. For Access Type, select Remote.
12. Choose the option for PT Administration. Click OK.
13. Click Next.
14. On the TLS screen, from the drop-down menu, select the Enterprise Certificate Authority, ca.test.local.
15. Select the Server Certificate Template to be used to generate certificates for the AMT devices. We selected
AMTWebServerCertificate. Click Next.
16. On the System Settings screen, choose the options Web UI, Serial Over LAN, IDE Redirection, and KVM
Redirection.
17. Select Use the following password for all systems. Enter the password for use after provisioning is complete.
We used P@ssw0rd
18. Click KVM Settings…
19. Enter the RFB Password for KVM sessions. We used P@ssw0rd
20. Enter the MEBX password. We used P@ssw0rd
21. Uncheck User Consent required before beginning KVM session, and click OK.
22. Choose the options Enable Intel AMT to respond to ping requests and Enable Fast Call for Help (within the
enterprise network).
23. To Edit IP and FQDN settings, click Set.
24. In the Network Settings window, select Use the following as the FQDN, and choose Primary DNS FQDN from
the drop-down menu.
25. Choose the option, the device and the OS will have the same FQDN (Shared FQDN).
26. Select Get the IP from the DHCP server.
27. Select Update the DNS directly or via DHCP option 81. Click OK.
28. Click Next.
29. Click Finish.
Configuring the clients
Repeat these steps for each client.
Reserving an IP address in DHCP
1. On the Domain Controller, run dhcpmgmt.msc.
2. Expand FQDN IPv4Scope, and click Reservations.
3. Click More Actions, and click New Reservation.
A Principled Technologies report 24Upgrading to new Dell OptiPlex desktops
4. For Reservation Name, enter the host name of the target client.
5. Enter an IP address to reserve.
6. Enter the MAC address of the target client’s Ethernet port.
7. Click Add.
Configuring policy on the target client
1. Log onto the target client using domainadministrator.
2. Download and apply applicable driver packages from the manufacturer’s Web site.
3. Open Windows Firewall with Advanced Security.
4. Click Firewall Properties.
5. On the Domain Profile, Private Profile, and Public Profile tabs, set the Firewall state to Off. Click OK.
6. Set the host name and IP of each virtual machine as described above.
7. Run lusrmgr.msc.
8. Select Groups.
9. Right-click Administrators, and click Properties.
10. Click Add.
11. Select Object Types, check the box for Computers, and click OK.
12. Disable the wireless adapter.
Configuring the Configuration Manager Client
1. On the management server, navigate to Program Files Microsoft Configuration Manager folder.
2. Copy the Client folder to the target client.
3. On the target client, run ccmsetup.exe. This task will run in the background and will take a few minutes to
complete.
4. In Control Panel, open Configuration Manager.
5. On the Site tab, click Configure Settings.
6. For Currently assigned to site code, enter PTL, and click Apply.
7. In the Actions panel, run the User Policy Retrieval & Evaluation Cycle and the Machine Policy Retrieval &
Evaluation Cycle.
8. After a few minutes, the Actions panel will populate with more tasks. Run each one of the tasks.
Adding the enterprise certificate authority to the AMT trusted root certification authorities
1. Power on the target client.
2. During POST, press CTRL-P to enter the Intel Management Engine BIOS settings.
3. When prompted for a password, type the default password admin
4. Provide and confirm a new password. We used P@ssw0rd
5. Select Intel AMT Configuration. Press Enter.
6. Select SOL/IDER/KVM.
7. All features should be Enabled. To exit the menu, press Esc.
8. Select User Consent.
9. Change User Opt-in to None.
10. Change Opt-in Configurable from Remote IT to Disabled. To exit the menu, press Esc.
11. Change Password Policy to During Setup and Configuration.
12. Select Network Setup.
A Principled Technologies report 25Upgrading to new Dell OptiPlex desktops
13. Select Intel ME Network Name Settings.
14. For Host Name, use the same host name used for the operating system.
15. For Domain Name, enter the domain name. We used test.local
16. For Shared/Dedicated FQDN, select Shared.
17. For Dynamic DNS Update, select Enabled. Press Esc to exit the menu.
18. Select Remote Setup and Configuration. Press Enter.
19. On Provisioning Server IPv4/IPv6, enter the IP address of the system center server. We used
192.168.1.50
20. For Provisioning Server FQDN, enter the FQDN of the management server. We entered cm.test.local.
For port number we used 9971
21. Select TLS PKI.
22. Select PKI DNS Suffix, and type the FQDN suffix. We used test.local. Press Enter.
23. Select Manage Hashes.
24. To add a new hash, press Insert.
25. Enter a descriptive name for the Enterprise Certificate Authority. We used test.local CA
26. Press Enter.
27. Following the syntax example provided in the prompt, enter the 40-character thumbprint previously copied
from the Enterprise CA root certificate. Press Enter.
28. To set the hash certificate as active, press Y. test.local CA will appear in the list of trusted root authorities
and should be active.
29. To return to the AMT Configuration Menu, press Esc.
30. Select Activate Network Access. To confirm, press Y.
31. To exit, press Esc until prompted. To confirm exit, press Y.
Executing the remote configuration script on the AMT managed client
1. Log into the AMT managed target client as domainadministrator.
2. Copy the Configurator folder from the SCS_9.1 directory located on the management server to C: on the
local host.
3. Open a command prompt as administrator.
4. Type cd C:Configurator and press Enter.
5. Execute the following command:
ACUConfig.exe /lowsecurity /output console /verbose ConfigViaRCSOnly
cm.test.local inteltest
6. The Configurator utility will contact the Remote Configuration Service and apply the settings configured in
the inteltest profile.
Setting up AMT discovery in SCCM
1. On the management server, open the SCCM Management Console. Locate the target client in the Devices
panel.
2. Right-click the headings bar in the Devices panel, and check the entries for AMT Status and AMT Version.
3. Right-click the server, and select Manage Out of BandDiscover AMT Status. Click OK.
4. In the Home menu at the top of the panel, click Refresh.
A Principled Technologies report 26Upgrading to new Dell OptiPlex desktops
5. The Client, Site Code, and Client Activity fields will populate. The AMT Status will change to Externally
provisioned.
Installing Dell Command | vPro Out of Band
1. Download the Dell Command | vPro Out of Band 2.0 from
downloads.dell.com/FOLDER02502830M/2/DCIV_194_ZPE.exe
2. Run DCIV_194_ZPE.exe. Continue as prompted to extract the installation files onto the management server.
3. Run DCIV_Setup_2_0_0.
4. On the Dell Command | Intel vPro Out of Band – v 2.0.0.194 window, click Next.
5. On the License Agreement screen, accept the License Agreement, and click Next.
6. On the Ready to Install the Program screen, click Install.
7. When complete, click Finish.
8. Open Dell Command | Intel vPro Out of Band.
9. At the welcome screen, click OK.
10. At the Settings screen, for Data Configuration enter the appropriate information. We used the following:
 System Center SQL server : db.test.local
 System Center database : CM_PTL
11. For Client Credentials, enter the appropriate information. We used the following:
 Operating System Domain: test.local
 Username : administrator
 Password : Password1
 Password confirmation : Password1
 AMT Management Engine Domain : test.local
 Username : admin
 Password : P@ssw0rd
 Password Confirmation : P@ssw0rd
12. On the Task Queue screen, turn off Refresh Automatically.
13. Set the History Limit to 7.
14. Click OK.
Timing common management tasks on the Dell OptiPlex desktops
Changing one BIOS setting
1. On the management server, place the mouse over the Windows start menu icon and start the timer. From
the task bar, click on the icon to open Dell Command | Intel vPro Out of Band.
2. Select Client Configuration.
3. Select BIOS Settings.
4. Click Next.
5. On the BIOS Settings screen, for Active Processor Cores, for Value to Set select All and check the box to
Apply the Setting.
6. Click Next.
7. On the Available clients screen, select the target client. Click the right pointing arrow to add the selected
client to the list.
8. For a second client, repeat step 7.
A Principled Technologies report 27Upgrading to new Dell OptiPlex desktops
9. Click Next.
10. Type a description in the Description field. We used test.
11. Click Next.
12. Click Finish.
13. Complete steps 1 through 12 two more times, and report the median of the three runs.
Changing five BIOS settings
1. On the management server, place the mouse over the Windows start menu icon and start the timer. From
the task bar, click on the icon to open Dell Command | Intel vPro Out of Band.
2. Select Client Configuration.
3. Select BIOS Settings.
4. Click Next.
5. On the BIOS Settings screen, for Active Processor Cores, for Value to Set select All and check the box to
Apply the Setting.
6. For Enable Intel SpeedStep for Value to Set select Enabled and check the box to Apply the Setting.
7. For Enable Intel Virtualization Technology for Value to Set select Enabled and check the box to Apply the
Setting.
8. For Enable MEBx Hotkey for Value to Set select Enabled and check the box to Apply the Setting.
9. For Enable VT for Direct I/O for Value to Set select Enabled and check the box to Apply the Setting.
10. Click Next.
11. On the Available clients screen, select the target client. Click the right pointing arrow to add the selected
client to the list.
12. Repeat step 11 for second client.
13. Click Next.
14. Type a description in the Description field. We used test.
15. Click Next.
16. Click Finish.
17. Complete steps 1 through 16 two more times, and report the median of the three runs.
Changing boot order
1. On the management server, place the mouse over the Windows start menu icon and start the timer. From
the task bar, click on the icon to open Dell Command | Intel vPro Out of Band.
2. Select Client Configuration.
3. Select Boot Order.
4. Select Internal Optical Drive from the Device list and click the up Arrow button to move the drive up in the
Boot order once.
5. Click Next.
6. Select the target client on the Available clients screen. Click the right pointing arrow to add the selected
client to the list.
7. Repeat step 6 for the second system.
8. Click Next.
9. Type a description in the Description field. We used test.
10. Click Next.
A Principled Technologies report 28Upgrading to new Dell OptiPlex desktops
11. Click Finish.
12. Complete steps 1 through 11 two more times, and report the median of the three runs.
Changing the BIOS password
1. On the management server, place the mouse over the Windows start menu icon and start the timer. From
the task bar, click on the icon to open Dell Command | Intel vPro Out of Band.
2. Select Client Configuration.
3. Select BIOS Passwords.
4. For Password task, select Set.
5. Select Administration.
6. For New Password, type Password1
7. For Confirm New Password, type Password1
8. Click Next.
9. On the Available clients screen, select the target client. Click the right pointing arrow to add the selected
client to the list.
10. Repeat step 9 for the second system.
11. Click Next.
12. Type a description in the Description field. We used test.
13. Click Next.
14. Click Finish.
15. Complete steps 1 through 14 two more times, and report the median of the three runs.
Changing the power profile
1. On the management server, place the mouse over the Windows start menu icon and start the timer. From
the task bar, click on the icon to open Dell Command | Intel vPro Out of Band.
2. Select Client Configuration.
3. Select Power Profile.
4. For Desktop power policy, select ON in S0; ME Wake in S3, S4-S5.
5. For Mobile power policy, select No change.
6. Click Next.
7. On the Available clients screen, select the target client. Click the right pointing arrow to add the selected
client to the list.
8. Repeat step 7 for the second system.
9. Click Next.
10. Type a description in the Description field. We used test
11. Click Finish.
12. Complete steps 1 through 11 two more times, and report the median of the three runs.
Measuring the time to open a KVM session
1. On the management server, place the mouse over the Windows start menu icon and start the timer. From
the task bar, click on the icon to open Dell Command | Intel vPro Out of Band.
2. Select Operations.
3. Select KVM Connect.
4. On the KVM Connect screen, select the target client, and click Connect.
A Principled Technologies report 29Upgrading to new Dell OptiPlex desktops
5. The KVM will window will appear and connect automatically. When the login screen is visible, stop the
timer.
6. Complete steps 1 through 5 two more times, and report the median of the three runs.
Timing common management tasks on the legacy desktop tower
Changing one BIOS setting
1. With the client at the Windows login screen, start the timer. Restart the computer.
2. As the system reboots, press F10 to boot into the setup menu.
3. Select English.
4. Under the advanced tab, select device options.
5. Select Multi-processor.
6. Select Enable
7. Press F10 to accept.
8. Press escape, down, and Enter to Save Changes and Exit.
9. Press F10 and allow the system to reach the login screen. When the login screen is visible, stop the timer.
10. Complete steps 1 through 9 two more times, and report the median of the three runs.
Changing five BIOS setting
1. With the client at the Windows login screen, start the timer. Restart the computer.
2. As the system reboots, press F10 to boot into the setup menu.
3. Select English.
4. Under the Security Tab, select System Security.
5. Select Virtualization Technology (VTx).
6. Select Enable.
7. Press F10 to accept
8. Select Virtualization Technology Direct I/O (VTd)
9. Select Enable.
10. Press F10 to accept.
11. Under the Power tab, select OS Power Management.
12. Select Runtime Power Management.
13. Select Enable.
14. Press F10 to accept.
15. Under the advanced tab, select device options.
16. Select Multi-processor.
17. Select Enable
18. Press F10 to accept.
19. Select Management operations.
20. Select MEBx Setup Prompt.
21. Select Displayed.
22. Press F10 to accept.
23. Press escape, down, and Enter to Save Changes and Exit.
24. Press F10 and allow the system to reach the login screen. When the login screen is visible, stop the timer.
25. Complete steps 1 through 24 two more times, and report the median of the three runs.
A Principled Technologies report 30Upgrading to new Dell OptiPlex desktops
Changing boot order
1. With the client at the Windows login screen, start the timer. Restart the computer.
2. As the system reboots, press F10 to boot into the setup menu.
3. Select English.
4. Under the Storage tab, select boot Order.
5. Select ATAPI CD-ROM Drive by pressing Enter.
6. Press up to move the CD-ROM Drive, and press enter.
7. Press F10 to accept.
8. Press escape, down, and Enter to Save Changes and Exit.
9. Press F10 and allow the system to reach the login screen. When the login screen is visible, stop the timer.
10. Complete steps 1 through 9 two more times, and report the median of the three runs.
Changing BIOS password
1. With the client at the Windows login screen, start the timer. Restart the computer.
2. As the system reboots, press F10 to boot into the setup menu.
3. Select English.
4. Under the Security tab, select Setup Password.
5. For Enter New Setup Password, type Password1.
6. For Enter New Password Again, type Password1
7. Press F10 to accept.
8. Press escape, down, and Enter to Save Changes and Exit.
9. Press F10 and allow the system to reach the login screen. When the login screen is visible, stop the timer.
10. Complete steps 1 through 9 two more times, and report the median of the three runs. Before starting the
next run, remove the added BIOS password.
Changing the power profile
1. With the client at the Windows login screen, start the timer. Restart the computer.
2. As the system reboots, press Ctrl + P to boot into MEBX.
3. Enter the Password.
4. Select Intel ME Configuration.
5. Press Y to Confirm.
6. Select Intel ME Power Control.
7. Press Enter.
8. Select Desktop: ON in S0, S3, S4-5.
9. Press ESC three times
10. When asked if you want to exit, press Y and allow the system to reach the login screen. When the login
screen is visible, stop the timer.
11. Complete steps 1 through 10 two more times, and report the median of the three runs.
Measuring system performance
HDXPRT 2012
Setting up the test
1. Insert the HDXPRT v1.1 DVD-ROM into your DVD drive.
2. At the HDXPRT Install screen, click Install HDXPRT.
A Principled Technologies report 31Upgrading to new Dell OptiPlex desktops
3. Accept the HDXPRT end-user license agreement.
4. After the setup is complete, select Yes, I want to restart my computer now, and click Finish.
Running the test
1. On the desktop, click the HDXPRT 2012 shortcut.
2. Click Run HDXPRT.
3. Enter a test name, choose 3 iterations, and click Run.
4. The Results Screen automatically appears at the end of a successful run.
BAPCo® SYSmark 2014 v1.0.1.21
Antivirus software conflicts
SYSmark 2014 is not compatible with any virus-scanning software, so we uninstalled any such software that was
present on the desktop PCs before we installed the benchmark.
Pre-installed software conflicts
SYSmark 2014 installs the following applications, which its test scripts employ:
 Adobe® Acrobat® XI Pro
 Adobe Photoshop® CS6 Extended
 Adobe Premiere® Pro CS6
 Google Chrome™
 Microsoft Excel® 2013
 Microsoft OneNote® 2013
 Microsoft Outlook® 2013
 Microsoft PowerPoint® 2013
 Microsoft Word 2013
 Trimble® SketchUp® Pro 2013
 WinZip® Pro 17.5
Setting up the test
1. Disable the User Account Control.
2. Click StartControl Panel.
3. At the User Accounts and Family Safety settings screen, click Add or remove user account.
4. At the User Account Control screen, click Continue.
5. Click Go to the main User Accounts page.
6. At the Make changes to your user account screen, click Turn User Account Control on or off.
7. At the User Account Control screen, click Continue.
8. Uncheck Use User Account Control to help protect your computer, and click OK.
9. At the You must restart your computer to apply these changes screen, click Restart Now.
10. Purchase SYSmark 2014 v1.0.1.21 from bapco.com/products/sysmark-2014 and install with default settings.
11. To launch SYSmark 2014, double-click the desktop icon, and select Configuration.
12. Select all options, and click Save.
Running the test
1. Double-click the desktop icon to launch SYSmark 2014.
2. Make sure Office Productivity, Media Creation, and Data/Financial Analysis are selected.
A Principled Technologies report 32Upgrading to new Dell OptiPlex desktops
3. Enter a Project name.
4. Select 3 Iterations, check the box beside Conditioning Run and beside Process Idle Tasks, and click Run
Benchmark.
5. When the benchmark completes and the main SYSmark 2014 menu appears, click Save FDR to create a
report.
Futuremark® PCMark 8 v2.3.293
Setting up the test
1. Download the PCMark 8 installer exe Windows package from www.futuremark.com/benchmarks/pcmark8.
2. Double-click the PCMark installer exe file to install PCMark 8 with the default options.
3. Click the PCMark 8 desktop icon to launch PCMark 8. Enter the registration code, click Register, and click OK.
4. Exit PCMark 8.
Running the test
1. Boot the system and type CMD to bring up a command prompt.
2. To open App options, right-click the Command Prompt app.
3. Click Run as administrator.
4. Type Cmd.exe /c start /wait Rundll32.exe advapi32.dll,ProcessIdleTasks
5. Do not interact with the system until the command completes.
6. After the command completes, wait 5 minutes before running the test.
7. Double-click the PCMark 8 desktop icon to launch the benchmark.
8. Select the Home test suite.
9. Click Run Conventional.
10. When the benchmark run completes, record the results.
11. Shut down the system.
12. Complete steps 1 through 11 two more times for the Home test suite, and report the median of the three
runs.
13. After completing the three runs of the Home test suite, perform steps 1 through 12 for the Creative, Work,
Storage, and Application suites.
3DMark
Installing 3Dmark v1.4.828
14. Download the 3DMark installer from www.futuremark.com/benchmarks/3dmark/all.
15. To install 3DMark with the default options, double-click the 3DMark installer exe file.
16. At the Welcome screen, click Next.
17. At the License Agreement screen, click I accept the terms of the license agreement, and click Next.
18. At the Setup Type screen, click Express, and click Next.
19. At the Ready to Install the Program screen, click Install.
20. At the Setup Complete screen, click Finish.
21. To launch 3DMark, double-click the 3DMark desktop icon. Enter the registration code, and click Register.
22. Exit 3DMark.
Running 3DMark v1.4.828
1. Boot the system and bring up a command prompt:
a. Type CMD into the Start menu search bar.
A Principled Technologies report 33Upgrading to new Dell OptiPlex desktops
b. Right-click the Command Prompt app.
c. Click the Run as administrator button.
2. Type Cmd.exe /c start /wait Rundll32.exe advapi32.dll,ProcessIdleTasks
3. Do not interact with the system until the command completes.
4. After the command completes, wait 5 minutes before running the test.
5. To launch the benchmark, double-click the 3DMark desktop icon.
6. At the 3DMark Benchmark screen, click Run Ice Storm Unlimited.
7. When the benchmark run completes, record the results.
8. Repeat steps 6 and 7, except run Ice Storm Extreme.
9. Perform steps 1 through 8 two more times, and report the median of the three runs.
Measuring power consumption
Test requirements
 ExTech 380801 True RMS Power Analyzer
 PassMark® BurnInTest Professional
 Thermometer
Measuring system temperature while idle and under load
Setting up the test
1. Using a power strip, plug the system under test (and monitor if used) into the ExTech.
2. Plug the ExTech into its own circuit.
3. On the system used to monitor the ExTech, open the Power Analyzer.
4. From the drop-down Option menu, select Sample Rate.
5. For the sample rate, enter 1.0, and select OK.
6. On the systems under test, set the power plan to the manufacturer’s default setting. Set the display
brightness to 100 percent:
a. Click Start.
b. In the Start menu’s quick search field, type Power Options
c. Move the Screen brightness slider all the way to the right.
7. Set the remaining power plan settings as follows:
 Dim the display: Never
 Turn off the display: Never
 Put the computer to sleep: Never
8. Disable the screen saver.
9. Download PassMark BurnIn Test Professional V7 from www.passmark.com/products/pt.htm.
10. To run setup, double-click bitpro_x64.exe.
11. At the Welcome screen, click Next.
12. Accept the license agreement, and click Next.
13. At the Choose Install Location screen, accept the default location of C:Program FilesBurnInTest, and click
Next.
14. At the Select Start Menu Folder screen, click Next.
15. At the Ready to Install screen, click Install.
A Principled Technologies report 34Upgrading to new Dell OptiPlex desktops
16. At the Completing the BurnInTest Setup Wizard screen, deselect View Readme.txt, and click Finish to launch
PerformanceTest.
17. At the Purchasing information screen, copy and paste the Username and key, and click Continue.
18. At the Key accepted screen, click OK.
19. From the Configuration menu item, select Test selection and duty cycles.
20. Change the Auto Stop After field to 180.
21. Select CPU, 2D Graphics, 3D Graphics, RAM, and Disk(s), and deselect all other subsystems.
22. Set load to 100, and click OK.
23. From the Configuration menu item, select Test Preferences and set or verify the following by clicking on
each tab:
 Disk: select C: drive
 Logging: select Turn automatic logging on
 2D Graphics: select All available Video Memory
 3D Graphics: defaults
 RAM: select Multi-Process Torture Test
Running the test
1. Boot the system and bring up an administrative command prompt:
2. Type Cmd.exe /c start /wait Rundll32.exe advapi32.dll,ProcessIdleTasks
3. Do not interact with the system until the command completes.
4. After the command completes, wait 5 minutes before running the test.
5. On the ExTech power monitor, enter a name for the test run.
6. Report the room temperature, and in the ExTech Power Analyzer window, click Start Recording
7. After 30 minutes, record the room temperature.
8. After 1 hour, record the room temperature and in the ExTech Power Analyzer window, click Stop Recording.
9. Record the average watts of the run as Idle Power consumption.
10. Record the average of the recorded room temperatures as the Idle Room Temperature.
11. On the ExTech power monitor, enter a name for the Under Load test run.
12. Double-click the PassMark BurnInTest desktop icon.
13. In the BurnInTest V7.0 Pro screen, click Start Selected Tests.
14. Report the room temperature, and in the ExTech Power Analyzer window, click Start Recording.
15. After 30 minutes, record the room temperature.
16. After 1 hour, record the room temperature, and in the ExTech Power Analyzer window, click Stop Recording.
17. Record the average watts of the run as Under Load Power Consumption.
18. Record the average of the recorded room temperature as the Under Lo
19. ad Room Temperature.
20. Power the system down and let it rest for one hour.
21. Complete steps 1 through 19 two more times, and report the median of the three Idle and Under Load runs
as well as the average temperature for each median run.
A Principled Technologies report 35Upgrading to new Dell OptiPlex desktops
APPENDIX E – BENCHMARK INFORMATION
About HDXPRT 2012
The High Definition Experience & Performance Ratings Test (HDXPRT) 2012 is a benchmark that evaluates the
capabilities of PCs in consumer digital media uses, divided into the following categories:
 Media Organizer
 Media Creator
 Photo Blogger
 Video Producer
 Music Maker
For more information on HDXPRT 2012, see
principledtechnologies.com/benchmarkxprt/whitepapers/2012/HDXPRT_2012_White_Paper.pdf.
About BAPCo SYSmark 2014
According to BAPCo, “SYSmark 2014 is an application-based benchmark that reflects usage patterns of business
users in the areas of office productivity, media creation, and data/financial analysis.” The benchmark features notable
applications from these fields. SYSmark 2014 generates a score from the times the tested system takes to complete each
individual operation in each scenario. For more information on this benchmark, see bapco.com/products/sysmark-2014.
About Futuremark PCMark 8 v2.2.282
According to Futuremark, “PCMark 8 is the latest version in our series of industry standard PC-benchmarking
tools.” PCMark 8 evaluates the performance of PCs from tablets to desktops by using real-world tasks and applications.
Applications are divided into scenarios that reflect common usage in different capacities. For our testing, we used the
Work portion of the benchmark, which offers workloads that test a system's ability to perform basic office work tasks,
such as writing documents, browsing Web sites, creating spreadsheets, and using video chat.
About Futuremark 3DMark (2013) v1.4.778
Futuremark 3DMark v1.4.778 is a collection of benchmarks designed to rate the graphics performance of
smartphones, tablets, notebooks, laptops, desktops, or high-performance gaming PCs. 3DMark includes benchmarks
designed for Windows, Apple®, and Android™ devices. The Ice Storm portion of 3DMark includes 720p graphics tests to
measure GPU performance and a physics test to stress CPU performance. Ice Storm is available for Windows, iOS, and
Android smart phones and tablets. It uses a DirectX® 11 feature level 9 for Windows and OpenGL® ES 2.0 for iOS and
Android systems. Ice Storm Extreme increases the rendering resolution to 1080p and uses higher quality textures and
post-processing effects in the Graphics tests.
For more information on 3DMark, see www.futuremark.com/benchmarks/3dmark.
A Principled Technologies report 36Upgrading to new Dell OptiPlex desktops
ABOUT PRINCIPLED TECHNOLOGIES
Principled Technologies, Inc.
1007 Slater Road, Suite 300
Durham, NC, 27703
www.principledtechnologies.com
We provide industry-leading technology assessment and fact-based
marketing services. We bring to every assignment extensive experience
with and expertise in all aspects of technology testing and analysis, from
researching new technologies, to developing new methodologies, to
testing with existing and new tools.
When the assessment is complete, we know how to present the results to
a broad range of target audiences. We provide our clients with the
materials they need, from market-focused data to use in their own
collateral to custom sales aids, such as test reports, performance
assessments, and white papers. Every document reflects the results of
our trusted independent analysis.
We provide customized services that focus on our clients’ individual
requirements. Whether the technology involves hardware, software, Web
sites, or services, we offer the experience, expertise, and tools to help our
clients assess how it will fare against its competition, its performance, its
market readiness, and its quality and reliability.
Our founders, Mark L. Van Name and Bill Catchings, have worked
together in technology assessment for over 20 years. As journalists, they
published over a thousand articles on a wide array of technology subjects.
They created and led the Ziff-Davis Benchmark Operation, which
developed such industry-standard benchmarks as Ziff Davis Media’s
Winstone and WebBench. They founded and led eTesting Labs, and after
the acquisition of that company by Lionbridge Technologies were the
head and CTO of VeriTest.
Principled Technologies is a registered trademark of Principled Technologies, Inc.
All other product names are the trademarks of their respective owners.
Disclaimer of Warranties; Limitation of Liability:
PRINCIPLED TECHNOLOGIES, INC. HAS MADE REASONABLE EFFORTS TO ENSURE THE ACCURACY AND VALIDITY OF ITS TESTING, HOWEVER,
PRINCIPLED TECHNOLOGIES, INC. SPECIFICALLY DISCLAIMS ANY WARRANTY, EXPRESSED OR IMPLIED, RELATING TO THE TEST RESULTS AND
ANALYSIS, THEIR ACCURACY, COMPLETENESS OR QUALITY, INCLUDING ANY IMPLIED WARRANTY OF FITNESS FOR ANY PARTICULAR PURPOSE.
ALL PERSONS OR ENTITIES RELYING ON THE RESULTS OF ANY TESTING DO SO AT THEIR OWN RISK, AND AGREE THAT PRINCIPLED
TECHNOLOGIES, INC., ITS EMPLOYEES AND ITS SUBCONTRACTORS SHALL HAVE NO LIABILITY WHATSOEVER FROM ANY CLAIM OF LOSS OR
DAMAGE ON ACCOUNT OF ANY ALLEGED ERROR OR DEFECT IN ANY TESTING PROCEDURE OR RESULT.
IN NO EVENT SHALL PRINCIPLED TECHNOLOGIES, INC. BE LIABLE FOR INDIRECT, SPECIAL, INCIDENTAL, OR CONSEQUENTIAL DAMAGES IN
CONNECTION WITH ITS TESTING, EVEN IF ADVISED OF THE POSSIBILITY OF SUCH DAMAGES. IN NO EVENT SHALL PRINCIPLED TECHNOLOGIES,
INC.’S LIABILITY, INCLUDING FOR DIRECT DAMAGES, EXCEED THE AMOUNTS PAID IN CONNECTION WITH PRINCIPLED TECHNOLOGIES, INC.’S
TESTING. CUSTOMER’S SOLE AND EXCLUSIVE REMEDIES ARE AS SET FORTH HEREIN.

More Related Content

What's hot

Microsoft System Center virtual environment comparison: Dell PowerEdge server...
Microsoft System Center virtual environment comparison: Dell PowerEdge server...Microsoft System Center virtual environment comparison: Dell PowerEdge server...
Microsoft System Center virtual environment comparison: Dell PowerEdge server...Principled Technologies
 
Get more comprehensive remote IT support capabilities on a Dell OptiPlex 7070...
Get more comprehensive remote IT support capabilities on a Dell OptiPlex 7070...Get more comprehensive remote IT support capabilities on a Dell OptiPlex 7070...
Get more comprehensive remote IT support capabilities on a Dell OptiPlex 7070...Principled Technologies
 
Faster, easier deployment of Dell PowerEdge servers helps it and your business
Faster, easier deployment of Dell PowerEdge servers  helps it and your businessFaster, easier deployment of Dell PowerEdge servers  helps it and your business
Faster, easier deployment of Dell PowerEdge servers helps it and your businessPrincipled Technologies
 
White Paper: Monitoring EMC Greenplum DCA with Nagios - EMC Greenplum Data Co...
White Paper: Monitoring EMC Greenplum DCA with Nagios - EMC Greenplum Data Co...White Paper: Monitoring EMC Greenplum DCA with Nagios - EMC Greenplum Data Co...
White Paper: Monitoring EMC Greenplum DCA with Nagios - EMC Greenplum Data Co...EMC
 
Dell OpenManage Essentials: Improve efficiency with fewer tools, more benefits
Dell OpenManage Essentials: Improve efficiency with fewer tools, more benefits Dell OpenManage Essentials: Improve efficiency with fewer tools, more benefits
Dell OpenManage Essentials: Improve efficiency with fewer tools, more benefits Principled Technologies
 
Cisco and The Applied Group Point of View
Cisco and The Applied Group Point of ViewCisco and The Applied Group Point of View
Cisco and The Applied Group Point of ViewDavid Barry
 
Reduce complexity and save money with Dell Engineered Solutions for VMware EV...
Reduce complexity and save money with Dell Engineered Solutions for VMware EV...Reduce complexity and save money with Dell Engineered Solutions for VMware EV...
Reduce complexity and save money with Dell Engineered Solutions for VMware EV...Principled Technologies
 
Take the guesswork out of video surveillance with pre-validated, virtualized ...
Take the guesswork out of video surveillance with pre-validated, virtualized ...Take the guesswork out of video surveillance with pre-validated, virtualized ...
Take the guesswork out of video surveillance with pre-validated, virtualized ...Principled Technologies
 
VMworld 2013: Quantifying the Business Value of VMware Horizon View
VMworld 2013: Quantifying the Business Value of VMware Horizon View VMworld 2013: Quantifying the Business Value of VMware Horizon View
VMworld 2013: Quantifying the Business Value of VMware Horizon View VMworld
 
Remote notebook management: Dell unique vPro extensions and Dell Client Integ...
Remote notebook management: Dell unique vPro extensions and Dell Client Integ...Remote notebook management: Dell unique vPro extensions and Dell Client Integ...
Remote notebook management: Dell unique vPro extensions and Dell Client Integ...Principled Technologies
 
Cloud Privada: más que solo virtualización
Cloud Privada: más que solo virtualizaciónCloud Privada: más que solo virtualización
Cloud Privada: más que solo virtualizaciónAlejandro Marin
 
Media and entertainment workload comparison: HP Z8 vs. Apple Mac Pro
Media and entertainment workload comparison: HP Z8 vs. Apple Mac ProMedia and entertainment workload comparison: HP Z8 vs. Apple Mac Pro
Media and entertainment workload comparison: HP Z8 vs. Apple Mac ProPrincipled Technologies
 
Take the guesswork out of video surveillance with pre-validated Milestone s...
Take the guesswork out of video  surveillance with pre-validated  Milestone s...Take the guesswork out of video  surveillance with pre-validated  Milestone s...
Take the guesswork out of video surveillance with pre-validated Milestone s...Principled Technologies
 
Be production-ready sooner by using ProDeploy Plus for Enterprise
Be production-ready sooner by using  ProDeploy Plus for EnterpriseBe production-ready sooner by using  ProDeploy Plus for Enterprise
Be production-ready sooner by using ProDeploy Plus for EnterprisePrincipled Technologies
 
Smarter infrastructure with the new IBM Pure Flex System
Smarter infrastructure with the new IBM Pure Flex SystemSmarter infrastructure with the new IBM Pure Flex System
Smarter infrastructure with the new IBM Pure Flex SystemCOMMON Europe
 
Five key emerging trends impacting Data Centers in 2016
Five key emerging trends impacting Data Centers in 2016 Five key emerging trends impacting Data Centers in 2016
Five key emerging trends impacting Data Centers in 2016 Greg Stover
 
Excalibur: best practices for virtual desktop operations leveraging Citrix Di...
Excalibur: best practices for virtual desktop operations leveraging Citrix Di...Excalibur: best practices for virtual desktop operations leveraging Citrix Di...
Excalibur: best practices for virtual desktop operations leveraging Citrix Di...Citrix
 
Database performance comparison of VMware vCloud Air, Amazon Web Services, an...
Database performance comparison of VMware vCloud Air, Amazon Web Services, an...Database performance comparison of VMware vCloud Air, Amazon Web Services, an...
Database performance comparison of VMware vCloud Air, Amazon Web Services, an...Principled Technologies
 
Disaster recovery with cloud computing
Disaster recovery with cloud computingDisaster recovery with cloud computing
Disaster recovery with cloud computingIsrael Roy Sambu
 

What's hot (20)

Microsoft System Center virtual environment comparison: Dell PowerEdge server...
Microsoft System Center virtual environment comparison: Dell PowerEdge server...Microsoft System Center virtual environment comparison: Dell PowerEdge server...
Microsoft System Center virtual environment comparison: Dell PowerEdge server...
 
Get more comprehensive remote IT support capabilities on a Dell OptiPlex 7070...
Get more comprehensive remote IT support capabilities on a Dell OptiPlex 7070...Get more comprehensive remote IT support capabilities on a Dell OptiPlex 7070...
Get more comprehensive remote IT support capabilities on a Dell OptiPlex 7070...
 
Faster, easier deployment of Dell PowerEdge servers helps it and your business
Faster, easier deployment of Dell PowerEdge servers  helps it and your businessFaster, easier deployment of Dell PowerEdge servers  helps it and your business
Faster, easier deployment of Dell PowerEdge servers helps it and your business
 
White Paper: Monitoring EMC Greenplum DCA with Nagios - EMC Greenplum Data Co...
White Paper: Monitoring EMC Greenplum DCA with Nagios - EMC Greenplum Data Co...White Paper: Monitoring EMC Greenplum DCA with Nagios - EMC Greenplum Data Co...
White Paper: Monitoring EMC Greenplum DCA with Nagios - EMC Greenplum Data Co...
 
Dell OpenManage Essentials: Improve efficiency with fewer tools, more benefits
Dell OpenManage Essentials: Improve efficiency with fewer tools, more benefits Dell OpenManage Essentials: Improve efficiency with fewer tools, more benefits
Dell OpenManage Essentials: Improve efficiency with fewer tools, more benefits
 
Cisco and The Applied Group Point of View
Cisco and The Applied Group Point of ViewCisco and The Applied Group Point of View
Cisco and The Applied Group Point of View
 
Reduce complexity and save money with Dell Engineered Solutions for VMware EV...
Reduce complexity and save money with Dell Engineered Solutions for VMware EV...Reduce complexity and save money with Dell Engineered Solutions for VMware EV...
Reduce complexity and save money with Dell Engineered Solutions for VMware EV...
 
Take the guesswork out of video surveillance with pre-validated, virtualized ...
Take the guesswork out of video surveillance with pre-validated, virtualized ...Take the guesswork out of video surveillance with pre-validated, virtualized ...
Take the guesswork out of video surveillance with pre-validated, virtualized ...
 
VMworld 2013: Quantifying the Business Value of VMware Horizon View
VMworld 2013: Quantifying the Business Value of VMware Horizon View VMworld 2013: Quantifying the Business Value of VMware Horizon View
VMworld 2013: Quantifying the Business Value of VMware Horizon View
 
Remote notebook management: Dell unique vPro extensions and Dell Client Integ...
Remote notebook management: Dell unique vPro extensions and Dell Client Integ...Remote notebook management: Dell unique vPro extensions and Dell Client Integ...
Remote notebook management: Dell unique vPro extensions and Dell Client Integ...
 
Cloud Privada: más que solo virtualización
Cloud Privada: más que solo virtualizaciónCloud Privada: más que solo virtualización
Cloud Privada: más que solo virtualización
 
Media and entertainment workload comparison: HP Z8 vs. Apple Mac Pro
Media and entertainment workload comparison: HP Z8 vs. Apple Mac ProMedia and entertainment workload comparison: HP Z8 vs. Apple Mac Pro
Media and entertainment workload comparison: HP Z8 vs. Apple Mac Pro
 
Take the guesswork out of video surveillance with pre-validated Milestone s...
Take the guesswork out of video  surveillance with pre-validated  Milestone s...Take the guesswork out of video  surveillance with pre-validated  Milestone s...
Take the guesswork out of video surveillance with pre-validated Milestone s...
 
Be production-ready sooner by using ProDeploy Plus for Enterprise
Be production-ready sooner by using  ProDeploy Plus for EnterpriseBe production-ready sooner by using  ProDeploy Plus for Enterprise
Be production-ready sooner by using ProDeploy Plus for Enterprise
 
Smarter infrastructure with the new IBM Pure Flex System
Smarter infrastructure with the new IBM Pure Flex SystemSmarter infrastructure with the new IBM Pure Flex System
Smarter infrastructure with the new IBM Pure Flex System
 
Five key emerging trends impacting Data Centers in 2016
Five key emerging trends impacting Data Centers in 2016 Five key emerging trends impacting Data Centers in 2016
Five key emerging trends impacting Data Centers in 2016
 
Construction of a Disaster Recovery Plan Webinar
Construction of a Disaster Recovery Plan WebinarConstruction of a Disaster Recovery Plan Webinar
Construction of a Disaster Recovery Plan Webinar
 
Excalibur: best practices for virtual desktop operations leveraging Citrix Di...
Excalibur: best practices for virtual desktop operations leveraging Citrix Di...Excalibur: best practices for virtual desktop operations leveraging Citrix Di...
Excalibur: best practices for virtual desktop operations leveraging Citrix Di...
 
Database performance comparison of VMware vCloud Air, Amazon Web Services, an...
Database performance comparison of VMware vCloud Air, Amazon Web Services, an...Database performance comparison of VMware vCloud Air, Amazon Web Services, an...
Database performance comparison of VMware vCloud Air, Amazon Web Services, an...
 
Disaster recovery with cloud computing
Disaster recovery with cloud computingDisaster recovery with cloud computing
Disaster recovery with cloud computing
 

Similar to Upgrading to new Dell OptiPlex desktops

Simplify administrator tasks and improve security and health monitoring with ...
Simplify administrator tasks and improve security and health monitoring with ...Simplify administrator tasks and improve security and health monitoring with ...
Simplify administrator tasks and improve security and health monitoring with ...Principled Technologies
 
Speed up (and simplify) employee device management
Speed up (and simplify) employee device managementSpeed up (and simplify) employee device management
Speed up (and simplify) employee device managementPrincipled Technologies
 
A Dell PowerEdge MX environment using OpenManage Enterprise and OpenManage En...
A Dell PowerEdge MX environment using OpenManage Enterprise and OpenManage En...A Dell PowerEdge MX environment using OpenManage Enterprise and OpenManage En...
A Dell PowerEdge MX environment using OpenManage Enterprise and OpenManage En...Principled Technologies
 
Streamline more than server registration
Streamline more than server registrationStreamline more than server registration
Streamline more than server registrationPrincipled Technologies
 
Systems management savings with Dell OpenManage on 13G Dell PowerEdge servers
Systems management savings with Dell OpenManage on 13G Dell PowerEdge servers Systems management savings with Dell OpenManage on 13G Dell PowerEdge servers
Systems management savings with Dell OpenManage on 13G Dell PowerEdge servers Principled Technologies
 
Kaseya Connect 2011 - Leveraging vPro (intel)
Kaseya Connect 2011 - Leveraging vPro (intel)Kaseya Connect 2011 - Leveraging vPro (intel)
Kaseya Connect 2011 - Leveraging vPro (intel)Kaseya
 
Reducing Cost and Complexity with Industrial System Consolidation
Reducing Cost and Complexity with Industrial System ConsolidationReducing Cost and Complexity with Industrial System Consolidation
Reducing Cost and Complexity with Industrial System ConsolidationIntel IoT
 
Faster and easier server installation with Dell ProDeploy Factory Configurati...
Faster and easier server installation with Dell ProDeploy Factory Configurati...Faster and easier server installation with Dell ProDeploy Factory Configurati...
Faster and easier server installation with Dell ProDeploy Factory Configurati...Principled Technologies
 
Reducing deployment time with Dell Chassis Management Controller
Reducing deployment time with Dell Chassis Management ControllerReducing deployment time with Dell Chassis Management Controller
Reducing deployment time with Dell Chassis Management ControllerPrincipled Technologies
 
Simplifying systems management with Dell OpenManage on 13G Dell PowerEdge ser...
Simplifying systems management with Dell OpenManage on 13G Dell PowerEdge ser...Simplifying systems management with Dell OpenManage on 13G Dell PowerEdge ser...
Simplifying systems management with Dell OpenManage on 13G Dell PowerEdge ser...Principled Technologies
 
Migrating Bailey Consoles R1
Migrating Bailey Consoles R1Migrating Bailey Consoles R1
Migrating Bailey Consoles R1Alvaro Rendon
 
A Dell and Nutanix solution can boost datacenter efficiency
A Dell and Nutanix solution can boost datacenter efficiencyA Dell and Nutanix solution can boost datacenter efficiency
A Dell and Nutanix solution can boost datacenter efficiencyPrincipled Technologies
 
I 21455 amt-infographic-final
I 21455 amt-infographic-finalI 21455 amt-infographic-final
I 21455 amt-infographic-finalStefano Budimir
 
Dell PowerEdge VRTX and M-series compute nodes configuration study
Dell PowerEdge VRTX and M-series compute nodes configuration studyDell PowerEdge VRTX and M-series compute nodes configuration study
Dell PowerEdge VRTX and M-series compute nodes configuration studyPrincipled Technologies
 
AVG Managed Workplace 9.1 Fact Sheet
AVG Managed Workplace 9.1 Fact SheetAVG Managed Workplace 9.1 Fact Sheet
AVG Managed Workplace 9.1 Fact SheetAVG Technologies
 
The evolution of Dell EMC PowerEdge server systems management - Infographic
The evolution of Dell EMC PowerEdge server systems management - InfographicThe evolution of Dell EMC PowerEdge server systems management - Infographic
The evolution of Dell EMC PowerEdge server systems management - InfographicPrincipled Technologies
 
Tres formas de modernizar la TI del dispositivo y mejorar la productividad
Tres formas de modernizar la TI del dispositivo y mejorar la productividadTres formas de modernizar la TI del dispositivo y mejorar la productividad
Tres formas de modernizar la TI del dispositivo y mejorar la productividadCade Soluciones
 
Slowear Heading Clouds
Slowear Heading CloudsSlowear Heading Clouds
Slowear Heading Cloudsxband
 
Simplify PC management and save IT time with an automated support service
Simplify PC management and save IT time with an automated support serviceSimplify PC management and save IT time with an automated support service
Simplify PC management and save IT time with an automated support servicePrincipled Technologies
 
Comguard expanding-portfolio
Comguard expanding-portfolioComguard expanding-portfolio
Comguard expanding-portfolioxband
 

Similar to Upgrading to new Dell OptiPlex desktops (20)

Simplify administrator tasks and improve security and health monitoring with ...
Simplify administrator tasks and improve security and health monitoring with ...Simplify administrator tasks and improve security and health monitoring with ...
Simplify administrator tasks and improve security and health monitoring with ...
 
Speed up (and simplify) employee device management
Speed up (and simplify) employee device managementSpeed up (and simplify) employee device management
Speed up (and simplify) employee device management
 
A Dell PowerEdge MX environment using OpenManage Enterprise and OpenManage En...
A Dell PowerEdge MX environment using OpenManage Enterprise and OpenManage En...A Dell PowerEdge MX environment using OpenManage Enterprise and OpenManage En...
A Dell PowerEdge MX environment using OpenManage Enterprise and OpenManage En...
 
Streamline more than server registration
Streamline more than server registrationStreamline more than server registration
Streamline more than server registration
 
Systems management savings with Dell OpenManage on 13G Dell PowerEdge servers
Systems management savings with Dell OpenManage on 13G Dell PowerEdge servers Systems management savings with Dell OpenManage on 13G Dell PowerEdge servers
Systems management savings with Dell OpenManage on 13G Dell PowerEdge servers
 
Kaseya Connect 2011 - Leveraging vPro (intel)
Kaseya Connect 2011 - Leveraging vPro (intel)Kaseya Connect 2011 - Leveraging vPro (intel)
Kaseya Connect 2011 - Leveraging vPro (intel)
 
Reducing Cost and Complexity with Industrial System Consolidation
Reducing Cost and Complexity with Industrial System ConsolidationReducing Cost and Complexity with Industrial System Consolidation
Reducing Cost and Complexity with Industrial System Consolidation
 
Faster and easier server installation with Dell ProDeploy Factory Configurati...
Faster and easier server installation with Dell ProDeploy Factory Configurati...Faster and easier server installation with Dell ProDeploy Factory Configurati...
Faster and easier server installation with Dell ProDeploy Factory Configurati...
 
Reducing deployment time with Dell Chassis Management Controller
Reducing deployment time with Dell Chassis Management ControllerReducing deployment time with Dell Chassis Management Controller
Reducing deployment time with Dell Chassis Management Controller
 
Simplifying systems management with Dell OpenManage on 13G Dell PowerEdge ser...
Simplifying systems management with Dell OpenManage on 13G Dell PowerEdge ser...Simplifying systems management with Dell OpenManage on 13G Dell PowerEdge ser...
Simplifying systems management with Dell OpenManage on 13G Dell PowerEdge ser...
 
Migrating Bailey Consoles R1
Migrating Bailey Consoles R1Migrating Bailey Consoles R1
Migrating Bailey Consoles R1
 
A Dell and Nutanix solution can boost datacenter efficiency
A Dell and Nutanix solution can boost datacenter efficiencyA Dell and Nutanix solution can boost datacenter efficiency
A Dell and Nutanix solution can boost datacenter efficiency
 
I 21455 amt-infographic-final
I 21455 amt-infographic-finalI 21455 amt-infographic-final
I 21455 amt-infographic-final
 
Dell PowerEdge VRTX and M-series compute nodes configuration study
Dell PowerEdge VRTX and M-series compute nodes configuration studyDell PowerEdge VRTX and M-series compute nodes configuration study
Dell PowerEdge VRTX and M-series compute nodes configuration study
 
AVG Managed Workplace 9.1 Fact Sheet
AVG Managed Workplace 9.1 Fact SheetAVG Managed Workplace 9.1 Fact Sheet
AVG Managed Workplace 9.1 Fact Sheet
 
The evolution of Dell EMC PowerEdge server systems management - Infographic
The evolution of Dell EMC PowerEdge server systems management - InfographicThe evolution of Dell EMC PowerEdge server systems management - Infographic
The evolution of Dell EMC PowerEdge server systems management - Infographic
 
Tres formas de modernizar la TI del dispositivo y mejorar la productividad
Tres formas de modernizar la TI del dispositivo y mejorar la productividadTres formas de modernizar la TI del dispositivo y mejorar la productividad
Tres formas de modernizar la TI del dispositivo y mejorar la productividad
 
Slowear Heading Clouds
Slowear Heading CloudsSlowear Heading Clouds
Slowear Heading Clouds
 
Simplify PC management and save IT time with an automated support service
Simplify PC management and save IT time with an automated support serviceSimplify PC management and save IT time with an automated support service
Simplify PC management and save IT time with an automated support service
 
Comguard expanding-portfolio
Comguard expanding-portfolioComguard expanding-portfolio
Comguard expanding-portfolio
 

More from Principled Technologies

Boost PC performance: How more available memory can improve productivity
Boost PC performance: How more available memory can improve productivityBoost PC performance: How more available memory can improve productivity
Boost PC performance: How more available memory can improve productivityPrincipled Technologies
 
Deploy with confidence: VMware Cloud Foundation 5.1 on next gen Dell PowerEdg...
Deploy with confidence: VMware Cloud Foundation 5.1 on next gen Dell PowerEdg...Deploy with confidence: VMware Cloud Foundation 5.1 on next gen Dell PowerEdg...
Deploy with confidence: VMware Cloud Foundation 5.1 on next gen Dell PowerEdg...Principled Technologies
 
Realize 2.1X the performance with 20% less power with AMD EPYC processor-back...
Realize 2.1X the performance with 20% less power with AMD EPYC processor-back...Realize 2.1X the performance with 20% less power with AMD EPYC processor-back...
Realize 2.1X the performance with 20% less power with AMD EPYC processor-back...Principled Technologies
 
Upgrade your cloud infrastructure with Dell PowerEdge R760 servers and VMware...
Upgrade your cloud infrastructure with Dell PowerEdge R760 servers and VMware...Upgrade your cloud infrastructure with Dell PowerEdge R760 servers and VMware...
Upgrade your cloud infrastructure with Dell PowerEdge R760 servers and VMware...Principled Technologies
 
A comparison of security features in Dell, HP, and Lenovo PC systems
A comparison of security features in Dell, HP, and Lenovo PC systemsA comparison of security features in Dell, HP, and Lenovo PC systems
A comparison of security features in Dell, HP, and Lenovo PC systemsPrincipled Technologies
 
Increase security, sustainability, and efficiency with robust Dell server man...
Increase security, sustainability, and efficiency with robust Dell server man...Increase security, sustainability, and efficiency with robust Dell server man...
Increase security, sustainability, and efficiency with robust Dell server man...Principled Technologies
 
Scale up your storage with higher-performing Dell APEX Block Storage for AWS ...
Scale up your storage with higher-performing Dell APEX Block Storage for AWS ...Scale up your storage with higher-performing Dell APEX Block Storage for AWS ...
Scale up your storage with higher-performing Dell APEX Block Storage for AWS ...Principled Technologies
 
Scale up your storage with higher-performing Dell APEX Block Storage for AWS
Scale up your storage with higher-performing Dell APEX Block Storage for AWSScale up your storage with higher-performing Dell APEX Block Storage for AWS
Scale up your storage with higher-performing Dell APEX Block Storage for AWSPrincipled Technologies
 
Get in and stay in the productivity zone with the HP Z2 G9 Tower Workstation
Get in and stay in the productivity zone with the HP Z2 G9 Tower WorkstationGet in and stay in the productivity zone with the HP Z2 G9 Tower Workstation
Get in and stay in the productivity zone with the HP Z2 G9 Tower WorkstationPrincipled Technologies
 
Open up new possibilities with higher transactional database performance from...
Open up new possibilities with higher transactional database performance from...Open up new possibilities with higher transactional database performance from...
Open up new possibilities with higher transactional database performance from...Principled Technologies
 
Improving database performance and value with an easy migration to Azure Data...
Improving database performance and value with an easy migration to Azure Data...Improving database performance and value with an easy migration to Azure Data...
Improving database performance and value with an easy migration to Azure Data...Principled Technologies
 
Realize better value and performance migrating from Azure Database for Postgr...
Realize better value and performance migrating from Azure Database for Postgr...Realize better value and performance migrating from Azure Database for Postgr...
Realize better value and performance migrating from Azure Database for Postgr...Principled Technologies
 
Set up students and teachers to excel now and in the future with Intel proces...
Set up students and teachers to excel now and in the future with Intel proces...Set up students and teachers to excel now and in the future with Intel proces...
Set up students and teachers to excel now and in the future with Intel proces...Principled Technologies
 
Finding the path to AI success with the Dell AI portfolio - Summary
Finding the path to AI success with the Dell AI portfolio - SummaryFinding the path to AI success with the Dell AI portfolio - Summary
Finding the path to AI success with the Dell AI portfolio - SummaryPrincipled Technologies
 
Finding the path to AI success with the Dell AI portfolio
Finding the path to AI success with the Dell AI portfolioFinding the path to AI success with the Dell AI portfolio
Finding the path to AI success with the Dell AI portfolioPrincipled Technologies
 
Achieve strong performance and value on Azure SQL Database Hyperscale
Achieve strong performance and value on Azure SQL Database HyperscaleAchieve strong performance and value on Azure SQL Database Hyperscale
Achieve strong performance and value on Azure SQL Database HyperscalePrincipled Technologies
 
Improve backup and recovery outcomes by combining Dell APEX Data Storage Serv...
Improve backup and recovery outcomes by combining Dell APEX Data Storage Serv...Improve backup and recovery outcomes by combining Dell APEX Data Storage Serv...
Improve backup and recovery outcomes by combining Dell APEX Data Storage Serv...Principled Technologies
 

More from Principled Technologies (20)

Boost PC performance: How more available memory can improve productivity
Boost PC performance: How more available memory can improve productivityBoost PC performance: How more available memory can improve productivity
Boost PC performance: How more available memory can improve productivity
 
Deploy with confidence: VMware Cloud Foundation 5.1 on next gen Dell PowerEdg...
Deploy with confidence: VMware Cloud Foundation 5.1 on next gen Dell PowerEdg...Deploy with confidence: VMware Cloud Foundation 5.1 on next gen Dell PowerEdg...
Deploy with confidence: VMware Cloud Foundation 5.1 on next gen Dell PowerEdg...
 
Realize 2.1X the performance with 20% less power with AMD EPYC processor-back...
Realize 2.1X the performance with 20% less power with AMD EPYC processor-back...Realize 2.1X the performance with 20% less power with AMD EPYC processor-back...
Realize 2.1X the performance with 20% less power with AMD EPYC processor-back...
 
Upgrade your cloud infrastructure with Dell PowerEdge R760 servers and VMware...
Upgrade your cloud infrastructure with Dell PowerEdge R760 servers and VMware...Upgrade your cloud infrastructure with Dell PowerEdge R760 servers and VMware...
Upgrade your cloud infrastructure with Dell PowerEdge R760 servers and VMware...
 
A comparison of security features in Dell, HP, and Lenovo PC systems
A comparison of security features in Dell, HP, and Lenovo PC systemsA comparison of security features in Dell, HP, and Lenovo PC systems
A comparison of security features in Dell, HP, and Lenovo PC systems
 
Increase security, sustainability, and efficiency with robust Dell server man...
Increase security, sustainability, and efficiency with robust Dell server man...Increase security, sustainability, and efficiency with robust Dell server man...
Increase security, sustainability, and efficiency with robust Dell server man...
 
Increase security, sustainability, and efficiency with robust Dell server man...
Increase security, sustainability, and efficiency with robust Dell server man...Increase security, sustainability, and efficiency with robust Dell server man...
Increase security, sustainability, and efficiency with robust Dell server man...
 
Scale up your storage with higher-performing Dell APEX Block Storage for AWS ...
Scale up your storage with higher-performing Dell APEX Block Storage for AWS ...Scale up your storage with higher-performing Dell APEX Block Storage for AWS ...
Scale up your storage with higher-performing Dell APEX Block Storage for AWS ...
 
Scale up your storage with higher-performing Dell APEX Block Storage for AWS
Scale up your storage with higher-performing Dell APEX Block Storage for AWSScale up your storage with higher-performing Dell APEX Block Storage for AWS
Scale up your storage with higher-performing Dell APEX Block Storage for AWS
 
Get in and stay in the productivity zone with the HP Z2 G9 Tower Workstation
Get in and stay in the productivity zone with the HP Z2 G9 Tower WorkstationGet in and stay in the productivity zone with the HP Z2 G9 Tower Workstation
Get in and stay in the productivity zone with the HP Z2 G9 Tower Workstation
 
Open up new possibilities with higher transactional database performance from...
Open up new possibilities with higher transactional database performance from...Open up new possibilities with higher transactional database performance from...
Open up new possibilities with higher transactional database performance from...
 
Improving database performance and value with an easy migration to Azure Data...
Improving database performance and value with an easy migration to Azure Data...Improving database performance and value with an easy migration to Azure Data...
Improving database performance and value with an easy migration to Azure Data...
 
Realize better value and performance migrating from Azure Database for Postgr...
Realize better value and performance migrating from Azure Database for Postgr...Realize better value and performance migrating from Azure Database for Postgr...
Realize better value and performance migrating from Azure Database for Postgr...
 
Realize better value and performance migrating from Azure Database for Postgr...
Realize better value and performance migrating from Azure Database for Postgr...Realize better value and performance migrating from Azure Database for Postgr...
Realize better value and performance migrating from Azure Database for Postgr...
 
Set up students and teachers to excel now and in the future with Intel proces...
Set up students and teachers to excel now and in the future with Intel proces...Set up students and teachers to excel now and in the future with Intel proces...
Set up students and teachers to excel now and in the future with Intel proces...
 
Finding the path to AI success with the Dell AI portfolio - Summary
Finding the path to AI success with the Dell AI portfolio - SummaryFinding the path to AI success with the Dell AI portfolio - Summary
Finding the path to AI success with the Dell AI portfolio - Summary
 
Finding the path to AI success with the Dell AI portfolio
Finding the path to AI success with the Dell AI portfolioFinding the path to AI success with the Dell AI portfolio
Finding the path to AI success with the Dell AI portfolio
 
Achieve strong performance and value on Azure SQL Database Hyperscale
Achieve strong performance and value on Azure SQL Database HyperscaleAchieve strong performance and value on Azure SQL Database Hyperscale
Achieve strong performance and value on Azure SQL Database Hyperscale
 
Improve backup and recovery outcomes by combining Dell APEX Data Storage Serv...
Improve backup and recovery outcomes by combining Dell APEX Data Storage Serv...Improve backup and recovery outcomes by combining Dell APEX Data Storage Serv...
Improve backup and recovery outcomes by combining Dell APEX Data Storage Serv...
 
Improve backup and recovery outcomes by combining Dell APEX Data Storage Serv...
Improve backup and recovery outcomes by combining Dell APEX Data Storage Serv...Improve backup and recovery outcomes by combining Dell APEX Data Storage Serv...
Improve backup and recovery outcomes by combining Dell APEX Data Storage Serv...
 

Recently uploaded

IAC 2024 - IA Fast Track to Search Focused AI Solutions
IAC 2024 - IA Fast Track to Search Focused AI SolutionsIAC 2024 - IA Fast Track to Search Focused AI Solutions
IAC 2024 - IA Fast Track to Search Focused AI SolutionsEnterprise Knowledge
 
Factors to Consider When Choosing Accounts Payable Services Providers.pptx
Factors to Consider When Choosing Accounts Payable Services Providers.pptxFactors to Consider When Choosing Accounts Payable Services Providers.pptx
Factors to Consider When Choosing Accounts Payable Services Providers.pptxKatpro Technologies
 
Slack Application Development 101 Slides
Slack Application Development 101 SlidesSlack Application Development 101 Slides
Slack Application Development 101 Slidespraypatel2
 
Raspberry Pi 5: Challenges and Solutions in Bringing up an OpenGL/Vulkan Driv...
Raspberry Pi 5: Challenges and Solutions in Bringing up an OpenGL/Vulkan Driv...Raspberry Pi 5: Challenges and Solutions in Bringing up an OpenGL/Vulkan Driv...
Raspberry Pi 5: Challenges and Solutions in Bringing up an OpenGL/Vulkan Driv...Igalia
 
Axa Assurance Maroc - Insurer Innovation Award 2024
Axa Assurance Maroc - Insurer Innovation Award 2024Axa Assurance Maroc - Insurer Innovation Award 2024
Axa Assurance Maroc - Insurer Innovation Award 2024The Digital Insurer
 
The Codex of Business Writing Software for Real-World Solutions 2.pptx
The Codex of Business Writing Software for Real-World Solutions 2.pptxThe Codex of Business Writing Software for Real-World Solutions 2.pptx
The Codex of Business Writing Software for Real-World Solutions 2.pptxMalak Abu Hammad
 
Data Cloud, More than a CDP by Matt Robison
Data Cloud, More than a CDP by Matt RobisonData Cloud, More than a CDP by Matt Robison
Data Cloud, More than a CDP by Matt RobisonAnna Loughnan Colquhoun
 
08448380779 Call Girls In Greater Kailash - I Women Seeking Men
08448380779 Call Girls In Greater Kailash - I Women Seeking Men08448380779 Call Girls In Greater Kailash - I Women Seeking Men
08448380779 Call Girls In Greater Kailash - I Women Seeking MenDelhi Call girls
 
04-2024-HHUG-Sales-and-Marketing-Alignment.pptx
04-2024-HHUG-Sales-and-Marketing-Alignment.pptx04-2024-HHUG-Sales-and-Marketing-Alignment.pptx
04-2024-HHUG-Sales-and-Marketing-Alignment.pptxHampshireHUG
 
08448380779 Call Girls In Civil Lines Women Seeking Men
08448380779 Call Girls In Civil Lines Women Seeking Men08448380779 Call Girls In Civil Lines Women Seeking Men
08448380779 Call Girls In Civil Lines Women Seeking MenDelhi Call girls
 
Histor y of HAM Radio presentation slide
Histor y of HAM Radio presentation slideHistor y of HAM Radio presentation slide
Histor y of HAM Radio presentation slidevu2urc
 
Exploring the Future Potential of AI-Enabled Smartphone Processors
Exploring the Future Potential of AI-Enabled Smartphone ProcessorsExploring the Future Potential of AI-Enabled Smartphone Processors
Exploring the Future Potential of AI-Enabled Smartphone Processorsdebabhi2
 
From Event to Action: Accelerate Your Decision Making with Real-Time Automation
From Event to Action: Accelerate Your Decision Making with Real-Time AutomationFrom Event to Action: Accelerate Your Decision Making with Real-Time Automation
From Event to Action: Accelerate Your Decision Making with Real-Time AutomationSafe Software
 
Developing An App To Navigate The Roads of Brazil
Developing An App To Navigate The Roads of BrazilDeveloping An App To Navigate The Roads of Brazil
Developing An App To Navigate The Roads of BrazilV3cube
 
Injustice - Developers Among Us (SciFiDevCon 2024)
Injustice - Developers Among Us (SciFiDevCon 2024)Injustice - Developers Among Us (SciFiDevCon 2024)
Injustice - Developers Among Us (SciFiDevCon 2024)Allon Mureinik
 
GenCyber Cyber Security Day Presentation
GenCyber Cyber Security Day PresentationGenCyber Cyber Security Day Presentation
GenCyber Cyber Security Day PresentationMichael W. Hawkins
 
Tata AIG General Insurance Company - Insurer Innovation Award 2024
Tata AIG General Insurance Company - Insurer Innovation Award 2024Tata AIG General Insurance Company - Insurer Innovation Award 2024
Tata AIG General Insurance Company - Insurer Innovation Award 2024The Digital Insurer
 
Salesforce Community Group Quito, Salesforce 101
Salesforce Community Group Quito, Salesforce 101Salesforce Community Group Quito, Salesforce 101
Salesforce Community Group Quito, Salesforce 101Paola De la Torre
 
Unblocking The Main Thread Solving ANRs and Frozen Frames
Unblocking The Main Thread Solving ANRs and Frozen FramesUnblocking The Main Thread Solving ANRs and Frozen Frames
Unblocking The Main Thread Solving ANRs and Frozen FramesSinan KOZAK
 
Breaking the Kubernetes Kill Chain: Host Path Mount
Breaking the Kubernetes Kill Chain: Host Path MountBreaking the Kubernetes Kill Chain: Host Path Mount
Breaking the Kubernetes Kill Chain: Host Path MountPuma Security, LLC
 

Recently uploaded (20)

IAC 2024 - IA Fast Track to Search Focused AI Solutions
IAC 2024 - IA Fast Track to Search Focused AI SolutionsIAC 2024 - IA Fast Track to Search Focused AI Solutions
IAC 2024 - IA Fast Track to Search Focused AI Solutions
 
Factors to Consider When Choosing Accounts Payable Services Providers.pptx
Factors to Consider When Choosing Accounts Payable Services Providers.pptxFactors to Consider When Choosing Accounts Payable Services Providers.pptx
Factors to Consider When Choosing Accounts Payable Services Providers.pptx
 
Slack Application Development 101 Slides
Slack Application Development 101 SlidesSlack Application Development 101 Slides
Slack Application Development 101 Slides
 
Raspberry Pi 5: Challenges and Solutions in Bringing up an OpenGL/Vulkan Driv...
Raspberry Pi 5: Challenges and Solutions in Bringing up an OpenGL/Vulkan Driv...Raspberry Pi 5: Challenges and Solutions in Bringing up an OpenGL/Vulkan Driv...
Raspberry Pi 5: Challenges and Solutions in Bringing up an OpenGL/Vulkan Driv...
 
Axa Assurance Maroc - Insurer Innovation Award 2024
Axa Assurance Maroc - Insurer Innovation Award 2024Axa Assurance Maroc - Insurer Innovation Award 2024
Axa Assurance Maroc - Insurer Innovation Award 2024
 
The Codex of Business Writing Software for Real-World Solutions 2.pptx
The Codex of Business Writing Software for Real-World Solutions 2.pptxThe Codex of Business Writing Software for Real-World Solutions 2.pptx
The Codex of Business Writing Software for Real-World Solutions 2.pptx
 
Data Cloud, More than a CDP by Matt Robison
Data Cloud, More than a CDP by Matt RobisonData Cloud, More than a CDP by Matt Robison
Data Cloud, More than a CDP by Matt Robison
 
08448380779 Call Girls In Greater Kailash - I Women Seeking Men
08448380779 Call Girls In Greater Kailash - I Women Seeking Men08448380779 Call Girls In Greater Kailash - I Women Seeking Men
08448380779 Call Girls In Greater Kailash - I Women Seeking Men
 
04-2024-HHUG-Sales-and-Marketing-Alignment.pptx
04-2024-HHUG-Sales-and-Marketing-Alignment.pptx04-2024-HHUG-Sales-and-Marketing-Alignment.pptx
04-2024-HHUG-Sales-and-Marketing-Alignment.pptx
 
08448380779 Call Girls In Civil Lines Women Seeking Men
08448380779 Call Girls In Civil Lines Women Seeking Men08448380779 Call Girls In Civil Lines Women Seeking Men
08448380779 Call Girls In Civil Lines Women Seeking Men
 
Histor y of HAM Radio presentation slide
Histor y of HAM Radio presentation slideHistor y of HAM Radio presentation slide
Histor y of HAM Radio presentation slide
 
Exploring the Future Potential of AI-Enabled Smartphone Processors
Exploring the Future Potential of AI-Enabled Smartphone ProcessorsExploring the Future Potential of AI-Enabled Smartphone Processors
Exploring the Future Potential of AI-Enabled Smartphone Processors
 
From Event to Action: Accelerate Your Decision Making with Real-Time Automation
From Event to Action: Accelerate Your Decision Making with Real-Time AutomationFrom Event to Action: Accelerate Your Decision Making with Real-Time Automation
From Event to Action: Accelerate Your Decision Making with Real-Time Automation
 
Developing An App To Navigate The Roads of Brazil
Developing An App To Navigate The Roads of BrazilDeveloping An App To Navigate The Roads of Brazil
Developing An App To Navigate The Roads of Brazil
 
Injustice - Developers Among Us (SciFiDevCon 2024)
Injustice - Developers Among Us (SciFiDevCon 2024)Injustice - Developers Among Us (SciFiDevCon 2024)
Injustice - Developers Among Us (SciFiDevCon 2024)
 
GenCyber Cyber Security Day Presentation
GenCyber Cyber Security Day PresentationGenCyber Cyber Security Day Presentation
GenCyber Cyber Security Day Presentation
 
Tata AIG General Insurance Company - Insurer Innovation Award 2024
Tata AIG General Insurance Company - Insurer Innovation Award 2024Tata AIG General Insurance Company - Insurer Innovation Award 2024
Tata AIG General Insurance Company - Insurer Innovation Award 2024
 
Salesforce Community Group Quito, Salesforce 101
Salesforce Community Group Quito, Salesforce 101Salesforce Community Group Quito, Salesforce 101
Salesforce Community Group Quito, Salesforce 101
 
Unblocking The Main Thread Solving ANRs and Frozen Frames
Unblocking The Main Thread Solving ANRs and Frozen FramesUnblocking The Main Thread Solving ANRs and Frozen Frames
Unblocking The Main Thread Solving ANRs and Frozen Frames
 
Breaking the Kubernetes Kill Chain: Host Path Mount
Breaking the Kubernetes Kill Chain: Host Path MountBreaking the Kubernetes Kill Chain: Host Path Mount
Breaking the Kubernetes Kill Chain: Host Path Mount
 

Upgrading to new Dell OptiPlex desktops

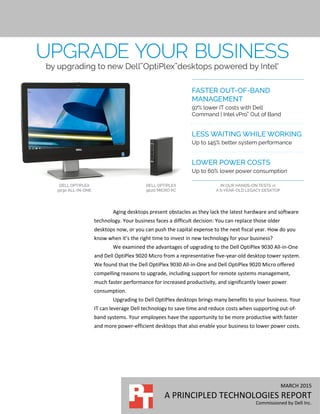
  • 1. MARCH 2015 A PRINCIPLED TECHNOLOGIES REPORT Commissioned by Dell Inc. Aging desktops present obstacles as they lack the latest hardware and software technology. Your business faces a difficult decision: You can replace those older desktops now, or you can push the capital expense to the next fiscal year. How do you know when it’s the right time to invest in new technology for your business? We examined the advantages of upgrading to the Dell OptiPlex 9030 All-in-One and Dell OptiPlex 9020 Micro from a representative five-year-old desktop tower system. We found that the Dell OptiPlex 9030 All-in-One and Dell OptiPlex 9020 Micro offered compelling reasons to upgrade, including support for remote systems management, much faster performance for increased productivity, and significantly lower power consumption. Upgrading to Dell OptiPlex desktops brings many benefits to your business. Your IT can leverage Dell technology to save time and reduce costs when supporting out-of- band systems. Your employees have the opportunity to be more productive with faster and more power-efficient desktops that also enable your business to lower power costs.
  • 2. A Principled Technologies report 2Upgrading to new Dell OptiPlex desktops FASTER OUT-OF-BAND MANAGEMENT WITH DELL COMMAND | INTEL VPRO OUT OF BAND Manage desktops remotely and regardless of state with out-of-band management Remote management has traditionally relied on in-band management, which requires each managed device to fully load its operating system (OS) and receive commands through a software-based management agent. With out-of-band (OOB) management, IT staff can now use a special hardware-based channel to connect with the device remotely when the OS is unreachable. Specifically, OOB management can happen when a system is in any of the following conditions:1, 2  the system is plugged in but not actively running (i.e., powered off or “asleep”)  the operating system has not loaded  the system is booted into its operating system and the software-based management agent is not available  the system is hung or non-operational OOB management functionality is valuable in situations that necessitate accessing, updating, or restoring multiple remote systems that IT staff cannot otherwise reach. For example, if vicious malware infects and corrupts the operating systems of many desktops and begins to propagate, IT staff need to shut down the systems to stop further infection. Using OOB management with hardware-based Keyboard-Video-Mouse (KVM) Remote Control, IT staff can access the infected desktops while they are offline, and then correct the problem by configuring the systems to boot to a separate drive or by redirecting them to run an executable. Intel Core™ vPro processors offer a hardware-based option for OOB management with the Intel Management Engine, an isolated and protected coprocessor that can communicate with the network and draw power independently of the system’s main components.3 Save time and lower IT costs with common management tasks With legacy desktop towers that are out-of-band, IT staff have to make physical deskside visits to perform common management tasks, one system at a time. This means more time and associated costs to complete the tasks. With new Dell OptiPlex desktops, however, your IT staff can apply changes to multiple systems simultaneously and remotely, regardless of their current power state. 1 en.community.dell.com/techcenter/extras/m/white_papers/20179305/download.aspx 2 www.intel.com/content/www/us/en/architecture-and-technology/vpro/vpro-technology-general.html 3 www.kernel.org/doc/Documentation/misc-devices/mei/mei.txt
  • 3. A Principled Technologies report 3Upgrading to new Dell OptiPlex desktops We looked at the amount of time your IT staff could save when managing a group of Dell OptiPlex 9030 All-in-One or Dell OptiPlex 9020 Micro desktops instead of a group of legacy desktop towers. We timed how long it took to complete five OOB management tasks on the Dell OptiPlex desktops using an SCCM management environment and Dell Command | Intel vPro Out of Band, and then timed how long it took to complete the same tasks manually on the legacy desktop tower. Figure 1 shows the amount of time your IT staff can save for common OOB management tasks with 50 systems when you upgrade to new Dell OptiPlex desktops; more efficient management can reduce IT labor time by up to 97 percent. Figure 1: Amount of IT time to complete five separate management tasks on 50 systems, in minutes. Lower numbers are better. Saving time with new Dell OptiPlex desktops when completing common OOB management tasks ultimately means savings in labor costs. For example, we found that new Dell OptiPlex desktops could save your business over $35 in IT labor costs for the simple task of changing a BIOS password for 50 systems. Figure 2 shows the lower costs that your business can realize with OOB management tasks when upgrading to new Dell OptiPlex desktops.4 4 We estimated an IT cost of $.6635 per minute, based on an average annual total compensation estimate from Salary.com of $82,809 for a Help Desk Support senior-level position.
  • 4. A Principled Technologies report 4Upgrading to new Dell OptiPlex desktops Figure 2: Cost of IT to complete five separate management tasks on 50 systems, in dollars. Lower numbers are better. Reduce repair costs and employee downtime when supporting a non-operational system at a remote site IT can resolve some problems for a non-operational Dell OptiPlex desktop remotely with OOB management that previously would have required an expensive deskside visit to a remote site with a legacy desktop tower. The travel time for a deskside visit ultimately increases the cost and overhead for IT to make a repair, and increases employee downtime and lost productivity.5, 6 With hardware-based KVM Remote Control and OOB management, IT staff can remotely access the target desktop and implement the necessary changes as soon as possible. We considered an example 10-minute repair of a single non-operational system to illustrate the potential IT savings with new Dell OptiPlex desktops for a single repair at a remote site. When repairing a legacy desktop tower, the one hour of total travel time to and from the remote site in this scenario represents a significant amount of overhead for IT. With the Dell OptiPlex 9030 All-in-One and Dell OptiPlex 9020 Micro, IT could simply launch a KVM Remote Control session—a process that we found took only 15 seconds. 5 The Dell OptiPlex 9030 All-in-One and Dell OptiPlex 9020 Micro in our study included the latest Intel vPro technology and the latest version of Intel Active Management Technology (Intel AMT). For more information on Intel AMT, visit www.intel.com/content/www/us/en/architecture-and-technology/intel-active-management-technology.html?wapkw=amt. 6 The legacy desktop tower in our study shipped with an older release of Intel AMT (5.2), which meant that it did not support hardware-based KVM Remote Control. software.intel.com/sites/manageability/AMT_Implementation_and_Reference_Guide/default.htm?turl=WordDocuments%2Fkvman dintelamt.htm
  • 5. A Principled Technologies report 5Upgrading to new Dell OptiPlex desktops We also looked at the amount of employee downtime for this example 10- minute repair of a single non-operational system. With the legacy desktop tower, the employee would have to wait until the following business day for a deskside visit, representing eight business hours of downtime after the initial call. With the Dell OptiPlex 9030 All-in-One and Dell OptiPlex 9020 Micro, the employee would have to wait only 15 seconds for IT to initiate the KVM Remote Control session.7 Figure 3 shows the total amount of employee downtime and IT labor for a single repair of a non-operational system at a remote site. Replacing desktops would enable IT to reduce employee downtime significantly and reduce overhead for IT staff when supporting a non-operational system. Instead of waiting eight business hours for the repair, the employee could get back to work much sooner. In addition, quicker repairs give IT staff more time to complete other tasks. Figure 3: Lost productivity due to employee downtime and IT labor for a single repair of a non- operational system at a remote site, in hours:minutes:seconds. Lower numbers are better. Figure 4 shows the value of the reduced employee downtime and the value of the time IT could save with the Dell OptiPlex 9030 All-in-One or Dell OptiPlex 9020 Micro for a single repair of a non-operational system at a remote site. The Dell OptiPlex 9030 All-in-One or Dell OptiPlex 9020 Micro would reduce the cost of employee downtime by $215.08 for a single 10-minute software repair—a savings of nearly 98 percent.8 The 10- minute software repair would cost $39.65 less with the Dell OptiPlex 9030 All-in-One or 7 We assumed an equal amount of time for IT to generate the support ticket with KVM Remote Control and the deskside visit, and did not include that time in our analysis. 8 We estimated an average end-user cost of $.4483 per minute, based on an average annual total compensation of $55,954.00, which includes an average 2013 US salary of $43,041.39 (www.ssa.gov/OACT/COLA/AWI.html) plus 30 percent in benefits.
  • 6. A Principled Technologies report 6Upgrading to new Dell OptiPlex desktops Dell OptiPlex 9020 Micro due to the elimination of IT travel time—a cost savings of 85 percent.9 Figure 4: Cost of lost productivity due to employee downtime and cost of IT labor for a single repair of a non- operational system at a remote site, in US dollars. Lower numbers are better. LESS WAITING WHILE WORKING WITH DELL OPTIPLEX DESKTOPS Promote productivity with up to 145% better system performance Waiting on a slow PC can be painful. A faster, more responsive desktop means your employees can finish the same tasks in less time, ultimately providing your employees an opportunity to be more productive. We used five industry-standard benchmarks to show the performance boost your employees can get with a new Intel processor-based Dell OptiPlex 9030 All-in-One or Dell OptiPlex 9020 Micro. The new Intel processor-powered desktops outperformed the legacy desktop tower on all of the performance benchmarks. For detailed specifications of the test systems, see Appendix A. For step-by-step details on how we performed our benchmark testing, see Appendix D. For more on the benchmarks, see Appendix E. As Figure 5 shows, we found the Dell OptiPlex 9030 All-in-One and Dell OptiPlex 9020 Micro provided significantly better system performance than the legacy desktop tower—145 percent and 114 percent, respectively. Note: We calculated the percentage wins for the Dell OptiPlex 9030 All-in-One and Dell OptiPlex 9020 Micro on each benchmark, and then calculated system performance by taking the geometric mean of 9 We estimated an IT cost of $.6635 per minute, based on an average annual total compensation estimate from Salary.com of $82,809 for a Help Desk Support senior-level position.
  • 7. A Principled Technologies report 7Upgrading to new Dell OptiPlex desktops those percentage wins versus the legacy desktop tower. For more details on how we calculated the system performance, see Appendix B. Figure 5: System performance for the Dell OptiPlex 9030 All-in-One and Dell OptiPlex 9020 Micro vs. the legacy desktop tower. Higher numbers are better. So what does better system performance mean for your business? If your average employee spends 10 minutes a day waiting to do the types of tasks included in the benchmarks (e.g., writing documents, browsing Web sites, and creating spreadsheets), 145 percent better system performance means your average employee could save almost 23 hours per year when moving from the legacy desktop tower to the Dell OptiPlex 9030 All-in-One. As Figure 6 shows, replacing desktops represents a significant opportunity for increased productivity as the size of the desktop fleet increases. For example, a business replacing 10,000 legacy desktop towers with 10,000 new Dell OptiPlex 9030 All-in-One desktops could see significant savings over four years—5.923 minutes saved daily per employee would add up to over 900,000 total hours saved that employees could use for other tasks.10, 11 10 Based on a conservative estimate that a hypothetical mix of productivity tasks would take an average of 10 minutes per employee per day with the legacy desktop tower. With 145.3 percent better system performance, the same mix of tasks would take an average of 4.077 minutes per employee per day with the Dell OptiPlex 9030 All-in-One, saving 5.923 minutes per employee per day. 11 Based on a 46-week work year per employee, which includes holidays, vacation, and sick leave (www.bls.gov/opub/btn/volume- 2/paid-leave-in-private-industry-over-the-past-20-years.htm). Faster desktops for your employees mean less waiting while working and an opportunity for increased productivity.
  • 8. A Principled Technologies report 8Upgrading to new Dell OptiPlex desktops Figure 6: Time saved in hours over four years when replacing a fleet of legacy desktop towers with Dell OptiPlex 9030 All-in-One desktops. PAY LESS FOR POWER WITH DELL OPTIPLEX DESKTOPS Save at the outlet with up to 60% fewer watts at idle and up to 42% fewer watts under load Why waste energy and dollars with inefficient older desktops? We found that both the Dell OptiPlex 9030 All-in-One and Dell OptiPlex 9020 Micro consumed significantly less power than the legacy desktop tower—and, notably, consumed less power under load than the legacy desktop tower consumed at idle. The Dell OptiPlex 9030 All-in-One consumed 55 percent fewer average watts while idle and 35 percent fewer average watts under load than did the legacy desktop tower. The Dell OptiPlex 9020 Micro consumed 60 percent fewer average watts while idle and 42 percent fewer average watts under load than did the legacy desktop tower. Figure 7 shows the power usage of all three systems while idle and under load. The Dell OptiPlex 9030 All-in-One and Dell OptiPlex 9020 Micro consumed less power under load than the legacy desktop tower consumed at idle.
  • 9. A Principled Technologies report 9Upgrading to new Dell OptiPlex desktops Figure 7: The average number of watts each system consumed while idle and under load. Lower numbers are better. As Figure 8 shows, replacing older inefficient desktops can significantly affect the bottom line. For example, a business replacing 10,000 legacy desktop towers with 10,000 new Dell OptiPlex 9020 Micro desktops could realize significant savings over four years; $7.65 saved annually per employee would add up to $306,000 total savings in power costs.12 Figure 8: Power consumption savings in dollars over four years when replacing a fleet of legacy desktop towers with Dell OptiPlex 9020 Micro desktops. 12 Based on a conservative estimate of one hour under load and seven hours idle for average power consumption per employee per day, 46-week work year per employee, and average US commercial power costs of $0.1075 per kilowatt-hour from the U.S. Energy Information Administration (www.eia.gov/electricity/monthly/pdf/epm.pdf).
  • 10. A Principled Technologies report 10Upgrading to new Dell OptiPlex desktops LEVERAGE THE NEWEST TECHNOLOGY WITH DELL OPTIPLEX DESKTOPS Gain the benefits of touch Touch-interactive technology is becoming as popular in the office as it is at home. An Intel study shows respondents overwhelmingly preferred laptops with touch,13 and shipments of touchscreen monitors are seeing growth.14 Microsoft® Windows® 8.1 does not require touch technology, but a touch- enabled version of the operating system can allow users to access information, collaborate, and make presentations through quick touch gestures. For the Dell OptiPlex 9030 All-in-One with the included touchscreen display, users can engage content such as Web pages, images, videos, pdfs, and email with touch-enabled apps such as Microsoft Office 365™, and then switch to the keyboard and mouse for typing and editing content, choosing the more comfortable interface for each task. For the Dell OptiPlex 9030 All-in-One that we tested, the touch-enabled display added $186 to the starting price over a similarly configured model without touch.15 If the touchscreen on the Dell OptiPlex 9030 All-in-One can deliver a productivity benefit of just one minute per day, the optional touch capability could pay back its added cost in under 20 months.16, 17 Connect via USB 3.0, DisplayPort, HDMI, and Wireless AC Replacing desktops can enable your business to take advantage of the latest USB technology. The Dell OptiPlex 9030 All-in-One and Dell OptiPlex 9020 Micro included USB 3.0 ports—eight and six, respectively. The legacy desktop tower offered USB 2.0 ports. USB 3.0 ports, such as those on the two Intel processor-powered desktops, can provide up to 4.8 Gbps transfer rates to USB 3.0 devices—up to 10 times faster than the transfer rate for USB 2.0 connections to USB 2.0 devices that you could get with the legacy desktop tower. Replacing desktops can also bring the latest display technology to your business. In addition to the touchscreen display on the Dell OptiPlex 9030 All-in-One, both the Dell OptiPlex 9030 All-in-One and Dell OptiPlex 9020 Micro included DisplayPort, which 13 www.neowin.net/news/intel-80-percent-of-pc-users-prefer-touch-screens and www.intelfreepress.com/news/do-people-want- touch-on-laptop-screens/197/ 14 www.businesswire.com/news/home/20141215006340/en/Worldwide-PC-Monitor-Market-Aided-Touch-Screen#.VJPVqCsgBg 15 The starting price ($1,598) + three-year ProSupport Service brought the price to $1,677.57 for non-touch-enabled display with Intel Core i5 processor and 8 GB memory for the Dell OptiPlex 9030 All-in-One. The starting price (including three-year ProSupport Service) for the Dell OptiPlex 9030 All-in-One with the same processor and memory and touch-enabled display was $1,863.29 via www.dell.com/us/business/p/optiplex-9030-aio/fs?pf=v on 12/19/2014. 16 A minute a day, valued at $9.72 ($350/36), per month could provide payback for a $186 cost in 19.1 months. 17 Note: We tested the Dell OptiPlex 9030 All-in-One installed with Windows 7 so that system configuration matched closely to the legacy desktop tower. The Dell OptiPlex 9030 All-in-One and Dell OptiPlex 9020 Micro are available with either Windows 7 or Windows 8.1. If a touchscreen delivers a productivity benefit of one minute per day with the Dell OptiPlex 9030 All-in-One, it could pay back its added cost in under 20 months.
  • 11. A Principled Technologies report 11Upgrading to new Dell OptiPlex desktops can support higher performance and lower power monitor displays than the legacy desktop tower we tested. The Dell OptiPlex 9030 All-in-One also offered HDMI—either DisplayPort or HDMI on the Dell OptiPlex 9030 All-in-One can be used to add a second display. Replacing desktops can also boost your business with the latest in wireless technology. The Dell OptiPlex 9030 All-in-One and Dell OptiPlex 9020 Micro both included Intel Dual Band Wireless-AC 7260 cards, while the legacy desktop tower we tested did not include a wireless card. Replacing a fleet of legacy desktop towers without wireless cards provides more flexibility by removing the requirement of an Ethernet port and cable for each desktop. Save workspace with All-in-One and Mini form factors Upgrading to new Dell OptiPlex desktops can also offer workspace savings for your business. As Figure 9 shows, the Dell OptiPlex 9030 All-in-One and Dell OptiPlex 9020 Micro required significantly less workspace than the legacy desktop tower in our study—59 and 60 percent less square inches, respectively. In addition, Dell offers mounts for the OptiPlex 9020 Micro that can further reduce its required workspace, creating more space savings when compared to the legacy desktop tower. Note: For more details on how we calculated workspace for the three systems, see Appendix C. Figure 9: Total workspace based on footprint for each system. Lower numbers are better. As Figure 10 shows, the workspace savings that replacing desktops can bring your business can have an enormous impact at scale. For example, a business replacing 10,000 legacy desktop towers with 10,000 new Dell OptiPlex 9020 Micro desktops could save 7,708 sq. ft. of valuable workspace.
  • 12. A Principled Technologies report 12Upgrading to new Dell OptiPlex desktops Figure 10: Workspace saved in square feet when replacing a fleet of legacy desktop towers with Dell OptiPlex 9020 Micro desktops. CONCLUSION Compared to aging desktops, new Dell OptiPlex desktops can allow employees to be more productive with faster and more reliable hardware while providing significantly lower power costs. Improved management technology with the new desktops can support the efforts of your IT staff and can reduce costly deskside visits. Upgrading your aging desktops with the Dell OptiPlex 9030 All-in-One or the Dell OptiPlex 9020 Micro desktops brings important improvements to your business through both hardware and software.
  • 13. A Principled Technologies report 13Upgrading to new Dell OptiPlex desktops APPENDIX A – SYSTEM CONFIGURATION INFORMATION Figure 11 details the systems we used in our tests. System Dell OptiPlex 9030 All- in-One Dell OptiPlex 9020 Micro Legacy desktop tower General Number of processor packages 1 1 1 Number of cores per processor 4 4 2 Number of hardware threads per core 1 1 1 Total number of processor threads in system 4 4 2 System power management policy Balanced Balanced Balanced Processor power-saving option EIST EIST EIST Dimensions (h × l × w in inches) 20.50 × 22.25 × 8.50 1.50 × 7.38 × 7.19 17.63 × 17.38 × 7.00 Weight (lbs.) 24.1 2.5 23.8 CPU Vendor Intel Intel Intel Name Core i5 Core i5 Core 2 Duo Model number 4590S 4590T E8400 Stepping C0 C0 E0 Socket type Socket 1150 LGA Socket 1150 LGA Socket 775 LGA Core frequency (GHz) 3.0 / 3.7 Turbo 2.0 / 3.0 Turbo 3.0 Bus frequency DMI2 5 GT/s DMI2 5 GT/s 1,333 MHz L1 cache 4 × 32 KB + 4 × 32 KB 4 × 32 KB + 4 × 32 KB 2 × 32 KB + 2 × 32 KB L2 cache 4 × 256 KB 4 × 256 KB 6 MB L3 cache 6 MB 6 MB N/A Platform Vendor and system name Dell OptiPlex 9030 All- in-One Dell OptiPlex 9020 Micro HP Compaq 8000 Elite Convertible Minitower Motherboard model number 0VNGWR 0Y5DDC 3647h Motherboard chipset Intel Q87 Intel Q87 Intel Q45/Q43 BIOS name and version Dell A03 (09/15/2014) Dell A02 (08/11/2014) Hewlett-Packard 786G7 v01.13 (07/20/2011) AMT Version 5.2.50 9.1.0 9.1.0
  • 14. A Principled Technologies report 14Upgrading to new Dell OptiPlex desktops System Dell OptiPlex 9030 All- in-One Dell OptiPlex 9020 Micro Legacy desktop tower Memory module(s) Vendor and model number Samsung® M471B5173DB0-YK0 Hyundai Electronics HMT41GS6BFR8A-PB Samsung M378B5673EH1-CH9 Type PC3-12800 PC3-12800 PC3-10600 Speed (MHz) 1,600 1,600 1,333 Speed running in the system (MHz) 1,600 1,600 1,066 Timing/Latency (tCL-tRCD-tRP- tRASmin) 11-11-11-28 11-11-11-28 7-7-7-20 Size (MB) 4,096 8,192 2,048 Number of memory module(s) 2 1 2 Total amount of system RAM (GB) 8 8 4 Channel (single/dual) Dual Single Dual Hard disk Vendor and model number Seagate® ST500LT012 Samsung PM851 SSD Seagate ST3320418AS Number of disks in system 1 1 1 Size (GB) 500 128 320 Buffer size (MB) 16 N/A 16 RPM 5,400 N/A 7,200 Type SATA 6.0 Gb/s SATA 6.0 Gb/s SATA 3.0 Gb/s Controller Intel 8 Series/C220 Chipset Family SATA AHCI Intel 8 Series/C220 Chipset Family SATA AHCI Intel Express Chipset SATA RAID Controller Driver Intel 12.8.7.1000 (10/18/2013) Intel 13.0.0.1098 (02/05/2014) Intel 10.1.0.1008 (11/06/2010) Operating system Name Windows 7 Professional x64 Windows 7 Professional x64 Windows 7 Professional x64 Build number 7600 7600 7600 Service Pack 1 1 1 File system NTFS NTFS NTFS Kernel ACPI x64-based PC ACPI x64-based PC ACPI x64-based PC Language English English English Microsoft DirectX® version 11 11 11
  • 15. A Principled Technologies report 15Upgrading to new Dell OptiPlex desktops System Dell OptiPlex 9030 All- in-One Dell OptiPlex 9020 Micro Legacy desktop tower Graphics Vendor and model number Intel HD Graphics 4600 Intel HD Graphics 4600 Intel GMA 4500 Type Integrated Integrated Integrated Chipset Intel HD Graphics Family Intel HD Graphics Family Intel 4 Series Express Chipset Family BIOS version 2179.5 2179.1 2066.0 Total available graphics memory (MB) 1,696 1,696 1,695 Dedicated video memory (MB) 64 64 64 System video memory (MB) 0 0 0 Shared system memory (MB) 1,632 1,632 1,631 Resolution 1,920 × 1,080 1,920 × 1,080 1,920 × 1,080 Driver Intel 10.18.10.3412 (01/29/2014) Intel 10.18.10.3412 (01/29/2014) Intel 8.15.10.2413 (06/03/2011) Sound card/subsystem Vendor and model number Realtek® High Definition Audio Realtek High Definition Audio Realtek High Definition Audio Driver Realtek 6.0.1.6053 (10/16/2014) Realtek 6.0.1.6032 (04/25/2014) Realtek 6.0.1.6383 (05/31/2011) Ethernet Vendor and model number Intel Ethernet Connection I217-LM Intel Ethernet Connection I217-LM Intel 82567LM-3 Gigabit Controller Driver Intel 12.12.50.4 (06/12/2014) Intel 12.12.50.7205 (07/31/2014) Intel 12.10.13.0 (12/16/2013) Wireless Vendor and model number Intel Dual Band Wireless-AC 7260 Intel Dual Band Wireless-AC 7260 N/A Driver Intel 17.0.5.8 (06/18/2014) Intel 17.0.5.8 (06/18/2014) N/A Optical drive(s) Vendor and model number TSSTcorp SU-208FB N/A HP TS-H653R Type DVD-RW N/A DVD-RW USB ports Number 8 6 10 Type 3.0 3.0 2.0 Other Media card reader, DisplayPort, 1 × HDMI In, 1 × HDMI Out DisplayPort N/A
  • 16. A Principled Technologies report 16Upgrading to new Dell OptiPlex desktops System Dell OptiPlex 9030 All- in-One Dell OptiPlex 9020 Micro Legacy desktop tower Monitor Model Dell All-in-One Touch Display Dell P2314H ViewSonic® VG730m LCD type Backlit LED Backlit LED SXGA LCD Screen size 23″ 23″ 17″ Refresh rate (Hz) 60 60 60 Maximum resolution 1,920 × 1,080 1,920 × 1,080 1,280 × 1,024 Figure 11: Detailed information for our test systems. Figure 12 describes the configuration of the server that we used to access the desktops for management tasks. System Dell PowerEdge™ R620 Power supplies Total number 2 Vendor and model number Dell D750E-S1 Wattage of each (W) 750 Cooling fans Total number 7 Vendor and model number Delta® GFC0412DS Dimensions (h × w) of each 1-1/2″ × 1-3/4″ Volts 12 Amps 1.82 General Number of processor packages 2 Number of cores per processor 8 Number of hardware threads per core 2 System power management policy Default CPU Vendor Intel Name Xeon® Model number E5-2660 Socket type LGA 2011 Core frequency (GHz) 2.20 Bus frequency 8 L1 cache 32 KB + 32 KB (per core) L2 cache 256 KB (per core) L3 cache 20 MB Platform Vendor and model number Dell PowerEdge R620 BIOS name and version Dell 2.4.3 (10/10/2014) BIOS settings Default
  • 17. A Principled Technologies report 17Upgrading to new Dell OptiPlex desktops System Dell PowerEdge™ R620 Memory module(s) Total RAM in system (GB) 128 Vendor and model number Micron® MT36KSF1G72PZ Type PC3-12800R Speed (MHz) 1,600 Speed running in the system (MHz) 1,600 Timing/Latency (tCL-tRCD-tRP-tRASmin) 9-9-9-24 Size (GB) 8 Number of RAM module(s) 20 Chip organization Double-sided Rank Dual Operating system Name Microsoft Windows Server® 2012 R2 Datacenter Build number 9600 File system NTFS Kernel 6.2.9600.16452 Language English RAID controller Vendor and model number Dell PERC H710P Mini Firmware version 21.3.1-0009 06/23/2014 Driver version 6.802.21.00 08/27/2014 Cache size (MB) 1,024 Local storage Vendor and model number Seagate ST9900806SS Number of drives 4 Size (GB) 900 RPM 10K Type SAS Ethernet adapters Vendor and model number Intel Gigabit I350 4-port Type Integrated Driver 12.11.97.1 (08/13/2014) USB 2.0 ports 4 Figure 12: Detailed information for our test server.
  • 18. A Principled Technologies report 18Upgrading to new Dell OptiPlex desktops APPENDIX B – HOW WE CALCULATED OVERALL SYSTEM PERFORMANCE We included the following benchmarks in our performance/productivity calculation:  HDXPRT 2012  PCMark® 8 Work workload  SYSmark® 2014  3DMark® Ice Storm  3DMark Ice Storm Extreme We ran the five benchmarks on the Dell OptiPlex 9030 All-in-One, Dell OptiPlex 9020 Micro, and legacy desktop tower, repeating each test three times. For our calculations, we selected the median of the three results for each benchmark and system. We calculated the percentage wins for the Dell OptiPlex 9030 All-in-One and Dell OptiPlex 9020 Micro versus the legacy desktop tower on each benchmark. The Dell OptiPlex 9030 All-in-One and Dell OptiPlex 9020 Micro outperformed the legacy desktop tower on all five benchmarks. We calculated system performance by taking the geometric mean of the percentage wins; that gave us a 145.3 percent system performance improvement for the Dell OptiPlex 9030 All-in-One versus the legacy desktop and a 114.1 percent system performance improvement for the Dell OptiPlex 9020 Micro (see Figure 13). Dell OptiPlex 9030 All-in-One Dell OptiPlex 9020 Micro Legacy desktop tower Score % improvement over legacy desktop tower Score % improvement over legacy desktop tower Score HDXPRT (Create HD score) 229 129% 193 93% 100 SYSmark (Overall Rating) 1,417 133% 1,334 120% 607 PCMark (Work Score) 3,015 29% 3,093 32% 2,341 3DMark Ice Storm (Median) 57,050 361% 40,258 225% 12,385 3DMark Ice Storm Extreme (Median) 34,812 360% 25,834 241% 7,566 Geometric mean of percentage wins 145.3% 114.1% Figure 13: System performance improvement based on our benchmark testing.
  • 19. A Principled Technologies report 19Upgrading to new Dell OptiPlex desktops APPENDIX C – HOW WE CALCULATED WORKSPACE Figure 14 shows the dimensions for the three systems and the workspace savings for the Dell OptiPlex 9030 All- in-One and Dell OptiPlex 9020 Micro. The base of the Dell OptiPlex 9030 All-in-One was roughly the same size as the 9″ circular base of the monitor that we paired with the legacy desktop tower. The legacy desktop tower chassis (17.6″ × 17.4″ × 7.0″) took up 121.7 square inches of desk space. The circular base of the monitor added 63.6 square inches, for a total footprint of 185.3 square inches. With a footprint of 76.5 square inches, the Dell OptiPlex 9030 All-in-One was 108.8 square inches smaller than the legacy desktop tower—a savings of 59 percent. The Dell OptiPlex 9020 Micro chassis (1.5″ × 7.4″ × 7.2″) took up 11.1 square inches of desk space. We used monitors with similar footprints for the Dell OptiPlex 9020 Micro (62.2 square inches) and the legacy desktop tower (63.6 squares inches). Including the monitors, the footprint of the Dell OptiPlex 9020 Micro was 111.0 square inches smaller than the footprint of the legacy desktop tower—a savings of 60 percent. Monitor System Total Length × width (inches) Area (sq. inches) Length × width (inches) Area (sq. inches) Total Area (sq. inches) Advantage vs. legacy (sq. inches) Advantage (%) Dell OptiPlex 9030 All- in-One 8.5 × 9.0 76.5 76.5 108.8 59% Dell OptiPlex 9020 Micro (on its narrow side) 7.1 × 8.9 63.2 7.4 × 1.5 11.1 74.3 111.0 60% Legacy desktop tower (circular base) 9.0 63.6 17.4 × 7 121.7 185.3 Figure 14: Dimensions of the three systems and the workspace savings for the Dell OptiPlex 9030 All-in-One and Dell OptiPlex 9020 Micro.
  • 20. A Principled Technologies report 20Upgrading to new Dell OptiPlex desktops APPENDIX D – HOW WE TESTED Configuring the SCCM management environment Starting from our base Microsoft System Center 2012 Configuration Manager build, we configured our environment to test KVM Remote Control capability on our target clients. Figure 15 shows our isolated testing environment, which comprised of one Dell PowerEdge R620 server running Windows Server 2008 R2 Hyper-V® with four virtual machines. Before configuration, we installed all available Windows updates on our clients and joined each desktop to the test.local domain. We created Active Directory accounts for AMT provisioning and installed Intel Setup and Configuration Software (Intel SCS). Next, we provisioned the desktops using Configurator, provided by Intel, to apply our custom management profile from SCS to each client’s management engine. We provide detailed steps below for each of these procedures. Finally, Dell Command | Intel vPro Out of Band , which we used to connect to the Dell OptiPlex 9030 All-in-One and Dell OptiPlex 9020 Micro to complete our out-of-band management testing. Description Computer name Operating system Roles Installed Assigned IP vCPU vRAM Domain controller dc.test.local Windows Server 2008 R2 Standard Active Directory, Domain Controller, DHCP 192.168.1.10 1 8 GB Certificate authority ca.test.local Windows Server 2008 R2 Enterprise Certification Authority 192.168.1.15 1 8 GB Database server db.test.local Windows Server 2008 R2 Standard SQL Server 2012 Enterprise 192.168.1.20 1 16 GB Management server cm.test.local Windows Server 2008 R2 Standard System Center 2012 Configuration Manager SP1 192.168.1.50 2 16 GB Figure 15: The details of our isolated testing environment. Constructing the infrastructure Creating Active Directory accounts for AMT provisioning 1. Log into the Domain Controller using the domainadministrator account. 2. Open Active Directory Administrative Center. 3. Under test(local), click NewGroup. 4. On the Create Group window, for Group name, use Kerberos Admins; for Group type, use security. 5. Add Kerberos Admins as a member of the Domain Admins group. 6. Add the computer account of the SCCM server to the Kerberos Admins security group. 7. Create an Organizational Unit for AMT managed systems. We used AMT 8. Create a security group called AMT 9. Add the Kerberos Admins group to the AMT security group. Creating certificate templates for OOB management 1. Log into the Windows 2008 R2 Enterprise server designated for Certificate Authority as domainadministrator. 2. Click StartAdministrative ToolsCertification Authority. 3. Right-click on test-CA-CA, and click Properties.
  • 21. A Principled Technologies report 21Upgrading to new Dell OptiPlex desktops 4. On the General tab, click View Certificate. 5. On the Details tab, scroll to and select Thumbprint. Copy the 40-character code displayed in the details. You will add this information to the AMT BIOS later. 6. To close the Certificate Authority properties, click OK. 7. Expand the Certification Authority, and select Certificate Templates. 8. Right-click Certificate Templates, and select Manage. 9. Locate Web Server in the list of available certificate templates. Right-click the template, and select Duplicate Template. 10. Select Windows 2003 Enterprise, and click OK. 11. Change the template name for the AMT Provisioning certificate. We used AMT Provisioning. 12. On the Subject Name tab, select Build from this Active Directory Information. Select Common Name, and choose the option UPN. 13. On the Security tab, add the security group created for the SCCM site server. We used the Kerberos Admin group. Add the Enroll permission for the security group. Ensure Domain Admins and Enterprise Admins have Enroll permissions. 14. On the Extensions tab, select Application Policies, and click Edit. 15. Click Add. Click New. Type AMT Provisioning for the name, and 2.16.840.1.113741.1.2.3 as the Object Identifier. Click OK. 16. Ensure AMT Provisioning and Server Authentication are listed, and click OK. 17. Click OK to close the template properties. 18. Right-click the AMT Web Server Certificate template, and select Duplicate Template. 19. Select Windows 2003 Enterprise, and click OK. 20. Change the template name for the AMT Web Server Certificate. We used AMT Web Server Certificate Template. 21. On the General tab, choose the option Publish Certificate in Active Directory. 22. On the Subject Name tab, select Supply in the request. 23. On the Security tab, ensure Domain Admins and Enterprise Admins have Enroll permissions. 24. To close the template properties, click OK. 25. In Certification Authority, navigate to Certificate Templates. 26. For both the AMT Provisioning Template, and the AMT Web Server Certificate Template, repeat the following steps: 27. Right-click the central panel, and select NewCertificate Template to Issue. 28. Select the AMT Provisioning Template. 29. Click OK. 30. Log into the management server as domainadministrator. 31. Click StartRun. Type mmc and press Enter. 32. In the mmc console, click FileAdd/Remove Snap-in… 33. Select Certificates, and click Add. Select Computer account. Click Next. 34. Select Local computer, and click Finish. 35. Click OK. 36. Expand Certificates (Local Computer)PersonalCertificates.
  • 22. A Principled Technologies report 22Upgrading to new Dell OptiPlex desktops 37. In the right panel, click More ActionsAll TasksRequest a new certificate… 38. Click Next. 39. Accept the defaults, and click Next. 40. Select the new AMT Provisioning certificate. Click Enroll. 41. Click FileAdd/Remove Snap-in… 42. Select Certificates, and click Add. Select Computer account. Click Next. 43. Select My user account, and click Finish. 44. Click OK. 45. Expand CertificatesPersonalCertificates. 46. In the right panel, click More ActionsAll TasksRequest a new certificate… 47. Click Next. 48. Accept the defaults, and click Next. 49. Select the new AMT Provisioning certificate. Click Enroll. 50. Click FileAdd/Remove Snap-in… 51. Select Certificates, and click Add. Select My user account. Click Next. 52. Select Local computer, and click Finish. 53. Click OK. 54. Expand Certificates – Current UserPersonalCertificates. 55. From Certificates (Local)PersonalCertificates, click and drag the certificate created using the AMT Provisioning template into Certificates – Current UserPersonalCertificates. 56. Click Close. Installing Intel Setup and Configuration Software (SCS) 9.1 1. Download IntelSCS_9.1.zip from downloadcenter.intel.com/Detail_Desc.aspx?DwnldID=20921. 2. Extract the contents to C:IntelSCS_9.1. 3. Browse to C:IntelSCS_9.1IntelSCSRCS. 4. Run IntelSCSInstaller.exe. 5. At the Welcome screen, click Next. 6. Select I accept the terms of the license agreement, and click Next. 7. Check the Boxes for Remote Configuration Service (RCS), Database Mode, and Console. 8. Enter the credentials of the Domain account that will run the service. We used test.localadministrator. Click Next. 9. Select db.test.local as the location for the SCS database. This information may populate automatically. Select Windows Authentication, and click Next. 10. On the Create Intel SCS Database pop-up, click Create Database. 11. On the confirmation screen, click Close. 12. On the confirmation screen, leave the default Installation Folder, and click Install. 13. Once the installation is complete, click Next. 14. Click Finish. Setting up AMT provisioning with Intel SCS Remote Configuration Service Creating the configuration profile 1. On the management server, launch the Intel Setup and Configuration Console.
  • 23. A Principled Technologies report 23Upgrading to new Dell OptiPlex desktops 2. Click Profiles. 3. To construct a profile for deployment, click New. 4. For Profile Name, enter a description of the target clients. We used inteltest. Click OK. 5. On the Getting Started Screen, choose Configuration / Reconfiguration. 6. On the Optional Settings screen, choose the options Active Directory Integration, Access Control List (ACL), and Transport Layer Security (TLS), and click Next. 7. On the AD Integration screen, browse for the OU created for the AMT managed devices. We used OU=AMT, DC=test, DC=local. Check the box for Always use host name, and click Next. 8. On the Access Control List screen, click Add. 9. Select Active Directory User/Group. Click Browse. 10. Add Kerberos Admin, Domain Admins, or other administrative users groups. Click OK. 11. For Access Type, select Remote. 12. Choose the option for PT Administration. Click OK. 13. Click Next. 14. On the TLS screen, from the drop-down menu, select the Enterprise Certificate Authority, ca.test.local. 15. Select the Server Certificate Template to be used to generate certificates for the AMT devices. We selected AMTWebServerCertificate. Click Next. 16. On the System Settings screen, choose the options Web UI, Serial Over LAN, IDE Redirection, and KVM Redirection. 17. Select Use the following password for all systems. Enter the password for use after provisioning is complete. We used P@ssw0rd 18. Click KVM Settings… 19. Enter the RFB Password for KVM sessions. We used P@ssw0rd 20. Enter the MEBX password. We used P@ssw0rd 21. Uncheck User Consent required before beginning KVM session, and click OK. 22. Choose the options Enable Intel AMT to respond to ping requests and Enable Fast Call for Help (within the enterprise network). 23. To Edit IP and FQDN settings, click Set. 24. In the Network Settings window, select Use the following as the FQDN, and choose Primary DNS FQDN from the drop-down menu. 25. Choose the option, the device and the OS will have the same FQDN (Shared FQDN). 26. Select Get the IP from the DHCP server. 27. Select Update the DNS directly or via DHCP option 81. Click OK. 28. Click Next. 29. Click Finish. Configuring the clients Repeat these steps for each client. Reserving an IP address in DHCP 1. On the Domain Controller, run dhcpmgmt.msc. 2. Expand FQDN IPv4Scope, and click Reservations. 3. Click More Actions, and click New Reservation.
  • 24. A Principled Technologies report 24Upgrading to new Dell OptiPlex desktops 4. For Reservation Name, enter the host name of the target client. 5. Enter an IP address to reserve. 6. Enter the MAC address of the target client’s Ethernet port. 7. Click Add. Configuring policy on the target client 1. Log onto the target client using domainadministrator. 2. Download and apply applicable driver packages from the manufacturer’s Web site. 3. Open Windows Firewall with Advanced Security. 4. Click Firewall Properties. 5. On the Domain Profile, Private Profile, and Public Profile tabs, set the Firewall state to Off. Click OK. 6. Set the host name and IP of each virtual machine as described above. 7. Run lusrmgr.msc. 8. Select Groups. 9. Right-click Administrators, and click Properties. 10. Click Add. 11. Select Object Types, check the box for Computers, and click OK. 12. Disable the wireless adapter. Configuring the Configuration Manager Client 1. On the management server, navigate to Program Files Microsoft Configuration Manager folder. 2. Copy the Client folder to the target client. 3. On the target client, run ccmsetup.exe. This task will run in the background and will take a few minutes to complete. 4. In Control Panel, open Configuration Manager. 5. On the Site tab, click Configure Settings. 6. For Currently assigned to site code, enter PTL, and click Apply. 7. In the Actions panel, run the User Policy Retrieval & Evaluation Cycle and the Machine Policy Retrieval & Evaluation Cycle. 8. After a few minutes, the Actions panel will populate with more tasks. Run each one of the tasks. Adding the enterprise certificate authority to the AMT trusted root certification authorities 1. Power on the target client. 2. During POST, press CTRL-P to enter the Intel Management Engine BIOS settings. 3. When prompted for a password, type the default password admin 4. Provide and confirm a new password. We used P@ssw0rd 5. Select Intel AMT Configuration. Press Enter. 6. Select SOL/IDER/KVM. 7. All features should be Enabled. To exit the menu, press Esc. 8. Select User Consent. 9. Change User Opt-in to None. 10. Change Opt-in Configurable from Remote IT to Disabled. To exit the menu, press Esc. 11. Change Password Policy to During Setup and Configuration. 12. Select Network Setup.
  • 25. A Principled Technologies report 25Upgrading to new Dell OptiPlex desktops 13. Select Intel ME Network Name Settings. 14. For Host Name, use the same host name used for the operating system. 15. For Domain Name, enter the domain name. We used test.local 16. For Shared/Dedicated FQDN, select Shared. 17. For Dynamic DNS Update, select Enabled. Press Esc to exit the menu. 18. Select Remote Setup and Configuration. Press Enter. 19. On Provisioning Server IPv4/IPv6, enter the IP address of the system center server. We used 192.168.1.50 20. For Provisioning Server FQDN, enter the FQDN of the management server. We entered cm.test.local. For port number we used 9971 21. Select TLS PKI. 22. Select PKI DNS Suffix, and type the FQDN suffix. We used test.local. Press Enter. 23. Select Manage Hashes. 24. To add a new hash, press Insert. 25. Enter a descriptive name for the Enterprise Certificate Authority. We used test.local CA 26. Press Enter. 27. Following the syntax example provided in the prompt, enter the 40-character thumbprint previously copied from the Enterprise CA root certificate. Press Enter. 28. To set the hash certificate as active, press Y. test.local CA will appear in the list of trusted root authorities and should be active. 29. To return to the AMT Configuration Menu, press Esc. 30. Select Activate Network Access. To confirm, press Y. 31. To exit, press Esc until prompted. To confirm exit, press Y. Executing the remote configuration script on the AMT managed client 1. Log into the AMT managed target client as domainadministrator. 2. Copy the Configurator folder from the SCS_9.1 directory located on the management server to C: on the local host. 3. Open a command prompt as administrator. 4. Type cd C:Configurator and press Enter. 5. Execute the following command: ACUConfig.exe /lowsecurity /output console /verbose ConfigViaRCSOnly cm.test.local inteltest 6. The Configurator utility will contact the Remote Configuration Service and apply the settings configured in the inteltest profile. Setting up AMT discovery in SCCM 1. On the management server, open the SCCM Management Console. Locate the target client in the Devices panel. 2. Right-click the headings bar in the Devices panel, and check the entries for AMT Status and AMT Version. 3. Right-click the server, and select Manage Out of BandDiscover AMT Status. Click OK. 4. In the Home menu at the top of the panel, click Refresh.
  • 26. A Principled Technologies report 26Upgrading to new Dell OptiPlex desktops 5. The Client, Site Code, and Client Activity fields will populate. The AMT Status will change to Externally provisioned. Installing Dell Command | vPro Out of Band 1. Download the Dell Command | vPro Out of Band 2.0 from downloads.dell.com/FOLDER02502830M/2/DCIV_194_ZPE.exe 2. Run DCIV_194_ZPE.exe. Continue as prompted to extract the installation files onto the management server. 3. Run DCIV_Setup_2_0_0. 4. On the Dell Command | Intel vPro Out of Band – v 2.0.0.194 window, click Next. 5. On the License Agreement screen, accept the License Agreement, and click Next. 6. On the Ready to Install the Program screen, click Install. 7. When complete, click Finish. 8. Open Dell Command | Intel vPro Out of Band. 9. At the welcome screen, click OK. 10. At the Settings screen, for Data Configuration enter the appropriate information. We used the following:  System Center SQL server : db.test.local  System Center database : CM_PTL 11. For Client Credentials, enter the appropriate information. We used the following:  Operating System Domain: test.local  Username : administrator  Password : Password1  Password confirmation : Password1  AMT Management Engine Domain : test.local  Username : admin  Password : P@ssw0rd  Password Confirmation : P@ssw0rd 12. On the Task Queue screen, turn off Refresh Automatically. 13. Set the History Limit to 7. 14. Click OK. Timing common management tasks on the Dell OptiPlex desktops Changing one BIOS setting 1. On the management server, place the mouse over the Windows start menu icon and start the timer. From the task bar, click on the icon to open Dell Command | Intel vPro Out of Band. 2. Select Client Configuration. 3. Select BIOS Settings. 4. Click Next. 5. On the BIOS Settings screen, for Active Processor Cores, for Value to Set select All and check the box to Apply the Setting. 6. Click Next. 7. On the Available clients screen, select the target client. Click the right pointing arrow to add the selected client to the list. 8. For a second client, repeat step 7.
  • 27. A Principled Technologies report 27Upgrading to new Dell OptiPlex desktops 9. Click Next. 10. Type a description in the Description field. We used test. 11. Click Next. 12. Click Finish. 13. Complete steps 1 through 12 two more times, and report the median of the three runs. Changing five BIOS settings 1. On the management server, place the mouse over the Windows start menu icon and start the timer. From the task bar, click on the icon to open Dell Command | Intel vPro Out of Band. 2. Select Client Configuration. 3. Select BIOS Settings. 4. Click Next. 5. On the BIOS Settings screen, for Active Processor Cores, for Value to Set select All and check the box to Apply the Setting. 6. For Enable Intel SpeedStep for Value to Set select Enabled and check the box to Apply the Setting. 7. For Enable Intel Virtualization Technology for Value to Set select Enabled and check the box to Apply the Setting. 8. For Enable MEBx Hotkey for Value to Set select Enabled and check the box to Apply the Setting. 9. For Enable VT for Direct I/O for Value to Set select Enabled and check the box to Apply the Setting. 10. Click Next. 11. On the Available clients screen, select the target client. Click the right pointing arrow to add the selected client to the list. 12. Repeat step 11 for second client. 13. Click Next. 14. Type a description in the Description field. We used test. 15. Click Next. 16. Click Finish. 17. Complete steps 1 through 16 two more times, and report the median of the three runs. Changing boot order 1. On the management server, place the mouse over the Windows start menu icon and start the timer. From the task bar, click on the icon to open Dell Command | Intel vPro Out of Band. 2. Select Client Configuration. 3. Select Boot Order. 4. Select Internal Optical Drive from the Device list and click the up Arrow button to move the drive up in the Boot order once. 5. Click Next. 6. Select the target client on the Available clients screen. Click the right pointing arrow to add the selected client to the list. 7. Repeat step 6 for the second system. 8. Click Next. 9. Type a description in the Description field. We used test. 10. Click Next.
  • 28. A Principled Technologies report 28Upgrading to new Dell OptiPlex desktops 11. Click Finish. 12. Complete steps 1 through 11 two more times, and report the median of the three runs. Changing the BIOS password 1. On the management server, place the mouse over the Windows start menu icon and start the timer. From the task bar, click on the icon to open Dell Command | Intel vPro Out of Band. 2. Select Client Configuration. 3. Select BIOS Passwords. 4. For Password task, select Set. 5. Select Administration. 6. For New Password, type Password1 7. For Confirm New Password, type Password1 8. Click Next. 9. On the Available clients screen, select the target client. Click the right pointing arrow to add the selected client to the list. 10. Repeat step 9 for the second system. 11. Click Next. 12. Type a description in the Description field. We used test. 13. Click Next. 14. Click Finish. 15. Complete steps 1 through 14 two more times, and report the median of the three runs. Changing the power profile 1. On the management server, place the mouse over the Windows start menu icon and start the timer. From the task bar, click on the icon to open Dell Command | Intel vPro Out of Band. 2. Select Client Configuration. 3. Select Power Profile. 4. For Desktop power policy, select ON in S0; ME Wake in S3, S4-S5. 5. For Mobile power policy, select No change. 6. Click Next. 7. On the Available clients screen, select the target client. Click the right pointing arrow to add the selected client to the list. 8. Repeat step 7 for the second system. 9. Click Next. 10. Type a description in the Description field. We used test 11. Click Finish. 12. Complete steps 1 through 11 two more times, and report the median of the three runs. Measuring the time to open a KVM session 1. On the management server, place the mouse over the Windows start menu icon and start the timer. From the task bar, click on the icon to open Dell Command | Intel vPro Out of Band. 2. Select Operations. 3. Select KVM Connect. 4. On the KVM Connect screen, select the target client, and click Connect.
  • 29. A Principled Technologies report 29Upgrading to new Dell OptiPlex desktops 5. The KVM will window will appear and connect automatically. When the login screen is visible, stop the timer. 6. Complete steps 1 through 5 two more times, and report the median of the three runs. Timing common management tasks on the legacy desktop tower Changing one BIOS setting 1. With the client at the Windows login screen, start the timer. Restart the computer. 2. As the system reboots, press F10 to boot into the setup menu. 3. Select English. 4. Under the advanced tab, select device options. 5. Select Multi-processor. 6. Select Enable 7. Press F10 to accept. 8. Press escape, down, and Enter to Save Changes and Exit. 9. Press F10 and allow the system to reach the login screen. When the login screen is visible, stop the timer. 10. Complete steps 1 through 9 two more times, and report the median of the three runs. Changing five BIOS setting 1. With the client at the Windows login screen, start the timer. Restart the computer. 2. As the system reboots, press F10 to boot into the setup menu. 3. Select English. 4. Under the Security Tab, select System Security. 5. Select Virtualization Technology (VTx). 6. Select Enable. 7. Press F10 to accept 8. Select Virtualization Technology Direct I/O (VTd) 9. Select Enable. 10. Press F10 to accept. 11. Under the Power tab, select OS Power Management. 12. Select Runtime Power Management. 13. Select Enable. 14. Press F10 to accept. 15. Under the advanced tab, select device options. 16. Select Multi-processor. 17. Select Enable 18. Press F10 to accept. 19. Select Management operations. 20. Select MEBx Setup Prompt. 21. Select Displayed. 22. Press F10 to accept. 23. Press escape, down, and Enter to Save Changes and Exit. 24. Press F10 and allow the system to reach the login screen. When the login screen is visible, stop the timer. 25. Complete steps 1 through 24 two more times, and report the median of the three runs.
  • 30. A Principled Technologies report 30Upgrading to new Dell OptiPlex desktops Changing boot order 1. With the client at the Windows login screen, start the timer. Restart the computer. 2. As the system reboots, press F10 to boot into the setup menu. 3. Select English. 4. Under the Storage tab, select boot Order. 5. Select ATAPI CD-ROM Drive by pressing Enter. 6. Press up to move the CD-ROM Drive, and press enter. 7. Press F10 to accept. 8. Press escape, down, and Enter to Save Changes and Exit. 9. Press F10 and allow the system to reach the login screen. When the login screen is visible, stop the timer. 10. Complete steps 1 through 9 two more times, and report the median of the three runs. Changing BIOS password 1. With the client at the Windows login screen, start the timer. Restart the computer. 2. As the system reboots, press F10 to boot into the setup menu. 3. Select English. 4. Under the Security tab, select Setup Password. 5. For Enter New Setup Password, type Password1. 6. For Enter New Password Again, type Password1 7. Press F10 to accept. 8. Press escape, down, and Enter to Save Changes and Exit. 9. Press F10 and allow the system to reach the login screen. When the login screen is visible, stop the timer. 10. Complete steps 1 through 9 two more times, and report the median of the three runs. Before starting the next run, remove the added BIOS password. Changing the power profile 1. With the client at the Windows login screen, start the timer. Restart the computer. 2. As the system reboots, press Ctrl + P to boot into MEBX. 3. Enter the Password. 4. Select Intel ME Configuration. 5. Press Y to Confirm. 6. Select Intel ME Power Control. 7. Press Enter. 8. Select Desktop: ON in S0, S3, S4-5. 9. Press ESC three times 10. When asked if you want to exit, press Y and allow the system to reach the login screen. When the login screen is visible, stop the timer. 11. Complete steps 1 through 10 two more times, and report the median of the three runs. Measuring system performance HDXPRT 2012 Setting up the test 1. Insert the HDXPRT v1.1 DVD-ROM into your DVD drive. 2. At the HDXPRT Install screen, click Install HDXPRT.
  • 31. A Principled Technologies report 31Upgrading to new Dell OptiPlex desktops 3. Accept the HDXPRT end-user license agreement. 4. After the setup is complete, select Yes, I want to restart my computer now, and click Finish. Running the test 1. On the desktop, click the HDXPRT 2012 shortcut. 2. Click Run HDXPRT. 3. Enter a test name, choose 3 iterations, and click Run. 4. The Results Screen automatically appears at the end of a successful run. BAPCo® SYSmark 2014 v1.0.1.21 Antivirus software conflicts SYSmark 2014 is not compatible with any virus-scanning software, so we uninstalled any such software that was present on the desktop PCs before we installed the benchmark. Pre-installed software conflicts SYSmark 2014 installs the following applications, which its test scripts employ:  Adobe® Acrobat® XI Pro  Adobe Photoshop® CS6 Extended  Adobe Premiere® Pro CS6  Google Chrome™  Microsoft Excel® 2013  Microsoft OneNote® 2013  Microsoft Outlook® 2013  Microsoft PowerPoint® 2013  Microsoft Word 2013  Trimble® SketchUp® Pro 2013  WinZip® Pro 17.5 Setting up the test 1. Disable the User Account Control. 2. Click StartControl Panel. 3. At the User Accounts and Family Safety settings screen, click Add or remove user account. 4. At the User Account Control screen, click Continue. 5. Click Go to the main User Accounts page. 6. At the Make changes to your user account screen, click Turn User Account Control on or off. 7. At the User Account Control screen, click Continue. 8. Uncheck Use User Account Control to help protect your computer, and click OK. 9. At the You must restart your computer to apply these changes screen, click Restart Now. 10. Purchase SYSmark 2014 v1.0.1.21 from bapco.com/products/sysmark-2014 and install with default settings. 11. To launch SYSmark 2014, double-click the desktop icon, and select Configuration. 12. Select all options, and click Save. Running the test 1. Double-click the desktop icon to launch SYSmark 2014. 2. Make sure Office Productivity, Media Creation, and Data/Financial Analysis are selected.
  • 32. A Principled Technologies report 32Upgrading to new Dell OptiPlex desktops 3. Enter a Project name. 4. Select 3 Iterations, check the box beside Conditioning Run and beside Process Idle Tasks, and click Run Benchmark. 5. When the benchmark completes and the main SYSmark 2014 menu appears, click Save FDR to create a report. Futuremark® PCMark 8 v2.3.293 Setting up the test 1. Download the PCMark 8 installer exe Windows package from www.futuremark.com/benchmarks/pcmark8. 2. Double-click the PCMark installer exe file to install PCMark 8 with the default options. 3. Click the PCMark 8 desktop icon to launch PCMark 8. Enter the registration code, click Register, and click OK. 4. Exit PCMark 8. Running the test 1. Boot the system and type CMD to bring up a command prompt. 2. To open App options, right-click the Command Prompt app. 3. Click Run as administrator. 4. Type Cmd.exe /c start /wait Rundll32.exe advapi32.dll,ProcessIdleTasks 5. Do not interact with the system until the command completes. 6. After the command completes, wait 5 minutes before running the test. 7. Double-click the PCMark 8 desktop icon to launch the benchmark. 8. Select the Home test suite. 9. Click Run Conventional. 10. When the benchmark run completes, record the results. 11. Shut down the system. 12. Complete steps 1 through 11 two more times for the Home test suite, and report the median of the three runs. 13. After completing the three runs of the Home test suite, perform steps 1 through 12 for the Creative, Work, Storage, and Application suites. 3DMark Installing 3Dmark v1.4.828 14. Download the 3DMark installer from www.futuremark.com/benchmarks/3dmark/all. 15. To install 3DMark with the default options, double-click the 3DMark installer exe file. 16. At the Welcome screen, click Next. 17. At the License Agreement screen, click I accept the terms of the license agreement, and click Next. 18. At the Setup Type screen, click Express, and click Next. 19. At the Ready to Install the Program screen, click Install. 20. At the Setup Complete screen, click Finish. 21. To launch 3DMark, double-click the 3DMark desktop icon. Enter the registration code, and click Register. 22. Exit 3DMark. Running 3DMark v1.4.828 1. Boot the system and bring up a command prompt: a. Type CMD into the Start menu search bar.
  • 33. A Principled Technologies report 33Upgrading to new Dell OptiPlex desktops b. Right-click the Command Prompt app. c. Click the Run as administrator button. 2. Type Cmd.exe /c start /wait Rundll32.exe advapi32.dll,ProcessIdleTasks 3. Do not interact with the system until the command completes. 4. After the command completes, wait 5 minutes before running the test. 5. To launch the benchmark, double-click the 3DMark desktop icon. 6. At the 3DMark Benchmark screen, click Run Ice Storm Unlimited. 7. When the benchmark run completes, record the results. 8. Repeat steps 6 and 7, except run Ice Storm Extreme. 9. Perform steps 1 through 8 two more times, and report the median of the three runs. Measuring power consumption Test requirements  ExTech 380801 True RMS Power Analyzer  PassMark® BurnInTest Professional  Thermometer Measuring system temperature while idle and under load Setting up the test 1. Using a power strip, plug the system under test (and monitor if used) into the ExTech. 2. Plug the ExTech into its own circuit. 3. On the system used to monitor the ExTech, open the Power Analyzer. 4. From the drop-down Option menu, select Sample Rate. 5. For the sample rate, enter 1.0, and select OK. 6. On the systems under test, set the power plan to the manufacturer’s default setting. Set the display brightness to 100 percent: a. Click Start. b. In the Start menu’s quick search field, type Power Options c. Move the Screen brightness slider all the way to the right. 7. Set the remaining power plan settings as follows:  Dim the display: Never  Turn off the display: Never  Put the computer to sleep: Never 8. Disable the screen saver. 9. Download PassMark BurnIn Test Professional V7 from www.passmark.com/products/pt.htm. 10. To run setup, double-click bitpro_x64.exe. 11. At the Welcome screen, click Next. 12. Accept the license agreement, and click Next. 13. At the Choose Install Location screen, accept the default location of C:Program FilesBurnInTest, and click Next. 14. At the Select Start Menu Folder screen, click Next. 15. At the Ready to Install screen, click Install.
  • 34. A Principled Technologies report 34Upgrading to new Dell OptiPlex desktops 16. At the Completing the BurnInTest Setup Wizard screen, deselect View Readme.txt, and click Finish to launch PerformanceTest. 17. At the Purchasing information screen, copy and paste the Username and key, and click Continue. 18. At the Key accepted screen, click OK. 19. From the Configuration menu item, select Test selection and duty cycles. 20. Change the Auto Stop After field to 180. 21. Select CPU, 2D Graphics, 3D Graphics, RAM, and Disk(s), and deselect all other subsystems. 22. Set load to 100, and click OK. 23. From the Configuration menu item, select Test Preferences and set or verify the following by clicking on each tab:  Disk: select C: drive  Logging: select Turn automatic logging on  2D Graphics: select All available Video Memory  3D Graphics: defaults  RAM: select Multi-Process Torture Test Running the test 1. Boot the system and bring up an administrative command prompt: 2. Type Cmd.exe /c start /wait Rundll32.exe advapi32.dll,ProcessIdleTasks 3. Do not interact with the system until the command completes. 4. After the command completes, wait 5 minutes before running the test. 5. On the ExTech power monitor, enter a name for the test run. 6. Report the room temperature, and in the ExTech Power Analyzer window, click Start Recording 7. After 30 minutes, record the room temperature. 8. After 1 hour, record the room temperature and in the ExTech Power Analyzer window, click Stop Recording. 9. Record the average watts of the run as Idle Power consumption. 10. Record the average of the recorded room temperatures as the Idle Room Temperature. 11. On the ExTech power monitor, enter a name for the Under Load test run. 12. Double-click the PassMark BurnInTest desktop icon. 13. In the BurnInTest V7.0 Pro screen, click Start Selected Tests. 14. Report the room temperature, and in the ExTech Power Analyzer window, click Start Recording. 15. After 30 minutes, record the room temperature. 16. After 1 hour, record the room temperature, and in the ExTech Power Analyzer window, click Stop Recording. 17. Record the average watts of the run as Under Load Power Consumption. 18. Record the average of the recorded room temperature as the Under Lo 19. ad Room Temperature. 20. Power the system down and let it rest for one hour. 21. Complete steps 1 through 19 two more times, and report the median of the three Idle and Under Load runs as well as the average temperature for each median run.
  • 35. A Principled Technologies report 35Upgrading to new Dell OptiPlex desktops APPENDIX E – BENCHMARK INFORMATION About HDXPRT 2012 The High Definition Experience & Performance Ratings Test (HDXPRT) 2012 is a benchmark that evaluates the capabilities of PCs in consumer digital media uses, divided into the following categories:  Media Organizer  Media Creator  Photo Blogger  Video Producer  Music Maker For more information on HDXPRT 2012, see principledtechnologies.com/benchmarkxprt/whitepapers/2012/HDXPRT_2012_White_Paper.pdf. About BAPCo SYSmark 2014 According to BAPCo, “SYSmark 2014 is an application-based benchmark that reflects usage patterns of business users in the areas of office productivity, media creation, and data/financial analysis.” The benchmark features notable applications from these fields. SYSmark 2014 generates a score from the times the tested system takes to complete each individual operation in each scenario. For more information on this benchmark, see bapco.com/products/sysmark-2014. About Futuremark PCMark 8 v2.2.282 According to Futuremark, “PCMark 8 is the latest version in our series of industry standard PC-benchmarking tools.” PCMark 8 evaluates the performance of PCs from tablets to desktops by using real-world tasks and applications. Applications are divided into scenarios that reflect common usage in different capacities. For our testing, we used the Work portion of the benchmark, which offers workloads that test a system's ability to perform basic office work tasks, such as writing documents, browsing Web sites, creating spreadsheets, and using video chat. About Futuremark 3DMark (2013) v1.4.778 Futuremark 3DMark v1.4.778 is a collection of benchmarks designed to rate the graphics performance of smartphones, tablets, notebooks, laptops, desktops, or high-performance gaming PCs. 3DMark includes benchmarks designed for Windows, Apple®, and Android™ devices. The Ice Storm portion of 3DMark includes 720p graphics tests to measure GPU performance and a physics test to stress CPU performance. Ice Storm is available for Windows, iOS, and Android smart phones and tablets. It uses a DirectX® 11 feature level 9 for Windows and OpenGL® ES 2.0 for iOS and Android systems. Ice Storm Extreme increases the rendering resolution to 1080p and uses higher quality textures and post-processing effects in the Graphics tests. For more information on 3DMark, see www.futuremark.com/benchmarks/3dmark.
  • 36. A Principled Technologies report 36Upgrading to new Dell OptiPlex desktops ABOUT PRINCIPLED TECHNOLOGIES Principled Technologies, Inc. 1007 Slater Road, Suite 300 Durham, NC, 27703 www.principledtechnologies.com We provide industry-leading technology assessment and fact-based marketing services. We bring to every assignment extensive experience with and expertise in all aspects of technology testing and analysis, from researching new technologies, to developing new methodologies, to testing with existing and new tools. When the assessment is complete, we know how to present the results to a broad range of target audiences. We provide our clients with the materials they need, from market-focused data to use in their own collateral to custom sales aids, such as test reports, performance assessments, and white papers. Every document reflects the results of our trusted independent analysis. We provide customized services that focus on our clients’ individual requirements. Whether the technology involves hardware, software, Web sites, or services, we offer the experience, expertise, and tools to help our clients assess how it will fare against its competition, its performance, its market readiness, and its quality and reliability. Our founders, Mark L. Van Name and Bill Catchings, have worked together in technology assessment for over 20 years. As journalists, they published over a thousand articles on a wide array of technology subjects. They created and led the Ziff-Davis Benchmark Operation, which developed such industry-standard benchmarks as Ziff Davis Media’s Winstone and WebBench. They founded and led eTesting Labs, and after the acquisition of that company by Lionbridge Technologies were the head and CTO of VeriTest. Principled Technologies is a registered trademark of Principled Technologies, Inc. All other product names are the trademarks of their respective owners. Disclaimer of Warranties; Limitation of Liability: PRINCIPLED TECHNOLOGIES, INC. HAS MADE REASONABLE EFFORTS TO ENSURE THE ACCURACY AND VALIDITY OF ITS TESTING, HOWEVER, PRINCIPLED TECHNOLOGIES, INC. SPECIFICALLY DISCLAIMS ANY WARRANTY, EXPRESSED OR IMPLIED, RELATING TO THE TEST RESULTS AND ANALYSIS, THEIR ACCURACY, COMPLETENESS OR QUALITY, INCLUDING ANY IMPLIED WARRANTY OF FITNESS FOR ANY PARTICULAR PURPOSE. ALL PERSONS OR ENTITIES RELYING ON THE RESULTS OF ANY TESTING DO SO AT THEIR OWN RISK, AND AGREE THAT PRINCIPLED TECHNOLOGIES, INC., ITS EMPLOYEES AND ITS SUBCONTRACTORS SHALL HAVE NO LIABILITY WHATSOEVER FROM ANY CLAIM OF LOSS OR DAMAGE ON ACCOUNT OF ANY ALLEGED ERROR OR DEFECT IN ANY TESTING PROCEDURE OR RESULT. IN NO EVENT SHALL PRINCIPLED TECHNOLOGIES, INC. BE LIABLE FOR INDIRECT, SPECIAL, INCIDENTAL, OR CONSEQUENTIAL DAMAGES IN CONNECTION WITH ITS TESTING, EVEN IF ADVISED OF THE POSSIBILITY OF SUCH DAMAGES. IN NO EVENT SHALL PRINCIPLED TECHNOLOGIES, INC.’S LIABILITY, INCLUDING FOR DIRECT DAMAGES, EXCEED THE AMOUNTS PAID IN CONNECTION WITH PRINCIPLED TECHNOLOGIES, INC.’S TESTING. CUSTOMER’S SOLE AND EXCLUSIVE REMEDIES ARE AS SET FORTH HEREIN.