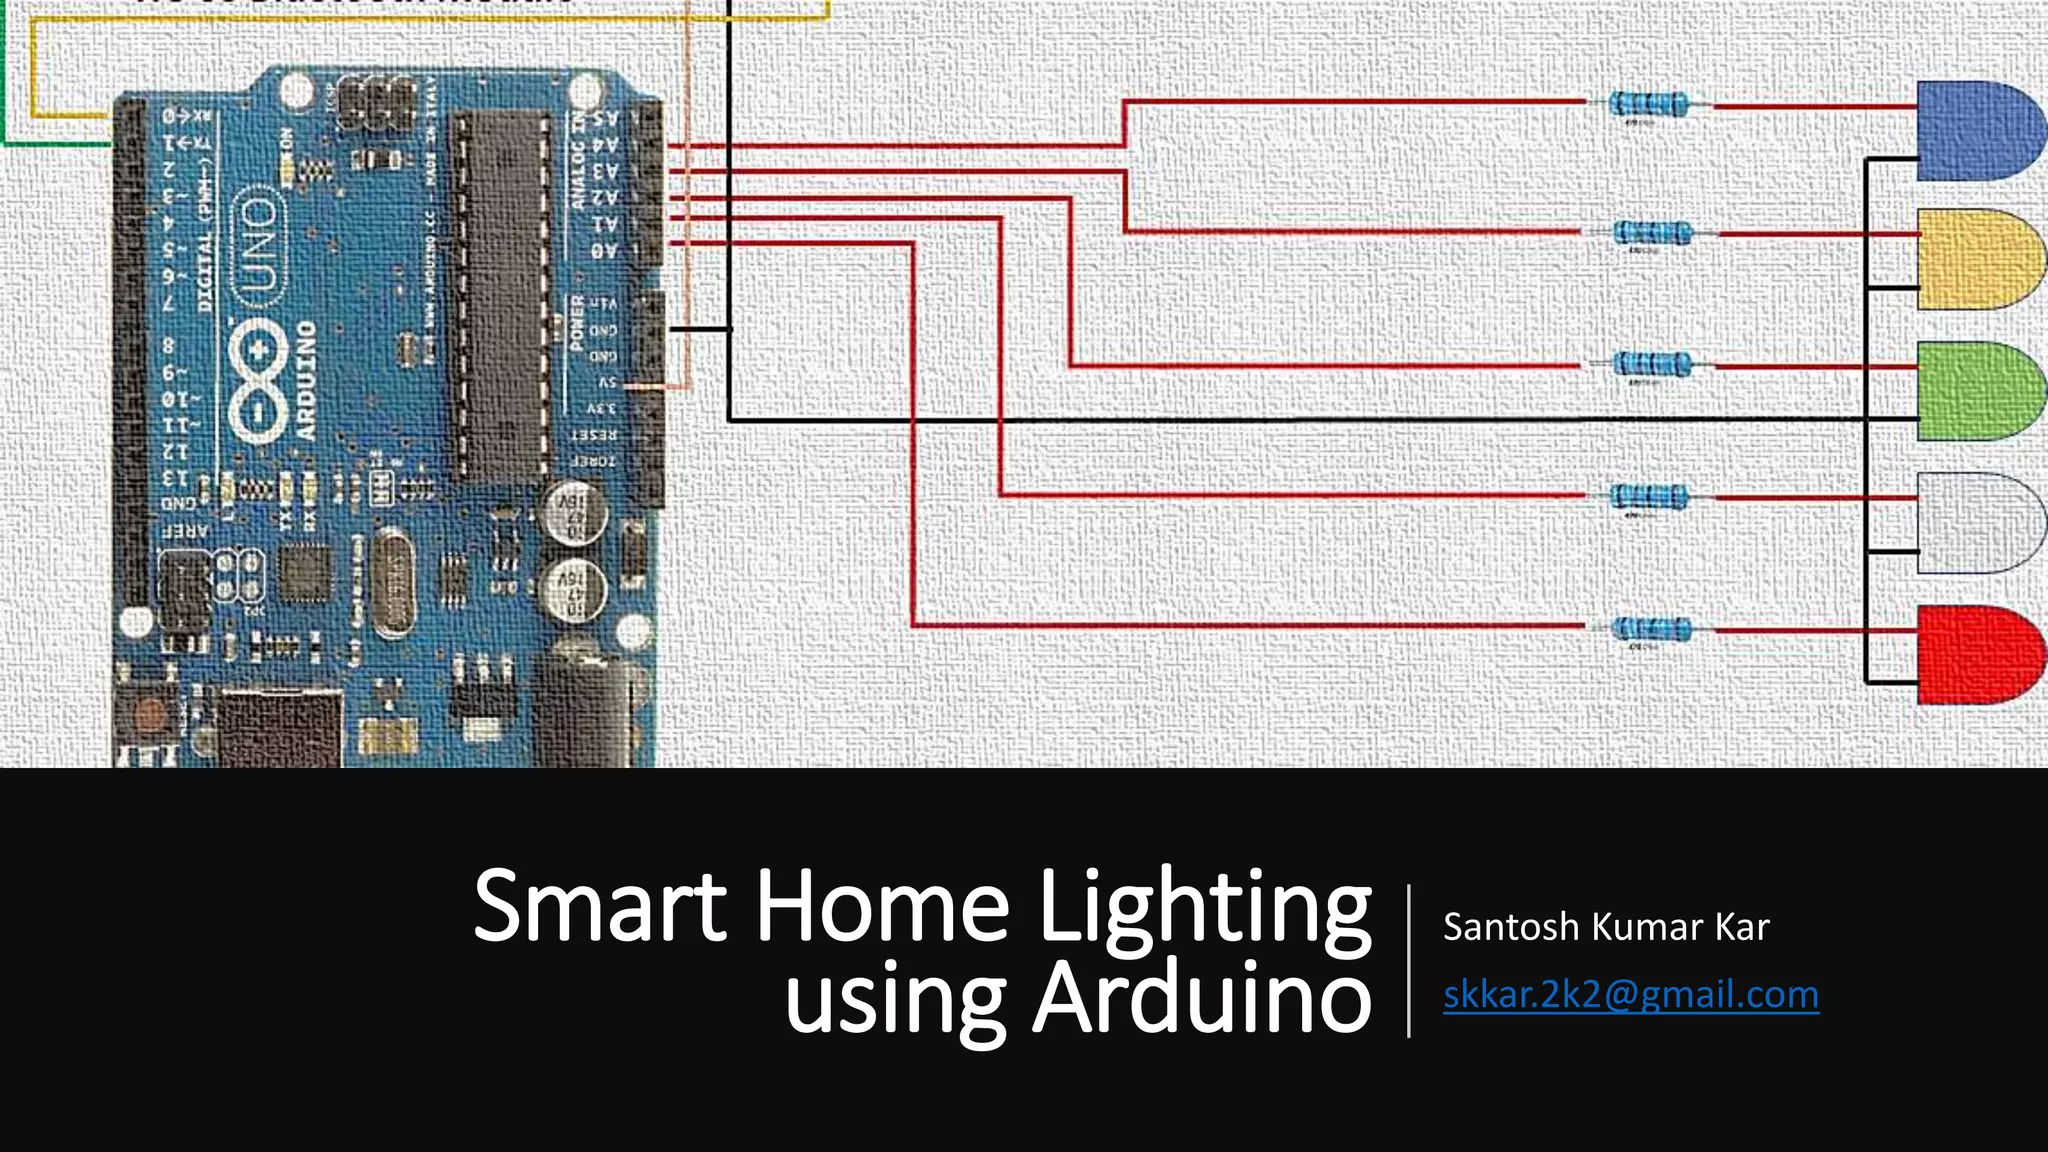
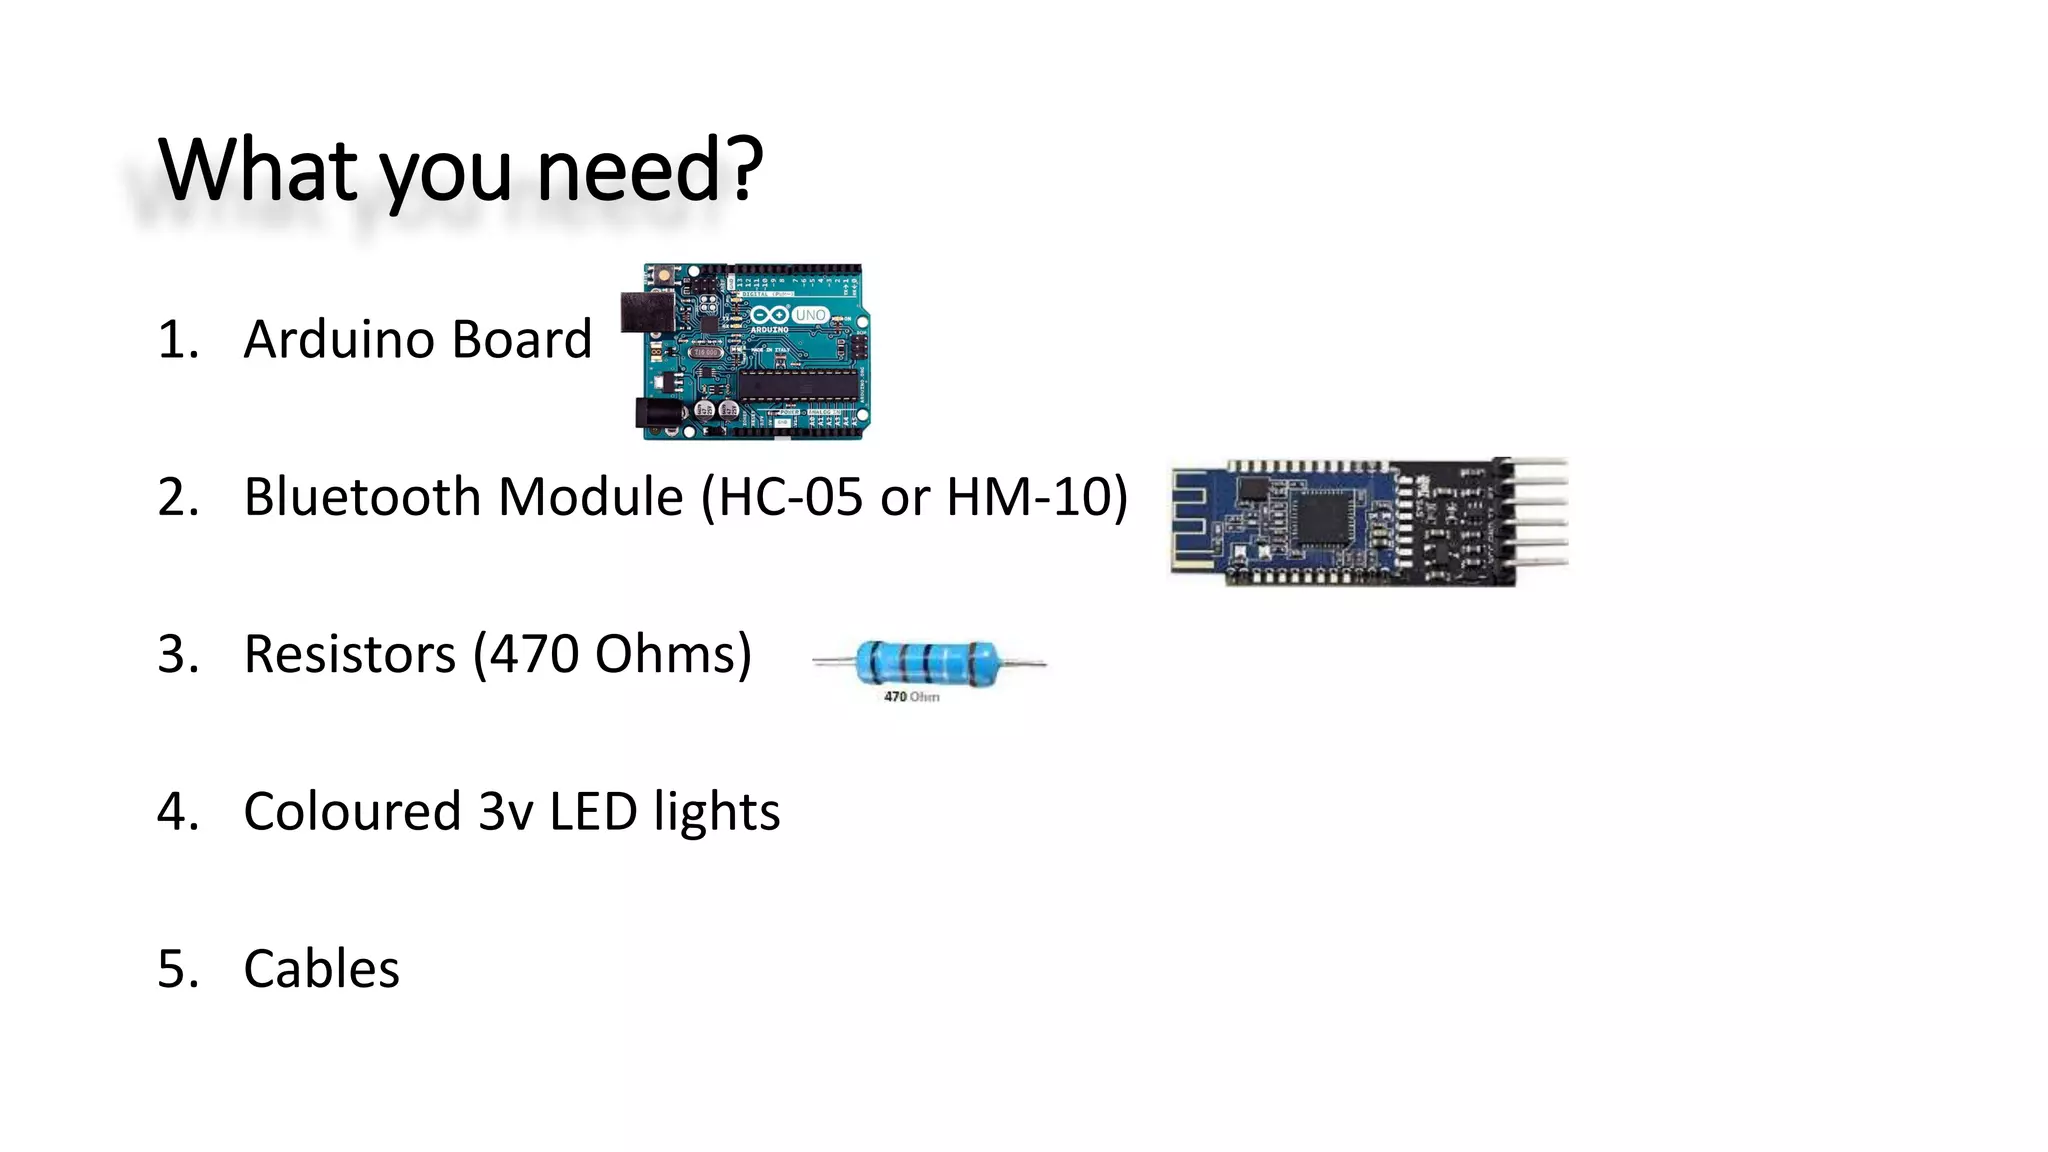
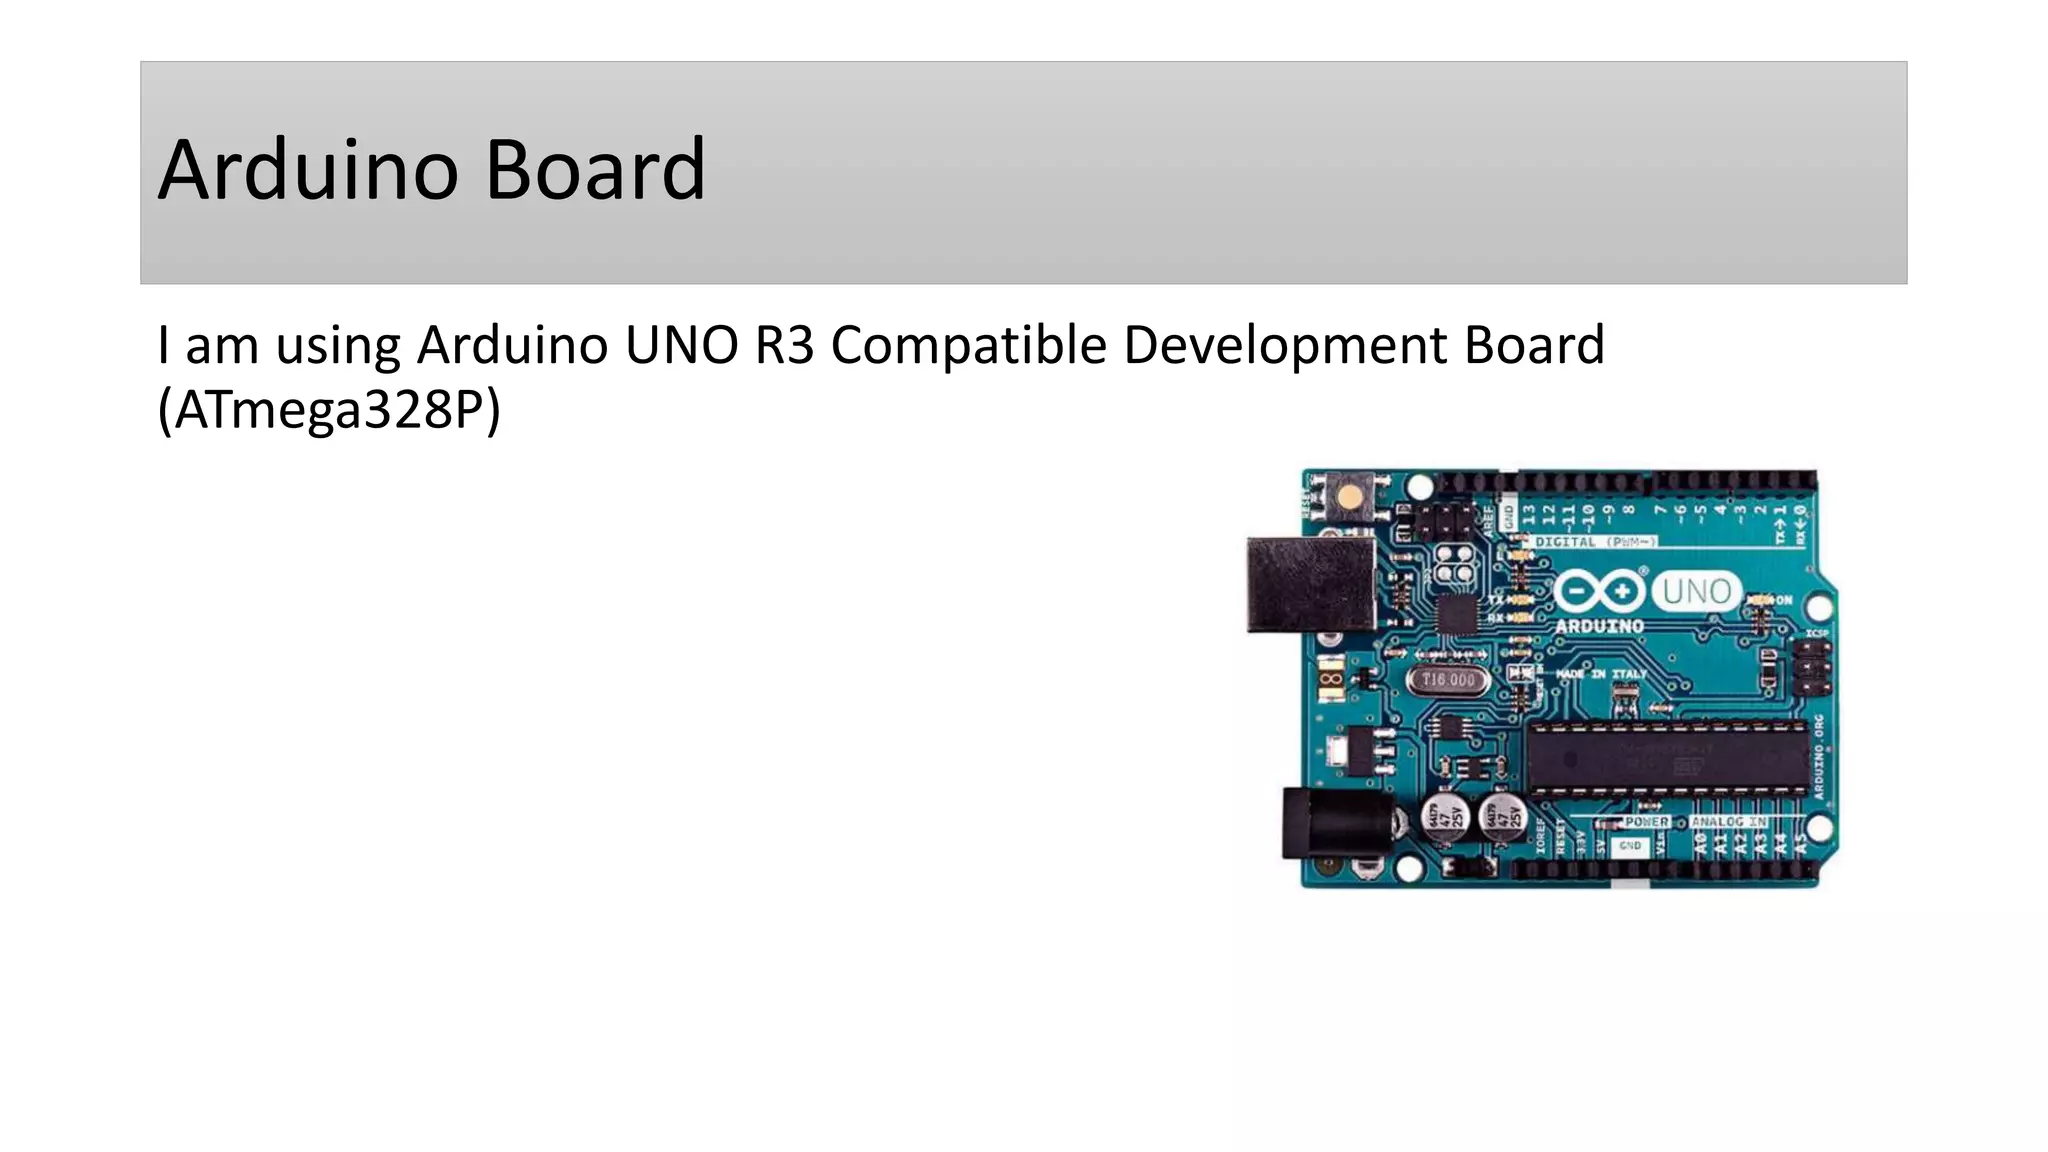
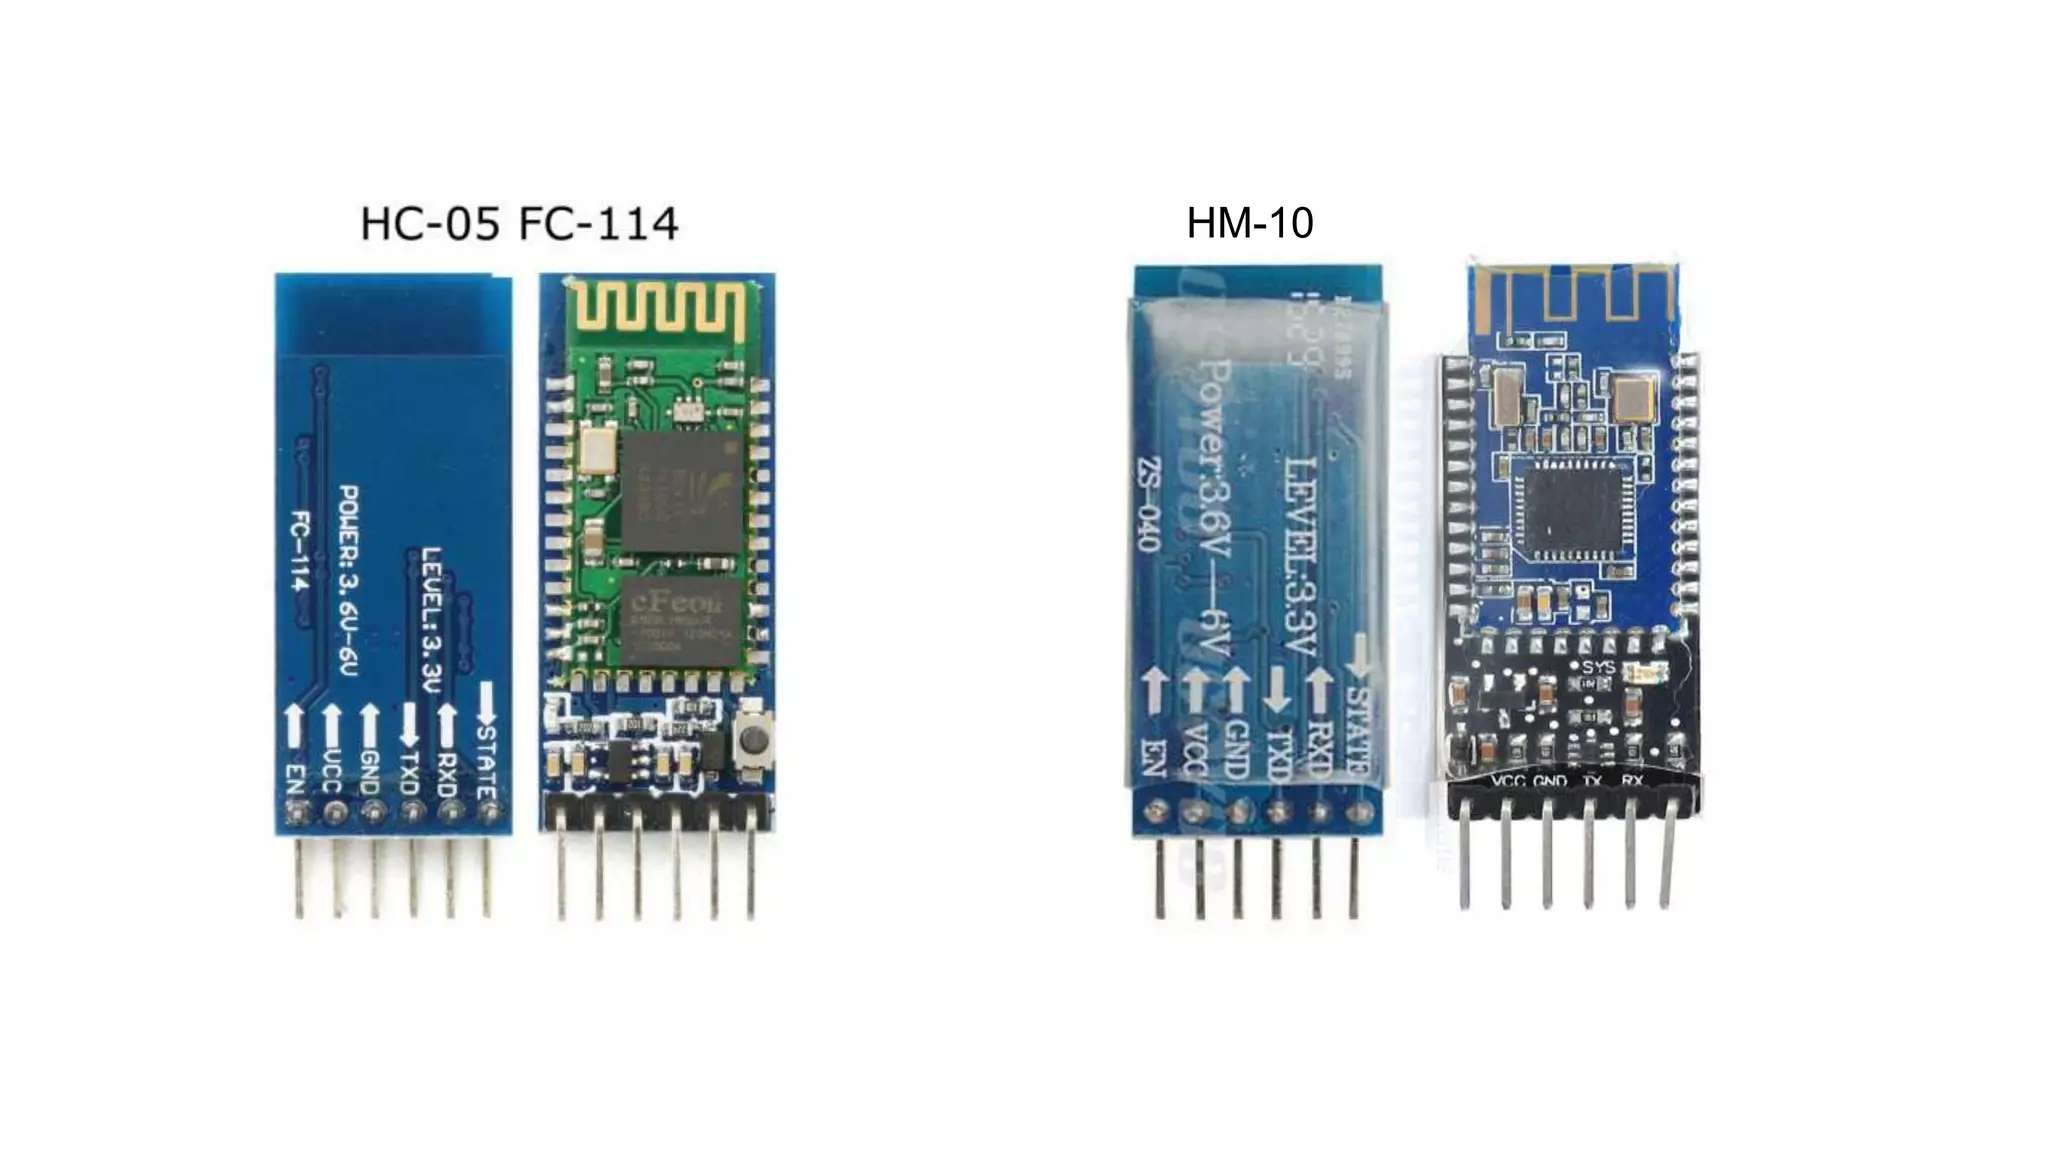
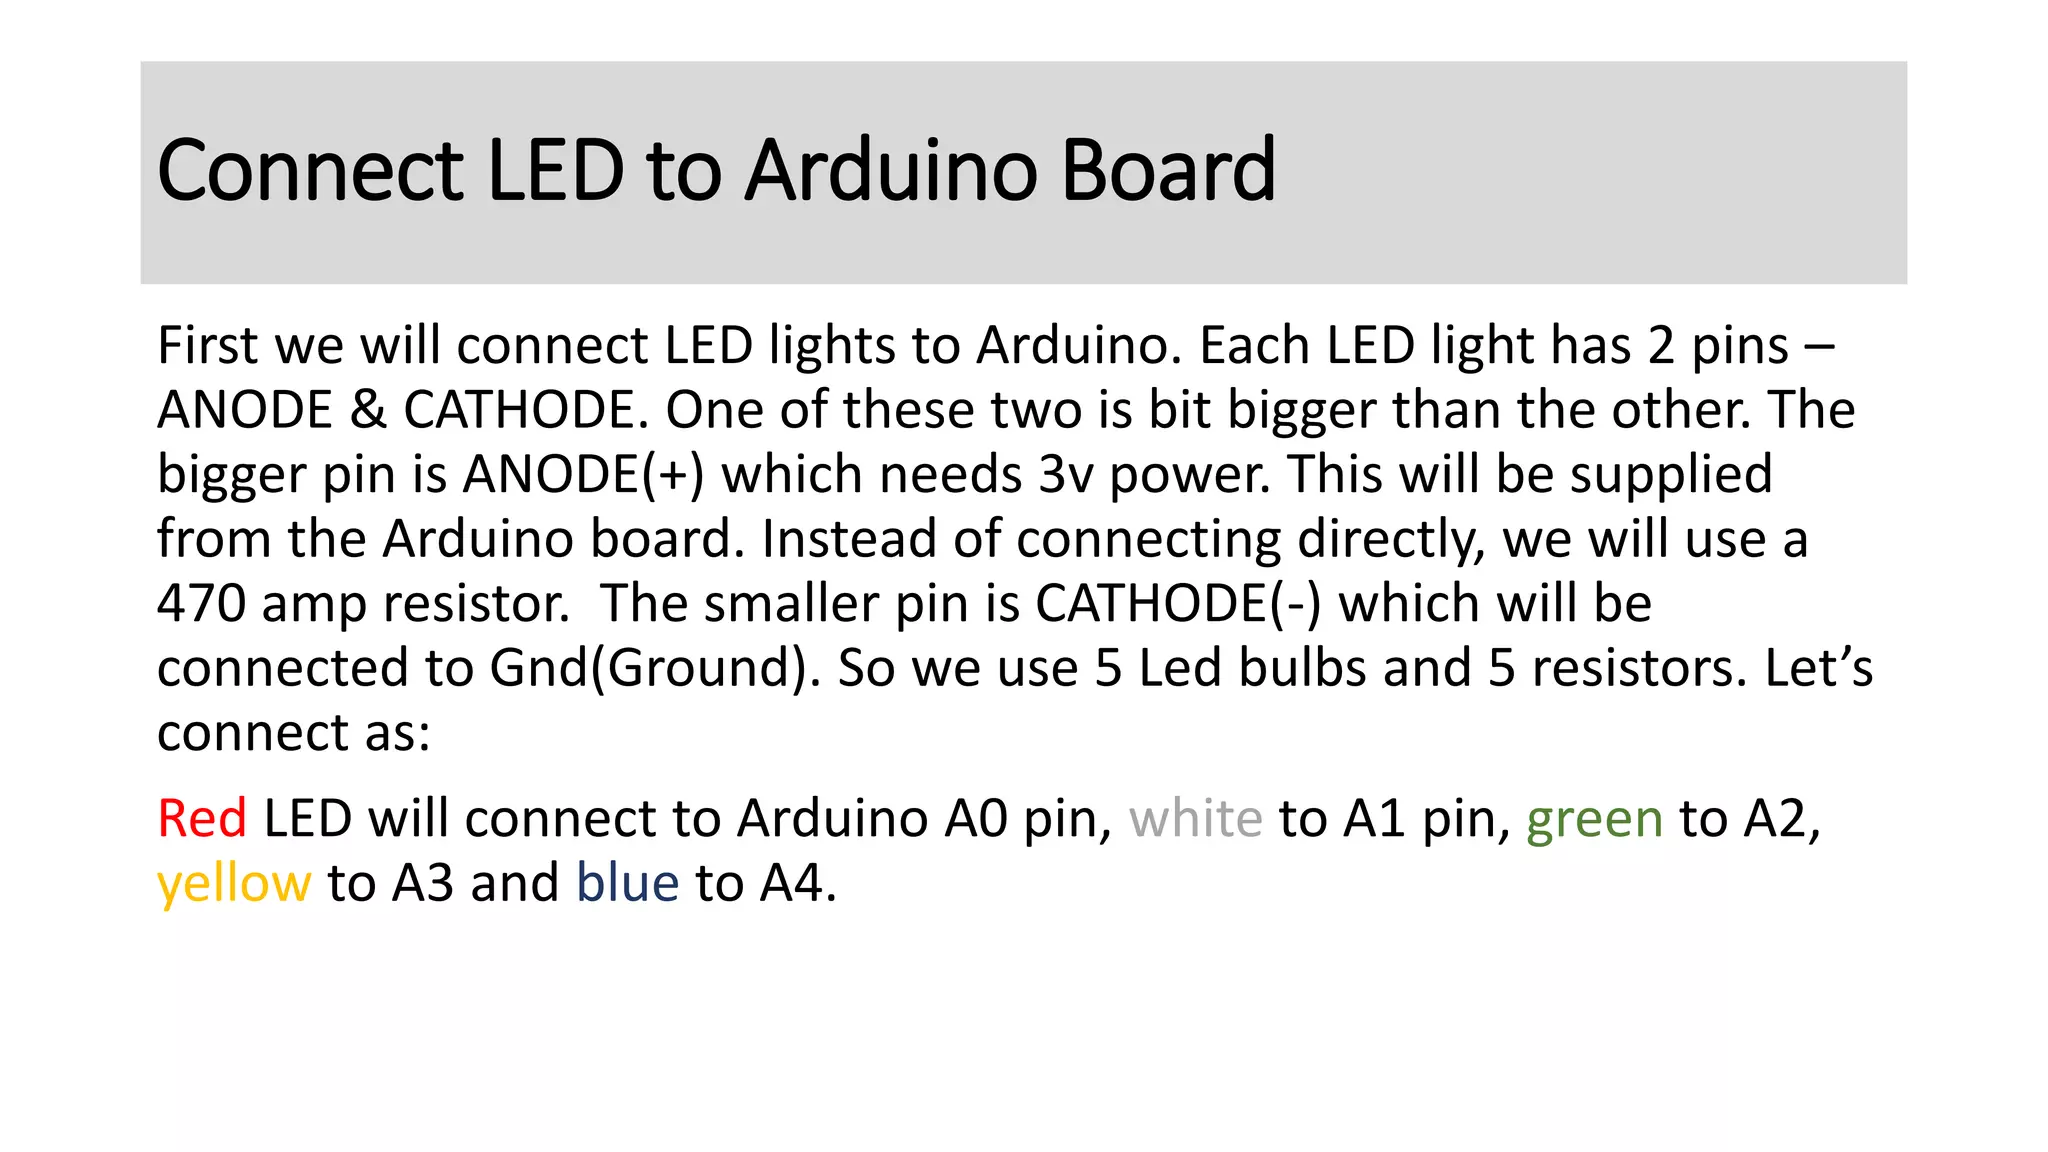
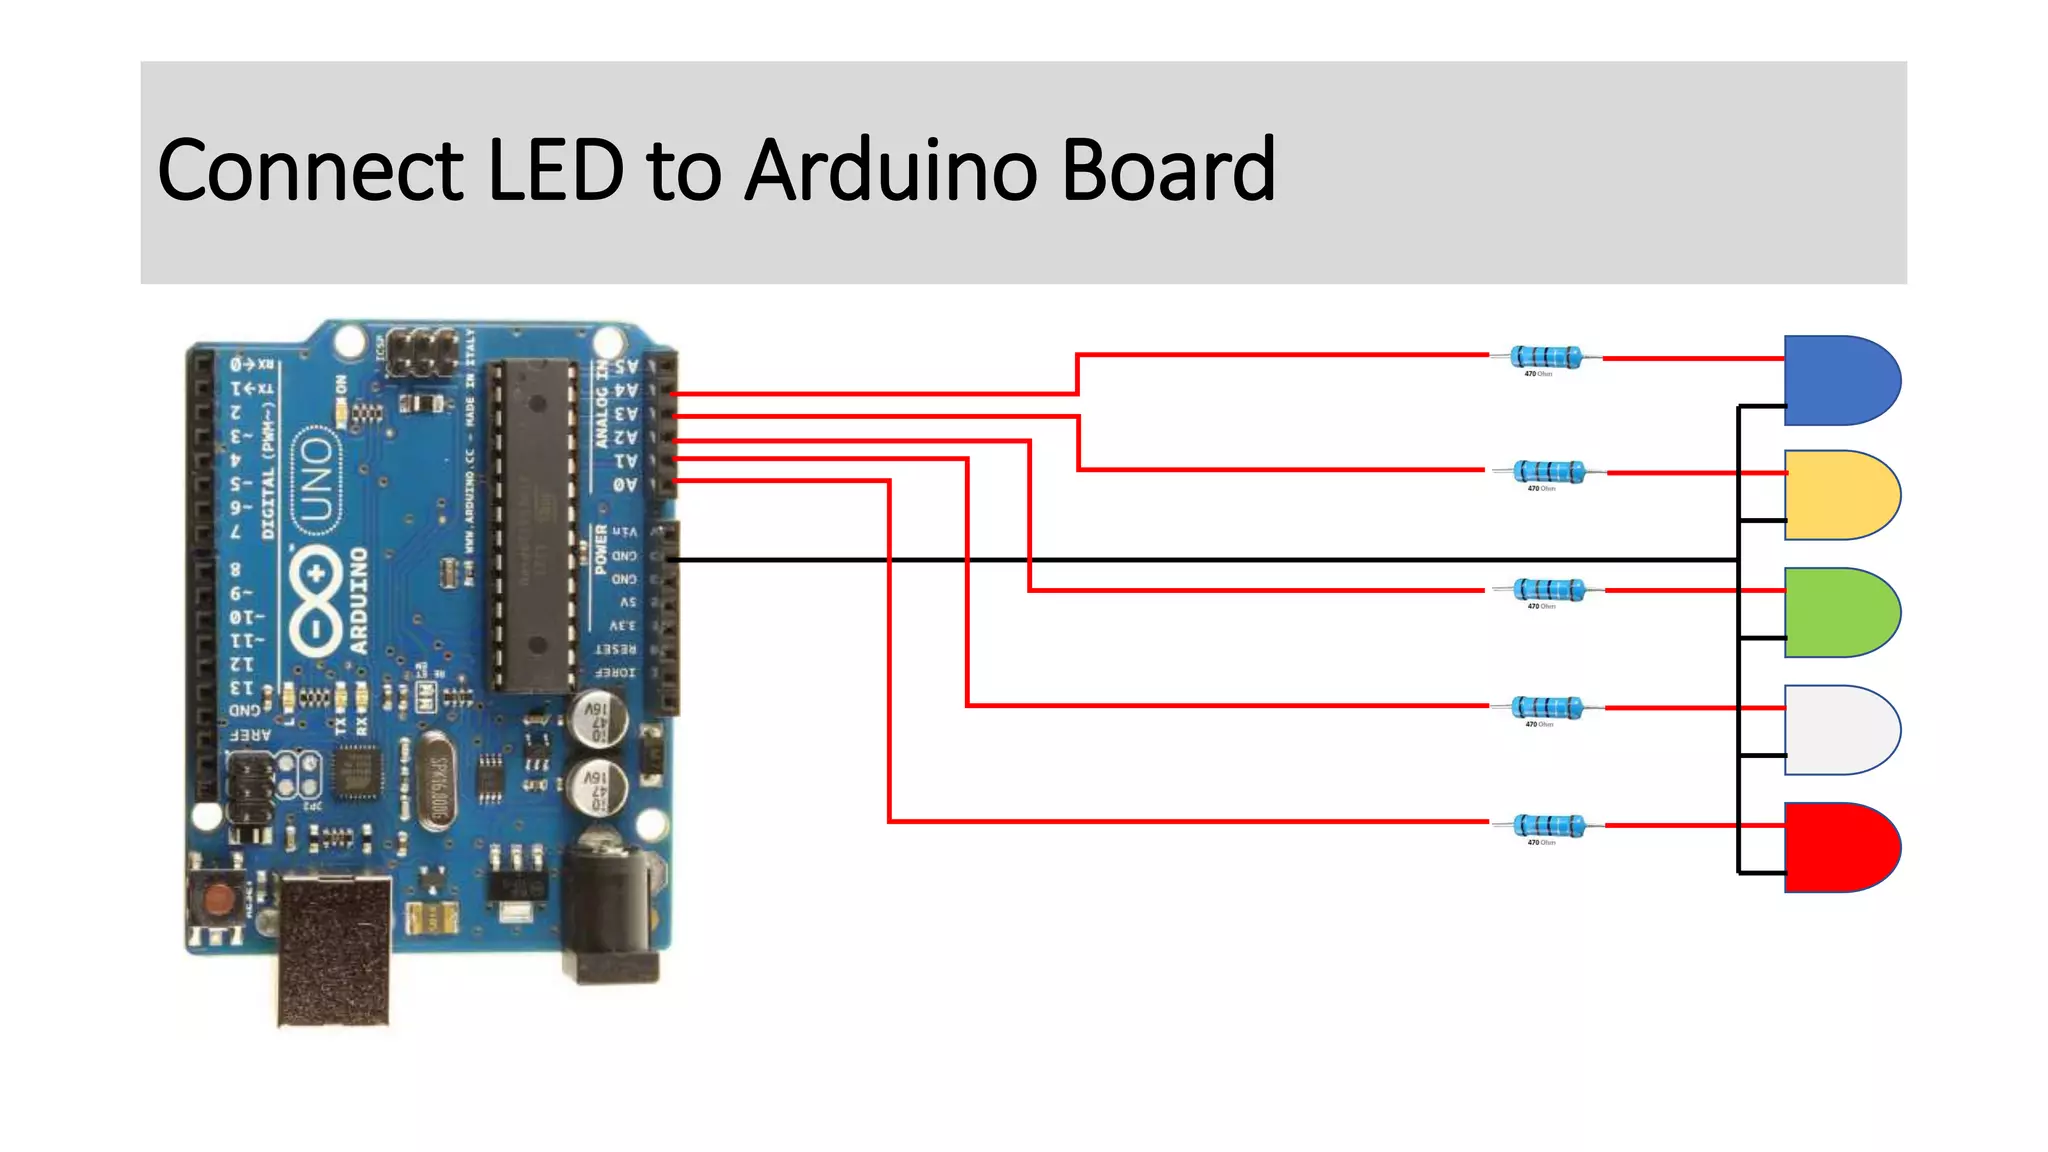
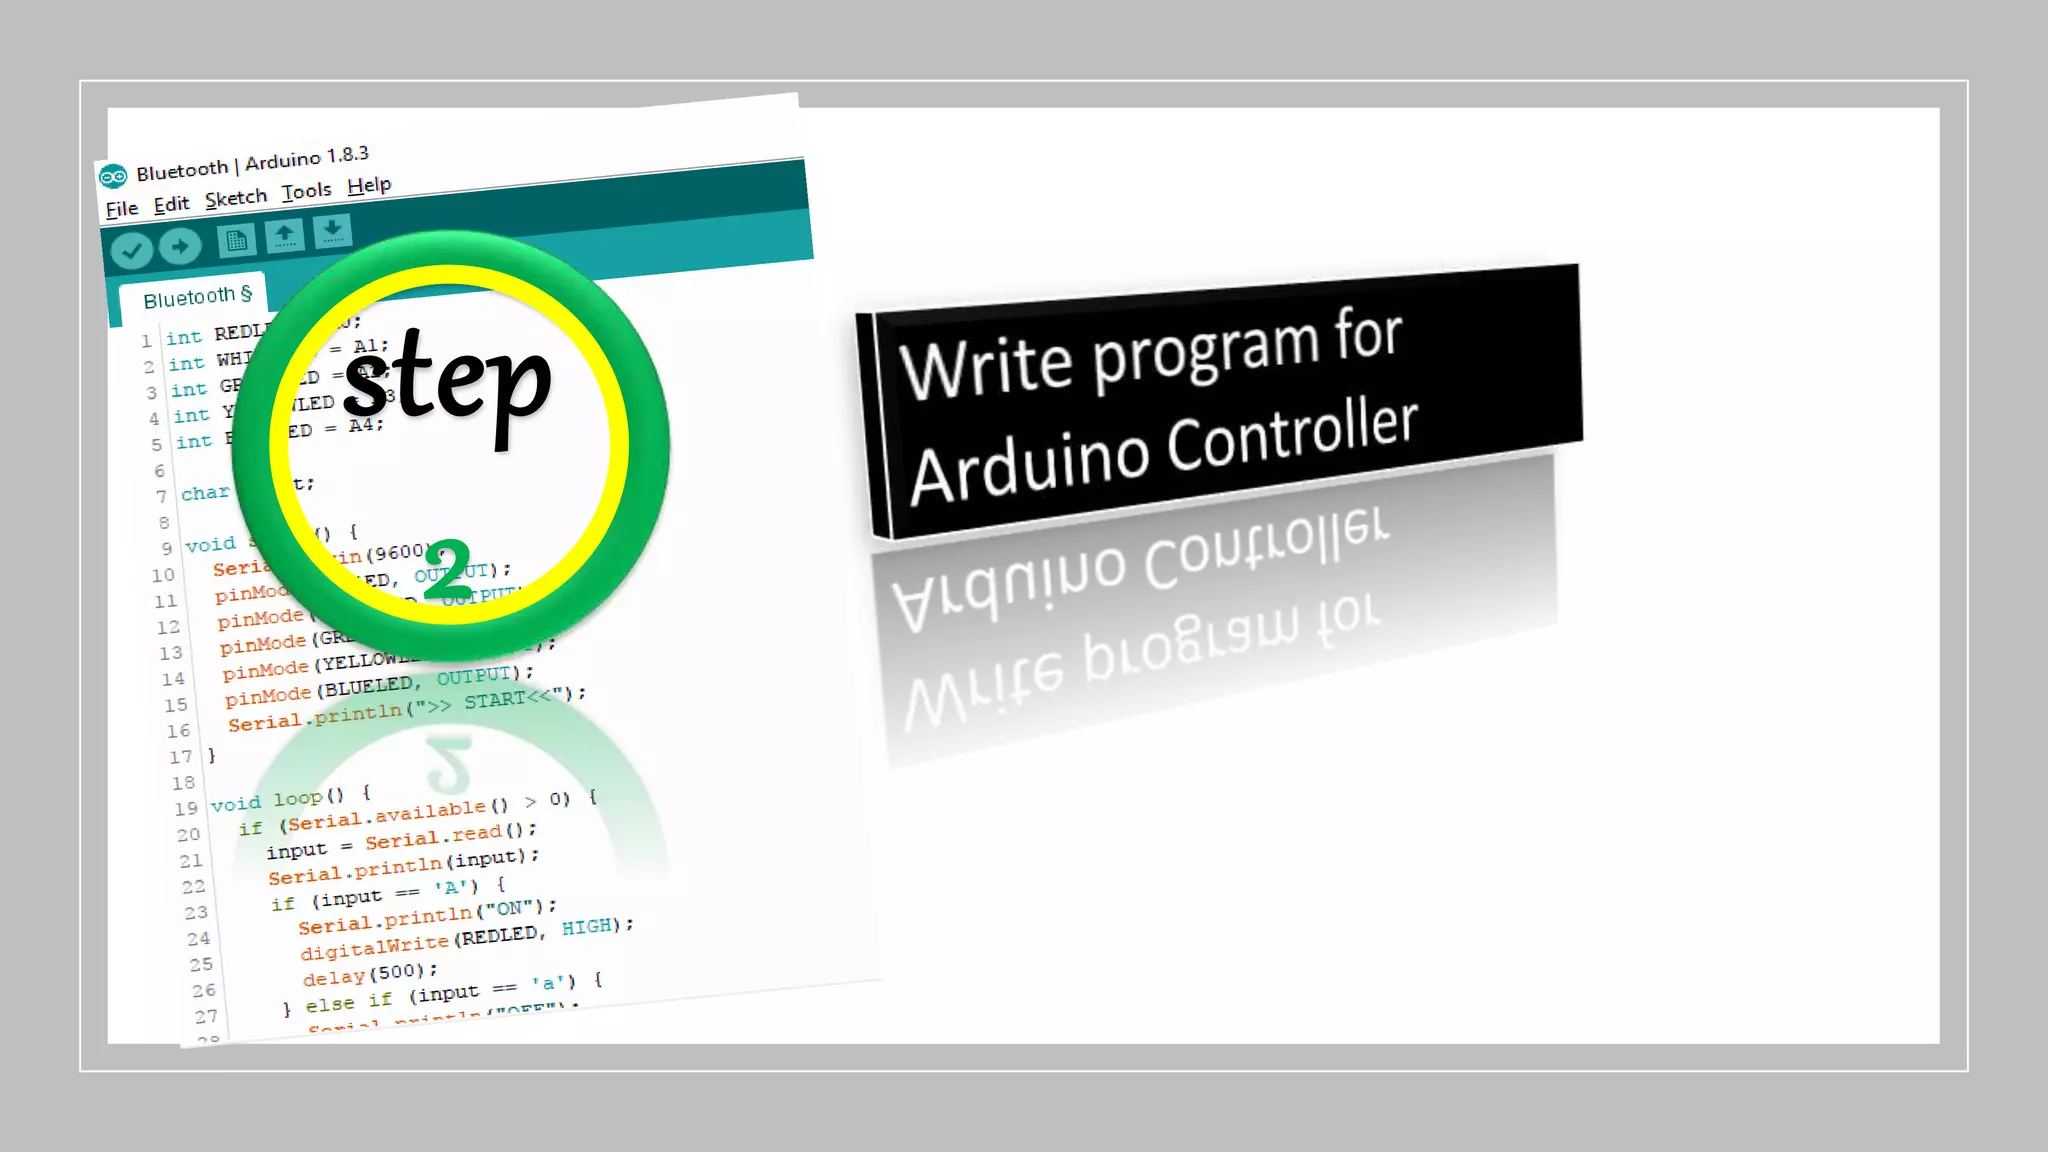
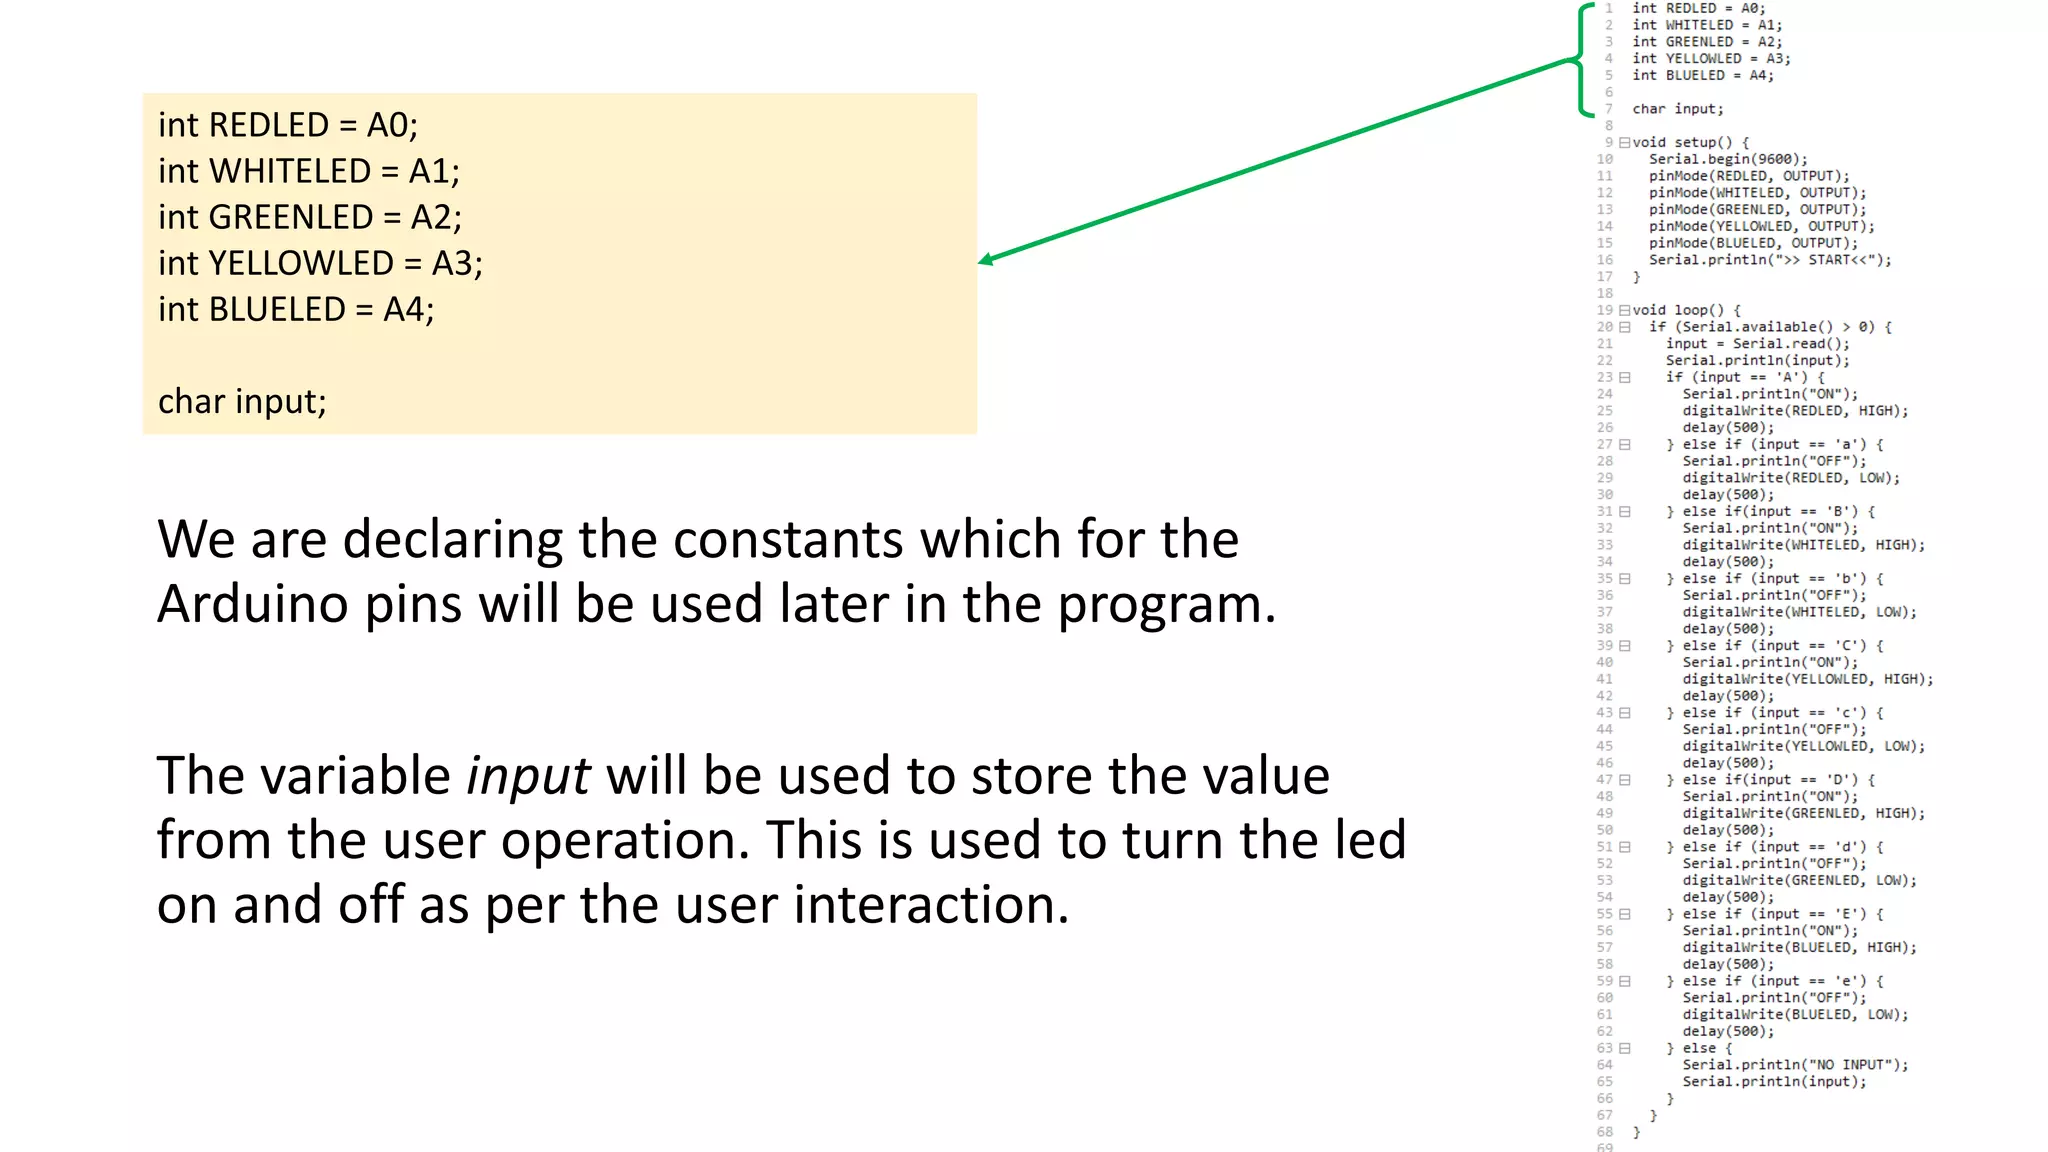
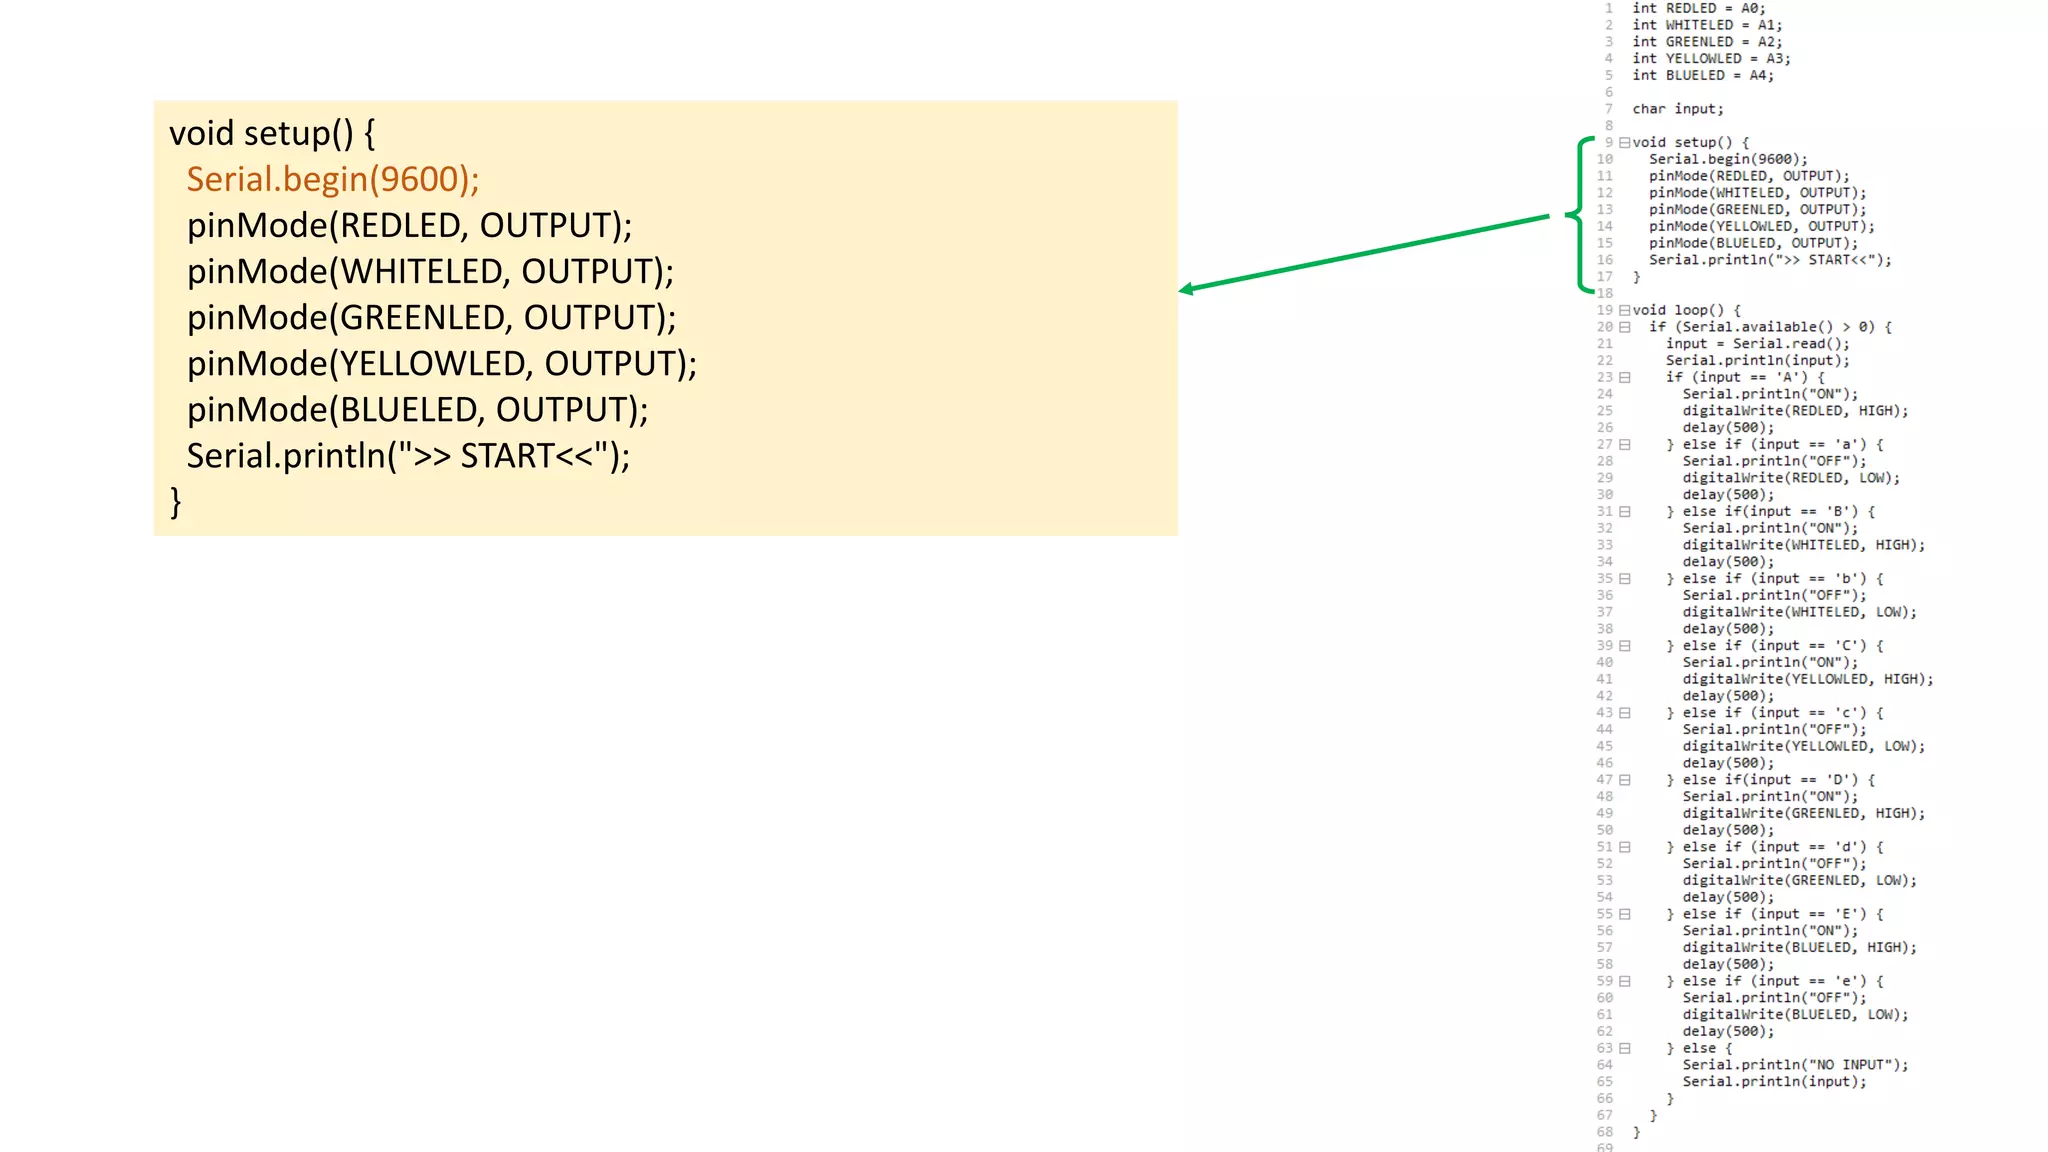
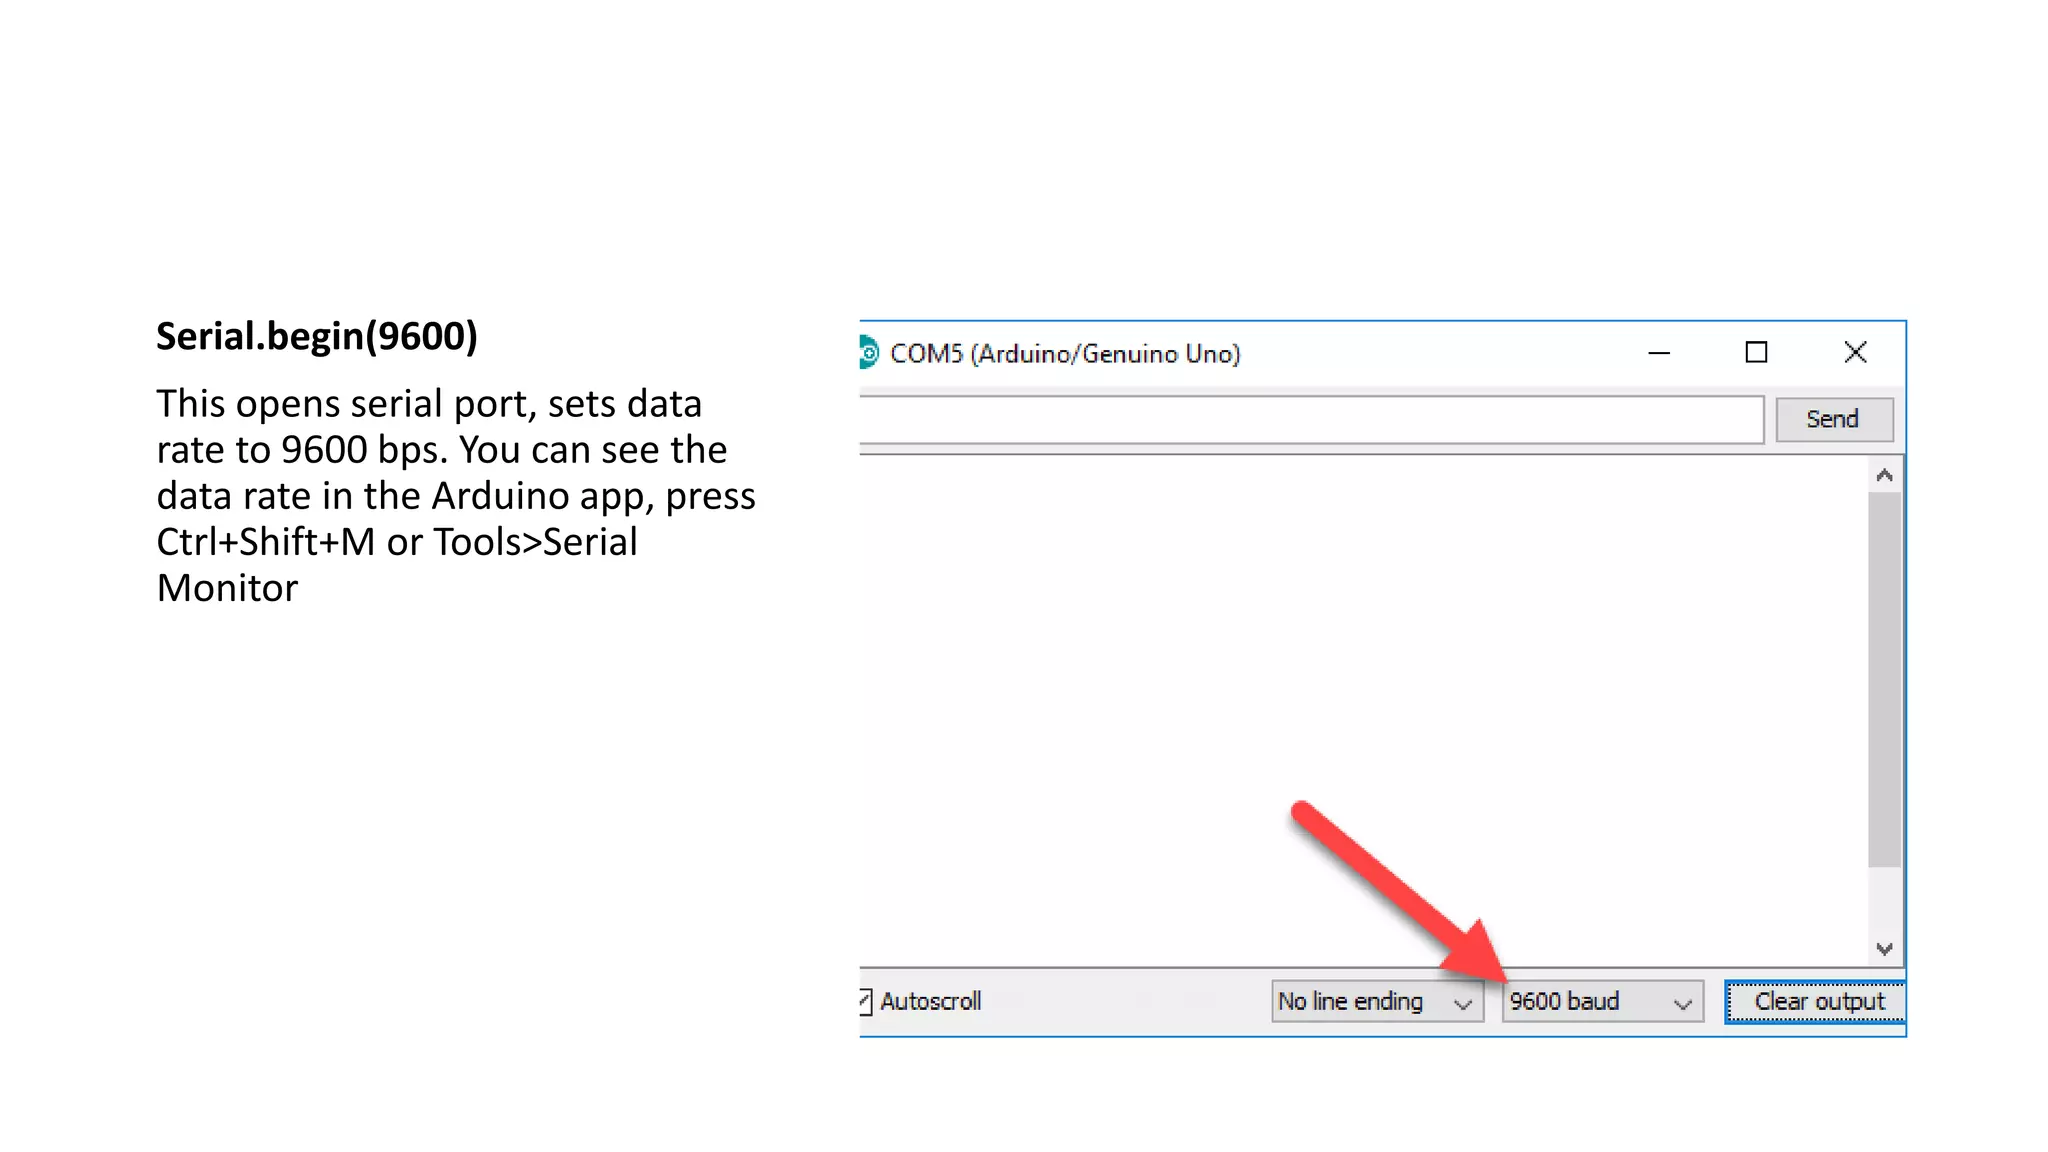
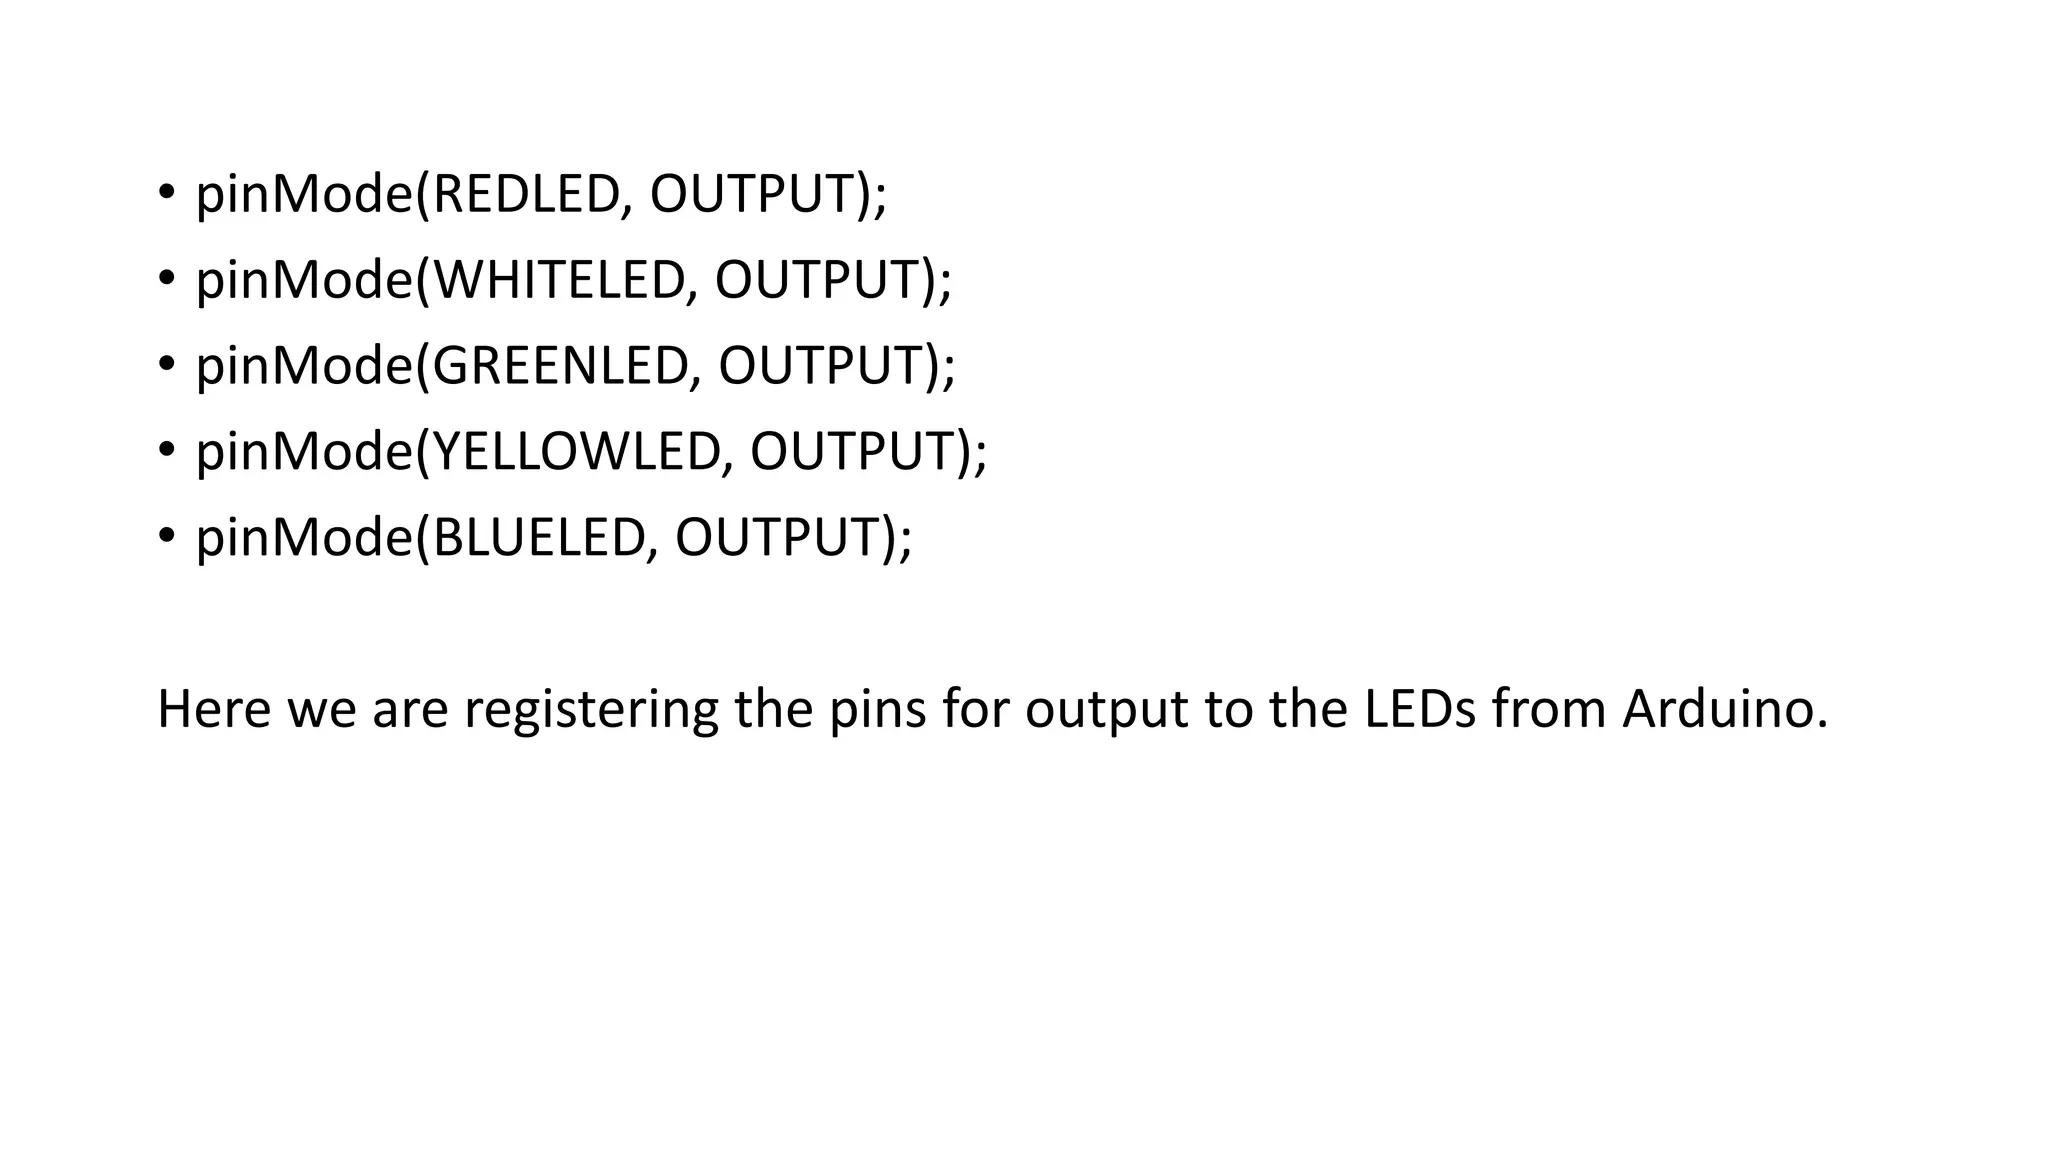
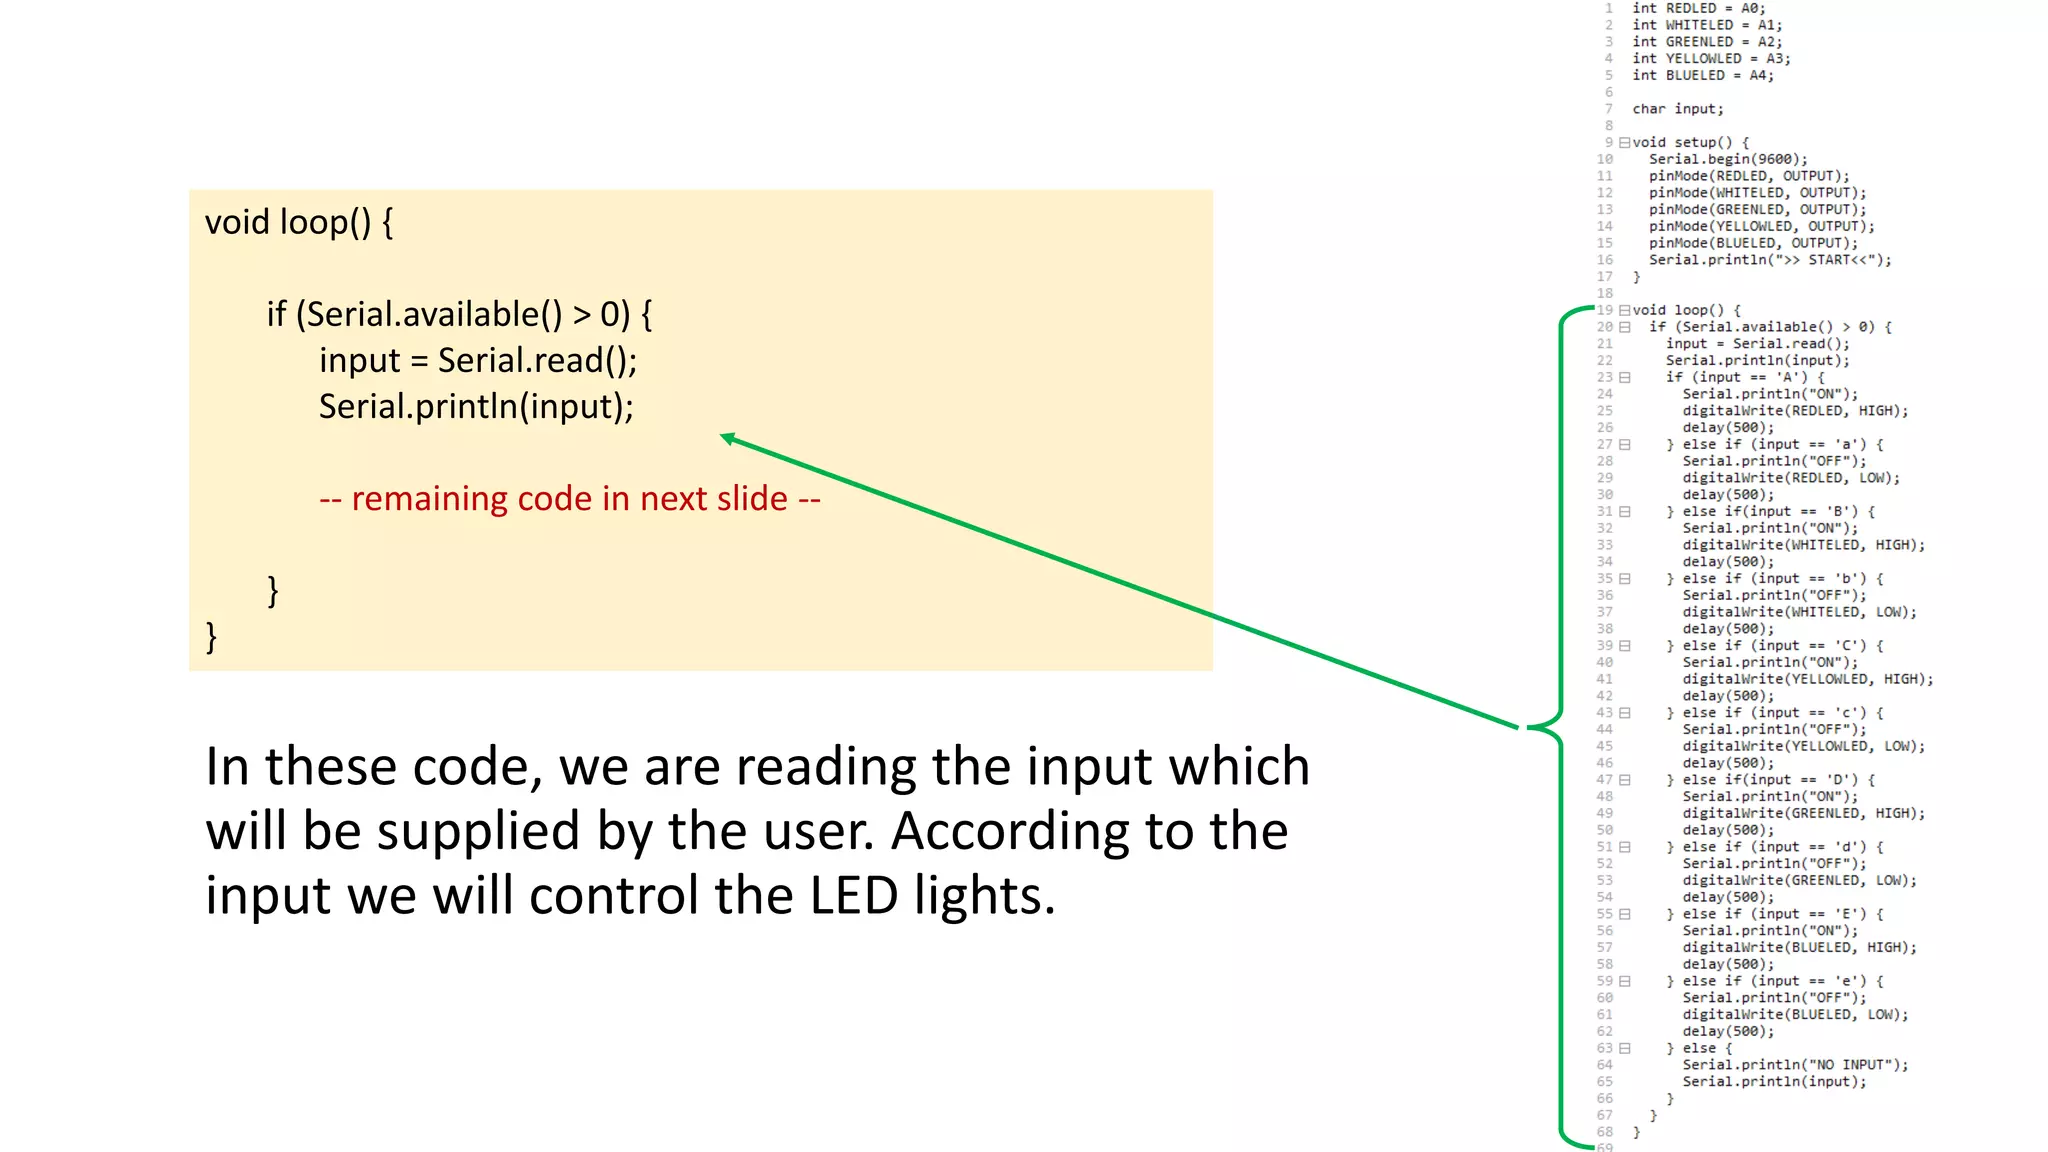
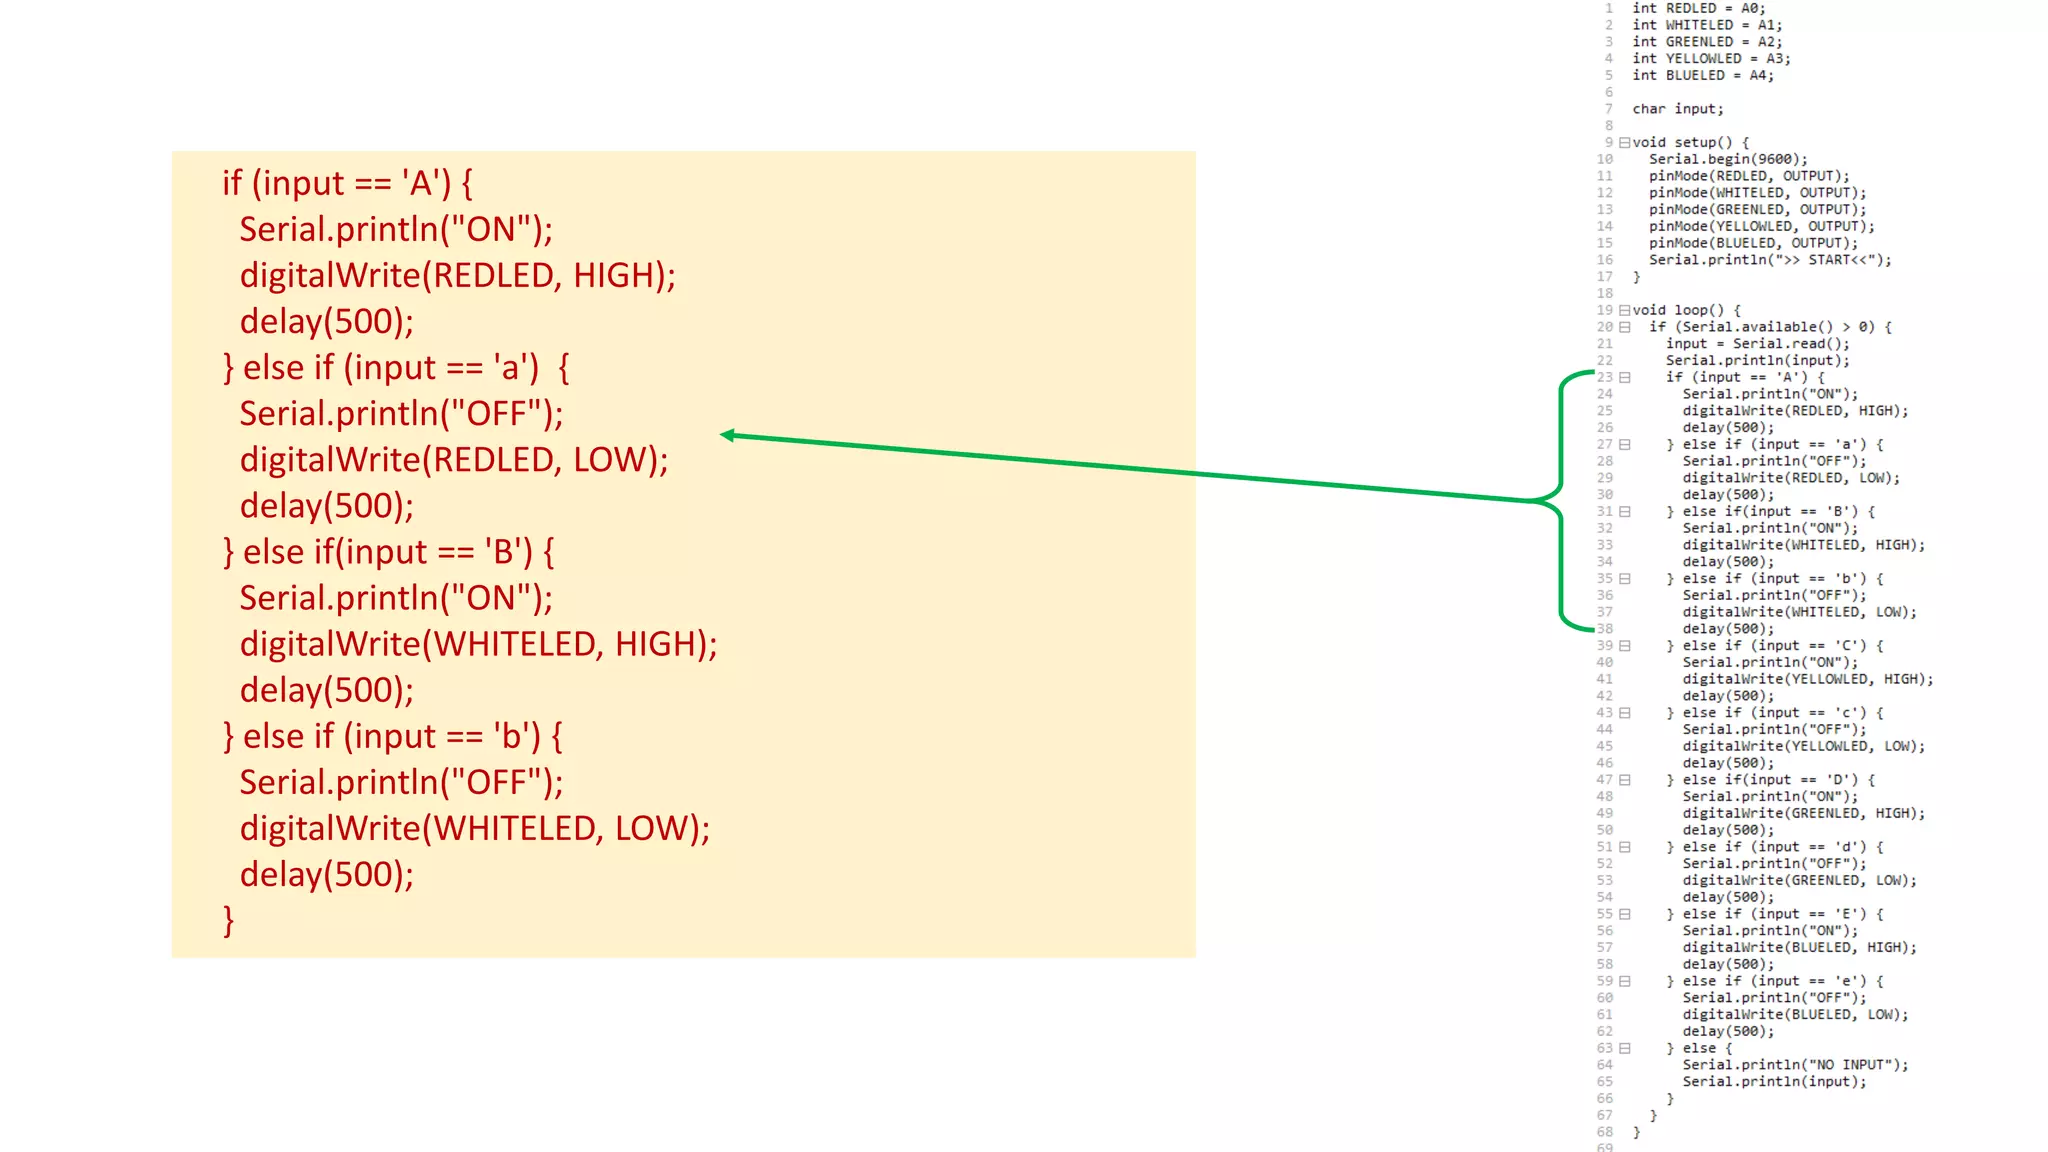
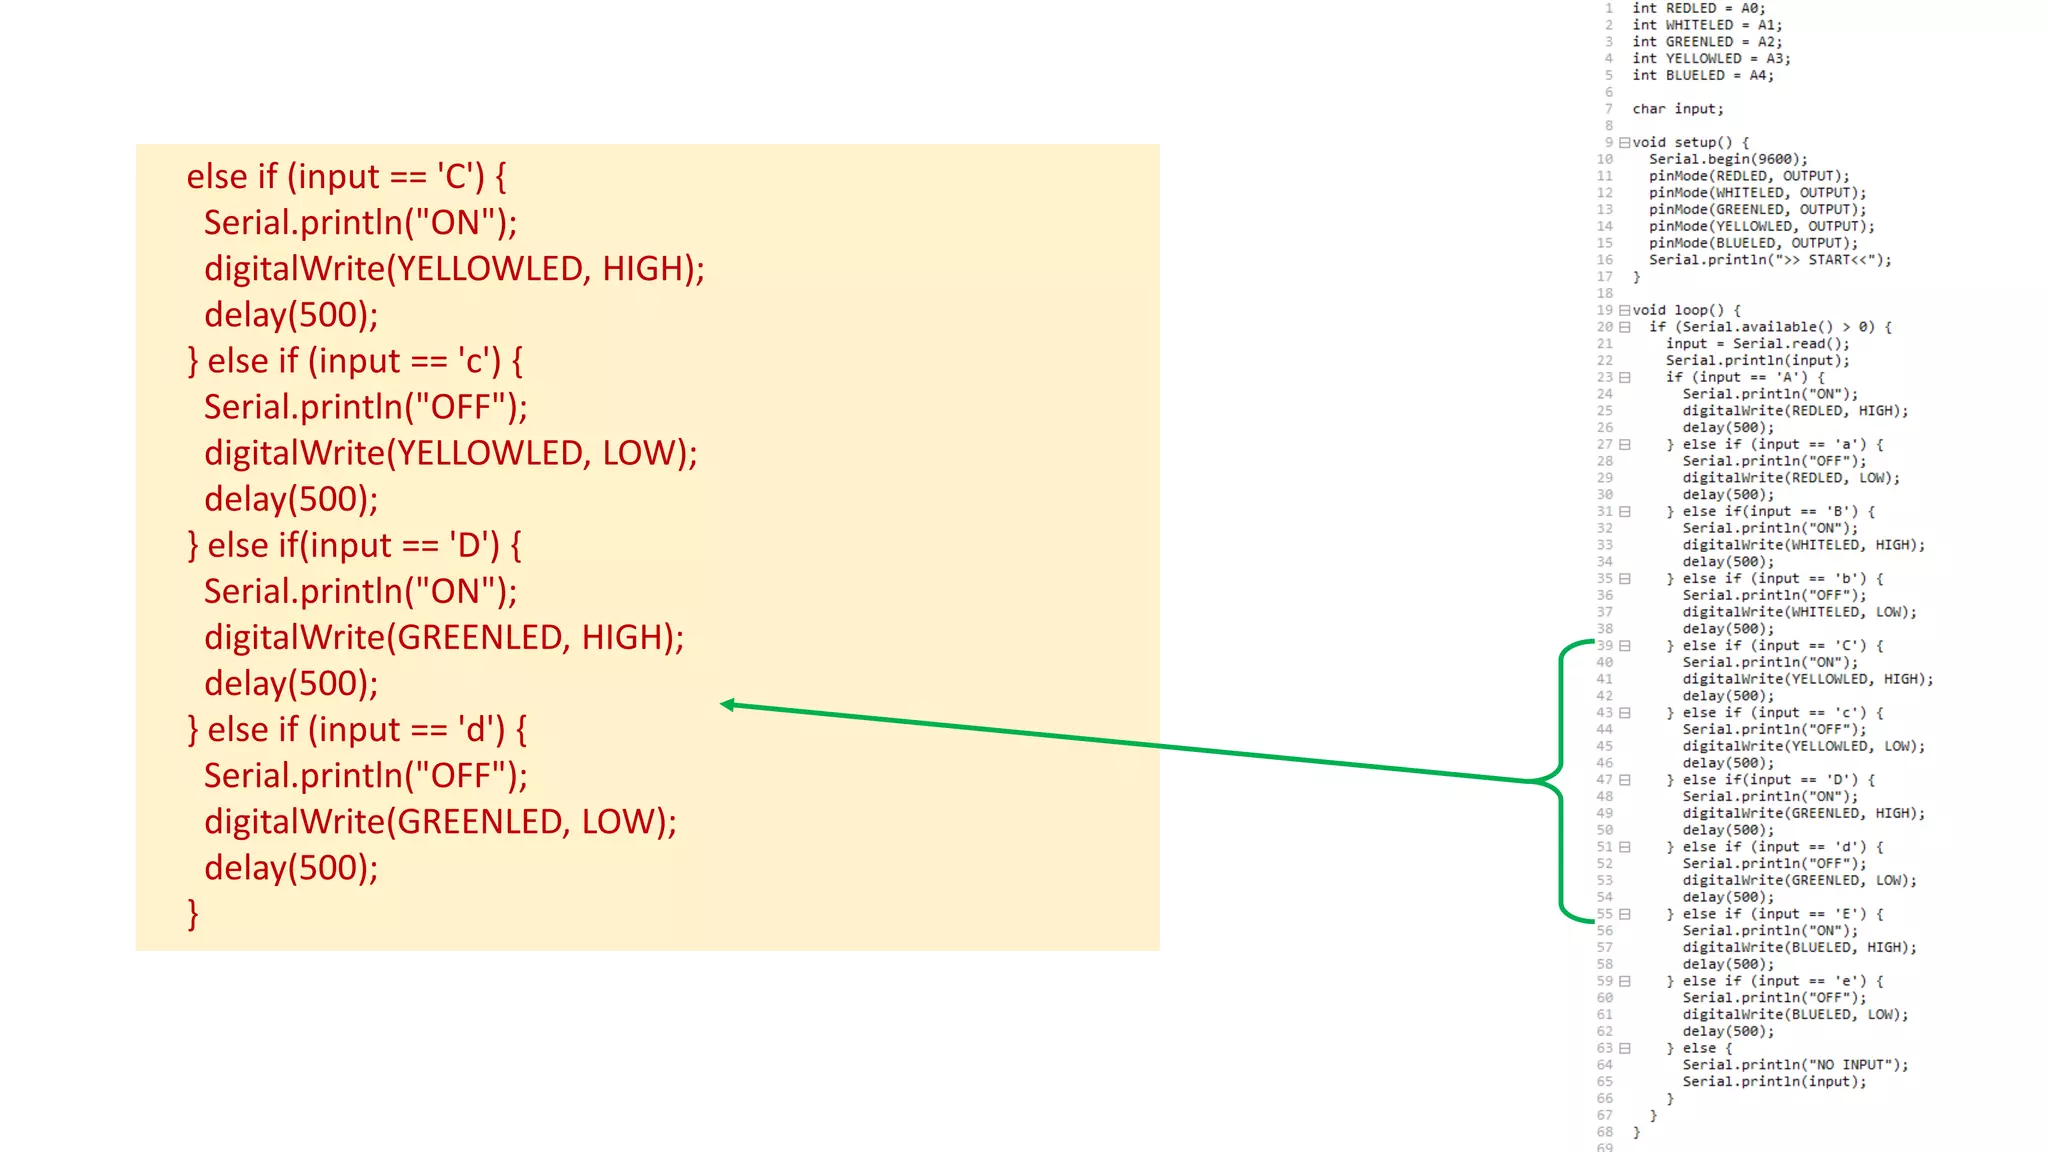
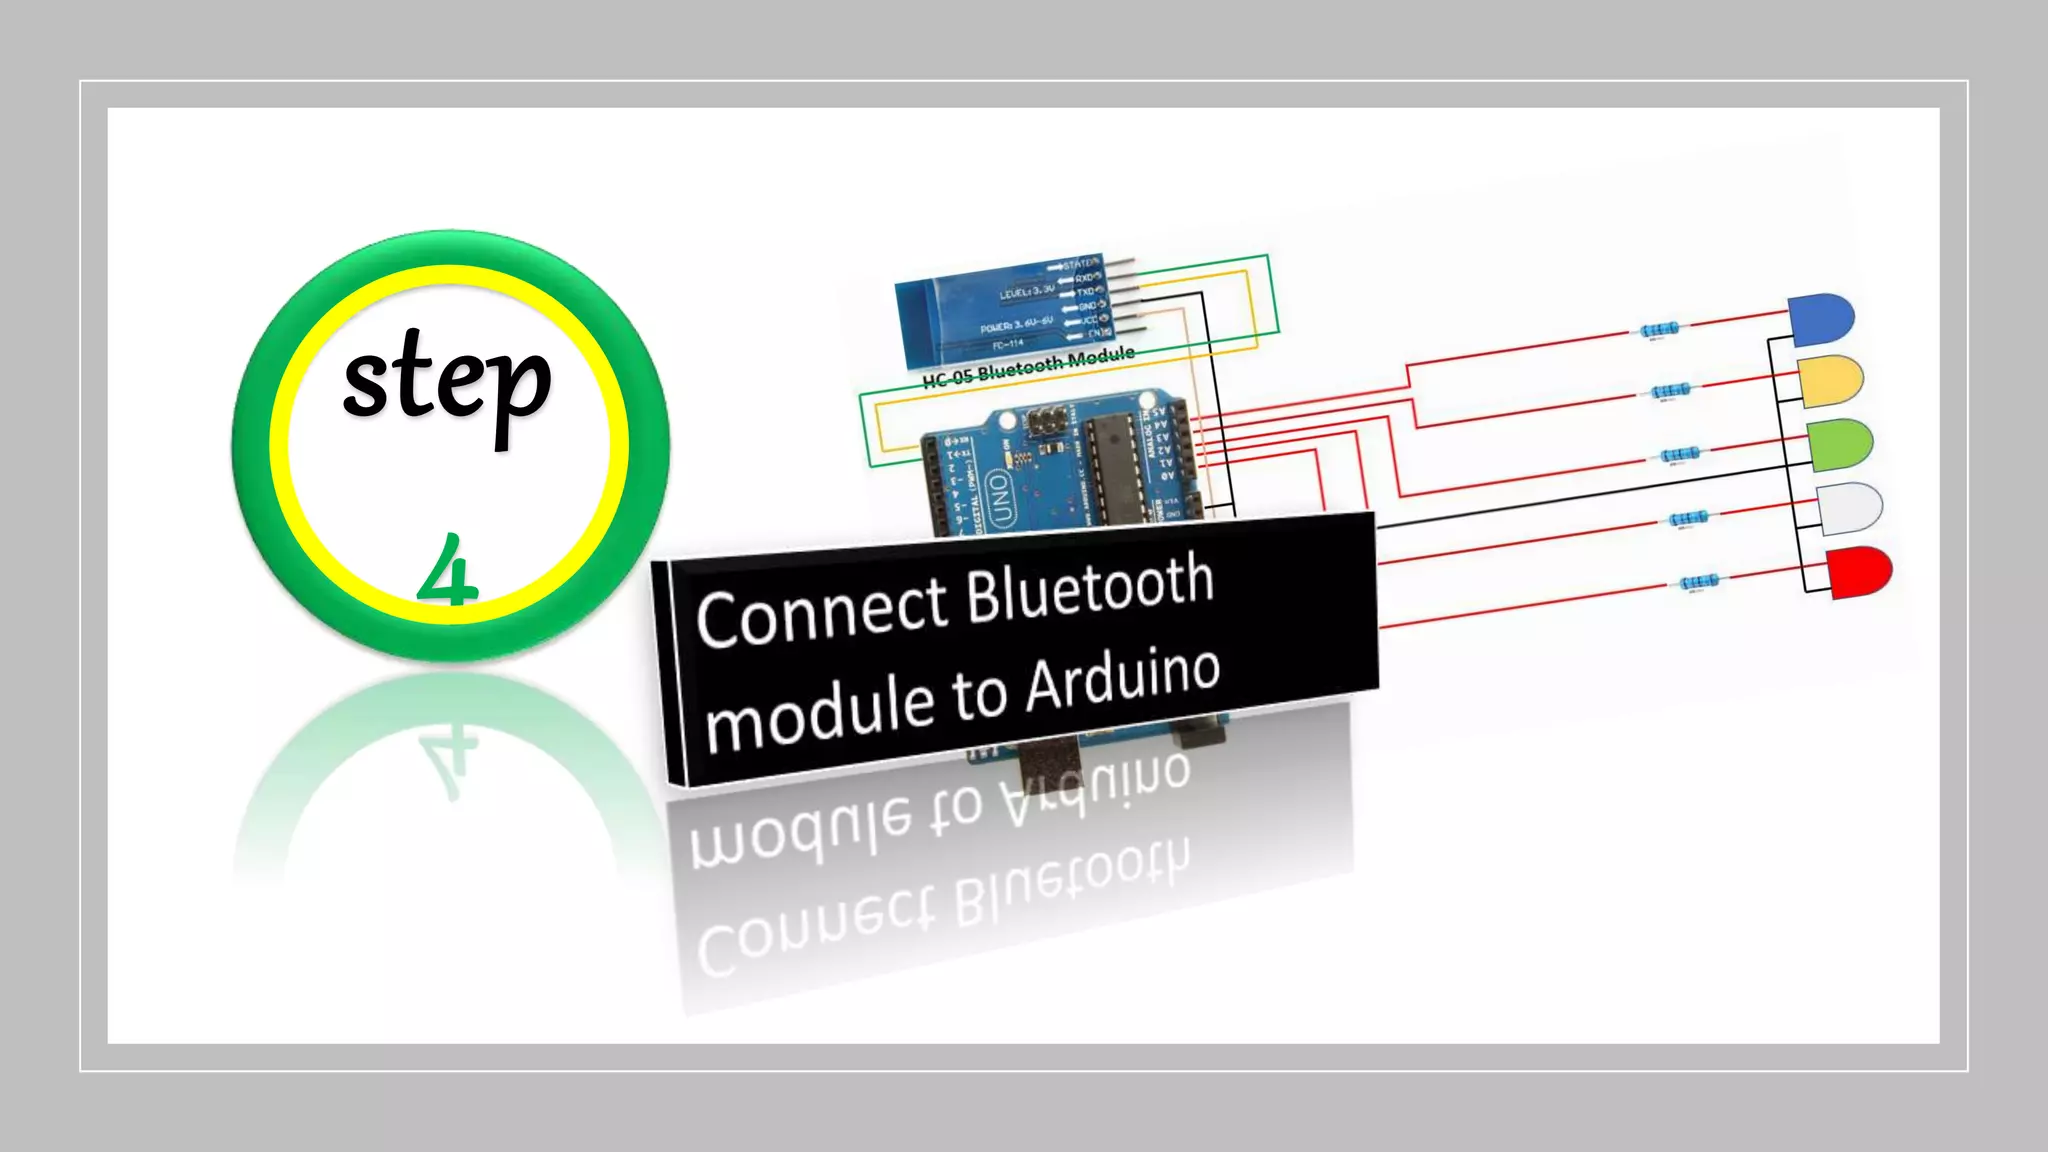
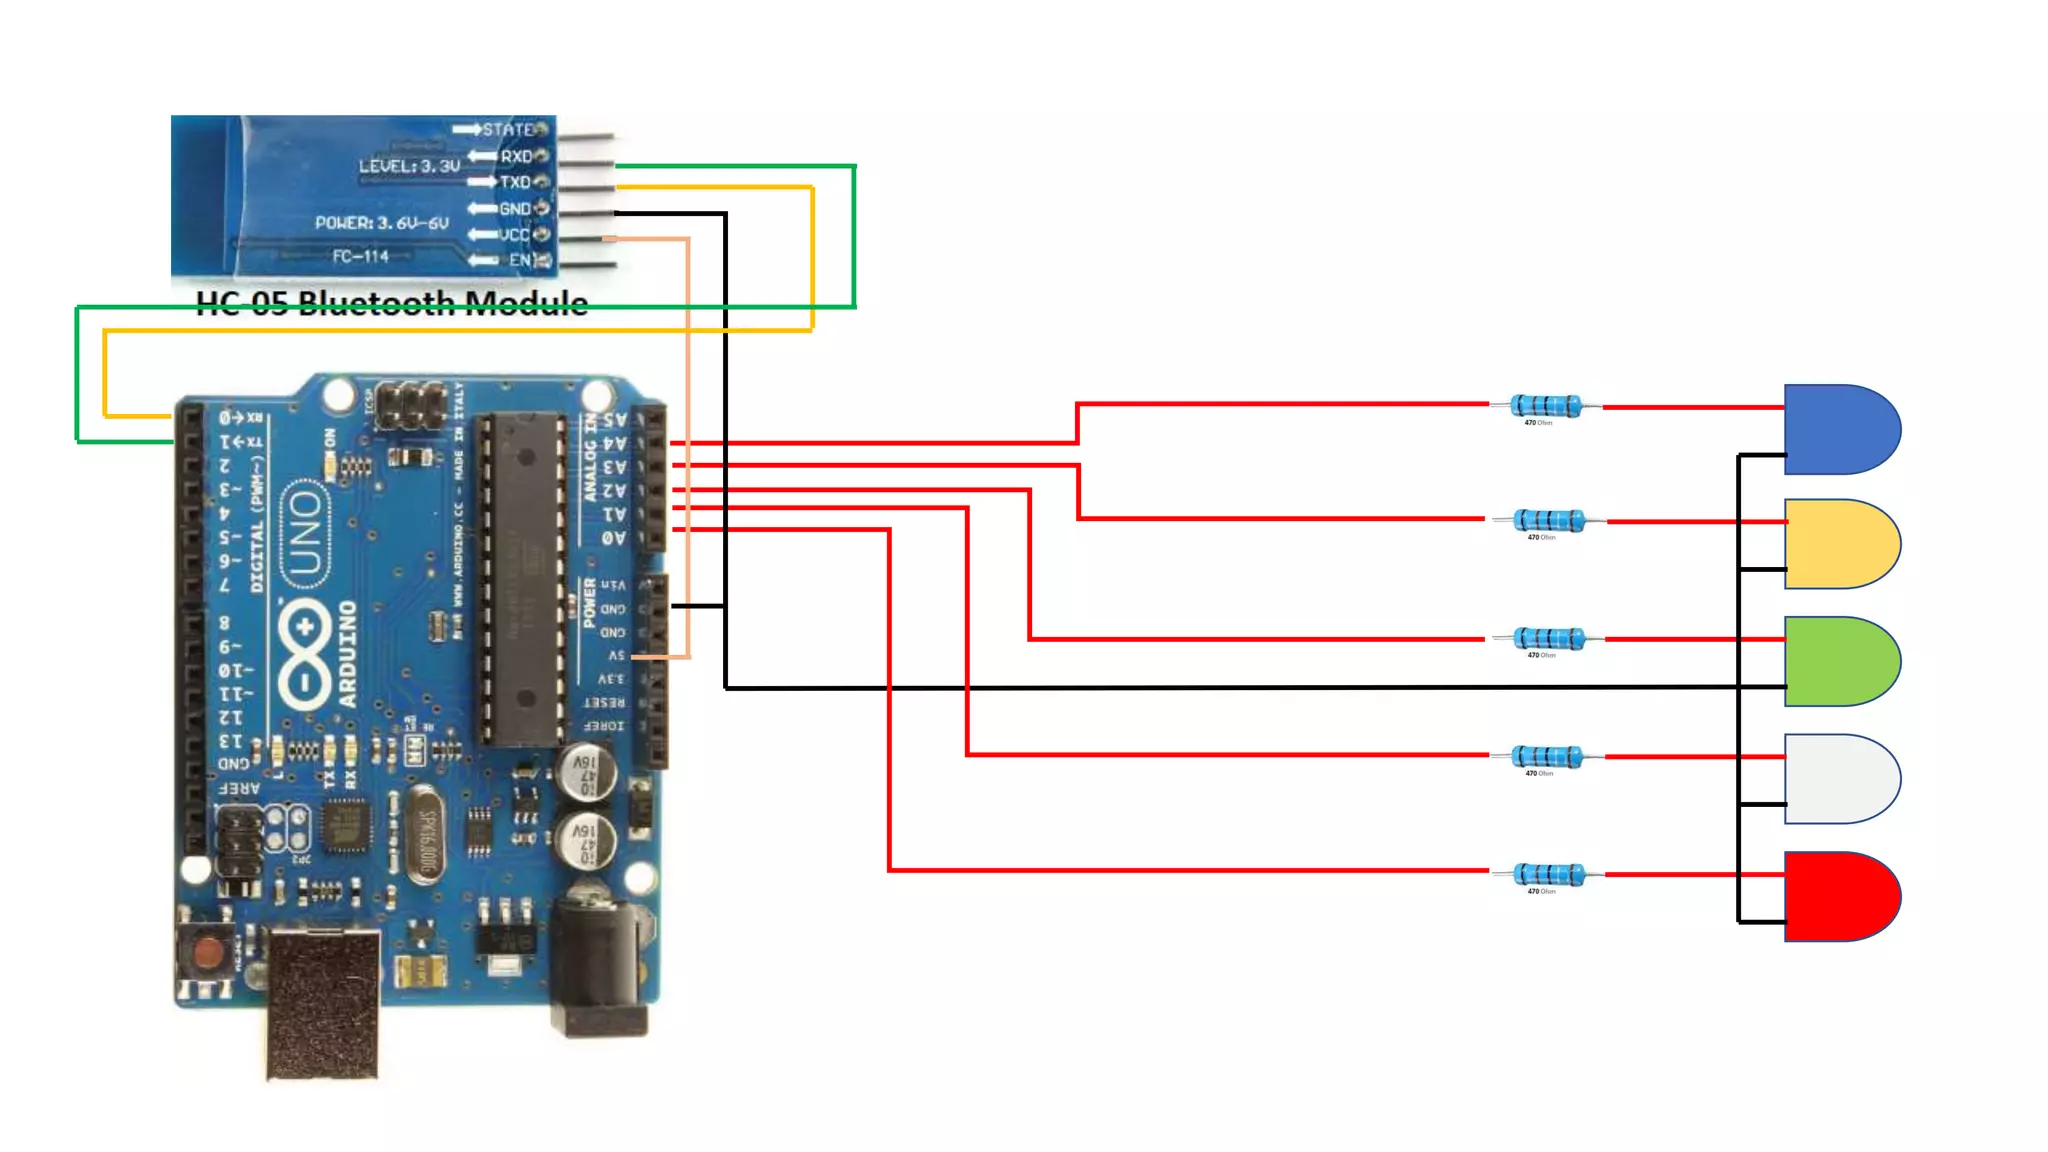
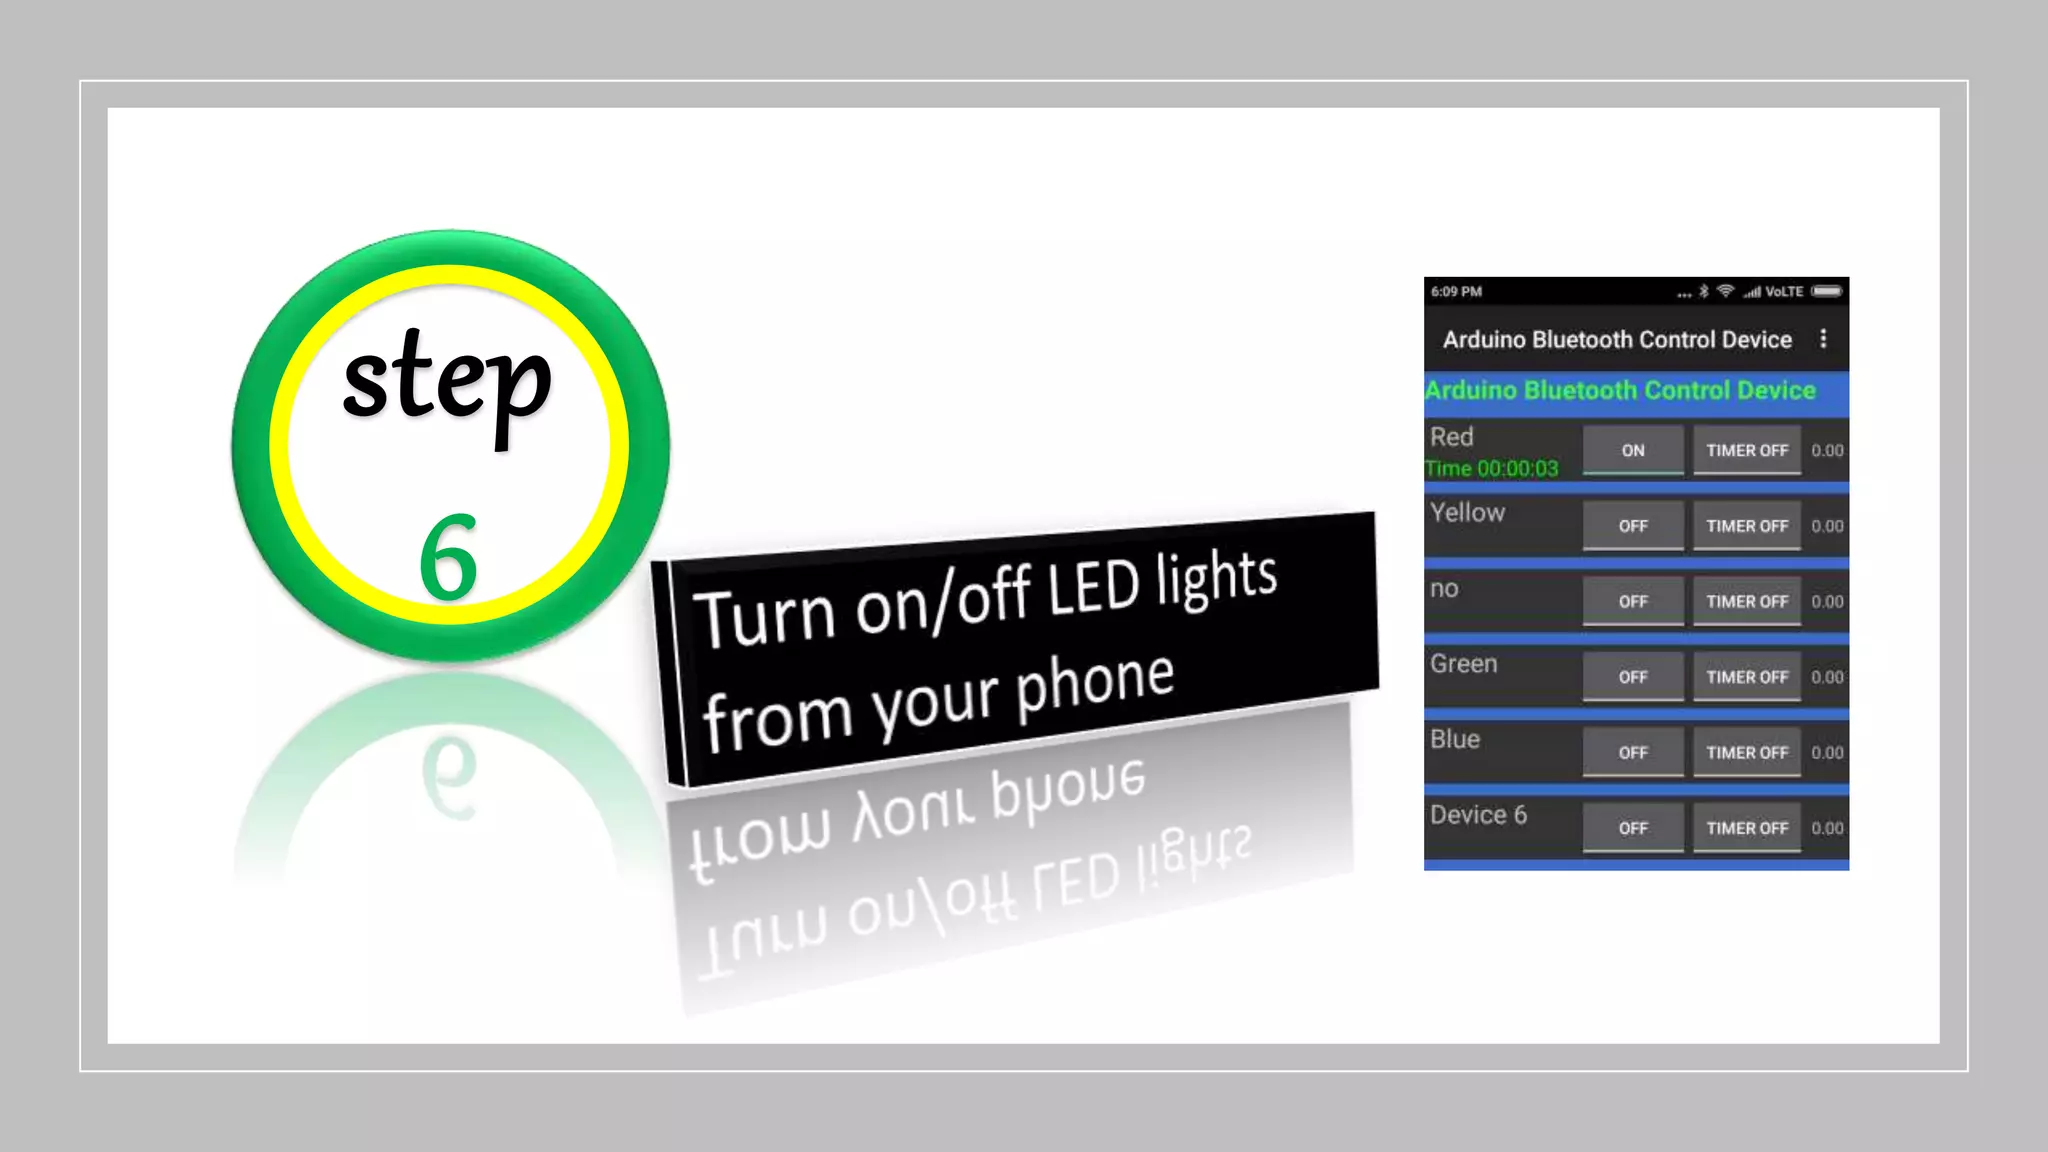
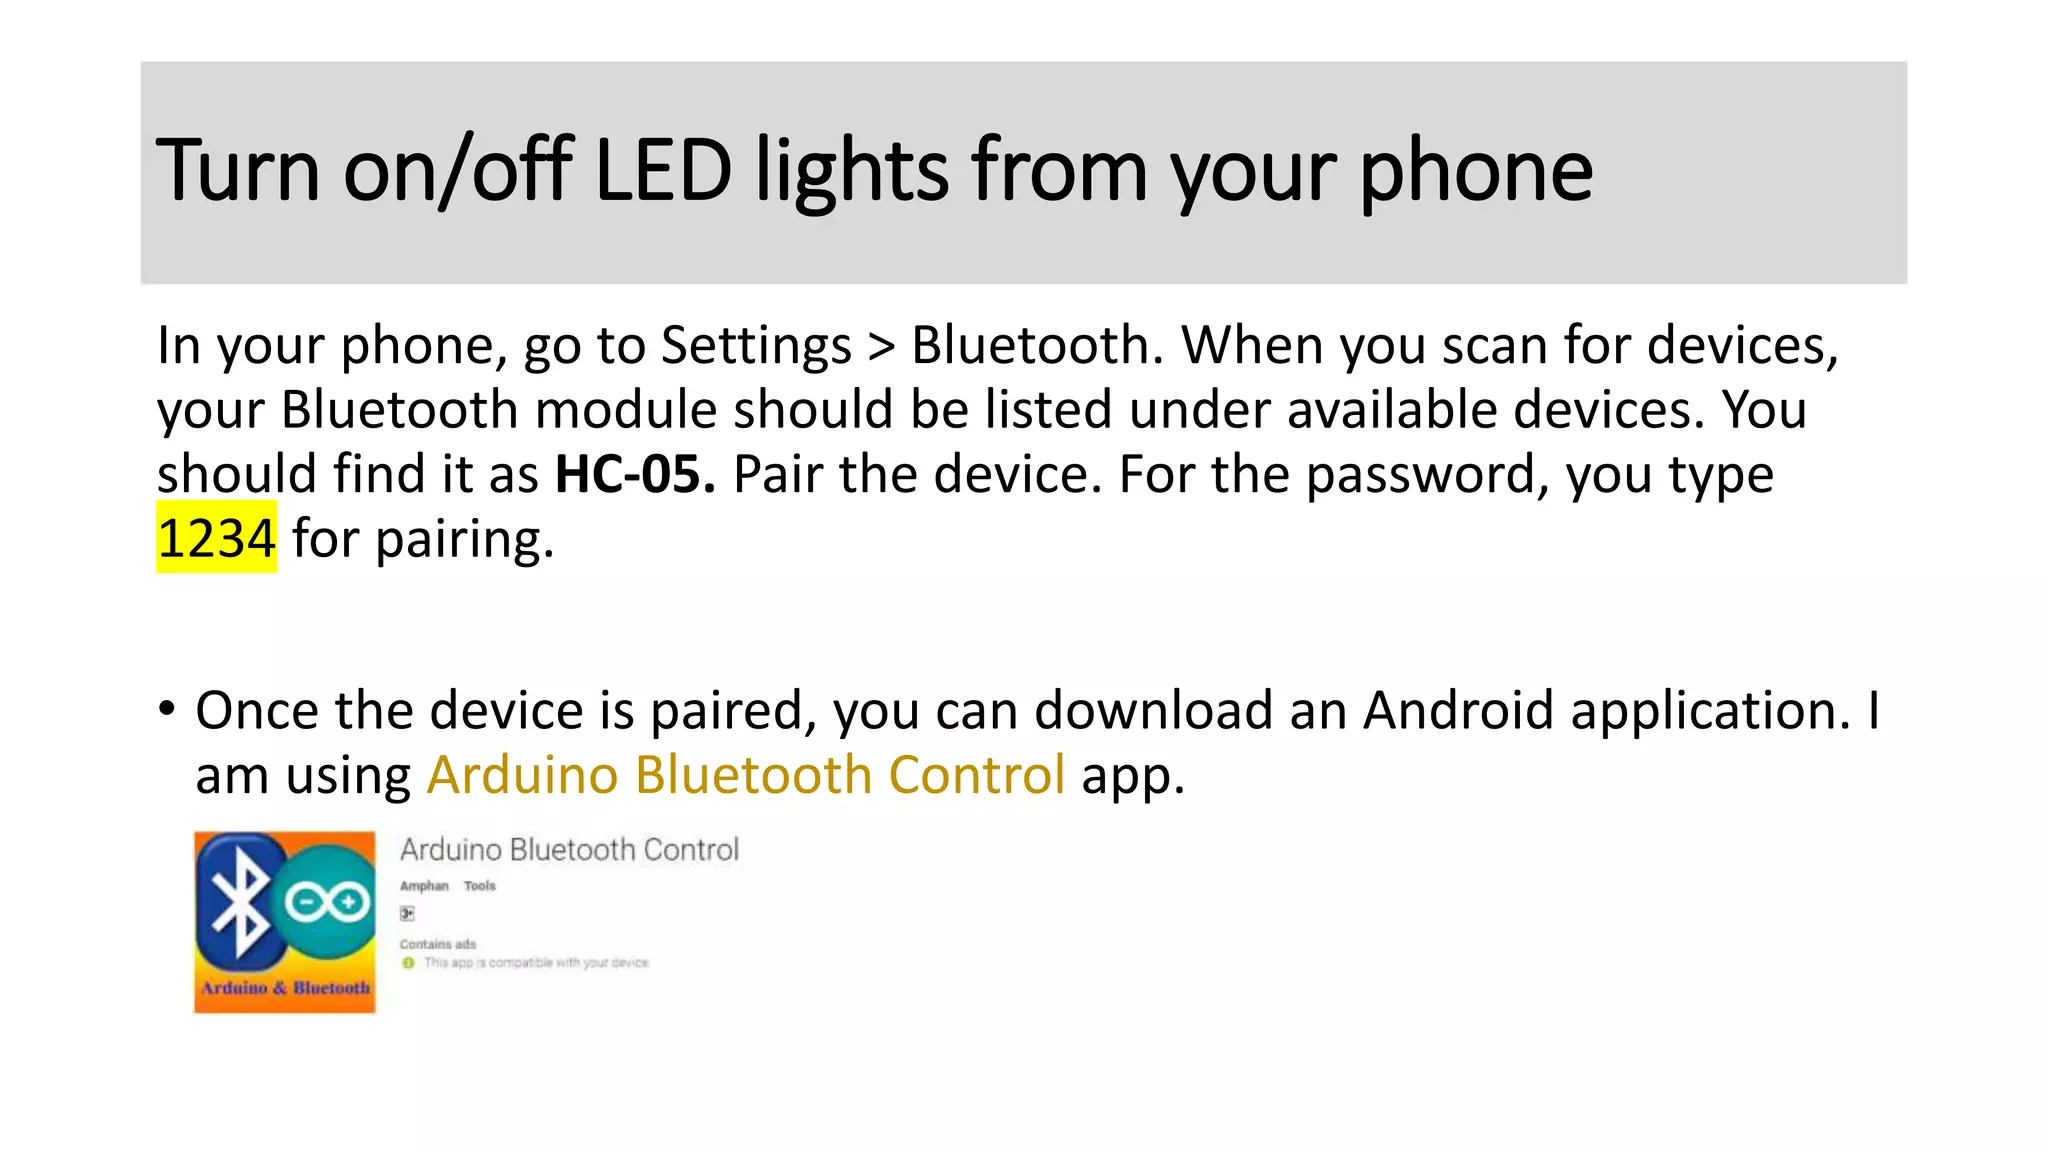
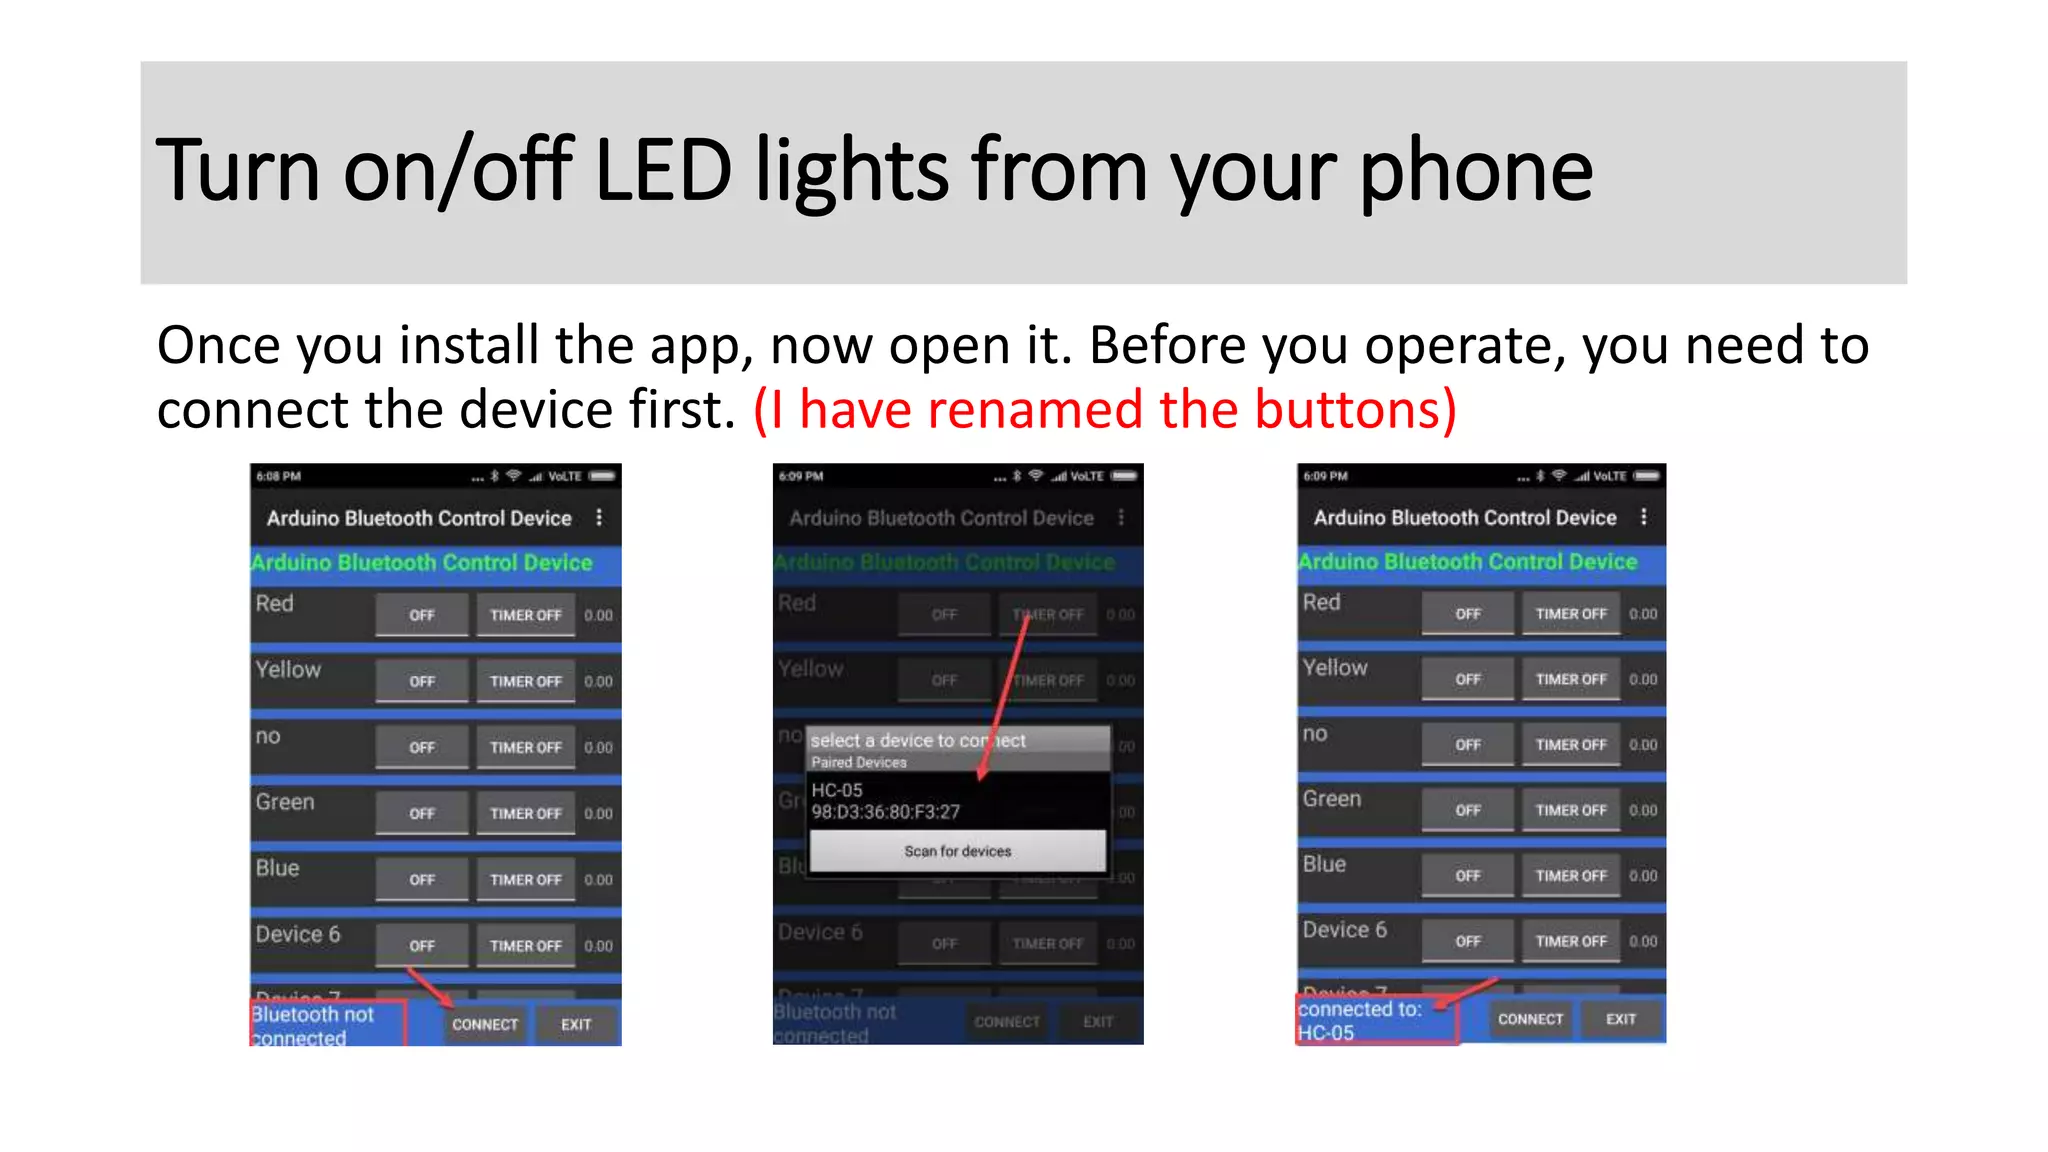
This is a document showing how Arduino can be used to control lights, fans or other electrical devices using a smart phone. We hare used Arduino UNO with HC-05 bluetooth module. Here we operate LED lights. This is helpful to initially understand how to deal with Arduino and bluetooth. In my next project I will show to operate 230v current to opearte lights and fans at our home.
2. What you need?
1. Arduino Board
2. Bluetooth Module (HC-05 or HM-10)
3. Resistors (470 Ohms)
4. Coloured 3v LED lights
5. Cables
3. Arduino Board
I am using Arduino UNO R3 Compatible Development Board
(ATmega328P)
4. Bluetooth Module (HC-05 or HM-10)
To communicate with Arduino, we need a Bluetooth module. Bluetooth
module will receive the signal from a Bluetooth enabled device such as
smart phone.
HC-05 has limitation that it can’t be connected to IoS device such as
iPhone because Apple uses MFi licensing program. If you are not using
IoS devices, you can use HC-05
If you have an iPhone and want to connect to Arduino via bluetooth,
your phone can’t be paired with HC-05. So you have to choose HM-10
module for Bluetooth communication.
7. Connect LED to Arduino Board
Now we will connect all LED lights to Arduino board. For that you need
1. Arduino board with power cable/USB
2. LED lights of 3v each (colours: white, red, green, yellow, blue)
3. 5 resistors of 470 amps each
4. Cables to connect LED lights to Arduino
8. First we will connect LED lights to Arduino. Each LED light has 2 pins –
ANODE & CATHODE. One of these two is bit bigger than the other. The
bigger pin is ANODE(+) which needs 3v power. This will be supplied
from the Arduino board. Instead of connecting directly, we will use a
470 amp resistor. The smaller pin is CATHODE(-) which will be
connected to Gnd(Ground). So we use 5 Led bulbs and 5 resistors. Let’s
connect as:
Red LED will connect to Arduino A0 pin, white to A1 pin, green to A2,
yellow to A3 and blue to A4.
Connect LED to Arduino Board
11. First we will write the program. The program will read the input and
power on the LED for the respective pins in the Arduino. So here we are
using 5 pins in the Arduino board – A0, A1, A2, A3, A4 which are
connected and control to 5 leds.
Write program for Arduino Controller
12. int REDLED = A0;
int WHITELED = A1;
int GREENLED = A2;
int YELLOWLED = A3;
int BLUELED = A4;
char input;
We are declaring the constants which for the
Arduino pins will be used later in the program.
The variable input will be used to store the value
from the user operation. This is used to turn the led
on and off as per the user interaction.
14. Serial.begin(9600)
This opens serial port, sets data
rate to 9600 bps. You can see the
data rate in the Arduino app, press
Ctrl+Shift+M or Tools>Serial
Monitor
15. • pinMode(REDLED, OUTPUT);
• pinMode(WHITELED, OUTPUT);
• pinMode(GREENLED, OUTPUT);
• pinMode(YELLOWLED, OUTPUT);
• pinMode(BLUELED, OUTPUT);
Here we are registering the pins for output to the LEDs from Arduino.
16. void loop() {
if (Serial.available() > 0) {
input = Serial.read();
Serial.println(input);
-- remaining code in next slide --
}
}
In these code, we are reading the input which
will be supplied by the user. According to the
input we will control the LED lights.
21. Once the code is finished, connect Arduino to your laptop. Now Upload
the application.
Once done, start testing the app.
Press ctrl+shift+M. This will open the Serial monitor. Enter your input
character – A. When you provide A and send, it will turn the red led
on. To turn other lights on, you can try any characters from A – E.
To turn them off, you pass character in small letters i.e. any character
from a – e
Let’s test it
23. There are many Bluetooth modules for Arduino available in the market.
However as discussed in the previous slide, we will choose one from
either HC-05 or HM-10 as per your device type. If you use iPhone to
communicate, you choose HM-10 else HC-05 is enough for only
Android.
The Bluetooth module has 6 pins. However we will use only 4 pins as:
VCC – This should be connected to 5v pin in the Arduino
GND – This should be connected to any GND pin in the Arduino
TXD – This should be connected to RD←0 pin in the Arduino
RXD – This should be connected to RD→1 pin in the Arduino
Connect Bluetooth module to Arduino
26. NO extra code for Bluetooth
Yes you read it correctly.
There is absolutely NO extra code for Bluetooth.
The same program will work to communicate from phone to Arduino.
28. Turn on/off LED lights from your phone
In your phone, go to Settings > Bluetooth. When you scan for devices,
your Bluetooth module should be listed under available devices. You
should find it as HC-05. Pair the device. For the password, you type
1234 for pairing.
• Once the device is paired, you can download an Android application. I
am using Arduino Bluetooth Control app.
29. Once you install the app, now open it. Before you operate, you need to
connect the device first. (I have renamed the buttons)
Turn on/off LED lights from your phone
30. There will be buttons, each button is configured to send a letter to the
Bluetooth device. It starts from A (A for on, a for off) for Device 1
button, B (B for on, b for off) for Device 2, …. and so on.
Now you should be able to operate the lights through the buttons.
That’s all. In my next slide, instead of LED lights we will connect to bulb
and fans used at our smart home.
Turn on/off LED lights from your phone