
More Related Content
Similar to SimpleGeo-Intro1.ppt
Similar to SimpleGeo-Intro1.ppt (20)
Recently uploaded
Recently uploaded (20)
SimpleGeo-Intro1.ppt
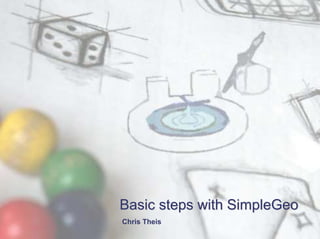
- 1. Basic steps with SimpleGeo Chris Theis
- 2. Overview Approaches for geometry construction (CAD, CSG) SimpleGeo – an interactive geometry modeler Plugin concept
- 3. Current status Current status Textual input 2D cuts (supplied by FLUKA via PLOTGEOM) Goal Combined interactive modeling & 3D visualization & debugging which is independent of the syntax and format Ways to go: CAD or CSG? CAD vs. CSG SimpleGeo Status & outlook 3
- 4. Why not use AutoCAD, etc…? What is the difference between CAD & CSG? C A D C S G The “looks” must be correct Mathematical properties must be preserved! CAD vs. CSG SimpleGeo Status & outlook 4
- 5. Mathematical properties? CAD CSG “So, what’s the big deal?” Tracking Point in polyhedron test with Considering N x M faces Solving x2 + y2 +z2 = R2 CAD vs. CSG SimpleGeo Status & outlook 5
- 6. SimpleGeo - a hybrid solution SimpleGeo CAD Can be rendered directly with “ordinary” GFX - cards CSG Output for MC – codes Hierarchical structure Complex modeling algorithms Numerical issues 6 CAD vs. CSG SimpleGeo Status & outlook CAD vs. CSG SimpleGeo Status & outlook
- 7. Constructive solid geometry Basic idea Solids are point sets (= primitives) that can be operated on Geometry Set of primitive solids combined with boolean operations Union Difference Intersection CAD vs. CSG SimpleGeo Status & outlook Group 7
- 8. Recursive CSG tree Original images courtesy of N. Stewart CAD vs. CSG SimpleGeo Status & outlook CSG trees are not unique. Different constructions can yield the same result. Recursive CSG tree Normalized CSG tree 8
- 9. Loading a FLUKA input 1. Select “File” -> “Import”* and open the file named NeutronGenerator.inp located in the directory dataNeutronGen 2. If more than 10 regions are loaded the automatic build function is disabled. You’ll immediately be notified of this. 3. Press the automatic build button on the toolbar 4. Press the “Reset view” button. CAD vs. CSG SimpleGeo Status & outlook CAD vs. CSG SimpleGeo Status & outlook * Versions >2.0 support the new syntax with names as well as the old syntax with numbers. In view of the free format a delimiter (e.g. space) between the values is mandatory! If this is not present a warning will be displayed. 9
- 11. Next step –object identification Activate the “identify” function on the toolbar Click on the gray sphere and the identified region will automatically be selected in the CSG tree. Selected (sub)regions are shown with red contours CAD vs. CSG SimpleGeo Status & outlook CAD vs. CSG SimpleGeo Status & outlook 11
- 12. Change visibility Turn off the visibility of the surrounding blackhole by pressing Space or by clicking on the checkbox in the CSG tree. CAD vs. CSG SimpleGeo Status & outlook CAD vs. CSG SimpleGeo Status & outlook * More on visibility (saving, loading, …) can be found in the manual’s FAQ section 2.8 & 2.9 12
- 13. Checking regions/subregions Select region labeled “002_Diff” The results of the selected region/subtree are marked in red. Select body number 4 of the region 002_Diff Only this body/subregion is marked in red. CAD vs. CSG SimpleGeo Status & outlook CAD vs. CSG SimpleGeo Status & outlook 13 FLUKA course, CERN 2008
- 14. Camera control A number of predefined views are available from the “View” menu. Select one and move the mouse over the render view which will trigger a redraw with the selected perspective. CAD vs. CSG SimpleGeo Status & outlook CAD vs. CSG SimpleGeo Status & outlook 14
- 15. Camera control 2 For dynamic and more flexible camera control active the SpaceBall on the toolbar. A ball with its 3 main arcs is drawn on top of the geometry. Moving the mouse near an arc will active it. Any movement of the mouse with the left mouse button pressed will move the arc and thus, the camera. CAD vs. CSG SimpleGeo Status & outlook CAD vs. CSG SimpleGeo Status & outlook 15
- 16. Camera control 3 For more flexibility you can grab the SpaceBall even at points that are not placed on an arc. For this you have to keep the Shift key pressed together with the left mouse button. On slow graphics cards this operation might slow down. Keeping the Ctrl key pressed in addition will reduce the level of detail shown during the movement! CAD vs. CSG SimpleGeo Status & outlook CAD vs. CSG SimpleGeo Status & outlook 16
- 17. Camera control 4 If you want to zoom in you can do this with a mouse wheel while the SpaceBall is activated. Otherwise select the zoom function on the toolbar. Just draw a rectangle around the area you would like to zoom in on. To reset to the normal view use the “Reset View” button. CAD vs. CSG SimpleGeo Status & outlook CAD vs. CSG SimpleGeo Status & outlook 17
- 18. Visualization modes Several different rendering options are available from the “View” menu. Non shaded views allow for better performance, especially on slow graphics cards. CAD vs. CSG SimpleGeo Status & outlook CAD vs. CSG SimpleGeo Status & outlook 18
- 19. Visualization modes Flat shading Default mode Gouraud shading More complex shading supporting shiny high-lights Wireframe Triangulated wireframe mode Skeleton rendering Colored wireframe mode Sketch rendering Black & white triangulated wireframe mode Overlay sketch Can be combined with Flat or Gouraud shading. Allows for inspecting regions that are located inside other regions. Render contours Can be combined with Flat or Gouraud shading. Only the outermost contours are drawn Render hard contours Only hard edges will be drawn which is useful, for example, for cylindrical bodies. CAD vs. CSG SimpleGeo Status & outlook CAD vs. CSG SimpleGeo Status & outlook 19
- 20. Visualization modes Try to combine “Flat” shading with “Render contours”. Try to combine “Flat” shading with “Overlay sketch”. This will allow you to see inside the surrounding air and show you the maze. CAD vs. CSG SimpleGeo Status & outlook CAD vs. CSG SimpleGeo Status & outlook 20
- 21. More on rendering options There are several other rendering options: Aliasing: Softening of jagged contour lines. High-end gfx cards can do this “on-the-fly” to some extent. Parallel projection, allows you to obtain flat looking images. The look is similar to 2D sections if the camera is set to the correct position. CAD vs. CSG SimpleGeo Status & outlook CAD vs. CSG SimpleGeo Status & outlook 21
- 22. Clipping planes Clipping planes remove everything on one side of the plane. You can select various predefined planes from the “View” - “Clipping planes” menu. Activating the Identify function from the toolbar you can interactively change the position of the clipping plane while moving the mouse with the left button pressed. CAD vs. CSG SimpleGeo Status & outlook CAD vs. CSG SimpleGeo Status & outlook 22 FLUKA course, CERN 2008
- 23. More on clipping planes The options (plane equation) of the clipping planes are available under the “Clipping planes” – “Settings…” item. There you can define the type, position and orientation. The orientation can be flipped by changing the sign for example. CAD vs. CSG SimpleGeo Status & outlook CAD vs. CSG SimpleGeo Status & outlook 23
- 24. Emphasizing an object If you want to emphasize an object you can select different options (color, line style, line width) for this one region only. First select the region and then choose the visualization attributes in the property view. These settings will be effective in any rendering mode where contours are shown. CAD vs. CSG SimpleGeo Status & outlook CAD vs. CSG SimpleGeo Status & outlook 24 FLUKA course, CERN 2008
- 25. Navigation in the CSG tree You can immediately jump to a region number X by choosing “Go to region...” from the “Edit” menu or by pressing Ctrl + G. To find regions choose “Find node” from the “Edit” menu or press Ctrl + F. Various search criterions like name, comments, materials and type are available. CAD vs. CSG SimpleGeo Status & outlook CAD vs. CSG SimpleGeo Status & outlook 25 FLUKA course, CERN 2008
- 26. Searching in the CSG tree Several search refinements options are available. The options given above will find every node which has a material assignment that partially matches “ai” in its name. In our case we will find all nodes with a material assignment of “Air”. Pressing the < and > key automatically jumps to the respective node in the CSG tree. If requested regular expressions are available for more complex searches. CAD vs. CSG SimpleGeo Status & outlook CAD vs. CSG SimpleGeo Status & outlook 26 FLUKA course, CERN 2008
- 27. Saving images & geometries… The currently visible geometry can be saved to an image by selecting “Save Image” from the “File” menu, or it can be copied to the clipboard via “Edit” – “Copy to clipboard” for immediate insertion in other Windows applications. The geometry can be exported to different raytracing packages via “File” - “Export” - “3D objects”. These packages do not support interactivity but supply photorealistic images. CAD vs. CSG SimpleGeo Status & outlook CAD vs. CSG SimpleGeo Status & outlook 27 FLUKA course, CERN 2008
- 28. Saving images & geometries… One supported file format is VRML. You can pass these files on to collaborators who can inspect them in a web browser using any freely available VRML plugin. (e.g. CORTONA). They do not need SimpleGeo! For ray-tracing packages only regions that are currently visible are saved to avoid cluttering. CAD vs. CSG SimpleGeo Status & outlook CAD vs. CSG SimpleGeo Status & outlook 28 Images can be saved in various formats or directly exported to other Windows programs via the clipboard.
- 29. Ray-traced geometry Geometry courtesy of M. Fuerstner CAD vs. CSG SimpleGeo Status & outlook CAD vs. CSG SimpleGeo Status & outlook 29
- 30. Key features Interactive creation & modification of a geometry via drag & drop Import of FLUKA, ALIFE, WAVEFRONT, PLY Export to FLUKA, MCNP(X), PHITS* Export to various 3D raytracing packages Arbitrary camera viewpoints VB-Script like macro language Relative coordinate frames of nodes Undo/Redo functionality Volume & mass calculation of regions CAD vs. CSG SimpleGeo Status & outlook 30 * This exporter is currently in beta state
- 31. Examples CAD vs. CSG SimpleGeo Status & outlook 31 Model courtesy of E. Feldbaumer
- 32. Examples CAD vs. CSG SimpleGeo Status & outlook 32 Model courtesy of E. Feldbaumer
- 33. Examples CAD vs. CSG SimpleGeo Status & outlook 33 CAD vs. CSG SimpleGeo Status & outlook
- 34. Examples CAD vs. CSG SimpleGeo Status & outlook Model courtesy of M. Brugger & S. Roesler 34
- 35. Examples CAD vs. CSG SimpleGeo Status & outlook Model courtesy of H. Vincke 35
- 36. Examples CAD vs. CSG SimpleGeo Status & outlook Model courtesy of L. Nicolas 36
- 37. Examples CAD vs. CSG SimpleGeo Status & outlook Model courtesy of H. Vincke 37
- 38. Examples CAD vs. CSG SimpleGeo Status & outlook Model courtesy of H. Vincke 38
- 39. Examples – 2D measures CAD vs. CSG SimpleGeo Status & outlook 39
- 40. Examples CAD vs. CSG SimpleGeo Status & outlook 40 Model courtesy of E. Lebbos
- 41. Thank you for your attention Website: www.cern.ch/theis/simplegeo Author: Christian.Theis {at} cern . ch 41