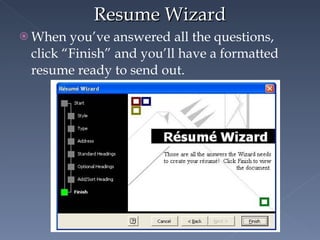
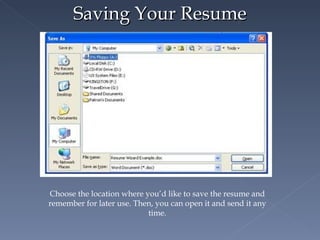
Job Searching 101: Preparing a resume and searching for jobs online Part One: How to Make a Resume Warren Public Libraries 1 City Square, Suite 100 Warren, Michigan 48093 (586) 751-0770
How do I prepare a resume? Microsoft Word Resume Wizard Double-click on the blue “W” Click the “File” Menu Select “New”
Resume Wizard On the right side of the screen, a side bar will open that offers different types of documents you can start with. Under “Templates,” click “Resume Wizard.”
Resume Wizard The Resume Wizard will open.
Resume Wizard Each screen of the Resume Wizard asks you questions. All you have to do is answer them.
Step One: Basic Info Fill in the boxes with your contact information. Make sure it is current, and that you will answer at the phone number or e-mail you provide. Be sure you can receive messages also.
Step Two: Headings Headings are other information a potential employer might need or want to know about you.
More About Headings There are two more windows on the Resume Wizard that ask about headings. Remember, these aren’t mandatory for every job.
Headings The third Headings screen asks you to create your own, if there’s something that isn’t covered by the previous two screens.
Resume Styles Resume Wizard offers three different styles for your resume. Contemporary Elegant Professional They all give the same information, just in different layouts; consider the type of job you are looking for when choosing.
Styles and Types    Contemporary Elegant   Professional  
Resume Types Resume Wizard offers four different types of resumes (this is different from styles). Chronological (in date order) Entry-Level (good for first-time workers) Professional (if you have multiple degrees or other experiences) Functional (best for labor work, skilled trades, etc)
Types and Styles (2)    Entry-Level    Chronological Functional   Professional  
Resume Wizard When you’ve answered all the questions, click “Finish” and you’ll have a formatted resume ready to send out.
Finished Resume Note the Help box at the right side, which suggests other things you can do: Add a Cover Letter, Change the Visual Style of the Resume, etc.
Spell Check!!! Make sure your finished document does not have any misspellings.  You can use Microsoft Word’s Spelling and Grammar tool, but be sure to check it yourself, too.
Save Your Resume! To be able to print or send your resume anywhere or to anyone, you MUST save it. You can bring a floppy disk or flash drive, or purchase a disk at the library.
Saving Your Resume Choose the location where you’d like to save the resume and remember for later use. Then, you can open it and send it any time.
Copying and Pasting Open the website where you are pasting your resume. Open your resume. Go to the “Edit” menu and click “Select All.”
Copying and Pasting All of the text on your resume should now be highlighted.  It should look like this:
Copying and Pasting Go to the “Edit” menu again. Click on “Copy.”
Copying and Pasting Go to the website where you are pasting your resume.  Click in the empty box.
Copying and Pasting Go to the “Edit” menu on the website. (it’s in the same place as it is on Word.) Click “Paste.” Your resume will appear in the blank box.
Uploading If you want to send your formatted resume to an employer, or have it on a website like Monster, you can choose to upload the file.
Uploading Choose “Upload.” Click “Browse.” 3 . Find your resume where it is saved. 4. Name your resume. 5. Click “Create the Resume.”

Resumes for Job Searching

  • 1.
    Job Searching 101:Preparing a resume and searching for jobs online Part One: How to Make a Resume Warren Public Libraries 1 City Square, Suite 100 Warren, Michigan 48093 (586) 751-0770
  • 2.
    How do Iprepare a resume? Microsoft Word Resume Wizard Double-click on the blue “W” Click the “File” Menu Select “New”
  • 3.
    Resume Wizard Onthe right side of the screen, a side bar will open that offers different types of documents you can start with. Under “Templates,” click “Resume Wizard.”
  • 4.
    Resume Wizard TheResume Wizard will open.
  • 5.
    Resume Wizard Eachscreen of the Resume Wizard asks you questions. All you have to do is answer them.
  • 6.
    Step One: BasicInfo Fill in the boxes with your contact information. Make sure it is current, and that you will answer at the phone number or e-mail you provide. Be sure you can receive messages also.
  • 7.
    Step Two: HeadingsHeadings are other information a potential employer might need or want to know about you.
  • 8.
    More About HeadingsThere are two more windows on the Resume Wizard that ask about headings. Remember, these aren’t mandatory for every job.
  • 9.
    Headings The thirdHeadings screen asks you to create your own, if there’s something that isn’t covered by the previous two screens.
  • 10.
    Resume Styles ResumeWizard offers three different styles for your resume. Contemporary Elegant Professional They all give the same information, just in different layouts; consider the type of job you are looking for when choosing.
  • 11.
    Styles and Types Contemporary Elegant  Professional 
  • 12.
    Resume Types ResumeWizard offers four different types of resumes (this is different from styles). Chronological (in date order) Entry-Level (good for first-time workers) Professional (if you have multiple degrees or other experiences) Functional (best for labor work, skilled trades, etc)
  • 13.
    Types and Styles(2)  Entry-Level  Chronological Functional  Professional 
  • 14.
    Resume Wizard Whenyou’ve answered all the questions, click “Finish” and you’ll have a formatted resume ready to send out.
  • 15.
    Finished Resume Notethe Help box at the right side, which suggests other things you can do: Add a Cover Letter, Change the Visual Style of the Resume, etc.
  • 16.
    Spell Check!!! Makesure your finished document does not have any misspellings. You can use Microsoft Word’s Spelling and Grammar tool, but be sure to check it yourself, too.
  • 17.
    Save Your Resume!To be able to print or send your resume anywhere or to anyone, you MUST save it. You can bring a floppy disk or flash drive, or purchase a disk at the library.
  • 18.
    Saving Your ResumeChoose the location where you’d like to save the resume and remember for later use. Then, you can open it and send it any time.
  • 19.
    Copying and PastingOpen the website where you are pasting your resume. Open your resume. Go to the “Edit” menu and click “Select All.”
  • 20.
    Copying and PastingAll of the text on your resume should now be highlighted. It should look like this:
  • 21.
    Copying and PastingGo to the “Edit” menu again. Click on “Copy.”
  • 22.
    Copying and PastingGo to the website where you are pasting your resume. Click in the empty box.
  • 23.
    Copying and PastingGo to the “Edit” menu on the website. (it’s in the same place as it is on Word.) Click “Paste.” Your resume will appear in the blank box.
  • 24.
    Uploading If youwant to send your formatted resume to an employer, or have it on a website like Monster, you can choose to upload the file.
  • 25.
    Uploading Choose “Upload.”Click “Browse.” 3 . Find your resume where it is saved. 4. Name your resume. 5. Click “Create the Resume.”

Editor's Notes

  • #3 If you’re making your resume for the first time, use the Microsoft Word Resume Wizard.
  • #5 Word has a number of “Wizards” that you can use to prepare resumes, cover letters, or any kind of correspondence.
  • #8 You don’t need to include headings like Hobbies or Extracurricular Activities; but if the job description asks for additional information, you can. Always be sure to note languages you speak fluently, and if you’re willing to relocate. If you are looking for a grounds crew job (for instance), and you’ve won awards for gardening, that’s definitely something important you could include under “Interests and Activities,” “Hobbies,” and/or “Awards Received.”
  • #9 If you have passed job-specific exams or have been accredited or licensed for something (Chauffeur’s License counts!) be sure to note it here.
  • #10 You can also change the order of your resume headings. If there’s something you think is most important about your resume, you can use the “Move Up” and “Move Down” buttons to make sure it’s the first thing a potential employer sees.
  • #14 Notice that all of these examples of “type” have the same information; it’s just presented in a different order.
  • #16 (We’ll handle cover letters in the next hour.)
  • #23 You should see a blinking cursor in the box. Now you’re ready to paste.
  • #25 Upload means to transfer your file to another location or device; in this case, to Monster, or Career Builder, etc.