Download as PDF, PPTX


![Debugging routeStack
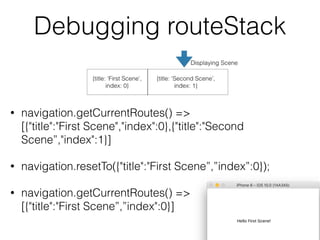
• navigation.getCurrentRoutes() =>
[{"title":"First Scene","index":0},{"title":"Second
Scene”,"index":1}]
• navigation.resetTo({"title":"First Scene”,”index”:0});
• navigation.getCurrentRoutes() =>
[{"title":"First Scene”,”index":0}]](https://image.slidesharecdn.com/l7-navigation-scenetransition-listview-160927060127/85/React-Native-Tutorial-Lecture-7-Navigation-Scene-Transition-ListView-13-320.jpg)
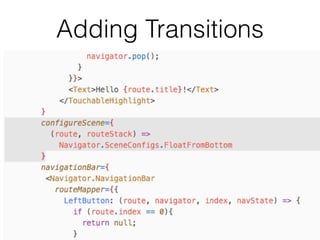
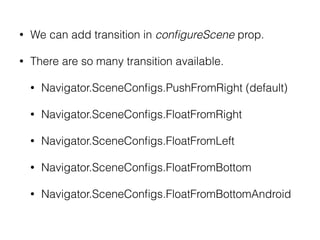
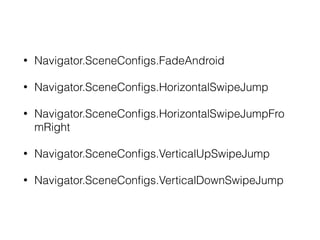
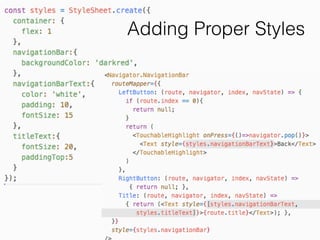
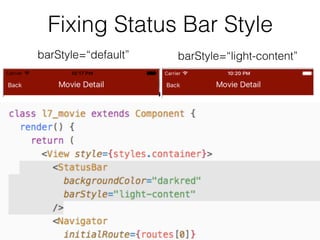
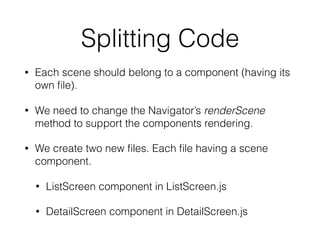
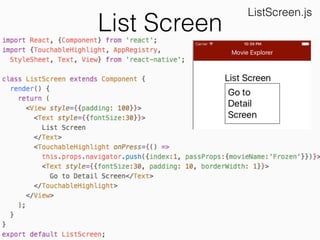
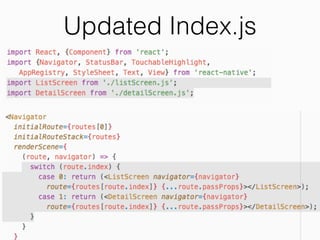
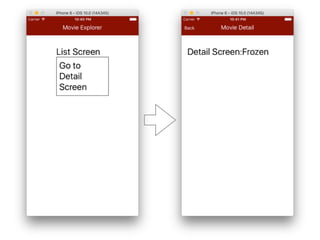
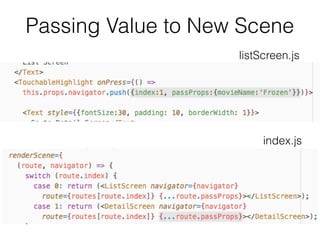
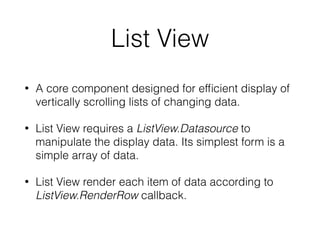
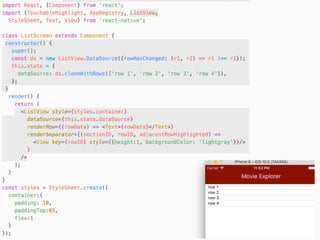
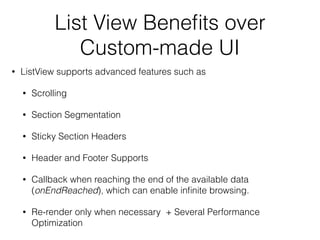
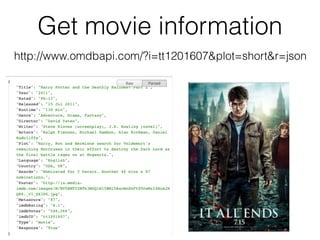
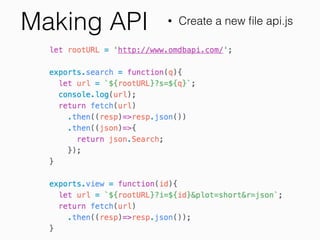
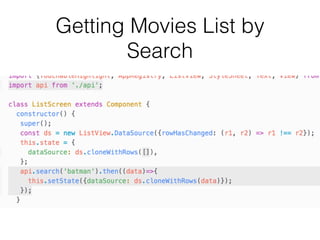
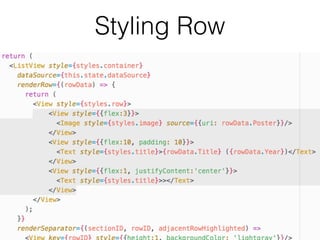
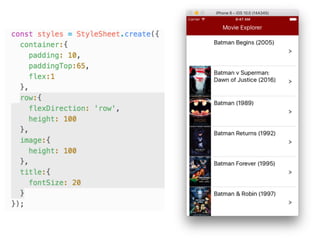


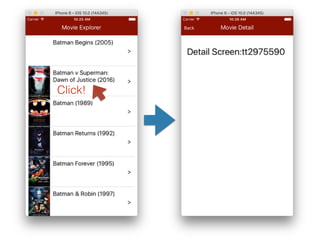
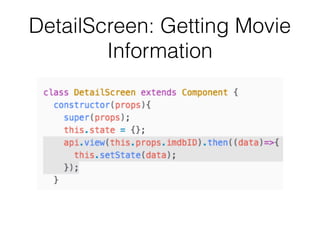
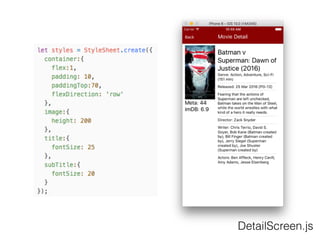

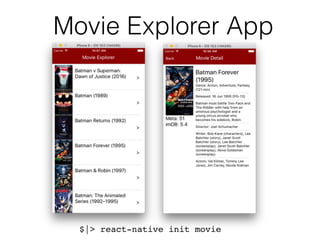
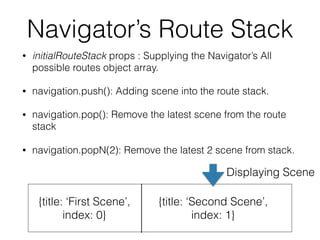
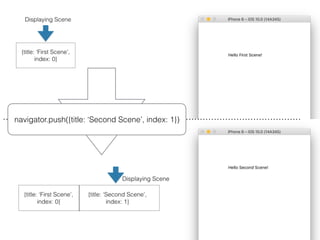
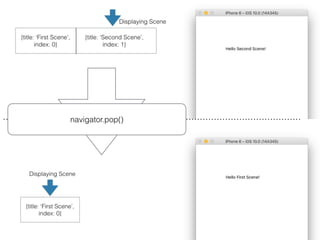
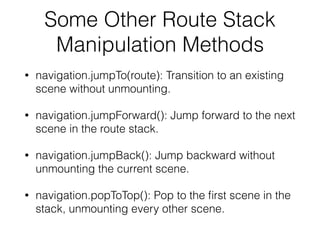
The document discusses how to build a movie explorer app using React Native and the Navigator component. It covers setting up the basic navigator with initial and render scene functions. It then discusses adding multiple scenes, manipulating the route stack, adding navigation bars, and transitions. It also covers splitting code into separate scene components, passing data between scenes, using the ListView component to display search results, making API calls to the OMDb API, and displaying detailed movie information in a second scene.


![[React Native Tutorial] Lecture 5: Input and State](https://cdn.slidesharecdn.com/ss_thumbnails/l5-react-native-input-state-160913041941-thumbnail.jpg?width=640&height=640&fit=bounds)
![[React-Native Tutorial 10] Camera Roll / Gallery / Camera / Native Modules by...](https://cdn.slidesharecdn.com/ss_thumbnails/l10-cameraroll-selfiescoreboard-161101033101-thumbnail.jpg?width=640&height=640&fit=bounds)
![[React Native Tutorial] Lecture 6: Component, Props, and Network](https://cdn.slidesharecdn.com/ss_thumbnails/l6-component-prop-network-160920050452-thumbnail.jpg?width=640&height=640&fit=bounds)


![[Lecture 3] AI and Deep Learning: Logistic Regression (Coding)](https://cdn.slidesharecdn.com/ss_thumbnails/lecture3empty-180216132805-thumbnail.jpg?width=640&height=640&fit=bounds)
![[Lecture 4] AI and Deep Learning: Neural Network (Theory)](https://cdn.slidesharecdn.com/ss_thumbnails/lecture4ink-180216131712-thumbnail.jpg?width=640&height=640&fit=bounds)
![[Lecture 2] AI and Deep Learning: Logistic Regression (Theory)](https://cdn.slidesharecdn.com/ss_thumbnails/lecture2-ink-180216131533-thumbnail.jpg?width=640&height=640&fit=bounds)