Download as PDF, PPTX
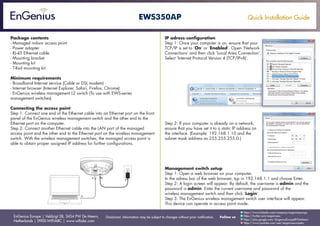
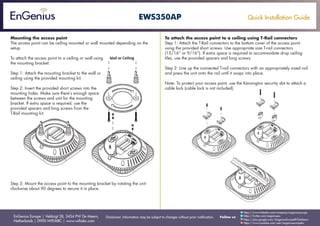
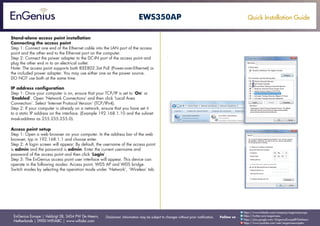

This document provides installation instructions for the EnGenius EWS350AP managed indoor access point. It describes how to connect the access point to a computer or EnGenius wireless management switch to configure it. It also explains how to mount the access point to a wall or ceiling using the included mounting bracket or T-rail connectors. Setup steps include configuring the computer's IP address, logging into the access point's web interface using the default credentials, and selecting the access point operation mode.


