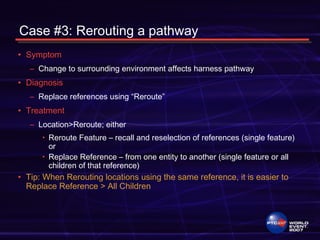
SlideShare a Scribd company logo
How to Perform Surgery and
not Triage when Modifying your
Harness Assembly
Cassandra Kemp, CeDeL Solutions LLC
Pete Pickett II, Mercury Mercruiser
Triage vs. Surgery
• Triage
– Emergency situation/ Unplanned Event
– Limited time to assess and prioritize the problem
– Shortcuts/Short term
– Not much skill involved
– Not considering downstream issues
• Surgery
– Planned Event/Timely
– Applying the best solution through diagnosis
– Trained resource with advanced skills
– Precise treatment manual or instrumental treatment
– Lifesaving (Time saving)
Common Changes –
Modifying a Harness
• Synchronizing Logical
References
• Replacing connector models
• Rerouting/Redefining
pathways
• Splitting a wire/cable
• Adjusting Bundles
• Considerations to
Downstream Deliverables
• RESOLVE MODE!
Understanding failures
Case# 1: Synchronizing Logical References
• Symptom
– Connectivity and/or parameters have changed in the 2D
schematic
• Diagnosis
– Update logical references from an modified/new RSD diagram
• Treatment
– Import new XML and Logical Ref > Compare (WAS-IS)
– Update property information Logical Reference>Update
– Automatic changes (Requires Regeneration Only)
• Wire names, spool changes*, component properties
– Manual Changes (Requires action)
• Create features, Delete segments, manual/autoroute,
Designate
Spool Change
Connectivity Change
Wire Name Change
Component Parameter
Ref Des Change
Case #2: Replacing A Connector Model
• Symptom
– Connector model has changed which affects routed segments
• Diagnosis
– Replace the connector and redefine routing references
• Treatment
– Automatic replacement
• Connector>Replace> select family table or interchange group
– Manual replacement
• Hide original connector and assemble new connector
• Reroute locations references to new connector
• Delete routed portion to the ENTRY csys
• Suppress original connector to detect children then delete if none
• Designate and Update connector and manually/auto route
• Tip: Family table connectors are the easiest to replace
Case 2 Demo
Reducing your Risk Factors
Component Creation
• Datum Axis off end of each component
on a sketched datum curve.
• Use Component Interfaces for
connectors. Axis as one constraint if
necessary.
• For terminals and seals, consider making
the assemblies flexible or use family
tables
• Consider UDF features in the skeleton
reference in space
Case #3: Rerouting a pathway
• Symptom
– Change to surrounding environment affects harness pathway
• Diagnosis
– Replace references using “Reroute”
• Treatment
– Location>Reroute; either
• Reroute Feature – recall and reselection of references (single feature)
or
• Replace Reference – from one entity to another (single feature or all
children of that reference)
• Tip: When Rerouting locations using the same reference, it is easier to
Replace Reference > All Children
Case #4: Redefining a pathway
• Symptom
– Diverging pathways need to be consolidated into one pathway
• Diagnosis
• Redefine locations on the pathway
• Treatment
– Determine the type of location created Info > Location
– Select the location and redefine to an existing location
• Location> Redefine> Location
– Repeat for each location until the paths converge
• Tip: Use Location>Reroute when you are only replacing
references and use Location>Redefine to change the type of
location as well as the references
Case 3 and 4 Demo
Case 5: Splitting a wire/cable
• Symptom
– Diagram changes require a routed wire to be split into two wires
and connected to an inline component.
• Diagnosis
– Use Split functionality to split wire and route to inline component
• Treatment
– Under Modify > Split cables > Select the wire > Enter names for
the segments
– Insert new connector > AutoDesignate and Logical Ref > Update
– Autoroute the wires to the connector
Tip: If you name the wire segments incorrectly, then use Modify >
Parameters to correct the names
Case 5 Demo
Case #6: Adjusting Bundles
• Symptom
– Wires/Cable needs to be removed from an existing bundle and
routed into another bundle
• Diagnosis
– Remove wires from bundle using Mod Bundle Functionality
• Treatment
– Modify > Mod Bundle > Select bundle > Extract cable > Select
wire/cable to remove from the pick list
– Modify > Mod Bundle > Select bundle > Add cable > Select
wire/cable to add from the pick list
• Tip: When removing wires from a bundle, they may not follow
the same orientation prior to bundling
Case #7: Adjusting Bundles
• Symptom
– Bundle needs to be removed but all the contents (wires/cables)
need to remain routed
• Diagnosis
– Delete bundle but not bundle contents
• Treatment
– May consider changing Tubing Bundle Sheath to Shrink Bundle
Sheath
– Feature > Delete > Del Feature > Select bundle id from Model tree
or Use Find
• Tip: If you select the bundle from the model then make sure to
select the Cable: Bundle and not Seg:Cable:Bundle to
automatically extract the wires/cables from the bundle
Case 6 and 7 Demo
Consideration to Downstream Deliverables
The flatten harness and flatten harness drawing are directly
related to the 3D harness part, therefore:
• Do not flatten the network.
– config option: fan_with_network no (default value is set to yes)
• Always create a 3D note on the first set start point
• Changing parameters, references or adding location does not
negatively affect the flattened harness
• Use Info > Flat Status to detect any changes
• Deleting and routing new segments will require reflattening and
recreation of created or shown dimensions
• Tip: Redefining rather than removing will minimize reflattening
Resolve Mode for Harness
• What are common problems?
• Missing References
• Minimum Bend Radius
• What happen when a harness feature fails
– Pro/E launches Resolve Mode
– Resolve by Undo only works for dimensional changes
– Problem must be resolved before a Save
• Cont’d…
Resolve Mode for Harness (cont’d)
• Troubleshooting the model / Interpreting the symptoms
– Read the resolve dialog box
– Always investigate to examine any changes in model and view
parent/child references
– Quick Fix vs. Fix Model
• Tip: Avoid Resolve model and harness failure by using robust
references and routing with the material in mind
Resolve Mode – Exceed Min Bend Radius
• Investigate the change:
– Investigate > Fail Geom > Item Info
• Resolve the problem:
– Fix Model > Application > Cabling > Spools > Modify the min
bend radius > Regenerate
– Fix Model > Application > Cabling > Location > Move
Resolve Mode – Missing References
• Investigate the change:
– Investigate > Show Ref
• Resolve the problem:
– Quick Fix > Reroute > Missing Ref>All children
• Tip: WF 4.0 Freezes failed locations
Prognosis
• You are on your way to a Road
of Recovery
• Welcome design changes for
your harnesses
• Practice Precision
• Save Time! Resolve don’t
Recreate
• Keep up with the latest
datecodes for software fixes
• Happy Routing!
Questions & Answers
• Resolve mode
– Common problems – Missing reference, cannot make minimum bend
radius
– Regenerate for failure
– Reading and exploring the problem using the resolve mode interfaces –
Dialog box-Missing References
– Resolve issue – Investigate > Show Ref
– Quick Fix > Reroute > Missing Ref > All Children
– Mapkey import changes – Resolve Mode- Min bend radius
– Fix Model > Application > Cabling > Spools > Modify the min bend radius
> Regenerate
– Fix Model > Application > Cabling > Location > Move
Downstream Deliverables Demo

More Related Content

Viewers also liked

Wiring harness
Wiring harnessWiring harness
Wiring harness
ashishkr.sharma
 
Eat 105 Chapter 3
Eat 105  Chapter 3Eat 105  Chapter 3
Airfoil terminology
Airfoil terminologyAirfoil terminology
Airfoil terminology
Smart Vino
 
Basics on airfoils and lift generation
Basics on airfoils and lift generationBasics on airfoils and lift generation
Basics on airfoils and lift generation
mayawwo
 
Electrical wiring BY Jemish
Electrical wiring BY JemishElectrical wiring BY Jemish
Electrical wiring BY Jemish
Goti Jemish
 
wiring Part 3: wires & cables
wiring Part 3: wires & cableswiring Part 3: wires & cables
wiring Part 3: wires & cables
vigyanashram
 
Aircraft control systems
Aircraft control systemsAircraft control systems
Aircraft control systems
Sanjay Singh
 
Basic aircraft control system
Basic aircraft control systemBasic aircraft control system
Basic aircraft control system
Aeronautical Division
 

Viewers also liked (8)

Wiring harness
Wiring harnessWiring harness
Wiring harness
 
Eat 105 Chapter 3
Eat 105  Chapter 3Eat 105  Chapter 3
Eat 105 Chapter 3
 
Airfoil terminology
Airfoil terminologyAirfoil terminology
Airfoil terminology
 
Basics on airfoils and lift generation
Basics on airfoils and lift generationBasics on airfoils and lift generation
Basics on airfoils and lift generation
 
Electrical wiring BY Jemish
Electrical wiring BY JemishElectrical wiring BY Jemish
Electrical wiring BY Jemish
 
wiring Part 3: wires & cables
wiring Part 3: wires & cableswiring Part 3: wires & cables
wiring Part 3: wires & cables
 
Aircraft control systems
Aircraft control systemsAircraft control systems
Aircraft control systems
 
Basic aircraft control system
Basic aircraft control systemBasic aircraft control system
Basic aircraft control system
 

Similar to PTCUSER2007_kemp_pickett_final_mk

Electrical and mechanical routing theory concepts using UG-NX
Electrical and mechanical routing theory concepts using UG-NXElectrical and mechanical routing theory concepts using UG-NX
Electrical and mechanical routing theory concepts using UG-NX
RAVINDRASHINDE59
 
Machine Learning
Machine LearningMachine Learning
Machine Learning
Girish Khanzode
 
Leveraging Feature Selection Within TreeNet
Leveraging Feature Selection Within TreeNetLeveraging Feature Selection Within TreeNet
Leveraging Feature Selection Within TreeNet
agdavis
 
Cassandra from the trenches: migrating Netflix
Cassandra from the trenches: migrating NetflixCassandra from the trenches: migrating Netflix
Cassandra from the trenches: migrating Netflix
Jason Brown
 
Diode Equivalent Circuits.ppt
Diode Equivalent Circuits.pptDiode Equivalent Circuits.ppt
Diode Equivalent Circuits.ppt
Puvaneswari5
 
2009 training - tim m - object oriented programming
2009   training - tim m - object oriented programming2009   training - tim m - object oriented programming
2009 training - tim m - object oriented programming
Tim Mahy
 
Using multiple Feature Models to specify configuration options for Electrical...
Using multiple Feature Models to specify configuration options for Electrical...Using multiple Feature Models to specify configuration options for Electrical...
Using multiple Feature Models to specify configuration options for Electrical...
Jaime Chavarriaga
 
Clean Code
Clean CodeClean Code
Clean Code
swaraj Patil
 
Developing Breakout Models in FEMAP (Includes Tutorial Walk-throughs)
Developing Breakout Models in FEMAP (Includes Tutorial Walk-throughs)Developing Breakout Models in FEMAP (Includes Tutorial Walk-throughs)
Developing Breakout Models in FEMAP (Includes Tutorial Walk-throughs)
Aswin John
 
Advancements in Phased Array Scan Planning
Advancements in Phased Array Scan PlanningAdvancements in Phased Array Scan Planning
Advancements in Phased Array Scan Planning
Olympus IMS
 
Chap013.pptx
Chap013.pptxChap013.pptx
Chap013.pptx
FilizMizrak
 
Refactoring: Improving the design of existing code. Chapter 6.
Refactoring: Improving the design of existing code. Chapter 6.Refactoring: Improving the design of existing code. Chapter 6.
Refactoring: Improving the design of existing code. Chapter 6.
Andrés Callejas González
 
Individual project
Individual projectIndividual project
Individual project
Minu Pradeep
 
Part 3 Practical CFD(1).pdf
Part 3 Practical CFD(1).pdfPart 3 Practical CFD(1).pdf
Part 3 Practical CFD(1).pdf
SajawalNawaz5
 
CART Classification and Regression Trees Experienced User Guide
CART Classification and Regression Trees Experienced User GuideCART Classification and Regression Trees Experienced User Guide
CART Classification and Regression Trees Experienced User Guide
Salford Systems
 
17.INTRODUCTION TO SCHEMA REFINEMENT.pptx
17.INTRODUCTION TO SCHEMA REFINEMENT.pptx17.INTRODUCTION TO SCHEMA REFINEMENT.pptx
17.INTRODUCTION TO SCHEMA REFINEMENT.pptx
AshokRachapalli1
 
SKILLWISE-SSIS DESIGN PATTERN FOR DATA WAREHOUSING
SKILLWISE-SSIS DESIGN PATTERN FOR DATA WAREHOUSINGSKILLWISE-SSIS DESIGN PATTERN FOR DATA WAREHOUSING
SKILLWISE-SSIS DESIGN PATTERN FOR DATA WAREHOUSING
Skillwise Group
 
Code Smells and Refactoring - Satyajit Dey & Ashif Iqbal
Code Smells and Refactoring - Satyajit Dey & Ashif IqbalCode Smells and Refactoring - Satyajit Dey & Ashif Iqbal
Code Smells and Refactoring - Satyajit Dey & Ashif Iqbal
Cefalo
 
Distribution System Planning.pptx
Distribution System Planning.pptxDistribution System Planning.pptx
Distribution System Planning.pptx
AVINASHBHARVE
 
Part 1_Methods for mechanically analysing a solid structure(1).pdf
Part 1_Methods for mechanically analysing a solid structure(1).pdfPart 1_Methods for mechanically analysing a solid structure(1).pdf
Part 1_Methods for mechanically analysing a solid structure(1).pdf
SajawalNawaz5
 

Similar to PTCUSER2007_kemp_pickett_final_mk (20)

Electrical and mechanical routing theory concepts using UG-NX
Electrical and mechanical routing theory concepts using UG-NXElectrical and mechanical routing theory concepts using UG-NX
Electrical and mechanical routing theory concepts using UG-NX
 
Machine Learning
Machine LearningMachine Learning
Machine Learning
 
Leveraging Feature Selection Within TreeNet
Leveraging Feature Selection Within TreeNetLeveraging Feature Selection Within TreeNet
Leveraging Feature Selection Within TreeNet
 
Cassandra from the trenches: migrating Netflix
Cassandra from the trenches: migrating NetflixCassandra from the trenches: migrating Netflix
Cassandra from the trenches: migrating Netflix
 
Diode Equivalent Circuits.ppt
Diode Equivalent Circuits.pptDiode Equivalent Circuits.ppt
Diode Equivalent Circuits.ppt
 
2009 training - tim m - object oriented programming
2009   training - tim m - object oriented programming2009   training - tim m - object oriented programming
2009 training - tim m - object oriented programming
 
Using multiple Feature Models to specify configuration options for Electrical...
Using multiple Feature Models to specify configuration options for Electrical...Using multiple Feature Models to specify configuration options for Electrical...
Using multiple Feature Models to specify configuration options for Electrical...
 
Clean Code
Clean CodeClean Code
Clean Code
 
Developing Breakout Models in FEMAP (Includes Tutorial Walk-throughs)
Developing Breakout Models in FEMAP (Includes Tutorial Walk-throughs)Developing Breakout Models in FEMAP (Includes Tutorial Walk-throughs)
Developing Breakout Models in FEMAP (Includes Tutorial Walk-throughs)
 
Advancements in Phased Array Scan Planning
Advancements in Phased Array Scan PlanningAdvancements in Phased Array Scan Planning
Advancements in Phased Array Scan Planning
 
Chap013.pptx
Chap013.pptxChap013.pptx
Chap013.pptx
 
Refactoring: Improving the design of existing code. Chapter 6.
Refactoring: Improving the design of existing code. Chapter 6.Refactoring: Improving the design of existing code. Chapter 6.
Refactoring: Improving the design of existing code. Chapter 6.
 
Individual project
Individual projectIndividual project
Individual project
 
Part 3 Practical CFD(1).pdf
Part 3 Practical CFD(1).pdfPart 3 Practical CFD(1).pdf
Part 3 Practical CFD(1).pdf
 
CART Classification and Regression Trees Experienced User Guide
CART Classification and Regression Trees Experienced User GuideCART Classification and Regression Trees Experienced User Guide
CART Classification and Regression Trees Experienced User Guide
 
17.INTRODUCTION TO SCHEMA REFINEMENT.pptx
17.INTRODUCTION TO SCHEMA REFINEMENT.pptx17.INTRODUCTION TO SCHEMA REFINEMENT.pptx
17.INTRODUCTION TO SCHEMA REFINEMENT.pptx
 
SKILLWISE-SSIS DESIGN PATTERN FOR DATA WAREHOUSING
SKILLWISE-SSIS DESIGN PATTERN FOR DATA WAREHOUSINGSKILLWISE-SSIS DESIGN PATTERN FOR DATA WAREHOUSING
SKILLWISE-SSIS DESIGN PATTERN FOR DATA WAREHOUSING
 
Code Smells and Refactoring - Satyajit Dey & Ashif Iqbal
Code Smells and Refactoring - Satyajit Dey & Ashif IqbalCode Smells and Refactoring - Satyajit Dey & Ashif Iqbal
Code Smells and Refactoring - Satyajit Dey & Ashif Iqbal
 
Distribution System Planning.pptx
Distribution System Planning.pptxDistribution System Planning.pptx
Distribution System Planning.pptx
 
Part 1_Methods for mechanically analysing a solid structure(1).pdf
Part 1_Methods for mechanically analysing a solid structure(1).pdfPart 1_Methods for mechanically analysing a solid structure(1).pdf
Part 1_Methods for mechanically analysing a solid structure(1).pdf
 

PTCUSER2007_kemp_pickett_final_mk

  • 1. How to Perform Surgery and not Triage when Modifying your Harness Assembly Cassandra Kemp, CeDeL Solutions LLC Pete Pickett II, Mercury Mercruiser
  • 2. Triage vs. Surgery • Triage – Emergency situation/ Unplanned Event – Limited time to assess and prioritize the problem – Shortcuts/Short term – Not much skill involved – Not considering downstream issues • Surgery – Planned Event/Timely – Applying the best solution through diagnosis – Trained resource with advanced skills – Precise treatment manual or instrumental treatment – Lifesaving (Time saving)
  • 3. Common Changes – Modifying a Harness • Synchronizing Logical References • Replacing connector models • Rerouting/Redefining pathways • Splitting a wire/cable • Adjusting Bundles • Considerations to Downstream Deliverables • RESOLVE MODE! Understanding failures
  • 4. Case# 1: Synchronizing Logical References • Symptom – Connectivity and/or parameters have changed in the 2D schematic • Diagnosis – Update logical references from an modified/new RSD diagram • Treatment – Import new XML and Logical Ref > Compare (WAS-IS) – Update property information Logical Reference>Update – Automatic changes (Requires Regeneration Only) • Wire names, spool changes*, component properties – Manual Changes (Requires action) • Create features, Delete segments, manual/autoroute, Designate
  • 5. Spool Change Connectivity Change Wire Name Change Component Parameter Ref Des Change
  • 6. Case #2: Replacing A Connector Model • Symptom – Connector model has changed which affects routed segments • Diagnosis – Replace the connector and redefine routing references • Treatment – Automatic replacement • Connector>Replace> select family table or interchange group – Manual replacement • Hide original connector and assemble new connector • Reroute locations references to new connector • Delete routed portion to the ENTRY csys • Suppress original connector to detect children then delete if none • Designate and Update connector and manually/auto route • Tip: Family table connectors are the easiest to replace
  • 8. Reducing your Risk Factors Component Creation • Datum Axis off end of each component on a sketched datum curve. • Use Component Interfaces for connectors. Axis as one constraint if necessary. • For terminals and seals, consider making the assemblies flexible or use family tables • Consider UDF features in the skeleton reference in space
  • 9. Case #3: Rerouting a pathway • Symptom – Change to surrounding environment affects harness pathway • Diagnosis – Replace references using “Reroute” • Treatment – Location>Reroute; either • Reroute Feature – recall and reselection of references (single feature) or • Replace Reference – from one entity to another (single feature or all children of that reference) • Tip: When Rerouting locations using the same reference, it is easier to Replace Reference > All Children
  • 10. Case #4: Redefining a pathway • Symptom – Diverging pathways need to be consolidated into one pathway • Diagnosis • Redefine locations on the pathway • Treatment – Determine the type of location created Info > Location – Select the location and redefine to an existing location • Location> Redefine> Location – Repeat for each location until the paths converge • Tip: Use Location>Reroute when you are only replacing references and use Location>Redefine to change the type of location as well as the references
  • 11. Case 3 and 4 Demo
  • 12. Case 5: Splitting a wire/cable • Symptom – Diagram changes require a routed wire to be split into two wires and connected to an inline component. • Diagnosis – Use Split functionality to split wire and route to inline component • Treatment – Under Modify > Split cables > Select the wire > Enter names for the segments – Insert new connector > AutoDesignate and Logical Ref > Update – Autoroute the wires to the connector Tip: If you name the wire segments incorrectly, then use Modify > Parameters to correct the names
  • 14. Case #6: Adjusting Bundles • Symptom – Wires/Cable needs to be removed from an existing bundle and routed into another bundle • Diagnosis – Remove wires from bundle using Mod Bundle Functionality • Treatment – Modify > Mod Bundle > Select bundle > Extract cable > Select wire/cable to remove from the pick list – Modify > Mod Bundle > Select bundle > Add cable > Select wire/cable to add from the pick list • Tip: When removing wires from a bundle, they may not follow the same orientation prior to bundling
  • 15. Case #7: Adjusting Bundles • Symptom – Bundle needs to be removed but all the contents (wires/cables) need to remain routed • Diagnosis – Delete bundle but not bundle contents • Treatment – May consider changing Tubing Bundle Sheath to Shrink Bundle Sheath – Feature > Delete > Del Feature > Select bundle id from Model tree or Use Find • Tip: If you select the bundle from the model then make sure to select the Cable: Bundle and not Seg:Cable:Bundle to automatically extract the wires/cables from the bundle
  • 16. Case 6 and 7 Demo
  • 17. Consideration to Downstream Deliverables The flatten harness and flatten harness drawing are directly related to the 3D harness part, therefore: • Do not flatten the network. – config option: fan_with_network no (default value is set to yes) • Always create a 3D note on the first set start point • Changing parameters, references or adding location does not negatively affect the flattened harness • Use Info > Flat Status to detect any changes • Deleting and routing new segments will require reflattening and recreation of created or shown dimensions • Tip: Redefining rather than removing will minimize reflattening
  • 18. Resolve Mode for Harness • What are common problems? • Missing References • Minimum Bend Radius • What happen when a harness feature fails – Pro/E launches Resolve Mode – Resolve by Undo only works for dimensional changes – Problem must be resolved before a Save • Cont’d…
  • 19. Resolve Mode for Harness (cont’d) • Troubleshooting the model / Interpreting the symptoms – Read the resolve dialog box – Always investigate to examine any changes in model and view parent/child references – Quick Fix vs. Fix Model • Tip: Avoid Resolve model and harness failure by using robust references and routing with the material in mind
  • 20. Resolve Mode – Exceed Min Bend Radius • Investigate the change: – Investigate > Fail Geom > Item Info • Resolve the problem: – Fix Model > Application > Cabling > Spools > Modify the min bend radius > Regenerate – Fix Model > Application > Cabling > Location > Move
  • 21. Resolve Mode – Missing References • Investigate the change: – Investigate > Show Ref • Resolve the problem: – Quick Fix > Reroute > Missing Ref>All children • Tip: WF 4.0 Freezes failed locations
  • 22. Prognosis • You are on your way to a Road of Recovery • Welcome design changes for your harnesses • Practice Precision • Save Time! Resolve don’t Recreate • Keep up with the latest datecodes for software fixes • Happy Routing!
  • 24.
  • 25. • Resolve mode – Common problems – Missing reference, cannot make minimum bend radius – Regenerate for failure – Reading and exploring the problem using the resolve mode interfaces – Dialog box-Missing References – Resolve issue – Investigate > Show Ref – Quick Fix > Reroute > Missing Ref > All Children – Mapkey import changes – Resolve Mode- Min bend radius – Fix Model > Application > Cabling > Spools > Modify the min bend radius > Regenerate – Fix Model > Application > Cabling > Location > Move Downstream Deliverables Demo

Editor's Notes

  1. Welcome to How to Perform Surgery and not Triage when modifying your Harness Assembly. Every design undergoes change throughout the design cycle and it important to understand methods to Redefine rather than Recreate so that downstream dependencies in the flat harness and drawing are preserved. This presentation is designed to provide common cases and methods to incorporating changes reliably in your Pro/Cabling models regardless of your design techniques. Pro/Cabling is a module designed to used 2D schematic data from RSD to digitally design 3D harness in Pro/Engineer. Quite often incorporating changes in your harness model is dependent on how the harness was designed and routed so we will equip you with tools on how to handle most changes and how to reduce your risk factors. I ask that you hold your questions until the end of the presentation where we will have time for Q&A.
  2. Before we begin, we will highlight the differences between Triage and Surgery and how the latter will improve responding to change in the harness assembly. Triage is a system used by medical or emergency personnel to rapidly provide assistance to an unplanned situation. In relation to the harness, incorporating changes to the harness in a triage situation would require deletion and recreation rather than looking at the options and saving/redefining the harness. Surgery situation tends to be a planned event that is done with skill and precision. We will show you how diagnosis the symptoms and the best treatment to apply.
  3. First we will provide an overview of common changes : Pro/Cabling is a module designed to used 2D schematic data from RSD to digitally design 3D harness in Pro/Engineer. Synchronizing Logical Data Updating model to an existing diagram or new diagram Replacing connector models Automatic and Manual replacements Splitting a wire or cable Rerouting/Redefining pathways Redefining/Rerouting locations Removing/Adding locations Adjusting bundles Extracting and adding from one bundle to another Deleting a bundle and keeping the contents Considerations to the flatten harness RESOLVE MODE! Understanding the failure
  4. Let’s walk through how our Comparison window would appear after each type of logical change.
  5. Family table connectors are the easiest to replace since the feature ids remain the same so there is no need for references. Interchange groups still have values when having components that are functionally the same but physically different.
  6. Automatic replacement Replace a connector using A family table An interchange assembly Note wires remain attached and ref des update Manual Replacements Assembly new connector Undesignate old connector and redesignate new connector Logical reference Update Reroute location near connector Delete portion to nearest location Manual or Autoroute to connector
  7. Create a Datum Axis off the end of each component to help route the network. Put it on a sketched datum curve. This allows for a direction to help drive the wires Setup Component Interfaces in each connector for quick assembly. Use the axis as one constraint if you need. If you use models for terminals and seals, consider making the assemblies flexible or family table several options. Consider UDf features in the skeleton reference in space
  8. Treatment Location>Reroute and step through either Reroute Feature or Replace References Reroute Feature- allows recall and reselection of references for a single feature Replace Reference –allows a replacement of references from one entity to another for a single feature or all children of that reference
  9. Open harness and redefine reference from the top surface to the side surface. Click Location > Reroute > Replace reference Click Location > Reroute > Reroute feat Redefine pathway Zoom into the diverge pathway Select Info > Location and determine the types of location Click Location > Redefine and select on the location A Select Free Location and change to Location and select an existing locations Select a location that is Free and change it to offset
  10. Open the assembly Make change in schematic Export XML Read in the logical Reference > Compare Split cables > Location > Name 2 Segments Designate connector > AutoRoute
  11. Open the model > Application Cabling Review the bundle (Show a bundle separated) Modify > Mod Bundle > Select bundle > Extract cable > Select wire/cable See the wire extracted Modify > Mod Bundle > Select bundle > Add cable > Select wire/cable Wire has been added to the new bundle.
  12. Let’s discuss the common reasons why harnesses fail. Typically they are driven by three main reasons: Missing references, minimum bend radius is too small or the cable segment is unable to be created because it is missing information. What happens when a harness feature fails? Pro/E launches Resolve Mode. If it was an incorrect dimensional value, the user can use undo changes. Otherwise they are required to fix the problem before he can save. Resolve Mode is an excellent tool to build up your knowledge of Pro/Engineer modeling. It will also determine whether you’re a Pro/E user or a Great Pro/E user. Instead of deleting and re-creating every time you have a problem, you can now simply fix the problem and that will save a lot of time.
  13. Demo Resolve Mode sample is a minimum bend failure. The Failure Diagnostics appears and indicates a cable/bundle segment failed regeneration. After clicking the Resolve Hints, we can further investigate the model and see that the minimum bend radius is violated. The system provides some hints to resolve the problem. We will use Investigate > Failed Geom > Item Info and the violated minimum bend radius will highlight. From this information, you can click Fix Model > Application Cabling> and item modify the spools or the Location. Let’s again demonstration this behavior in Pro/E. The locations will still be visible, however the bundle segment will not appear.
  14. Demo The following demo will demonstrate samples of why a harness launches Resolve Mode. In this case we are missing references. We know this because the Failure Diagnostic shows that the Cable location in part 8045855-003 has failed. If we click on the Resolve Hints, it tells use to INVESTIGATE to Show the References and then use quick fix redefine or reroute to change the references if necessary. WE will click Investigate and Show ref and a Dialog box appears showing the reference that is missing. We will now use Quick Fix Reroute to reroute all the children to the new reference. Let’s demonstrate the steps in Pro/E.
  15. This concludes the Presentation on How to perform Surgery and not Triage when modifying your harness assemblies. You are on your way to the Road of Recovery. Unfortunately