Practical Lecture 2:Advanced Management
of Mechanically Ventilated Adult Patients
2.
2.1 Initiation ofMechanical Ventilation
• Mechanical ventilation is initiated when the patient's
respiratory system fails to maintain adequate gas exchange.
This can result from hypoxemic respiratory failure (Type I)
or hypercapnic respiratory failure (Type II).
• Indications:
• Apnea or impending respiratory arrest
• PaO₂ < 60 mmHg despite supplemental O₂
• PaCO₂ > 50 mmHg with pH < 7.25
• Significant work of breathing, altered mental status, or
shock
3.
• Assess indications:apnea, ARF, PaO2 < 60 mmHg,
PaCO2 > 50 mmHg, pH < 7.25.
• Select mode: Assist Control (AC), Synchronized
Intermittent Mandatory Ventilation (SIMV), or
Pressure Control (PC)
• Set initial parameters: tidal volume (6–8 mL/kg IBW),
RR (12–16), FiO2 (start at 100%), PEEP (5 cmH2O).
• Confirm settings with ABG and chest movement.
• Ensure proper humidification and secure
ETT/tracheostomy.
4.
2.2 Changes andManipulation of Settings
• Ventilator settings must be individualized and adjusted
based on the patient’s ABG values, clinical status, and
mechanical feedback (e.g., compliance, resistance).
• Adjust tidal volume and RR to manage PaCO2 and pH.
• Increase FiO2 or PEEP to improve oxygenation (PaO2).
• Monitor peak and plateau pressures to avoid
barotrauma.
• Use pressure support to aid spontaneous breaths (in
SIMV).
• Wean FiO2 as tolerated to avoid oxygen toxicity.
5.
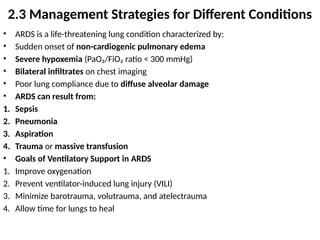
• ARDS isa life-threatening lung condition characterized by:
• Sudden onset of non-cardiogenic pulmonary edema
• Severe hypoxemia (PaO₂/FiO₂ ratio < 300 mmHg)
• Bilateral infiltrates on chest imaging
• Poor lung compliance due to diffuse alveolar damage
• ARDS can result from:
1. Sepsis
2. Pneumonia
3. Aspiration
4. Trauma or massive transfusion
• Goals of Ventilatory Support in ARDS
1. Improve oxygenation
2. Prevent ventilator-induced lung injury (VILI)
3. Minimize barotrauma, volutrauma, and atelectrauma
4. Allow time for lungs to heal
2.3 Management Strategies for Different Conditions
6.
• Lung-Protective VentilationStrategy
🔹 1. Low Tidal Volume (VT)
• Set VT at 4–6 mL/kg of ideal body weight
• Rationale: reduces overdistension of alveoli, lowering risk of volutrauma
• Monitor plateau pressure (Pplat): keep < 30 cmH₂O
🔹 2. High PEEP (Positive End-Expiratory Pressure)
• Prevents alveolar collapse at end-expiration
• Improves functional residual capacity (FRC)
• Often titrated using FiO₂/PEEP tables (e.g., ARDSNet protocols)
• Be cautious of hemodynamic effects (↓ venous return, ↓ CO)
🔹 3. Permissive Hypercapnia
• Allow elevated PaCO₂ and lower pH (as long as pH > 7.20)
• Accepting mild acidosis avoids aggressive ventilation that could injure lungs
• Contraindicated in: ↑ ICP, severe pulmonary hypertension
🔹 4. FiO₂ Titration
• Start at 100%, reduce to maintain SpO₂ 88–95% or PaO₂ 55–80 mmHg
• Combine with increasing PEEP to minimize oxygen toxicity
• Key Monitoring
• SpO₂ and ABGs 2.Peak and plateau pressures 3.Lung compliance 4. Hemodynamic
status 5. Signs of barotrauma (e.g., pneumothorax, subcutaneous emphysema)
7.
2.3 Management Strategiesfor Different Conditions
• 2. COPD Exacerbation:
• Use lower RR, longer expiratory time to prevent air trapping and
auto-PEEP
• May benefit from noninvasive ventilation (NIV)
• 3. Neuromuscular Disease:
• Full ventilatory support often required
• Monitor vital capacity and maximum inspiratory pressure (MIP)
• 4. Cardiogenic Pulmonary Edema:
• Apply PEEP to reduce preload and improve oxygenation
• Diuresis and cardiac support may be needed concurrently
• 5. Postoperative or Trauma Patients:
• Focus on airway protection, lung expansion, and pain control
• Monitor for aspiration, atelectasis, or hemodynamic instability
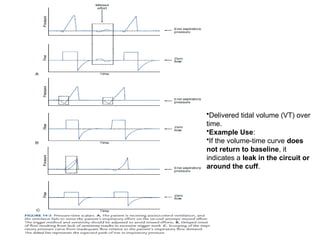
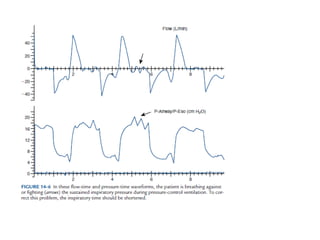
•Delivered tidal volume(VT) over
time.
•Example Use:
•If the volume-time curve does
not return to baseline, it
indicates a leak in the circuit or
around the cuff.
10.
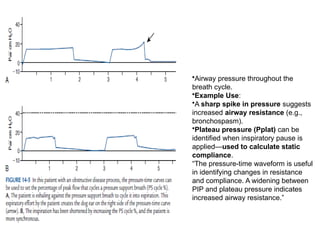
•Airway pressure throughoutthe
breath cycle.
•Example Use:
•A sharp spike in pressure suggests
increased airway resistance (e.g.,
bronchospasm).
•Plateau pressure (Pplat) can be
identified when inspiratory pause is
applied—used to calculate static
compliance.
“The pressure-time waveform is useful
in identifying changes in resistance
and compliance. A widening between
PIP and plateau pressure indicates
increased airway resistance.”
12.
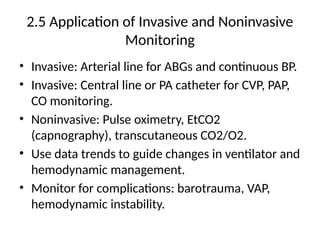
2.5 Application ofInvasive and Noninvasive Monitoring
• Invasive monitoring techniques provide accurate,
continuous, and critical data in the care of
mechanically ventilated patients.
• An arterial line, typically inserted into the radial or
femoral artery, allows for real-time blood pressure
monitoring and facilitates frequent arterial blood
gas (ABG) sampling without repeated needle sticks.
• This is particularly useful in unstable or critically ill
patients.
13.
• Additionally, acentral venous catheter (CVC) provides
access for fluid and medication administration, and
enables monitoring of central venous pressure (CVP),
which reflects right heart preload and fluid status.
• For more comprehensive hemodynamic assessment, a
pulmonary artery (PA) catheter, or Swan-Ganz
catheter, may be used.
• This device allows measurement of pulmonary artery
pressure (PAP), pulmonary capillary wedge pressure
(PCWP), and cardiac output (CO), all of which are
essential in managing patients with cardiopulmonary
dysfunction, such as ARDS or heart failure.
14.
• Noninvasive monitoringmethods offer safer,
continuous alternatives without the risks of vascular
catheterization.
• Pulse oximetry is the most common tool, providing
real-time estimates of arterial oxygen saturation
(SpO₂) and allowing titration of oxygen therapy.
While highly useful, it can be affected by poor
perfusion, motion, or presence of dyshemoglobins.
• Capnography (EtCO₂ monitoring) is another key
noninvasive technique that assesses exhaled CO₂,
reflecting both ventilation and, indirectly, perfusion
status.
15.
• This isespecially valuable in verifying endotracheal
tube placement and tracking ventilatory changes.
• For patients requiring long-term trend monitoring
or in settings where ABGs are less accessible,
transcutaneous monitoring of CO₂ and O₂ provides
a noninvasive method to estimate blood gas values
through the skin using sensors.
• Together, these tools help clinicians assess the
patient's oxygenation, ventilation, and circulatory
status, and guide ventilator adjustments and
interventions accordingly.
16.
2.5 Application ofInvasive and Noninvasive
Monitoring
• Invasive: Arterial line for ABGs and continuous BP.
• Invasive: Central line or PA catheter for CVP, PAP,
CO monitoring.
• Noninvasive: Pulse oximetry, EtCO2
(capnography), transcutaneous CO2/O2.
• Use data trends to guide changes in ventilator and
hemodynamic management.
• Monitor for complications: barotrauma, VAP,
hemodynamic instability.
17.
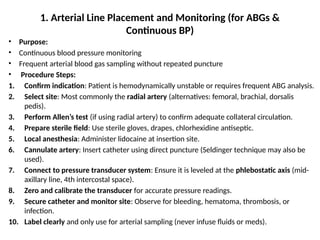
1. Arterial LinePlacement and Monitoring (for ABGs &
Continuous BP)
• Purpose:
• Continuous blood pressure monitoring
• Frequent arterial blood gas sampling without repeated puncture
• Procedure Steps:
1. Confirm indication: Patient is hemodynamically unstable or requires frequent ABG analysis.
2. Select site: Most commonly the radial artery (alternatives: femoral, brachial, dorsalis
pedis).
3. Perform Allen’s test (if using radial artery) to confirm adequate collateral circulation.
4. Prepare sterile field: Use sterile gloves, drapes, chlorhexidine antiseptic.
5. Local anesthesia: Administer lidocaine at insertion site.
6. Cannulate artery: Insert catheter using direct puncture (Seldinger technique may also be
used).
7. Connect to pressure transducer system: Ensure it is leveled at the phlebostatic axis (mid-
axillary line, 4th intercostal space).
8. Zero and calibrate the transducer for accurate pressure readings.
9. Secure catheter and monitor site: Observe for bleeding, hematoma, thrombosis, or
infection.
10. Label clearly and only use for arterial sampling (never infuse fluids or meds).
18.
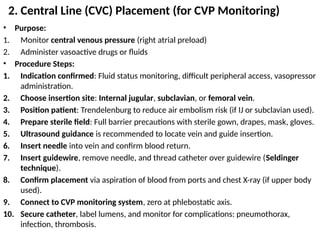
2. Central Line(CVC) Placement (for CVP Monitoring)
• Purpose:
1. Monitor central venous pressure (right atrial preload)
2. Administer vasoactive drugs or fluids
• Procedure Steps:
1. Indication confirmed: Fluid status monitoring, difficult peripheral access, vasopressor
administration.
2. Choose insertion site: Internal jugular, subclavian, or femoral vein.
3. Position patient: Trendelenburg to reduce air embolism risk (if IJ or subclavian used).
4. Prepare sterile field: Full barrier precautions with sterile gown, drapes, mask, gloves.
5. Ultrasound guidance is recommended to locate vein and guide insertion.
6. Insert needle into vein and confirm blood return.
7. Insert guidewire, remove needle, and thread catheter over guidewire (Seldinger
technique).
8. Confirm placement via aspiration of blood from ports and chest X-ray (if upper body
used).
9. Connect to CVP monitoring system, zero at phlebostatic axis.
10. Secure catheter, label lumens, and monitor for complications: pneumothorax,
infection, thrombosis.
19.
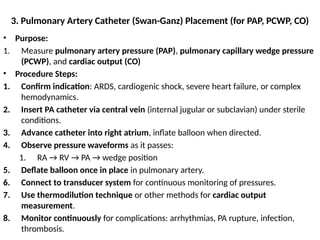
3. Pulmonary ArteryCatheter (Swan-Ganz) Placement (for PAP, PCWP, CO)
• Purpose:
1. Measure pulmonary artery pressure (PAP), pulmonary capillary wedge pressure
(PCWP), and cardiac output (CO)
• Procedure Steps:
1. Confirm indication: ARDS, cardiogenic shock, severe heart failure, or complex
hemodynamics.
2. Insert PA catheter via central vein (internal jugular or subclavian) under sterile
conditions.
3. Advance catheter into right atrium, inflate balloon when directed.
4. Observe pressure waveforms as it passes:
1. RA → RV → PA → wedge position
5. Deflate balloon once in place in pulmonary artery.
6. Connect to transducer system for continuous monitoring of pressures.
7. Use thermodilution technique or other methods for cardiac output
measurement.
8. Monitor continuously for complications: arrhythmias, PA rupture, infection,
thrombosis.
20.
• Important SafetyNotes
1. Use strict aseptic technique to prevent catheter-
related bloodstream infections.
2. Maintain continuous waveform monitoring to
verify catheter position and function.
3. Remove catheters as soon as they are no longer
clinically indicated.
21.
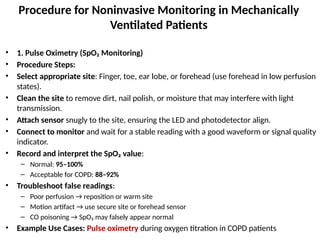
Procedure for NoninvasiveMonitoring in Mechanically
Ventilated Patients
• 1. Pulse Oximetry (SpO₂ Monitoring)
• Procedure Steps:
• Select appropriate site: Finger, toe, ear lobe, or forehead (use forehead in low perfusion
states).
• Clean the site to remove dirt, nail polish, or moisture that may interfere with light
transmission.
• Attach sensor snugly to the site, ensuring the LED and photodetector align.
• Connect to monitor and wait for a stable reading with a good waveform or signal quality
indicator.
• Record and interpret the SpO₂ value:
– Normal: 95–100%
– Acceptable for COPD: 88–92%
• Troubleshoot false readings:
– Poor perfusion → reposition or warm site
– Motion artifact → use secure site or forehead sensor
– CO poisoning → SpO₂ may falsely appear normal
• Example Use Cases: Pulse oximetry during oxygen titration in COPD patients
22.
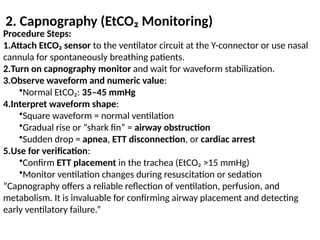
2. Capnography (EtCO₂Monitoring)
Procedure Steps:
1.Attach EtCO₂ sensor to the ventilator circuit at the Y-connector or use nasal
cannula for spontaneously breathing patients.
2.Turn on capnography monitor and wait for waveform stabilization.
3.Observe waveform and numeric value:
•Normal EtCO₂: 35–45 mmHg
4.Interpret waveform shape:
•Square waveform = normal ventilation
•Gradual rise or “shark fin” = airway obstruction
•Sudden drop = apnea, ETT disconnection, or cardiac arrest
5.Use for verification:
•Confirm ETT placement in the trachea (EtCO₂ >15 mmHg)
•Monitor ventilation changes during resuscitation or sedation
“Capnography offers a reliable reflection of ventilation, perfusion, and
metabolism. It is invaluable for confirming airway placement and detecting
early ventilatory failure.”
23.
2.6 Setup andManagement of Non-Invasive
Ventilation (NIV)
• Indications: COPD exacerbation, cardiogenic
pulmonary edema, sleep apnea.
• Contraindications: apnea, facial trauma, inability to
protect airway.
• Initial settings: IPAP 10–15 cmH2O, EPAP 4–6 cmH2O.
• Use full-face or nasal mask; ensure proper seal to
avoid air leaks.
• Monitor tolerance, ABGs, SpO2, and adjust settings as
needed.
24.
2.6 Setup andManagement of Non-Invasive
Ventilation (NIV)
• Non-Invasive Ventilation (NIV) is a method of providing
ventilatory support without the need for an artificial
airway such as an endotracheal tube.
• It is commonly indicated in patients with acute
exacerbations of COPD, cardiogenic pulmonary edema, or
obstructive sleep apnea, and can be delivered via a full-
face or nasal mask.
• Initial settings typically include an inspiratory positive
airway pressure (IPAP) of 10–15 cmH₂O and an expiratory
positive airway pressure (EPAP) of 4–6 cmH₂O.
25.
• Proper maskfitting is crucial to minimize air leaks and
optimize patient comfort.
• Continuous monitoring of respiratory rate, oxygen
saturation, and blood gases is essential to assess
effectiveness and tolerance.
• NIV is contraindicated in cases of apnea, facial trauma, or
inability to protect the airway.
• When applied appropriately, it can reduce the need for
intubation, improve gas exchange, and decrease mortality
in selected patients.