Download as PPSX, PPTX


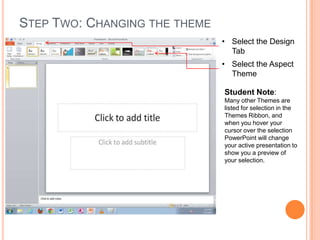
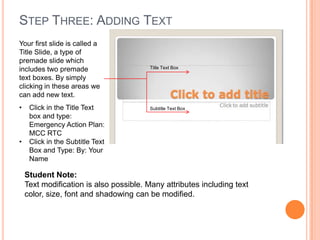
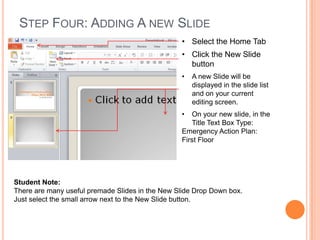


This document provides instructions for creating a basic PowerPoint presentation with the following key points: - It outlines 7 steps to create a new PowerPoint presentation, add text and images, change themes, insert additional slides, add transitions between slides, and save the presentation as a slide show file. - The steps include how to start a new presentation, select a theme, add titles and text to slides, insert images, add more slides, choose a transition effect, and save the file for presentation. - Notes are included under each step to provide additional details about formatting text, choosing from premade slide templates, and selecting different transition effects between slides.


