Downloaded 29 times
![Create a Photo Album (Select [Insert] Tab – [Photo Album] on Ribbon)](https://image.slidesharecdn.com/powerpointstepshandout-091105024733-phpapp01/85/Power-Point-Steps-Handout-2-320.jpg)


![Creating an Interactive Menu (Right-click on selected text, select [Hyperlink])](https://image.slidesharecdn.com/powerpointstepshandout-091105024733-phpapp01/85/Power-Point-Steps-Handout-15-320.jpg)


![Creating an Action Button Menu Draw a rectangle Right-click on rectangle Select Edit Text Type [Menu] – to return to Menu Slide [Next] - to go to the next slide [End] – to go to the last slide](https://image.slidesharecdn.com/powerpointstepshandout-091105024733-phpapp01/85/Power-Point-Steps-Handout-23-320.jpg)


![Creating a Video Slide (Select [When Clicked] – resize video)](https://image.slidesharecdn.com/powerpointstepshandout-091105024733-phpapp01/85/Power-Point-Steps-Handout-27-320.jpg)
![Creating a Video Slide (Select [When Clicked] – resize video)](https://image.slidesharecdn.com/powerpointstepshandout-091105024733-phpapp01/85/Power-Point-Steps-Handout-28-320.jpg)


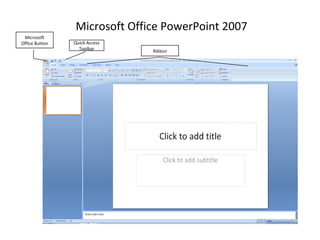
This document provides instructions for creating an interactive photo album and non-linear presentation in Microsoft PowerPoint about the Grand Canyon. The steps include: 1) Creating a photo album by selecting photos from a folder and arranging them on slides. 2) Adding a title slide and rearranging photos. 3) Creating navigation buttons and hyperlinks to allow nonlinear movement between slides about locations, people, geography, vegetation and more. 4) Inserting a video about forming the Grand Canyon and framing it with a drawn shape.