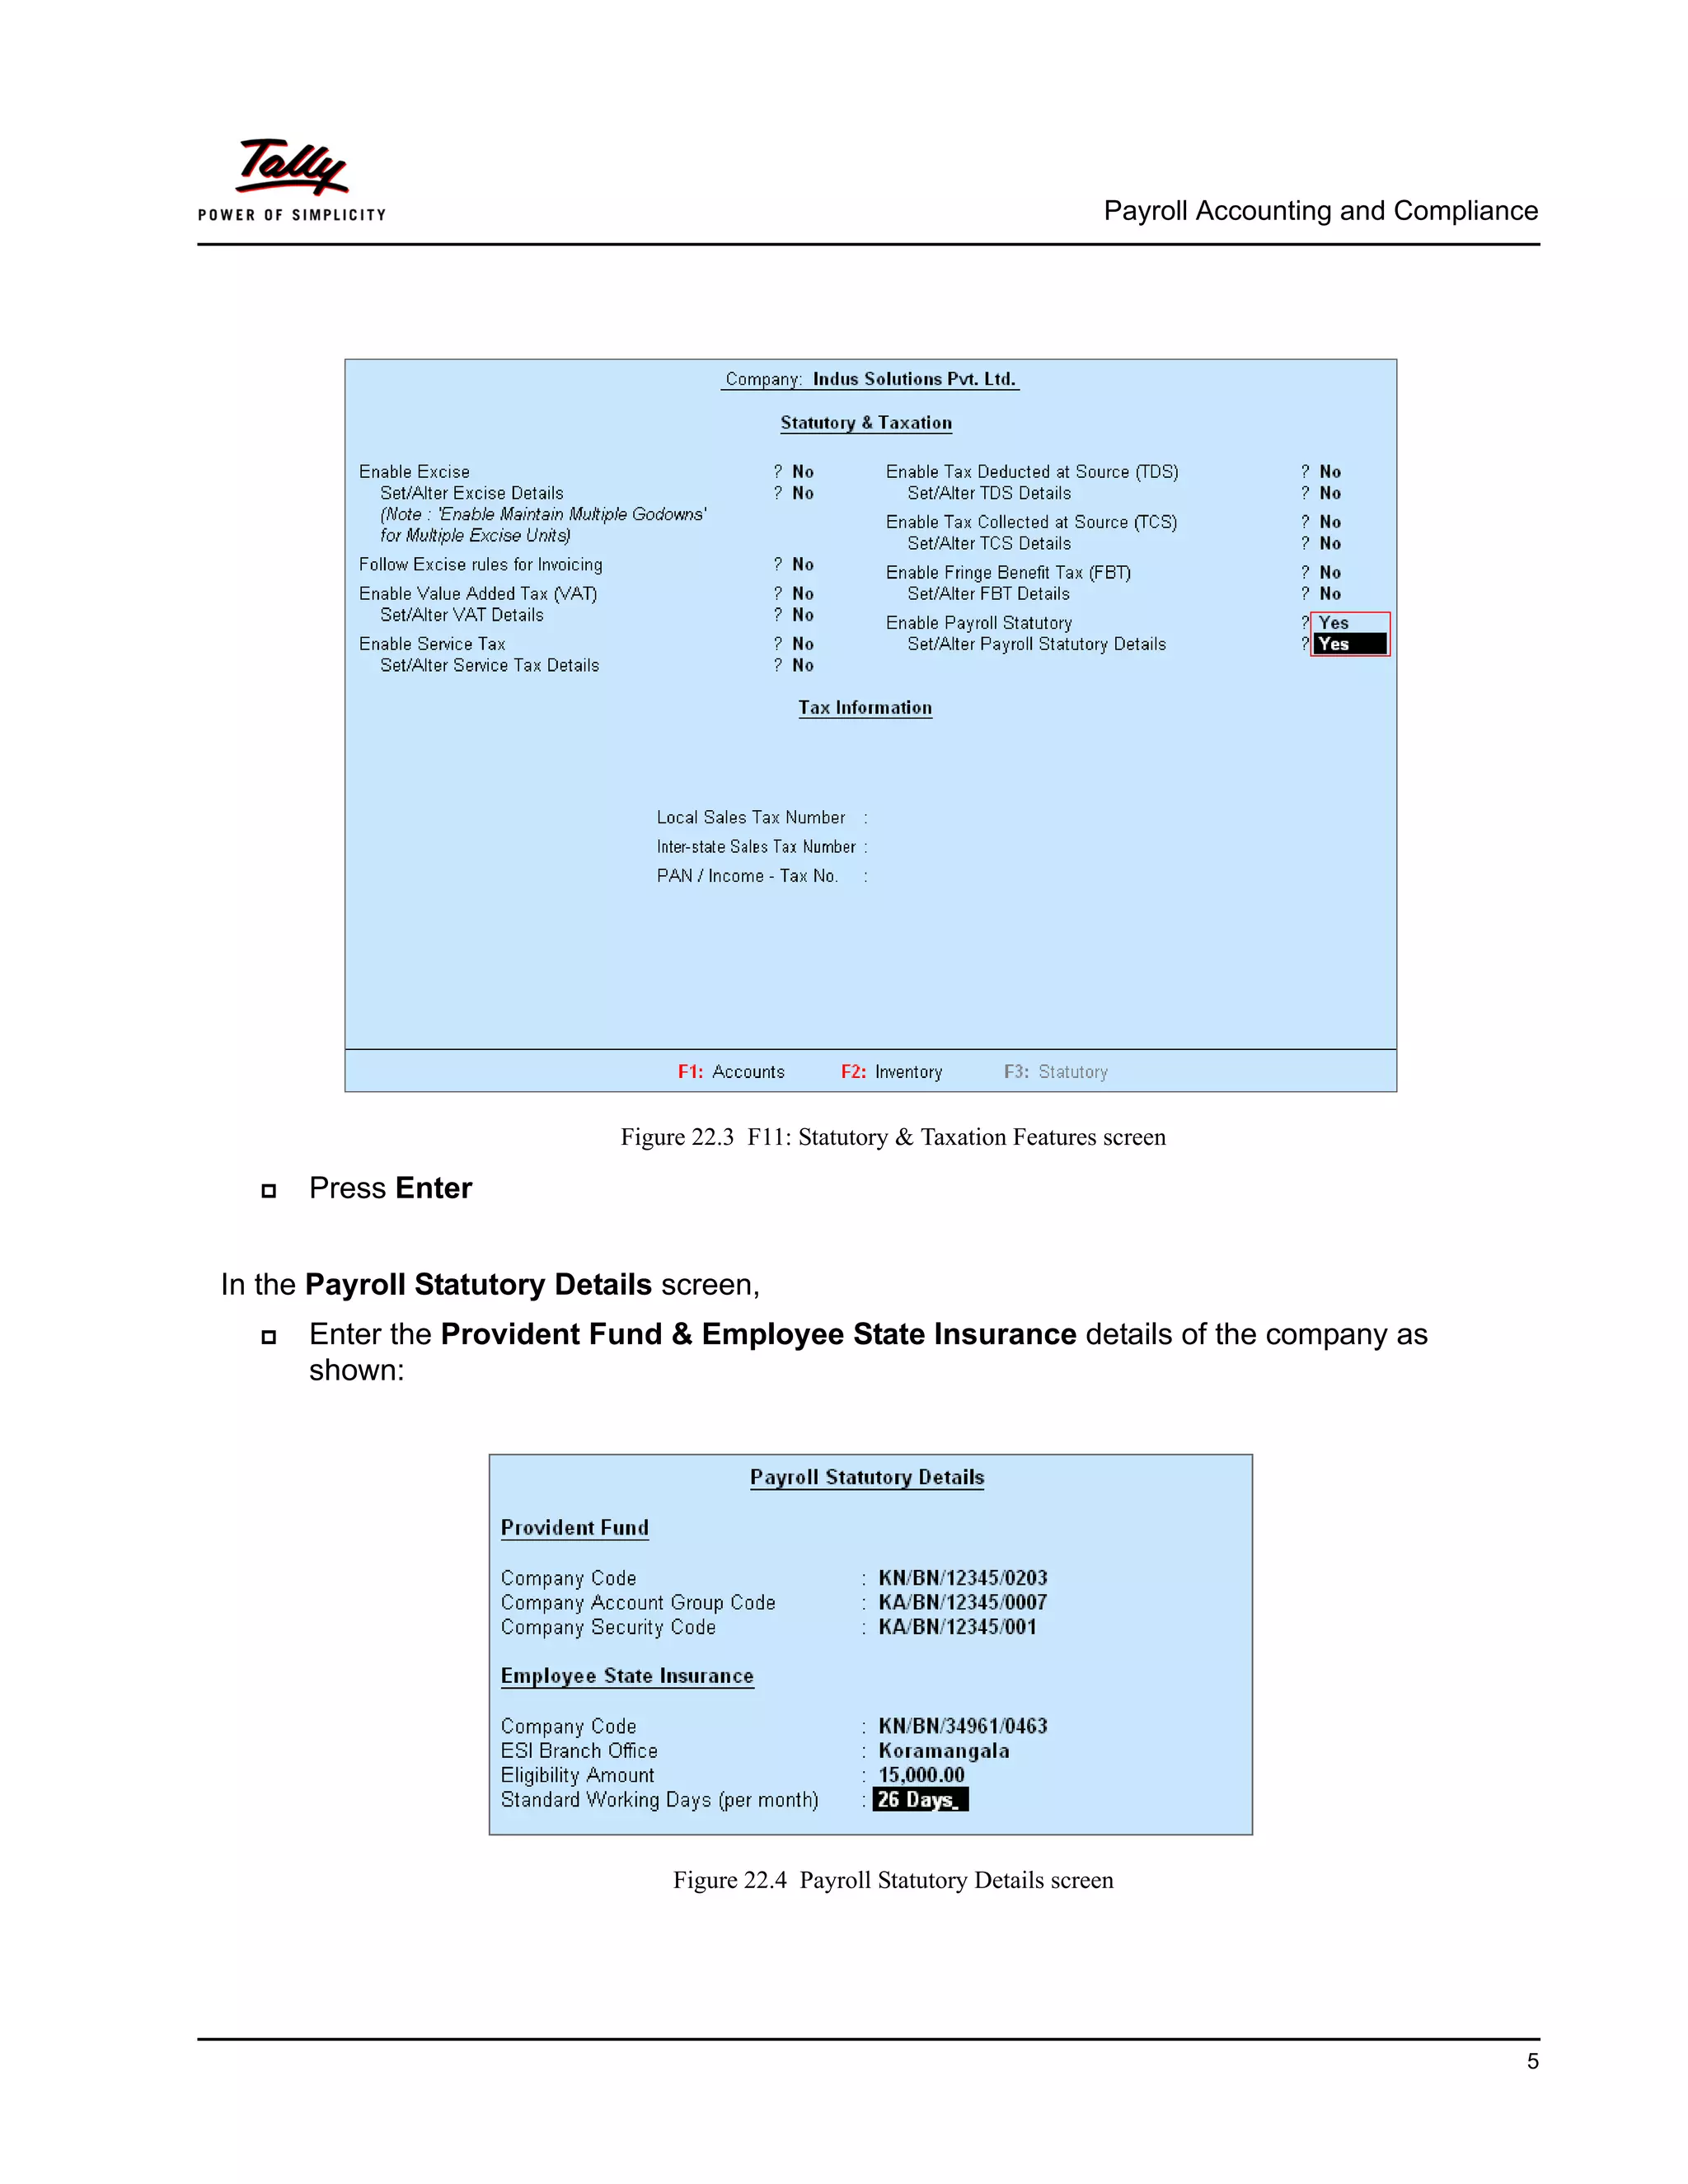

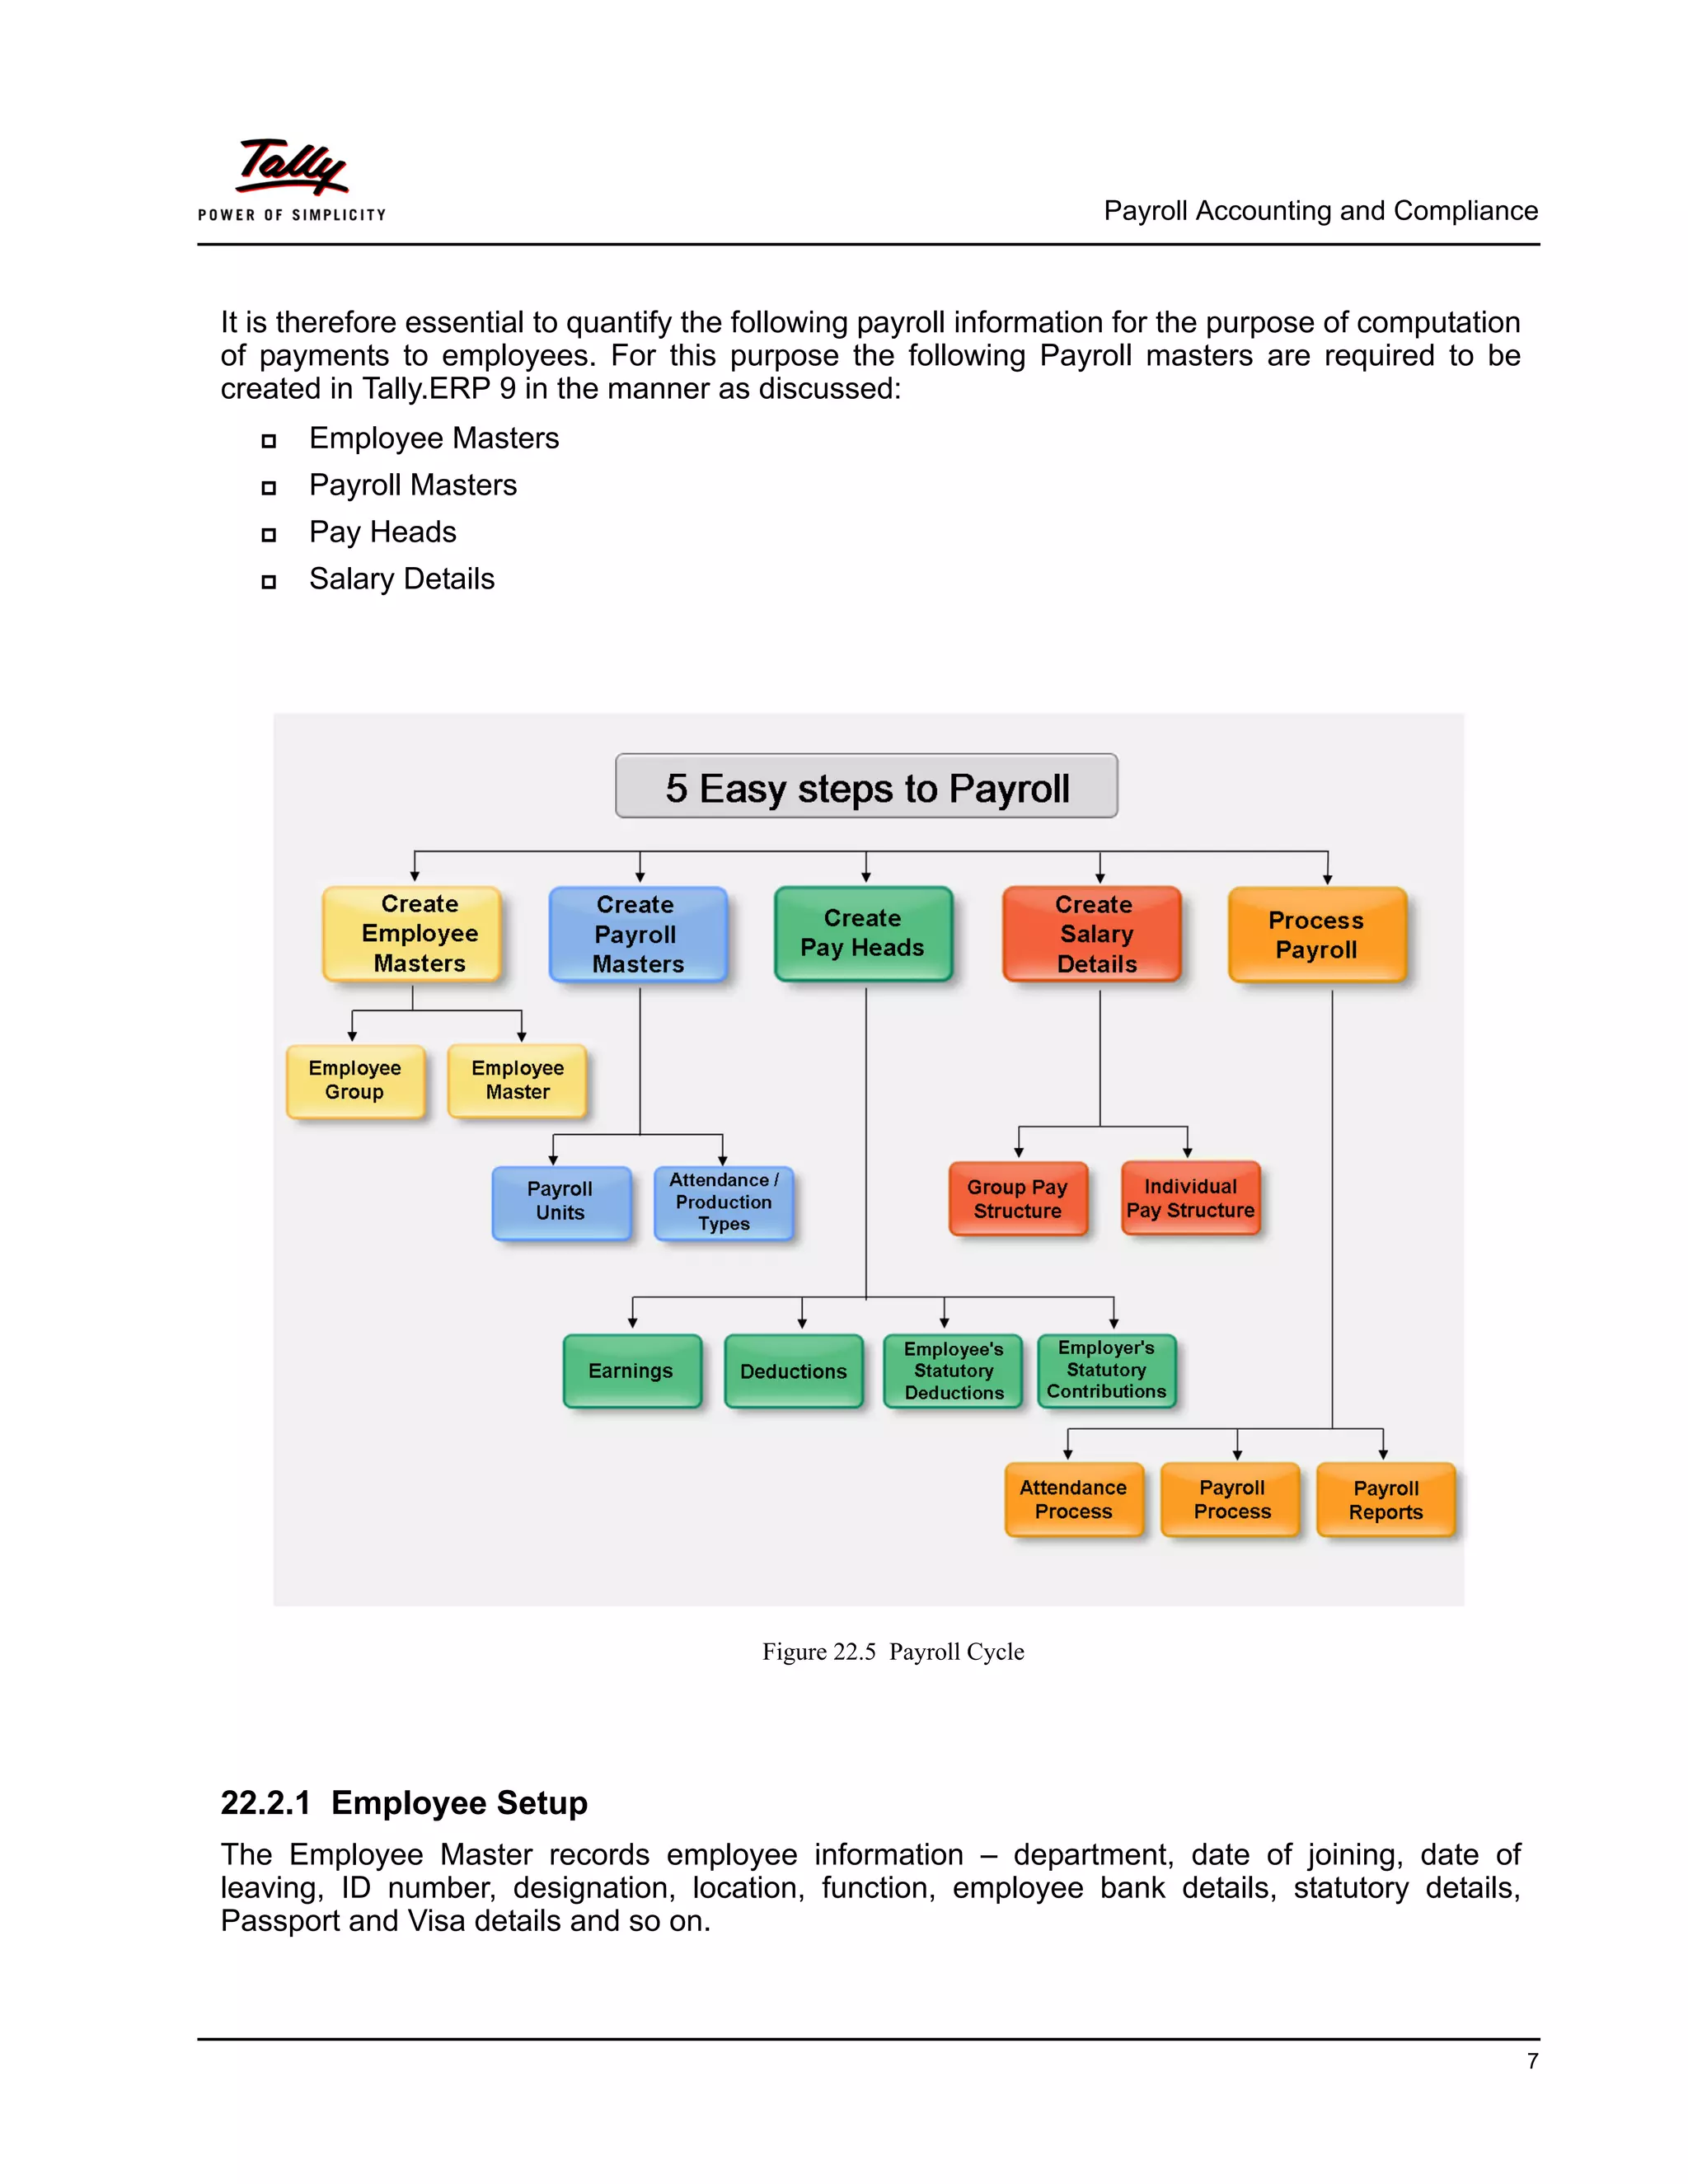
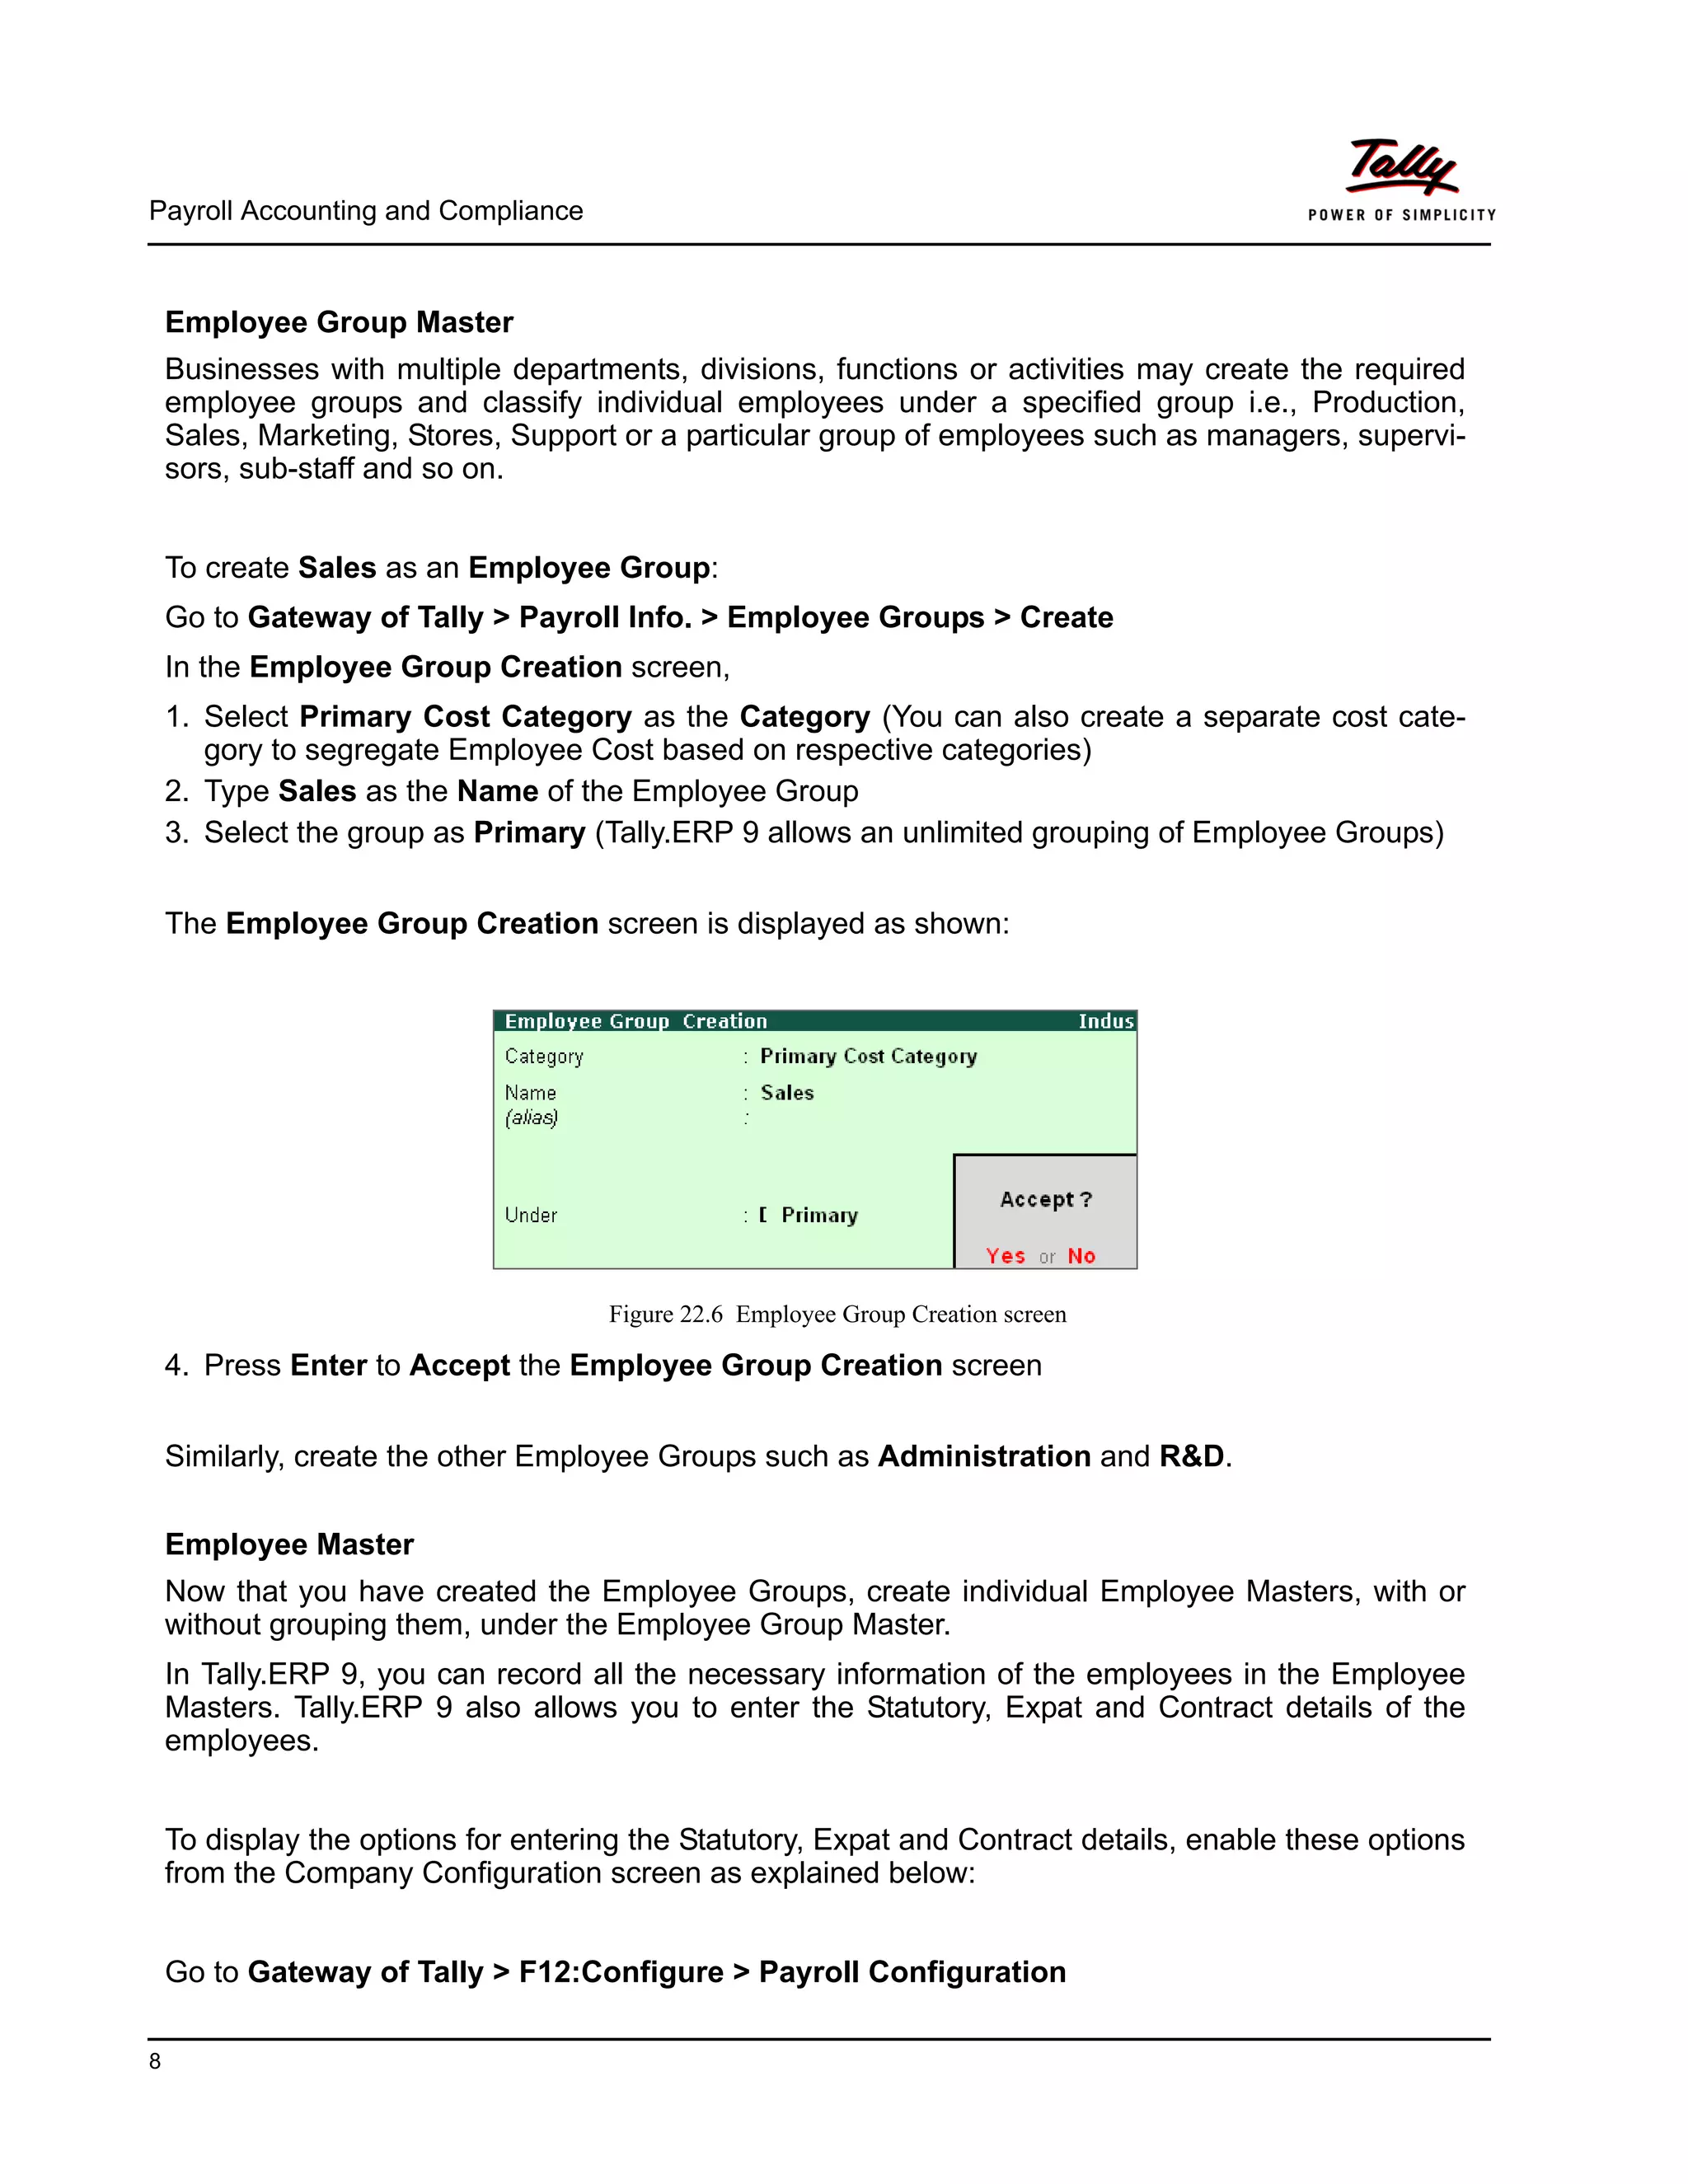
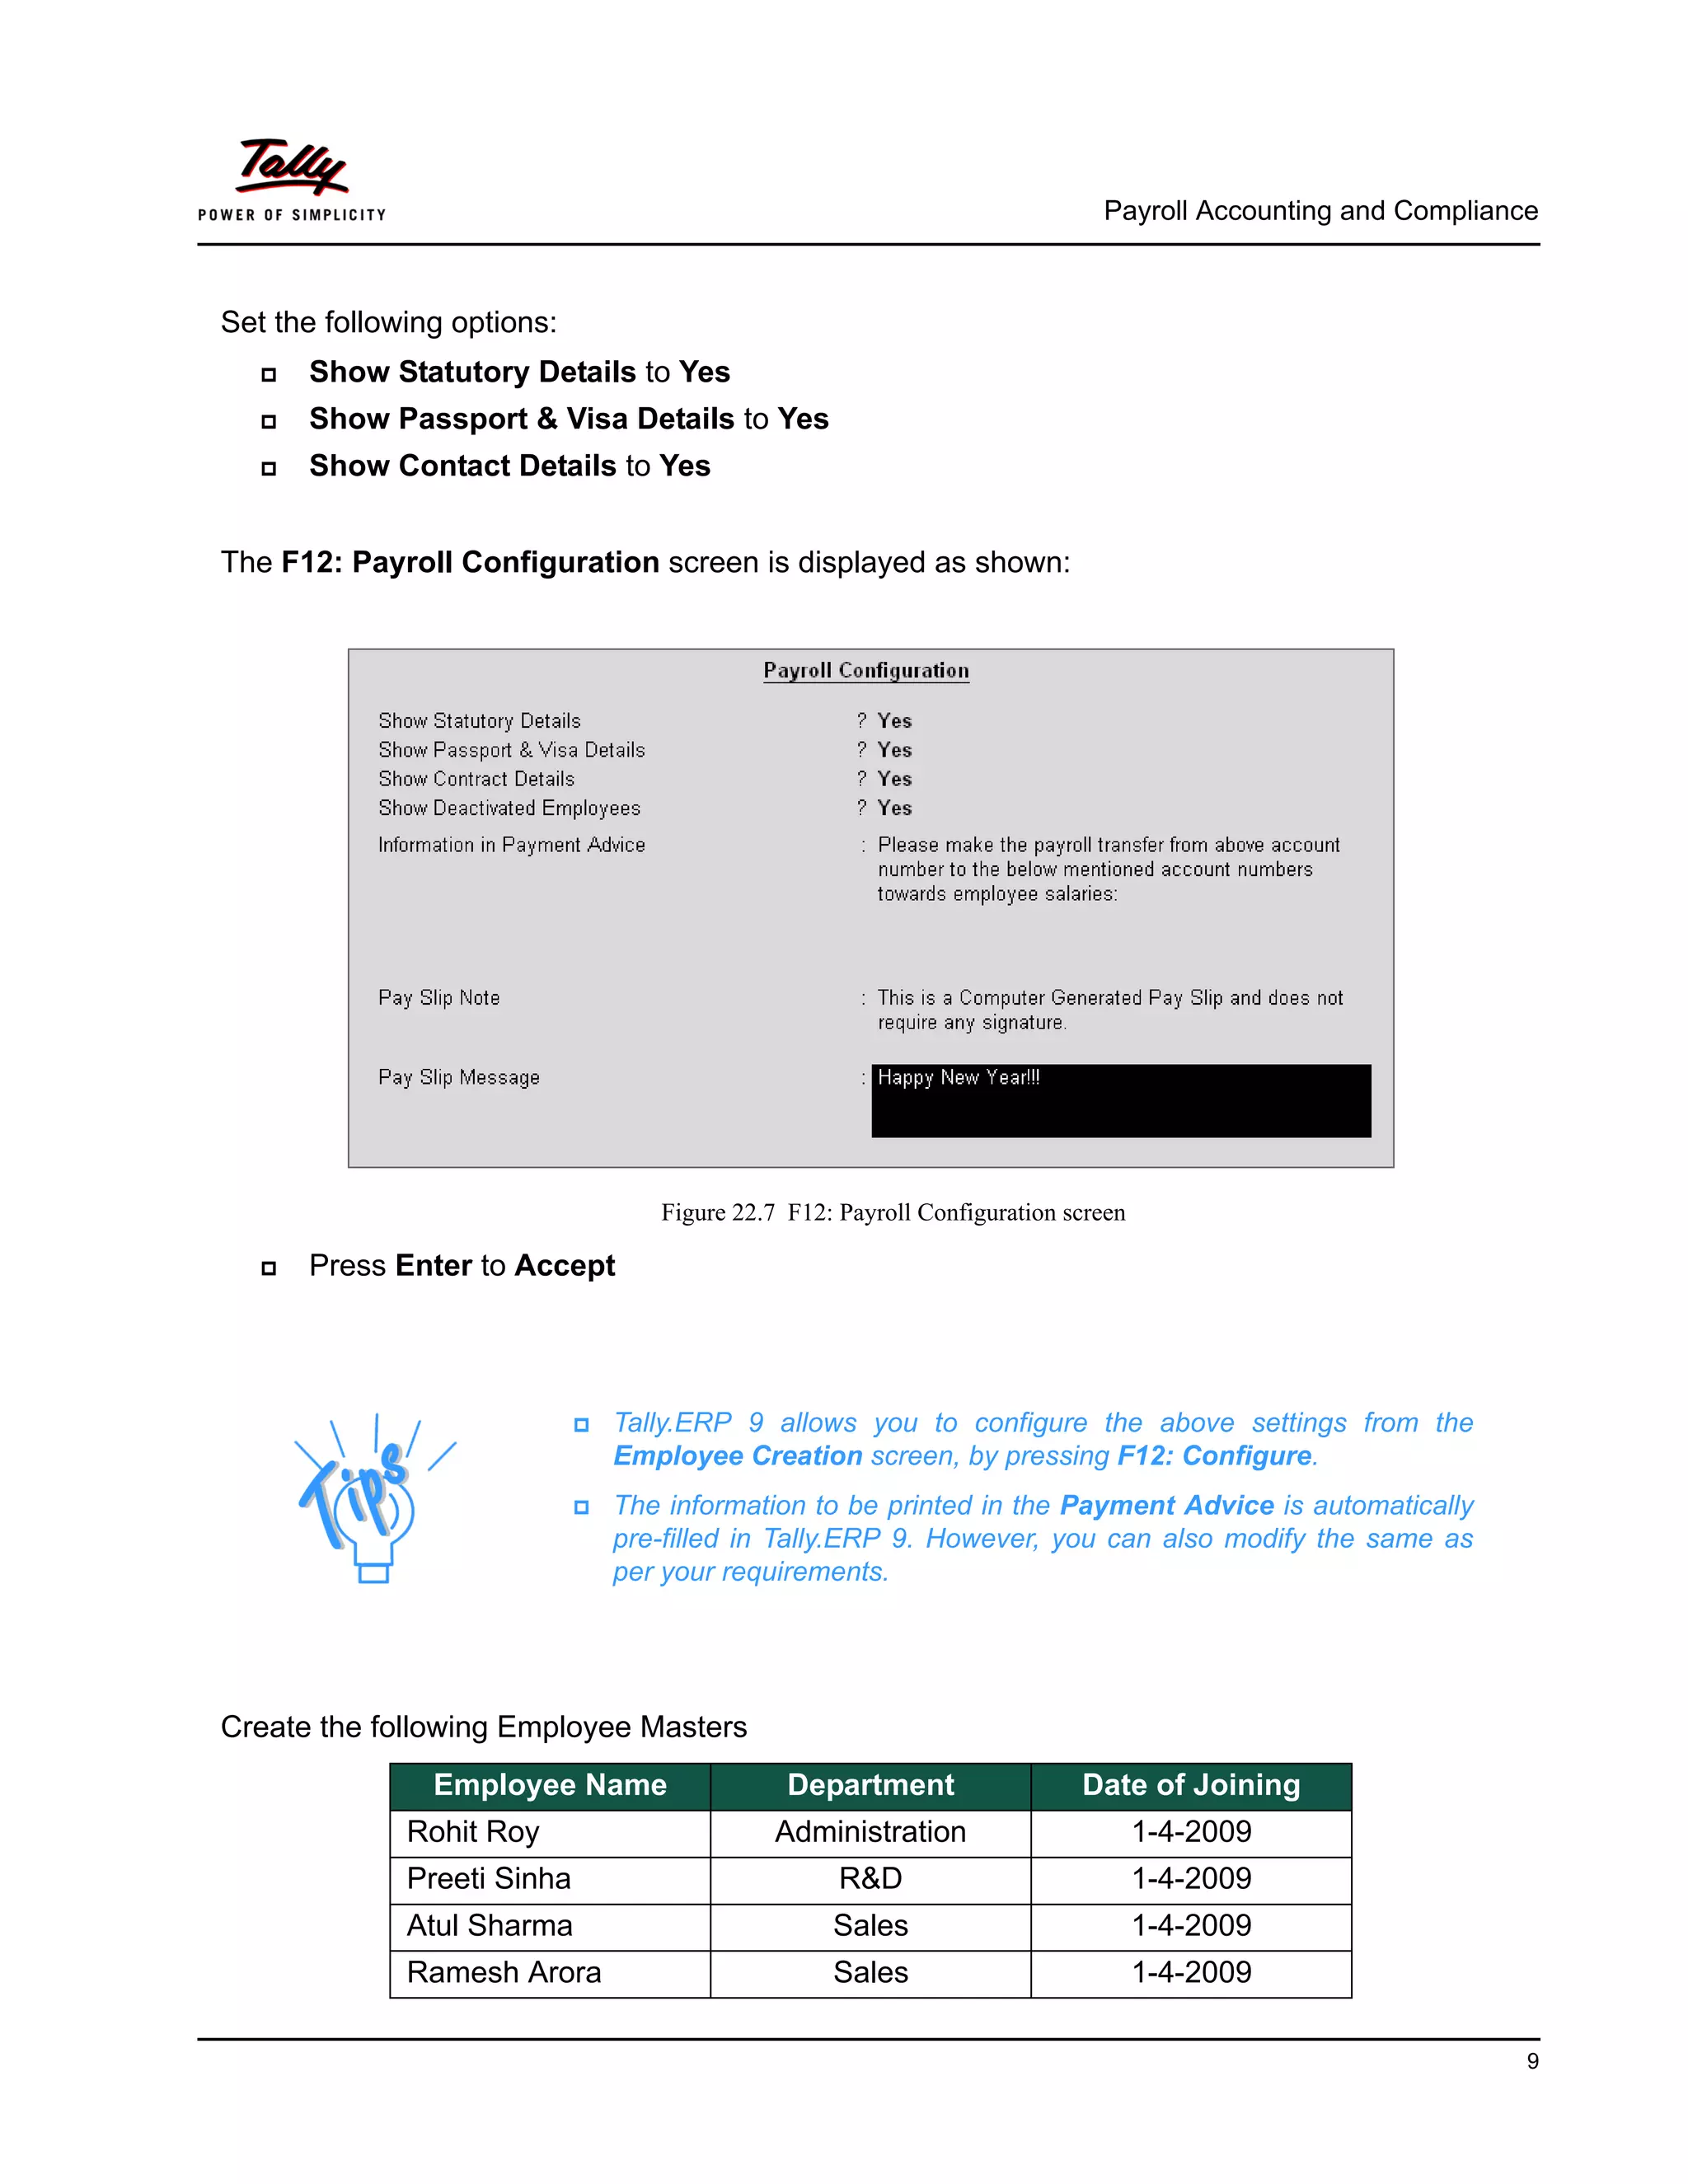
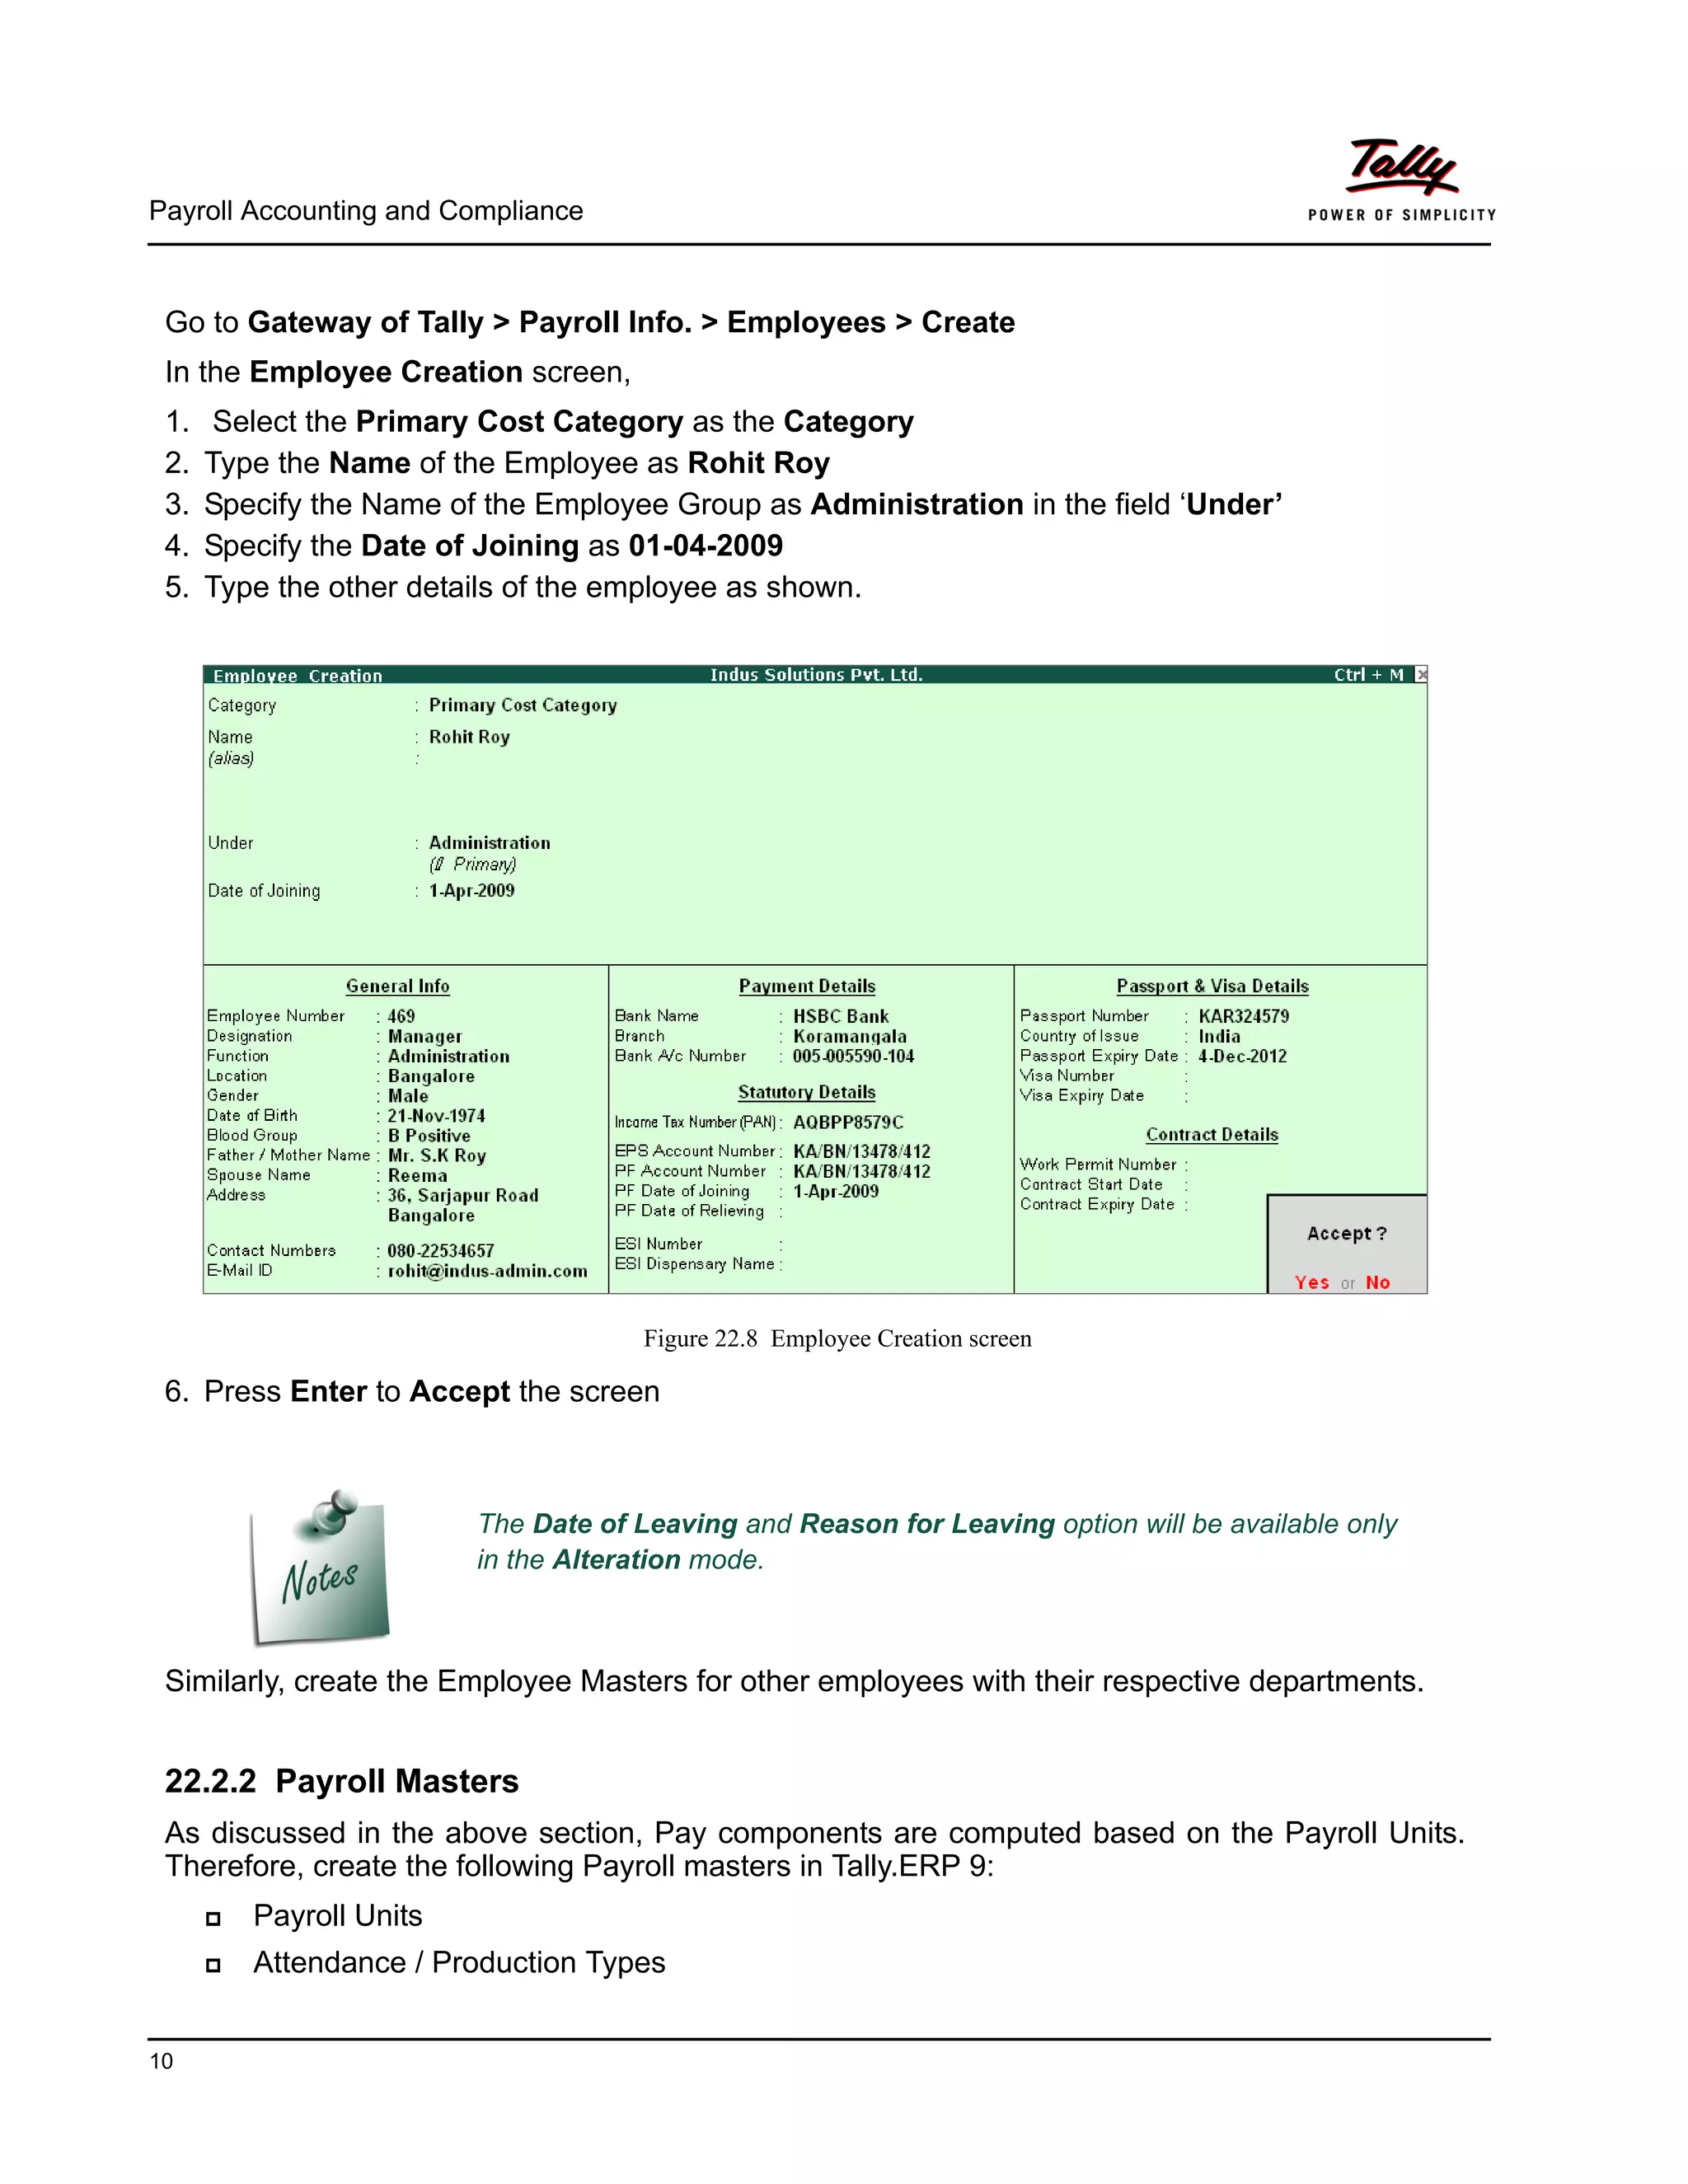

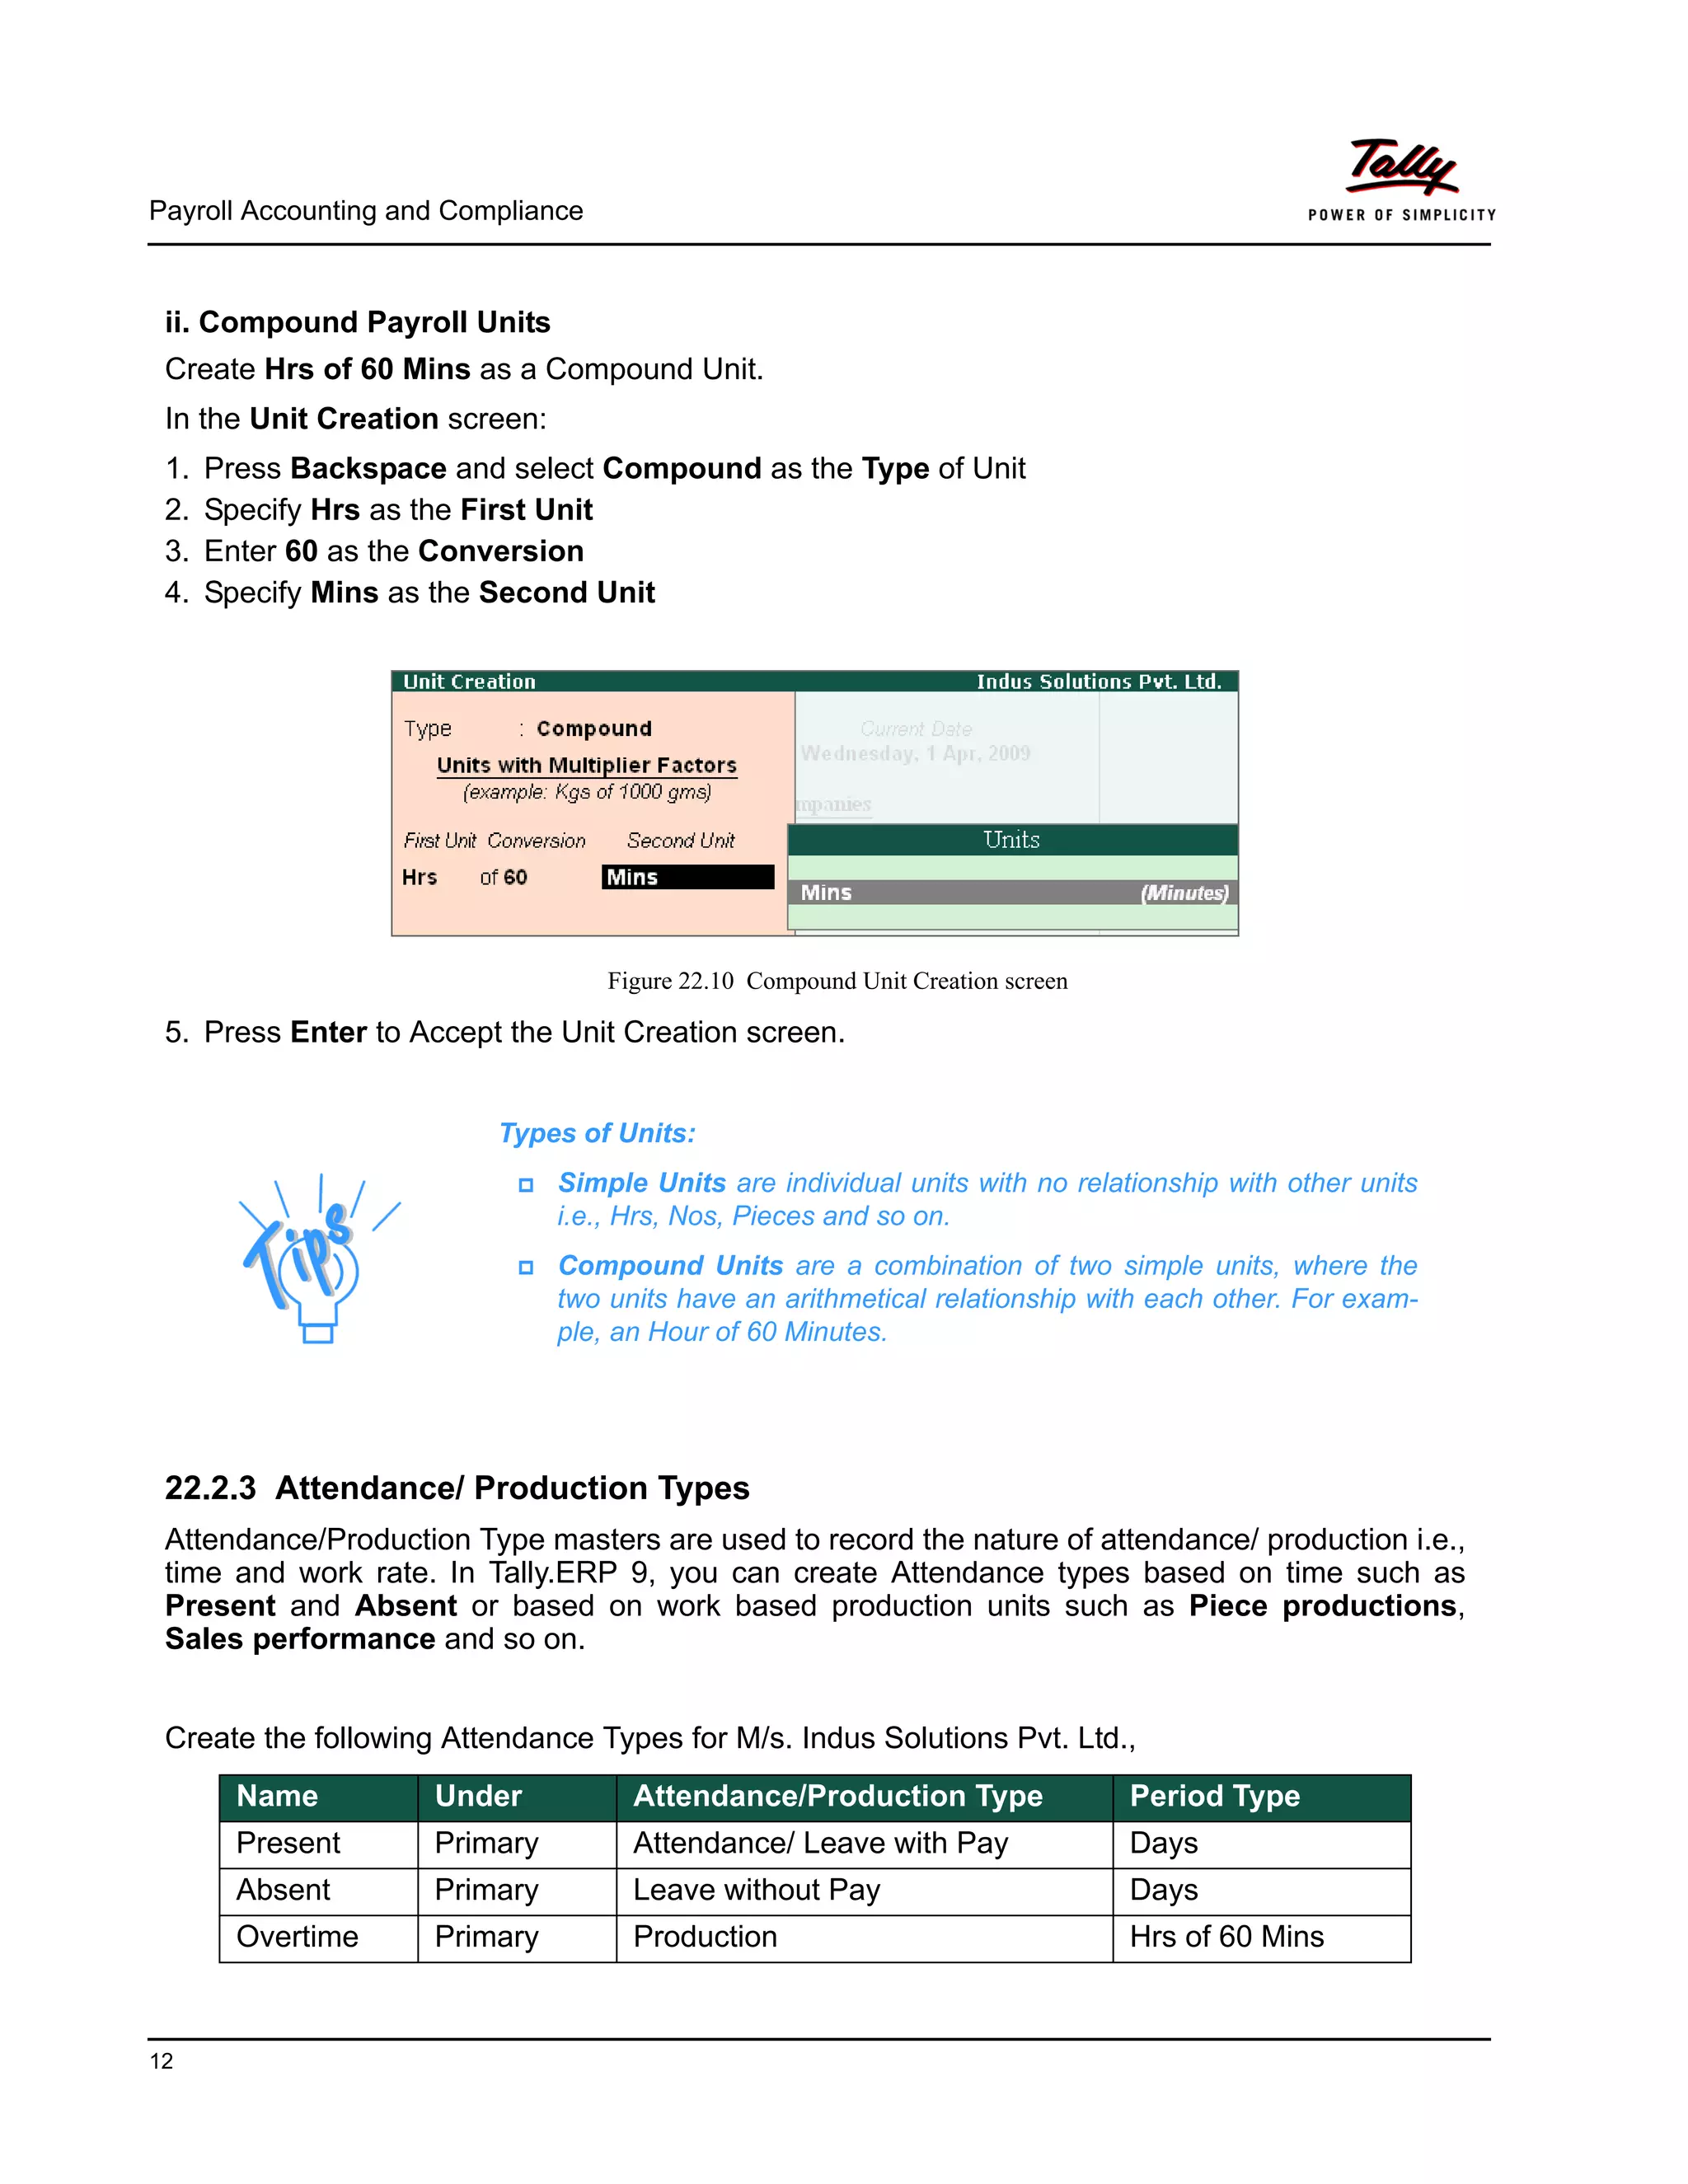
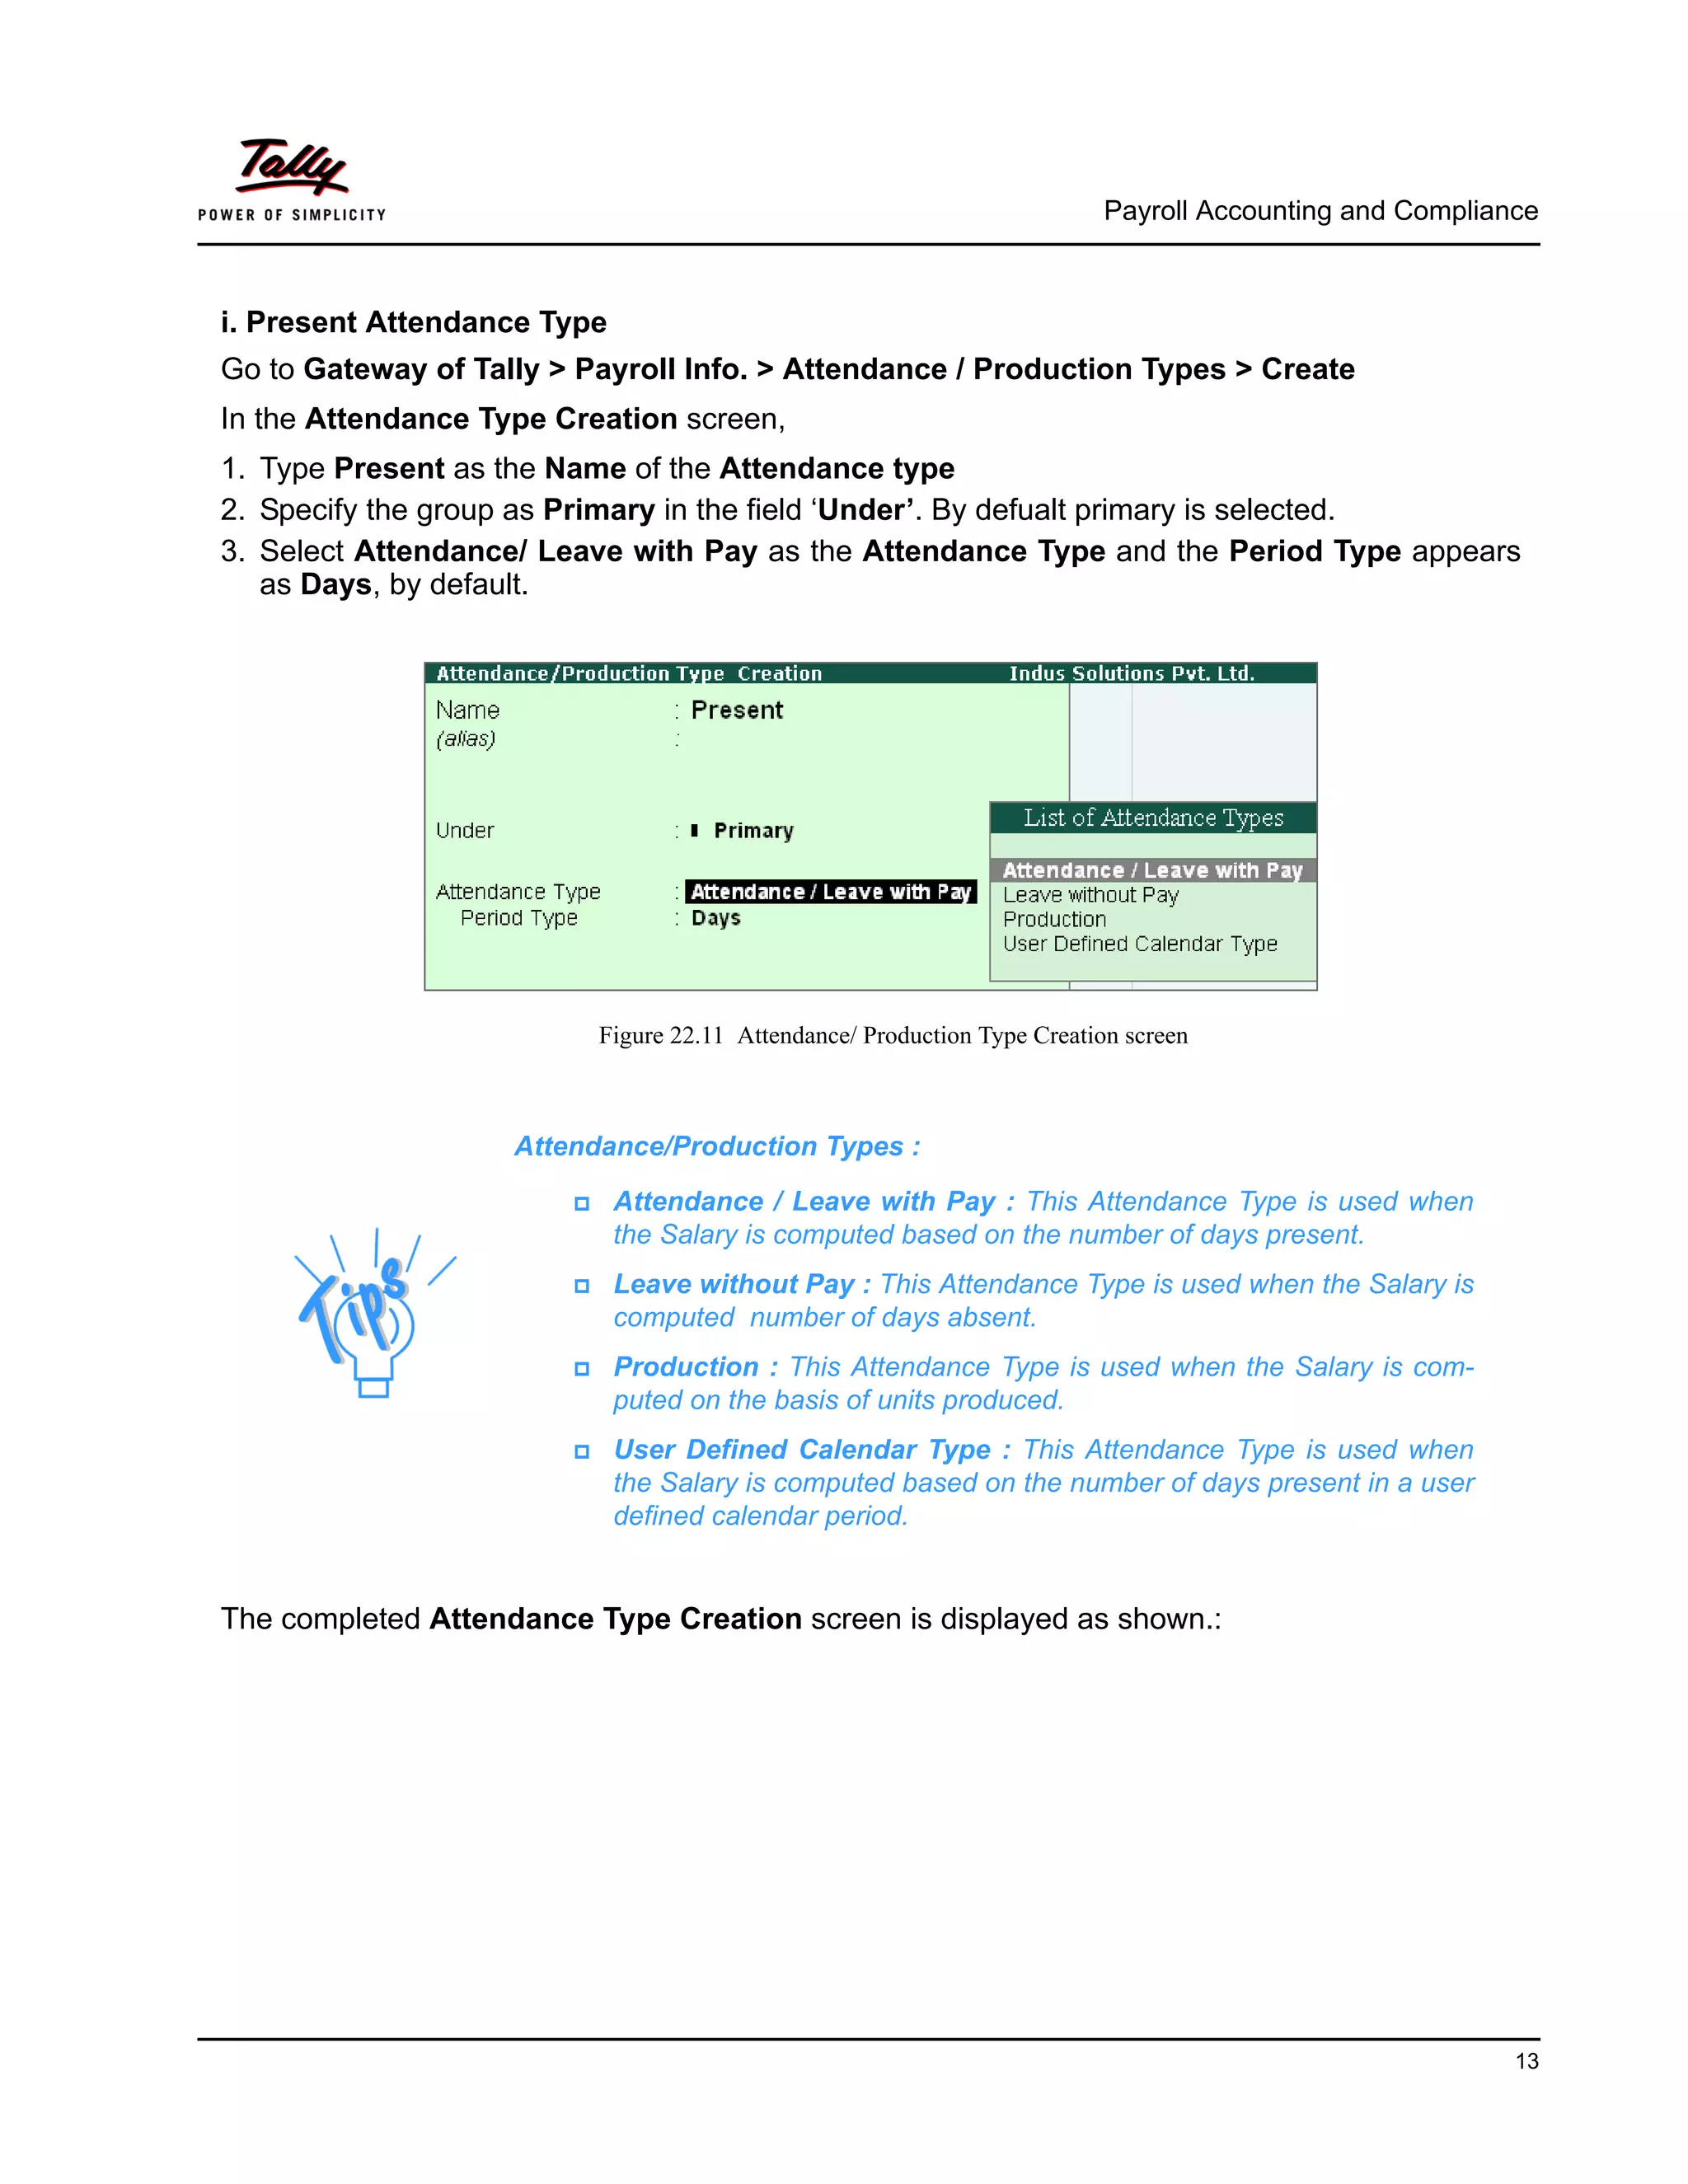
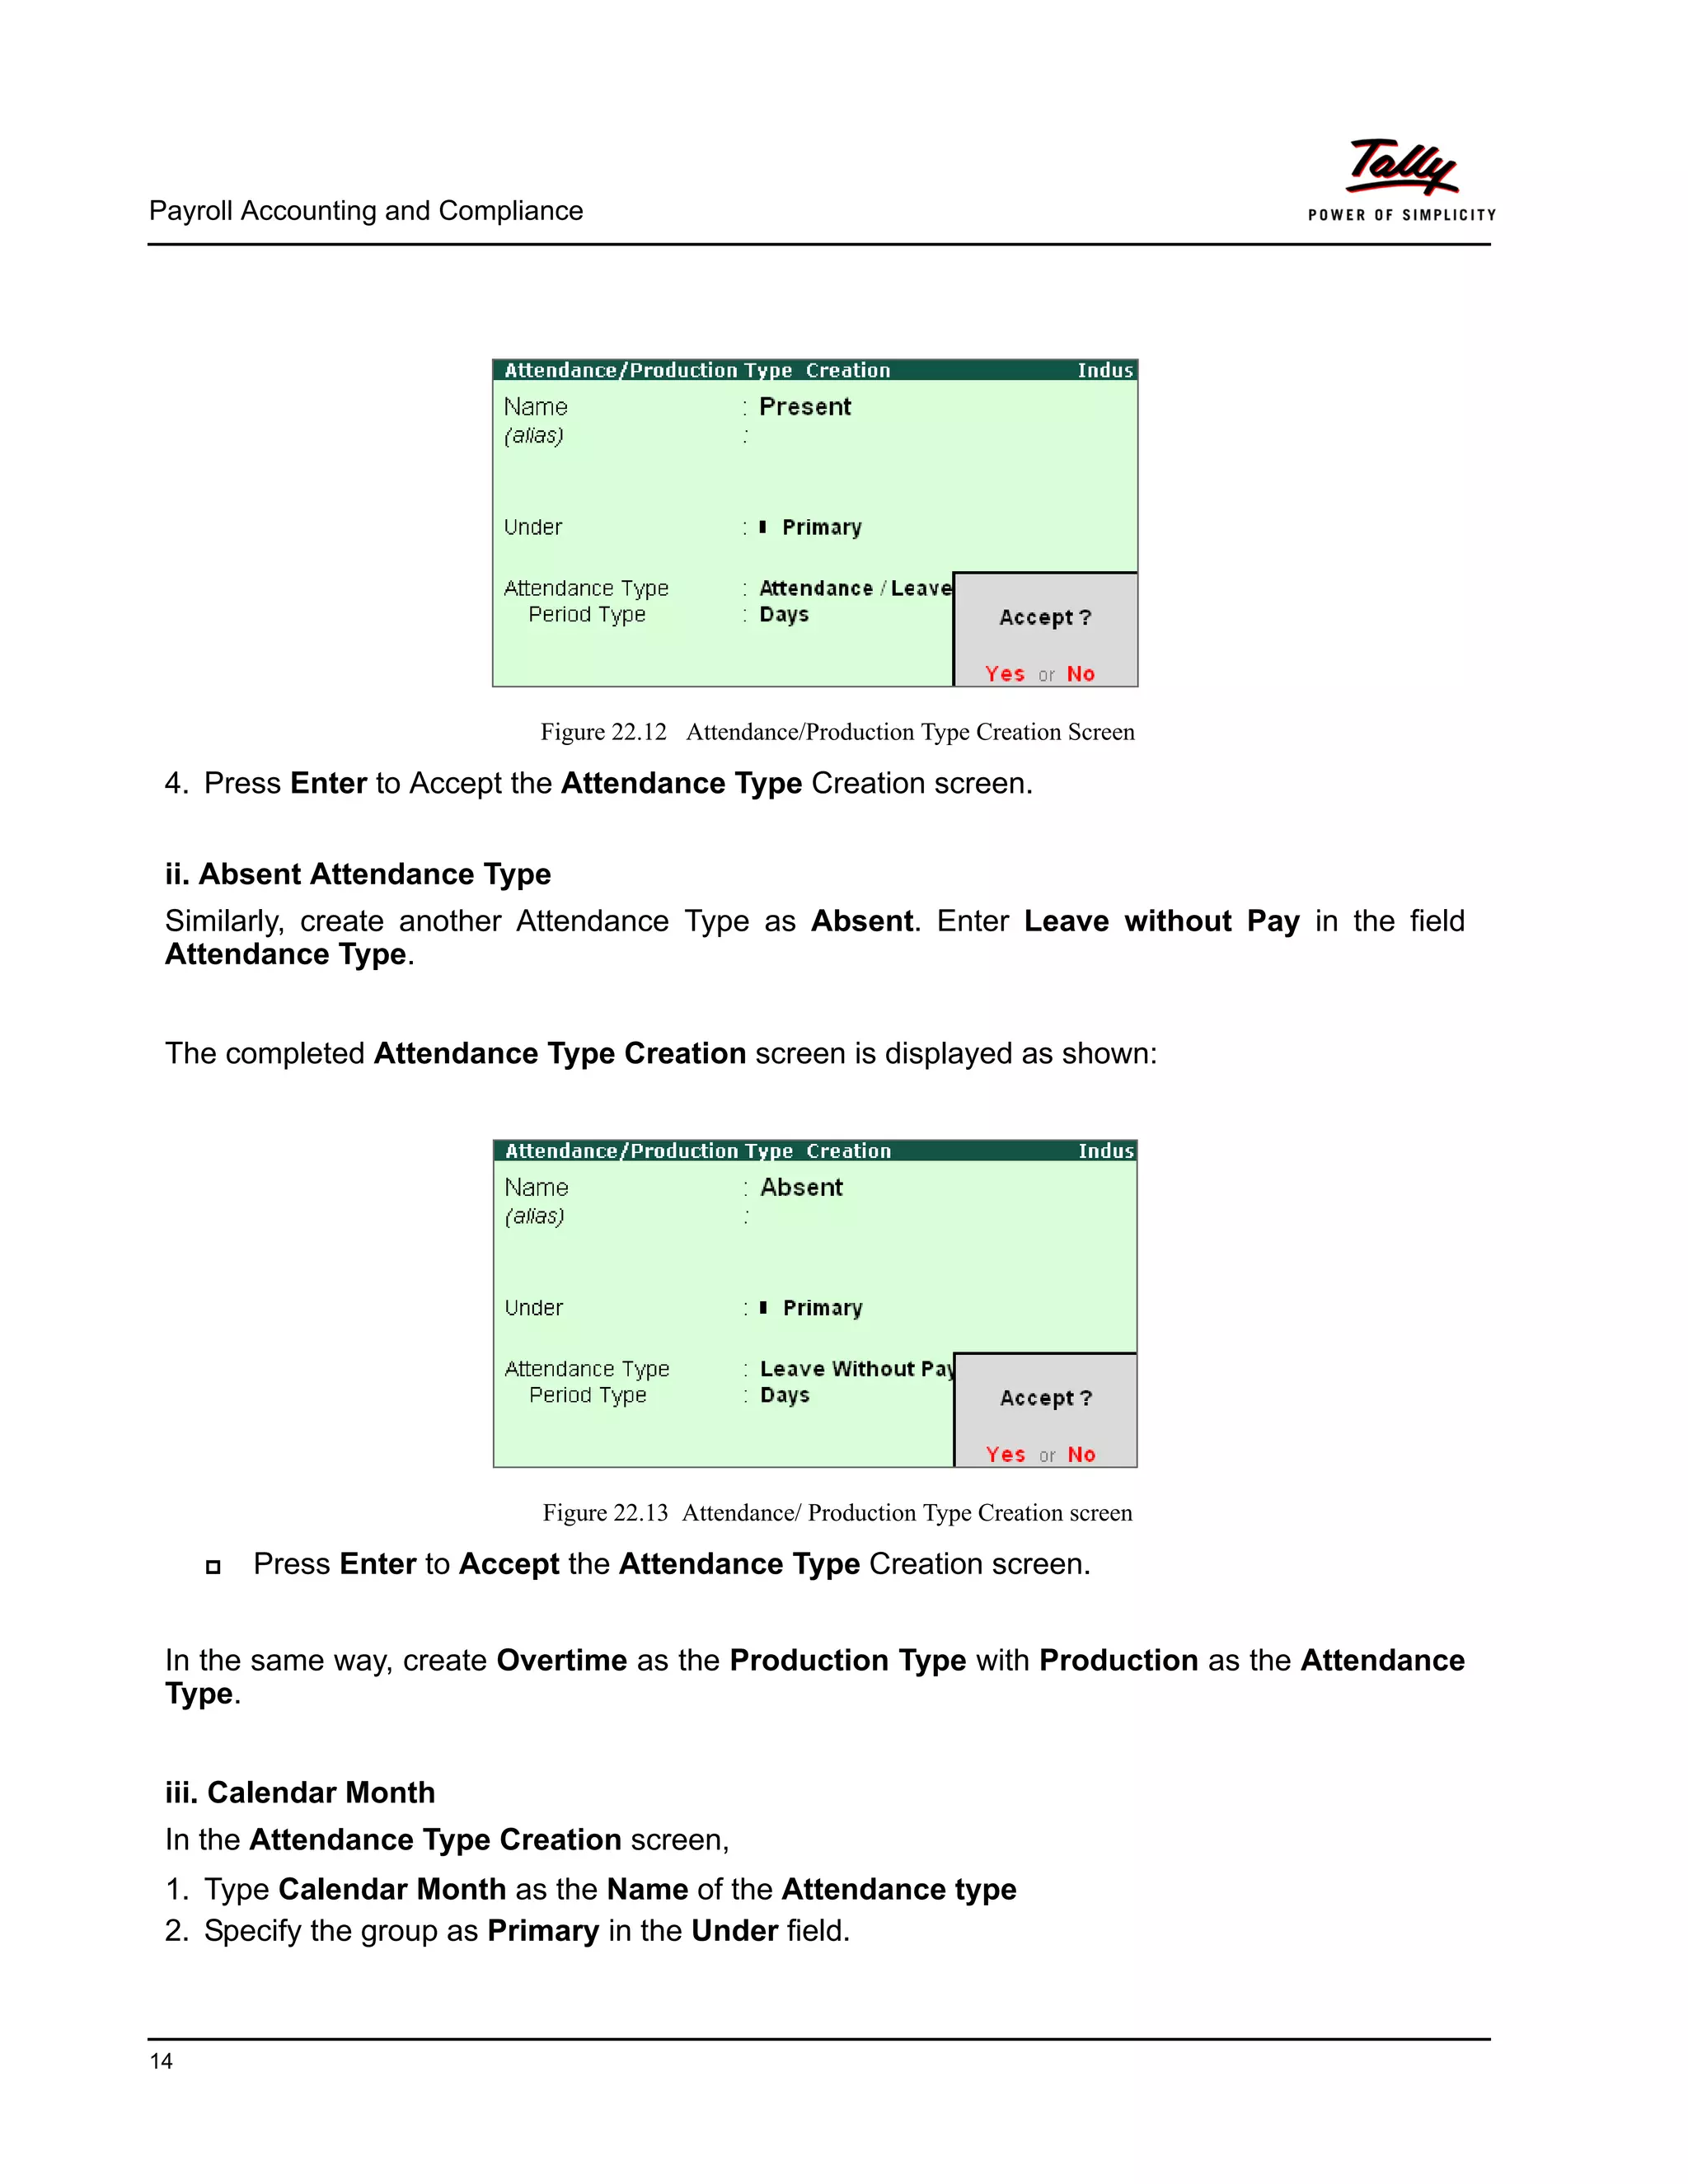
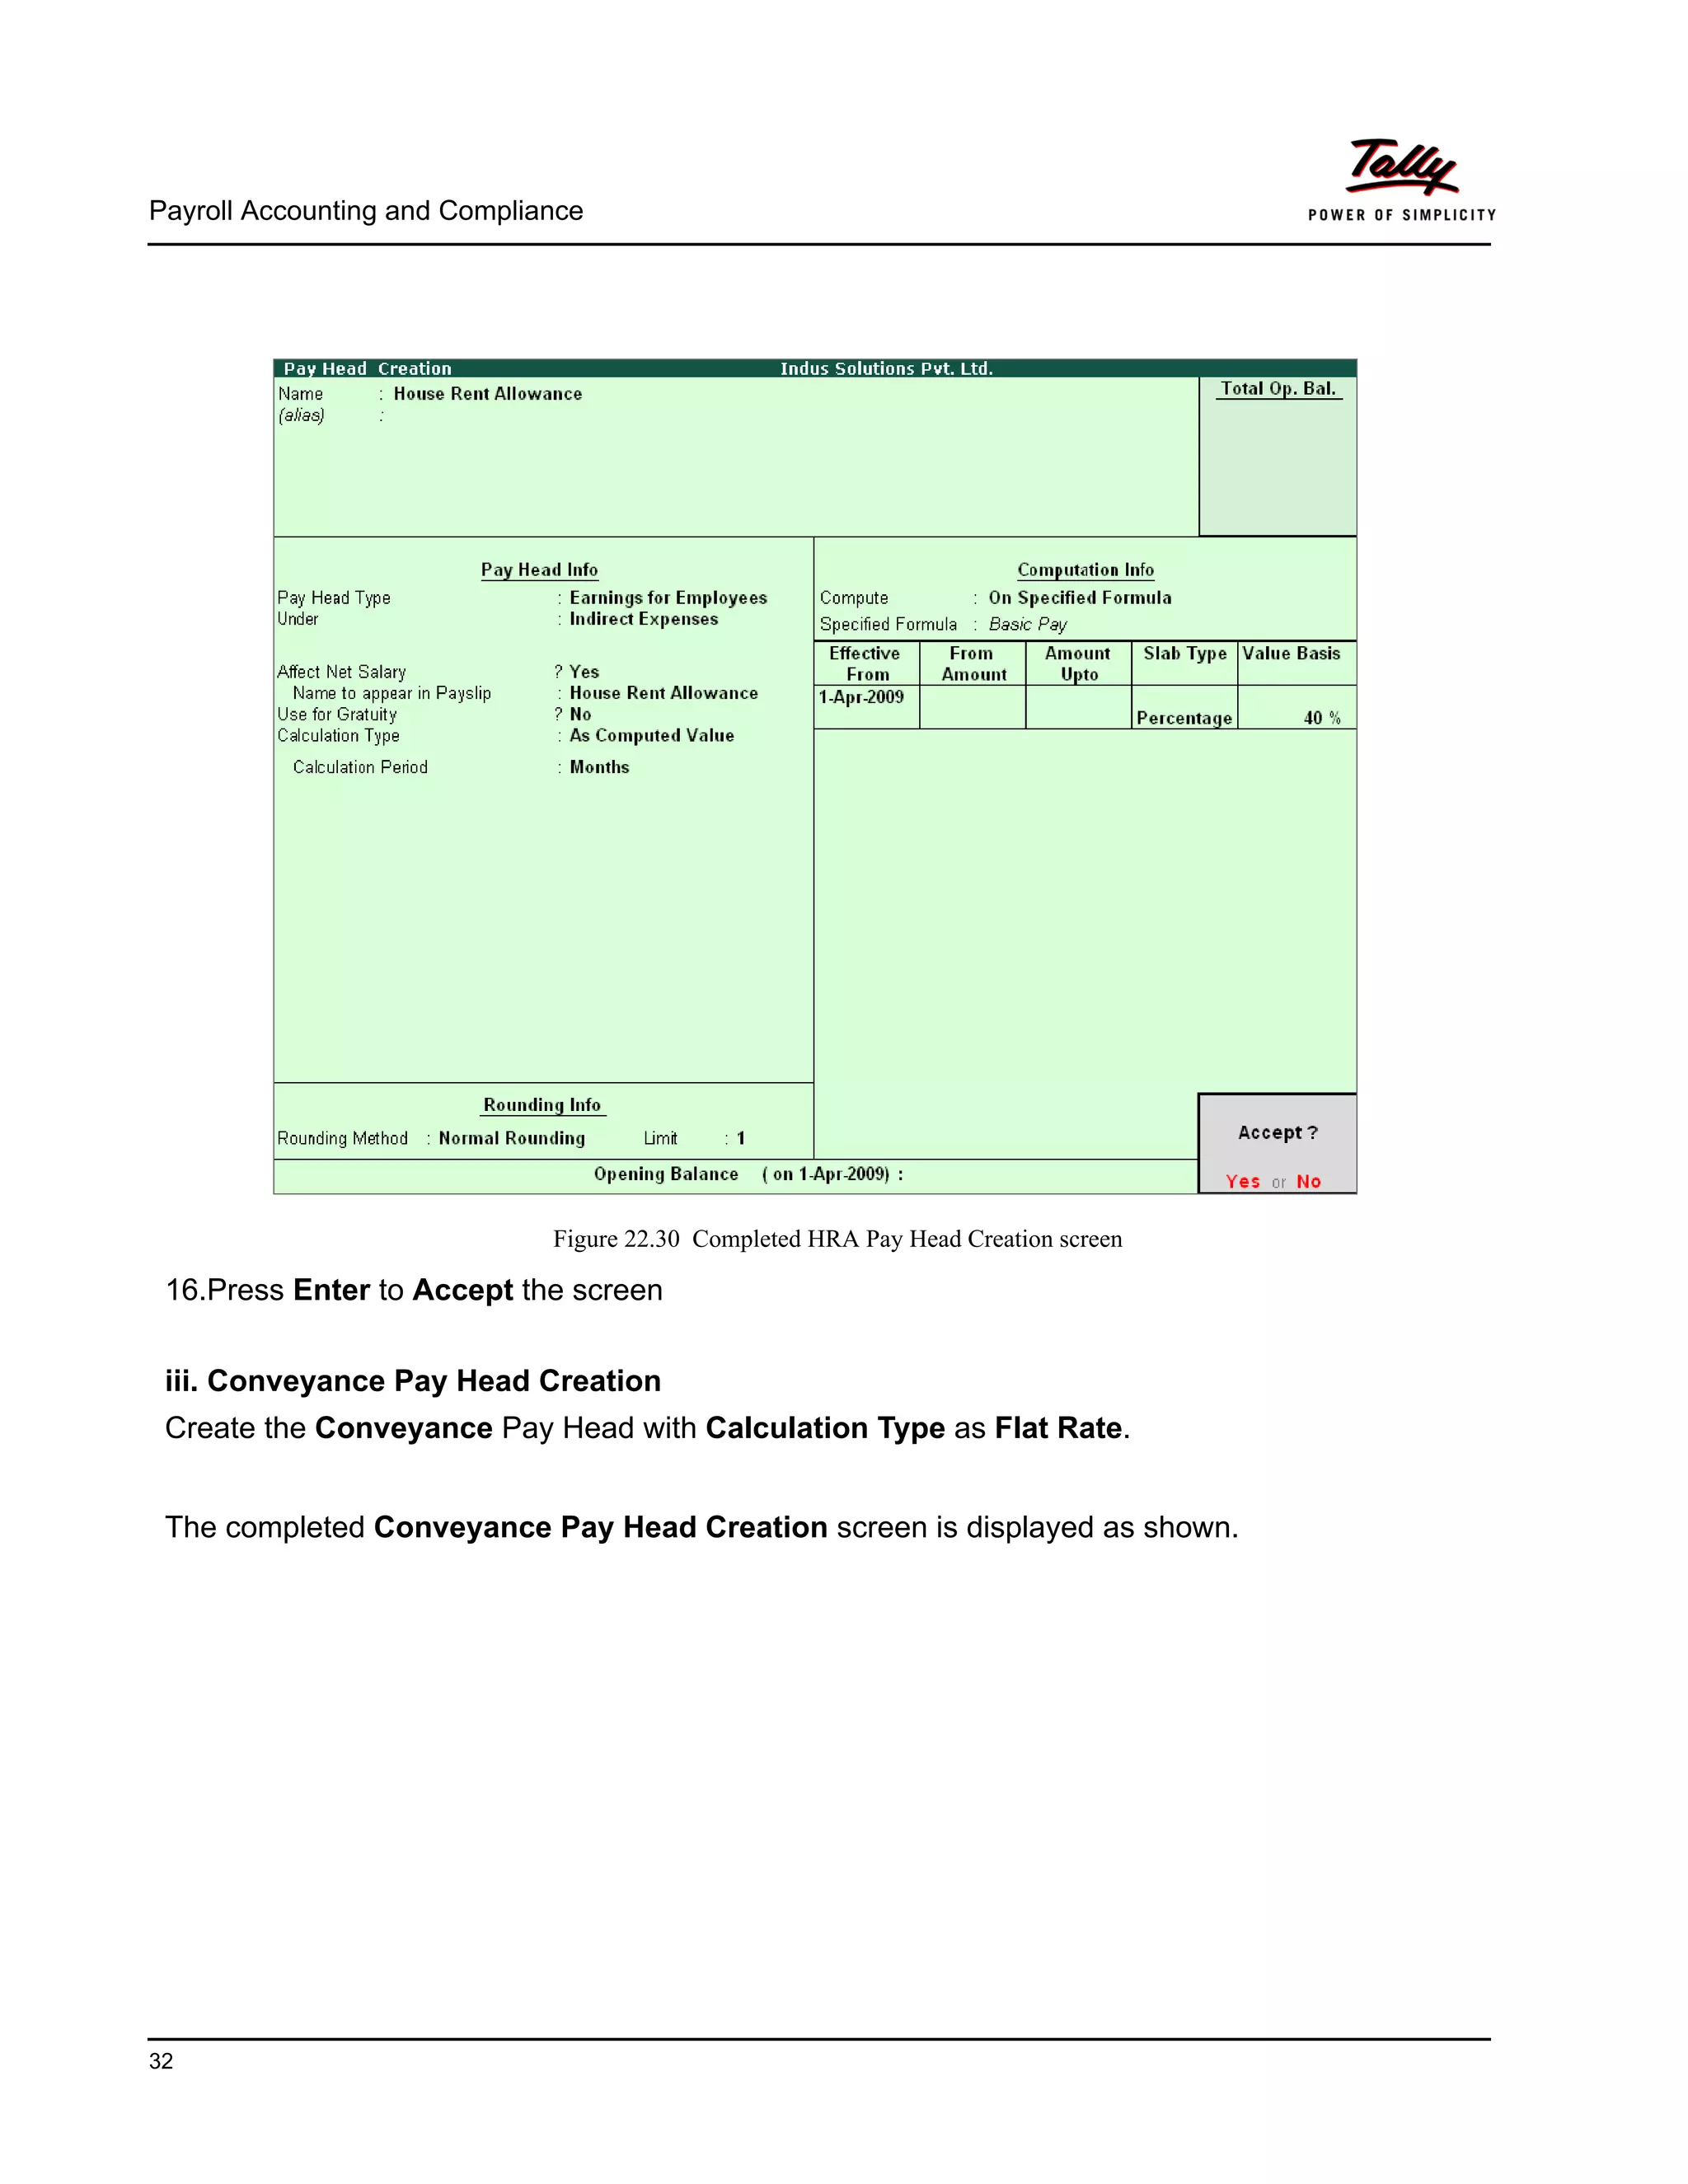
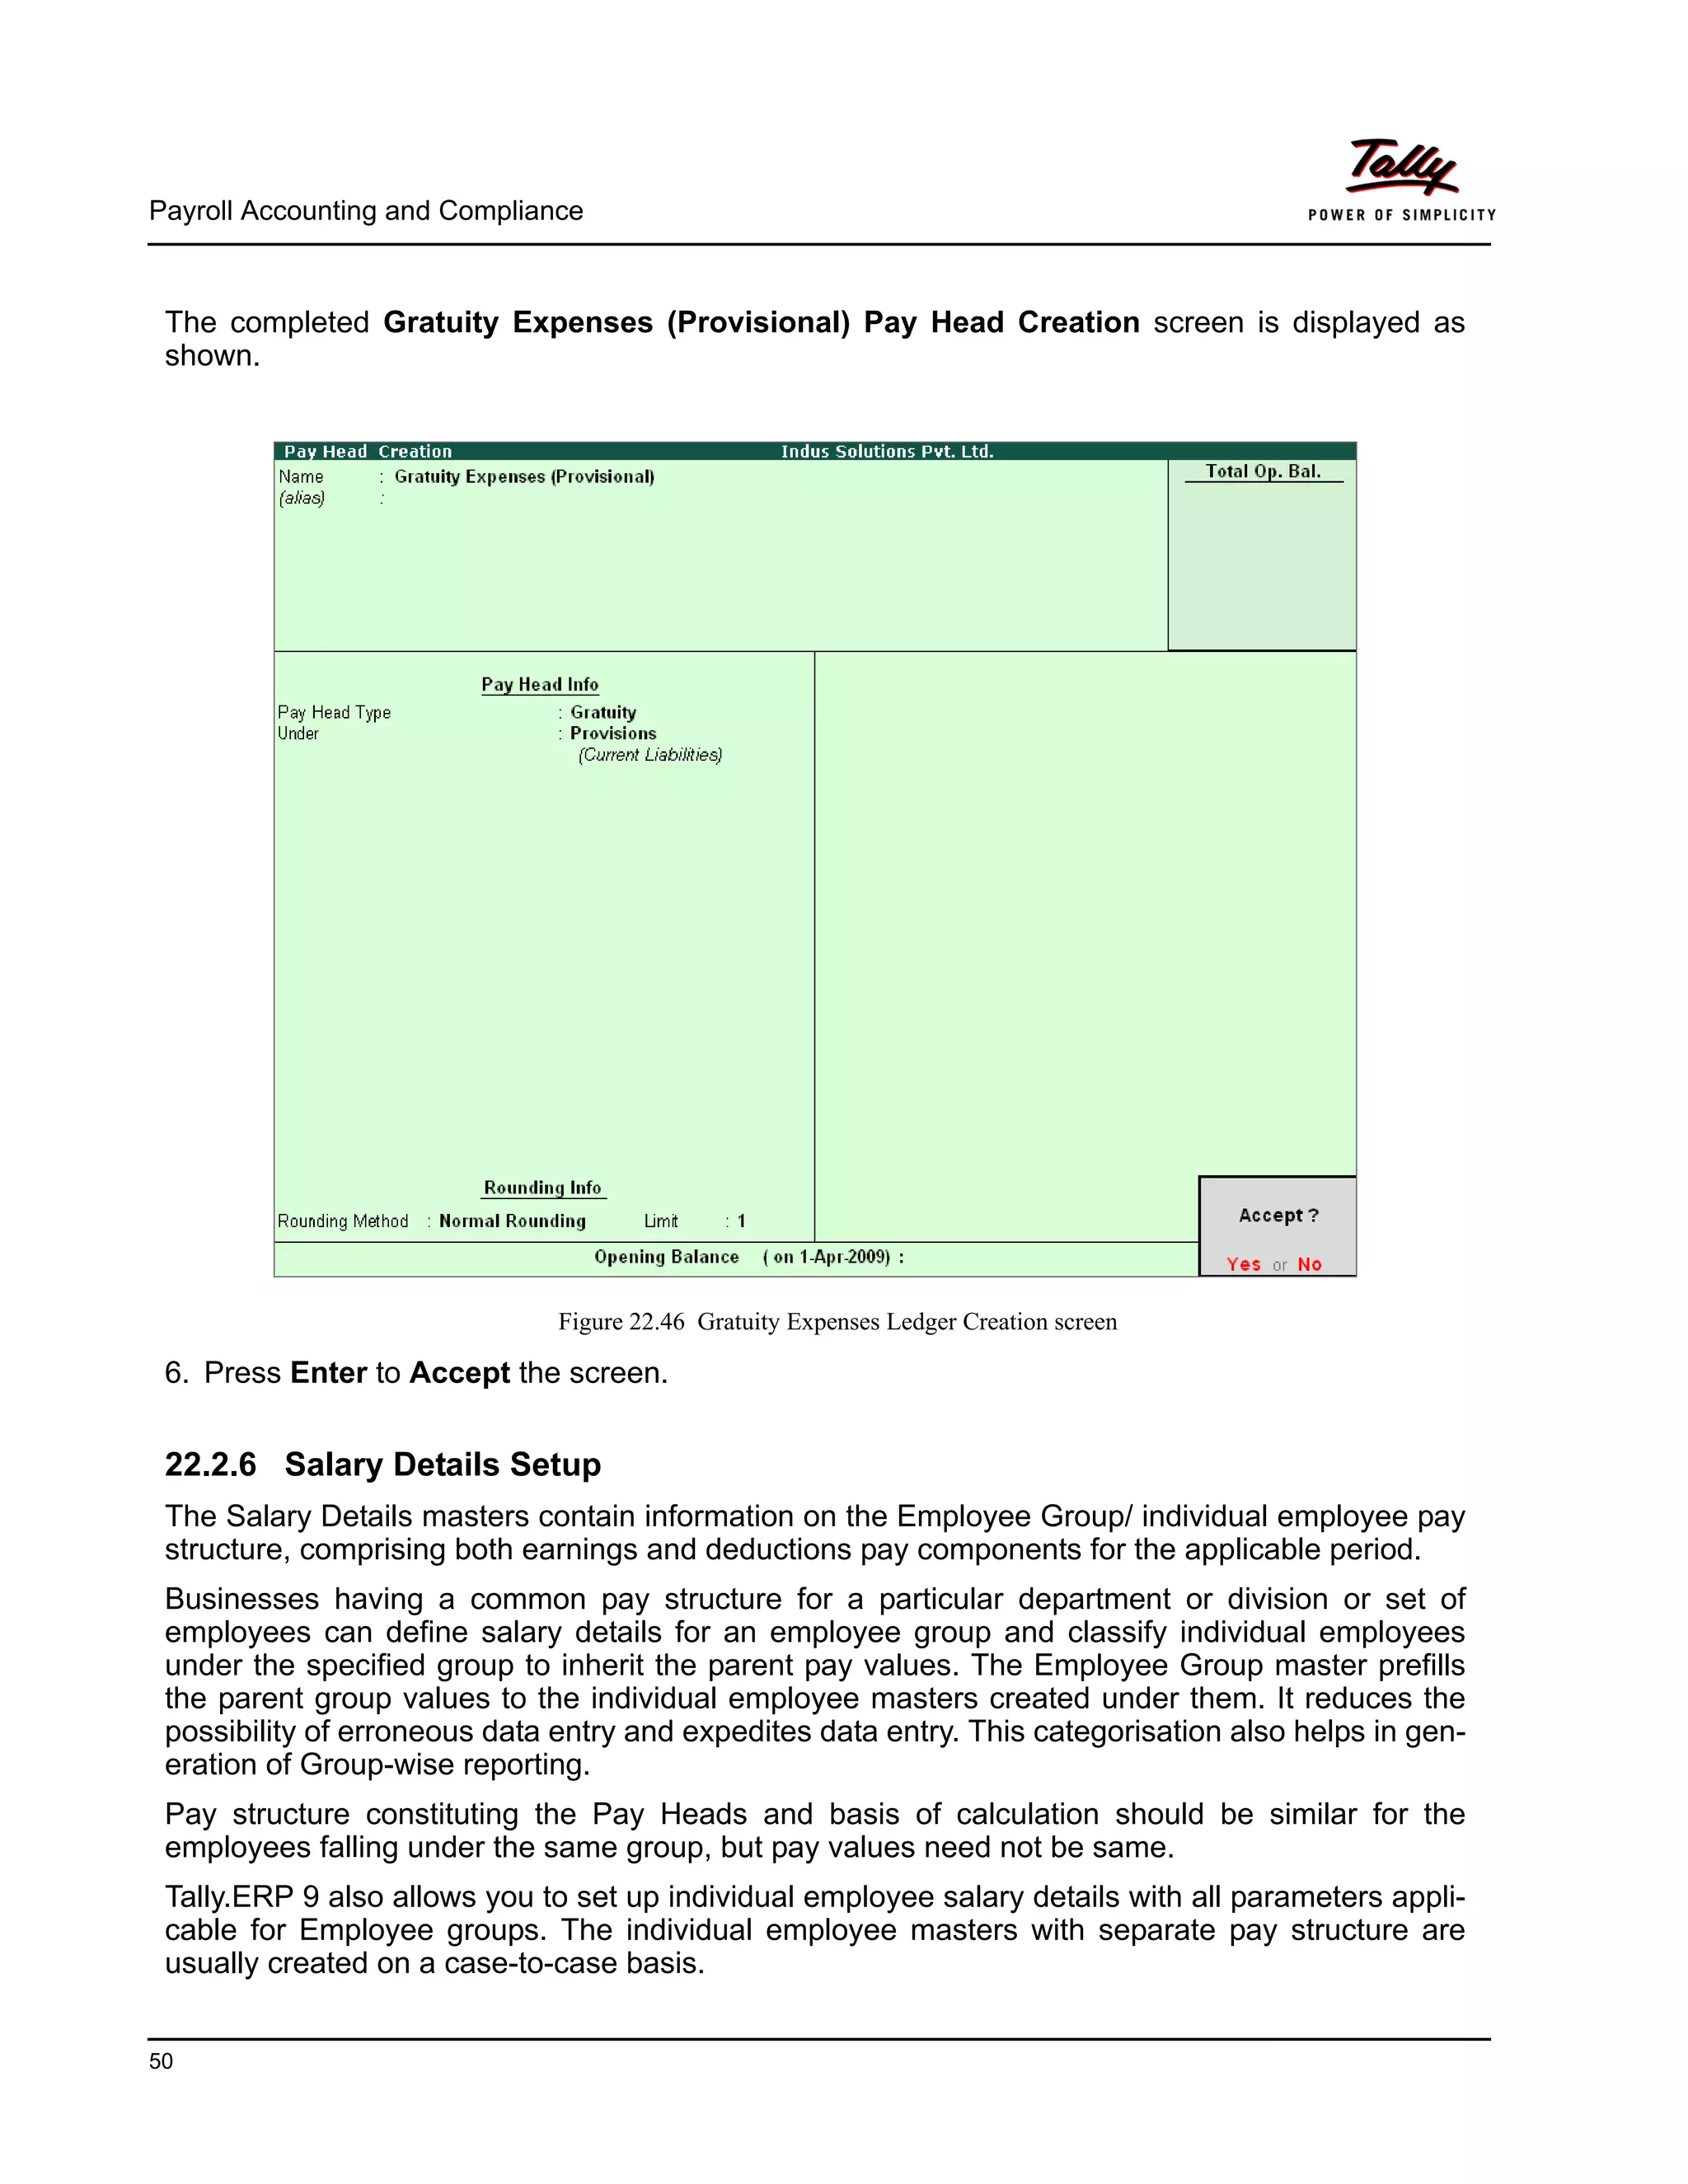
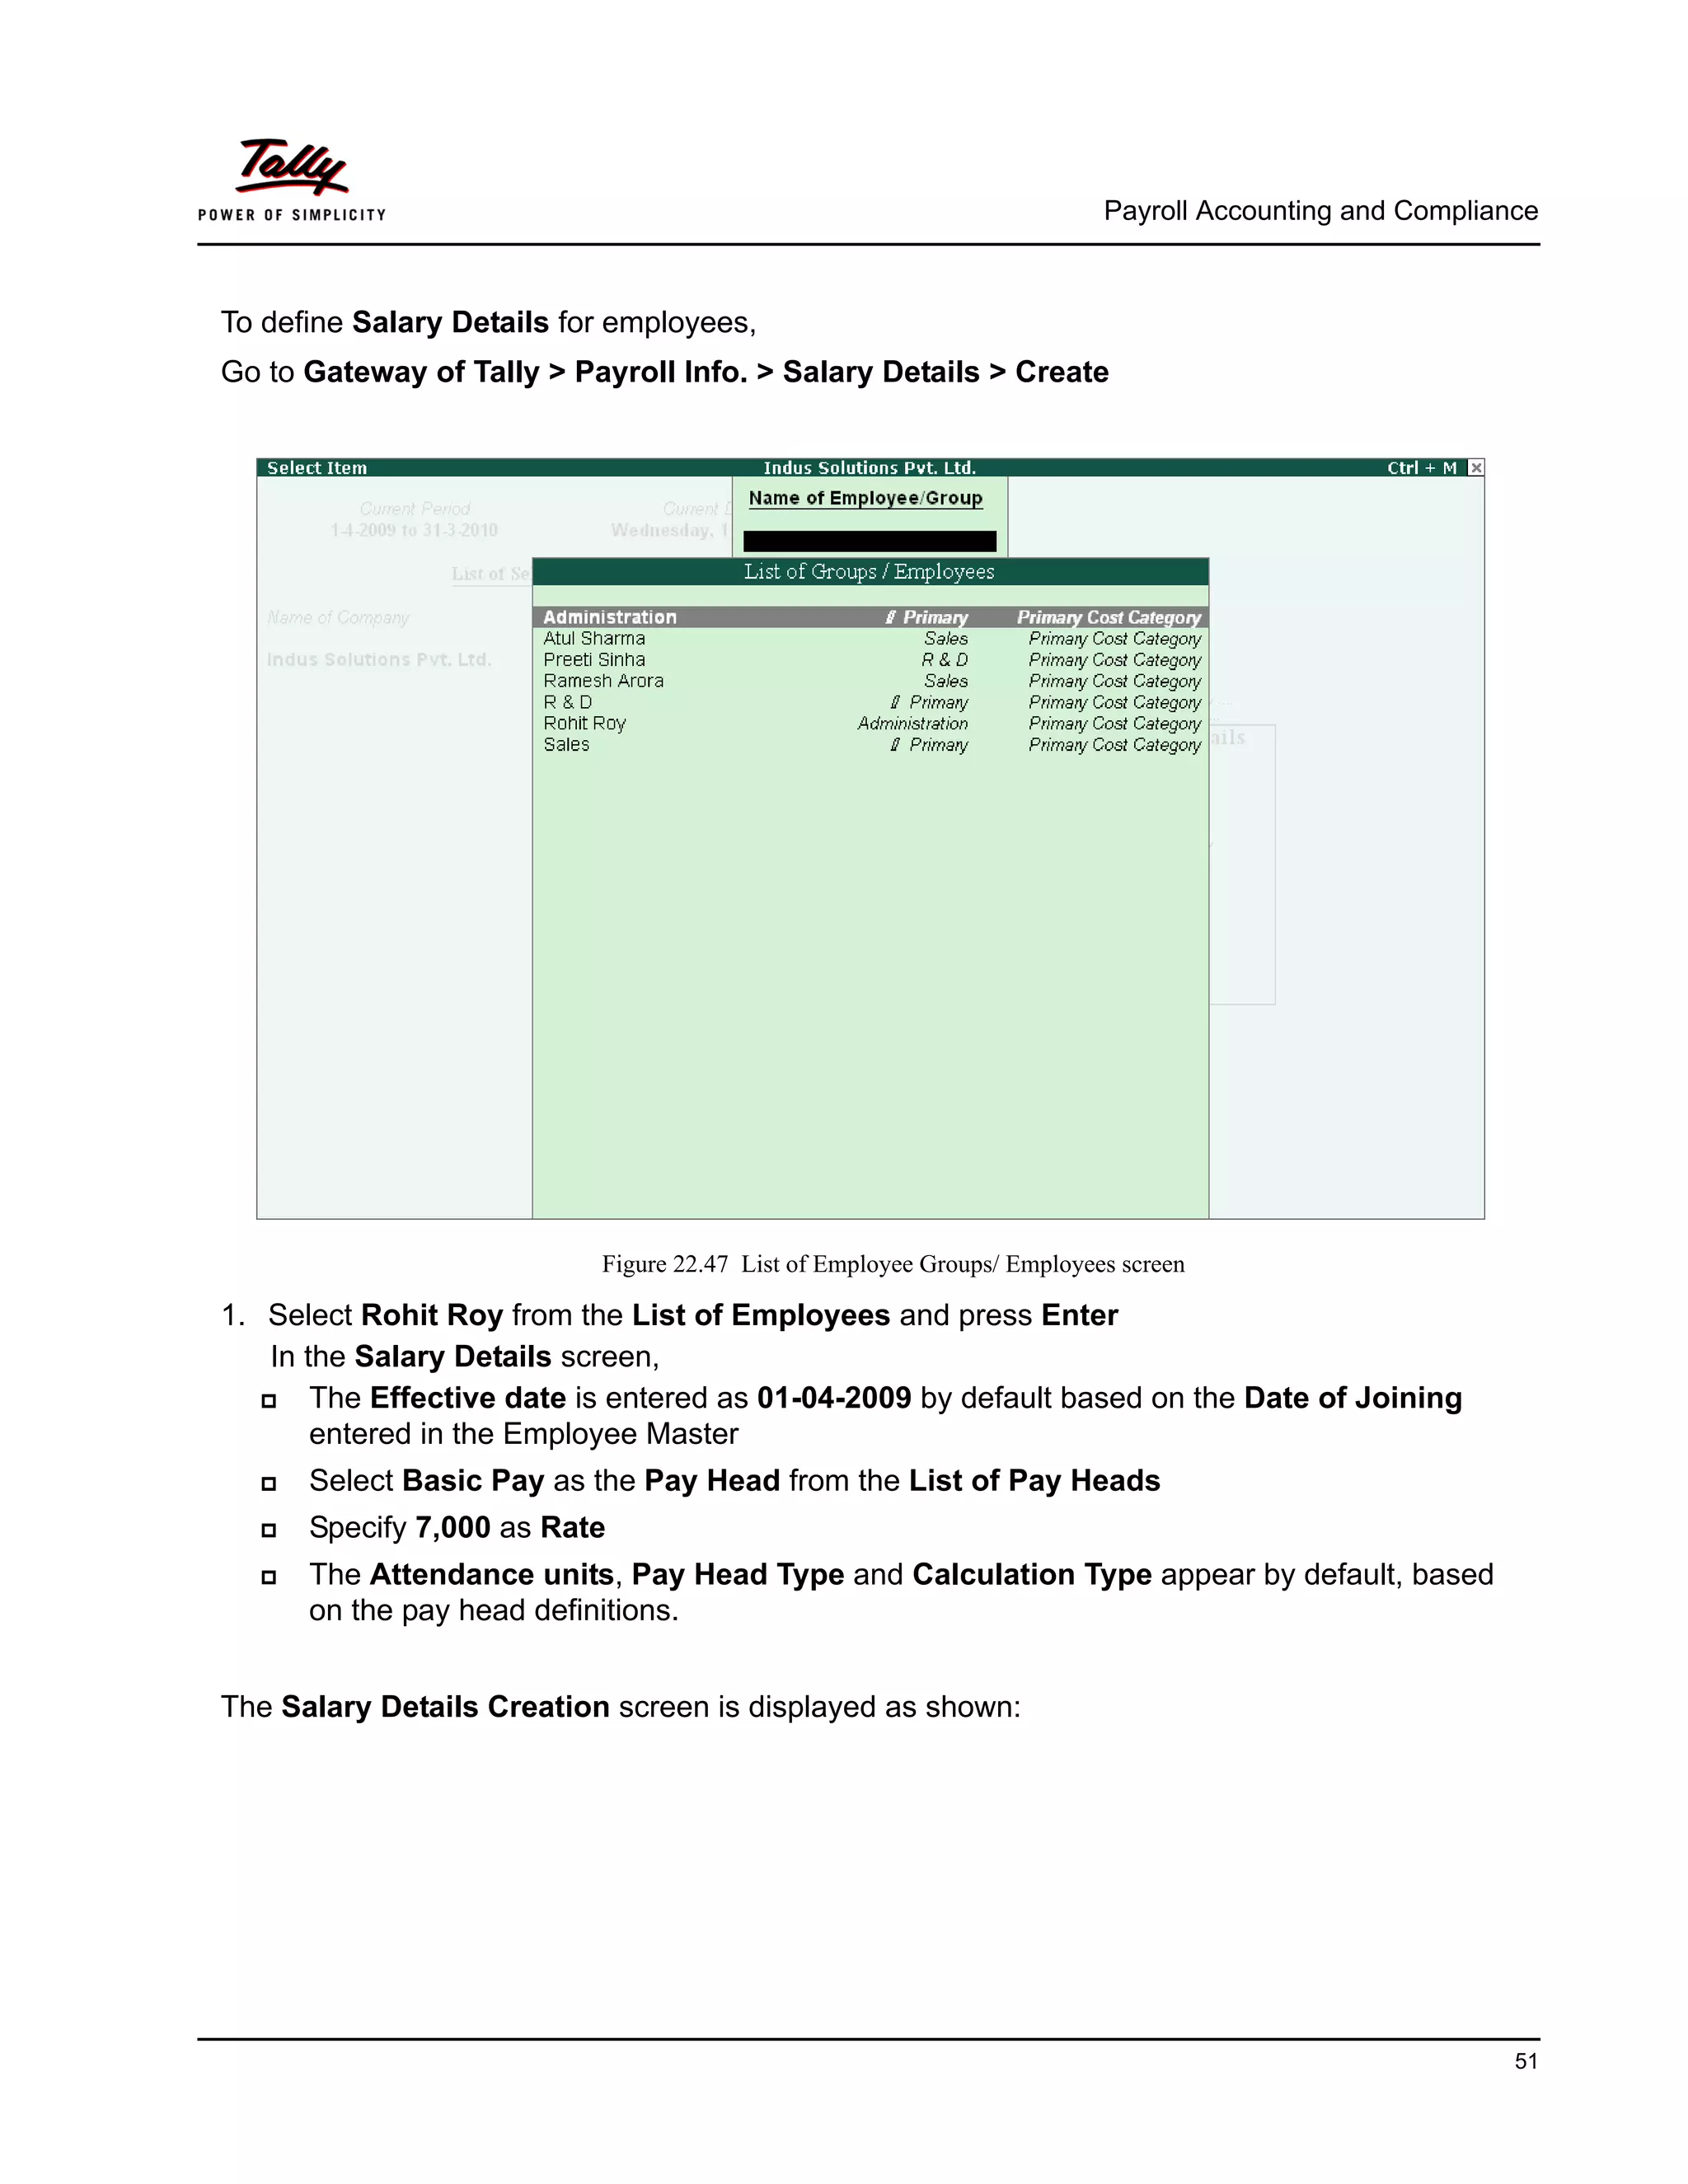
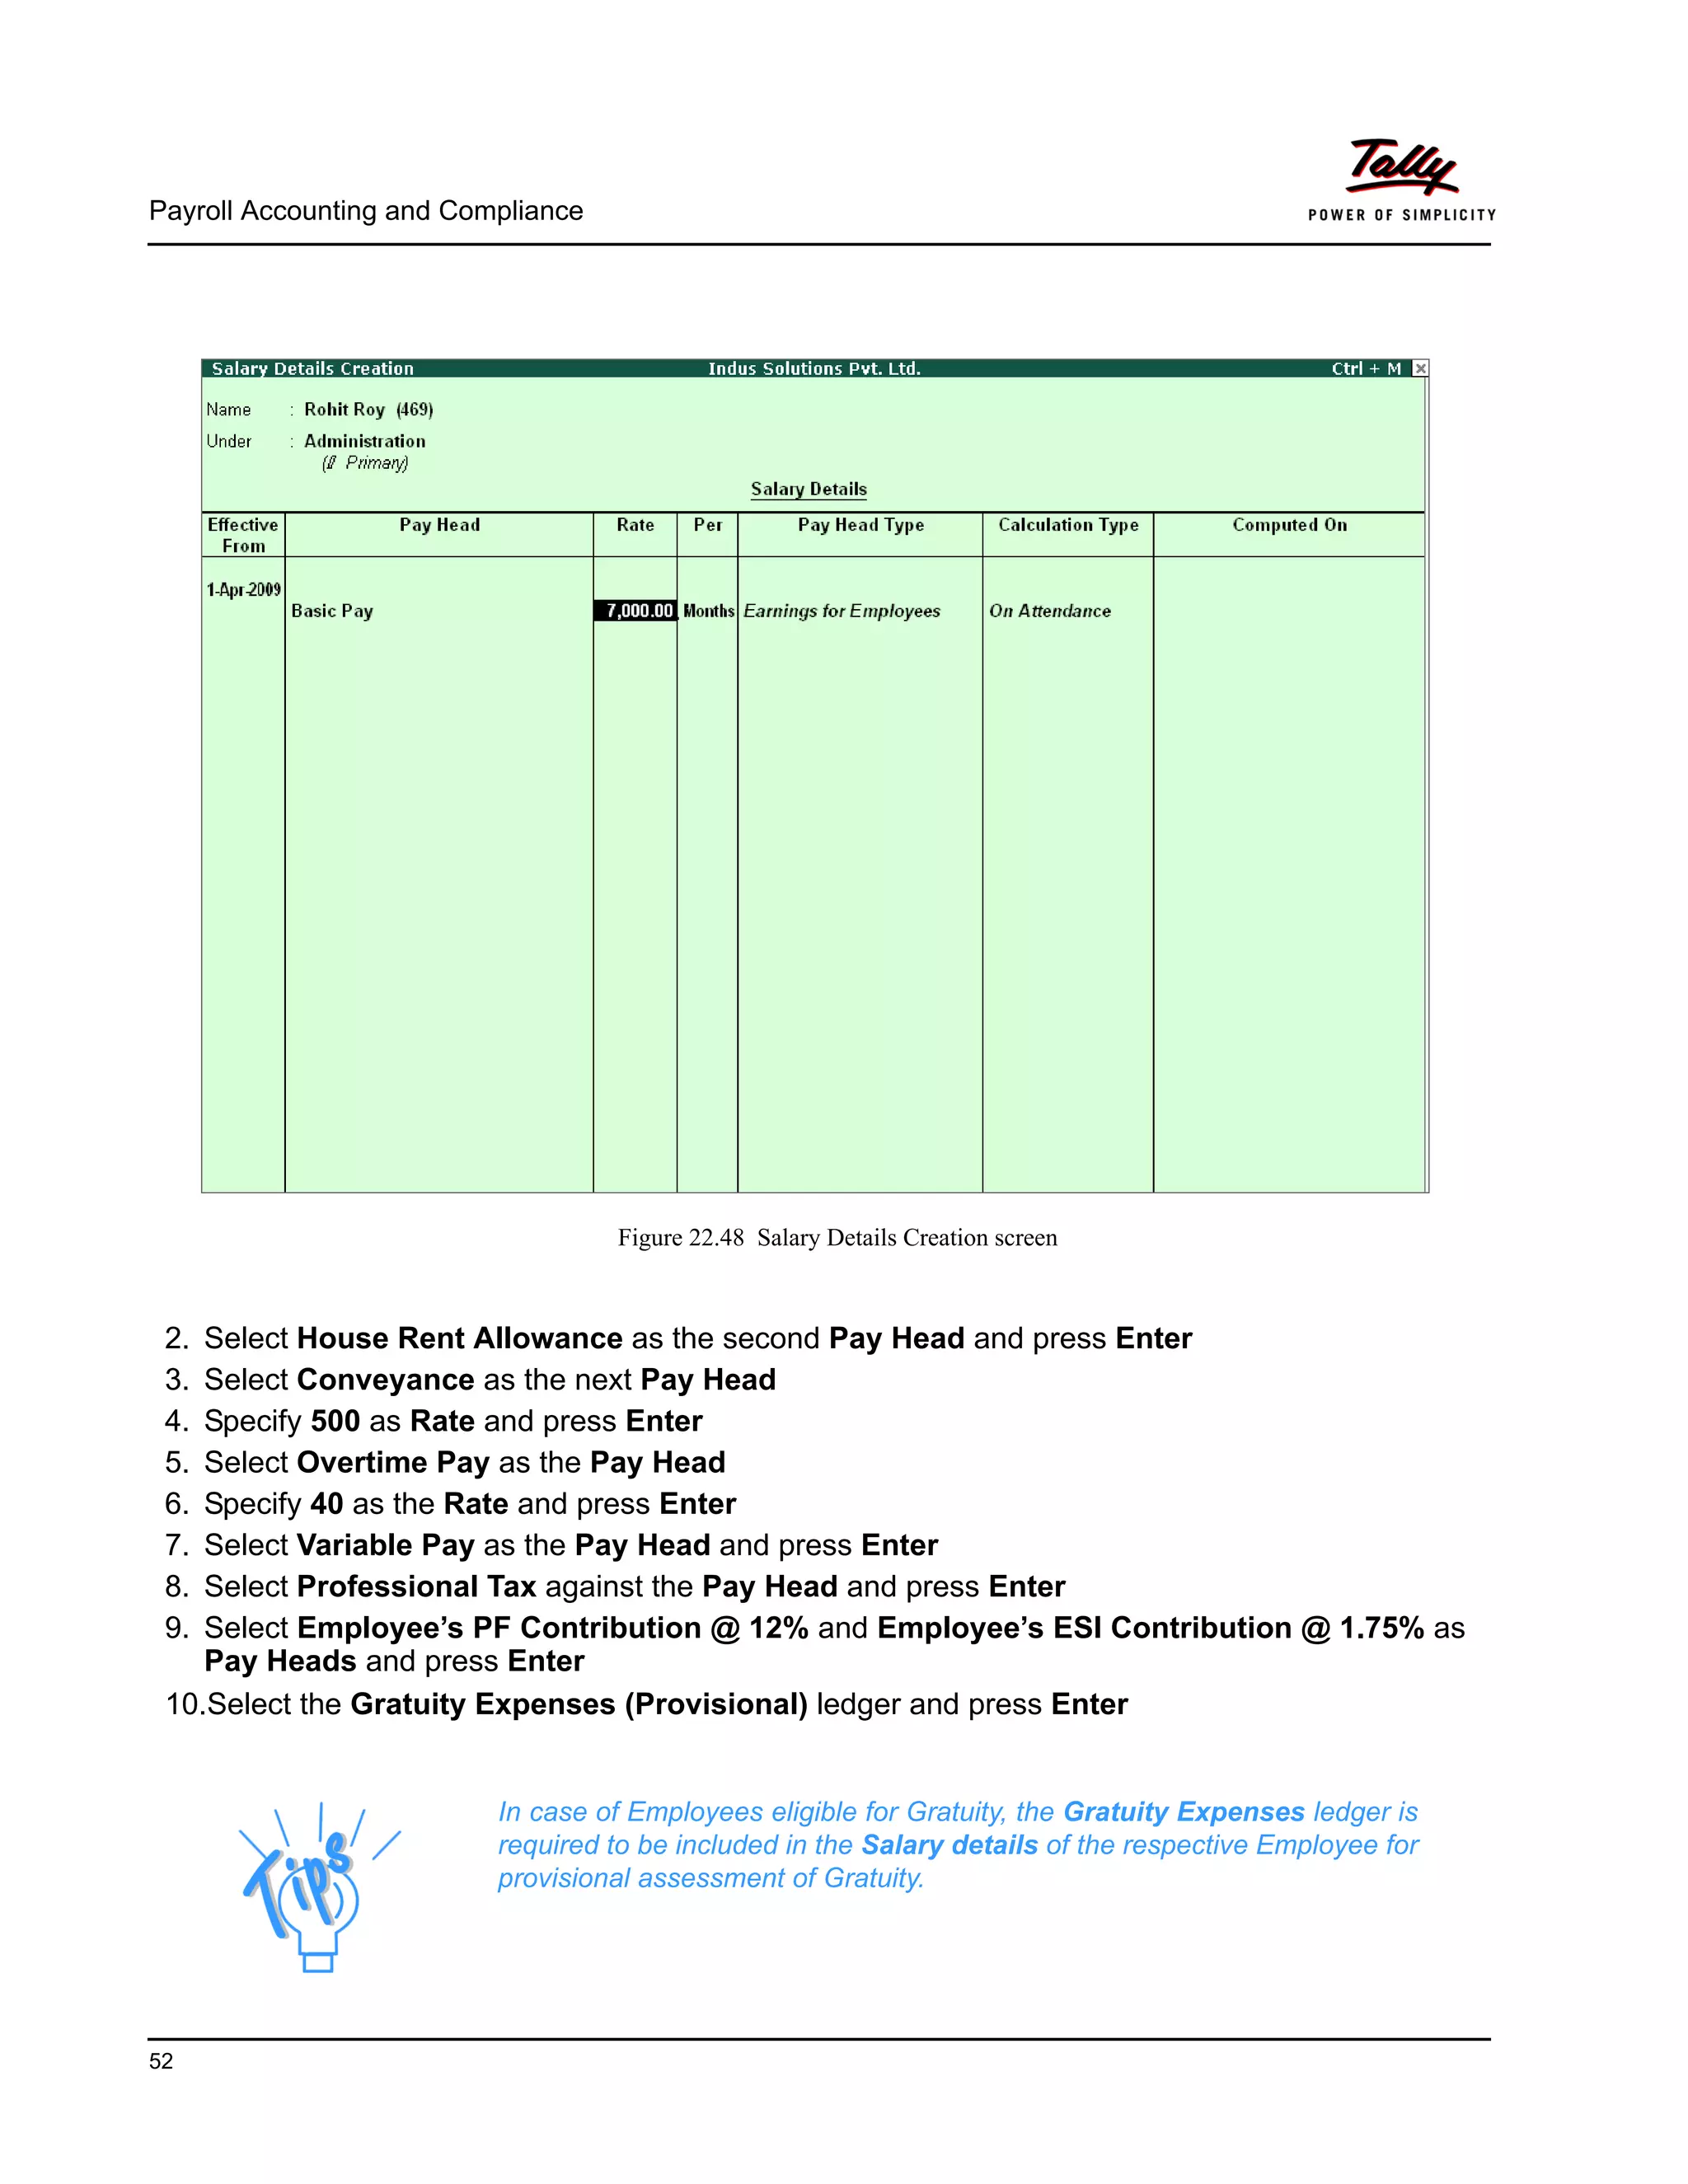
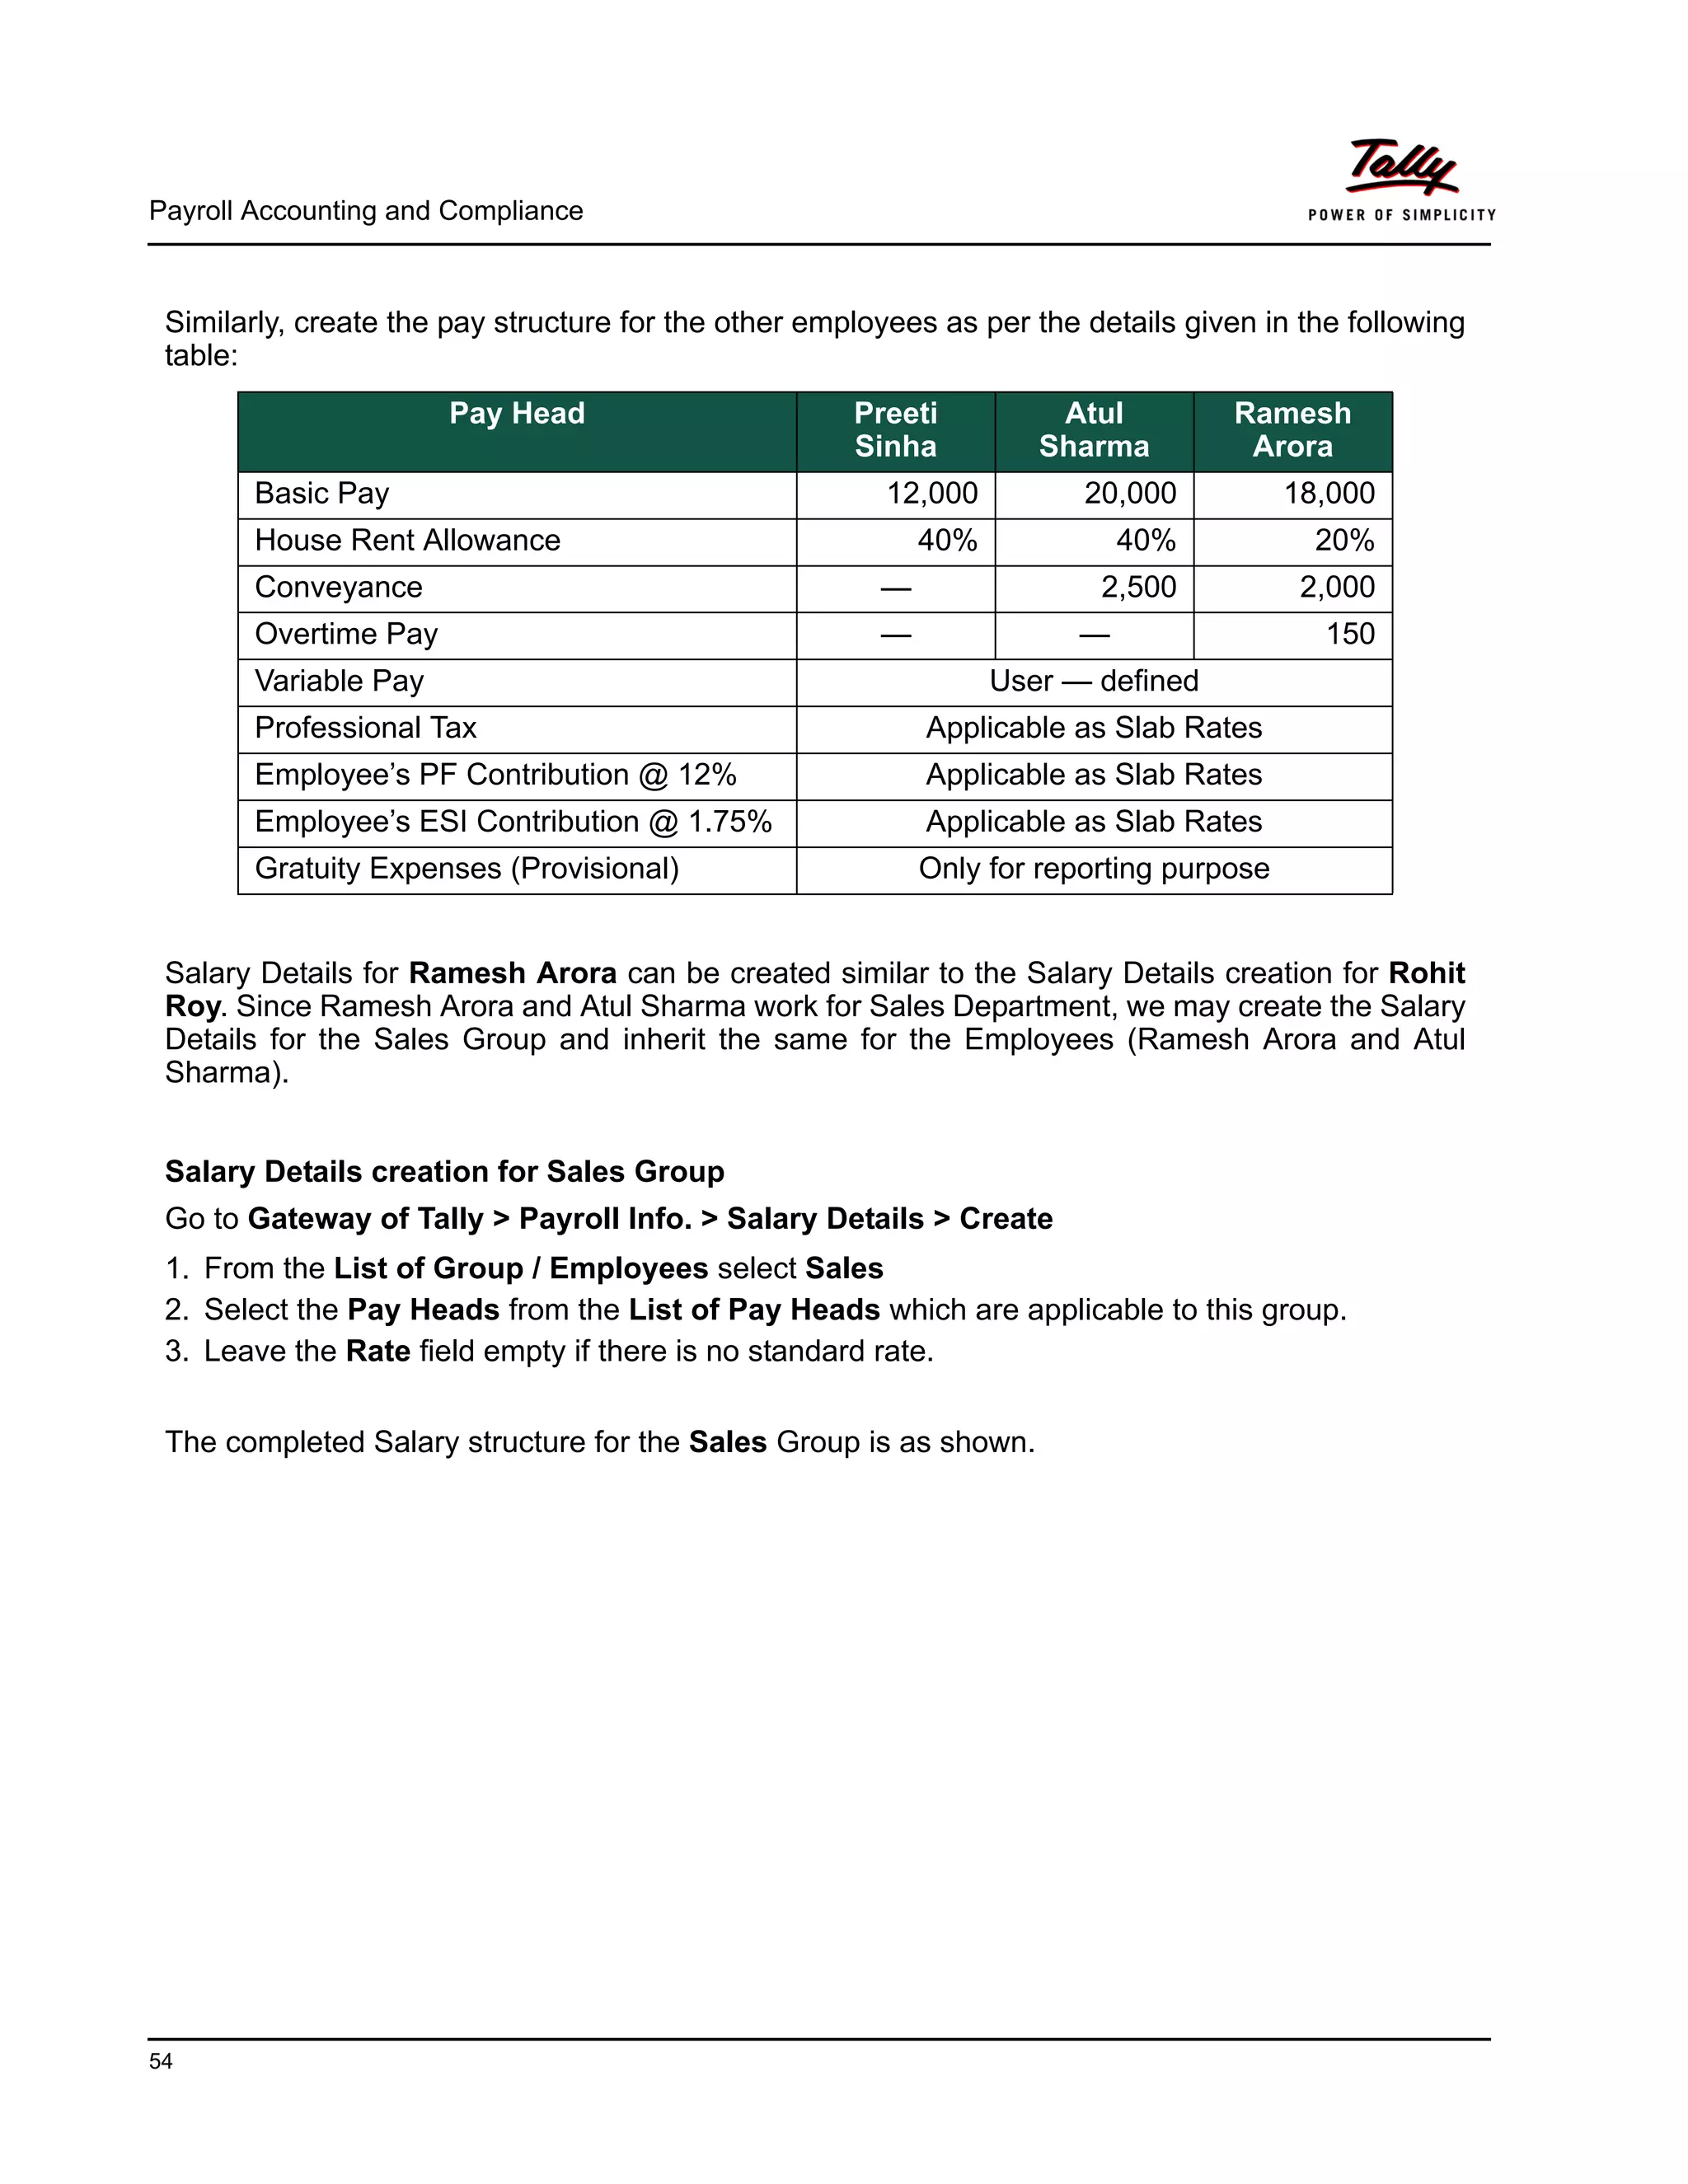
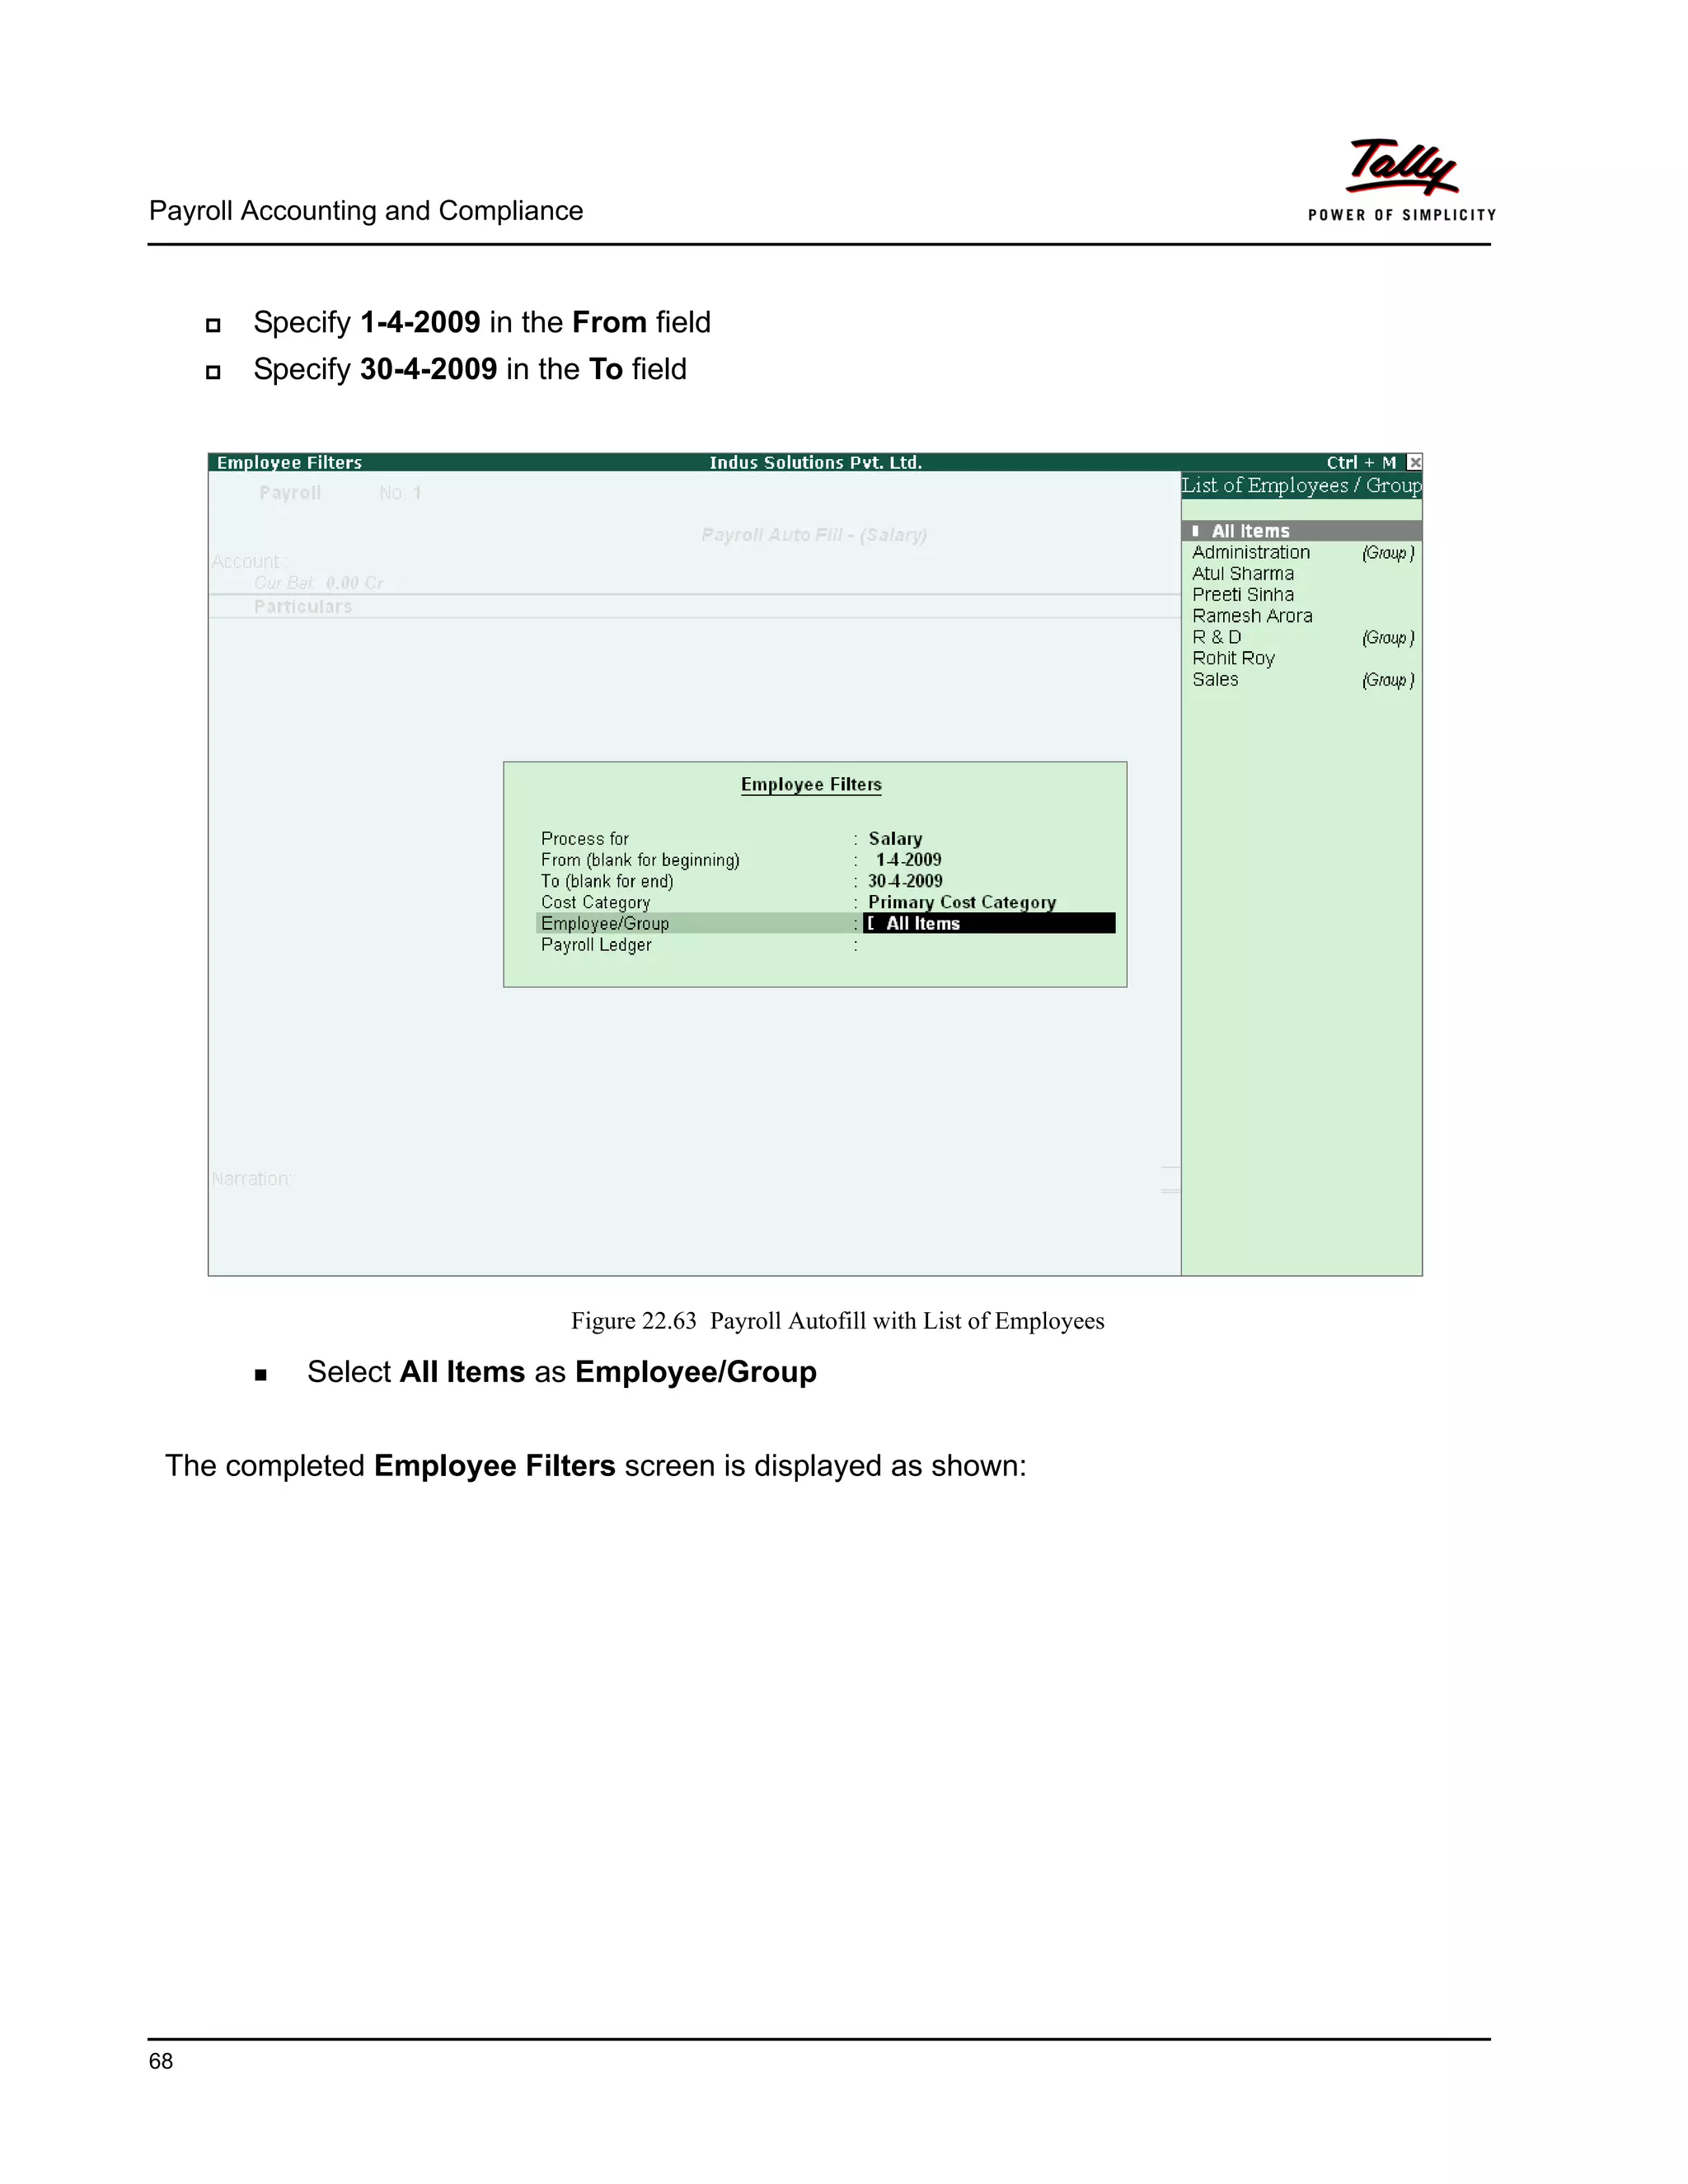
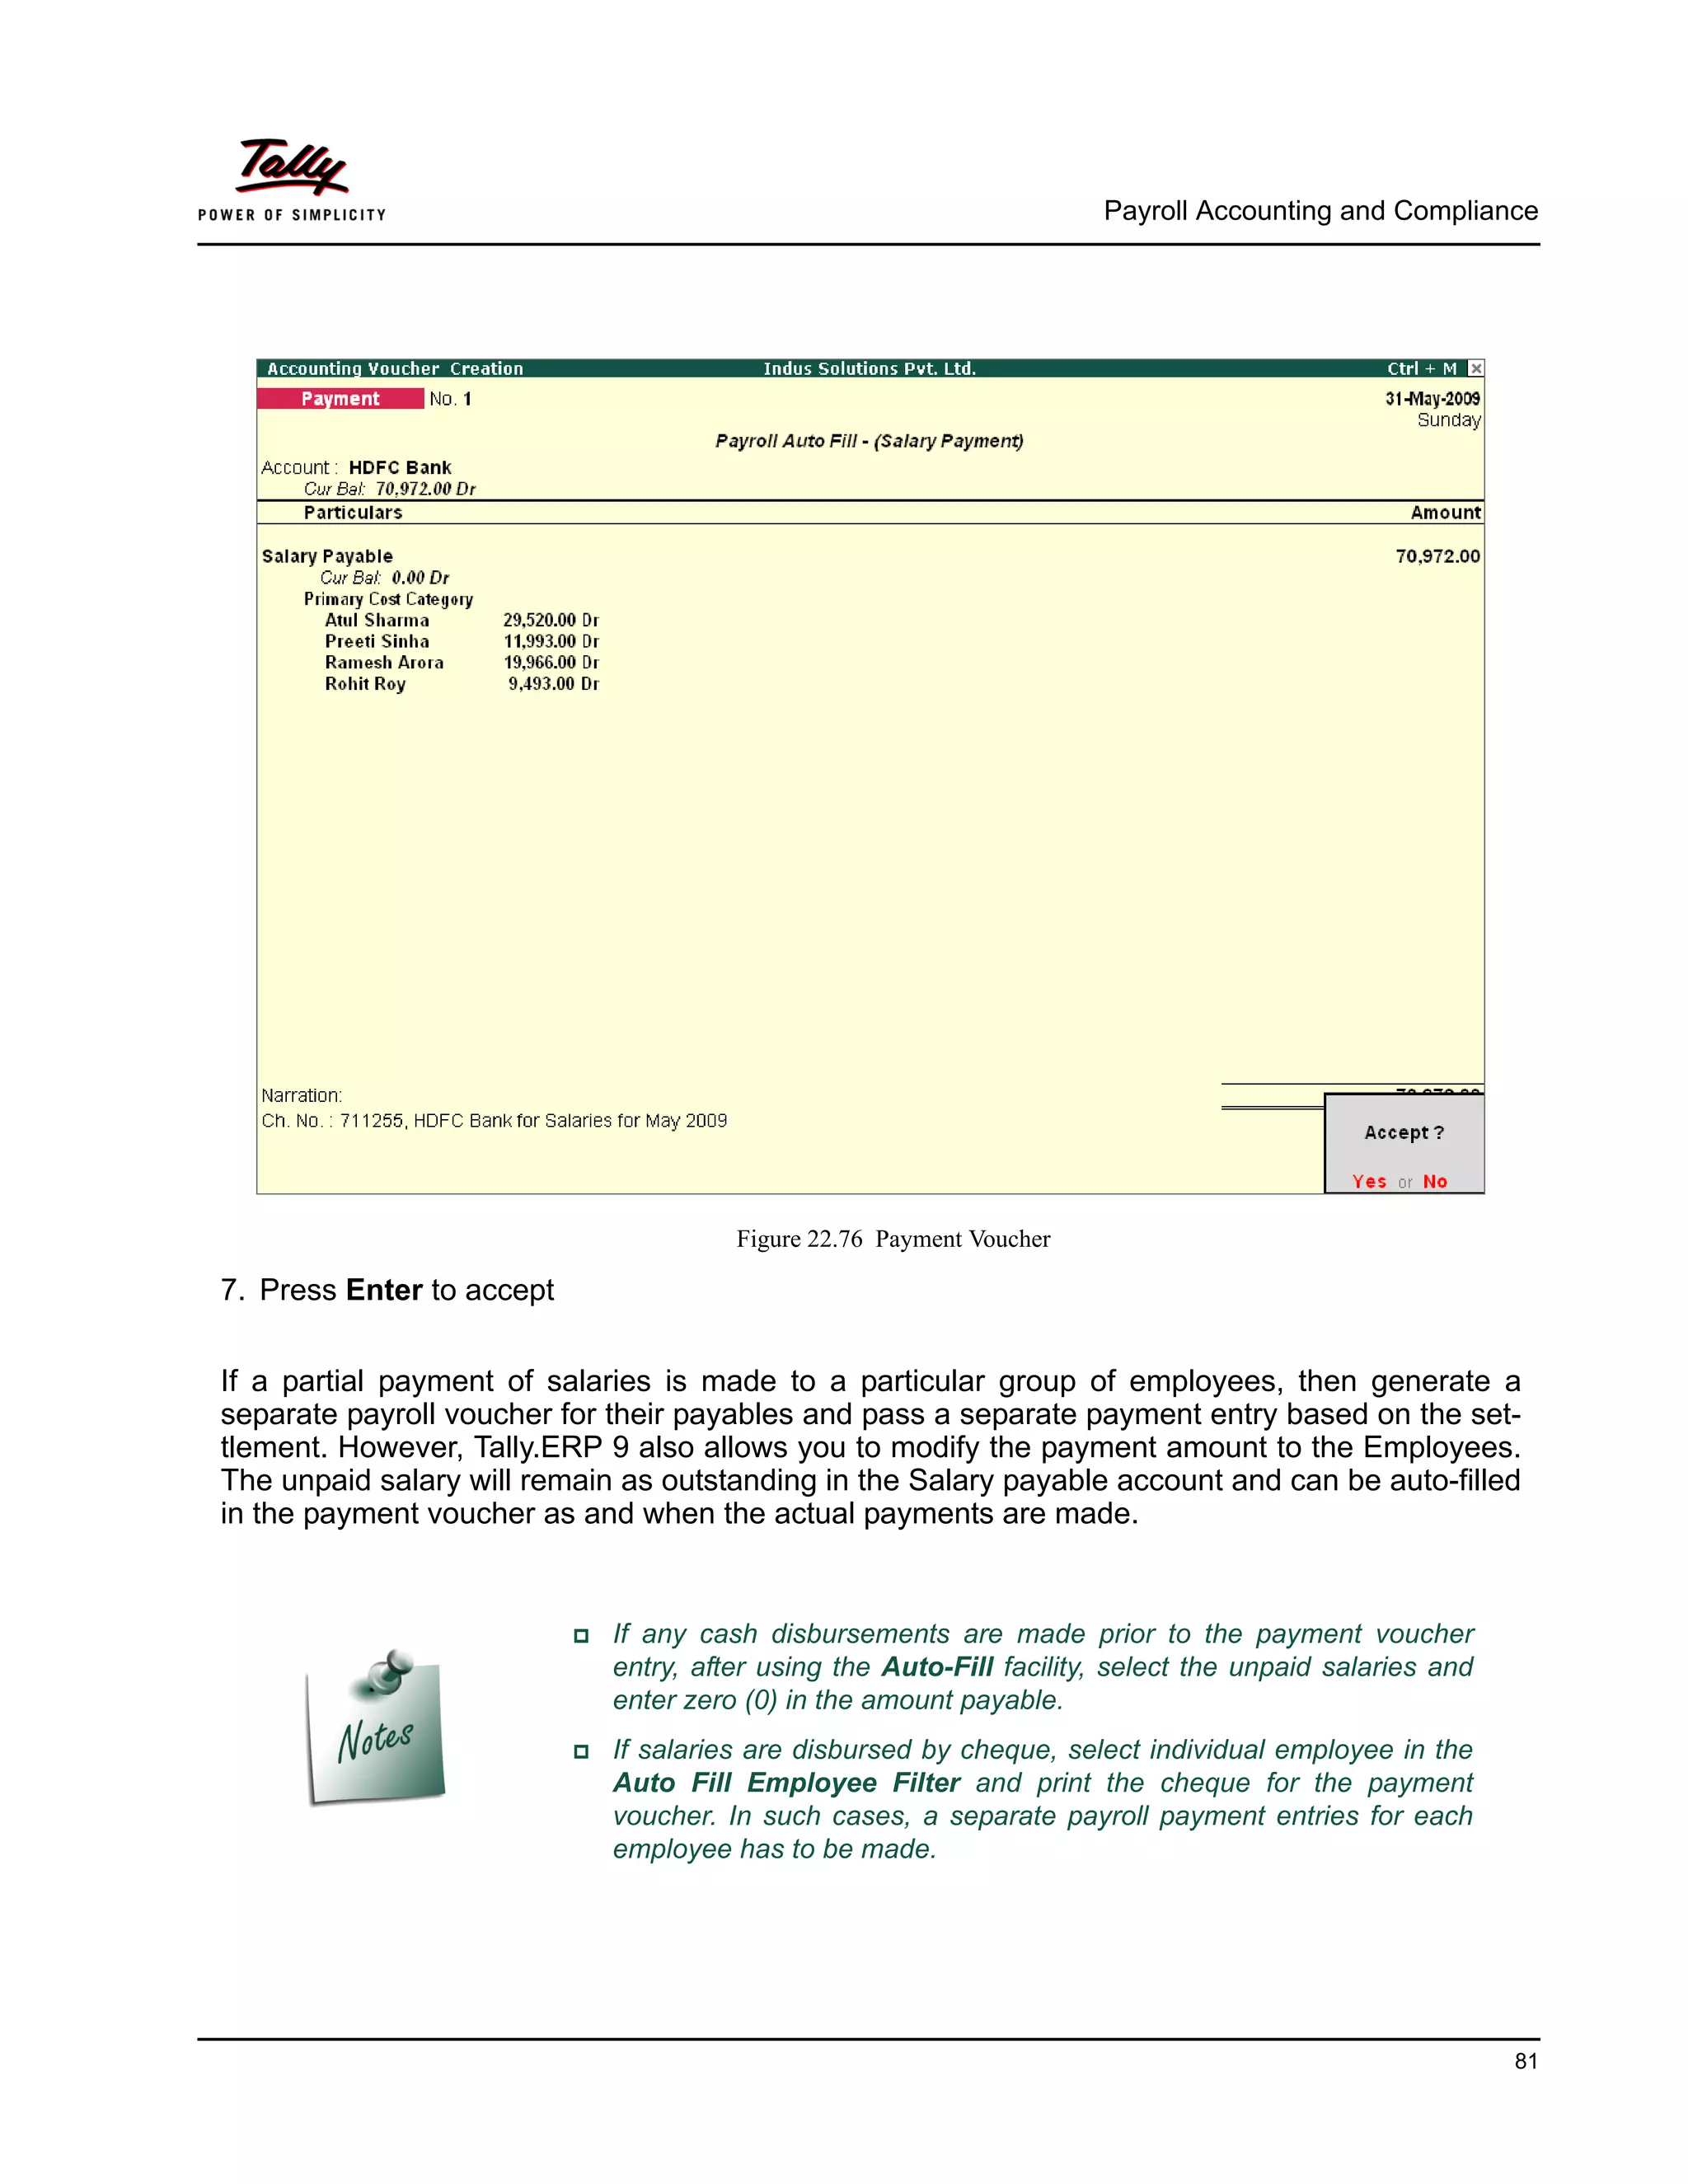
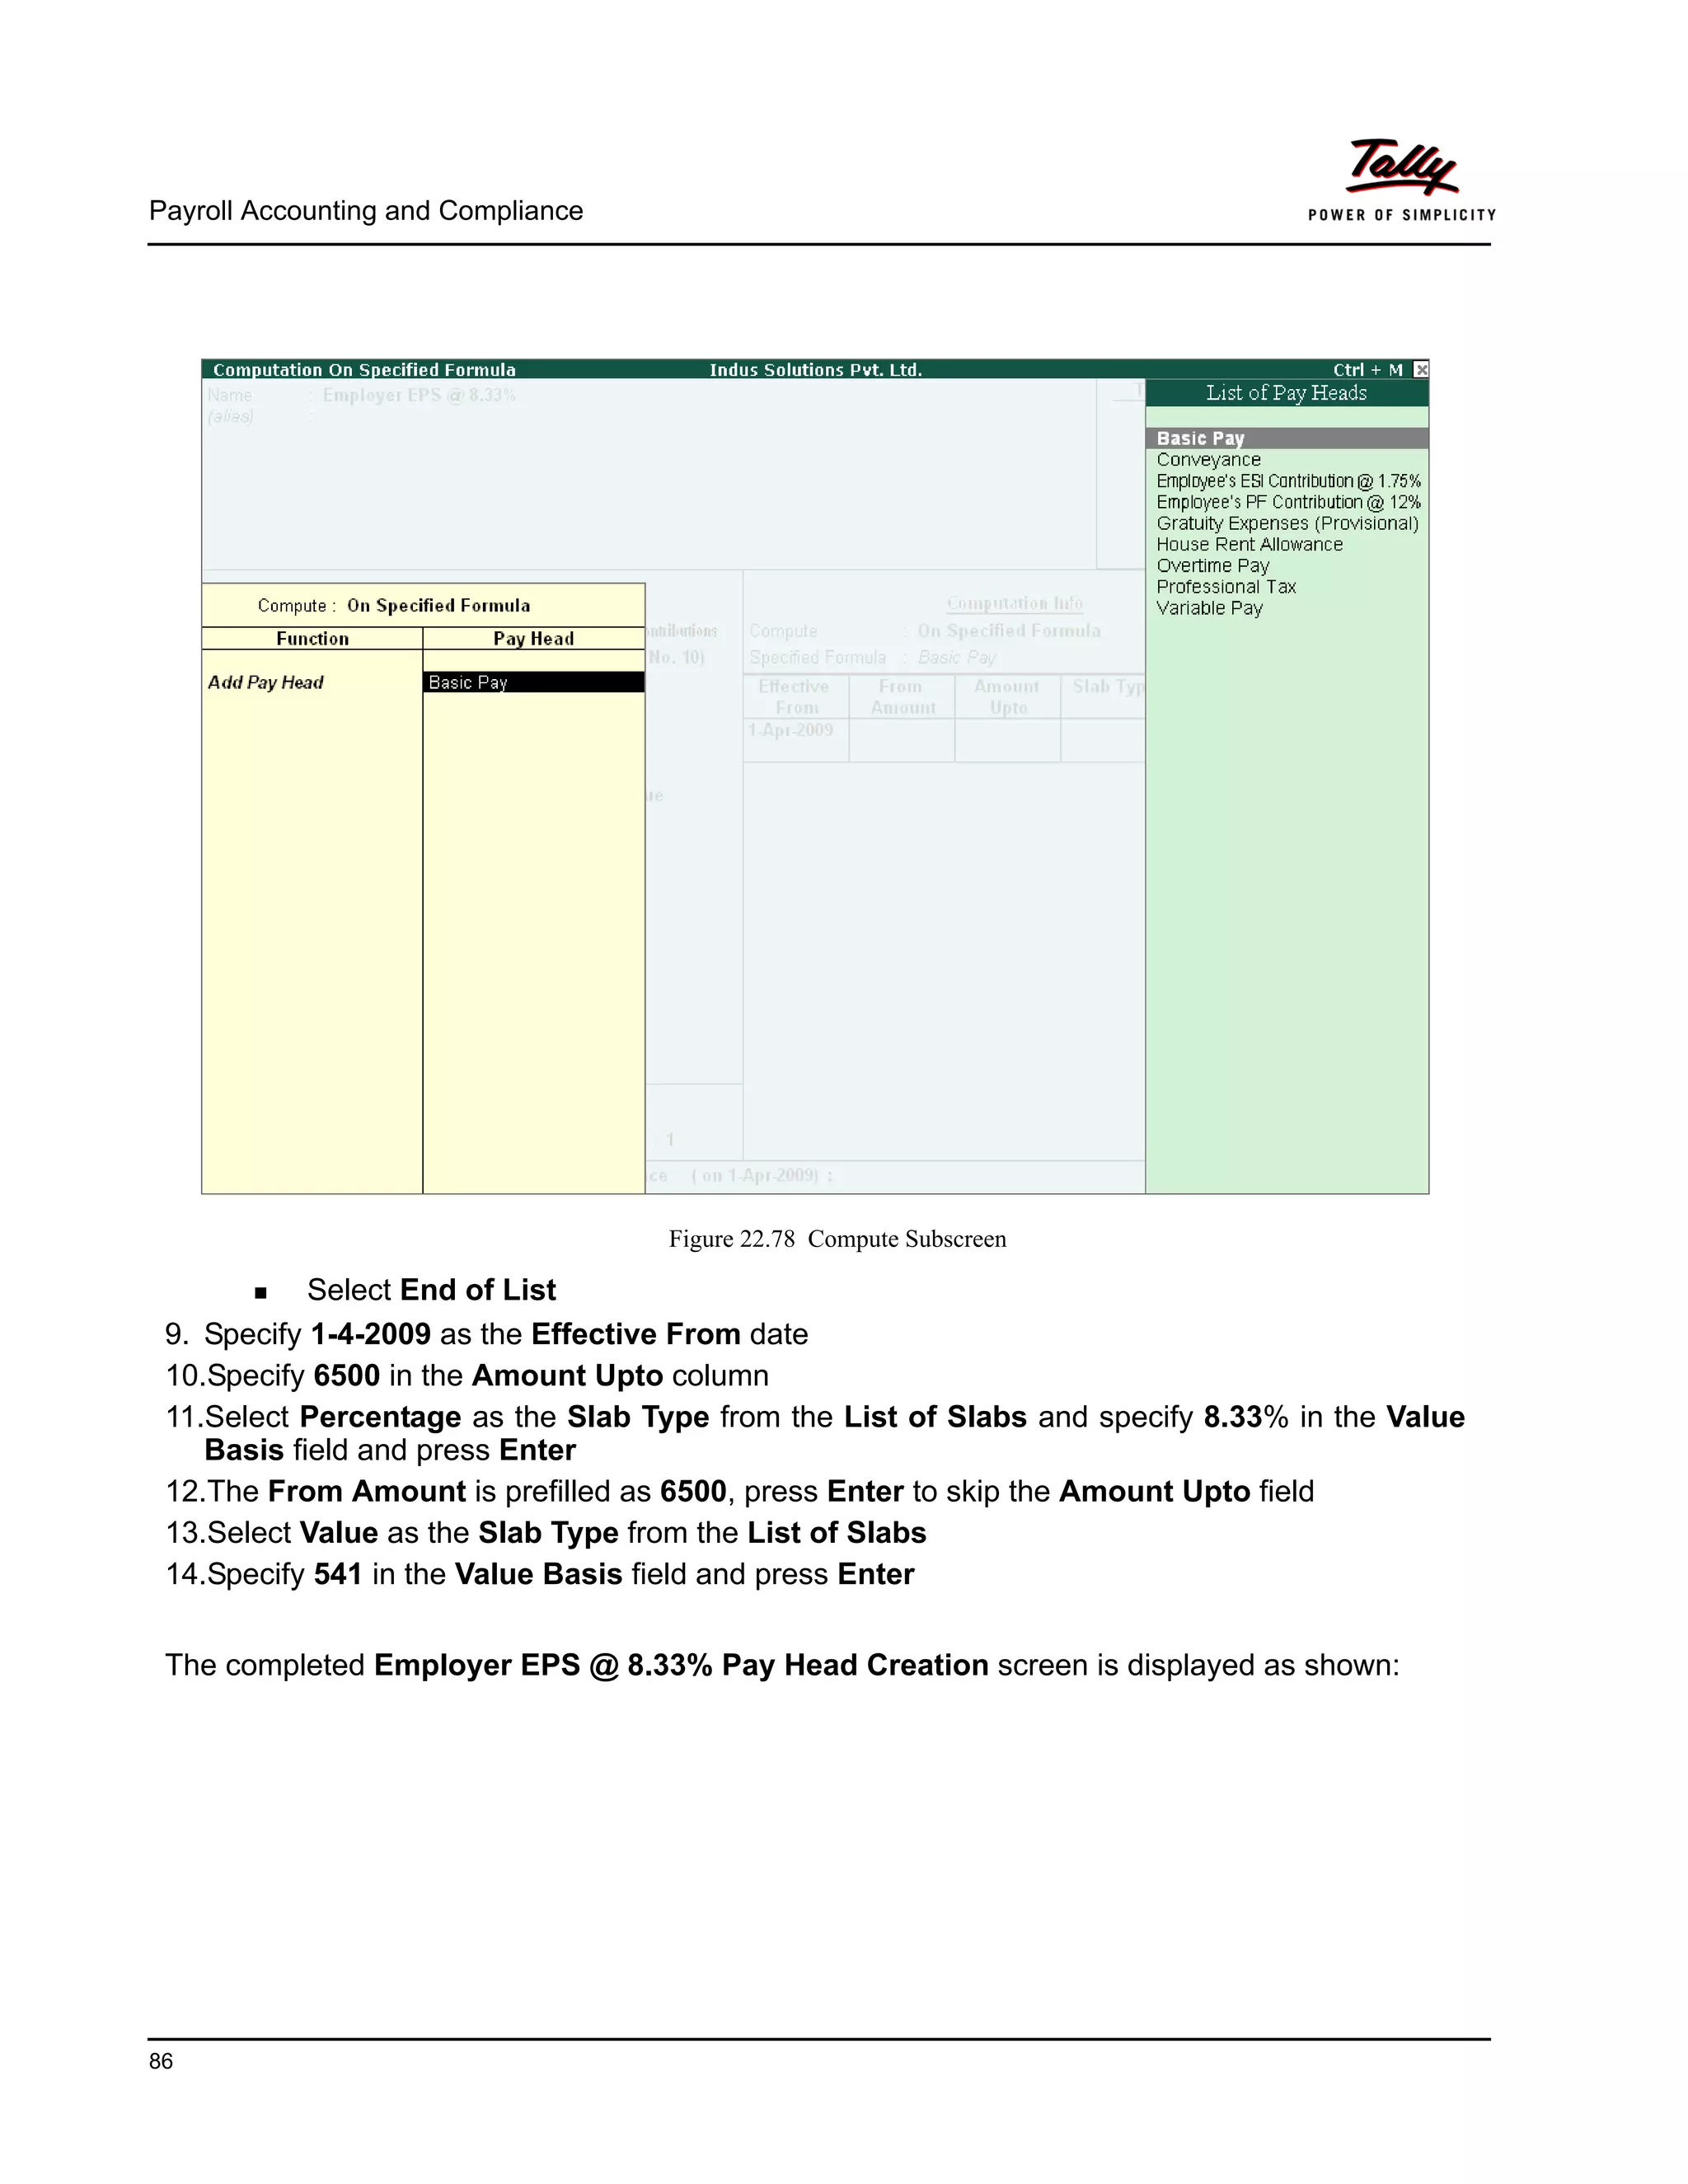
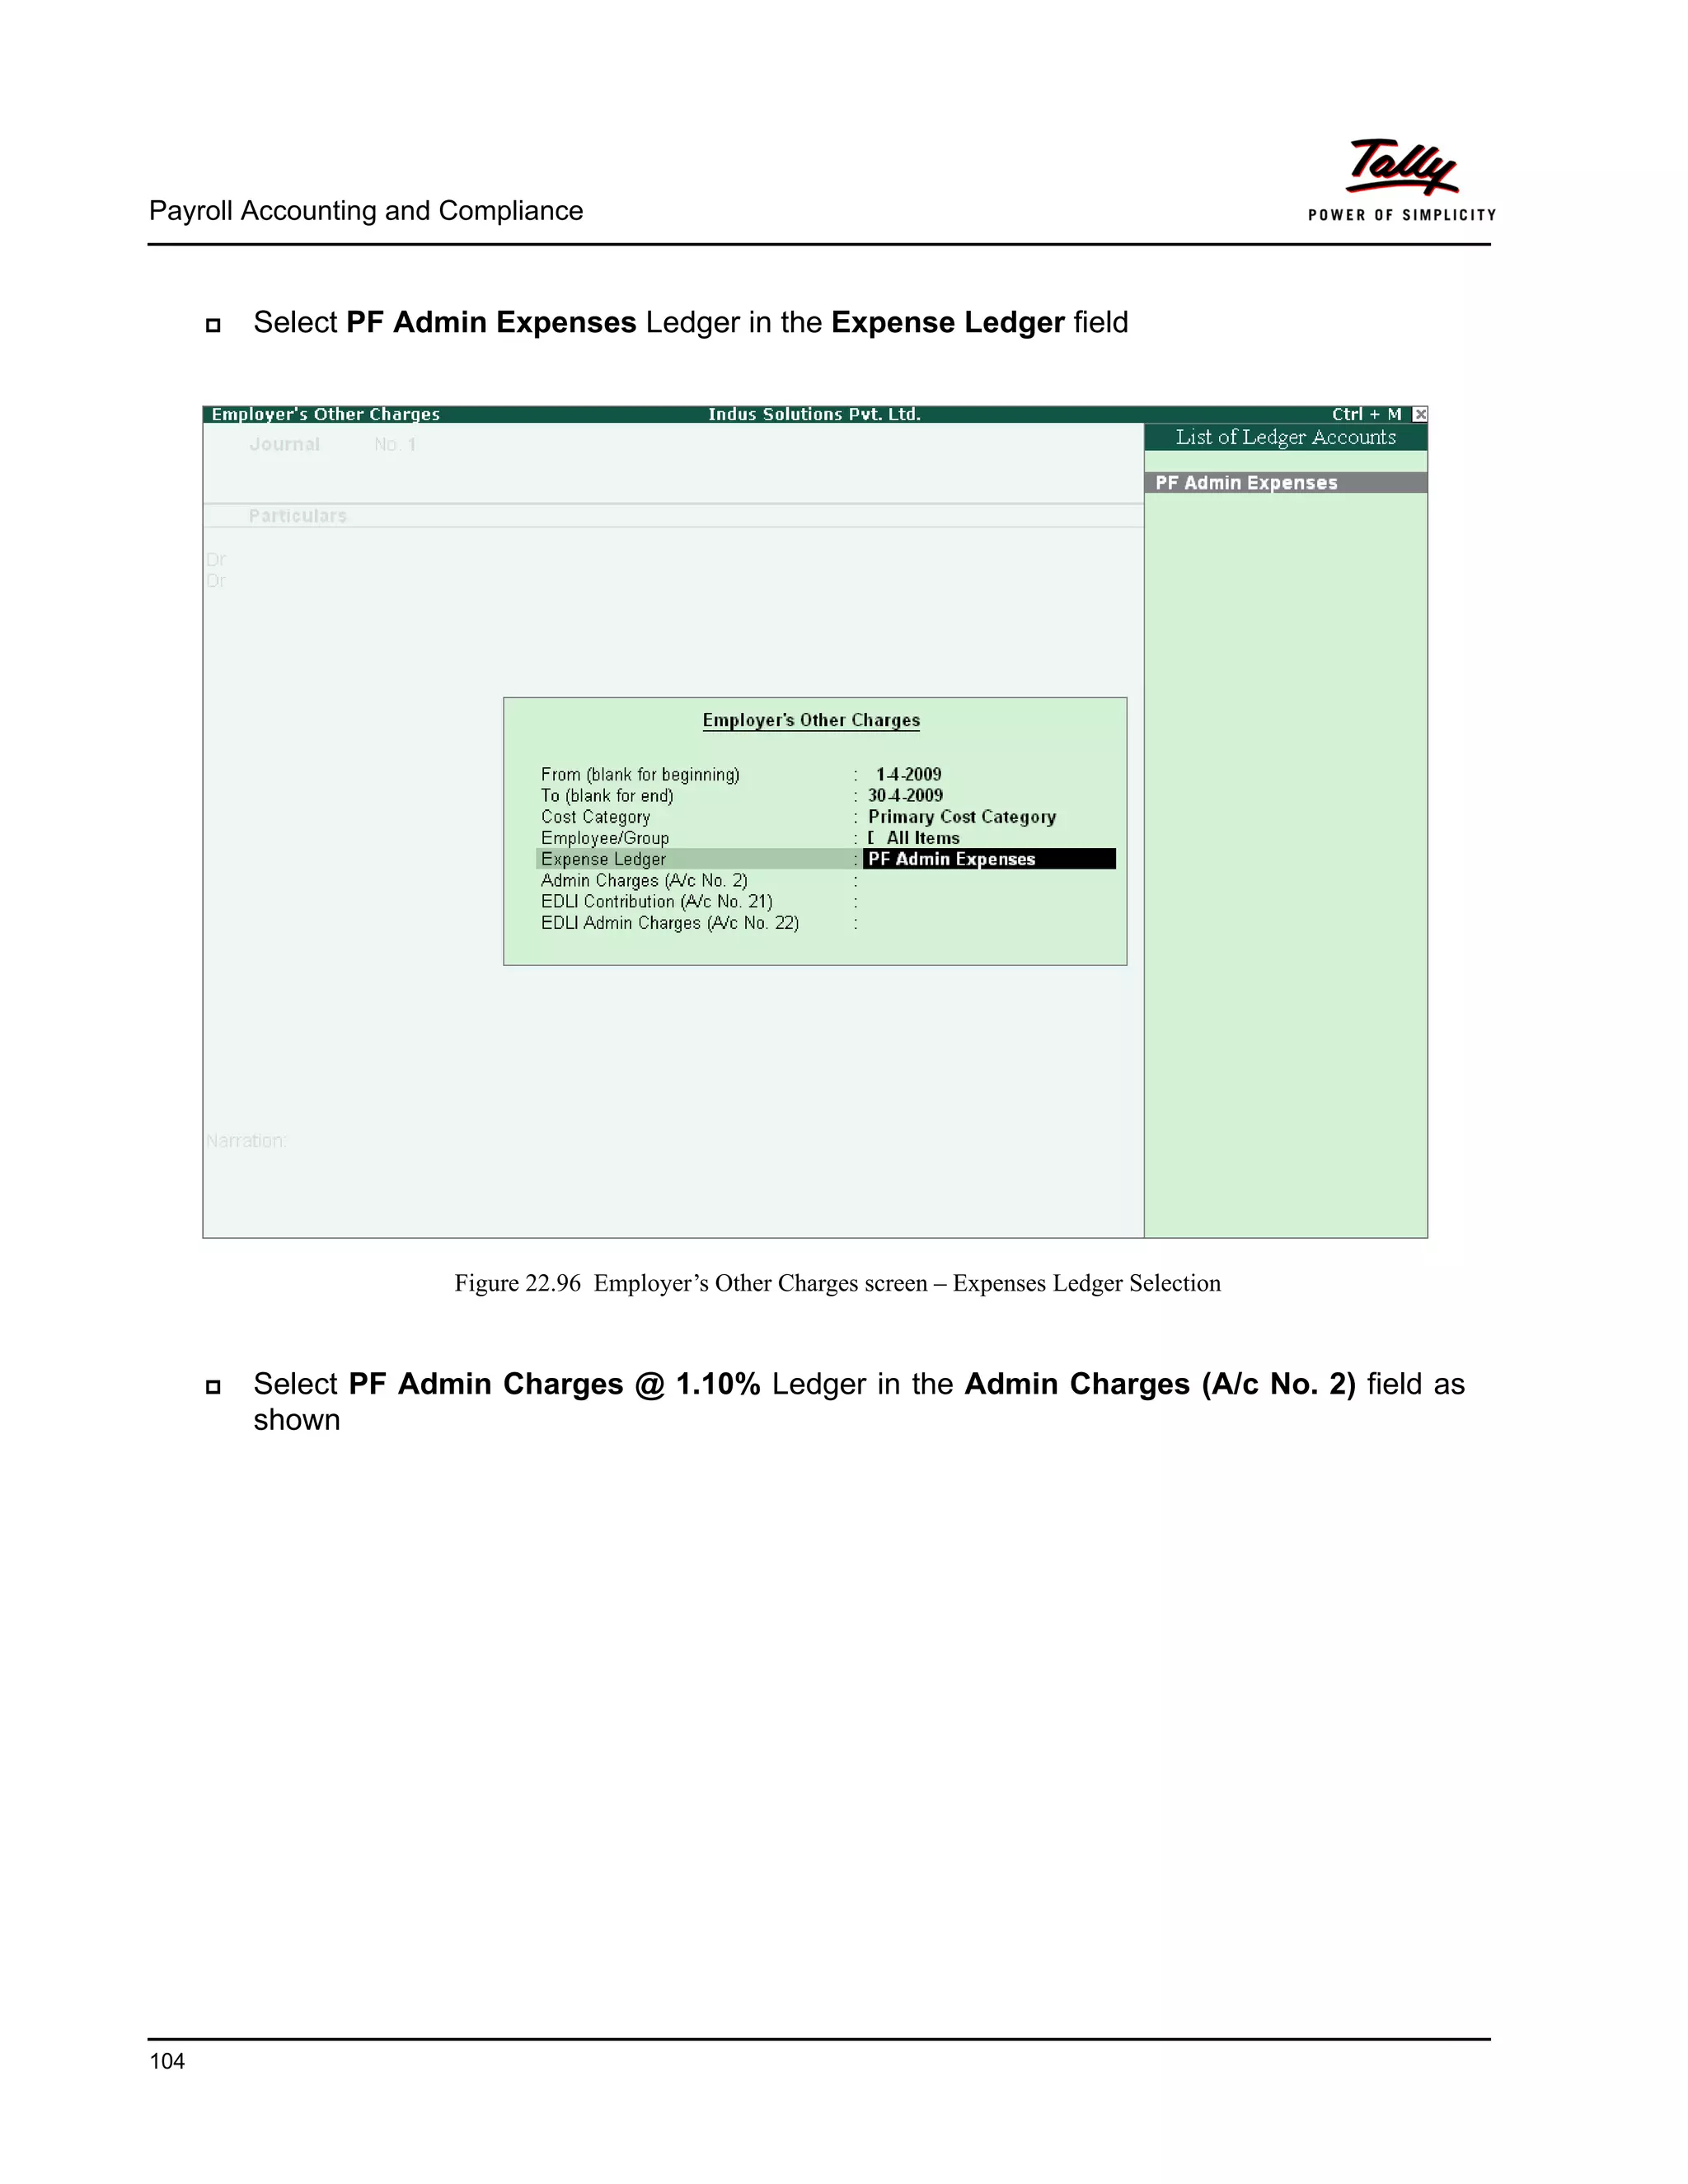
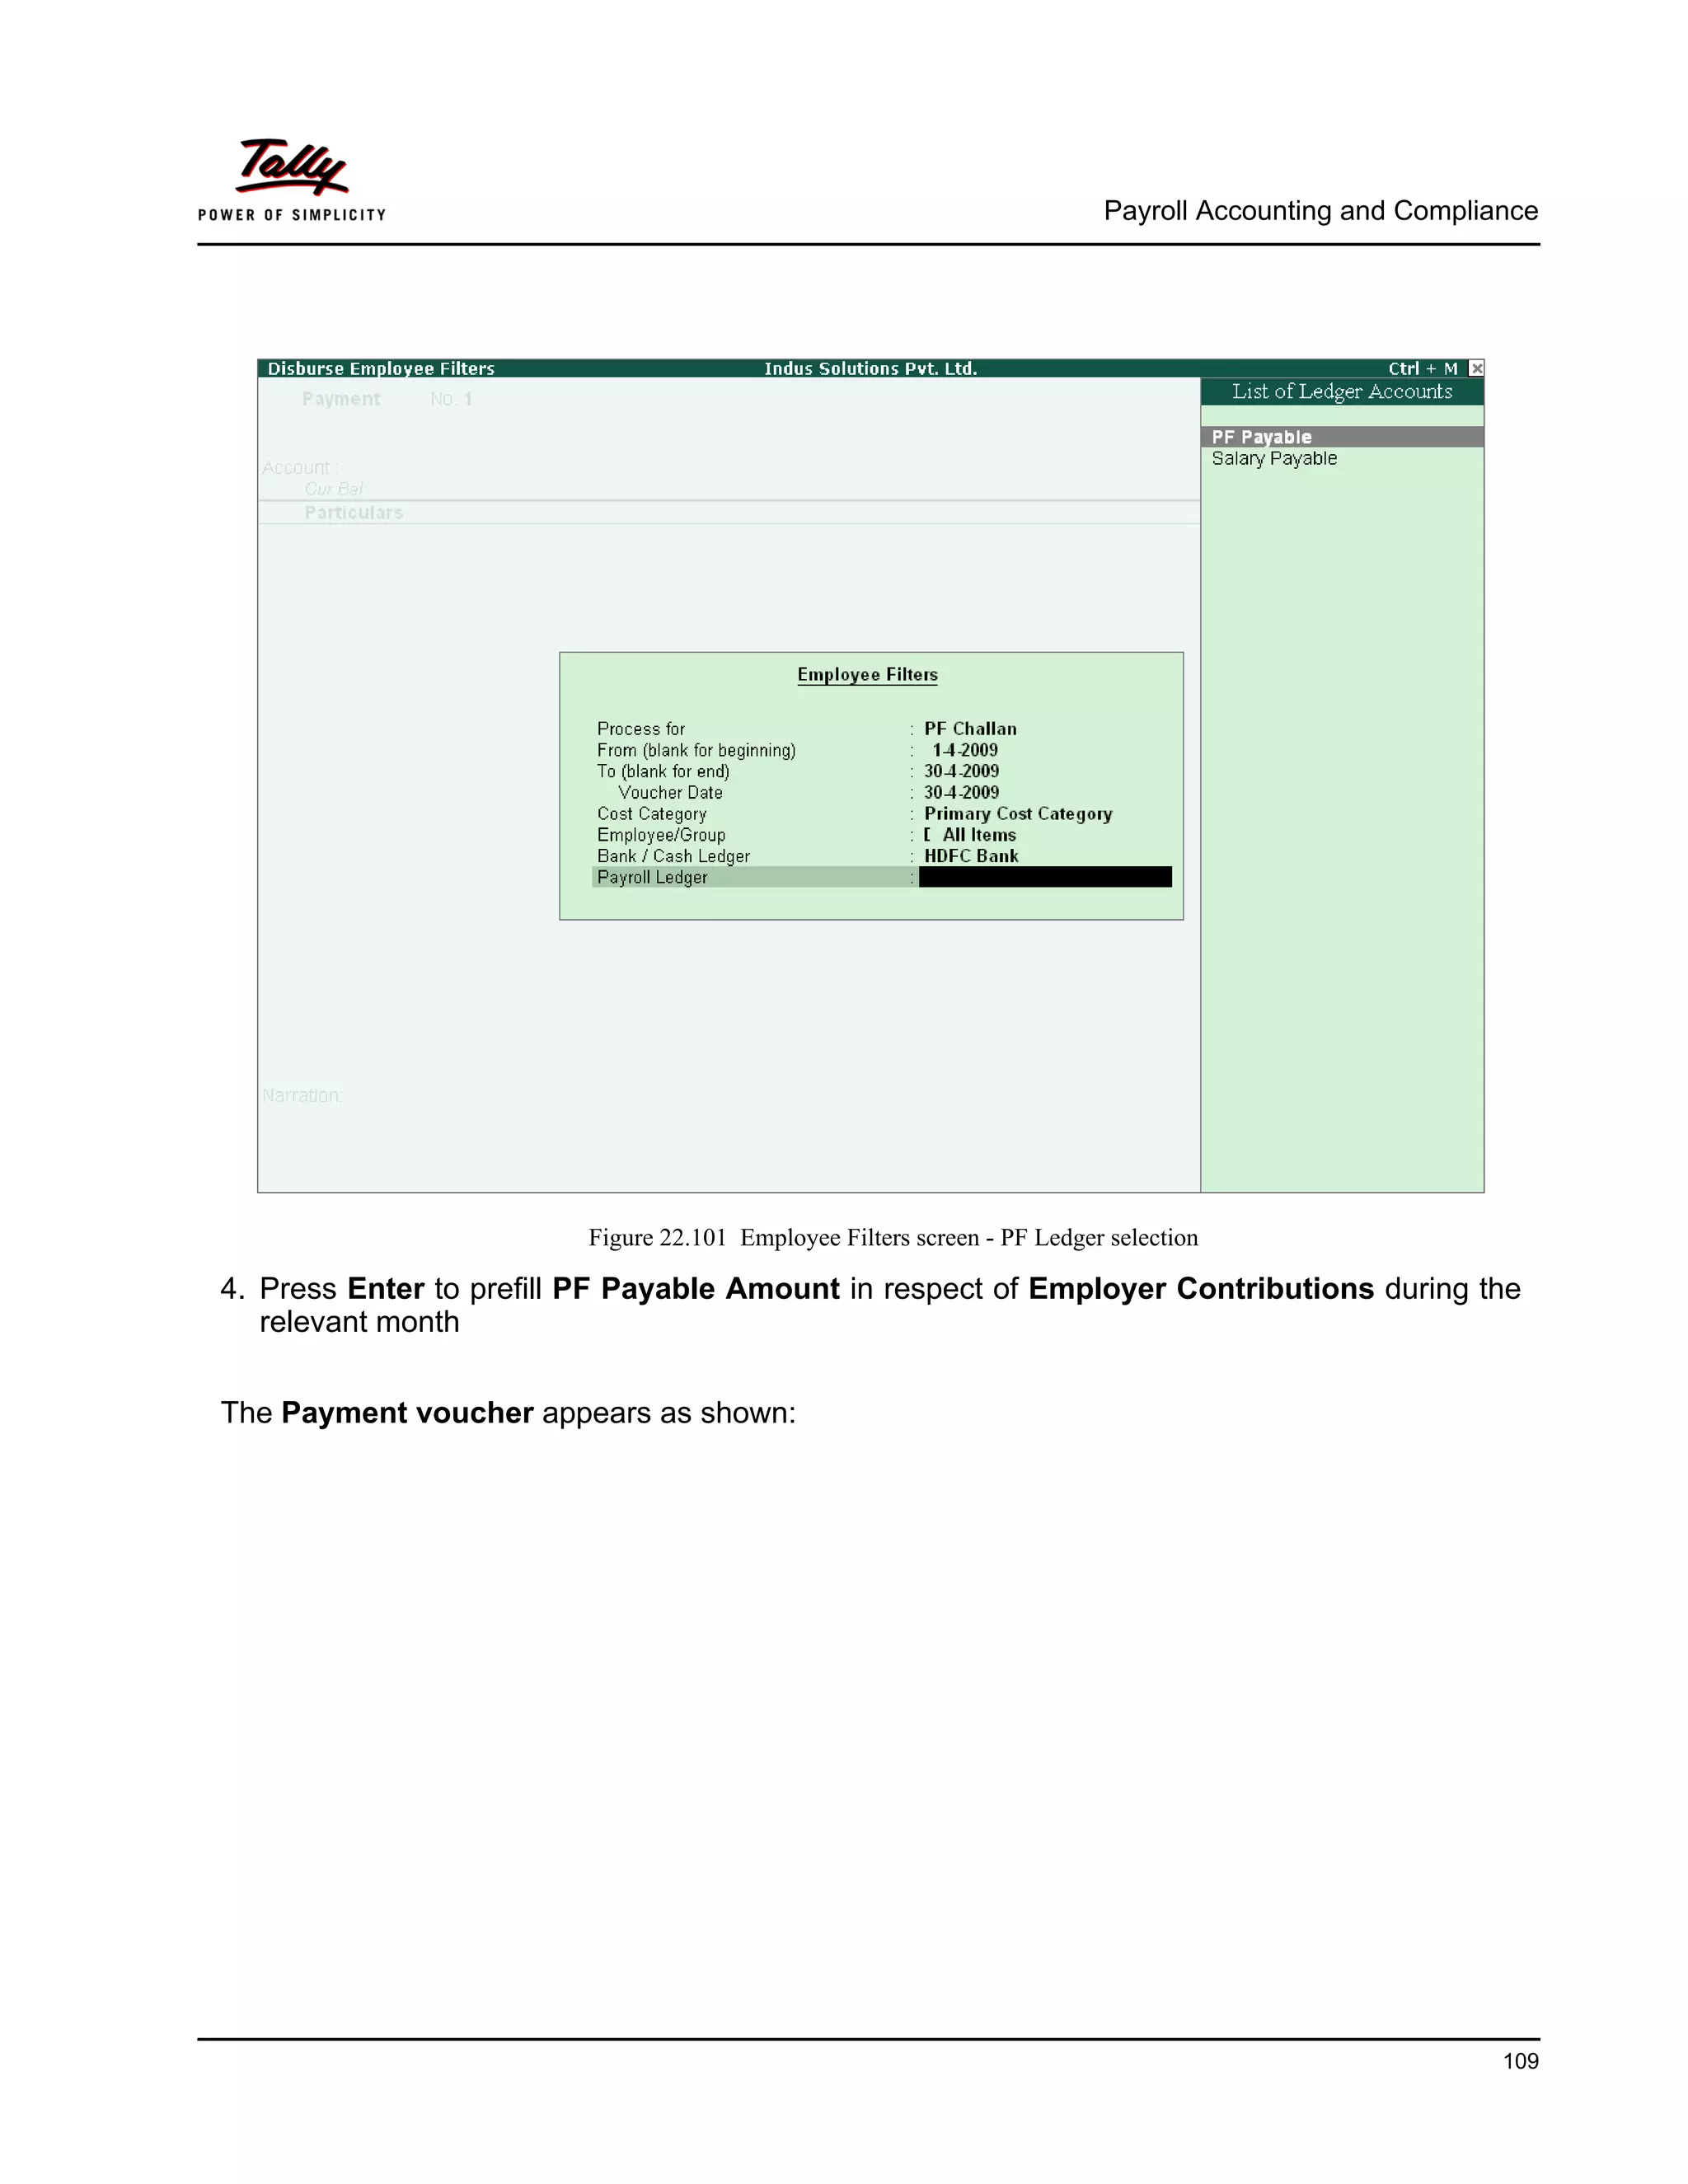
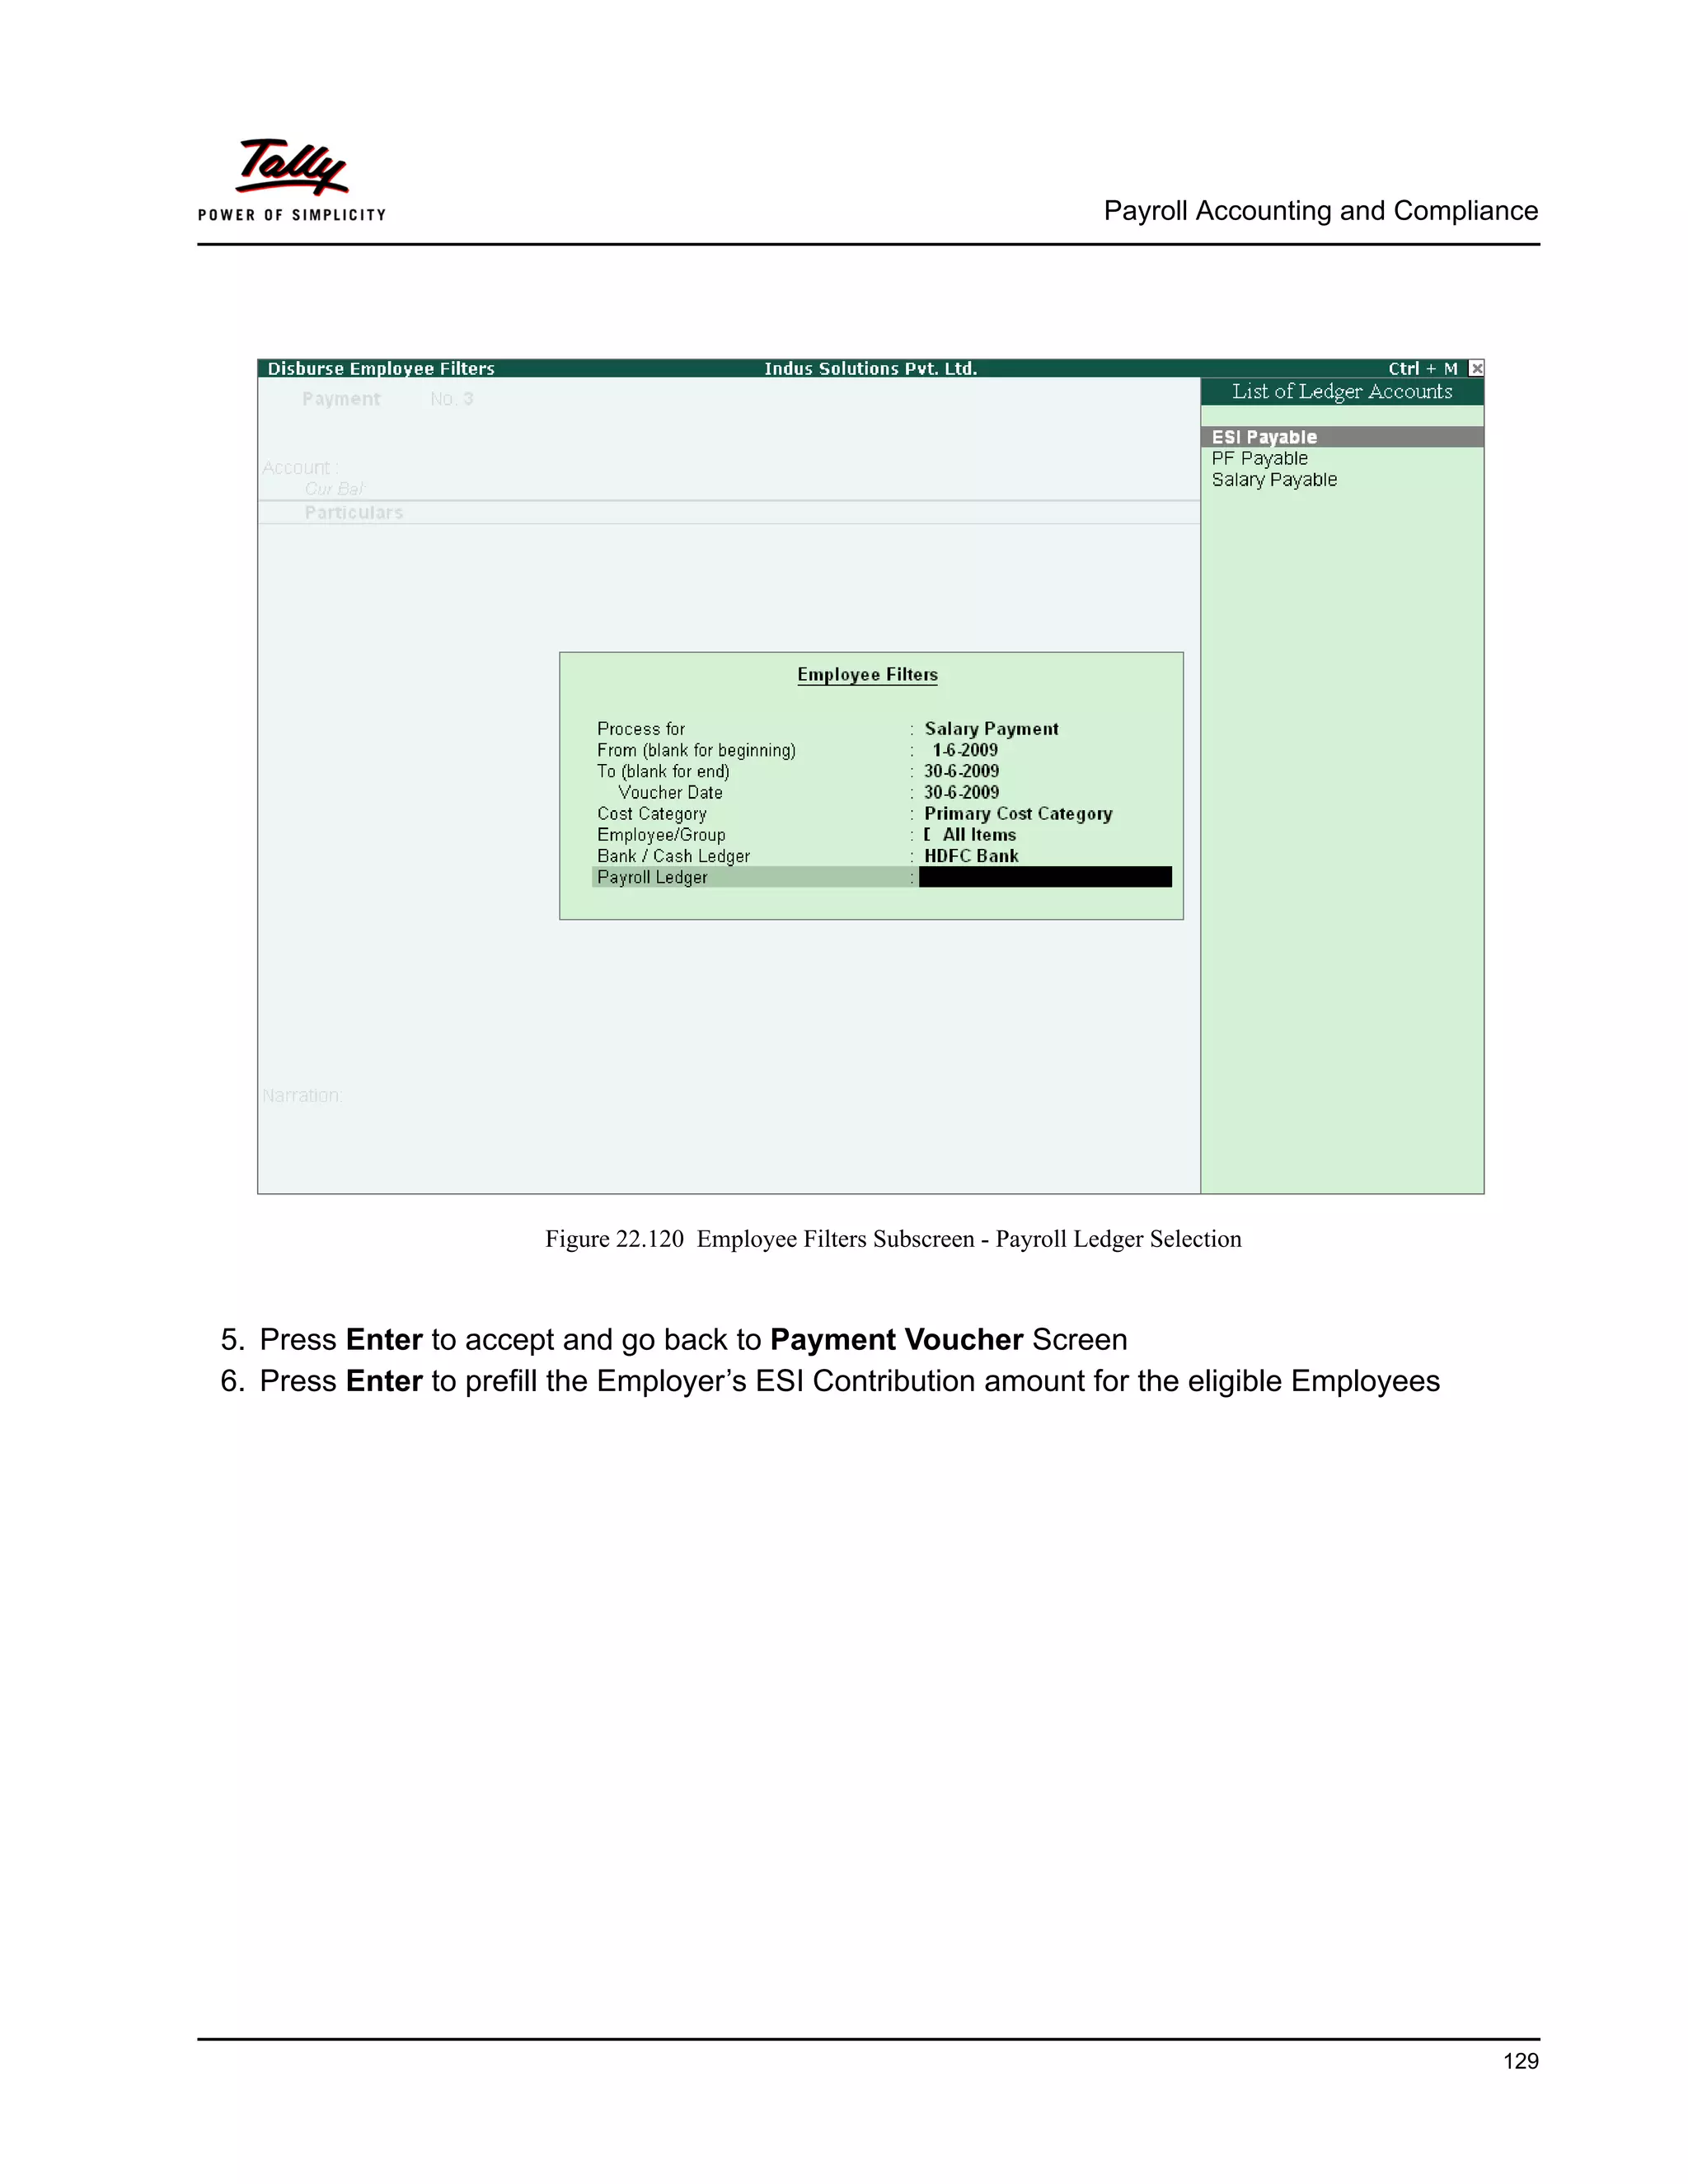
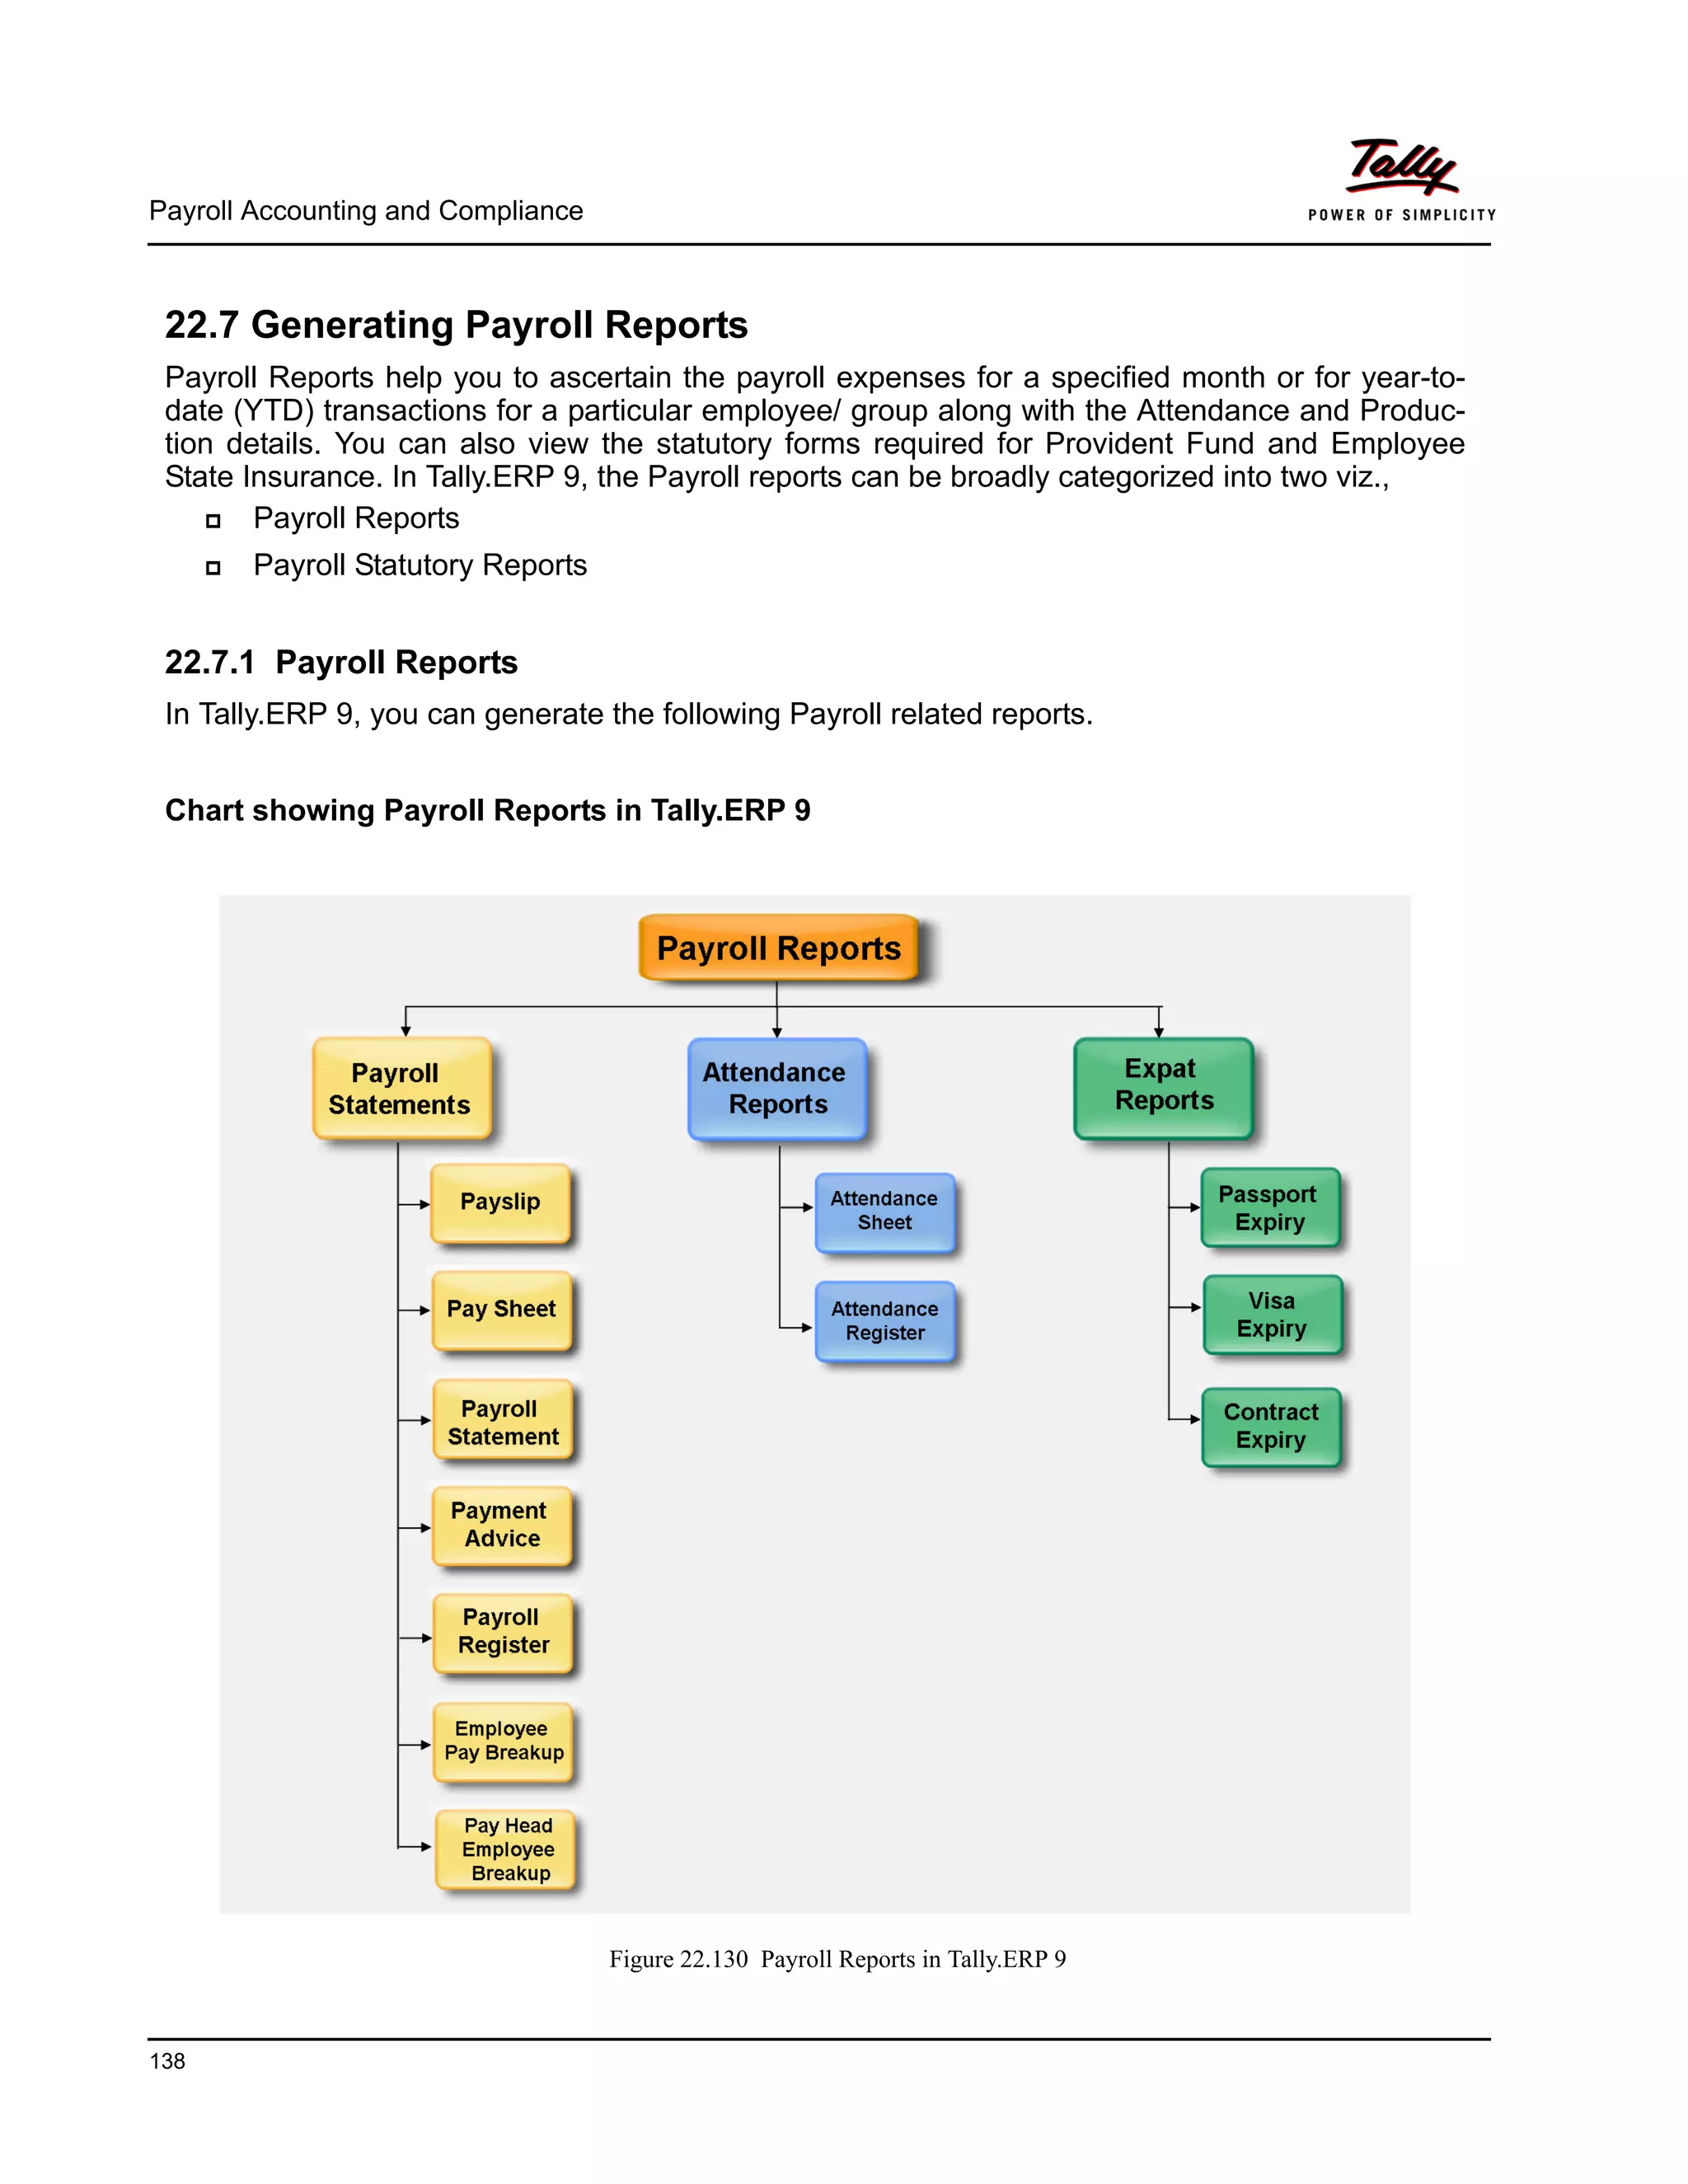
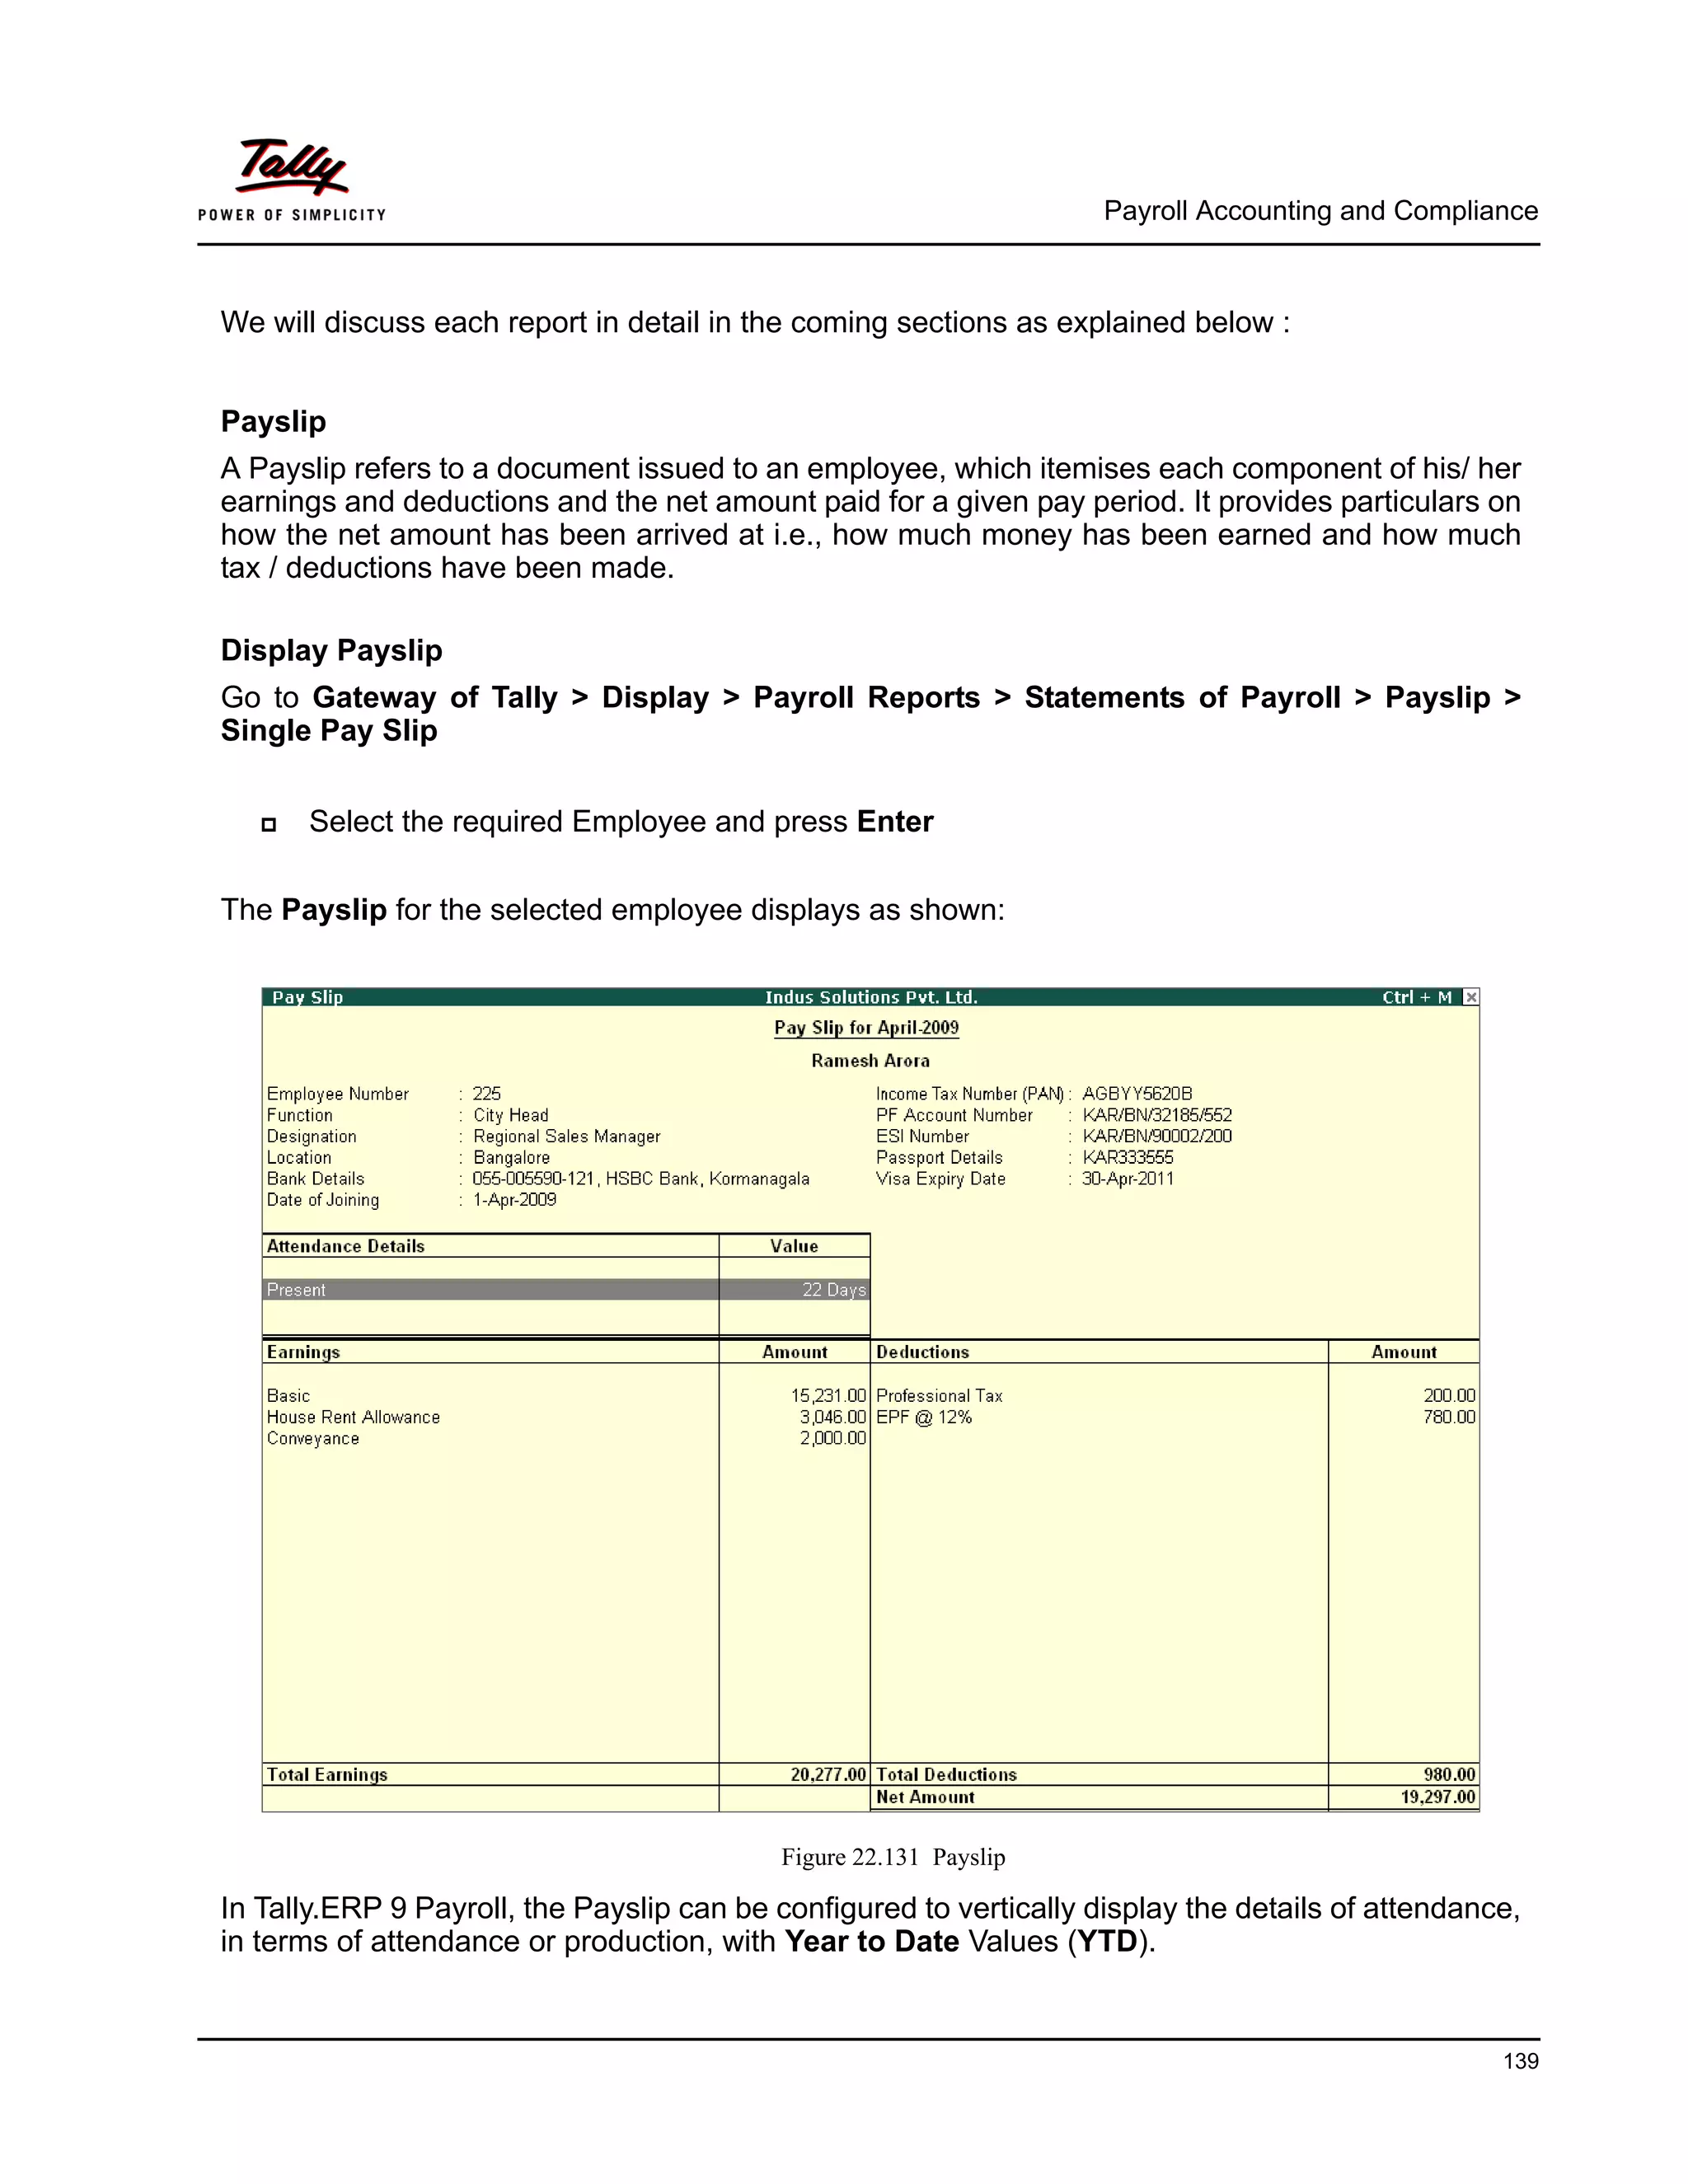
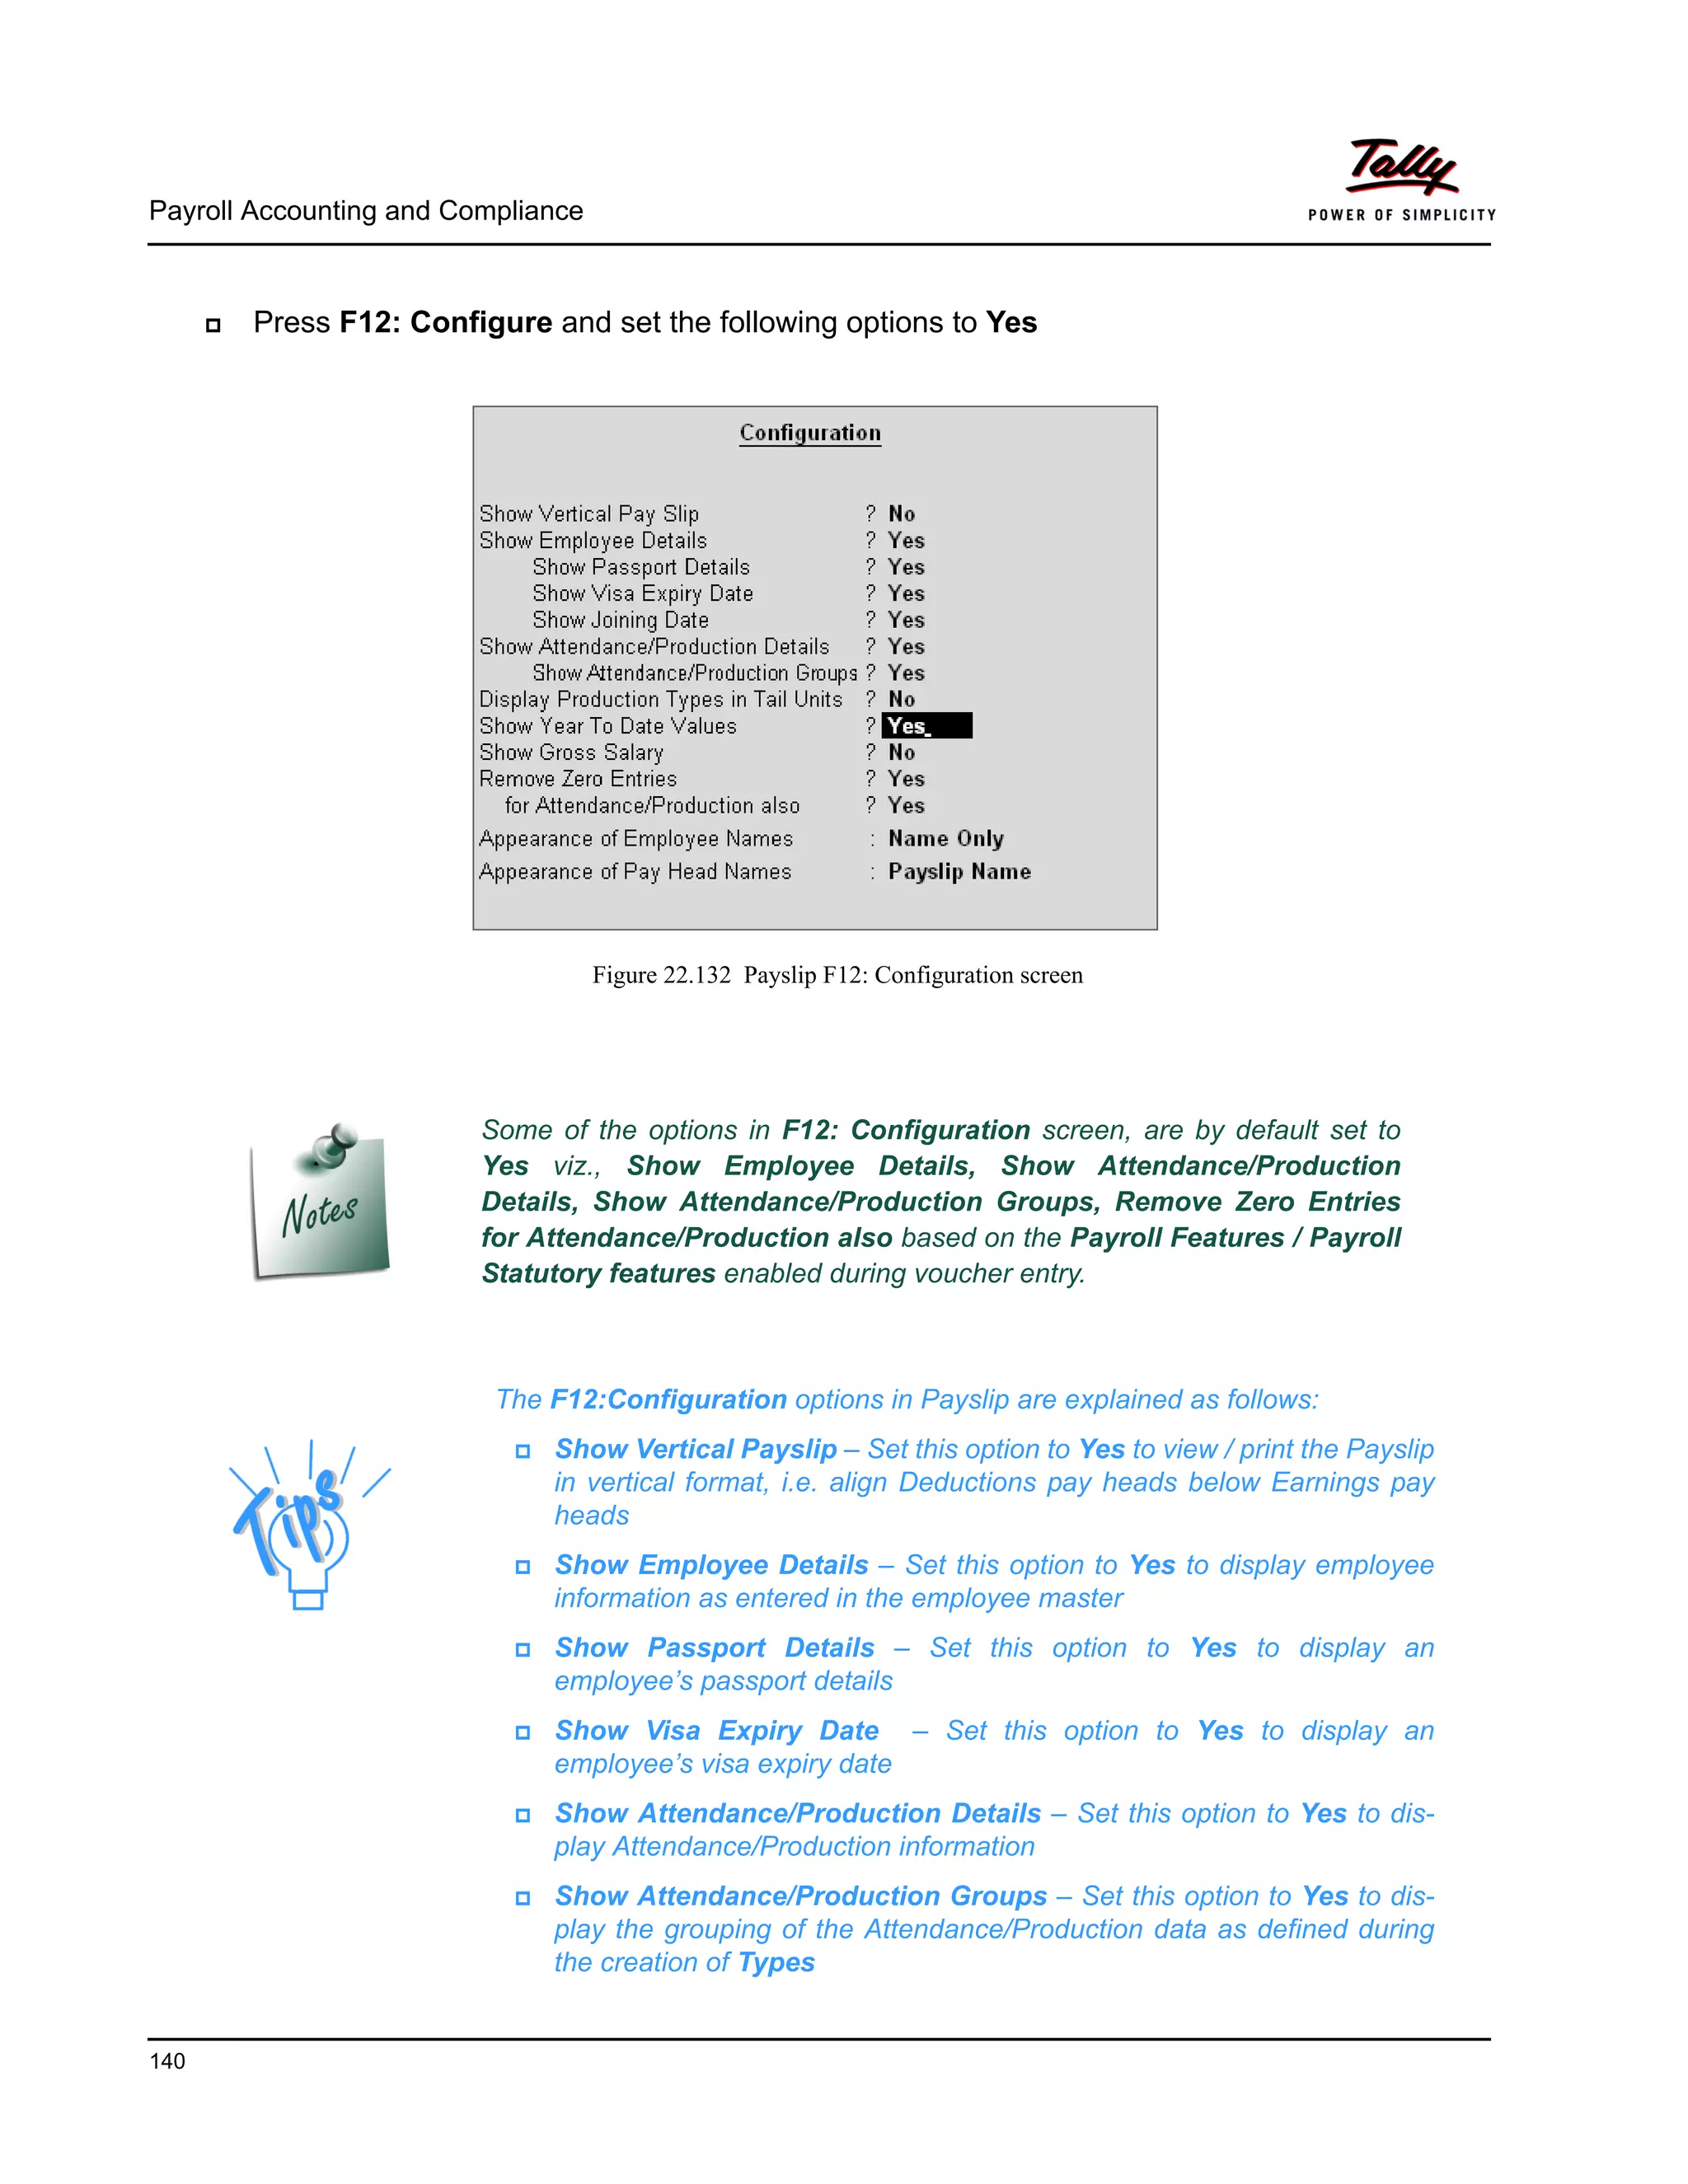
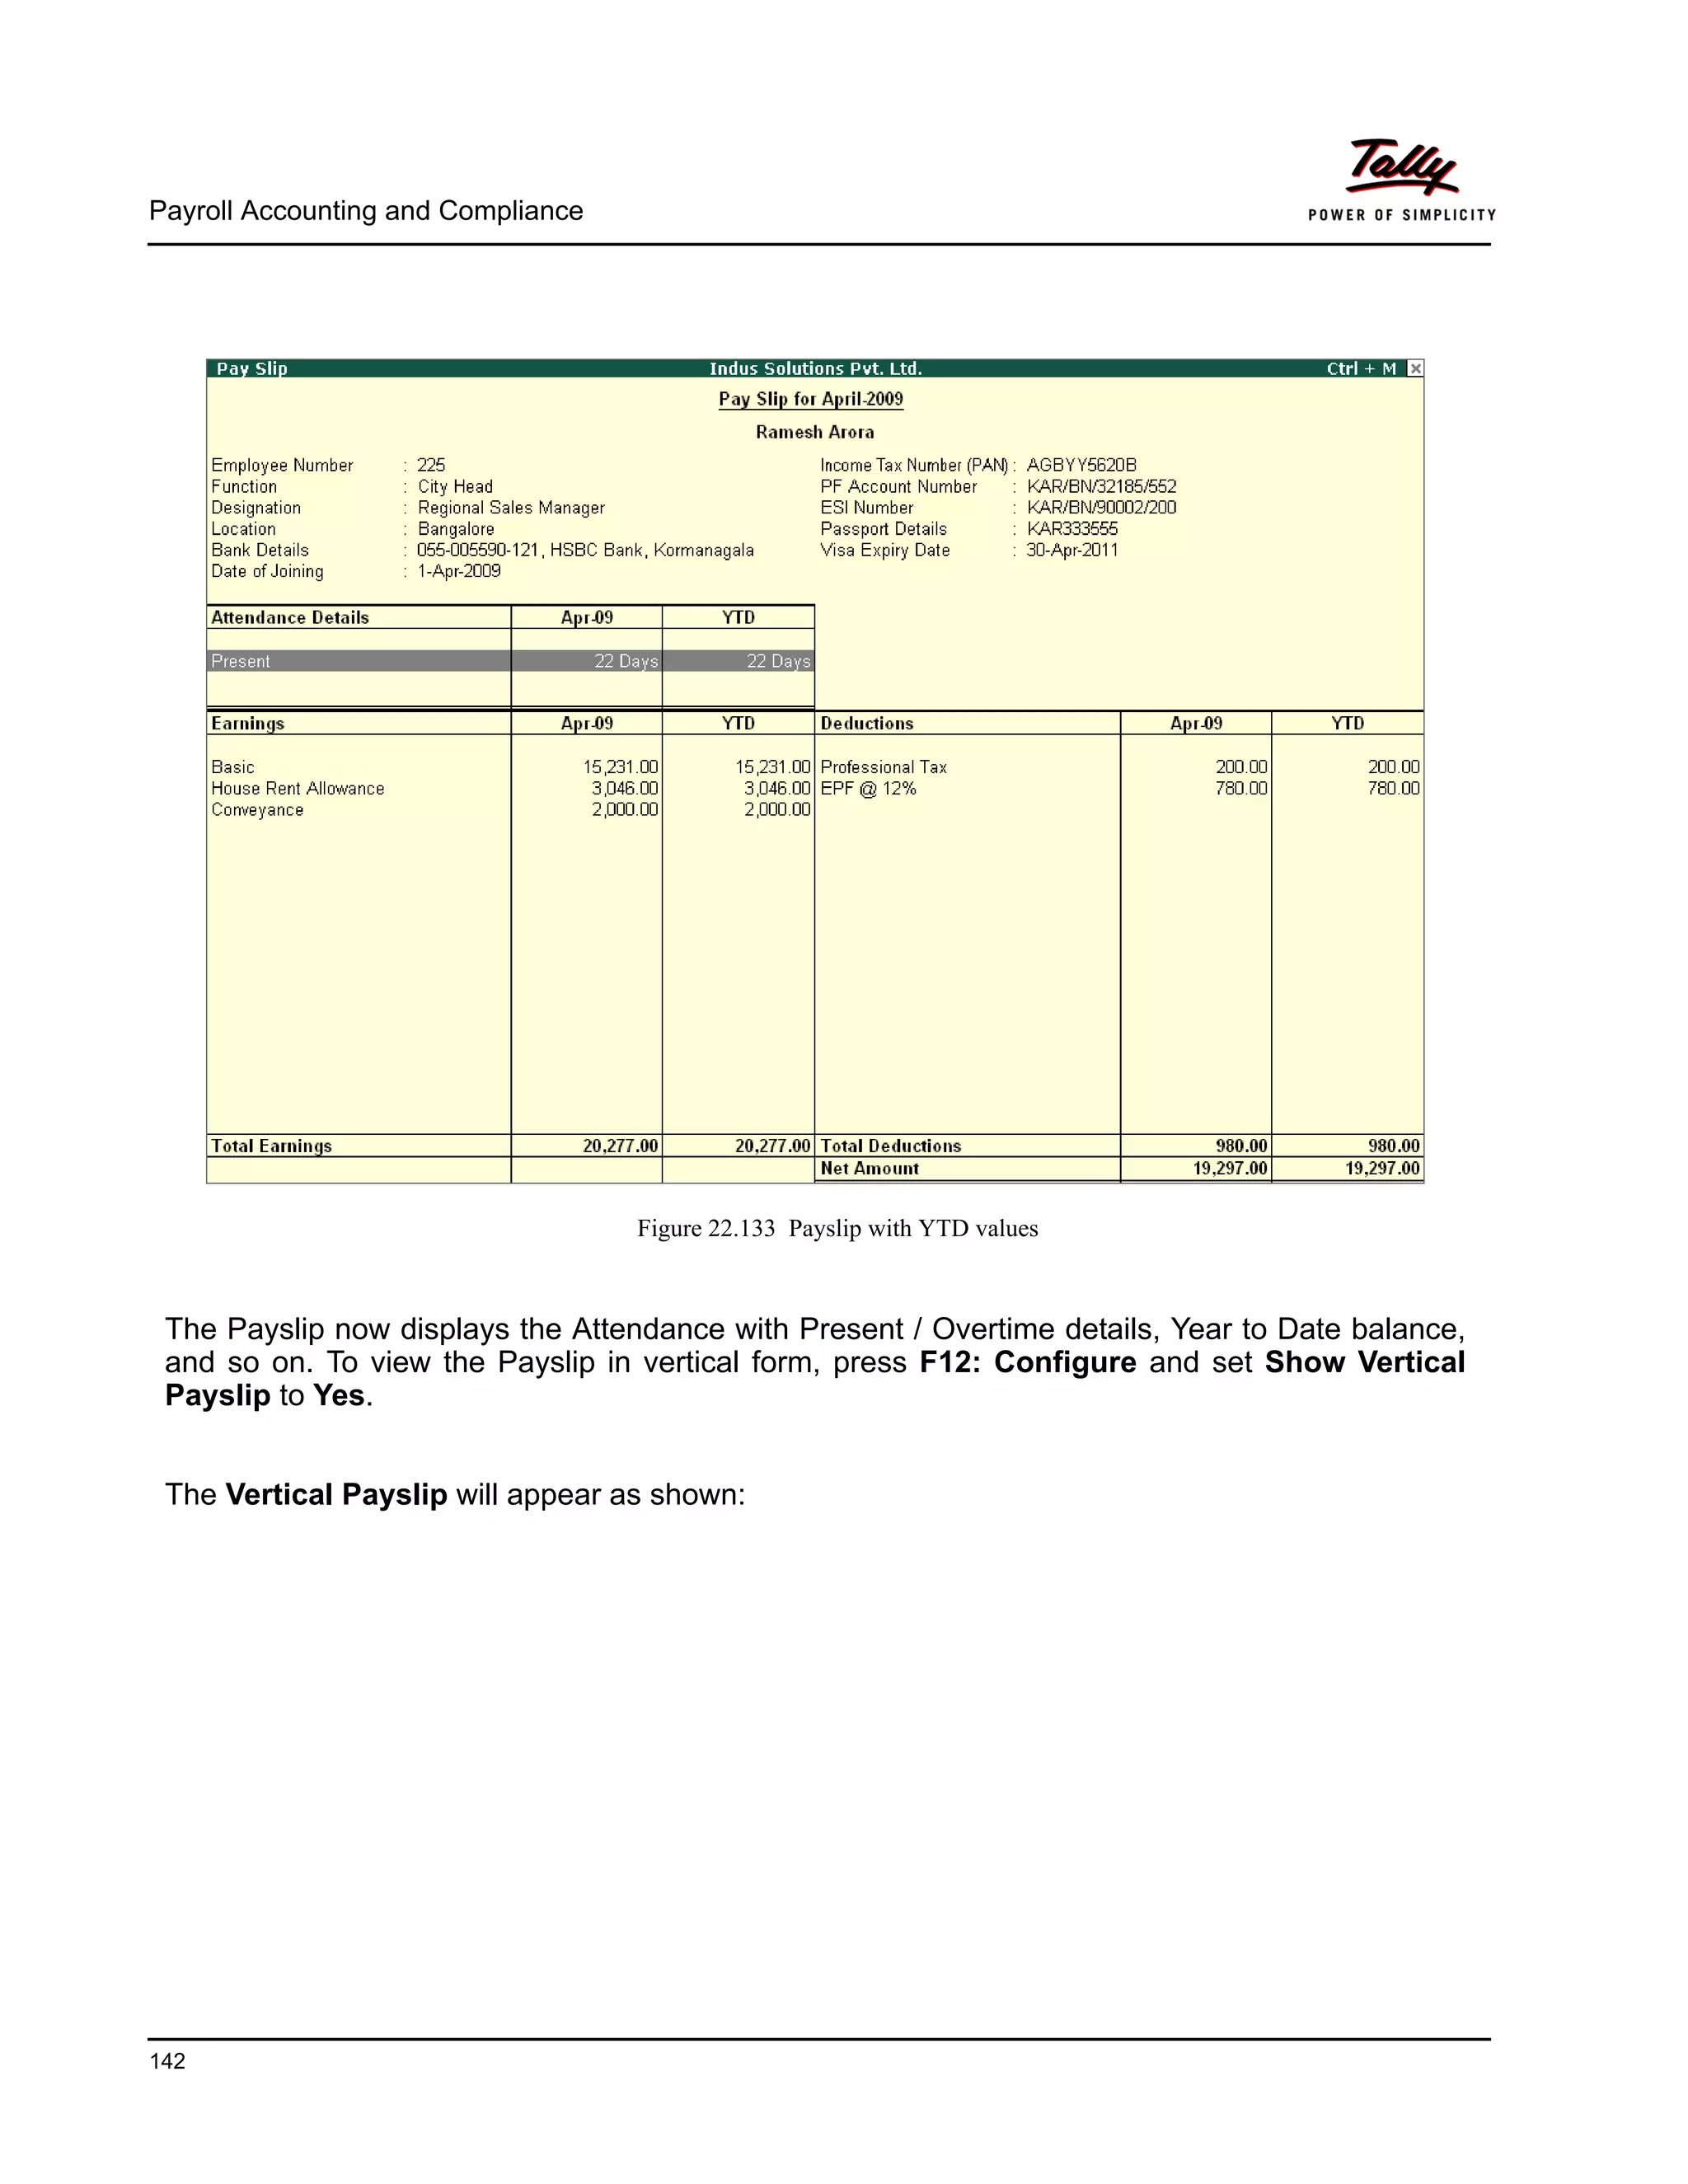
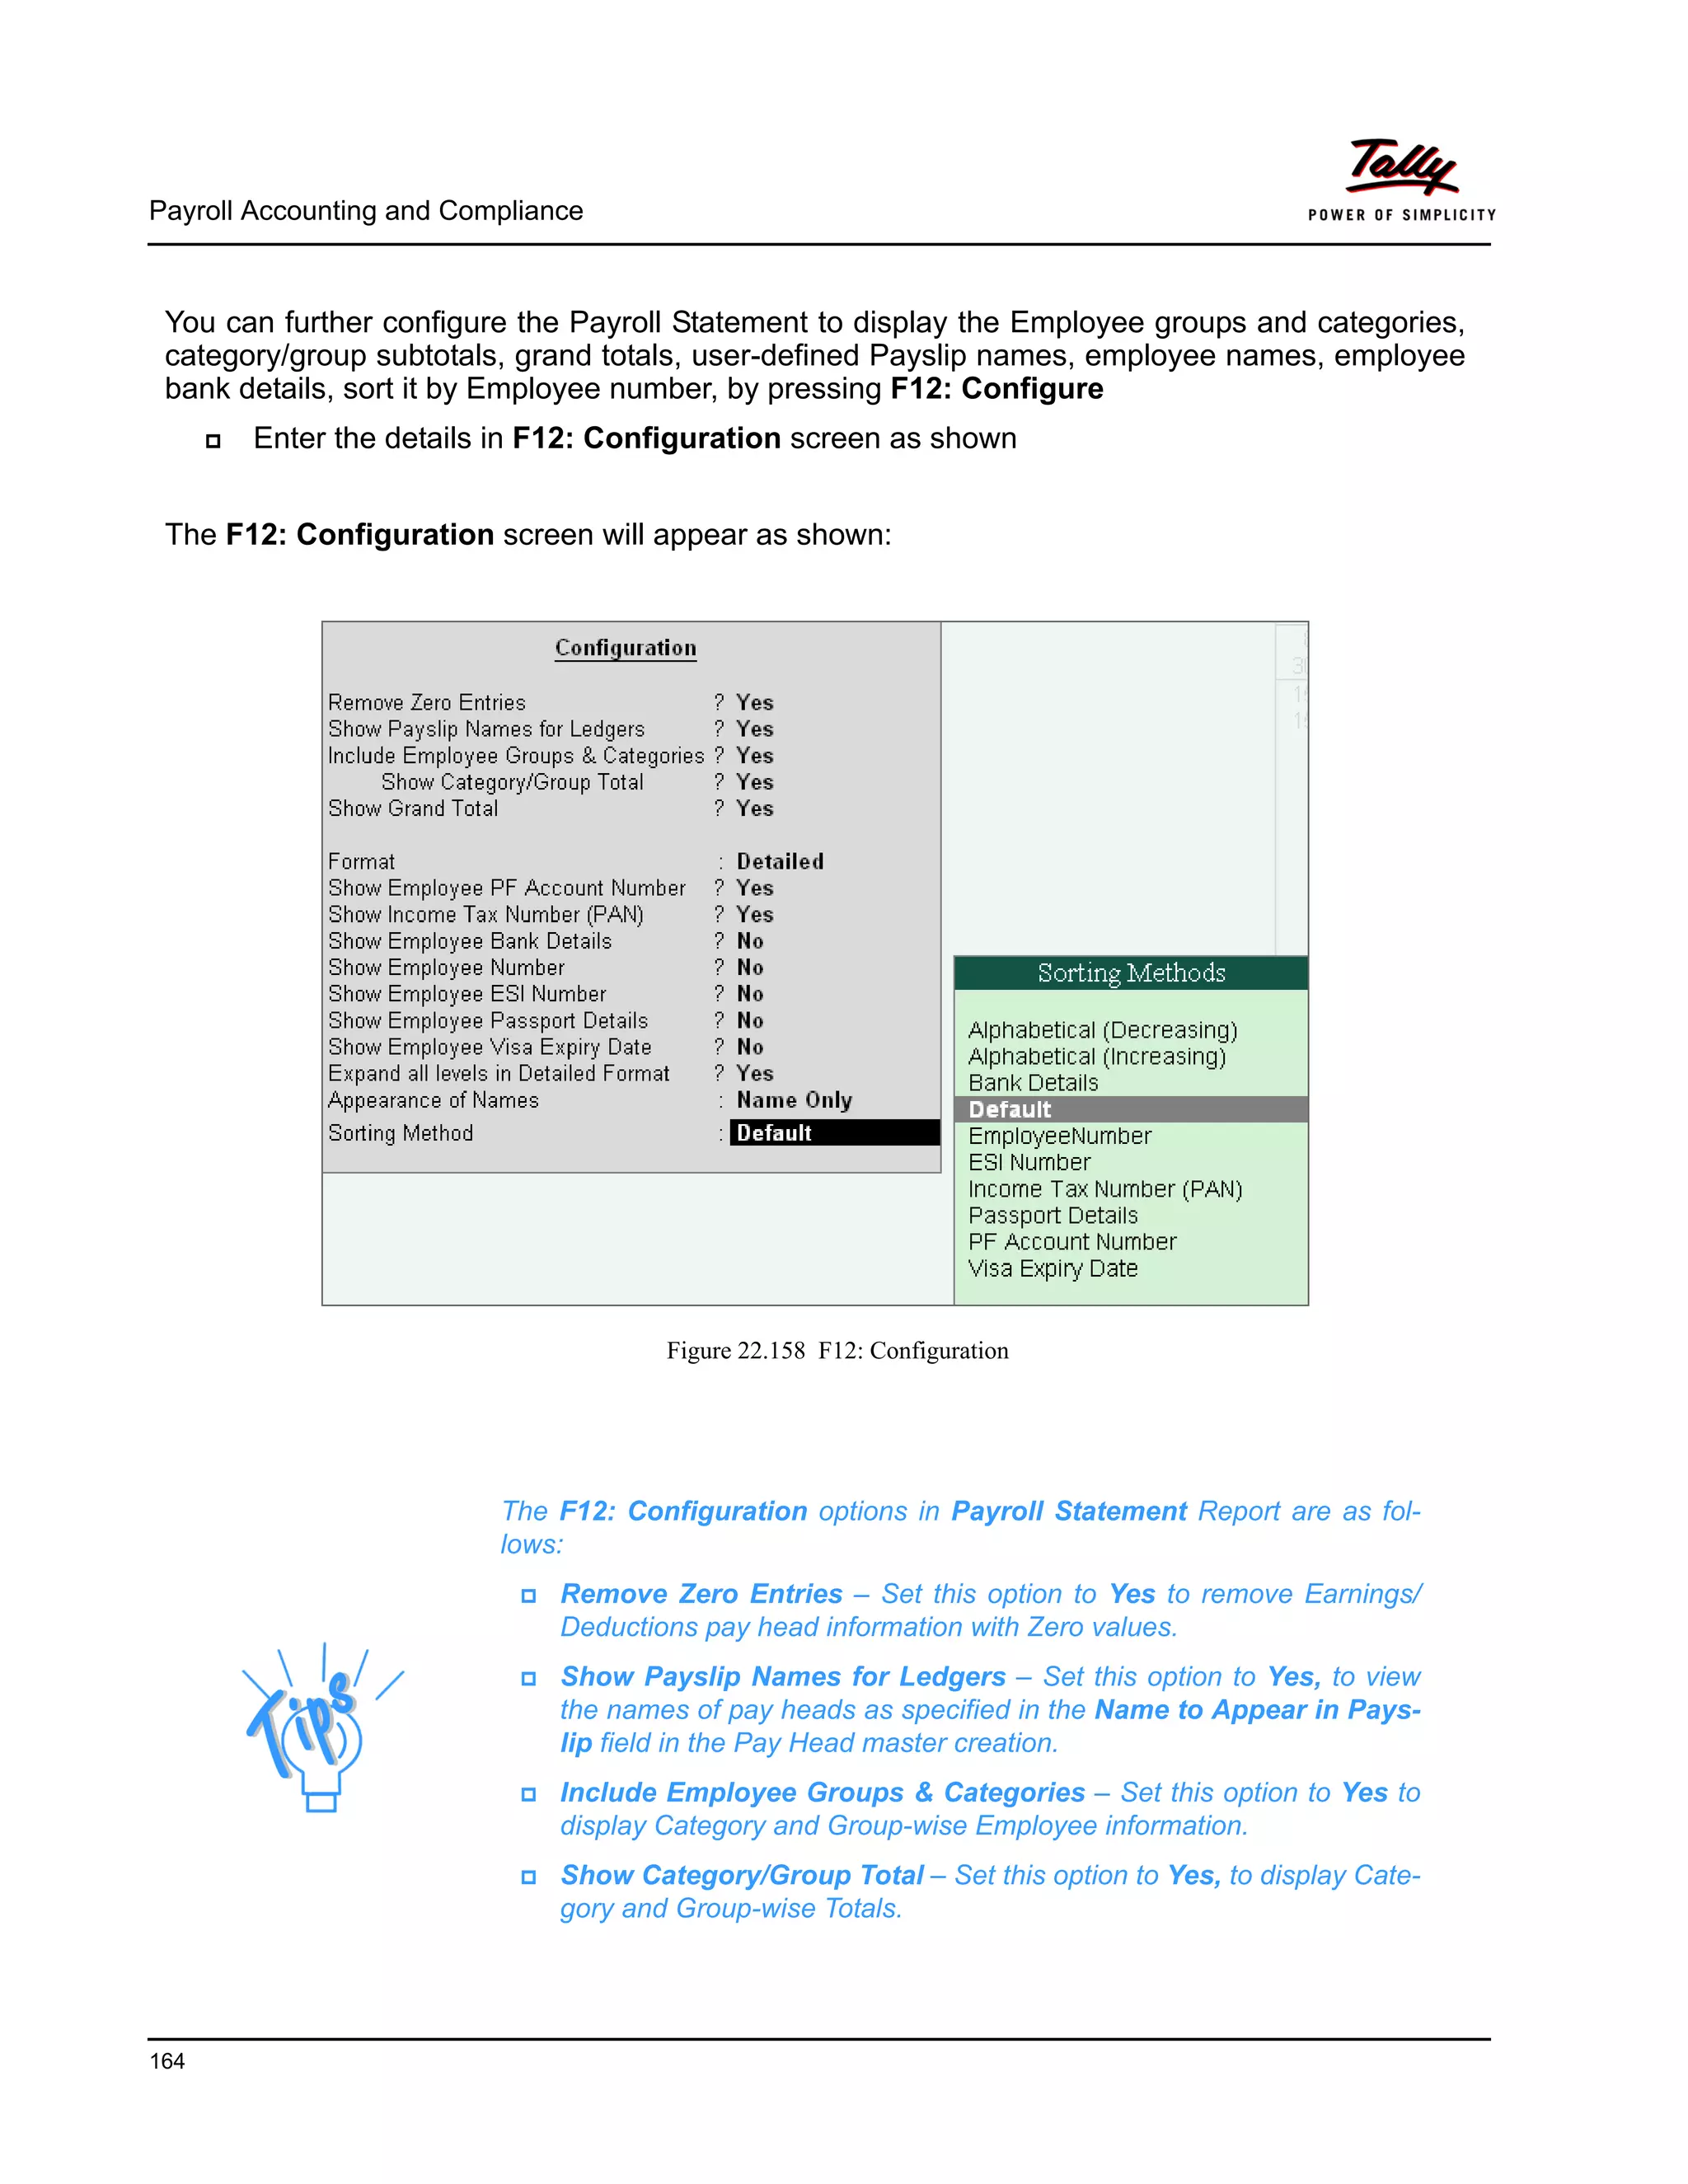
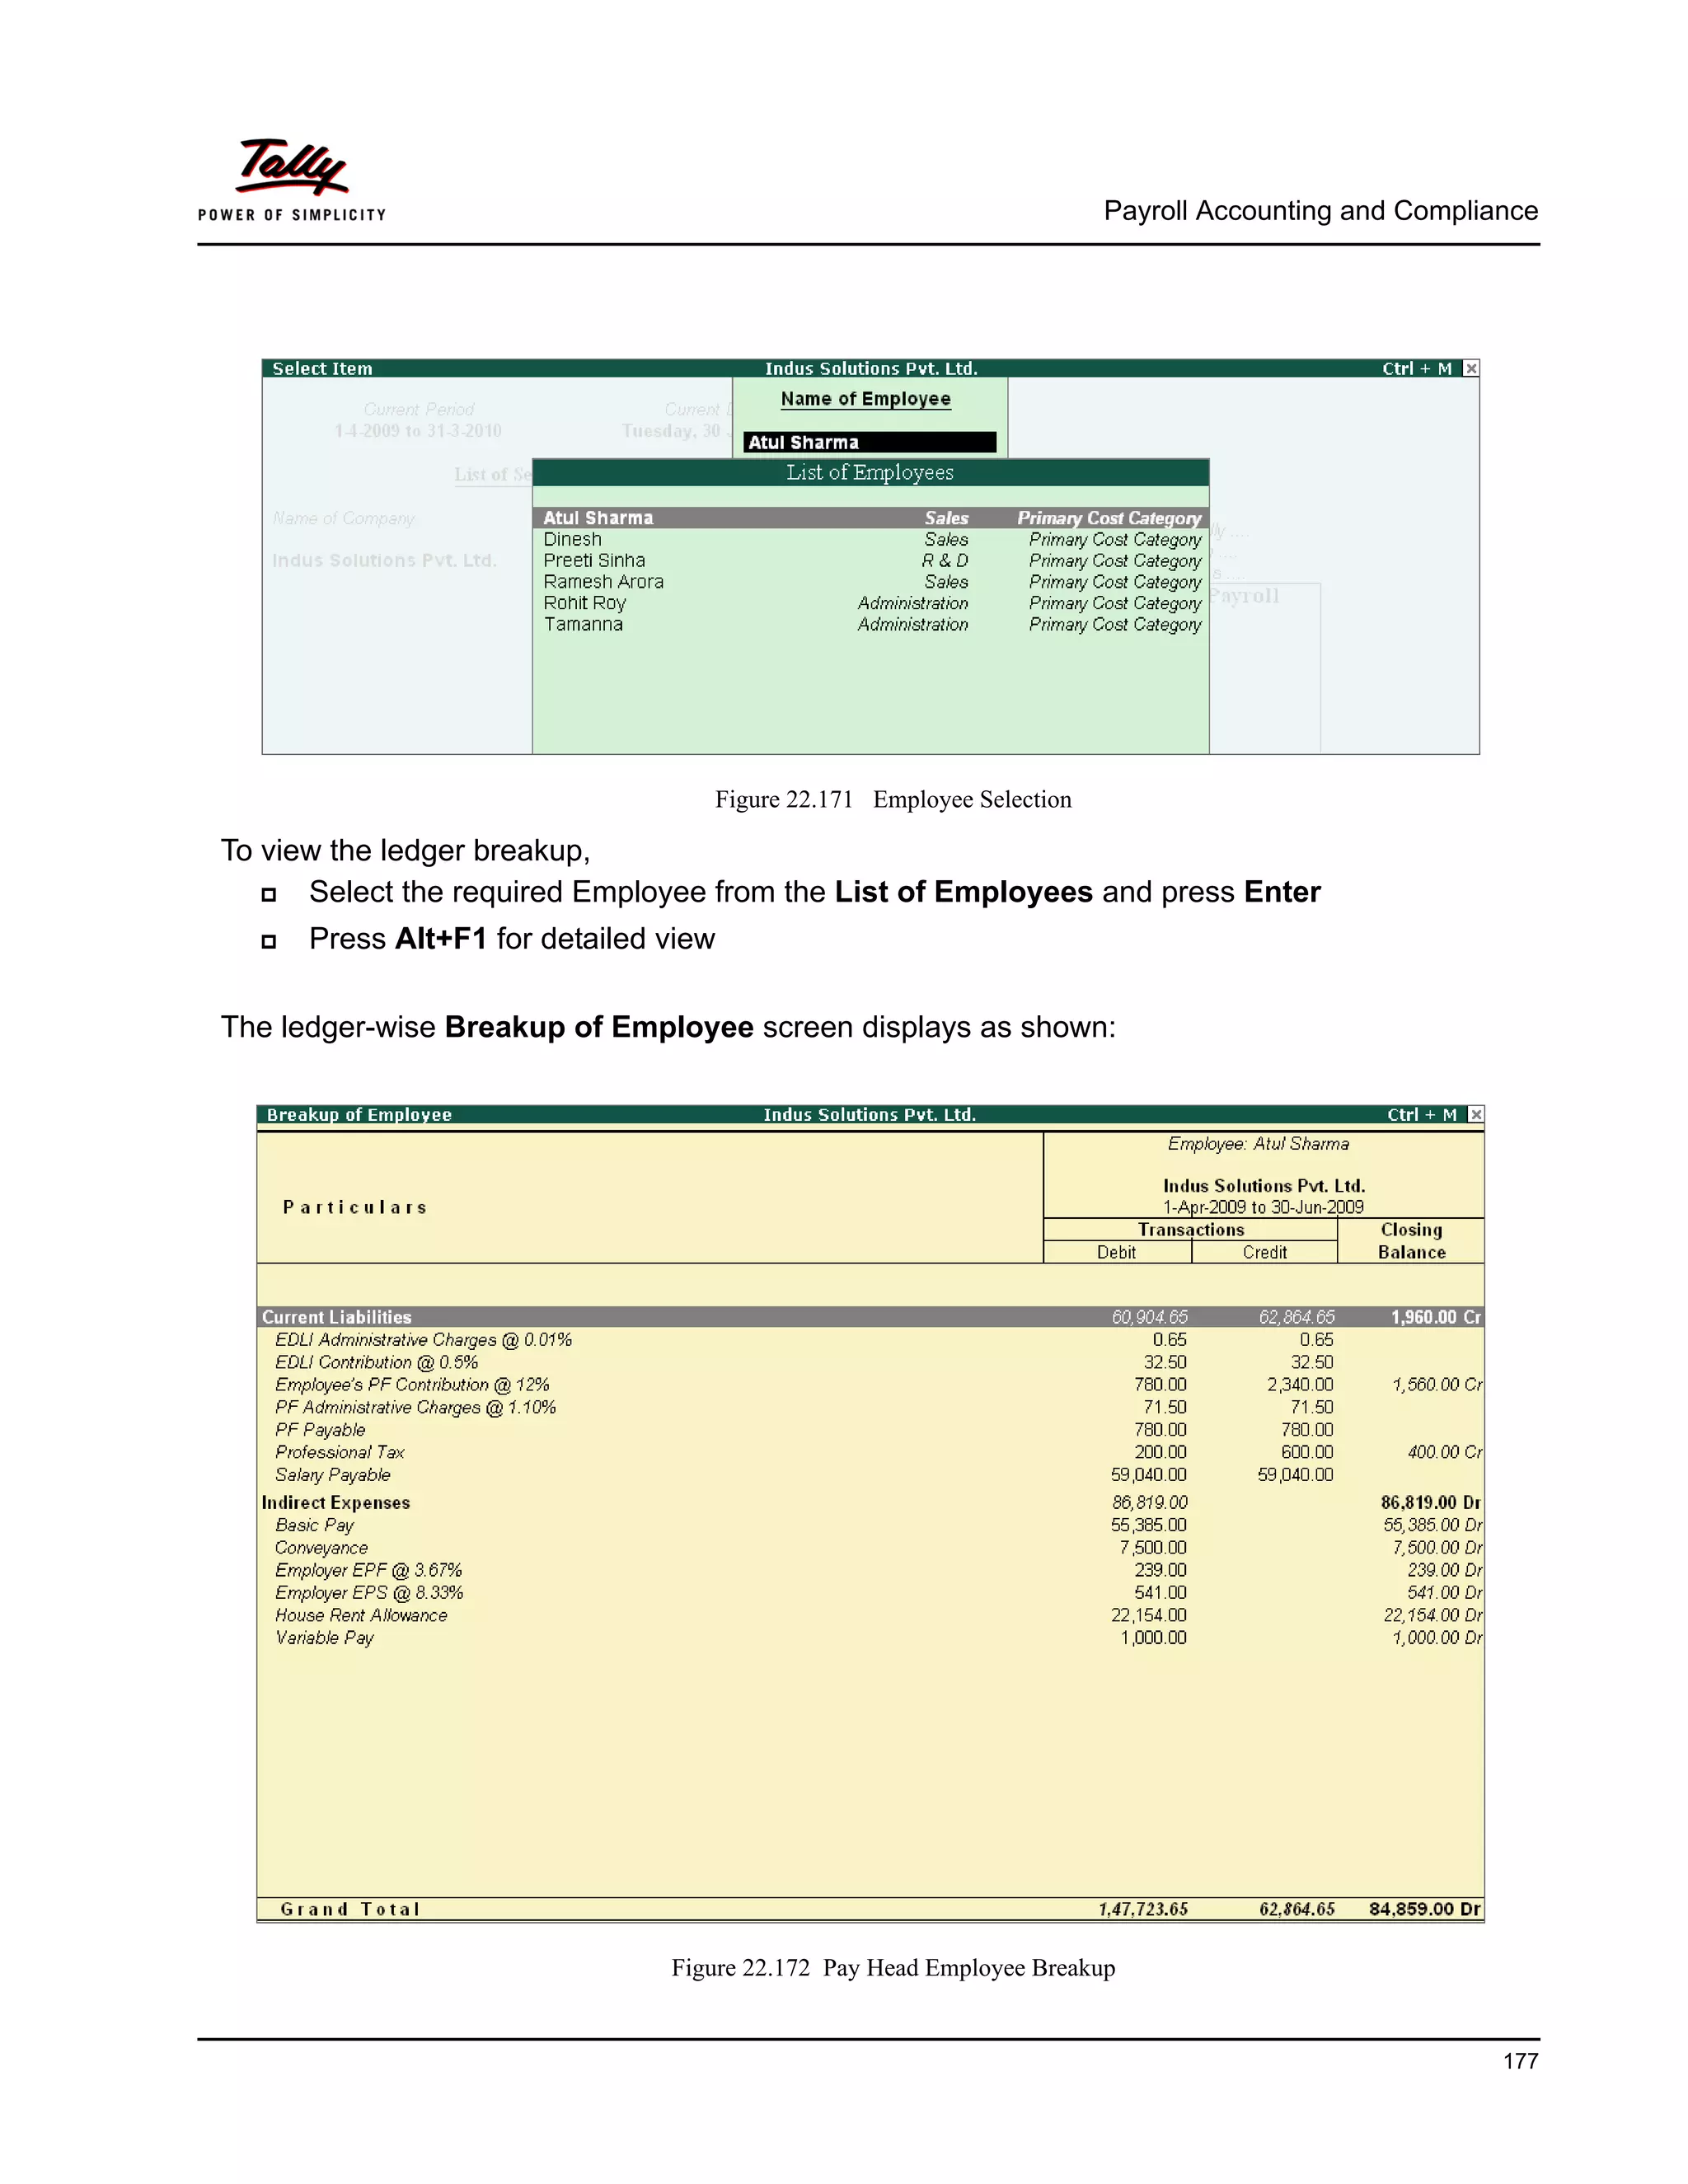
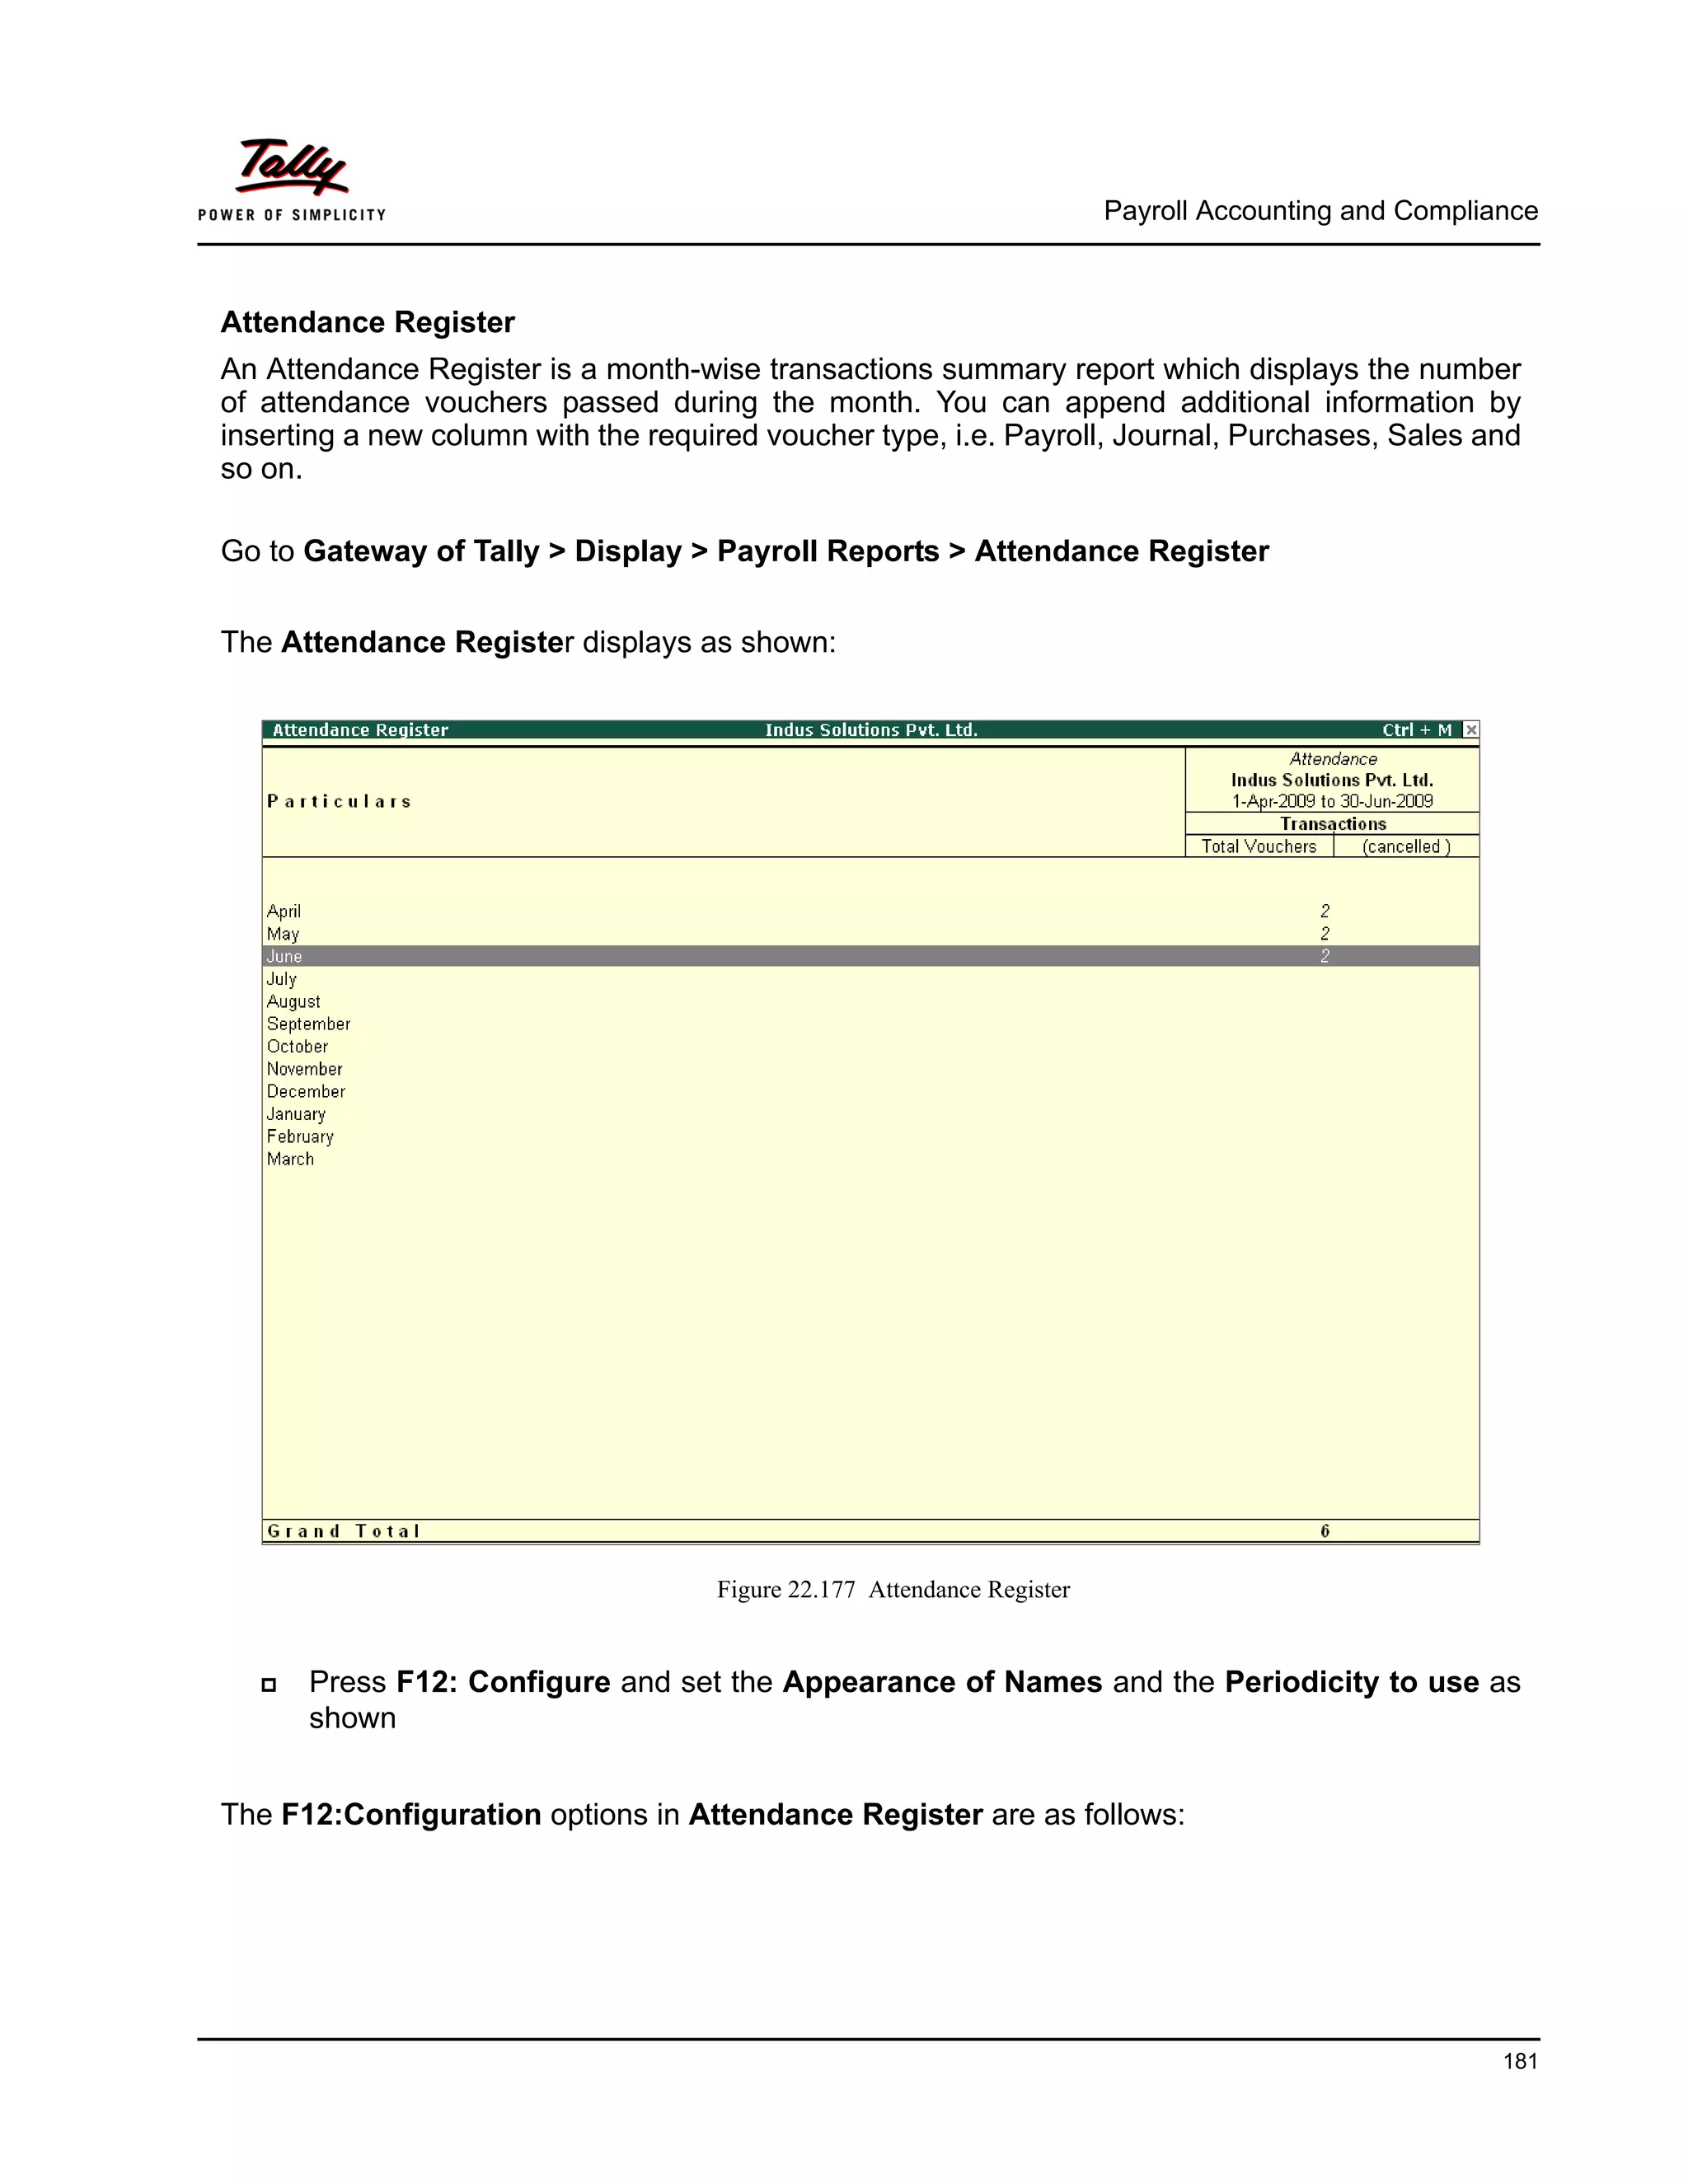
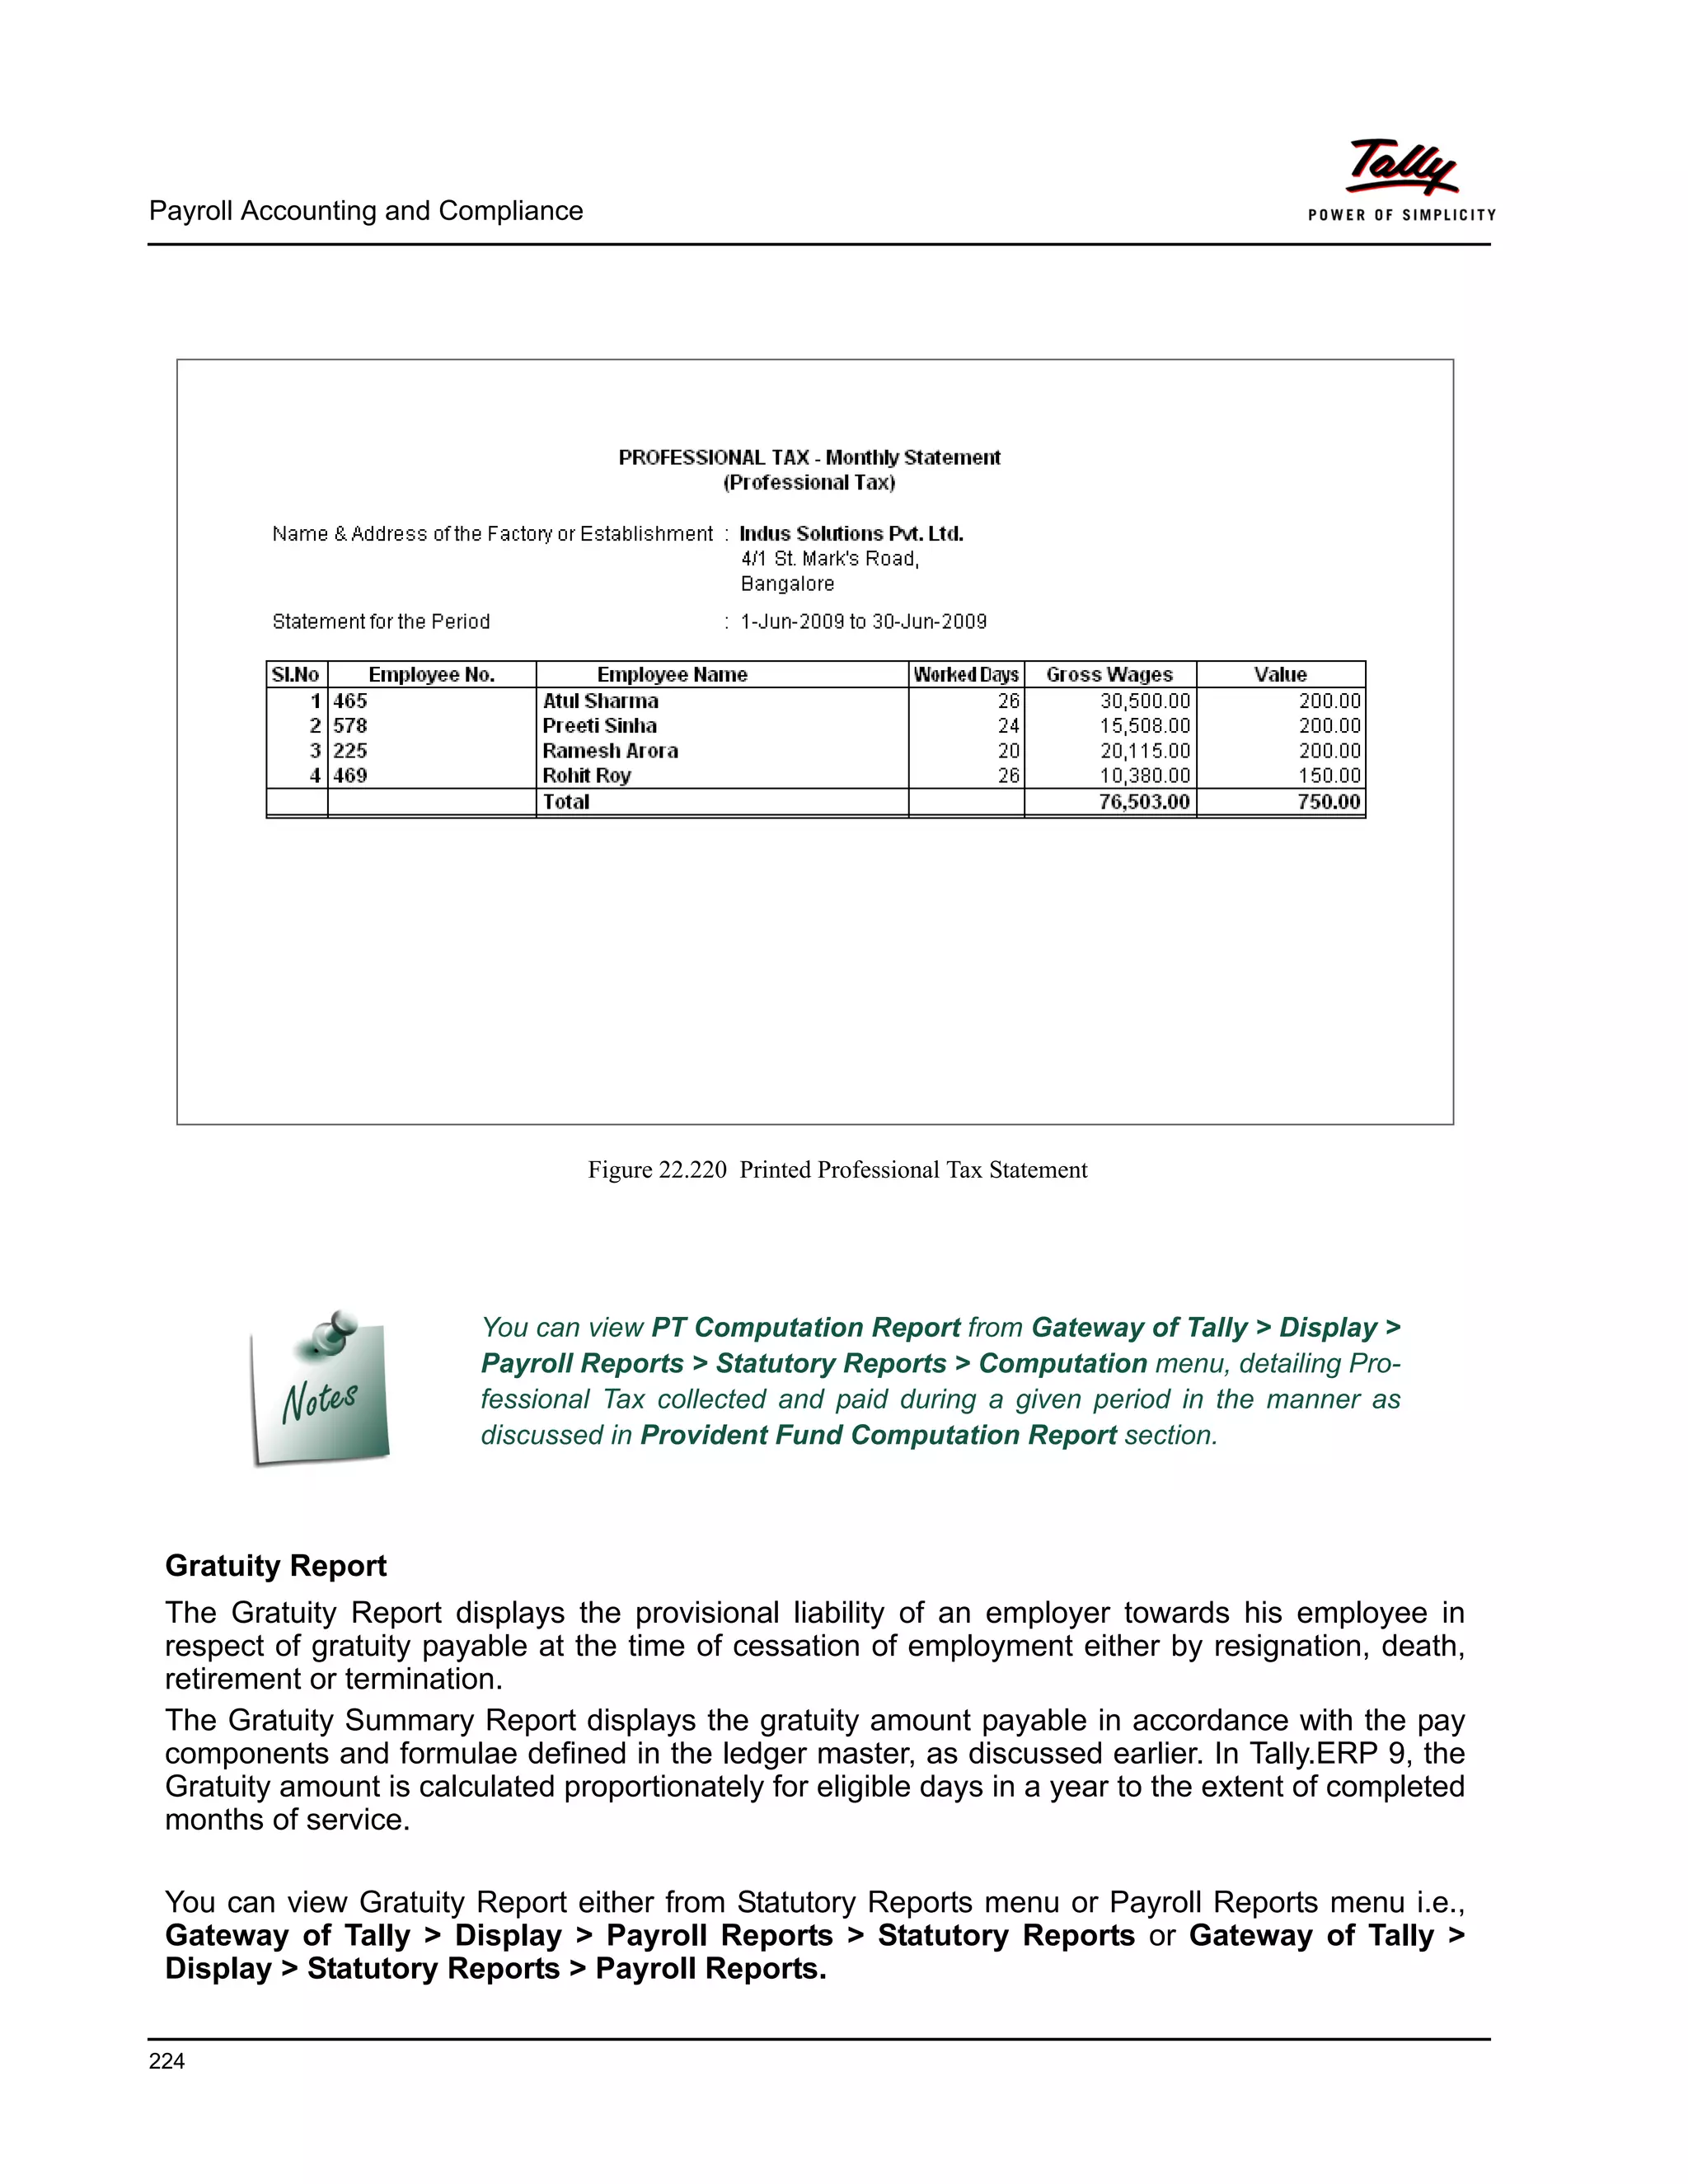
![Payroll Accounting and Compliance
22
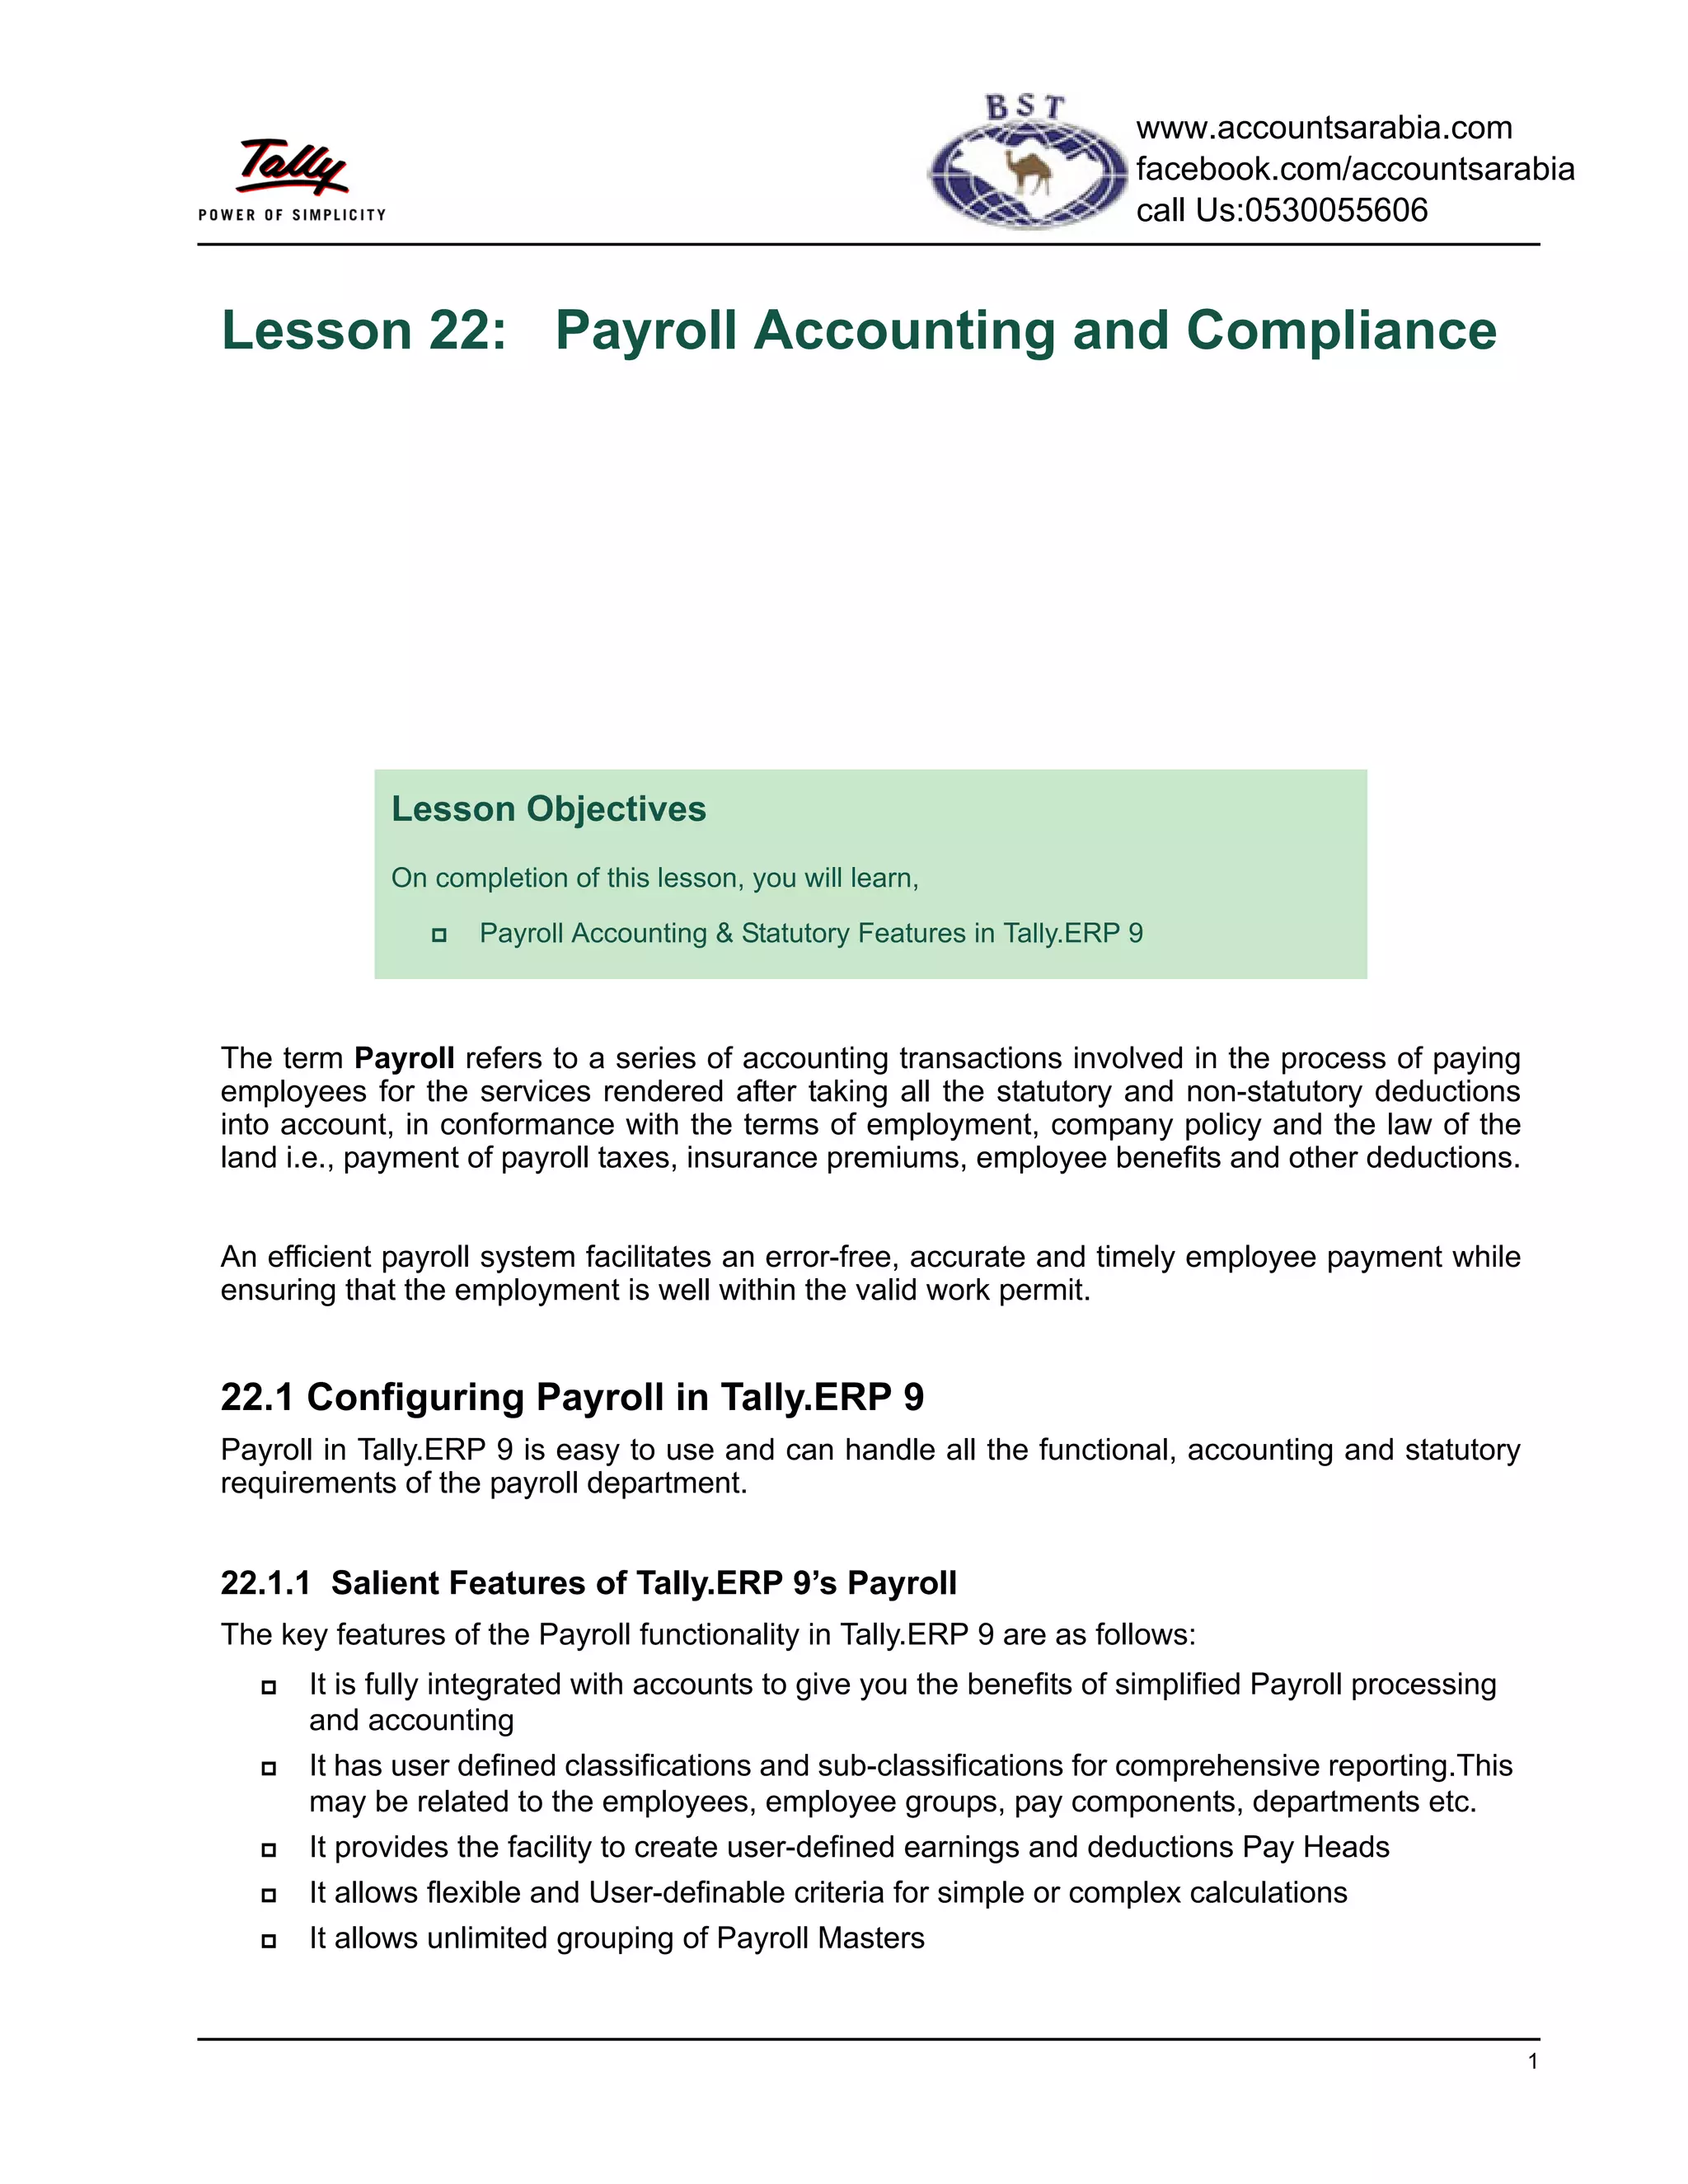
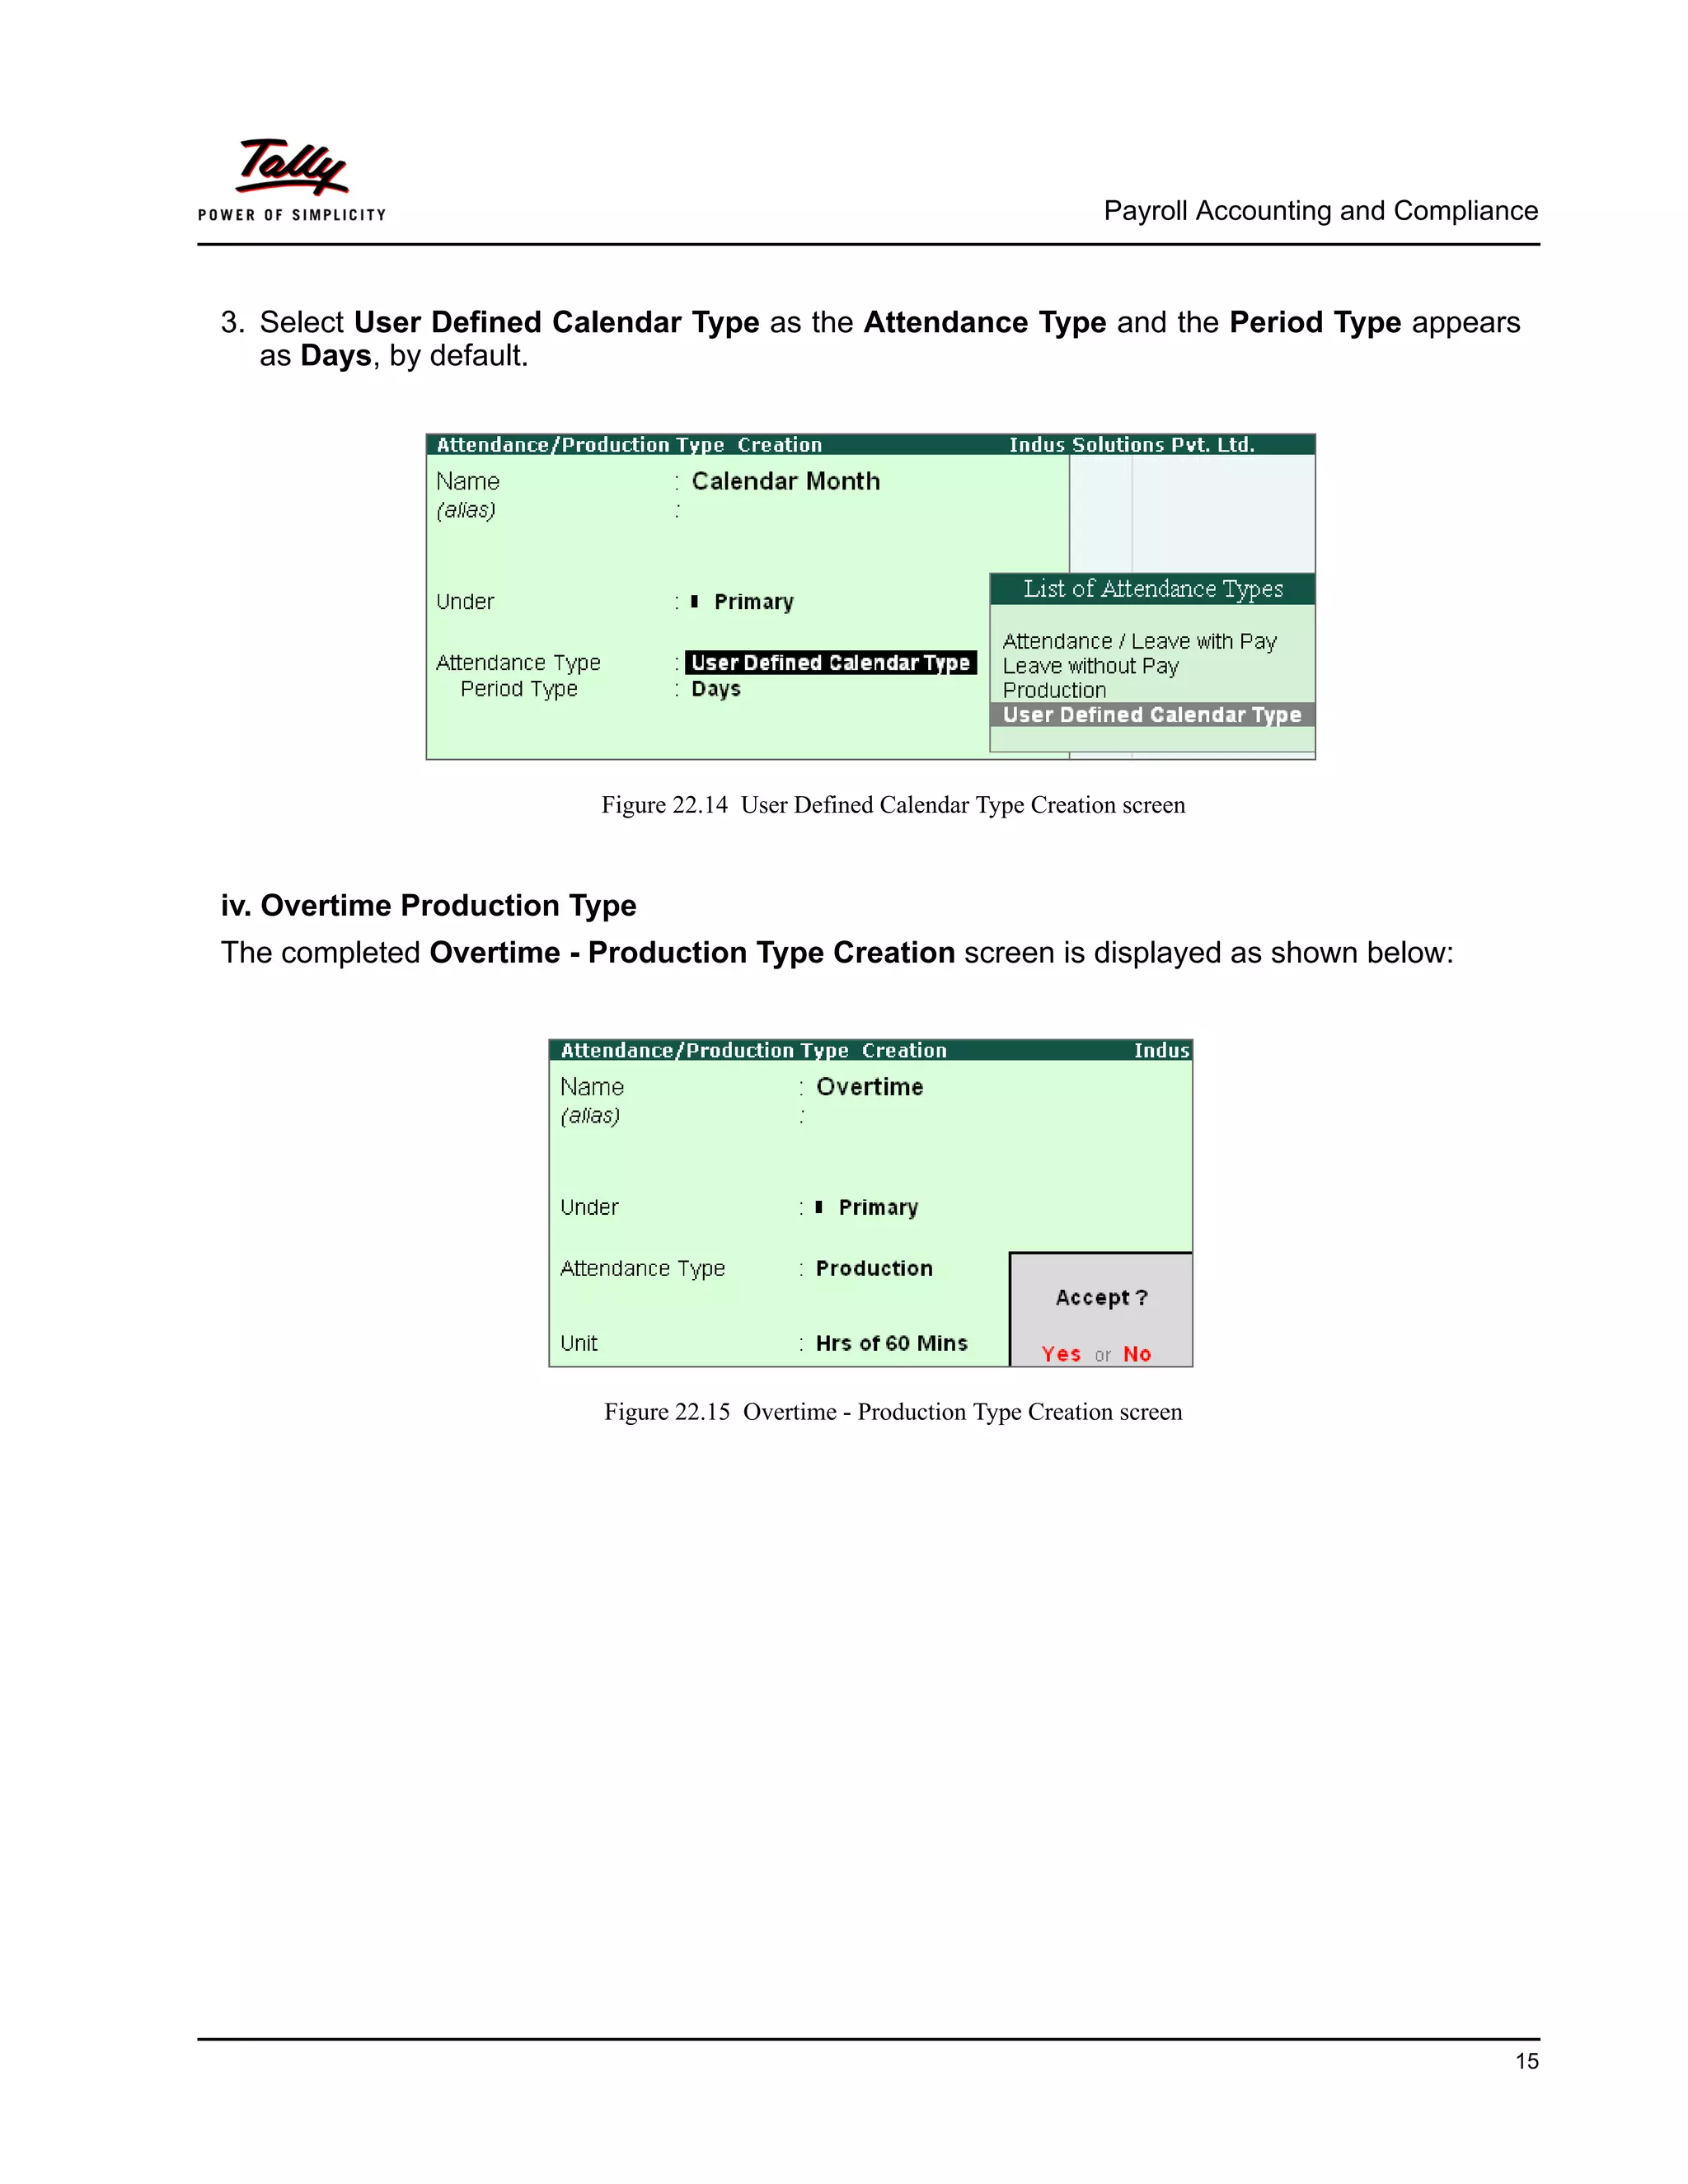
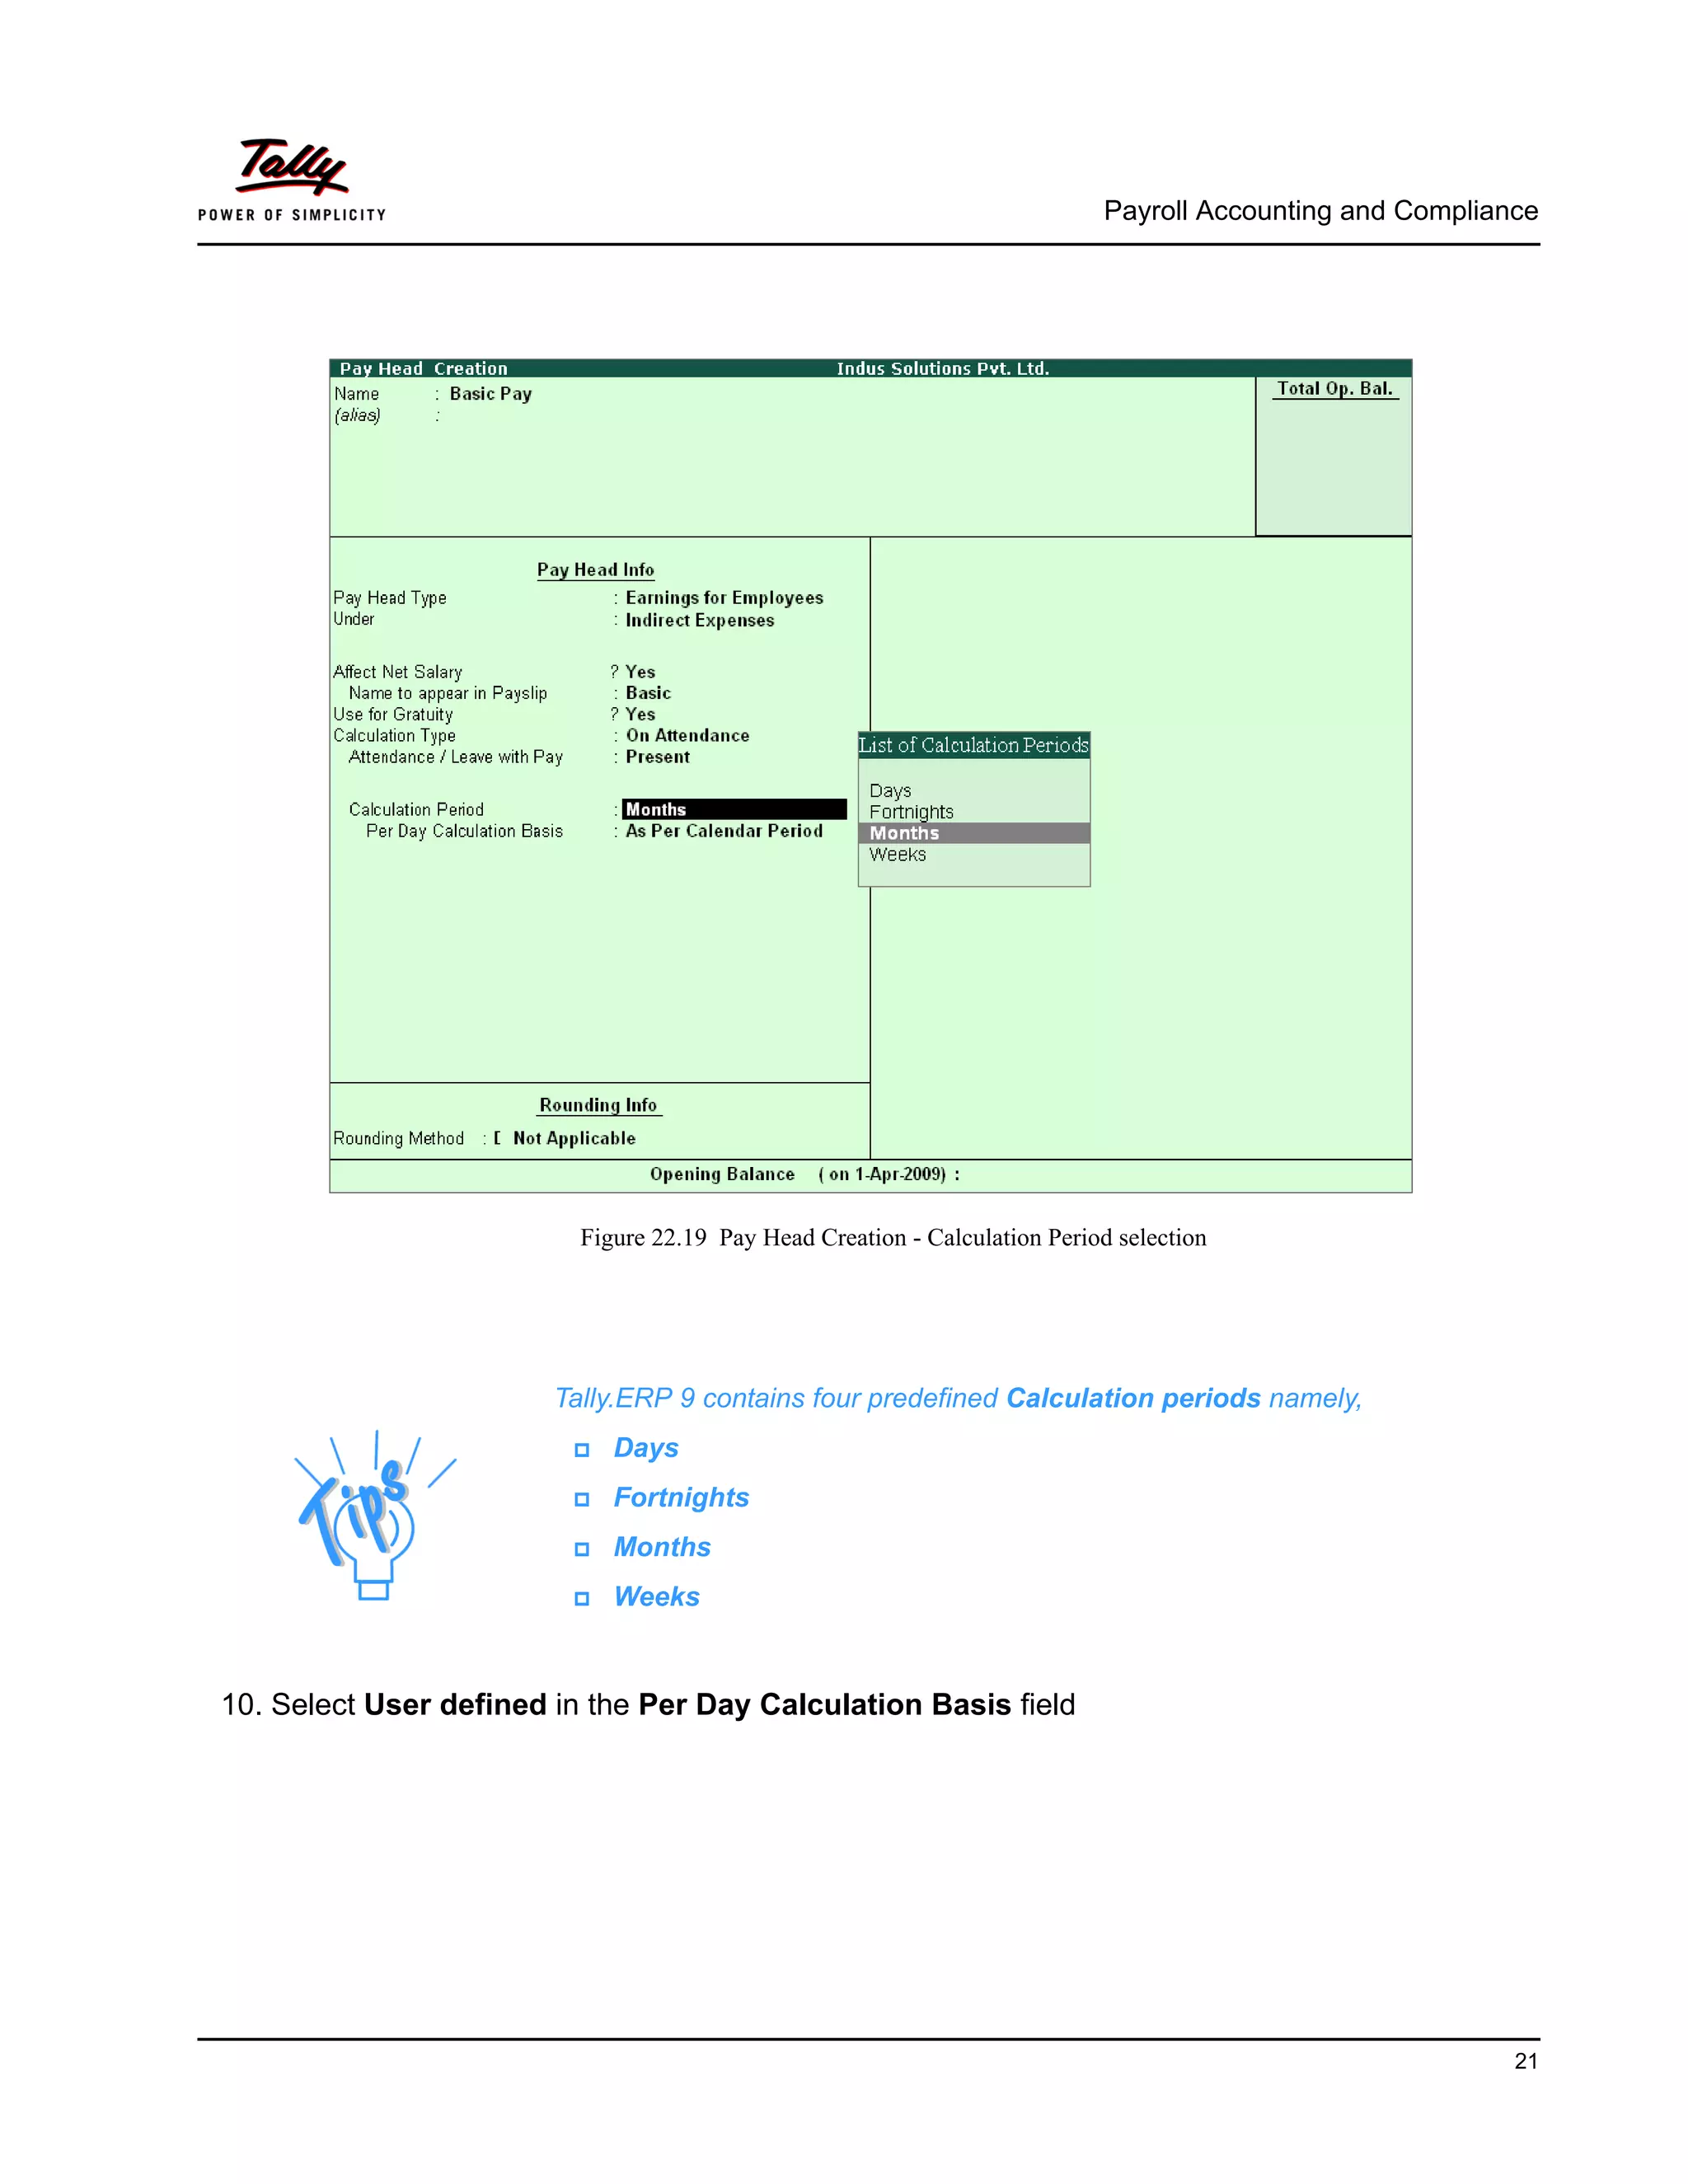
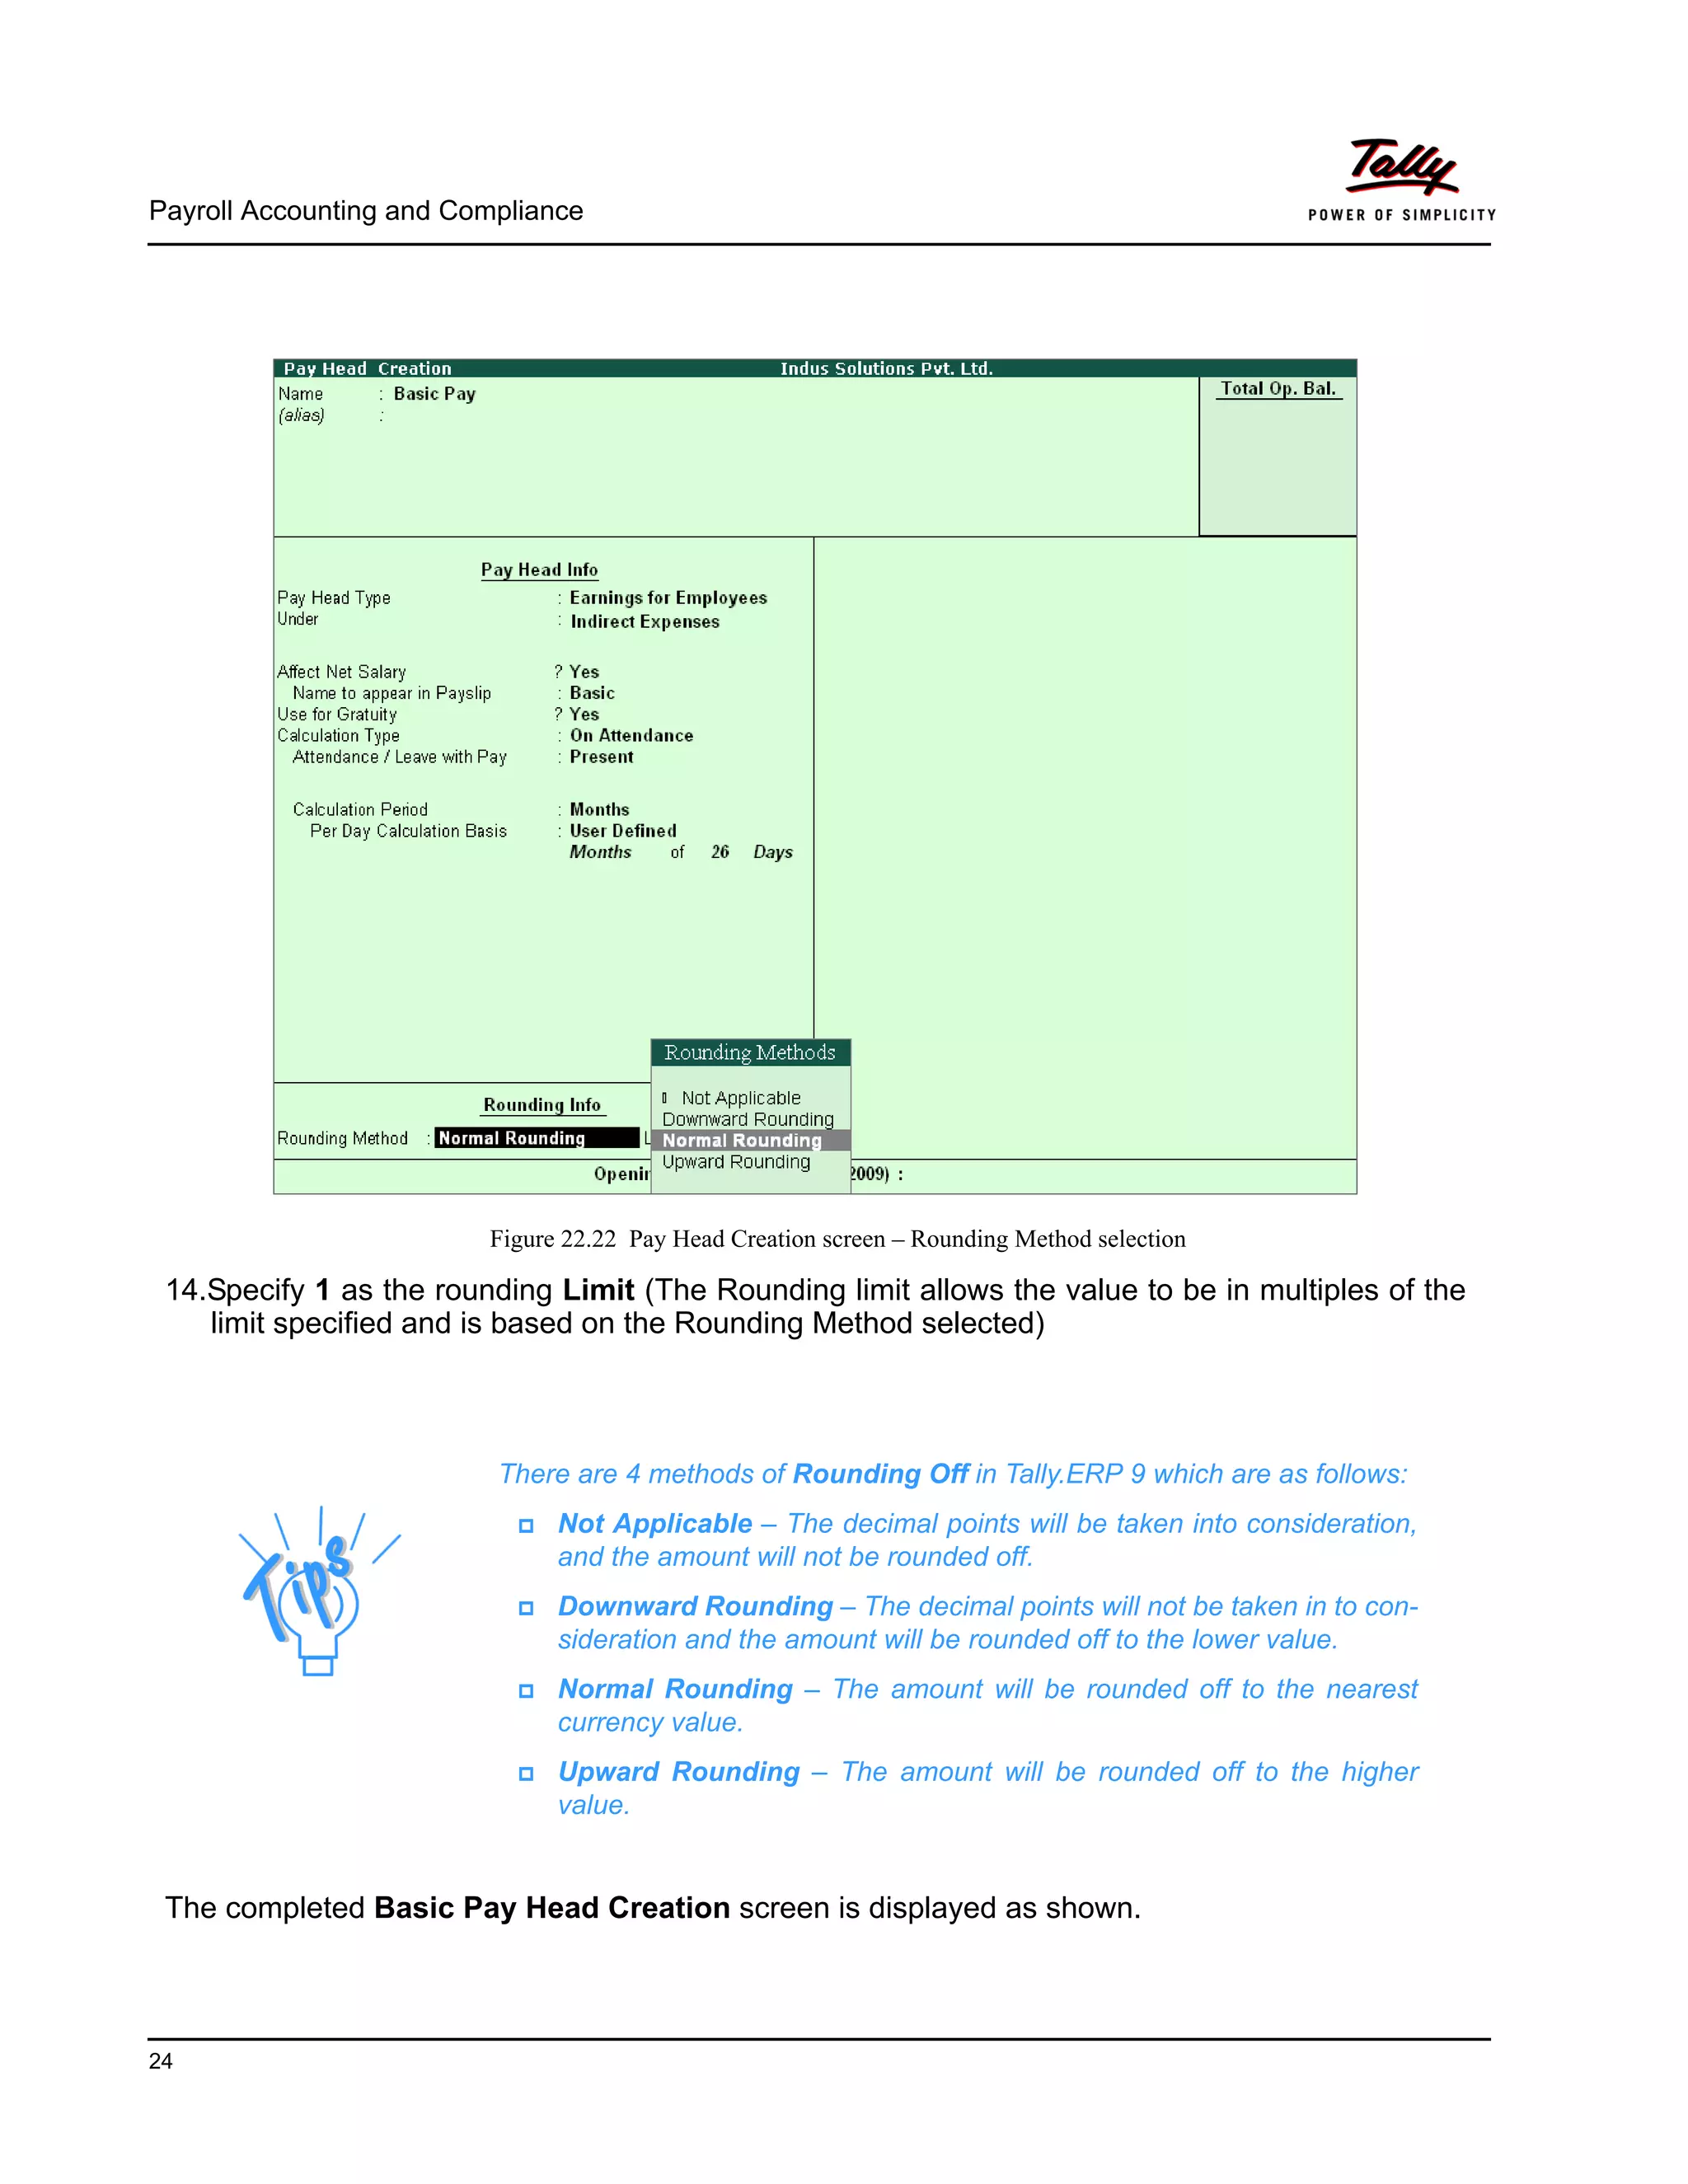
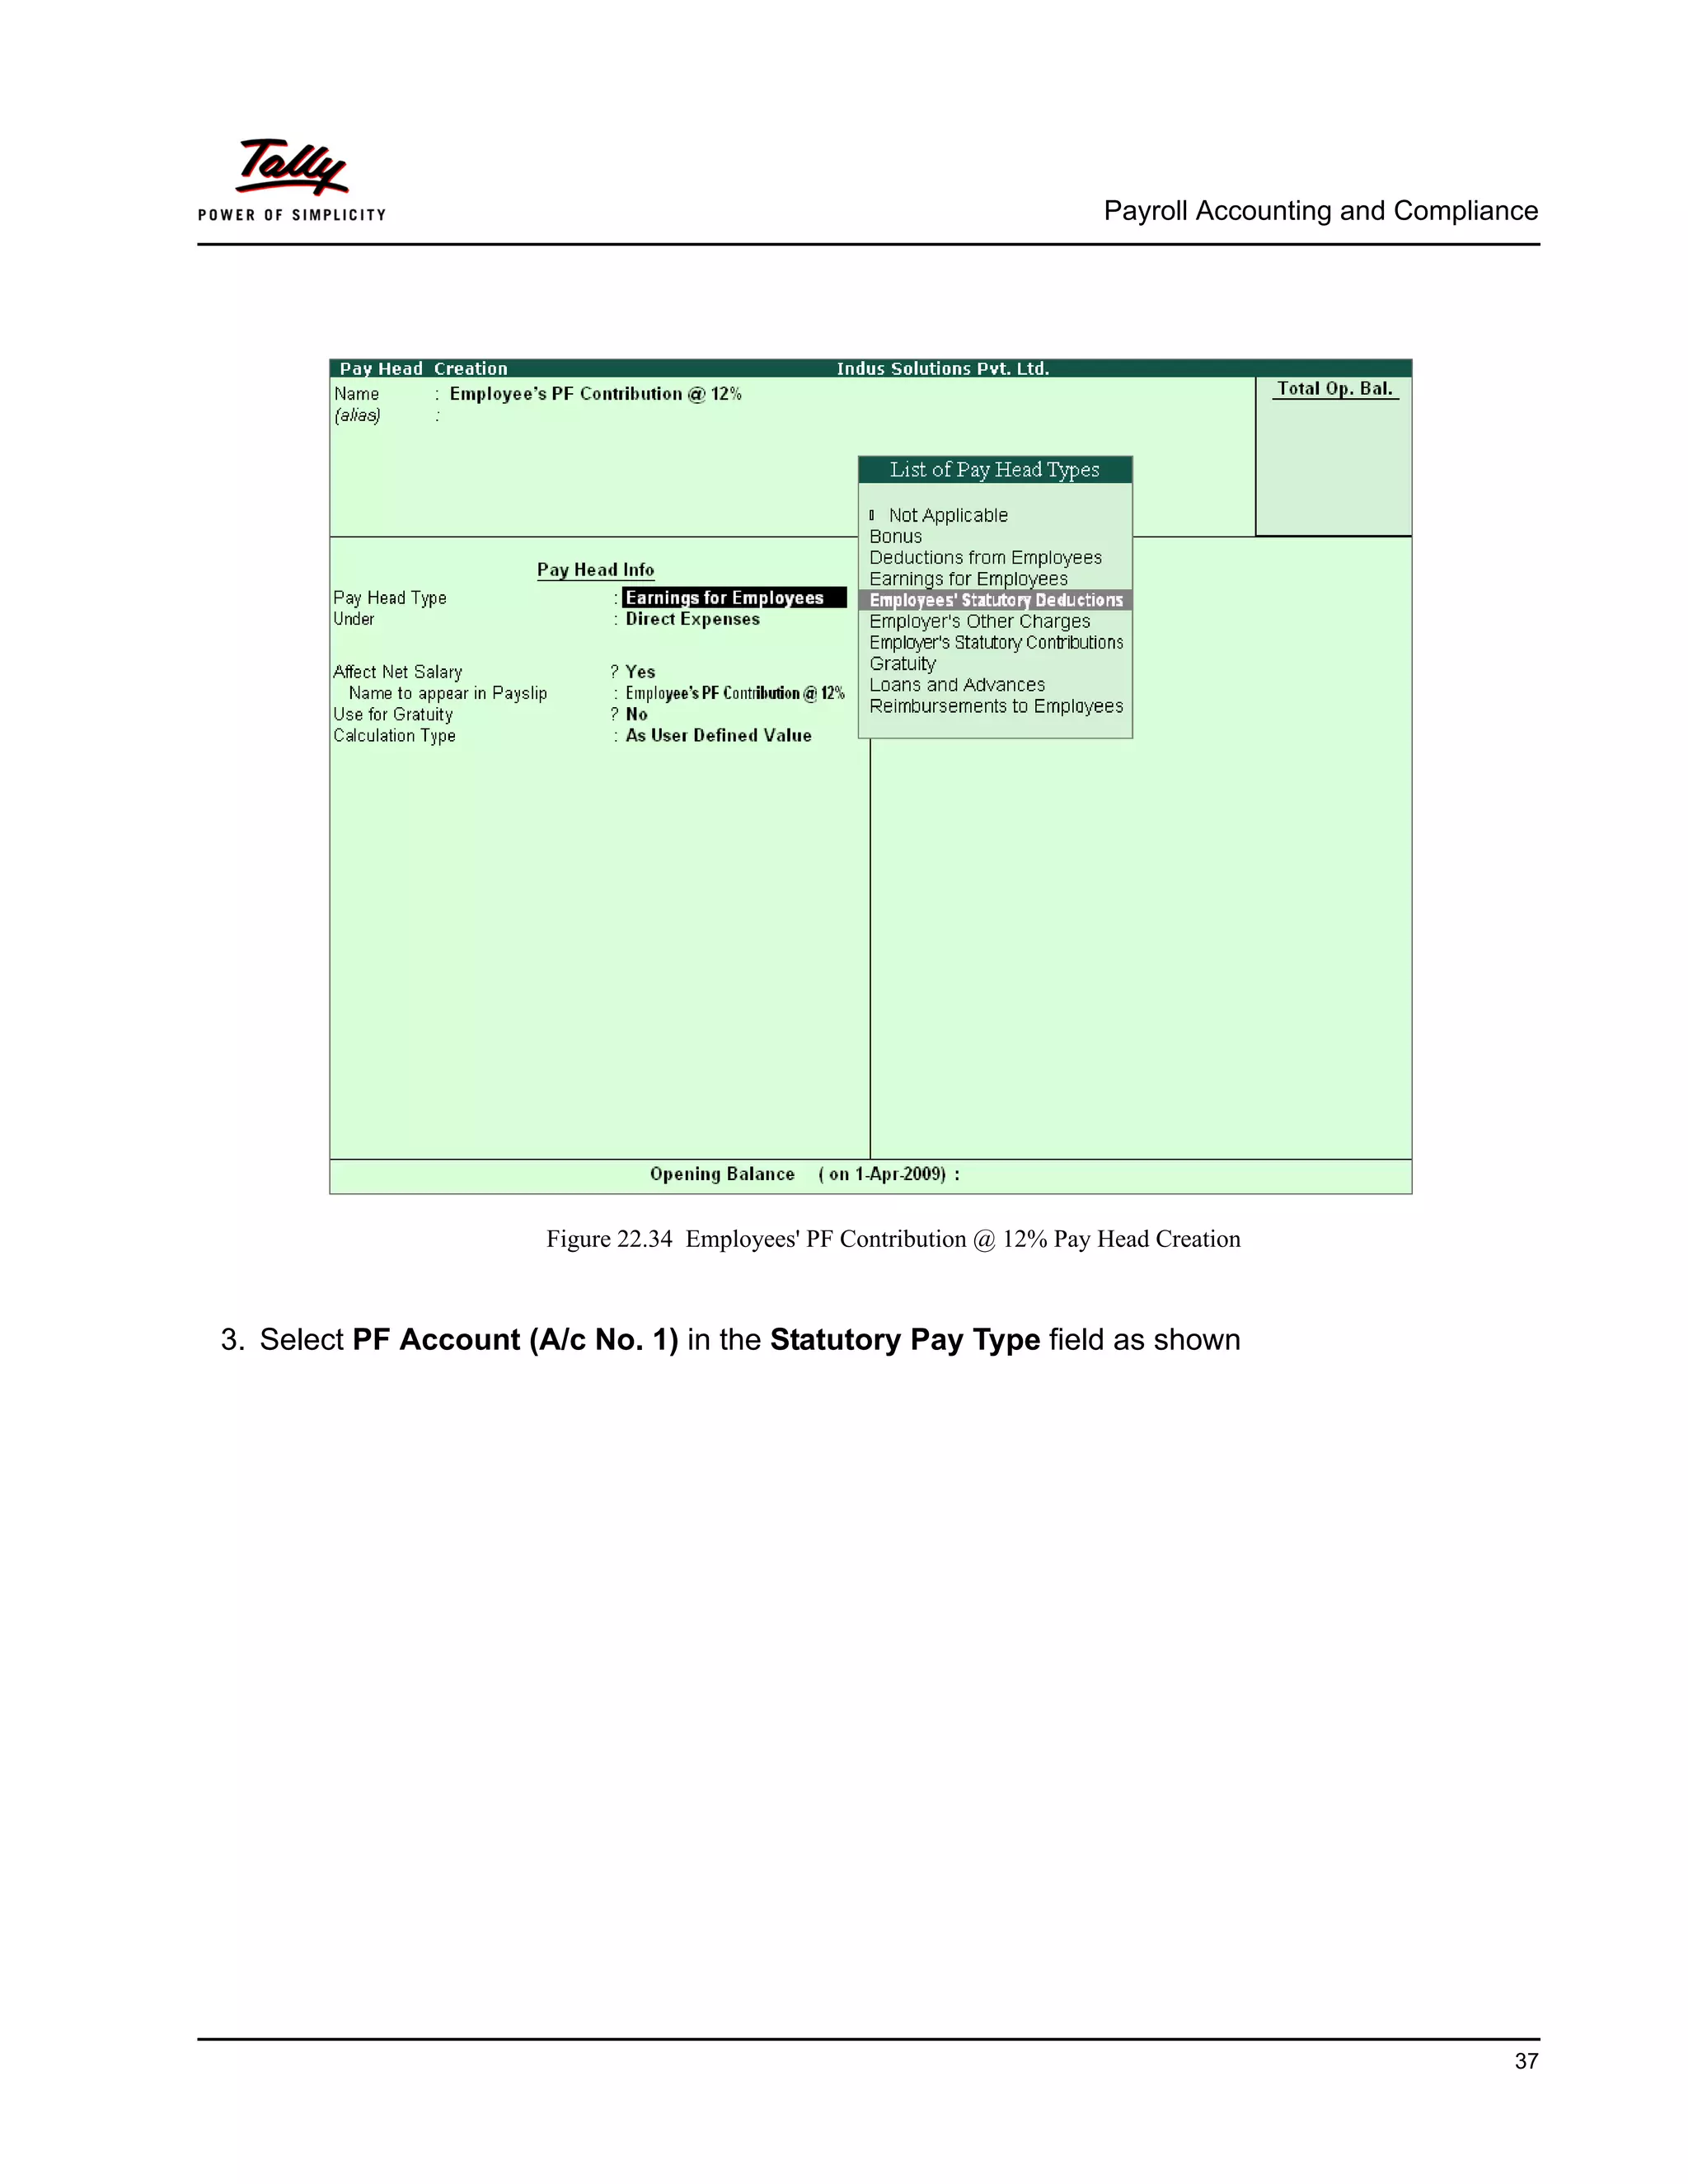
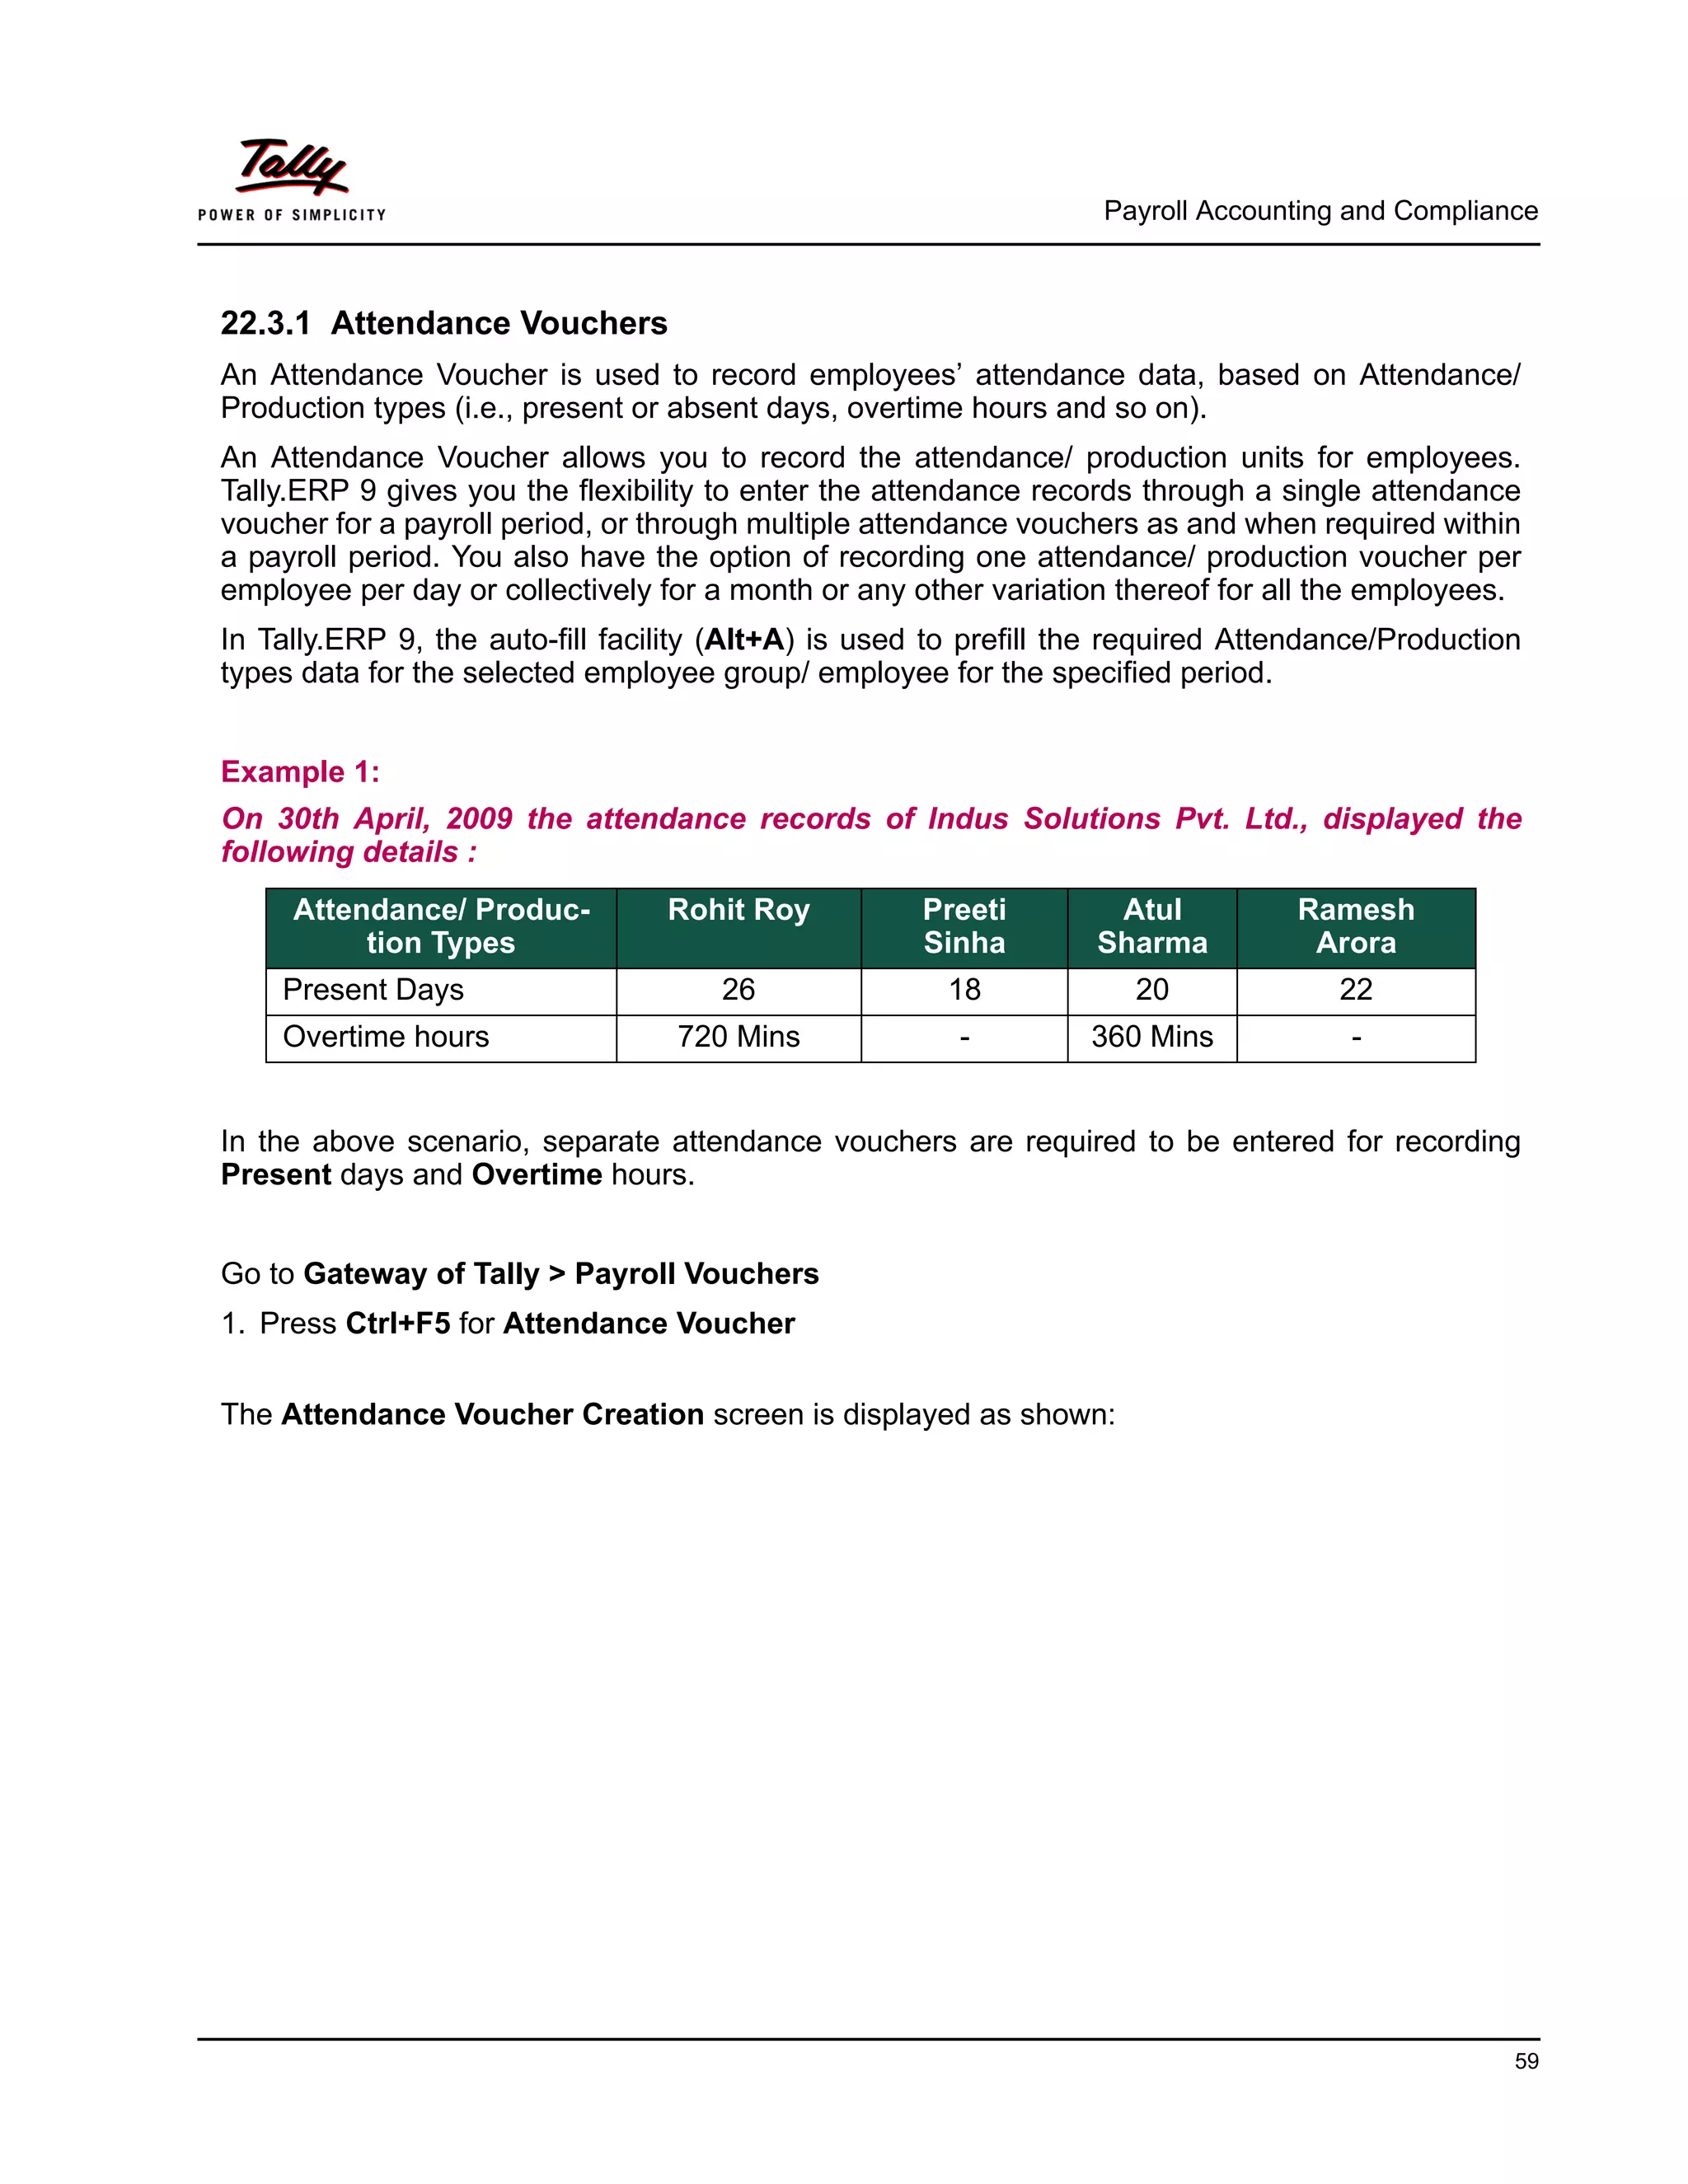
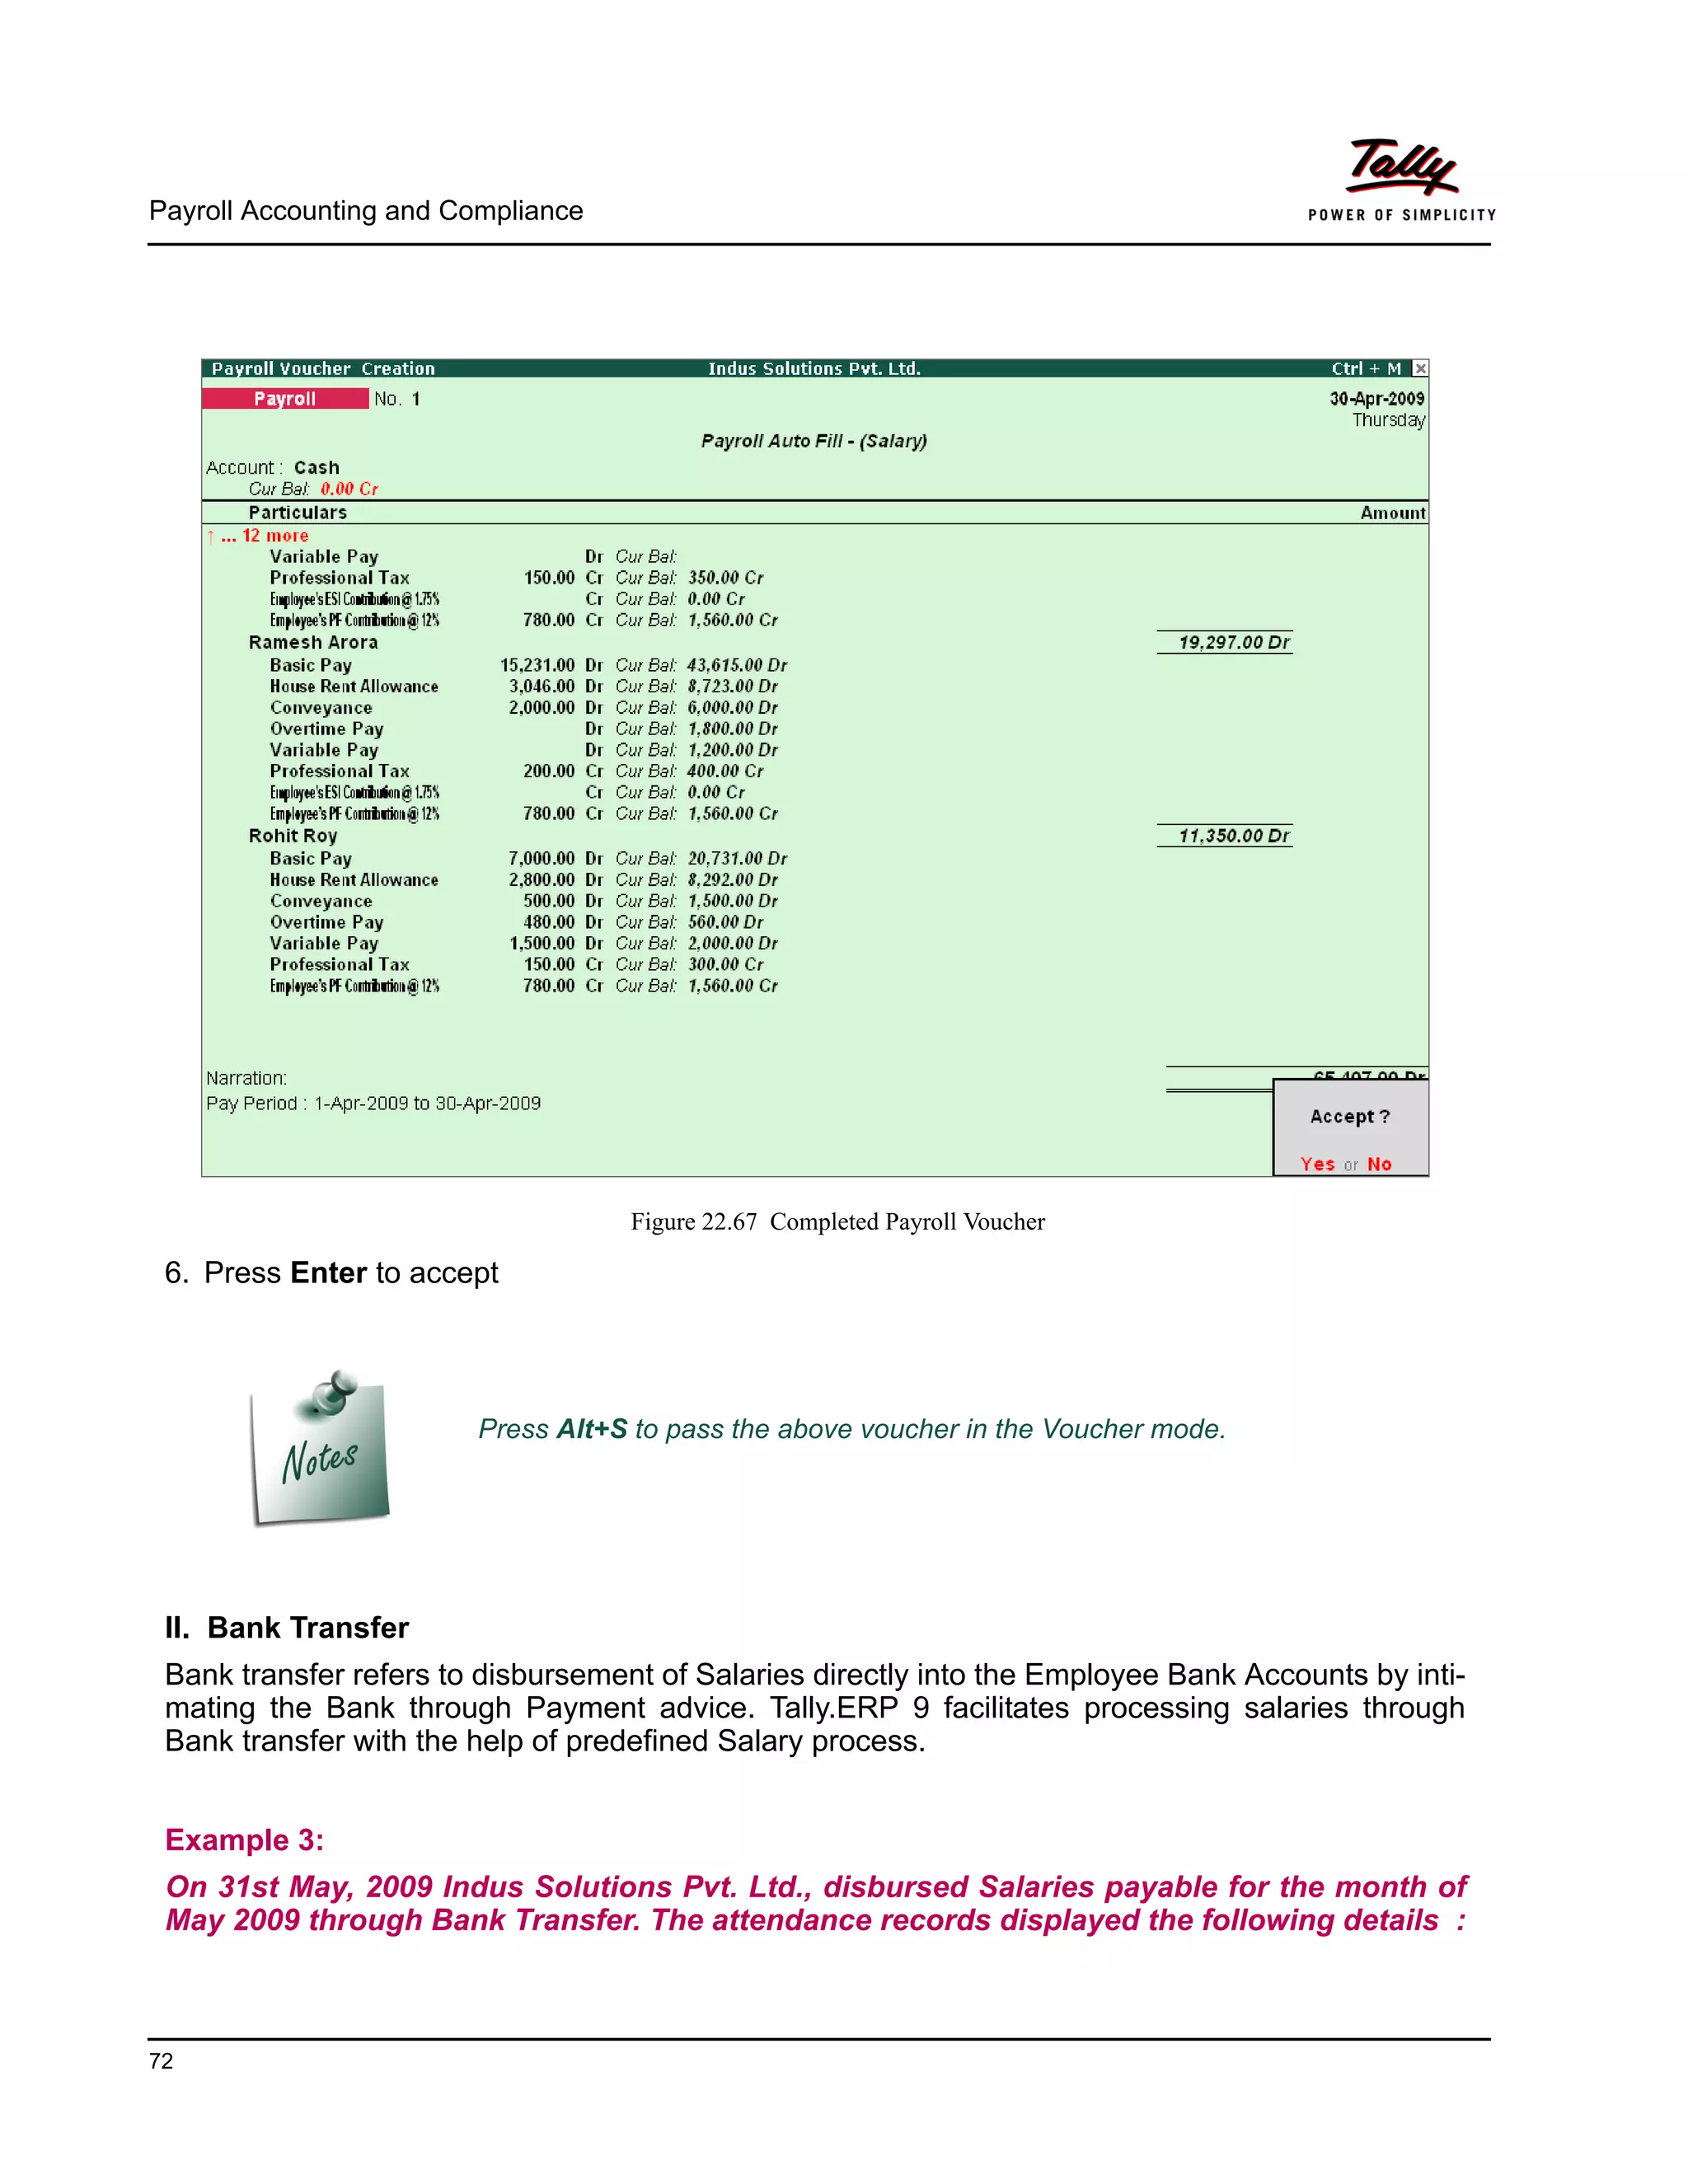
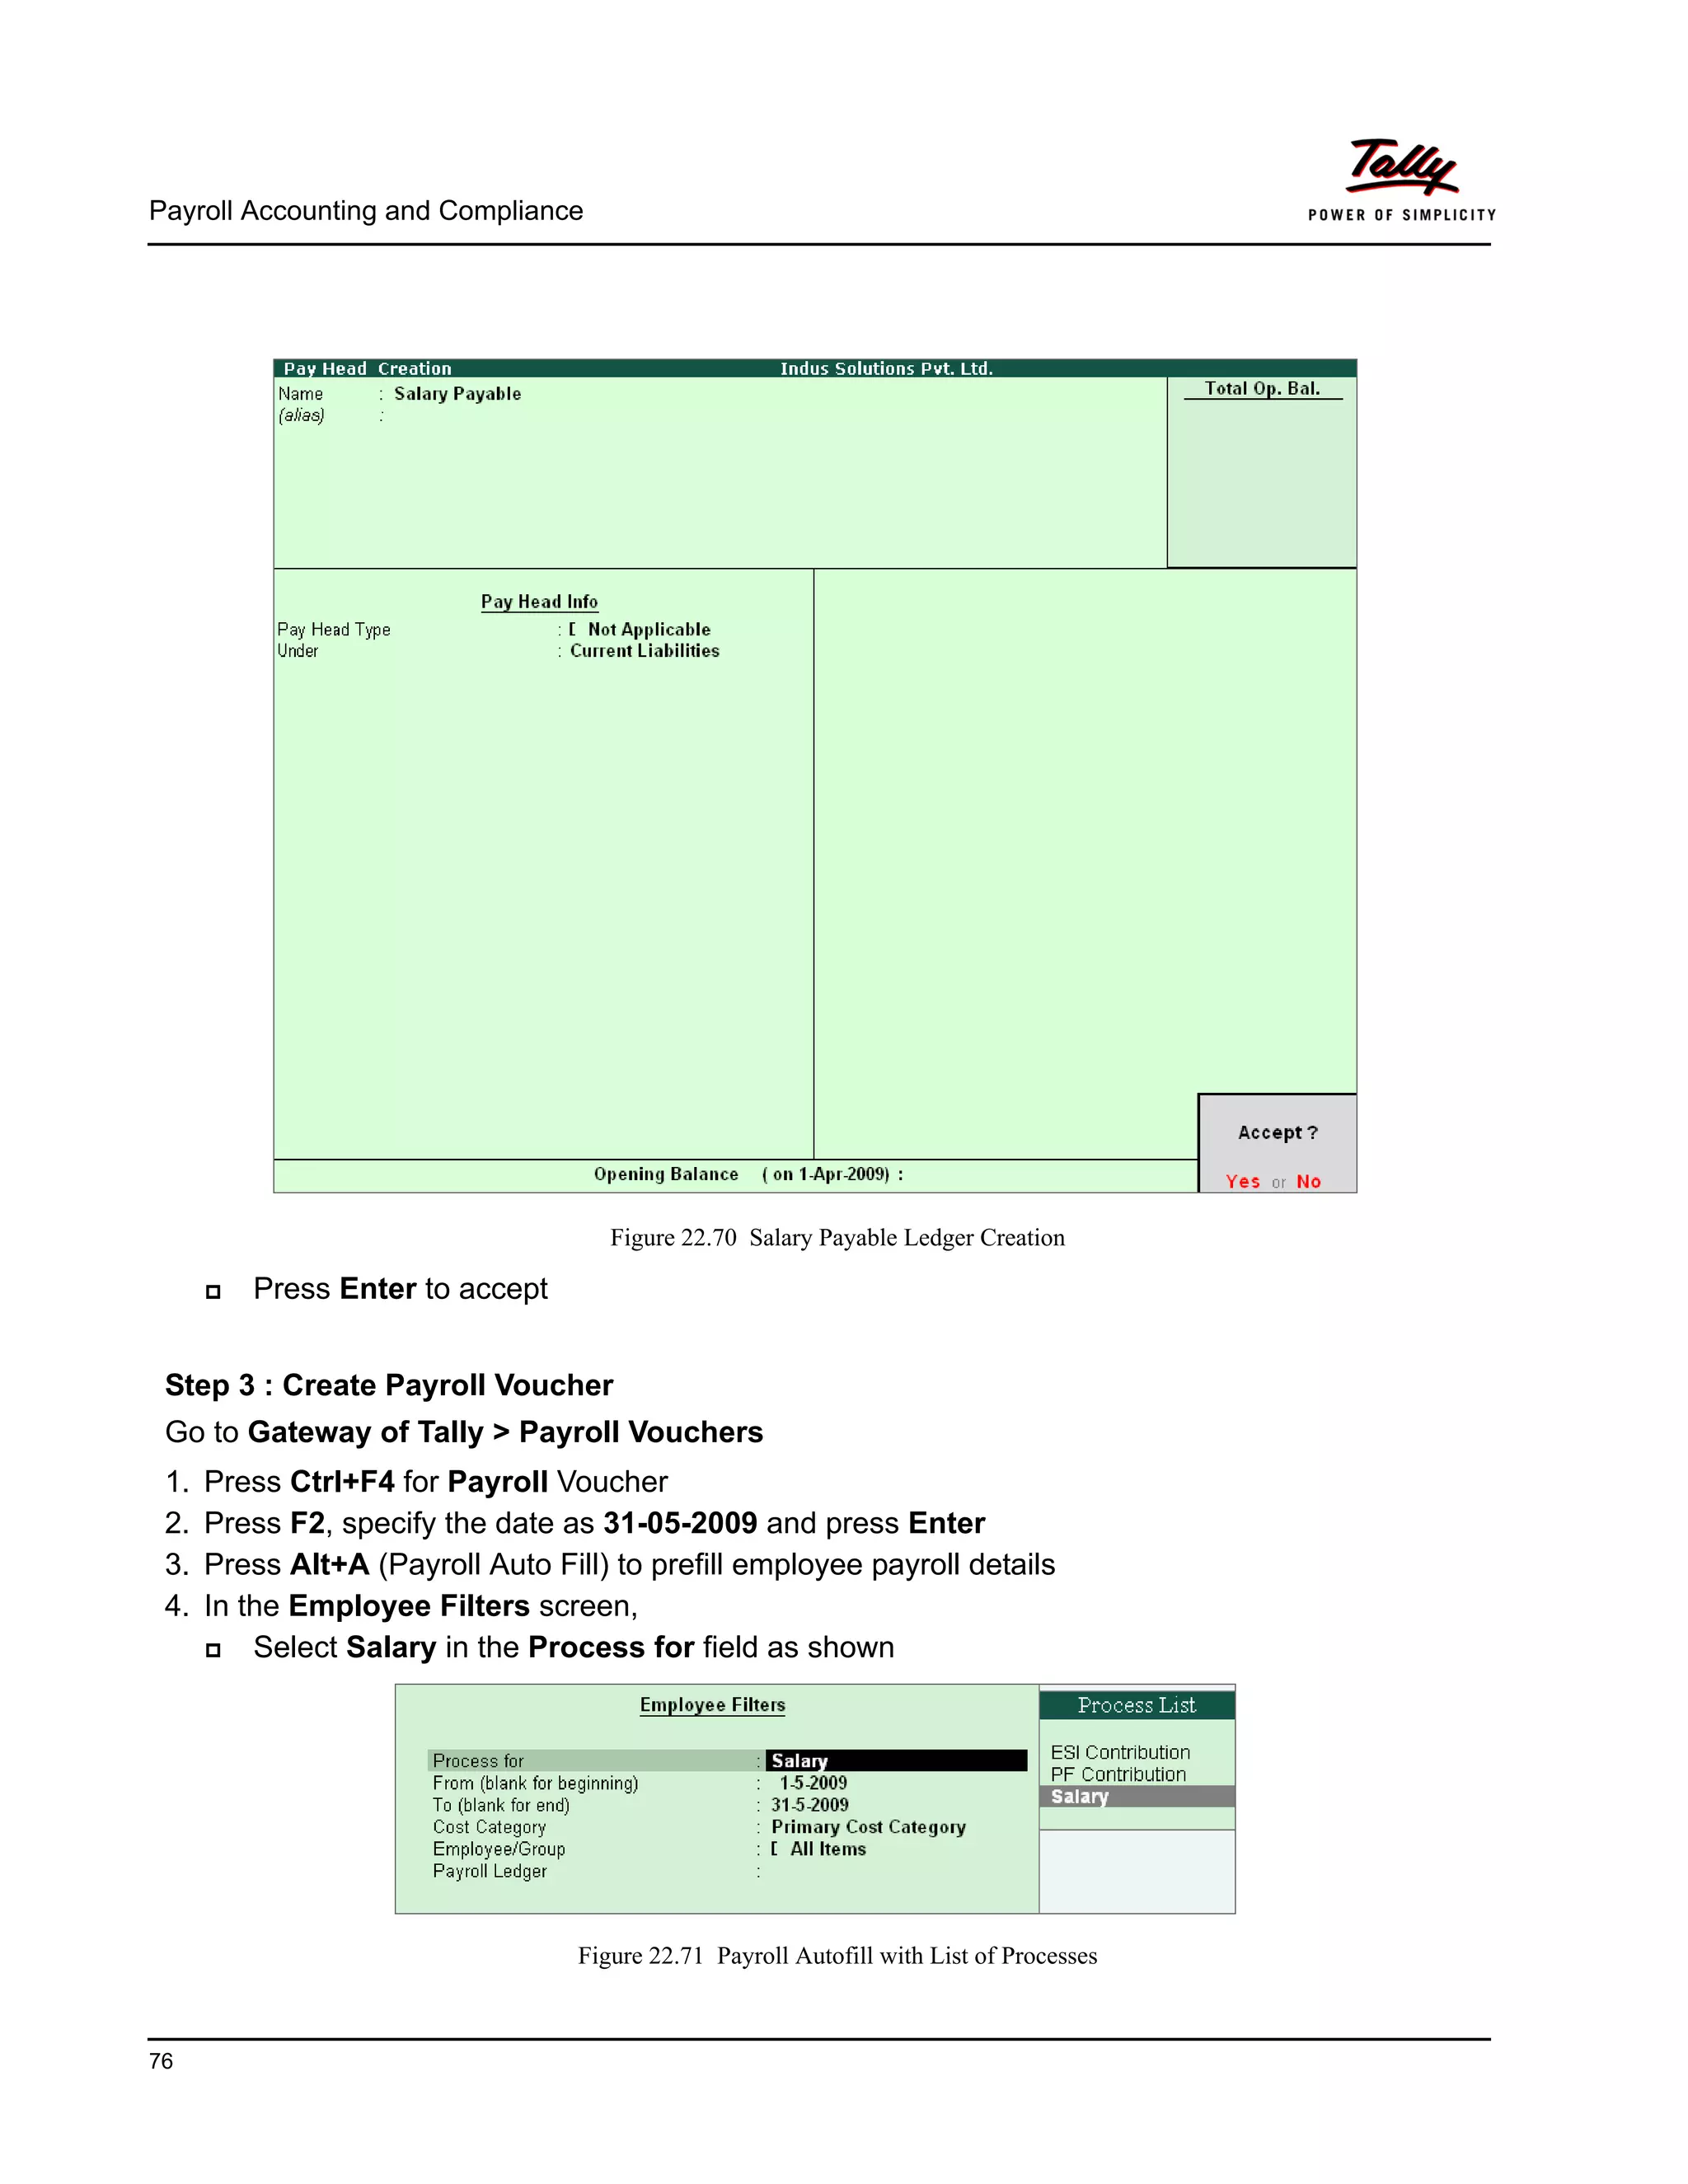
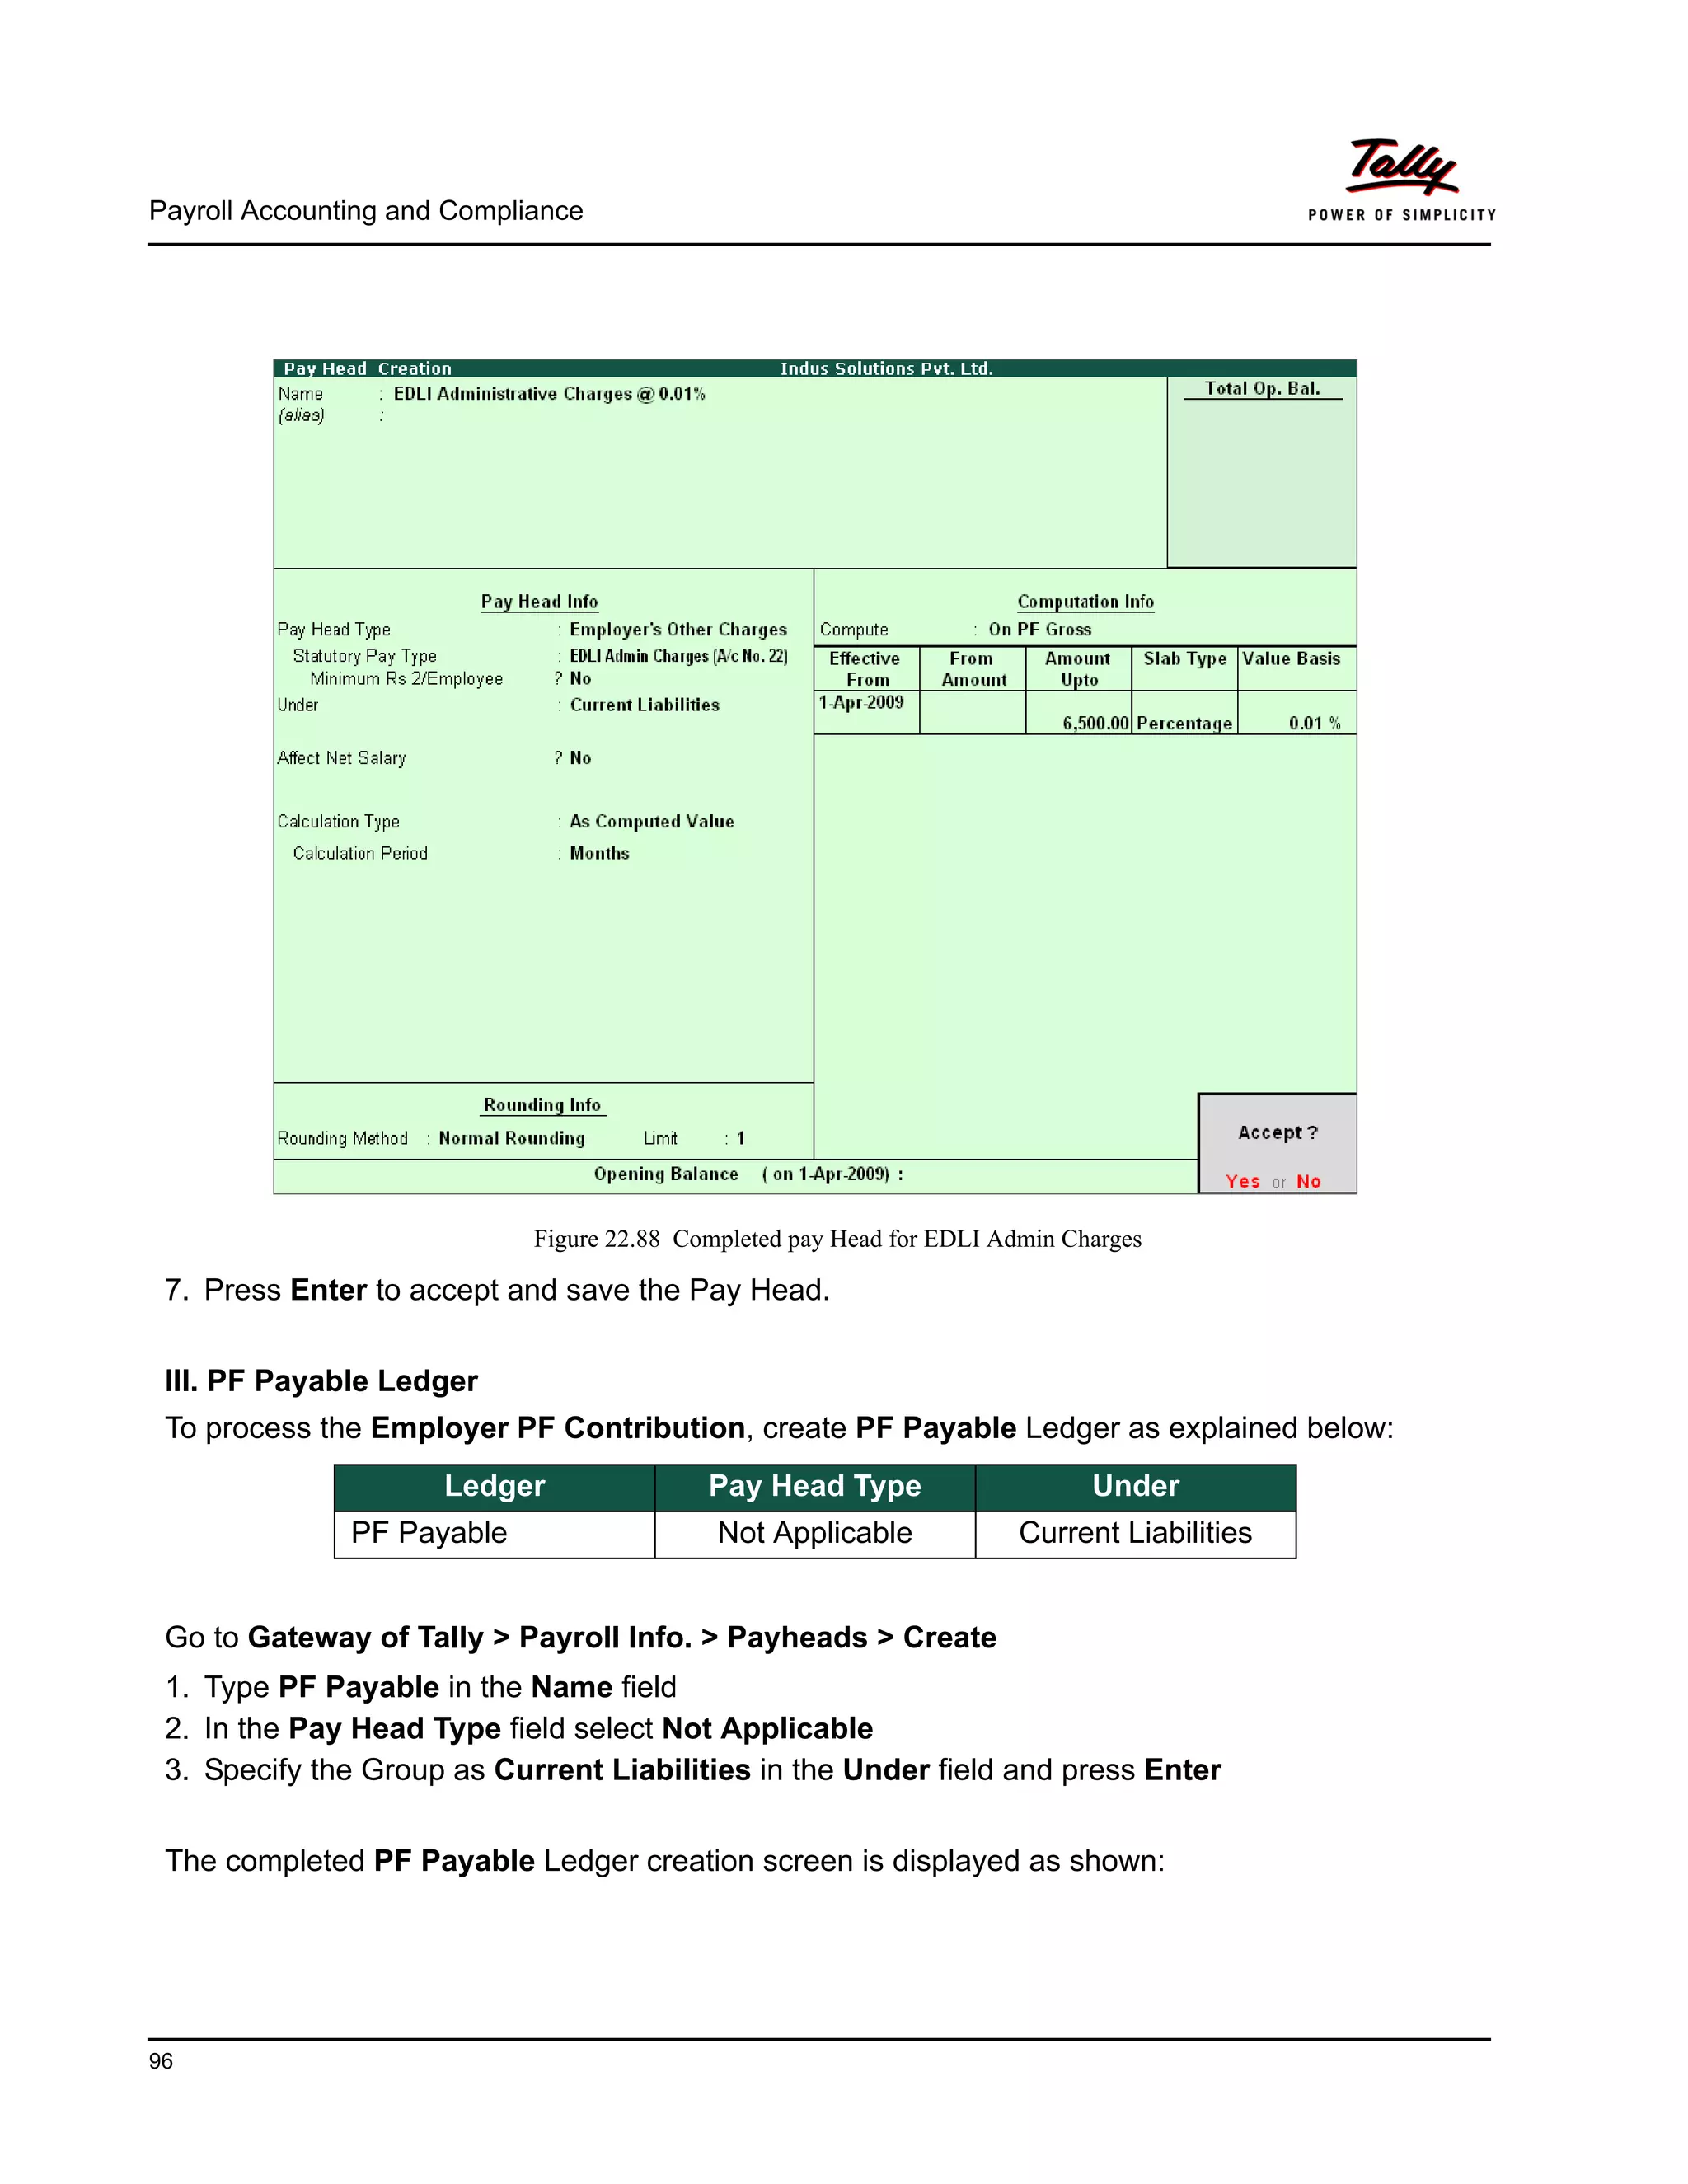
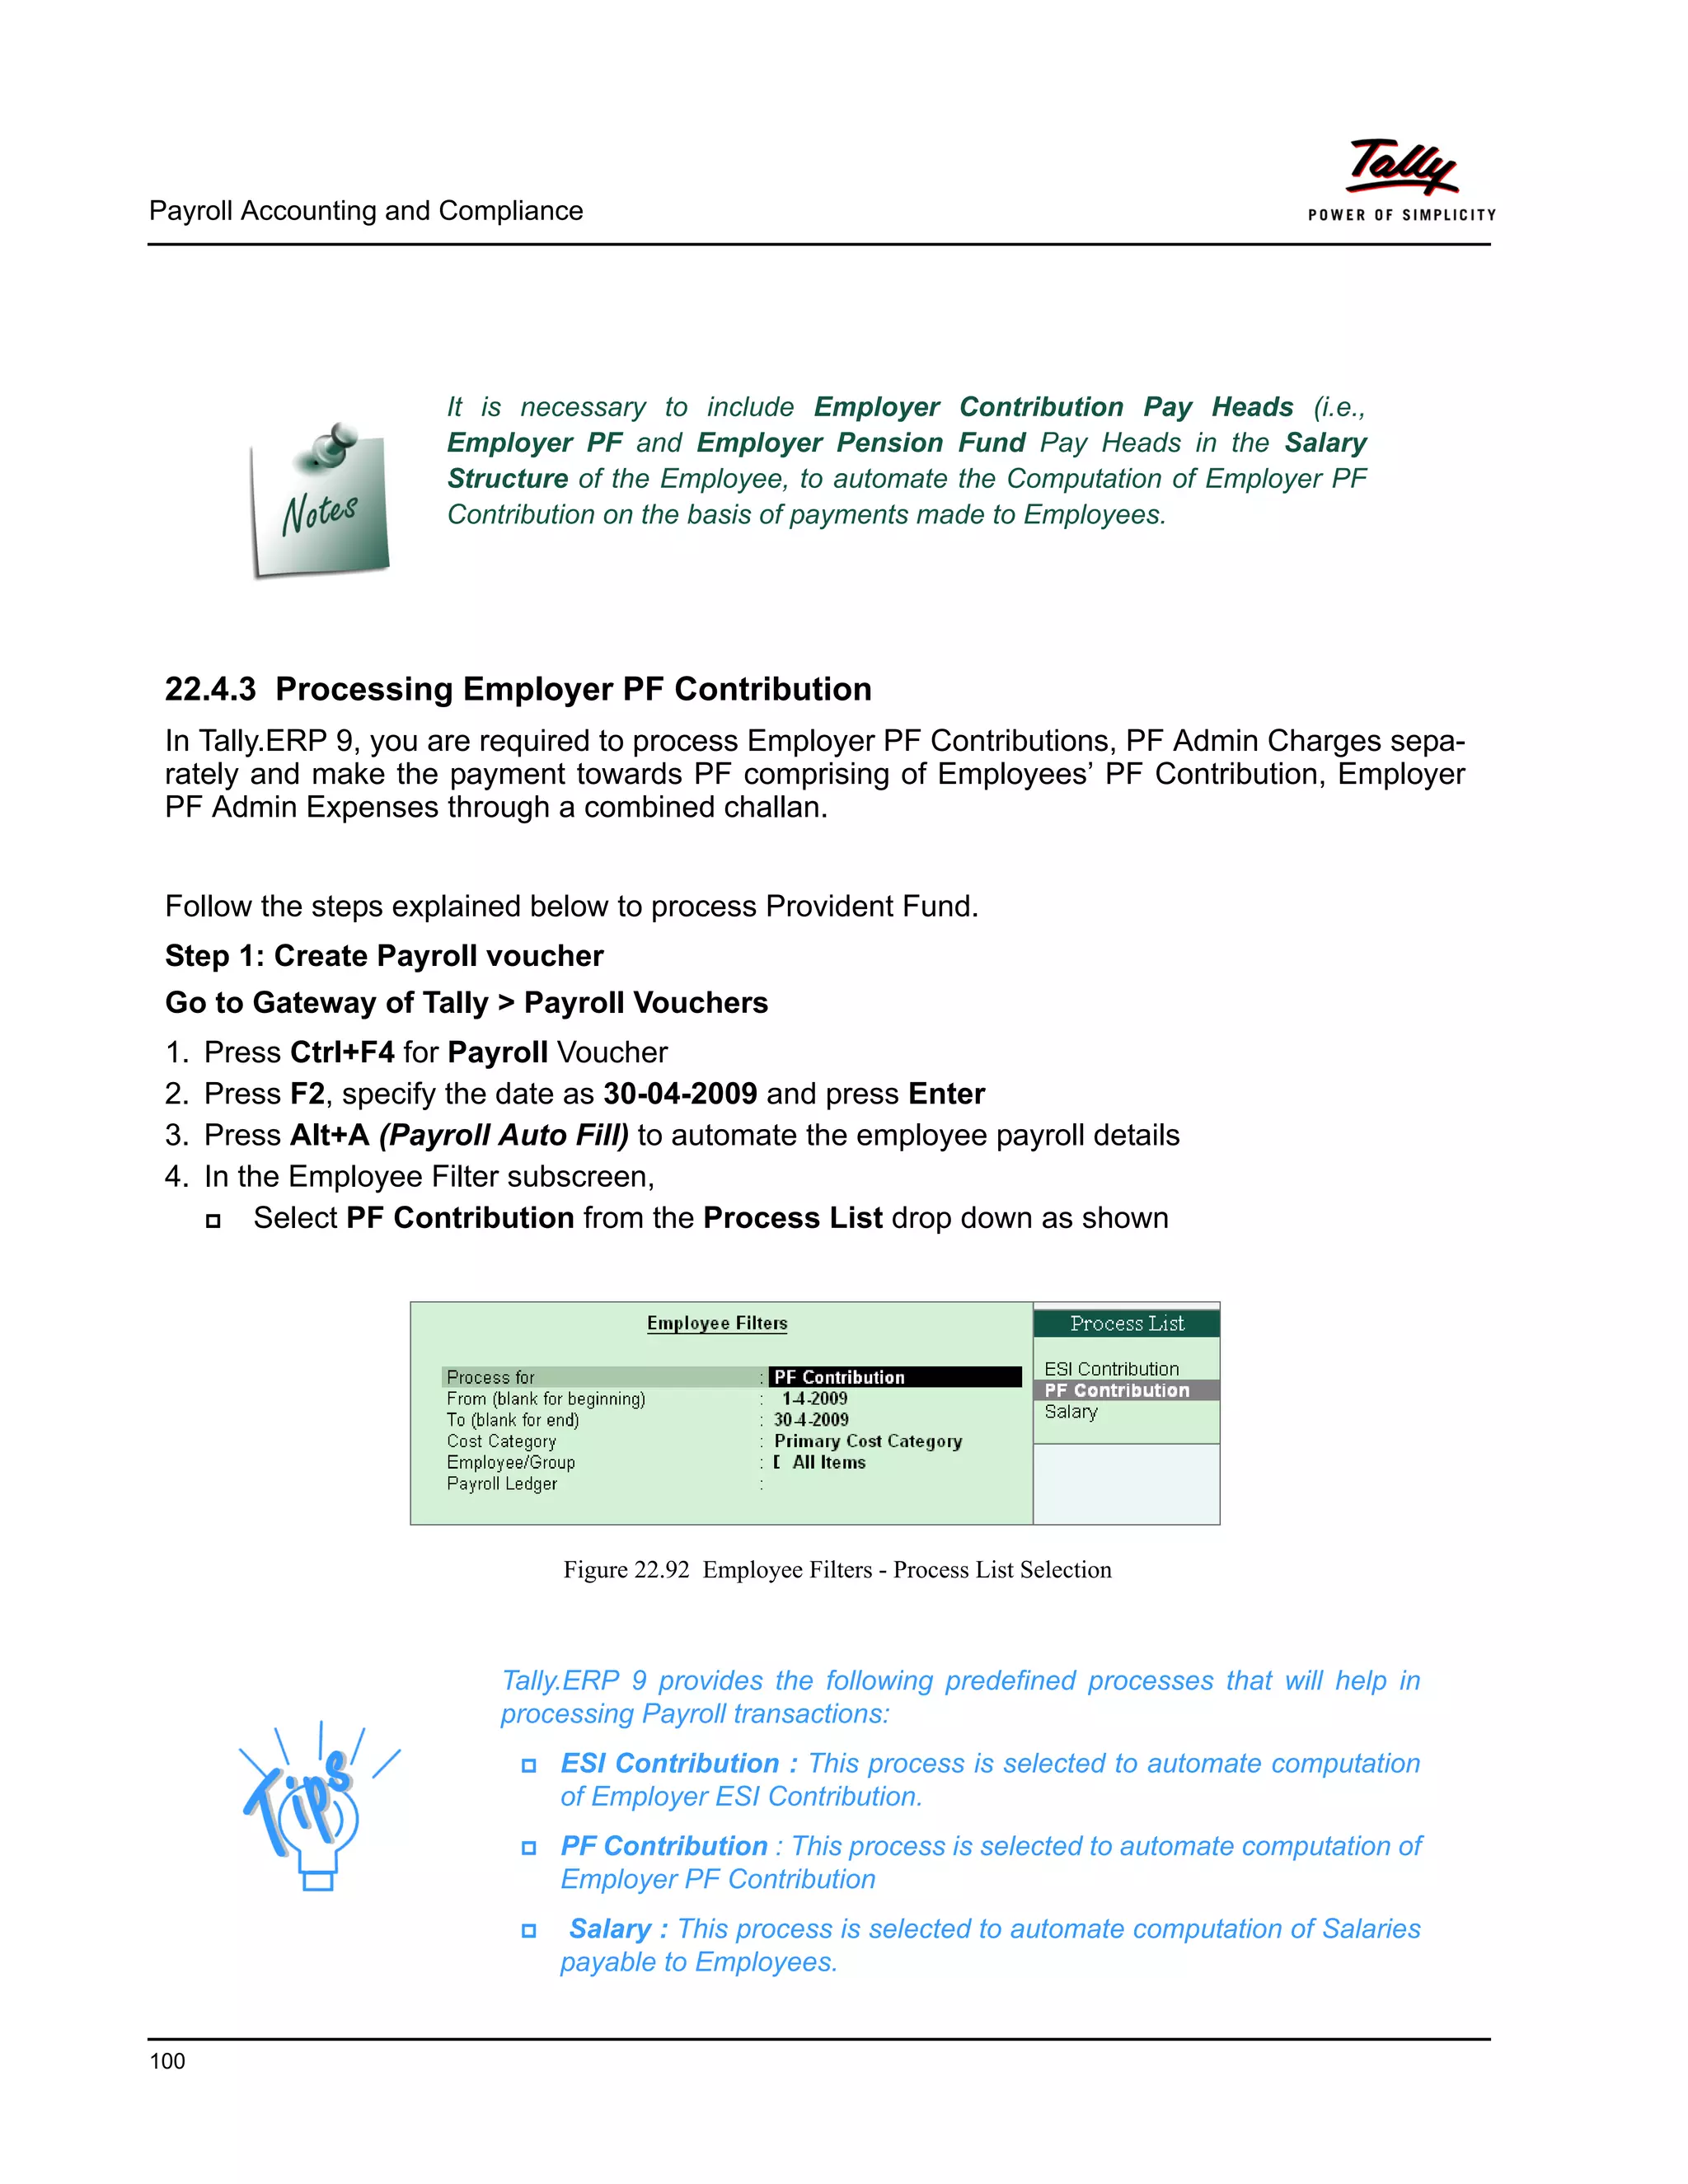
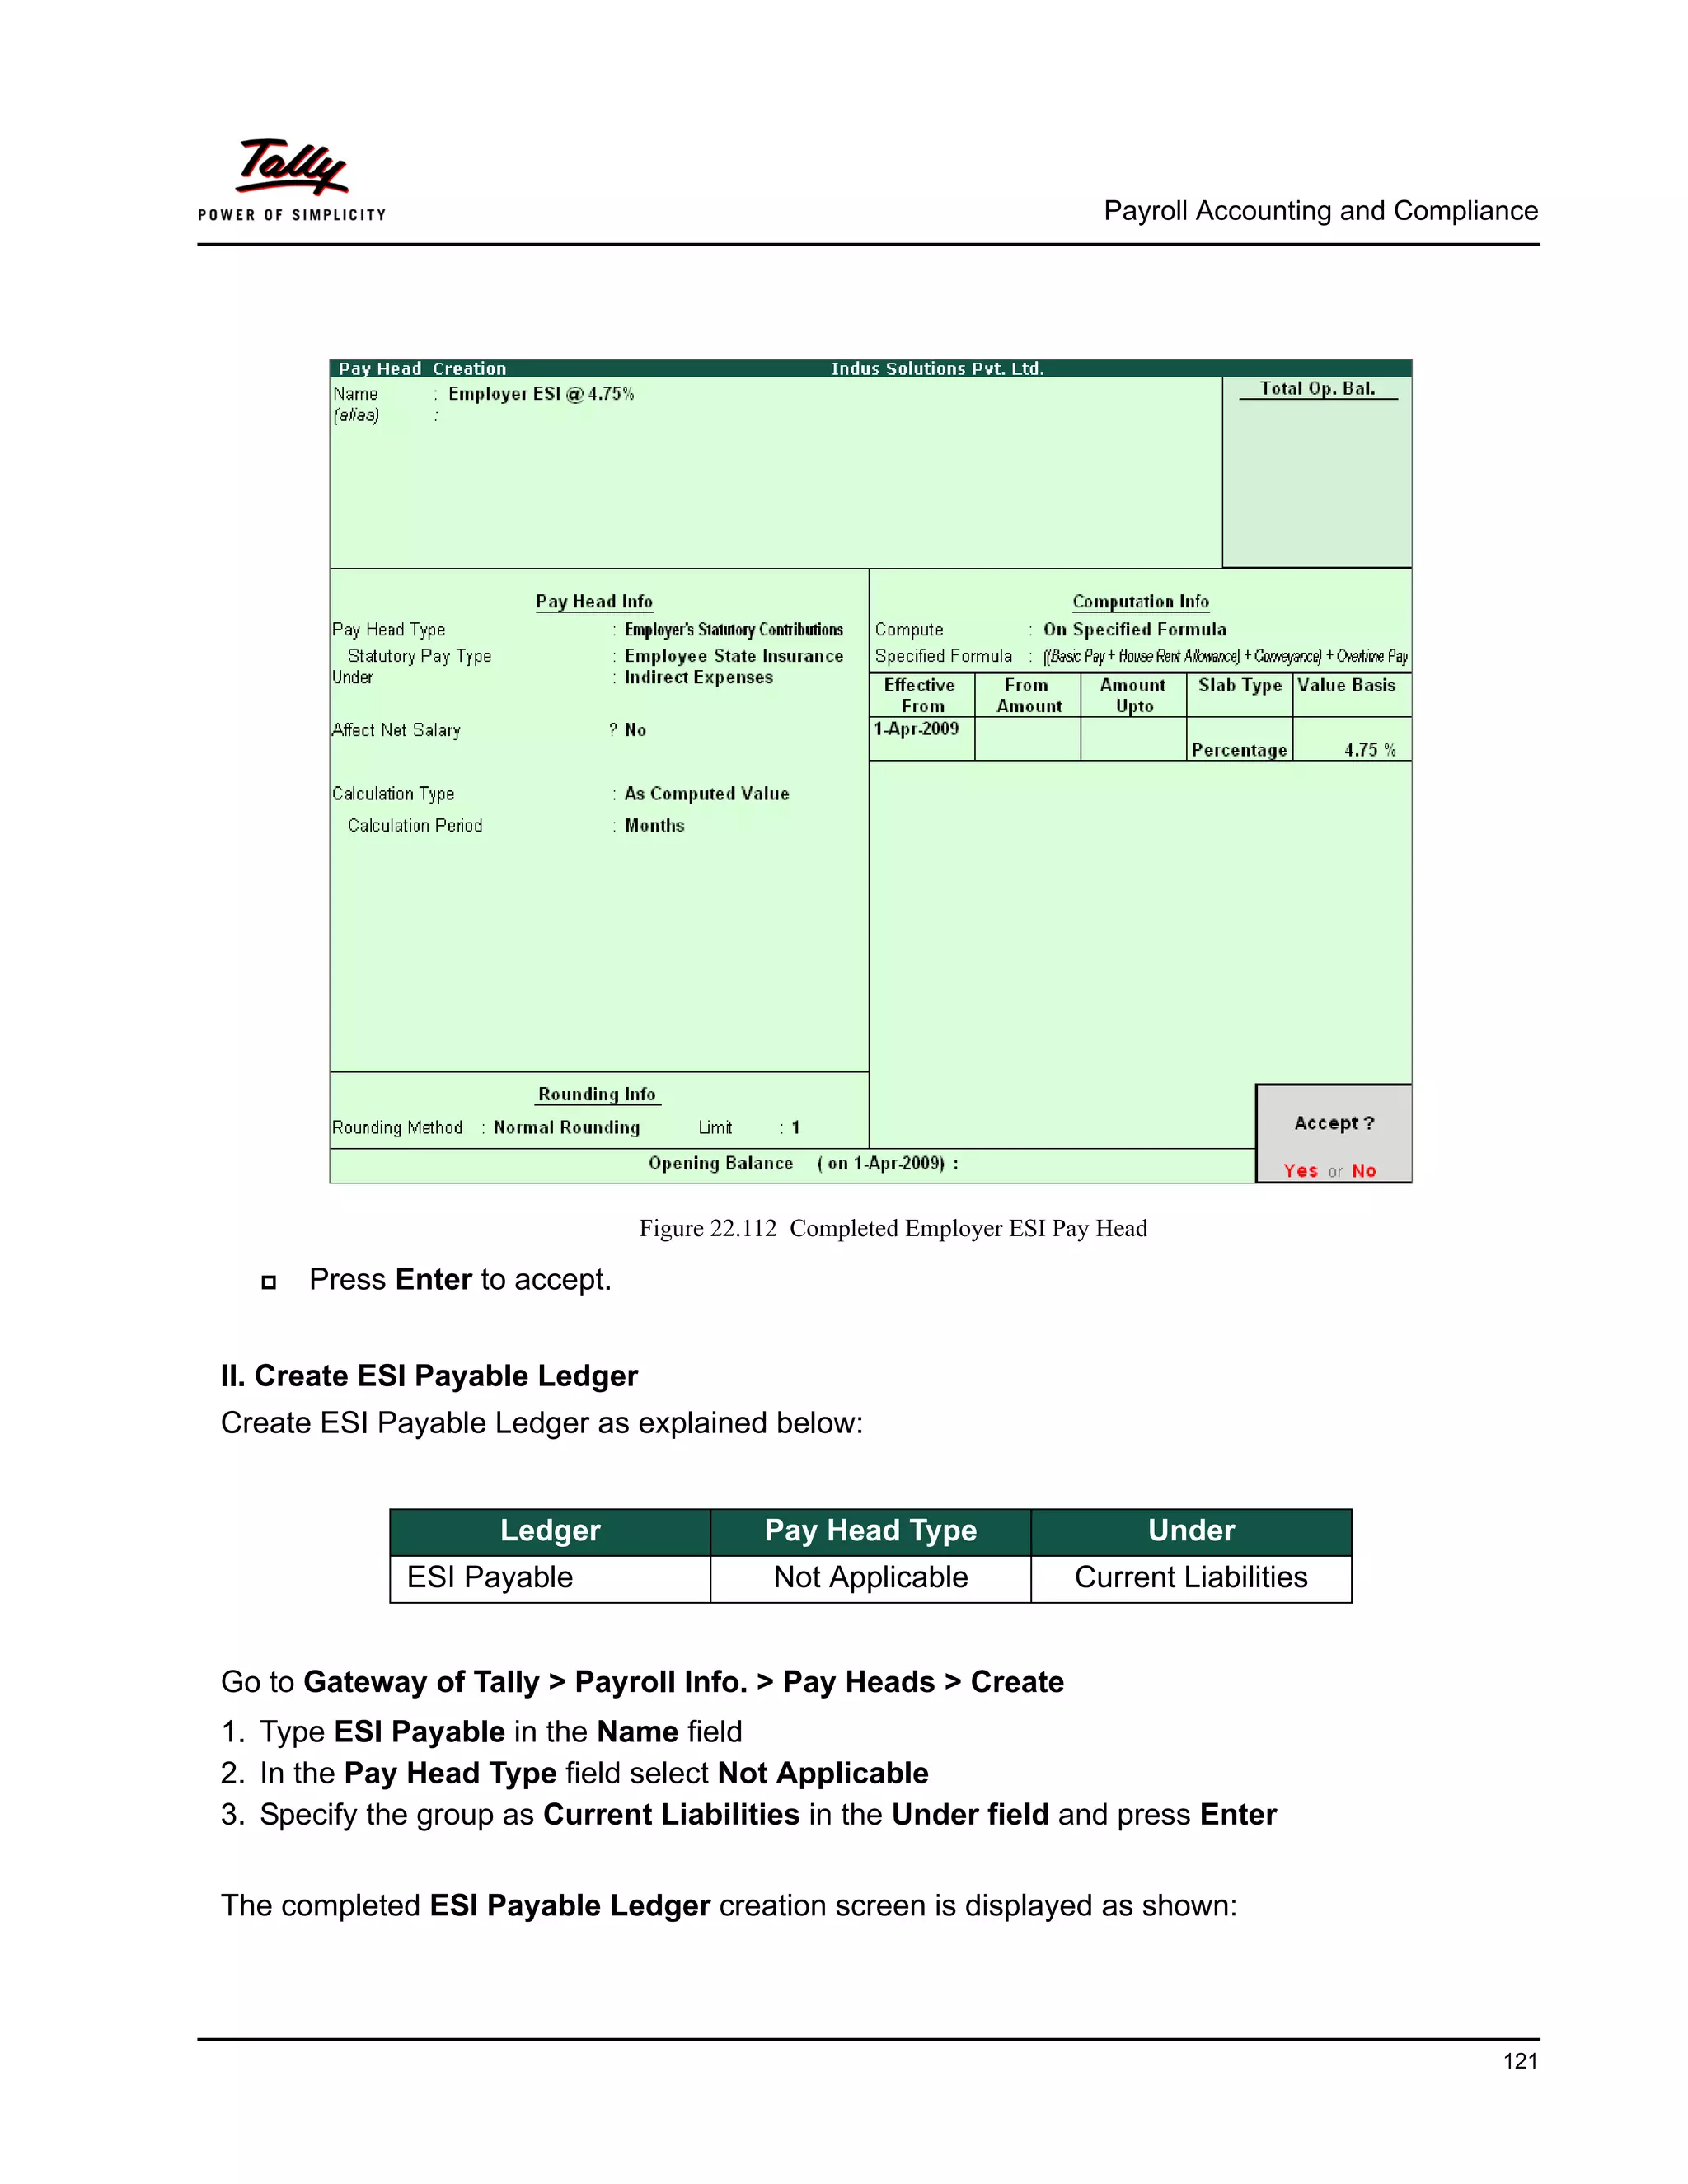
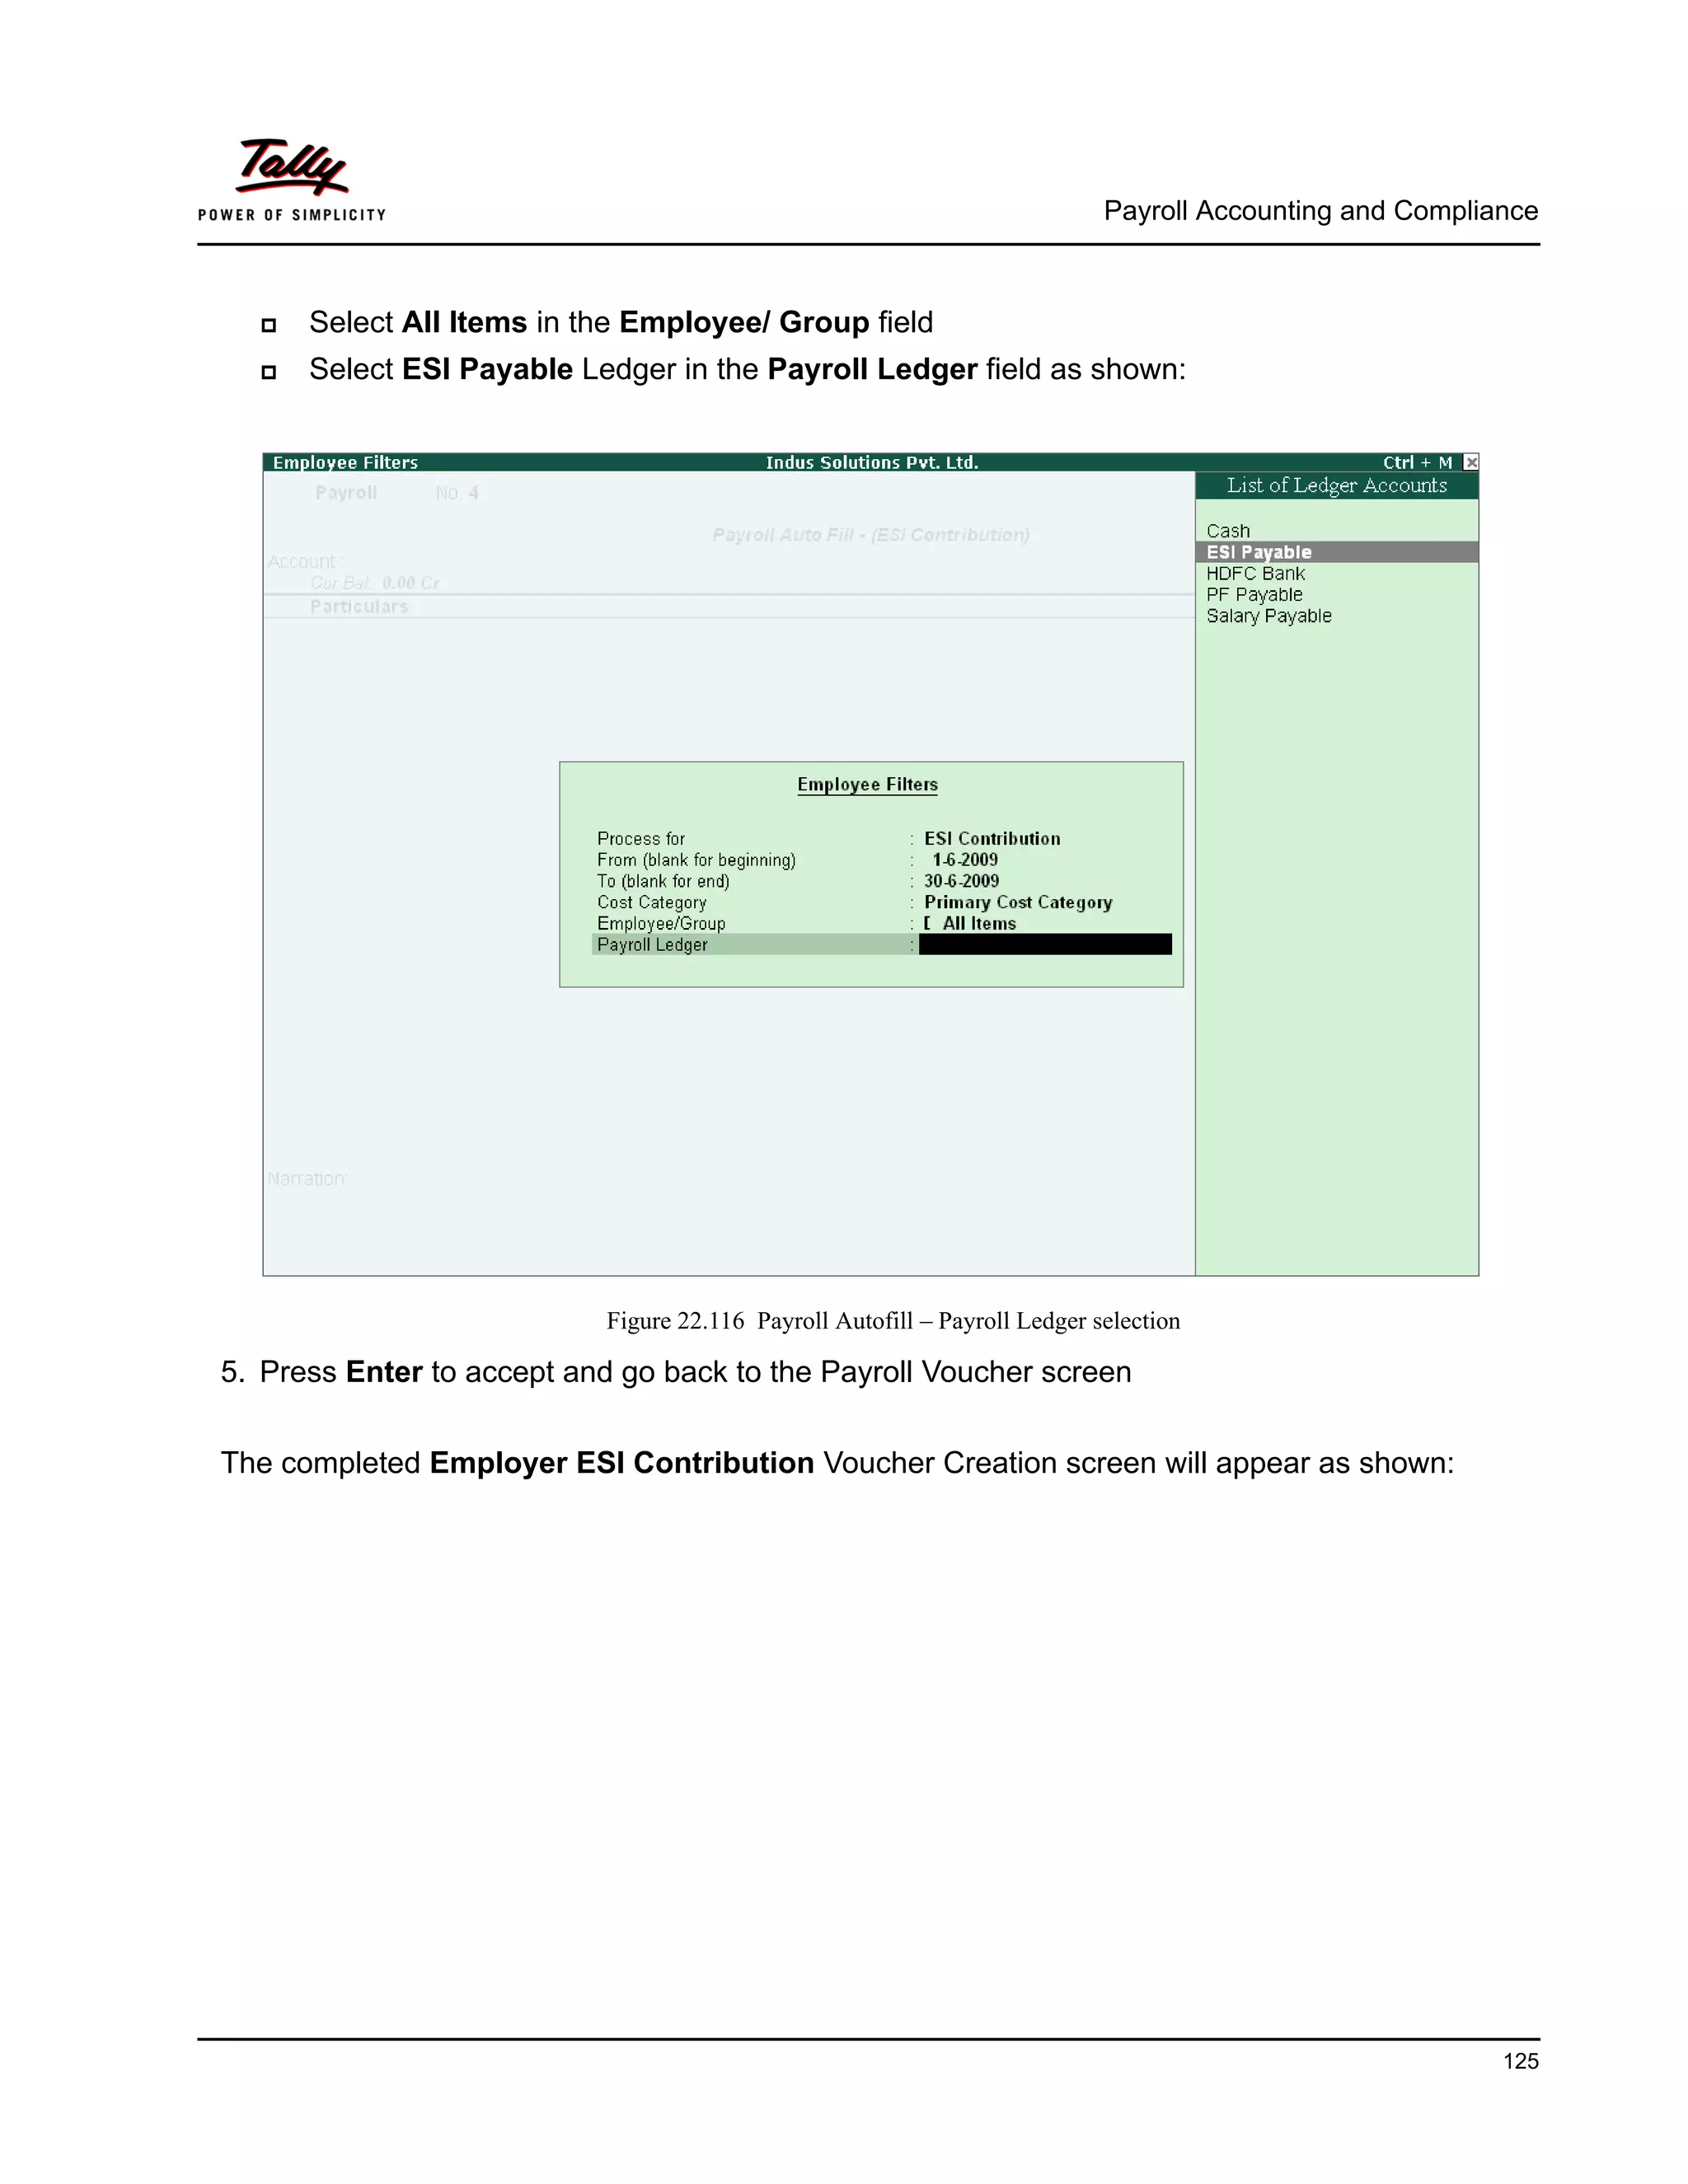
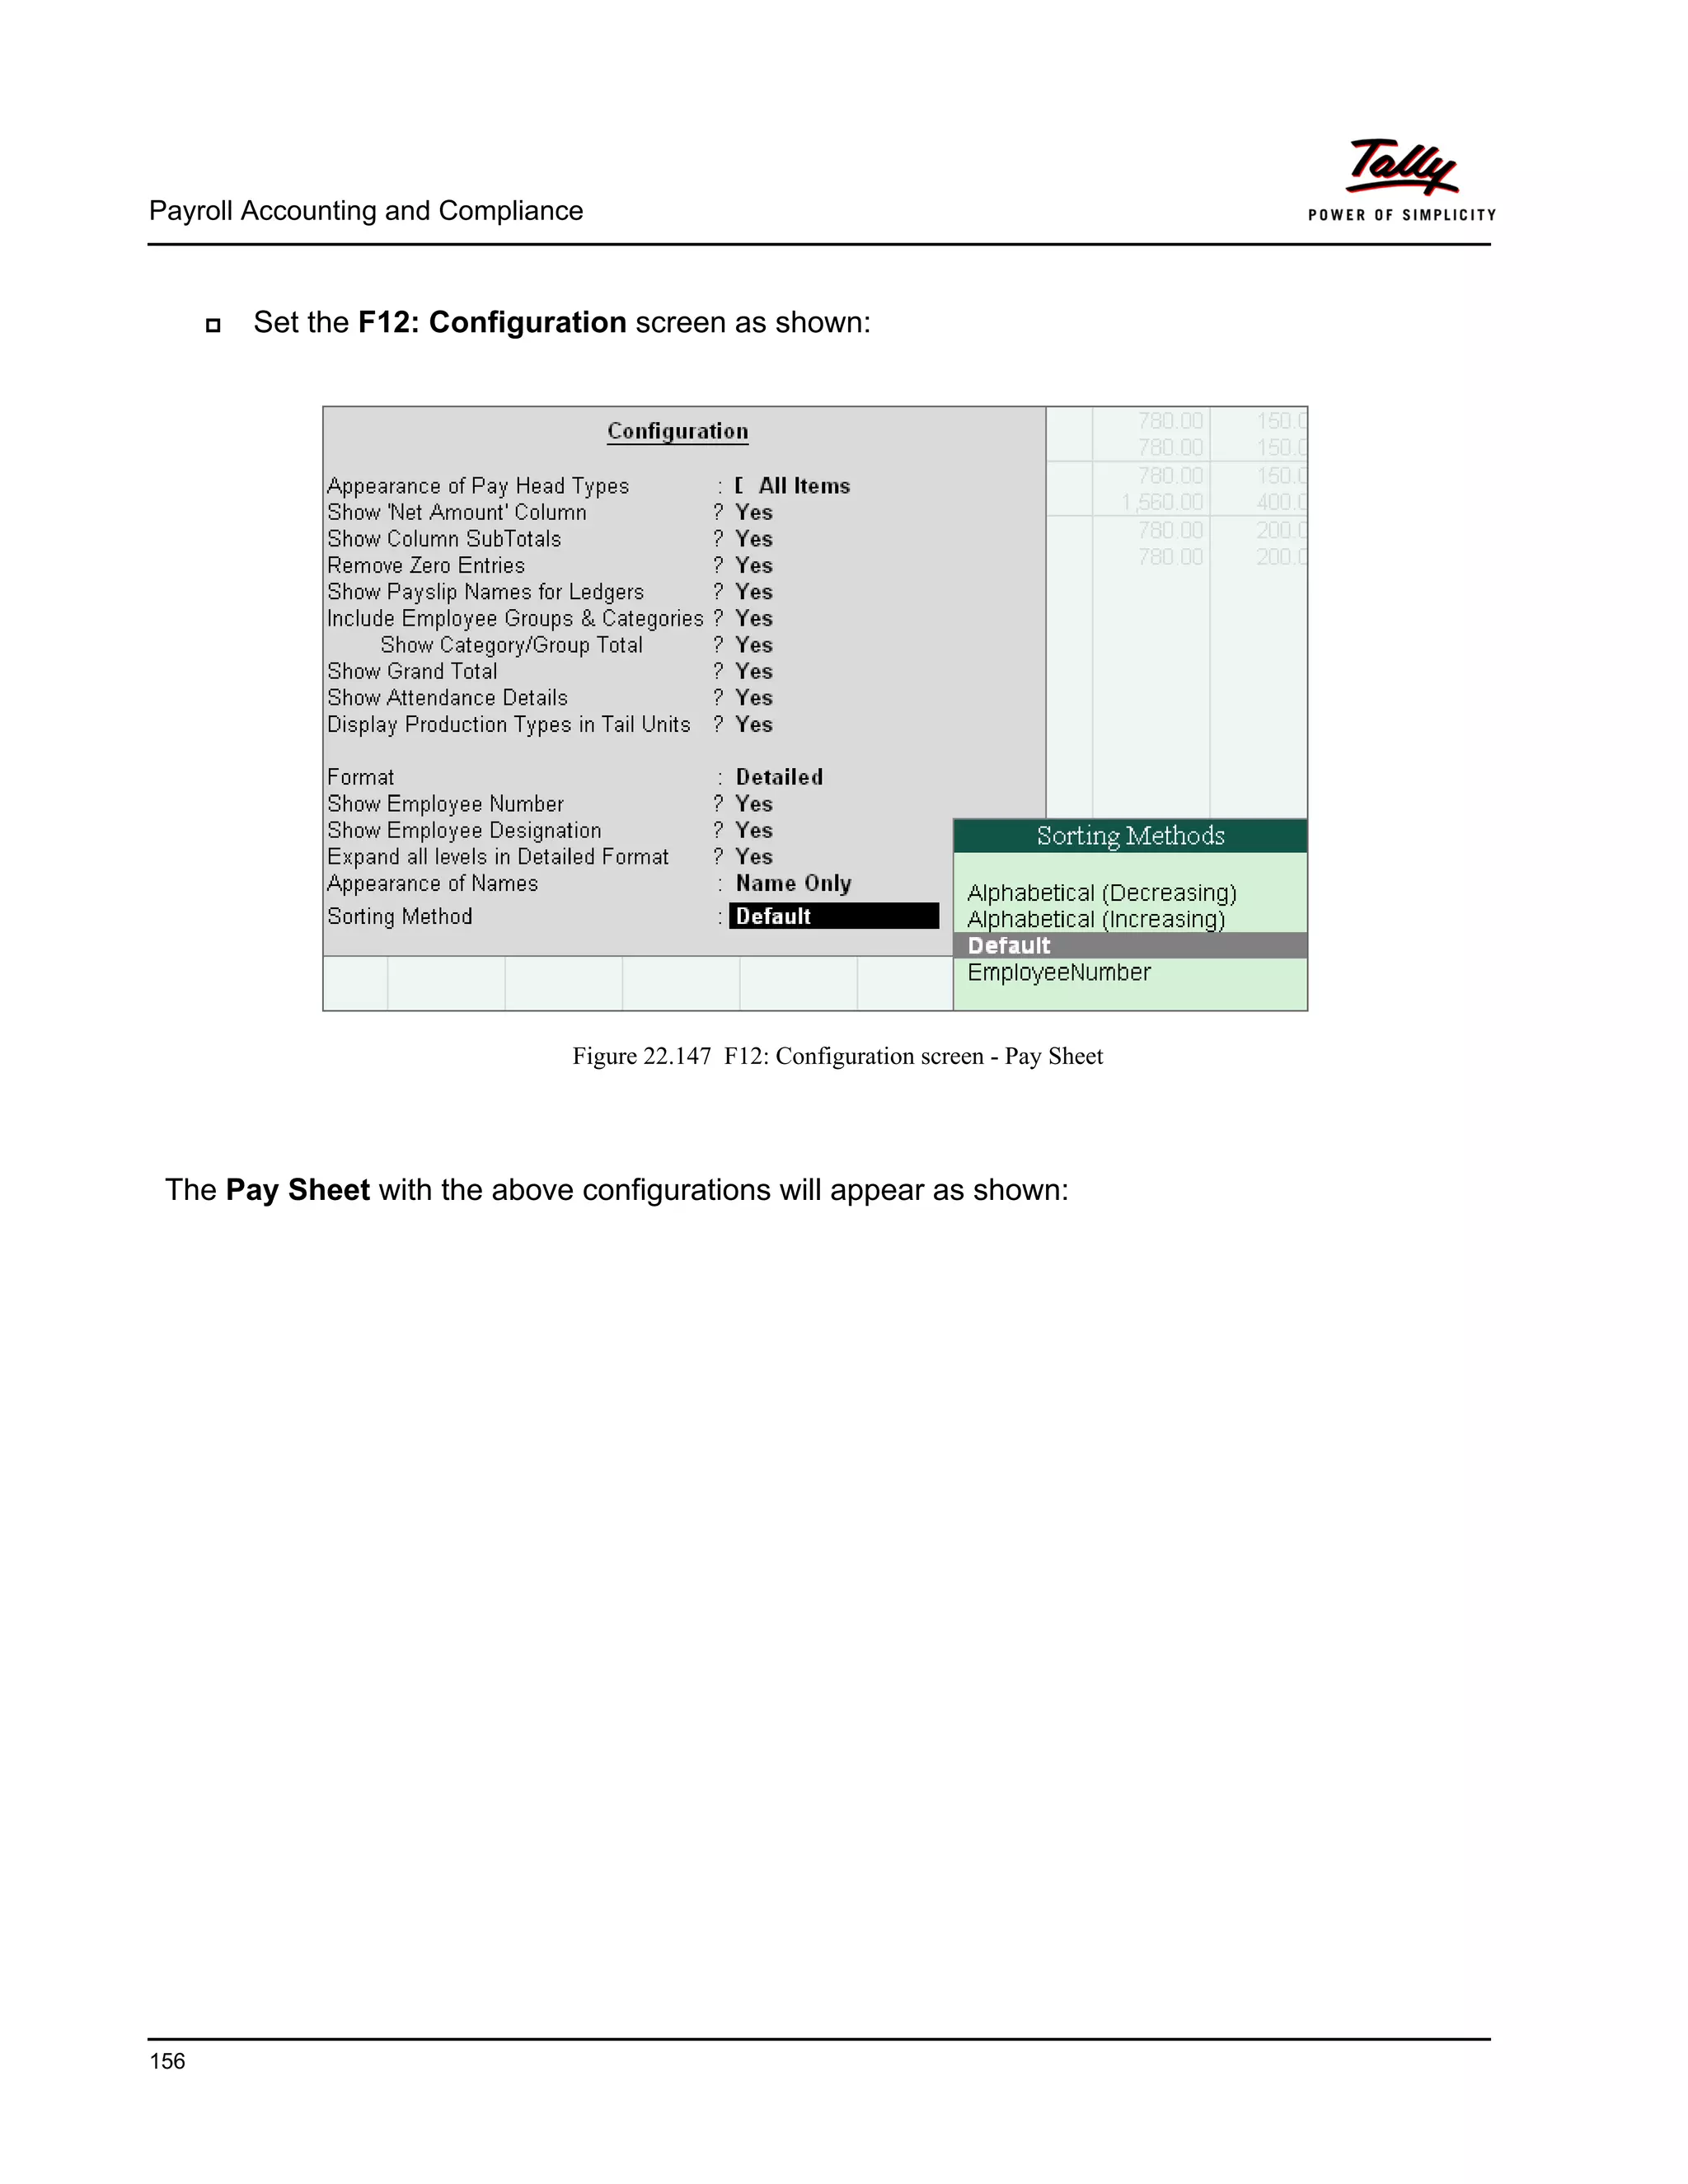
Figure 22.20 Pay Head Creation screen - Calculation Basis Selection
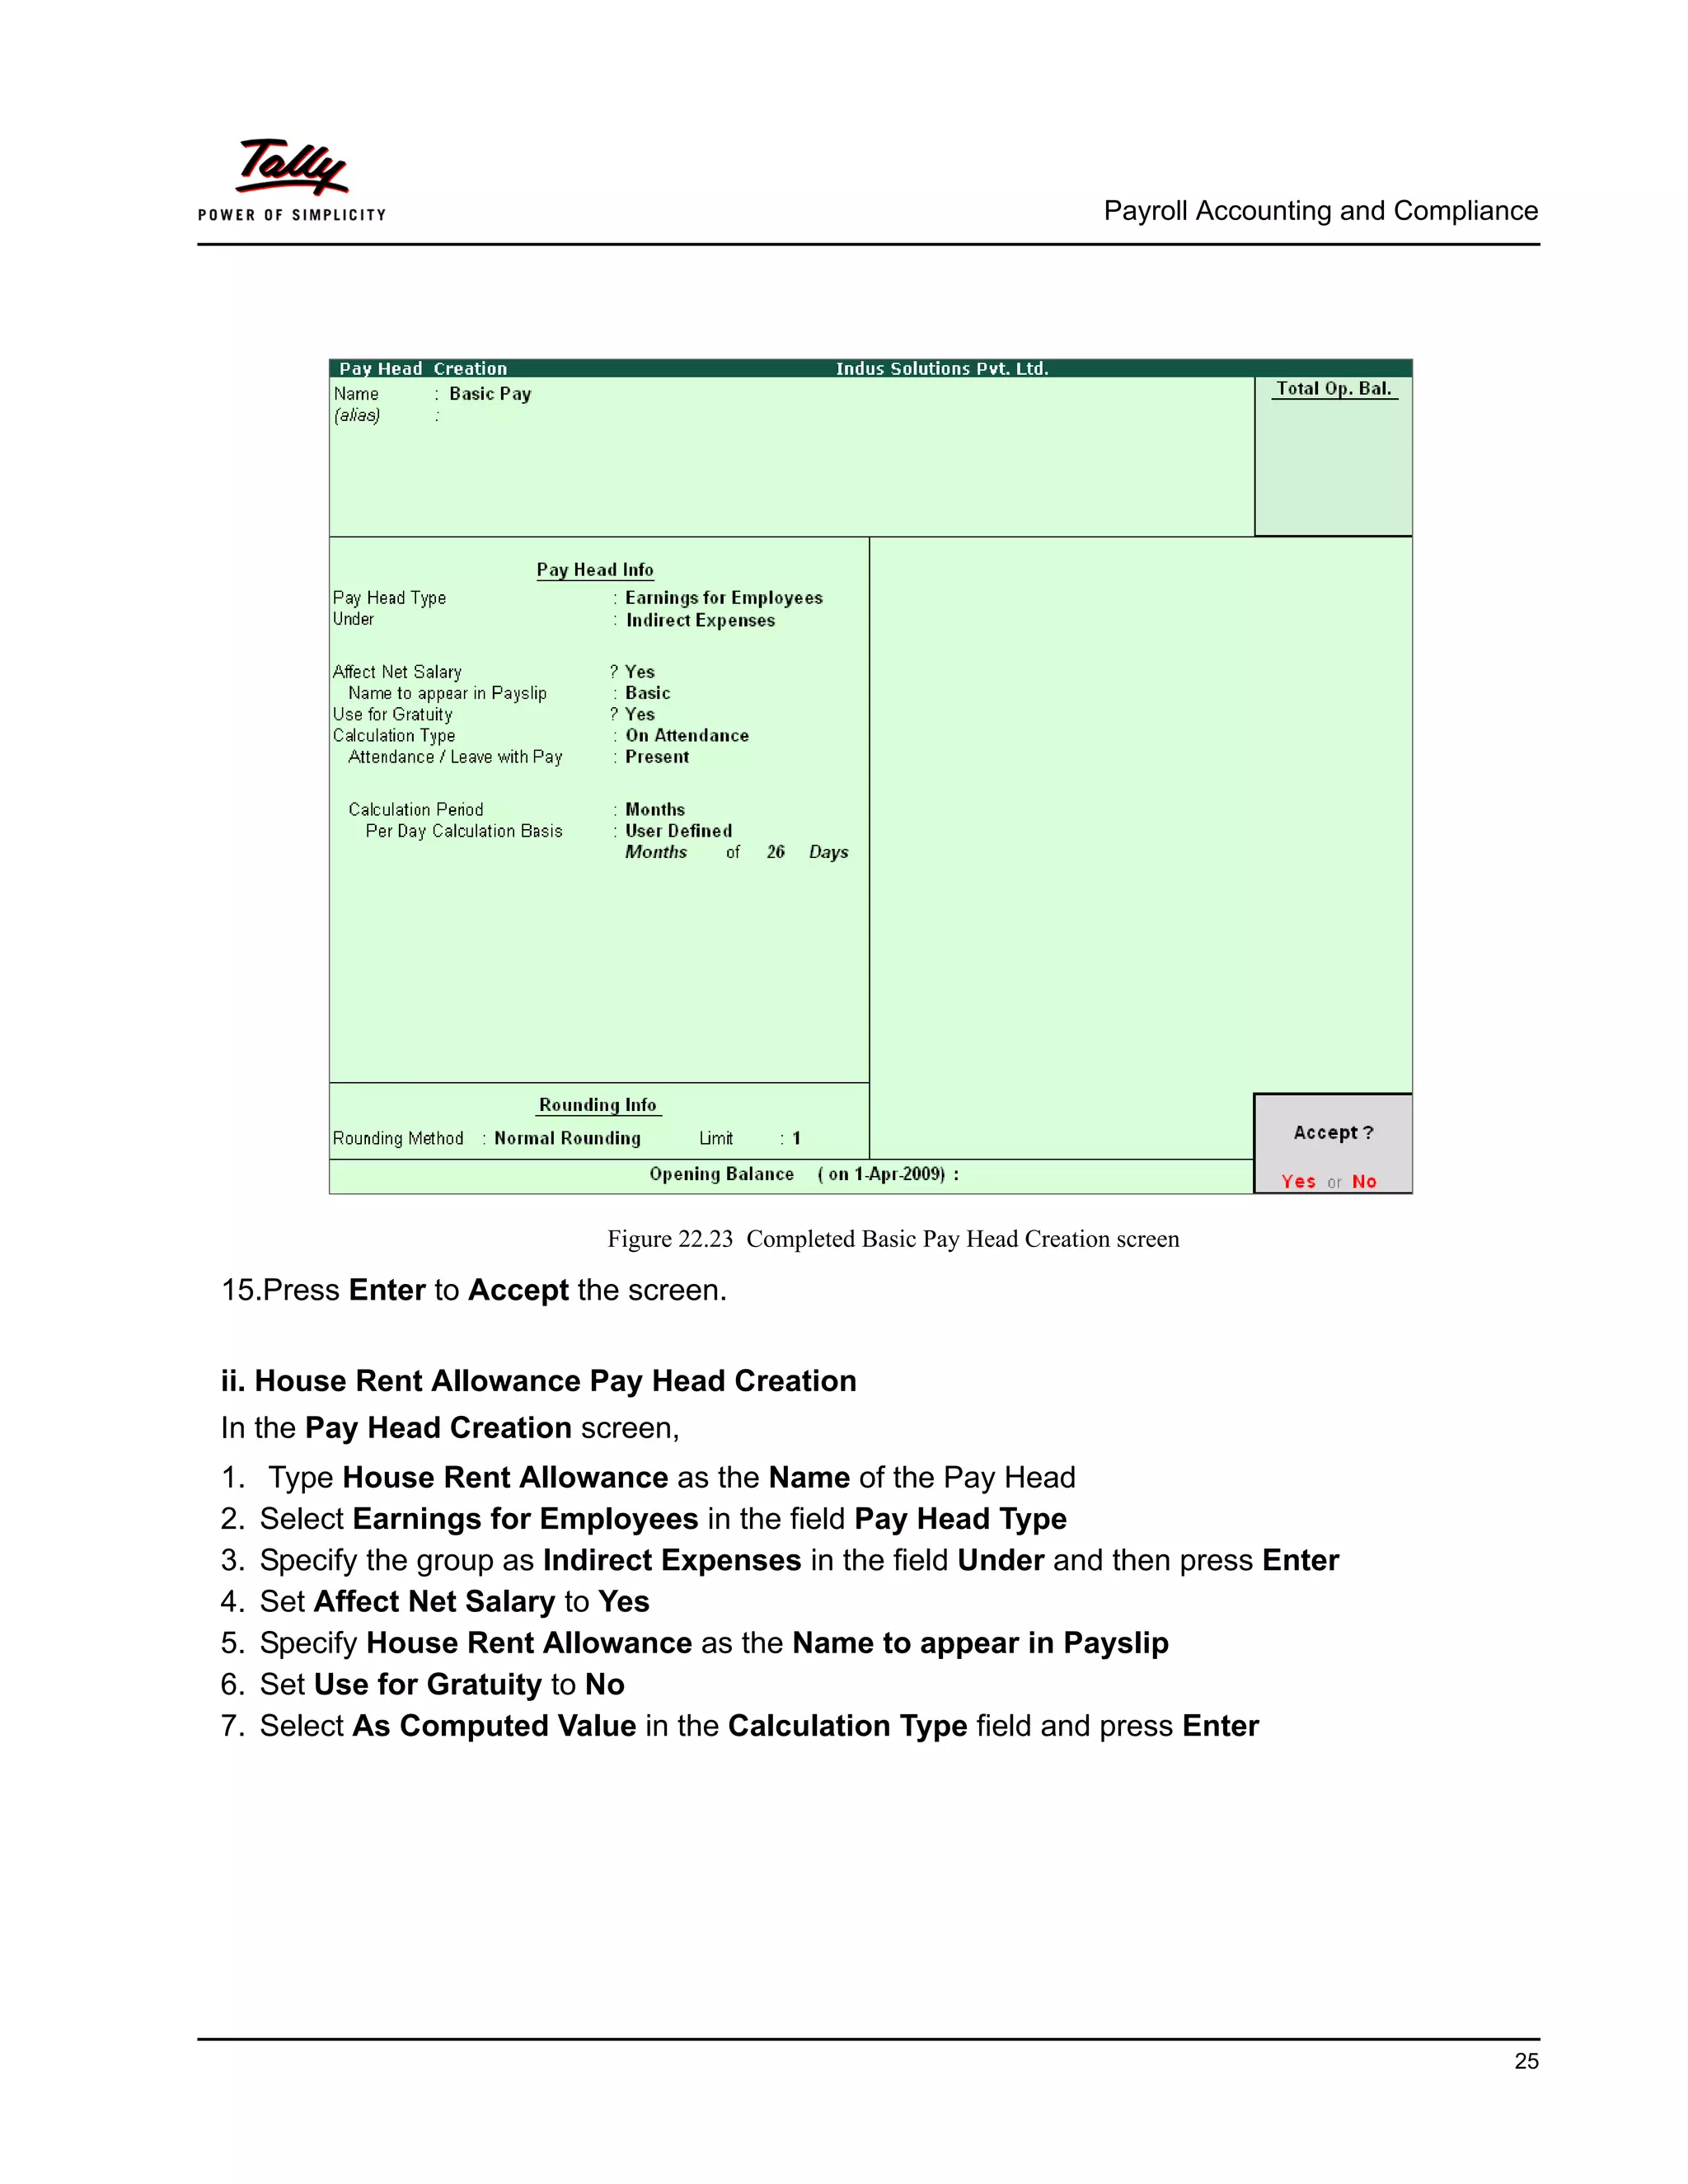
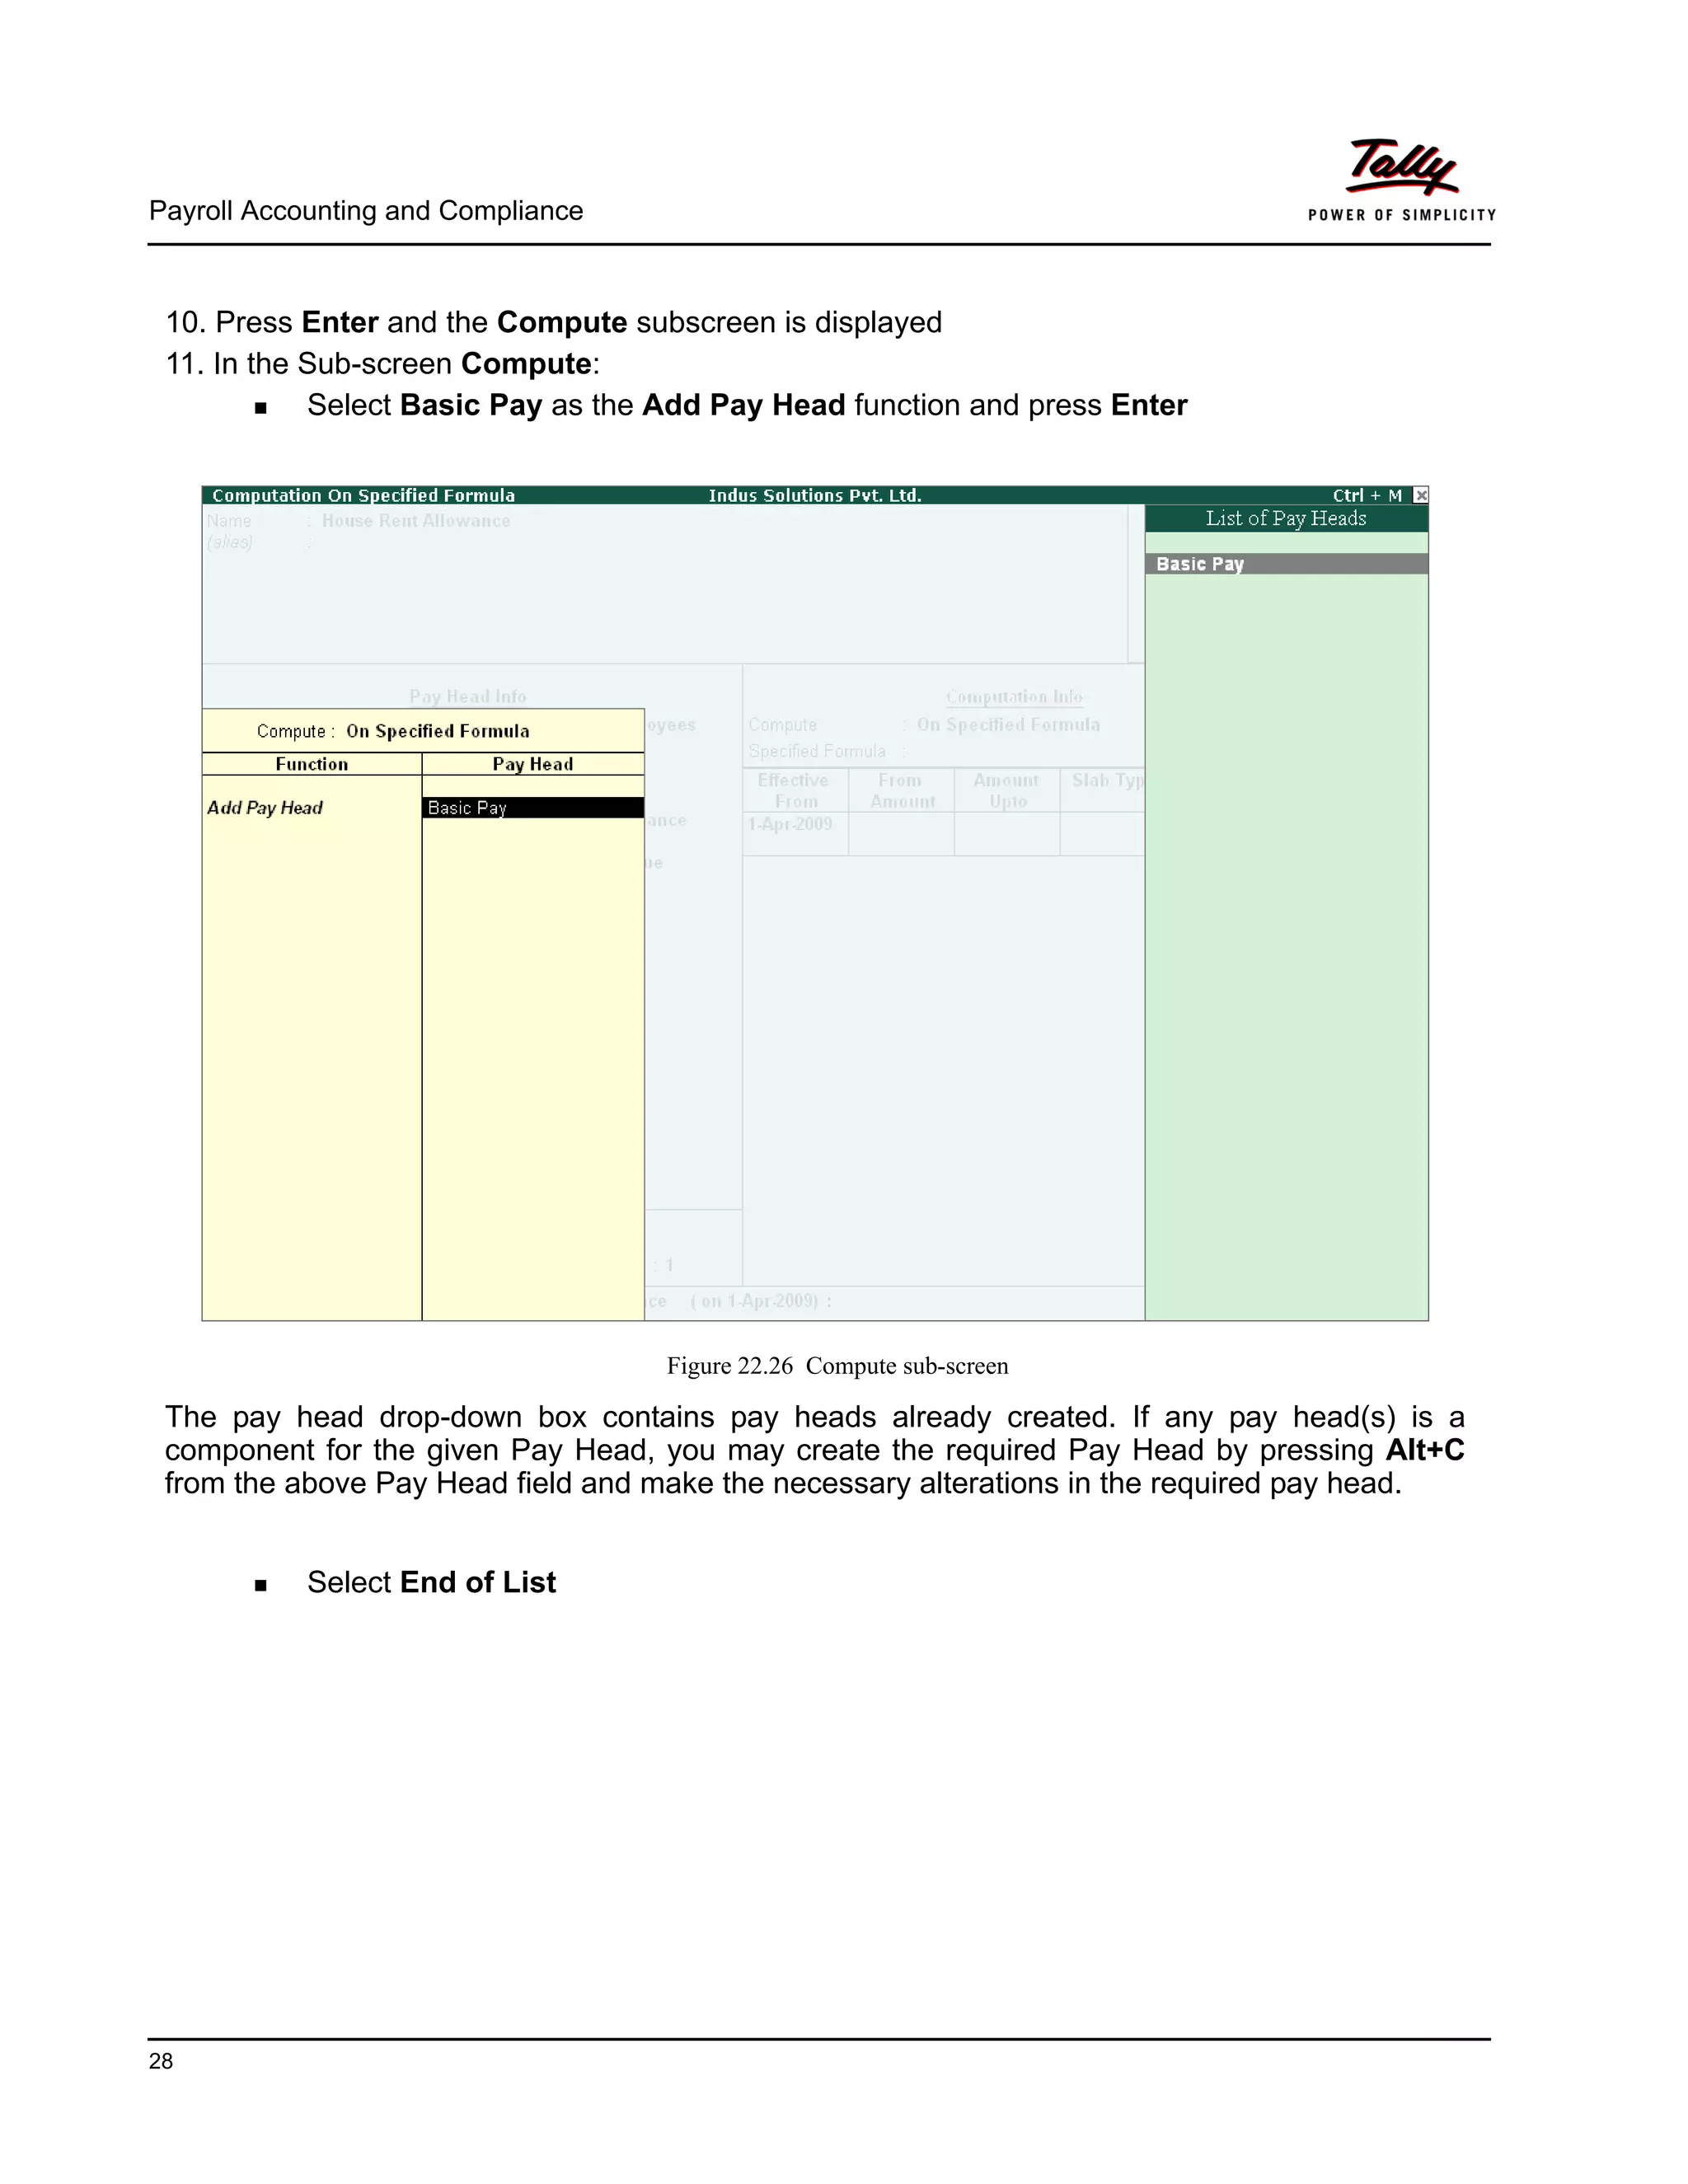
11.Press Enter to Accept
Calculation Basis refers to the periodicity of the given calculation period.
As per Calendar Period refers to the perpetual calendar month, i.e. if
the payroll process is carried out for the month of March, then the
attendance records will be entered for 31 days.
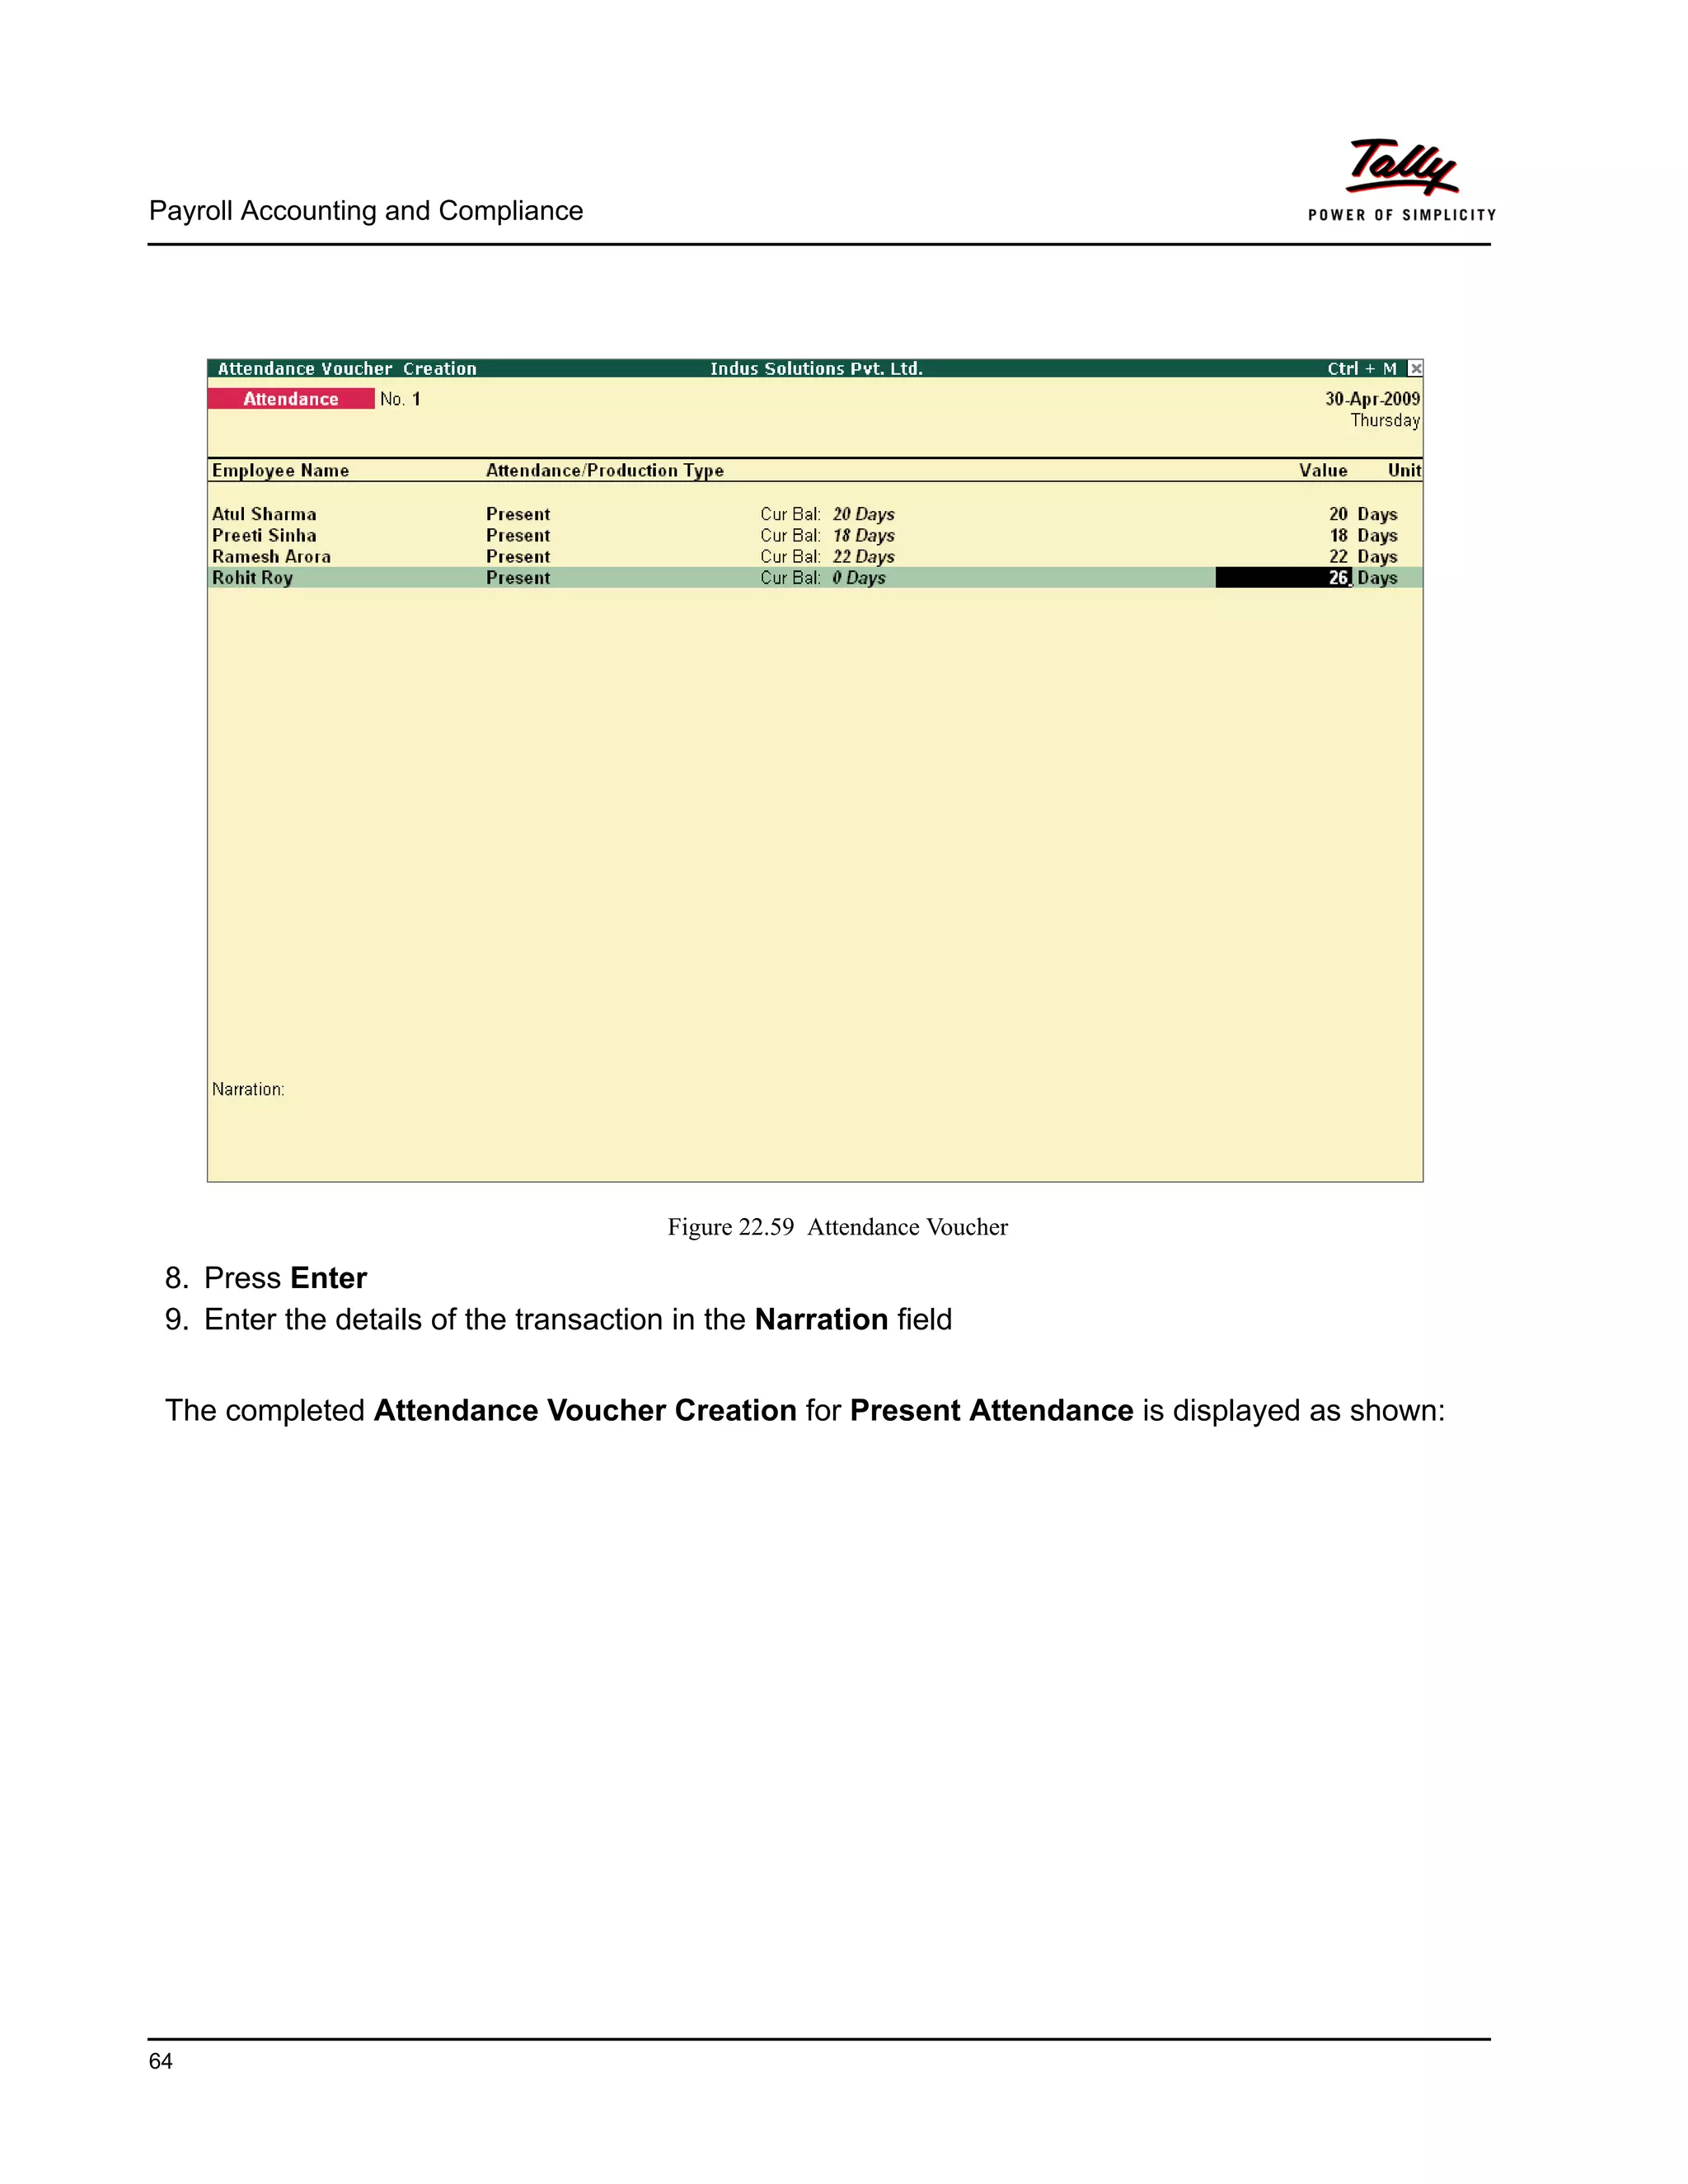
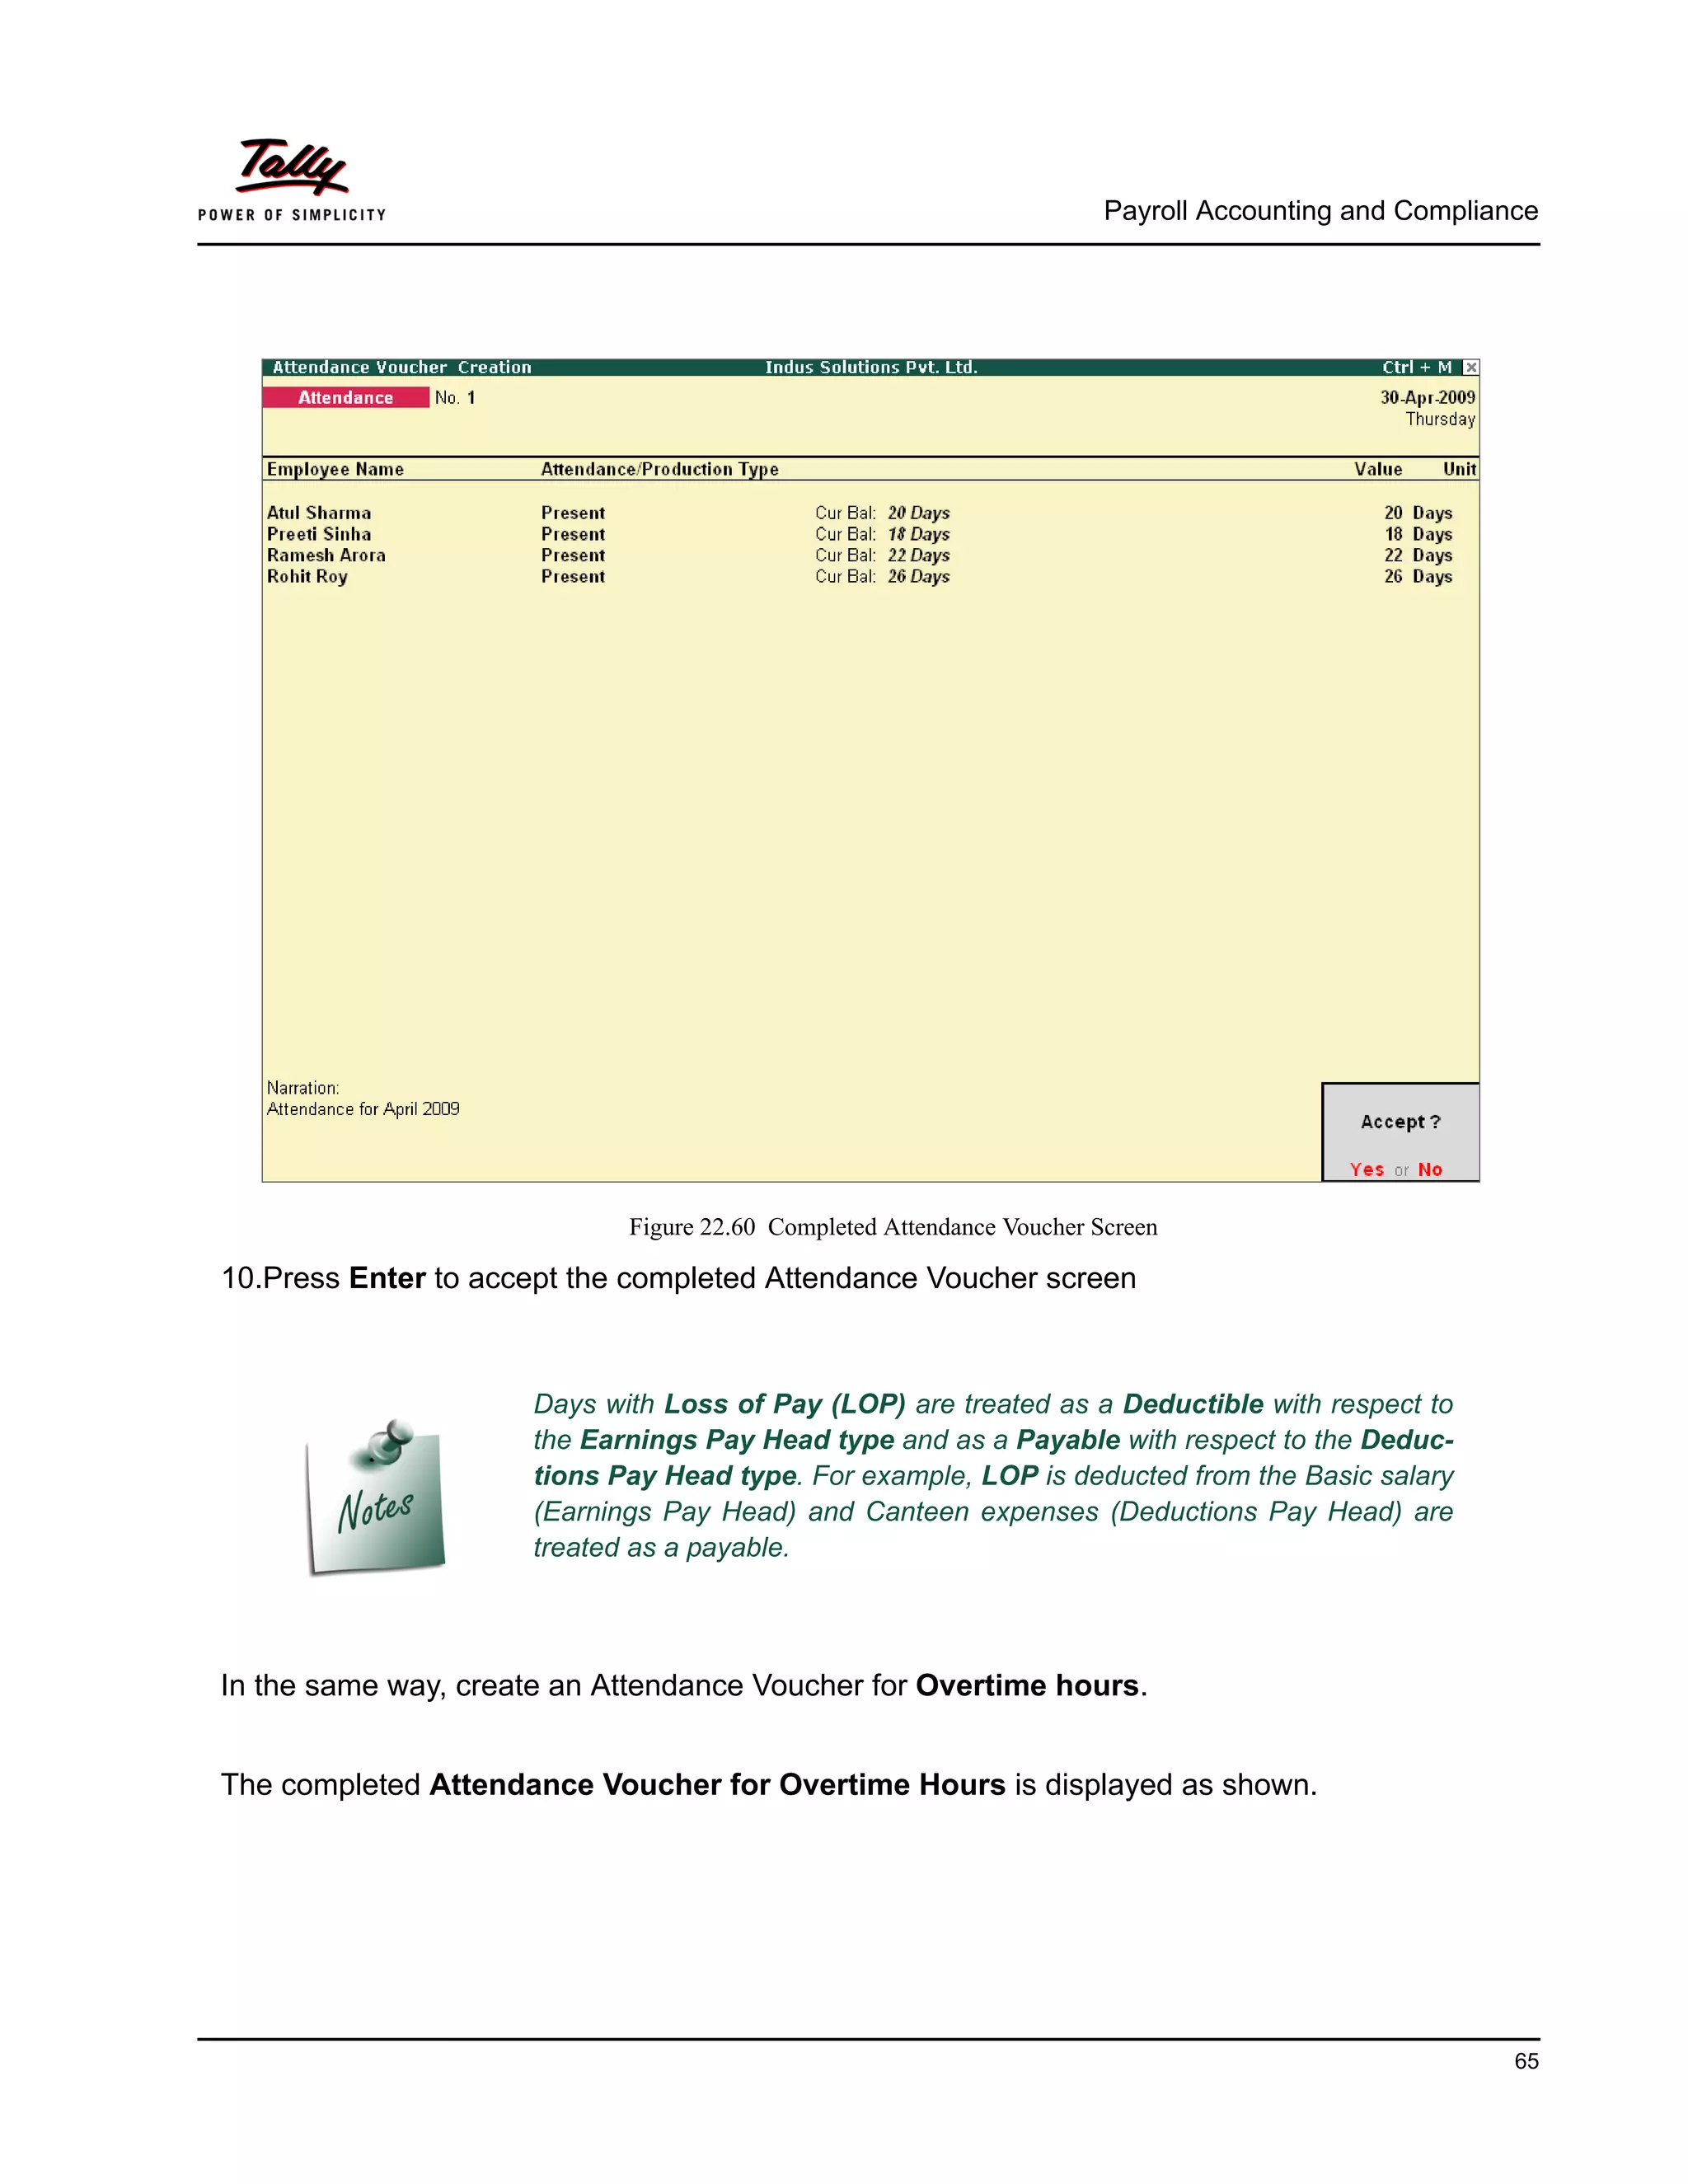
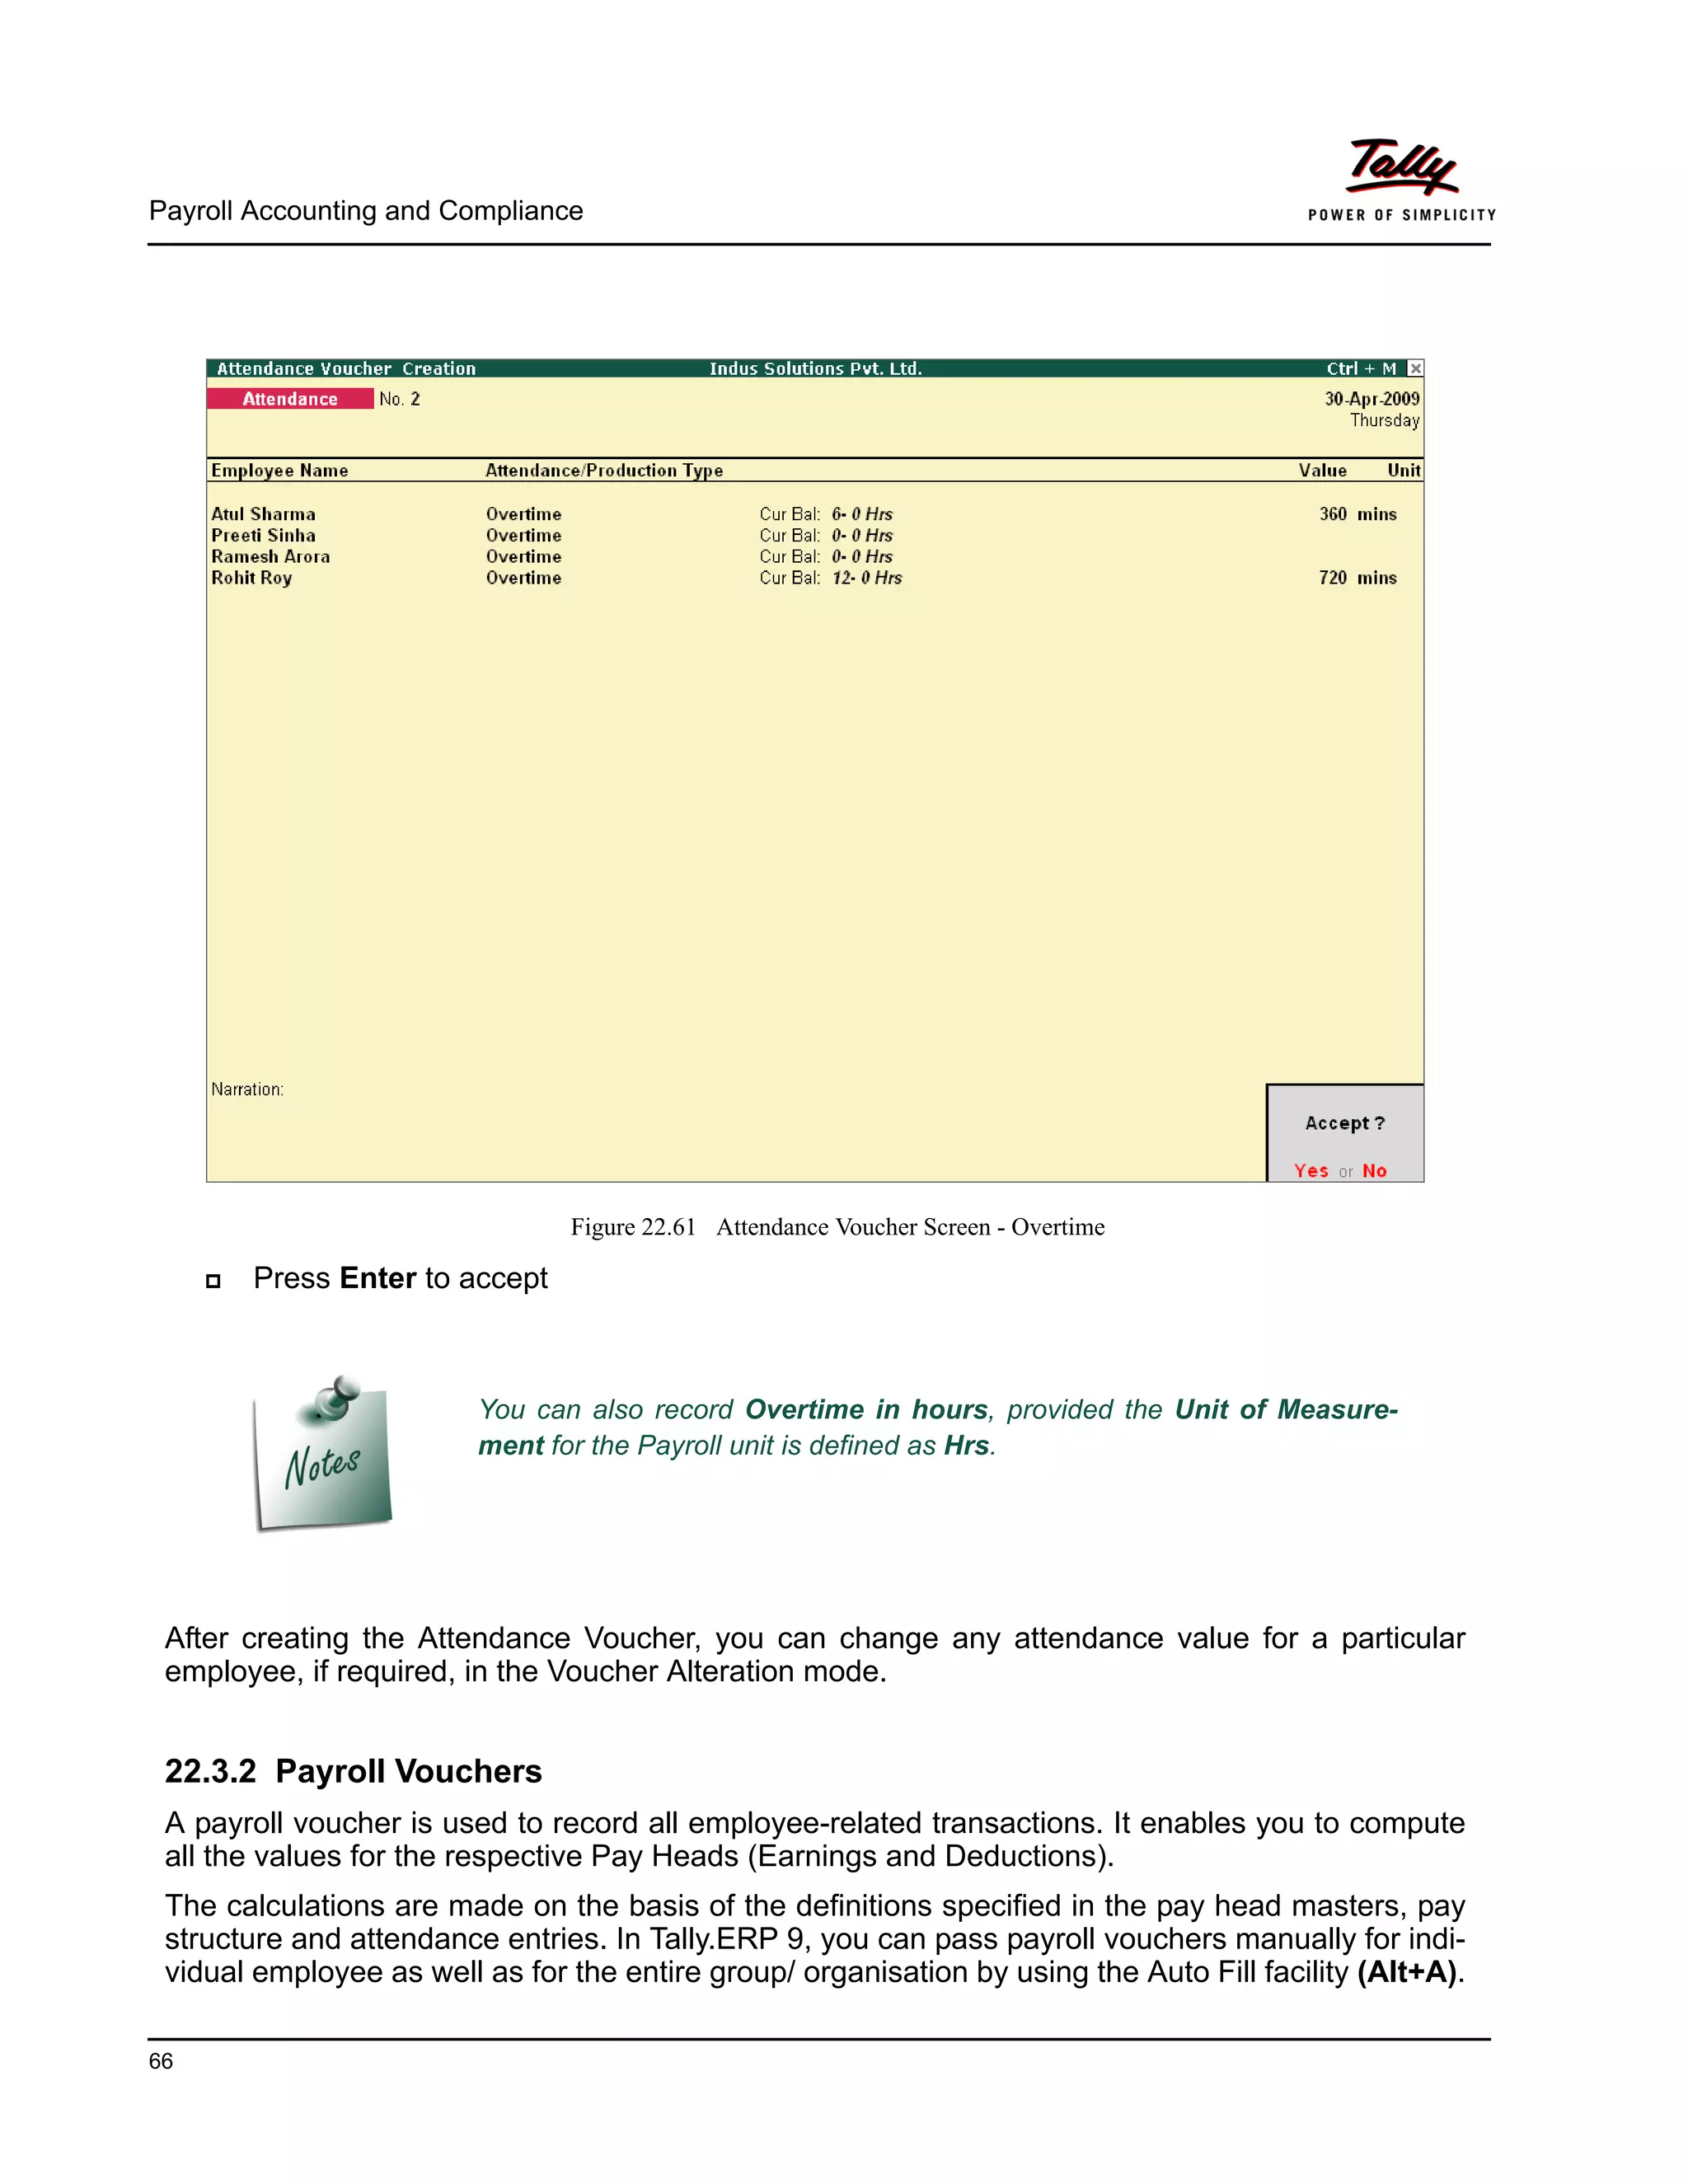
User Defined Value refers to the consistent payroll period irrespective
of calendar month, i.e. If an employee’s salary is based on a standard
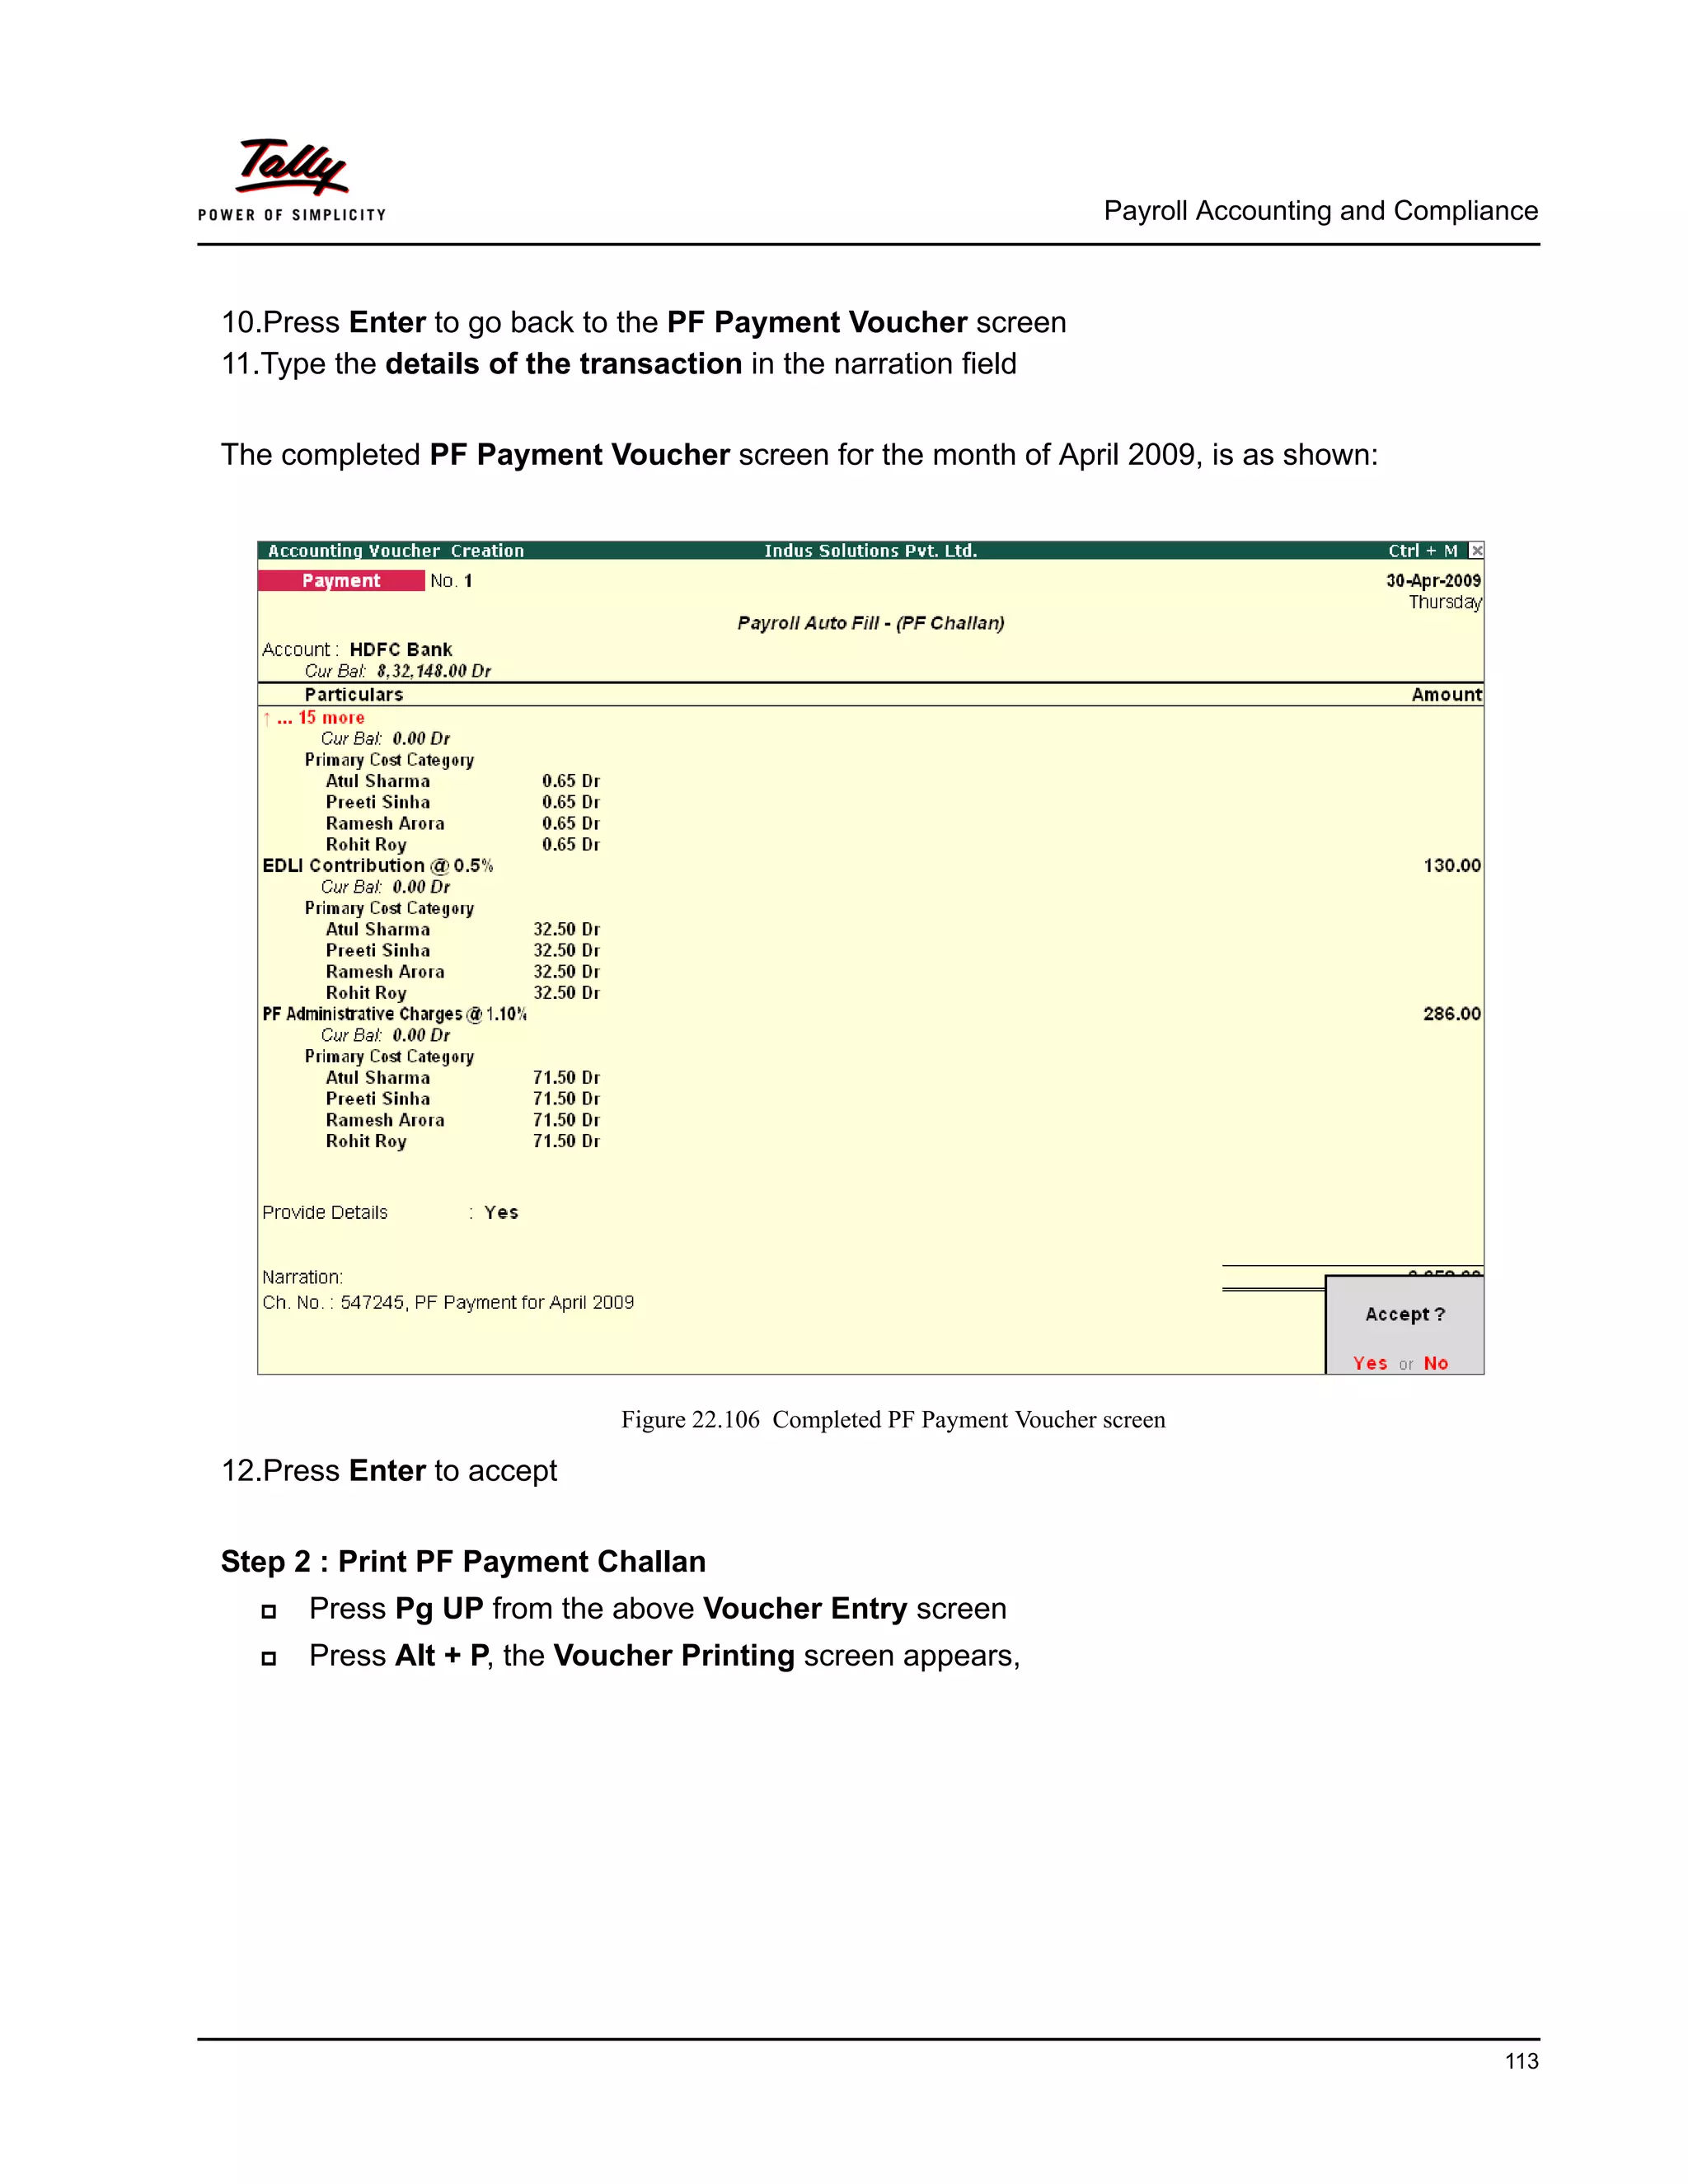
month of 30 days irrespective of the calendar month, then you can
select User Defined as the Calculation Basis and define the periodic-
ity of the specified period or month.
For example, an employee’s monthly salary is Rs. 3,000 and the
calculation basis is defined as a month of 30 days. If he takes 3
days leave in January (which consists of 31 days), then the salary
per day is computed as (Rs. 3000/30 days, i.e. 100). The net salary
after deducting the leave salary [i.e. Rs. 300 (3 days x Rs. 100)]
amounts to Rs. 2,700.](https://image.slidesharecdn.com/payrollaccountingintallyerp9-130613034648-phpapp01/75/Payroll-accounting-in-tally-erp-9-22-2048.jpg)


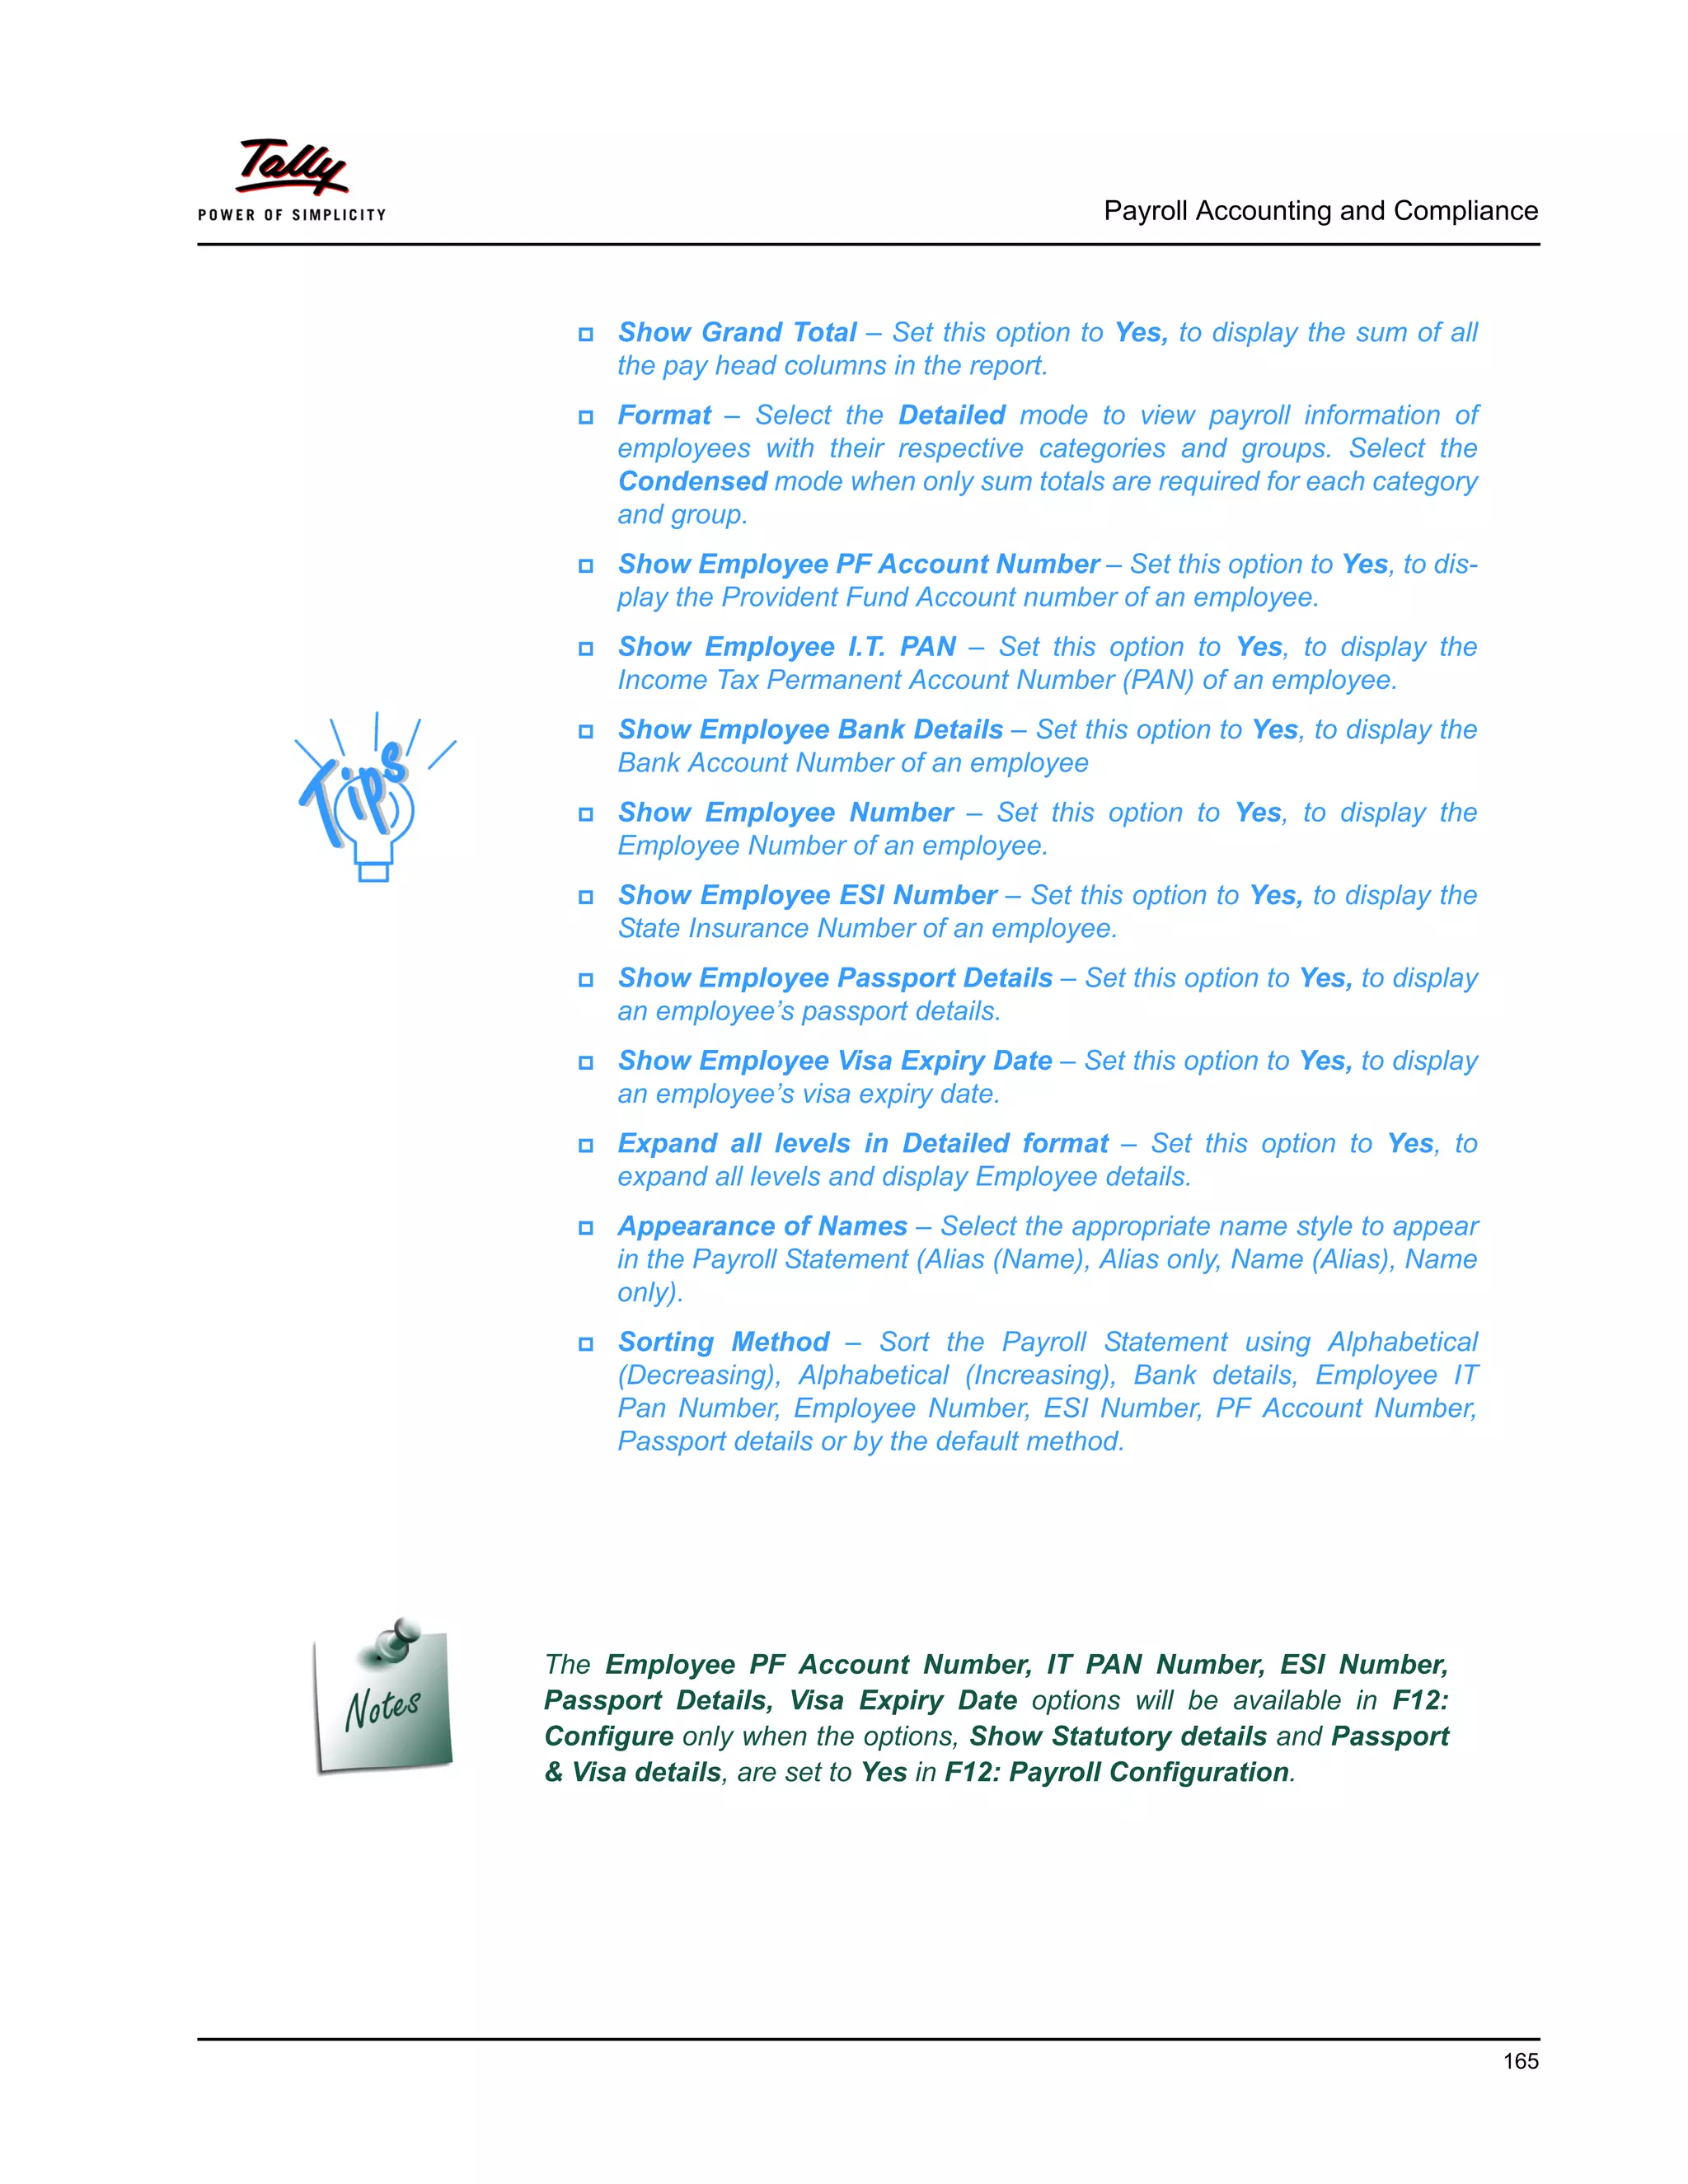


![Payroll Accounting and Compliance
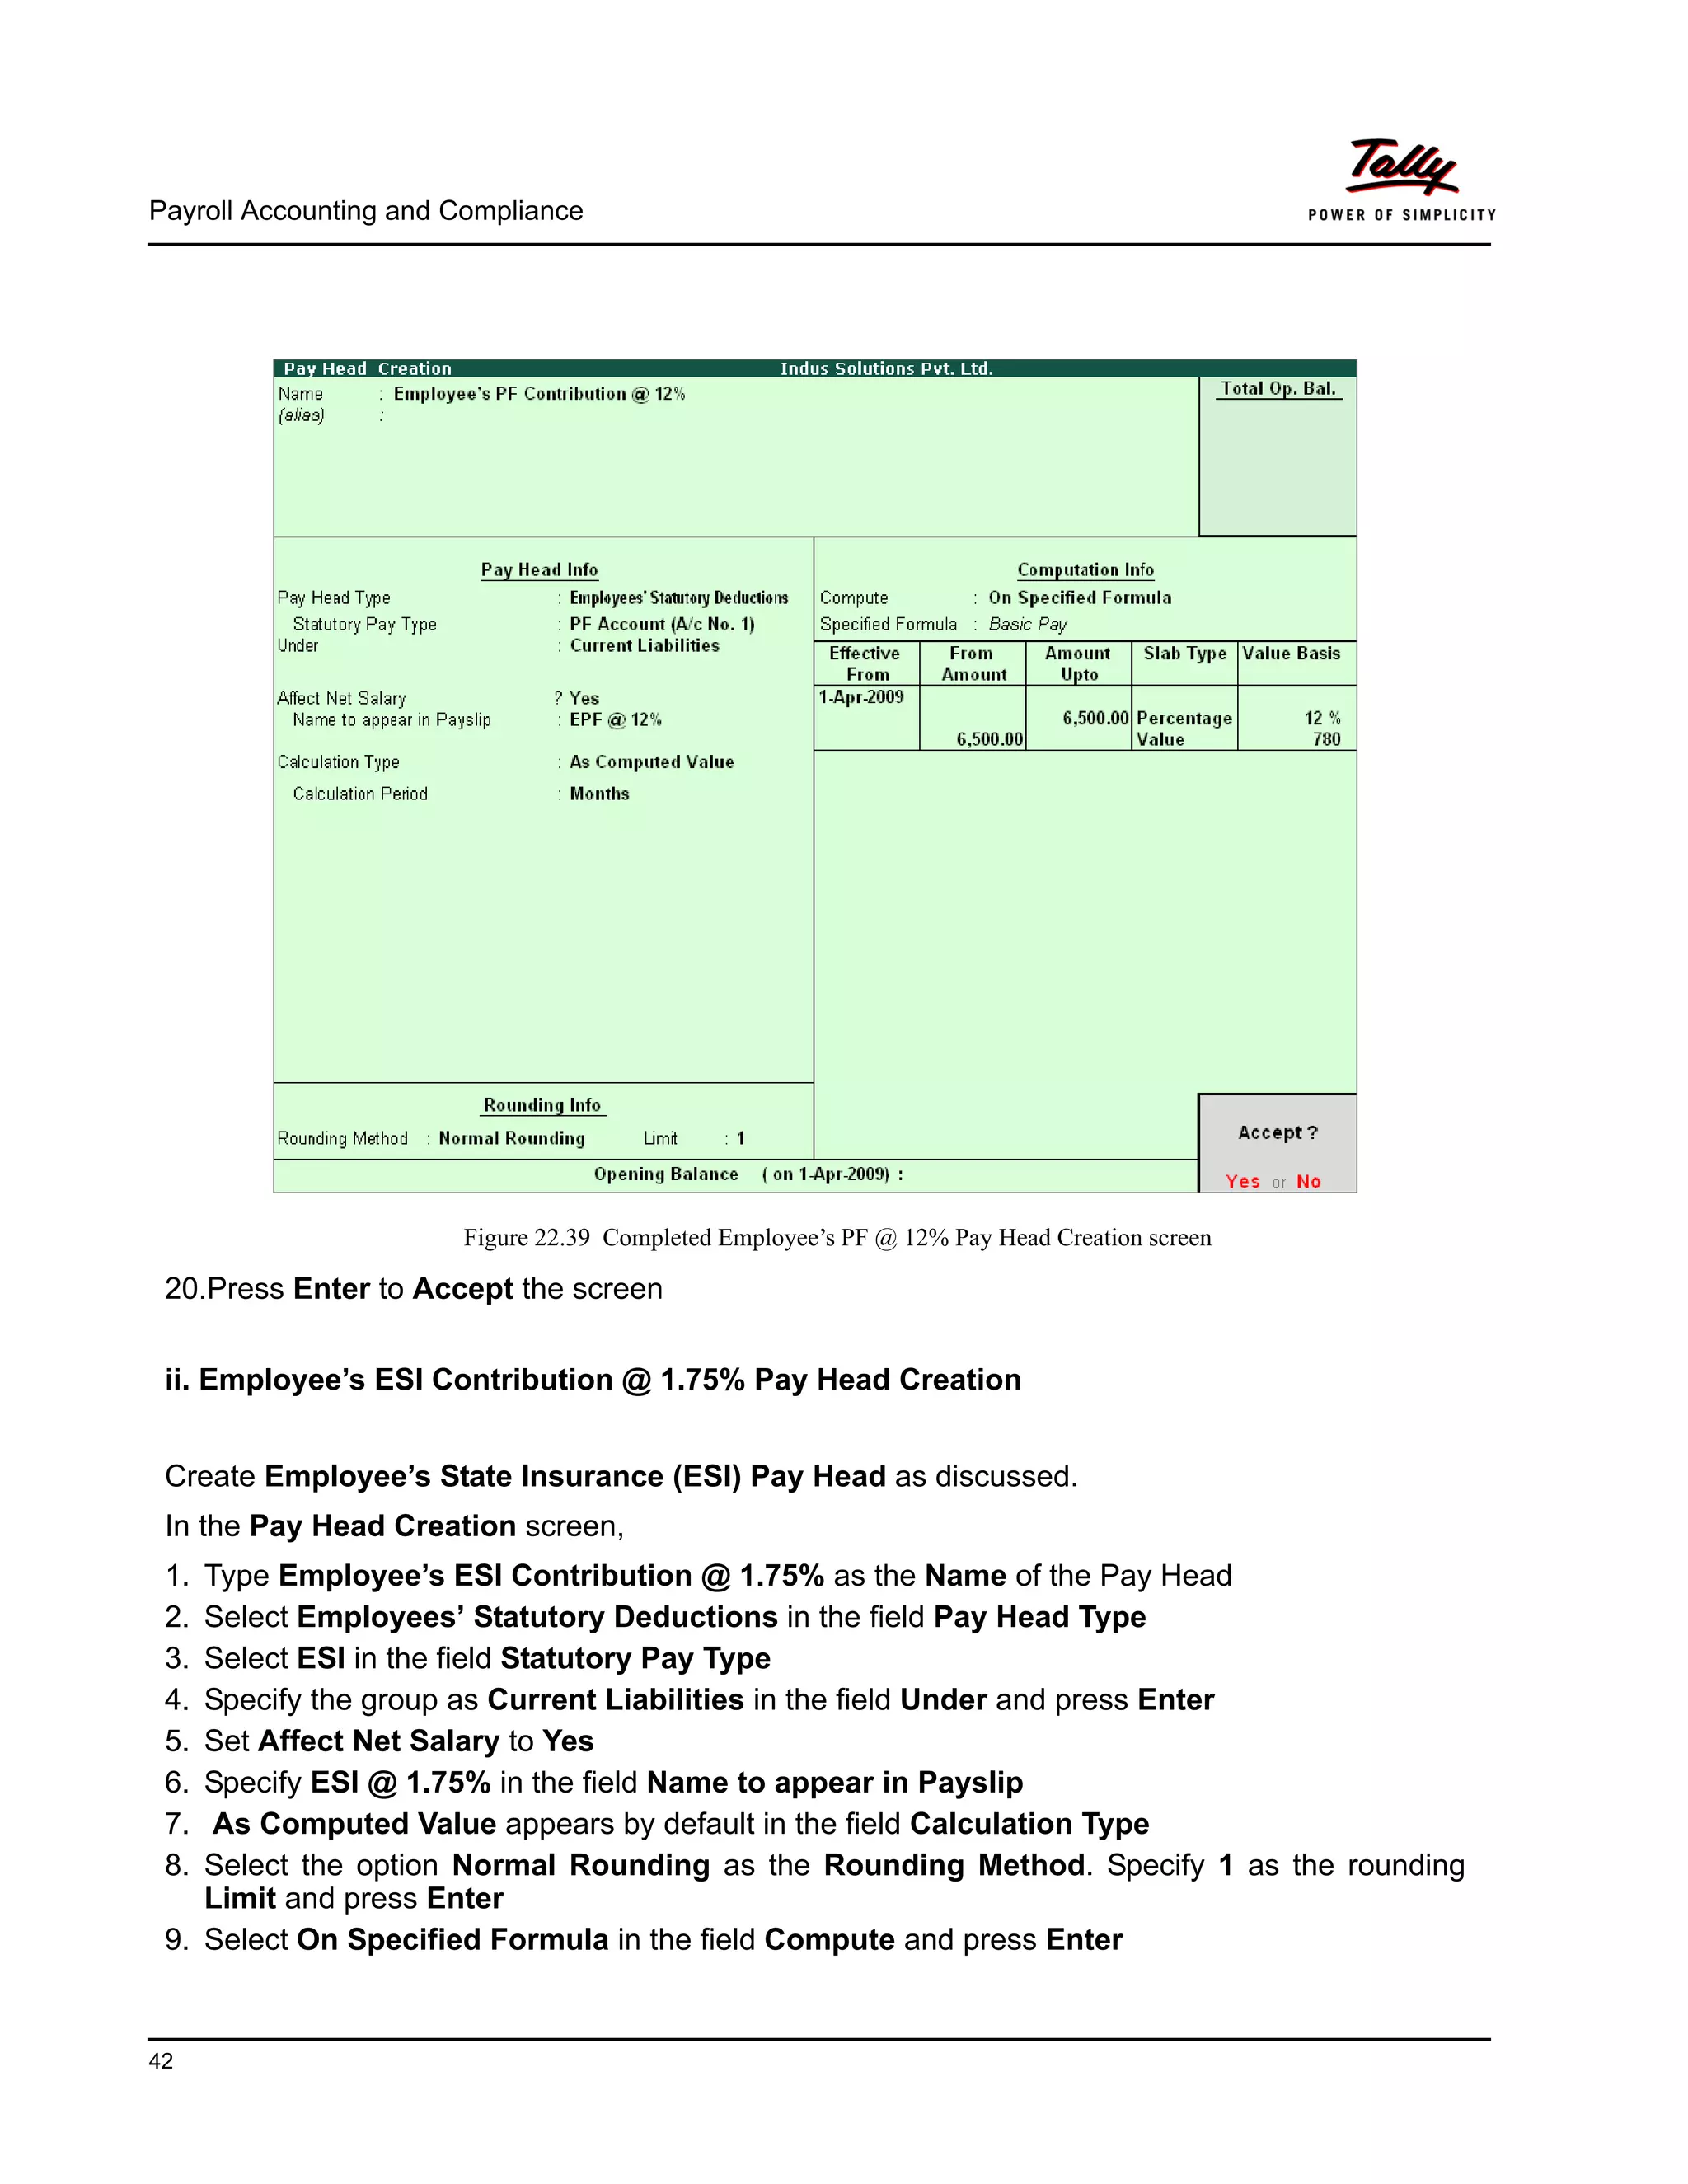
189
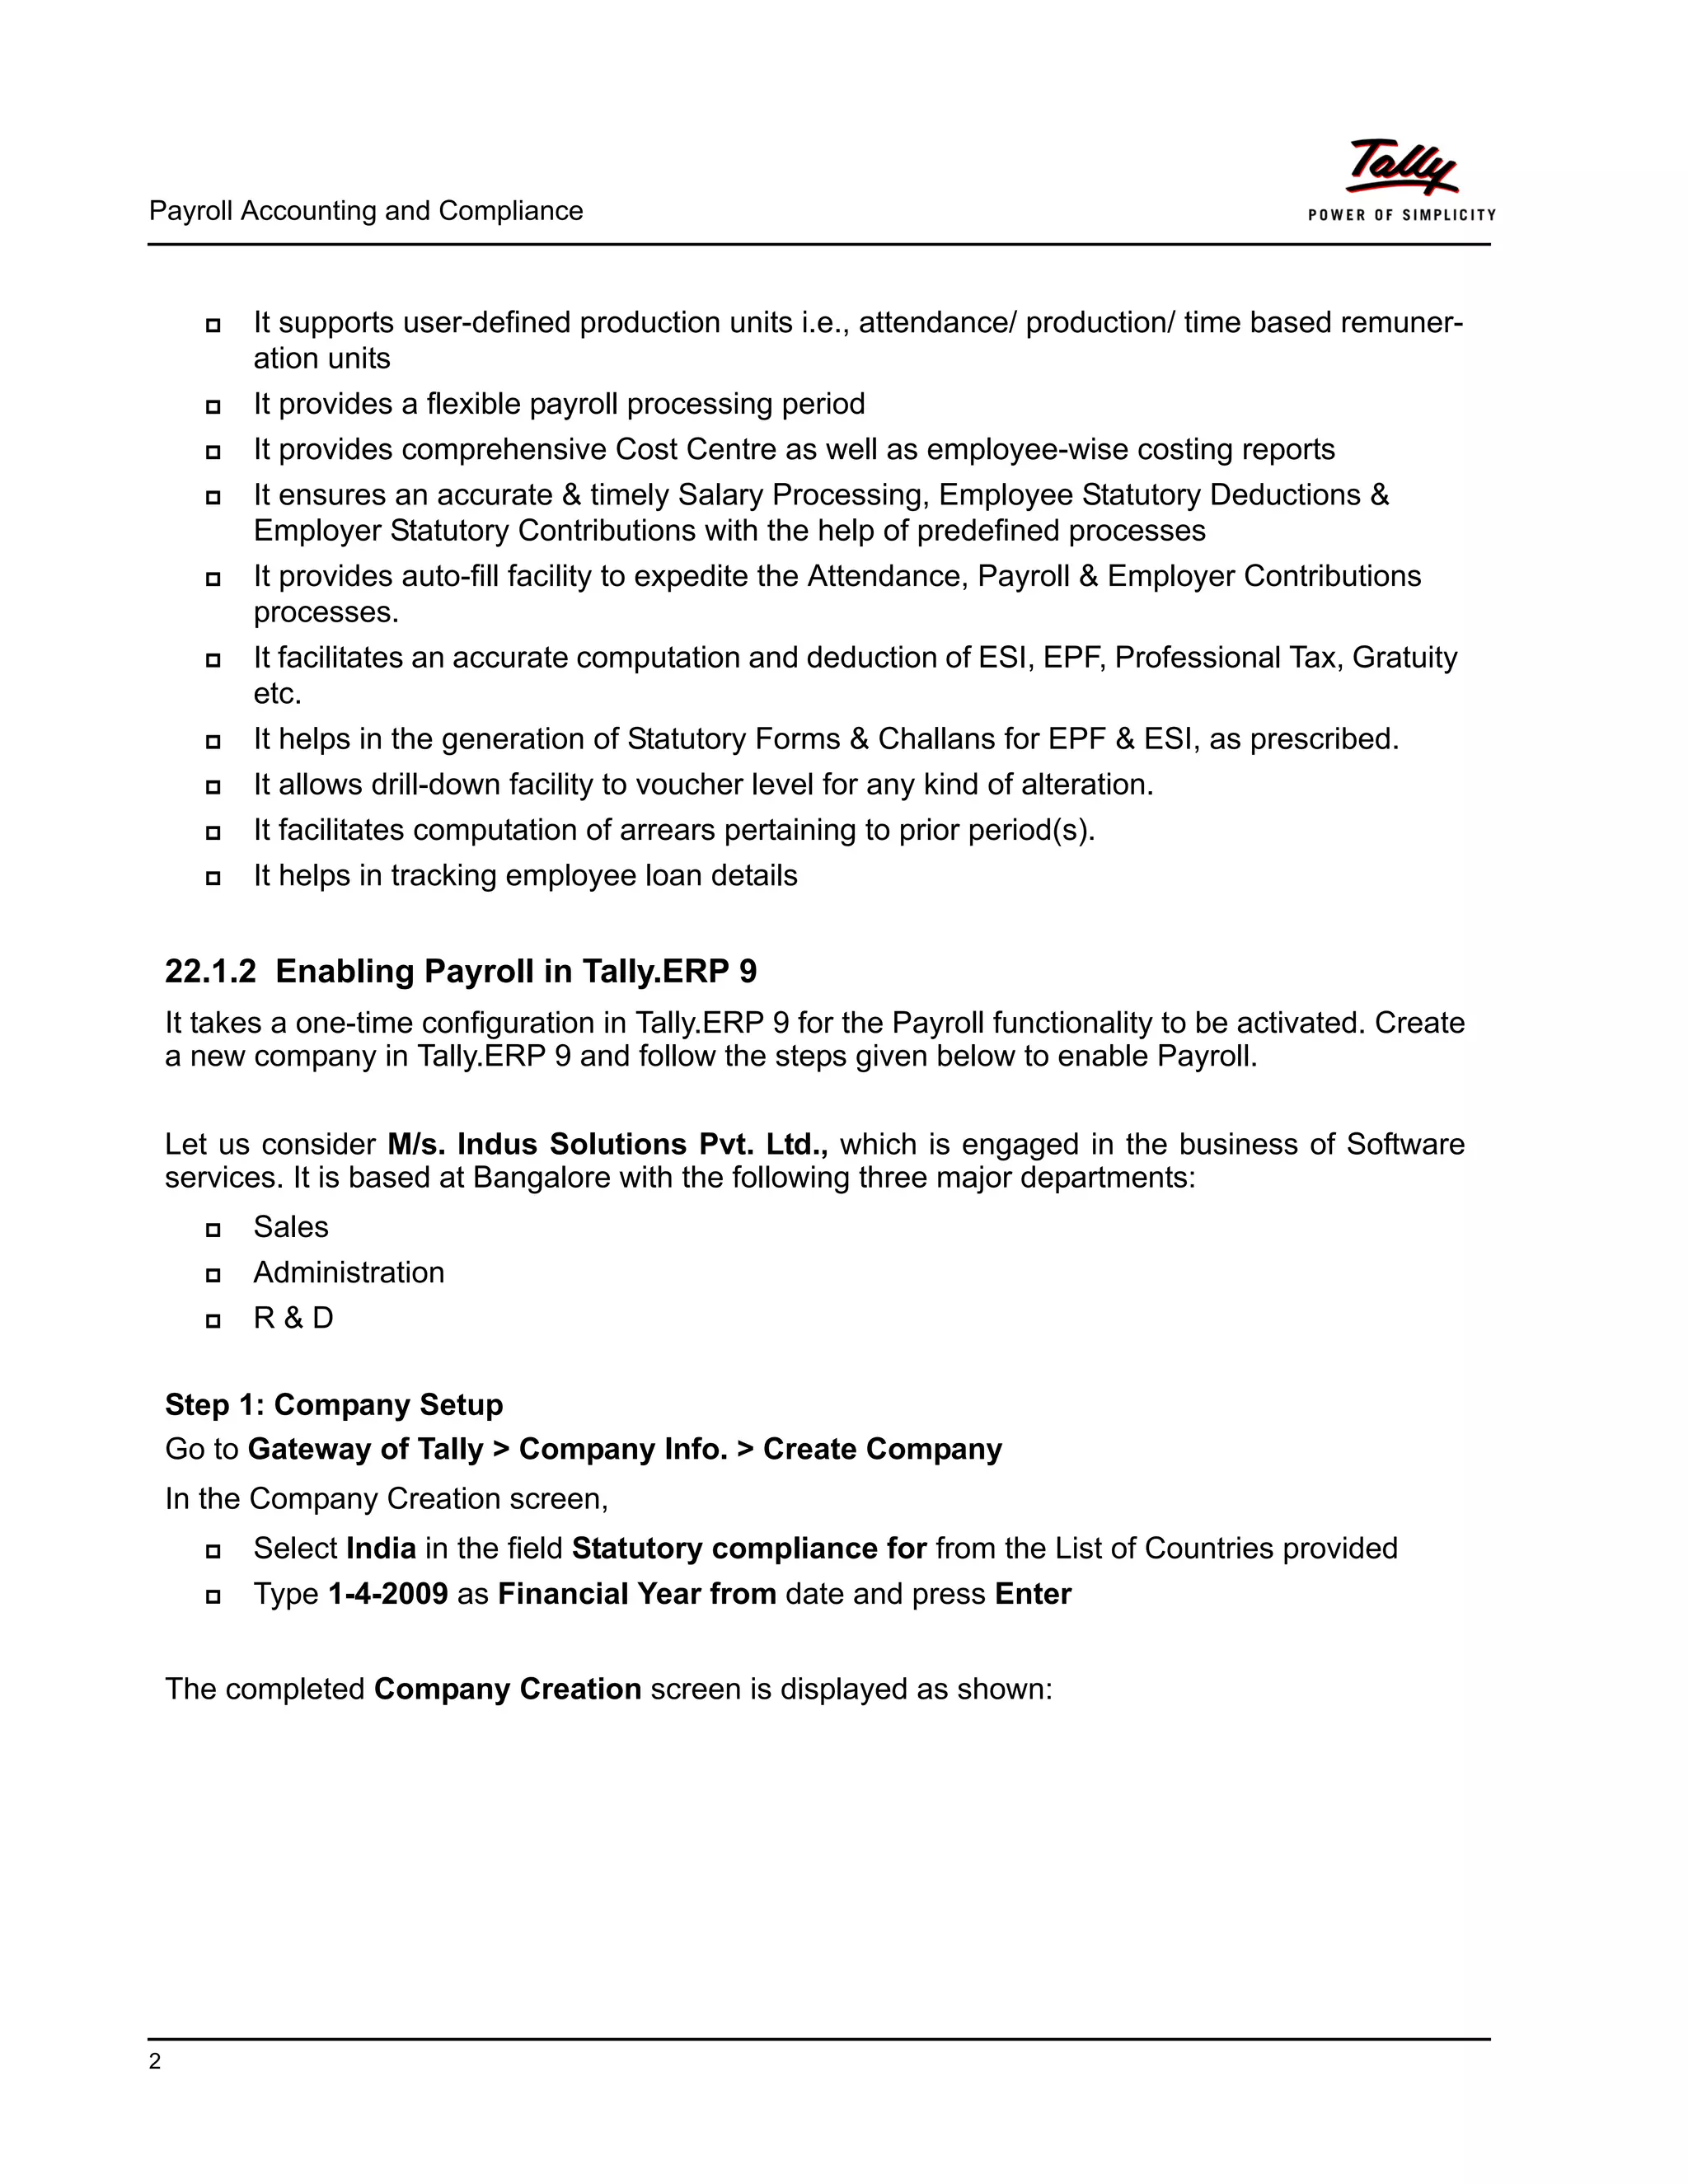
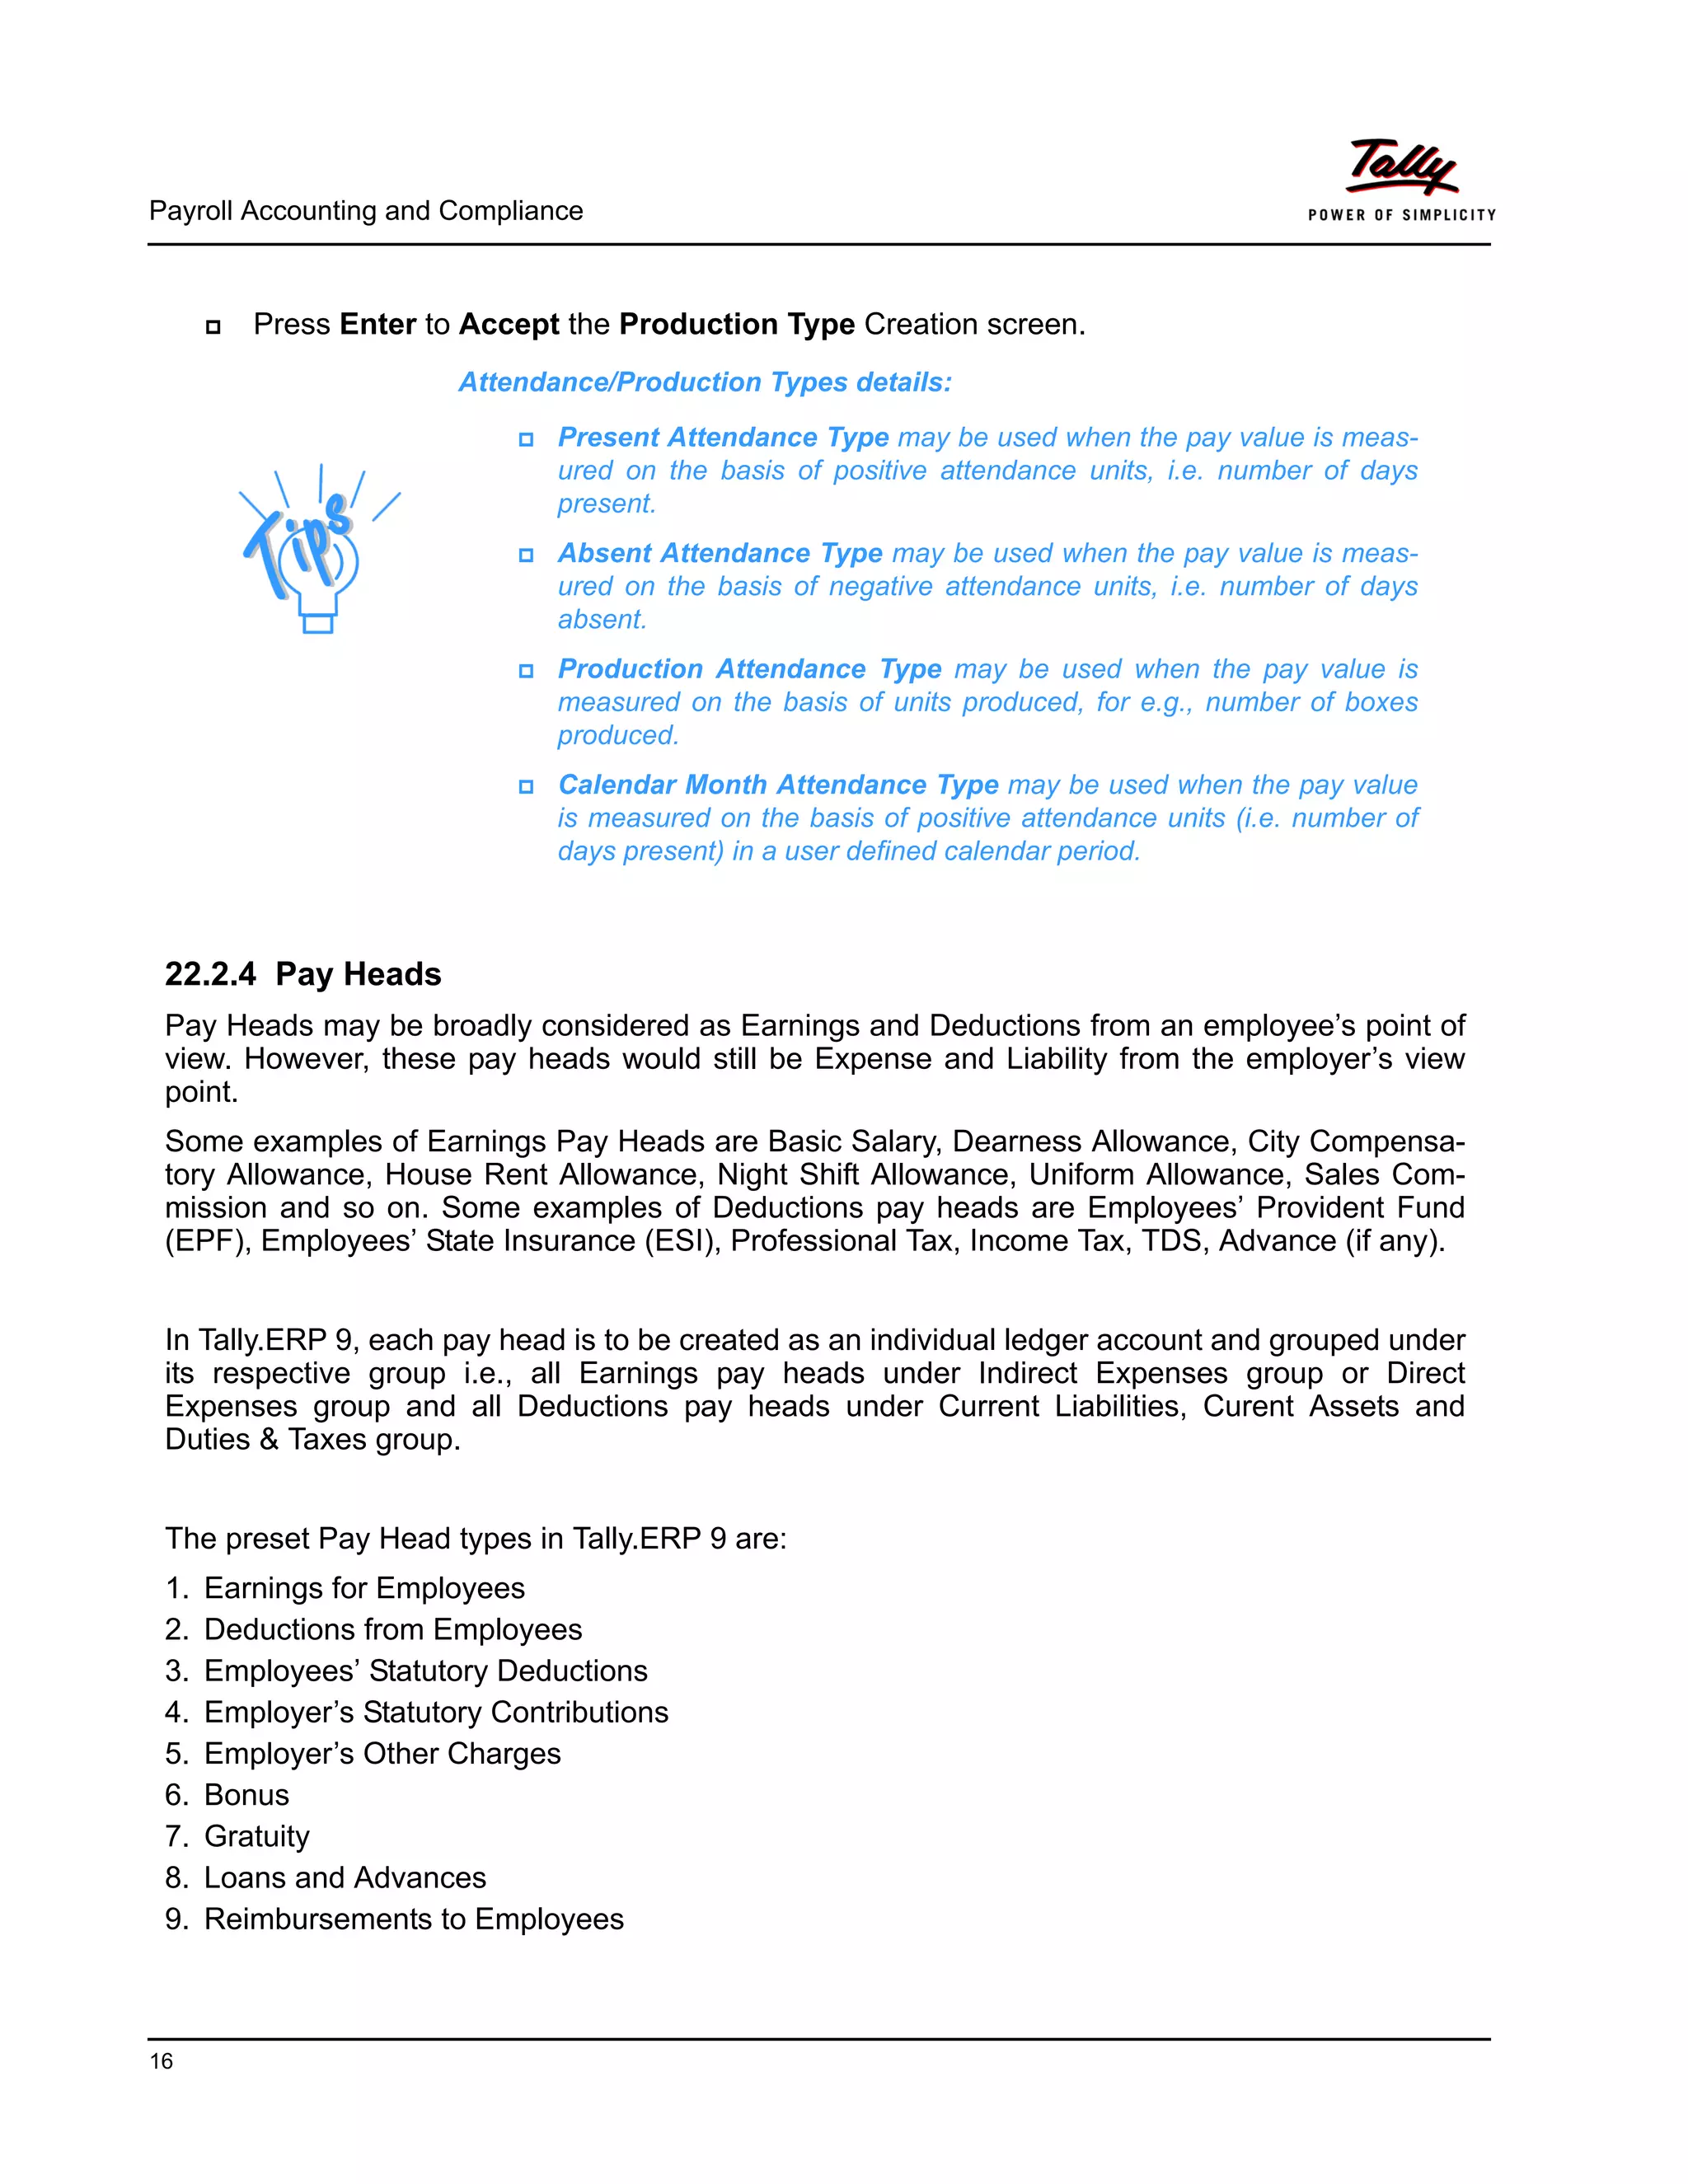
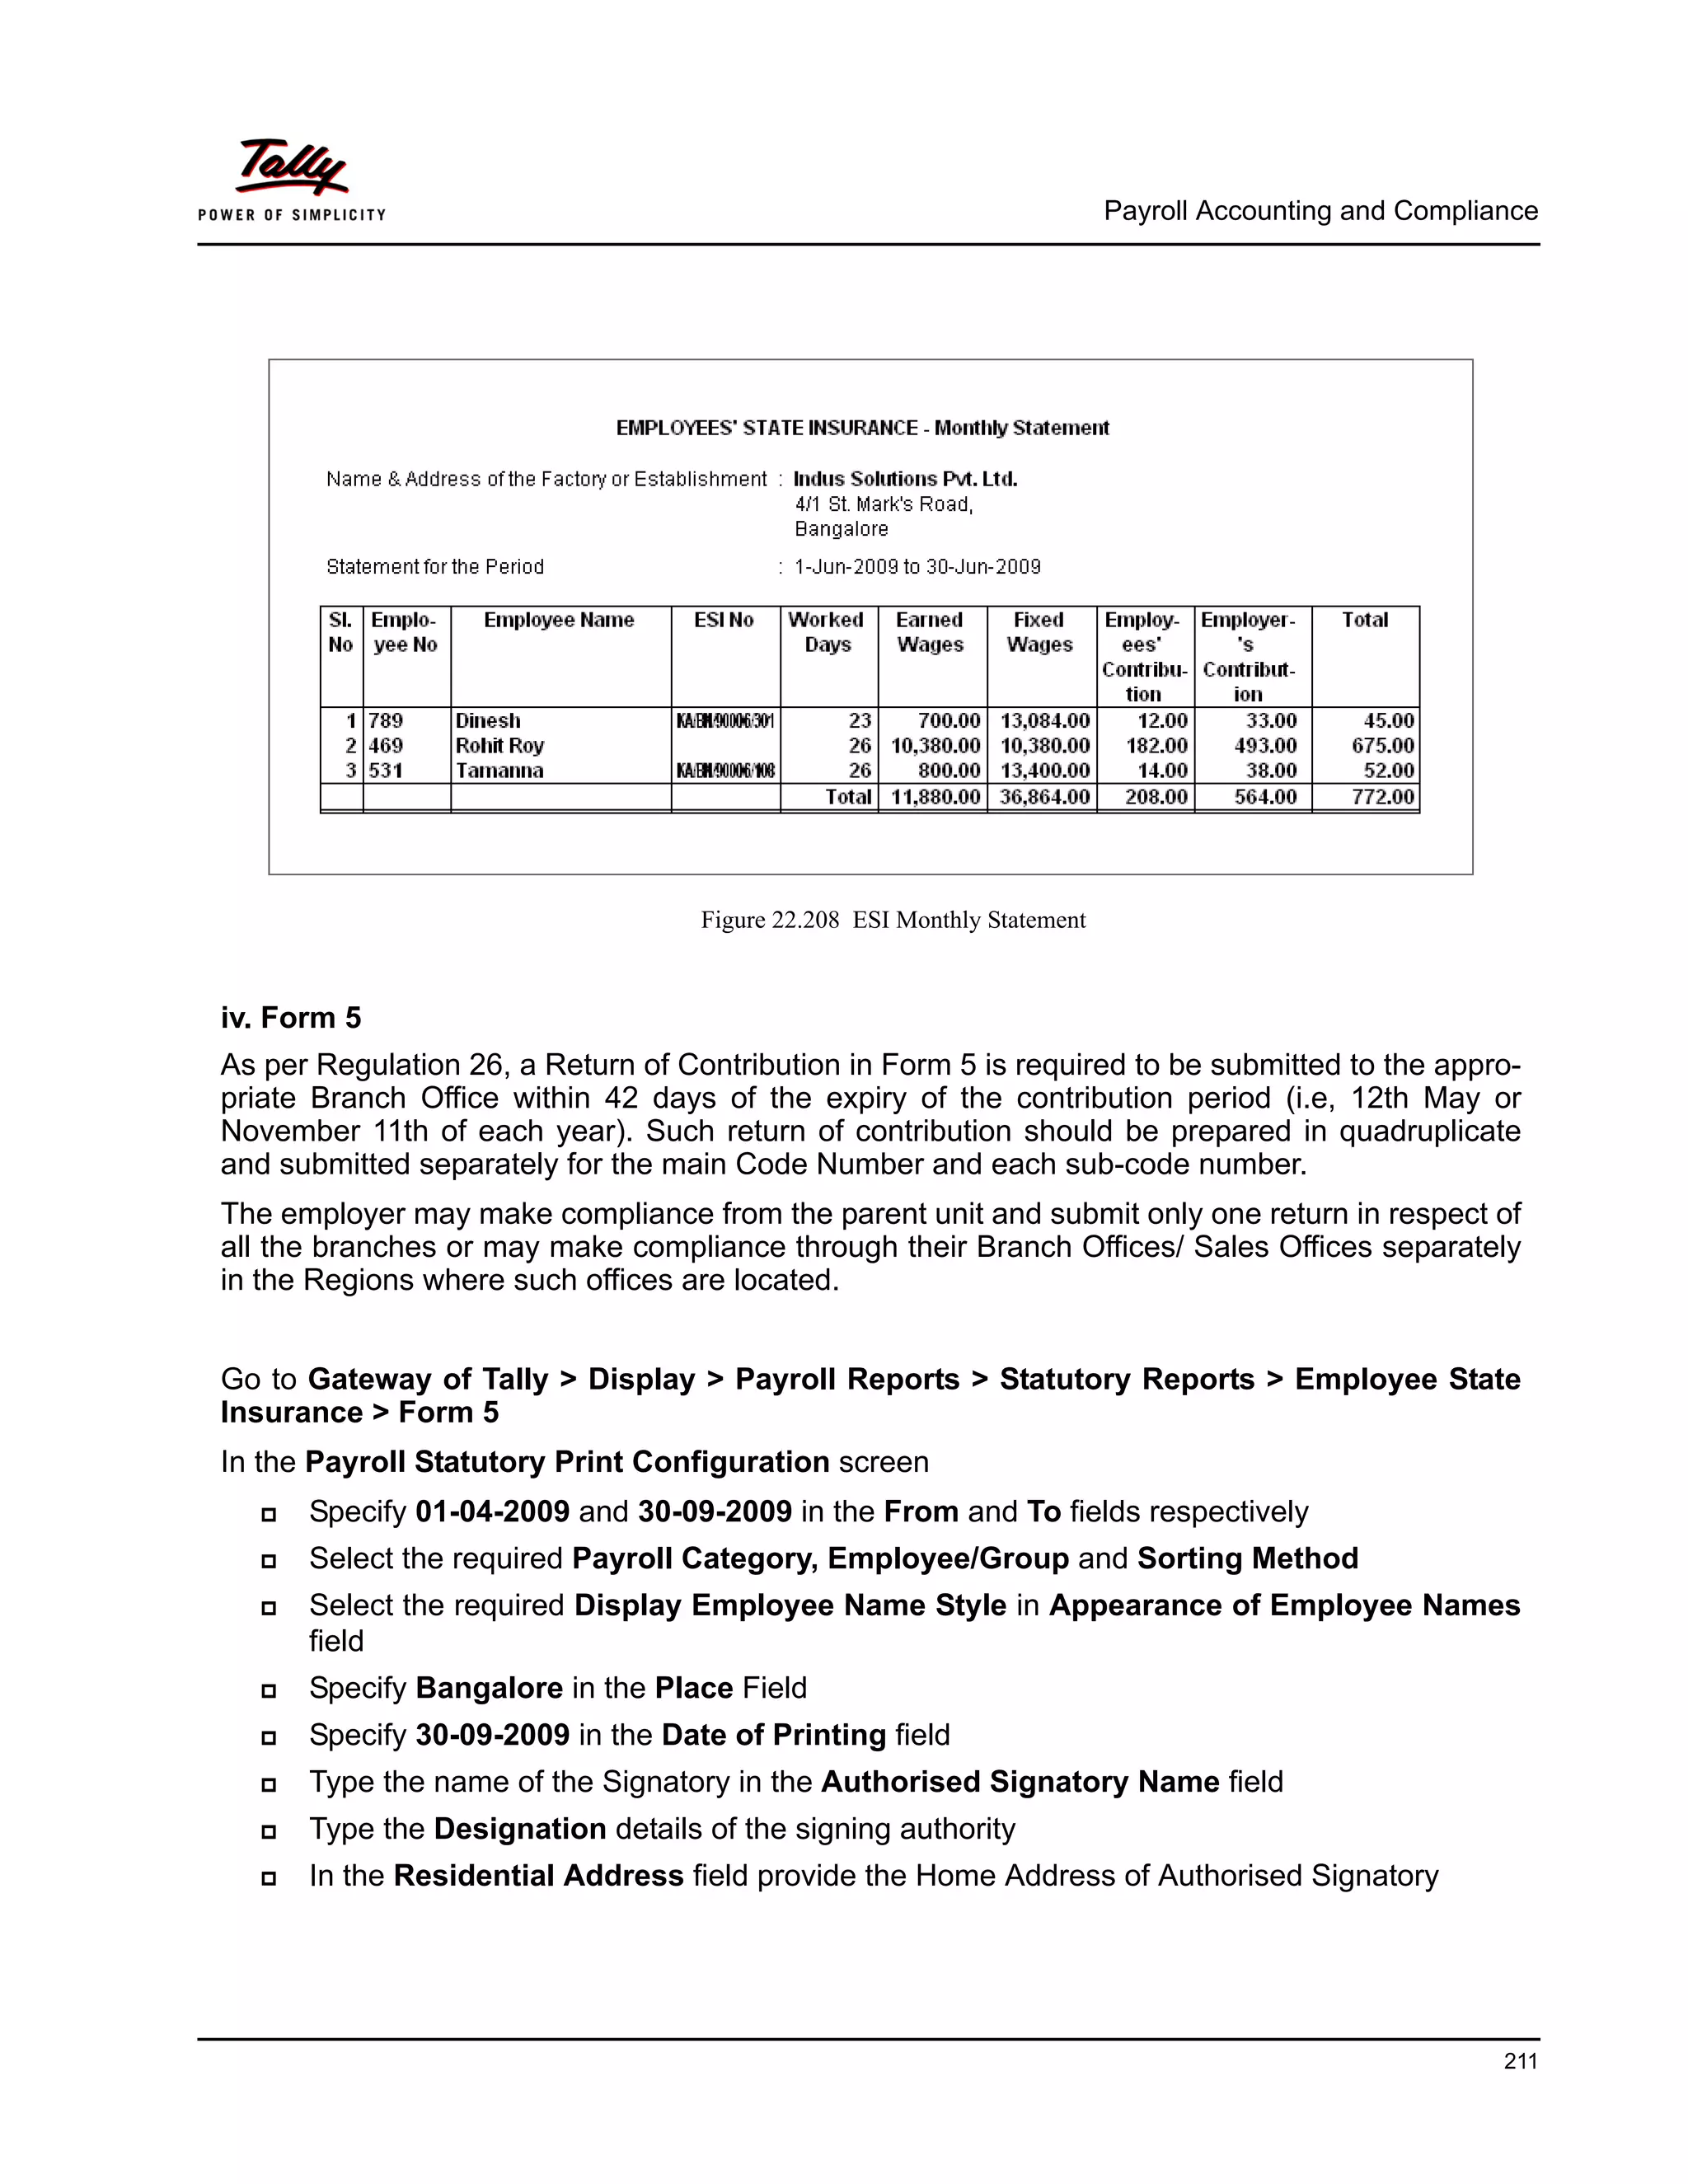
Figure 22.186 Detailed PF Computation Report
You can further drill down to Employee Breakup of Pay Head report and from their to Employee
Vouchers and so on, by pressing Enter on the required ledger from the above screen.
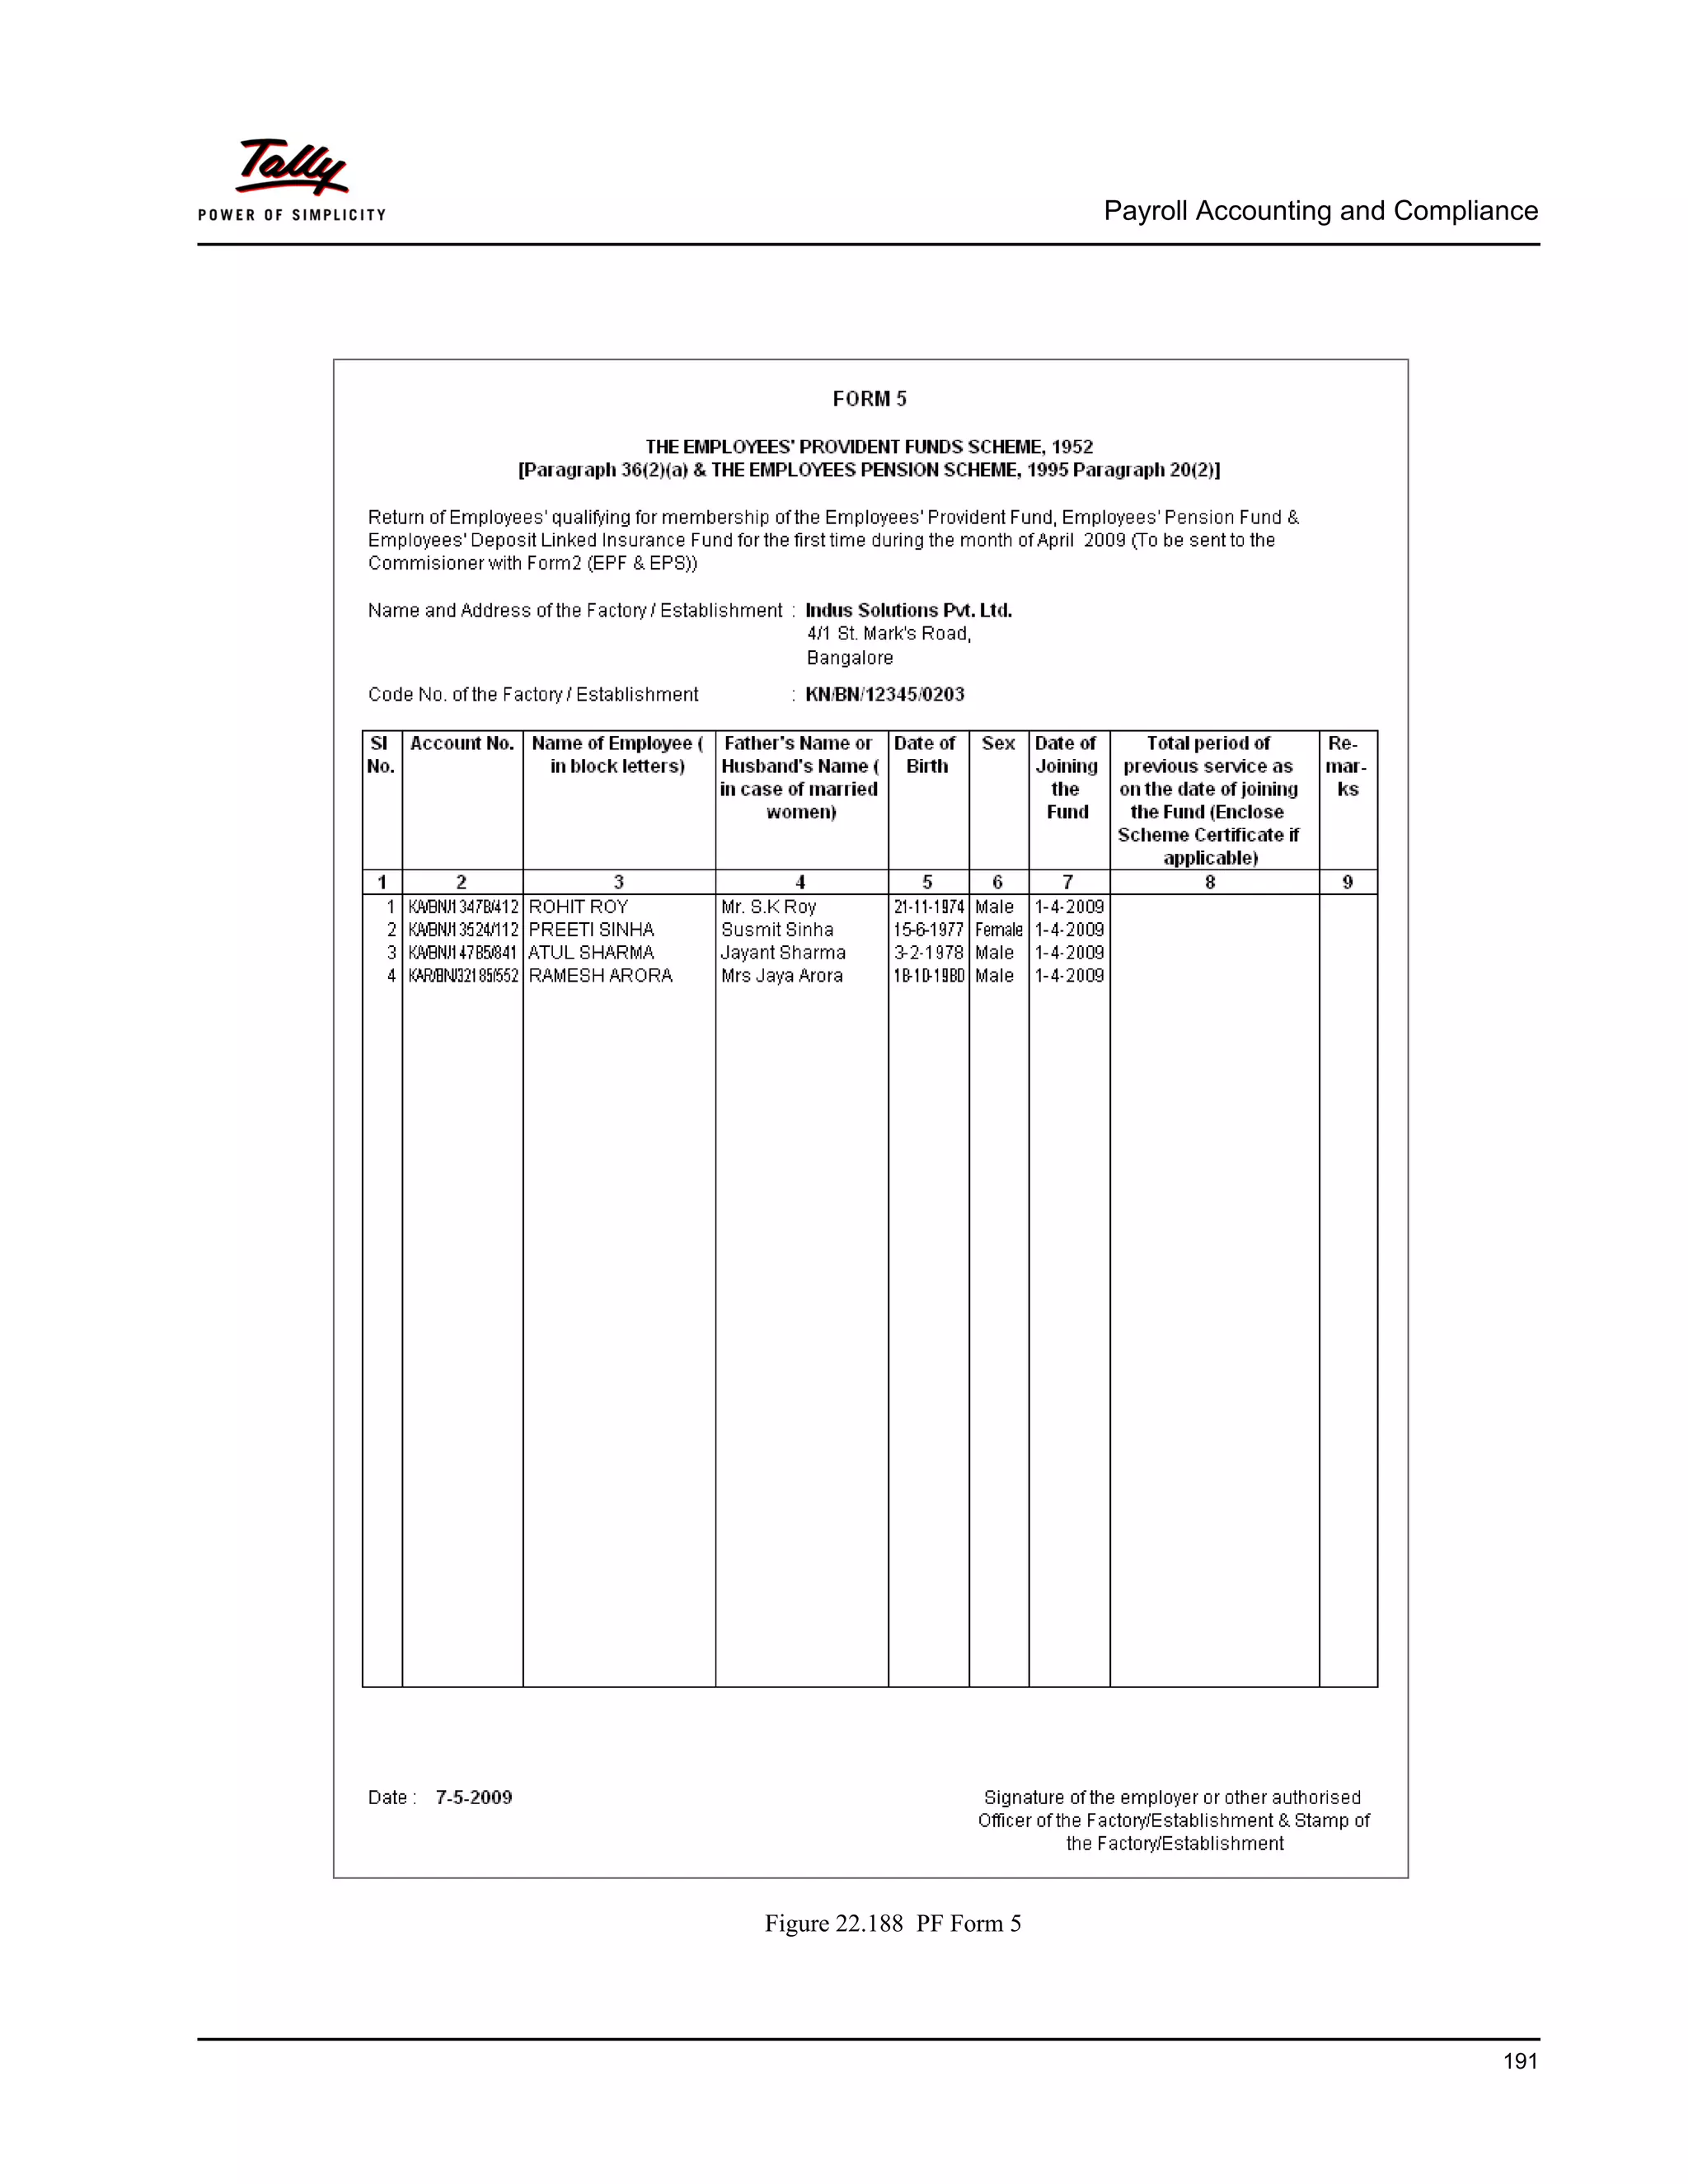
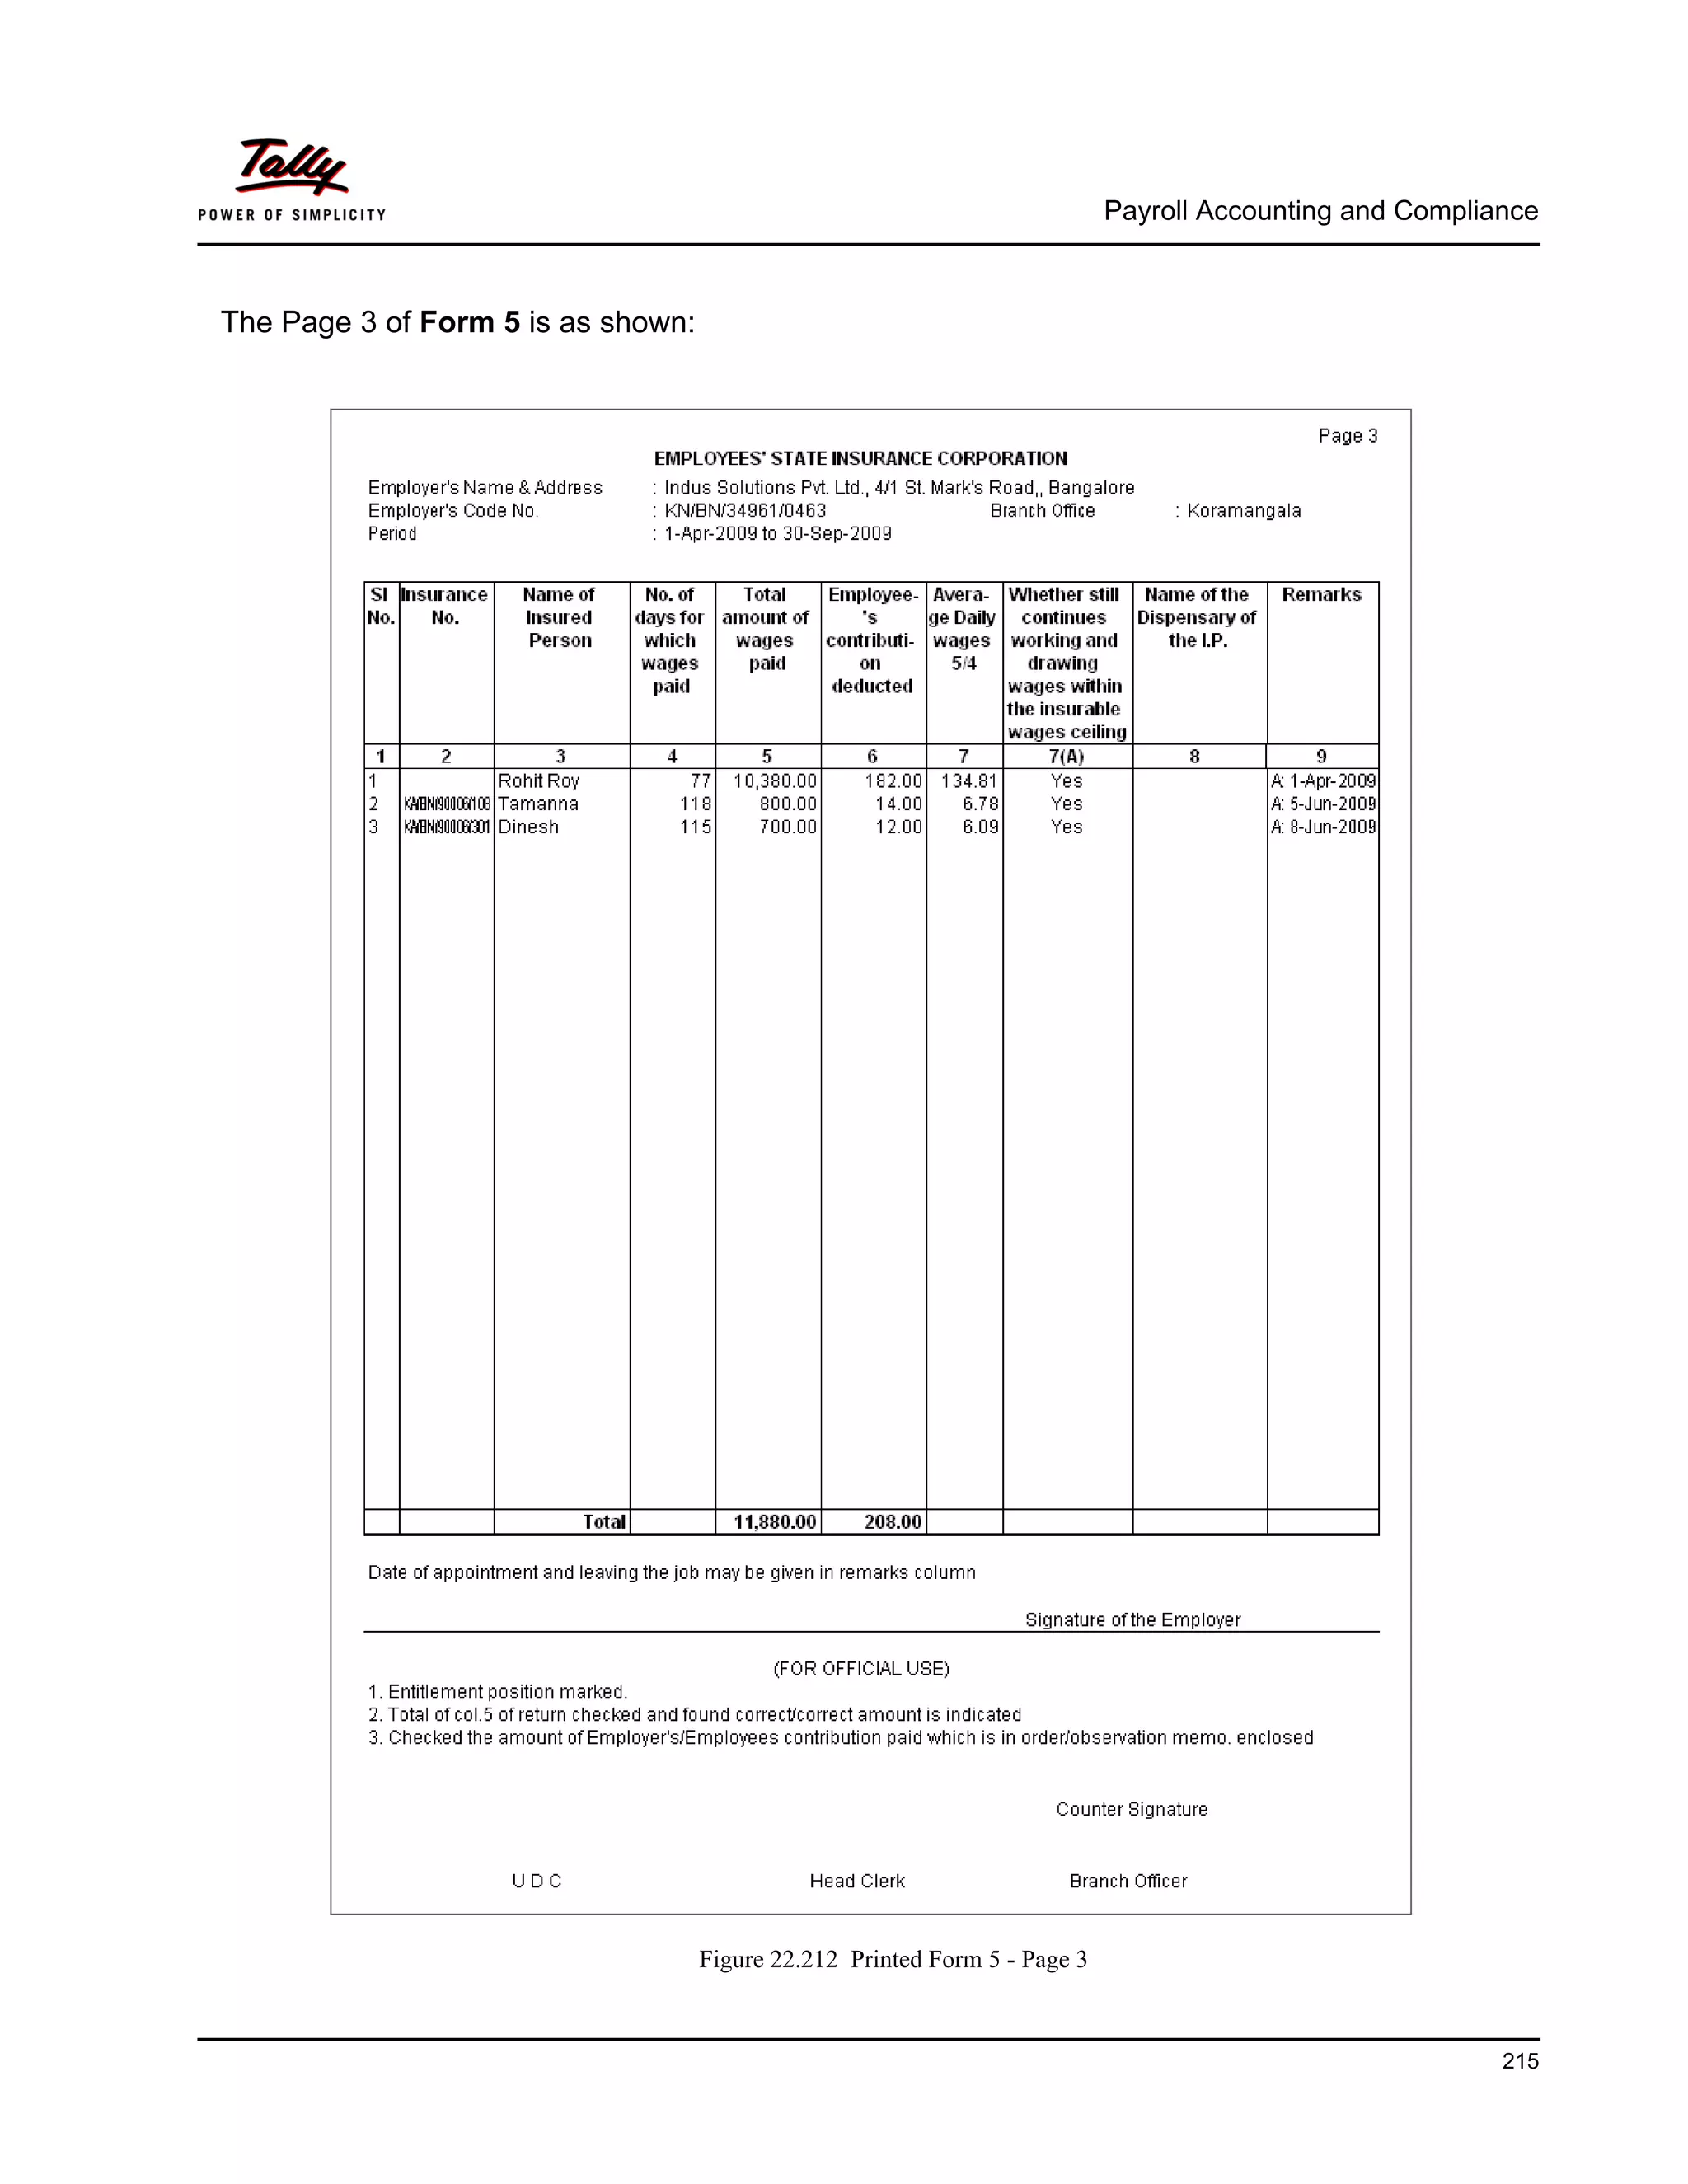
ii. Form 5
As per the Employees' Provident Funds Scheme,1952 [para 36 (2)(a)], a return is required to be
submitted in Form 5 within 15 days of the following month detailing the list of Employees qualify-
ing for membership to the Employees’ Provident Fund for the First time during every month.
Form 5 is a monthly Returns to be submitted with the details of any new employee covered under
EPF. In Tally.ERP 9, you can generate Form 5 in the prescribed format containing the details of
the new joinees in the organisation for the selected month. To generate the PF Form 5 for the
month of June 2009, follow the steps given below:
Go to Gateway of Tally > Display > Payroll Reports > Statutory Reports > Provident Fund >
Form 5
In the Payroll Statutory Print Configuration screen,
Specify 01-04-2009 and 30-04-2009 in the From and To fields respectively
Select the required Payroll Category, Employee/Group and Sorting Method](https://image.slidesharecdn.com/payrollaccountingintallyerp9-130613034648-phpapp01/75/Payroll-accounting-in-tally-erp-9-189-2048.jpg)
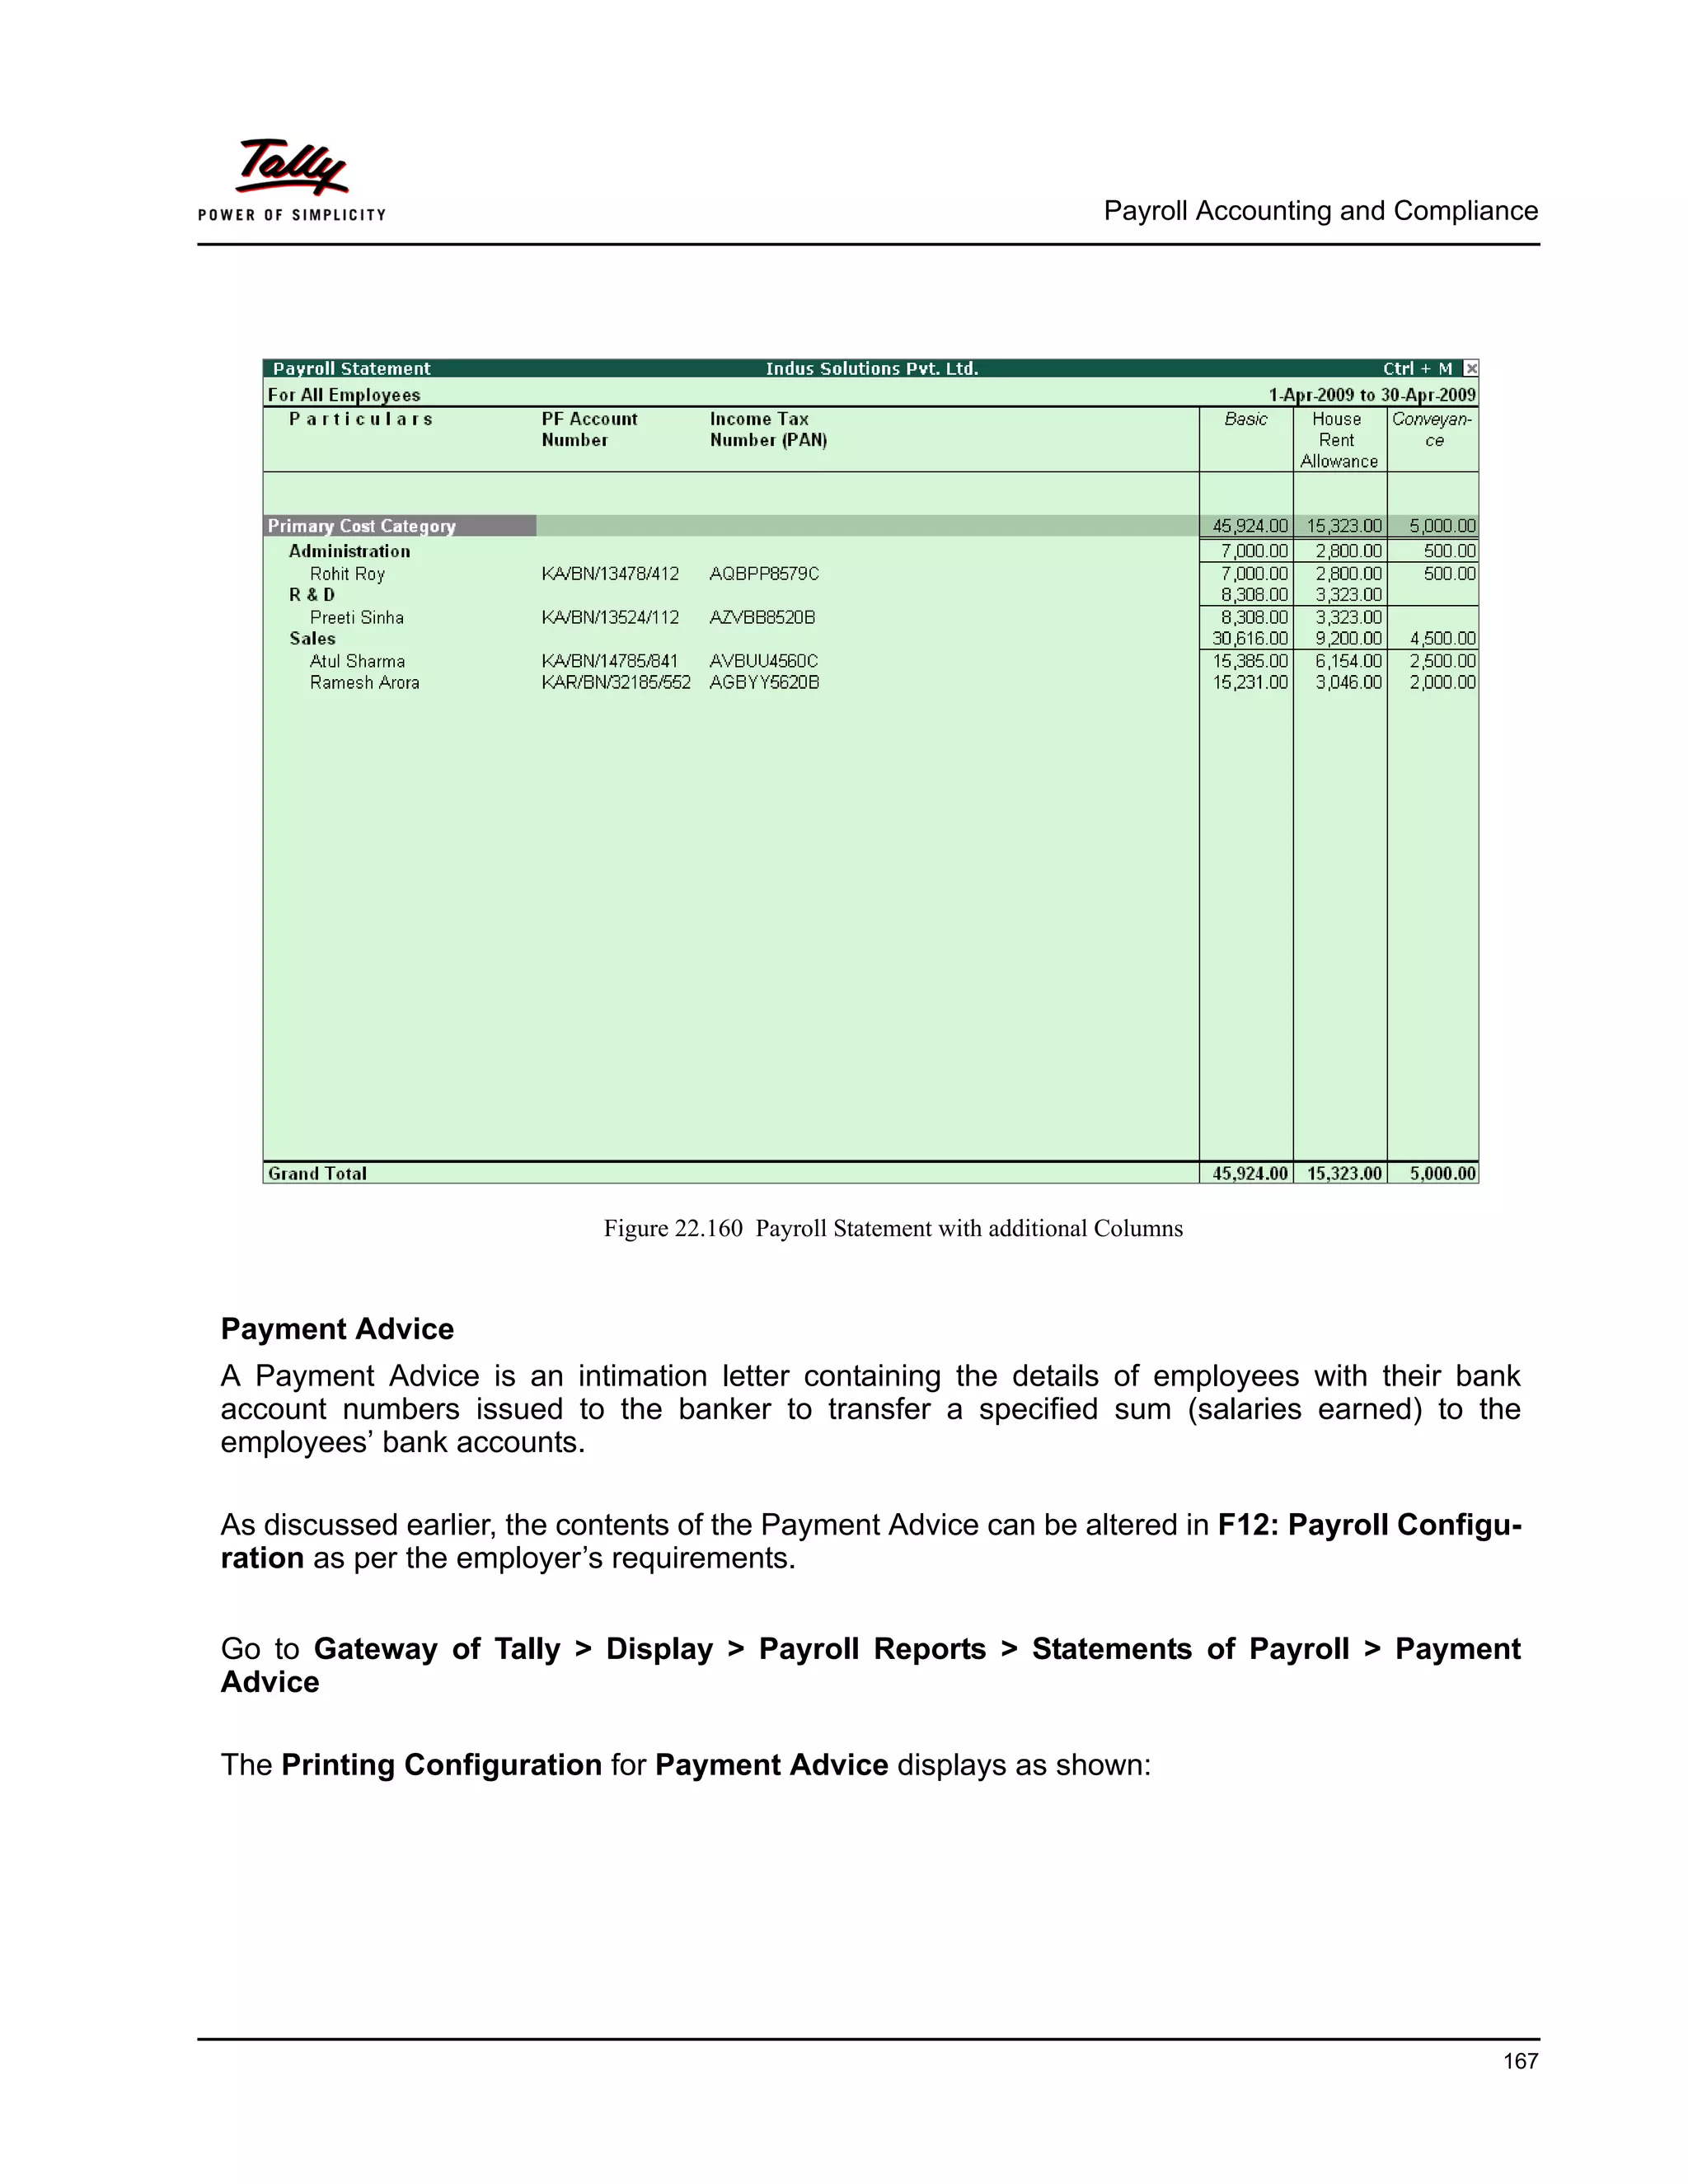
![Payroll Accounting and Compliance
195
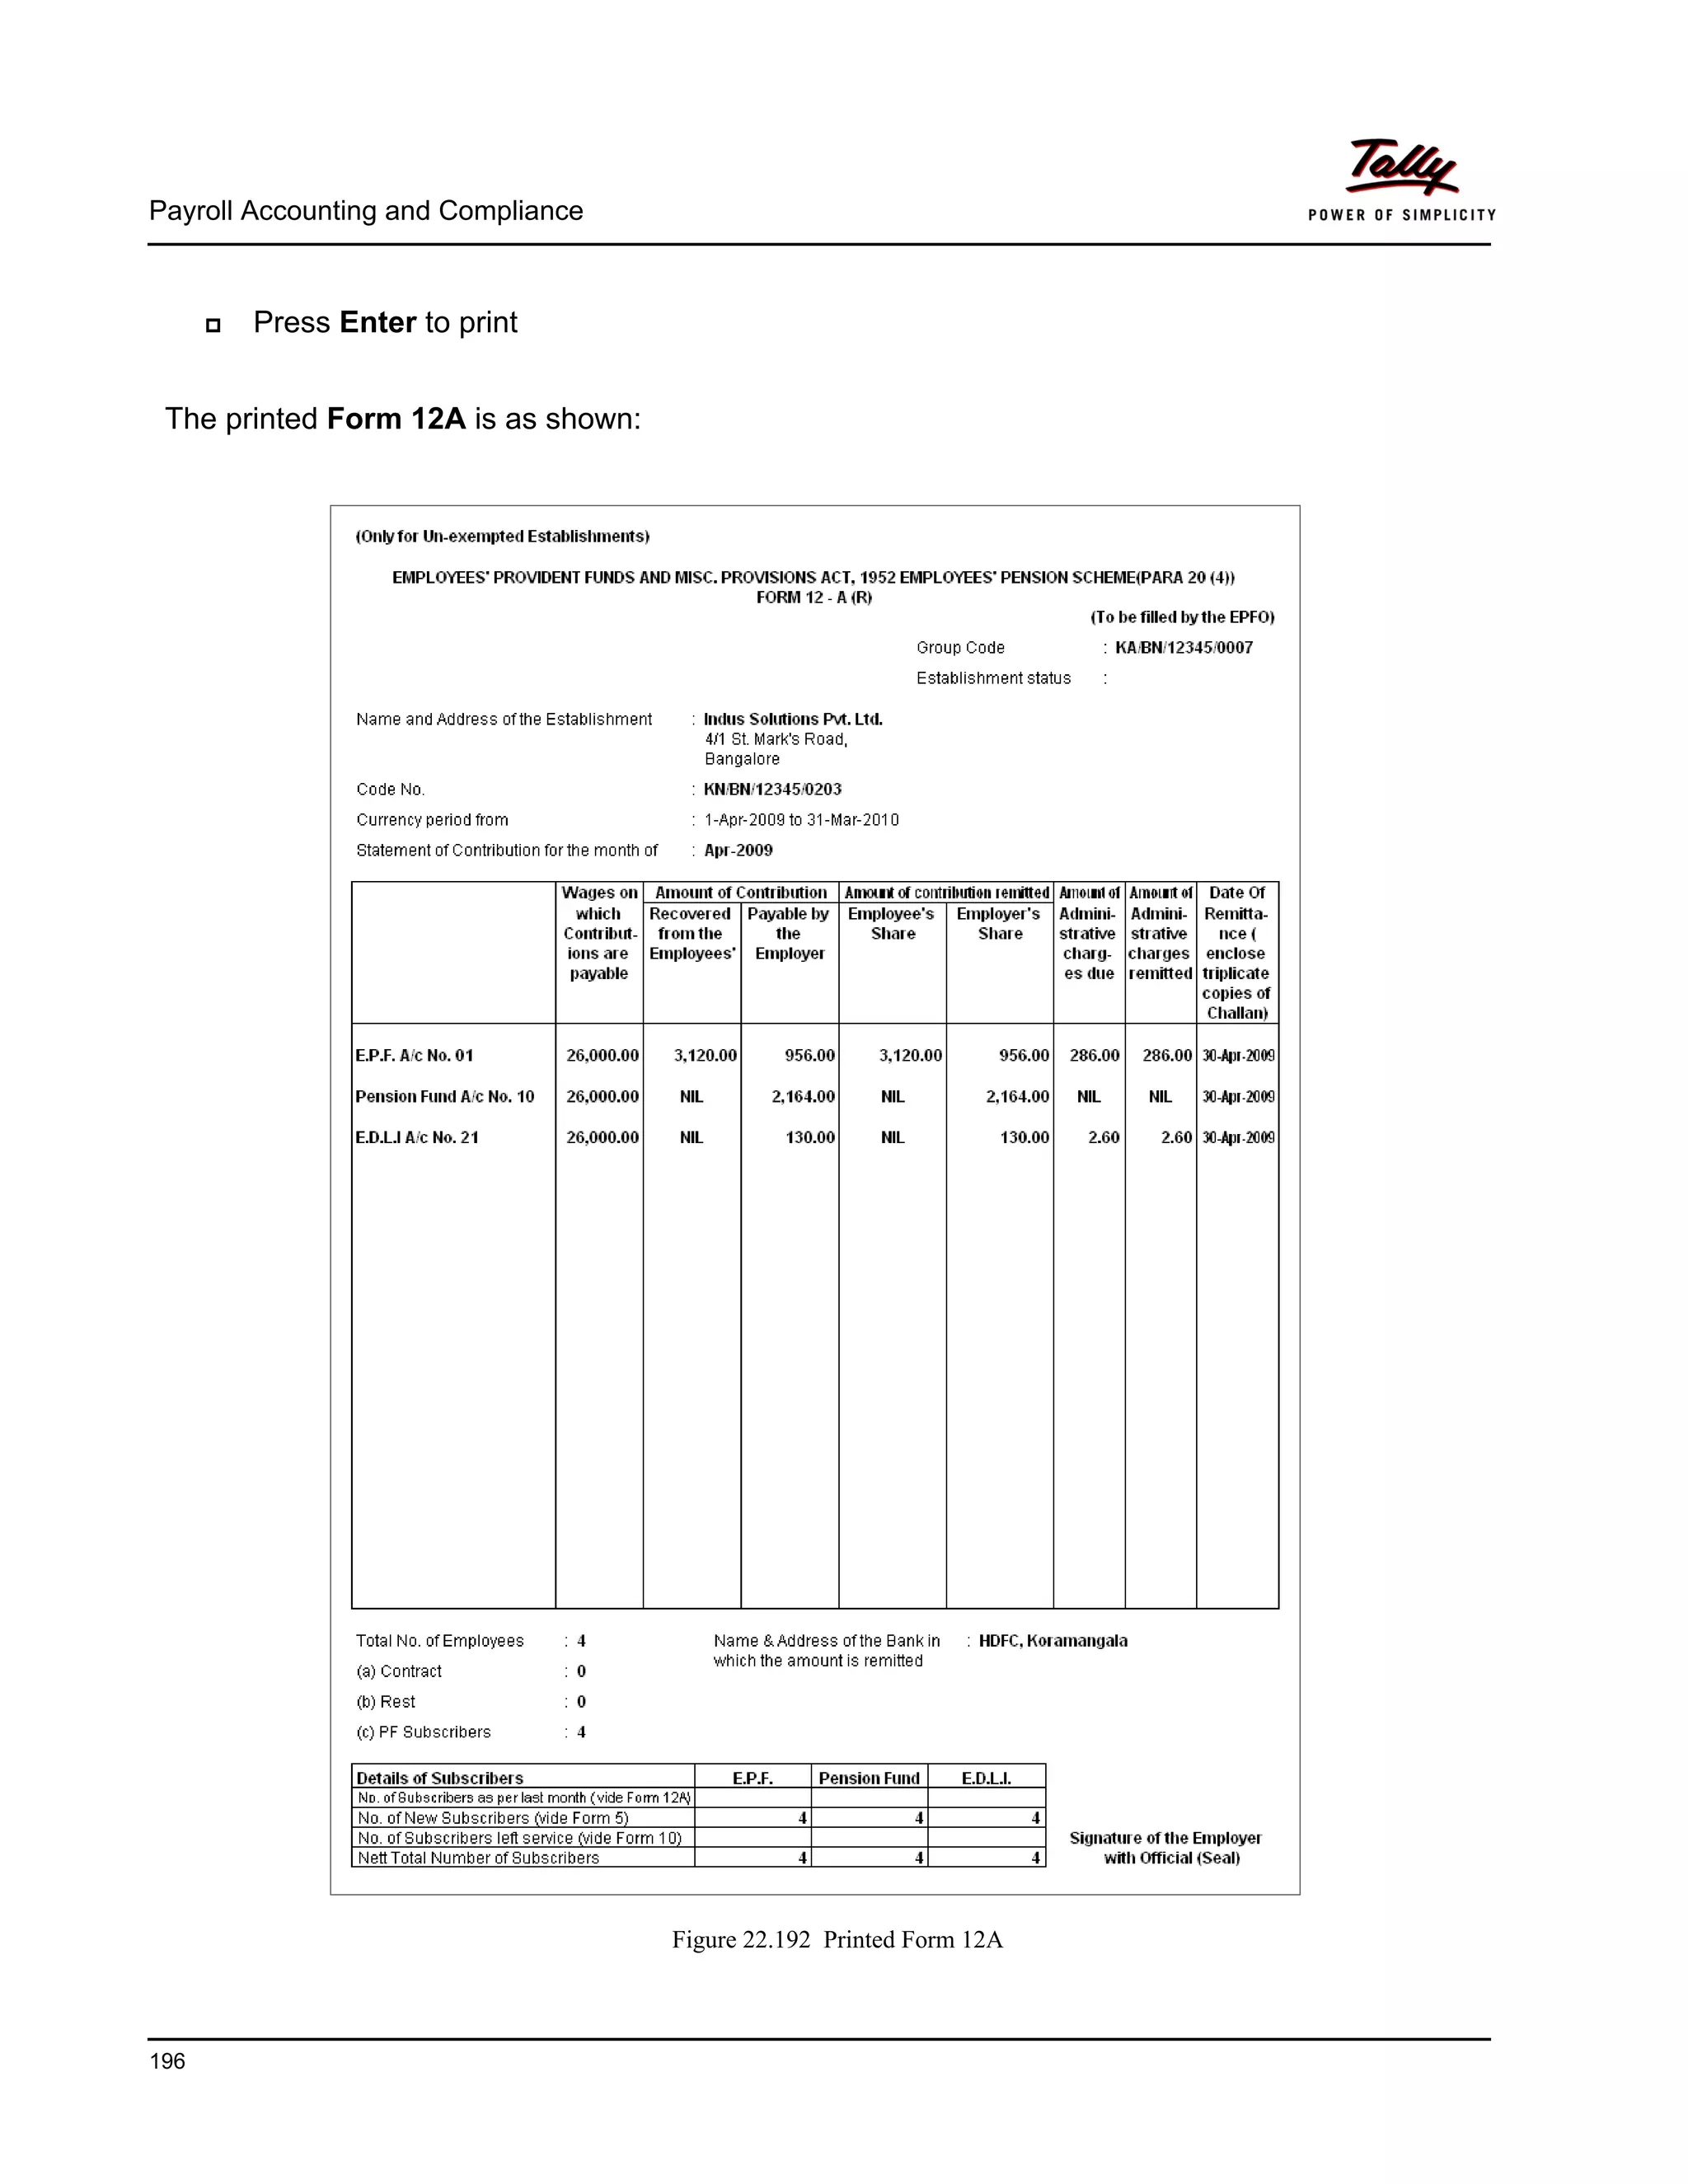
iv. Form 12A
As per the Employees' Provident Funds Scheme, 1952 [para 36(1)] and the Employees' Pension
Scheme 1995 [para 20(4)] and the Employees' Deposit Linked Insurance Scheme, 1976, a con-
solidated Statement of dues and remittance is required to be submitted by 25th of the following
month to which the dues relate.
You can generate Form 12A in the prescribed format containing the details of the amount of con-
tribution, amount of contribution remitted and the date of remittance in respect of EPF, Pension
Fund and EDLI Contribution for the selected month. To generate the PF Form 12A for the month
of August 2009, follow the steps given below.
Go to Gateway of Tally > Display > Payroll Reports > Statutory Reports > Provident Fund >
Form 12A
In the Payroll Statutory Print Configuration screen
Specify 01-04-2009 and 30-04-2009 in the From and To fields respectively
Select the required Payroll Category, Employee/Group and Sorting Method
Specify the Name & Address of the Bank
Set Include VPF Account to No
Specify 0 in the Number of Contract Employees field
Press Enter to accept 0 in Number of Rest (Temporary Employees) field
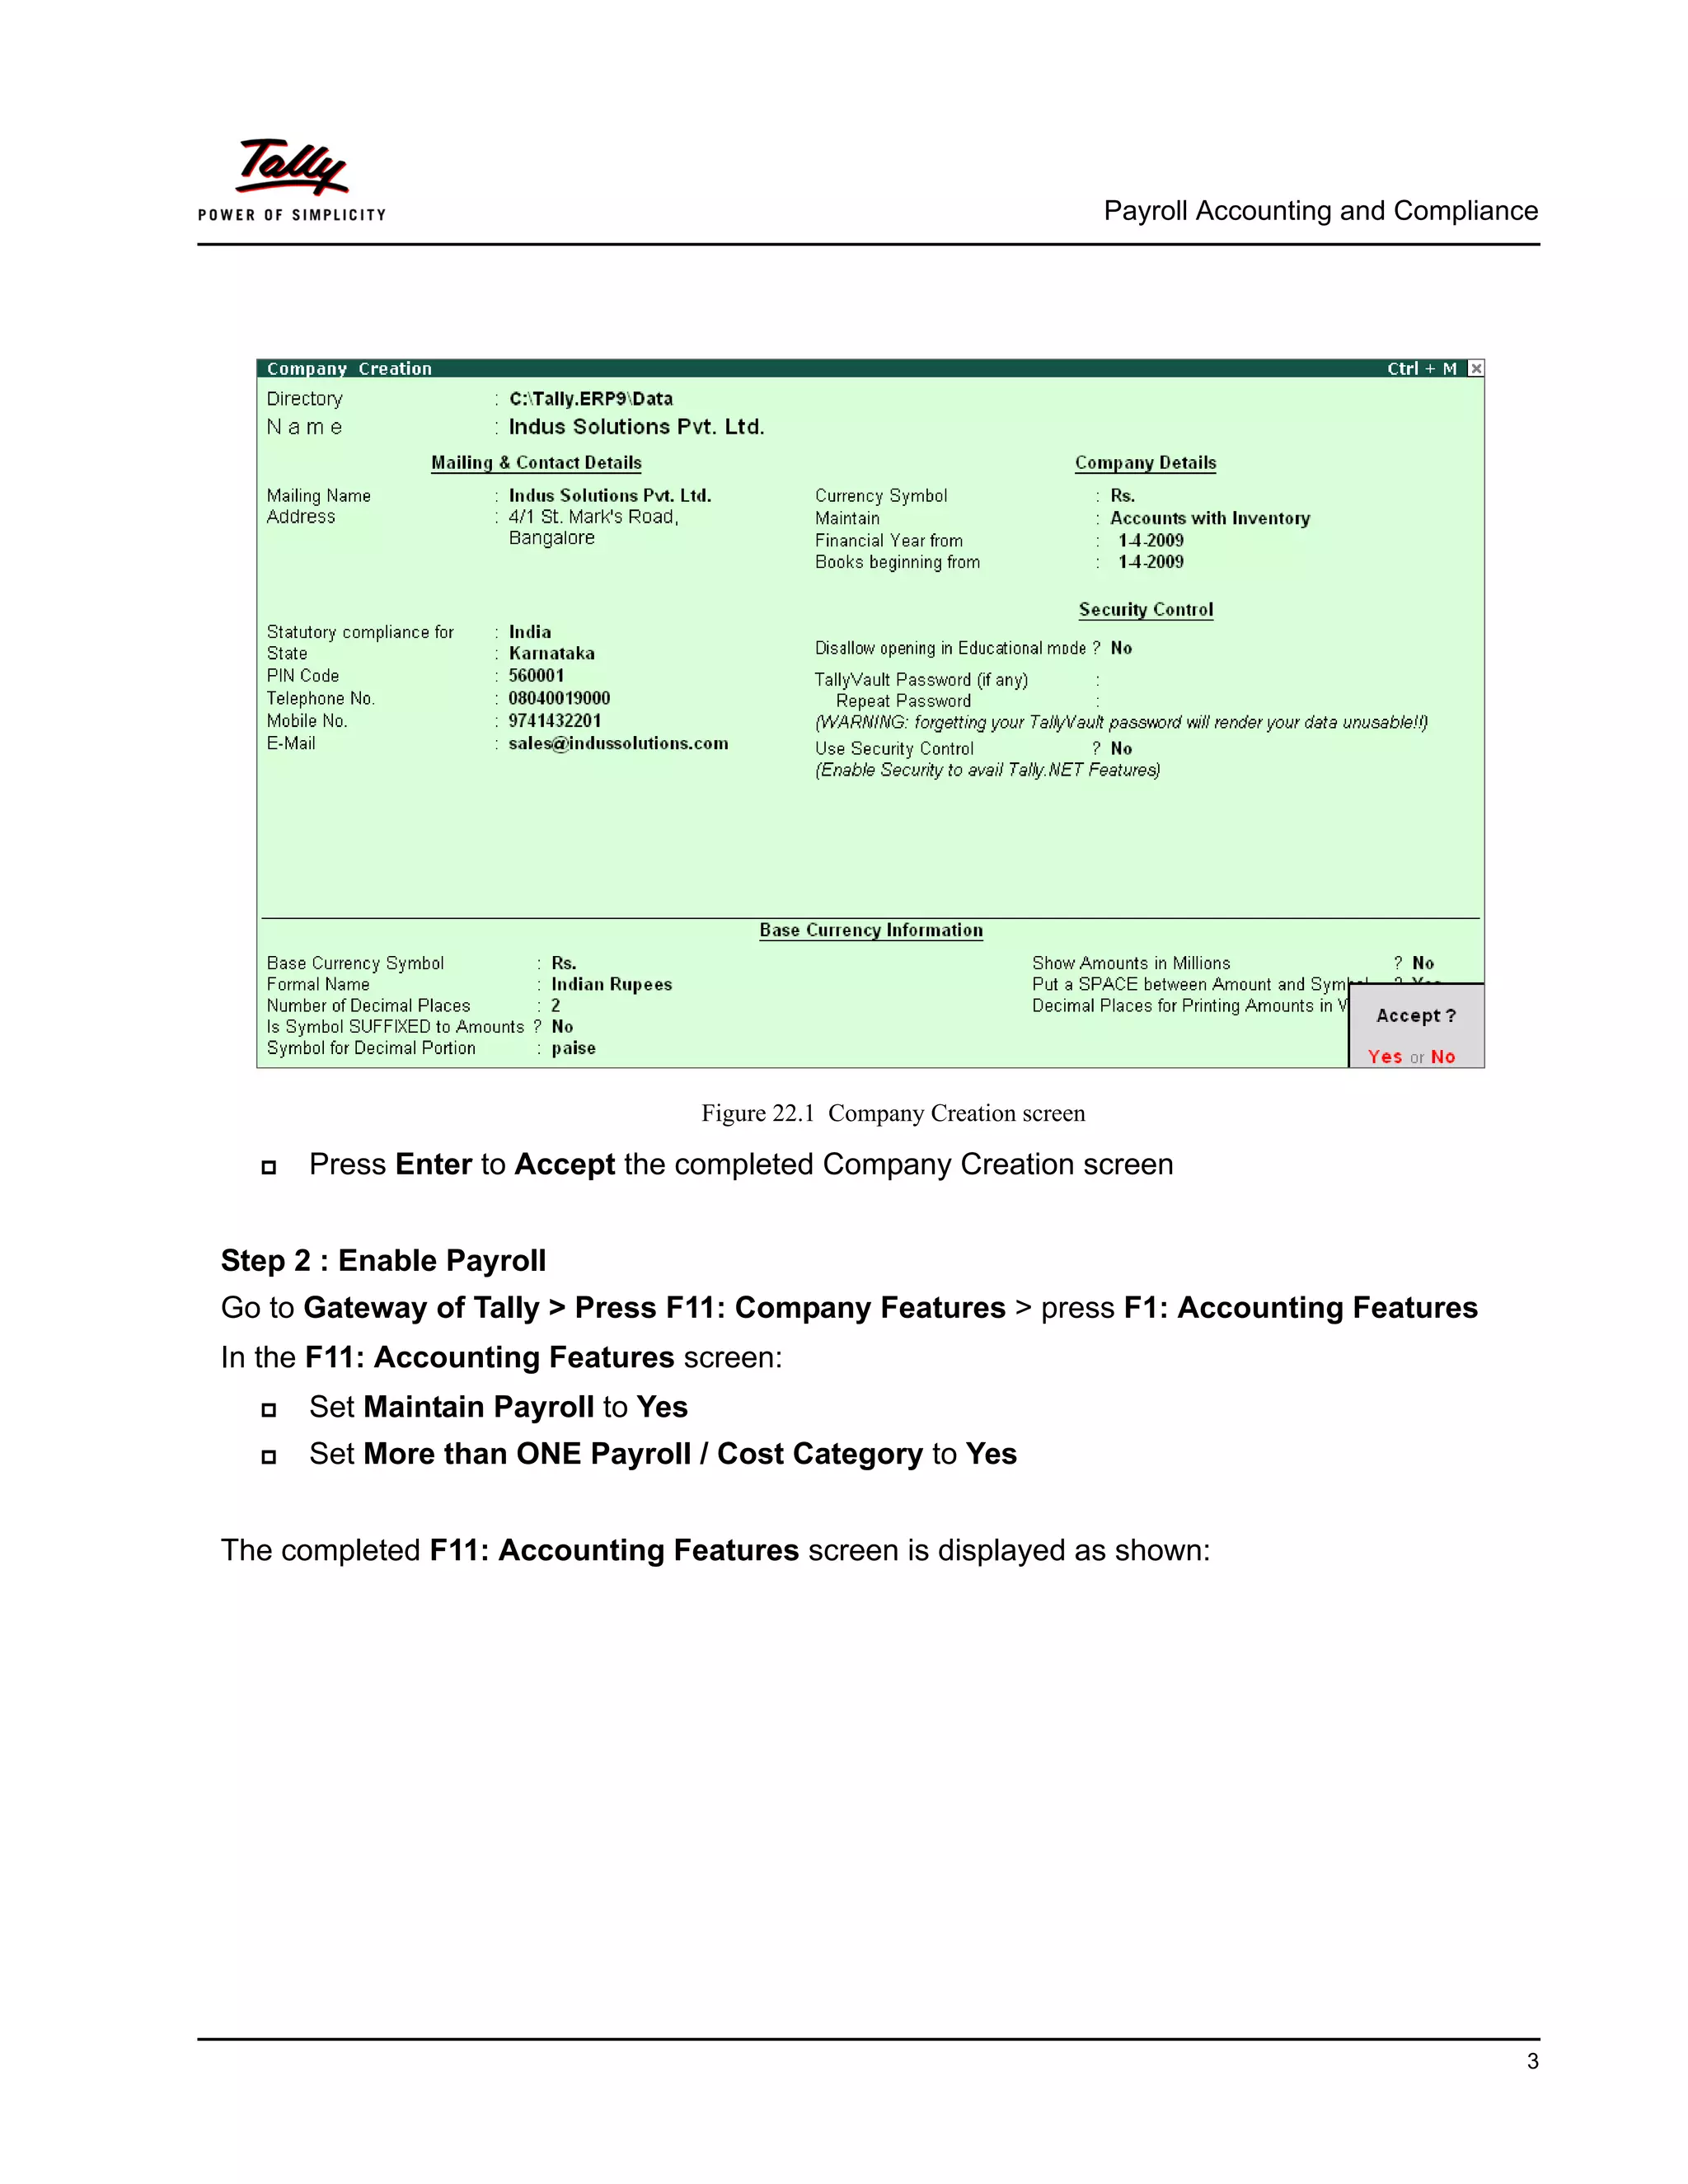
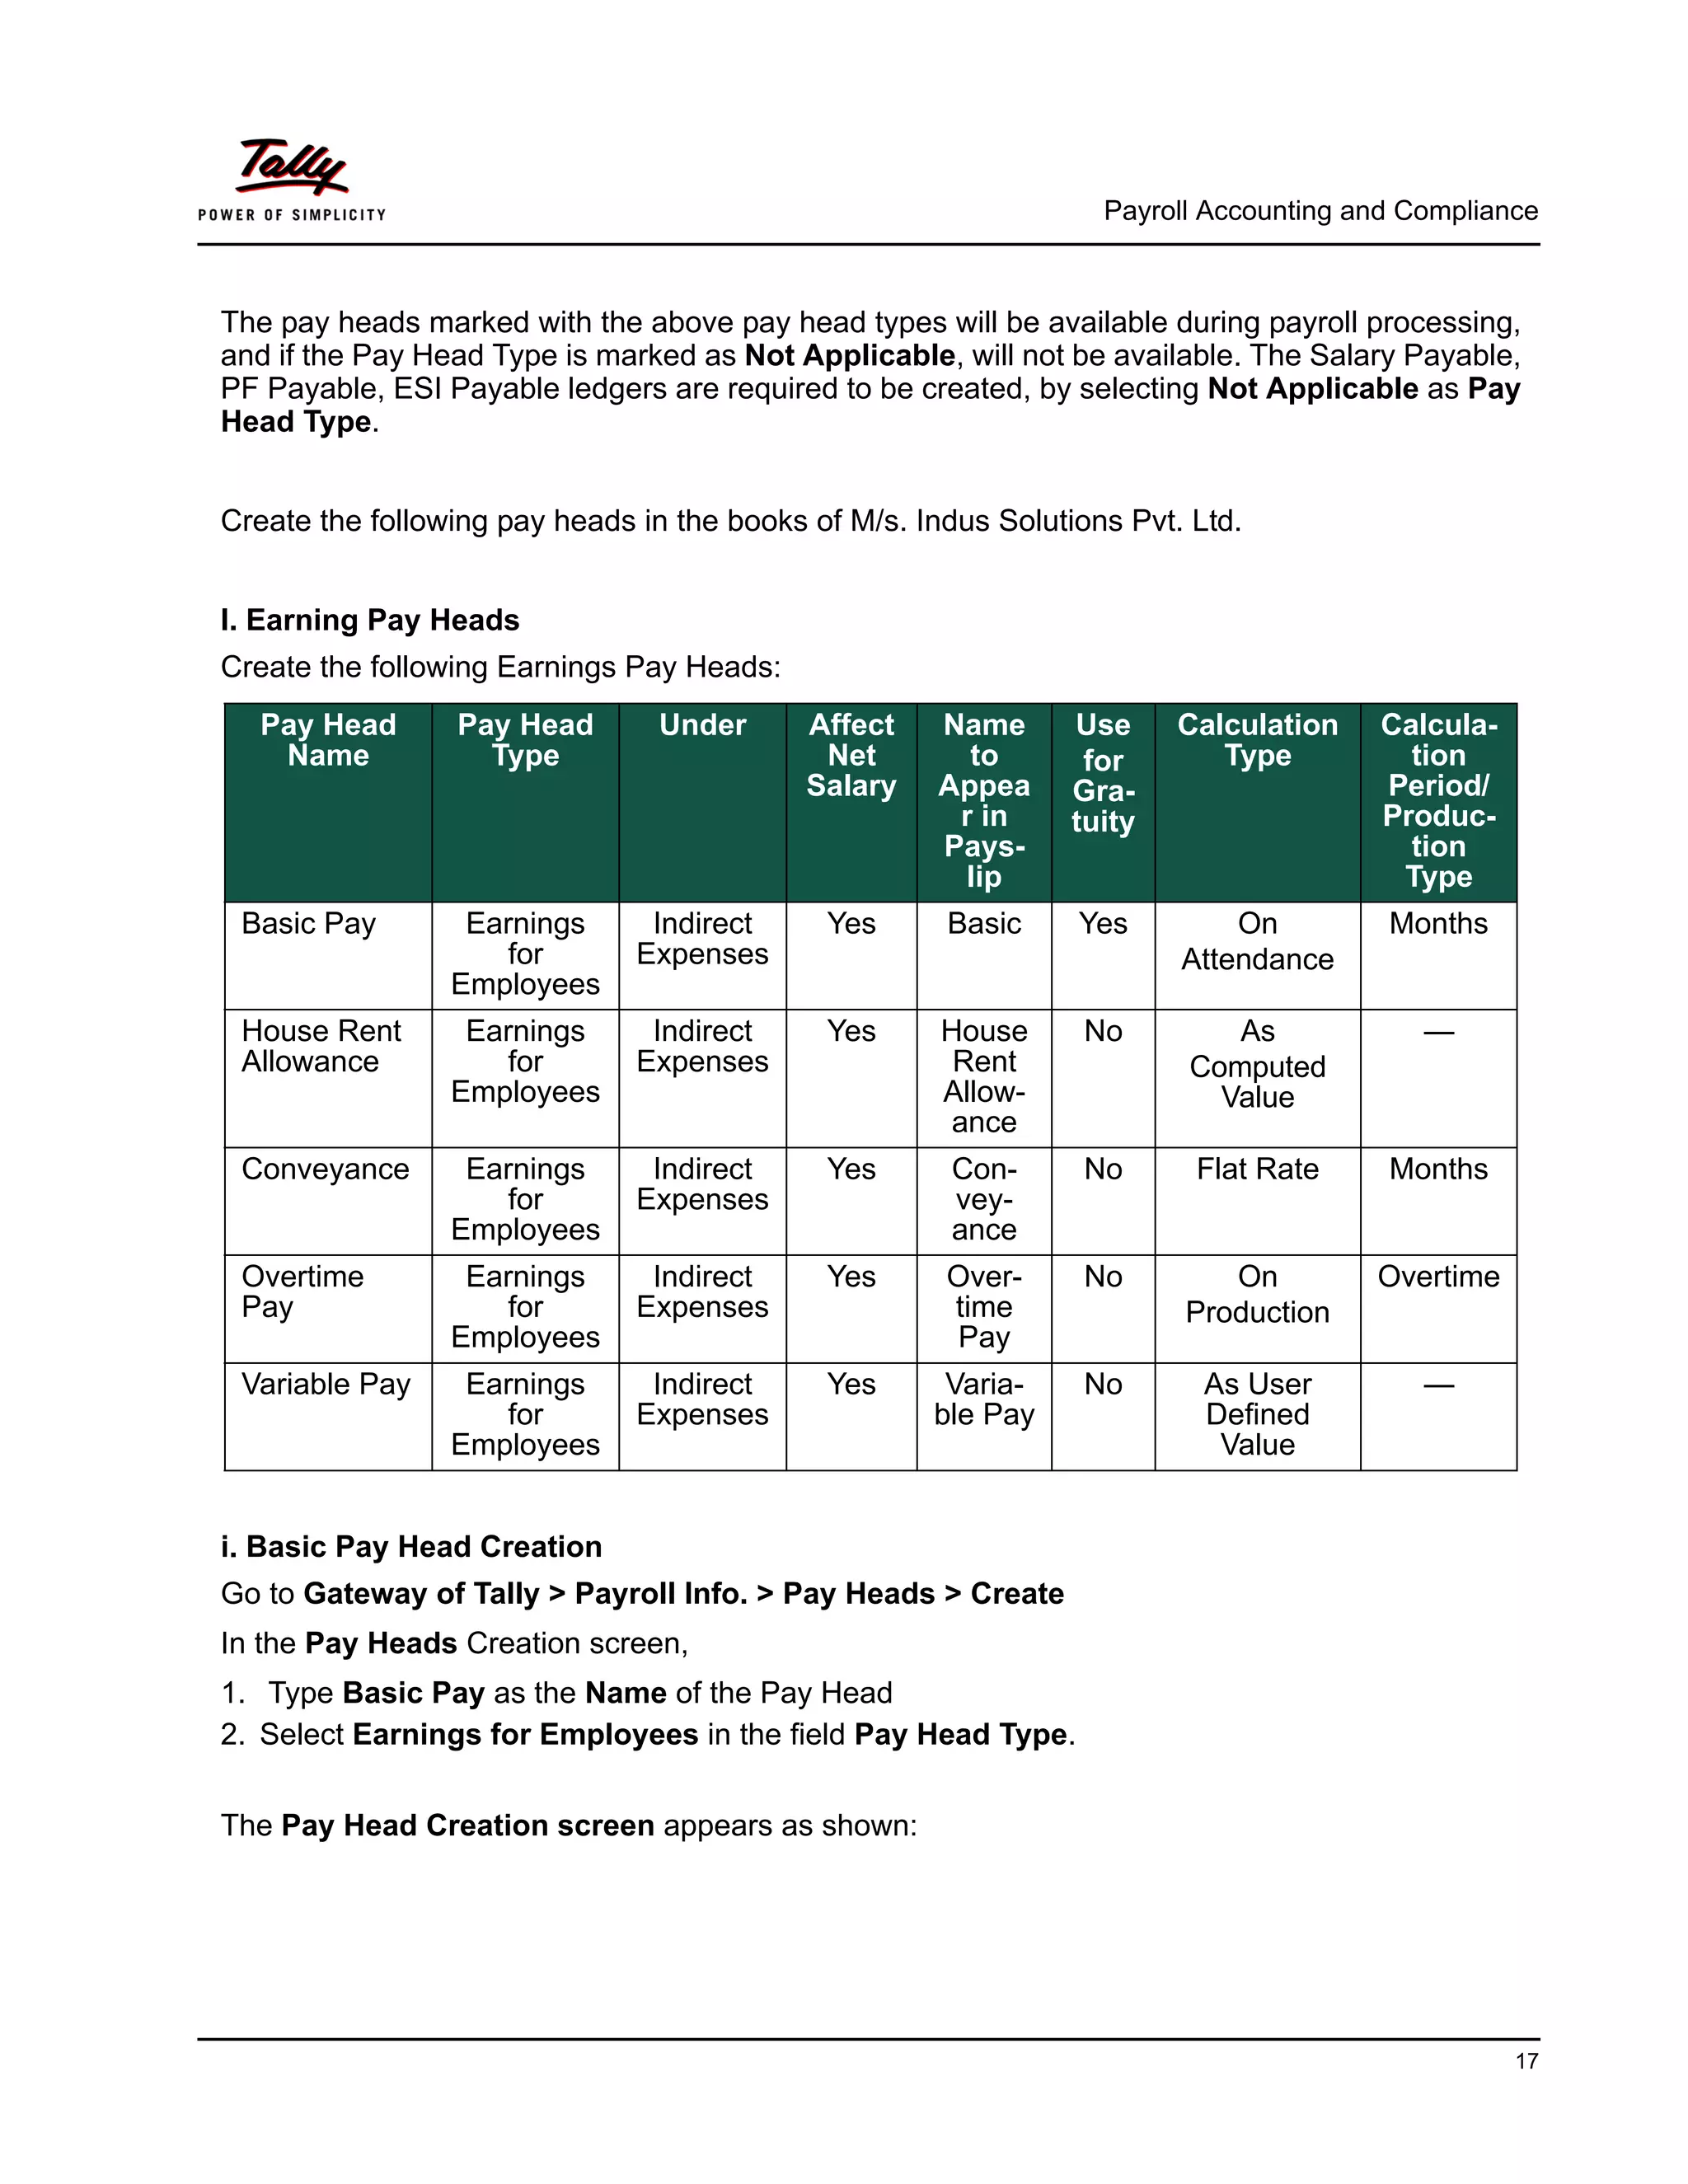
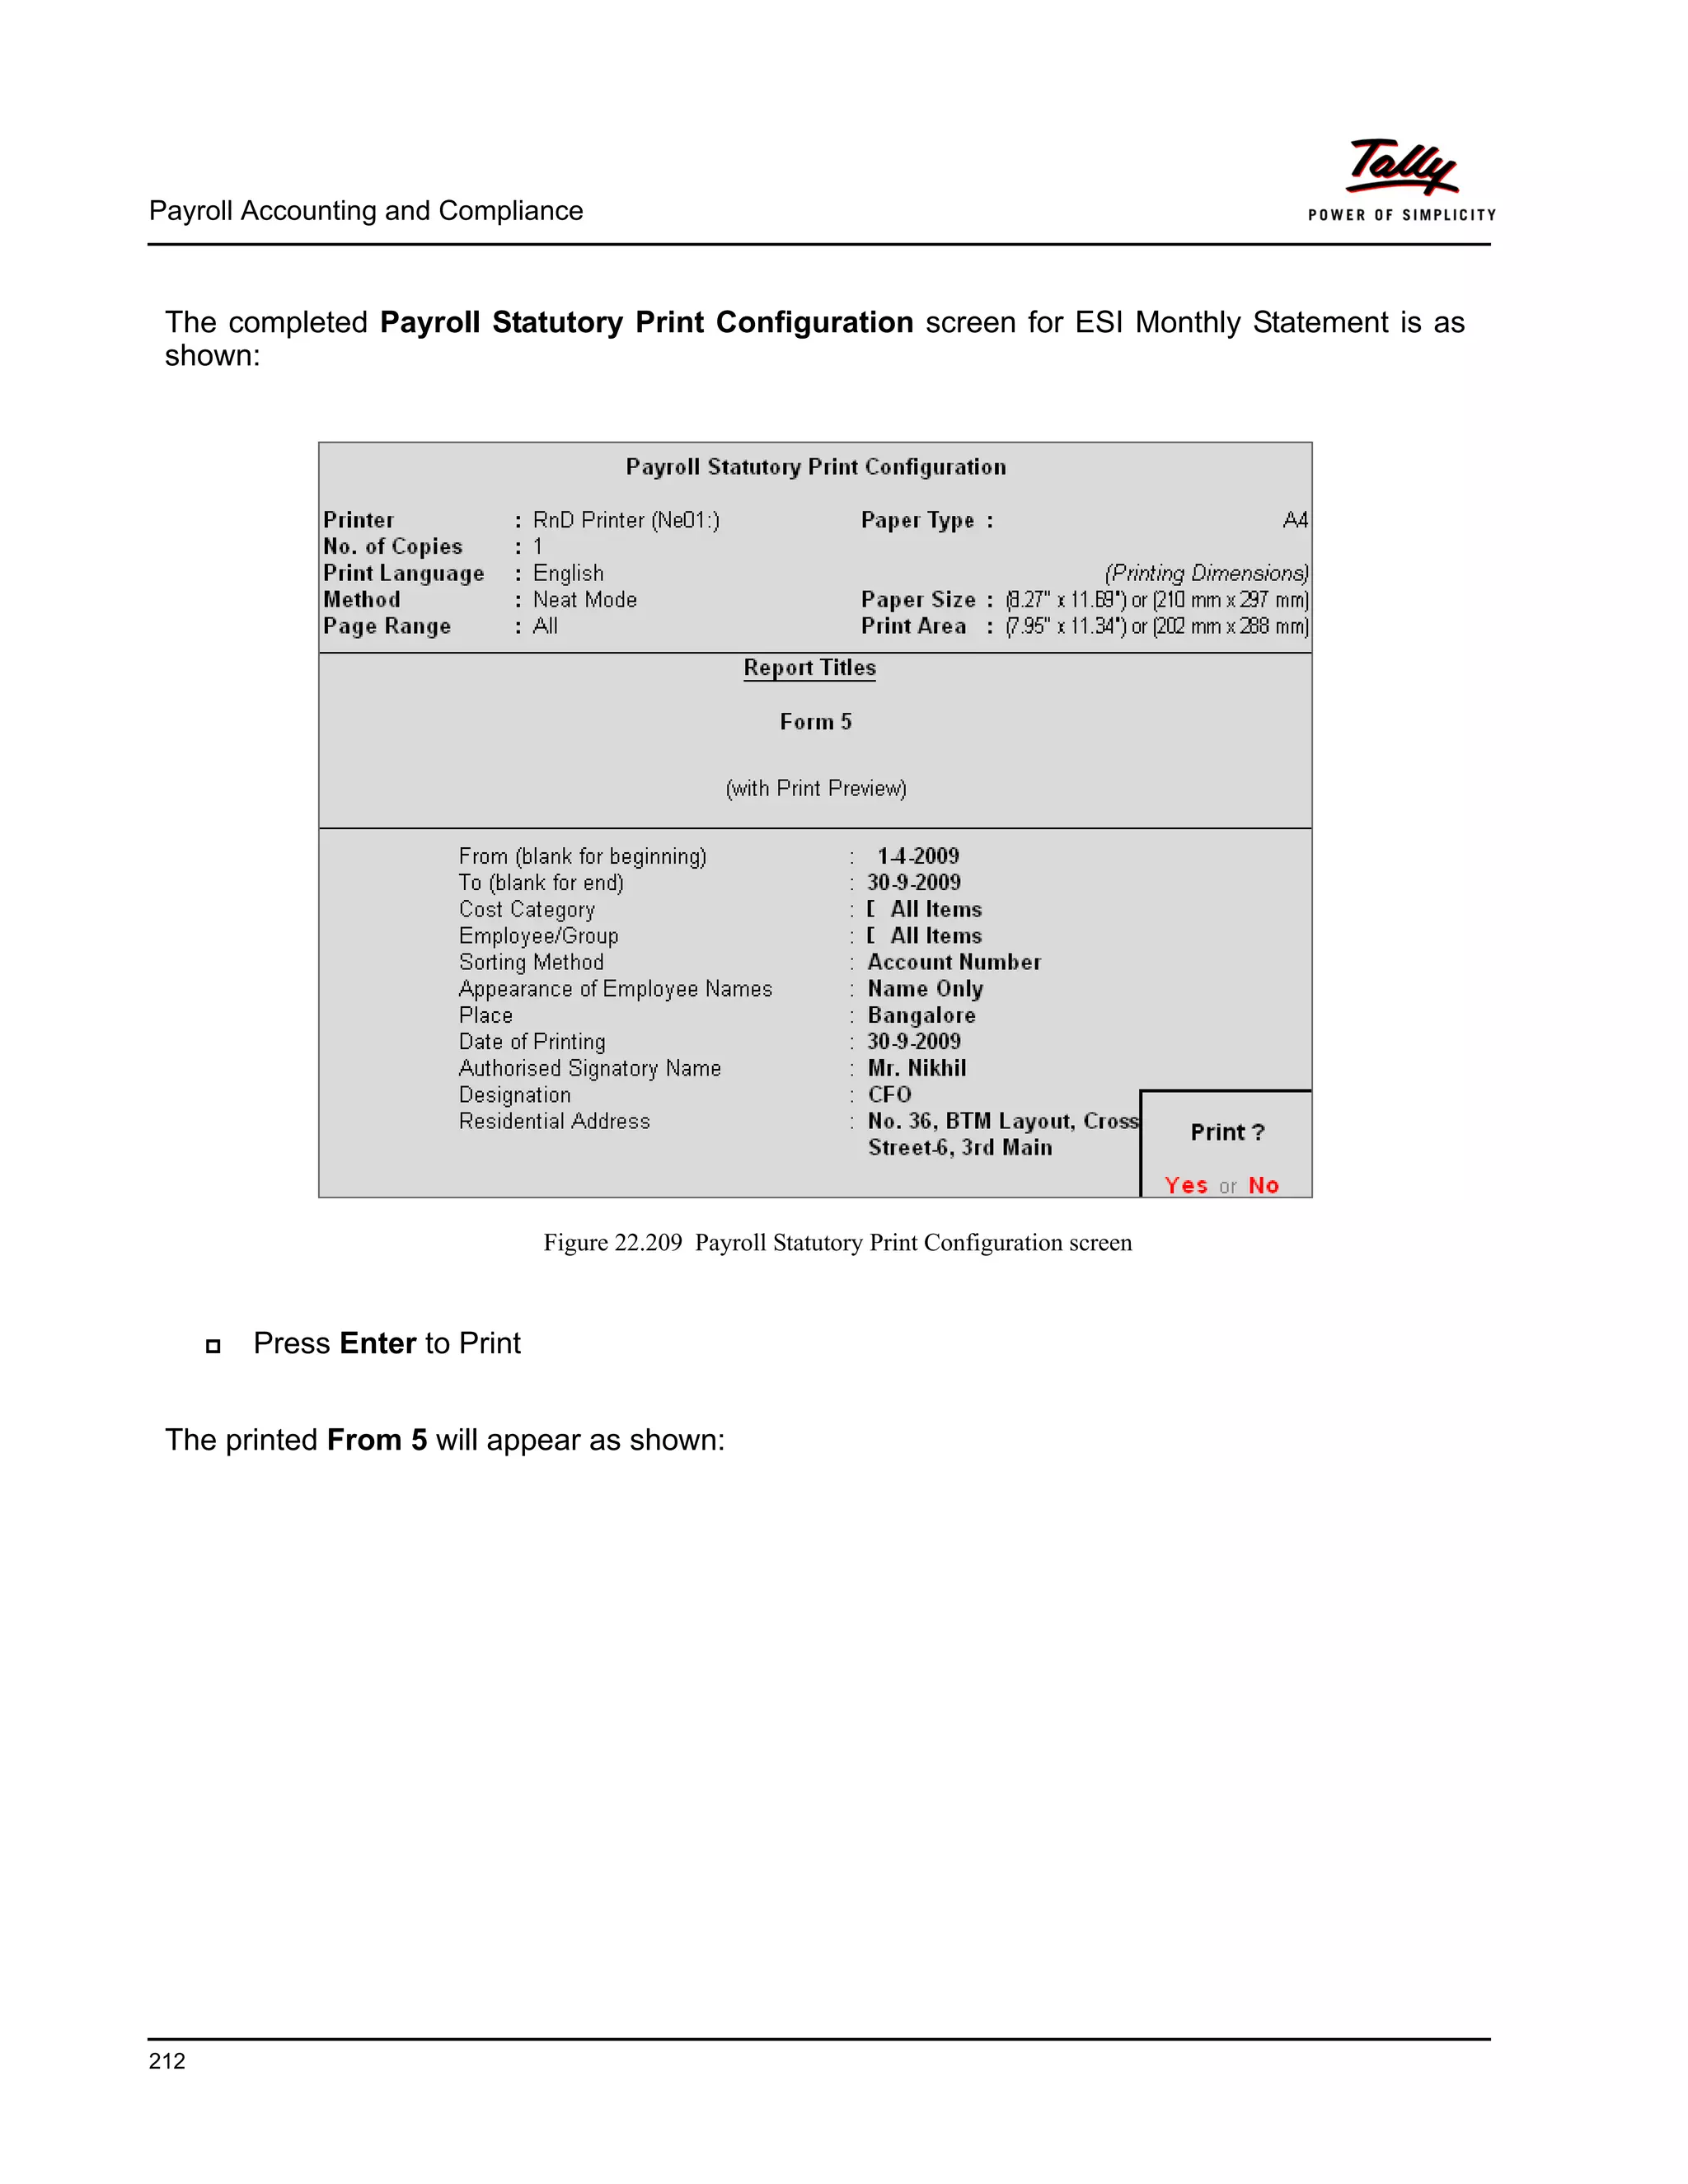
The completed Payroll Statutory Print Configuration screen is as shown.
Figure 22.191 Completed Print Configuration screen](https://image.slidesharecdn.com/payrollaccountingintallyerp9-130613034648-phpapp01/75/Payroll-accounting-in-tally-erp-9-195-2048.jpg)

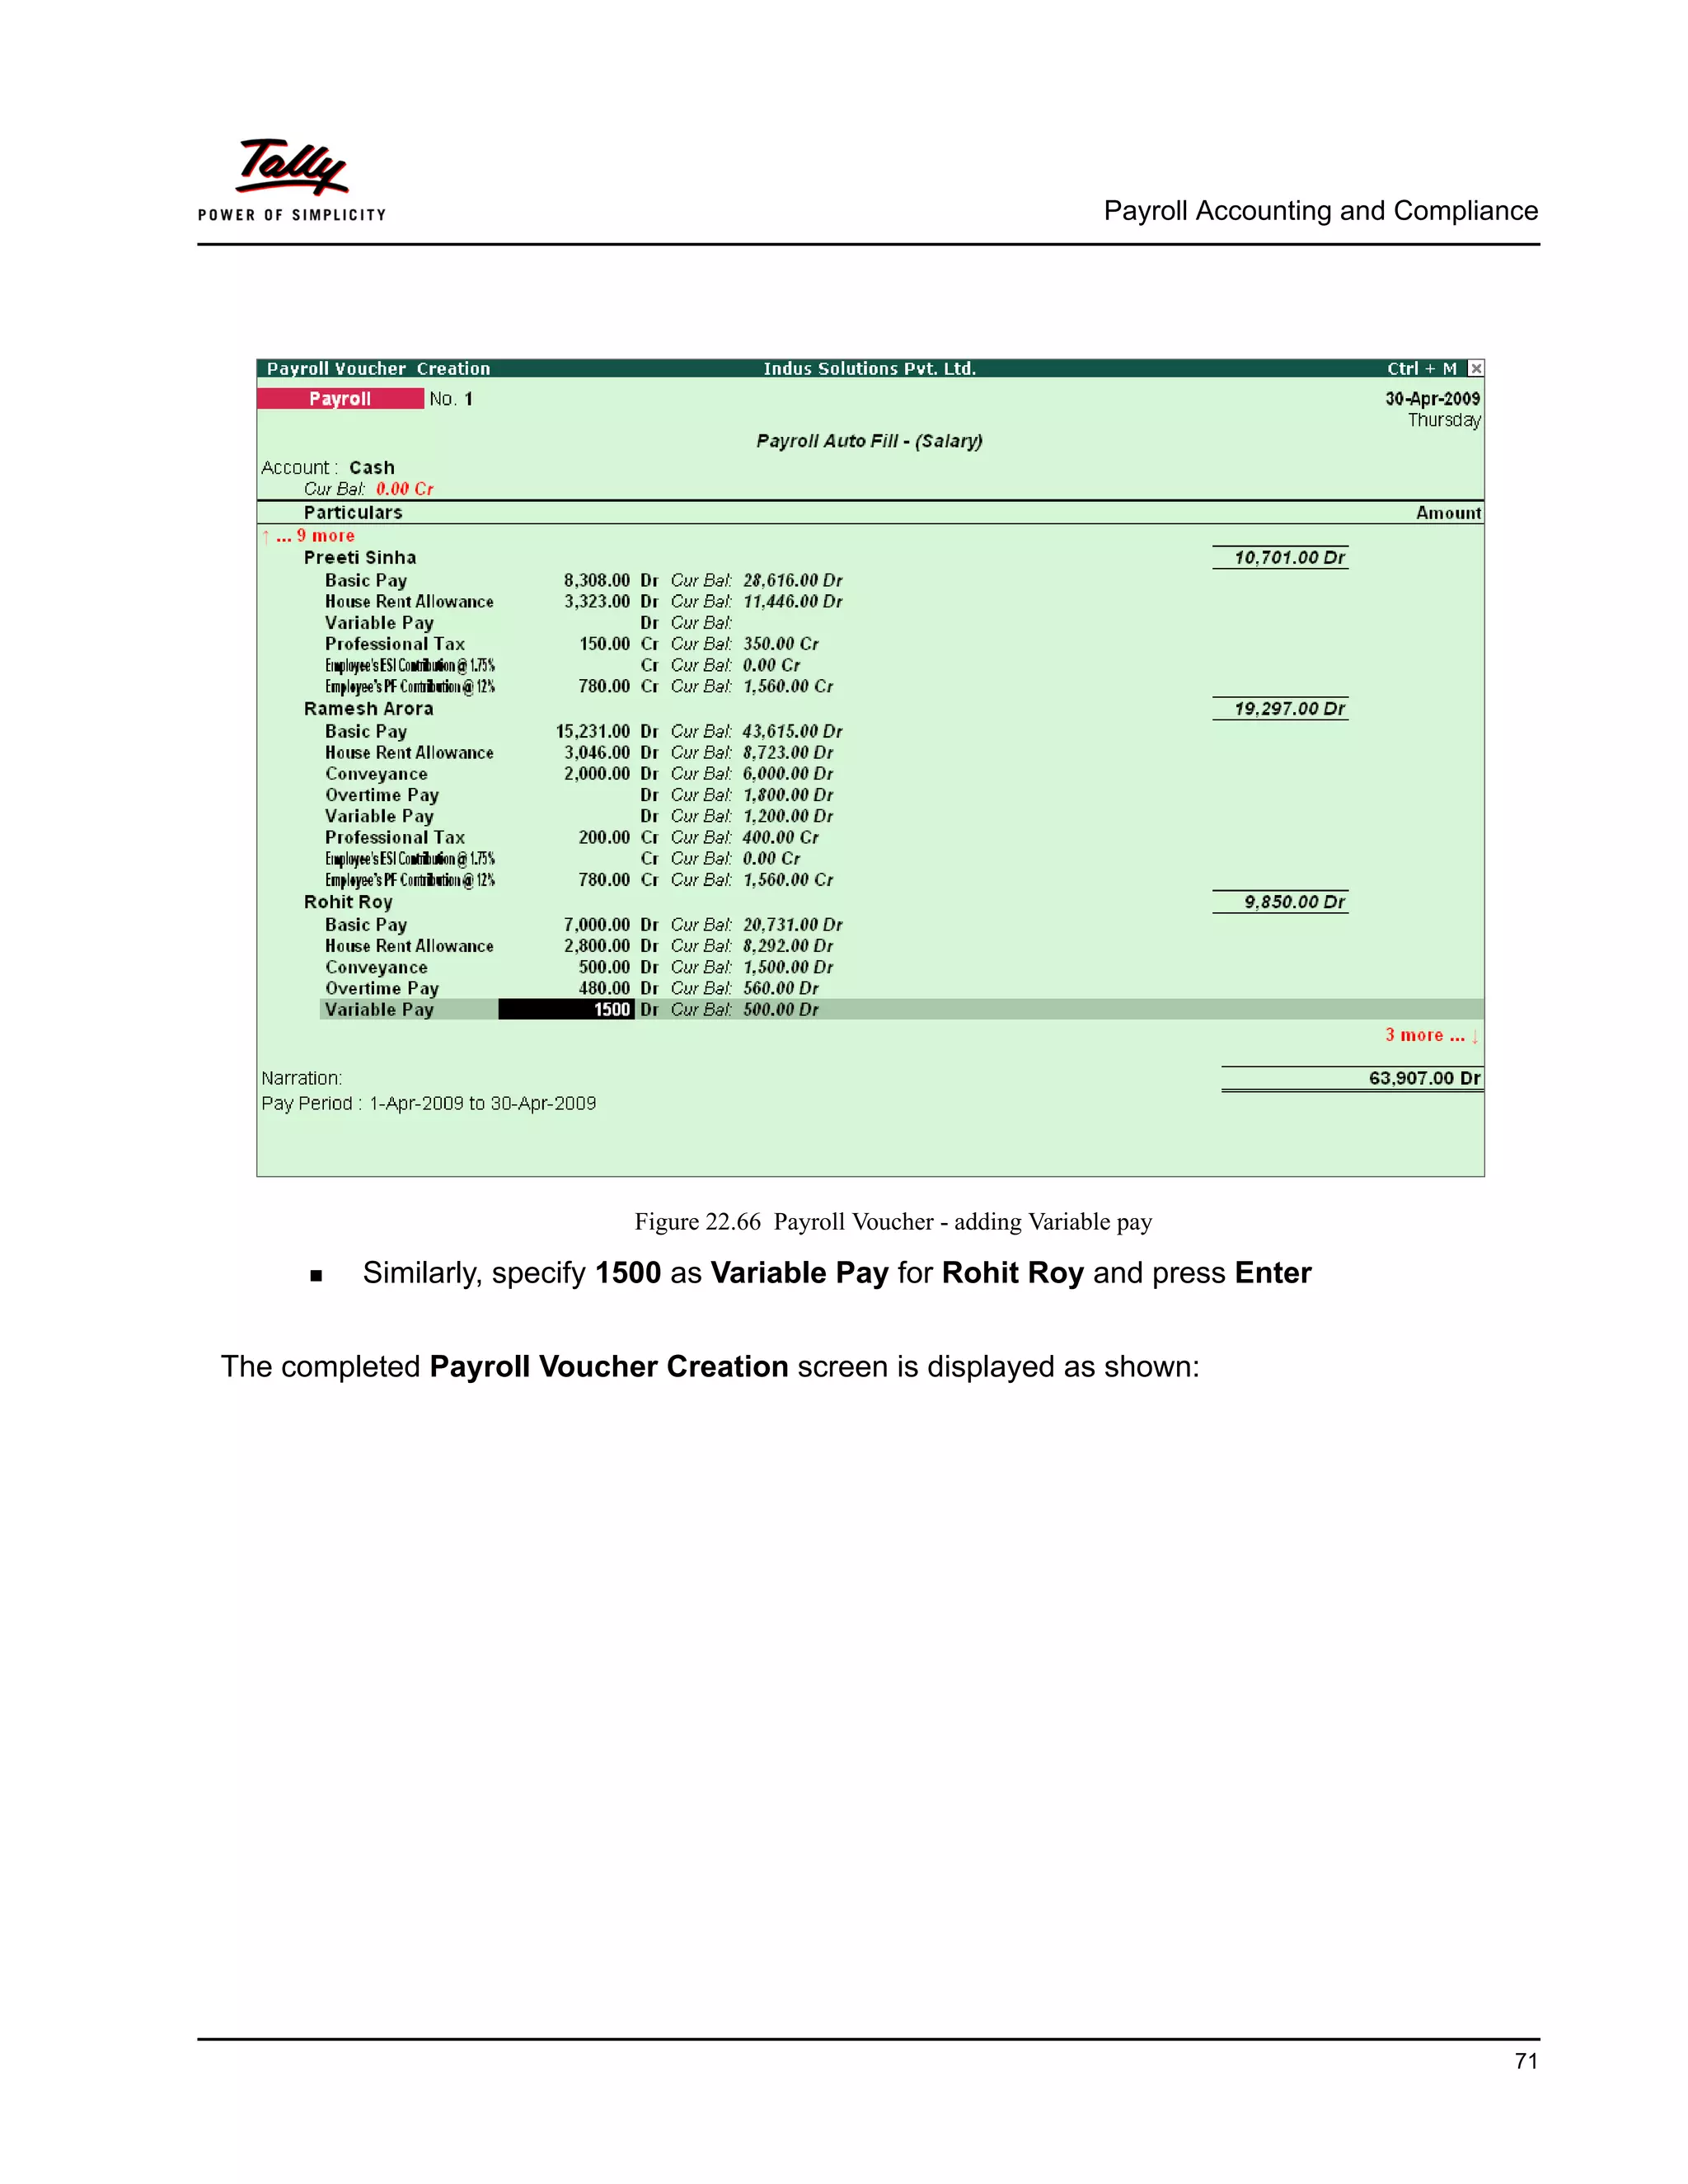
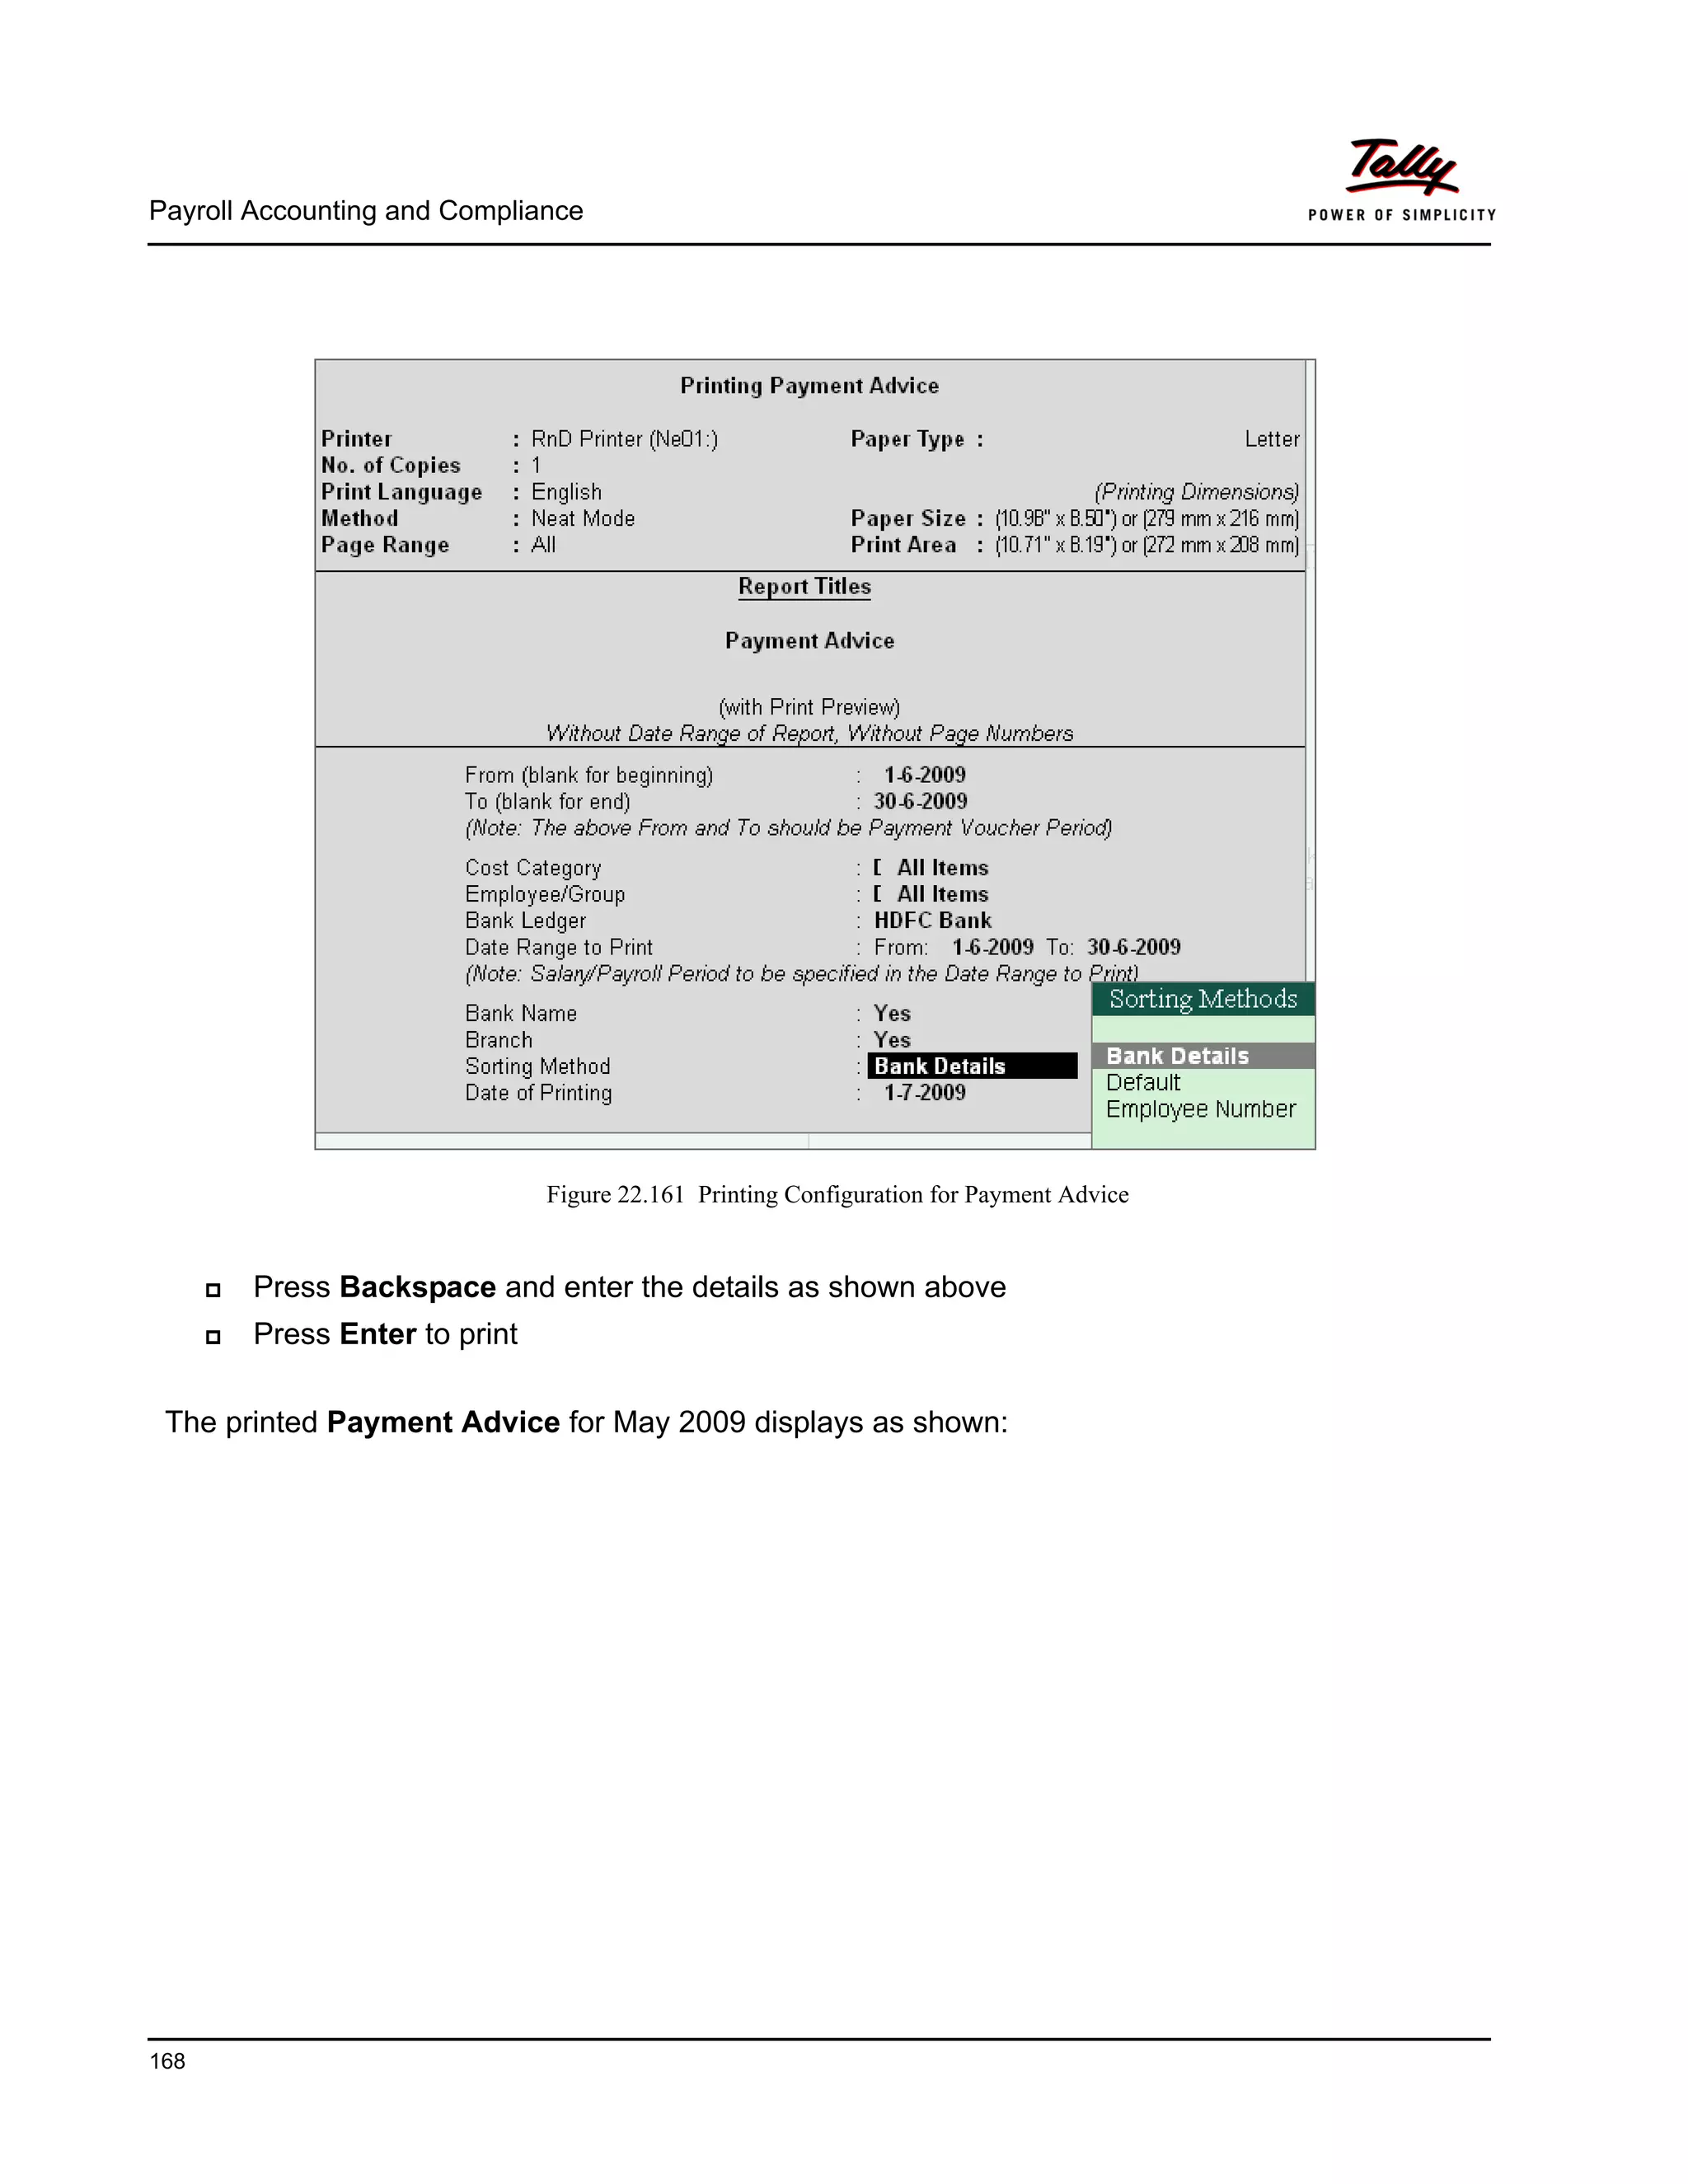
![Payroll Accounting and Compliance
198
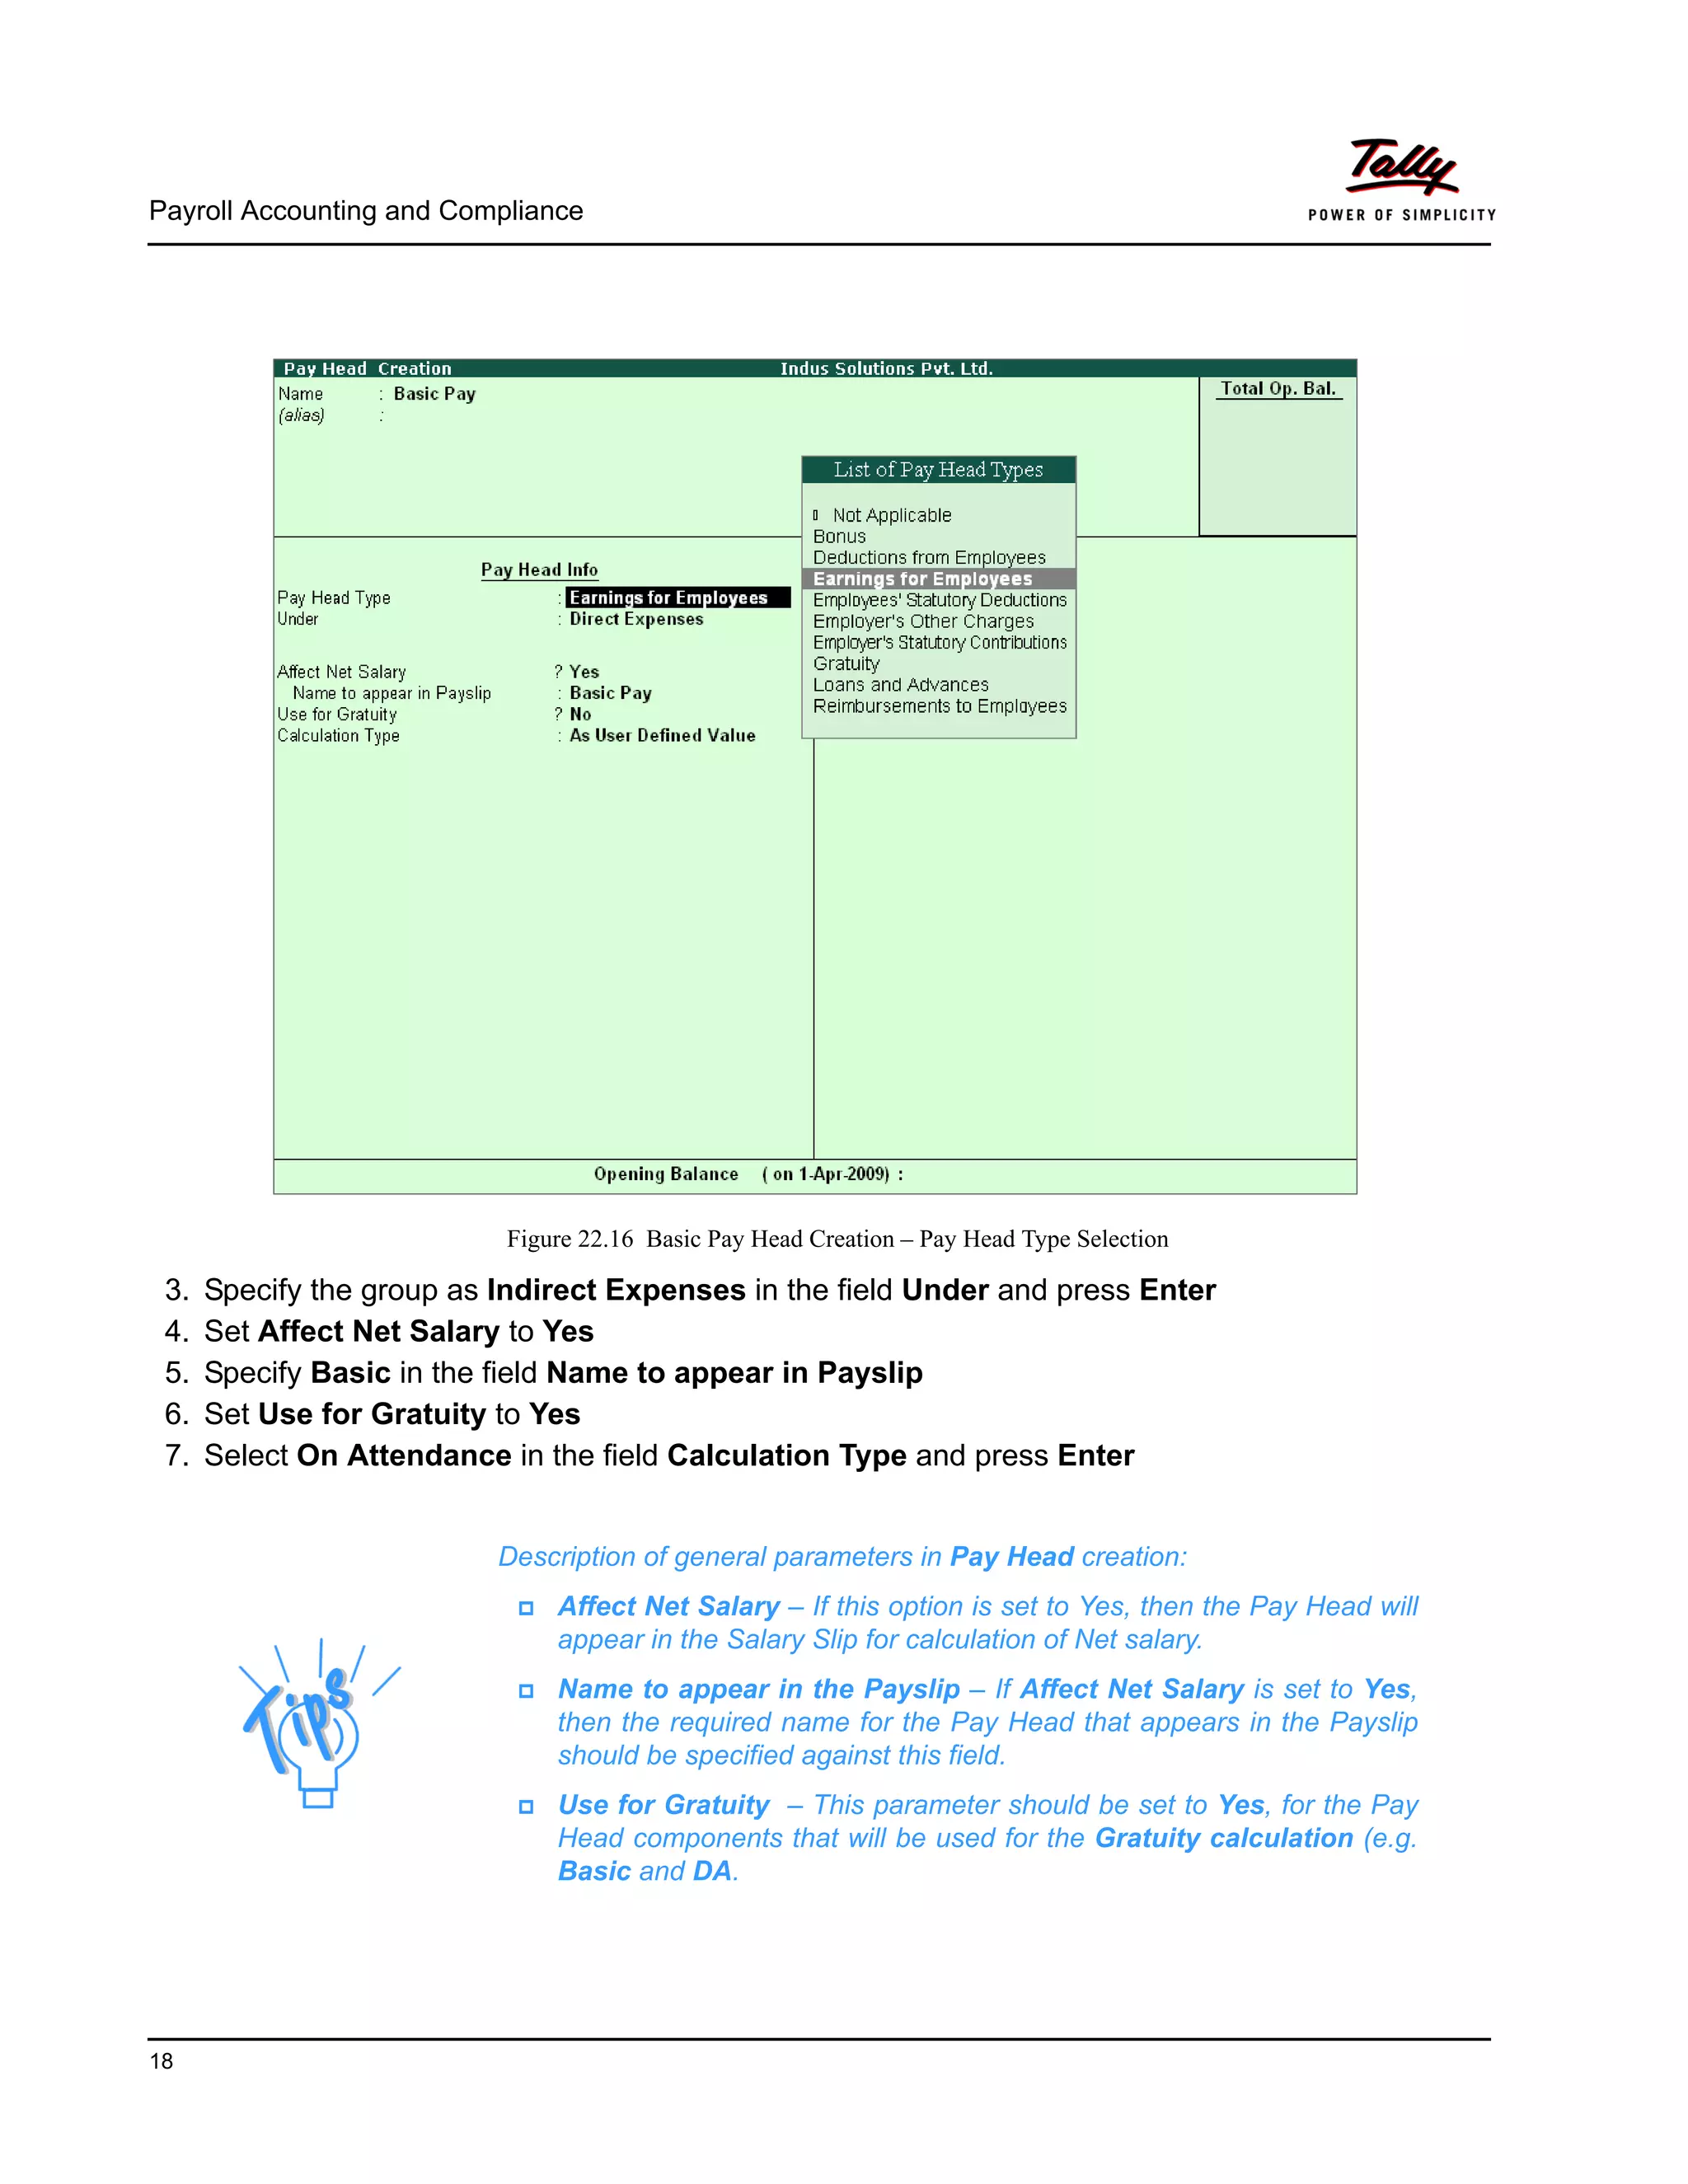
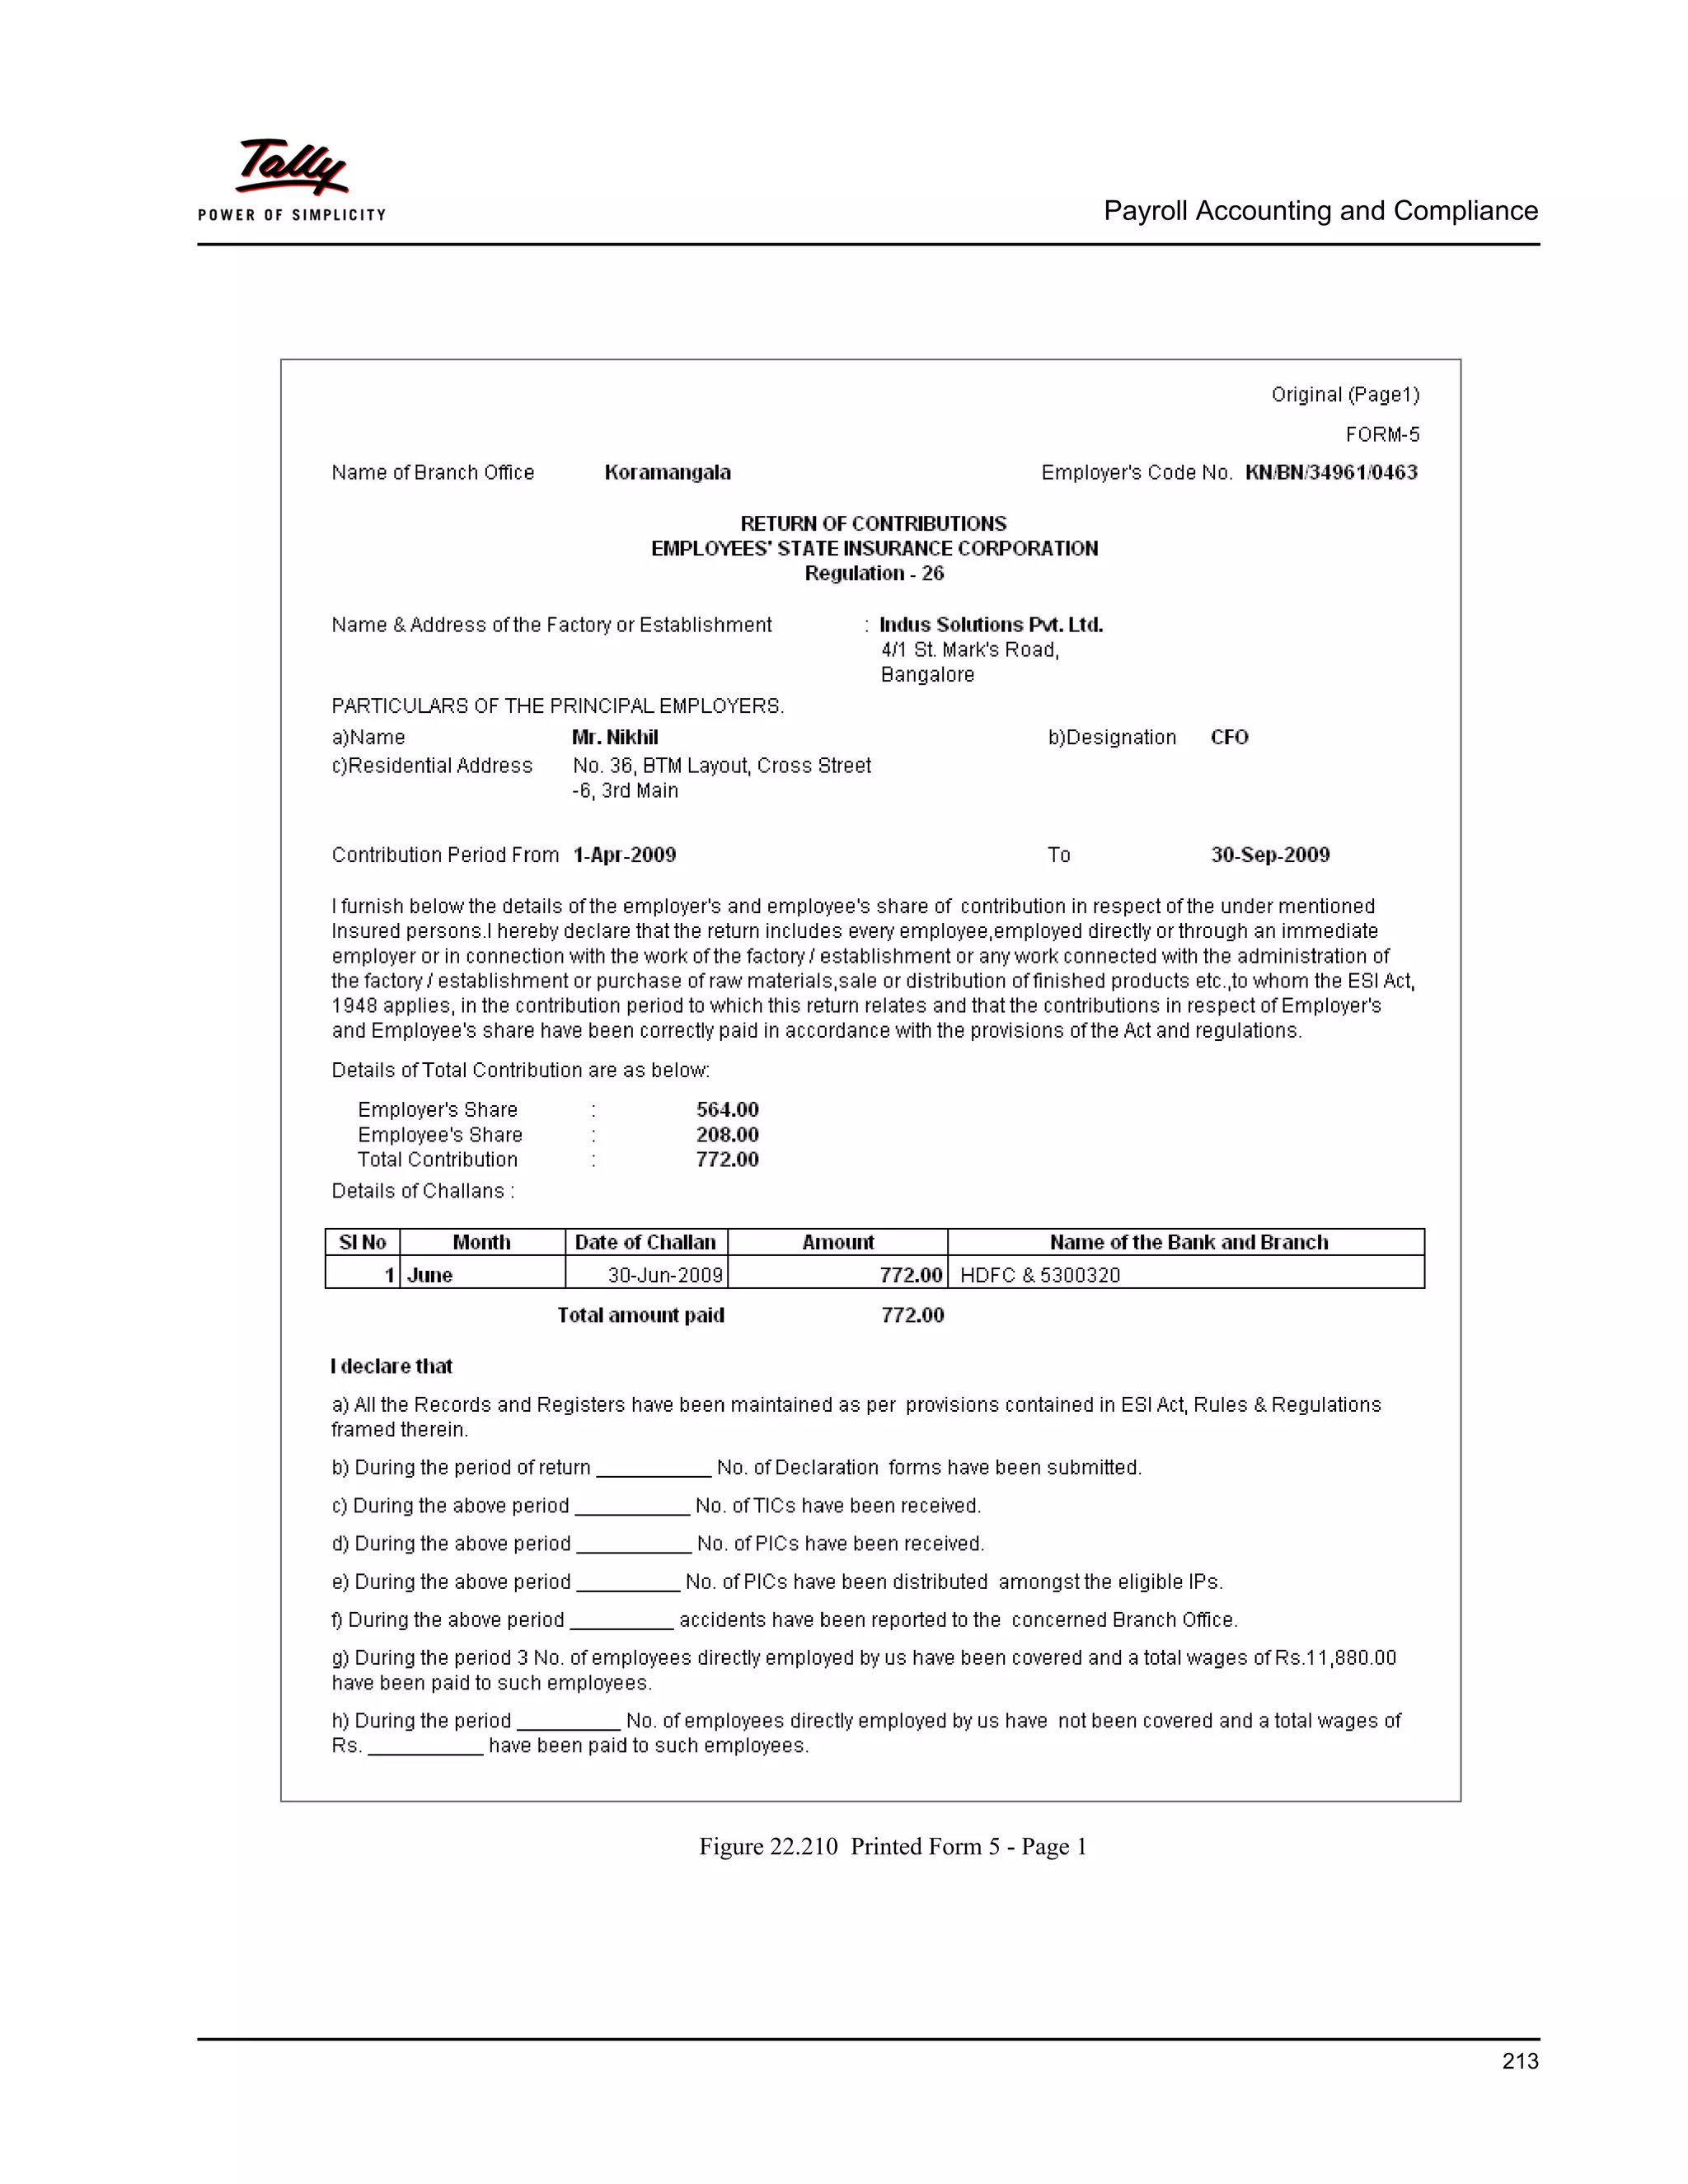
Figure 22.194 PF Monthly Statement
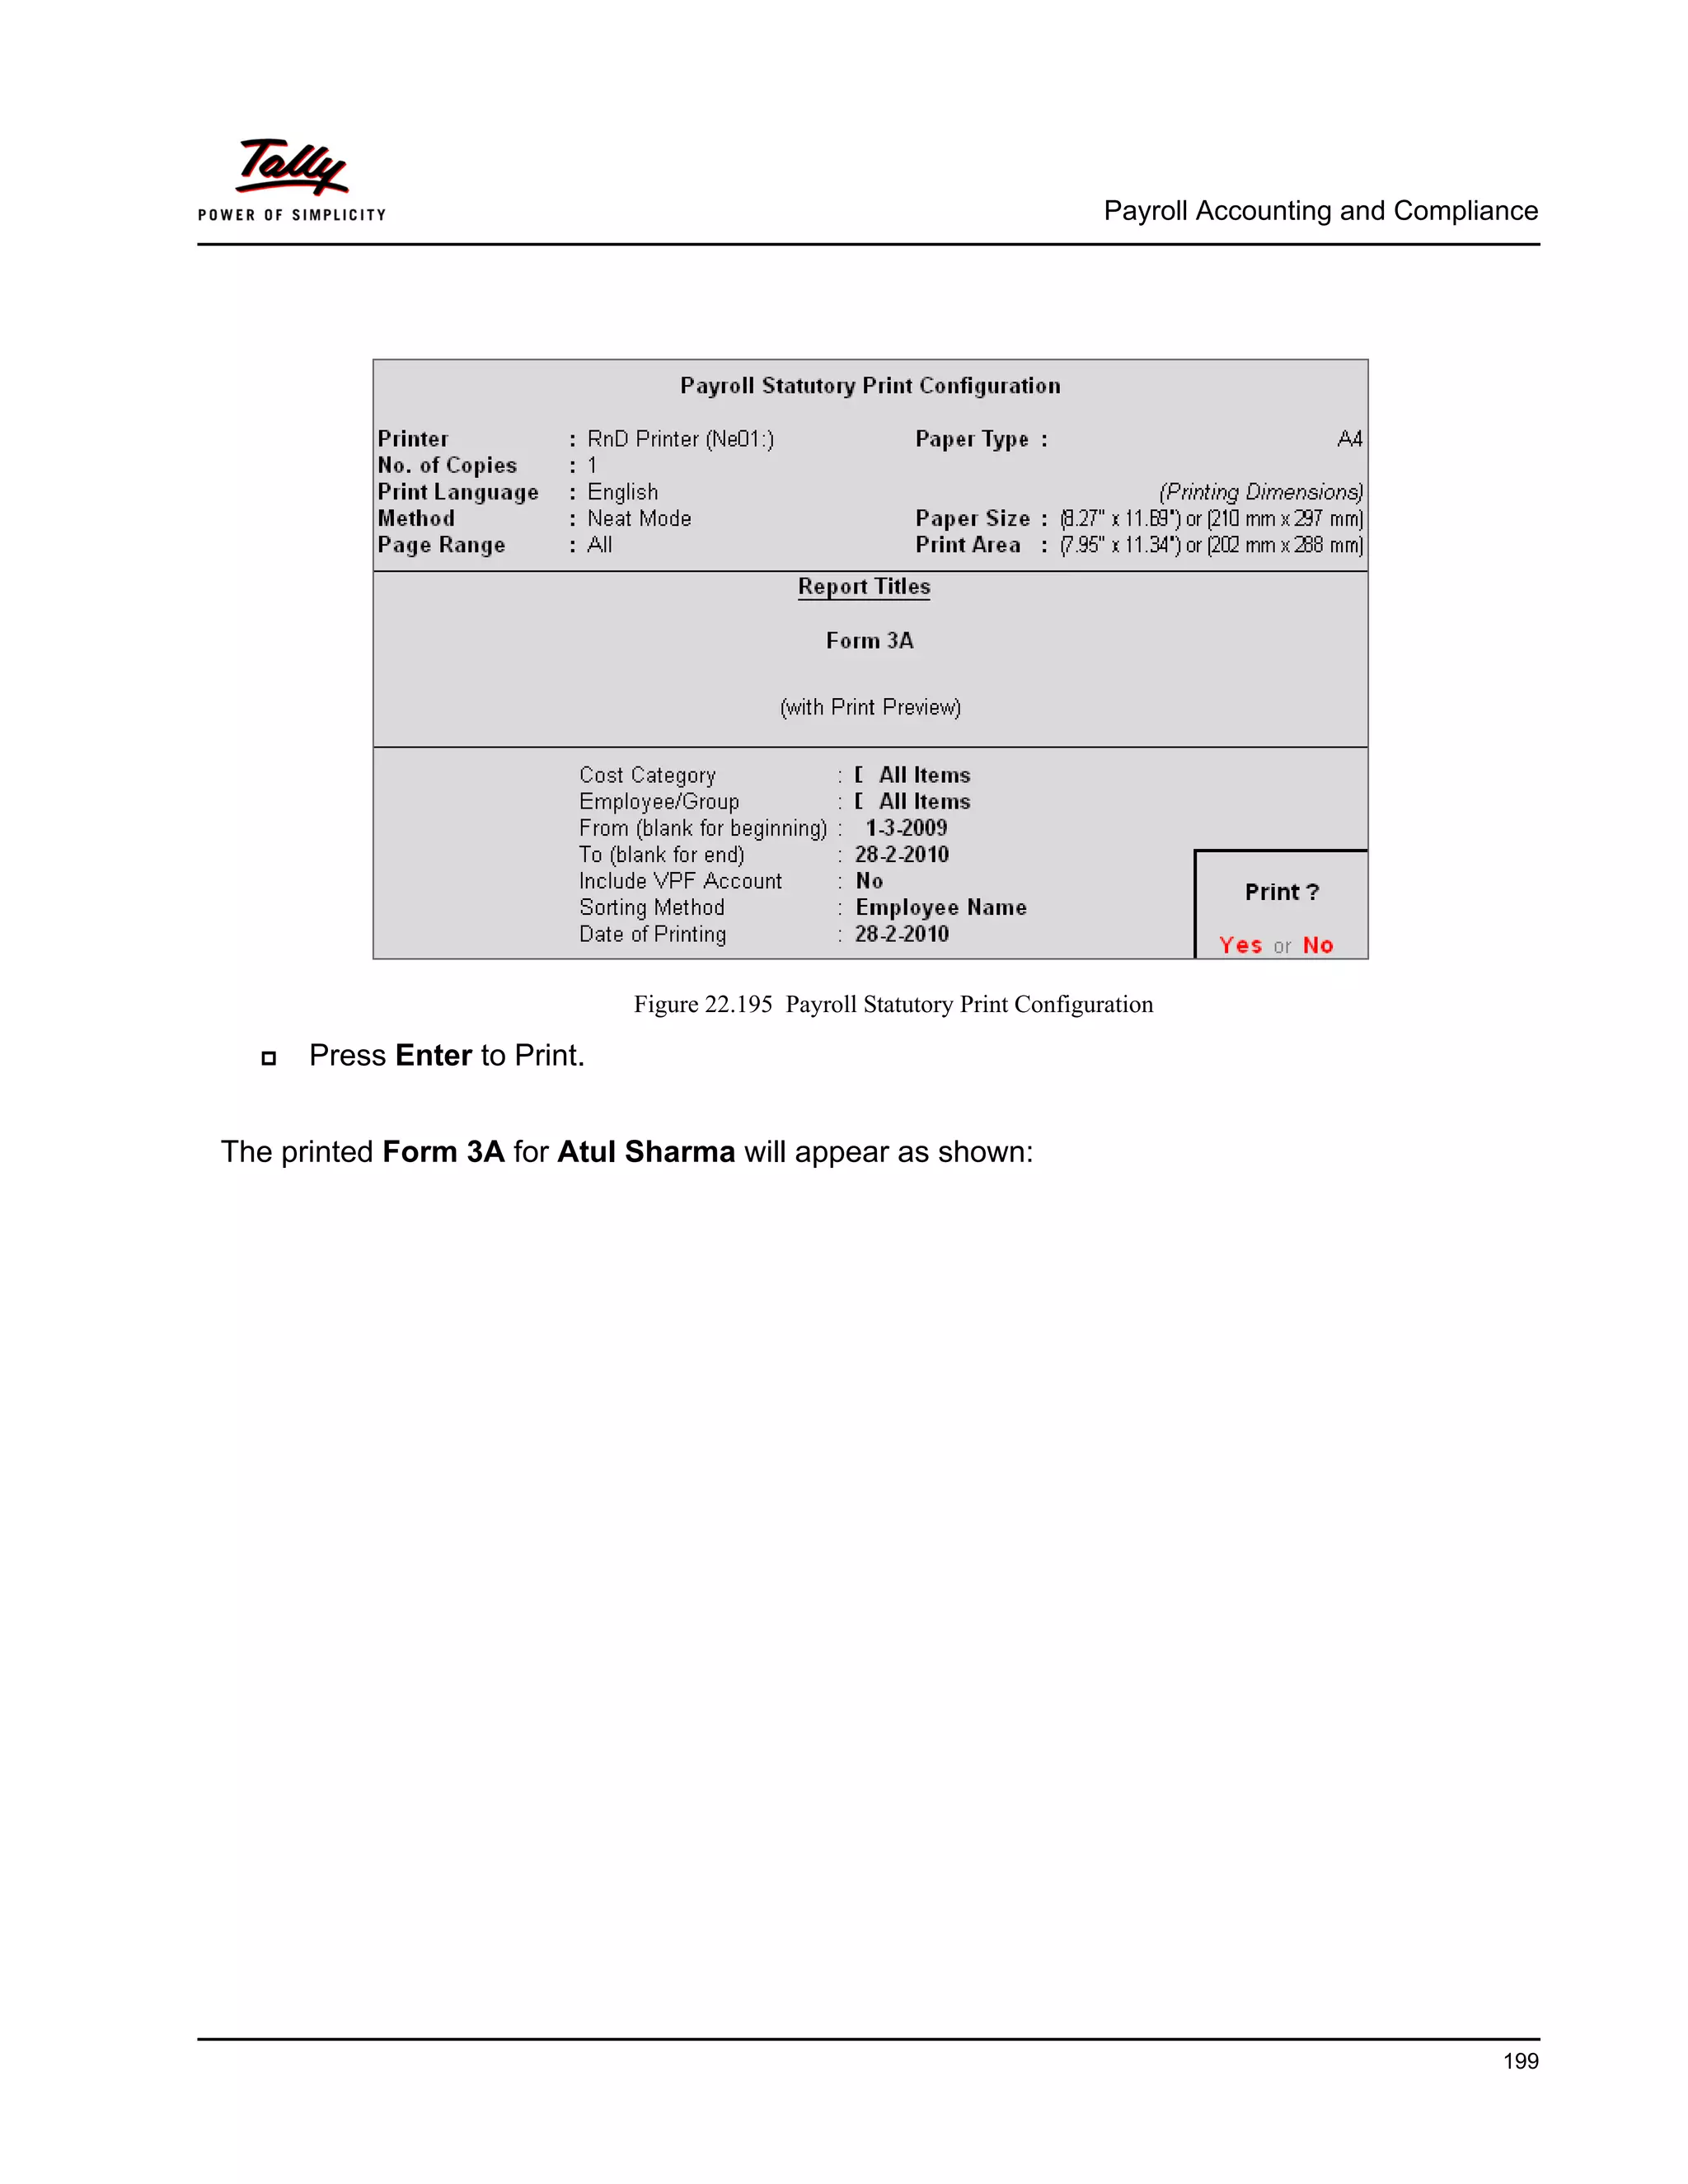
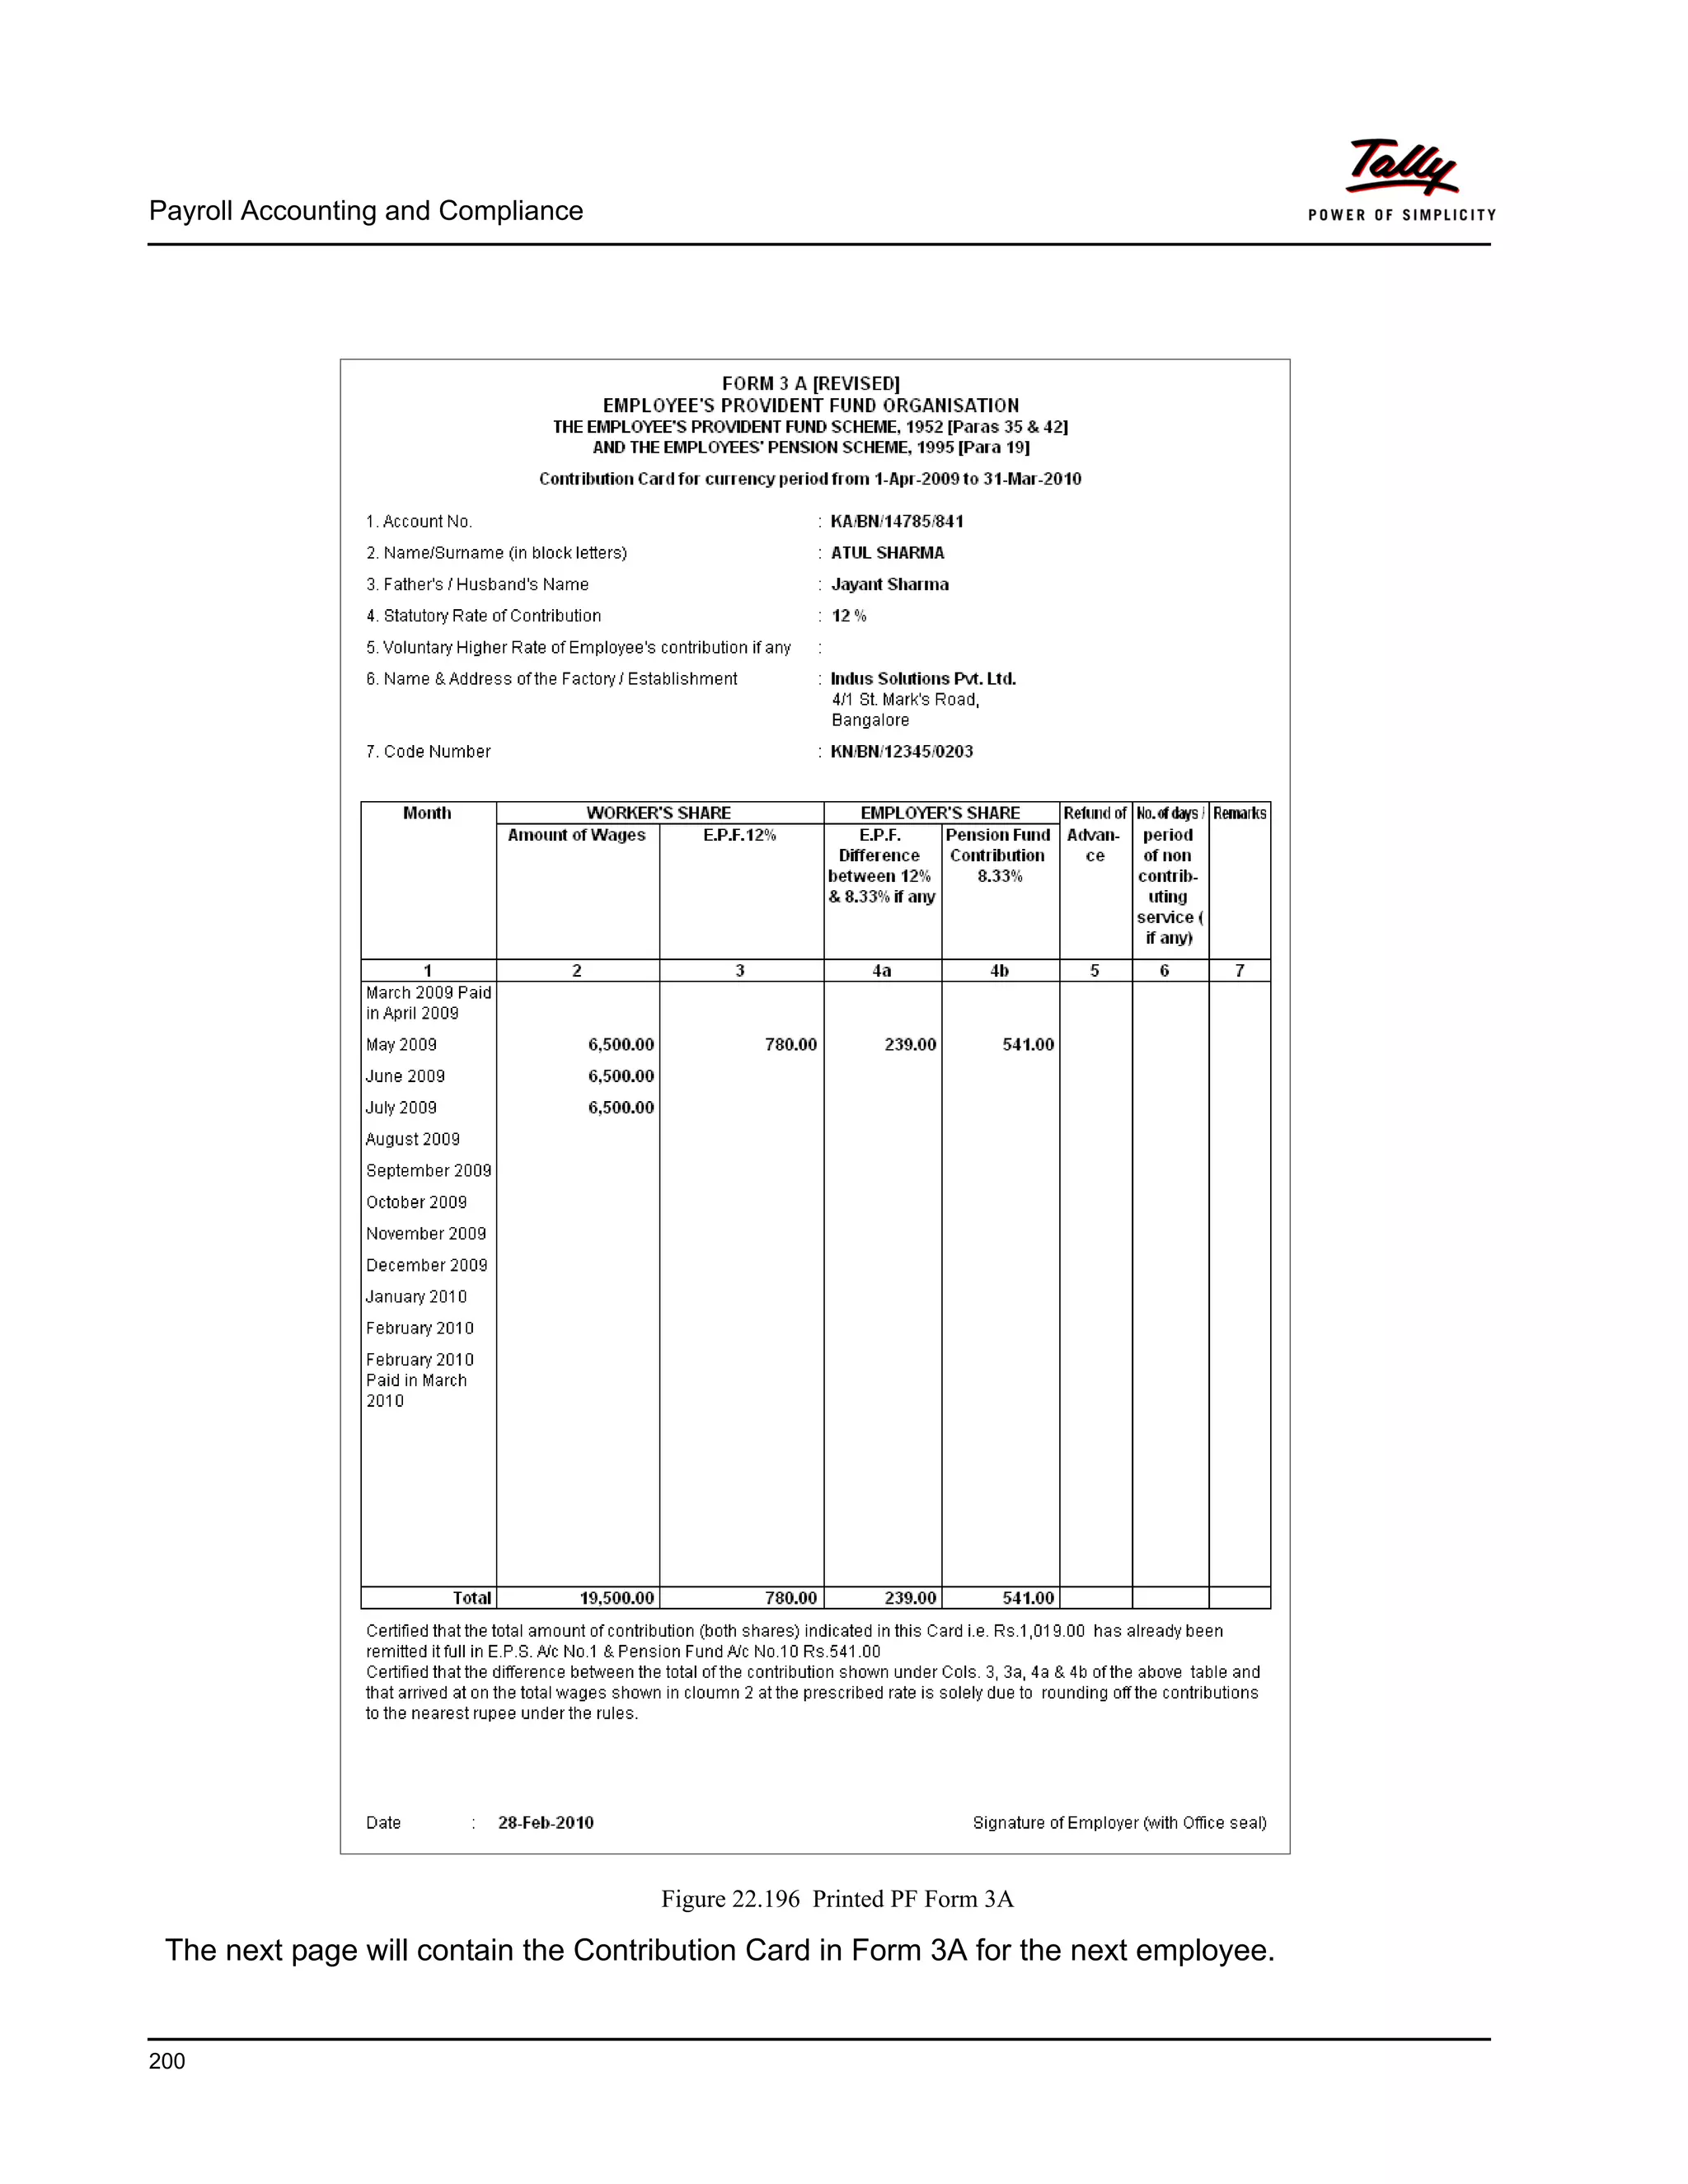
vi. Form 3A
As per the Employees' Provident Funds Scheme,1952 [para 35 & 42] and the Employees'
Pension Scheme 1995 (Para 19), a Form (Member’s Annual Contribution Card) showing month
wise recoveries towards EPF and Pension Fund in respect of a member for one financial year is
required to be furnished by the employer before 30th April of the following year.
Form 3A is a annual contribution card to be furnished for each employee in separate sheet to
EPFO. To print Form 3A, follow the steps given below:
Go to Gateway of Tally > Display > Payroll Reports > Statutory Reports > Provident Fund >
Form 3A
In the Payroll Statutory Print Configuration screen
Select Primary Cost Category in the Cost Category field
Select All Items in the Employee/Group field
Specify 01-03-2009 and 28-02-2010 in the From and To fields respectively
Set Include VPF Account to No
Select the Employee Name in the Sorting Method field
Specify 28-02-2010 in the Date of Printing field
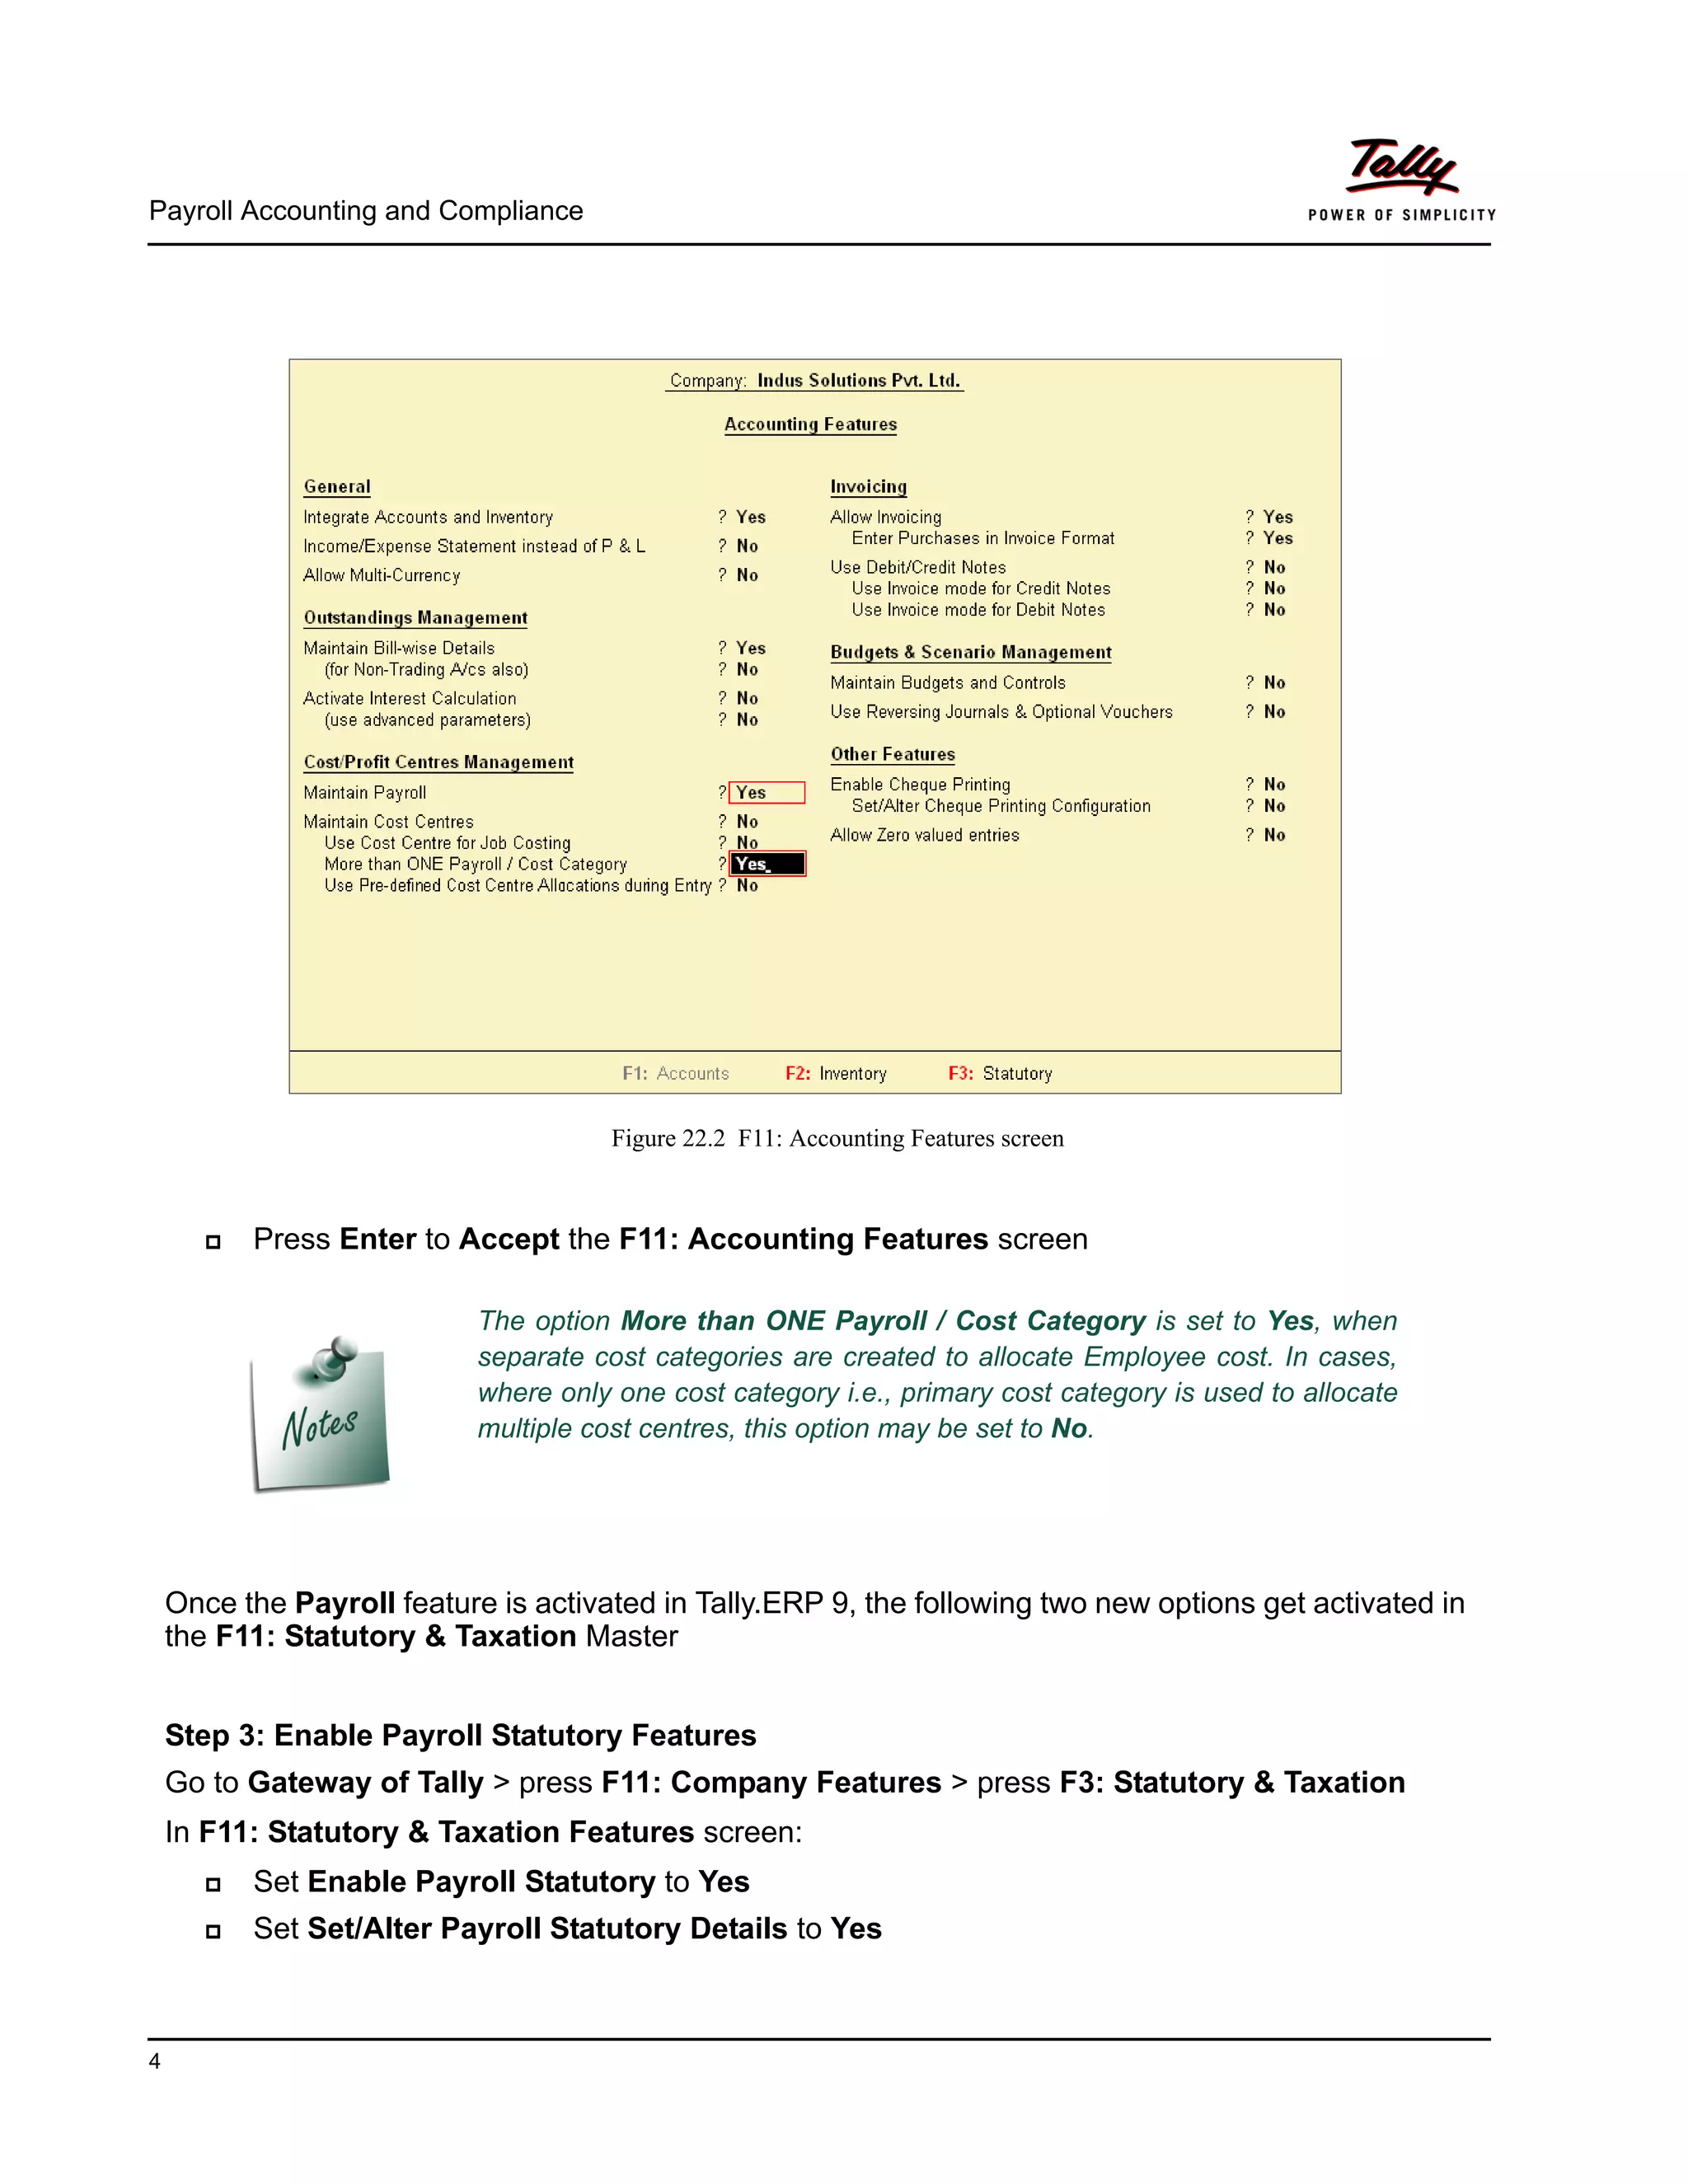
The completed Payroll Statutory Print Configuration screen will appear as shown:](https://image.slidesharecdn.com/payrollaccountingintallyerp9-130613034648-phpapp01/75/Payroll-accounting-in-tally-erp-9-198-2048.jpg)
![Payroll Accounting and Compliance
201
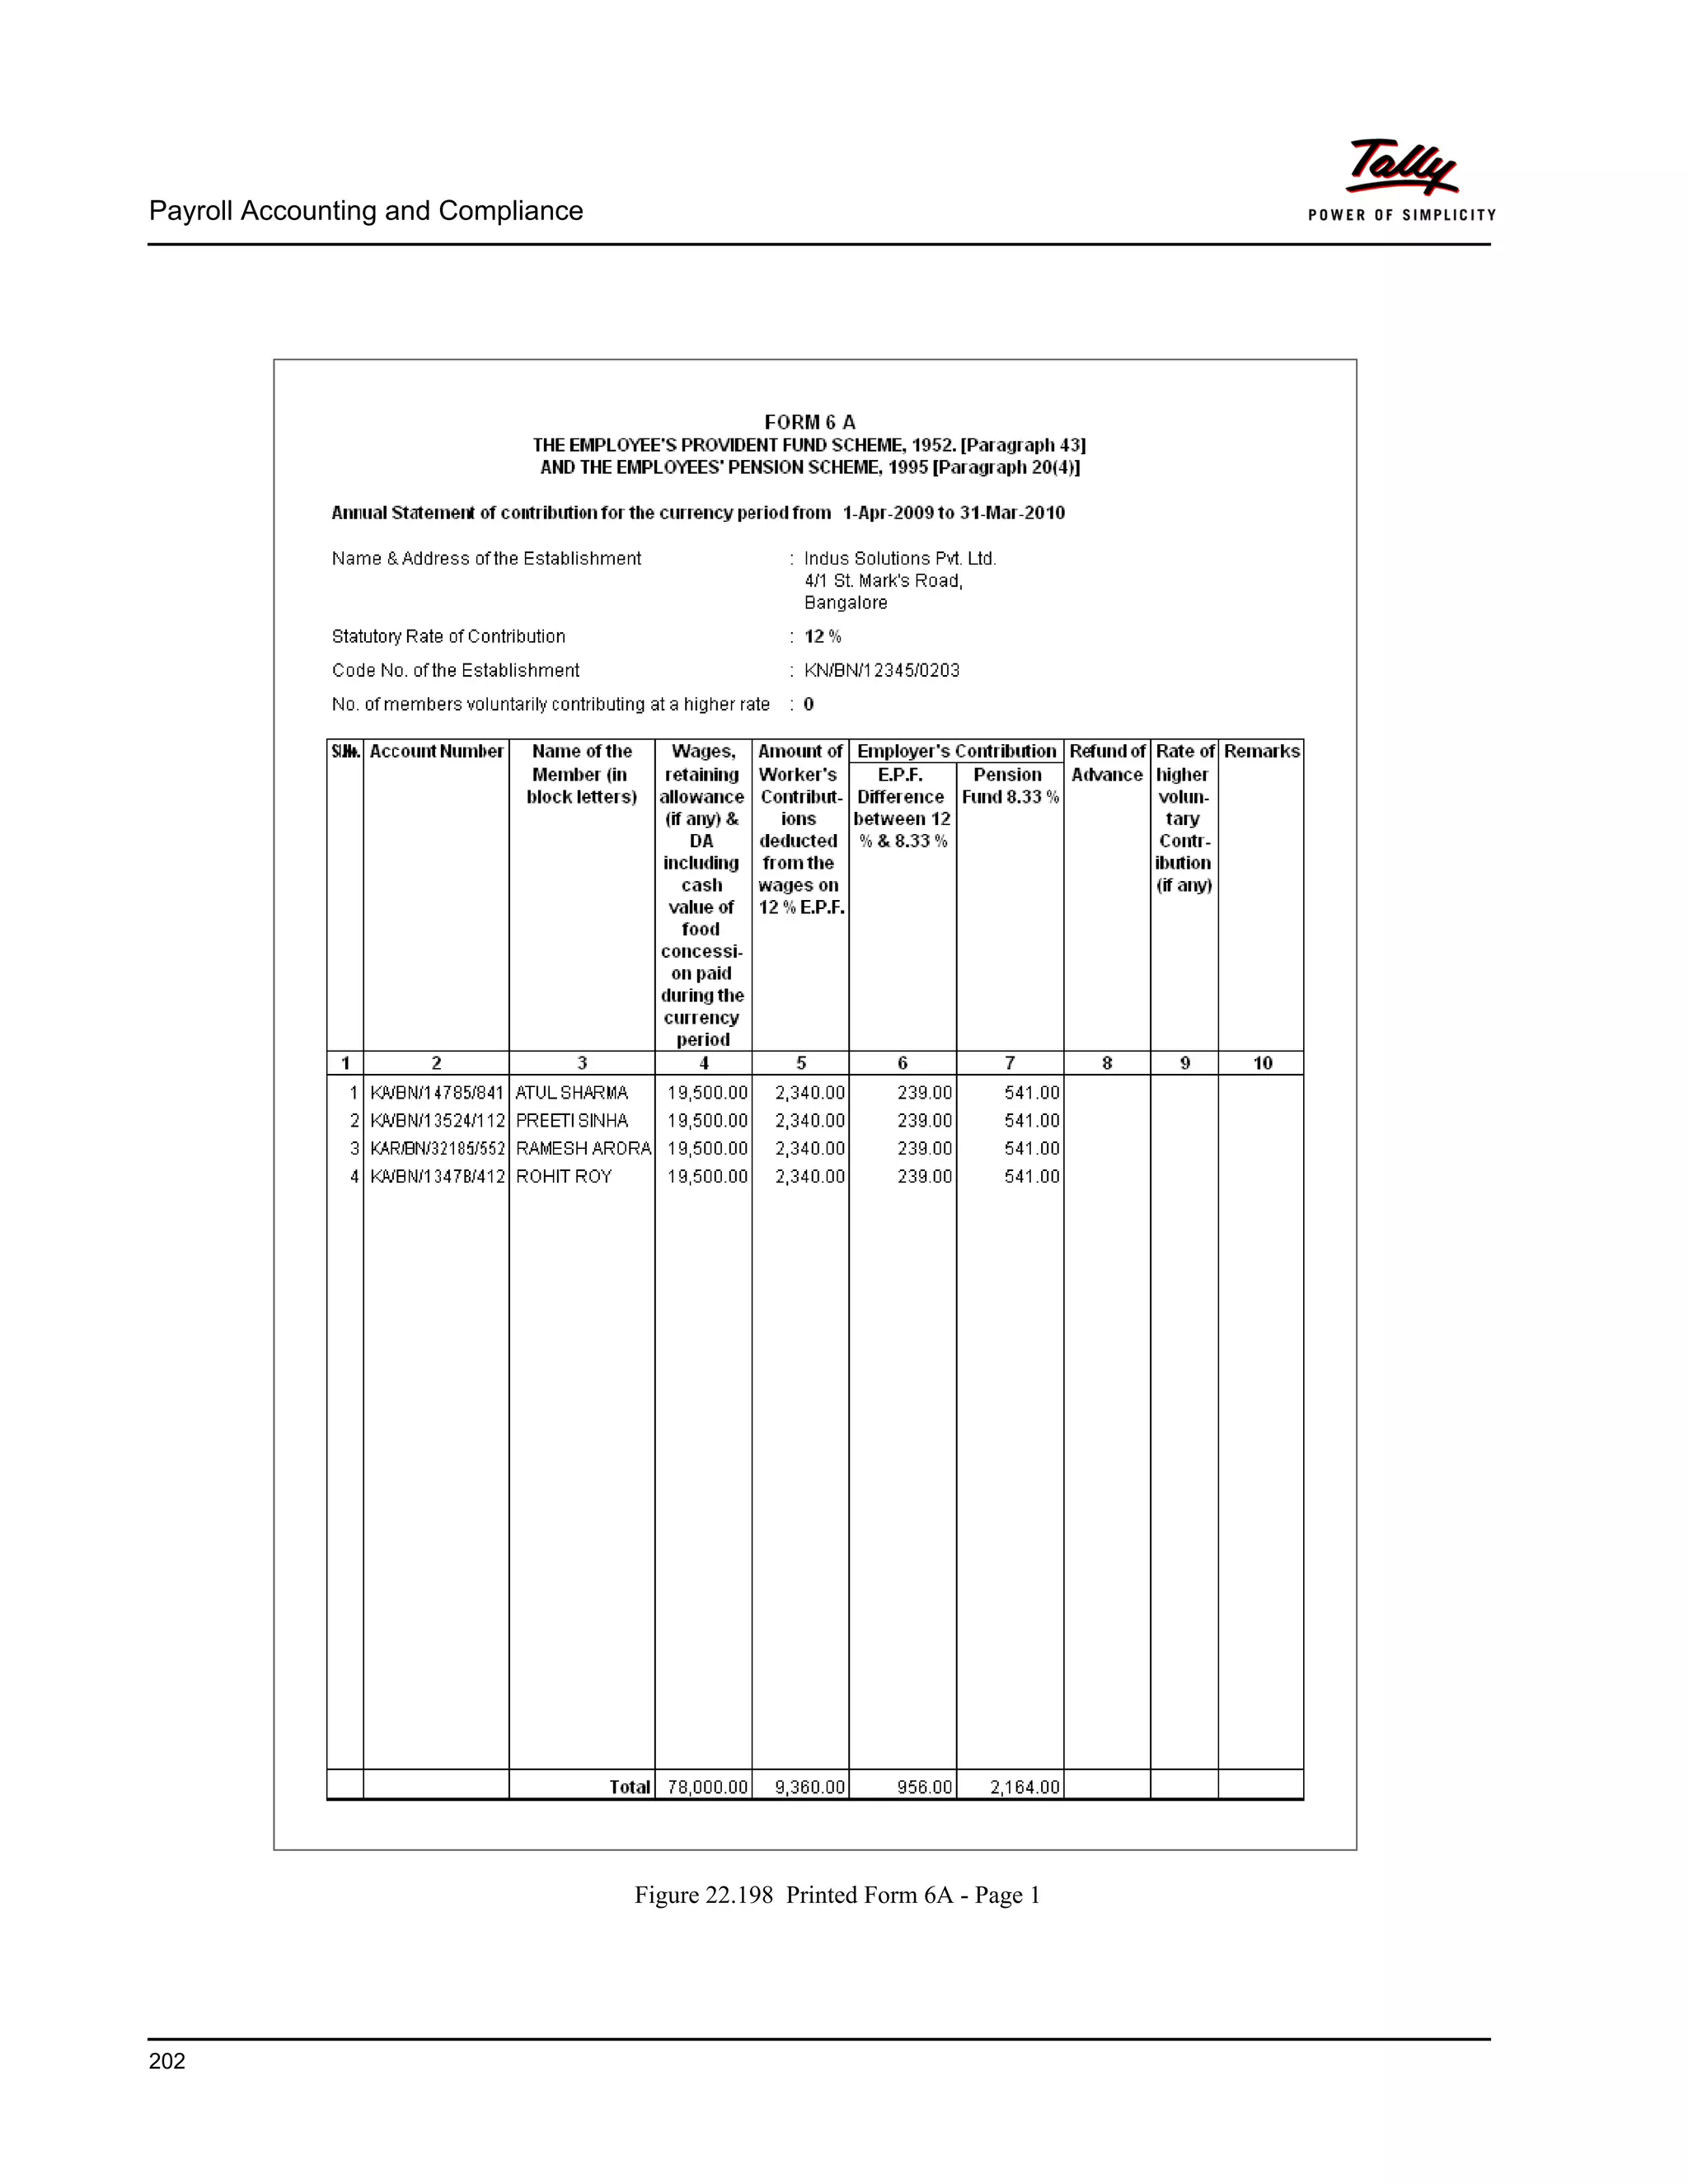
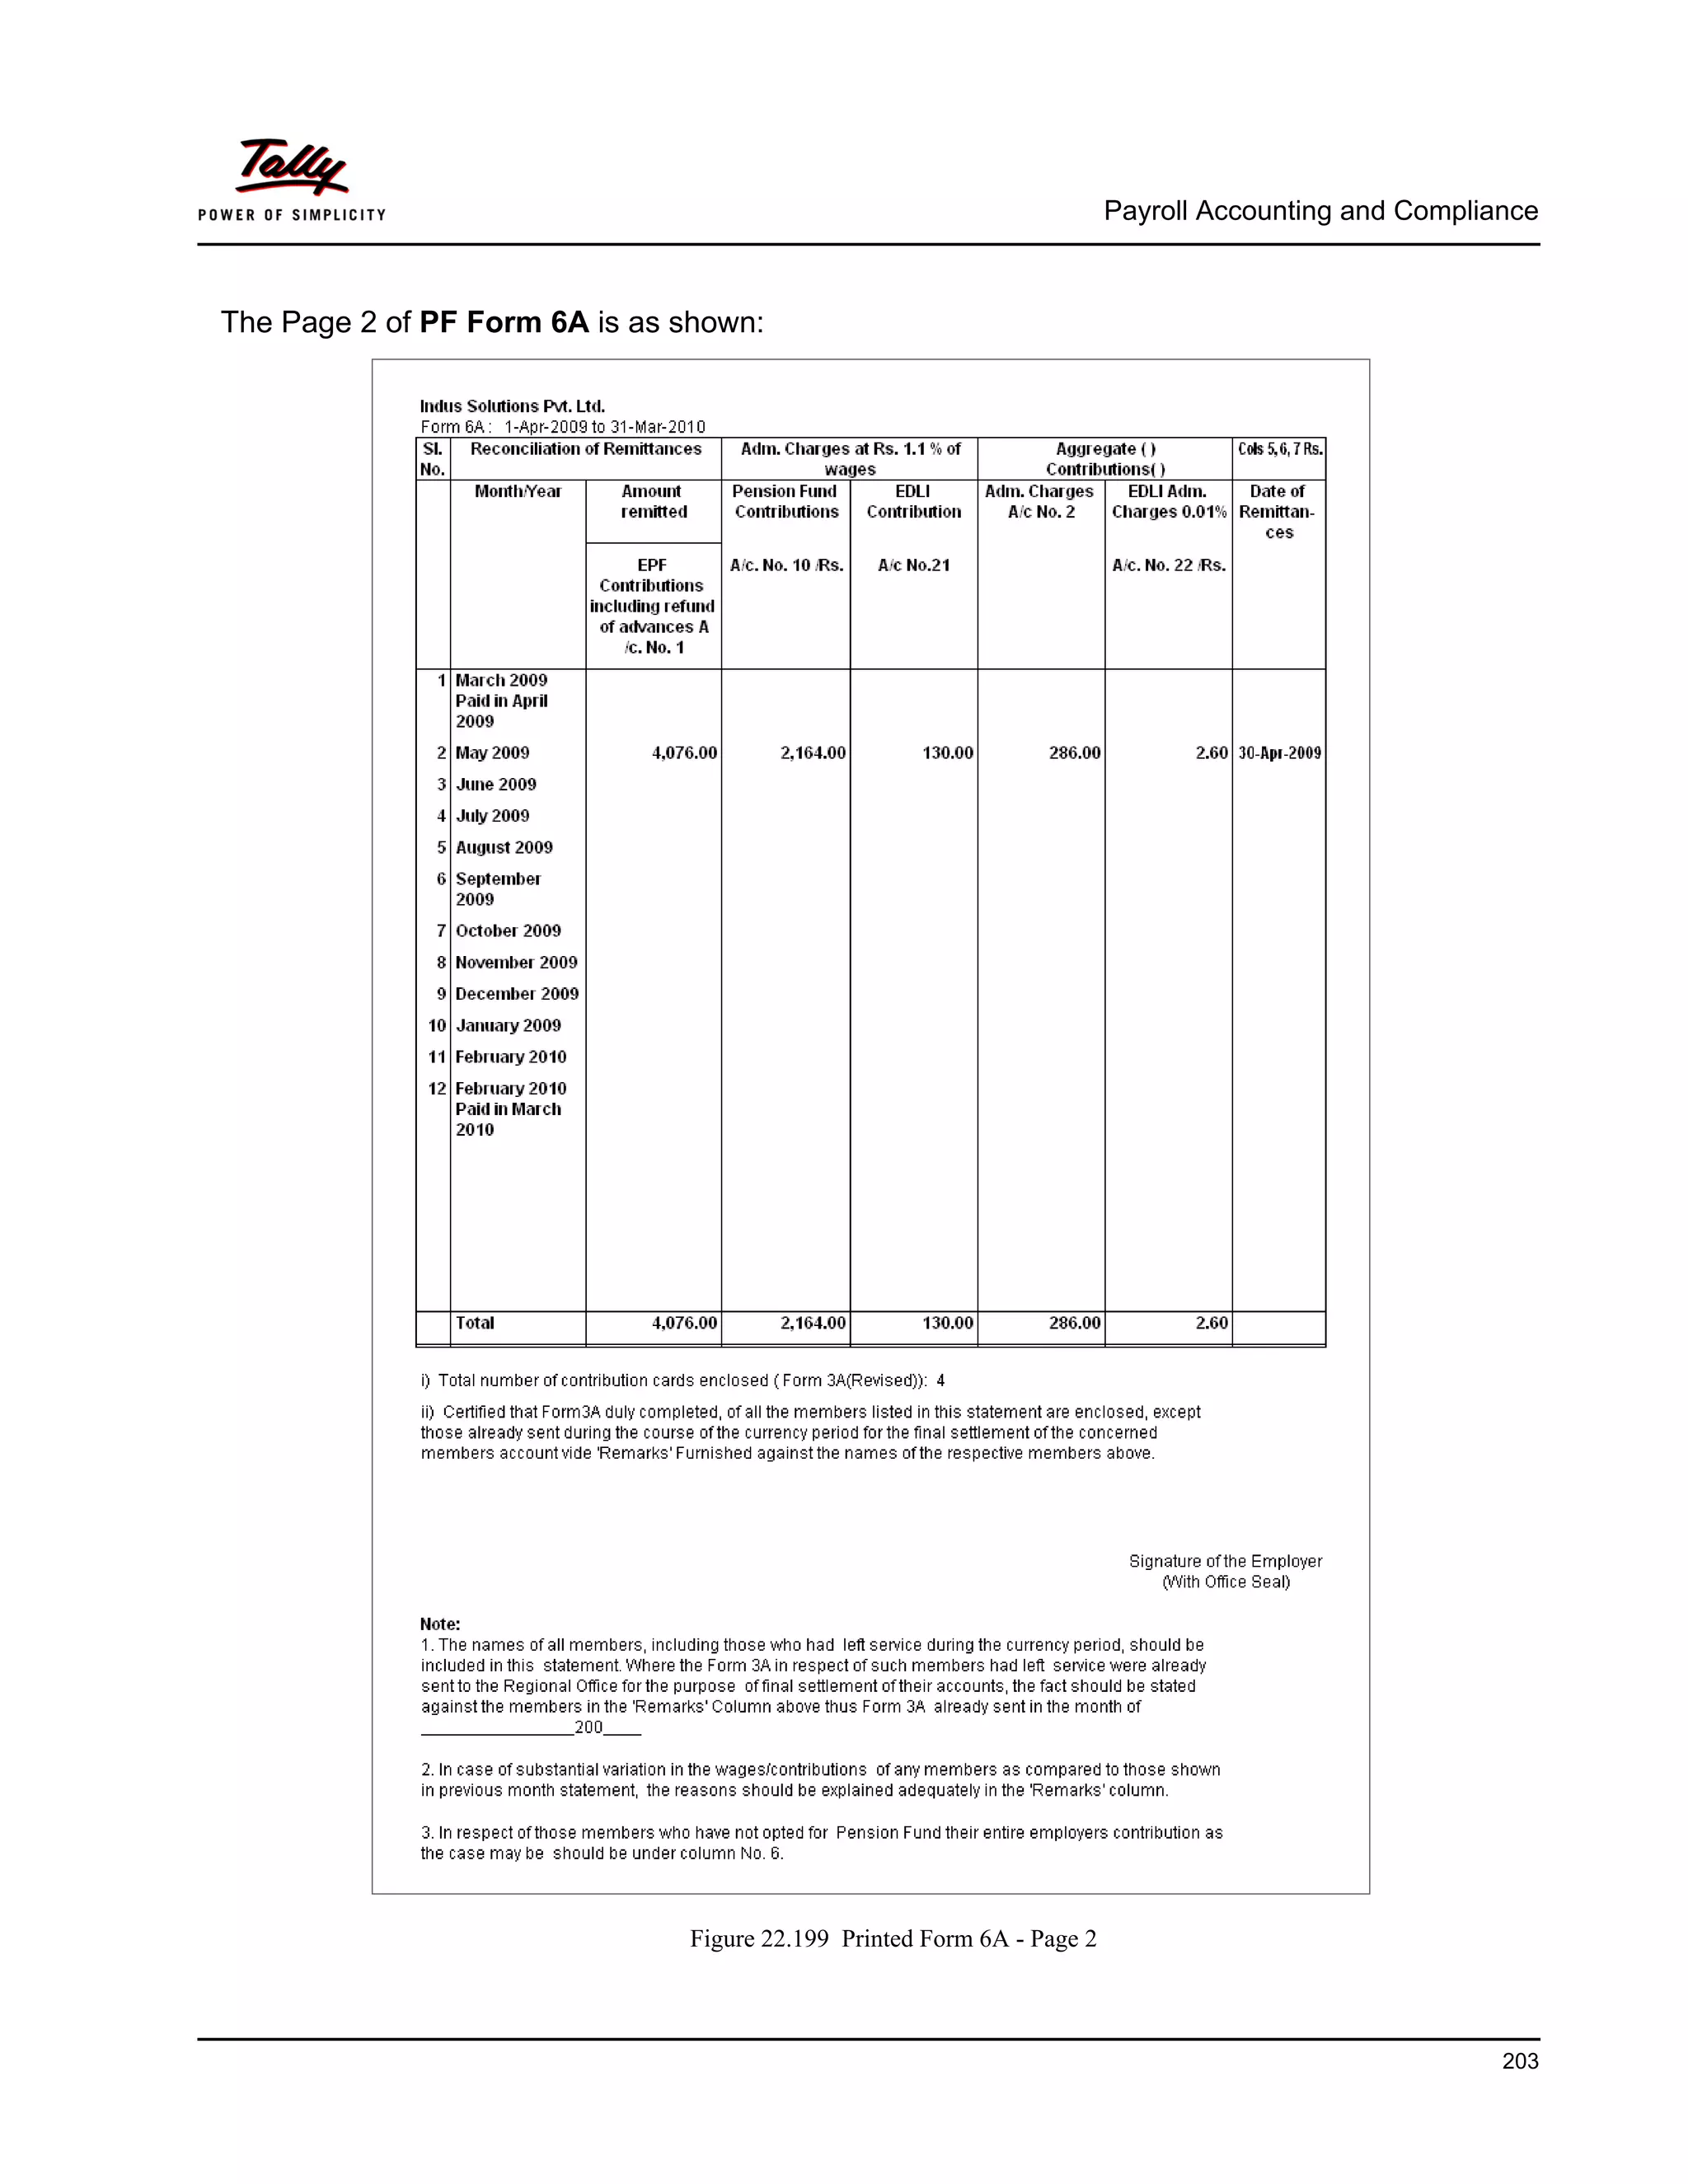
vii. Form 6A
As per the Employees' Provident Funds Scheme,1952 [para 43] and the Employees' Pension
Scheme 1975 [para 20], a Form (Consolidated Annual Contribution Statement) providing annual
contributions of each member of the establishment is required to be submitted by 30th April.
Form 6A is vital form for compiling the annual Provident Fund statement of a subscriber. In
Tally.ERP 9, you can generate Form 6A in the prescribed format. To print Form 6A follow the steps
given below:
Go to Gateway of Tally > Display > Payroll Reports > Statutory Reports > Provident Fund >
Form 6A
In the Payroll Statutory Print Configuration screen
Specify 01-03-2009 and 28-02-2010 in the From and To fields respectively
Select the required Payroll Category, Employee/Group and Sorting Method
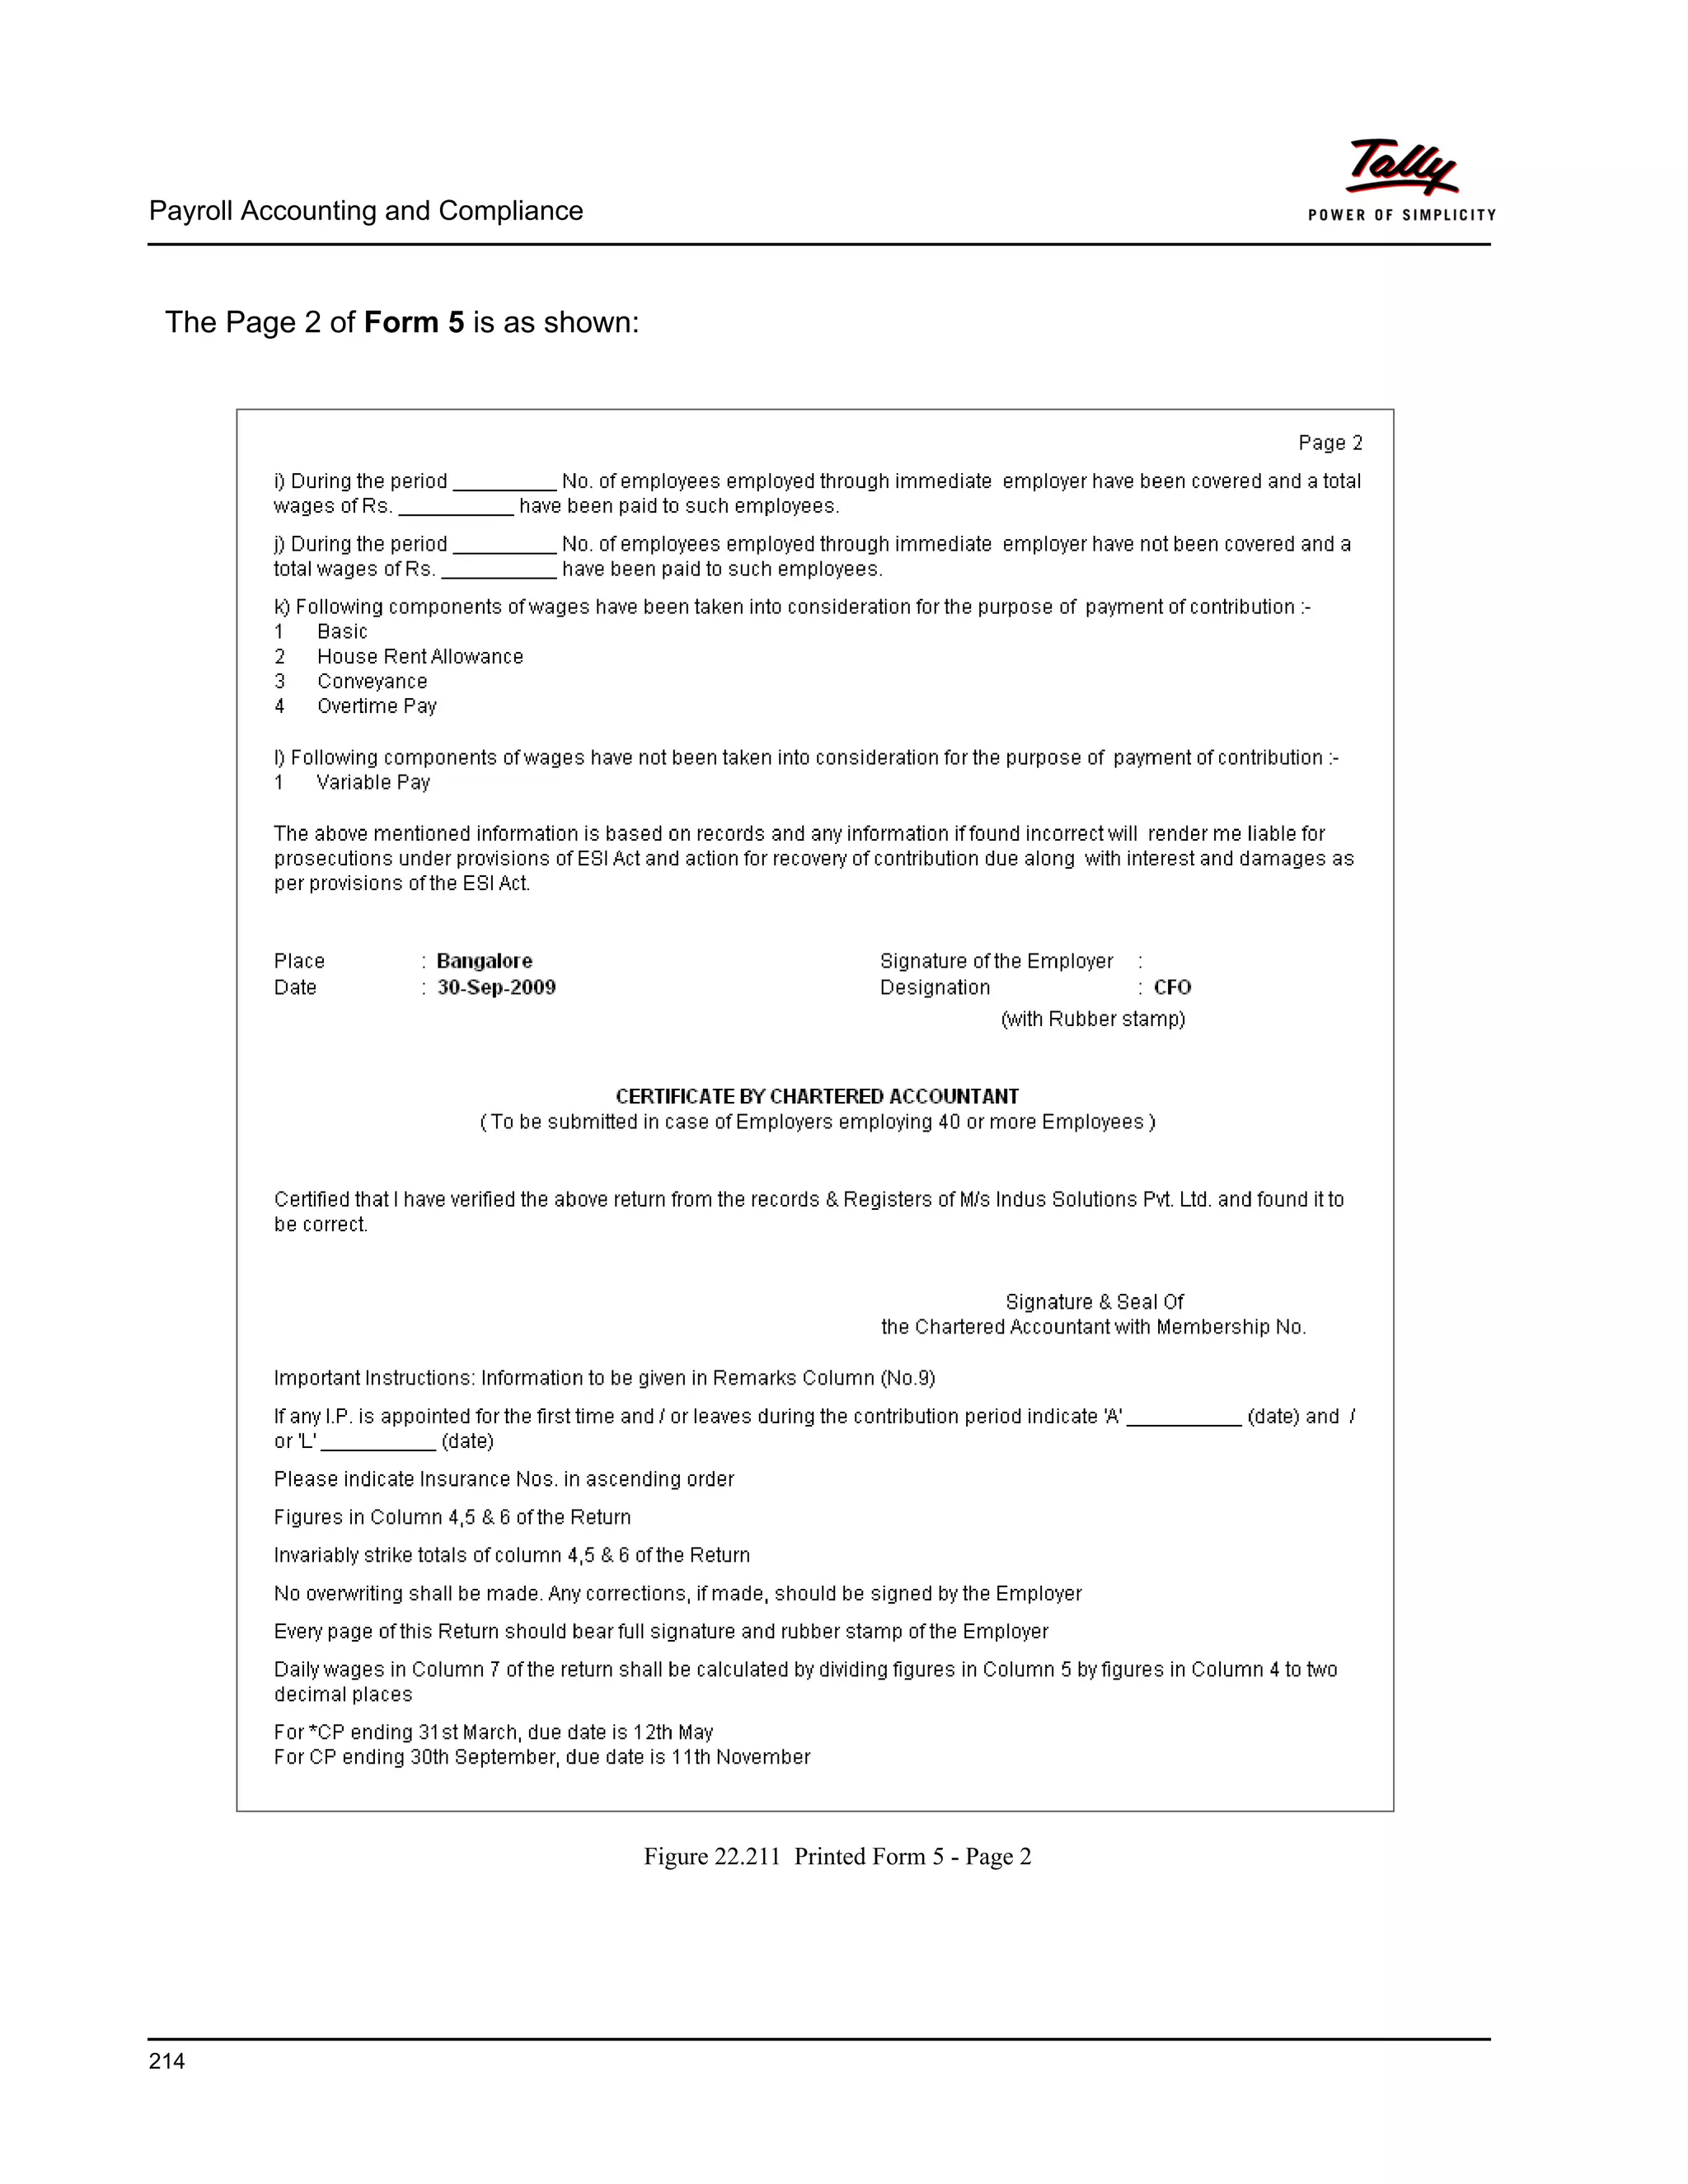
The completed Payroll Statutory Print Configuration screen will appear as shown:
Figure 22.197 Payroll Statutory Print Configuration for PF Form 6A
Press Enter to Print.
The printed Form 6A will appear as shown:](https://image.slidesharecdn.com/payrollaccountingintallyerp9-130613034648-phpapp01/75/Payroll-accounting-in-tally-erp-9-201-2048.jpg)
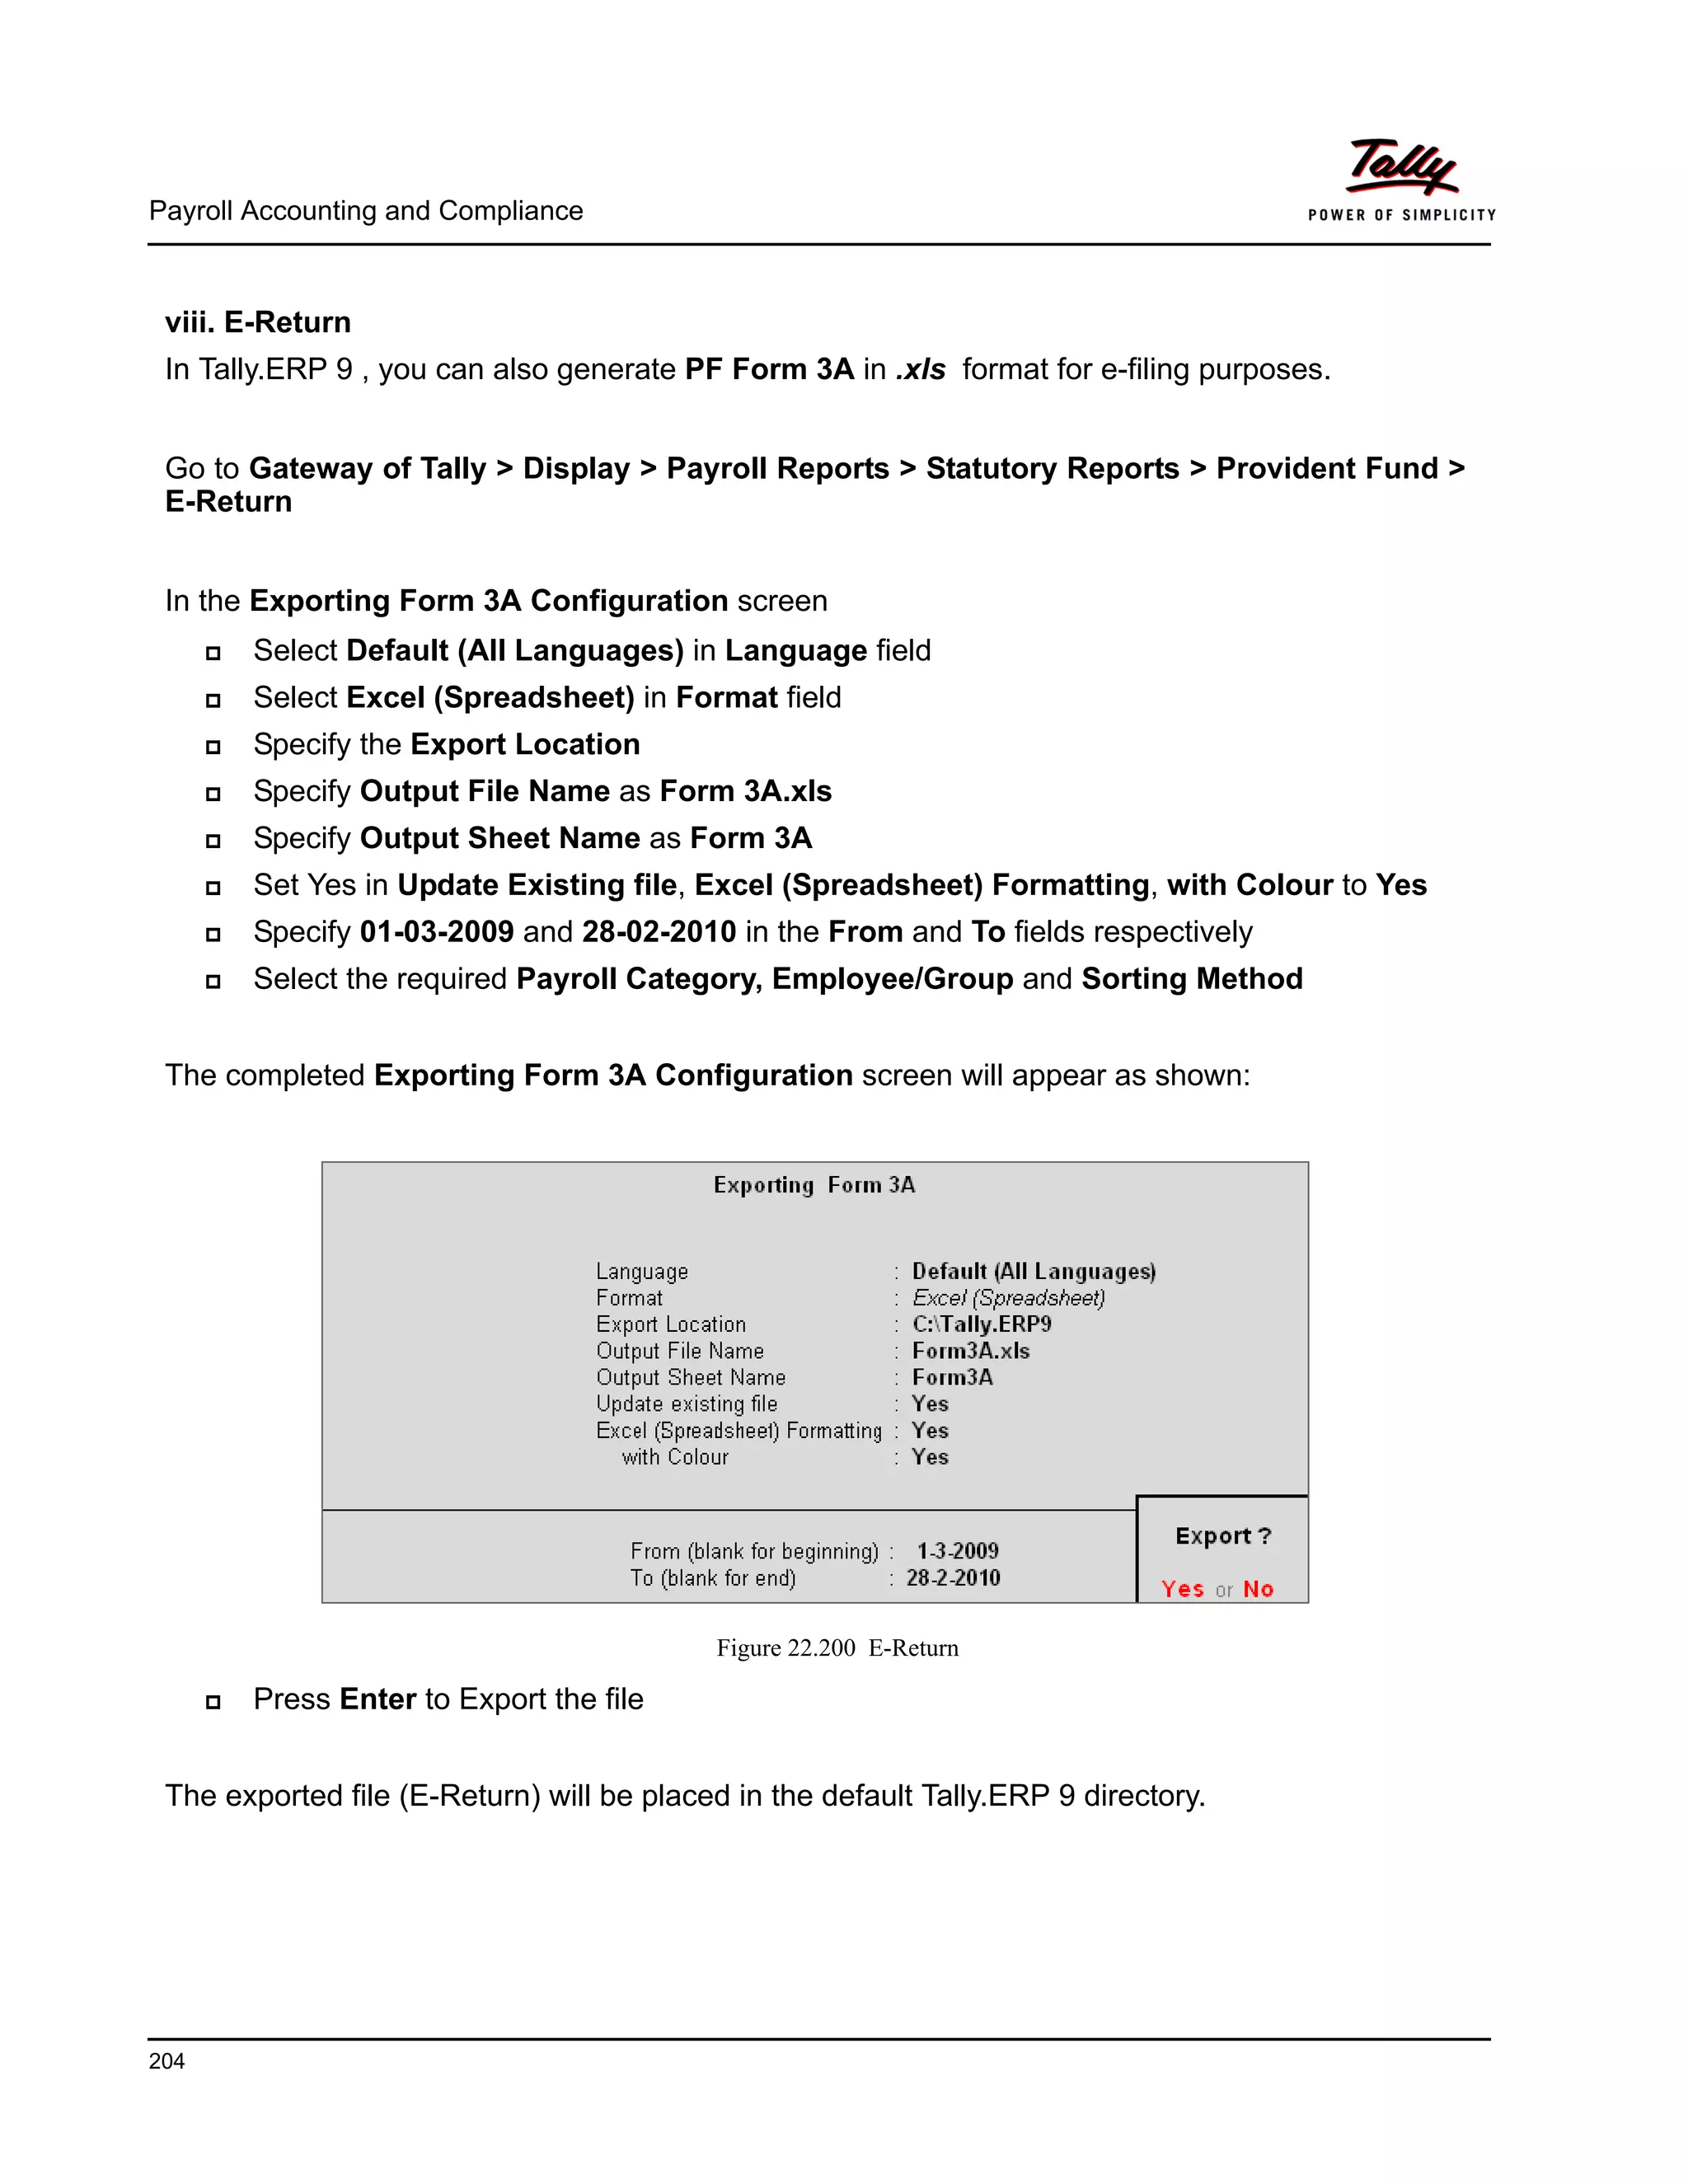
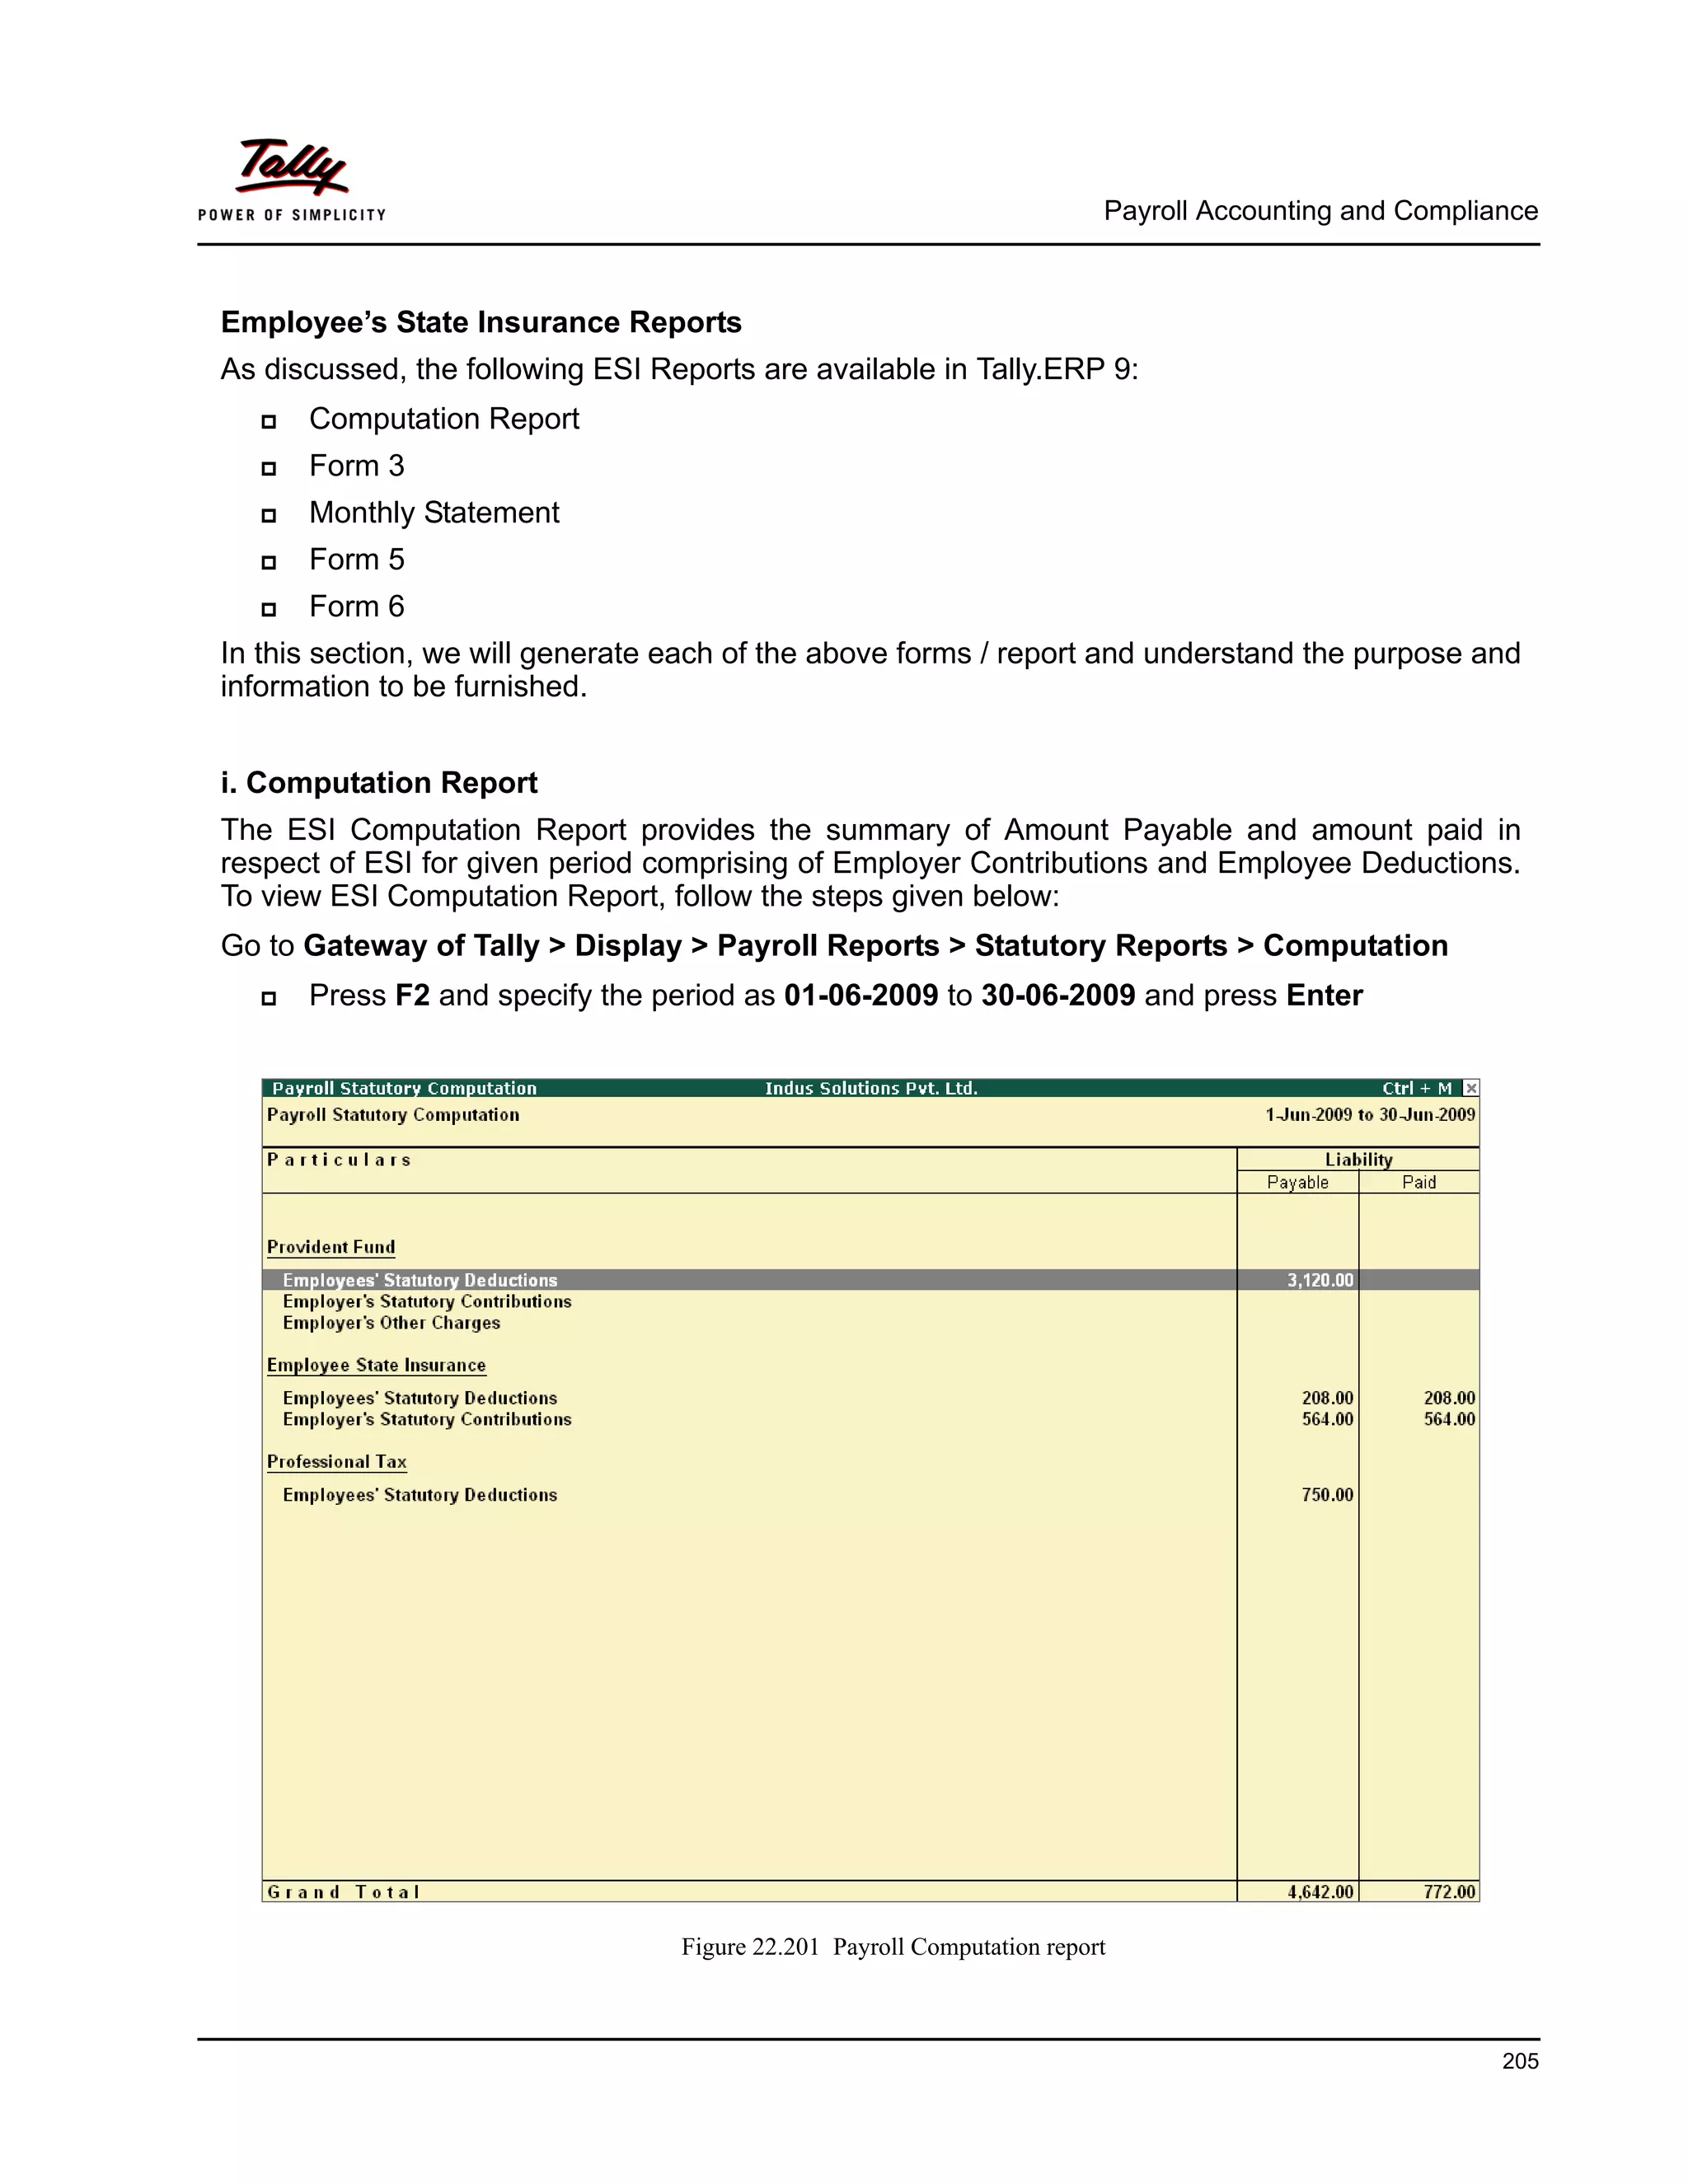
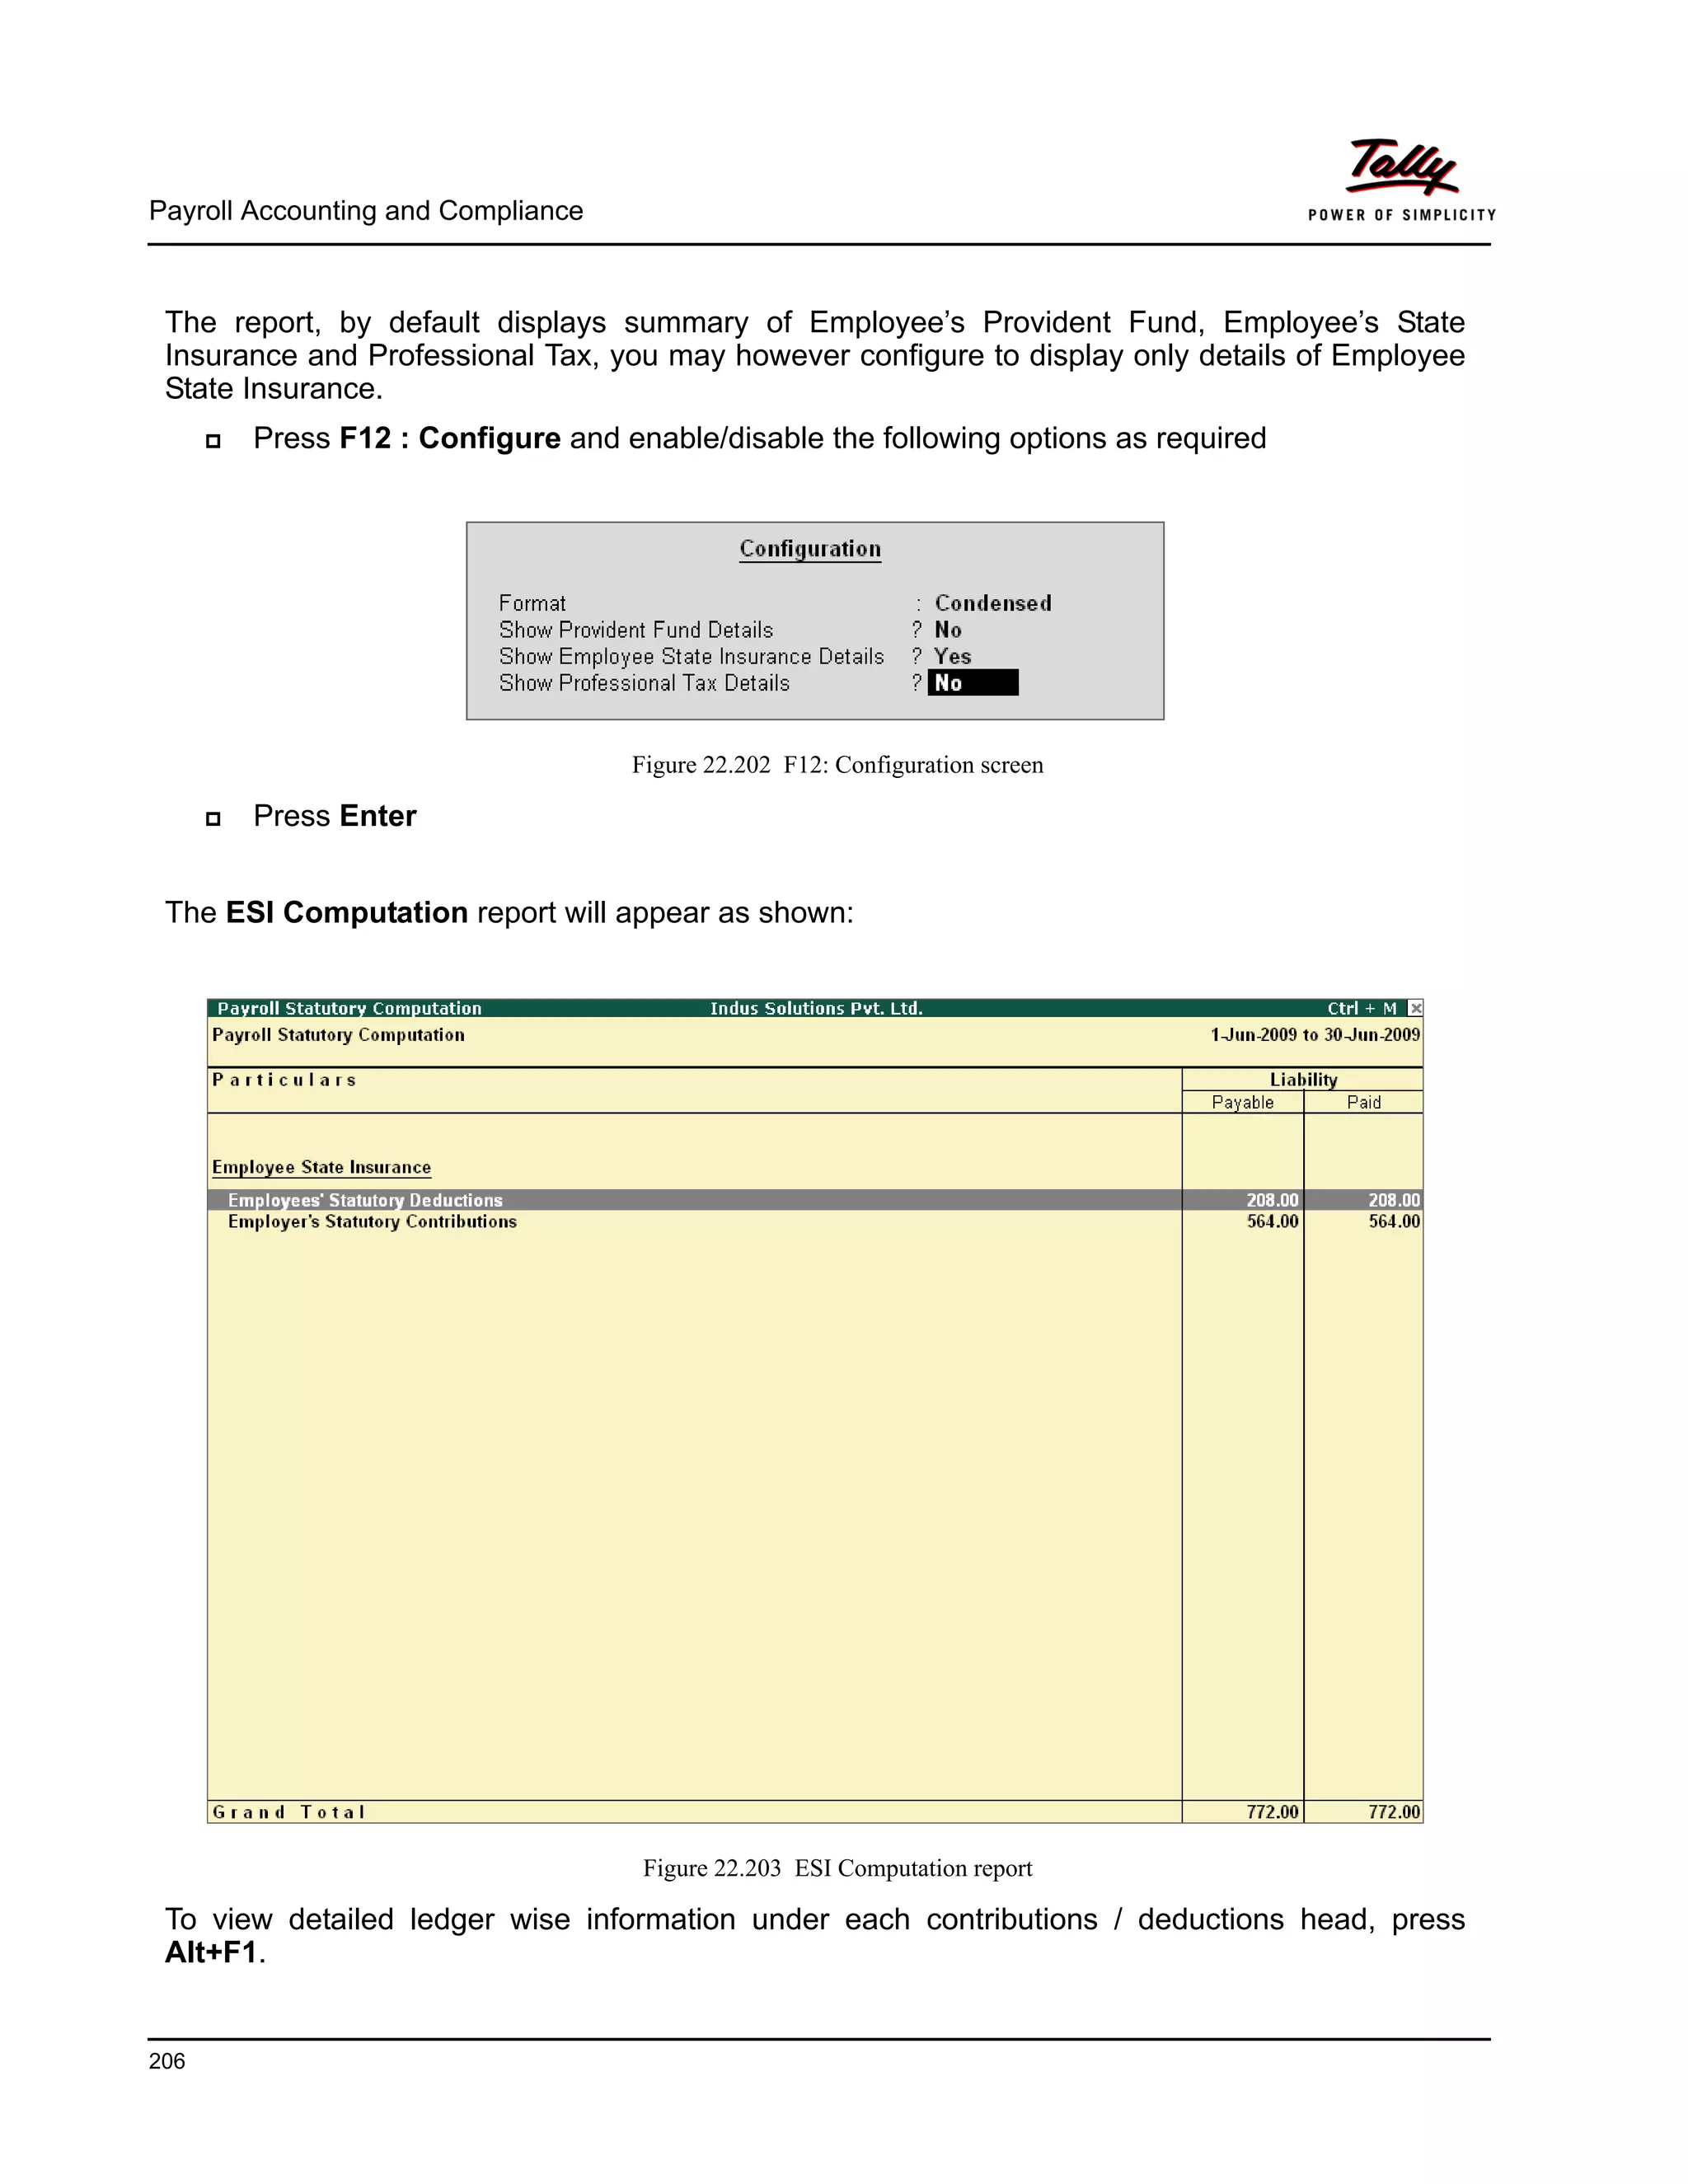
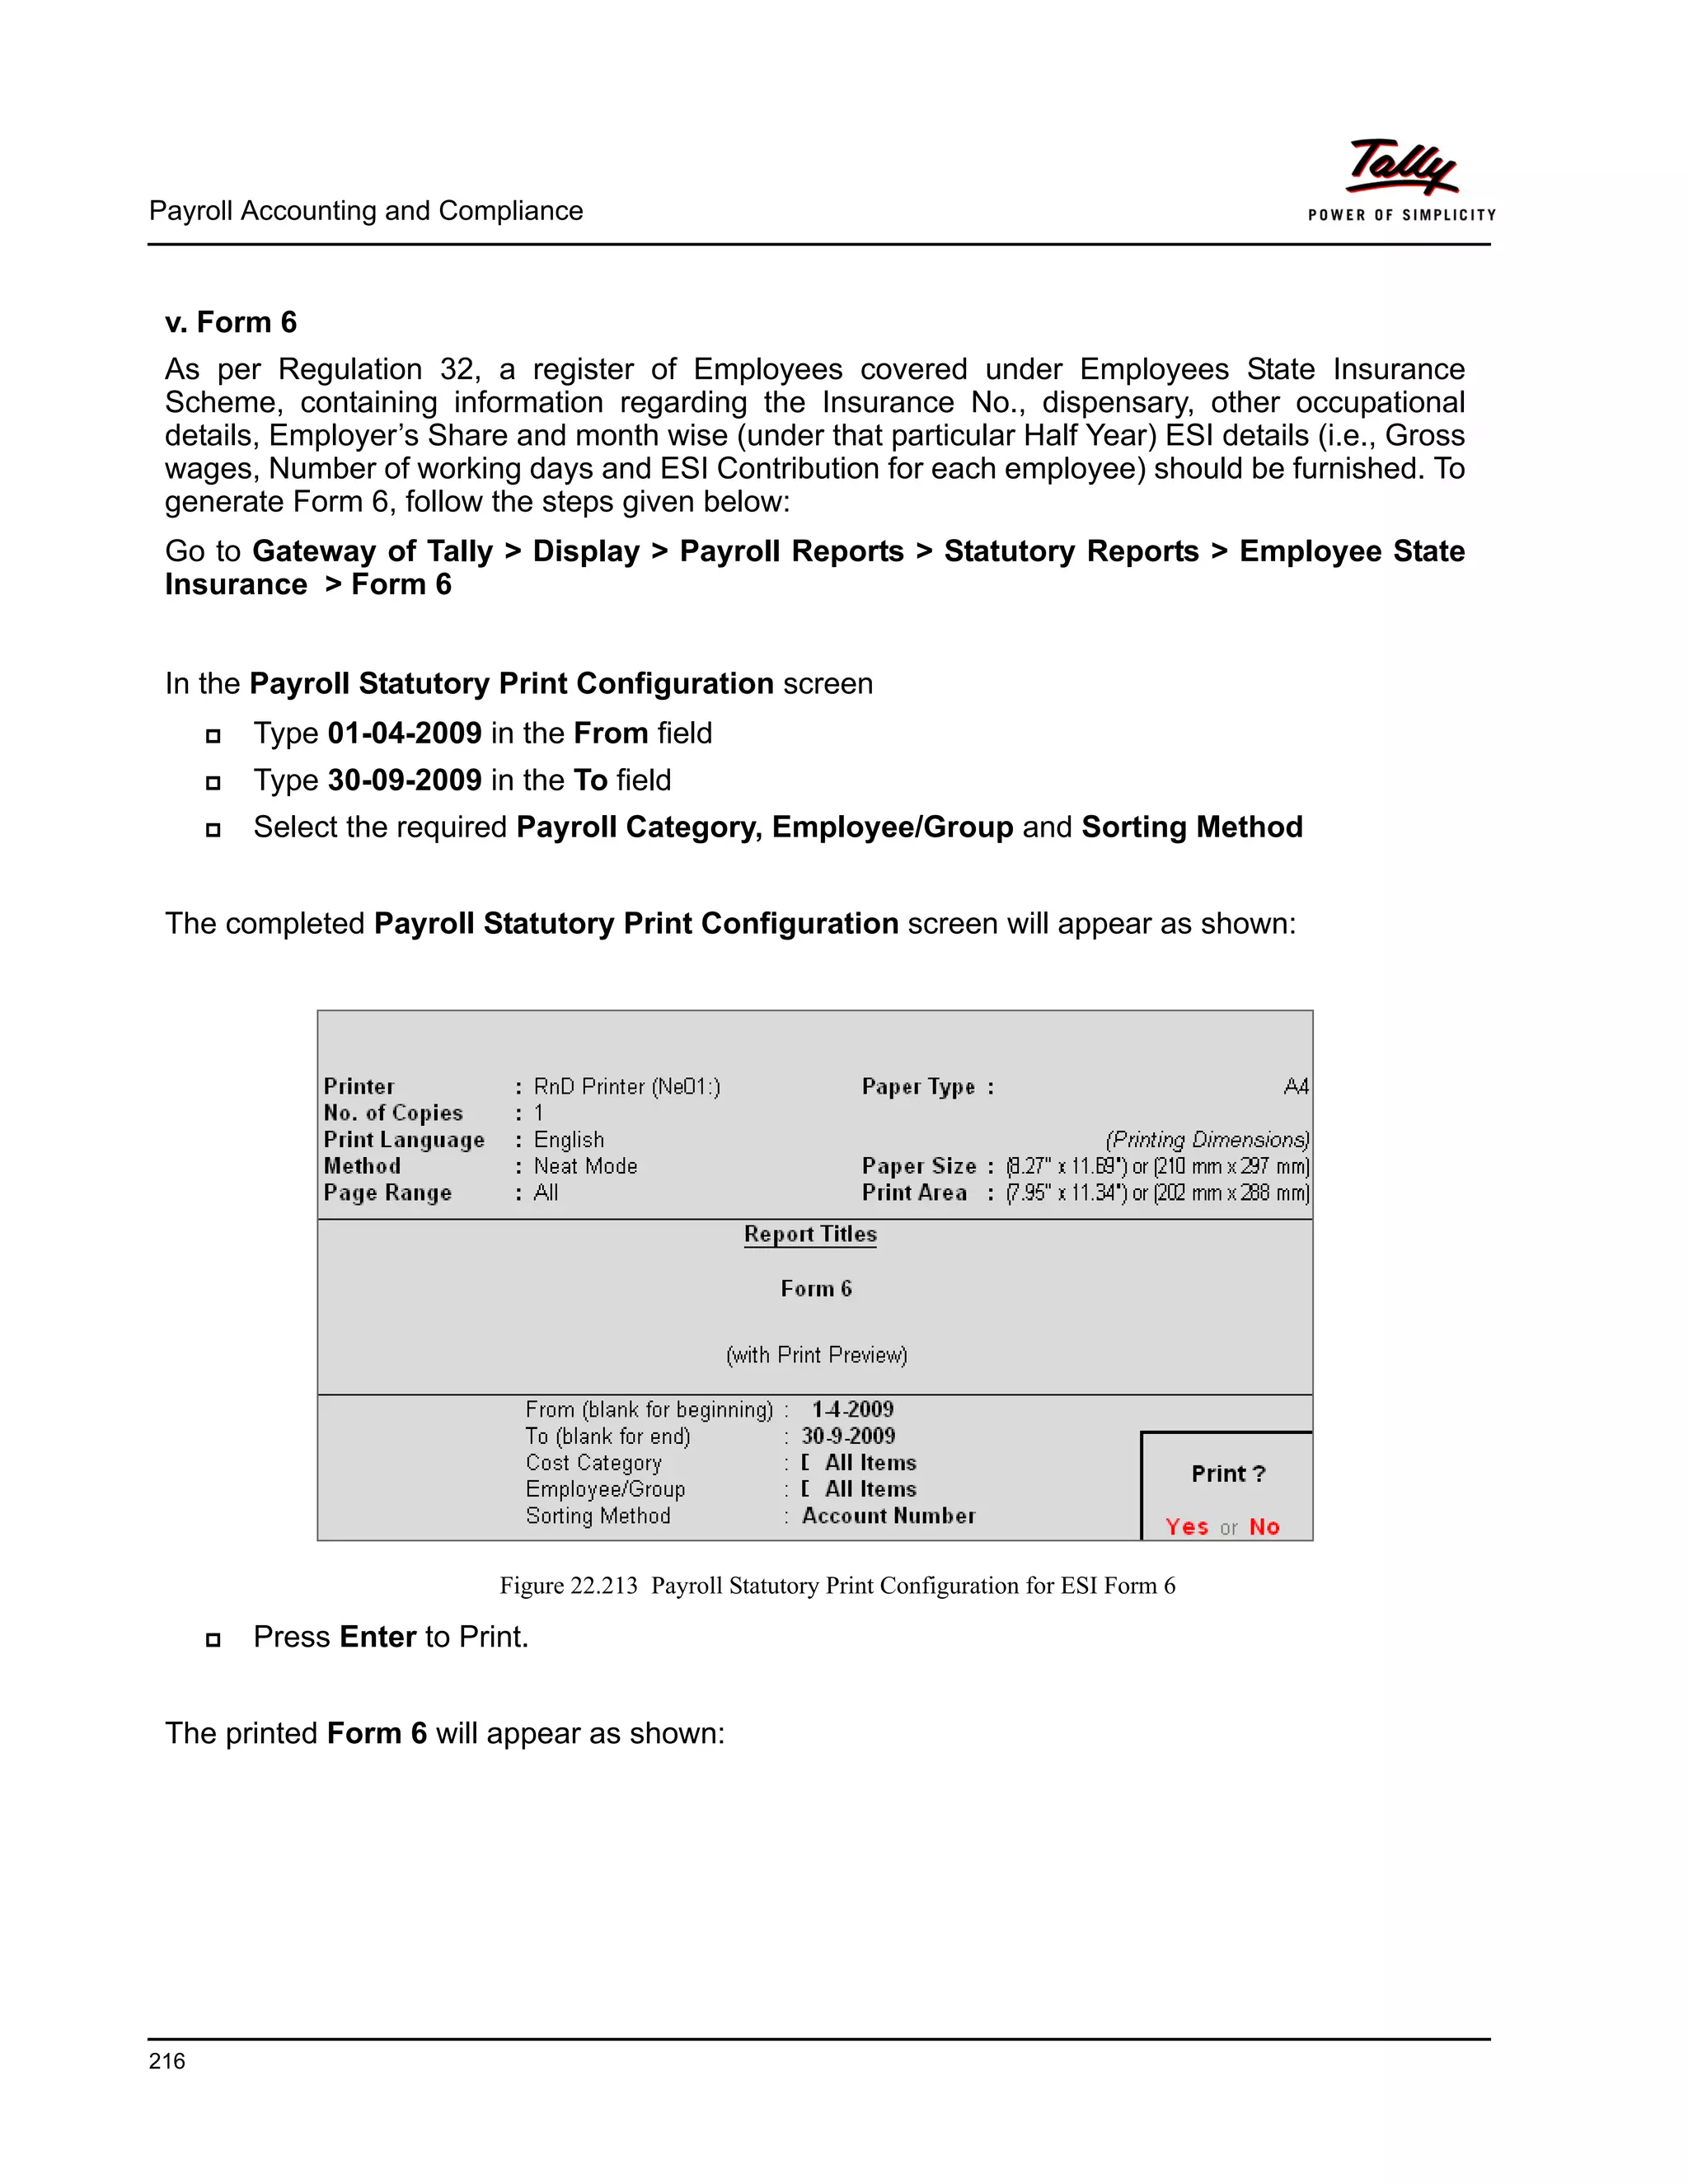

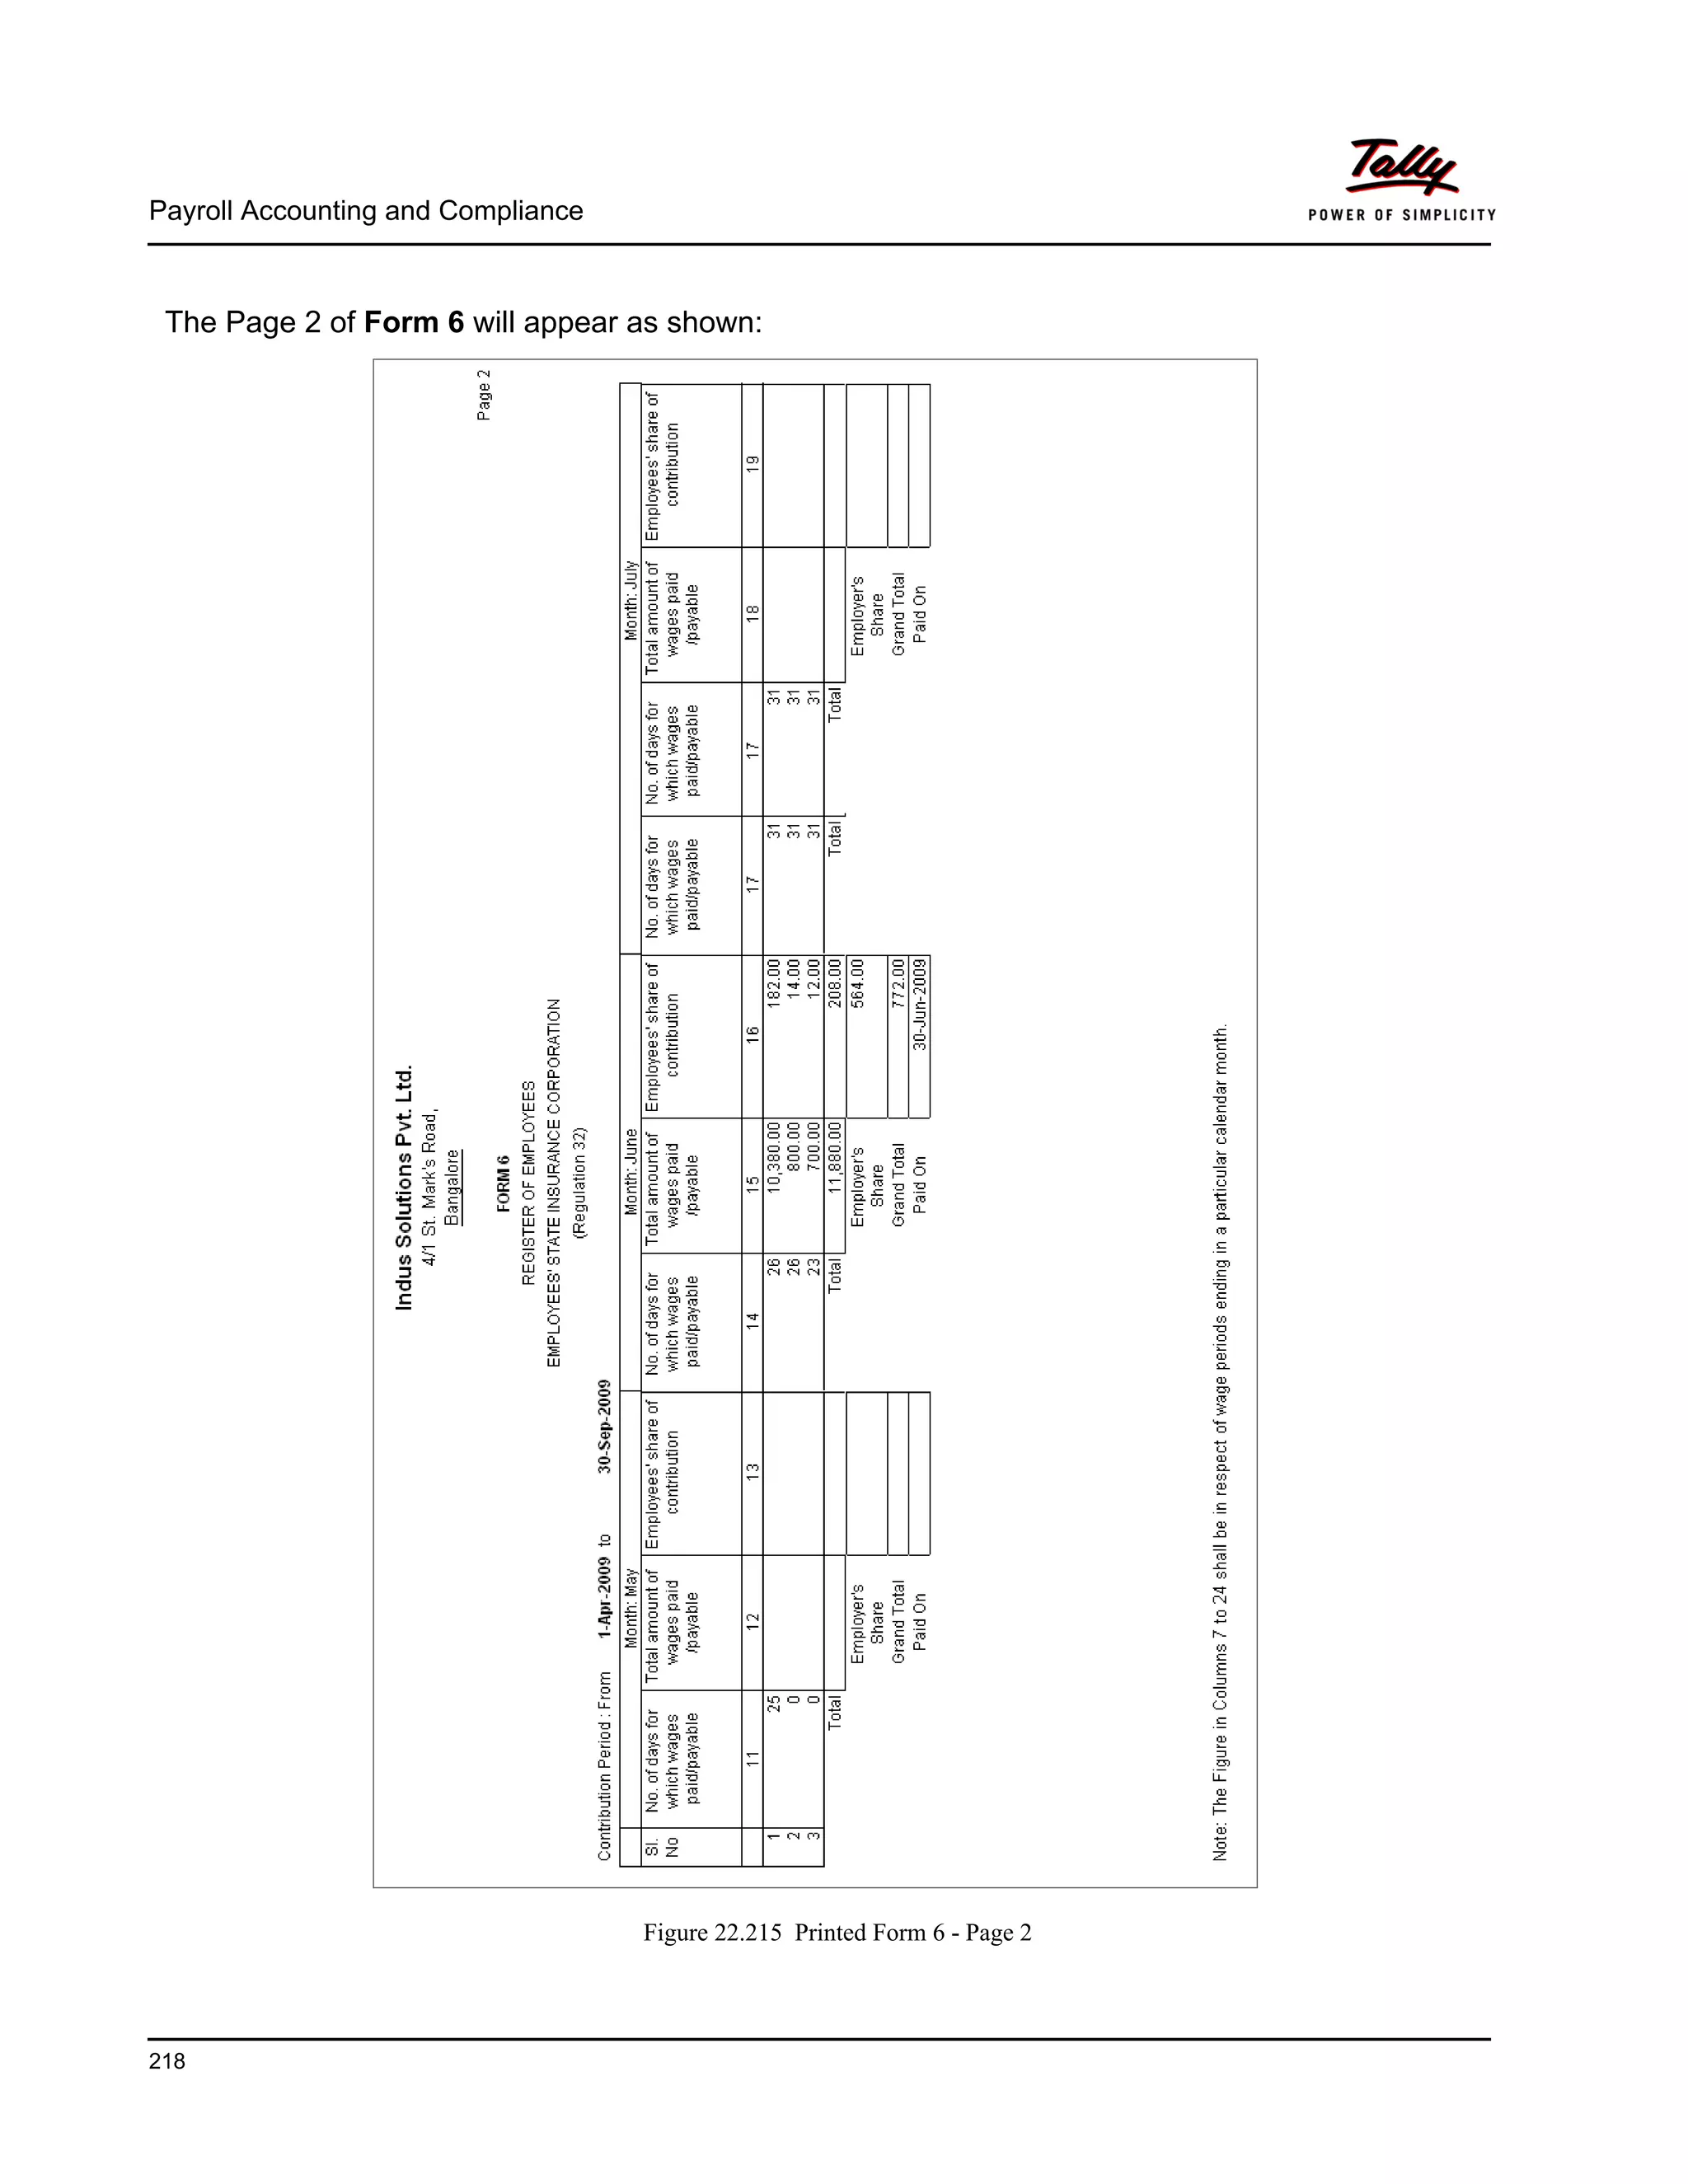
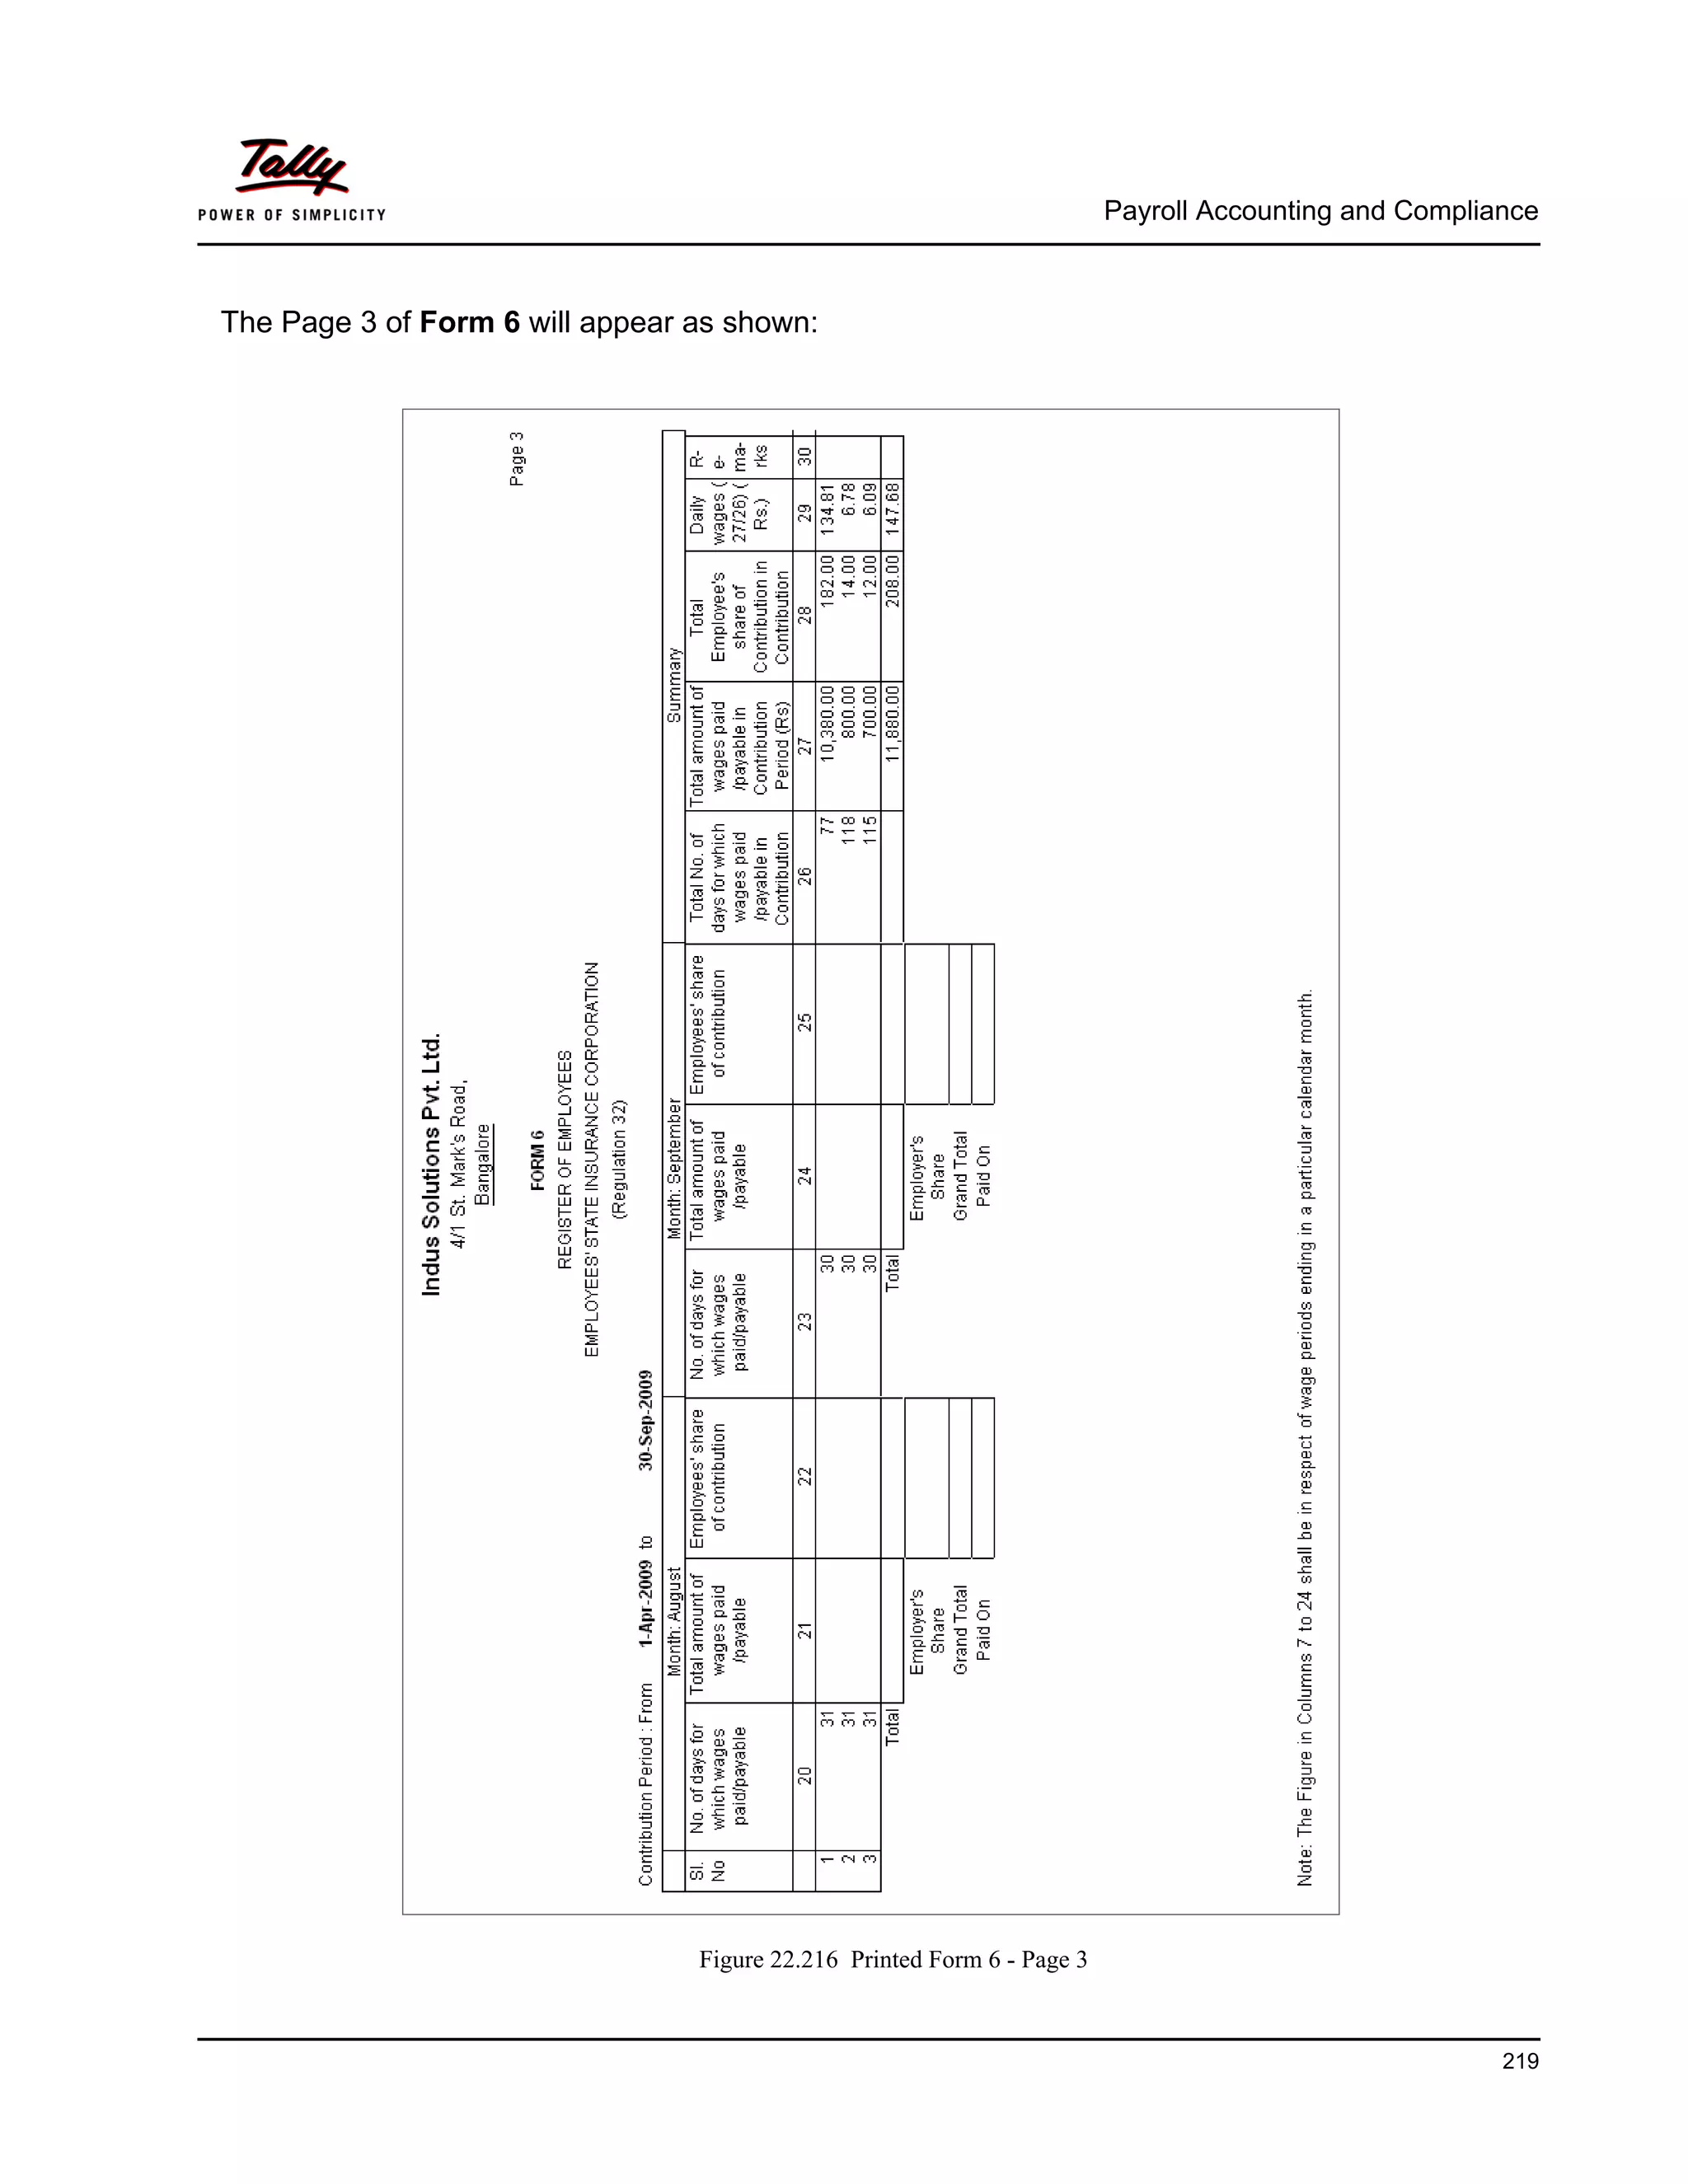
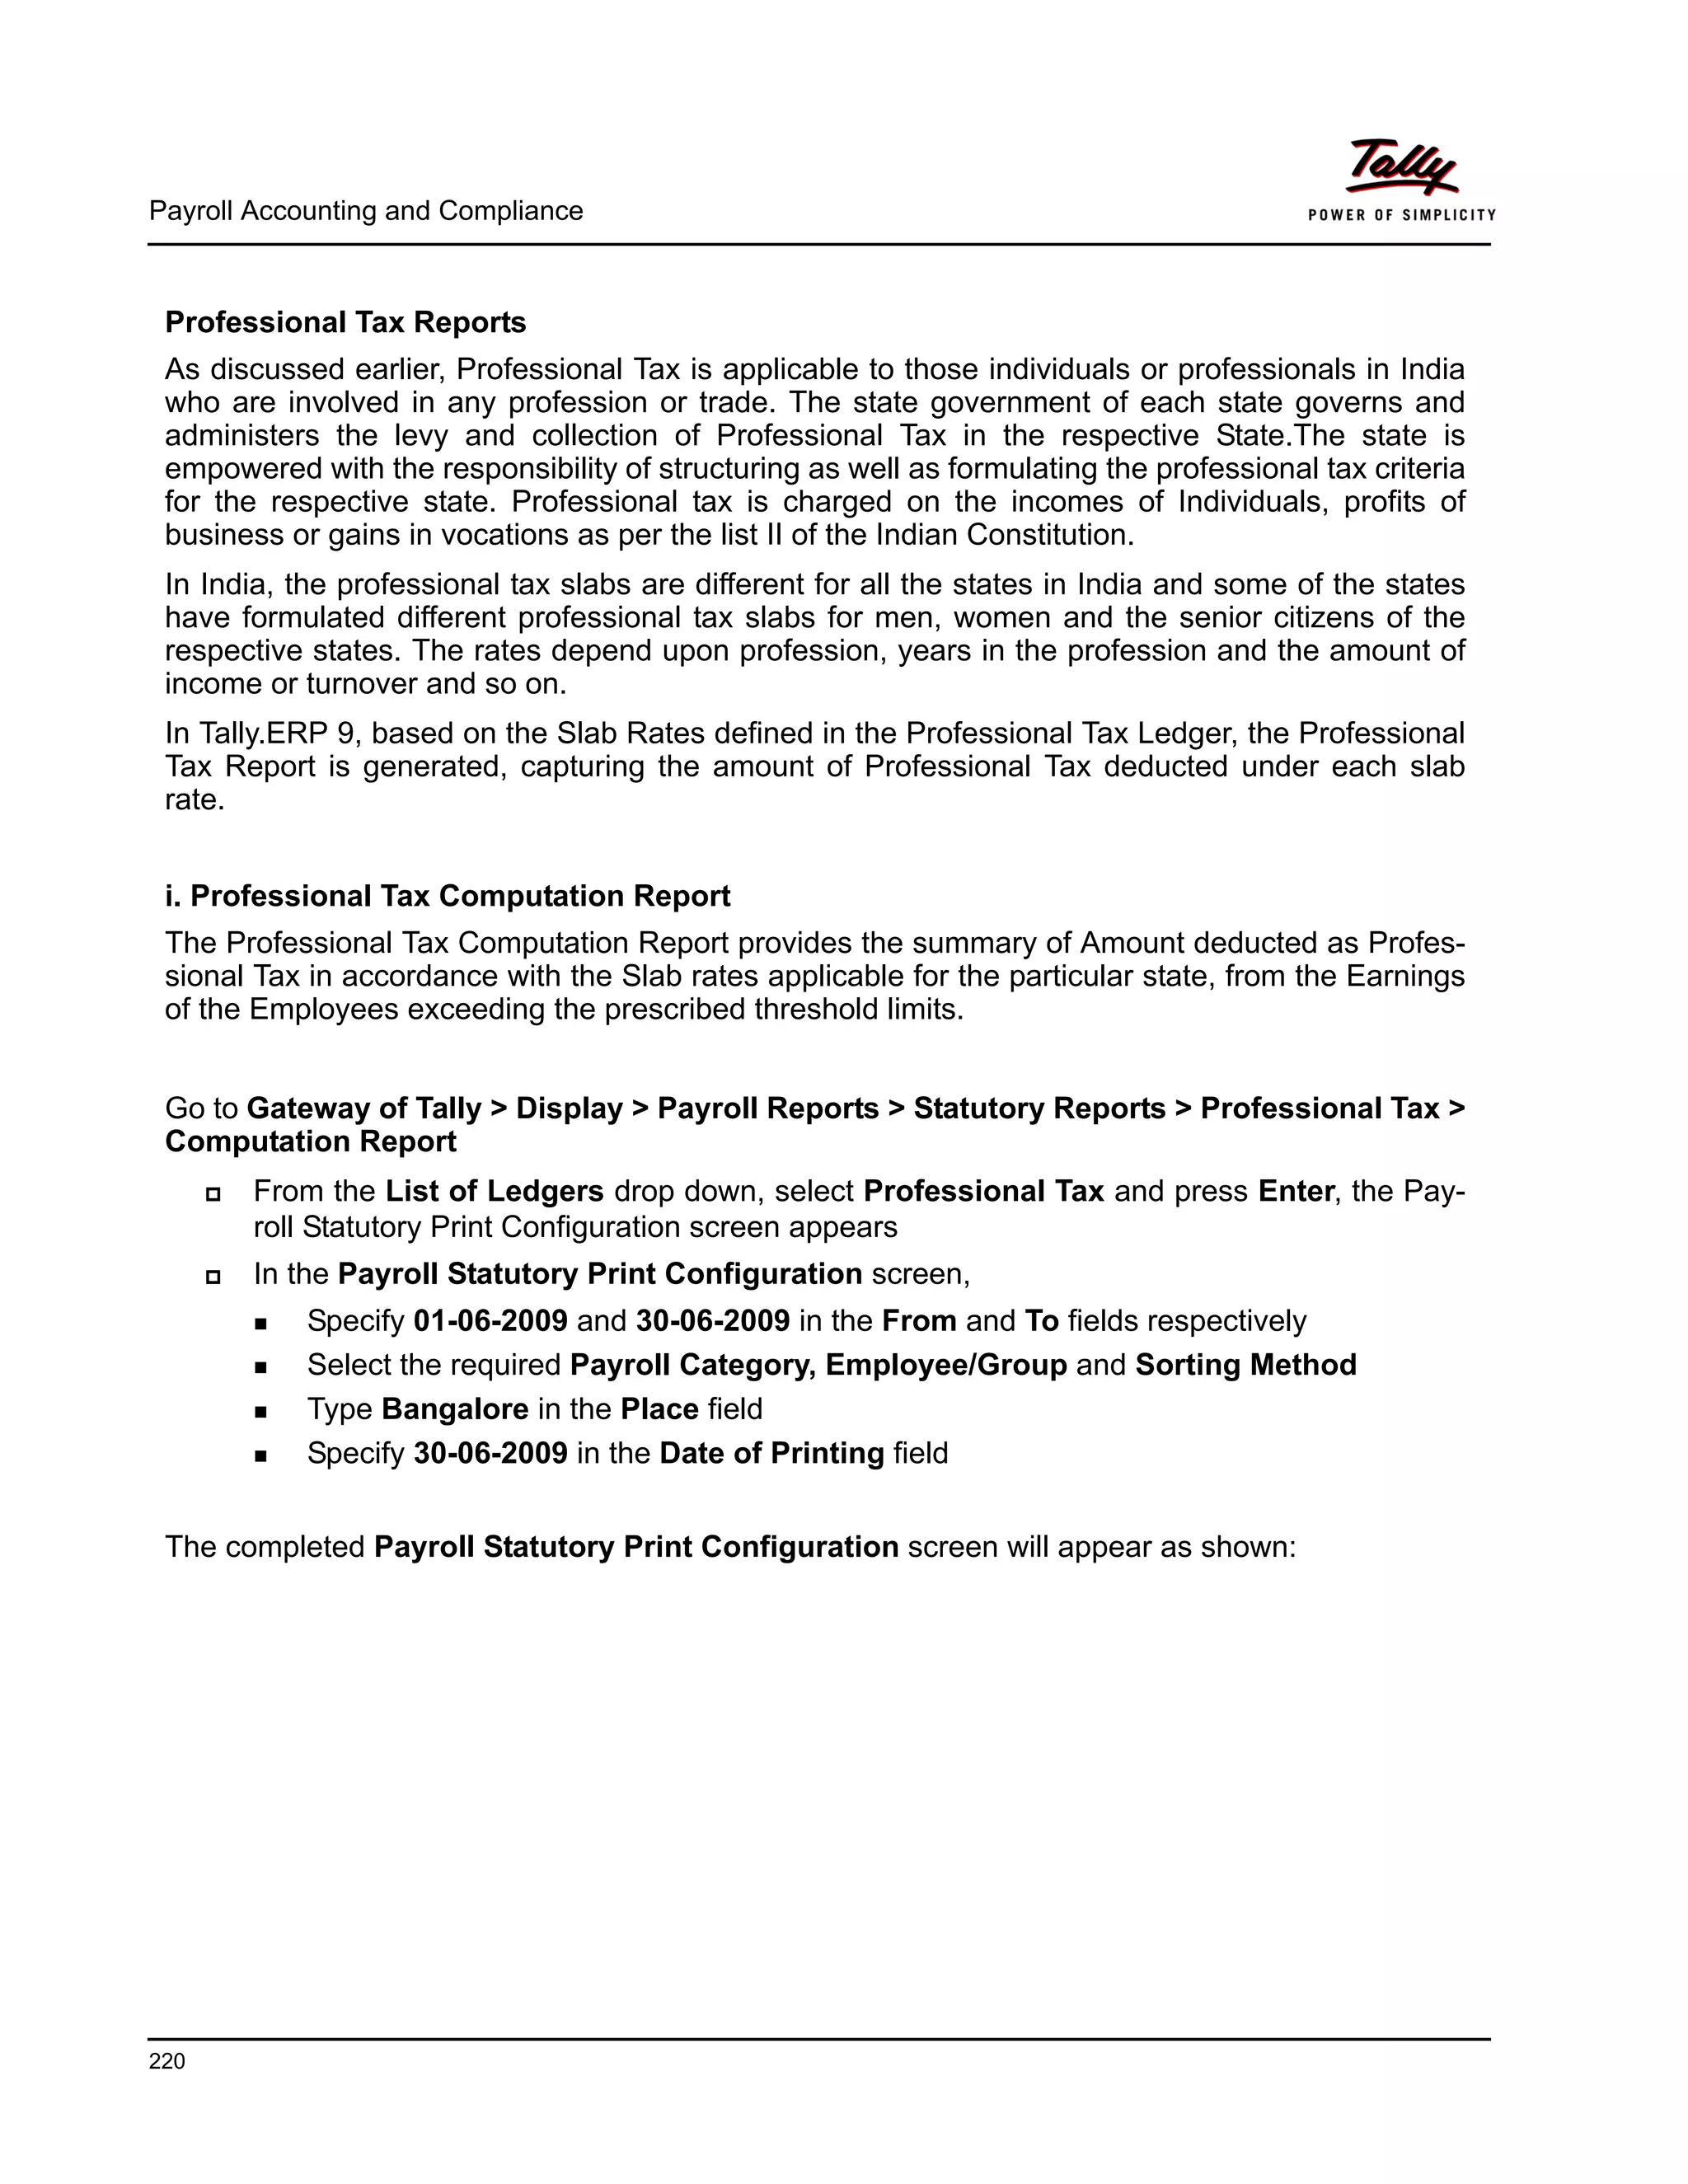
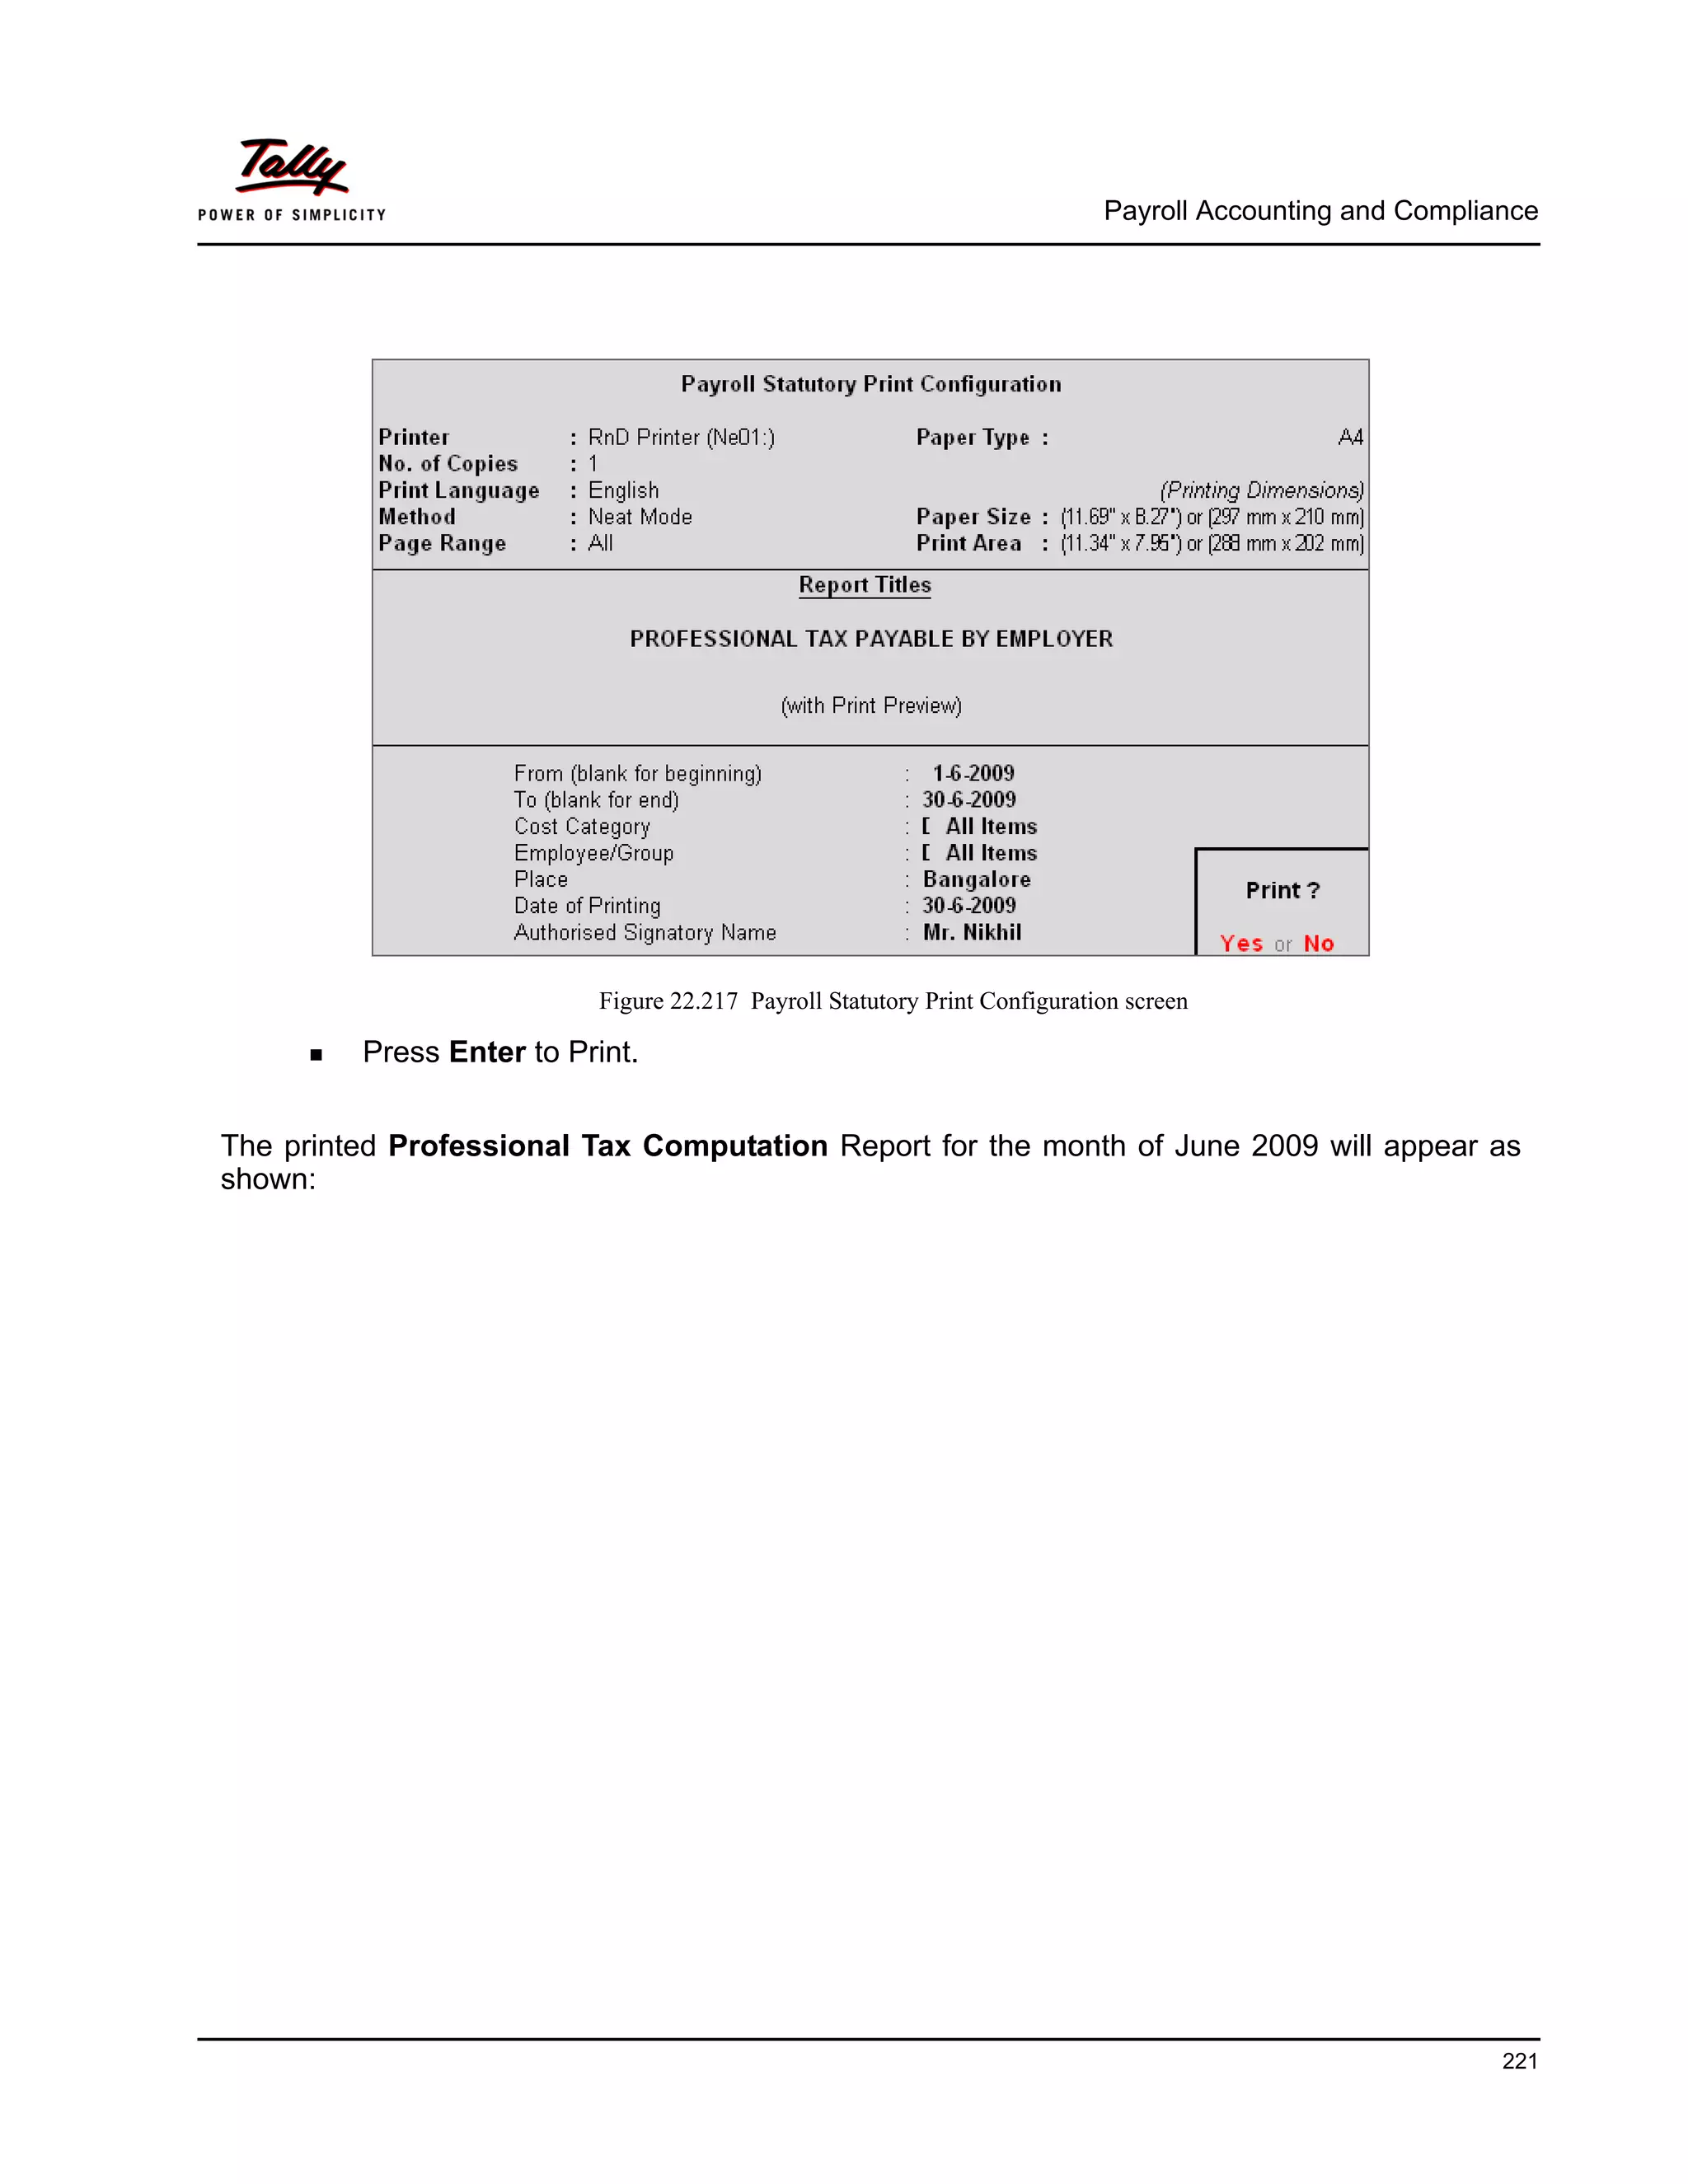
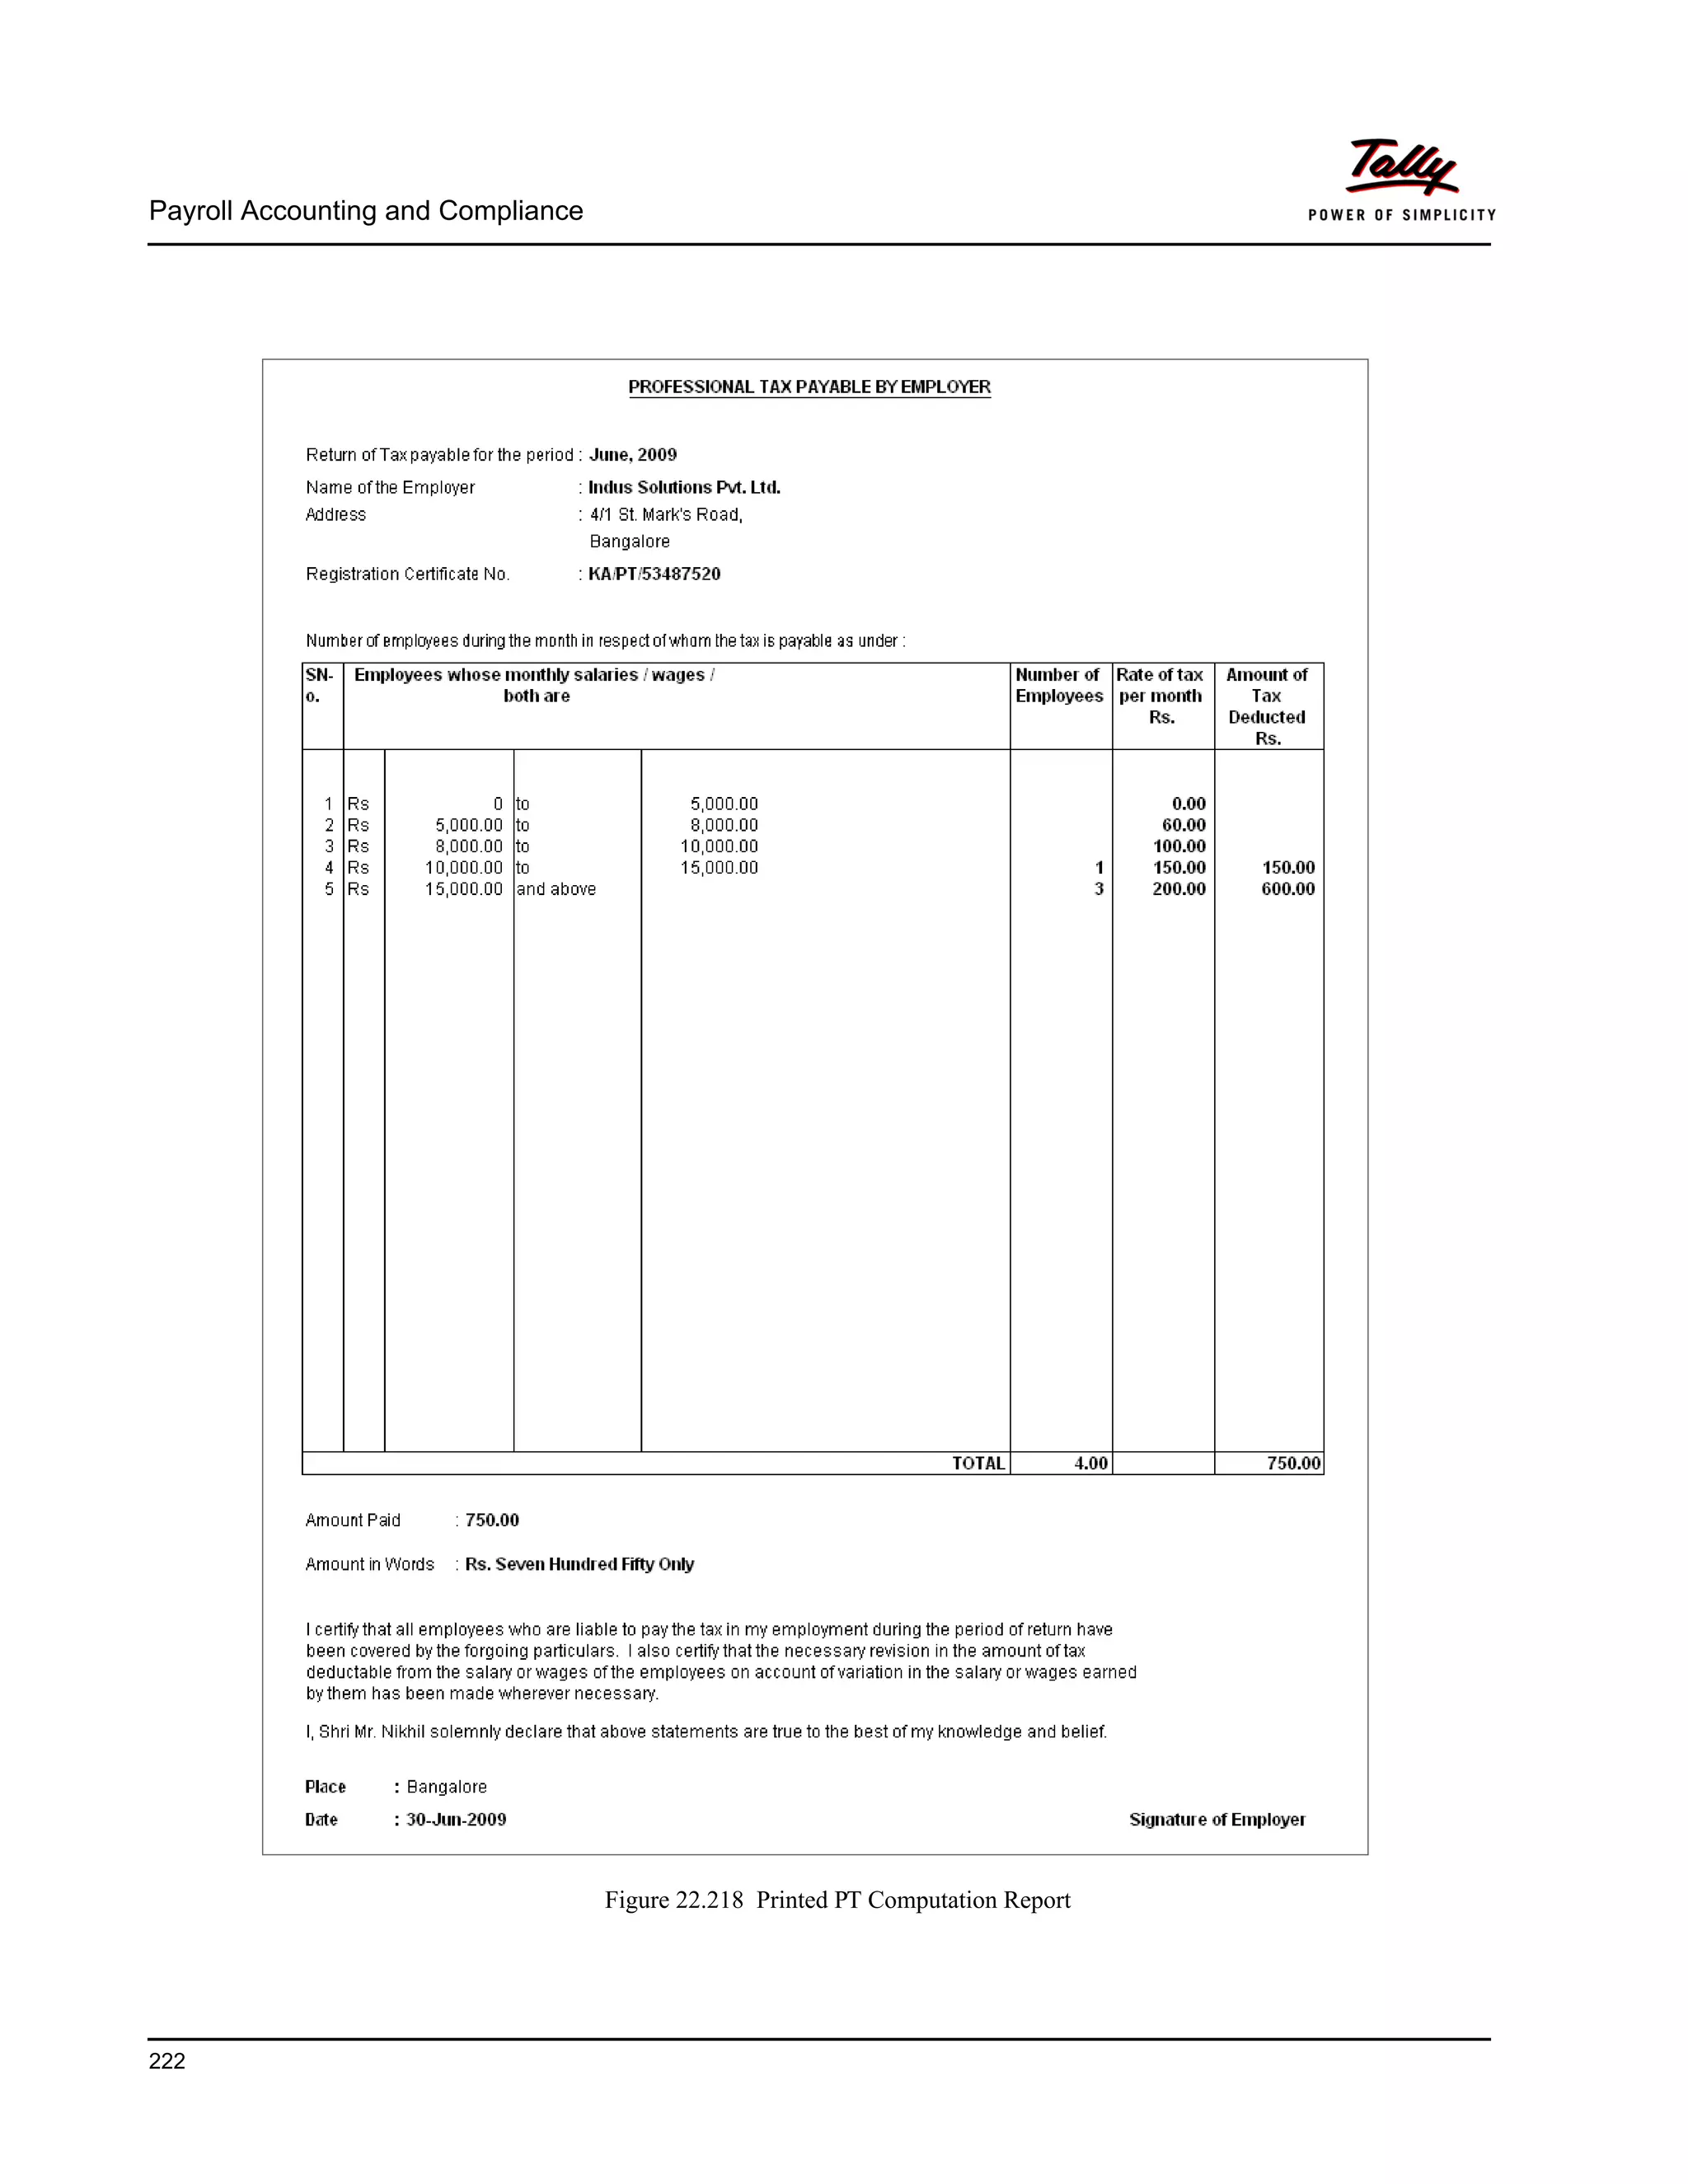

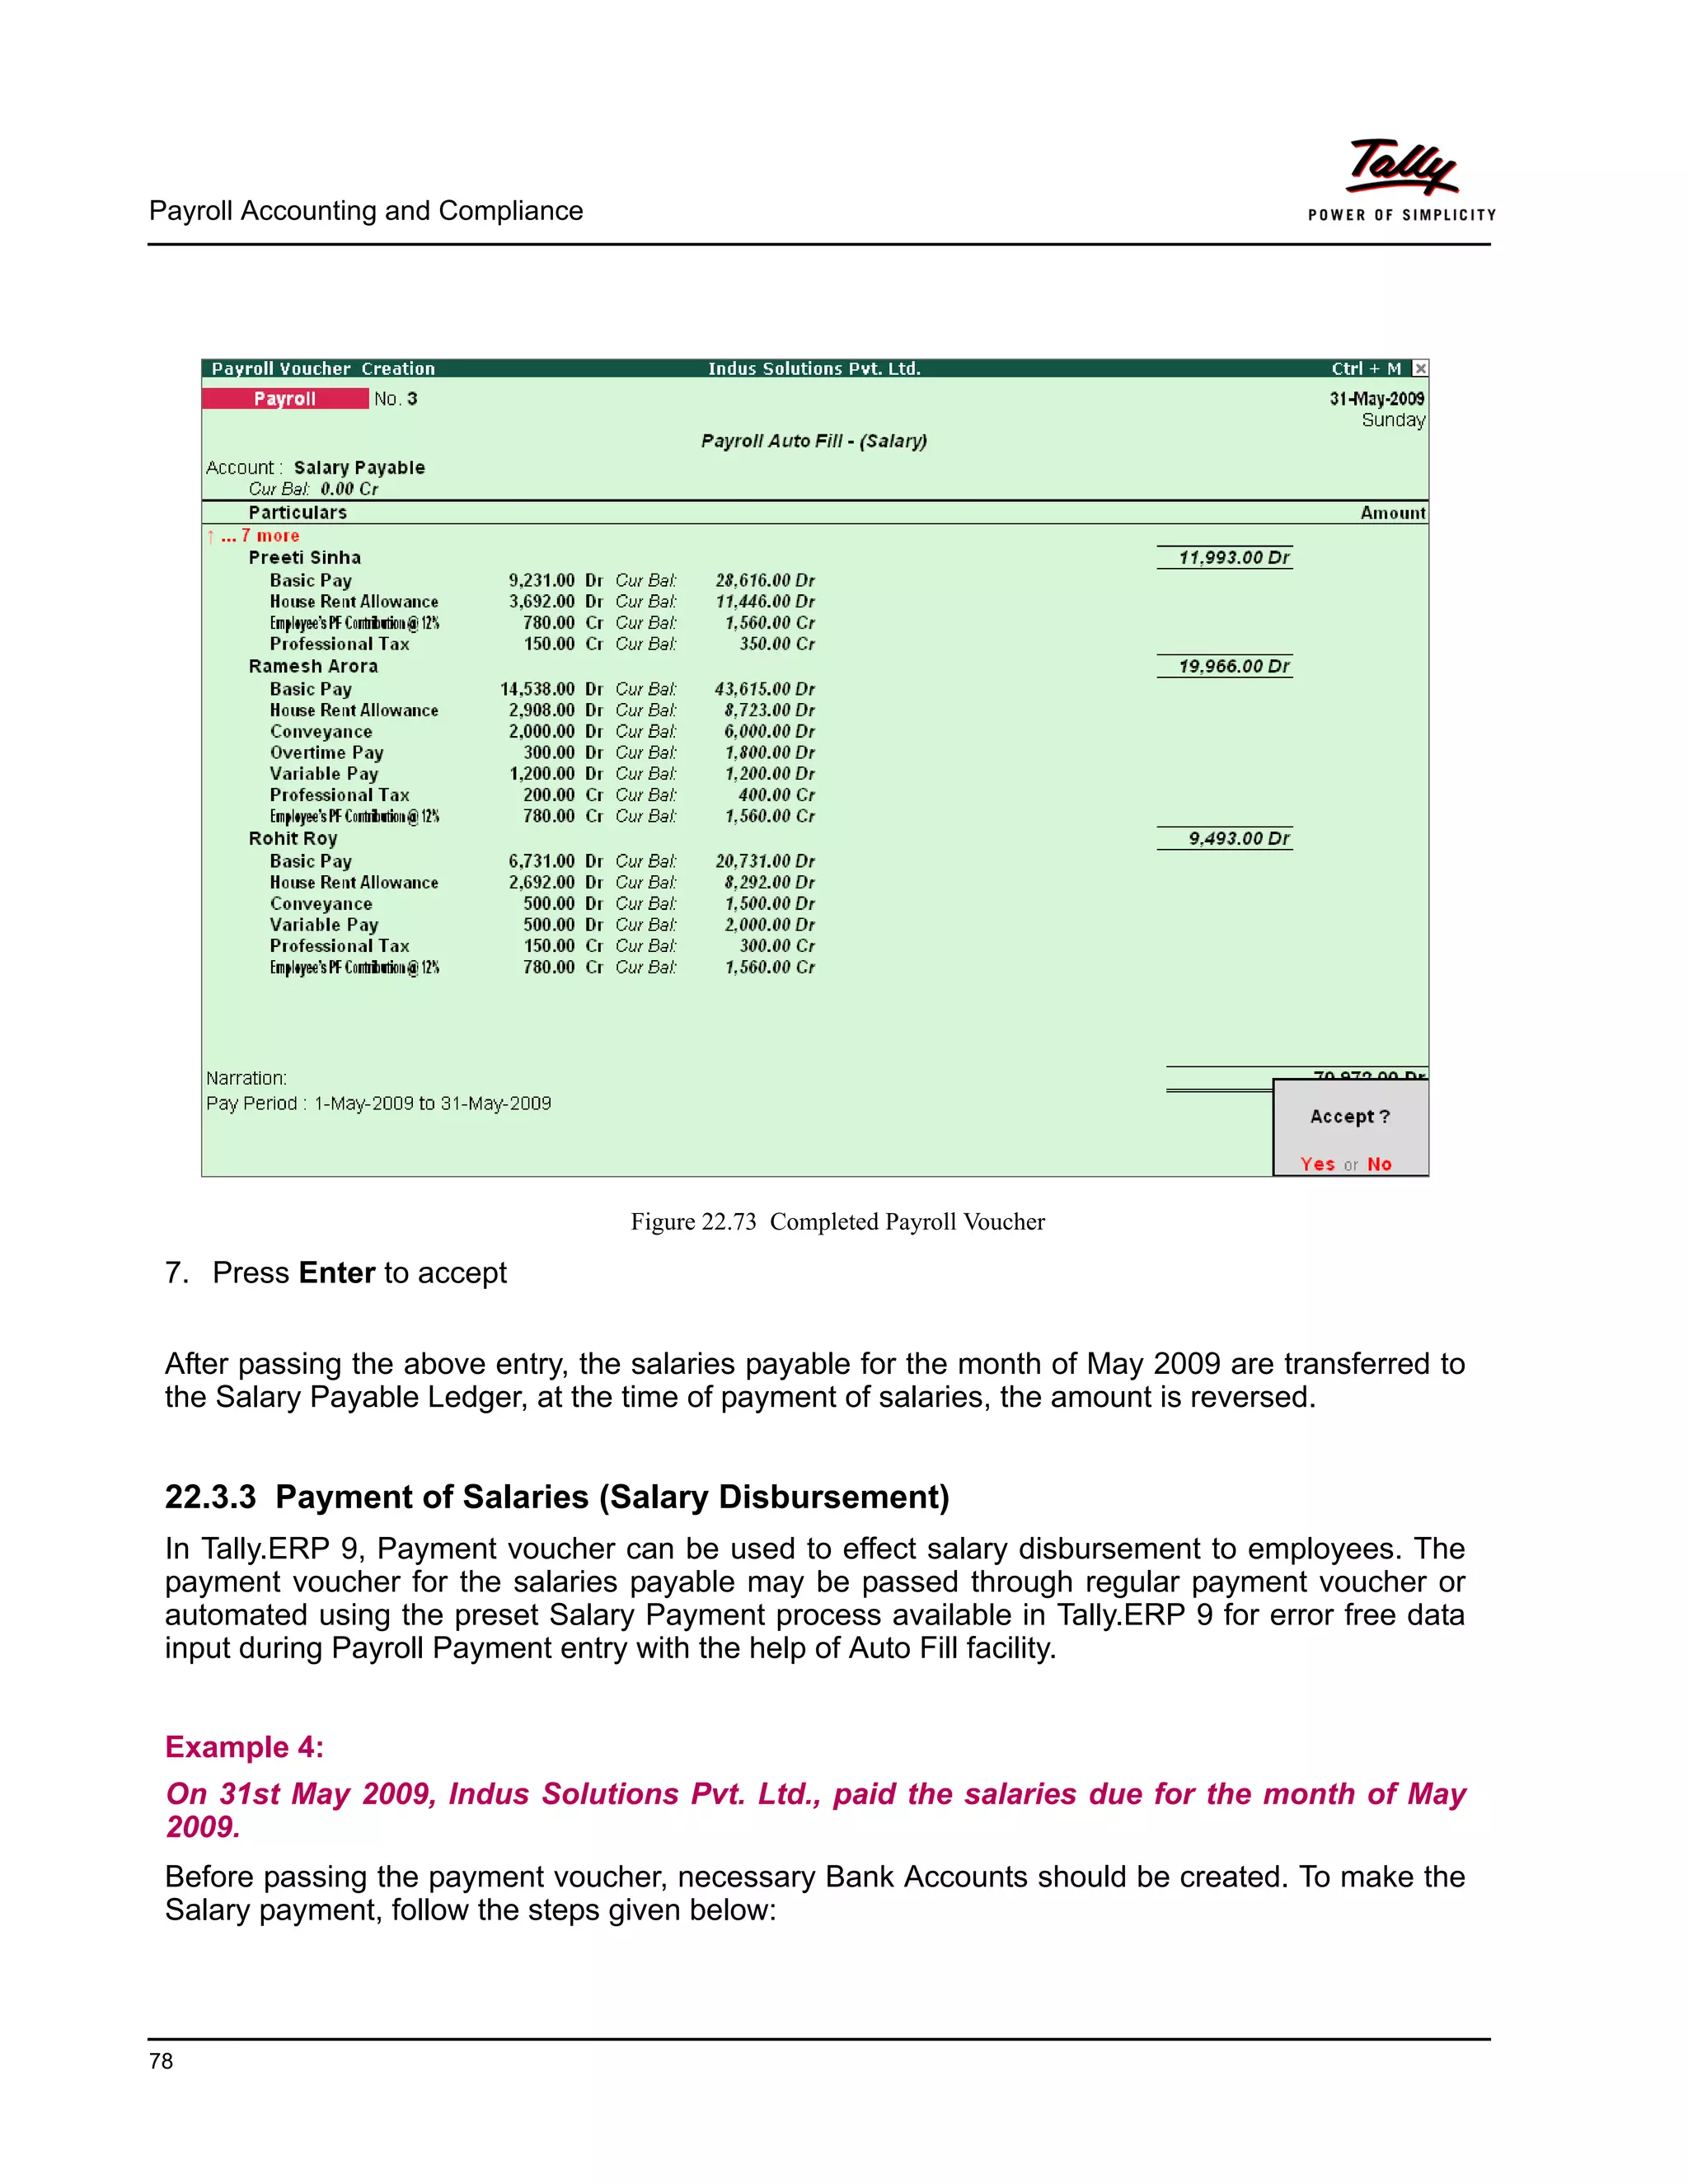
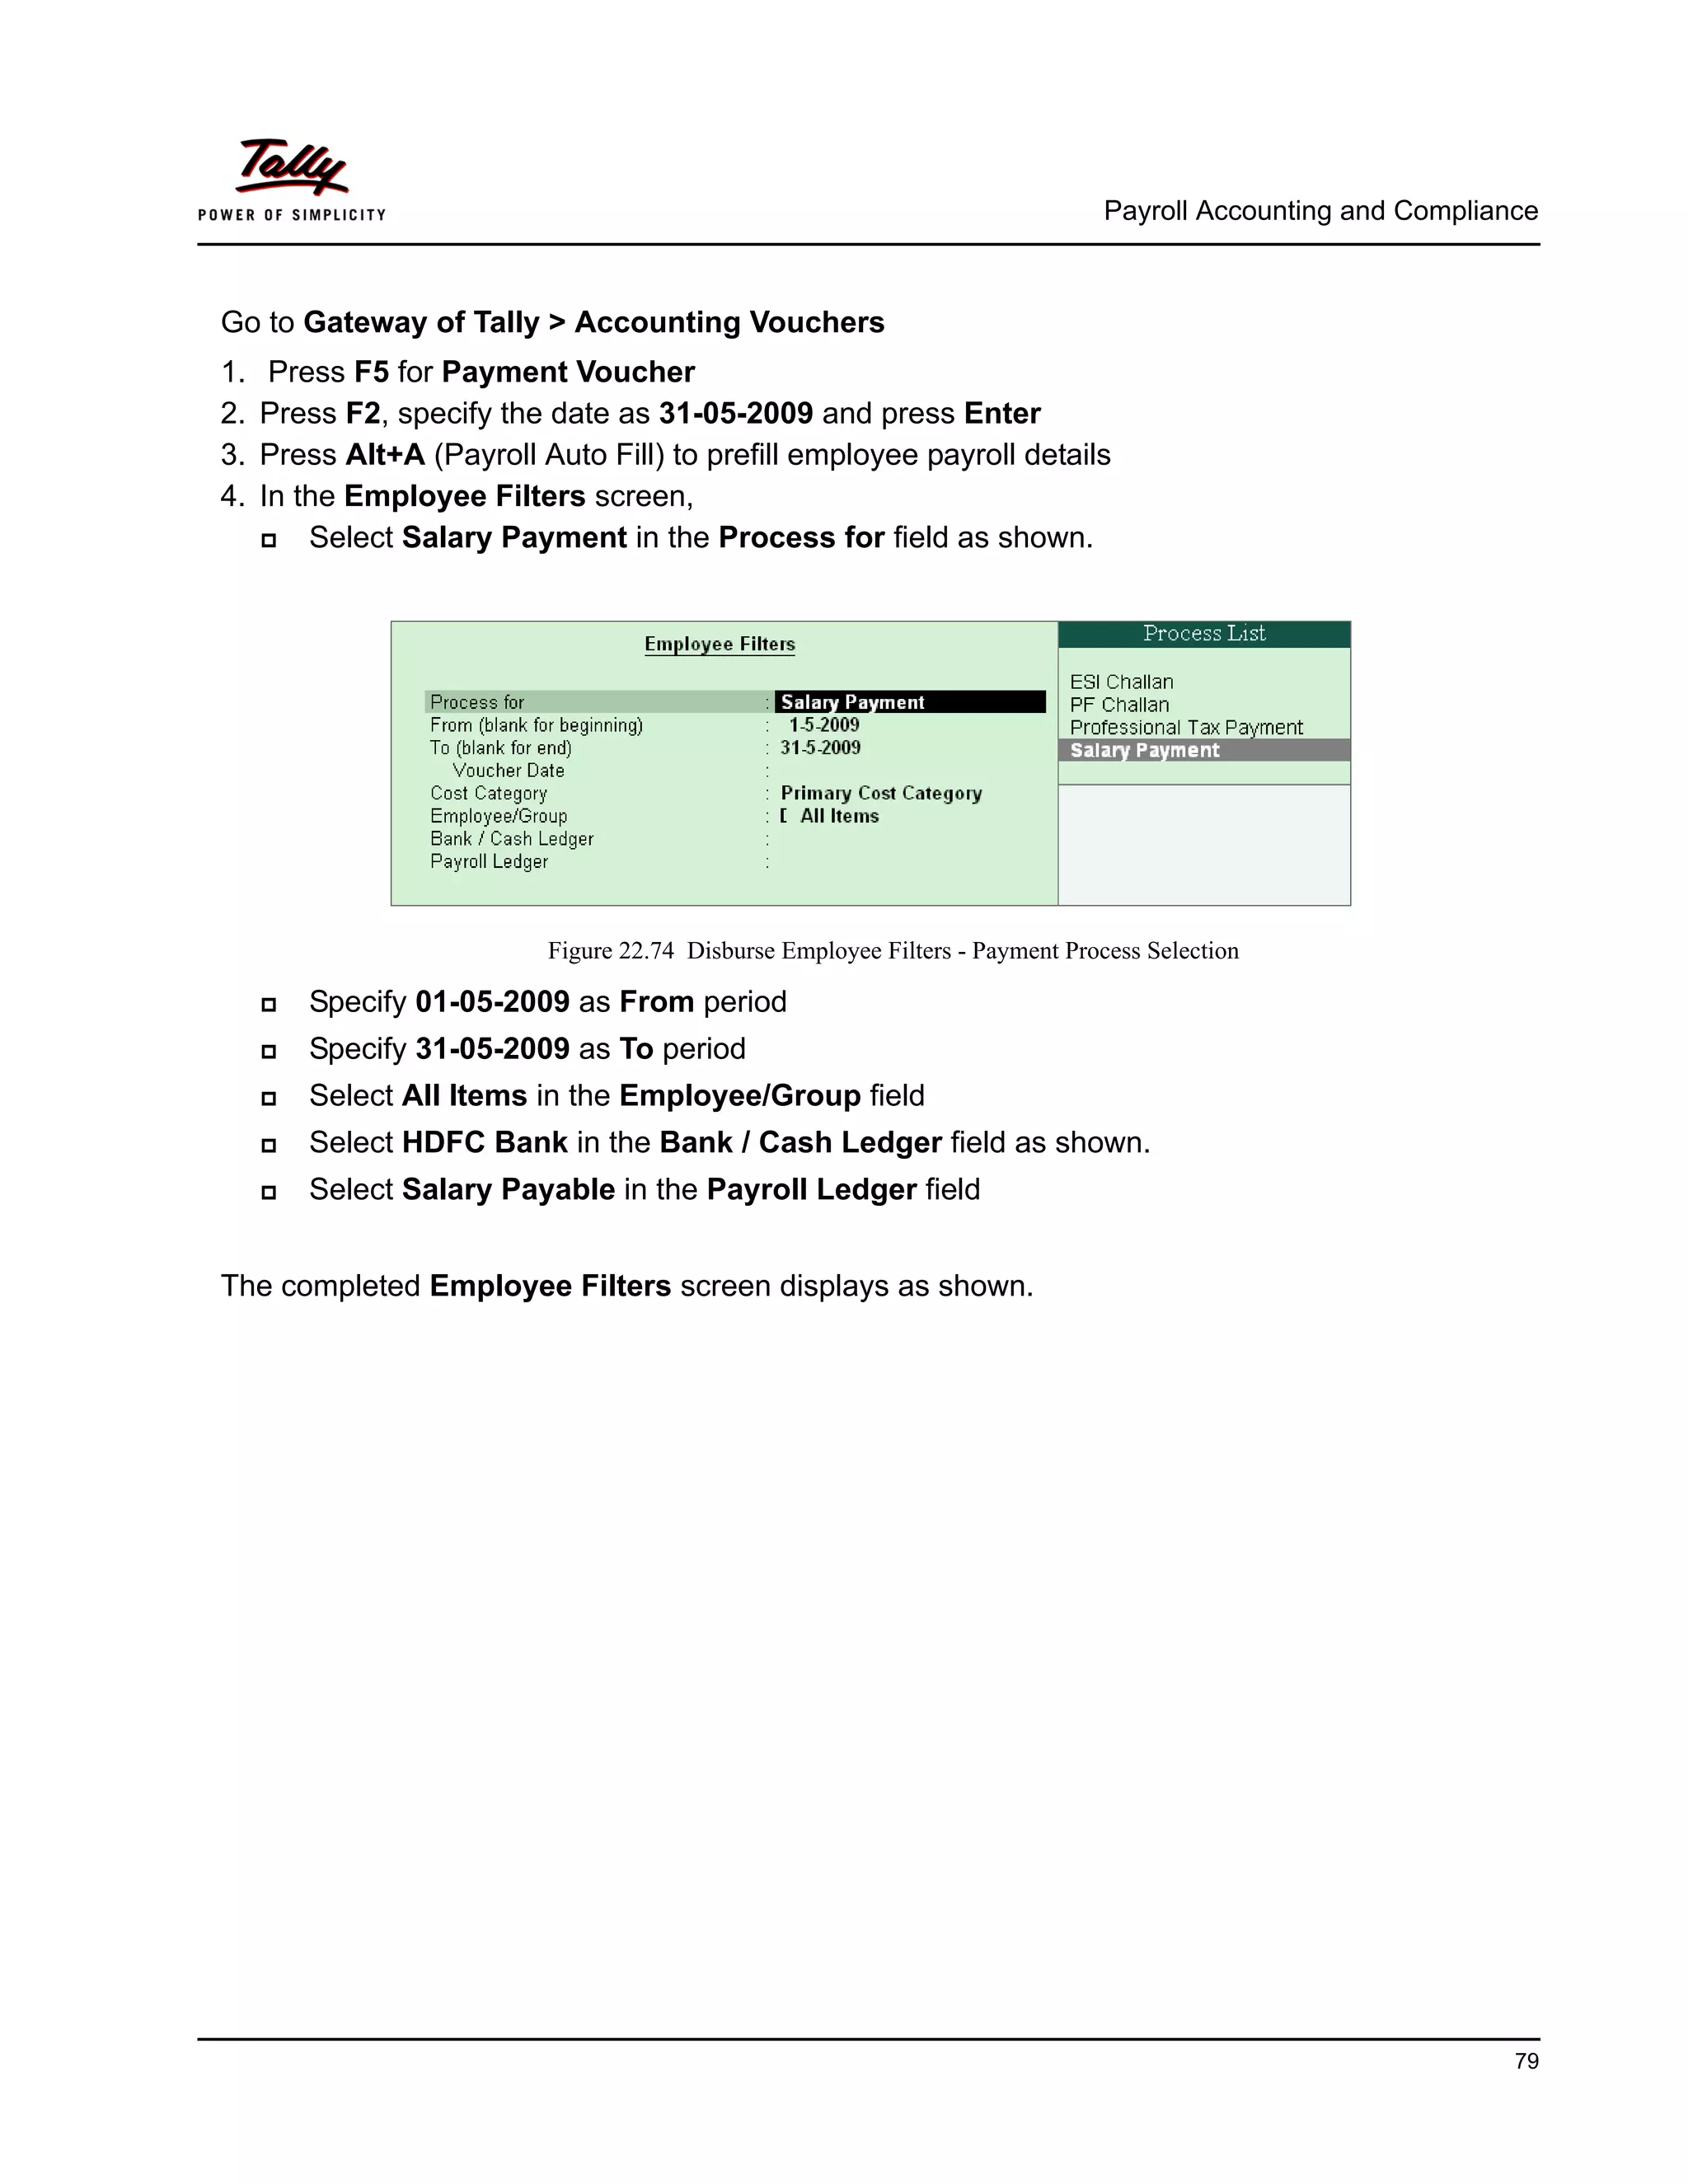
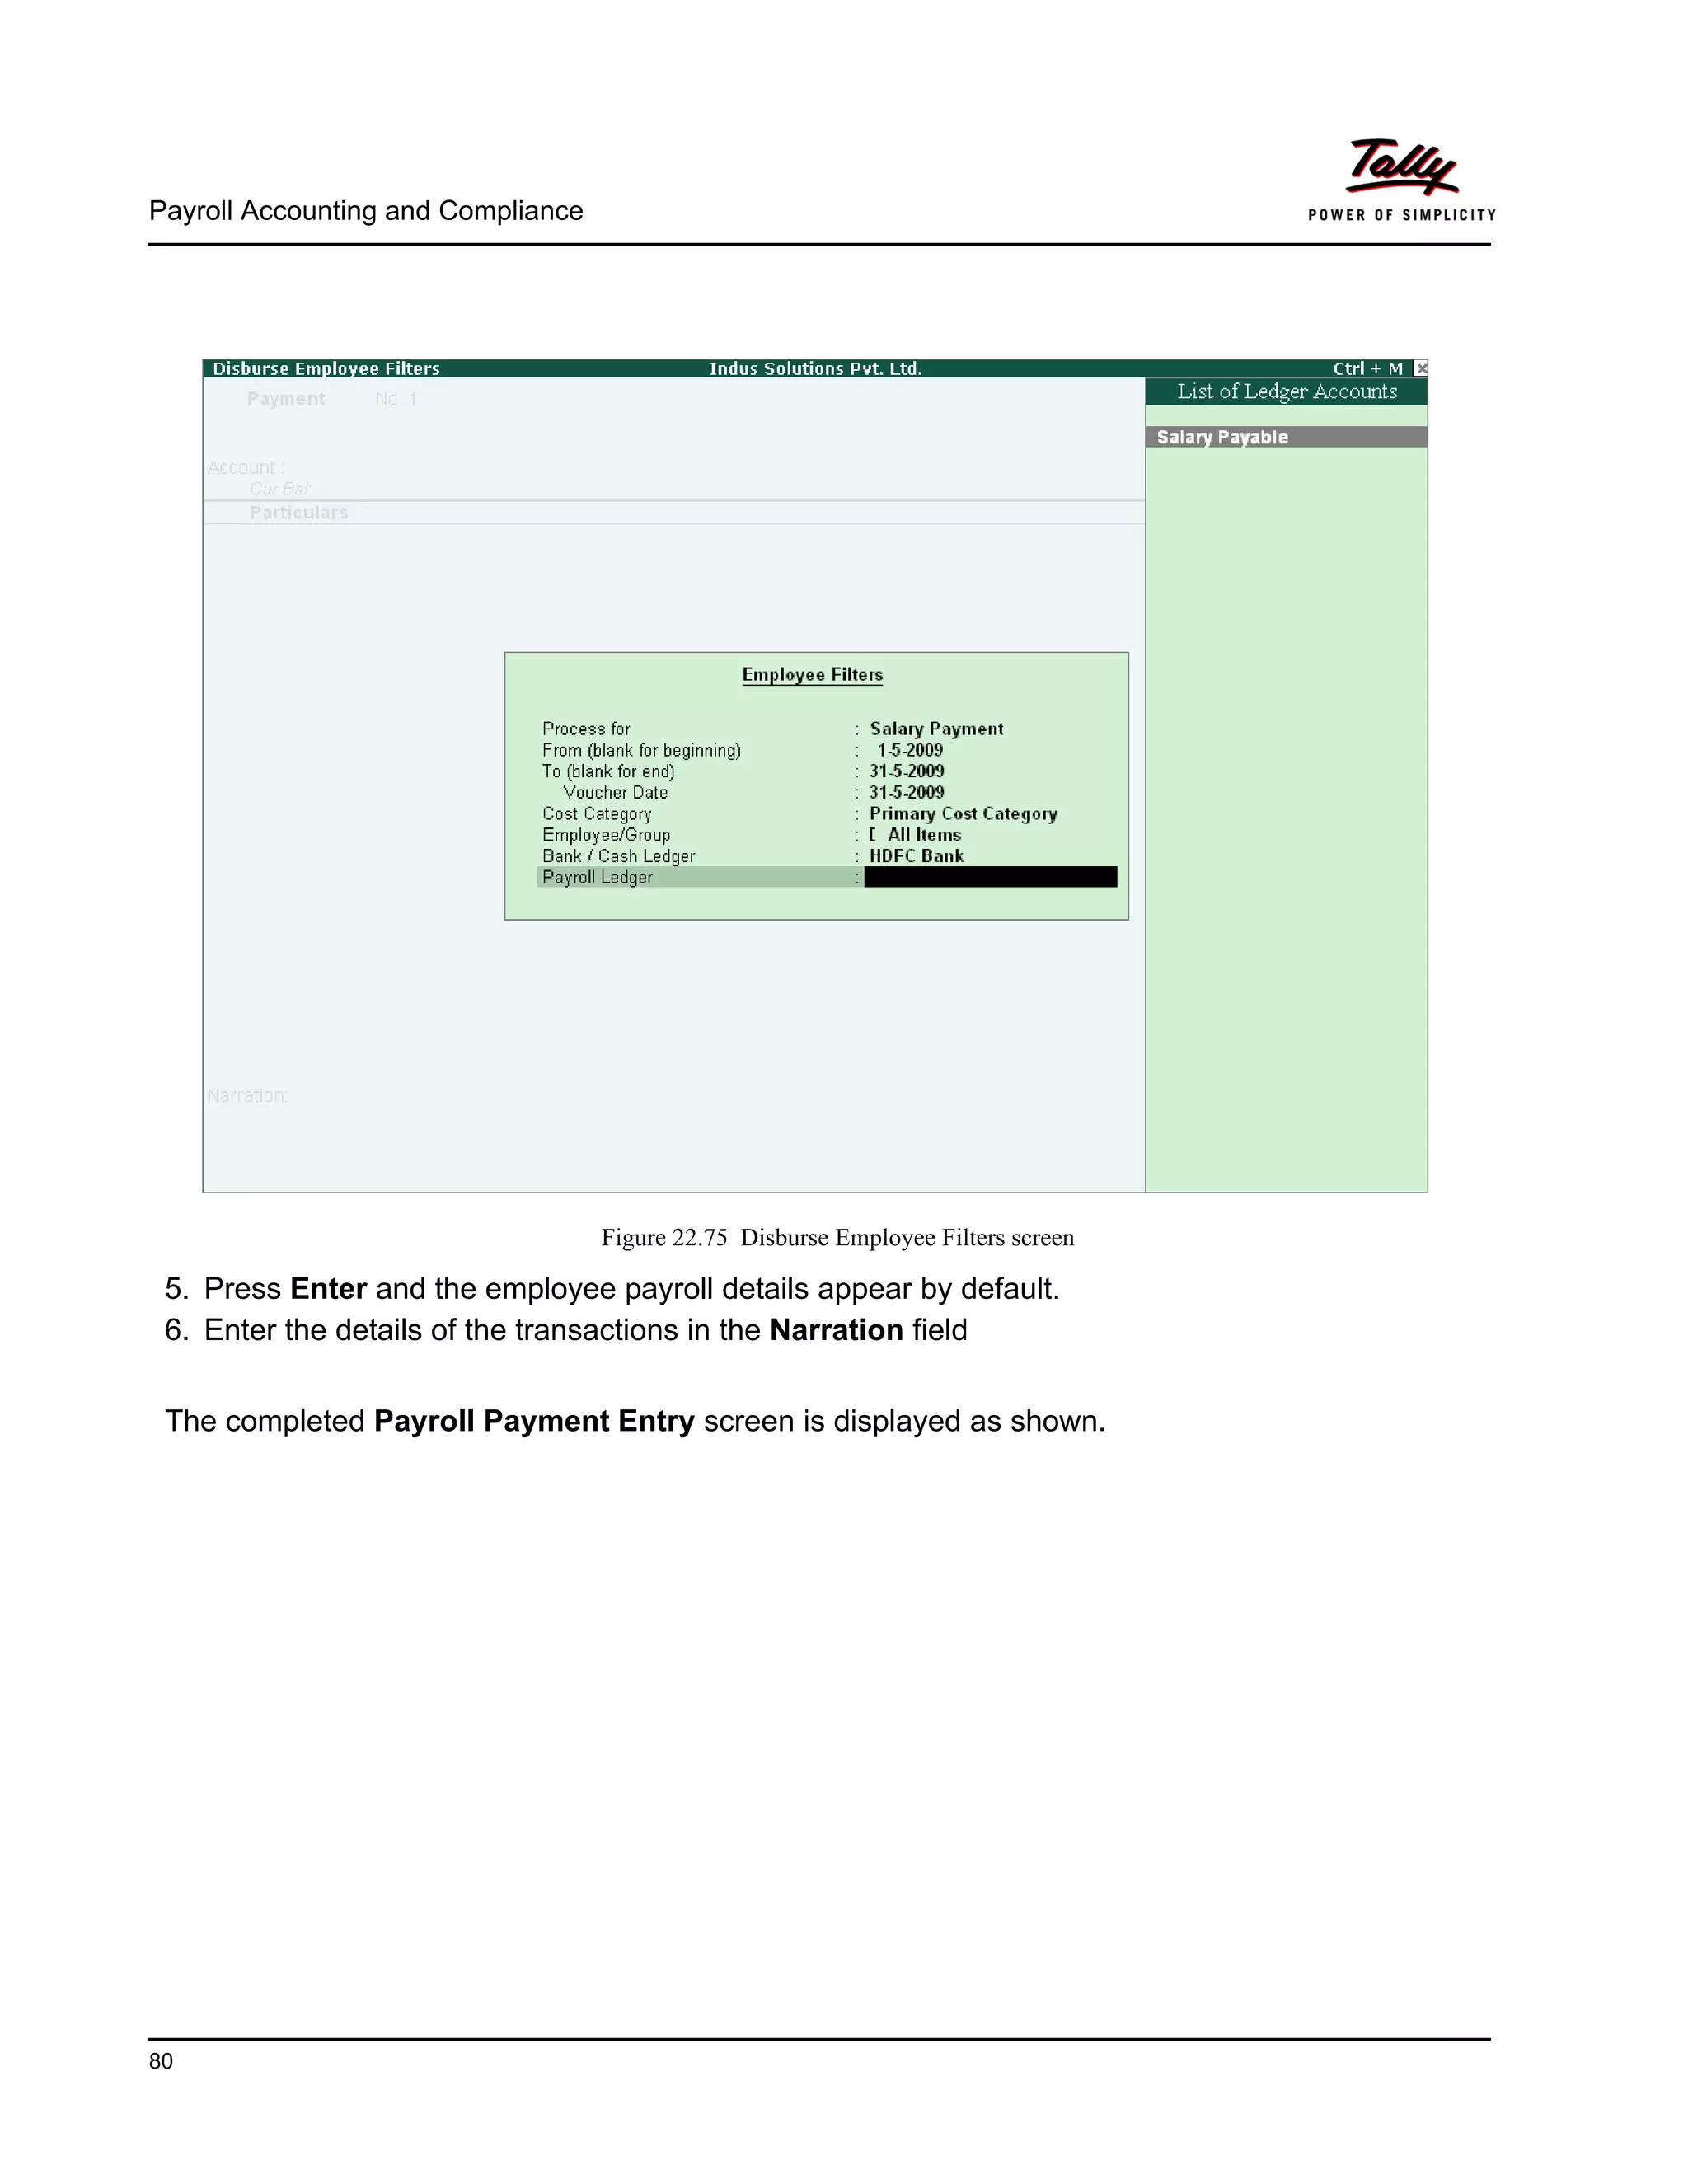
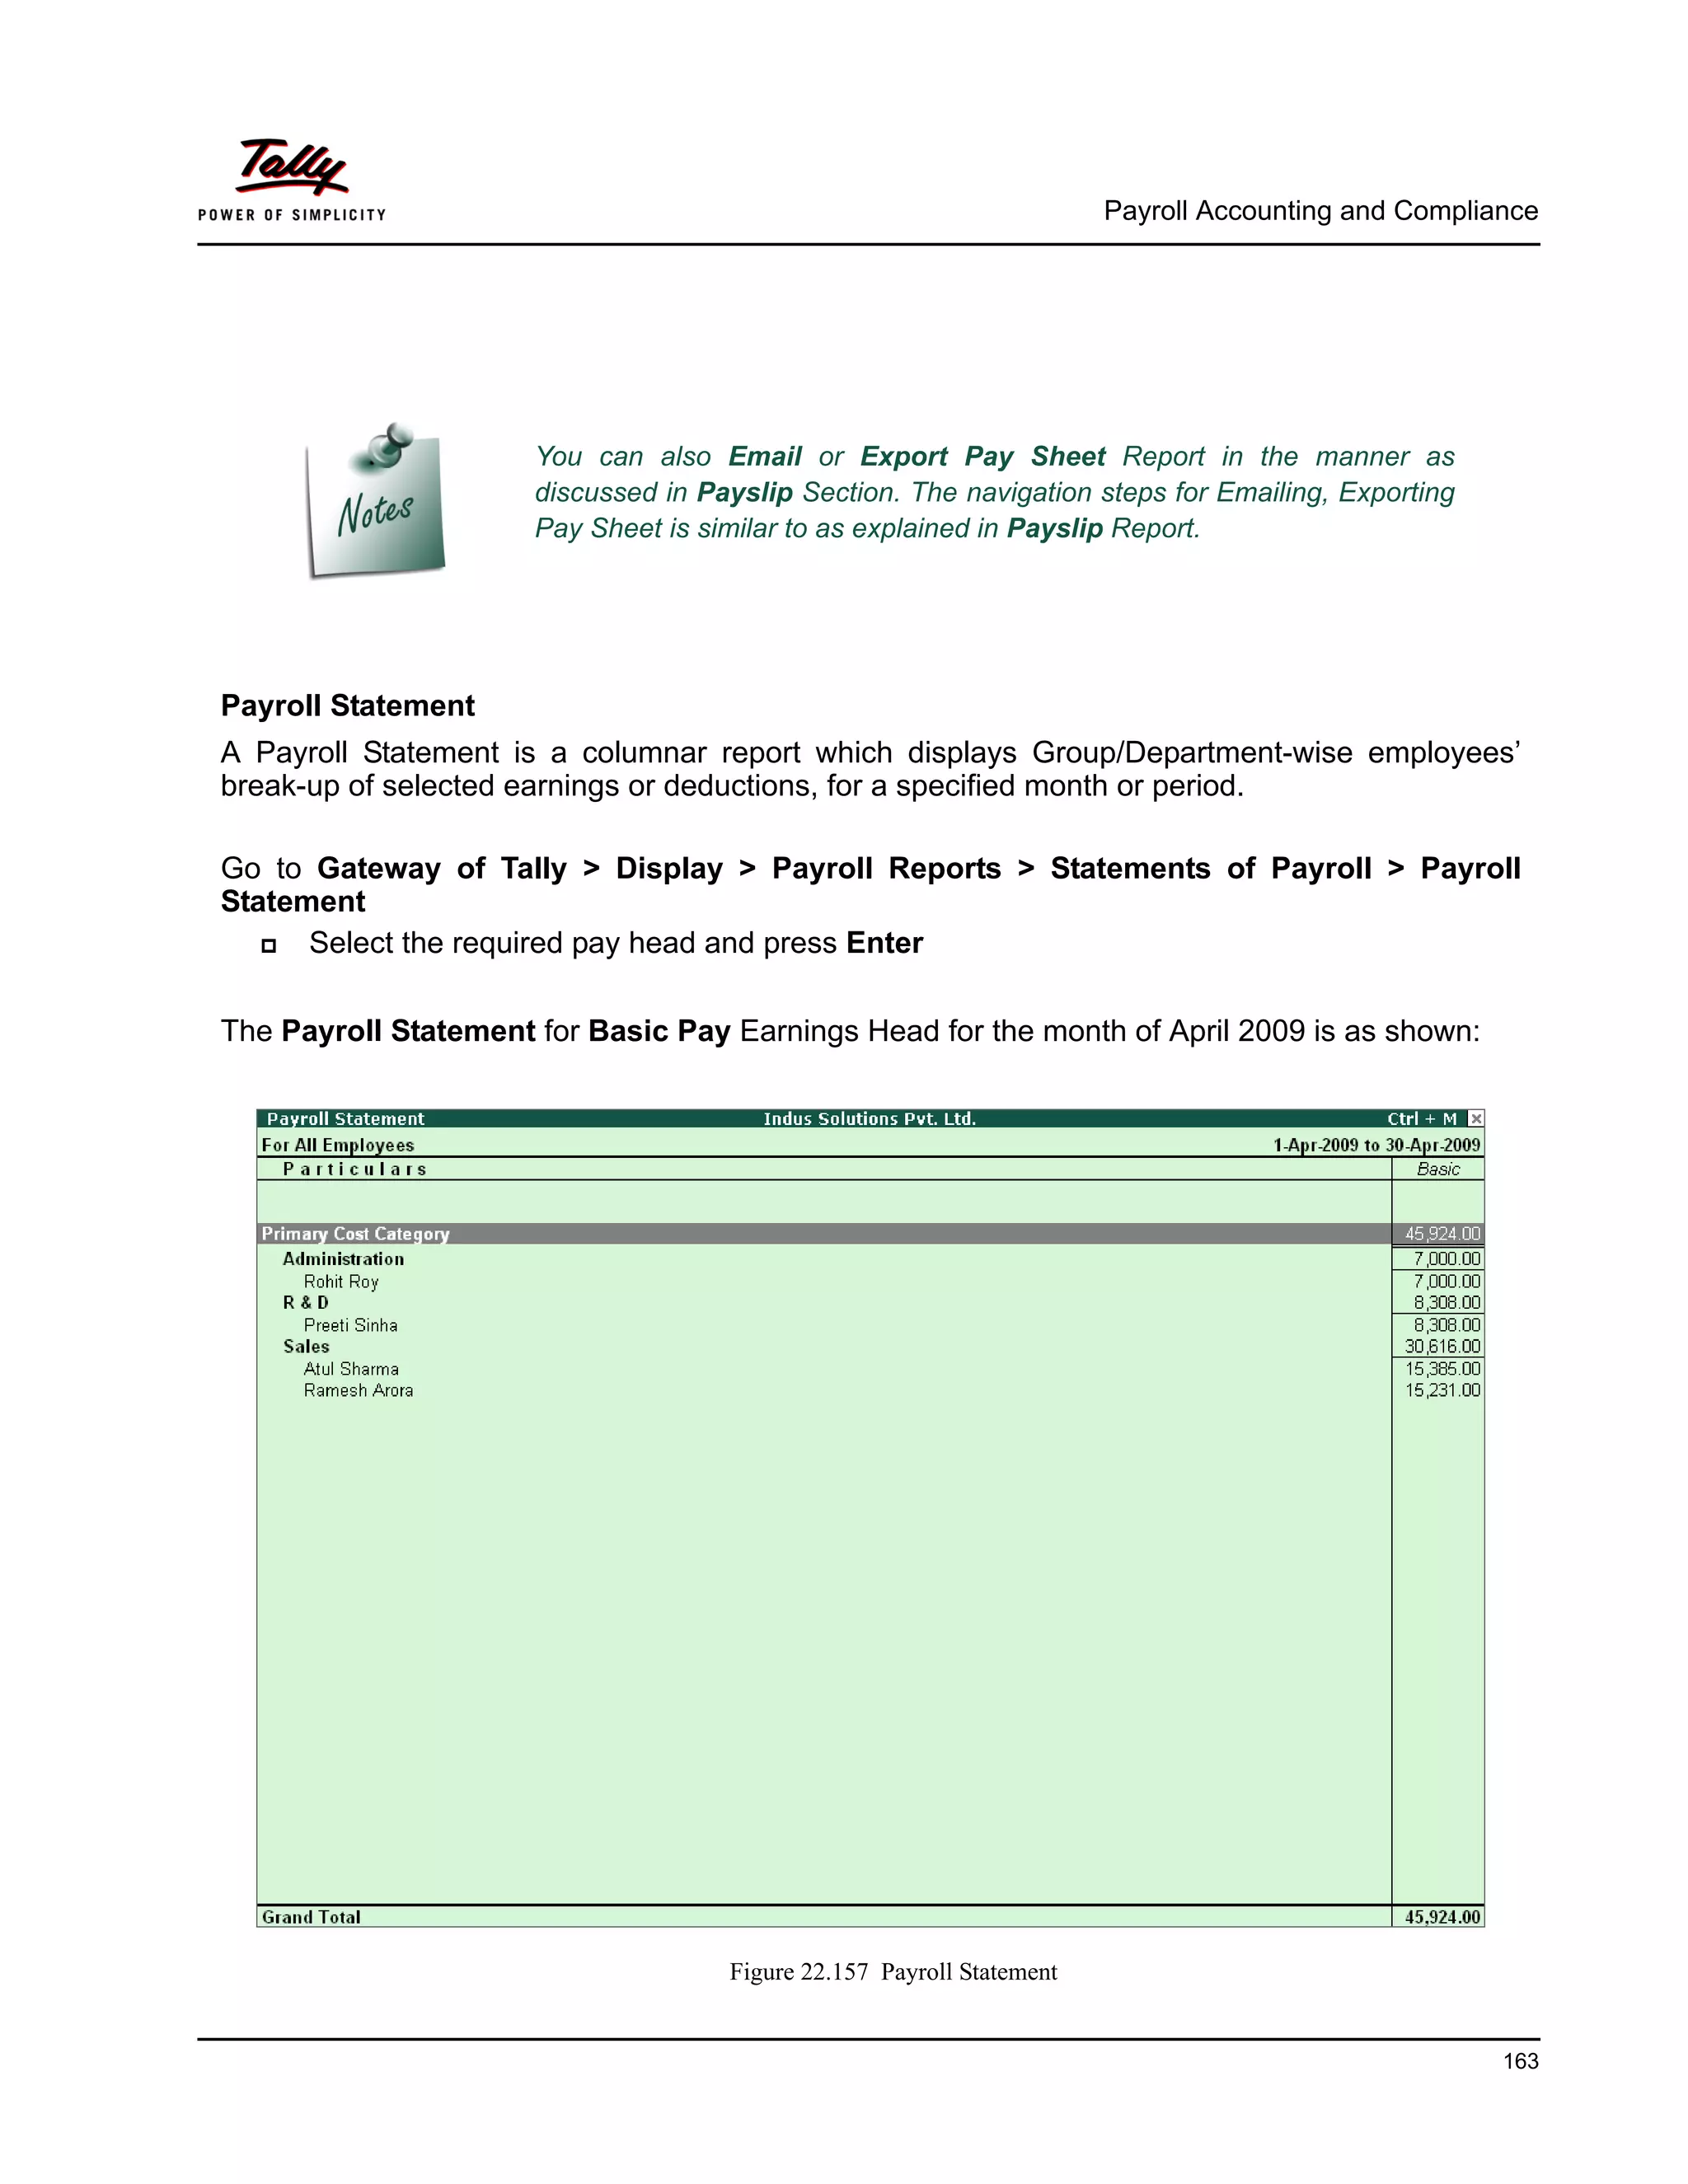
This document provides a comprehensive overview of payroll accounting and compliance using Tally.ERP 9, detailing the configuration and features essential for efficient payroll processing. It covers steps for setting up payroll, creating employee and payroll masters, as well as defining pay heads and attendance types, ensuring compliance with statutory requirements.


