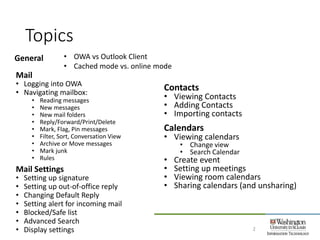
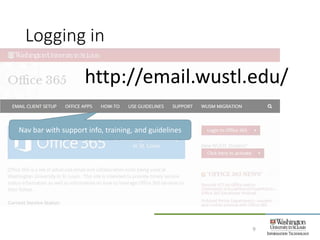
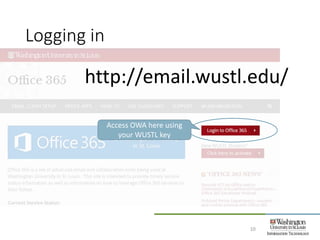
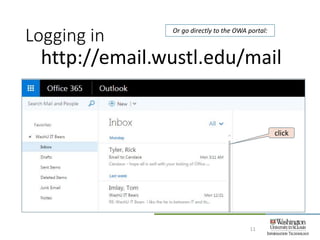
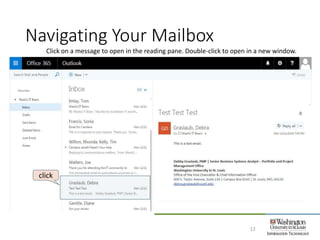
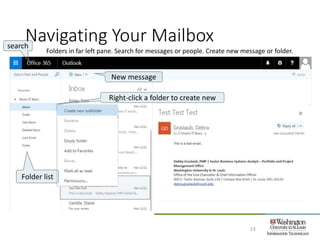
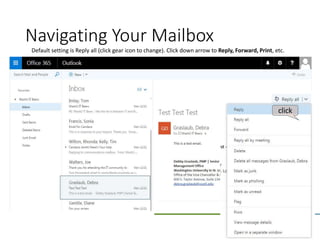
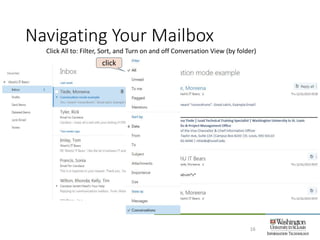
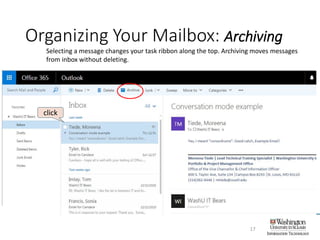
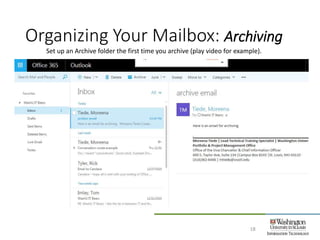
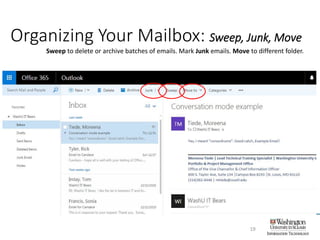
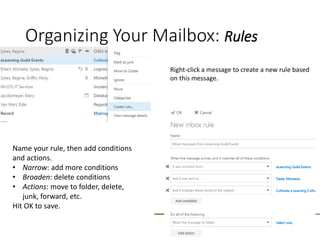
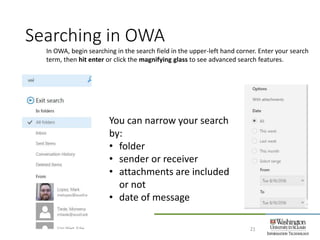
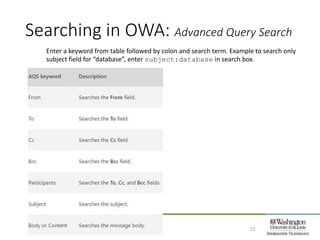
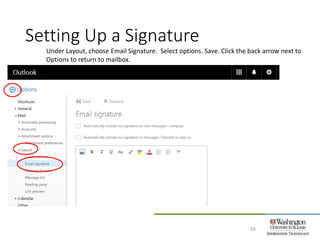
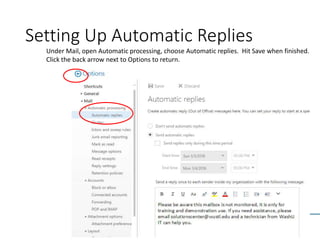
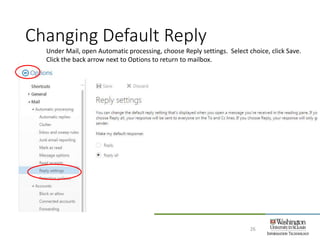
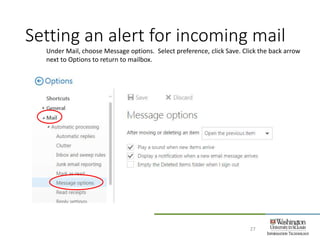
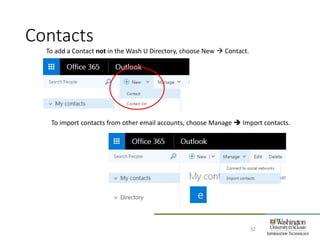
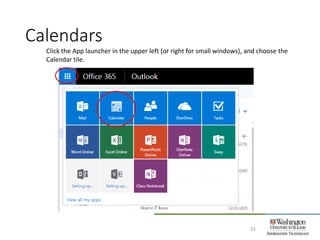
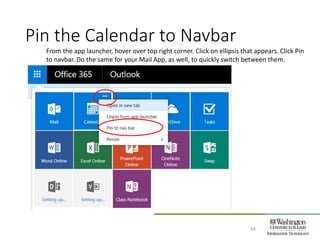
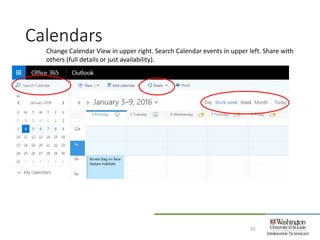
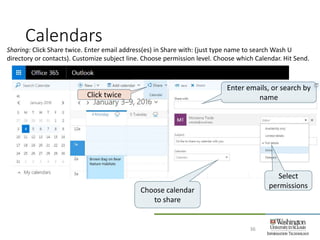
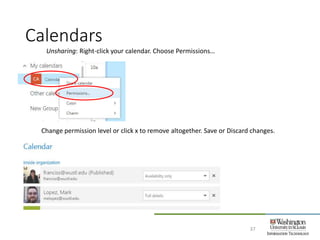
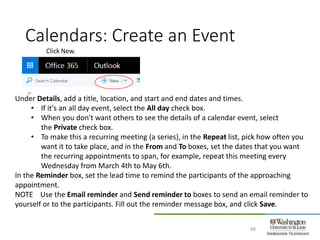
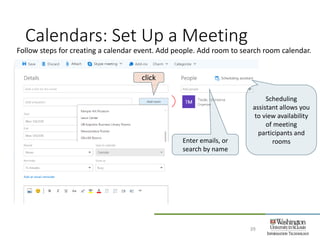
This document provides an overview and instructions for using Outlook Web Access (OWA) to access email, contacts, and calendars. It covers how to log in to OWA, navigate mailboxes, organize emails, search, set up signatures and automatic replies, block senders, and view calendars. It also compares OWA to using the Outlook desktop client, noting that Outlook offers more features but OWA allows access from any device with a web browser.
2. Topics
Mail
• Logging into OWA
• Navigating mailbox:
• Reading messages
• New messages
• New mail folders
• Reply/Forward/Print/Delete
• Mark, Flag, Pin messages
• Filter, Sort, Conversation View
• Archive or Move messages
• Mark junk
• Rules
Mail Settings
• Setting up signature
• Setting up out-of-office reply
• Changing Default Reply
• Setting alert for incoming mail
• Blocked/Safe list
• Advanced Search
• Display settings 2
Contacts
• Viewing Contacts
• Adding Contacts
• Importing contacts
Calendars
• Viewing calendars
• Change view
• Search Calendar
• Create event
• Setting up meetings
• Viewing room calendars
• Sharing calendars (and unsharing)
• OWA vs Outlook Client
• Cached mode vs. online mode
General
3. OWA: Outlook Web Access/App
3
• OWA allows you to access your email through any
web browser connected to the internet. OWA is part
of Office 365.
• The Outlook client also allows you to access your
email, but requires you to install software on your
device. Outlook is included as part of the Microsoft
Office suite.
• Generally, Outlook offers more features than OWA,
such as integration with other Office Suite apps.
• OWA offers anywhere access, and is (generally) faster.
4. Outlook Client Features
4
• Complete offline access.
• Delay or schedule emails.
• Paste objects into messages.
• Advanced search features.
• Advanced display settings.
5. Cached Mode vs Online Mode
5
• OWA is always in online mode (offline available when
enabled and on updated browsers).
• Outlook Client can be in cached mode or online
mode.
• Online Mode: pulls info directly from server (does not
create a local copy to work from), and requires a
connection.
• Cached Mode: pulls info from a local copy on your
machine, which is updated periodically from the
server.
6. Cached Mode vs Online Mode (cont.)
6
• Cached Mode: allows users to work offline, and users
feel less impact from network connectivity issues.
• Online Mode: best if using a client with shared
machines (OWA may be best option in that case), or if
working with very large mailboxes (over 25 GB) when
disk space is an issue (or limit the size of the local
cache to only messages from past 3 months, for
example).
7. OWA Interactive Training
7
Click on area indicated
(reading or slideshow view)
Peach callouts indicate when action is
required from you. Click on the
indicated object (this one).
Yes! Just like that!
13. Navigating Your Mailbox
13
Folders in far left pane. Search for messages or people. Create new message or folder.
Folder list
search
New message
Right-click a folder to create new
14. Navigating Your Mailbox
14
Default setting is Reply all (click gear icon to change). Click down arrow to Reply, Forward, Print, etc.
click
17. Organizing Your Mailbox: Archiving
17
Selecting a message changes your task ribbon along the top. Archiving moves messages
from inbox without deleting.
click
18. 18
Set up an Archive folder the first time you archive (play video for example).
Organizing Your Mailbox: Archiving
19. 19
Sweep to delete or archive batches of emails. Mark Junk emails. Move to different folder.
Organizing Your Mailbox: Sweep, Junk, Move
20. 20
Right-click a message to create a new rule based
on this message.
Organizing Your Mailbox: Rules
Name your rule, then add conditions
and actions.
• Narrow: add more conditions
• Broaden: delete conditions
• Actions: move to folder, delete,
junk, forward, etc.
Hit OK to save.
21. Searching in OWA
21
In OWA, begin searching in the search field in the upper-left hand corner. Enter your search
term, then hit enter or click the magnifying glass to see advanced search features.
You can narrow your search
by:
• folder
• sender or receiver
• attachments are included
or not
• date of message
22. Searching in OWA: Advanced Query Search
22
Enter a keyword from table followed by colon and search term. Example to search only
subject field for “database”, enter subject:database in search box.
23. Setting Up a Signature
23
Click gear, and search “signature” in settings search bar. Click “Email signature”. Or scroll
down to select App Settings for Mail.
24. Setting Up a Signature
24
Under Layout, choose Email Signature. Select options. Save. Click the back arrow next to
Options to return to mailbox.
25. Setting Up Automatic Replies
25
Under Mail, open Automatic processing, choose Automatic replies. Hit Save when finished.
Click the back arrow next to Options to return.
26. Changing Default Reply
26
Under Mail, open Automatic processing, choose Reply settings. Select choice, click Save.
Click the back arrow next to Options to return to mailbox.
27. Setting an alert for incoming mail
27
Under Mail, choose Message options. Select preference, click Save. Click the back arrow
next to Options to return to mailbox.
28. Blocked/Safe Sender List
28
Under Mail, choose Accounts. Select Block or allow. Enter a sender or domain, and click
plus sign to add to your safe or blocked list. Emails from those senders or domains will be
moved automatically to junk (or never moved to junk for safe senders).
30. Contacts
30
Contacts are accessed through the People app. Click the App launcher in the upper left (or
right on small windows), and choose the People tile.
31. Contacts
31
Use Search People to find contacts in the Wash U Directory. If no search results appear, be
sure you are searching the Directory. Add to contacts, or a Contact List.
click
32. Contacts
32
To add a Contact not in the Wash U Directory, choose New Contact.
To import contacts from other email accounts, choose Manage Import contacts.
33. Calendars
33
Click the App launcher in the upper left (or right for small windows), and choose the
Calendar tile.
34. Pin the Calendar to Navbar
34
From the app launcher, hover over top right corner. Click on ellipsis that appears. Click Pin
to navbar. Do the same for your Mail App, as well, to quickly switch between them.
35. Calendars
35
Change Calendar View in upper right. Search Calendar events in upper left. Share with
others (full details or just availability).
36. Calendars
36
Sharing: Click Share twice. Enter email address(es) in Share with: (just type name to search Wash U
directory or contacts). Customize subject line. Choose permission level. Choose which Calendar. Hit Send.
Click twice
Enter emails, or search by
name
Choose calendar
to share
Select
permissions
38. Calendars: Create an Event
38
Click New.
Under Details, add a title, location, and start and end dates and times.
• If it's an all day event, select the All day check box.
• When you don't want others to see the details of a calendar event, select
the Private check box.
• To make this a recurring meeting (a series), in the Repeat list, pick how often you
want it to take place, and in the From and To boxes, set the dates that you want
the recurring appointments to span, for example, repeat this meeting every
Wednesday from March 4th to May 6th.
In the Reminder box, set the lead time to remind the participants of the approaching
appointment.
NOTE Use the Email reminder and Send reminder to boxes to send an email reminder to
yourself or to the participants. Fill out the reminder message box, and click Save.
39. Calendars: Set Up a Meeting
39
Follow steps for creating a calendar event. Add people. Add room to search room calendar.
click
Enter emails, or
search by name
Scheduling
assistant allows you
to view availability
of meeting
participants and
rooms
40. View Calendar and Mail Together
40
Outlook Client allows you to “peek” at your calendar while viewing Mail.
OWA does not. However, you can open your OWA calendar in a separate tab in your
browser.
41. Settings
41
You may need to change your time zone. Click gear in upper-right and choose Options.
Then select Region and time zone, and set to Central Time.
Intro myself.
We only have one hour, so I will be prioritizing according to your requests, and what I understand the change in your area to be.
OWA is major difference, as it was associated with a different looking interface with old server.
For many, OWA is what you are using at shared computers, and it is slowing up your productivity.
By far the number one requested item was to explain difference between OWA and Outlook Client, so will start there, and also as a level-set. A number of the questions/responses I got on the survey were unclear whether they concerned OWA or Outlook Client.
Generally, I like to keep the trainings separate, because it becomes confusing to switch b/w two interfaces. We will do so here, esp. during your direct training session.
I will make the training materials available online, as well as updating the FAQ there.
There is a 1-page OWA Quick Guide as a handout.
Haha on the faster, but hold on a moment.
There were a number of comments about slowness, but I wasn’t sure whether these concerned OWA or client, and where it was running. All critical to know to respond to slowness requests.
Generally, you want to choose Cached mode for a client, as you will have faster results and
There were a number of comments about slowness, but I wasn’t sure whether these concerned OWA or client, and where it was running. All critical to know to respond to slowness requests.
Generally, you want to choose Cached mode for a client, as you will have faster results and be able to work offline.
Exception: not on shared machines, and not in non-persistent virtual desktop environment (don’t want to create your cached copy every time).
Click wustl key box
Click graslaub message
Click folders, search, and new.
Click reply all
Note you can save a message in OWA by Print to PDF
Click message. Click Archive.
Video
Note: mailboxes are limited to 50 gb, although unlimited archiving can be turned on. Deleted items are permanently removed after one year (30 day recovery window).
Click sweep, click junk, click move to to create new folder. Show folder online.