SlideShare a Scribd company logo
1 of 47
Download to read offline
From Microsoft
Outlook
to HCL Notes
–
A guide
(which can also be used for experienced Notes user)
By HCL Ambassador Hogne Bø Pettersen
V. 1.0: 11.03.2020
Table of Contents
About this document........................................................................................................................... 4
Notes client settings and functions..................................................................................................... 5
Open documents in new windows.................................................................................................. 5
Preview pane................................................................................................................................... 5
Shortcuts ......................................................................................................................................... 6
Spell checking.................................................................................................................................. 9
Rich text formatting in HCL Notes................................................................................................. 11
Mail.................................................................................................................................................... 14
Creating a new email..................................................................................................................... 14
Sorting email folders and views .................................................................................................... 15
Search for emails........................................................................................................................... 17
Flag an email for follow up............................................................................................................ 18
Turn an email into a meeting or To do.......................................................................................... 19
See your calendar while using your email..................................................................................... 20
Quick rules..................................................................................................................................... 21
Mail signature................................................................................................................................ 22
Mail conversations ........................................................................................................................ 25
Notifications .................................................................................................................................. 26
Out of office................................................................................................................................... 26
Spellchecking your email............................................................................................................... 28
Prevent sending emails with blank Subject line............................................................................ 29
Formatting email text.................................................................................................................... 30
Set default email font.................................................................................................................... 30
Add another email account........................................................................................................... 31
Calendar ............................................................................................................................................ 33
Share your calendar....................................................................................................................... 33
Color code calendar entries .......................................................................................................... 36
Change calendar views.................................................................................................................. 38
Week numbers .............................................................................................................................. 40
Find available time ........................................................................................................................ 40
View Invitee Status........................................................................................................................ 41
Contacts............................................................................................................................................. 42
Add contact ................................................................................................................................... 42
Recent contacts............................................................................................................................. 43
To do.................................................................................................................................................. 45
Create a To do ............................................................................................................................... 45
Mark a To do as completed or incomplete ................................................................................... 46
Summary ........................................................................................................................................... 47
About this document
While Notes is so much more than just an email, calendar, and contacts application, it is
usually among one of the most important features of the client.
Outlook is the email and scheduling client with the largest user base. This means that if you
get new employees in your company, they were most likely Outlook users in their previous
position. If you are using Notes for email and calendaring, there will be a period of
adjustment for the employee.
In the past 15 years I've had several user training sessions for users that comes from the world
of Outlook to the world of Notes. This posting is therefore built on my long experience about
what the usual questions and challenges are.
This article will hopefully help you make the transition smoother and make it easier for the
employee to adapt to working with Notes. I have therefore included tips on how you can set
up the client to mimic Outlook behaviour (like opening everything in new windows).
In addition, I have described how you use a lot of the functions that Outlook, and Notes have
in common, that might be a bit different in Notes.
I also think this article will be of great help to users who have used Notes for years.
Notes client settings and functions
Open documents in new windows
In Outlook, any document that you create or open will appear in its own window. This is of
course possible in Notes as well.
1. Go to the menu File and choose Preferences
2. Click on Windows in the Preferences screen
3. Select Open each document in its own window under Window Management:
4. Click Apply and then OK
5. Every window and document will from now be opened in its own window
PS! You can also open any Notes document in a new window at any time by right clicking on
it in the view or folder and choose Open in New Window
Preview pane
Just like in Outlook, you can choose whether you want to have a preview pane for your email,
calendar and to do entries, and if it should be displayed at the bottom or to the right.
Click on button named Show to the upper right, above the mail, calendar or to do folder you
are currently working with:
You can also control whether you want the email or document to be marked as read or not
when it's been displayed in the preview pane:
1. Go to the menu File and choose Preferences
2. Click on Basic Notes Client Configuration in the left side menu
3. In the big Additional Options field you check Mark documents when opened in
preview pane if you want the the emails or document to be marked as read after being
displayed in the preview pane. If you don't want that, you have to uncheck this option:
4. Click OK
PS! You can also mark a read document as unread or an unread document as read by hitting
the Insert button on your keyboard
Shortcuts
In Outlook you have shortcut icons for the mail, calendar, and To do in the lower left corner.
In Notes you have several ways to get shortcuts for Mail, Calendar and Contacts:
Shortcut buttons
Click on View -> Show Shortcut Buttons and choose Mail. Then repeat this for Calendar
and Contacts:
You will now see these shortcut buttons under the menu line:
Unfortunately To do is not available as a shortcut button.
Bookmarks
However, To do is available as a bookmark, together with Mail, Calendar and Contacts.
You find these bookmarks under the Open button:
You can pin the bookmarks under the Open button to be permanently visible by right clicking
on the Open button and choose Dock the Open List. You can also choose Use Large Icons.
Now Mail, Calendar, Contacts and To do will have permanent shortcuts to the left in the
Notes client:
Spell checking
Spellcheck can be done in any rich text field, both in emails, calendar and to do entries, and
documents in other Notes applications.
Turn on spell checking
1. Go to the File menu and choose Preferences
2. Click on Spell Check:
3. To activate spell checking, click on Enable Instant Spell checking
4. You can choose the default language from the list Primary Dictionary (if it's not
there, contact your administrator to have it installed), by clicking on it and then
clicking on the button Set as Deafult
5. Set any other settings you want and click OK
Using spell checking
After turning it on, spell checking will now be performed in all rich text fields. Notes will
underline spelling errors with a red line:
The spell check in Notes is not nearly as advanced as in Outlook, but it's still very helpful.
Spell checking several languages at once
Outlook will automatically detect what language you write in while spell checking. So if you
change from Norwegian to English, and both of these languages are installed on your
computer, it will change the spell checking to the language you are currently writing in.
Notes doesn't do that. If you want to spell check in another language than the default
language, you have to manually change what language you want to use for spell checking.
Here is how you can spell check more than one language at once in Notes:
1. Write the text:
2. Highlight the text you want to spell check in a different language from the default
language:
3. Hold down the CTRL key on your keyboard and hit th K key. Or go to the menu Text
and choose Text Properties:
4. In the popup window, go to the Language field at the bottom and choose the desired
language:
5. The language will now be changed for the highlighted text:
Rich text formatting in HCL Notes
Rich text fields are fields in Notes where you can format the text with colors, photos, tables,
different types of fonts and so on. The email body field (where you write the message text) is
an example of a Notes rich text field. Rich text fields are also in calendar and To do entries
and they can also be in any Notes application you use.
You can format the text in a rich text field in most of the ways that you are used to:
There is a toolbar for all these formatting options above the document, under the row showing
all your open windows and documents:
If you can't see this toolbar, it could mean that it's either turned off, or that you aren't in a rich
text field right now. You can check this in the menu View -> Toolbar:
Make sure Text Properties is checked. If you choose Show Toolbars Only When Editing,
the toolbar will only show up when you are in a rich text field. If Hide All Toolbars is
checked, all toolbars will be hidden all the time.
Mail
Creating a new email
Creating emails in Notes is very similar to how you do it in Outlook.
1. Click CTRL + M to create a new email (or click the New button if you are in mail
folder). You can do this even your mail application isn't even open in Notes
.
2. To add email addresses you can simply start typing the name or address in the To, Cc
or Bcc field (if the Bcc field isn't displayed, click on the button called Display above
the mail form and choose Bcc). You can also click on To:
a) You will now see this popup:
b) You can now select people from your company directory. If you want to add people
from your personal Contacts, change to your Contacts application in the Directory
pull down field:
c) You can use the Find names starting with field to type the beginning of a person's
name to find the person you are looking for, if you don't want to scroll through the list.
d) Use the buttons to the right of the address field to add people and addresses to the
To, Cc or Bcc fields
e) Click OK
3. You can now write your email. To add attachments you can simply drag and drop files
into the email.
Sorting email folders and views
Newest mail on top or bottom
To make sure the newest email is always on top or bottom in your inbox or other mail folders do this:
1. Go to File -> Preferences and choose Mail:
2. Click on the tab Basics
3. Scroll to the bottom and choose your setting here:
4. Click OK
5. Close Mail and re-open it again
Sorting email by column
You can sort your email folders by clicking on the column names at the top:
You can sort by sender (Who), Subject, Date, Size, recipient icon, attachments, and flagging.
Click on Who to sort by sender alphabetically or Subject to sort by subject alphabetically. Click once
more to go back to the standard sorting
If you click on Date you switch between having the newest email on top or at the bottom
If you click once on Size the largest emails will be put on top. If you click once more the largest emails
will be at the bottom. If you click a third time the folder will go back to the standard sorting.
Clicking on recipient icon, attachments or flagging will sort the folder based on these. If you click
once more it will go back to the default sorting.
Group by Date
Just like in Outlook you can group emails by date as well. Click on the Show button in the upper right
of the folder and choose Group By Date:
All emails in that folder will now be grouped like this:
If you click on the Date column to change the sorting, the grouping will reflect this. However, if you
click on any other sorting, the Group by Date sorting will be paused until you sort the folder by date
again.
Unread mail only
You can also choose to see unread mails only inside a folder. Click on the Show button in the upper
right of the folder and choose Unread Only. All read mails will no longer be displayed, until you turn
this off again. All sorting options will work.
PS! If you have a preview window, and it’s set to mark an email as unread after being previewed, it
will disappear from the folder when you move to the next email. Do not panic, just turn off Unread
Only.
Search for emails
To search for emails in Notes, simply click inside the folder you want to search and start typing:
In the example above the folder was sorted by Who when I started typing. You can see this by the
fact that Who is listed in the Find in field.
You can change this by clicking on the pulldown list:
If you change this to Subject or Date, the folder will be re-sorted in the background.
After choosing the column you want to search, you simply write what you want to search for and
click on the Find button. If any email has your search expression in the start of the selected column’s
value, it will take you to that email.
If you choose Any column you can search for any expression in any column. It does not even have to
start with that expression:
In the example above, it would find any email containing the word tickets in either Who or Subject,
even if the column value started with another word. Example: It would find both Tickets for you, Your
tickets and Bus tickets.
Flag an email for follow up
You can flag an email for follow up simply by right clicking on the email:
You can also mark one or more emails and then hit the flagging button above the folder:
Under Add or Edit Flag... you can set due dates and a lot of other settings. Read all about
flagging of emails in this tip.
You can see a view of all your flagged emails if you click on Follow Up in the left side menu
in your email. You can also see them constantly listed in the left side menu by scrolling down
to the bottom of the left side menu.
Click on the small arrow:
PS! If you have Notes V11 or newer, you don't need to look for this small arrow. You can just
expand the menu item called Show Mini View.
After clicking on the arrow you can choose Follow Up in the pulldown menu that appears:
Now the list of emails you have flagged will be displayed in the left menu.
Turn an email into a meeting or To do
To turn an email into a calendar entry, such as a meeting invite, or a To do, by right clicking
on the email and choose Copy Into New:
If you click on Calendar Entry you can choose what kind of calendar entry it should be. A
pop up will appear, and if you select Meeting, it will prepare a new meeting document. Notes
will automatically populate the invite fields with all the people in the To, Cc and Bcc fields.
See your calendar while using your email
In Outlook you must actively choose to display your calendar in the right sidebar. In HCL
Notes, it's always there for you, and unlike Outlook it will also show entries from any
imported calendars (Outlook only displays your main calendar).
Simply click on Day at a Glance in the right sidebar panel, and you can see all your
appointments for today:
You can click on the arrows to navigate from one day to the next, and you can navigate
through the months in the calendar underneath the calendar entries.
To get back to today, click on the Today button.
PS! If the right sidebar panel isn't visible, just click CTRL + 9 on the keyboard.
Quick rules
Like in Outlook, you can create quick rules based on the currently selected email:
1. Click on the email you want to create a rule from
2. Click on the More button above the folder and choose Create Quick Rule...:
3. You will then get a popup window where you can choose what should trigger the rule:
In the example above I have set it to the following:
Under 1 I have set the condition to match the displayed Subject
Under 2 I have chosen that at least one of the selected conditions under 1 should be
met. This is not necessary here since I have only selected one condition, but you do
have the option for selecting more than one.
Under 3 I have selected that emails matching this rule should be automatically moved
to the folder Under arbeid. You choose a folder by clicking on Select... and you can
also create new folders in the popup window that will appear
Bonus tip if you have Notes V10 or newer: If you want this rule to be triggered on
emails that already are in your inbox, you click on Run Now on Inbox....If you want
it to trigger on matching emails no matter what folder they are in you click on Run
Now On All documents....
4. Click on OK when finished
From now on all emails with that subject will automatically be transferred to the selected
folder.
You can administer your rules, as well as create even more complex rules, by clicking on the
More button and then selecting Mail Rules -> Manage Rules:
Mail signature
Creating the signature
You create your email signature like this:
1. Open any folder in your email
2. Click on the More button above the folder and select Preferences...:
3. You will now be taken to the Mail preferences window. Click on the Signature tab:
4. Check Automatically append a signature to the bottom of my outgoing mail
messages to make sure the signature is always added to your emails
5. You have the following signature types:
Rich Text: Here you can add formatted text, hypertext links and images (like in the
image above)
Plain Text: Here you can add nothing but a pure text signature. This will be added
whenever you send an email as pure text, or you manually select it before sending an
email
HTML Image or file: If you choose this, you will be asked to upload an image file or
an HTML (web) file
6. Some people like to have a different signature when they reply to, or forward, a
message. You can therefore click on the tab Reply and Forward Messages, where
you will get these options:
Default: If you choose this, it will use the same signature you set for New Messages
Rich Text: If you choose this you get a rich text field where you can create a totally
different signature with formatted text, hypertext links and images
Plain Text: If you choose this you can create a different pure text signature
HTML or Image File: You can upload a different image or HTML file to use as a reply
or forward signature
7. Click on OK when finished
The signature will now always be added to your emails.
Different signatures
In Outlook you can have different signatures for different purposes and email accounts. This
is not possible in Notes, but what you can do is create image or HTML files with alternative
signatures. Add them to a folder on your PC or network drive.
If you want to use an alternative signature, you do it like this:
1. Create a new email or reply to an email
2. Place your cursor just above your standard signature (this is important!)
3. Click on the Signature button and choose New Signature from File...:
4. Your standard signature will now be removed from the email, and you will see this
popup window:
5. Click on Browse to find the signature file
6. Click on OK
7. The signature will now be added to your email, instead of the standard one
Mail conversations
Just like in Outlook, you can in Notes choose whether you want the emails in a folder to be
displayed as conversation threads or not.
You do this by clicking on the Show button in the upper right corner of the folder, and choose
Conversations:
Notes does have a functionality here that Outlook doesn't have. Whenever you click on an
email that is a part of a conversation thread, even if the entire folder is set to display
Individual Messages, you will still get a twistie to the left of the email:
If you click on this, you will still be able to see the entire conversation, even if the folder is set
to display individual messages only.
Notifications
Like in Outlook a sound will play, you will get popup notifications and/or a slide in summary
and an envelope icon will appear in the taskbar when a new email arrives.
You can control these notifications by clicking on File -> Preferences and then expand Mail
and choose Sending and Receiving. Under the section called Receiving you can choose what
notifications, if any, you want:
Out of office
Like Outlook, Notes gives you the ability to set up an automatic reply that should go out to
people who send you an email. In Outlook it's called Automatic Replies, while in Notes it's
called Out of Office:
1. Click on the More button above the folder and choose Out of Office...:
2. You now get the Out of Office form in Notes. Here you can set the date for when you
are leaving, whether you should be available for meetings or not (people will see you
as busy when checking your schedule if you choose not to be), a subject for the
automatic reply and the mail message itself.
.
3. You can also set an Alternate notification:
By clicking on To, you can choose people from your personal contact list, as well as
the corporate directory, who should receive an alternate notification. You can also add
emails directly in the field to the right of the To function. You then set an alternate
subject and message text.
4. You can also set up who should not get an Out of Office message from you under
Exclusions:
In this example I have set that any email sent from hotmail.com you should not get an
automatic reply. I have also added that any message containing the phrase Nigerian
prince in the subject shouldn't get a reply either. You add a phrase by entering it in the
field A message subject contains any of these exact phrases and then click on Add
Phrase. To remove a phrase, click on it in the big square, and then click on Remove
Phrase.
5. When you are finished you can click on Enable and Close at the top if you want to
activate the Out of Office agent. If you have set it to start at a later date, it won't start
sending out automatic replies before the selected date and time has been reached. If
you click Save and Close, you will only save this as a draft, and it will not be
activated.
Spellchecking your email
Spellchecking while writing
Check the spell-checking sub sections in the Notes client settings and functions section
above
Spell-checking before sending
You can also do a last spell checking before sending the email. It will also spell check the
Subject line.
Here is how you turn this on:
1. Go to File -> Preferences
.
2. Choose Mail in the preferences window:
3. Make sure the Spell-check messages before sending option is checked under Message
Options
4. Click OK
When you now write an email, and hit send, Notes will spell check the Subject line and the
main text of the message:
• You can choose which language you want to use as Dictionary
• You can skip a word and jump to the next or you can skip all by just clicking on Send
As Is
• You can choose a suggested word from the list, or type your own correction, and then
click Replace. Notes will then jump to the next misspelled word
• You can add a word to the Dictionary, so that Notes won't claim that it's misspelled
the next time
• You can click on Spelling Options... to tell Notes to ignore words in uppercase and
with numbers
Prevent sending emails with blank Subject line
1. Go to File -> Preferences
2. Choose Mail in the preferences window:
3. Make sure the Warn me about blank message subjects option is checked under
Message Options
4. Click OK
Notes will now warn you if you try to send an email without a subject line
Formatting email text
Check the Rich text formatting in HCL Notes sub section in the Notes client settings and
functions section above on how to format text in an email.
Set default email font
You can change the default font in email in this way:
1. Write a text with the font that you want to set as a standard font
2. Highlight it:
3. Go to the Text menu and choose Set Current Font as Mail Default:
4. Notes will confirm your choice:
5. Click OK
Now Notes will always use this as your default font in emails
Add another email account
Unfortunately, you cannot add another email account to Notes like you can in Outlook.
What you can do is create group mail applications that you can open like you open your own
email. You can also be given access to other people’s email, which you then can open up like
your own mail application.
However, these will be in their own windows in the Notes client, and not collected in the left
side menu, like in Outlook.
Calendar
Share your calendar
You can share your calendar with other users.
1. Go to the menu File and choose Preferences
2. Click on Calendar and To do and then on Access and Delegation:
.
3. Click on Add...:
4. You can under Person or Group choose if everyone should have access, or just the
persons or groups that you add by clicking in the field to the right of Just this person
or group
5. Under Components you select what they should have access to
6. Under Access you choose if they only should be able to read your calendar, or if they
should also be given full access (there's nothing in between)
7. Click OK when finished
8. You will now see the person and how much access they have:
9. You can later change the access via the Change Access... button or remove the person
from the access list by clikcing on Remove
Add a shared calendar to your calendar
You add a shared calendar like this:
1. In the left menu of your Notes calendar, you expand Show Calendars and click on
Add a calendar...:
2. This window appears:
3. You can now search for a Notes user and then choose the colors you want this user's
calendar entries to be displayed with. Click OK when finished
4. To toggle on and off this users calendar, you can check and uncheck the calendar from
the list of your calendars:
Color code calendar entries
Just like in Outlook, you can also color code your calendar entries. This means that calendar
entries matching certain criteria that you set will be colorised so that you can differentiate the
various appointments with a quick glance.
You do this by adding a category to a calendar entry:
1. When you create a calendar entry, like a meeting, you can add a category by clicking
here:
If the Category option is not there, click on the button Display and choose Category:
2. After clicking Category, you will get a list of all your categories in popup window:
3. You can add more than one category by checking it. To add a new category, simply
type it in the Add category field
4. Click OK
5. To the right of the Category field you find an option called Assign Colors...:
6. Click on it and this popup appears:
7. Click on one of the buttons looking like the button the arrow in the illustration above
is pointing at to select the category or categories you want to give a certain color
8. Then you choose the background color and text color for this category
9. Click OK when finished
10. The calendar will immediately be updated with this color. Here is an example of a
calendar with color coded entries:
Change calendar views
In Outlook you choose in the top ribbon menu if you want to see a calendar displayed as a
day, week, work week, month or as a schedule.
Period views
In Notes you switch between a day, two days, a work week, a week or a month and as a
weekly planner under the left side menu item called Views:
Summary or timeslots
You can switch between viewing the calendar as a summarised calendar or as timeslots by
clicking on the Switch button in the upper right of the calendar:
Timeslots will display the calendar like this:
Week numbers
Week numbers are displayed in the calendar footer at the bottom of the calendar. You turn it
on like this:
1. Make sure the calendar footer is turned on by clicking on Display and then choose
Calendar footer:
2. The calendar footer will now be visible under the calendar view. Click on the little
pulldown arrow to choose Week [Number]:
You can also do this in Day at a Glance in the right sidebar panel.
Find available time
Check one person's schedule
You can quickly check if a colleague is available by right clicking on an email from this
person and choose the name of the person and then select Find Available Time...:
You will now see a pop up window where you can select a time where both of you are green
and then you can click on Create Meeting.
Check the schedule for meeting participants
If you are creating a meeting you can check when people you have added to the meeting are
free. You do can do this by clicking on the Find Available Times tab, next to Description:
If the bar turns green, it means everybody whose schedule you have access to are available. If
it's red, it means one or more of the invitees are busy at the proposed time.
You can move the bar around to change the date and time of the meeting. You can even
increase or decrease the size of the bar to change the length of the meeting.
View Invitee Status
It is very easy to check who have replied to your meeting invite, and whether they have
accepted or not. Simply open the meeting document and click on the button Invitee Status.
Contacts
Like in Outlook, you have your own personal Contacts app in your Notes client. You can add
contacts and organise them in groups. You can also control the addresses that are displayed
when you type email addresses into the To field in a new email.
Add contact
From Mail
You can add a contact from an email by right clicking on the email and choose Add Sender
to Contacts.... A popup window will appear where the email address and name fields
automatically will be filled out. You can then add more details, if you want. After clicking on
OK, the contact will be added to Contacts.
From Contacts
Open your Contacts application and click on the My Contacts item in the left side menu and
then simply click on the New button above the contacts view. A popup window will appear
where you can add some basic information about the new contact.
If you want to fill in more details about a new contact, click on the pulldown arrow to the
right of the New button and choose Contact. A form will now appear where you can add a lot
of details about the new contact.
Create contact group
You can also organise your contacts into groups.
1. Open your Contacts application and click on the Groups item in the left side menu
2. Give the group a name and a description:
3. Go to the field Members
4. Start typing the name of the contact you want to add. Notes will automatically suggest
names from already existing contacts. Click on the one you want and click the enter
key on your keyboard to start adding a new one. You can also add the email address of
contacts that aren't in your Contacts register. Just type the email address and hint the
enter key. You can also click on Members. You will then see this popup:
You can now select people from your company directory. If you want to add people
from your personal Contacts, change to your contact application in the Directory pull
down field:
You can use the Find names starting with field to type the beginning of a person's
name to find the person you are looking for, if you do not want to scroll through the
list
5. Click OK
6. Click Save and Close
You can now use the group when sending emails or meeting invites.
Recent contacts
When you create a new email and start typing the address or name of a person in the To, Cc or
Bcc field, Notes will suggest names and addresses for you:
Sometimes Notes will suggest email addresses or contacts that you don't want to see in the
typeahead. You can fix this in Contacts:
1. Open Contacts
2. Click on the Recent Contacts item in the left side menu
3. Find the address or person you don't want to see in the typeahead anymore and click
on him or her
4. Now click on the button over the view called Hide in Typeahead
It will now no longer show up in in the typeahead. If you want it to show up again, you just
repeat step 1-3 and then click on Show in Typeahead in step 4
To do
In Outlook you have an application called Tasks. In Notes this is called To do.
Create a To do
As described under Mail, you can turn an email into a To do, just like in Outlook. But you can
also create a To do from scratch:
1. Open the To do application
2. From any folder inside To do, you can click on the New button in the upper left corner
above the folder. This form will appear:
.
3. You can set a priority, a due date, a start date and whether this is a To do that should
be repeated or not (if you click on Repeat you can choose a whole range of repeating
patterns). You can also assign this To do to another person. In addition you can
categorize it and add further details in the rich text field Description
4. If you choose a due date, an option called Notify Me will appear in the upper right
corner of the form:
If you click on the clock icon you can choose when you should be notified, and how.
5. Click on Save and Close when finished
Mark a To do as completed or incomplete
To mark a To do as completed, simply right click on it and choose Mark Complete. You can
also open it for editing and click on the button Mark Complete.
You mark a completed To do as incomplete in the exact same way. To see your completed To
dos, click on the menu item Complete in the left side menu in the To do app.
Summary
Hopefully, these tips will ease your users transition from using Outlook to using Notes instead
as their email, calendar, and contacts application.
It will probably also give a lot of good tips to already experienced Notes users.
Anything I forgot? Anything I should leave out? Let me know at hbp@elfworld.org

More Related Content

What's hot

Computer Generated Flannel Boards
Computer Generated Flannel BoardsComputer Generated Flannel Boards
Computer Generated Flannel BoardsFantasy BookLover
 
Save Time By Automating Tasks
Save Time By Automating TasksSave Time By Automating Tasks
Save Time By Automating TasksIvy Tongson
 
FindNerd : A Social Network with Project And Task Management Features
FindNerd : A Social Network with Project And Task Management FeaturesFindNerd : A Social Network with Project And Task Management Features
FindNerd : A Social Network with Project And Task Management FeaturesFindNerd
 
Creating The Final Product
Creating The Final ProductCreating The Final Product
Creating The Final ProductN Amb
 
Creating The Final Product
Creating The Final ProductCreating The Final Product
Creating The Final ProductN Amb
 
Introduction to Google Forms
Introduction to Google FormsIntroduction to Google Forms
Introduction to Google FormsClaire Amos
 
How to Create visual content using powerpoint
How to Create visual content using powerpointHow to Create visual content using powerpoint
How to Create visual content using powerpointseema Vishwakarma
 

What's hot (14)

Step #4 Part 2
Step #4 Part 2Step #4 Part 2
Step #4 Part 2
 
Computer Generated Flannel Boards
Computer Generated Flannel BoardsComputer Generated Flannel Boards
Computer Generated Flannel Boards
 
Adding one
Adding oneAdding one
Adding one
 
Save Time By Automating Tasks
Save Time By Automating TasksSave Time By Automating Tasks
Save Time By Automating Tasks
 
FindNerd : A Social Network with Project And Task Management Features
FindNerd : A Social Network with Project And Task Management FeaturesFindNerd : A Social Network with Project And Task Management Features
FindNerd : A Social Network with Project And Task Management Features
 
Creating The Final Product
Creating The Final ProductCreating The Final Product
Creating The Final Product
 
Creating The Final Product
Creating The Final ProductCreating The Final Product
Creating The Final Product
 
Flickr
FlickrFlickr
Flickr
 
Introduction to Google Forms
Introduction to Google FormsIntroduction to Google Forms
Introduction to Google Forms
 
Hatchems class tutorial
Hatchems class tutorialHatchems class tutorial
Hatchems class tutorial
 
How To Use Google Drive
How To Use Google DriveHow To Use Google Drive
How To Use Google Drive
 
How to Use Gleam
How to Use GleamHow to Use Gleam
How to Use Gleam
 
How to Create visual content using powerpoint
How to Create visual content using powerpointHow to Create visual content using powerpoint
How to Create visual content using powerpoint
 
Google form quiz
Google form quizGoogle form quiz
Google form quiz
 

Similar to From outlook-to-notes-a-user-guide by hbp@elfworld.org

Windows 7-getting-started
Windows 7-getting-startedWindows 7-getting-started
Windows 7-getting-startedjaimehero
 
Uklug2011 raven newman_21_may
Uklug2011 raven newman_21_mayUklug2011 raven newman_21_may
Uklug2011 raven newman_21_mayMary Raven
 
Uklug2011 Know your Notes
Uklug2011 Know your NotesUklug2011 Know your Notes
Uklug2011 Know your Notesdominion
 
Managing multiple tasks
Managing multiple tasksManaging multiple tasks
Managing multiple tasksJohn Robinson
 
What is journals
What is journalsWhat is journals
What is journalspeterb8
 
20 Microsoft 365 Productivity Tips
20 Microsoft 365 Productivity Tips20 Microsoft 365 Productivity Tips
20 Microsoft 365 Productivity TipsChristian Buckley
 
20 Microsoft 365 Productivity Tips - Minnesota M365 User Group - 2021/06/14
20 Microsoft 365 Productivity Tips - Minnesota M365 User Group - 2021/06/1420 Microsoft 365 Productivity Tips - Minnesota M365 User Group - 2021/06/14
20 Microsoft 365 Productivity Tips - Minnesota M365 User Group - 2021/06/14Thomas Duff
 
20 Microsoft 365 Productivity Tips - Minnesota SharePoint User Group
20 Microsoft 365 Productivity Tips -  Minnesota SharePoint User Group20 Microsoft 365 Productivity Tips -  Minnesota SharePoint User Group
20 Microsoft 365 Productivity Tips - Minnesota SharePoint User GroupThomas Duff
 
Office 365 Productivity Tips -- January Joust
Office 365 Productivity Tips -- January JoustOffice 365 Productivity Tips -- January Joust
Office 365 Productivity Tips -- January JoustChristian Buckley
 
Computer applications lab manual
Computer applications lab manualComputer applications lab manual
Computer applications lab manualshahid naseem
 
Microsoft Outlook 2007
Microsoft Outlook 2007Microsoft Outlook 2007
Microsoft Outlook 2007fitzmorrisk
 
Lotusphere 2012: BP102 'UserBlast'
Lotusphere 2012: BP102 'UserBlast'Lotusphere 2012: BP102 'UserBlast'
Lotusphere 2012: BP102 'UserBlast'Mat Newman
 
Office 365 Productivity Tips -- November Smack-Down
Office 365 Productivity Tips -- November Smack-DownOffice 365 Productivity Tips -- November Smack-Down
Office 365 Productivity Tips -- November Smack-DownChristian Buckley
 
Office 365 Productivity Tips November 2017 November Smack-Down
Office 365 Productivity Tips November 2017 November Smack-DownOffice 365 Productivity Tips November 2017 November Smack-Down
Office 365 Productivity Tips November 2017 November Smack-DownThomas Duff
 
Office 365 Productivity Tips "Summer Scuffle"
Office 365 Productivity Tips "Summer Scuffle"Office 365 Productivity Tips "Summer Scuffle"
Office 365 Productivity Tips "Summer Scuffle"Christian Buckley
 
Outlook 2016 for mac quick start guide
Outlook 2016 for mac quick start guideOutlook 2016 for mac quick start guide
Outlook 2016 for mac quick start guideJuan Rojas
 

Similar to From outlook-to-notes-a-user-guide by hbp@elfworld.org (20)

Project.ppt
Project.pptProject.ppt
Project.ppt
 
Windows 7-getting-started
Windows 7-getting-startedWindows 7-getting-started
Windows 7-getting-started
 
Uklug2011 raven newman_21_may
Uklug2011 raven newman_21_mayUklug2011 raven newman_21_may
Uklug2011 raven newman_21_may
 
Uklug2011 Know your Notes
Uklug2011 Know your NotesUklug2011 Know your Notes
Uklug2011 Know your Notes
 
Managing multiple tasks
Managing multiple tasksManaging multiple tasks
Managing multiple tasks
 
What is journals
What is journalsWhat is journals
What is journals
 
outlook 2013
outlook 2013outlook 2013
outlook 2013
 
20 Microsoft 365 Productivity Tips
20 Microsoft 365 Productivity Tips20 Microsoft 365 Productivity Tips
20 Microsoft 365 Productivity Tips
 
20 Microsoft 365 Productivity Tips - Minnesota M365 User Group - 2021/06/14
20 Microsoft 365 Productivity Tips - Minnesota M365 User Group - 2021/06/1420 Microsoft 365 Productivity Tips - Minnesota M365 User Group - 2021/06/14
20 Microsoft 365 Productivity Tips - Minnesota M365 User Group - 2021/06/14
 
20 Microsoft 365 Productivity Tips - Minnesota SharePoint User Group
20 Microsoft 365 Productivity Tips -  Minnesota SharePoint User Group20 Microsoft 365 Productivity Tips -  Minnesota SharePoint User Group
20 Microsoft 365 Productivity Tips - Minnesota SharePoint User Group
 
Office 365 Productivity Tips -- January Joust
Office 365 Productivity Tips -- January JoustOffice 365 Productivity Tips -- January Joust
Office 365 Productivity Tips -- January Joust
 
Computer applications lab manual
Computer applications lab manualComputer applications lab manual
Computer applications lab manual
 
Microsoft Outlook 2007
Microsoft Outlook 2007Microsoft Outlook 2007
Microsoft Outlook 2007
 
Lotusphere 2012: BP102 'UserBlast'
Lotusphere 2012: BP102 'UserBlast'Lotusphere 2012: BP102 'UserBlast'
Lotusphere 2012: BP102 'UserBlast'
 
Office 365 Productivity Tips -- November Smack-Down
Office 365 Productivity Tips -- November Smack-DownOffice 365 Productivity Tips -- November Smack-Down
Office 365 Productivity Tips -- November Smack-Down
 
Office 365 Productivity Tips November 2017 November Smack-Down
Office 365 Productivity Tips November 2017 November Smack-DownOffice 365 Productivity Tips November 2017 November Smack-Down
Office 365 Productivity Tips November 2017 November Smack-Down
 
Outlook 2007 Get Up To Speed
Outlook 2007  Get Up To SpeedOutlook 2007  Get Up To Speed
Outlook 2007 Get Up To Speed
 
Customizing Outlook MS Outlook Advance
Customizing Outlook MS Outlook AdvanceCustomizing Outlook MS Outlook Advance
Customizing Outlook MS Outlook Advance
 
Office 365 Productivity Tips "Summer Scuffle"
Office 365 Productivity Tips "Summer Scuffle"Office 365 Productivity Tips "Summer Scuffle"
Office 365 Productivity Tips "Summer Scuffle"
 
Outlook 2016 for mac quick start guide
Outlook 2016 for mac quick start guideOutlook 2016 for mac quick start guide
Outlook 2016 for mac quick start guide
 

More from jayeshpar2006

Open Mic - IBM Sametime Proxy Clustering
Open Mic - IBM Sametime Proxy ClusteringOpen Mic - IBM Sametime Proxy Clustering
Open Mic - IBM Sametime Proxy Clusteringjayeshpar2006
 
Open Mic IBM connections and IBM Verse on premise integration
Open Mic IBM connections and IBM Verse on premise integrationOpen Mic IBM connections and IBM Verse on premise integration
Open Mic IBM connections and IBM Verse on premise integrationjayeshpar2006
 
Jump session partitions
Jump session partitionsJump session partitions
Jump session partitionsjayeshpar2006
 
Open Mic on Managed Mail Replica
Open Mic on Managed Mail ReplicaOpen Mic on Managed Mail Replica
Open Mic on Managed Mail Replicajayeshpar2006
 
IBM Verse On-premises
IBM Verse On-premisesIBM Verse On-premises
IBM Verse On-premisesjayeshpar2006
 
Ask the expert session on ibm traveler and new security changes
Ask the expert session on ibm traveler and new security changes Ask the expert session on ibm traveler and new security changes
Ask the expert session on ibm traveler and new security changes jayeshpar2006
 
Open Mic: IBM Sametime Web Client & Meeting Server - An Introduction to new f...
Open Mic: IBM Sametime Web Client & Meeting Server - An Introduction to new f...Open Mic: IBM Sametime Web Client & Meeting Server - An Introduction to new f...
Open Mic: IBM Sametime Web Client & Meeting Server - An Introduction to new f...jayeshpar2006
 
IBM Mail Support for Microsoft Outlook
IBM Mail Support for Microsoft OutlookIBM Mail Support for Microsoft Outlook
IBM Mail Support for Microsoft Outlookjayeshpar2006
 
IBM Notes Traveler Administration and Log Troubleshooting tips - Part 2
IBM Notes Traveler Administration and Log Troubleshooting tips - Part 2IBM Notes Traveler Administration and Log Troubleshooting tips - Part 2
IBM Notes Traveler Administration and Log Troubleshooting tips - Part 2jayeshpar2006
 
IBM Notes Traveler administration and Log troubleshooting tips
IBM Notes Traveler administration and Log troubleshooting tipsIBM Notes Traveler administration and Log troubleshooting tips
IBM Notes Traveler administration and Log troubleshooting tipsjayeshpar2006
 
Notes Browser Plugin 9.0.1 - "Accessing legacy Applications"
Notes Browser Plugin 9.0.1 - "Accessing legacy Applications"Notes Browser Plugin 9.0.1 - "Accessing legacy Applications"
Notes Browser Plugin 9.0.1 - "Accessing legacy Applications"jayeshpar2006
 
Important tips on Router and SMTP mail routing
Important tips on Router and SMTP mail routingImportant tips on Router and SMTP mail routing
Important tips on Router and SMTP mail routingjayeshpar2006
 
IBM Notes Traveler Best Practices
IBM Notes Traveler Best PracticesIBM Notes Traveler Best Practices
IBM Notes Traveler Best Practicesjayeshpar2006
 
Lotus Domino Clusters
Lotus Domino ClustersLotus Domino Clusters
Lotus Domino Clustersjayeshpar2006
 

More from jayeshpar2006 (14)

Open Mic - IBM Sametime Proxy Clustering
Open Mic - IBM Sametime Proxy ClusteringOpen Mic - IBM Sametime Proxy Clustering
Open Mic - IBM Sametime Proxy Clustering
 
Open Mic IBM connections and IBM Verse on premise integration
Open Mic IBM connections and IBM Verse on premise integrationOpen Mic IBM connections and IBM Verse on premise integration
Open Mic IBM connections and IBM Verse on premise integration
 
Jump session partitions
Jump session partitionsJump session partitions
Jump session partitions
 
Open Mic on Managed Mail Replica
Open Mic on Managed Mail ReplicaOpen Mic on Managed Mail Replica
Open Mic on Managed Mail Replica
 
IBM Verse On-premises
IBM Verse On-premisesIBM Verse On-premises
IBM Verse On-premises
 
Ask the expert session on ibm traveler and new security changes
Ask the expert session on ibm traveler and new security changes Ask the expert session on ibm traveler and new security changes
Ask the expert session on ibm traveler and new security changes
 
Open Mic: IBM Sametime Web Client & Meeting Server - An Introduction to new f...
Open Mic: IBM Sametime Web Client & Meeting Server - An Introduction to new f...Open Mic: IBM Sametime Web Client & Meeting Server - An Introduction to new f...
Open Mic: IBM Sametime Web Client & Meeting Server - An Introduction to new f...
 
IBM Mail Support for Microsoft Outlook
IBM Mail Support for Microsoft OutlookIBM Mail Support for Microsoft Outlook
IBM Mail Support for Microsoft Outlook
 
IBM Notes Traveler Administration and Log Troubleshooting tips - Part 2
IBM Notes Traveler Administration and Log Troubleshooting tips - Part 2IBM Notes Traveler Administration and Log Troubleshooting tips - Part 2
IBM Notes Traveler Administration and Log Troubleshooting tips - Part 2
 
IBM Notes Traveler administration and Log troubleshooting tips
IBM Notes Traveler administration and Log troubleshooting tipsIBM Notes Traveler administration and Log troubleshooting tips
IBM Notes Traveler administration and Log troubleshooting tips
 
Notes Browser Plugin 9.0.1 - "Accessing legacy Applications"
Notes Browser Plugin 9.0.1 - "Accessing legacy Applications"Notes Browser Plugin 9.0.1 - "Accessing legacy Applications"
Notes Browser Plugin 9.0.1 - "Accessing legacy Applications"
 
Important tips on Router and SMTP mail routing
Important tips on Router and SMTP mail routingImportant tips on Router and SMTP mail routing
Important tips on Router and SMTP mail routing
 
IBM Notes Traveler Best Practices
IBM Notes Traveler Best PracticesIBM Notes Traveler Best Practices
IBM Notes Traveler Best Practices
 
Lotus Domino Clusters
Lotus Domino ClustersLotus Domino Clusters
Lotus Domino Clusters
 

Recently uploaded

What is Fashion PLM and Why Do You Need It
What is Fashion PLM and Why Do You Need ItWhat is Fashion PLM and Why Do You Need It
What is Fashion PLM and Why Do You Need ItWave PLM
 
why an Opensea Clone Script might be your perfect match.pdf
why an Opensea Clone Script might be your perfect match.pdfwhy an Opensea Clone Script might be your perfect match.pdf
why an Opensea Clone Script might be your perfect match.pdfjoe51371421
 
cybersecurity notes for mca students for learning
cybersecurity notes for mca students for learningcybersecurity notes for mca students for learning
cybersecurity notes for mca students for learningVitsRangannavar
 
BATTLEFIELD ORM: TIPS, TACTICS AND STRATEGIES FOR CONQUERING YOUR DATABASE
BATTLEFIELD ORM: TIPS, TACTICS AND STRATEGIES FOR CONQUERING YOUR DATABASEBATTLEFIELD ORM: TIPS, TACTICS AND STRATEGIES FOR CONQUERING YOUR DATABASE
BATTLEFIELD ORM: TIPS, TACTICS AND STRATEGIES FOR CONQUERING YOUR DATABASEOrtus Solutions, Corp
 
Russian Call Girls in Karol Bagh Aasnvi ➡️ 8264348440 💋📞 Independent Escort S...
Russian Call Girls in Karol Bagh Aasnvi ➡️ 8264348440 💋📞 Independent Escort S...Russian Call Girls in Karol Bagh Aasnvi ➡️ 8264348440 💋📞 Independent Escort S...
Russian Call Girls in Karol Bagh Aasnvi ➡️ 8264348440 💋📞 Independent Escort S...soniya singh
 
Building a General PDE Solving Framework with Symbolic-Numeric Scientific Mac...
Building a General PDE Solving Framework with Symbolic-Numeric Scientific Mac...Building a General PDE Solving Framework with Symbolic-Numeric Scientific Mac...
Building a General PDE Solving Framework with Symbolic-Numeric Scientific Mac...stazi3110
 
Short Story: Unveiling the Reasoning Abilities of Large Language Models by Ke...
Short Story: Unveiling the Reasoning Abilities of Large Language Models by Ke...Short Story: Unveiling the Reasoning Abilities of Large Language Models by Ke...
Short Story: Unveiling the Reasoning Abilities of Large Language Models by Ke...kellynguyen01
 
(Genuine) Escort Service Lucknow | Starting ₹,5K To @25k with A/C 🧑🏽‍❤️‍🧑🏻 89...
(Genuine) Escort Service Lucknow | Starting ₹,5K To @25k with A/C 🧑🏽‍❤️‍🧑🏻 89...(Genuine) Escort Service Lucknow | Starting ₹,5K To @25k with A/C 🧑🏽‍❤️‍🧑🏻 89...
(Genuine) Escort Service Lucknow | Starting ₹,5K To @25k with A/C 🧑🏽‍❤️‍🧑🏻 89...gurkirankumar98700
 
What is Binary Language? Computer Number Systems
What is Binary Language?  Computer Number SystemsWhat is Binary Language?  Computer Number Systems
What is Binary Language? Computer Number SystemsJheuzeDellosa
 
Professional Resume Template for Software Developers
Professional Resume Template for Software DevelopersProfessional Resume Template for Software Developers
Professional Resume Template for Software DevelopersVinodh Ram
 
Steps To Getting Up And Running Quickly With MyTimeClock Employee Scheduling ...
Steps To Getting Up And Running Quickly With MyTimeClock Employee Scheduling ...Steps To Getting Up And Running Quickly With MyTimeClock Employee Scheduling ...
Steps To Getting Up And Running Quickly With MyTimeClock Employee Scheduling ...MyIntelliSource, Inc.
 
Building Real-Time Data Pipelines: Stream & Batch Processing workshop Slide
Building Real-Time Data Pipelines: Stream & Batch Processing workshop SlideBuilding Real-Time Data Pipelines: Stream & Batch Processing workshop Slide
Building Real-Time Data Pipelines: Stream & Batch Processing workshop SlideChristina Lin
 
Try MyIntelliAccount Cloud Accounting Software As A Service Solution Risk Fre...
Try MyIntelliAccount Cloud Accounting Software As A Service Solution Risk Fre...Try MyIntelliAccount Cloud Accounting Software As A Service Solution Risk Fre...
Try MyIntelliAccount Cloud Accounting Software As A Service Solution Risk Fre...MyIntelliSource, Inc.
 
What are the features of Vehicle Tracking System?
What are the features of Vehicle Tracking System?What are the features of Vehicle Tracking System?
What are the features of Vehicle Tracking System?Watsoo Telematics
 
Call Girls in Naraina Delhi 💯Call Us 🔝8264348440🔝
Call Girls in Naraina Delhi 💯Call Us 🔝8264348440🔝Call Girls in Naraina Delhi 💯Call Us 🔝8264348440🔝
Call Girls in Naraina Delhi 💯Call Us 🔝8264348440🔝soniya singh
 
Intelligent Home Wi-Fi Solutions | ThinkPalm
Intelligent Home Wi-Fi Solutions | ThinkPalmIntelligent Home Wi-Fi Solutions | ThinkPalm
Intelligent Home Wi-Fi Solutions | ThinkPalmSujith Sukumaran
 
Alluxio Monthly Webinar | Cloud-Native Model Training on Distributed Data
Alluxio Monthly Webinar | Cloud-Native Model Training on Distributed DataAlluxio Monthly Webinar | Cloud-Native Model Training on Distributed Data
Alluxio Monthly Webinar | Cloud-Native Model Training on Distributed DataAlluxio, Inc.
 
Automate your Kamailio Test Calls - Kamailio World 2024
Automate your Kamailio Test Calls - Kamailio World 2024Automate your Kamailio Test Calls - Kamailio World 2024
Automate your Kamailio Test Calls - Kamailio World 2024Andreas Granig
 
Unit 1.1 Excite Part 1, class 9, cbse...
Unit 1.1 Excite Part 1, class 9, cbse...Unit 1.1 Excite Part 1, class 9, cbse...
Unit 1.1 Excite Part 1, class 9, cbse...aditisharan08
 

Recently uploaded (20)

What is Fashion PLM and Why Do You Need It
What is Fashion PLM and Why Do You Need ItWhat is Fashion PLM and Why Do You Need It
What is Fashion PLM and Why Do You Need It
 
why an Opensea Clone Script might be your perfect match.pdf
why an Opensea Clone Script might be your perfect match.pdfwhy an Opensea Clone Script might be your perfect match.pdf
why an Opensea Clone Script might be your perfect match.pdf
 
cybersecurity notes for mca students for learning
cybersecurity notes for mca students for learningcybersecurity notes for mca students for learning
cybersecurity notes for mca students for learning
 
Call Girls In Mukherjee Nagar 📱 9999965857 🤩 Delhi 🫦 HOT AND SEXY VVIP 🍎 SE...
Call Girls In Mukherjee Nagar 📱  9999965857  🤩 Delhi 🫦 HOT AND SEXY VVIP 🍎 SE...Call Girls In Mukherjee Nagar 📱  9999965857  🤩 Delhi 🫦 HOT AND SEXY VVIP 🍎 SE...
Call Girls In Mukherjee Nagar 📱 9999965857 🤩 Delhi 🫦 HOT AND SEXY VVIP 🍎 SE...
 
BATTLEFIELD ORM: TIPS, TACTICS AND STRATEGIES FOR CONQUERING YOUR DATABASE
BATTLEFIELD ORM: TIPS, TACTICS AND STRATEGIES FOR CONQUERING YOUR DATABASEBATTLEFIELD ORM: TIPS, TACTICS AND STRATEGIES FOR CONQUERING YOUR DATABASE
BATTLEFIELD ORM: TIPS, TACTICS AND STRATEGIES FOR CONQUERING YOUR DATABASE
 
Russian Call Girls in Karol Bagh Aasnvi ➡️ 8264348440 💋📞 Independent Escort S...
Russian Call Girls in Karol Bagh Aasnvi ➡️ 8264348440 💋📞 Independent Escort S...Russian Call Girls in Karol Bagh Aasnvi ➡️ 8264348440 💋📞 Independent Escort S...
Russian Call Girls in Karol Bagh Aasnvi ➡️ 8264348440 💋📞 Independent Escort S...
 
Building a General PDE Solving Framework with Symbolic-Numeric Scientific Mac...
Building a General PDE Solving Framework with Symbolic-Numeric Scientific Mac...Building a General PDE Solving Framework with Symbolic-Numeric Scientific Mac...
Building a General PDE Solving Framework with Symbolic-Numeric Scientific Mac...
 
Short Story: Unveiling the Reasoning Abilities of Large Language Models by Ke...
Short Story: Unveiling the Reasoning Abilities of Large Language Models by Ke...Short Story: Unveiling the Reasoning Abilities of Large Language Models by Ke...
Short Story: Unveiling the Reasoning Abilities of Large Language Models by Ke...
 
(Genuine) Escort Service Lucknow | Starting ₹,5K To @25k with A/C 🧑🏽‍❤️‍🧑🏻 89...
(Genuine) Escort Service Lucknow | Starting ₹,5K To @25k with A/C 🧑🏽‍❤️‍🧑🏻 89...(Genuine) Escort Service Lucknow | Starting ₹,5K To @25k with A/C 🧑🏽‍❤️‍🧑🏻 89...
(Genuine) Escort Service Lucknow | Starting ₹,5K To @25k with A/C 🧑🏽‍❤️‍🧑🏻 89...
 
What is Binary Language? Computer Number Systems
What is Binary Language?  Computer Number SystemsWhat is Binary Language?  Computer Number Systems
What is Binary Language? Computer Number Systems
 
Professional Resume Template for Software Developers
Professional Resume Template for Software DevelopersProfessional Resume Template for Software Developers
Professional Resume Template for Software Developers
 
Steps To Getting Up And Running Quickly With MyTimeClock Employee Scheduling ...
Steps To Getting Up And Running Quickly With MyTimeClock Employee Scheduling ...Steps To Getting Up And Running Quickly With MyTimeClock Employee Scheduling ...
Steps To Getting Up And Running Quickly With MyTimeClock Employee Scheduling ...
 
Building Real-Time Data Pipelines: Stream & Batch Processing workshop Slide
Building Real-Time Data Pipelines: Stream & Batch Processing workshop SlideBuilding Real-Time Data Pipelines: Stream & Batch Processing workshop Slide
Building Real-Time Data Pipelines: Stream & Batch Processing workshop Slide
 
Try MyIntelliAccount Cloud Accounting Software As A Service Solution Risk Fre...
Try MyIntelliAccount Cloud Accounting Software As A Service Solution Risk Fre...Try MyIntelliAccount Cloud Accounting Software As A Service Solution Risk Fre...
Try MyIntelliAccount Cloud Accounting Software As A Service Solution Risk Fre...
 
What are the features of Vehicle Tracking System?
What are the features of Vehicle Tracking System?What are the features of Vehicle Tracking System?
What are the features of Vehicle Tracking System?
 
Call Girls in Naraina Delhi 💯Call Us 🔝8264348440🔝
Call Girls in Naraina Delhi 💯Call Us 🔝8264348440🔝Call Girls in Naraina Delhi 💯Call Us 🔝8264348440🔝
Call Girls in Naraina Delhi 💯Call Us 🔝8264348440🔝
 
Intelligent Home Wi-Fi Solutions | ThinkPalm
Intelligent Home Wi-Fi Solutions | ThinkPalmIntelligent Home Wi-Fi Solutions | ThinkPalm
Intelligent Home Wi-Fi Solutions | ThinkPalm
 
Alluxio Monthly Webinar | Cloud-Native Model Training on Distributed Data
Alluxio Monthly Webinar | Cloud-Native Model Training on Distributed DataAlluxio Monthly Webinar | Cloud-Native Model Training on Distributed Data
Alluxio Monthly Webinar | Cloud-Native Model Training on Distributed Data
 
Automate your Kamailio Test Calls - Kamailio World 2024
Automate your Kamailio Test Calls - Kamailio World 2024Automate your Kamailio Test Calls - Kamailio World 2024
Automate your Kamailio Test Calls - Kamailio World 2024
 
Unit 1.1 Excite Part 1, class 9, cbse...
Unit 1.1 Excite Part 1, class 9, cbse...Unit 1.1 Excite Part 1, class 9, cbse...
Unit 1.1 Excite Part 1, class 9, cbse...
 

From outlook-to-notes-a-user-guide by hbp@elfworld.org

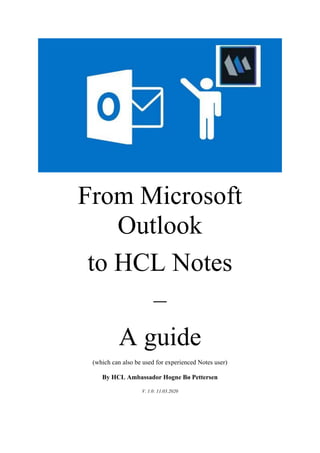
  • 1. From Microsoft Outlook to HCL Notes – A guide (which can also be used for experienced Notes user) By HCL Ambassador Hogne Bø Pettersen V. 1.0: 11.03.2020
  • 2. Table of Contents About this document........................................................................................................................... 4 Notes client settings and functions..................................................................................................... 5 Open documents in new windows.................................................................................................. 5 Preview pane................................................................................................................................... 5 Shortcuts ......................................................................................................................................... 6 Spell checking.................................................................................................................................. 9 Rich text formatting in HCL Notes................................................................................................. 11 Mail.................................................................................................................................................... 14 Creating a new email..................................................................................................................... 14 Sorting email folders and views .................................................................................................... 15 Search for emails........................................................................................................................... 17 Flag an email for follow up............................................................................................................ 18 Turn an email into a meeting or To do.......................................................................................... 19 See your calendar while using your email..................................................................................... 20 Quick rules..................................................................................................................................... 21 Mail signature................................................................................................................................ 22 Mail conversations ........................................................................................................................ 25 Notifications .................................................................................................................................. 26 Out of office................................................................................................................................... 26 Spellchecking your email............................................................................................................... 28 Prevent sending emails with blank Subject line............................................................................ 29 Formatting email text.................................................................................................................... 30 Set default email font.................................................................................................................... 30 Add another email account........................................................................................................... 31 Calendar ............................................................................................................................................ 33 Share your calendar....................................................................................................................... 33 Color code calendar entries .......................................................................................................... 36 Change calendar views.................................................................................................................. 38 Week numbers .............................................................................................................................. 40 Find available time ........................................................................................................................ 40 View Invitee Status........................................................................................................................ 41 Contacts............................................................................................................................................. 42 Add contact ................................................................................................................................... 42 Recent contacts............................................................................................................................. 43 To do.................................................................................................................................................. 45
  • 3. Create a To do ............................................................................................................................... 45 Mark a To do as completed or incomplete ................................................................................... 46 Summary ........................................................................................................................................... 47
  • 4. About this document While Notes is so much more than just an email, calendar, and contacts application, it is usually among one of the most important features of the client. Outlook is the email and scheduling client with the largest user base. This means that if you get new employees in your company, they were most likely Outlook users in their previous position. If you are using Notes for email and calendaring, there will be a period of adjustment for the employee. In the past 15 years I've had several user training sessions for users that comes from the world of Outlook to the world of Notes. This posting is therefore built on my long experience about what the usual questions and challenges are. This article will hopefully help you make the transition smoother and make it easier for the employee to adapt to working with Notes. I have therefore included tips on how you can set up the client to mimic Outlook behaviour (like opening everything in new windows). In addition, I have described how you use a lot of the functions that Outlook, and Notes have in common, that might be a bit different in Notes. I also think this article will be of great help to users who have used Notes for years.
  • 5. Notes client settings and functions Open documents in new windows In Outlook, any document that you create or open will appear in its own window. This is of course possible in Notes as well. 1. Go to the menu File and choose Preferences 2. Click on Windows in the Preferences screen 3. Select Open each document in its own window under Window Management: 4. Click Apply and then OK 5. Every window and document will from now be opened in its own window PS! You can also open any Notes document in a new window at any time by right clicking on it in the view or folder and choose Open in New Window Preview pane Just like in Outlook, you can choose whether you want to have a preview pane for your email, calendar and to do entries, and if it should be displayed at the bottom or to the right. Click on button named Show to the upper right, above the mail, calendar or to do folder you are currently working with:
  • 6. You can also control whether you want the email or document to be marked as read or not when it's been displayed in the preview pane: 1. Go to the menu File and choose Preferences 2. Click on Basic Notes Client Configuration in the left side menu 3. In the big Additional Options field you check Mark documents when opened in preview pane if you want the the emails or document to be marked as read after being displayed in the preview pane. If you don't want that, you have to uncheck this option: 4. Click OK PS! You can also mark a read document as unread or an unread document as read by hitting the Insert button on your keyboard Shortcuts In Outlook you have shortcut icons for the mail, calendar, and To do in the lower left corner. In Notes you have several ways to get shortcuts for Mail, Calendar and Contacts: Shortcut buttons Click on View -> Show Shortcut Buttons and choose Mail. Then repeat this for Calendar and Contacts:
  • 7. You will now see these shortcut buttons under the menu line: Unfortunately To do is not available as a shortcut button. Bookmarks However, To do is available as a bookmark, together with Mail, Calendar and Contacts.
  • 8. You find these bookmarks under the Open button: You can pin the bookmarks under the Open button to be permanently visible by right clicking on the Open button and choose Dock the Open List. You can also choose Use Large Icons. Now Mail, Calendar, Contacts and To do will have permanent shortcuts to the left in the Notes client:
  • 9. Spell checking Spellcheck can be done in any rich text field, both in emails, calendar and to do entries, and documents in other Notes applications. Turn on spell checking 1. Go to the File menu and choose Preferences 2. Click on Spell Check: 3. To activate spell checking, click on Enable Instant Spell checking 4. You can choose the default language from the list Primary Dictionary (if it's not there, contact your administrator to have it installed), by clicking on it and then clicking on the button Set as Deafult 5. Set any other settings you want and click OK Using spell checking After turning it on, spell checking will now be performed in all rich text fields. Notes will underline spelling errors with a red line:
  • 10. The spell check in Notes is not nearly as advanced as in Outlook, but it's still very helpful. Spell checking several languages at once Outlook will automatically detect what language you write in while spell checking. So if you change from Norwegian to English, and both of these languages are installed on your computer, it will change the spell checking to the language you are currently writing in. Notes doesn't do that. If you want to spell check in another language than the default language, you have to manually change what language you want to use for spell checking. Here is how you can spell check more than one language at once in Notes: 1. Write the text: 2. Highlight the text you want to spell check in a different language from the default language: 3. Hold down the CTRL key on your keyboard and hit th K key. Or go to the menu Text and choose Text Properties:
  • 11. 4. In the popup window, go to the Language field at the bottom and choose the desired language: 5. The language will now be changed for the highlighted text: Rich text formatting in HCL Notes Rich text fields are fields in Notes where you can format the text with colors, photos, tables, different types of fonts and so on. The email body field (where you write the message text) is an example of a Notes rich text field. Rich text fields are also in calendar and To do entries and they can also be in any Notes application you use. You can format the text in a rich text field in most of the ways that you are used to:
  • 12. There is a toolbar for all these formatting options above the document, under the row showing all your open windows and documents: If you can't see this toolbar, it could mean that it's either turned off, or that you aren't in a rich text field right now. You can check this in the menu View -> Toolbar:
  • 13. Make sure Text Properties is checked. If you choose Show Toolbars Only When Editing, the toolbar will only show up when you are in a rich text field. If Hide All Toolbars is checked, all toolbars will be hidden all the time.
  • 14. Mail Creating a new email Creating emails in Notes is very similar to how you do it in Outlook. 1. Click CTRL + M to create a new email (or click the New button if you are in mail folder). You can do this even your mail application isn't even open in Notes . 2. To add email addresses you can simply start typing the name or address in the To, Cc or Bcc field (if the Bcc field isn't displayed, click on the button called Display above the mail form and choose Bcc). You can also click on To: a) You will now see this popup: b) You can now select people from your company directory. If you want to add people from your personal Contacts, change to your Contacts application in the Directory pull down field:
  • 15. c) You can use the Find names starting with field to type the beginning of a person's name to find the person you are looking for, if you don't want to scroll through the list. d) Use the buttons to the right of the address field to add people and addresses to the To, Cc or Bcc fields e) Click OK 3. You can now write your email. To add attachments you can simply drag and drop files into the email. Sorting email folders and views Newest mail on top or bottom To make sure the newest email is always on top or bottom in your inbox or other mail folders do this: 1. Go to File -> Preferences and choose Mail: 2. Click on the tab Basics 3. Scroll to the bottom and choose your setting here:
  • 16. 4. Click OK 5. Close Mail and re-open it again Sorting email by column You can sort your email folders by clicking on the column names at the top: You can sort by sender (Who), Subject, Date, Size, recipient icon, attachments, and flagging. Click on Who to sort by sender alphabetically or Subject to sort by subject alphabetically. Click once more to go back to the standard sorting If you click on Date you switch between having the newest email on top or at the bottom If you click once on Size the largest emails will be put on top. If you click once more the largest emails will be at the bottom. If you click a third time the folder will go back to the standard sorting. Clicking on recipient icon, attachments or flagging will sort the folder based on these. If you click once more it will go back to the default sorting. Group by Date Just like in Outlook you can group emails by date as well. Click on the Show button in the upper right of the folder and choose Group By Date: All emails in that folder will now be grouped like this:
  • 17. If you click on the Date column to change the sorting, the grouping will reflect this. However, if you click on any other sorting, the Group by Date sorting will be paused until you sort the folder by date again. Unread mail only You can also choose to see unread mails only inside a folder. Click on the Show button in the upper right of the folder and choose Unread Only. All read mails will no longer be displayed, until you turn this off again. All sorting options will work. PS! If you have a preview window, and it’s set to mark an email as unread after being previewed, it will disappear from the folder when you move to the next email. Do not panic, just turn off Unread Only. Search for emails To search for emails in Notes, simply click inside the folder you want to search and start typing:
  • 18. In the example above the folder was sorted by Who when I started typing. You can see this by the fact that Who is listed in the Find in field. You can change this by clicking on the pulldown list: If you change this to Subject or Date, the folder will be re-sorted in the background. After choosing the column you want to search, you simply write what you want to search for and click on the Find button. If any email has your search expression in the start of the selected column’s value, it will take you to that email. If you choose Any column you can search for any expression in any column. It does not even have to start with that expression: In the example above, it would find any email containing the word tickets in either Who or Subject, even if the column value started with another word. Example: It would find both Tickets for you, Your tickets and Bus tickets. Flag an email for follow up You can flag an email for follow up simply by right clicking on the email:
  • 19. You can also mark one or more emails and then hit the flagging button above the folder: Under Add or Edit Flag... you can set due dates and a lot of other settings. Read all about flagging of emails in this tip. You can see a view of all your flagged emails if you click on Follow Up in the left side menu in your email. You can also see them constantly listed in the left side menu by scrolling down to the bottom of the left side menu. Click on the small arrow: PS! If you have Notes V11 or newer, you don't need to look for this small arrow. You can just expand the menu item called Show Mini View. After clicking on the arrow you can choose Follow Up in the pulldown menu that appears: Now the list of emails you have flagged will be displayed in the left menu. Turn an email into a meeting or To do To turn an email into a calendar entry, such as a meeting invite, or a To do, by right clicking on the email and choose Copy Into New:
  • 20. If you click on Calendar Entry you can choose what kind of calendar entry it should be. A pop up will appear, and if you select Meeting, it will prepare a new meeting document. Notes will automatically populate the invite fields with all the people in the To, Cc and Bcc fields. See your calendar while using your email In Outlook you must actively choose to display your calendar in the right sidebar. In HCL Notes, it's always there for you, and unlike Outlook it will also show entries from any imported calendars (Outlook only displays your main calendar). Simply click on Day at a Glance in the right sidebar panel, and you can see all your appointments for today:
  • 21. You can click on the arrows to navigate from one day to the next, and you can navigate through the months in the calendar underneath the calendar entries. To get back to today, click on the Today button. PS! If the right sidebar panel isn't visible, just click CTRL + 9 on the keyboard. Quick rules Like in Outlook, you can create quick rules based on the currently selected email: 1. Click on the email you want to create a rule from 2. Click on the More button above the folder and choose Create Quick Rule...: 3. You will then get a popup window where you can choose what should trigger the rule:
  • 22. In the example above I have set it to the following: Under 1 I have set the condition to match the displayed Subject Under 2 I have chosen that at least one of the selected conditions under 1 should be met. This is not necessary here since I have only selected one condition, but you do have the option for selecting more than one. Under 3 I have selected that emails matching this rule should be automatically moved to the folder Under arbeid. You choose a folder by clicking on Select... and you can also create new folders in the popup window that will appear Bonus tip if you have Notes V10 or newer: If you want this rule to be triggered on emails that already are in your inbox, you click on Run Now on Inbox....If you want it to trigger on matching emails no matter what folder they are in you click on Run Now On All documents.... 4. Click on OK when finished From now on all emails with that subject will automatically be transferred to the selected folder. You can administer your rules, as well as create even more complex rules, by clicking on the More button and then selecting Mail Rules -> Manage Rules: Mail signature Creating the signature You create your email signature like this:
  • 23. 1. Open any folder in your email 2. Click on the More button above the folder and select Preferences...: 3. You will now be taken to the Mail preferences window. Click on the Signature tab:
  • 24. 4. Check Automatically append a signature to the bottom of my outgoing mail messages to make sure the signature is always added to your emails 5. You have the following signature types: Rich Text: Here you can add formatted text, hypertext links and images (like in the image above) Plain Text: Here you can add nothing but a pure text signature. This will be added whenever you send an email as pure text, or you manually select it before sending an email HTML Image or file: If you choose this, you will be asked to upload an image file or an HTML (web) file 6. Some people like to have a different signature when they reply to, or forward, a message. You can therefore click on the tab Reply and Forward Messages, where you will get these options: Default: If you choose this, it will use the same signature you set for New Messages Rich Text: If you choose this you get a rich text field where you can create a totally different signature with formatted text, hypertext links and images Plain Text: If you choose this you can create a different pure text signature HTML or Image File: You can upload a different image or HTML file to use as a reply or forward signature 7. Click on OK when finished The signature will now always be added to your emails. Different signatures In Outlook you can have different signatures for different purposes and email accounts. This is not possible in Notes, but what you can do is create image or HTML files with alternative signatures. Add them to a folder on your PC or network drive.
  • 25. If you want to use an alternative signature, you do it like this: 1. Create a new email or reply to an email 2. Place your cursor just above your standard signature (this is important!) 3. Click on the Signature button and choose New Signature from File...: 4. Your standard signature will now be removed from the email, and you will see this popup window: 5. Click on Browse to find the signature file 6. Click on OK 7. The signature will now be added to your email, instead of the standard one Mail conversations Just like in Outlook, you can in Notes choose whether you want the emails in a folder to be displayed as conversation threads or not. You do this by clicking on the Show button in the upper right corner of the folder, and choose Conversations:
  • 26. Notes does have a functionality here that Outlook doesn't have. Whenever you click on an email that is a part of a conversation thread, even if the entire folder is set to display Individual Messages, you will still get a twistie to the left of the email: If you click on this, you will still be able to see the entire conversation, even if the folder is set to display individual messages only. Notifications Like in Outlook a sound will play, you will get popup notifications and/or a slide in summary and an envelope icon will appear in the taskbar when a new email arrives. You can control these notifications by clicking on File -> Preferences and then expand Mail and choose Sending and Receiving. Under the section called Receiving you can choose what notifications, if any, you want: Out of office Like Outlook, Notes gives you the ability to set up an automatic reply that should go out to people who send you an email. In Outlook it's called Automatic Replies, while in Notes it's called Out of Office:
  • 27. 1. Click on the More button above the folder and choose Out of Office...: 2. You now get the Out of Office form in Notes. Here you can set the date for when you are leaving, whether you should be available for meetings or not (people will see you as busy when checking your schedule if you choose not to be), a subject for the automatic reply and the mail message itself. . 3. You can also set an Alternate notification: By clicking on To, you can choose people from your personal contact list, as well as the corporate directory, who should receive an alternate notification. You can also add emails directly in the field to the right of the To function. You then set an alternate subject and message text. 4. You can also set up who should not get an Out of Office message from you under Exclusions:
  • 28. In this example I have set that any email sent from hotmail.com you should not get an automatic reply. I have also added that any message containing the phrase Nigerian prince in the subject shouldn't get a reply either. You add a phrase by entering it in the field A message subject contains any of these exact phrases and then click on Add Phrase. To remove a phrase, click on it in the big square, and then click on Remove Phrase. 5. When you are finished you can click on Enable and Close at the top if you want to activate the Out of Office agent. If you have set it to start at a later date, it won't start sending out automatic replies before the selected date and time has been reached. If you click Save and Close, you will only save this as a draft, and it will not be activated. Spellchecking your email Spellchecking while writing Check the spell-checking sub sections in the Notes client settings and functions section above Spell-checking before sending You can also do a last spell checking before sending the email. It will also spell check the Subject line. Here is how you turn this on: 1. Go to File -> Preferences .
  • 29. 2. Choose Mail in the preferences window: 3. Make sure the Spell-check messages before sending option is checked under Message Options 4. Click OK When you now write an email, and hit send, Notes will spell check the Subject line and the main text of the message: • You can choose which language you want to use as Dictionary • You can skip a word and jump to the next or you can skip all by just clicking on Send As Is • You can choose a suggested word from the list, or type your own correction, and then click Replace. Notes will then jump to the next misspelled word • You can add a word to the Dictionary, so that Notes won't claim that it's misspelled the next time • You can click on Spelling Options... to tell Notes to ignore words in uppercase and with numbers Prevent sending emails with blank Subject line 1. Go to File -> Preferences
  • 30. 2. Choose Mail in the preferences window: 3. Make sure the Warn me about blank message subjects option is checked under Message Options 4. Click OK Notes will now warn you if you try to send an email without a subject line Formatting email text Check the Rich text formatting in HCL Notes sub section in the Notes client settings and functions section above on how to format text in an email. Set default email font You can change the default font in email in this way: 1. Write a text with the font that you want to set as a standard font 2. Highlight it:
  • 31. 3. Go to the Text menu and choose Set Current Font as Mail Default: 4. Notes will confirm your choice: 5. Click OK Now Notes will always use this as your default font in emails Add another email account Unfortunately, you cannot add another email account to Notes like you can in Outlook.
  • 32. What you can do is create group mail applications that you can open like you open your own email. You can also be given access to other people’s email, which you then can open up like your own mail application. However, these will be in their own windows in the Notes client, and not collected in the left side menu, like in Outlook.
  • 33. Calendar Share your calendar You can share your calendar with other users. 1. Go to the menu File and choose Preferences 2. Click on Calendar and To do and then on Access and Delegation: .
  • 34. 3. Click on Add...: 4. You can under Person or Group choose if everyone should have access, or just the persons or groups that you add by clicking in the field to the right of Just this person or group 5. Under Components you select what they should have access to 6. Under Access you choose if they only should be able to read your calendar, or if they should also be given full access (there's nothing in between) 7. Click OK when finished 8. You will now see the person and how much access they have:
  • 35. 9. You can later change the access via the Change Access... button or remove the person from the access list by clikcing on Remove Add a shared calendar to your calendar You add a shared calendar like this: 1. In the left menu of your Notes calendar, you expand Show Calendars and click on Add a calendar...: 2. This window appears: 3. You can now search for a Notes user and then choose the colors you want this user's calendar entries to be displayed with. Click OK when finished 4. To toggle on and off this users calendar, you can check and uncheck the calendar from the list of your calendars:
  • 36. Color code calendar entries Just like in Outlook, you can also color code your calendar entries. This means that calendar entries matching certain criteria that you set will be colorised so that you can differentiate the various appointments with a quick glance. You do this by adding a category to a calendar entry: 1. When you create a calendar entry, like a meeting, you can add a category by clicking here: If the Category option is not there, click on the button Display and choose Category: 2. After clicking Category, you will get a list of all your categories in popup window:
  • 37. 3. You can add more than one category by checking it. To add a new category, simply type it in the Add category field 4. Click OK 5. To the right of the Category field you find an option called Assign Colors...: 6. Click on it and this popup appears: 7. Click on one of the buttons looking like the button the arrow in the illustration above is pointing at to select the category or categories you want to give a certain color 8. Then you choose the background color and text color for this category 9. Click OK when finished
  • 38. 10. The calendar will immediately be updated with this color. Here is an example of a calendar with color coded entries: Change calendar views In Outlook you choose in the top ribbon menu if you want to see a calendar displayed as a day, week, work week, month or as a schedule. Period views In Notes you switch between a day, two days, a work week, a week or a month and as a weekly planner under the left side menu item called Views:
  • 39. Summary or timeslots You can switch between viewing the calendar as a summarised calendar or as timeslots by clicking on the Switch button in the upper right of the calendar: Timeslots will display the calendar like this:
  • 40. Week numbers Week numbers are displayed in the calendar footer at the bottom of the calendar. You turn it on like this: 1. Make sure the calendar footer is turned on by clicking on Display and then choose Calendar footer: 2. The calendar footer will now be visible under the calendar view. Click on the little pulldown arrow to choose Week [Number]: You can also do this in Day at a Glance in the right sidebar panel. Find available time Check one person's schedule You can quickly check if a colleague is available by right clicking on an email from this person and choose the name of the person and then select Find Available Time...:
  • 41. You will now see a pop up window where you can select a time where both of you are green and then you can click on Create Meeting. Check the schedule for meeting participants If you are creating a meeting you can check when people you have added to the meeting are free. You do can do this by clicking on the Find Available Times tab, next to Description: If the bar turns green, it means everybody whose schedule you have access to are available. If it's red, it means one or more of the invitees are busy at the proposed time. You can move the bar around to change the date and time of the meeting. You can even increase or decrease the size of the bar to change the length of the meeting. View Invitee Status It is very easy to check who have replied to your meeting invite, and whether they have accepted or not. Simply open the meeting document and click on the button Invitee Status.
  • 42. Contacts Like in Outlook, you have your own personal Contacts app in your Notes client. You can add contacts and organise them in groups. You can also control the addresses that are displayed when you type email addresses into the To field in a new email. Add contact From Mail You can add a contact from an email by right clicking on the email and choose Add Sender to Contacts.... A popup window will appear where the email address and name fields automatically will be filled out. You can then add more details, if you want. After clicking on OK, the contact will be added to Contacts. From Contacts Open your Contacts application and click on the My Contacts item in the left side menu and then simply click on the New button above the contacts view. A popup window will appear where you can add some basic information about the new contact. If you want to fill in more details about a new contact, click on the pulldown arrow to the right of the New button and choose Contact. A form will now appear where you can add a lot of details about the new contact. Create contact group You can also organise your contacts into groups. 1. Open your Contacts application and click on the Groups item in the left side menu 2. Give the group a name and a description: 3. Go to the field Members 4. Start typing the name of the contact you want to add. Notes will automatically suggest names from already existing contacts. Click on the one you want and click the enter key on your keyboard to start adding a new one. You can also add the email address of
  • 43. contacts that aren't in your Contacts register. Just type the email address and hint the enter key. You can also click on Members. You will then see this popup: You can now select people from your company directory. If you want to add people from your personal Contacts, change to your contact application in the Directory pull down field: You can use the Find names starting with field to type the beginning of a person's name to find the person you are looking for, if you do not want to scroll through the list 5. Click OK 6. Click Save and Close You can now use the group when sending emails or meeting invites. Recent contacts When you create a new email and start typing the address or name of a person in the To, Cc or Bcc field, Notes will suggest names and addresses for you:
  • 44. Sometimes Notes will suggest email addresses or contacts that you don't want to see in the typeahead. You can fix this in Contacts: 1. Open Contacts 2. Click on the Recent Contacts item in the left side menu 3. Find the address or person you don't want to see in the typeahead anymore and click on him or her 4. Now click on the button over the view called Hide in Typeahead It will now no longer show up in in the typeahead. If you want it to show up again, you just repeat step 1-3 and then click on Show in Typeahead in step 4
  • 45. To do In Outlook you have an application called Tasks. In Notes this is called To do. Create a To do As described under Mail, you can turn an email into a To do, just like in Outlook. But you can also create a To do from scratch: 1. Open the To do application 2. From any folder inside To do, you can click on the New button in the upper left corner above the folder. This form will appear: . 3. You can set a priority, a due date, a start date and whether this is a To do that should be repeated or not (if you click on Repeat you can choose a whole range of repeating patterns). You can also assign this To do to another person. In addition you can categorize it and add further details in the rich text field Description 4. If you choose a due date, an option called Notify Me will appear in the upper right corner of the form:
  • 46. If you click on the clock icon you can choose when you should be notified, and how. 5. Click on Save and Close when finished Mark a To do as completed or incomplete To mark a To do as completed, simply right click on it and choose Mark Complete. You can also open it for editing and click on the button Mark Complete. You mark a completed To do as incomplete in the exact same way. To see your completed To dos, click on the menu item Complete in the left side menu in the To do app.
  • 47. Summary Hopefully, these tips will ease your users transition from using Outlook to using Notes instead as their email, calendar, and contacts application. It will probably also give a lot of good tips to already experienced Notes users. Anything I forgot? Anything I should leave out? Let me know at hbp@elfworld.org