This document provides instructions for drawing an ovoid shape upon its largest axis in 7 steps:
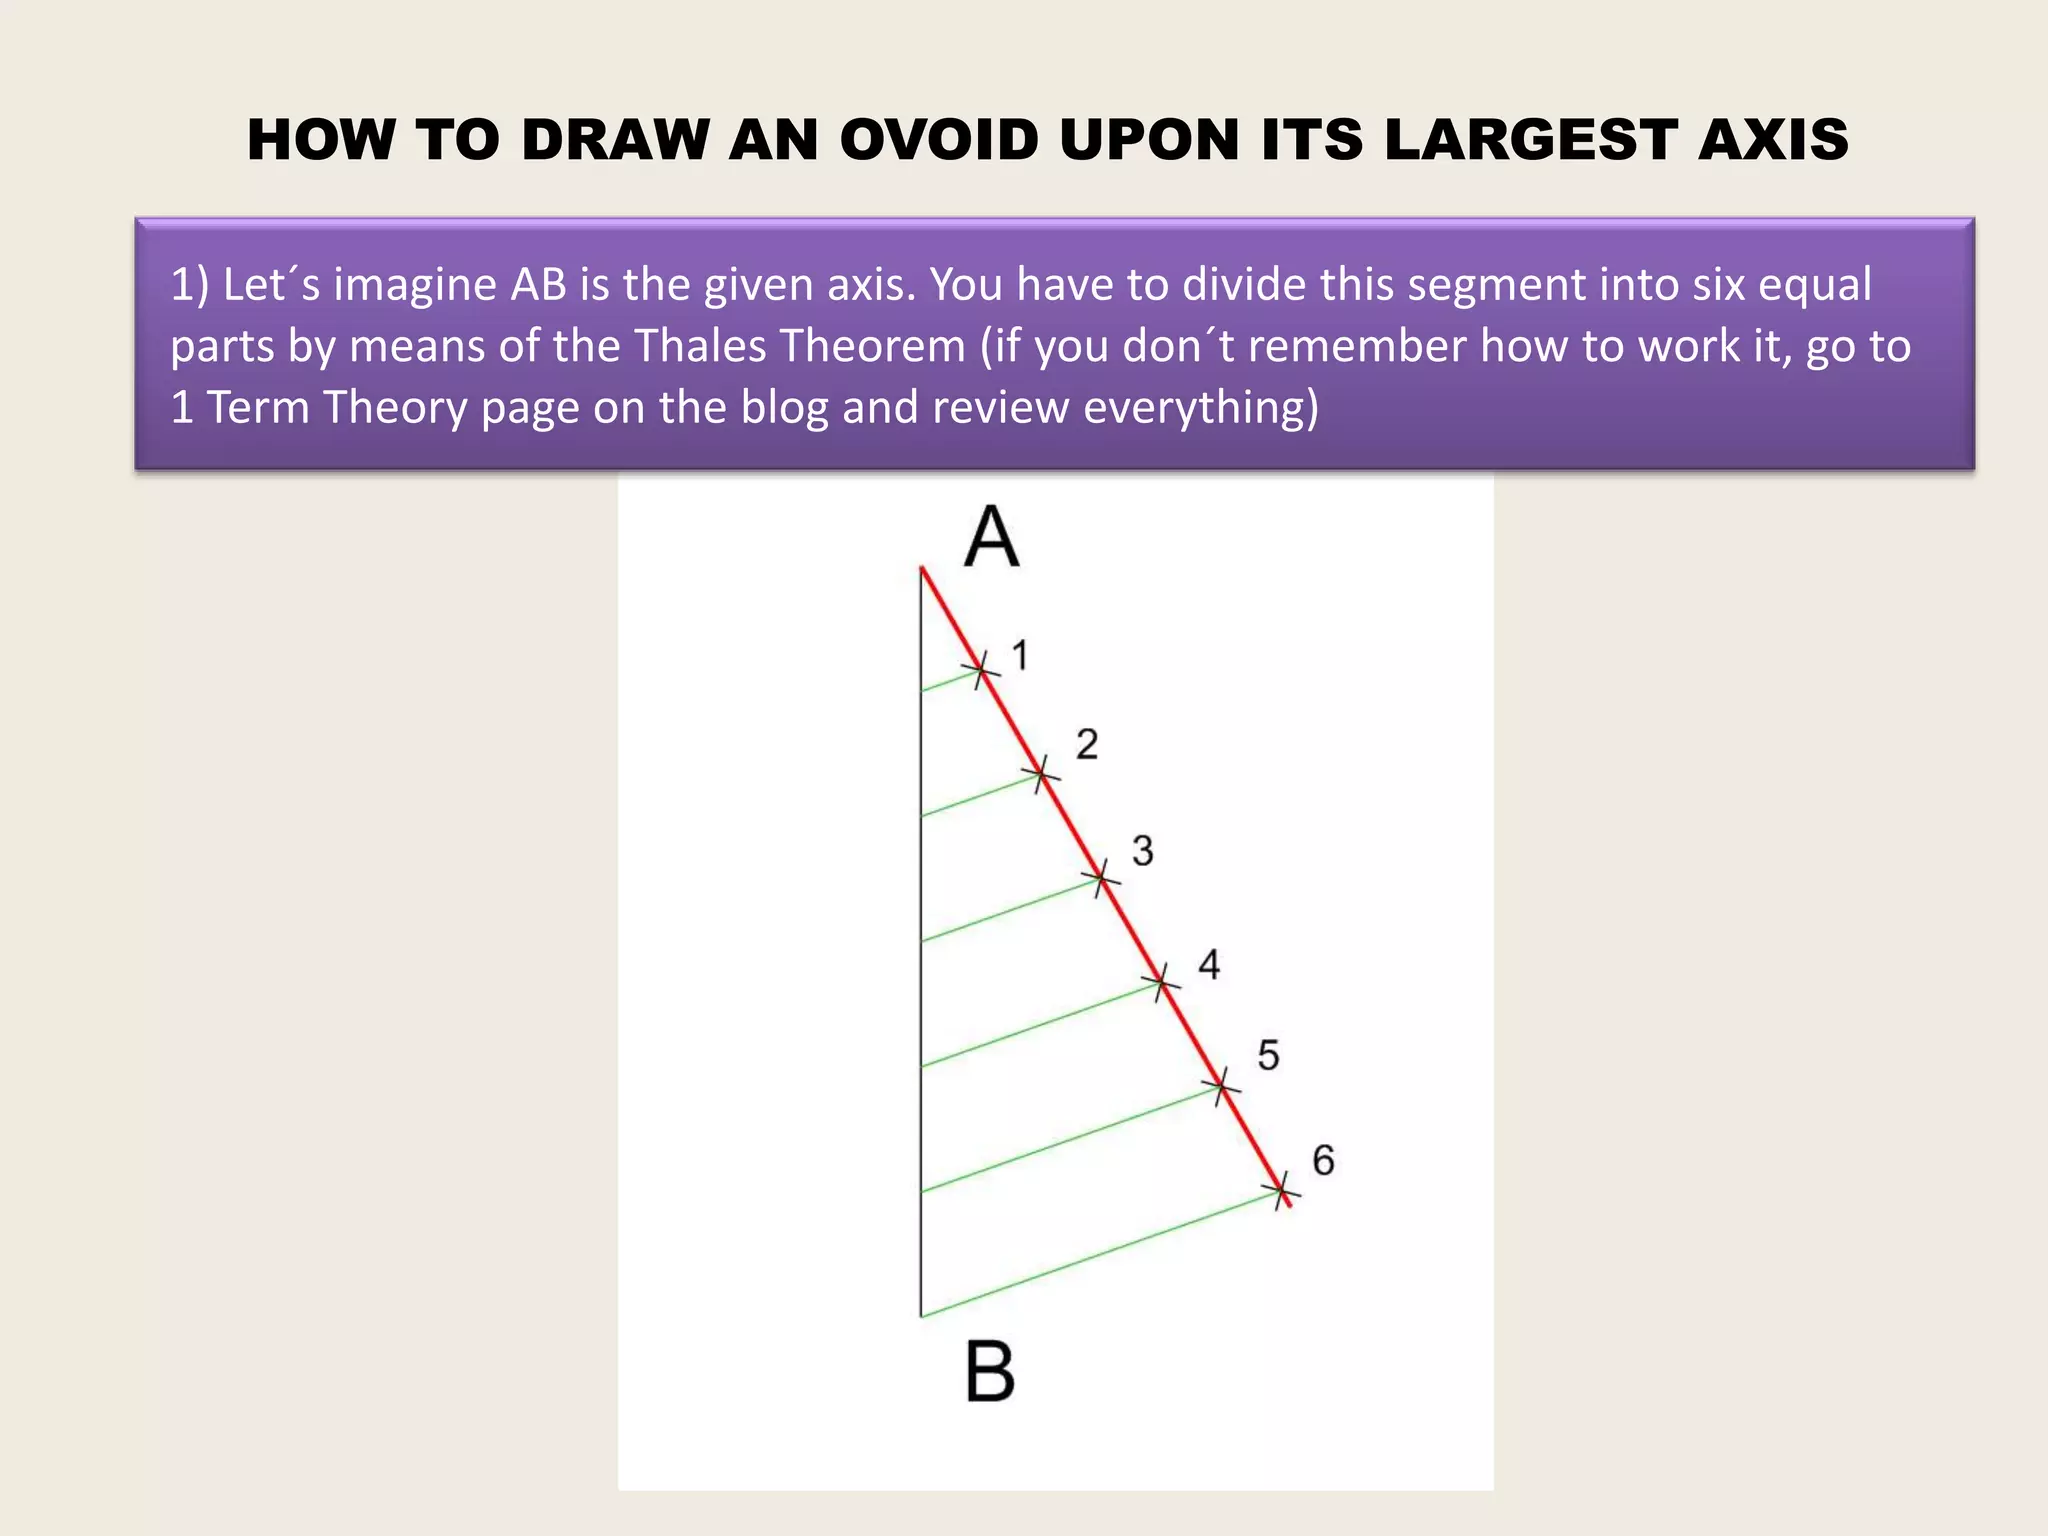
1) Divide the given axis AB into six equal parts.
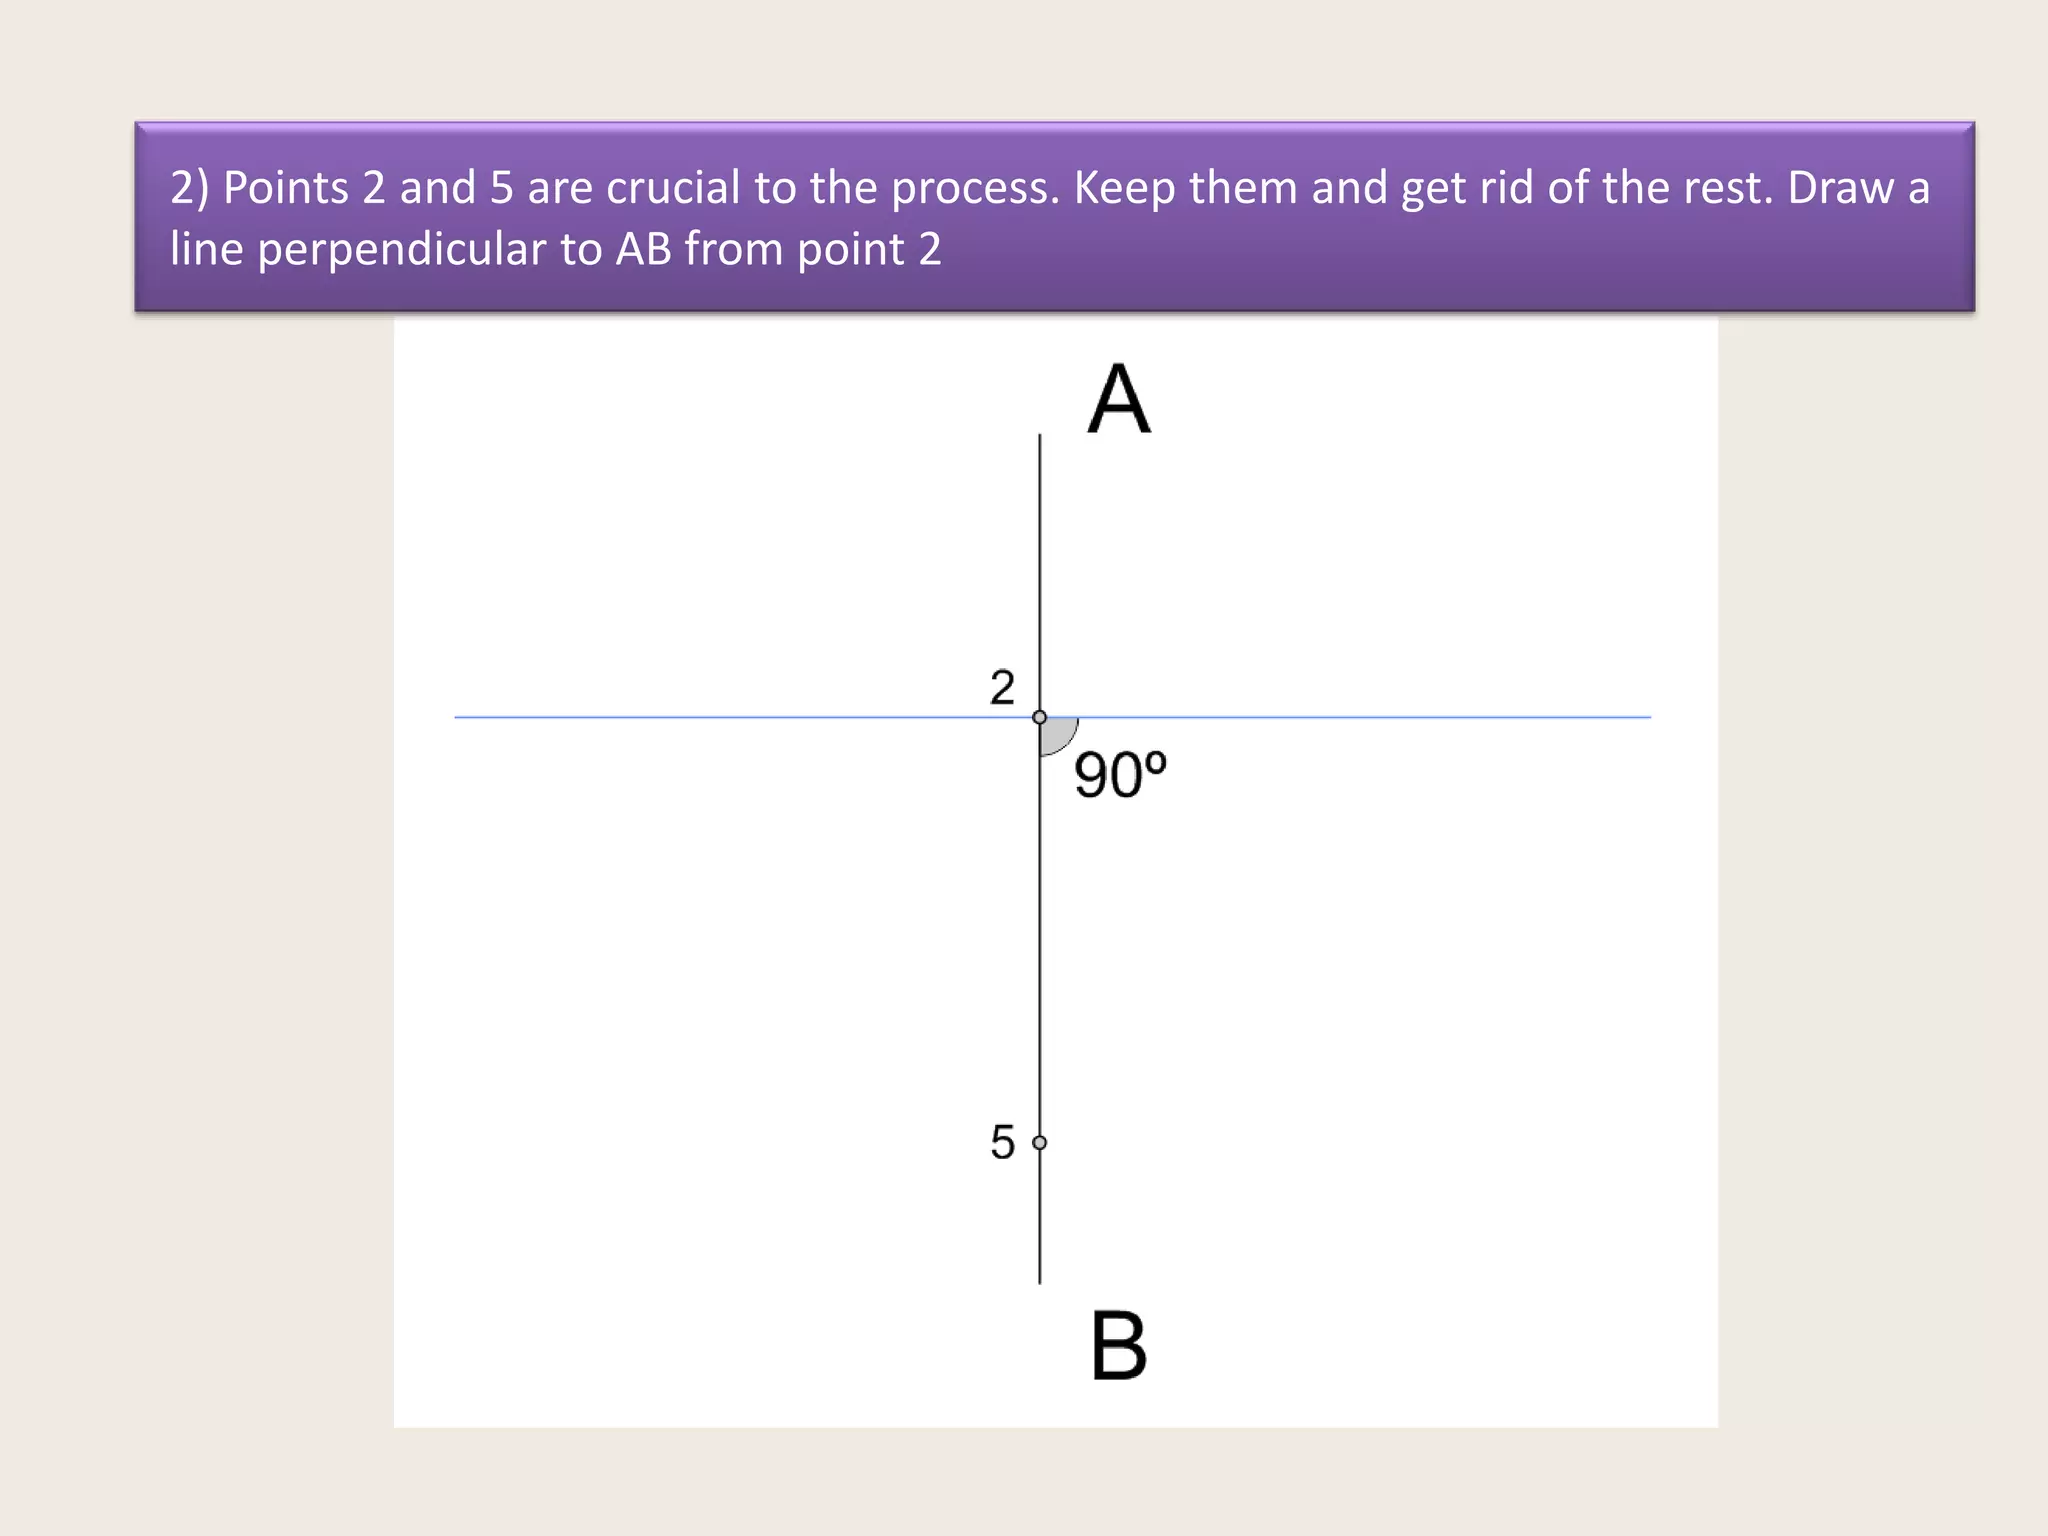
2) Retain points 2 and 5 and discard the others. Draw a perpendicular line from point 2.
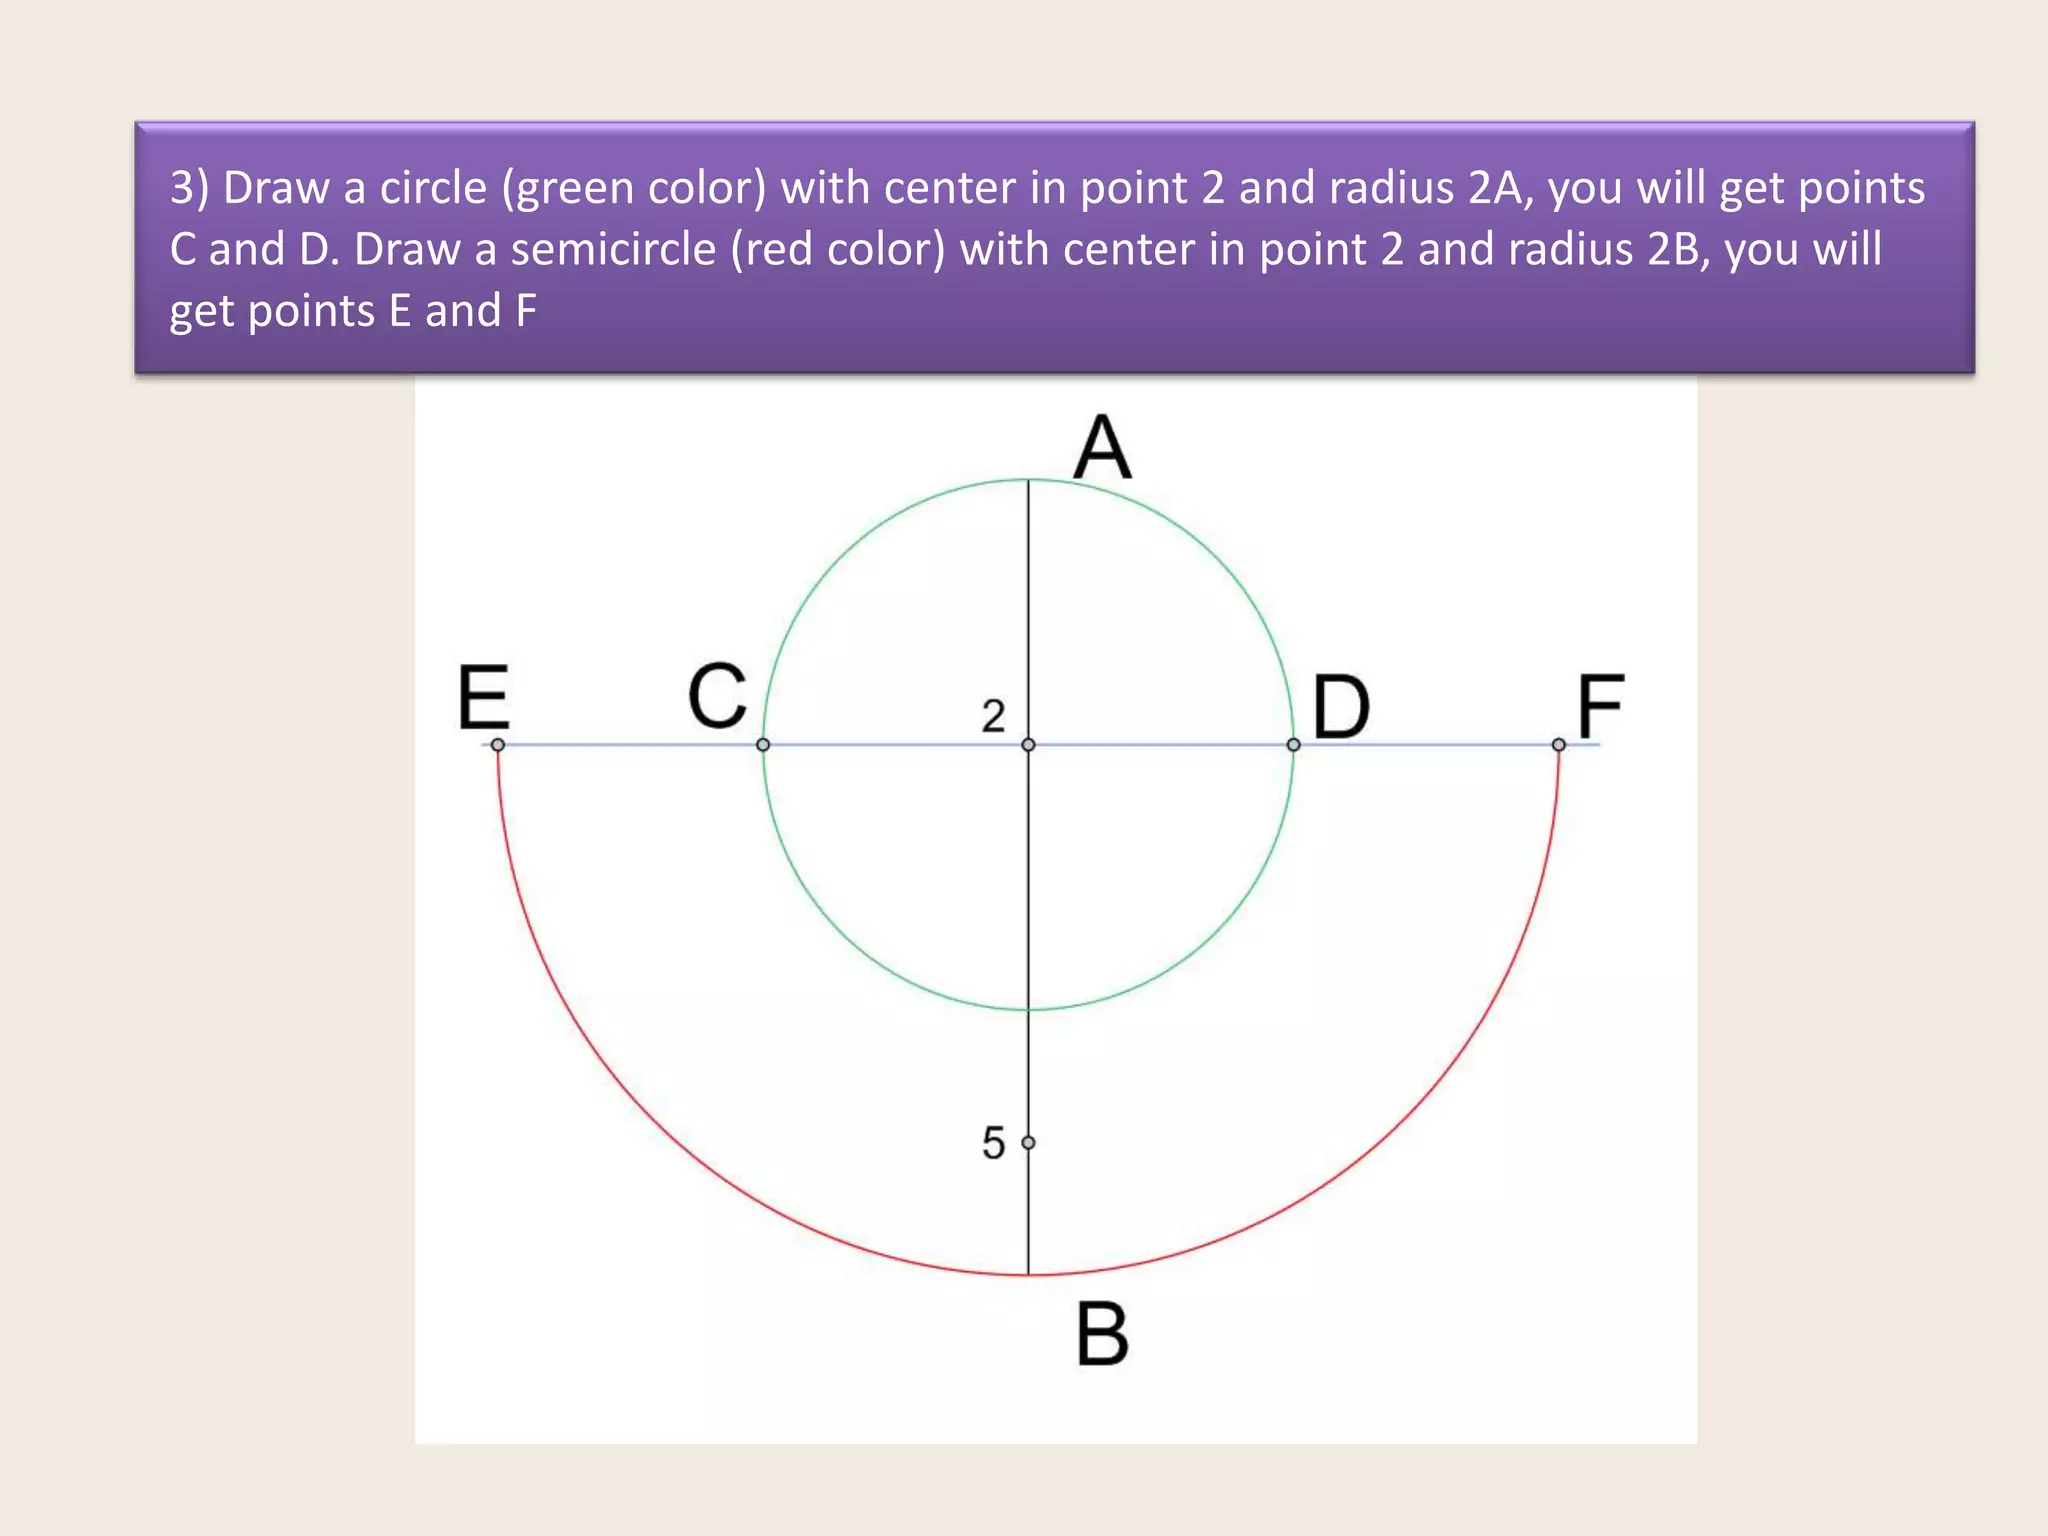
3) Draw a green circle from point 2 with radius 2A and a red semicircle from point 2 with radius 2B to find points C,D,E,F.
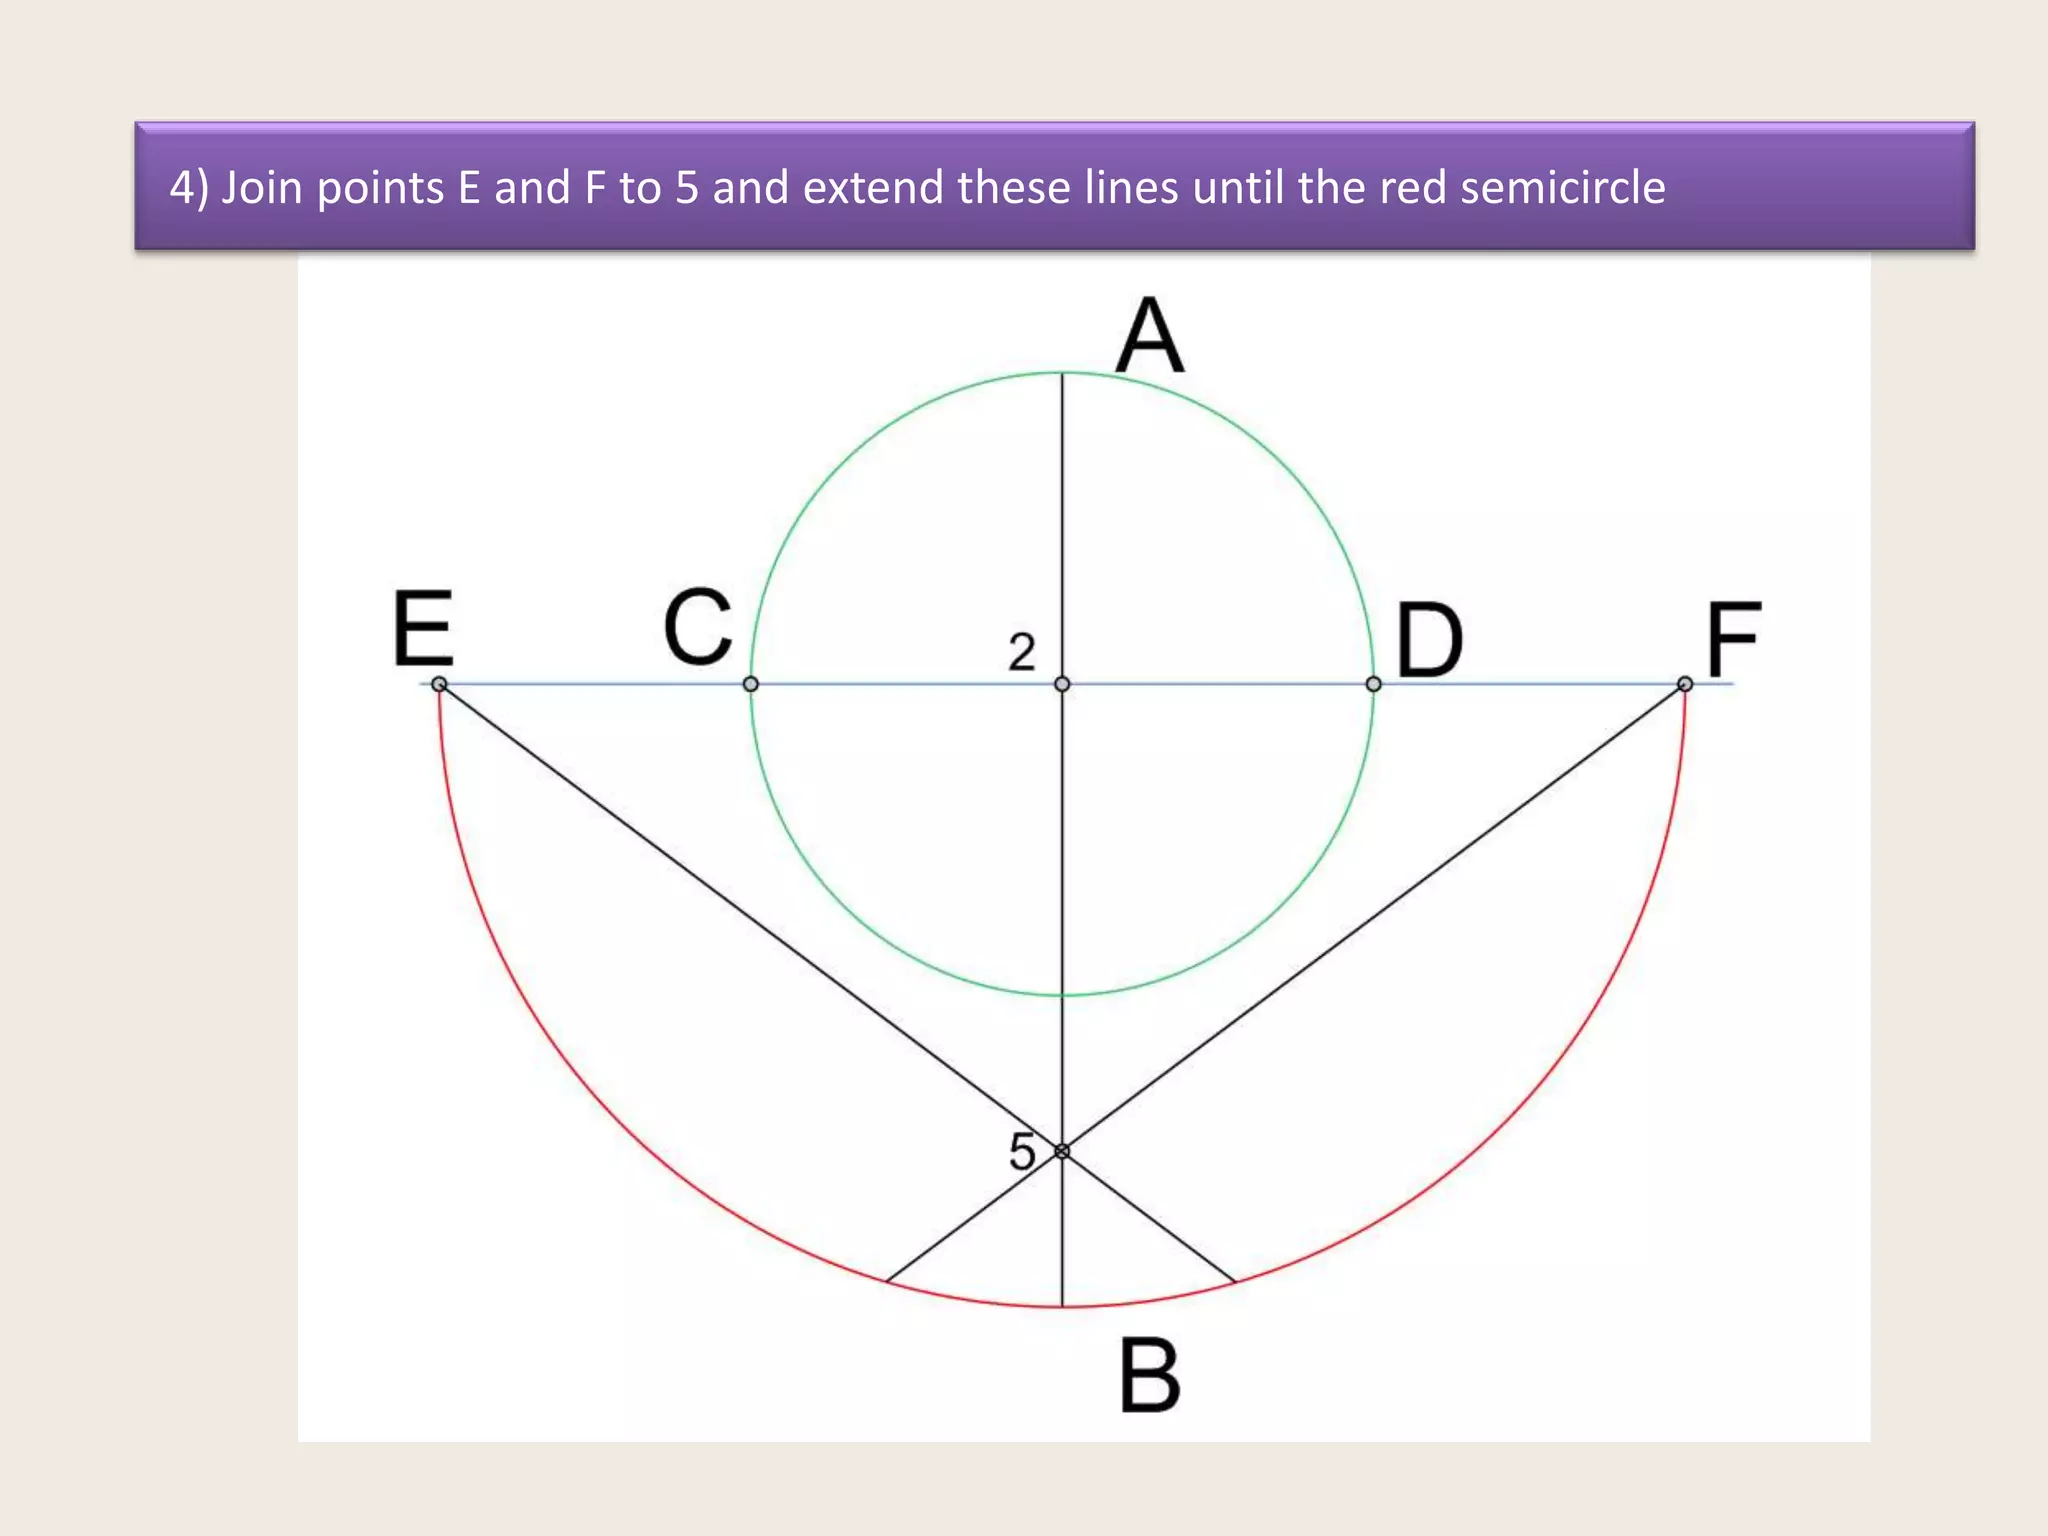
4) Join points E and F to point 5, extending the lines until the red semicircle.
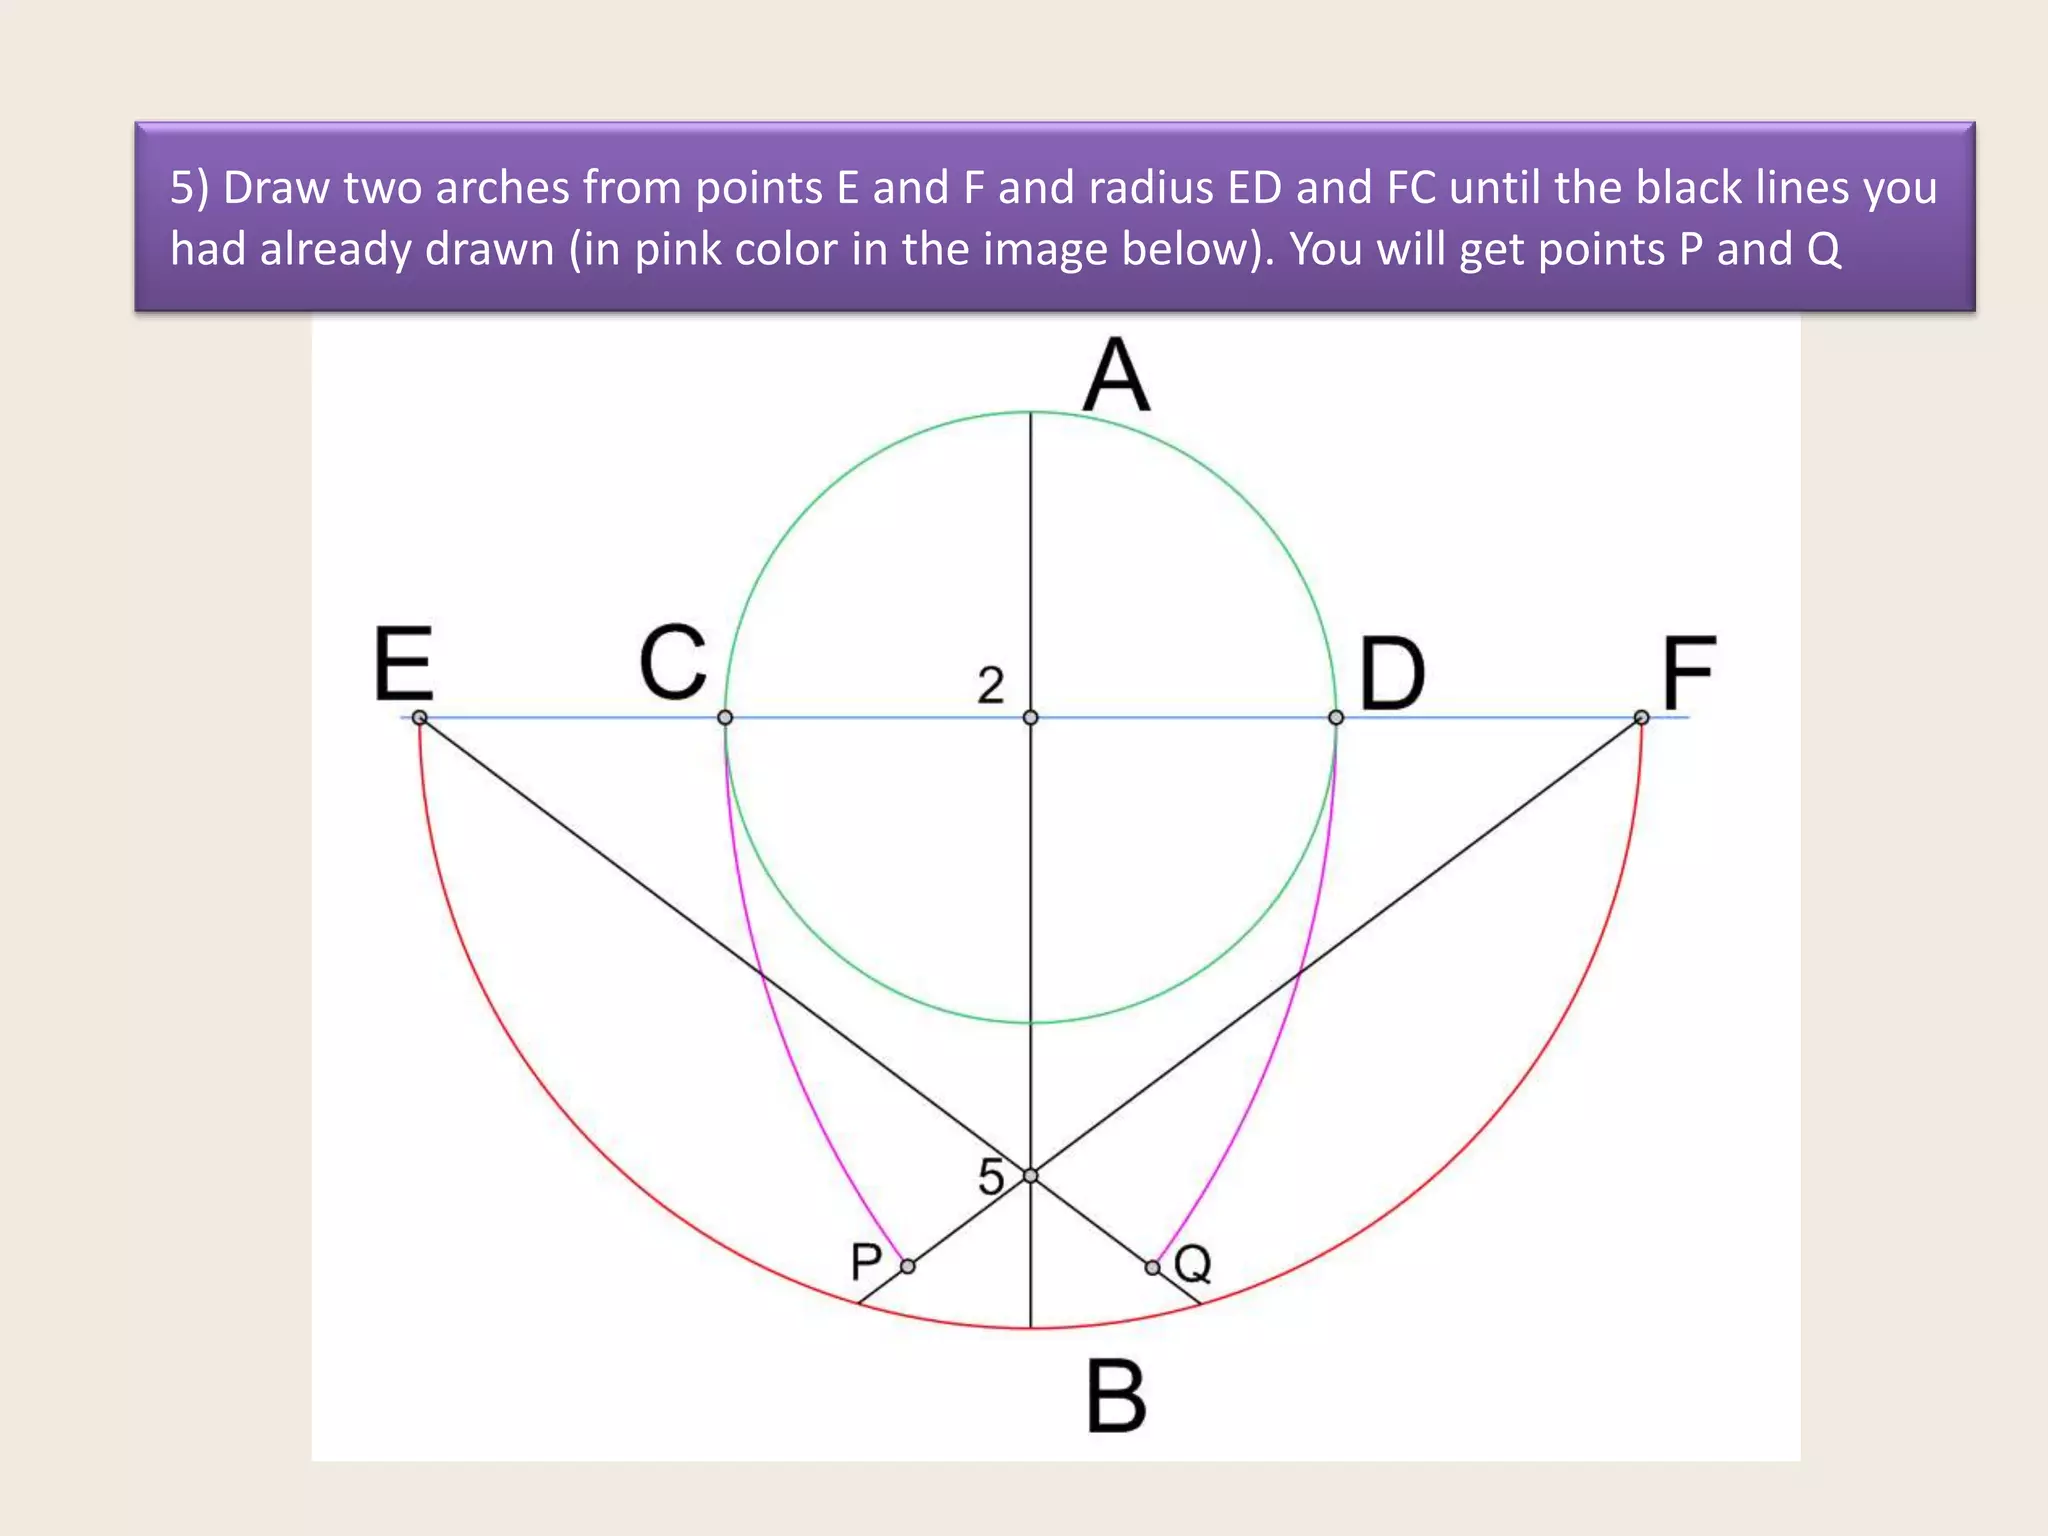
5) Draw arches from E and F with radii ED and FC until the black lines, finding points P and Q.
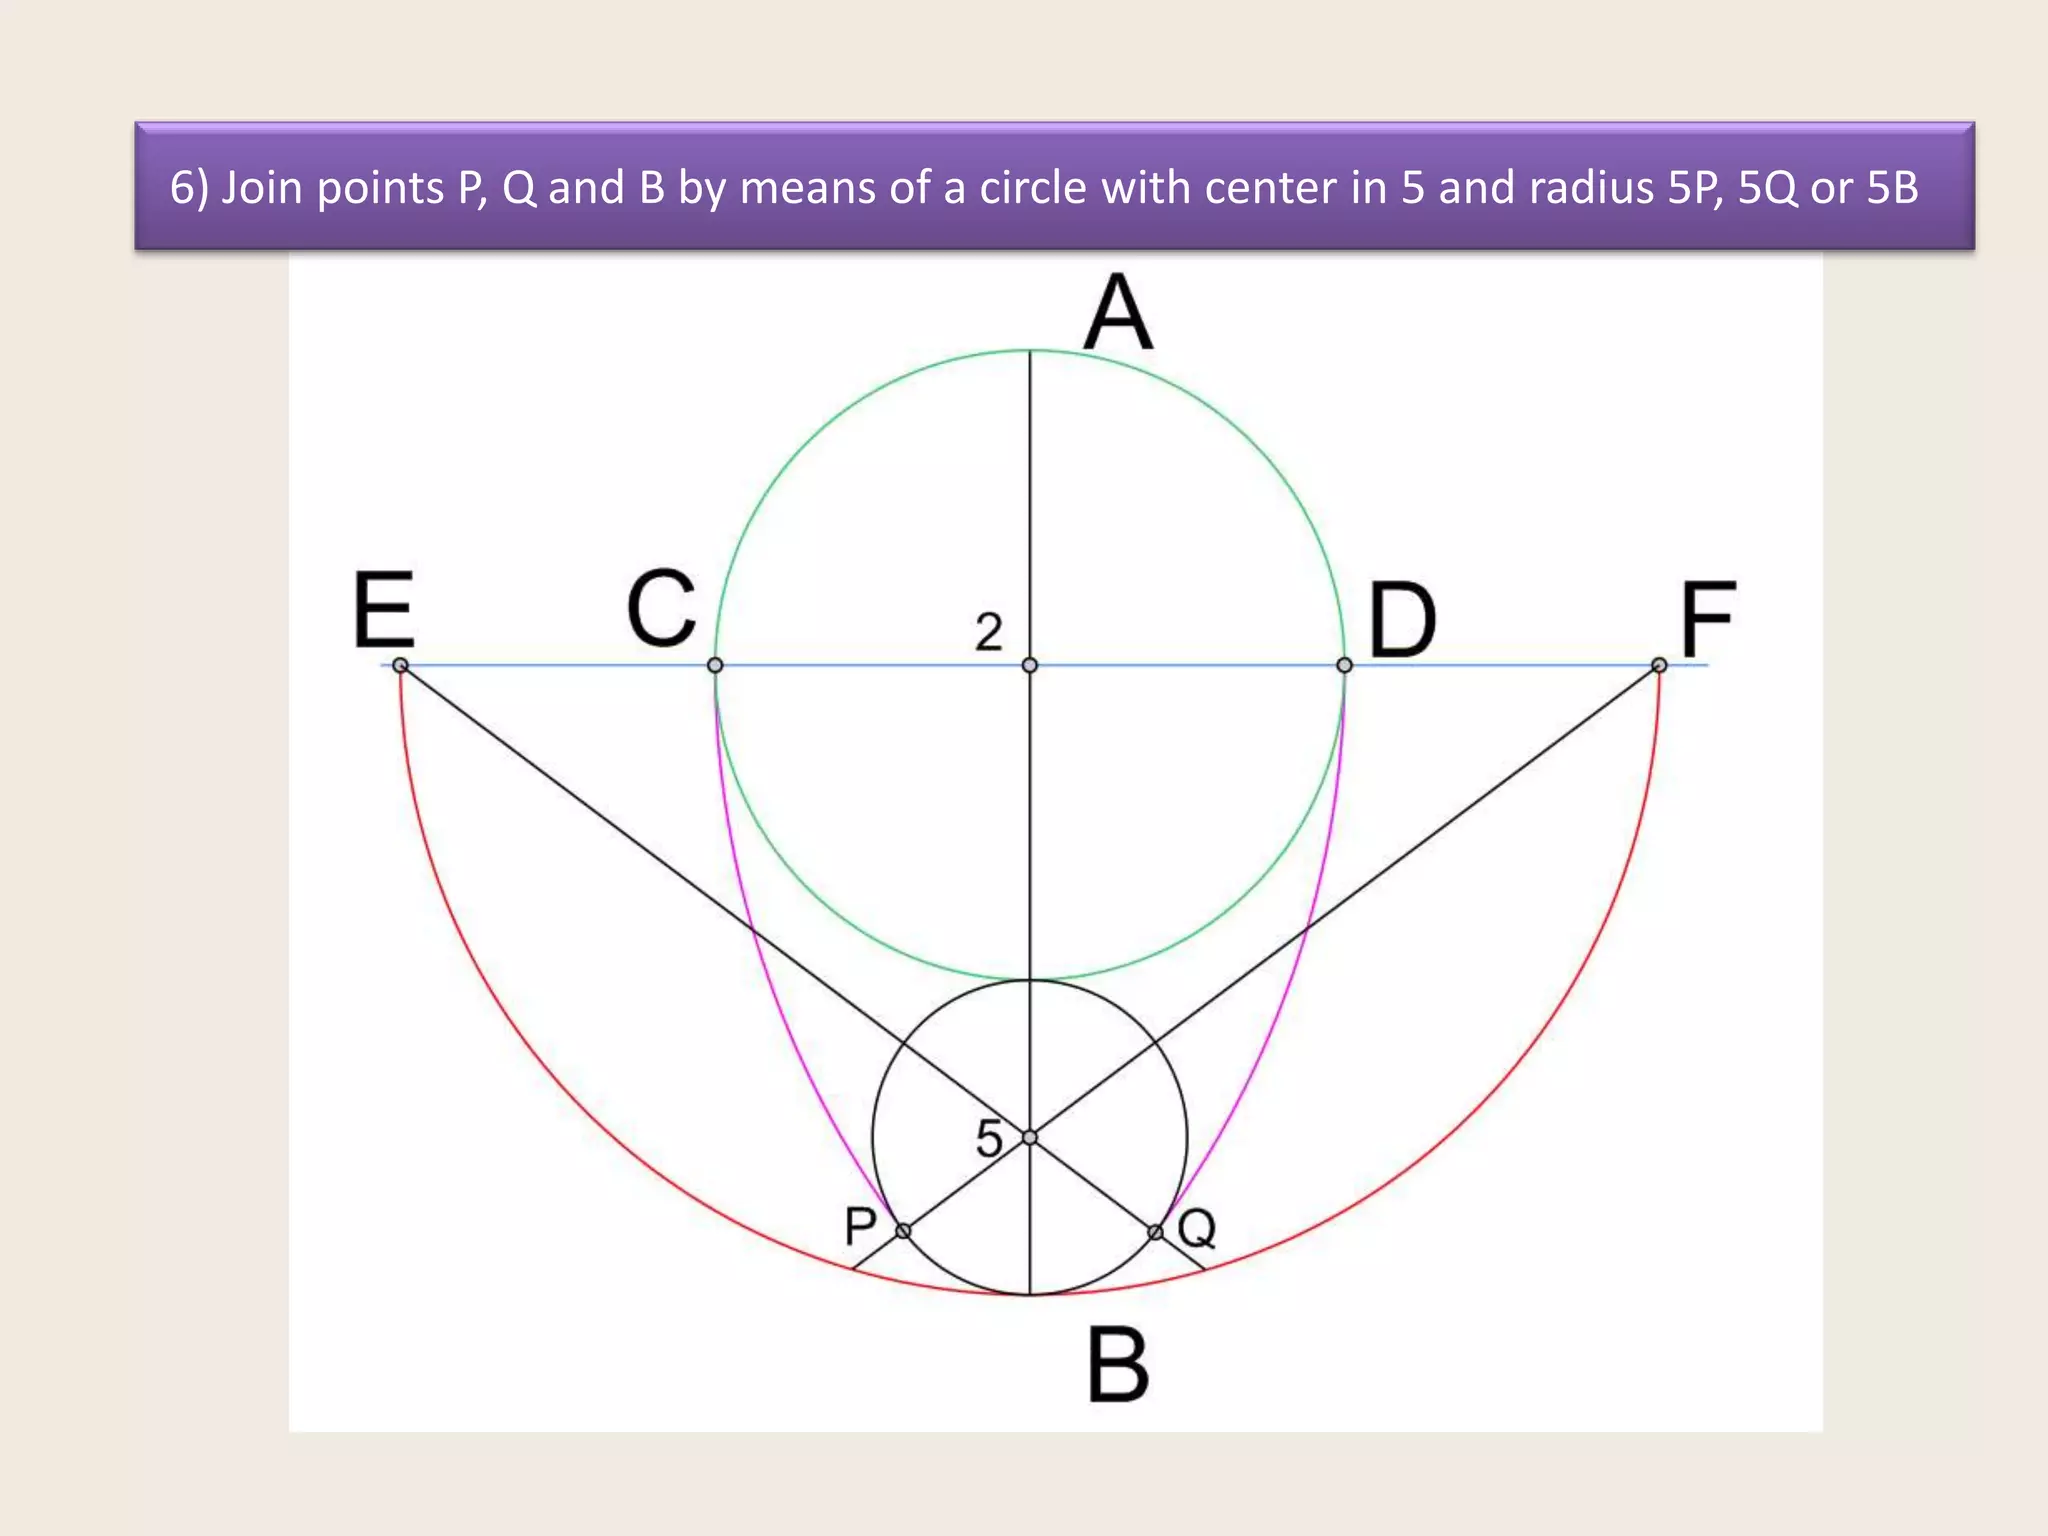
6) Draw a circle