
Recommended
More Related Content
What's hot
What's hot (20)
Similar to New sewing machine
Similar to New sewing machine (20)
More from Sunil Kumar
More from Sunil Kumar (14)
Recently uploaded
Recently uploaded (20)
New sewing machine
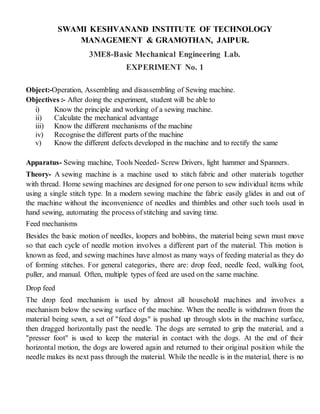
- 1. SWAMI KESHVANAND INSTITUTE OF TECHNOLOGY MANAGEMENT & GRAMOTHAN, JAIPUR. 3ME8-Basic Mechanical Engineering Lab. EXPERIMENT No. 1 Object:-Operation, Assembling and disassembling of Sewing machine. Objectives :- After doing the experiment, student will be able to i) Know the principle and working of a sewing machine. ii) Calculate the mechanical advantage iii) Know the different mechanisms of the machine iv) Recognise the different parts of the machine v) Know the different defects developed in the machine and to rectify the same Apparatus- Sewing machine, Tools Needed- Screw Drivers, light hammer and Spanners. Theory- A sewing machine is a machine used to stitch fabric and other materials together with thread. Home sewing machines are designed for one person to sew individual items while using a single stitch type. In a modern sewing machine the fabric easily glides in and out of the machine without the inconvenience of needles and thimbles and other such tools used in hand sewing, automating the process ofstitching and saving time. Feed mechanisms Besides the basic motion of needles, loopers and bobbins, the material being sewn must move so that each cycle of needle motion involves a different part of the material. This motion is known as feed, and sewing machines have almost as many ways of feeding material as they do of forming stitches. For general categories, there are: drop feed, needle feed, walking foot, puller, and manual. Often, multiple types of feed are used on the same machine. Drop feed The drop feed mechanism is used by almost all household machines and involves a mechanism below the sewing surface of the machine. When the needle is withdrawn from the material being sewn, a set of "feed dogs" is pushed up through slots in the machine surface, then dragged horizontally past the needle. The dogs are serrated to grip the material, and a "presser foot" is used to keep the material in contact with the dogs. At the end of their horizontal motion, the dogs are lowered again and returned to their original position while the needle makes its next pass through the material. While the needle is in the material, there is no
- 2. feed action. Almost all household machines and the majority of industrial machines use drop feed.
- 3. Main parts of the machine Stitch Formation :- Sewing machines can make a great variety of plain or patterned stitches. Ignoring strictly decorative aspects, over three dozen distinct stitch formations are formally recognized by the ISO 4915:1991 standard, involving one to seven separate threads to form the stitch. Plain stitches fall into four general categories: chainstitch, lockstitch, overlock and coverstitch. Chainstitch Chainstitch was used by early sewing machines and has two major drawbacks: The stitch is not self-locking, and if the thread breaks at any point or is not tied at both ends, the whole length of stitching comes out. It is also easily ripped out. The direction of sewing cannot be changed much from one stitch to the next, or the stitching process fails. A better stitch was found in the lockstitch. The chainstitch is still used today in clothing manufacture, though due to its major drawback it is generally paired with an overlock stitch along the same seam.
- 4. Lockstitch Formation of a lock-stitch using a boat shuttle as employed in early domestic machines Lockstitch utilising a rotating hook invented by Allen B Wilson. This is employed on many modern machines Formation of the double locking chain stitch Lockstitch is the familiar stitch performed by most household sewing machines and most industrial "single needle" sewing machines from two threads, one passed through a needle and one coming from a bobbin or shuttle. Each thread stays on the same side of the material being sewn, interlacing with the other thread at each needle hole by means of a bobbin driver. As a result, a lockstitch can be formed anywhere on the material being sewn; it does not need to be near an edge. Overlock Overlock, also known as "serging" or "serger stitch", can be formed with one to four threads, one or two needles, and one or two loopers. Overlock sewing machines are usually equipped with knives that trim or create the edge immediately in front of the stitch formation. Household and industrial overlock machines are commonly used for garment seams in knit or stretchy fabrics, for garment seams where the fabric is light enough that the seam does not need to be pressed open, and for protecting edges against raveling. Machines using two to four threads are most common, and frequently one machine can be configured for several varieties of overlock stitch. Overlock machines with five or more threads usually make both a chainstitch with one needle and one looper, and an overlock stitch with the remaining needles
- 5. and loopers. This combination is known as a "safety stitch". A similar machine used for stretch fabrics is called a mock safety. Coverstitch Coverstitch is formed by two or more needles and one or two loopers. Like lockstitch and chainstitch, coverstitch can be formed anywhere on the material being sewn. One looper manipulates a thread below the material being sewn, forming a bottom cover stitch against the needle threads. An additional looper above the material can form a top cover stitch simultaneously. The needle threads form parallel rows, while the looper threads cross back and forth all the needle rows. Coverstitch is so-called because the grid of crossing needle and looper threads covers raw seam edges, much as the overlock stitch does. It is widely used in garment construction, particularly for attaching trims and flat seaming where the raw edges can be finished in the same operation as forming the seam. Problem solving Upper thread breaks. Threading is not correct. Thread has a knot in it. Thread tension is too tight. Needle is bent or blunt or has a sharp eye. Needle is wrong size. Needle has been inserted wrong. Needle and thread does not match. Starting to stitch too fast. Thread take-up lever has not been threaded. Correctly thread machine. Remove knot. Correct thread tension. Replace needle. Replace needle with correct size. Properly insert needle. Start machine at a medium speed. Use proper thread or needle. Check threading order. Bobbin thread breaks. Bobbin has not been fully inserted in bobbin case. Bobbin has been incorrectly threaded. Bobbin does not turn smoothly in bobbin case. Lint in bobbin case or shuttle. Securely install bobbin into bobbincase. Correctly thread bobbin case. Check to see that bobbin has been wound evenly. Clean bobbin case and shuttle.
- 6. Skipped stitches. Thread tension is too tight. Needle is bent or blunt. Needle is wrong size. Needle and thread does not match. Thread take-up lever has not been threaded. Light pressure on presser foot. Incorrect setting of needle. Correct thread tension. Replace needle. Replace needle with correct size. Use proper thread or needle. Check threading order. Increase pressure on presser foot. Reset needle. Stitches are not formed properly. Thread has not been pulled into thread sensor guide. Threading is not correct. Bobbin case has been threaded wrong. Spool cap is wrong size for thread spool. Fully pull thread into thread sensor guide. Correct threading. Correctly thread bobbin case. Replace the cap with correct size. Loud noise is heard. Knocking noise, machine jammed. Dust has accumulated in feed dogs. Lint is in hook. Thread caught in shuttle. Clean machine. Clean machine. Disassemble machine and clean shuttle. Experiment Outcome 1. We have learnt the principle of Sewing Machine. 2. After dissembling the sewing machine, we have recognized the various parts of the machine and their functions.