Downloaded 44 times


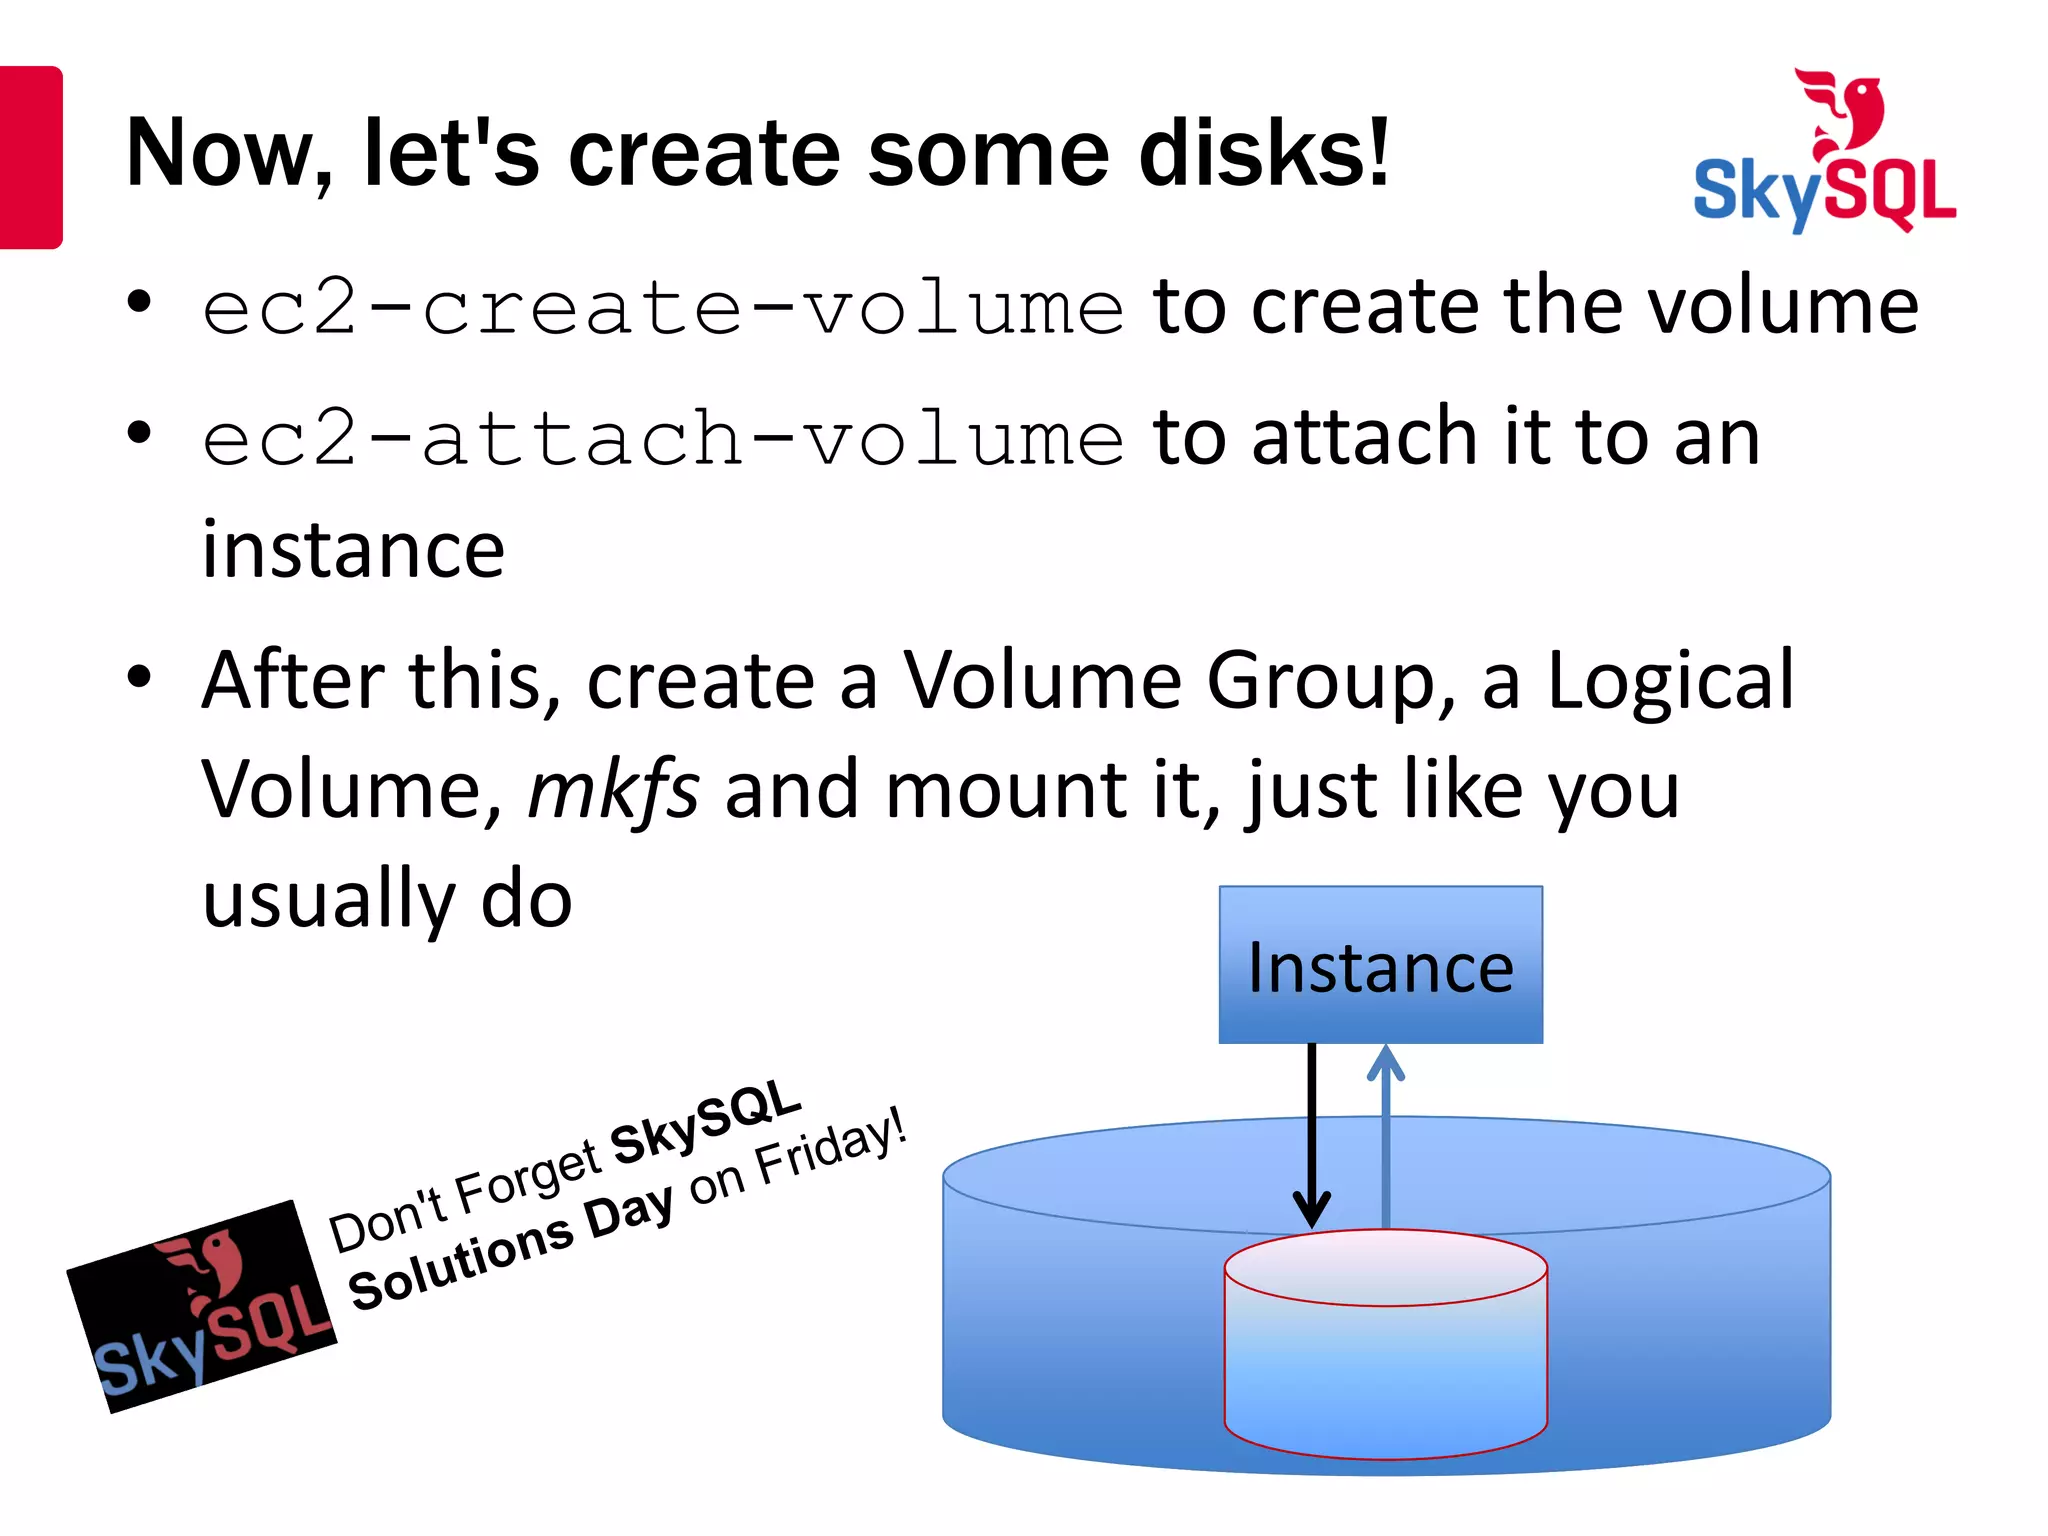
![Disk creation for MySQL in EC2
INSTANCE=`curl -s http://169.254.169.254/latest/meta-
data/instance-id`
AZ=`curl -s http://169.254.169.254/latest/meta-
data/placement/availability-zone`
VOLID=`ec2-create-volume --size 200 -z $AZ | awk '{print $2}'`
ec2-create-tags $VOLID --tag role=mysqlmaster
ec2-attach-volume $VOLID -i $INSTANCE -d =/dev/sdb1
while [ ! -b /dev/xvdb1 ]; do
echo "Waiting for /dev/xvdb1 to become available"
sleep 5
done
sudo pvcreate /dev/xvdb1
sudo vgcreate vg_mysql /dev/xvdb1
sudo lvcreate -L $195G -n lv_mysql vg_mysql
sudo mkfs -t xfs /dev/vg_mysql/lv_mysql
sudo mount -t xfs /dev/vb_mysqk/lv_mysql /data
sudo chown -R mysql:mysql /data](https://image.slidesharecdn.com/mysqlonaws101-130425174003-phpapp01/75/MySQL-on-AWS-101-19-2048.jpg)
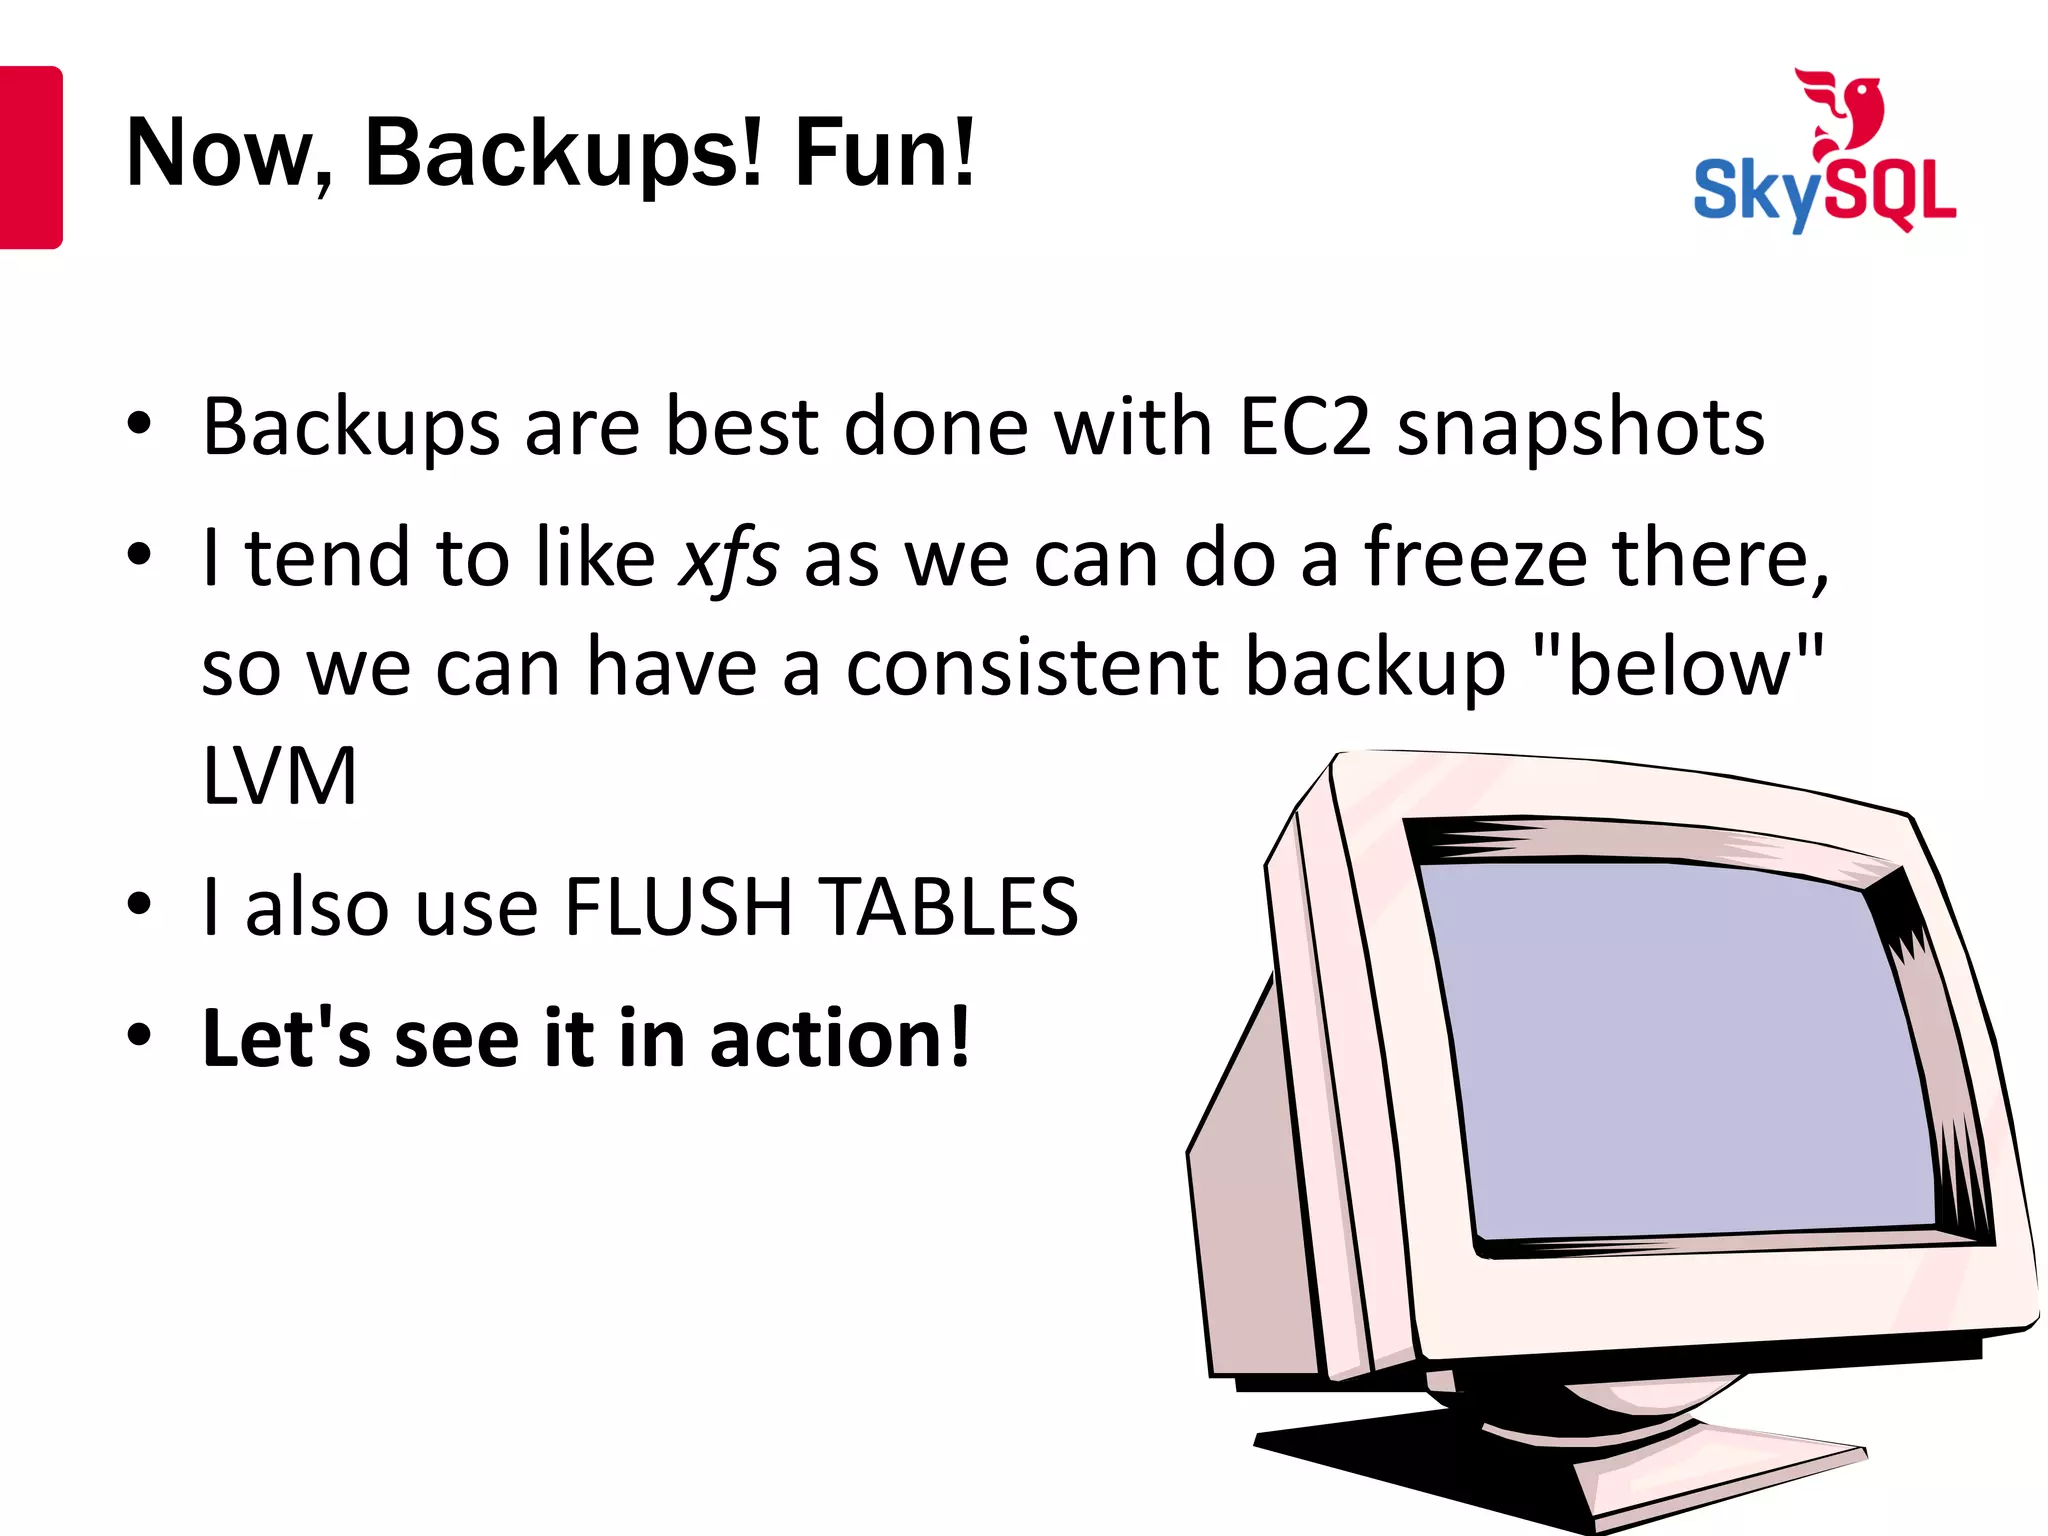
![Creating the snapshot – Part 2
sync; sync
sudo xfs_freeze -f /data
VOLID=`cat $HOME/volid.dat`
SNAPID=`ec2-create-snapshot $VOLID -d
mysql_master_backup | awk '{print $2}'`
SNAPSTAT=`ec2-describe-snapshots $SNAPID | awk
'{print $4}'`
while [ "x$SNAPSTAT" != "xcompleted" ]; do
echo "Waiting for snapshot to complete"
sleep 1
SNAPSTAT=`ec2-describe-snapshots $SNAPID | awk
'{print $4}'`
done
sudo xfs_freeze -u /data](https://image.slidesharecdn.com/mysqlonaws101-130425174003-phpapp01/75/MySQL-on-AWS-101-23-2048.jpg)
![Provisioning a slave – Create Volume
INSTANCE=`curl -s http://169.254.169.254/latest/meta-
data/instance-id`
AZ=`curl -s http://169.254.169.254/latest/meta-
data/placement/availability-zone`
SNAPID=`ec2-describe-snapshots -F
description=mysql_master_backup | awk '{print $2}'`
VOLID=`ec2-create-volume --snapshot $SNAPID --
availability-zone $AZ | awk '{print $2}'`
ec2-attach-volume $VOLID -i $INSTANCE -d /dev/sdb1
while [ ! -b /dev/xvdb1 ]; do
echo "Waiting for /dev/xvdb1 to become available"
sleep 5
done](https://image.slidesharecdn.com/mysqlonaws101-130425174003-phpapp01/75/MySQL-on-AWS-101-26-2048.jpg)
![Provisioning a slave – Set up MySQL
cd /usr/local/mariadb1001
sudo bin/mysqld_safe --defaults-
file=/usr/local/mariadb1001/my.cnf &
while [ ! -S /tmp/mysql.sock ]; do
sleep 3
done
MASTERFILE=`awk '{print $1}' < /data/snappos.dat`
MASTERPOS=`awk '{print $2}' < /data/snappos.dat`
echo "CHANGE MASTER TO MASTER_LOG_FILE='$MASTERFILE',
master_log_pos=$MASTERPOS,
master_host='aws101_1',
master_port=3306,
master_user='repl',
master_password='repl';" | mysql -u root
mysql -u root -e "start slave"](https://image.slidesharecdn.com/mysqlonaws101-130425174003-phpapp01/75/MySQL-on-AWS-101-28-2048.jpg)


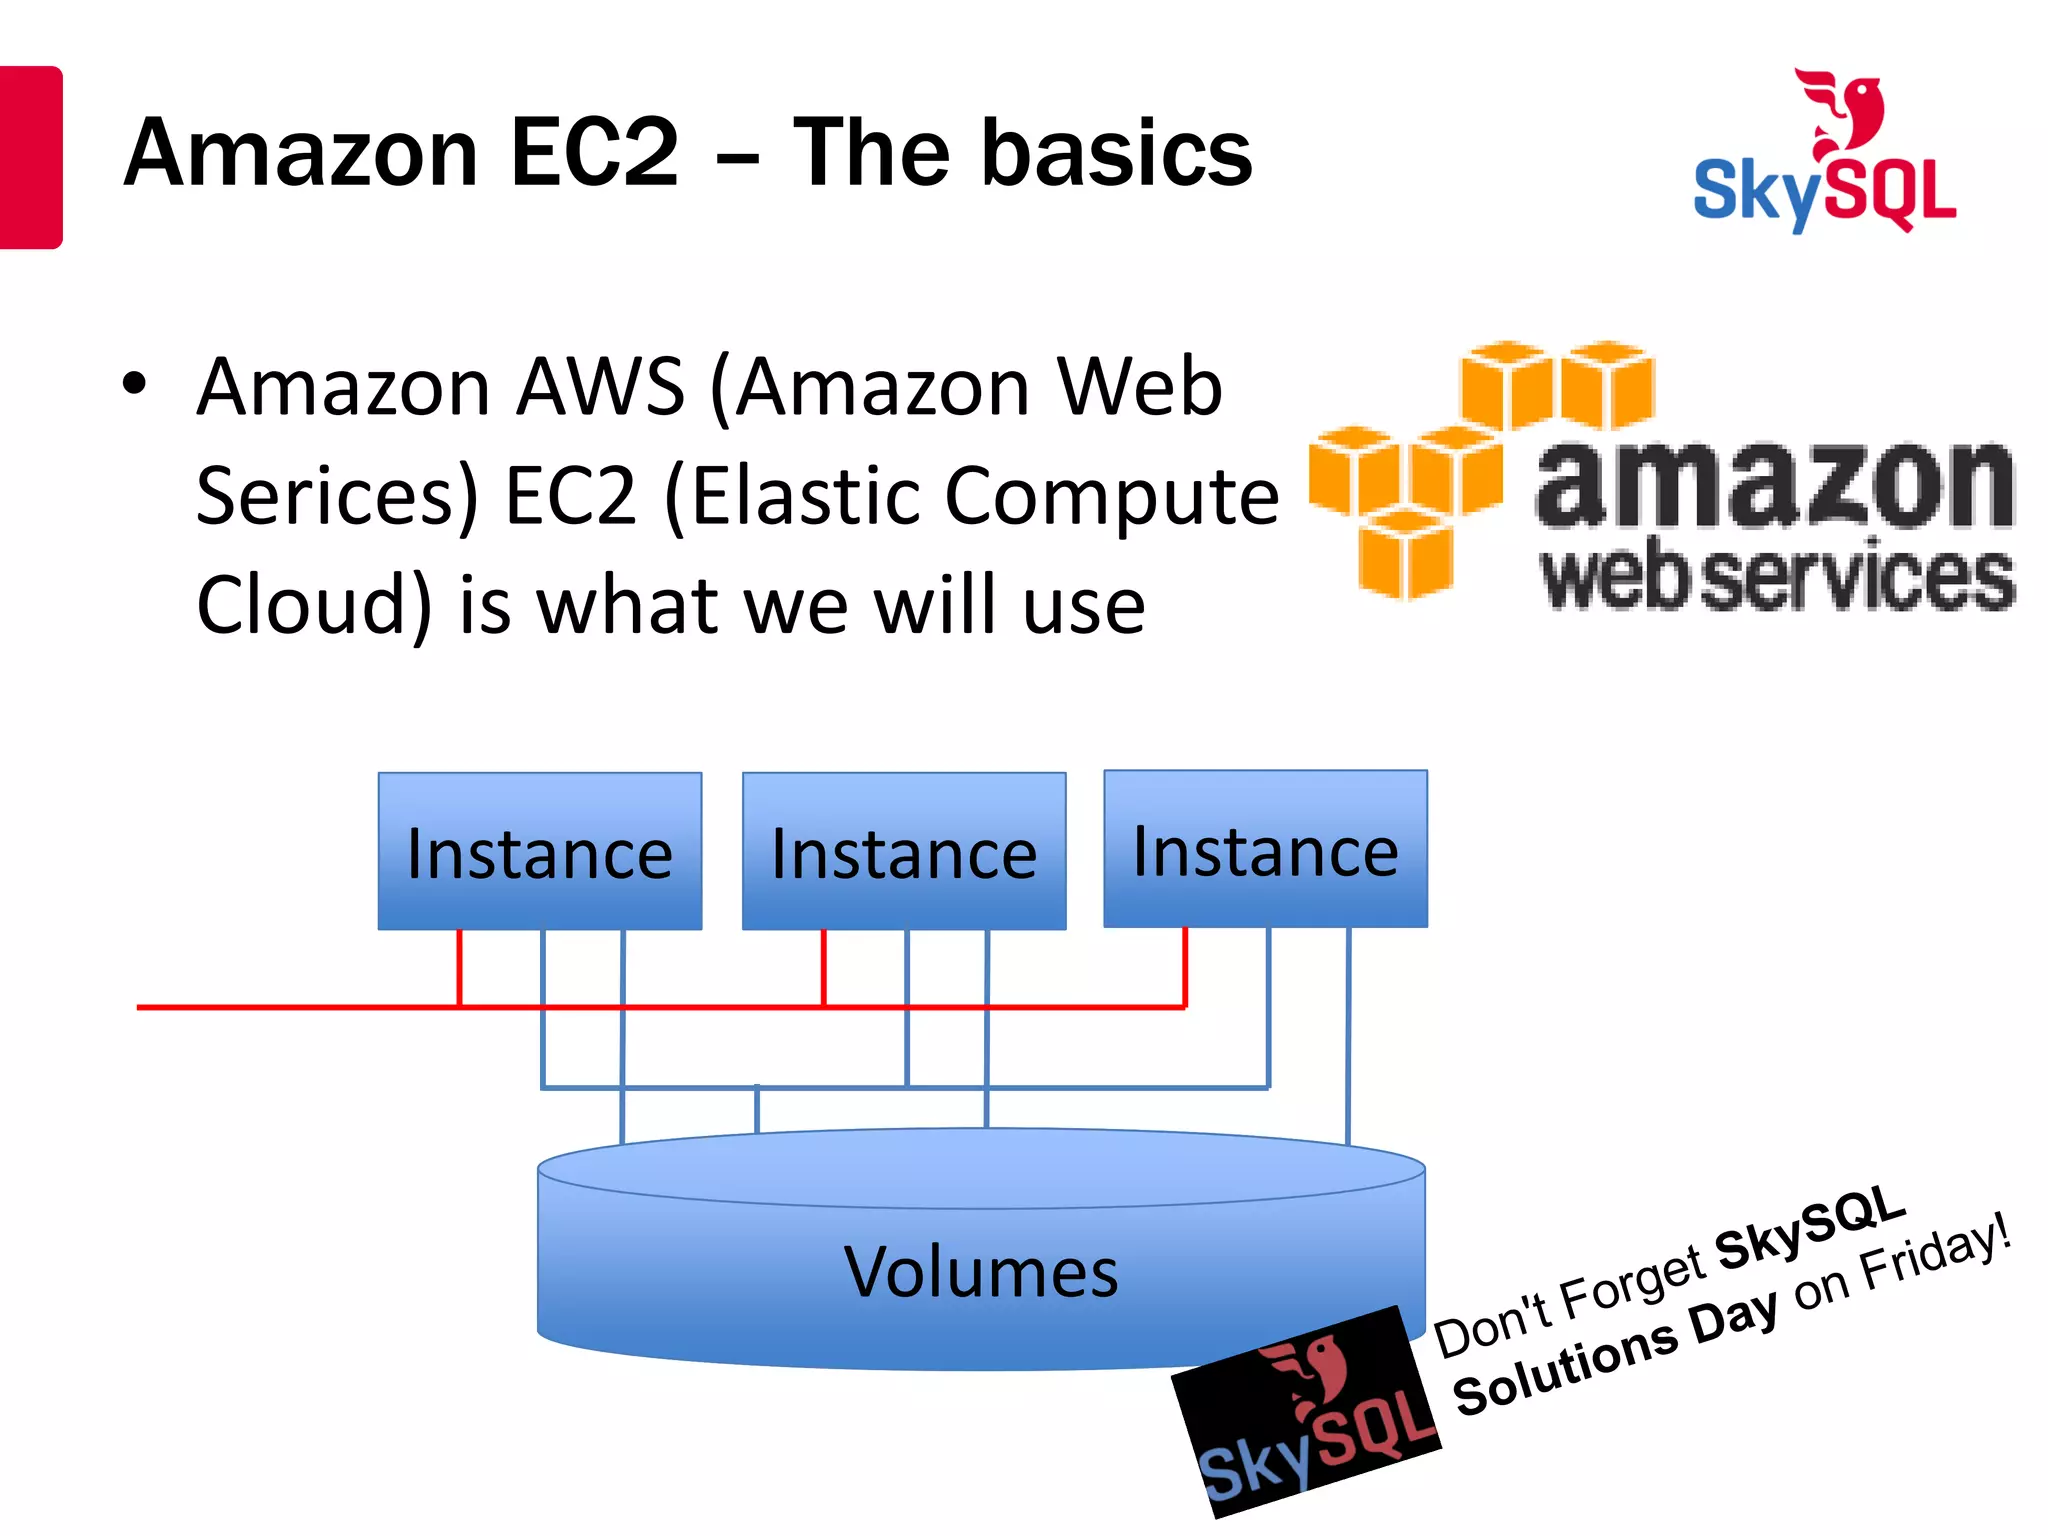
The document is a presentation by Anders Karlsson on setting up MySQL on Amazon AWS EC2, aimed at MySQL DBAs interested in exploring the Amazon cloud. It covers Amazon's database options, EC2 basics, and provides a hands-on approach to installing and managing MySQL instances and backups. The talk includes practical commands and steps for creating, attaching volumes, and provisioning slaves from backups in the EC2 environment.


![aws.batch 4[2] - Read-Only.pptx](https://cdn.slidesharecdn.com/ss_thumbnails/aws-230627092345-5980ca54-thumbnail.jpg?width=640&height=640&fit=bounds)


![Vibe Coding vs. Spec-Driven Development [Free Meetup]](https://cdn.slidesharecdn.com/ss_thumbnails/vibecodingvsspecdrivendevelopment-251209105622-43f455e7-thumbnail.jpg?width=640&height=640&fit=bounds)


