SlideShare a Scribd company logo
1 of 198
What is Angular?
• Angular is an open-source JavaScript framework for building both
mobile and desktop web applications.
• Angular is exclusively used to build Single Page Applications (SPA).
• Angular is completely rewritten and is not an upgrade to Angular 1.
• Developers prefer TypeScript to write Angular code. But other than
TypeScript, you can also write code using JavaScript (ES5 or
ECMAScript 5).
• Madewithangularjs.com
Features of Angular
1. Dependency Injection
2. Data Binding
3. Testing
4. Model view Controller
ANGULAR
Angular application setup:
To develop an application using Angular on a local system, you need to
set up a development environment that includes the installation of:
• Node.js (^12.20.2 || ^14.15.5 || ^16.10.0) and npm (min
version required 6.13.4)
• Angular CLI
• Visual Studio Code
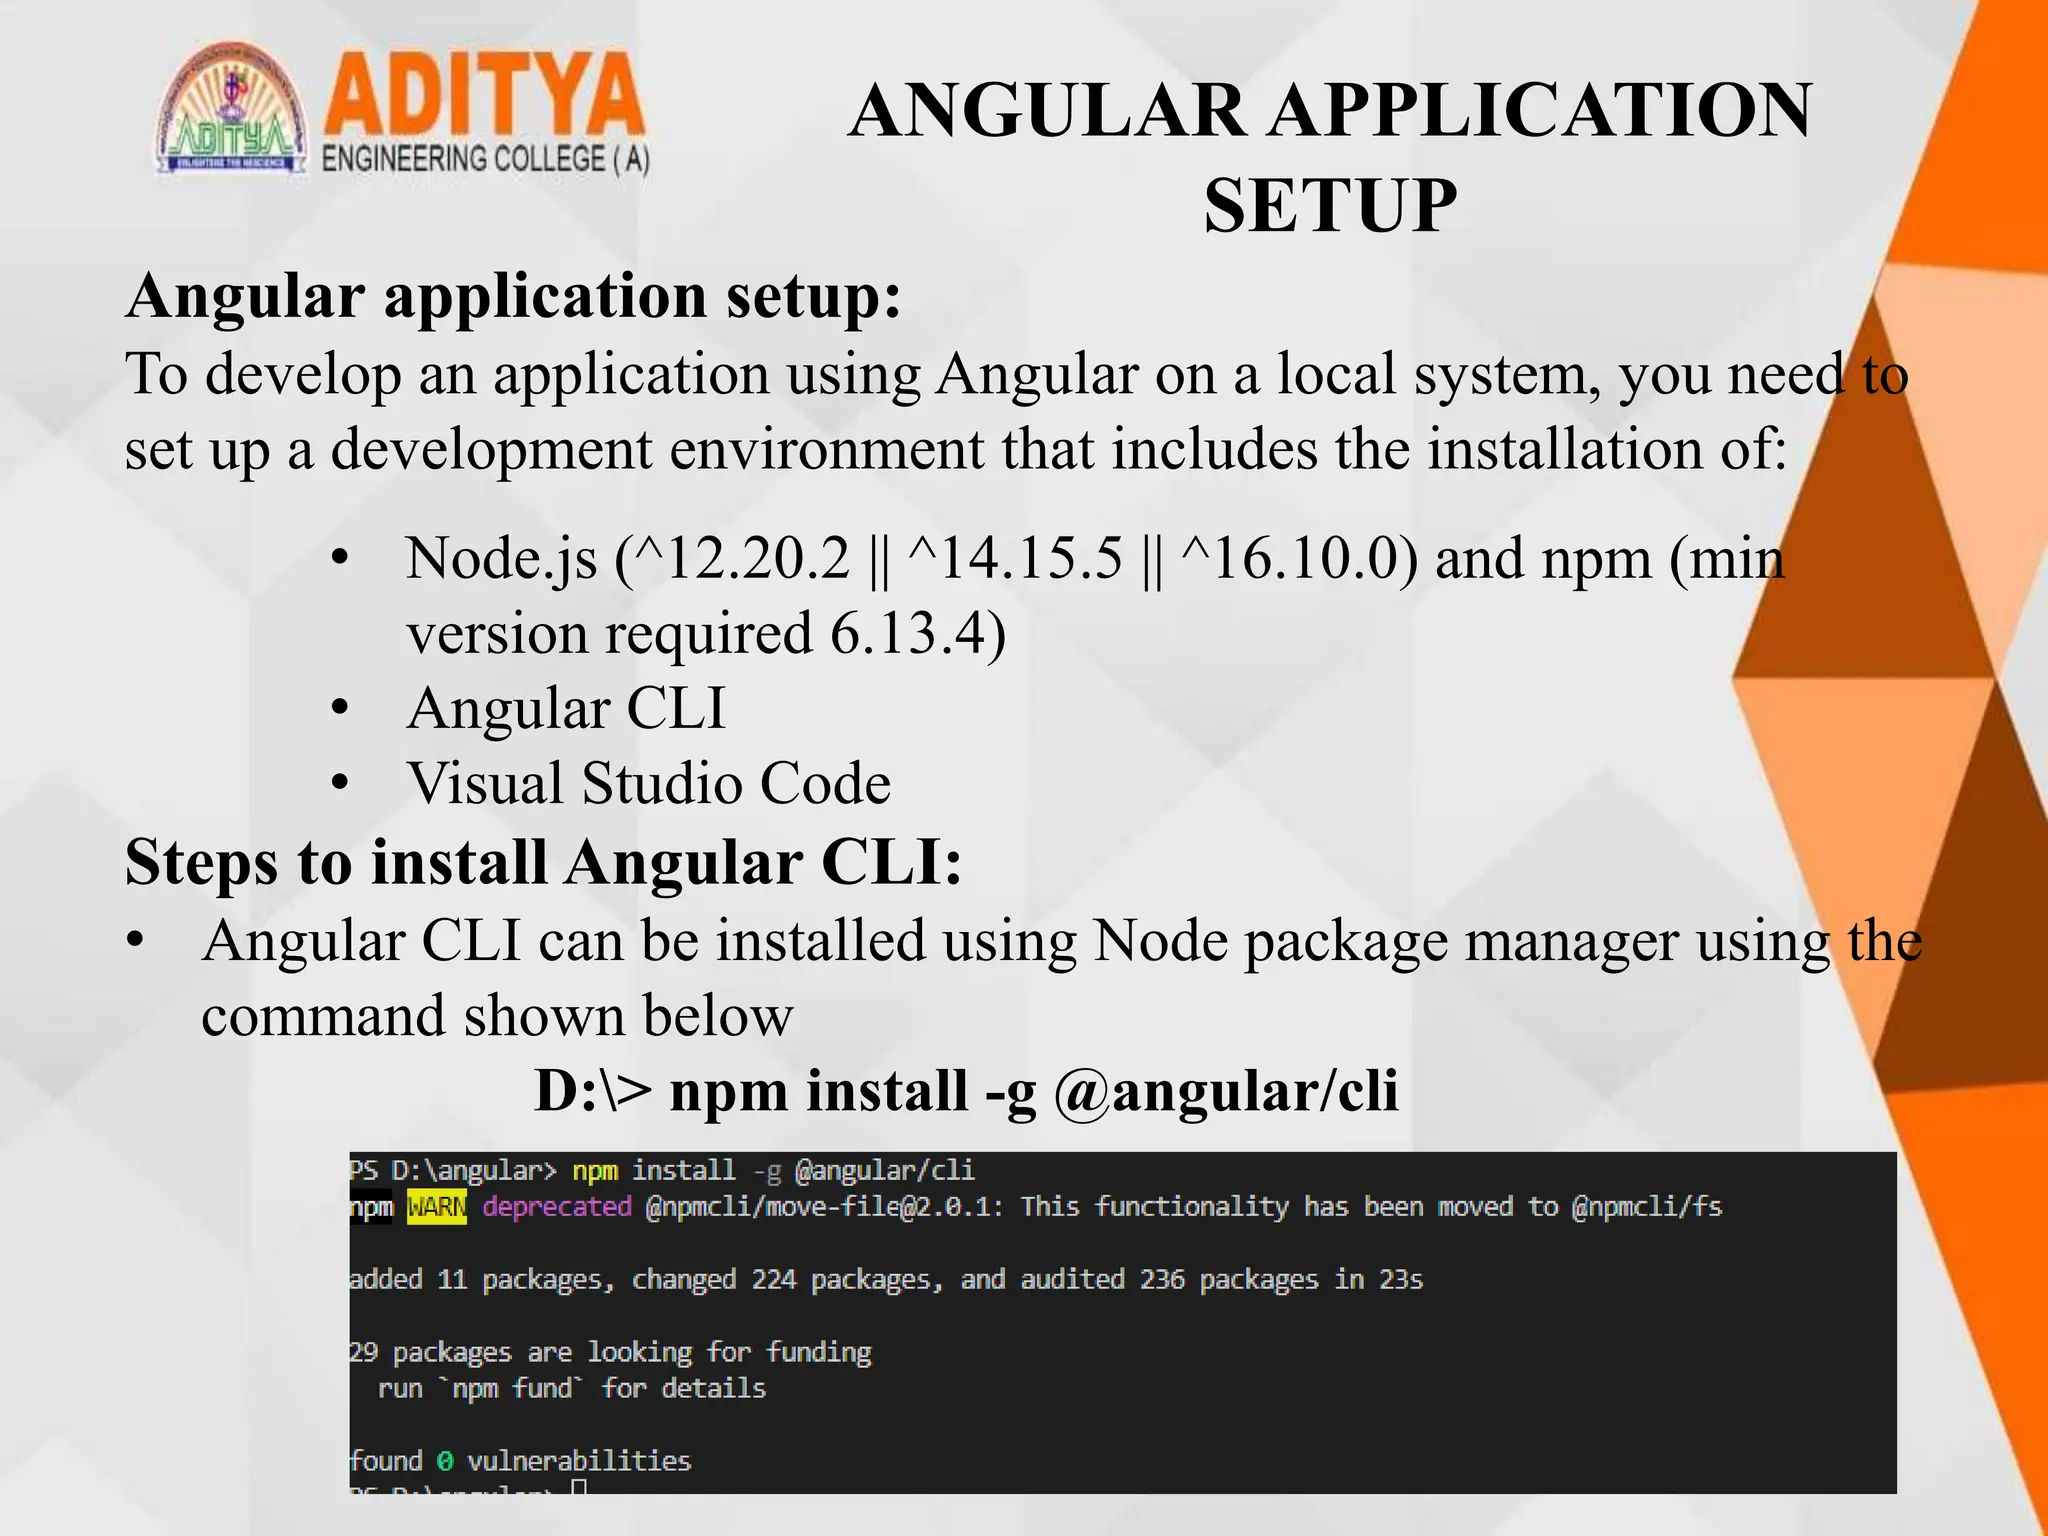
Steps to install Angular CLI:
• Angular CLI can be installed using Node package manager using the
command shown below
D:> npm install -g @angular/cli
ANGULAR APPLICATION
SETUP
ANGULAR APPLICATION
SETUP
• Test successful installation of Angular CLI using the following
command
D:> ng v
ANGULAR APPLICATION
SETUP
• Angular CLI is a command-line interface tool to build Angular
applications. It makes application development faster and easier to
maintain.
• Using CLI, you can create projects, add files to them, and perform
development tasks such as testing, bundling, and deployment of
applications.
--pic---in mail
• To create an application in the Angular.
ng new MyApp
COMPONENTS AND MODULES
Components:
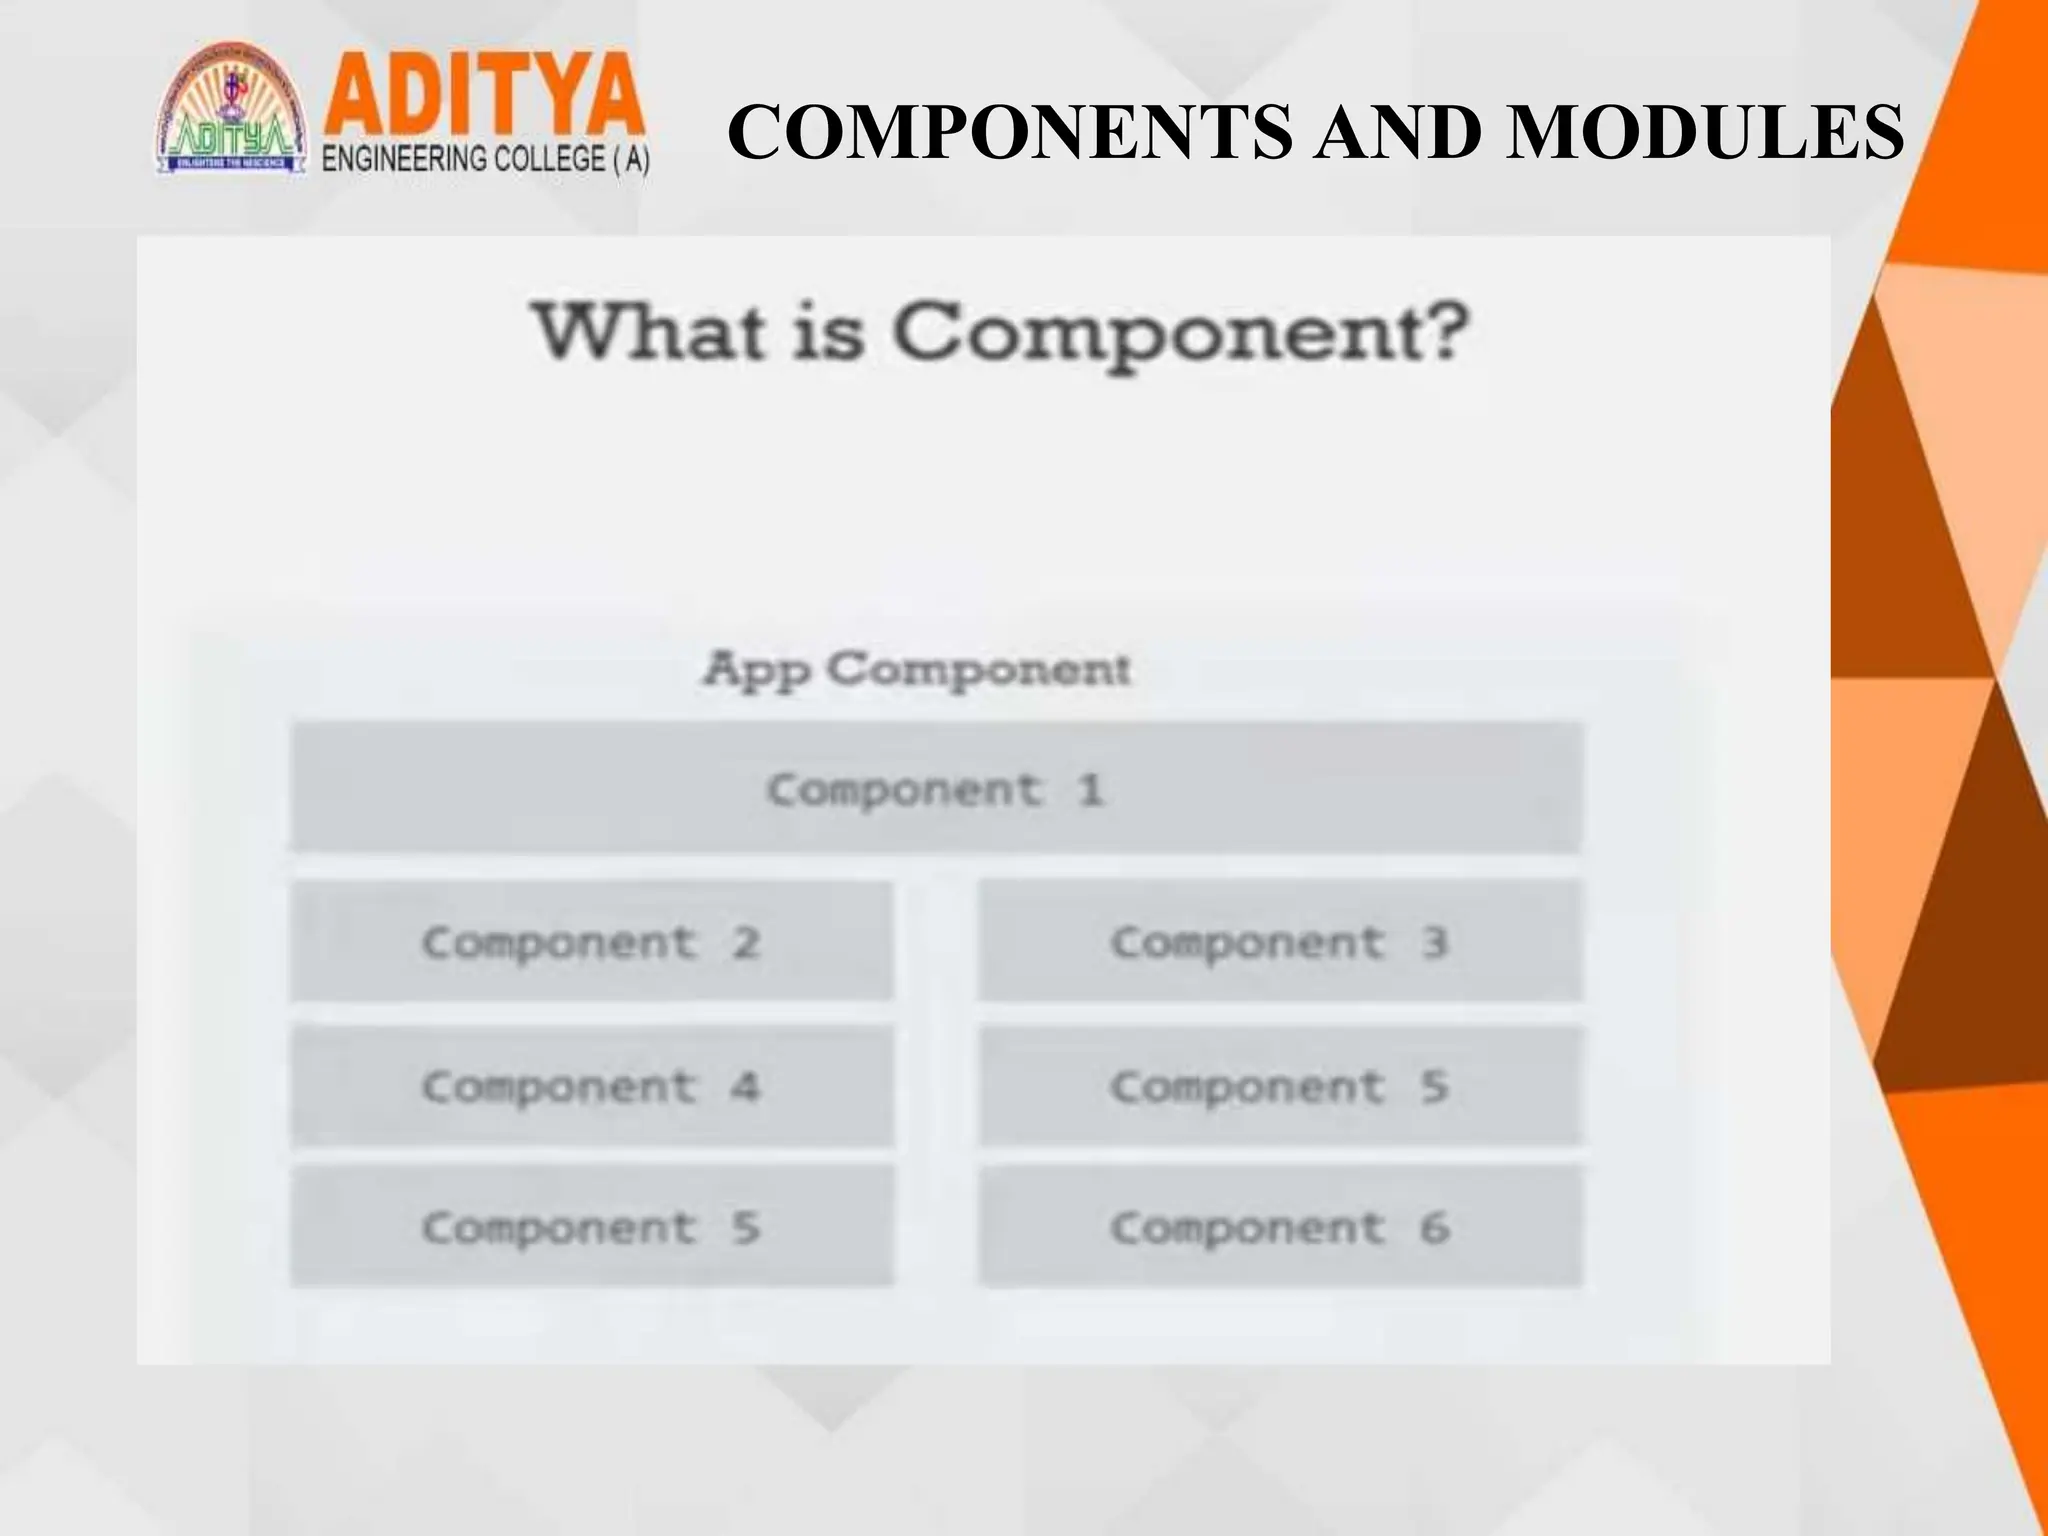
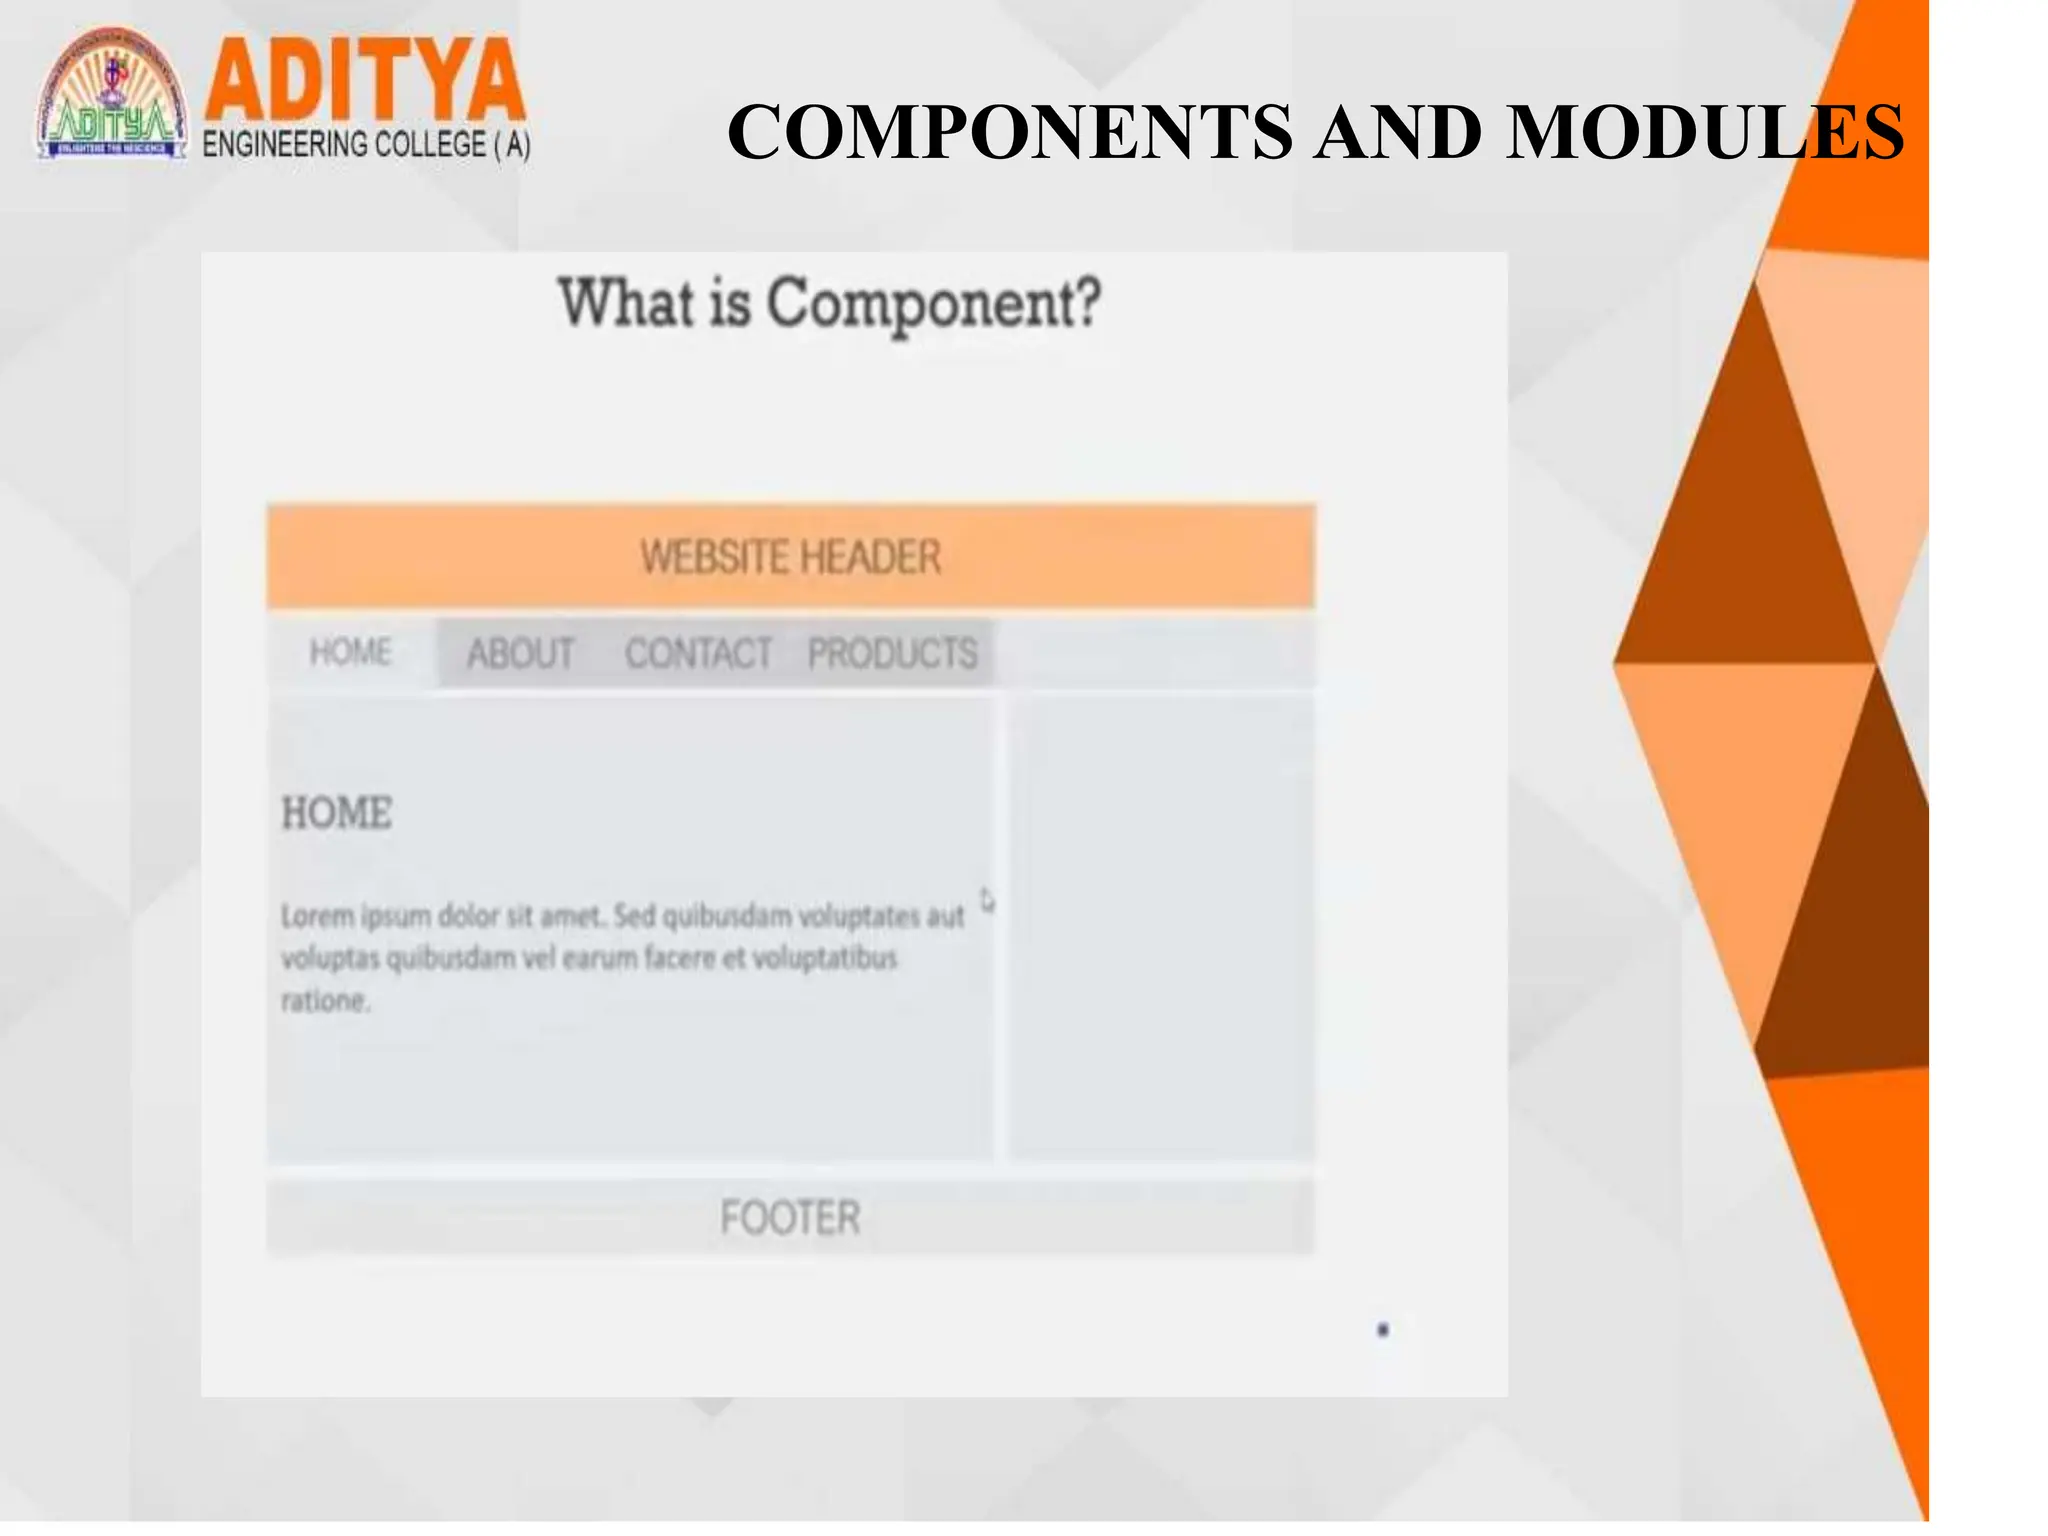
• A component is the basic building block of an Angular application
• It emphasize the separation of concerns and each part of the
Angular application can be written independently of one another.
• It is reusable
Modules:
• Modules in Angular are used to organize the application. It sets the
execution context of an Angular application.
• A module in Angular is a class with the @NgModule decorator
added to it.
• @NgModule metadata will contain the declarations of
components, pipes, directives, services that are to be used across
the application.
• Every Angular application should have one root module which is
loaded first to launch the application.
• Submodules should be configured in the root module.
COMPONENTS AND MODULES
Components:
• A component is the basic building block of an Angular application
• It emphasize the separation of concerns and each part of the
Angular application can be written independently of one another.
• It is reusable
COMPONENTS AND MODULES
COMPONENTS AND
MODULES
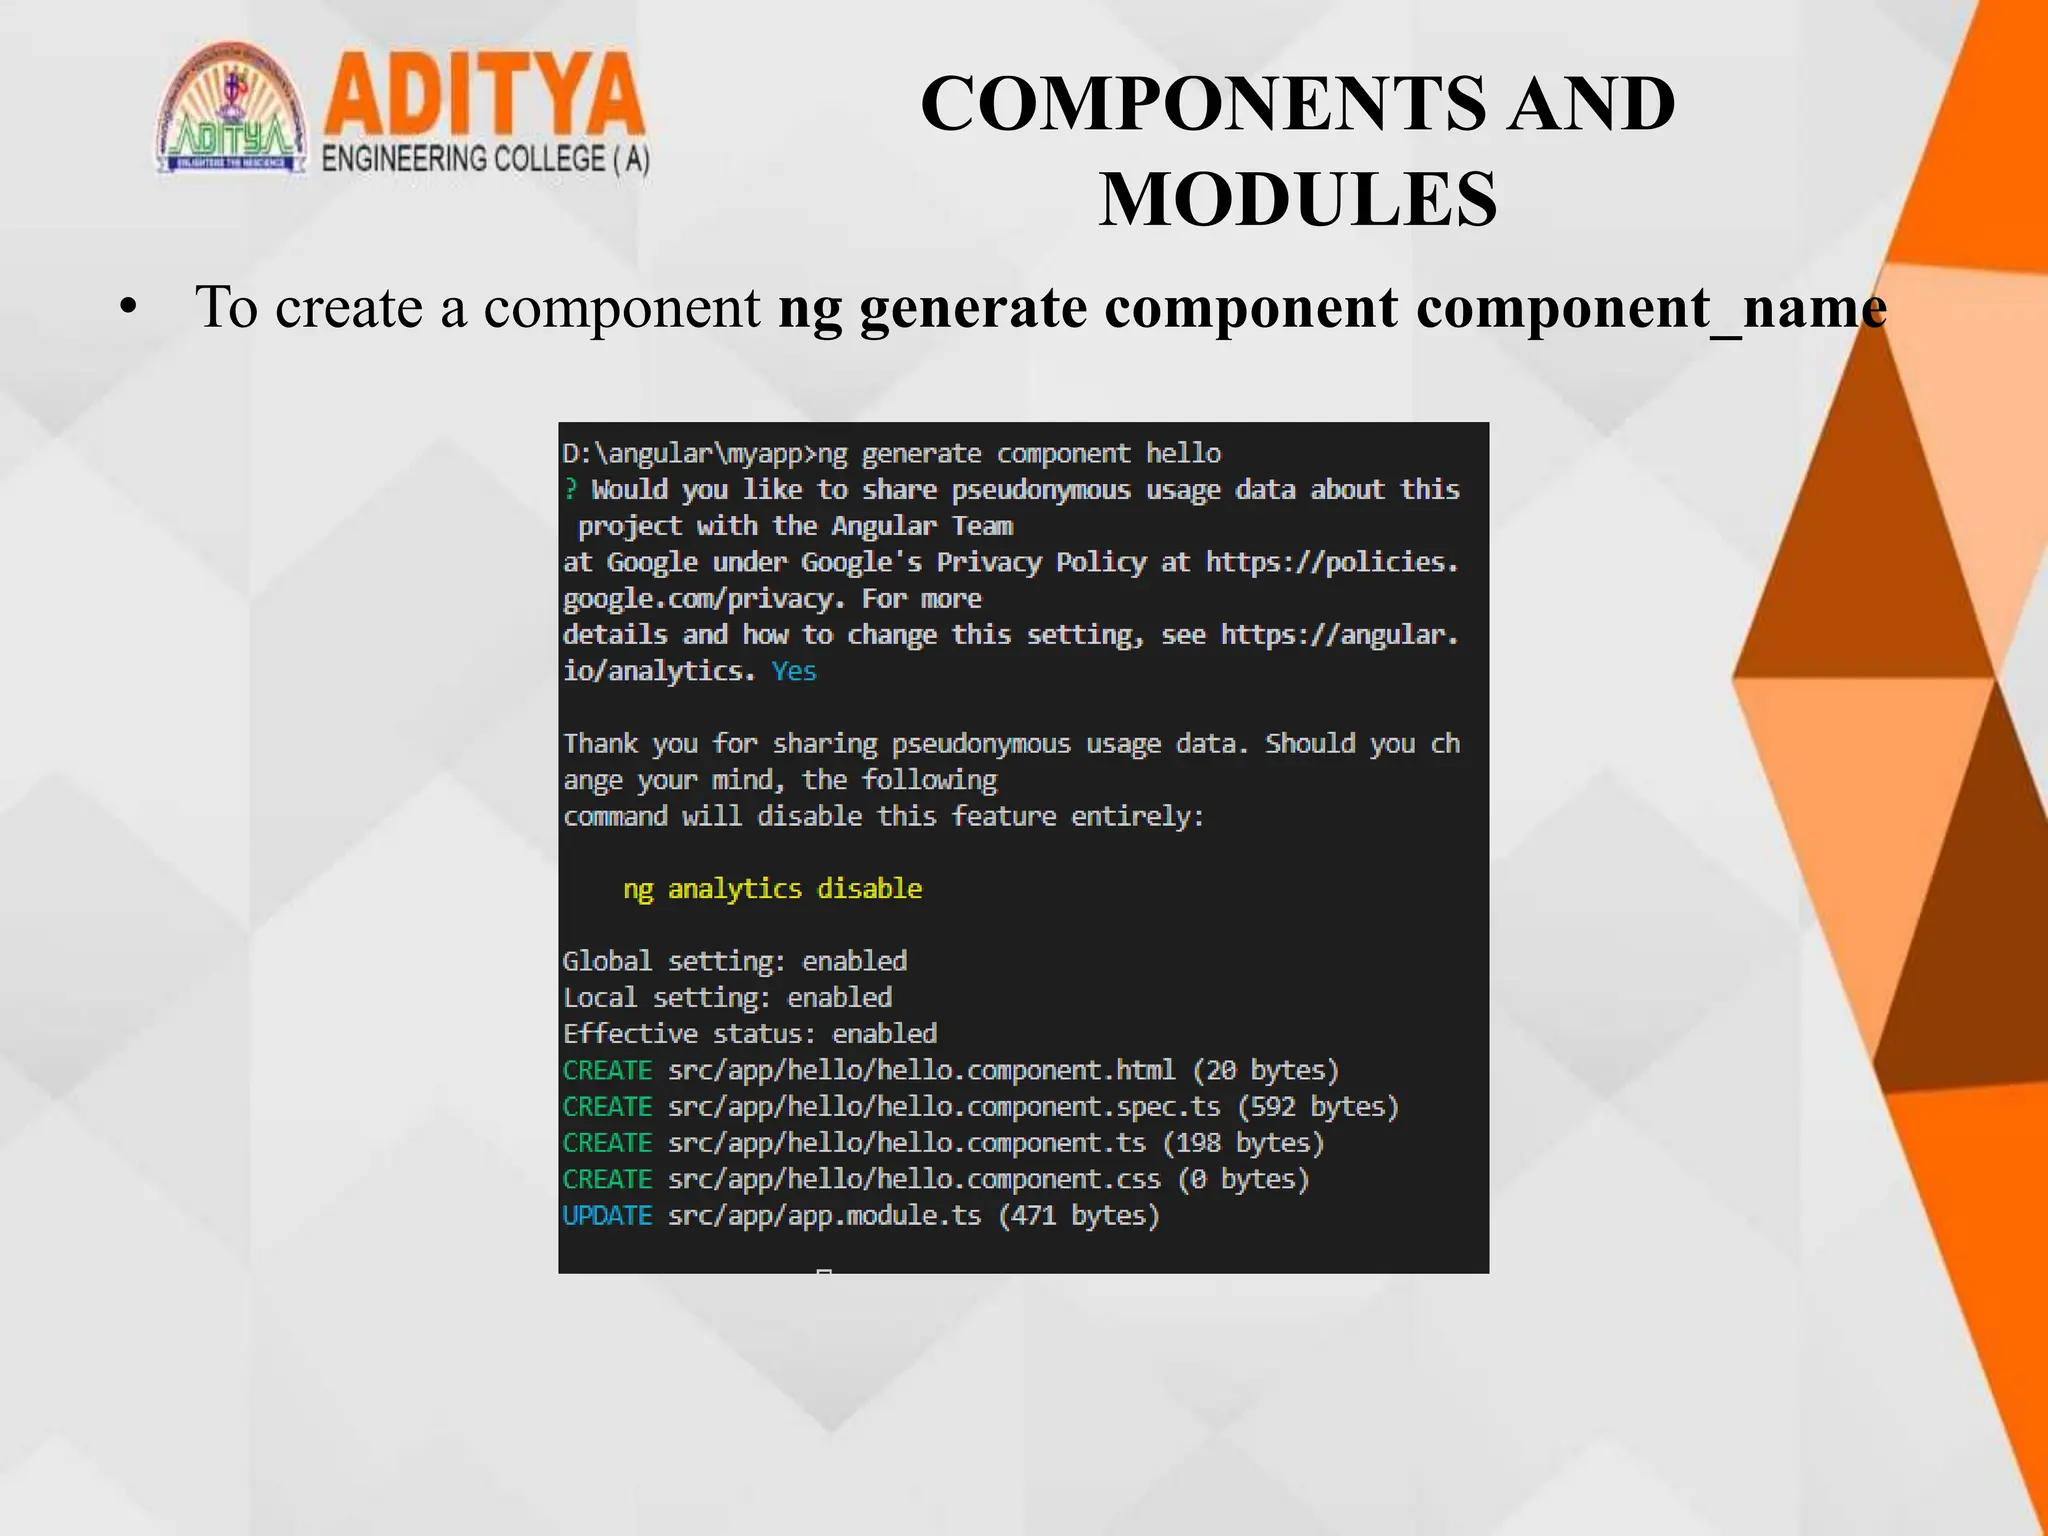
• To create a component ng generate component component_name
Executing Angular Application
Execute the application and check the output.
• Open terminal in Visual Studio Code IDE by selecting View Menu ->
Integrated Terminal.
• Type the following command to run the application ng serve --open
Elements of Template
Template
• Templates separate the view layer from the rest of the
framework.
• You can change the view layer without breaking the
application.
• Templates in Angular represents a view and its role is to
display data and change the data whenever an event occurs
• The default language for templates is HTML
The basic elements of template syntax:
•HTML
•Template Expressions
•Template Statements
Elements of Template
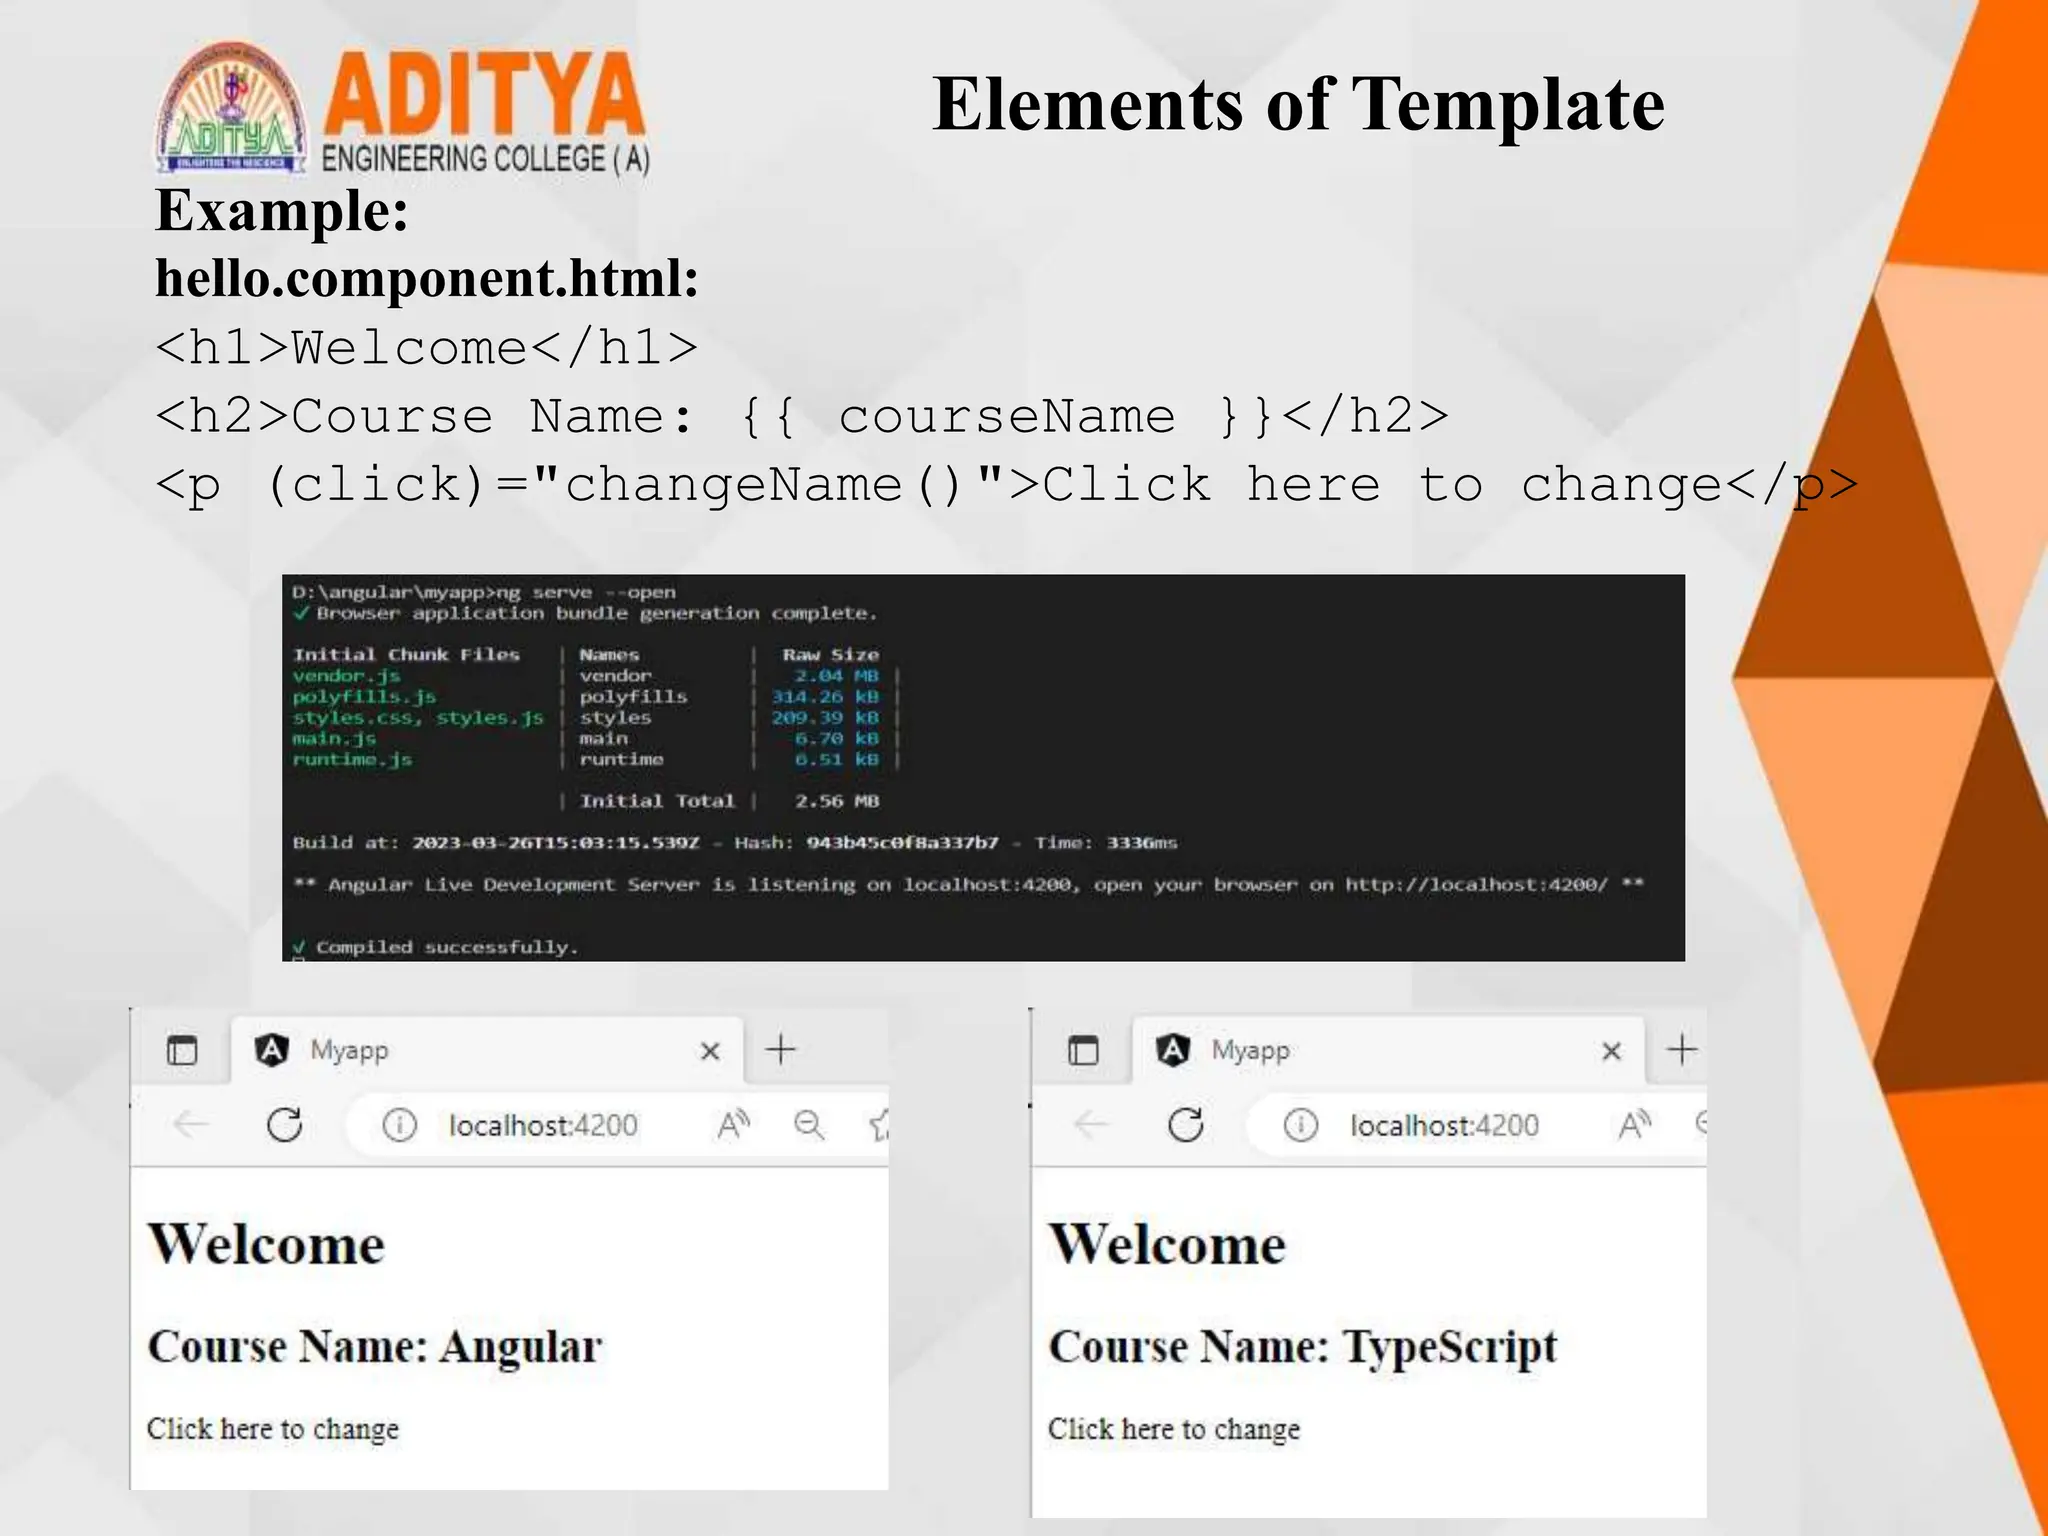
Example:
hello.component.ts:
import { Component, OnInit } from '@angular/core';
@Component({
selector: 'app-hello',
templateUrl: './hello.component.html',
styleUrls: ['./hello.component.css']
})
export class HelloComponent implements OnInit {
courseName = "Angular";
constructor() { }
ngOnInit() {
}
changeName() {
this.courseName = "TypeScript";
}
Elements of Template
Example:
hello.component.html:
<h1>Welcome</h1>
<h2>Course Name: {{ courseName }}</h2>
<p (click)="changeName()">Click here to change</p>
Change Detection
• Angular’s change detection system operates by comparing the
current and previous states of the application data.
• When there is a change in the data, the change detection
mechanism triggers a re-evaluation of the view, updating it with the
new data.
• Angular offers two modes of change detection: default and OnPush.
• Angular is very fast though it goes through all components from
top to bottom for every single event as it generates VM-friendly
code.
• Due to this, Angular can perform hundreds of thousands of checks
in a few milliseconds.
Structural Directives
• A Structural directive changes the DOM layout by adding and
removing DOM elements.
*directive-name = expression
• Angular has few built-in structural directives such as:
• ngIf
• ngFor
• ngSwitch
ngIf:ngIf directive renders components or elements conditionally
based on whether or not an expression is true or false.
Examlpe:
App.component.ts:
import { Component } from '@angular/core';
@Component({
selector: 'app-root',
templateUrl: './app.component.html',
styleUrls: ['./app.component.css']
})
Structural Directives
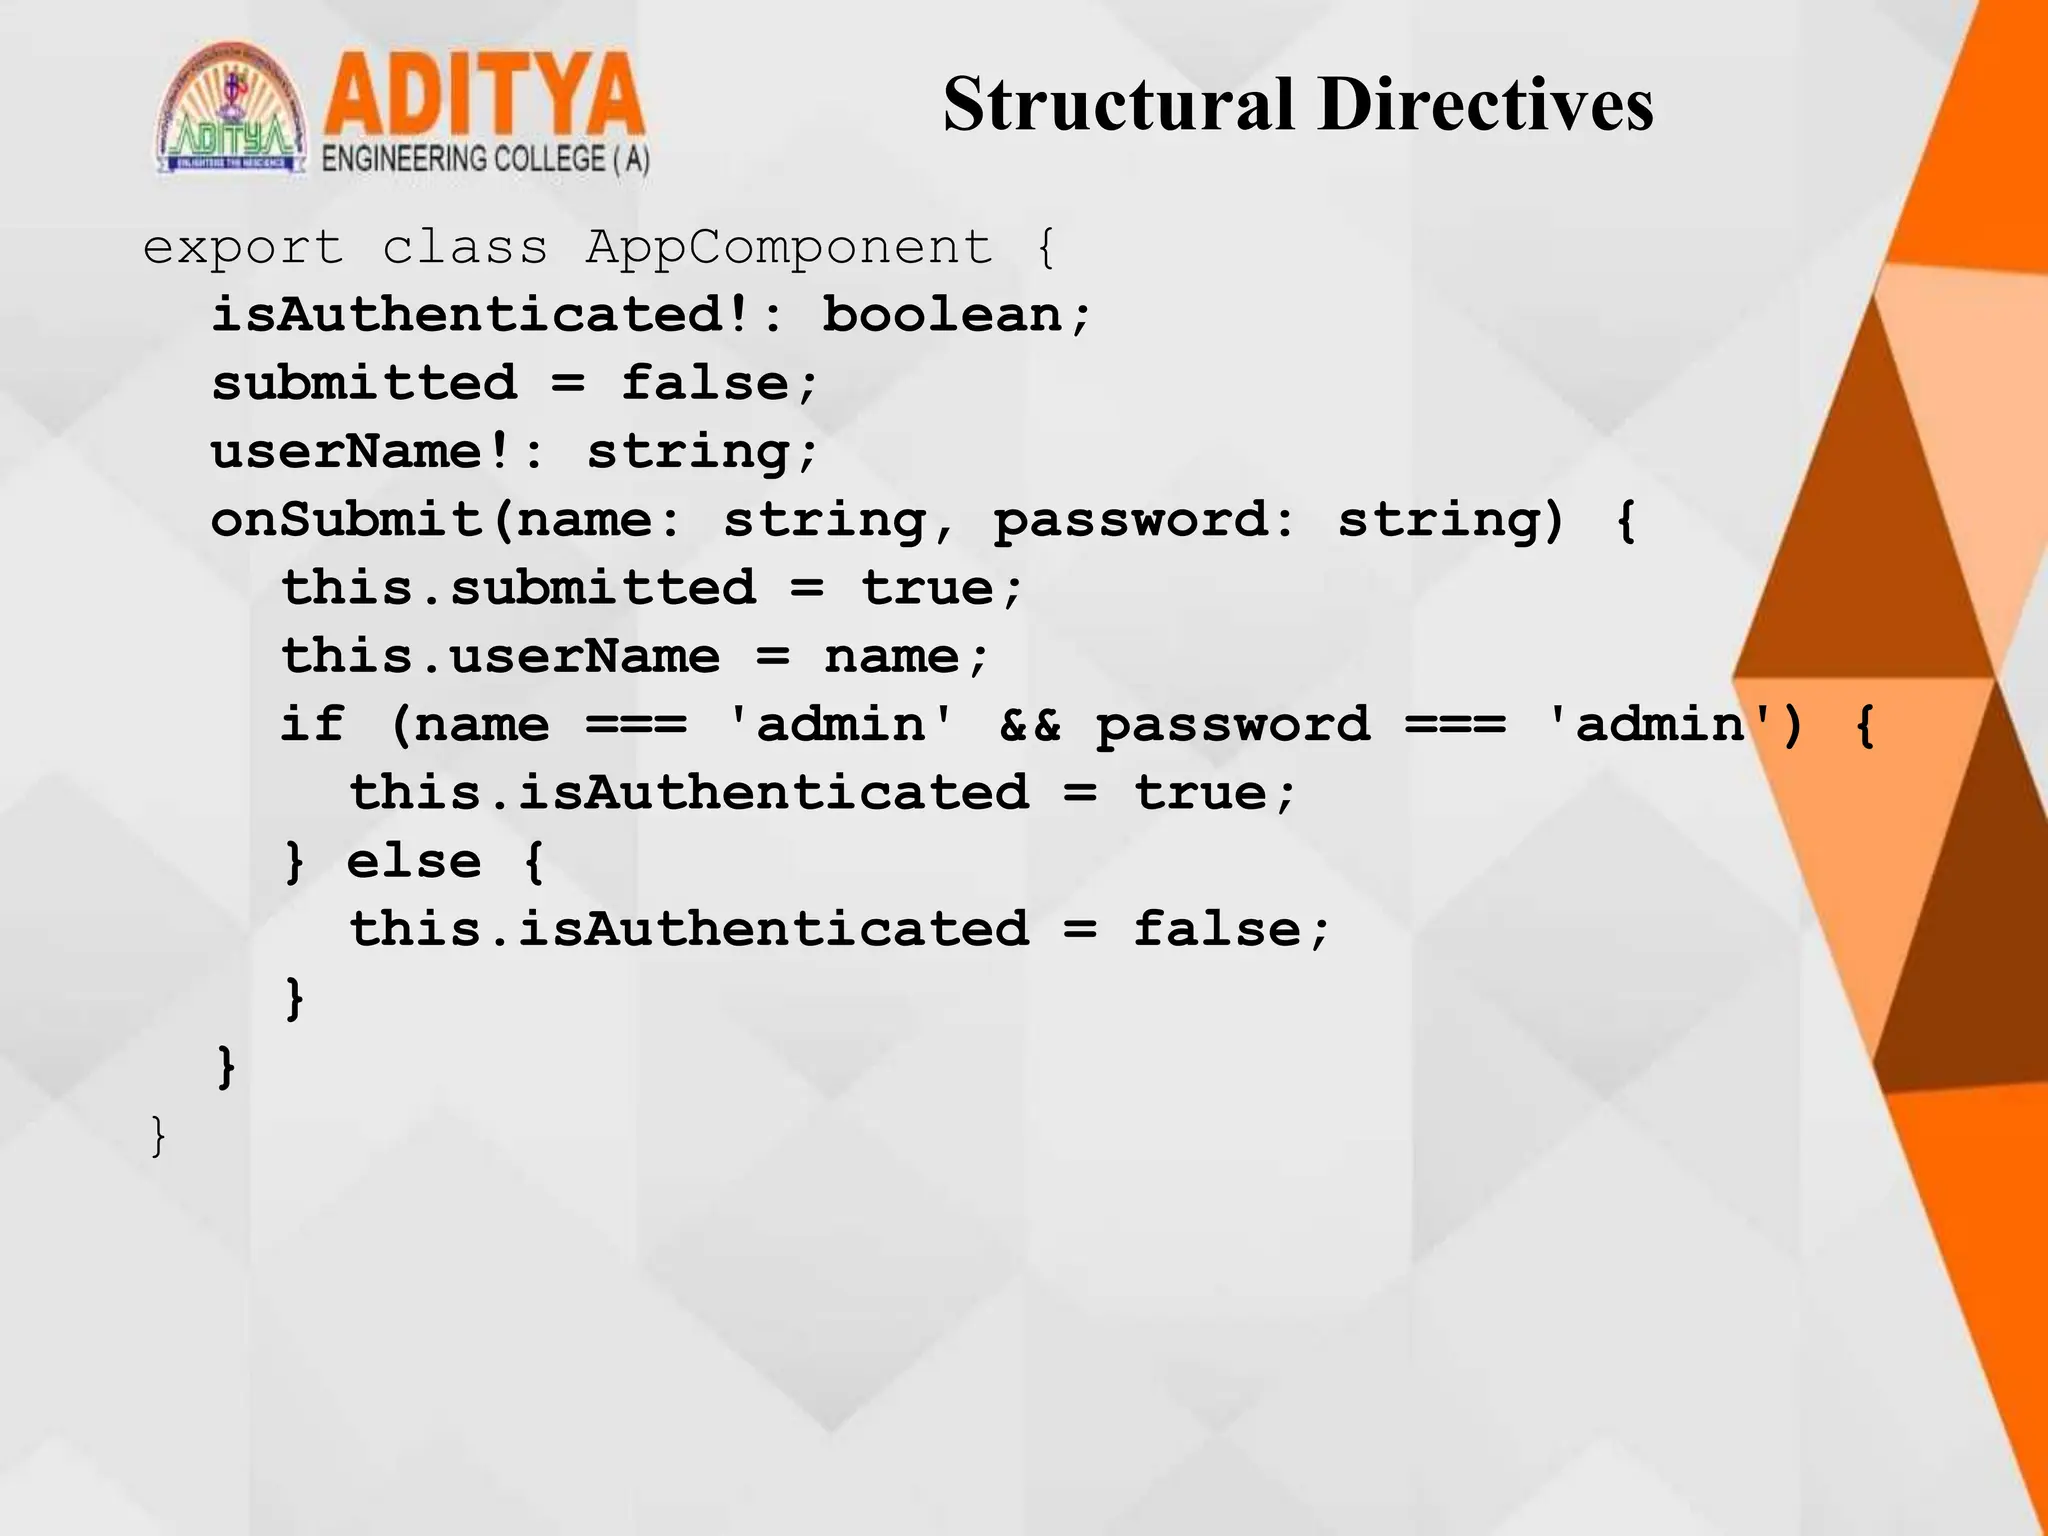
export class AppComponent {
isAuthenticated!: boolean;
submitted = false;
userName!: string;
onSubmit(name: string, password: string) {
this.submitted = true;
this.userName = name;
if (name === 'admin' && password === 'admin') {
this.isAuthenticated = true;
} else {
this.isAuthenticated = false;
}
}
}
Structural Directives
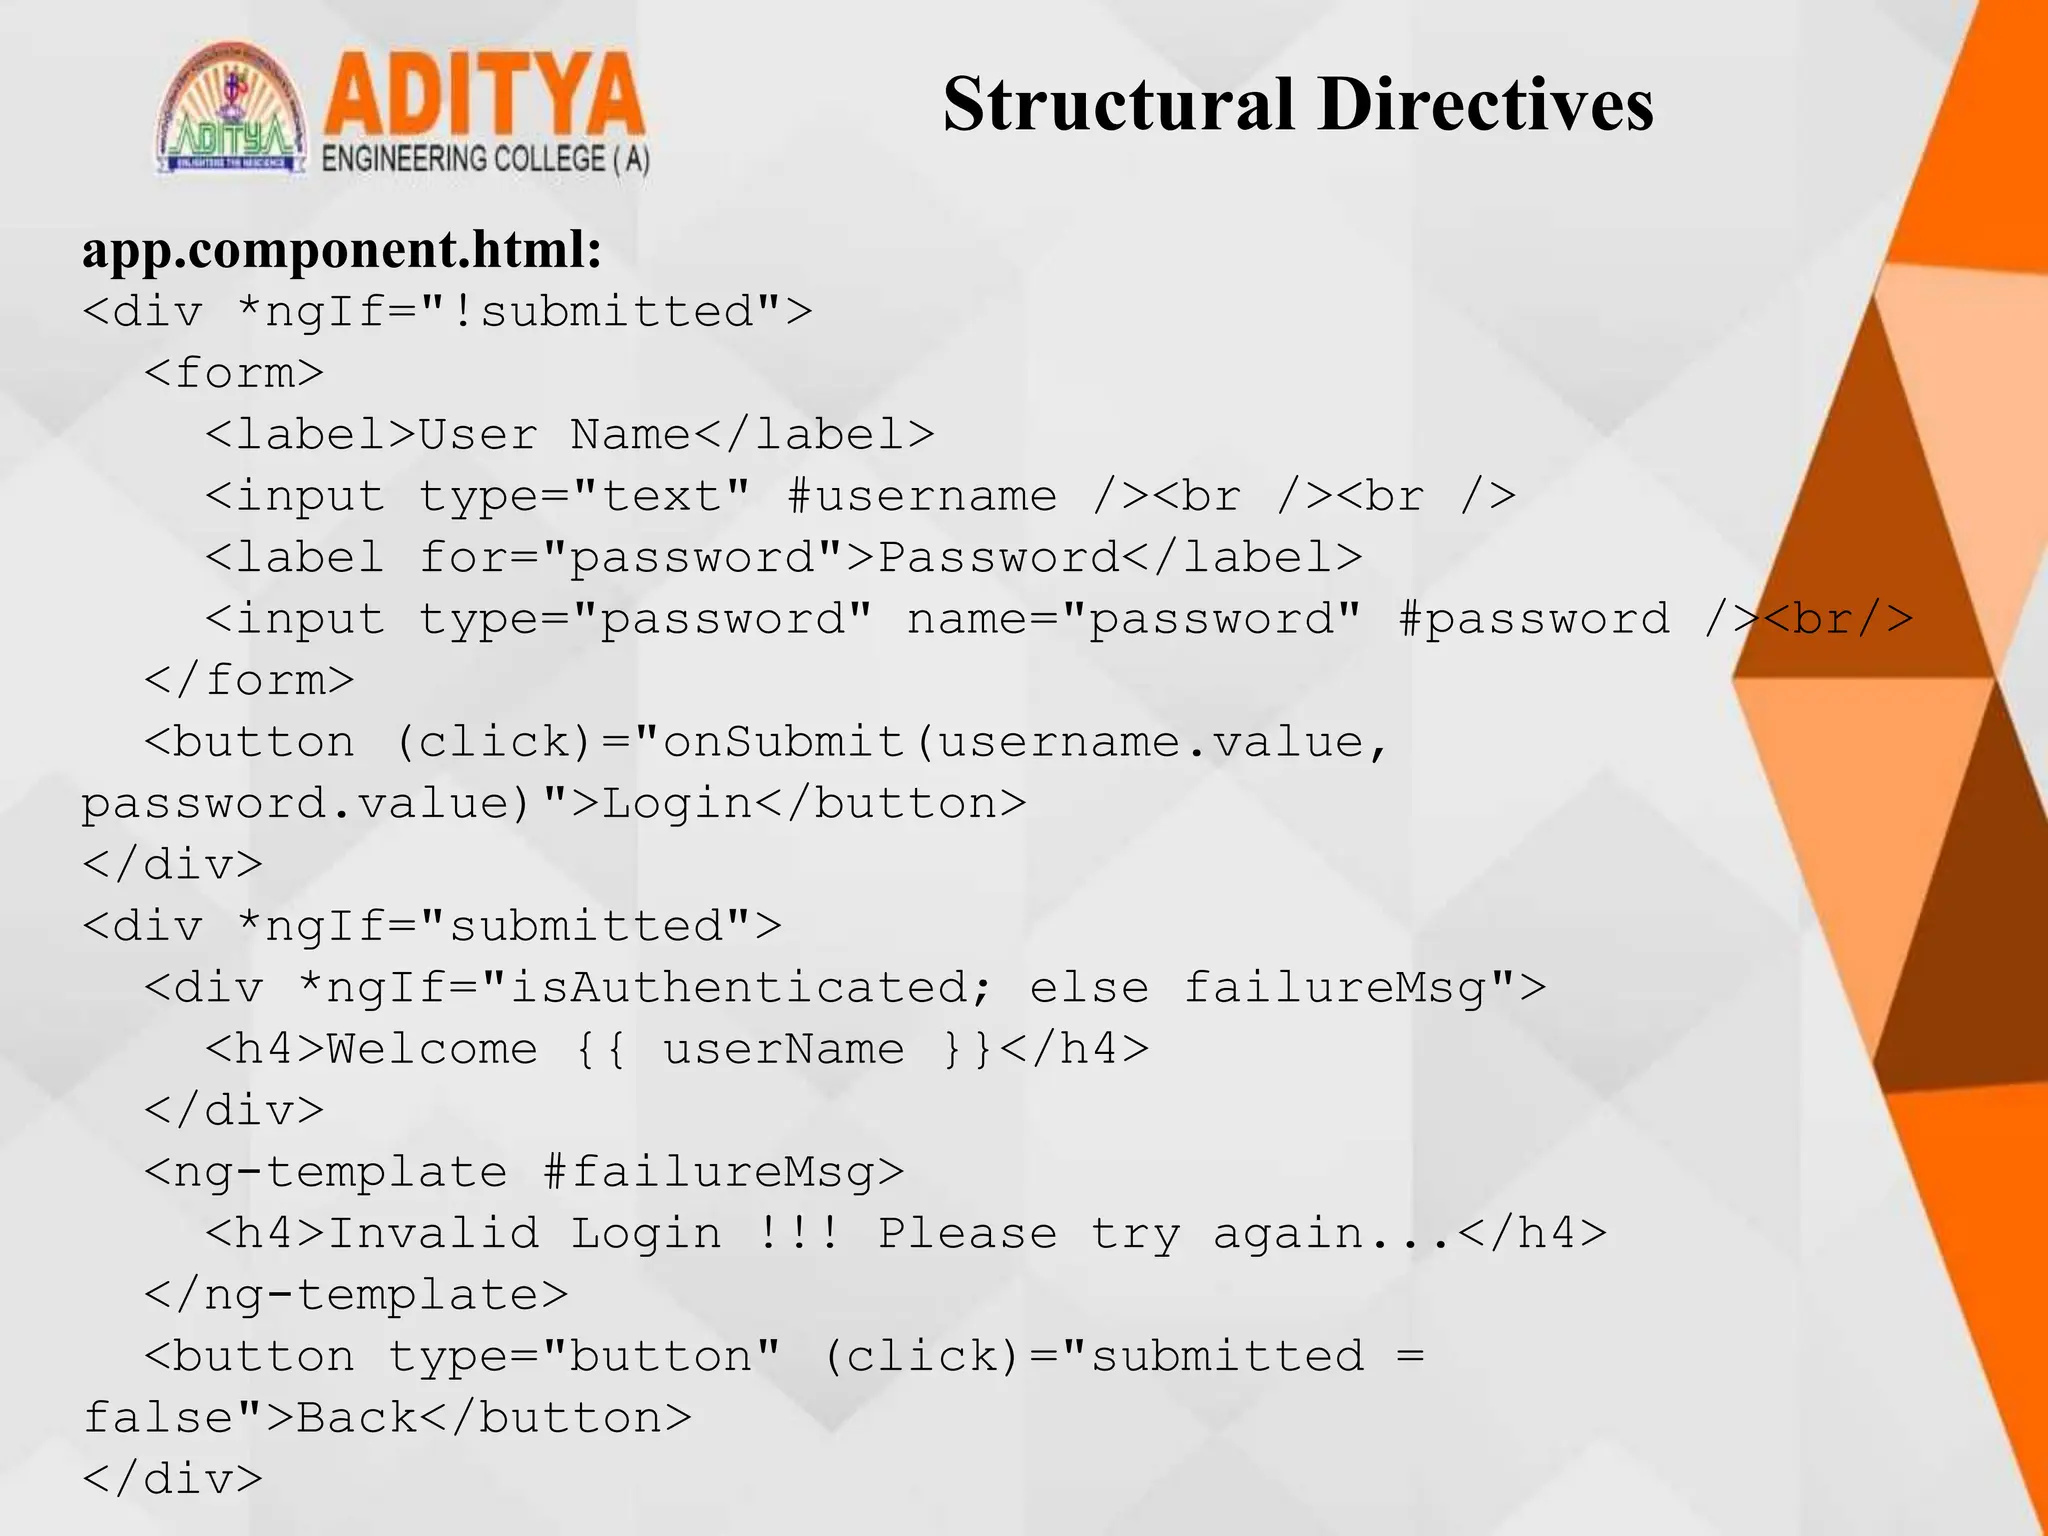
app.component.html:
<div *ngIf="!submitted">
<form>
<label>User Name</label>
<input type="text" #username /><br /><br />
<label for="password">Password</label>
<input type="password" name="password" #password /><br/>
</form>
<button (click)="onSubmit(username.value,
password.value)">Login</button>
</div>
<div *ngIf="submitted">
<div *ngIf="isAuthenticated; else failureMsg">
<h4>Welcome {{ userName }}</h4>
</div>
<ng-template #failureMsg>
<h4>Invalid Login !!! Please try again...</h4>
</ng-template>
<button type="button" (click)="submitted =
false">Back</button>
</div>
Structural Directives
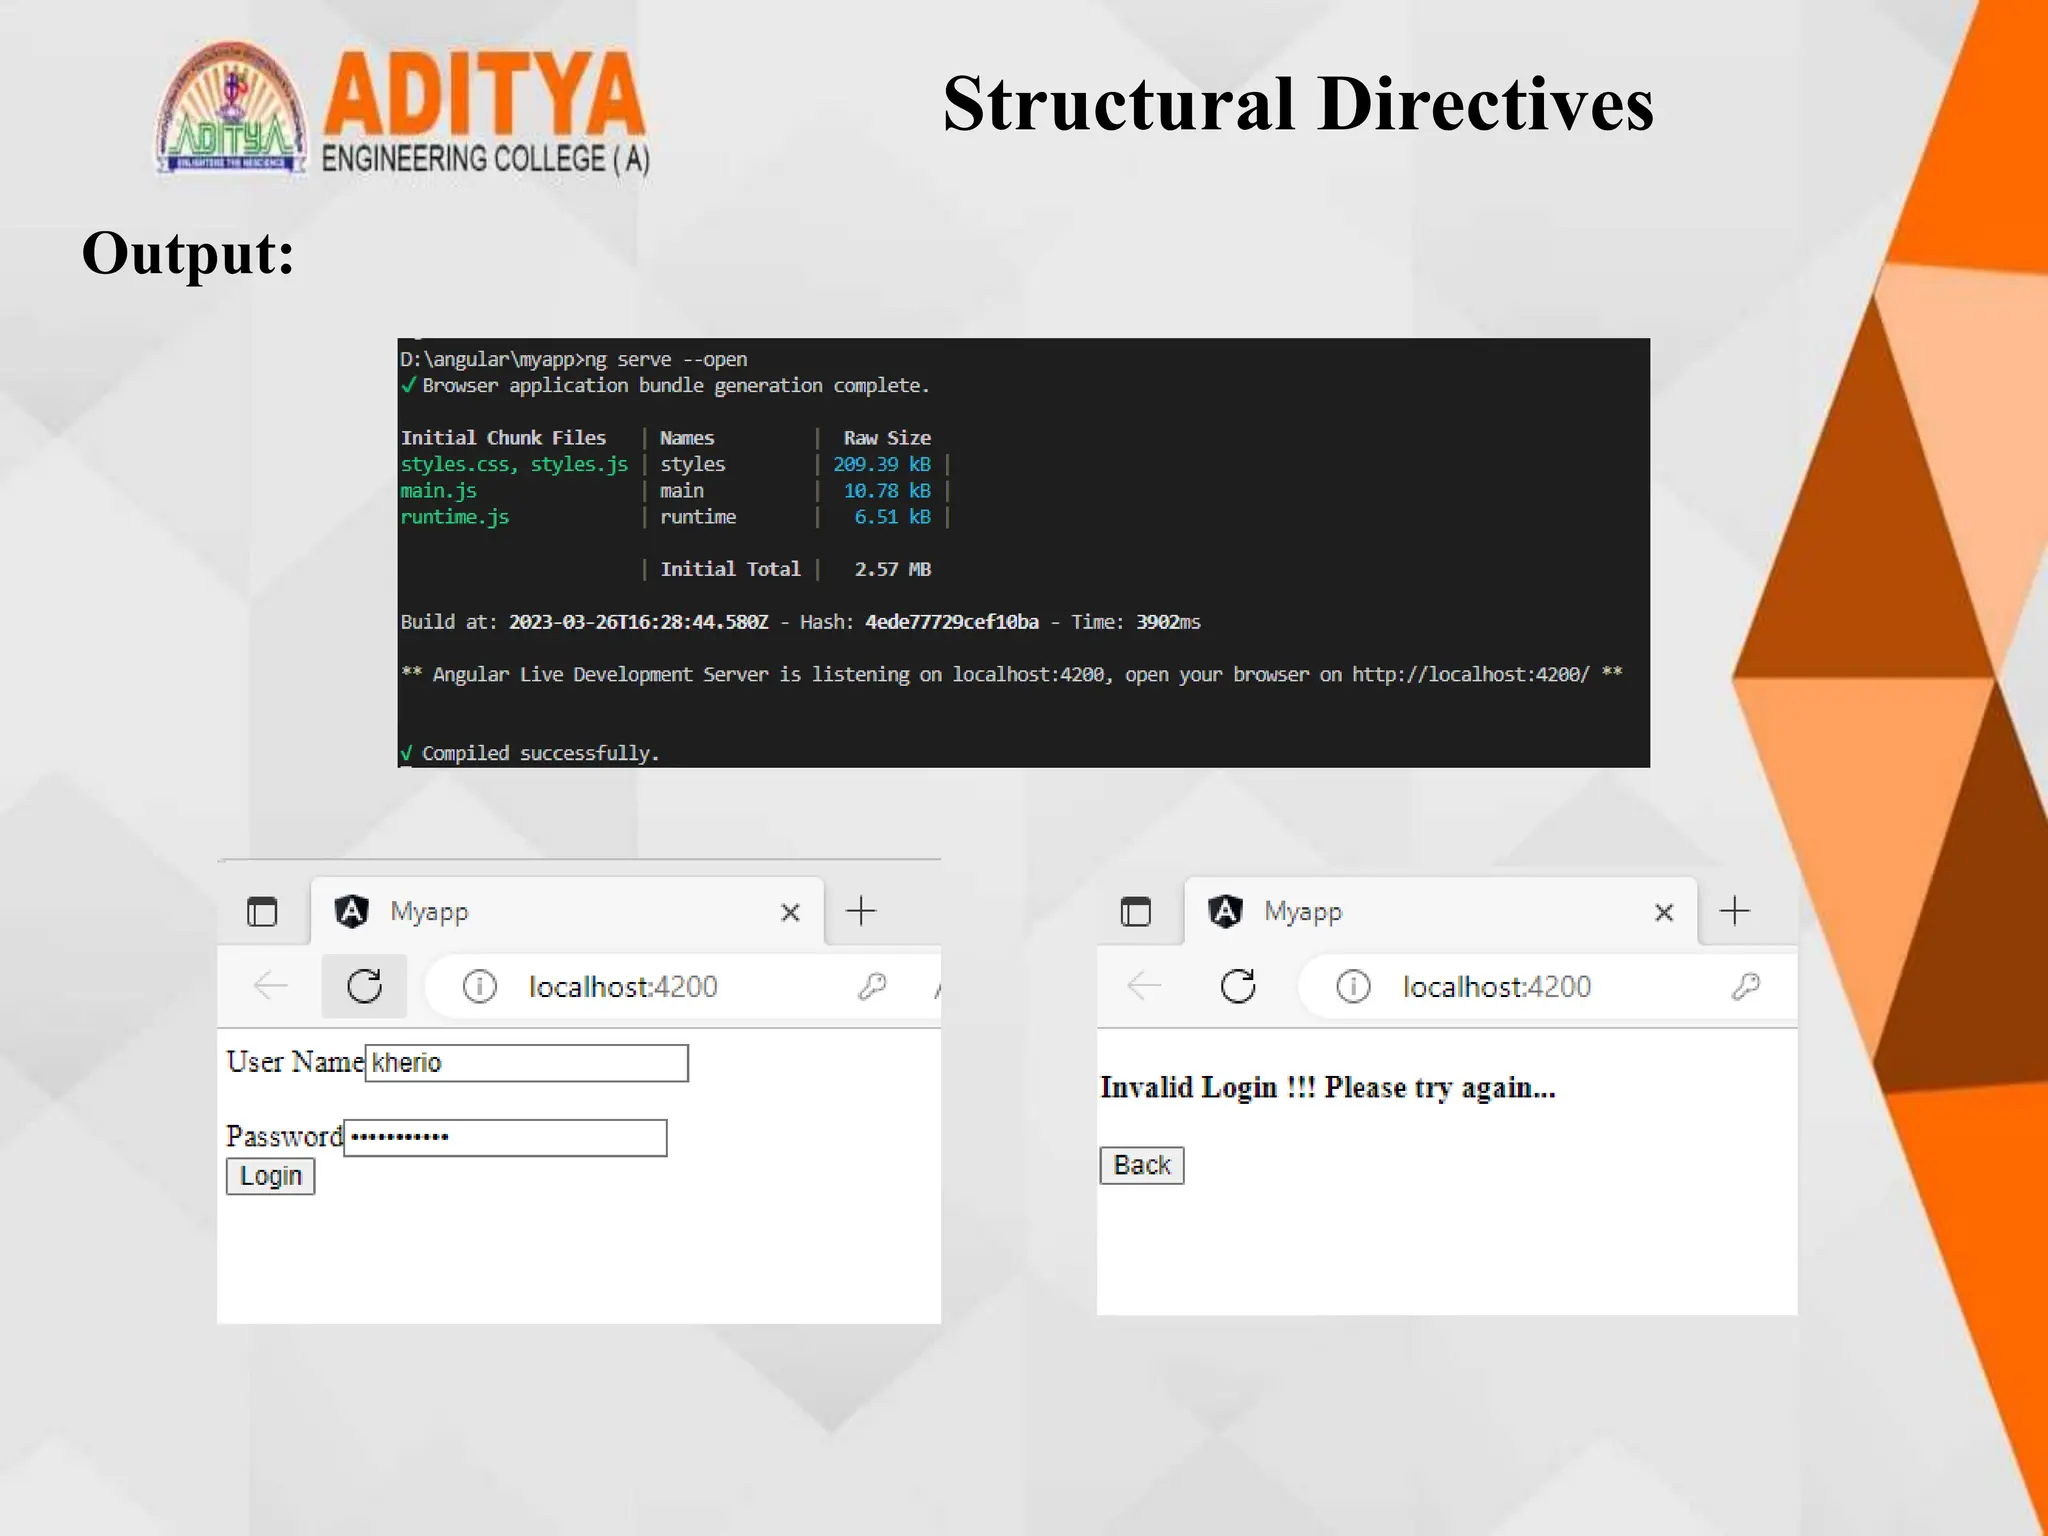
Output:
Structural Directives
• ngFor:ngFor directive is used to iterate over-collection of data i.e.,
arrays.
*ngFor = "expression"
Example:
App.component.ts:
import { Component } from '@angular/core';
@Component({
selector: 'app-root',
templateUrl: './app.component.html',
styleUrls: ['./app.component.css']
})
export class AppComponent {
courses: any[] = [
{ id: 1, name: "TypeScript" },
{ id: 2, name: "Angular" },
{ id: 3, name: "Node JS" },
{ id: 1, name: "TypeScript" }
];
}
Structural Directives
App.component.html:
<ul>
<li *ngFor="let course of courses; let i = index">
{{i}} - {{ course.name }}
</li>
</ul>
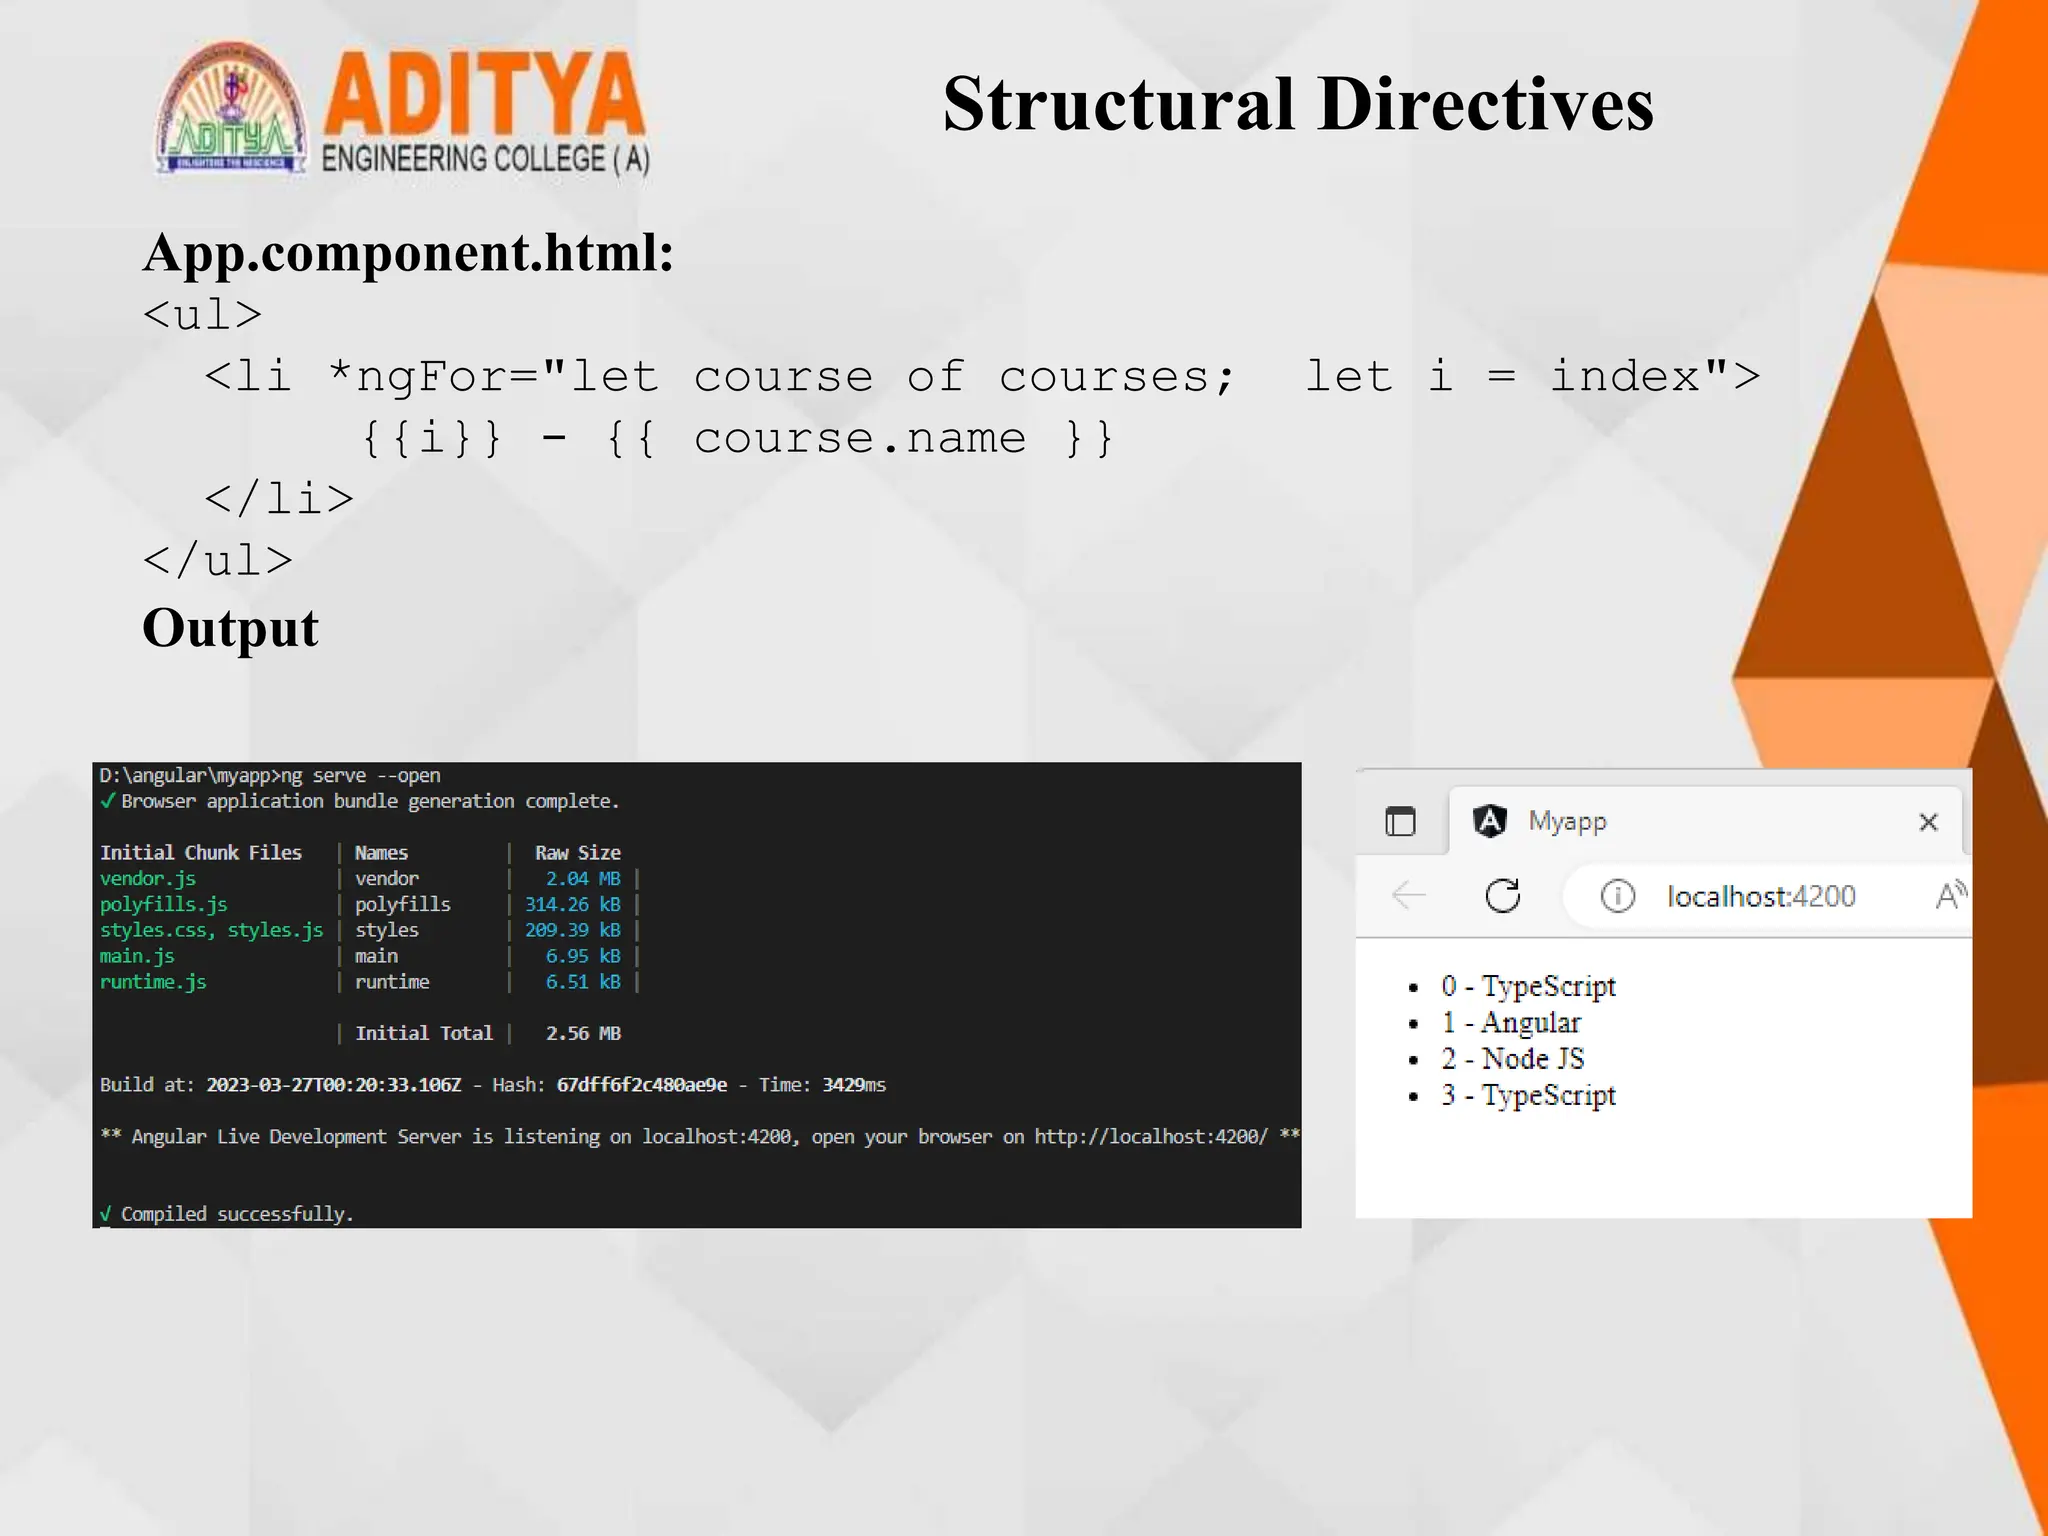
Output
Structural Directives
• ngSwitch:ngSwitch adds or removes DOM trees when their
expressions match the switch expression. Its syntax is comprised of two
directives, an attribute directive, and a structural directive.
• It is very similar to a switch statement in JavaScript and other
programming languages.
Example:
App.component.ts:
import { Component } from '@angular/core';
@Component({
selector: 'app-root',
templateUrl: './app.component.html',
styleUrls: ['./app.component.css']
})
export class AppComponent {
choice = 0;
nextChoice() {
this.choice++;
}
}
Structural Directives
App.component.html:
<h4>
Current choice is {{ choice }}
</h4>
<div [ngSwitch]="choice">
<p *ngSwitchCase="1">First Choice</p>
<p *ngSwitchCase="2">Second Choice</p>
<p *ngSwitchCase="3">Third Choice</p>
<p *ngSwitchCase="2">Second Choice Again</p>
<p *ngSwitchDefault>Default Choice</p>
</div>
<div>
<button (click)="nextChoice()">
Next Choice
</button>
</div>
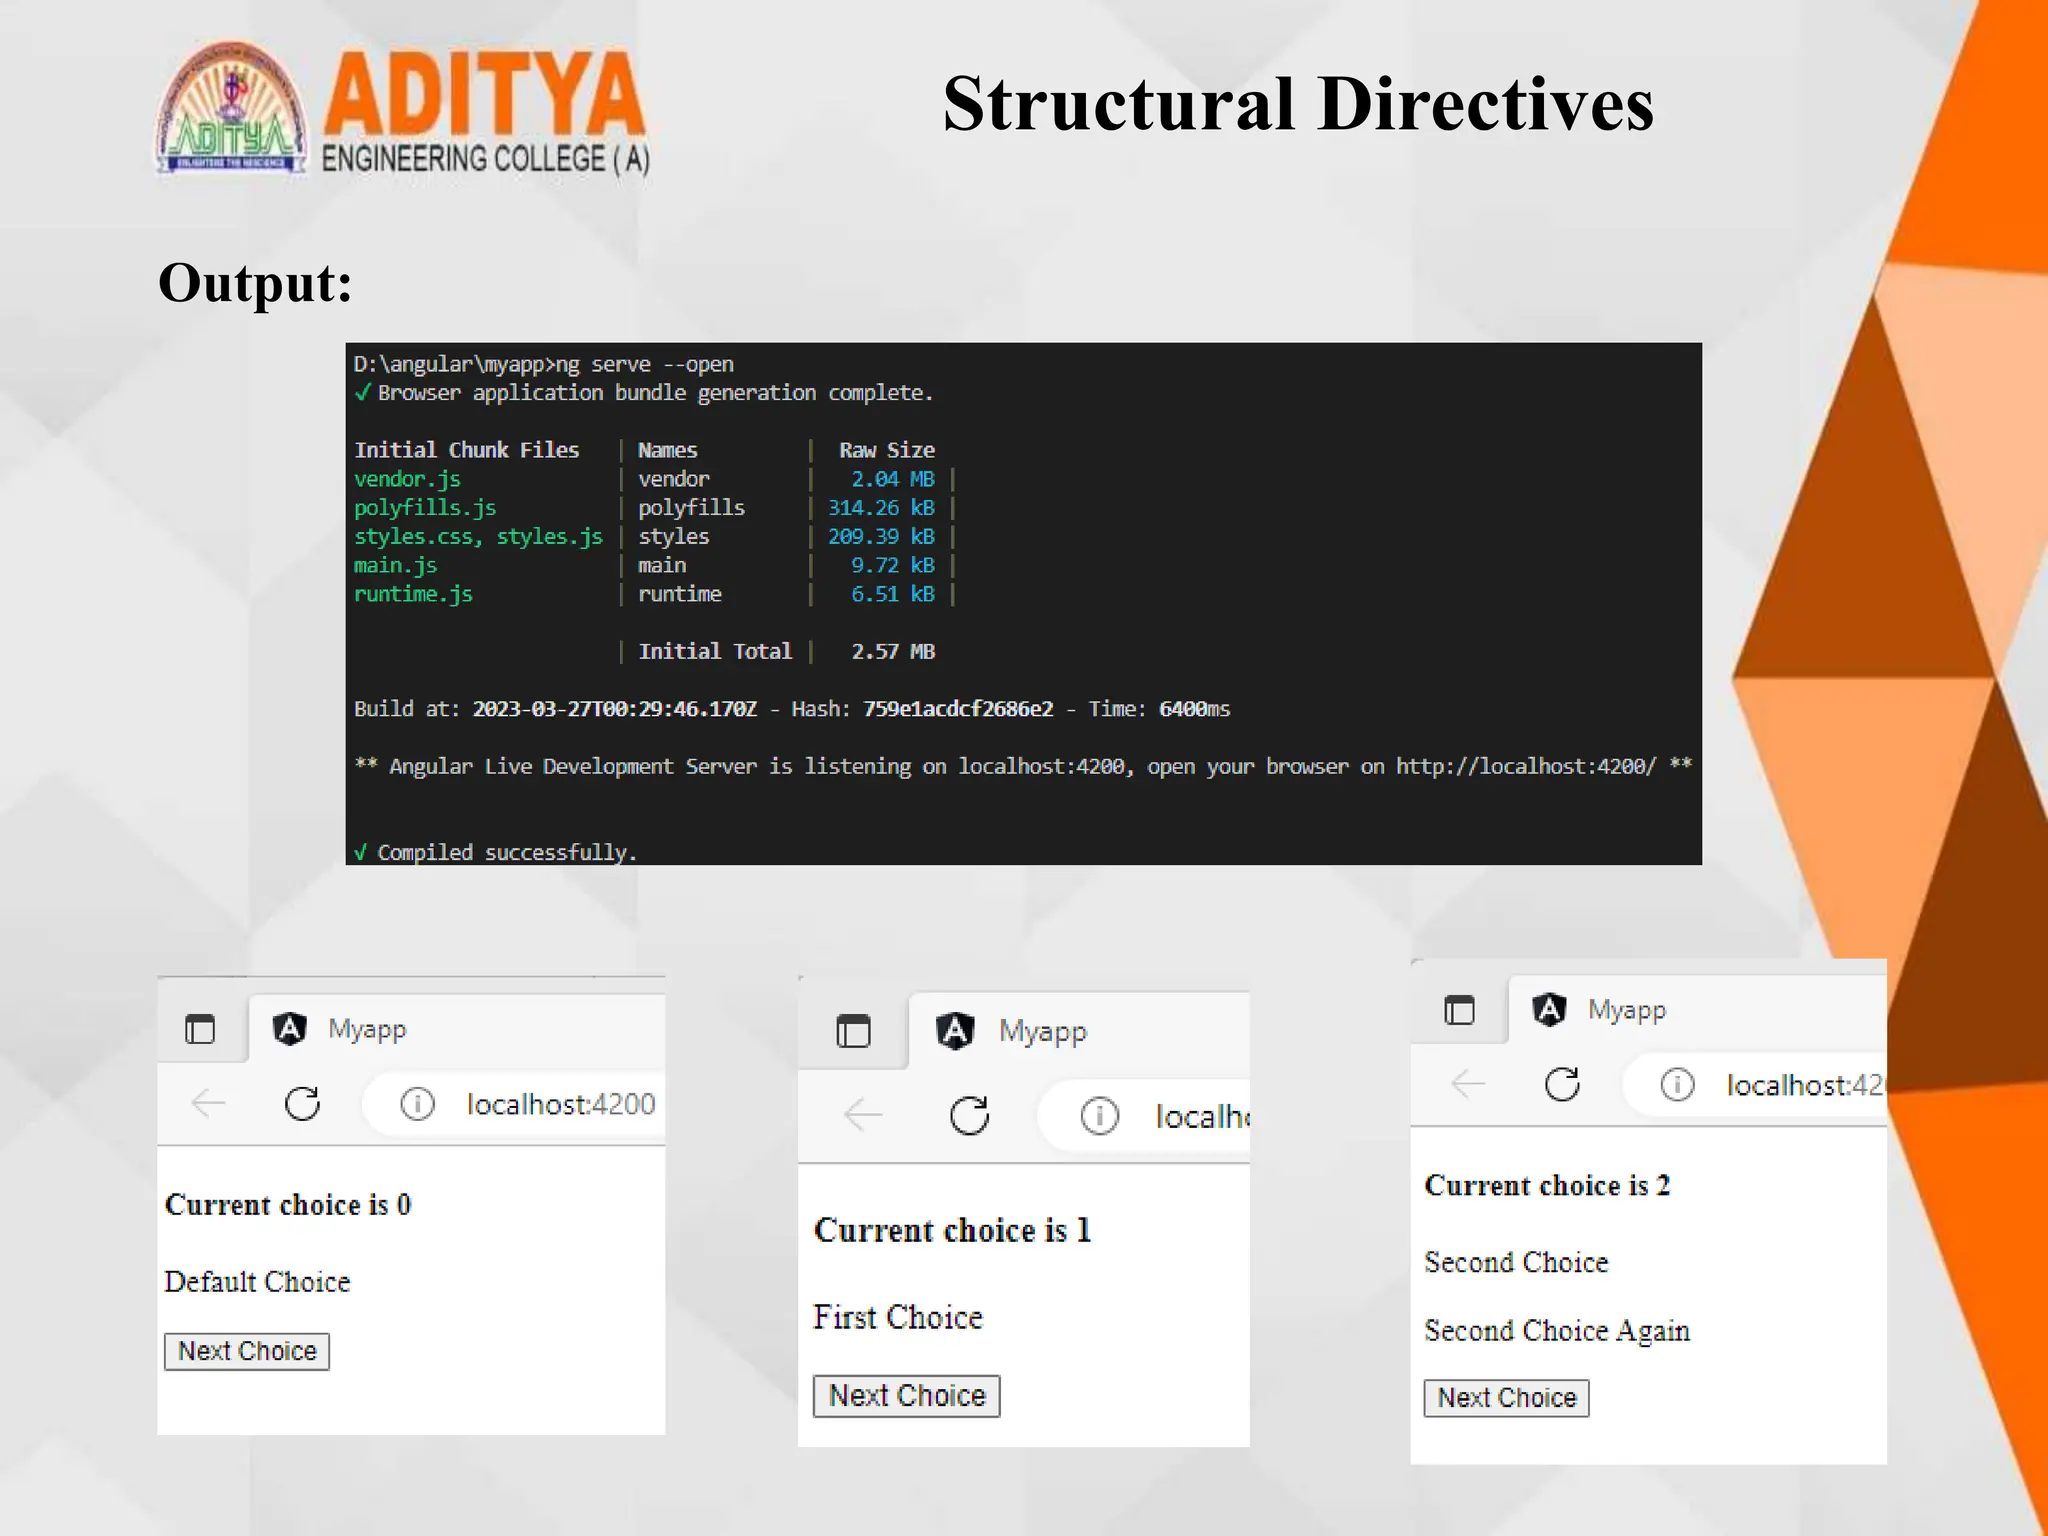
Structural Directives
Output:
Custom Structural Directive
• You can create custom structural directives when there is no built-in
directive available for the required functionality.
• For example, when you want to manipulate the DOM in a particular
way which is different from how the built-in structural directives
manipulate.
Example:
Generate a directive called 'repeat' using the following command:
ng generate directive repeat
Repeat.directive.ts:
import { Directive, TemplateRef, ViewContainerRef, Input
} from '@angular/core';
@Directive({
selector: '[appRepeat]'
})
Custom Structural Directive
export class RepeatDirective {
constructor(private templateRef: TemplateRef<any>,
private viewContainer: ViewContainerRef) { }
@Input() set appRepeat(count: number) {
for (let i = 0; i < count; i++) {
this.viewContainer.createEmbeddedView(this.templat
eRef);
}
}
}
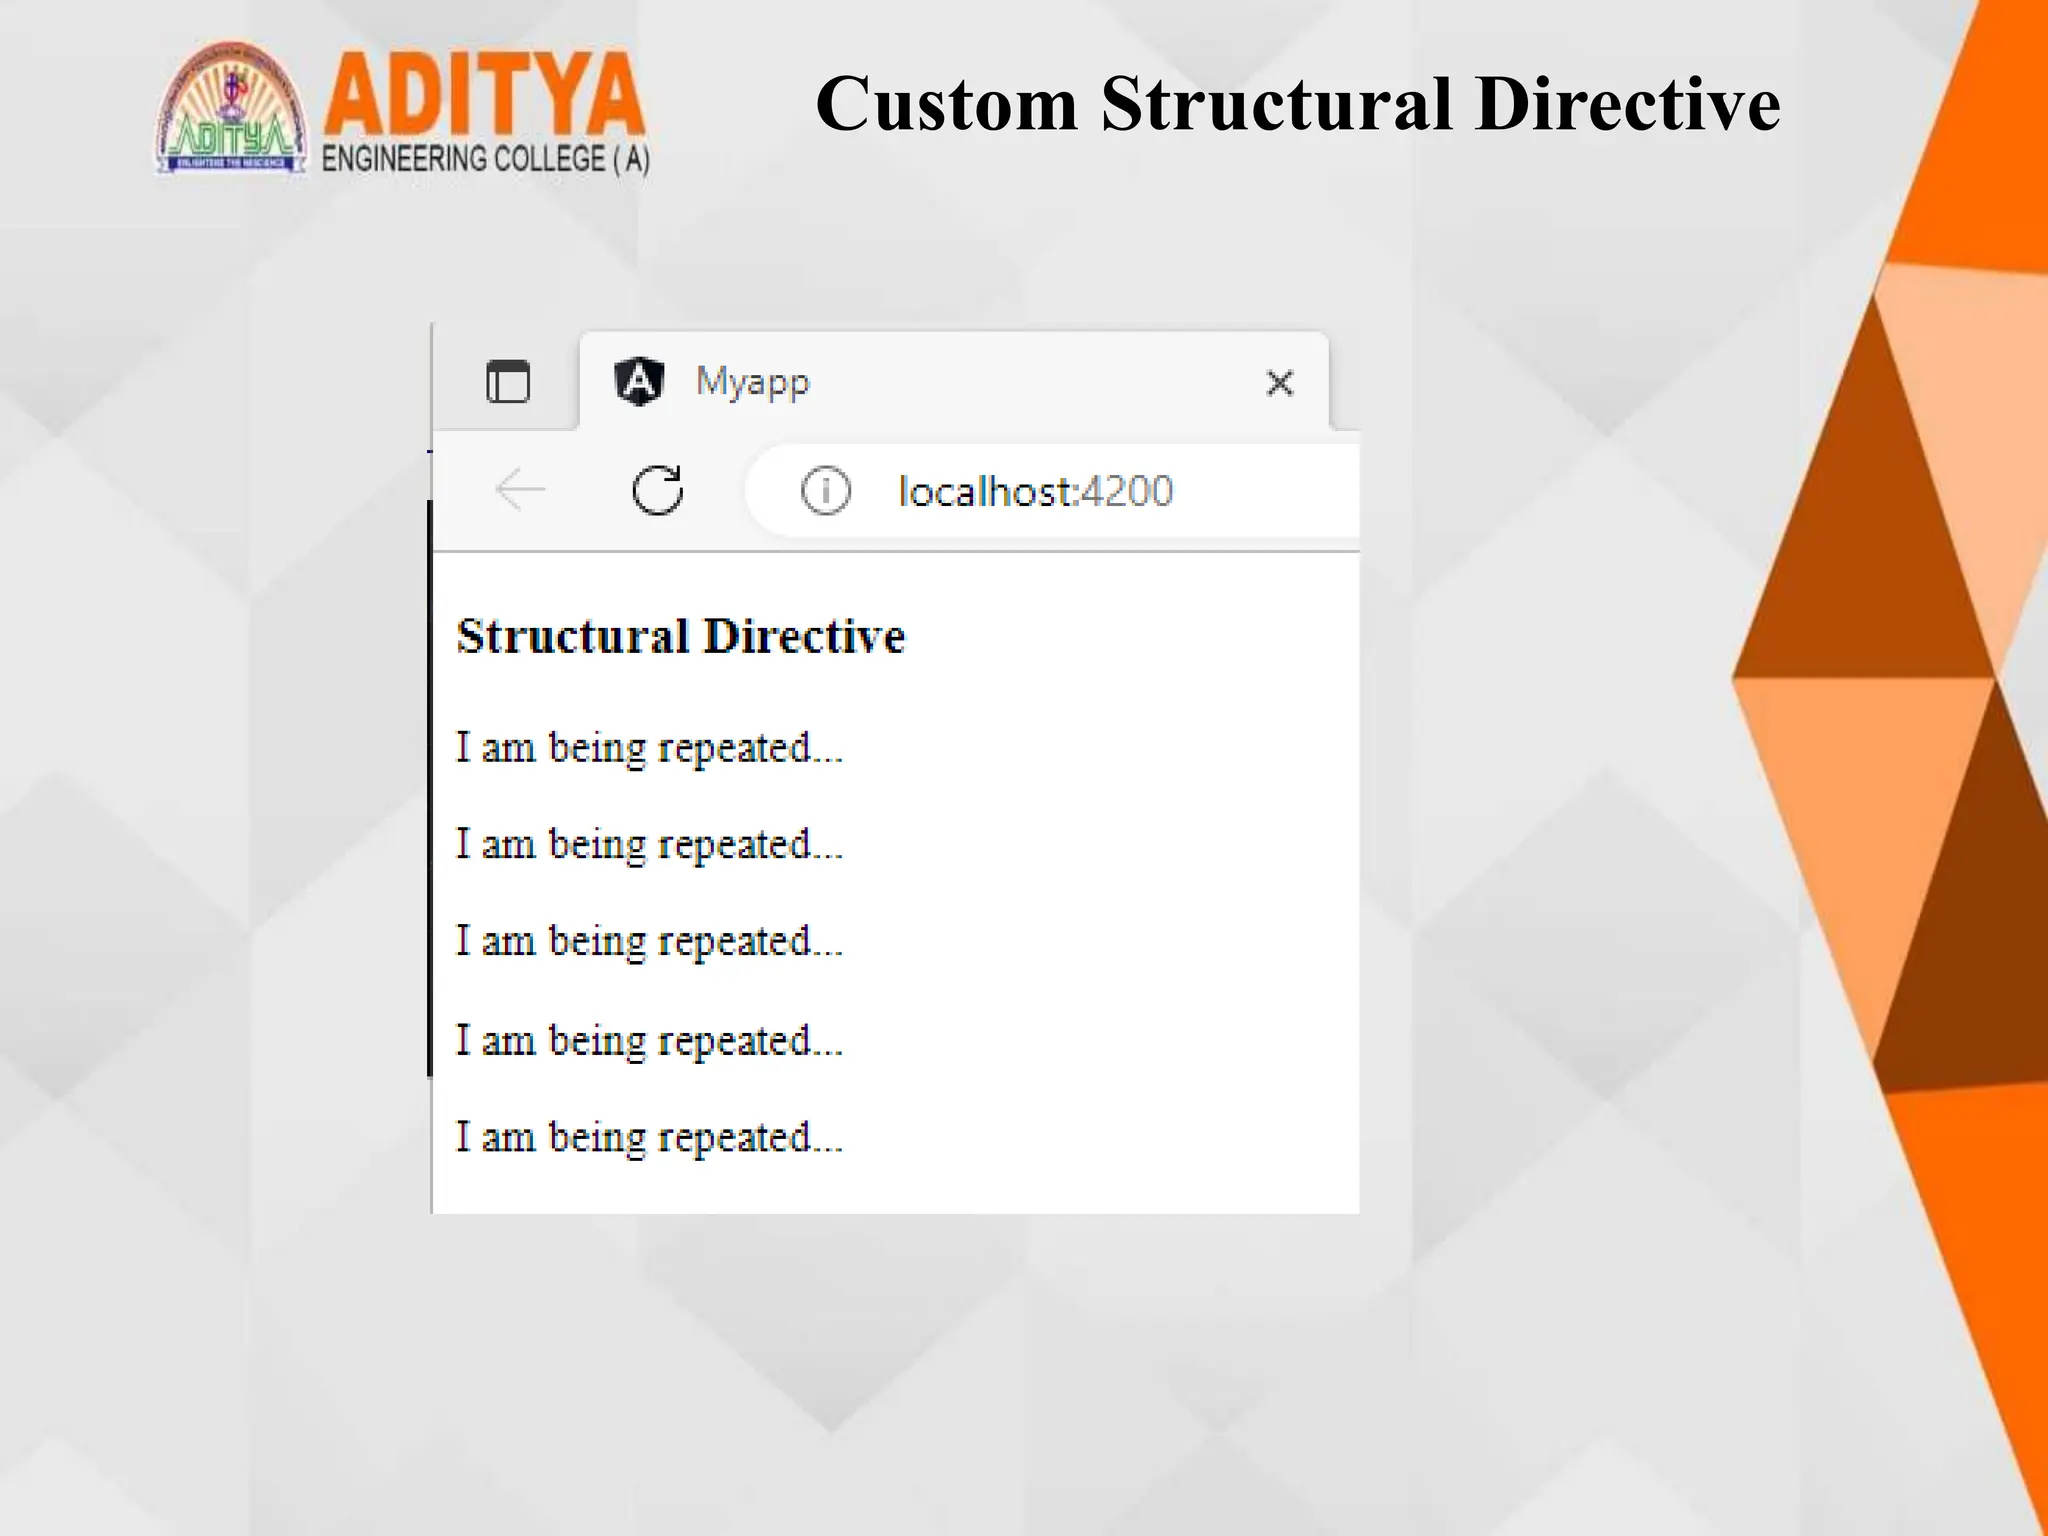
App.component.html:
<h3>Structural Directive</h3>
<p *appRepeat="5">I am being repeated...</p>
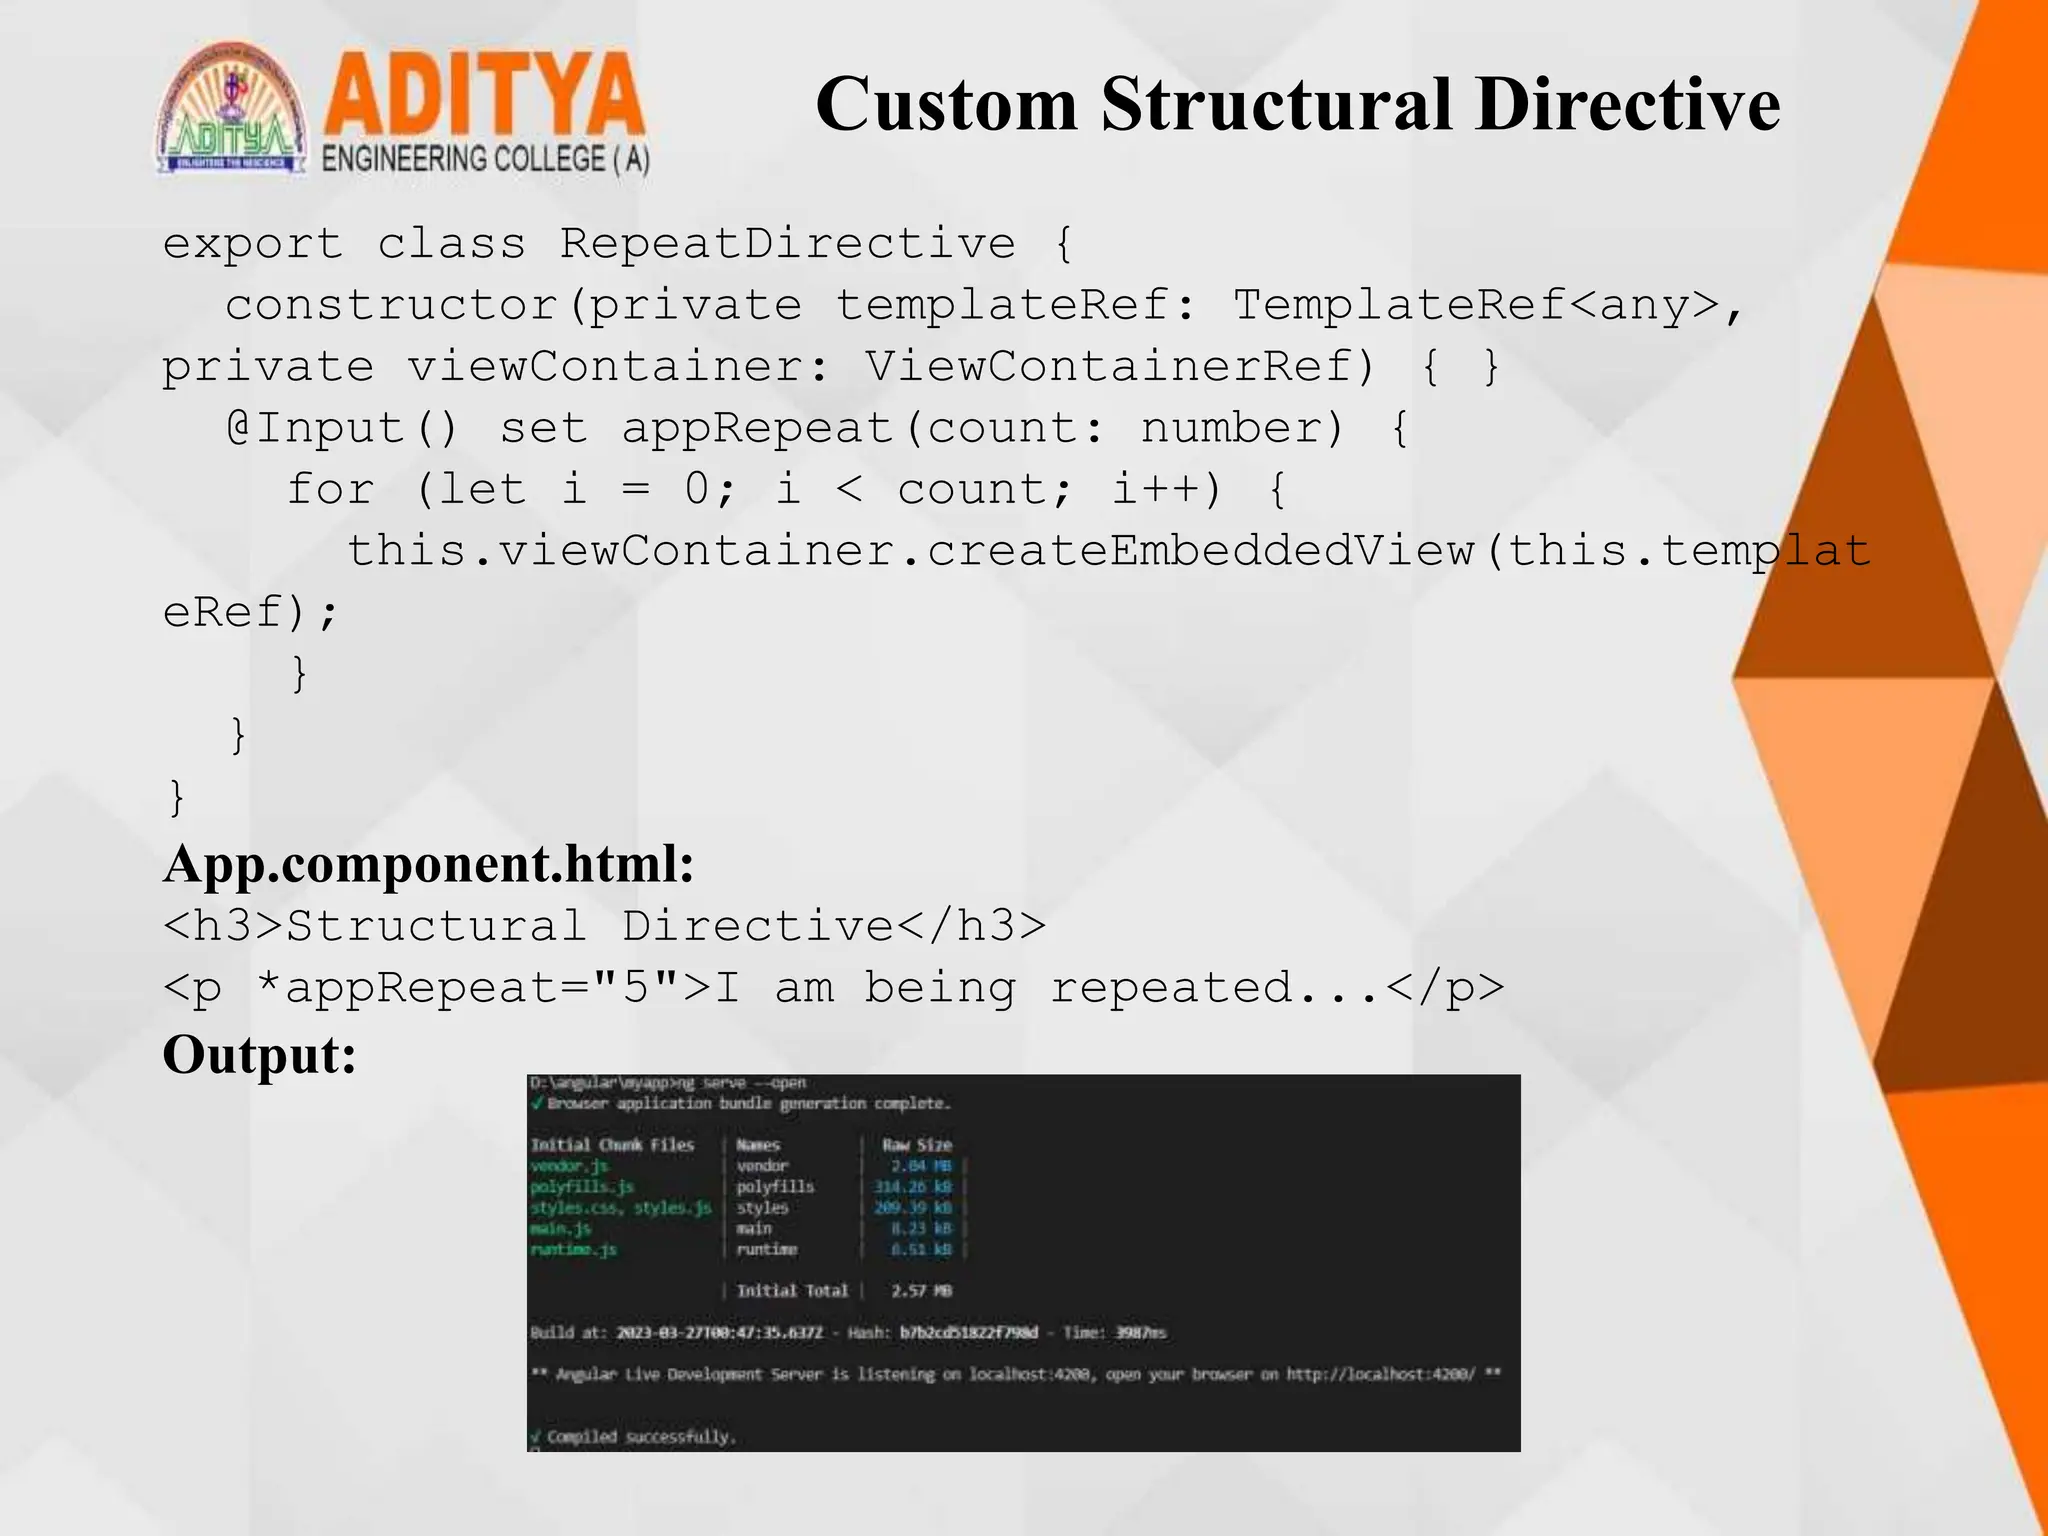
Output:
Custom Structural Directive
Attribute Directives
• Attribute directives change the appearance/behavior of a component/element.
• Following are built-in attribute directives:
• ngStyle
• ngClass
• ngStyle:This directive is used to modify a component/element’s style. You
can use the following syntax to set a single CSS style to the element which is
also known as style binding
[style.<cssproperty>] = "value“
Example:
App.component.ts:
import { Component } from '@angular/core';
@Component({
selector: 'app-root',
templateUrl: './app.component.html',
styleUrls: ['./app.component.css']
})
export class AppComponent {
colorName = 'yellow';
color = 'red';
}
Attribute Directives
app.component.html:
<div [style.background-color]="colorName"
[style.color]="color">
Uses fixed yellow background
</div>
Output:
Attribute Directives
• ngClass:It allows you to dynamically set and change the CSS classes for a
given DOM element. Use the following syntax to set a single CSS class to the
element which is also known as class binding.
Example:
App.component.ts:
import { Component } from '@angular/core';
@Component({
selector: 'app-root',
templateUrl: './app.component.html',
styleUrls: ['./app.component.css']
})
export class AppComponent {
isBordered = true;
}
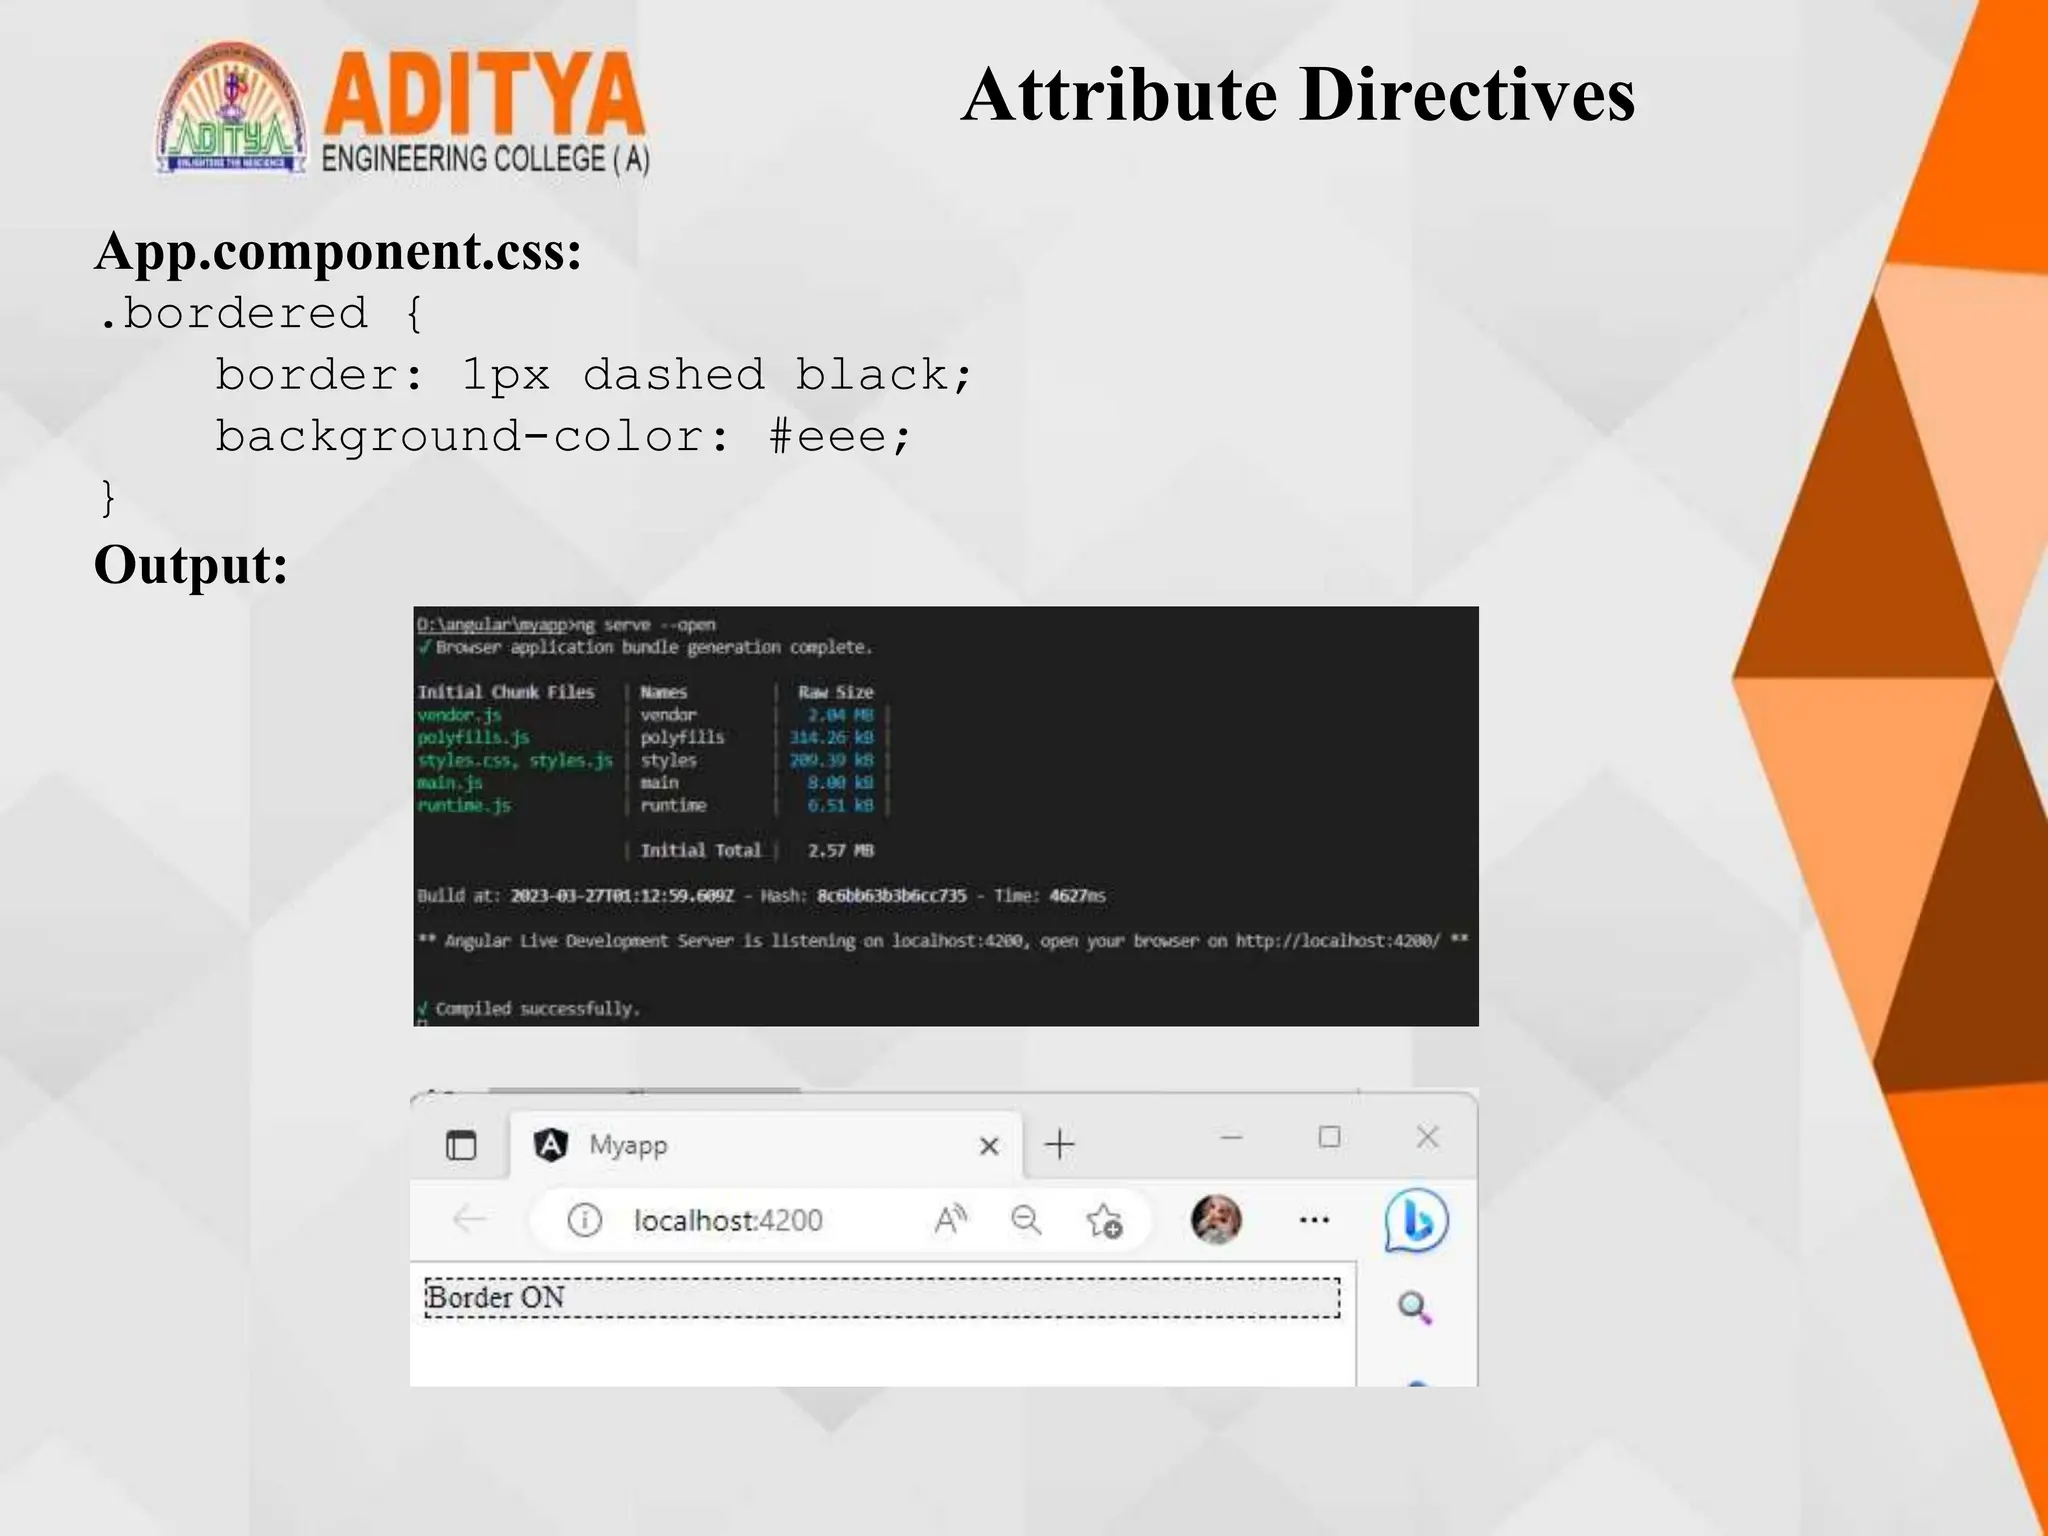
App.compnnent.html:
<div [class.bordered]="isBordered">
Border {{ isBordered ? "ON" : "OFF" }}
</div>
Attribute Directives
App.component.css:
.bordered {
border: 1px dashed black;
background-color: #eee;
}
Output:
Custom Attribute Directive
• You can create a custom attribute directive when there is no built-in
directive available for the required functionality.
Example:
Generate a directive called 'message' using the following command
ng generate directive message
Message.directive.ts:
import { Directive, ElementRef, Renderer2, HostListener,
Input } from '@angular/core';
@Directive({
selector: '[appMessage]'
})
export class MessageDirective {
@Input('appMessage') message!: string;
constructor(private el: ElementRef, private renderer:
Renderer2) {
renderer.setStyle(el.nativeElement, 'cursor',
'pointer');}
Custom Attribute Directive
@HostListener('click') onClick() {
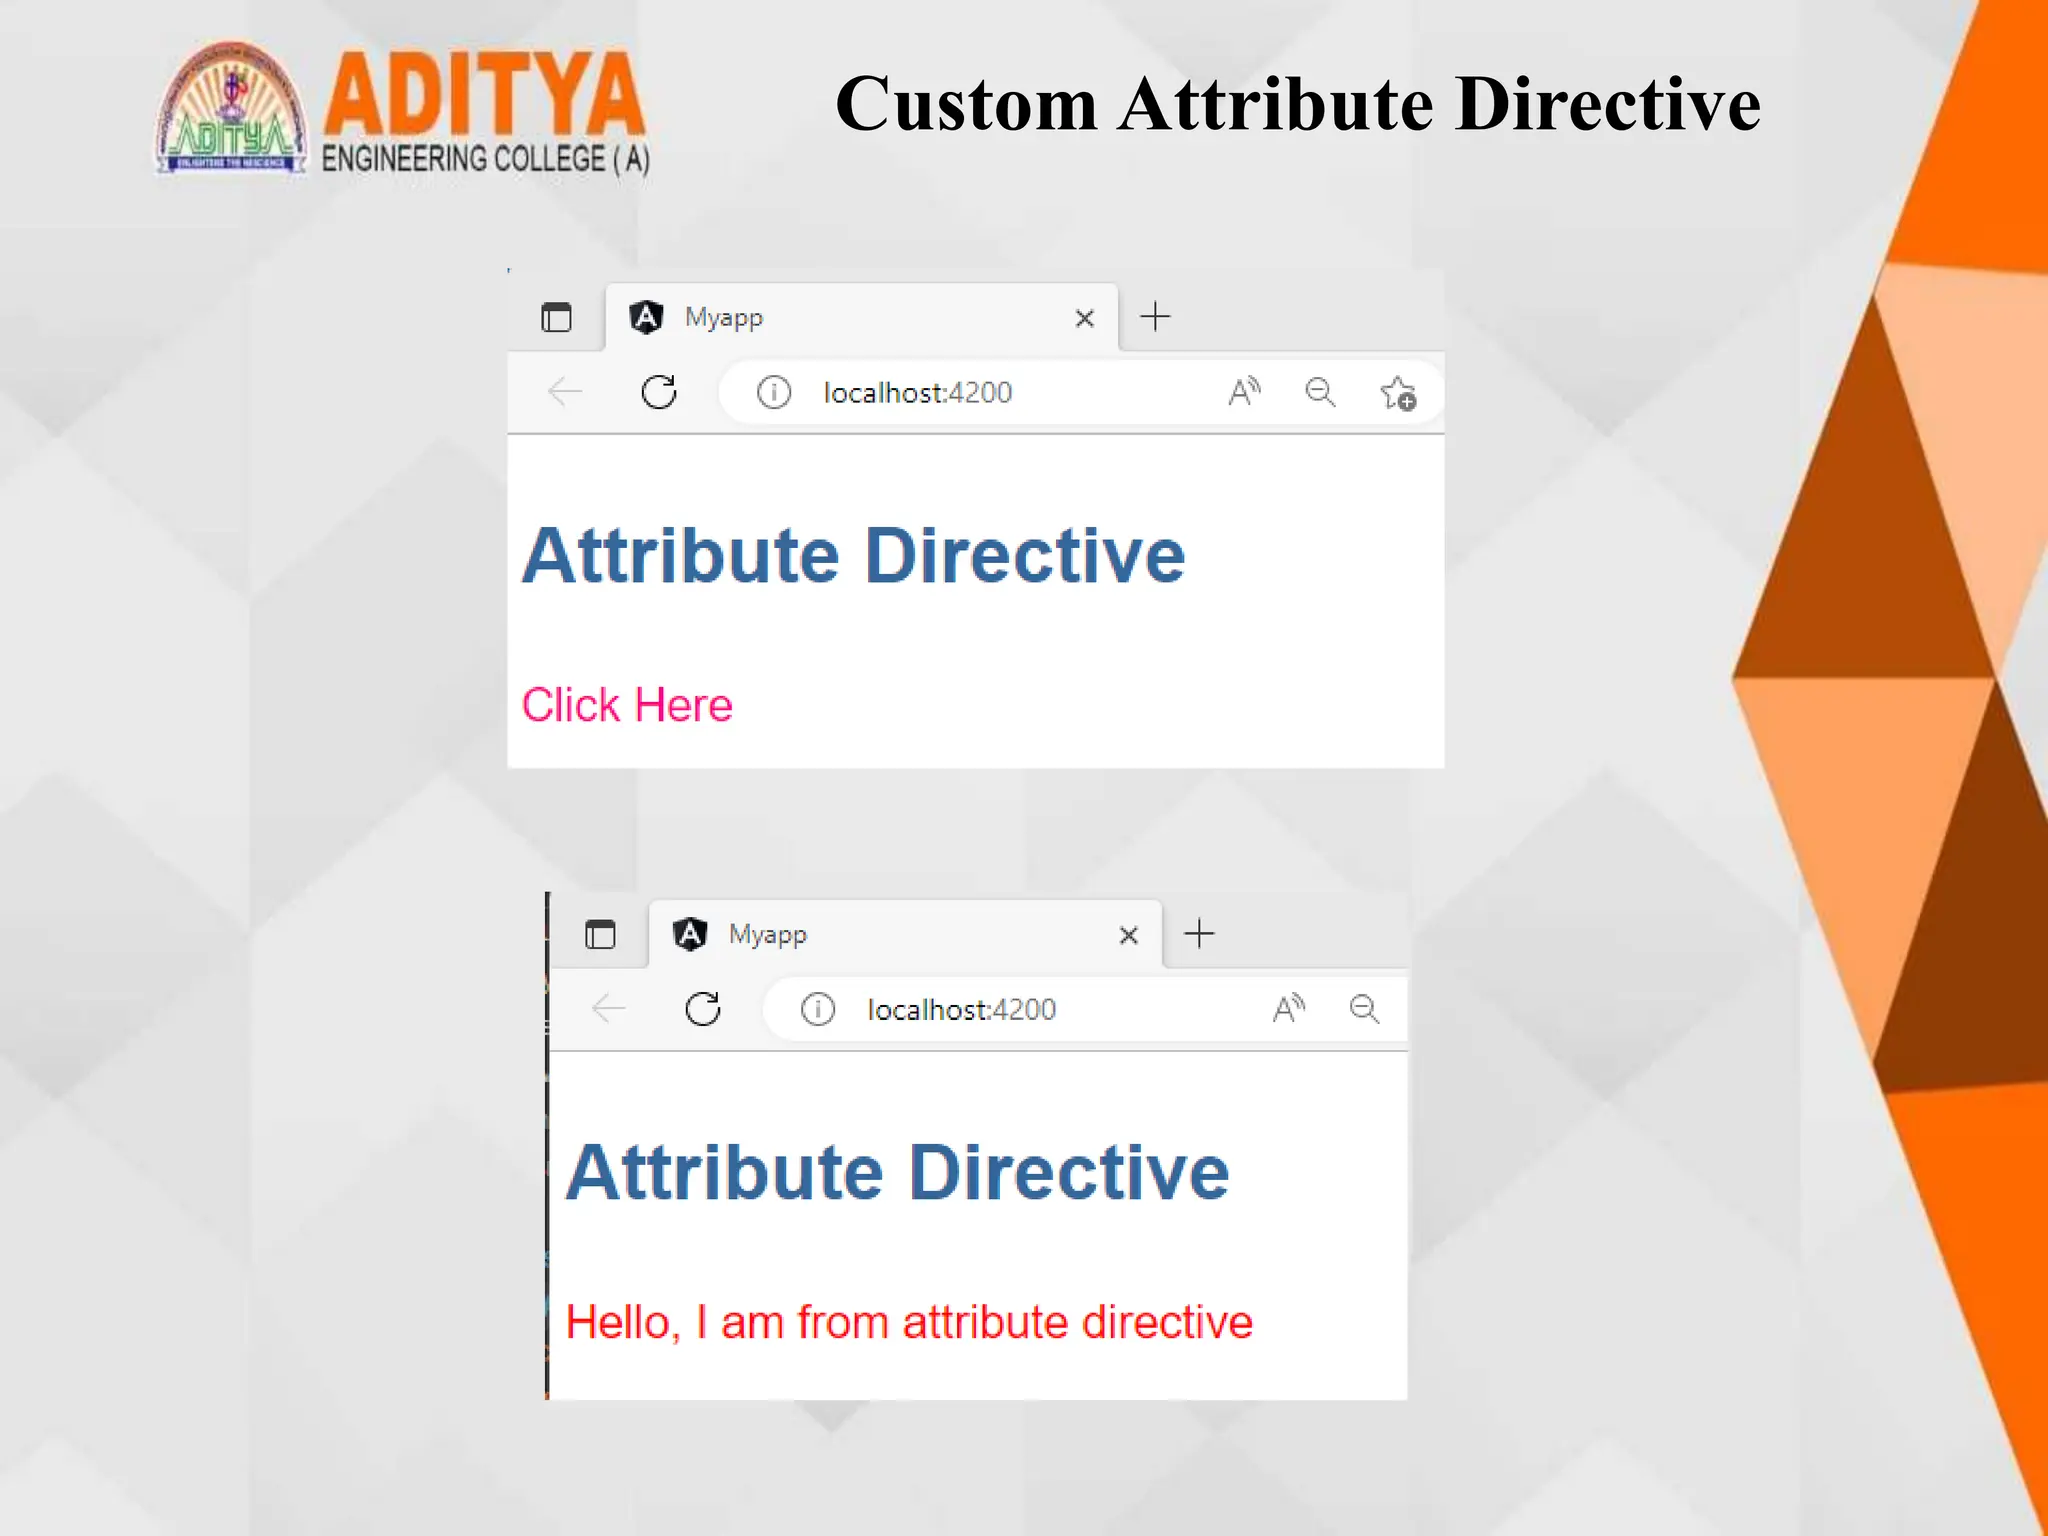
this.el.nativeElement.innerHTML = this.message;
this.renderer.setStyle(this.el.nativeElement, 'color',
'red');
}
}
App.component.ts:
import { Component } from '@angular/core';
@Component({
selector: 'app-root',
templateUrl: './app.component.html',
styleUrls: ['./app.component.css']
})
export class AppComponent {
myMessage="Hello, I am from attribute directive"
}
Custom Attribute Directive
app.component.html:
<h3>Attribute Directive</h3>
<p [appMessage]="myMessage">Click Here</p>
App.component.css:
h3 {
color: #369;
font-family: Arial, Helvetica, sans-serif;
font-size: 250%;
}
p {
color: #ff0080;
font-family: Arial, Helvetica, sans-serif;
font-size: 150%;
}
Custom Attribute Directive
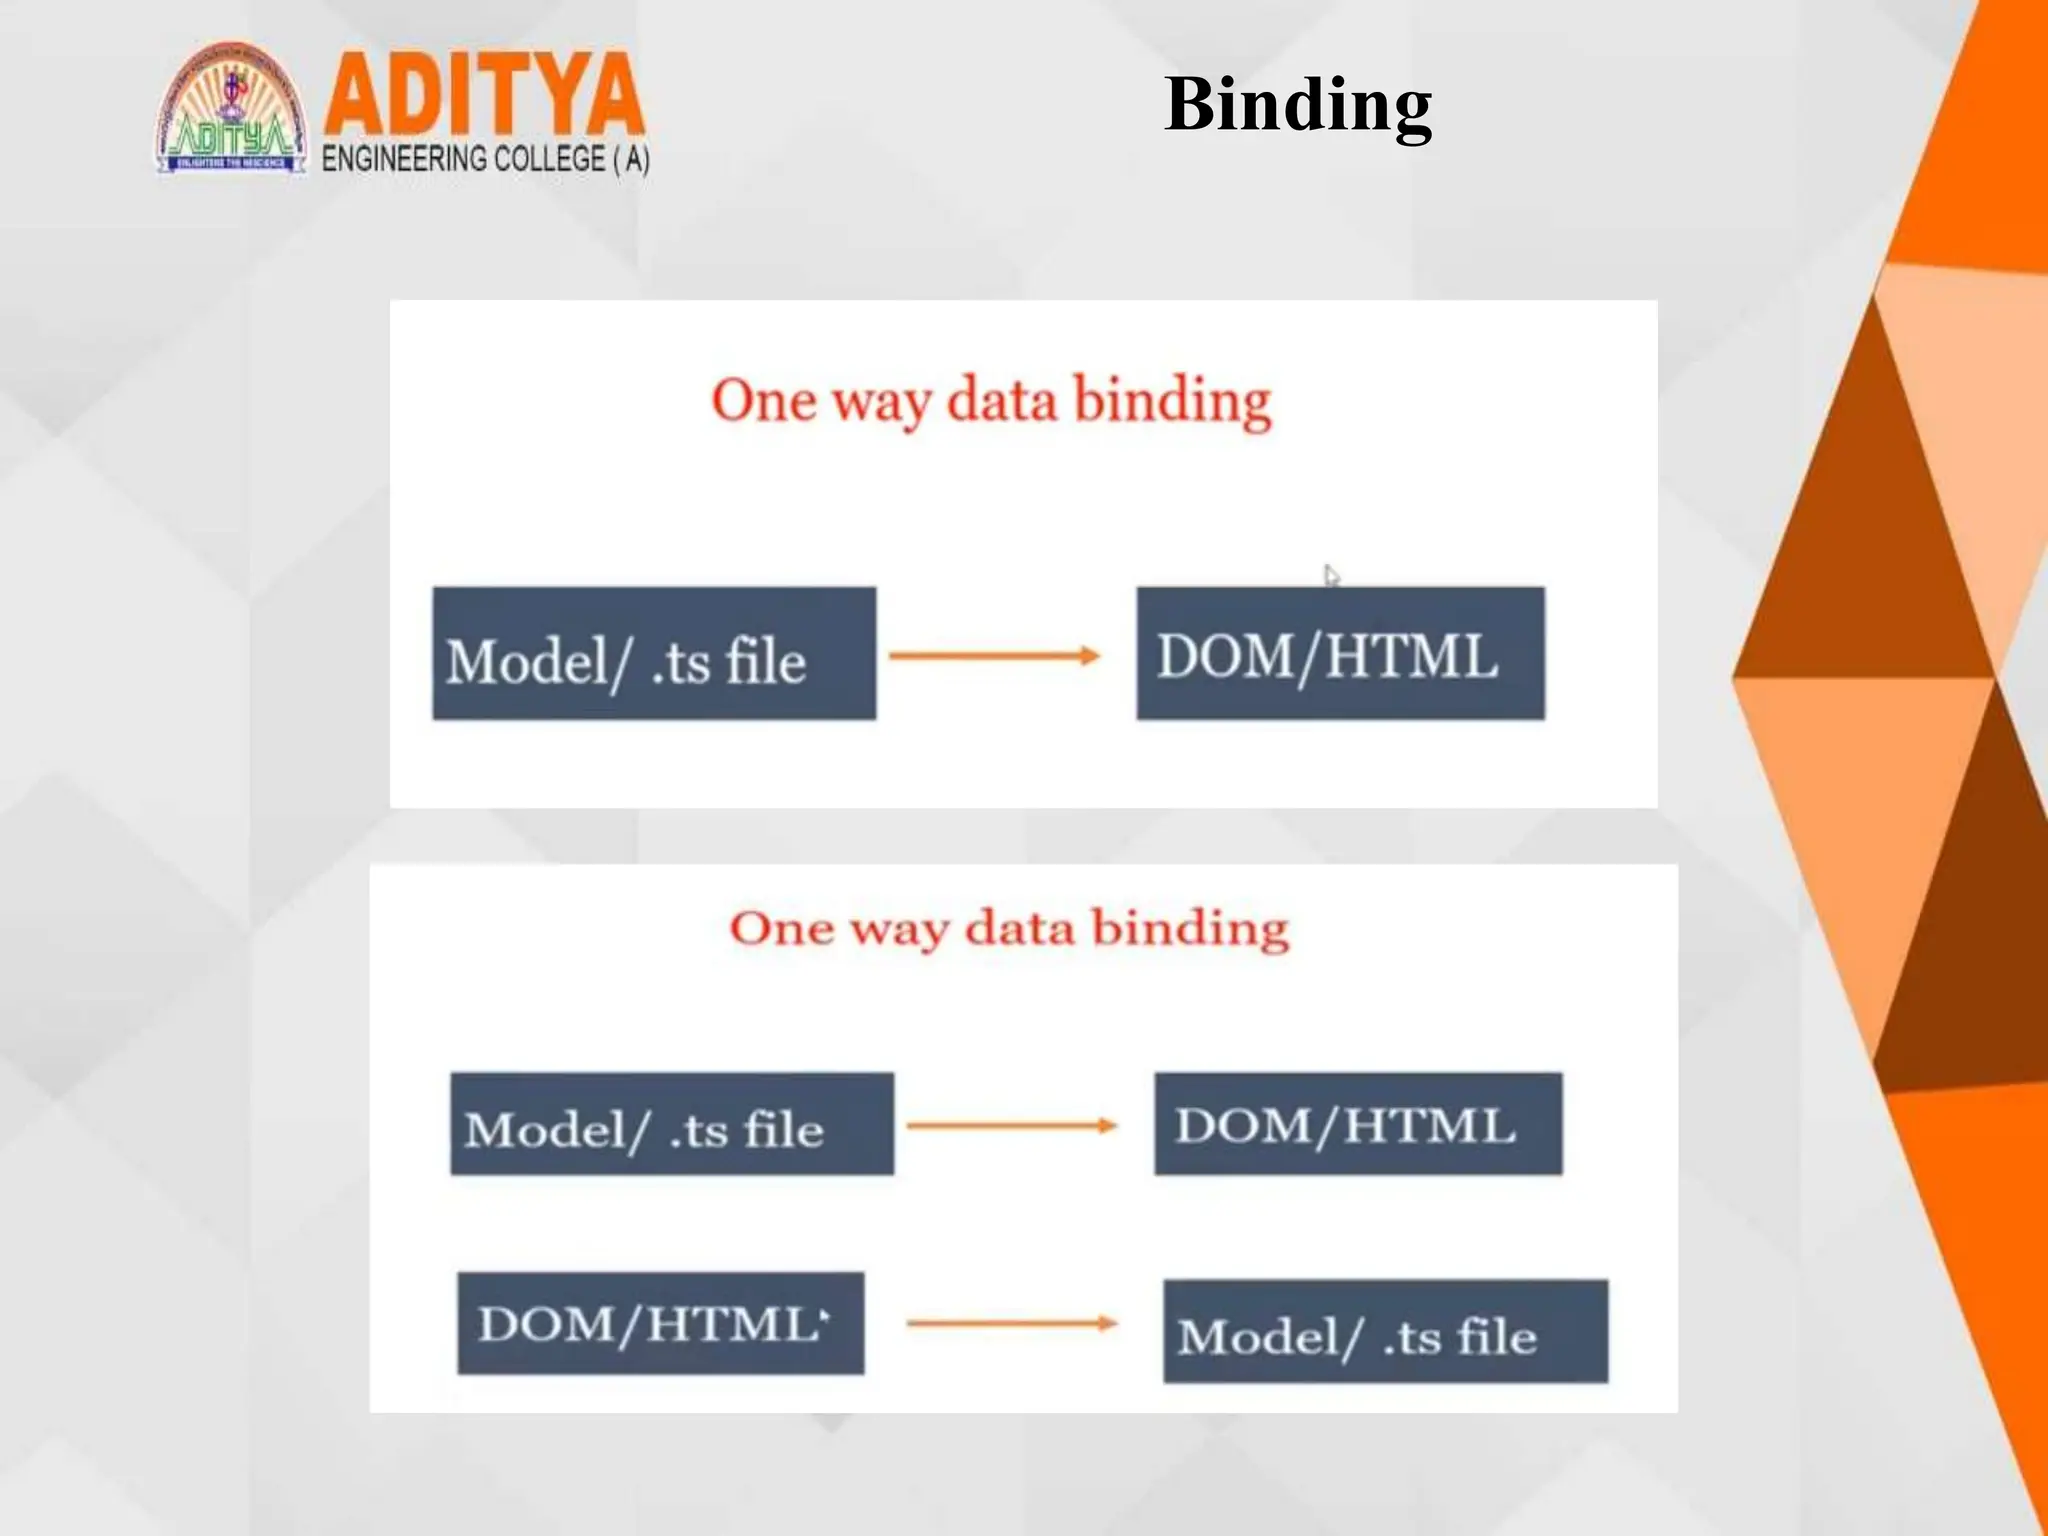
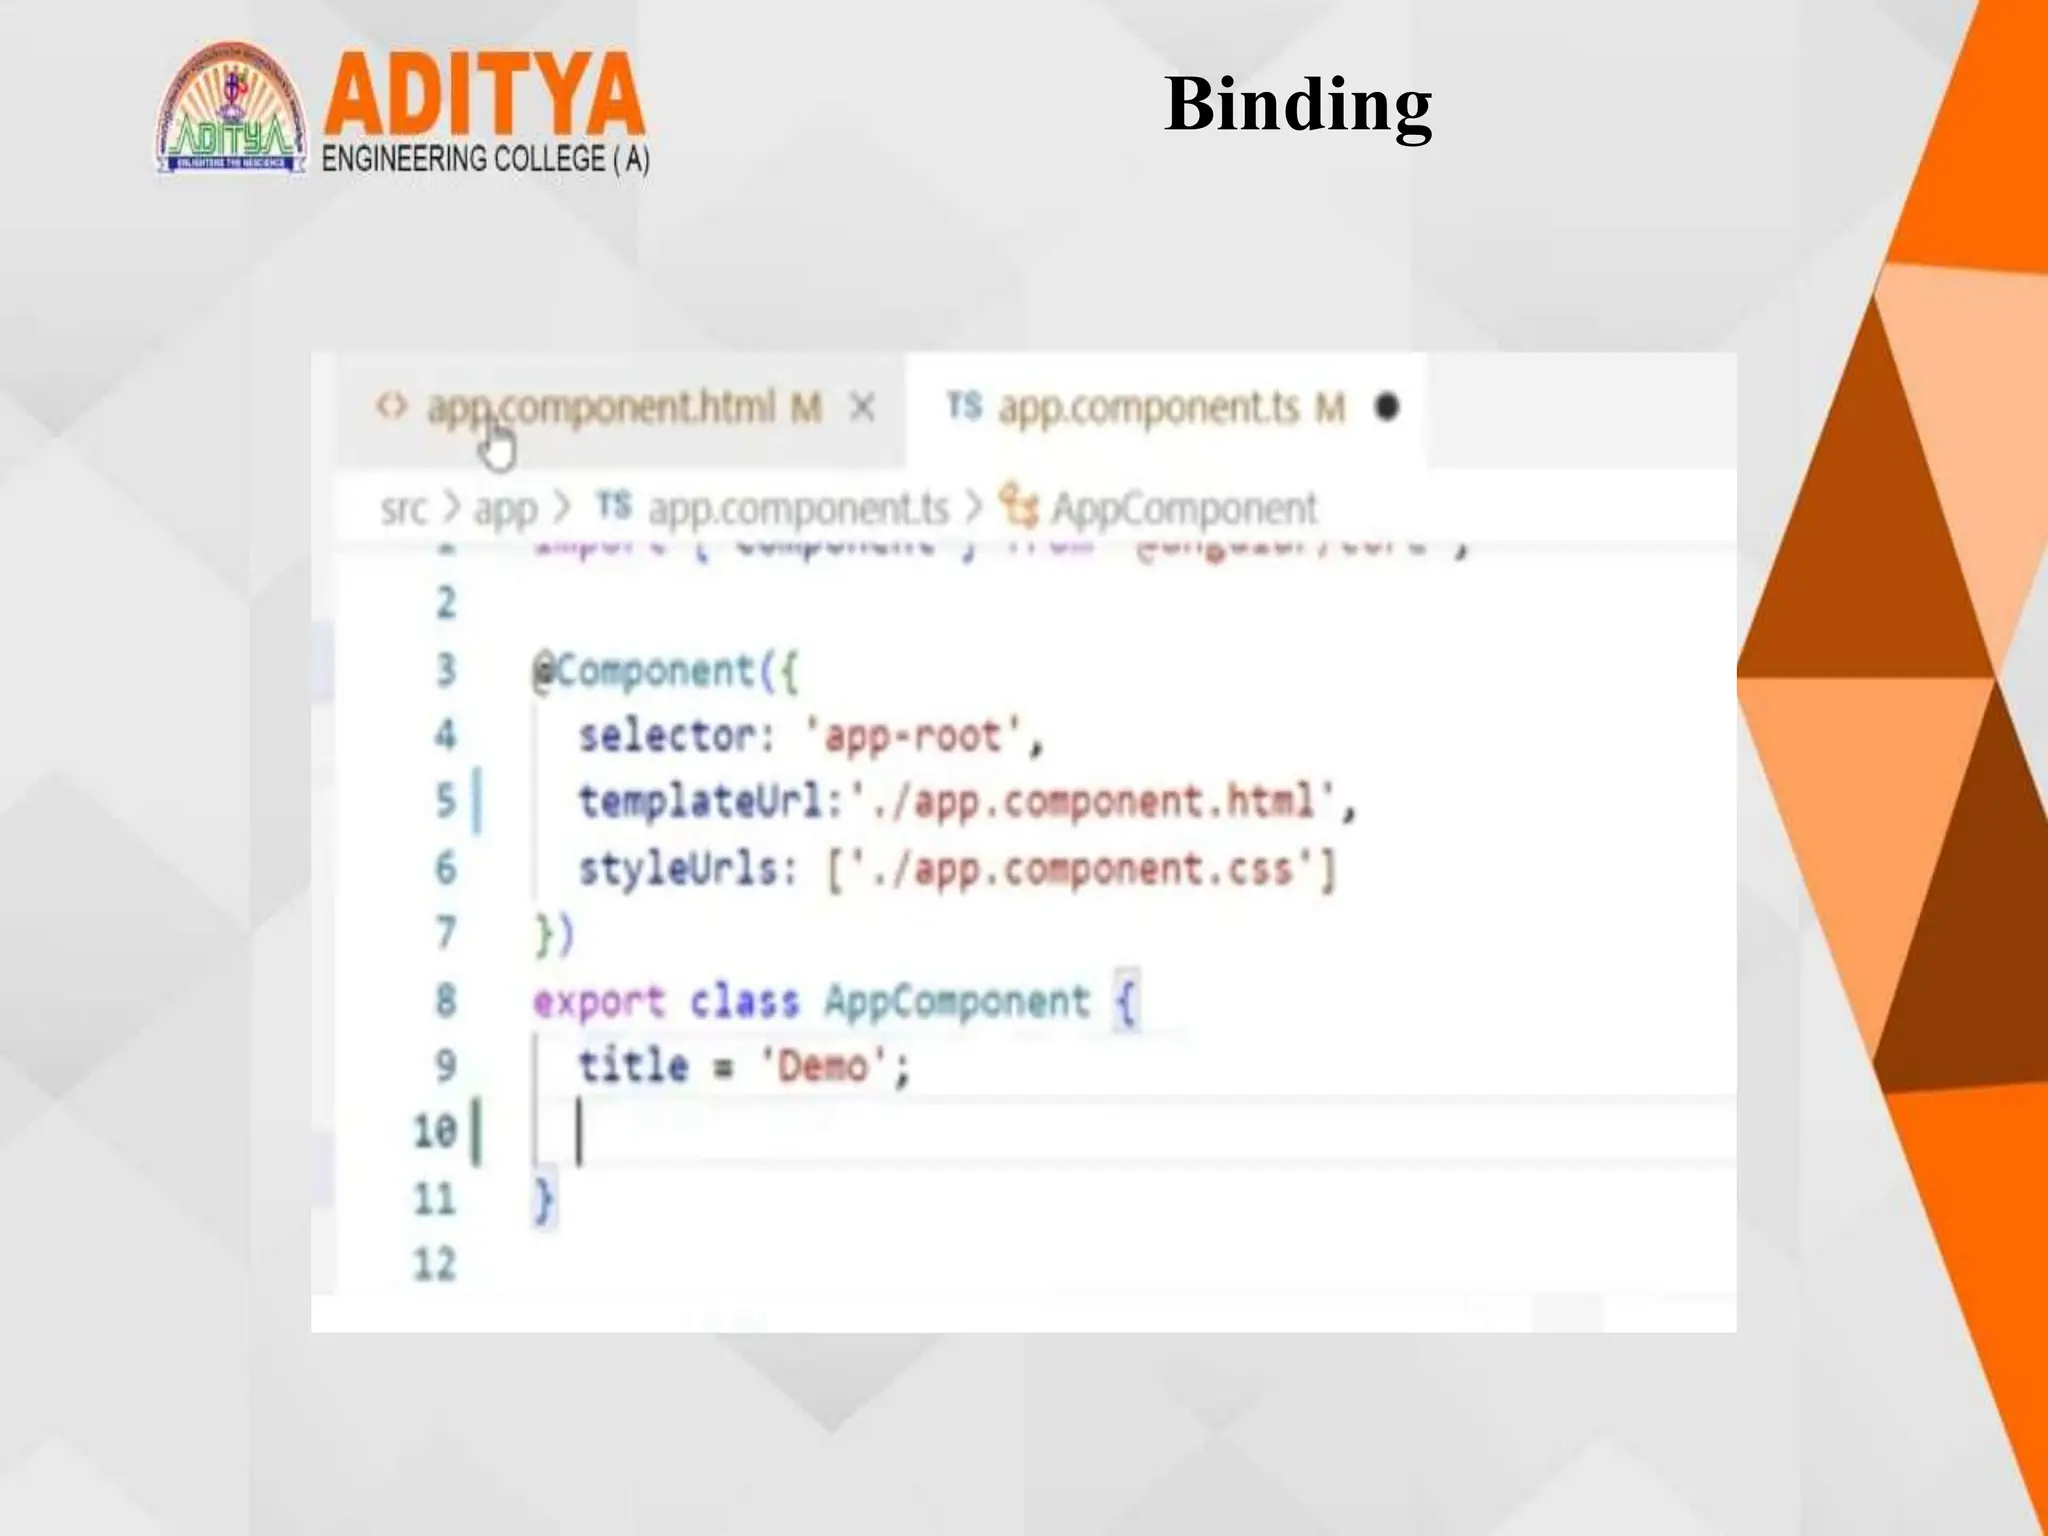
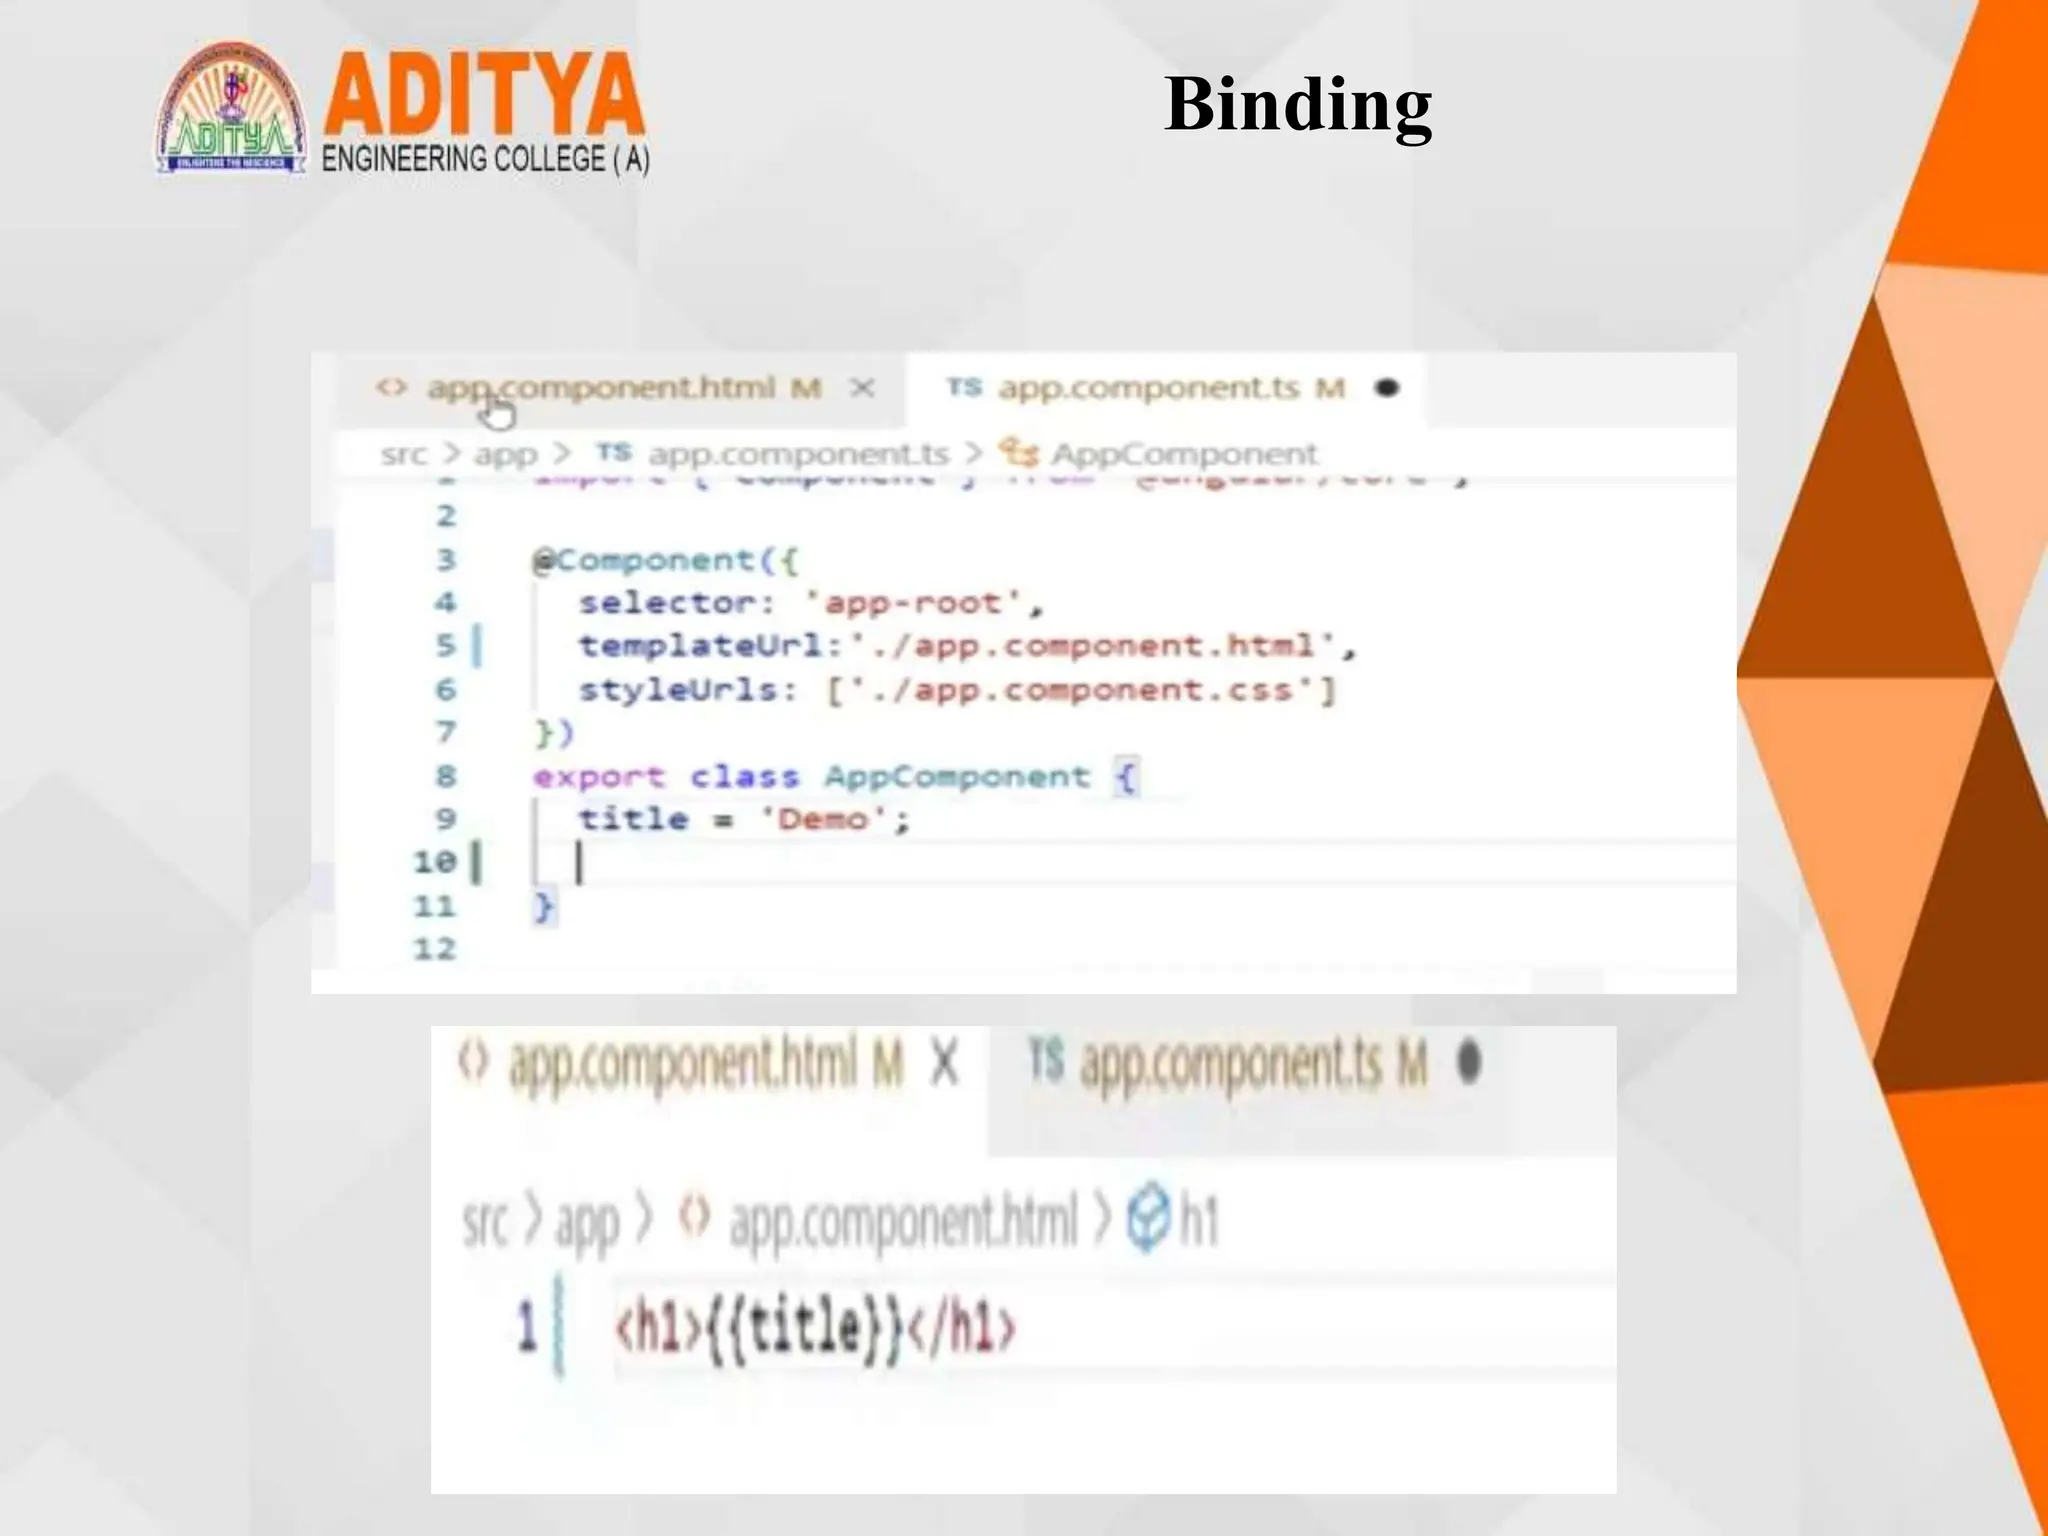
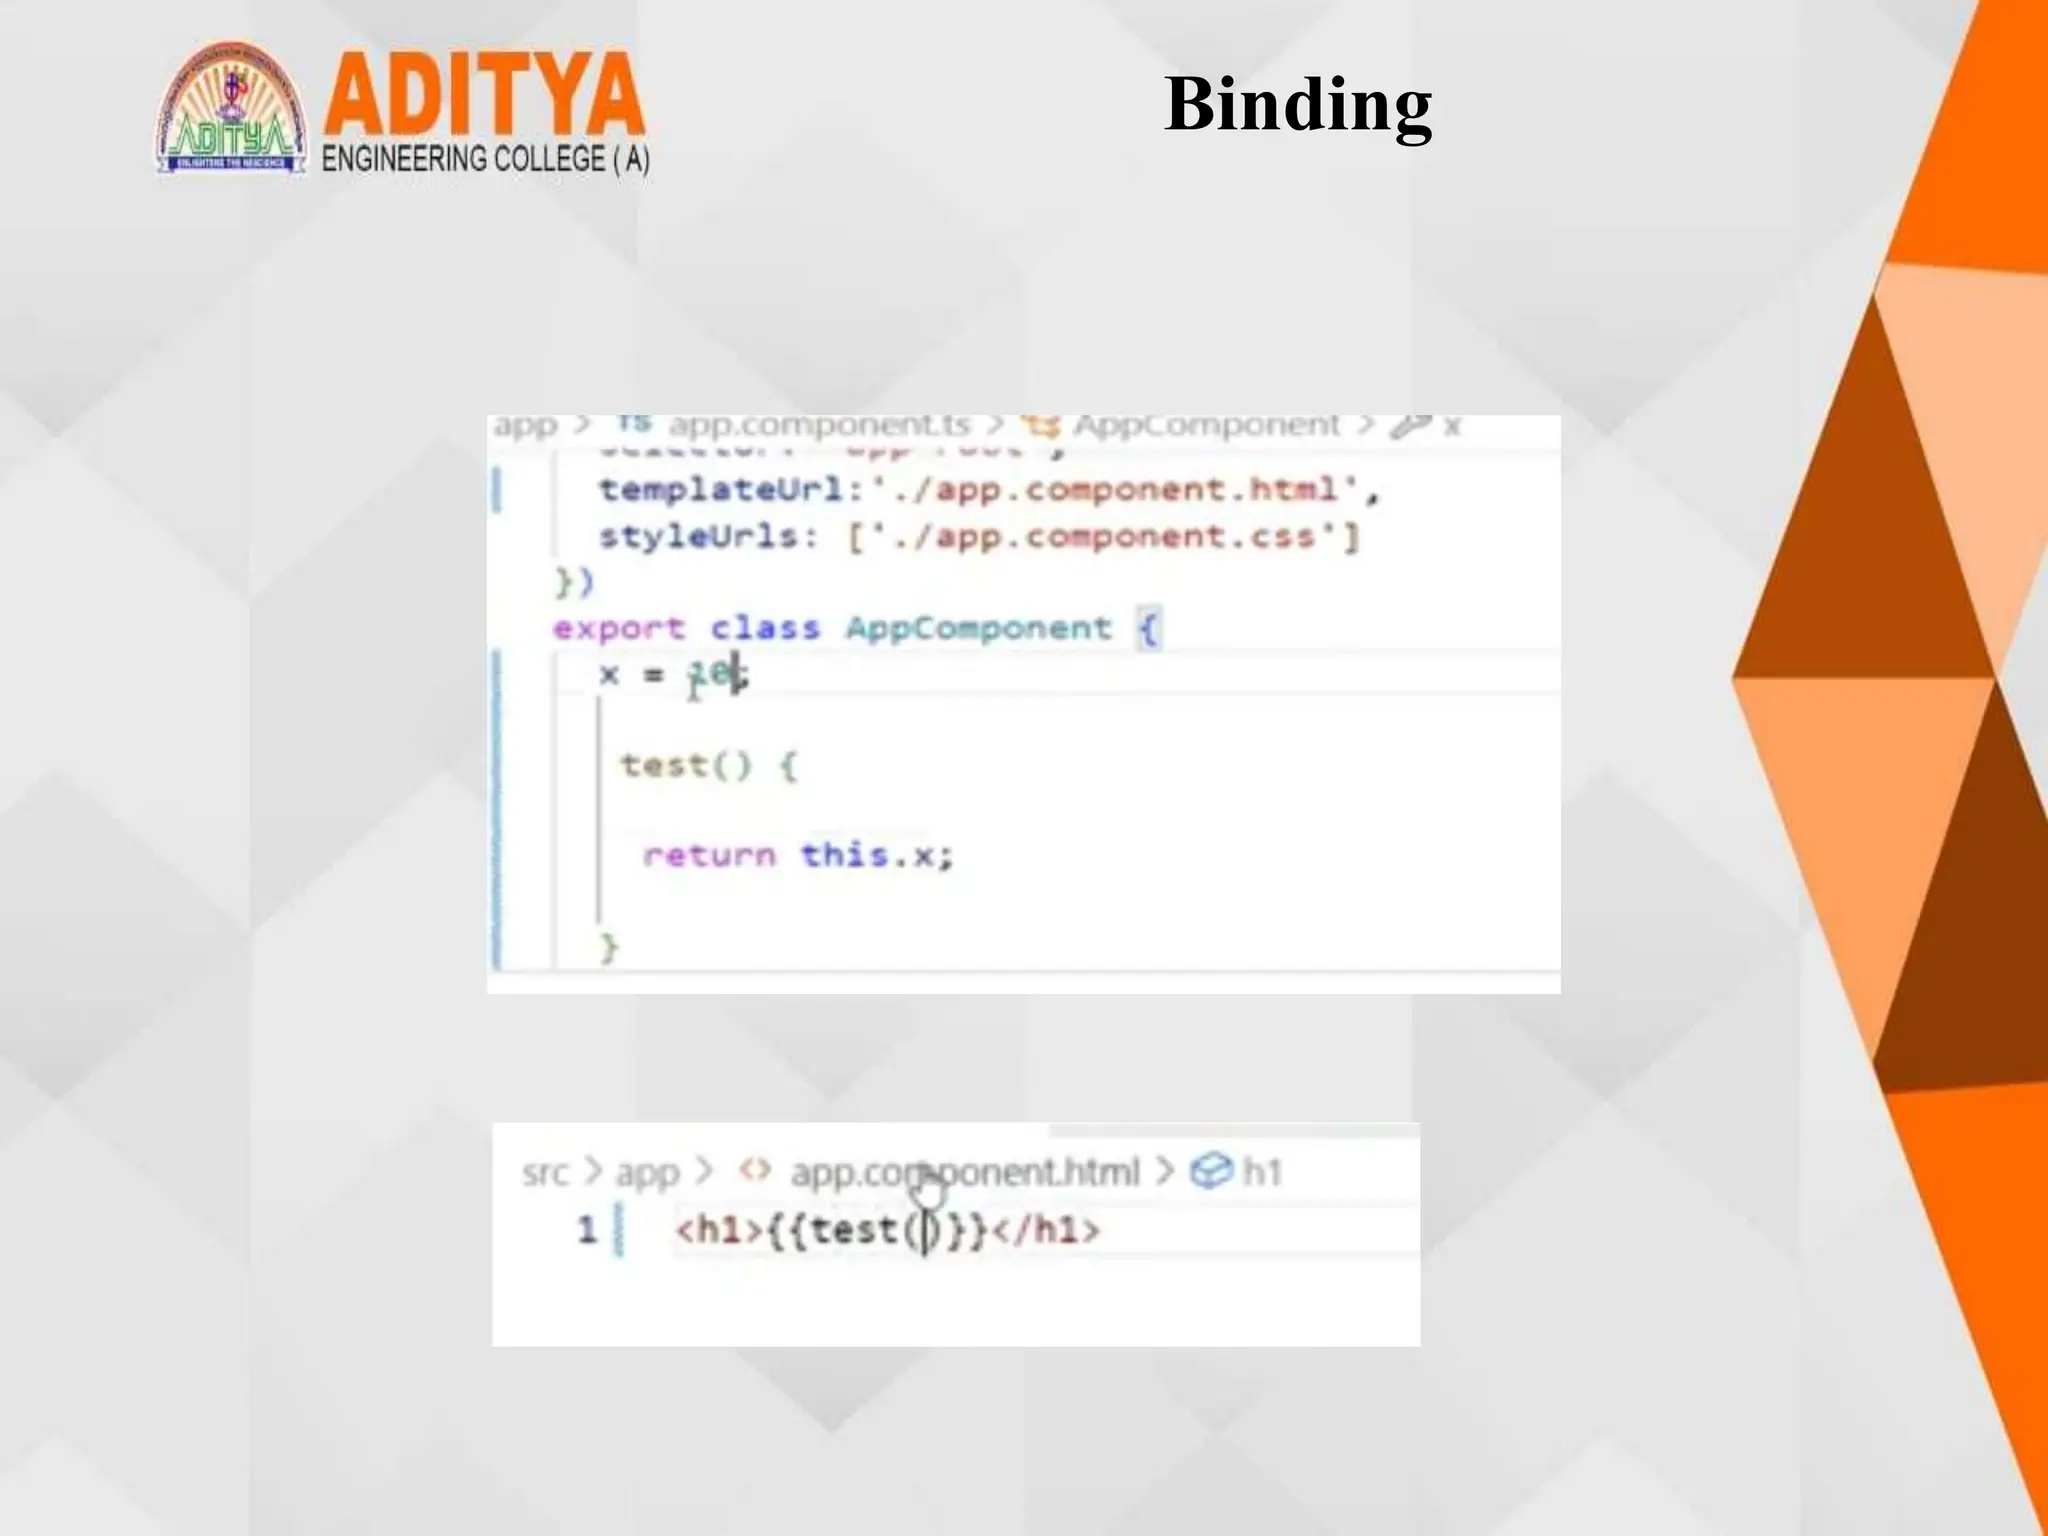
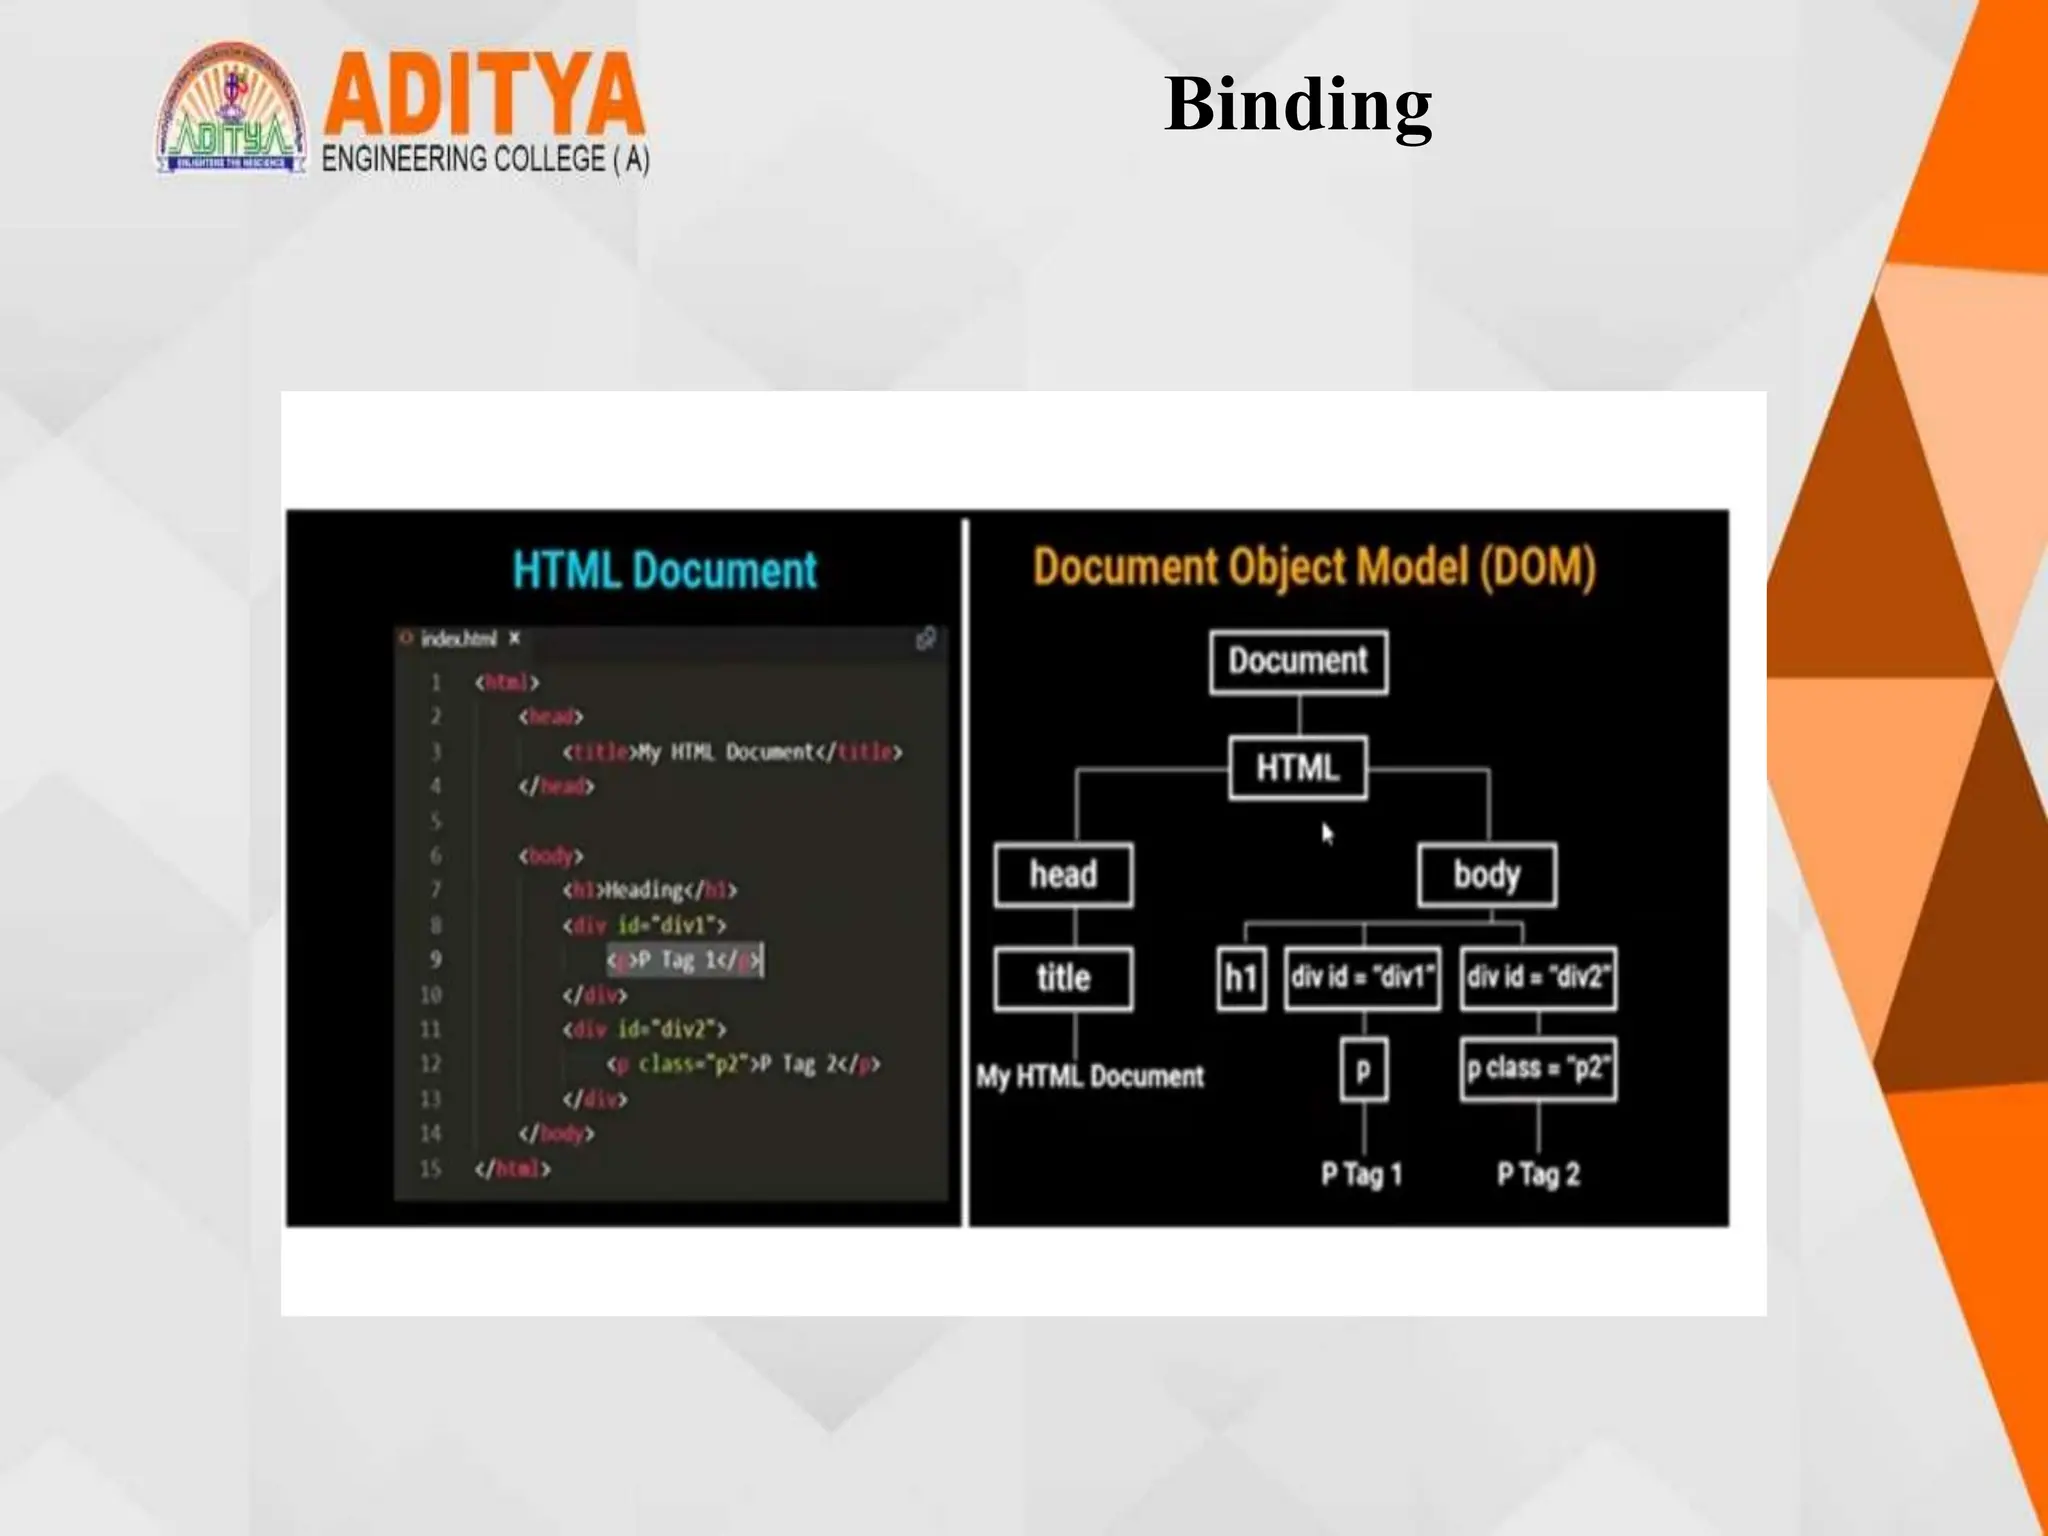
Binding
Binding
Binding
Binding
Binding
Binding
Binding
Binding
Property Binding
• Property Binding in Angular helps you set values for properties of HTML
elements or directives.
• To bind to an element's property, enclose it in square brackets, [], which
identifies the property as a target property.A target property is the DOM
property to which you want to assign a value.
Syntax: <img [src] = 'imageUrl' />
or
<img bind-src = 'imageUrl' />
• Here the component's imageUrl property is bound to the value to the image
element's property src.
• Interpolation can be used as an alternative to property binding. Property
binding is mostly used when it is required to set a non-string value.
Example:
app.component.ts
import { Component } from '@angular/core';
@Component({
selector: 'app-root',
templateUrl: './app.component.html',
styleUrls: ['./app.component.css']
Property Binding
})
export class AppComponent {
imgUrl = 'assets/logo.png';
}
Inside src/assets and place a logo.png file inside it.
app.component.html
<img [src]='imgUrl’>
Output:
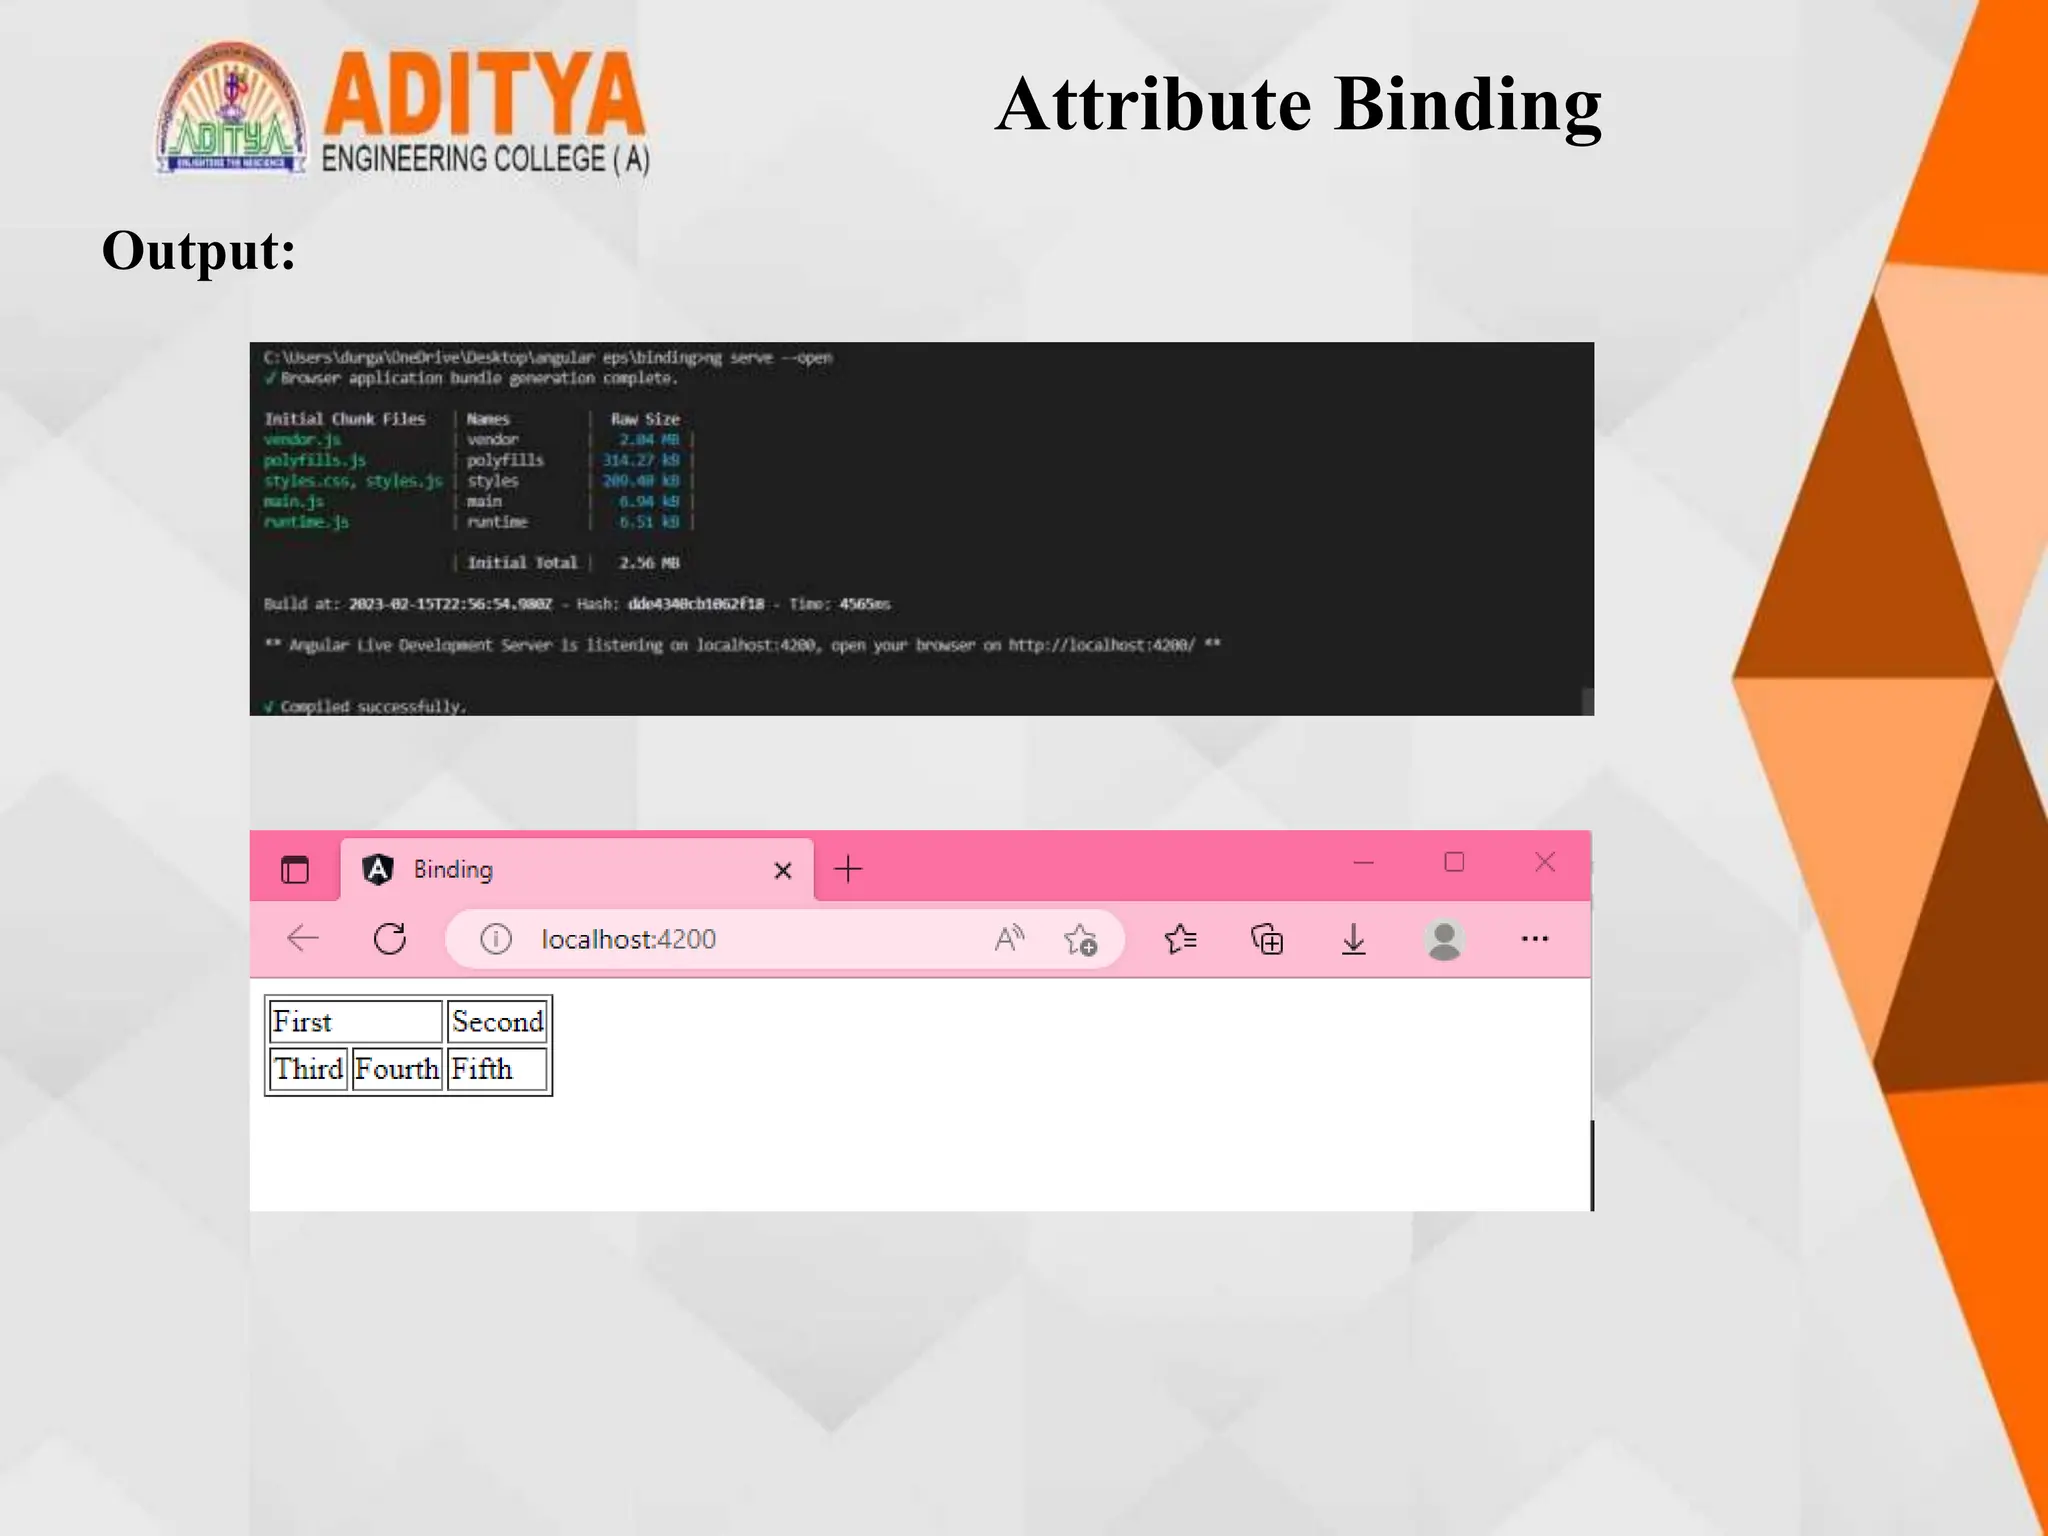
Attribute Binding
• Property binding will not work for a few elements/pure attributes like ARIA,
SVG, and COLSPAN. In such cases, you need to go for attribute binding.
• Attribute binding can be used to bind a component property to the attribute
directly
• Binding to the colspan attribute helps you to keep your tables
programmatically dynamic.
• Depending on the amount of data that your application populates a table with,
the number of columns that a row spans could change.
• Attribute binding syntax starts with prefix attr. followed by a dot sign and the
name of an attribute. And then set the attribute value to an expression.
<td [attr.colspan] = "2+3">Hello</td>
Example:
app.component.ts
import { Component } from '@angular/core';
@Component({
selector: 'app-root',
templateUrl: './app.component.html',
styleUrls: ['./app.component.css']
})
Attribute Binding
export class AppComponent {
colspanValue = '2’;
}
app.component.html
<table border=1>
<tr>
<td [attr.colspan]="colspanValue"> First </td>
<td>Second</td>
</tr>
<tr>
<td>Third</td>
<td>Fourth</td>
<td>Fifth</td>
</tr>
</table>
Attribute Binding
Output:
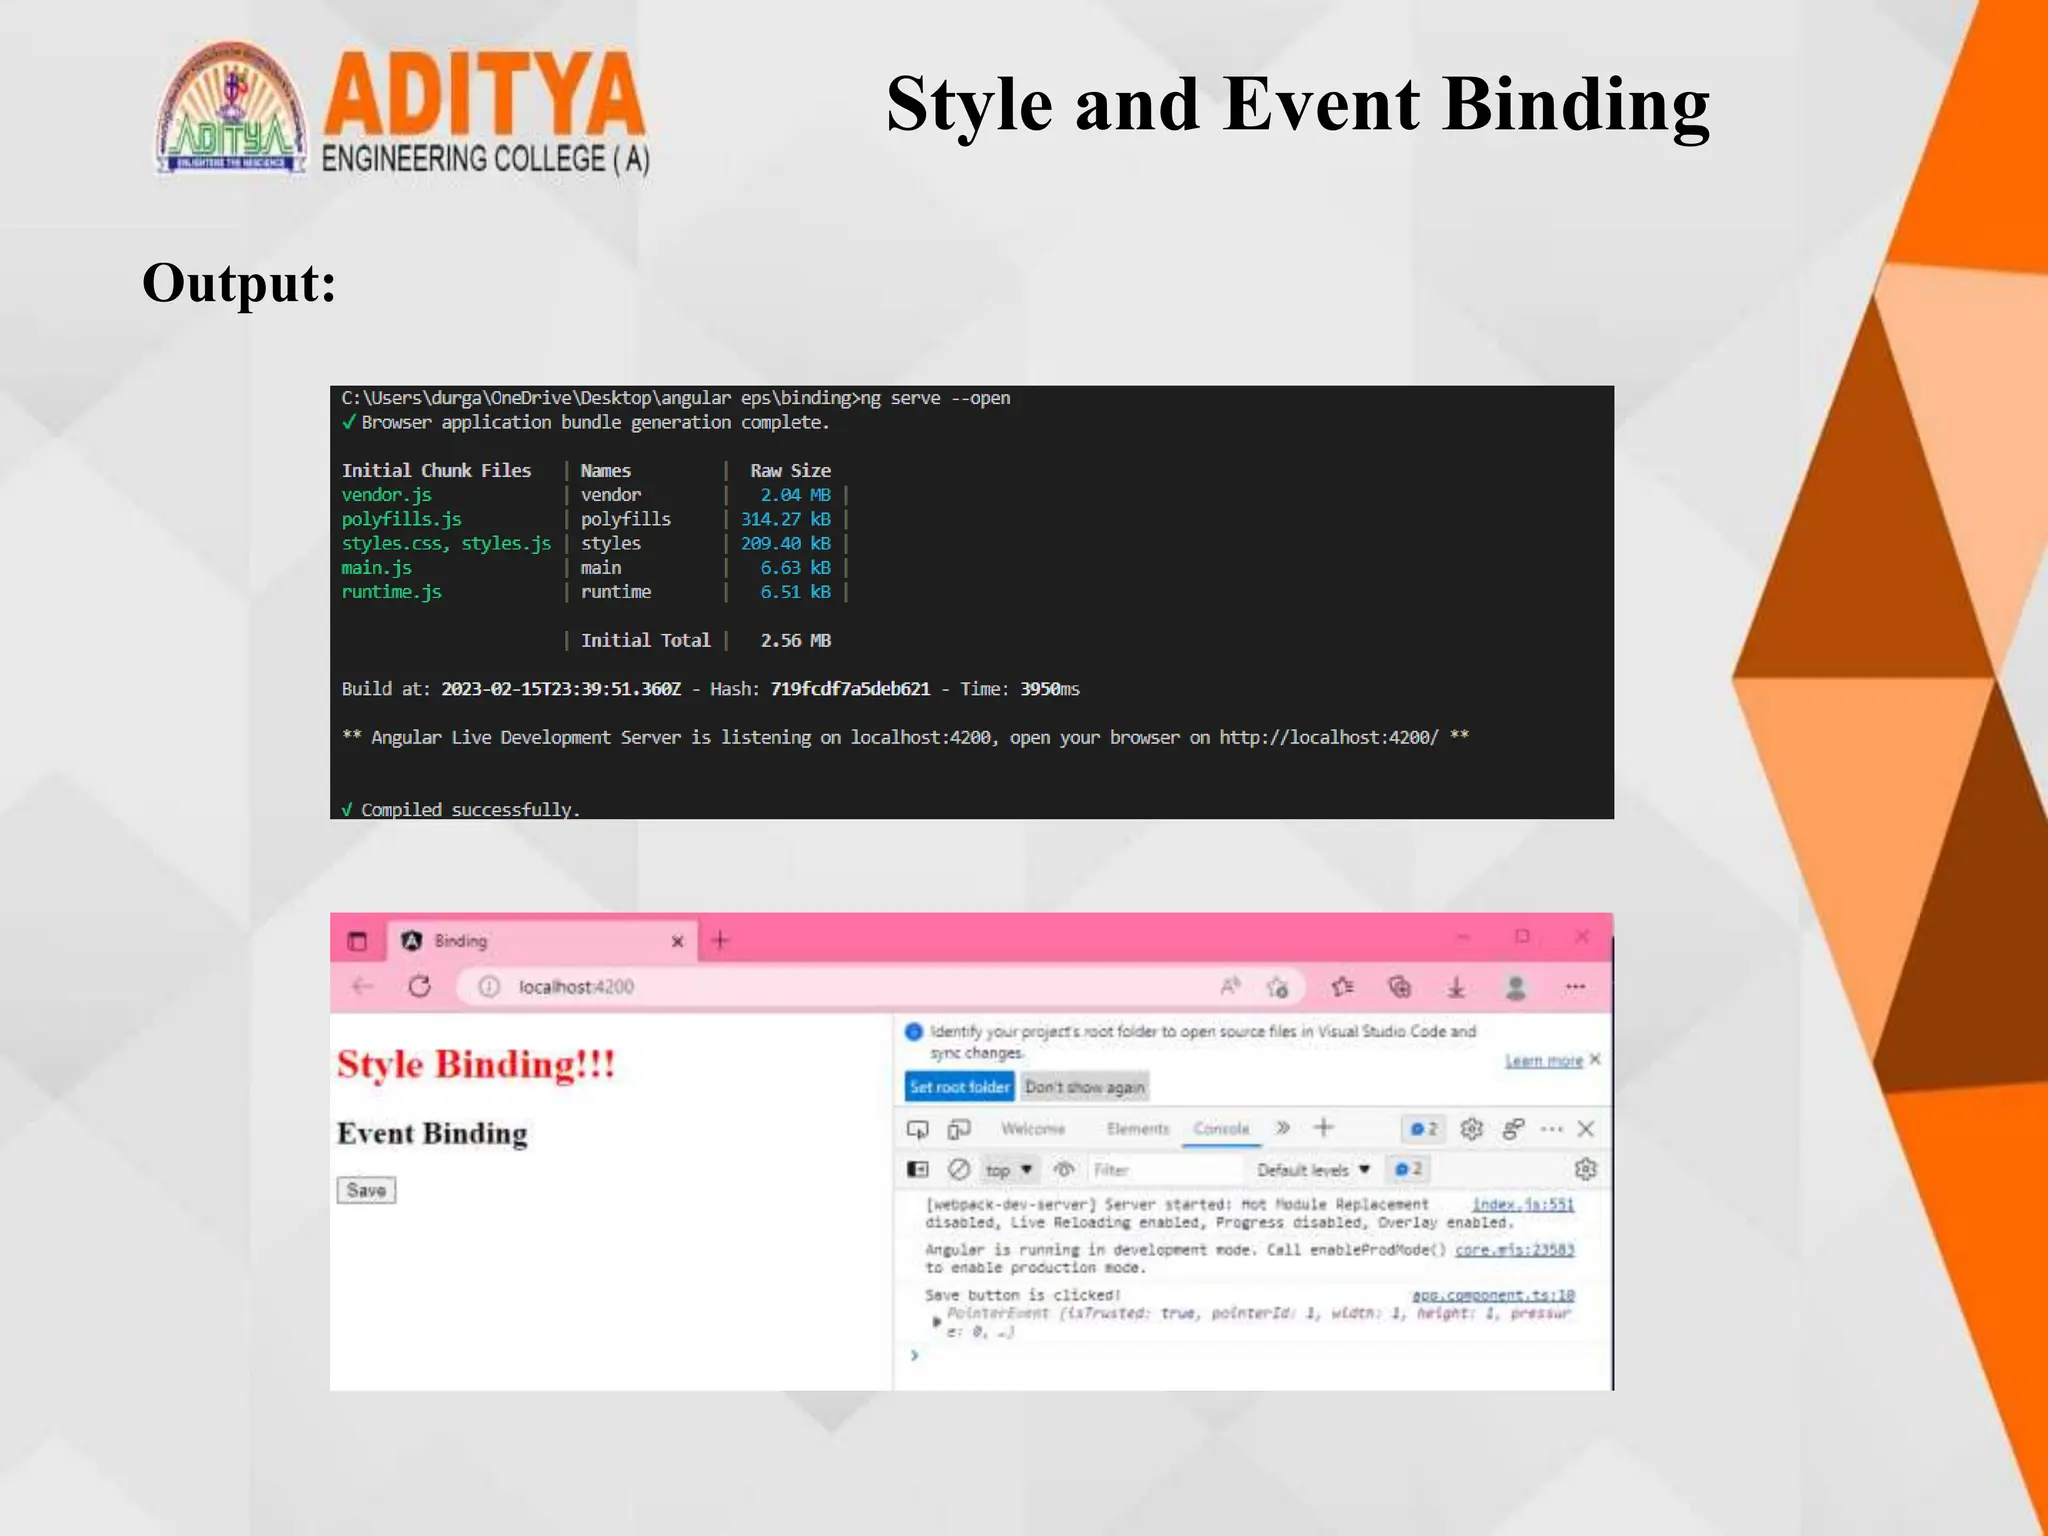
Style and Event Binding
 Style binding is used to set inline styles. Syntax starts with prefix style,
followed by a dot and the name of a CSS style property.
Syntax: [style.styleproperty]
 User actions such as entering text in input boxes, picking items from lists,
button clicks may result in a flow of data in the opposite direction: from an
element to the component.
 Event binding syntax consists of a target event with ( ) on the left of an equal
sign and a template statement on the right.
Syntax: < element (event) = function() >
Example:
app.component.ts
import { Component } from '@angular/core';
@Component({
selector: 'app-root',
templateUrl: './app.component.html',
styleUrls: ['./app.component.css']
})
Style and Event Binding
export class AppComponent {
onSave($event: any){
console.log("Save button is clicked!", $event)
}
}
app.component.html
<h1 [style.color] = "'red'"
[style.text-align] = "'left'" >
Style Binding!!!
</h1>
<h2>Event Binding </h2>
<button (click)="onSave($event)">Save</button>
Style and Event Binding
Output:
Built in Pipes
• Pipes provide a beautiful way of transforming the data inside templates, for
the purpose of display.
• Pipes in Angular take an expression value as an input and transform it into
the desired output before displaying it to the user.
• It provides a clean and structured code as you can reuse the pipes throughout
the application, while declaring each pipe just once.
Syntax: {{ expression | pipe }}
• Uppercase:This pipe converts the template expression into uppercase.
Syntax:{{ expression | uppercase }}
• Lowercase:This pipe converts the template expression into lowercase.
Syntax: {{ expression | lowercase }}
• Titlecase:This pipe converts the first character in each word of the given
expression into a capital letter.
Syntax: {{ expression | titlecase }}
Built in Pipes
Example:
app.component.ts
import { Component } from '@angular/core';
@Component({
selector: 'app-root',
templateUrl: './app.component.html',
styleUrls: ['./app.component.css']})
export class AppComponent {
title = 'product details';
productCode = 'PROD_P001';
productName = 'Laptop';
}
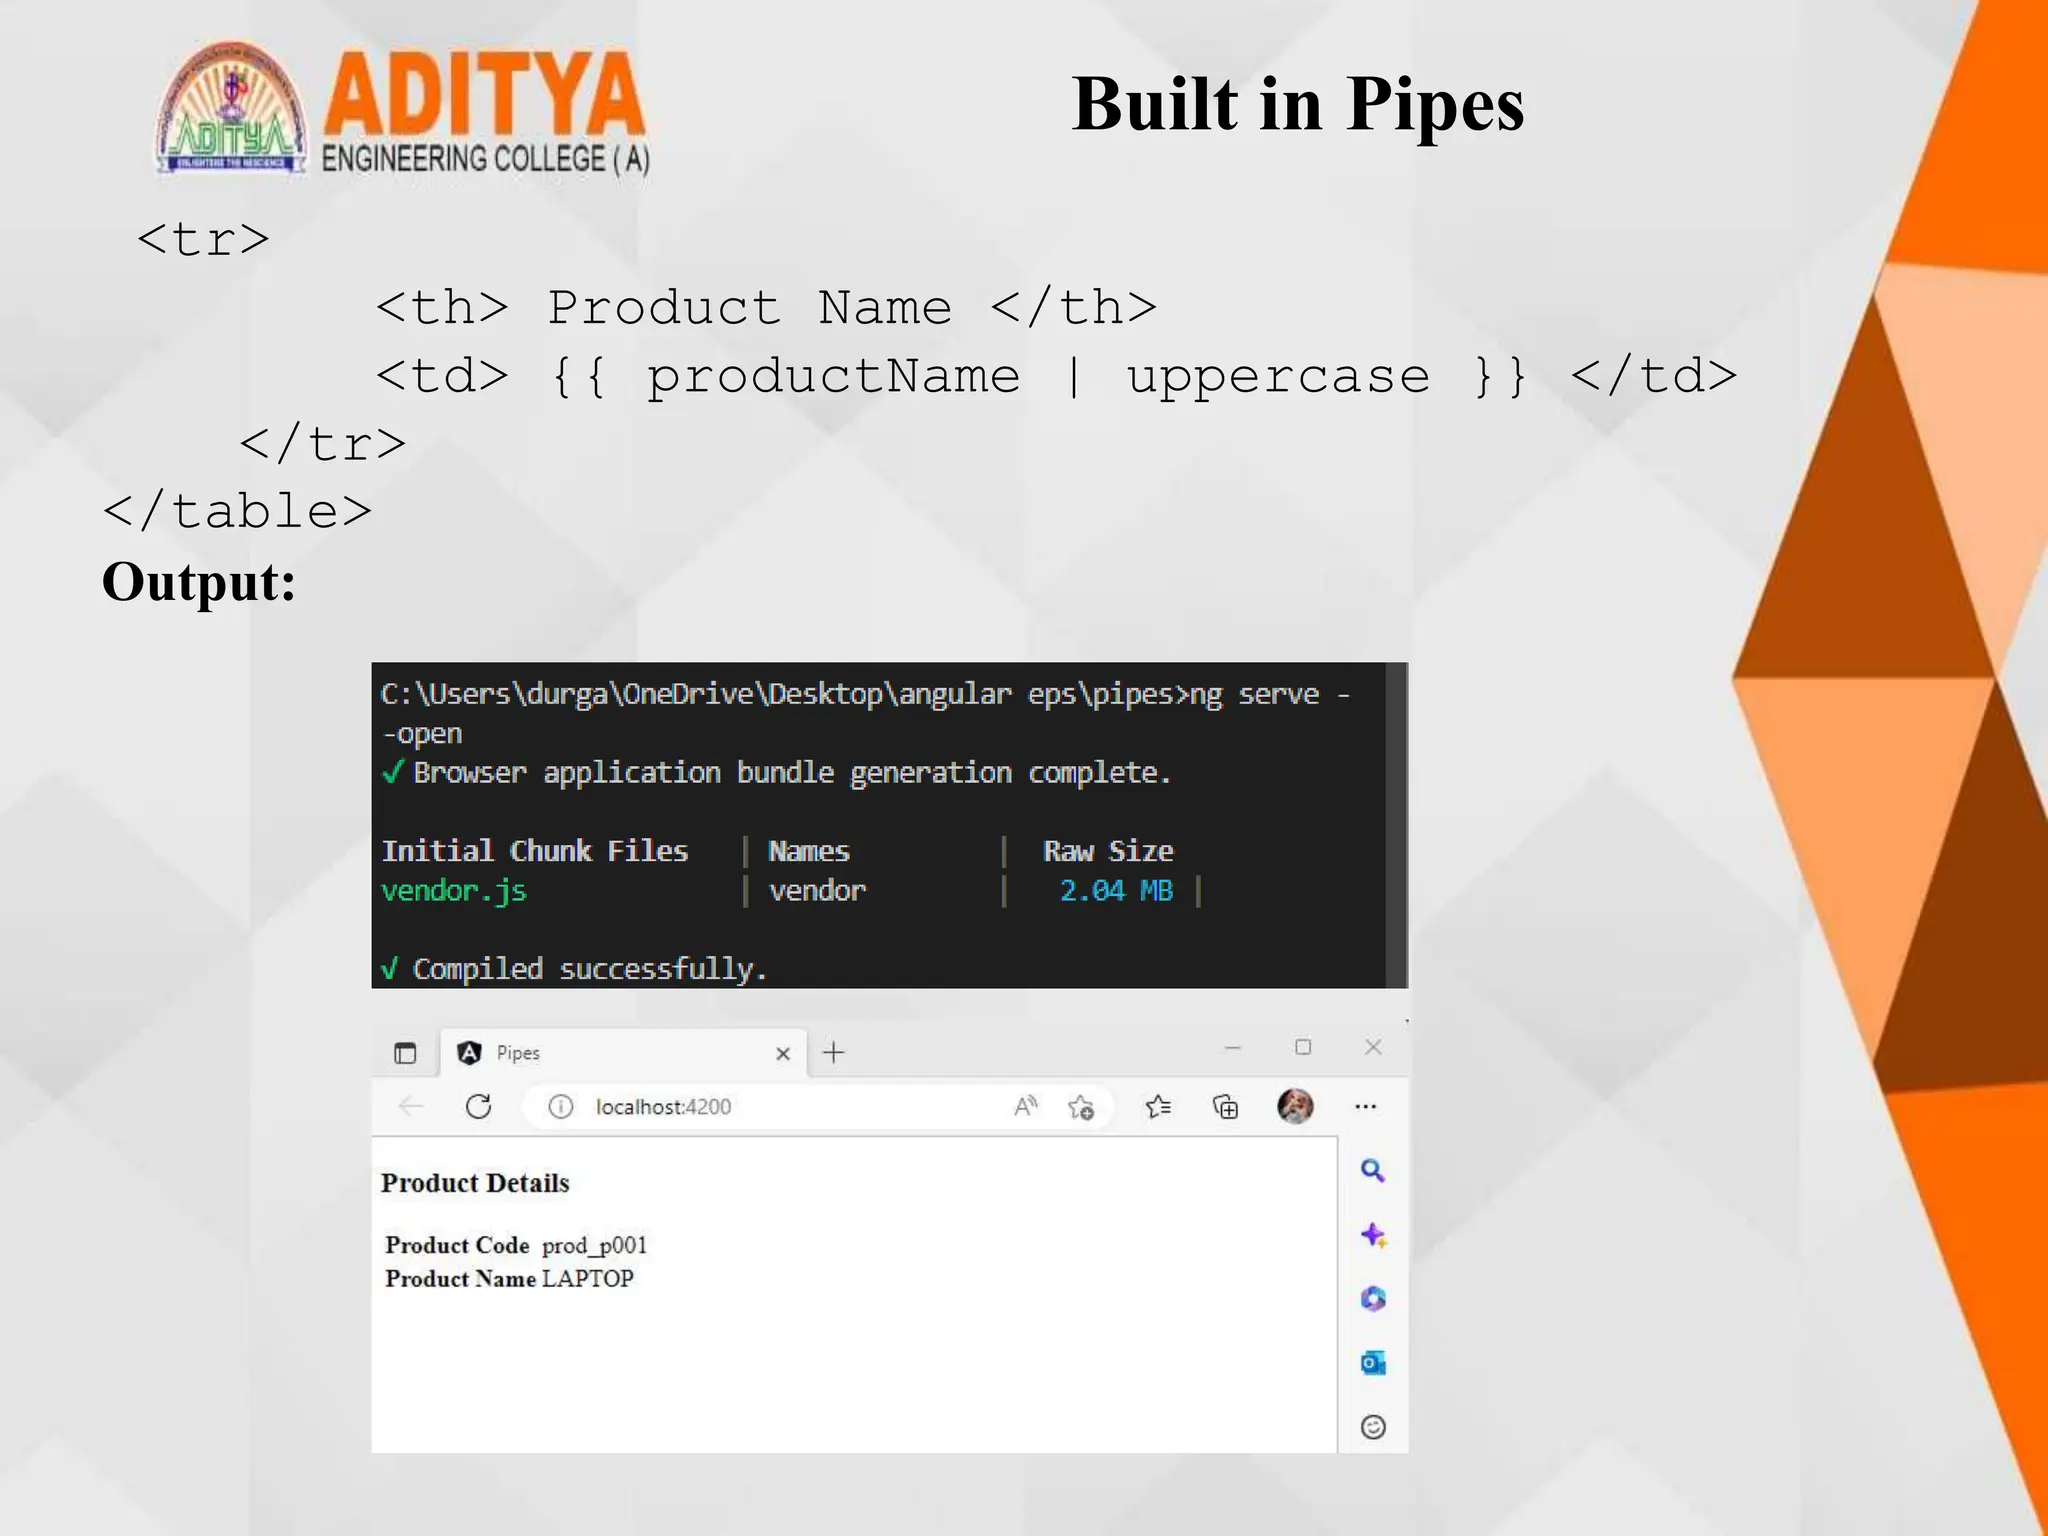
app.component,html
<h3> {{ title | titlecase}} </h3>
<table style="text-align:left">
<tr>
<th> Product Code </th>
<td> {{ productCode | lowercase }} </td>
</tr>
Built in Pipes
<tr>
<th> Product Name </th>
<td> {{ productName | uppercase }} </td>
</tr>
</table>
Output:
Passing Parameters to Pipes
• A pipe can also have optional parameters to change the output. To pass
parameters, after a
• pipe name add a colon( : ) followed by the parameter value.
pipename : parametervalue
• This pipe displays a currency symbol before the expression. By default, it
displays the currency symbol $
{{ expression | currency:currencyCode:symbol:digitInfo:locale }}
Example:
app.component.ts:
import { Component } from '@angular/core';
@Component({
selector: 'app-root',
templateUrl: './app.component.html',
styleUrls: ['./app.component.css']
})
Passing Parameters to Pipes
export class AppComponent {
title = 'product details';
productCode = 'PROD_P001';
productName = 'Apple MPTT2 MacBook Pro';
productPrice = 217021;
purchaseDate = '1/17/2018';
productTax = '0.1';
productRating = 4.92;
}
app.component.html:
<h3> {{ title | titlecase}} </h3>
<table style="text-align:left">
<tr>
<th> Product Code </th>
<td> {{ productCode | slice:5:9 }} </td>
</tr>
Passing Parameters to Pipes
<tr>
<th> Product Name </th>
<td> {{ productName | uppercase }} </td>
</tr>
<tr>
<th> Product Price </th>
<td> {{ productPrice | currency:
'INR':'symbol':'':'fr' }} </td>
</tr>
<tr>
<th> Purchase Date </th>
<td> {{ purchaseDate | date:'fullDate' |
lowercase}} </td>
</tr>
<tr>
<th> Product Tax </th>
<td> {{ productTax | percent : '.2' }} </td>
</tr>
Passing Parameters to Pipes
<tr>
<th> Product Rating </th>
<td>{{ productRating | number:'1.3-5'}} </td>
</tr>
</table>
app.module.ts:
import { NgModule } from '@angular/core';
import { BrowserModule } from '@angular/platform-
browser';
import { AppRoutingModule } from './app-
routing.module';
import { AppComponent } from './app.component';
import { CoursesListComponent } from './courses-
list/courses-list.component';
@NgModule({
declarations: [
AppComponent,
],
Passing Parameters to Pipes
imports: [
BrowserModule,
],
providers: [],
bootstrap: [AppComponent]
})
export class AppModule { }
Output:
Nested Components Basics
• Nested component is a component that is loaded into another component
• The component where another component is loaded onto is called a
container component/parent component.
• The root component is loaded in the index.html page using its selector
name.
• Similarly, to load one component into a parent component, use the
selector name of the component in the template i.e., the HTML page of
the container component.
• Example Program:
app.module.ts
import { NgModule } from '@angular/core';
import { BrowserModule } from '@angular/platform-browser';
import { AppComponent } from './app.component';
import { CourseListComponent } from './course-list/course-
list.component';
Nested Components Basics
@NgModule({
declarations: [
AppComponent,
CourseListComponent,
],
imports: [
BrowserModule,
],
providers: [],
bootstrap: [AppComponent]
})
export class AppModule { }
course-list.component.ts:
import { Component } from '@angular/core';
@Component({
selector: 'app-course-list',
templateUrl: './course-list.component.html',
styleUrls: ['./course-list.component.css']
})
Nested Components Basics
export class CourseListComponent {
courses = [
{ courseId: 1, courseName: "Node JS" },
{ courseId: 2, courseName: "Typescript" },
{ courseId: 3, courseName: "Angular" },
{ courseId: 4, courseName: "React JS" }
];
}
course.component.html:
<table border="1">
<thead>
<tr>
<th>Course ID</th>
<th>Course Name</th>
</tr>
</thead>
Nested Components Basics
<tbody>
<tr *ngFor="let course of courses">
<td>{{ course.courseId }}</td>
<td>{{ course.courseName }}</td>
</tr>
</tbody>
</table>
course-list.component.css:
tr{
text-align:center;
}
app.component.html:
<h2>Popular Courses</h2>
<button (click)="show = true">View Courses
list</button><br /><br />
<div *ngIf="show">
<app-course-list></app-course-list>
</div>
Nested Components Basics
app.component.ts:
import { Component } from '@angular/core';
@Component({
selector: 'app-root',
templateUrl: './app.component.html',
styleUrls: ['./app.component.css']
})
export class AppComponent {
show!: boolean;
title: any;
}
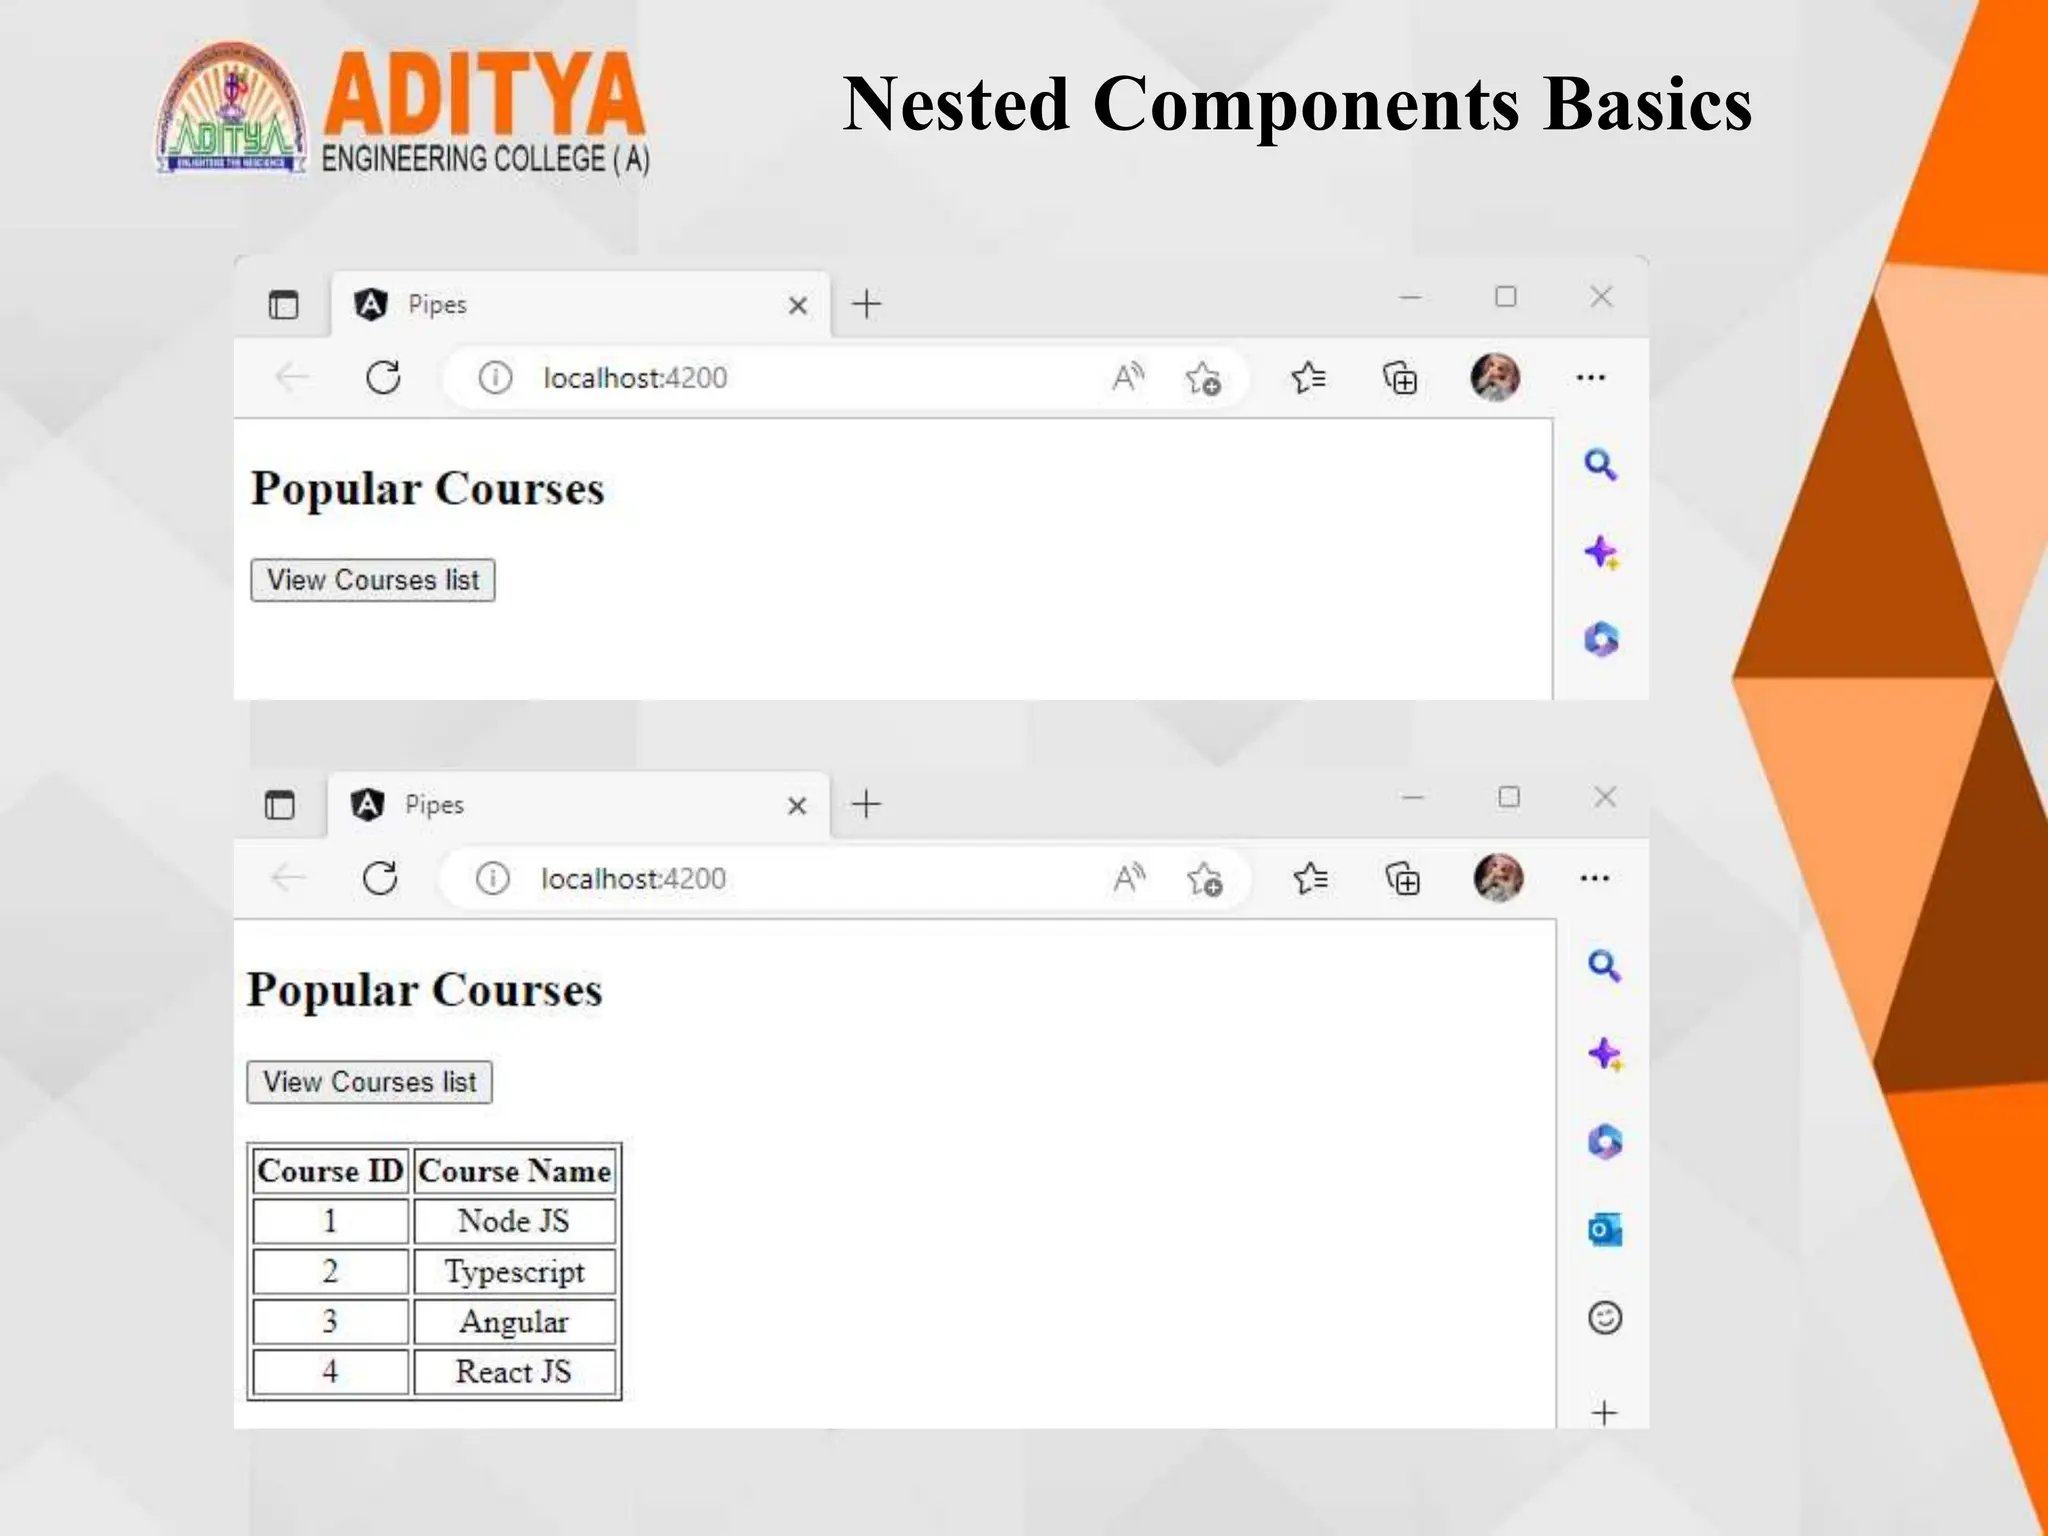
Output:
Nested Components Basics
Passing data from Container
Component to Child Component
• Component communication is needed if data needs to be shared between
the components In order to pass data from container/parent component to
child component, @Input decorator can be used.
• A child component can use @Input decorator on any property type like
arrays, objects, etc. making it a data-bound input property.
• The parent component can pass value to the data-bound input property
when rendering the child within it.
• Program:
courses-list.component.ts:
import { Component, Input } from '@angular/core';
@Component({
selector: 'app-course-list',
templateUrl: './course-list.component.html',
styleUrls: ['./course-list.component.css']
})
Passing data from Container
Component to Child Component
• Component communication is needed if data needs to be shared between
the components In order to pass data from container/parent component to
child component, @Input decorator can be used.
• A child component can use @Input decorator on any property type like
arrays, objects, etc. making it a data-bound input property.
• The parent component can pass value to the data-bound input property
when rendering the child within it.
Program:
courses-list.component.ts:
import { Component, Input } from '@angular/core';
@Component({
selector: 'app-course-list',
templateUrl: './course-list.component.html',
styleUrls: ['./course-list.component.css']
})
Passing data from Container
Component to Child Component
export class CourseListComponent {
courses = [
{ courseId: 1, courseName: "Node JS" },
{ courseId: 2, courseName: "Typescript" },
{ courseId: 3, courseName: "Angular" },
{ courseId: 4, courseName: "React JS" }
];
course!: any[];
@Input() set cName(name: string) {
this.course = [];
for (var i = 0; i < this.courses.length; i++) {
if (this.courses[i].courseName === name) {
this.course.push(this.courses[i]);
}
}
}
}
Passing data from Container
Component to Child Component
course-list.component.html:
<table border="1">
<thead>
<tr>
<th>Course ID</th>
<th>Course Name</th>
</tr>
</thead>
<tbody>
<tr *ngFor="let course of courses">
<td>{{c.courseId}}</td>
<td>{{c.courseName}}</td>
</tr>
</tbody>
</table>
Passing data from Container
Component to Child Component
app.component.html:
<h2>Course Details</h2>
Select a course to view
<select #course (change)="name = course.value">
<option value="Node JS">Node JS</option>
<option value="Typescript">Typescript</option>
<option value="Angular">Angular</option>
<option value="React JS">React JS</option></select
><br /><br />
<app-courses-list [cName]="name"></app-courses-list>
app.component.ts:
import { Component } from '@angular/core';
@Component({
selector: 'app-root',
styleUrls: ['./app.component.css'],
templateUrl: './app.component.html'
})
Passing data from Container
Component to Child Component
export class AppComponent {
name!: string;
}
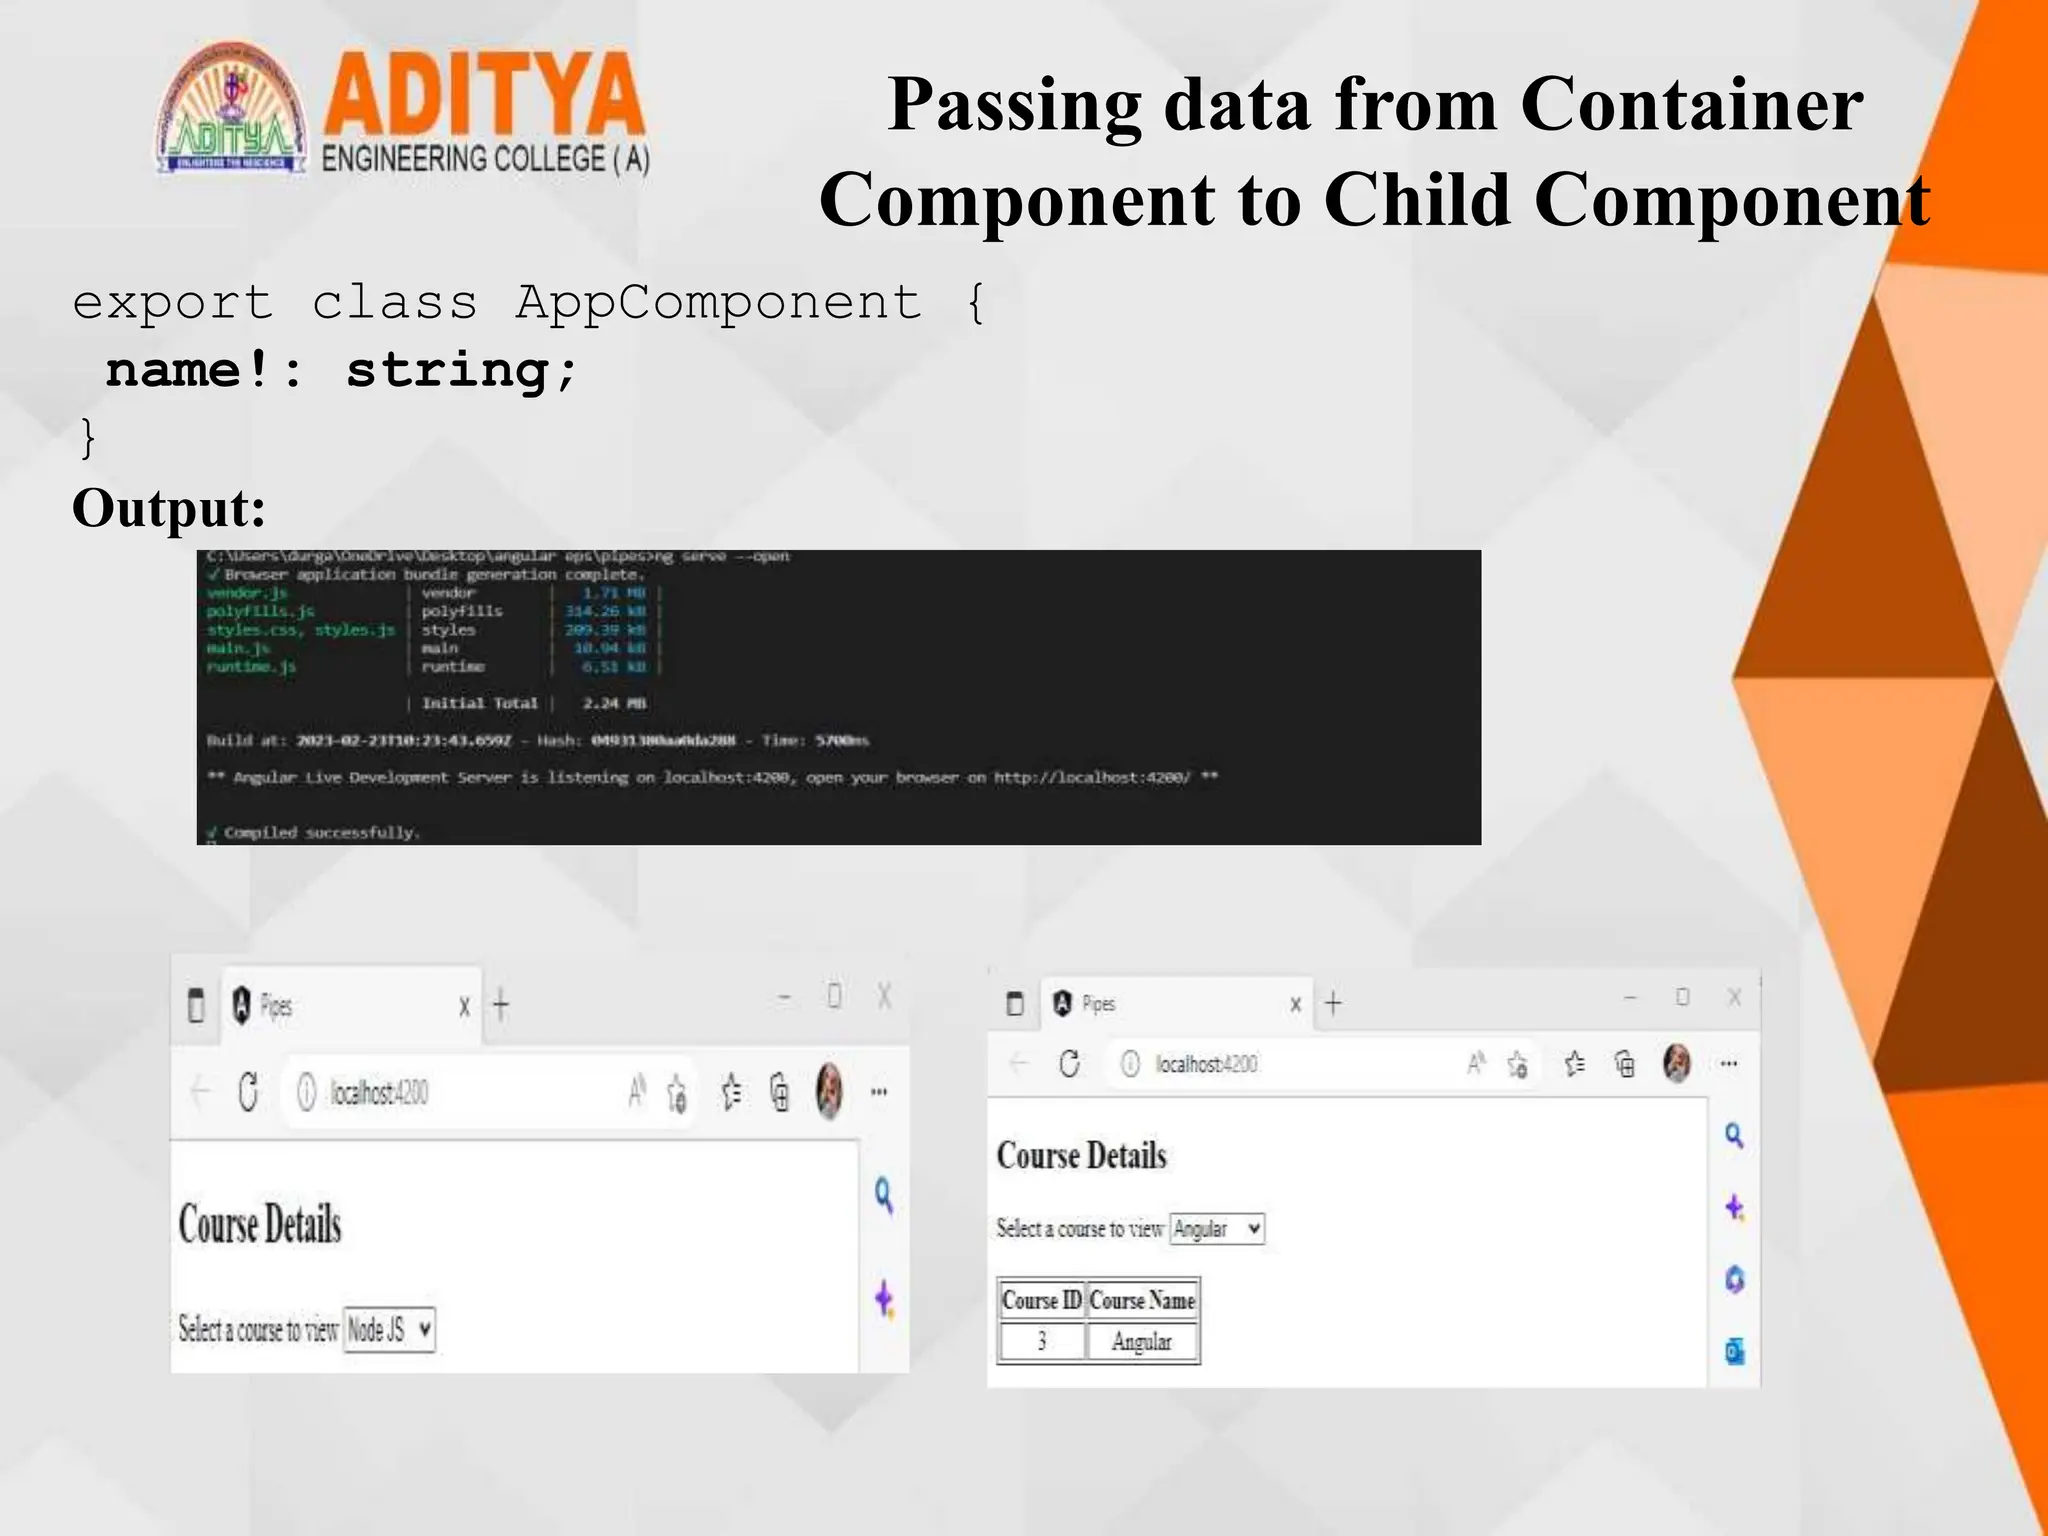
Output:
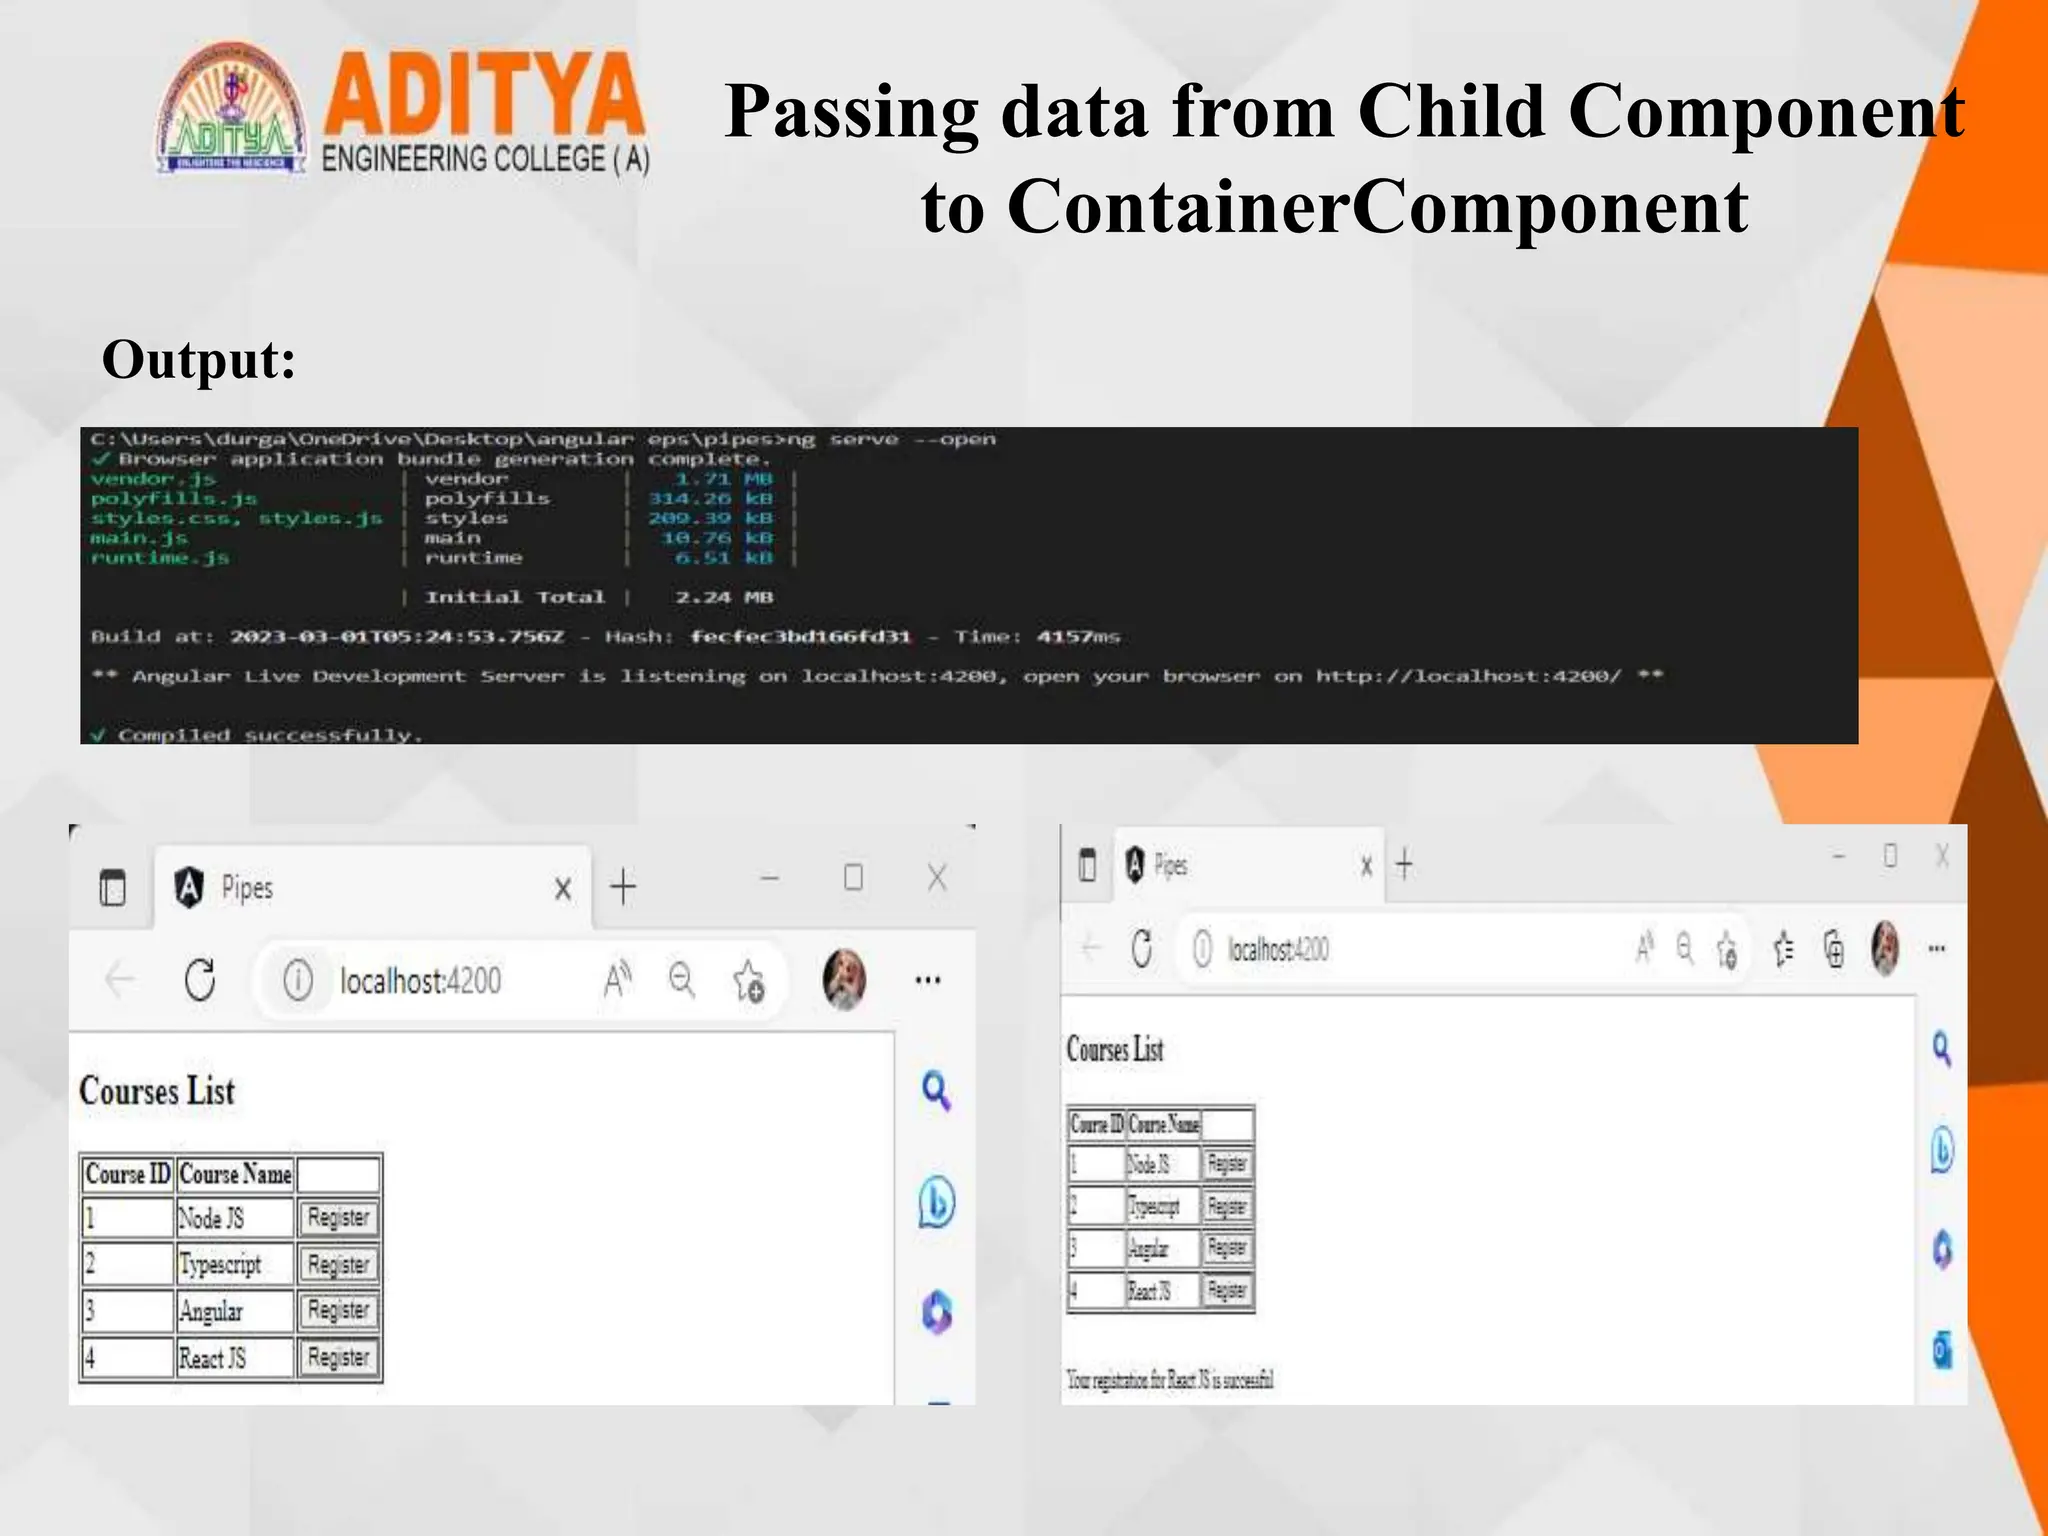
Passing data from Child Component
to ContainerComponent
• If a child component wants to send data to its parent component, then it must
create a property with @Output decorator.
• The only method for the child component to pass data to its parent
component is through events. The property must be of type EventEmitter.
Program:
course-list.compnent.ts
import { Component,OnInit, Input,Output, EventEmitter
} from '@angular/core';
@Component({
selector: 'app-courses-list',
templateUrl: './course-list.component.html',
styleUrls: ['./course-list.component.css'],
})
export class CoursesListComponent {
courses = [
{ courseId: 1, courseName: 'Node JS' },
{ courseId: 2, courseName: 'Typescript' },
Passing data from Child Component
to ContainerComponent
{ courseId: 3, courseName: 'Angular' },
{ courseId: 4, courseName: 'React JS' },
];
registerEvent: any;
register(courseName:string){
this.registerEvent.emit(courseName);
}
}
course-list.component.html
<table border="1">
<thead>
<tr>
<th>Course ID</th>
<th>Course Name</th>
<th></th>
</tr>
</thead>
Passing data from Child Component
to ContainerComponent
<tbody>
<tr *ngFor="let course of courses">
<td>{{ course.courseId }}</td>
<td>{{ course.courseName }}</td>
<td><button
(click)="register(course.courseName)">Register</button
></td>
</tr>
</tbody>
</table>
app.component.html
<h2>Courses List</h2>
<app-courses-list
(registerEvent)="courseReg($event)"></app-courses-
list>
<br /><br />
<div *ngIf="message">{{ message }}</div>
Passing data from Child Component
to ContainerComponent
app.component.ts
import { Component } from '@angular/core';
@Component({
selector: 'app-root',
styleUrls: ['./app.component.css'],
templateUrl: './app.component.html'
})
export class AppComponent {
message!: string;
courseReg(courseName: string) {
this.message = `Your registration for
${courseName} is successful`;
}
}
Passing data from Child Component
to ContainerComponent
Output:
Shadow DOM
• Shadow DOM is a web components standard by W3C.
• It enables encapsulation for DOM tree and styles. Shadow DOM hides DOM
logic behind other elements and confines styles only for that
component.ViewEncapsulation.ShadowDOM enables Angular to use the
browser's native Shadow DOM implementation.
• Angular doesn’t use shadow DOM in ViewEncapsulation.None.
• All the styles defined in a component is applied to the entire document. i.e., a
component can overwrite another component’s styles. This is an unscoped
strategy.
Program:
ViewEncapsulation.ShadowDOM:
Create a component first using ng generate component first
Shadow DOM
First.component.css:
.cmp {
padding: 6px;
margin: 6px;
border: blue 2px solid;
}
First.component.html:
<div class="cmp">First Component</div>
Now generate another component with name Second using ng generate second
Shadow DOM
Second.component.css
.cmp {
border: green 2px solid;
padding: 6px;
margin: 6px;
}
Second.component.html
<div class="cmp">Second Component</div>
Second.component.ts
import { Component, ViewEncapsulation } from
'@angular/core';
@Component({
selector: 'app-second',
templateUrl: './second.component.html',
styleUrls: ['./second.component.css'],
encapsulation: ViewEncapsulation.ShadowDom
})
export class SecondComponent {}
Shadow DOM
App.component.css
.cmp {
padding: 8px;
margin: 6px;
border: 2px solid red;
}
App.component.html
<h3>CSS Encapsulation with Angular</h3>
<div class="cmp">
App Component
<app-first></app-first>
<app-second></app-second>
</div>
Shadow DOM
Output:
ViewEncapsulation.None
App.component.ts:
import { Component, ViewEncapsulation } from
'@angular/core';
@Component({
selector: 'app-root',
styleUrls: ['./app.component.css'],
templateUrl: './app.component.html',
encapsulation: ViewEncapsulation.None
})
export class AppComponent {}
Shadow DOM
Second.component.ts:
import { Component, ViewEncapsulation } from
'@angular/core';
@Component({
selector: 'app-second',
templateUrl: './second.component.html',
styleUrls: ['./second.component.css'],
encapsulation: ViewEncapsulation.None
})
export class SecondComponent {
}
Output:
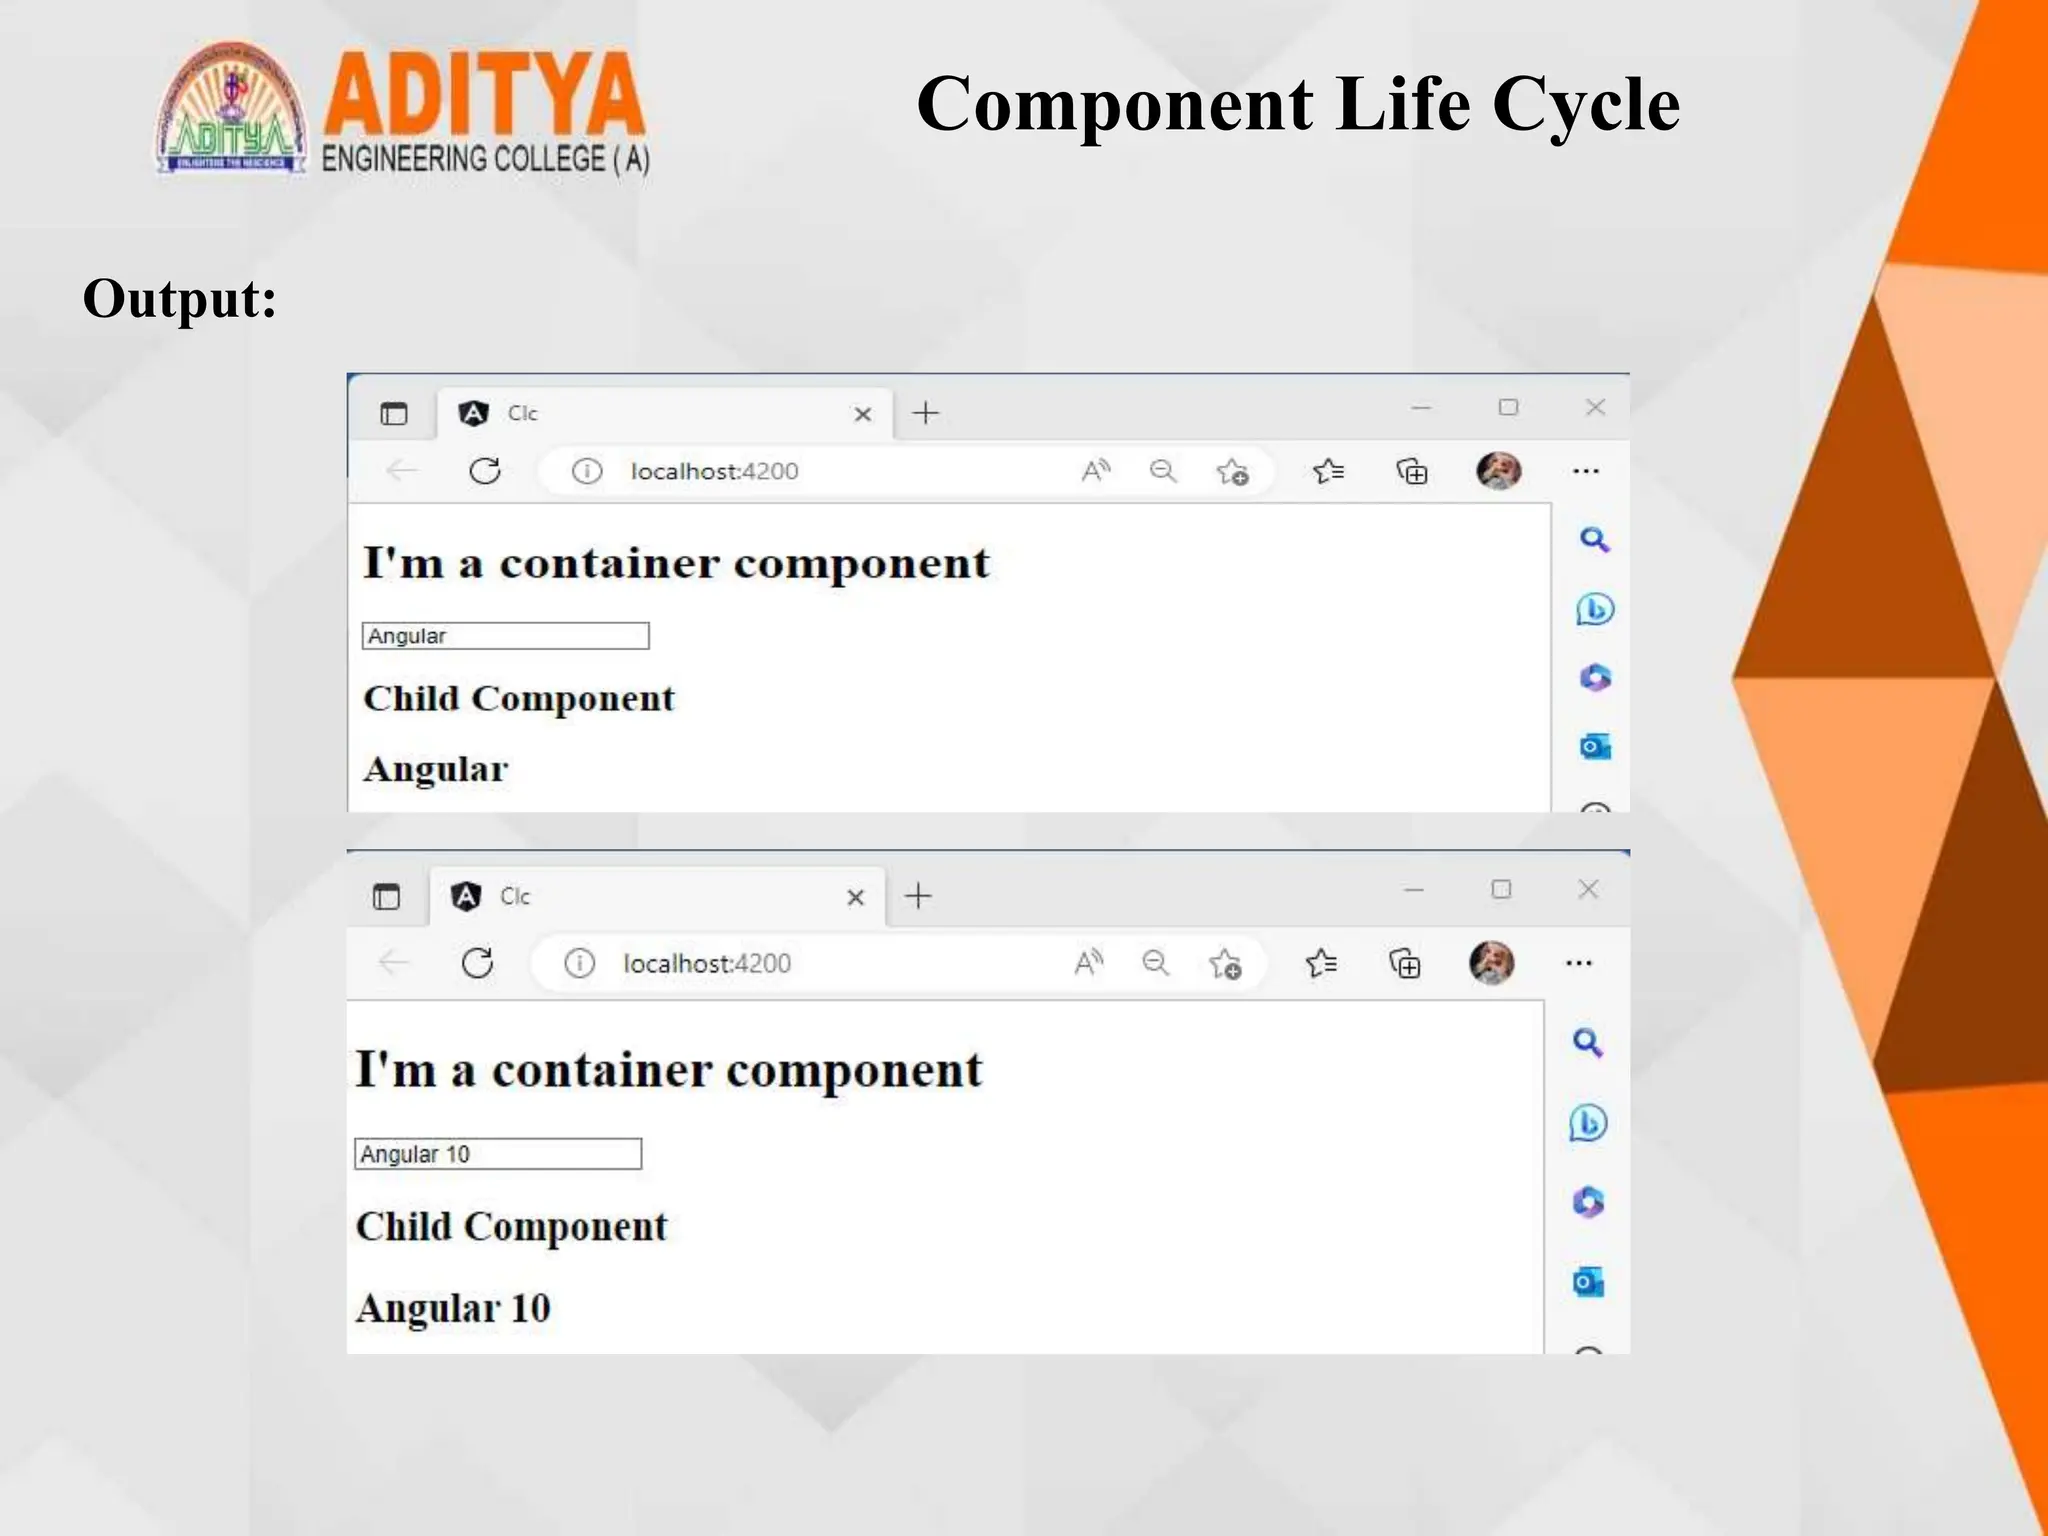
Component Life Cycle
• A component has a life cycle that is managed by Angular.
• It includes creating a component, rendering it, creating and rendering its
child components, checks when its data-bound properties change, and
destroy it before removing it from the DOM.
• Angular has some methods/hooks which provide visibility into these key
life moments of a component and the ability to act when they occur.
ngOnChanges – It gets invoked when Angular sets data-bound input property
i.e., the property attached with @Input(). This will be invoked whenever input
property changes its value
ngOnInit – It gets invoked when Angular initializes the directive or
component
ngDoCheck - It will be invoked for every change detection in the application
ngAfterContentInit – It gets invoked after Angular projects content into its
view
ngAfterContentChecked – It gets invoked after Angular checks the bindings
of the content it projected into its view
Component Life Cycle
Program:
app.component.ts:
import { Component, OnInit, DoCheck,
AfterContentInit, AfterContentChecked,AfterViewInit,
AfterViewChecked,OnDestroy } from '@angular/core';
@Component({
---------------
})
export class AppComponent implements OnInit, DoCheck,
AfterContentInit, AfterContentChecked,
AfterViewInit, AfterViewChecked,
OnDestroy {
data = 'Angular';
ngOnInit() {
console.log('Init');
}
Component Life Cycle
ngDoCheck(): void {
console.log('Change detected');
}
ngAfterContentInit(): void {
console.log('After content init');
}
ngAfterContentChecked(): void {
console.log('After content checked');
}
ngAfterViewInit(): void {
console.log('After view init');
}
ngAfterViewChecked(): void {
console.log('After view checked');
}
ngOnDestroy(): void {
console.log('Destroy'); }
}
Component Life Cycle
app.component.html:
<div>
<h1>I'm a container component</h1>
<input type="text" [(ngModel)]="data" />
<app-child [title]="data"></app-child>
</div>
Create child component using the command ng generate component child.
child.component.ts:
import { Component, OnChanges, Input }
from'@angular/core';
@Component({
-------------})
export class ChildComponent implements OnChanges {
@Input() title!: string;
ngOnChanges(changes: any): void {
console.log('changes in child:' +
JSON.stringify(changes));
} }
Component Life Cycle
child.component.html:
<h2>Child Component</h2>
<h2>{{title}}</h2>
app.module.ts:
import { NgModule } from '@angular/core’;
--------------
import { FormsModule } from '@angular/forms’;
--------------------------
imports: [
BrowserModule,
AppRoutingModule,
FormsModule
],
providers: [],
bootstrap: [AppComponent],
})
export class AppModule { }
Component Life Cycle
Output:
Template Driven Forms
• Template-driven forms are the forms that are created using Angular template
syntax. In template-driven form, data binding, validation, etc., will be written
in the template itself.
• create a component called CourseFormComponent using the following
command
• D:>ng generate component courseForm
Program:
course.ts:
export class Course {
constructor(
public courseId: number,
public courseName: string,
public duration: string
) { }
}
Template Driven Forms
course-form.component.ts:
import { Component } from '@angular/core';
import { Course } from './course’;
-----------
export class CourseFormComponent {
course = new Course(1, 'Angular', '5 days');
submitted = false;
onSubmit() { this.submitted = true; }}
Install Boostrap
PS D:...form> npm install bootstrap@3.3.7 --save
angular.json :
"styles": [
"styles.css",
"./node_modules/bootstrap/dist/css/bootstrap.min.css"
],
Template Driven Forms
course-form.component.html :
<div class="container">
<div [hidden]="submitted">
<h1>Course Form</h1>
<form (ngSubmit)="onSubmit()" #courseForm="ngForm">
<div class="form-group">
<label for="id">Course Id</label>
<input type="text" class="form-control"
required [(ngModel)]="course.courseId" name="id"
#id="ngModel">
<div [hidden]="id.valid || id.pristine"
class="alert alert-danger">
Course Id is required
</div></div> <div class="form-group">
<label for="name">Course Name</label>
<input type="text" class="form-control"
required [(ngModel)]="course.courseName" name="name"
#name="ngModel">
-------------------------------
Template Driven Forms
<button type="submit" class="btn btn-default"
[disabled]="!courseForm.form.valid">Submit</button>
<button type="button" class="btn btn-default"
(click)="courseForm.reset()">New Course</button>
</form>
</div>
<div [hidden]="!submitted">
<h2>You submitted the following:</h2>
<div class="row">
<div class="col-xs-3">Course ID</div>
<div class="col-xs-9 pull-left">{{
course.courseId }}</div>
</div><div class="row">
<div class="col-xs-3">Course Name</div>
<div class="col-xs-9 pull-left">{{
course.courseName }}</div>
<br><button class="btn btn-default"
(click)="submitted=false">Edit</button>
</div></div>
Template Driven Forms
course-form.component.css:
input.ng-valid[required] {
border-left: 5px solid #42A948; /* green */
}
input.ng-dirty.ng-invalid:not(form) {
border-left: 5px solid #a94442; /* red */
}
app.component.html:
<app-course-form></app-course-form>
app.module.ts:
import { NgModule } from '@angular/core';
import { FormsModule } from '@angular/forms’;
---------------------------
Template Driven Forms
imports: [
BrowserModule,
FormsModule
],
providers: [],
bootstrap: [AppComponent]
})
export class AppModule { }
Output:
Model Driven Forms or
Reactive Forms
• In reactive forms, you can control the form completely from the component
class and hence you will get direct, explicit access to the underlying forms
object model.
• Hence, reactive forms are also known as 'model-driven forms'. As reactive
forms are more robust and scalable, they are more suitable for creating all kind
of forms in an application, irrespective of the size of form.
app.module.ts:
import { NgModule } from '@angular/core';
import { ReactiveFormsModule } from '@angular/forms’;
--------------------
import { RegistrationFormComponent } from
'./registration-form/registration-form.component';
imports: [
BrowserModule,
ReactiveFormsModule
],
----------------------
})export class AppModule { }
Model Driven Forms or
Reactive Forms
Command:ng generate component RegistrationForm
Install Bootstrap:
Command: npm install bootstrap@3.3.7 --save
registration-form.component.ts:
import { Component, OnInit } from '@angular/core';
import { FormBuilder, FormGroup, Validators } from
'@angular/forms’;
------------------------
export class RegistrationFormComponent implements
OnInit {
registerForm!: FormGroup;
submitted!:boolean;
Model Driven Forms or
Reactive Forms
constructor(private formBuilder: FormBuilder) { }
ngOnInit() {
this.registerForm = this.formBuilder.group({
firstName: ['', Validators.required],
lastName: ['', Validators.required],
address: this.formBuilder.group({
street: [],
zip: [],
city: []
})
});
}
}
registration-form.component.html:
<div class="container">
<h1>Registration Form</h1>
<form [formGroup]="registerForm">
Model Driven Forms or
Reactive Forms
<div class="form-group">
<label>First Name</label>
<input type="text" class="form-control"
formControlName="firstName">
----------------------------------------
<label>Last Name</label>
<input type="text" class="form-control"
formControlName="lastName">
----------------------
<div class="form-group">
<fieldset formGroupName="address">
<legend>Address:</legend>
<label>Street</label>
<input type="text" class="form-control"
formControlName="street">
<label>Zip</label>
Model Driven Forms or
Reactive Forms
<input type="text" class="form-control"
formControlName="zip">
<label>City</label>
<input type="text" class="form-control"
formControlName="city">
</fieldset>
</div>
<button type="submit" class="btn btn-primary"
(click)="submitted=true">Submit</button>
</form>
<br/>
<div [hidden]="!submitted">
<h3> Employee Details </h3>
<p>First Name: {{
registerForm.get('firstName')?.value }} </p>
Model Driven Forms or
Reactive Forms
<p> Last Name: {{ registerForm.get('lastName')?.value
}} </p>
<p> Street: {{
registerForm.get('address.street')?.value }}</p>
<p> Zip: {{
registerForm.get('address.zip')?.value }} </p>
<p> City: {{
registerForm.get('address.city')?.value }}</p>
</div>
</div>
registration-form.component.css:
.ng-valid[required] {
border-left: 5px solid #42A948; /* green */
}
.ng-invalid:not(form) {
border-left: 5px solid #a94442; /* red */ }
Model Driven Forms or
Reactive Forms
app.component.html:
<app-registration-form></app-registration-form>
Output:
Custom Validators in
Reactive Forms
 Custom validation can be applied to form controls of a Reactive Form in
Angular.
 Custom validators are implemented as separate functions inside the
component.ts file.
 these functions can be added to the list of other validators configured for a
form control.
Program:
registration-form.component.ts:
import { Component, OnInit } from '@angular/core’;
---------------------------
export class RegistrationFormComponent implements
OnInit {
registerForm!: FormGroup;
submitted!:boolean;
constructor(private formBuilder: FormBuilder) { }
ngOnInit() {
Custom Validators in
Reactive Forms
this.registerForm = this.formBuilder.group({
firstName: ['', Validators.required],
lastName: ['', Validators.required],
address: this.formBuilder.group({
street: [],
zip: [],
city: []
}),
email: ['',[Validators.required,validateEmail]]
});}}
function validateEmail(c: FormControl): any {
let EMAIL_REGEXP = /^([a-zA-Z0-9_-.]+)@([a-zA-Z0-
9_-.]+).([a-zA-Z]{2,5})$/;
return EMAIL_REGEXP.test(c.value) ? null : {
emailInvalid: {
message: "Invalid Format!"
}};}
Custom Validators in
Reactive Forms
registration-form.component.html:
<div class="container">
------------------------------------
<h1>Registration Form</h1>
<form [formGroup]="registerForm">
<div [hidden]="!submitted">
<h3> Employee Details </h3>
<p>First Name: {{
registerForm.get('firstName')?.value }} </p>
<p> Last Name: {{
registerForm.get('lastName')?.value }} </p>
-----------------------------------------
<p> Street: {{
registerForm.get('address.street')?.value }}</p>
<p> City: {{ registerForm.get('address.city')?.value
}}</p>
<p>Email: {{ registerForm.get('email')?.value
}}</p></div></div>
Custom Validators in
Reactive Forms
Output:
Custom Validators in
Template Driven forms
• While creating forms, there can be situations for validations for which built-in
validators are not available.
• Few such examples include validating a phone number, validating if the
password and confirm password fields matches or not, etc.
• In such situations, we can create custom validators to implement the required
functionality.
Program:
course.ts:
export class Course {
constructor(
public courseId: number,
public courseName: string,
public duration: string,
public email: string
) { }
}
Custom Validators in
Template Driven forms
course-form.component.ts:
import { Component } from '@angular/core';
import { Course } from './course’;
-------------------
export class CourseFormComponent {
course: Course = new Course(1, 'Angular 2', '4 days',
'devikan4353@gmail.com');
submitted = false;
onSubmit() { this.submitted = true; }
}
email.validator.ts:
import { Directive } from '@angular/core';
import { NG_VALIDATORS, FormControl, Validator } from
'@angular/forms';
@Directive({
selector: '[validateEmail]',
------------------------- })
Custom Validators in
Template Driven forms
export class EmailValidator implements Validator {
validate(control: FormControl): any {
const emailRegexp =
/^([a-zA-Z0-9_-.]+)@([a-zA-Z0-9_-.]+).([a-
zA-Z]{2,5})$/;
if (!emailRegexp.test(control.value)) {
return { emailInvalid: 'Email is invalid' };
}
return null;
}
}
app.module.ts:
import { FormsModule } from '@angular/forms’;
----------------------------
import { EmailValidator } from './course-
form/email.validator';
Custom Validators in
Template Driven forms
@NgModule({
declarations: [
AppComponent,
CourseFormComponent,
EmailValidator
],
--------------------------
})
export class AppModule { }
course-form.component.html:
<div class="container">
<div [hidden]="submitted">
<h1>Course Form</h1>
<form (ngSubmit)="onSubmit()" #courseForm="ngForm">
<div class="form-group">
<label for="id">Course Id</label>
-------------------------------
Custom Validators in
Template Driven forms
<div class="form-group">
<label for="name">Course Name</label>
-------------------------------
<div [hidden]="duration.valid || duration.pristine"
class="alert alert-danger">Duration is required</div>
</div>
-------------------------------
<div [hidden]="!submitted">
<h2>You submitted the following:</h2>
--------------------------------
<div class="row">
<div class="col-xs-3">Email</div>
<div class="col-xs-9 pull-left">{{ course.email
}}</div></div>
<br><button class="btn btn-default"
(click)="submitted=false">Edit</button>
</div></div>
Custom Validators in
Template Driven forms
App.component.html:
<app-course-form></app-course-form>
Output:
Services Basics
• A service in Angular is a class that contains some functionality that can be
reused across the application. A service is a singleton object. Angular services
are a mechanism of abstracting shared code and functionality throughout the
application.
• Angular Services come as objects which are wired together using dependency
injection.
• Angular provides a few inbuilt services also can create custom services.
• Services can be used to:
1.share the code across components of an application.
2.make HTTP requests.
• Create a new component: ng generate component book
• Creating a Service
• To create a service class, use the following command:
• Command: ng generate service book
Services Basics
Program:
book.ts:
export class Book {
id!: number;
name!: string;}
books-data.ts:
import { Book } from './book';
export let BOOKS: Book[] = [{ id: 1, name: 'HTML 5' },
{ id: 2, name: 'CSS 3' },
{ id: 3, name: 'Java Script' },
{ id: 4, name: 'Ajax Programming' },
{ id: 5, name: 'jQuery' },
{ id: 6, name: 'Mastering Node.js' },
{ id: 7, name: 'Angular JS 1.x' },
{ id: 8, name: 'Core Java' },
{ id: 9, name: 'Backbone JS' },{ id: 10, name:
'MongoDB Basics’ } ];
Services Basics
book.service.ts:
import { Injectable } from '@angular/core';
import { BOOKS } from './book.data';
@Injectable({
providedIn: 'root'
})
export class BookService {
getBooks() {
return BOOKS; }}
book.component.ts:
import { Component, OnInit } from '@angular/core';
import { Book } from './book';
import { BookService } from './book.service';
@Component({
selector: 'app-book',
templateUrl: './book.component.html',
styleUrls: ['./book.component.css’] })
Services Basics
export class BookComponent implements OnInit {
books!: Book[];
constructor(private bookService: BookService) { }
getBooks() {
this.books = this.bookService.getBooks();
}
ngOnInit() {
this.getBooks();
}
}
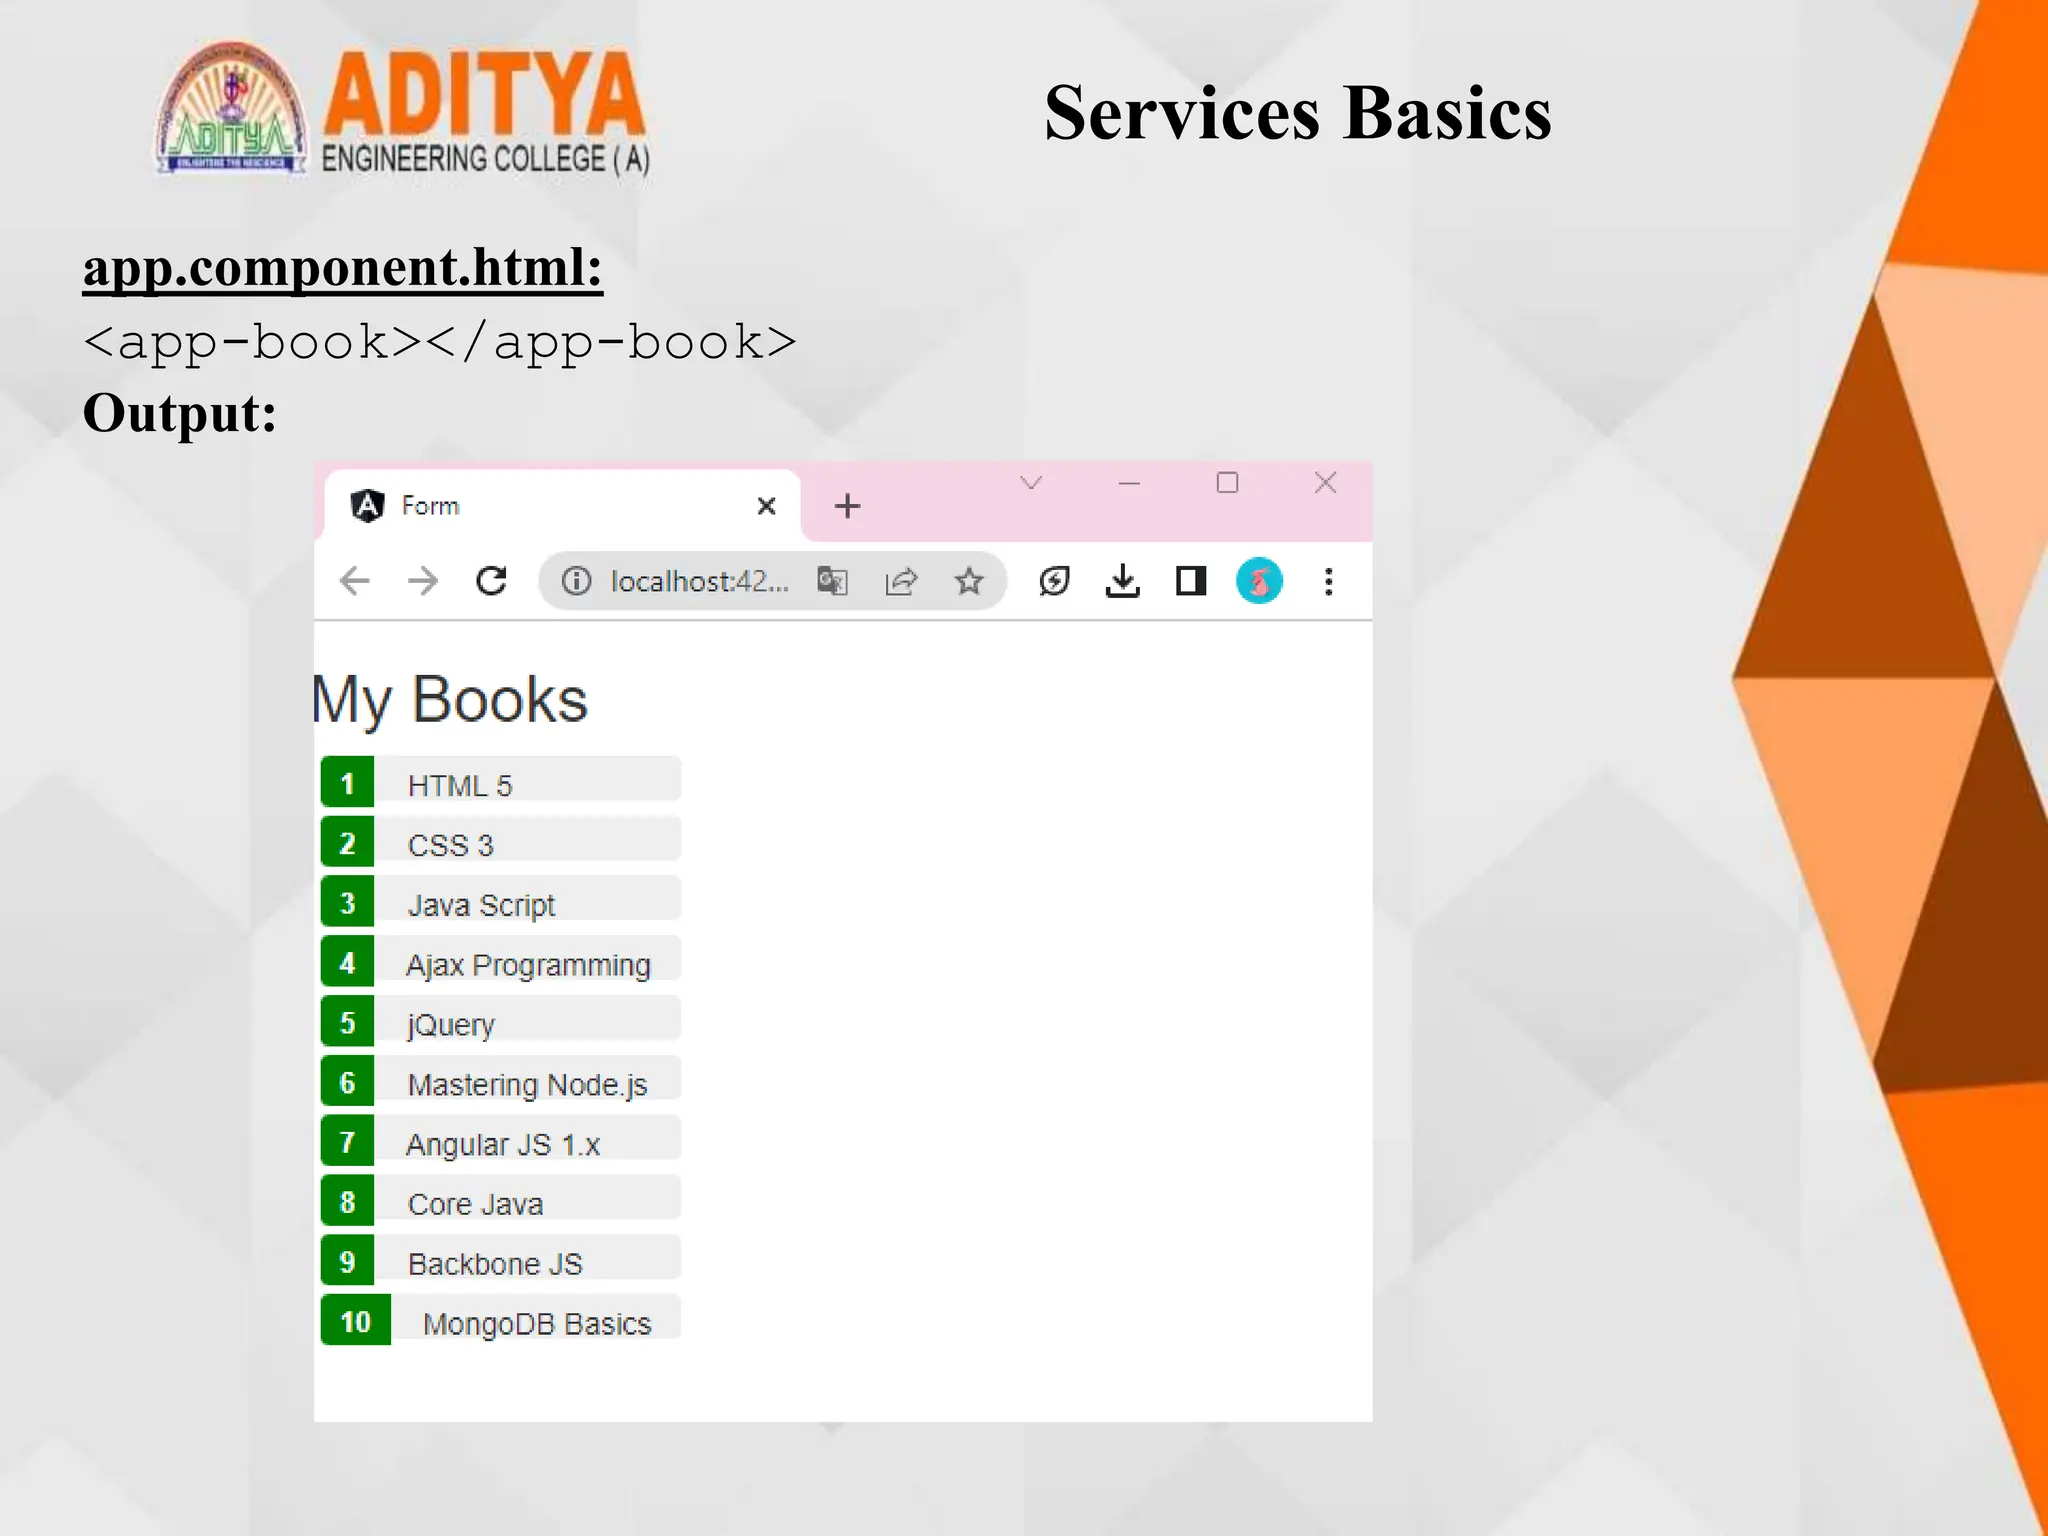
book.component.html:
<h2>My Books</h2>
<ul class="books">
<li *ngFor="let book of books">
<span class="badge">{{book.id}}</span>
{{book.name}}
</li></ul>
Services Basics
book.component.css:
.books {
margin: 0 0 2em 0;
list-style-type: none;
padding: 0;
width: 13em;
}
.books li {
cursor: pointer;
position: relative;
left: 0;
background-color:#eee;
margin: 0.5em;
padding: 0.3em 0;
height: 1.5em;
border-radius: 4px;
}
Services Basics
.books li:hover {
color: #607d8b;
background-color: #ddd;
left: 0.1em; }
.books .badge {
display: inline-block;
font-size: small;
color: white;
padding: 0.8em 0.7em 0 0.7em;
background-color: green;
line-height: 0.5em;
position: relative;
left: -1px;
top: -4px;
height: 1.8em;
margin-right: 0.8em;
border-radius: 4px 0 0 4px;
}
Services Basics
app.component.html:
<app-book></app-book>
Output:
RxJS Observables
RxJS
• Reactive Extensions for JavaScript (RxJS) is a third-party library used by
the Angular team.
• RxJS is a reactive streams library used to work with asynchronous streams of
data.
• Observables, in RxJS, are used to represent asynchronous streams of data.
Observables are a more advanced version of Promises in JavaScript
Program:
app.component.ts:
import { Component } from '@angular/core';
import { Observable } from 'rxjs';
@Component({
selector: 'app-root',
styleUrls: ['./app.component.css'],
templateUrl: './app.component.html'
})
RxJS Observables
export class AppComponent {
data!: Observable<number>;
myArray: number[] = [];
errors!: boolean;
finished!: boolean;
fetchData(): void {
this.data = new Observable(observer => {
setTimeout(() => { observer.next(43); }, 1000),
setTimeout(() => { observer.next(54); }, 2000),
setTimeout(() => { observer.complete(); }, 3000);
});
this.data.subscribe((value) =>
this.myArray.push(value),
error => this.errors = true,
() => this.finished = true);
}
}
RxJS Observables
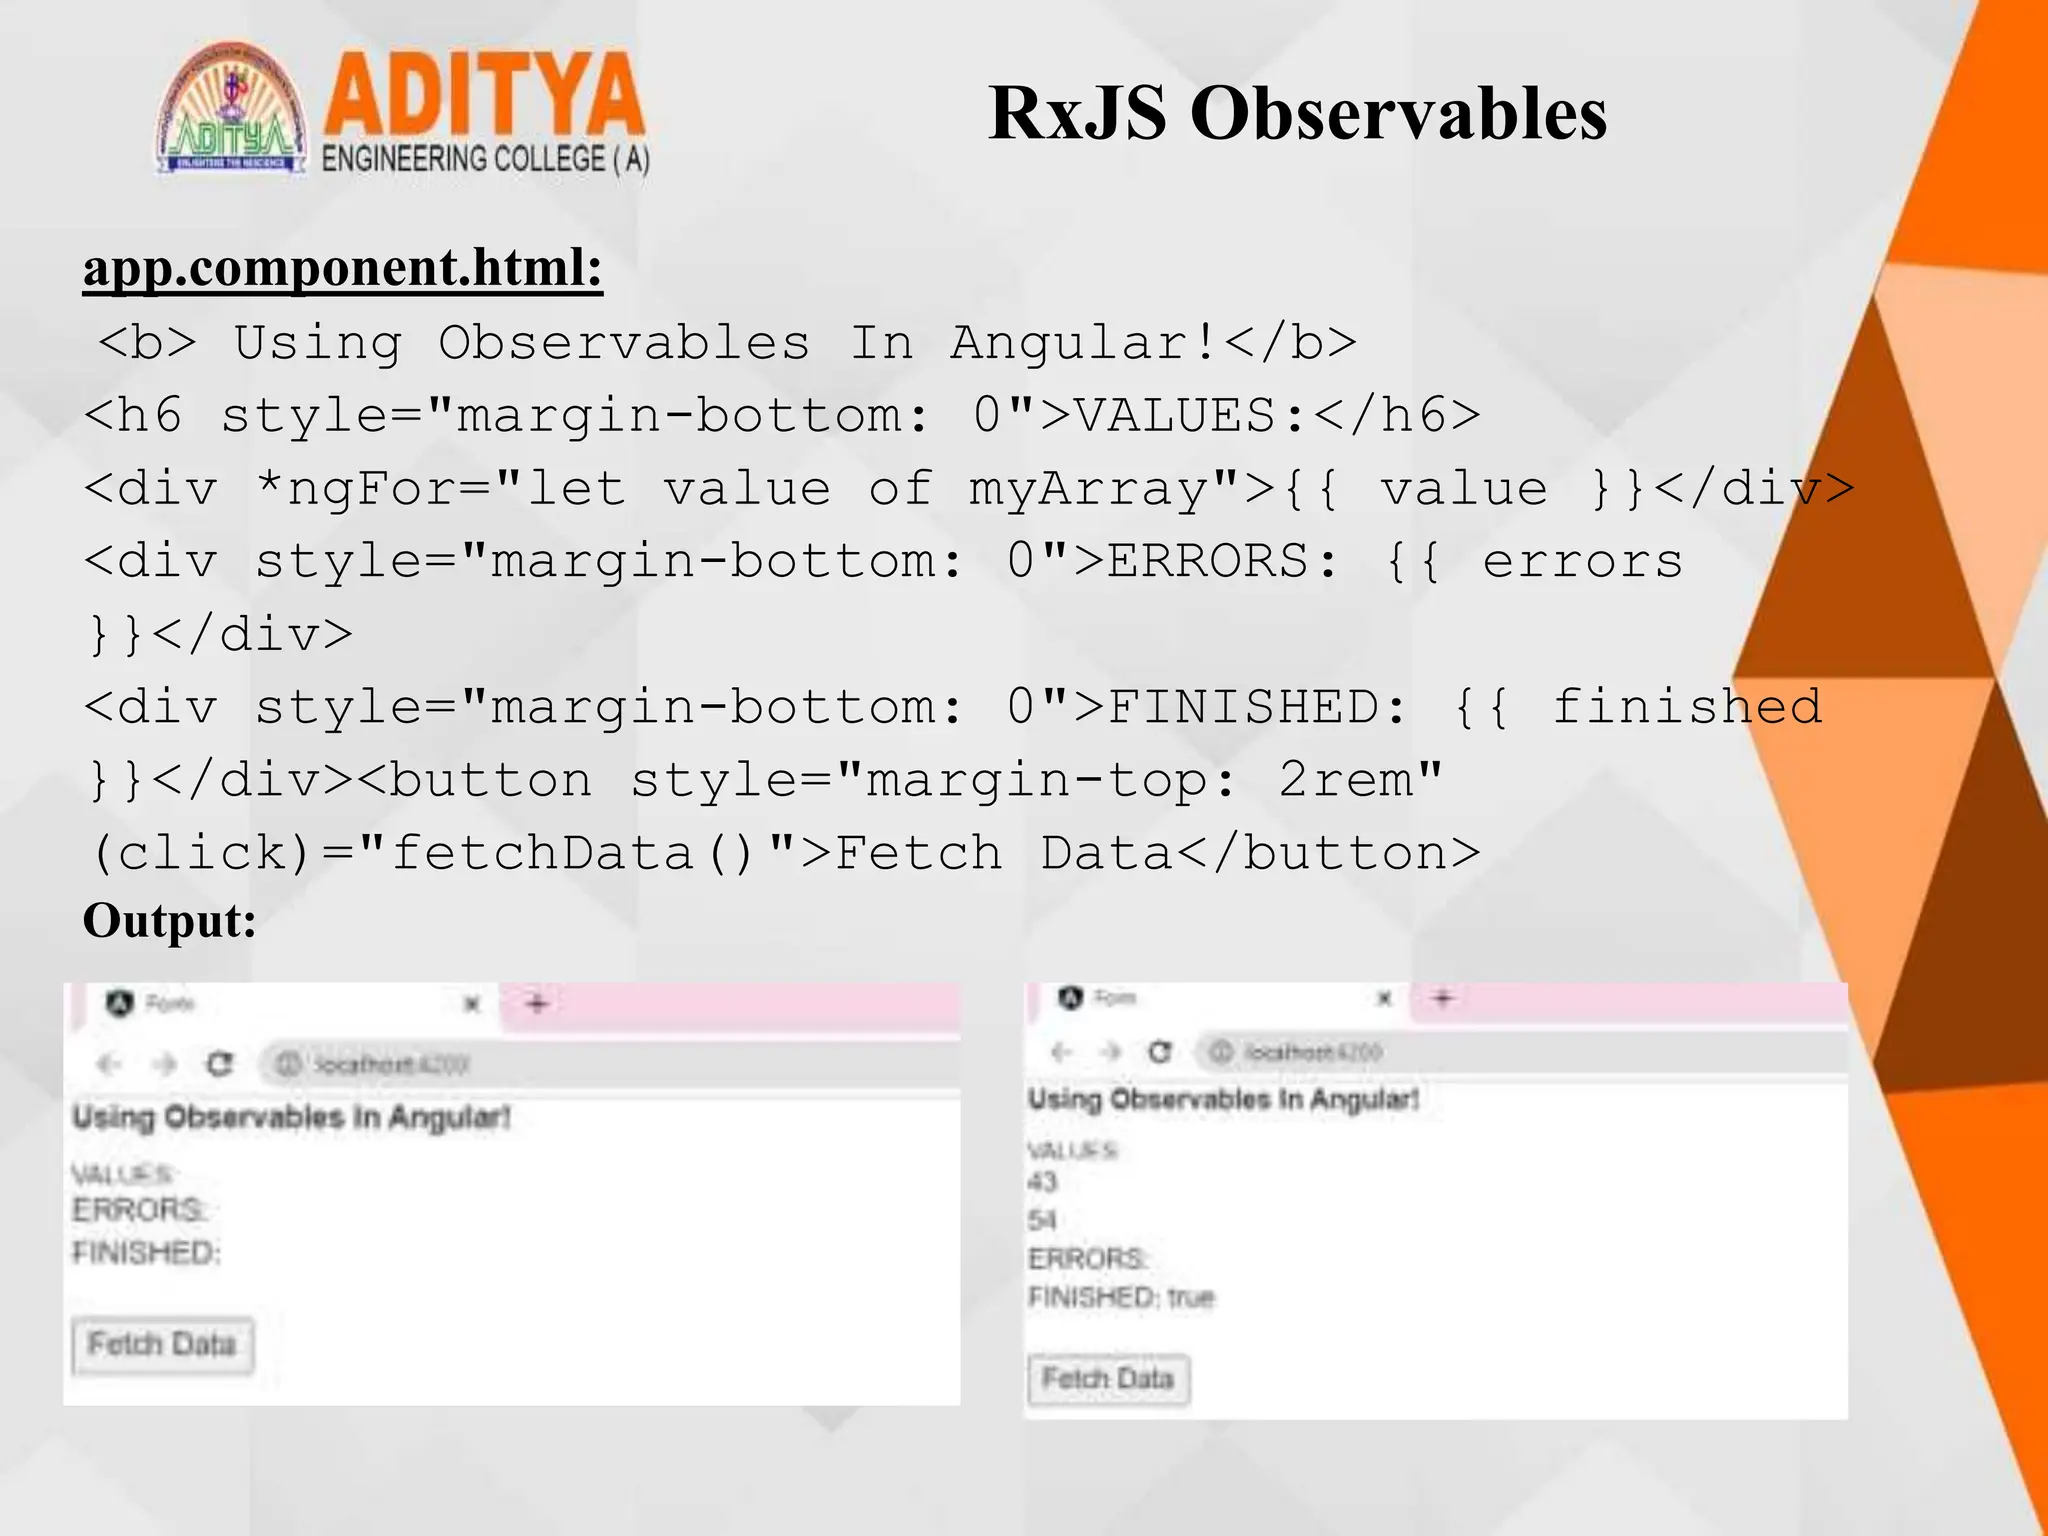
app.component.html:
<b> Using Observables In Angular!</b>
<h6 style="margin-bottom: 0">VALUES:</h6>
<div *ngFor="let value of myArray">{{ value }}</div>
<div style="margin-bottom: 0">ERRORS: {{ errors
}}</div>
<div style="margin-bottom: 0">FINISHED: {{ finished
}}</div><button style="margin-top: 2rem"
(click)="fetchData()">Fetch Data</button>
Output:
Server Communication
using HttpClient
 Most front-end applications communicate with backend services using
HTTP Protocol
 While making calls to an external server, the users must continue to be
able to interact with the page. That is, the page should not freeze until the
HTTP request returns from the external server. So, all HTTP requests are
asynchronous.
 HttpClient from @angular/common/http to communicate must be used
with backend services.
 Additional benefits of HttpClient include testability features, typed request
and response objects, request and response interception, Observable APIs,
and streamlined error handling.
 HttpClientModule must be imported from @angular/common/http in the
module class to make HTTP service available to the entire module. Import
HttpClient service class into a component’s constructor. HTTP methods
like get, post, put, and delete are made used off.
 JSON is the default response type for HttpClient
Server Communication
using HttpClient
Program:
Backend Environment Creation:
Program:
app.js:
var express = require('express');
var router = require('./routes/index');
var cors = require('cors');
var app = express();
var bodyParser = require('body-parser');
Server Communication
using HttpClient
app.use(bodyParser.json())
app.use(bodyParser.urlencoded({ extended: true }));
app.use(function (req, res, next) {
res.header("Access-Control-Allow-Origin", "*");
res.header("Access-Control-Allow-Methods",
"GET,HEAD,OPTIONS,POST,PUT,DELETE");
res.header("Access-Control-Allow-Headers",
"Origin, X-Requested-With, Content-Type, Accept, x-
client-key, x-client-token, x-client-secret,
Authorization");
next();
});
app.use(cors())
app.options('*', cors())
app.use('/', router);
app.listen(3020, function () {
console.log('Server is up and running...’); });
Server Communication
using HttpClient
books.json:
[{
"id": 1,
"name": "HTML 5"
},{
"id": 2,
"name": "CSS 3"
},{
"id": 3,
"name": "Java Script"
},{
"id": 4,
"name": "Ajax Programming"
},{
"id": 5,
"name": "jQuery"
},
Server Communication
using HttpClient
{
"id": 6,
"name": "Mastering Node.js"
},{
"id": 7,
"name": "Angular JS 1.x"
},{
"id": 8,
"name": "ng-book 2"
},{
"id": 9,
"name": "Backbone JS"
},{
"id": 10,
"name": "Yeoman"
}
]
Server Communication
using HttpClient
index.js:
var express = require('express');
var bookList = [{ "id": 1, "name": "HTML 5" },
{ "id": 2, "name": "CSS 3" },
{ "id": 3, "name": "Java Script" },
{ "id": 4, "name": "Ajax Programming" },
{ "id": 5, "name": "jQuery" },
{ "id": 6, "name": "Mastering Node.js" },
{ "id": 7, "name": "Angular JS 1.x" },
{ "id": 8, "name": "ng-book 2" },
{ "id": 9, "name": "Backbone JS" },
{ "id": 10, "name": "Yeoman" }
]
var router = express.Router();
var path = require('path');
router.get('/', function (req, res, next) {
console.log("hi")
})
Server Communication
using HttpClient
router.post('/addBook', function (req, res) {
res.setHeader("Access-Control-Allow-Origin",
"*");
res.setHeader("Access-Control-Allow-
Credentials", "true");
res.setHeader("Access-Control-Allow-Methods",
"POST, GET, OPTIONS, DELETE");
res.setHeader("Access-Control-Allow-Headers",
"Content-Type, Accept, X-Requested-With, remember-
me");
var body = req.body;
bookList.push(body)
res.json(body);});
router.delete('/bookList/:id', function (req, res) {
var id = req.params.id
var index = bookList.findIndex(book => book.id ==
id)
Server Communication
using HttpClient
bookList.splice(index, 1);
res.json(bookList);
});
router.get('/bookList', function (req, res) {
res.setHeader("Access-Control-Allow-Origin",
"*");
res.setHeader("Access-Control-Allow-Origin",
"*");
res.json(bookList);
});
router.put('/update', function (req, res) {
var obj = bookList.findIndex(book => book.id ==
req.body.id)
bookList[obj] = req.body
res.json(bookList);
});
module.exports = router;
Server Communication
using HttpClient
FrontEnd Code:
book.component.css:
.books {
margin: 0 0 2em 0;
list-style-type: none;
padding: 0;
width: 13em;
}
.books li {
cursor: pointer;
position: relative;
left: 0;
background-color:#eee;
margin: 0.5em;
padding: 0.3em 0;
height: 1.5em;
border-radius: 4px;
}
Server Communication
using HttpClient
.books li:hover {
color: #607d8b;
background-color: #ddd;
left: 0.1em;
}
.books .badge {
display: inline-block;
font-size: small;
color: white;
padding: 0.8em 0.7em 0 0.7em;
background-color: green;
line-height: 0.5em;
position: relative;
left: -1px;
top: -4px;
height: 1.8em;
margin-right: 0.8em;
border-radius: 4px 0 0 4px;}
Server Communication
using HttpClient
book.component.html:
<h2>{{ title }}</h2>
<h2>Books List</h2>
<ul class="books">
<li *ngFor="let book of books">
<span class="badge">{{ book.id }}</span> {{
book.name }}
</li>
</ul>
<button class="btn btn-primary" (click)="ADD_BOOK =
true">Add Book</button>&nbsp;
-------------------------------------
<div *ngIf="ADD_BOOK">
<table>
<tr>
<td>Enter Id of the book:</td>
<td>
<input type="number" #id /></td></tr>
Server Communication
using HttpClient
---------------------
<button class="btn btn-primary"
(click)="addBook(id.value, name.value); ADD_BOOK =
false">
Add Record
</button>
</td>
</tr></table>
<br /></div>
<div *ngIf="UPDATE_BOOK">
<table>
<tr>
<td>Enter Id of the book:</td>
<td>
<input type="number" #id />
</td></tr><br />
----------------------------------
Server Communication
using HttpClient
<button class="btn btn-primary"
(click)="deleteBook(id.value); DELETE_BOOK = false">
Delete Record
</button>
</td>
</tr>
</table>
</div>
<div class="error" *ngIf="errorMessage">{{
errorMessage }}</div>
book.component.ts:
import { Component, OnInit } from '@angular/core';
import { BookService } from './book.service';
import { Book } from './book’;
----------------------
export class BookComponent implements OnInit {
Server Communication
using HttpClient
title = ' Server Communication using HttpClient ';
books!: Book[];
errorMessage!: string;
ADD_BOOK!: boolean;
UPDATE_BOOK!: boolean;
DELETE_BOOK!: boolean;
constructor(private bookService: BookService) { }
getBooks() {
this.bookService.getBooks().subscribe({
next: books => this.books = books,
error:error => this.errorMessage = <any>error
})
}
addBook(bookId: string, name: string): void {
let id=parseInt(bookId)
Server Communication
using HttpClient
this.bookService.addBook({id, name })
.subscribe({next:(book: any) =>
this.books.push(book)});
}
updateBook(bookId: string, name: string): void {
let id=parseInt(bookId)
this.bookService.updateBook({ id, name })
.subscribe({next:(book: any) => this.books =
book});
}
deleteBook(bookId: string): void {
let id=parseInt(bookId)
this.bookService.deleteBook(id)
.subscribe({next:(book: any) => this.books =
book});
}ngOnInit() {
this.getBooks();
}}
Server Communication
using HttpClient
book.service.ts:
import { Injectable } from '@angular/core';
import { HttpClient, HttpErrorResponse, HttpHeaders
} from '@angular/common/http’;
--------------------------------------
export class BookService {
booksUrl = 'http://localhost:3020/bookList';
constructor(private http: HttpClient) { }
getBooks(): Observable<Book[]> {
return
---------------------------------------}
updateBook(book: Book): Observable<any> {
const options = new HttpHeaders({ 'Content-
Type': 'application/json' });
-------------------------------------
deleteBook(bookId: number): Observable<any> {
const url = `${this.booksUrl}/${bookId}`;
Server Communication
using HttpClient
return this.http.delete(url).pipe(
catchError(this.handleError));
}
private handleError(err: HttpErrorResponse):
Observable<any> {
let errMsg = '';
if (err.error instanceof Error) {
-----------------------------
console.log(`Backend returned code ${err.status}`);
errMsg = err.error.status;
}
return throwError(()=>errMsg);}}
book.ts:
export class Book {
id!: number;
name!: string;}
Server Communication
using HttpClient
books-data.ts:
import { Book } from './book';
export let BOOKS: Book[] = [
{ id: 1, name: 'HTML 5' },
{ id: 2, name: 'CSS 3' },
{ id: 3, name: 'Java Script' },
{ id: 4, name: 'Ajax Programming' },
{ id: 5, name: 'jQuery' },
{ id: 6, name: 'Mastering Node.js' },
{ id: 7, name: 'Angular JS 1.x' },
{ id: 8, name: 'Core Java' },
{ id: 9, name: 'Backbone JS' },
{ id: 10, name: 'MongoDB Basics' }
];
Server Communication
using HttpClient
app.module.ts:
import { NgModule } from '@angular/core';
import { BrowserModule } from '@angular/platform-
browser’;
-----------------------
@NgModule({
imports: [BrowserModule, HttpClientModule],
declarations: [AppComponent, BookComponent],
providers: [],
bootstrap: [AppComponent]
})
export class AppModule { }
app.component.html:
<app-book></app-book>
Server Communication
using HttpClient
Output:
Communicating with different
backend services using Angular
HttpClient
• Angular can also be used to connect to different services written in
different technologies/languages. For example, we can make a call from
Angular to Node/Express or Java or Mainframe or .Net services, etc.
Program:
mobiles.json:
[{
"productId": 1,
"productName": "Samsung Galaxy Note 7",
"productCode": "MOB-120",
"description": "64GB, Coral Blue",
"price": 800,
"imageUrl":
"assets/imgs/samsung_note7_coralblue.jpg",
"manufacturer": "Samsung",
"ostype": "Android",
"rating": 4 },
Communicating with different
backend services using Angular
HttpClient
{
"productId": 2,
"productName": "Samsung Galaxy Note 7",
"productCode": "MOB-124",
"description": "64GB, Gold",
"price": 850,
"imageUrl":
"assets/imgs/samsung_note7_gold.jpg",
"manufacturer": "Samsung",
"ostype": "Android",
"rating": 4
}
]
Communicating with different
backend services using Angular
HttpClient
tablets.json :
[{
"productId": 1,
"productName": "Apple iPad Mini 2",
"productCode": "TAB-120",
"description": "16GB, White",
"price": 450,"imageUrl":
"assets/imgs/apple_ipad_mini.jpg",
"manufacturer": "Apple","ostype": "iOS",
"rating": 4 },
{ "productId": 2,
"productName": "Apple iPad Air2",
"productCode": "TAB-124",
"description": "64GB, Black","price": 600,
"imageUrl": "assets/imgs/ipad_air.jpg",
"manufacturer": "Apple","ostype": "iOS",
"rating": 3
}]
Communicating with different
backend services using Angular
HttpClient
product.service.ts:
import { Injectable } from '@angular/core’;
-------------------------
export class ProductService {
selectedProducts: any = [];
products: any = [];
producttype="tablet";
username: string = '';
sessionStorage
constructor(private http: HttpClient) {
if(sessionStorage.getItem('selectedProducts'))
{this.selectedProducts =
JSON.parse(sessionStorage.getItem('selectedProducts')
+ '');
}
}
Communicating with different
backend services using Angular
HttpClient
getProducts(): Observable<Product[]> {
if (this.producttype === 'tablet') {
return
this.http.get<Product[]>('./assets/products/tablets.js
on').pipe(
tap((products) => this.products =
products),
catchError(this.handleError));
}
--------------------------------------
private handleError(err: HttpErrorResponse) {
return throwError(() => err.error() || 'Server
error');
}
}
Communicating with different
backend services using Angular
HttpClient
products.module.ts:
import { ProductsRoutingModule } from './products-
routing.module';
import { ProductListComponent } from './product-
list/product-list.component’;
--------------------
import { RatingComponent } from './rating.component';
import { ProductService } from './product.service';
import { AuthGuardService } from './auth-guard.service';
@NgModule({
imports: [
CommonModule,
FormsModule,
ProductsRoutingModule ],
--------------------------------------
export class ProductsModule { }
Communicating with different
backend services using Angular
HttpClient
product-list.component.ts:
import { ProductService } from '../product.service';
import { Cart } from '../cart/Cart';
import { Product } from '../product’;
----------------------------------------
export class ProductListComponent implements OnInit,
AfterViewInit {
chkman: any = [];
chkmanos: any = [];
rate: number = 0;
pageTitle = 'mCart’;imageWidth = 80;
imageHeight = 120;imageMargin = 12;
showImage = false;
listFilter: string = '';
manufacturers = [{ 'id': 'Samsung', 'checked': false
},
Communicating with different
backend services using Angular
HttpClient
{ 'id': 'Microsoft', 'checked': false },
{ 'id': 'Apple', 'checked': false },
{ 'id': 'Micromax', 'checked': false }
];
os = [{ 'id': 'Android', 'checked': false },
{ 'id': 'Windows', 'checked': false },
{ 'id': 'iOS', 'checked': false }];
price_range = [{ 'id': '300-450', 'checked': false
},
-------------------------------------------
tabselect(producttype: string) {
this.manufacturers = [{ 'id': 'Samsung',
'checked': false },
{ 'id': 'Microsoft', 'checked': false },
{ 'id': 'Apple', 'checked': false },
{ 'id': 'Micromax', 'checked': false } ];
Communicating with different
backend services using Angular
HttpClient
this.os = [{ 'id': 'Android', 'checked': false },
{ 'id': 'Windows', 'checked': false },
{ 'id': 'iOS', 'checked': false }];
this.price_range = [{ 'id': '300-450',
'checked': false },
{ 'id': '450-600', 'checked': false },
{ 'id': '600-800', 'checked': false },
{ 'id': '800-1000', 'checked': false }];
---------------------------
error: error => this.errorMessage = error
});
}
onChange(value: string) {
this.sortoption = value;
}
}
Communicating with different
backend services using Angular
HttpClient
Output:
Routing Basics, Router Links
• Routing means navigation between multiple views on a single page.
• Routing allows to express some aspects of the application's state in the URL. The
full application can be built without changing the URL.
• Routing allows to:
❖ Navigate between the views
❖ Create modular applications
• ng generate component dashboard
• ng generate component bookDetail
• ng g c PageNotFound
• Run Backend code parallel
• And also install service book and book.ts and books-data in book component
Program:
dashboard.component.ts:
import { Component, OnInit } from '@angular/core';
import { Router } from '@angular/router’;
------------------------------------------------------------
@Component({
templateUrl: './dashboard.component.html',
styleUrls: ['./dashboard.component.css']})
Routing Basics, Router Links
export class DashboardComponent implements OnInit {
books: Book[] = [];
constructor(
private router: Router,
private bookService: BookService) { }
ngOnInit(): void {
this.bookService.getBooks()
.subscribe({next:books => this.books =
books.slice(1, 5)});
}
gotoDetail(book: Book): void {
this.router.navigate(['/detail', book.id]);
}
}
Routing Basics, Router Links
dashboard.component.html:
<h3>Top Books</h3>
<div class="grid grid-pad">
<div *ngFor="let book of books"
(click)="gotoDetail(book)" class="col-1-4">
<div class="module book">
<h4>{{ book.name }}</h4>
</div>
</div>
</div>
dashboard.component.css:
class*="col-"] {
float: left;
}
*,
*:after,
Routing Basics, Router Links
book.service.ts:
import { Injectable } from '@angular/core';
import { HttpClient, HttpErrorResponse, HttpHeaders,
HttpResponse } from '@angular/common/http';
import { Observable, throwError } from 'rxjs’;
--------------------------------
export class BookService {
booksUrl = 'http://localhost:3020/bookList';
private txtUrl = './assets/sample.txt';
constructor(private http: HttpClient) { }
getBooks(): Observable<Book[]> {
return this.http.get<any>(this.booksUrl,
{observe:'response'}).pipe(
tap((data: any) => console.log('Data Fetched:' +
JSON.stringify(data))),
map((data: any) => data.body),
catchError(this.handleError));
}
Routing Basics, Router Links
---------------------------
console.log(`Backend returned code ${err.status}`);
errMsg = err.error.status;
}
return throwError(()=>errMsg); }}
book-detail.component.ts:
import { Component, OnInit } from '@angular/core';
import { ActivatedRoute } from '@angular/router’;
-------------------------------
export class BookDetailComponent implements OnInit {
book!: Book;
error!: any;
constructor(
private bookService: BookService,
private route: ActivatedRoute
) { }
Routing Basics, Router Links
ngOnInit() {
this.route.paramMap.subscribe(params => {
this.bookService.getBook(params.get('id')).subscribe((
book) => {
this.book = book ?? this.book;
}); }); }
goBack() {
window.history.back();
}}
book-detail.component.html:
<div *ngIf="book">
<h2>{{ book.name }} details!</h2>
<div><label>Id: </label>{{ book.id }}</div>
<div><label>Name: </label> <input
[(ngModel)]="book.name" placeholder="name" />
</div><button (click)="goBack()">Back</button>
</div>
Routing Basics, Router Links
book-detail.component.css:
label {
display: inline-block;
width: 3em;
margin: 0.5em 0;
color: orange;
font-weight: bold;
}input {
height: 2em;
font-size: 1em;
padding-left: 0.4em;
}button {
margin-top: 20px;
font-family: Arial;
background-color: #eee;
border: none;padding: 5px 10px;
border-radius: 4px;cursor: pointer;
cursor: hand;}
Routing Basics, Router Links
button:hover {
background-color: #cfd8dc;
}
button:disabled {
background-color: #eee;
color: #ccc;
cursor: auto;
}
h2{
color:Orange;
}
page-not-found.component.html:
<div>
<h1>404 Error</h1>
<h1>Page Not Found</h1>
</div>
Routing Basics, Router Links
app-routing.module.ts:
import { NgModule } from '@angular/core';
import { RouterModule, Routes } from
'@angular/router';
import { BookComponent } from './book/book.component’;
-------------------------
const appRoutes: Routes = [
{ path: 'dashboard', component: DashboardComponent},
{ path: '', redirectTo: '/dashboard', pathMatch:
'full' },
{ path: 'books', component: BookComponent },
{ path: 'detail/:id', component: BookDetailComponent
},
{ path: '**', component: PageNotFoundComponent },
];
---------------------------------------------------
})
export class AppRoutingModule { }
Routing Basics, Router Links
app.module.ts :
import { BookComponent } from './book/book.component';
import { DashboardComponent } from
'./dashboard/dashboard.component';
import { BookDetailComponent } from './book-detail/book-
detail.component';
import { AppRoutingModule } from './app-routing.module';
import { PageNotFoundComponent } from './page-not-
found/page-not-found.component’;
-------------------------------------------
@NgModule({
imports: [BrowserModule, HttpClientModule, FormsModule,
AppRoutingModule],
declarations: [AppComponent, BookComponent,
DashboardComponent, BookDetailComponent,PageNotFound
PageNotFoundComponent ],
providers: [],bootstrap: [AppComponent]
})export class AppModule { }
Routing Basics, Router Links
app.component.ts:
import { Component } from '@angular/core';
@Component({
selector: 'app-root',
styleUrls: ['./app.component.css'],
templateUrl: './app.component.html'
})
export class AppComponent {
title = 'Tour of Books';}
app.component.html:
<h1>{{title}}</h1>
<nav>
<a [routerLink]='["/dashboard"]'
routerLinkActive="active">Dashboard</a>
<a [routerLink]='["/books"]'
routerLinkActive="active">Books</a>
</nav>
<router-outlet></router-outlet>
Routing Basics, Router Links
app.component.css:
h1 {
color: green;
font-family: Arial, Helvetica, sans-serif;
font-size: 250%;
}h2, h3 {
color: #444;
font-family: Arial, Helvetica, sans-serif;
font-weight: lighter;
}body {
margin: 2em;
}body, input[text], button {
color: #888;
font-family: Cambria, Georgia;
}a {
cursor: pointer;
cursor: hand;
}
Routing Basics, Router Links
button {
font-family: Arial;
background-color: #eee;border: none;
padding: 5px 10px;
border-radius: 4px;cursor: pointer;cursor: hand;
}button:hover {
background-color: #cfd8dc;
}button:disabled {
background-color: #eee;
color: #aaa;
cursor: auto;
}nav a {
padding: 5px 10px;text-decoration: none;
margin-right: 10px;margin-top: 10px;
display: inline-block;
background-color: #eee;border-radius: 4px;
}
Routing Basics, Router Links
nav a:visited, a:link {
color: #607D8B;
}
nav a:hover {
color: #039be5;
background-color: #CFD8DC;
}
nav a.active {
color: green;
}
* {
font-family: Arial, Helvetica, sans-serif;
}
styles.css :
body{
padding:10px;
}
Routing Basics, Router Links
book.component.ts:
import { Component, OnInit } from '@angular/core';
import { Book } from './book';
import { BookService } from './book.service’;
------------------------
export class BookComponent implements OnInit {
books!: Book[];
errorMessage!: string;
constructor(private bookService: BookService) { }
getBooks() {
this.bookService.getBooks().subscribe({
next: books => this.books = books,
error:error => this.errorMessage = <any>error
})
} ngOnInit(): void {
this.getBooks();
}
}
Routing Basics, Router Links
book.component.html:
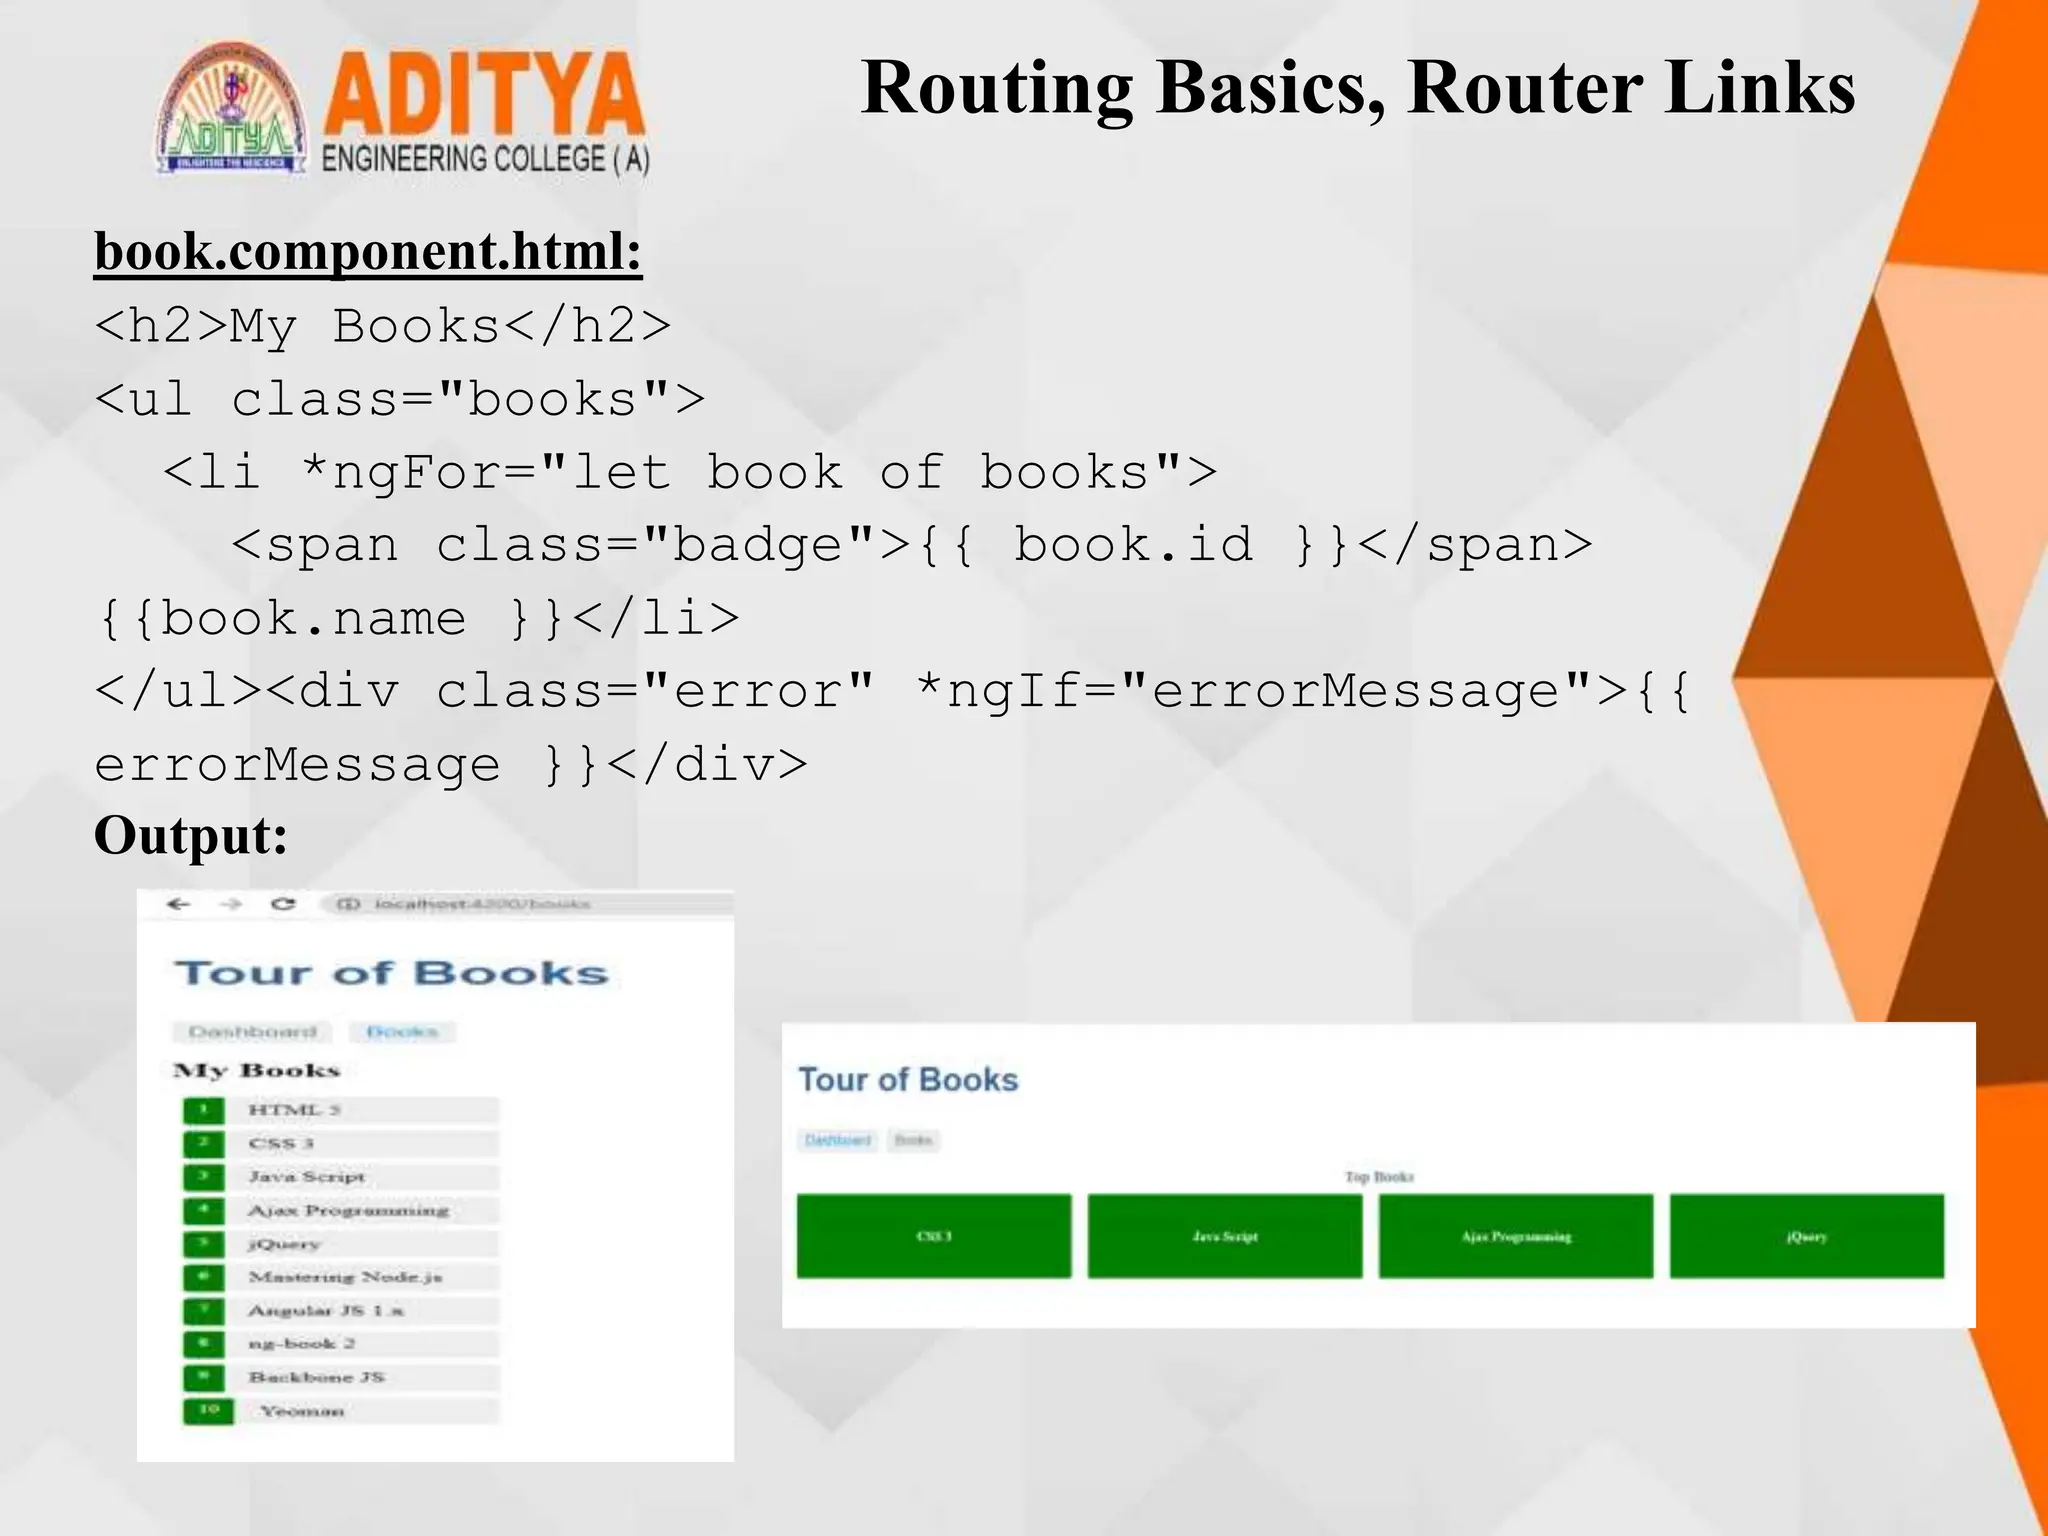
<h2>My Books</h2>
<ul class="books">
<li *ngFor="let book of books">
<span class="badge">{{ book.id }}</span>
{{book.name }}</li>
</ul><div class="error" *ngIf="errorMessage">{{
errorMessage }}</div>
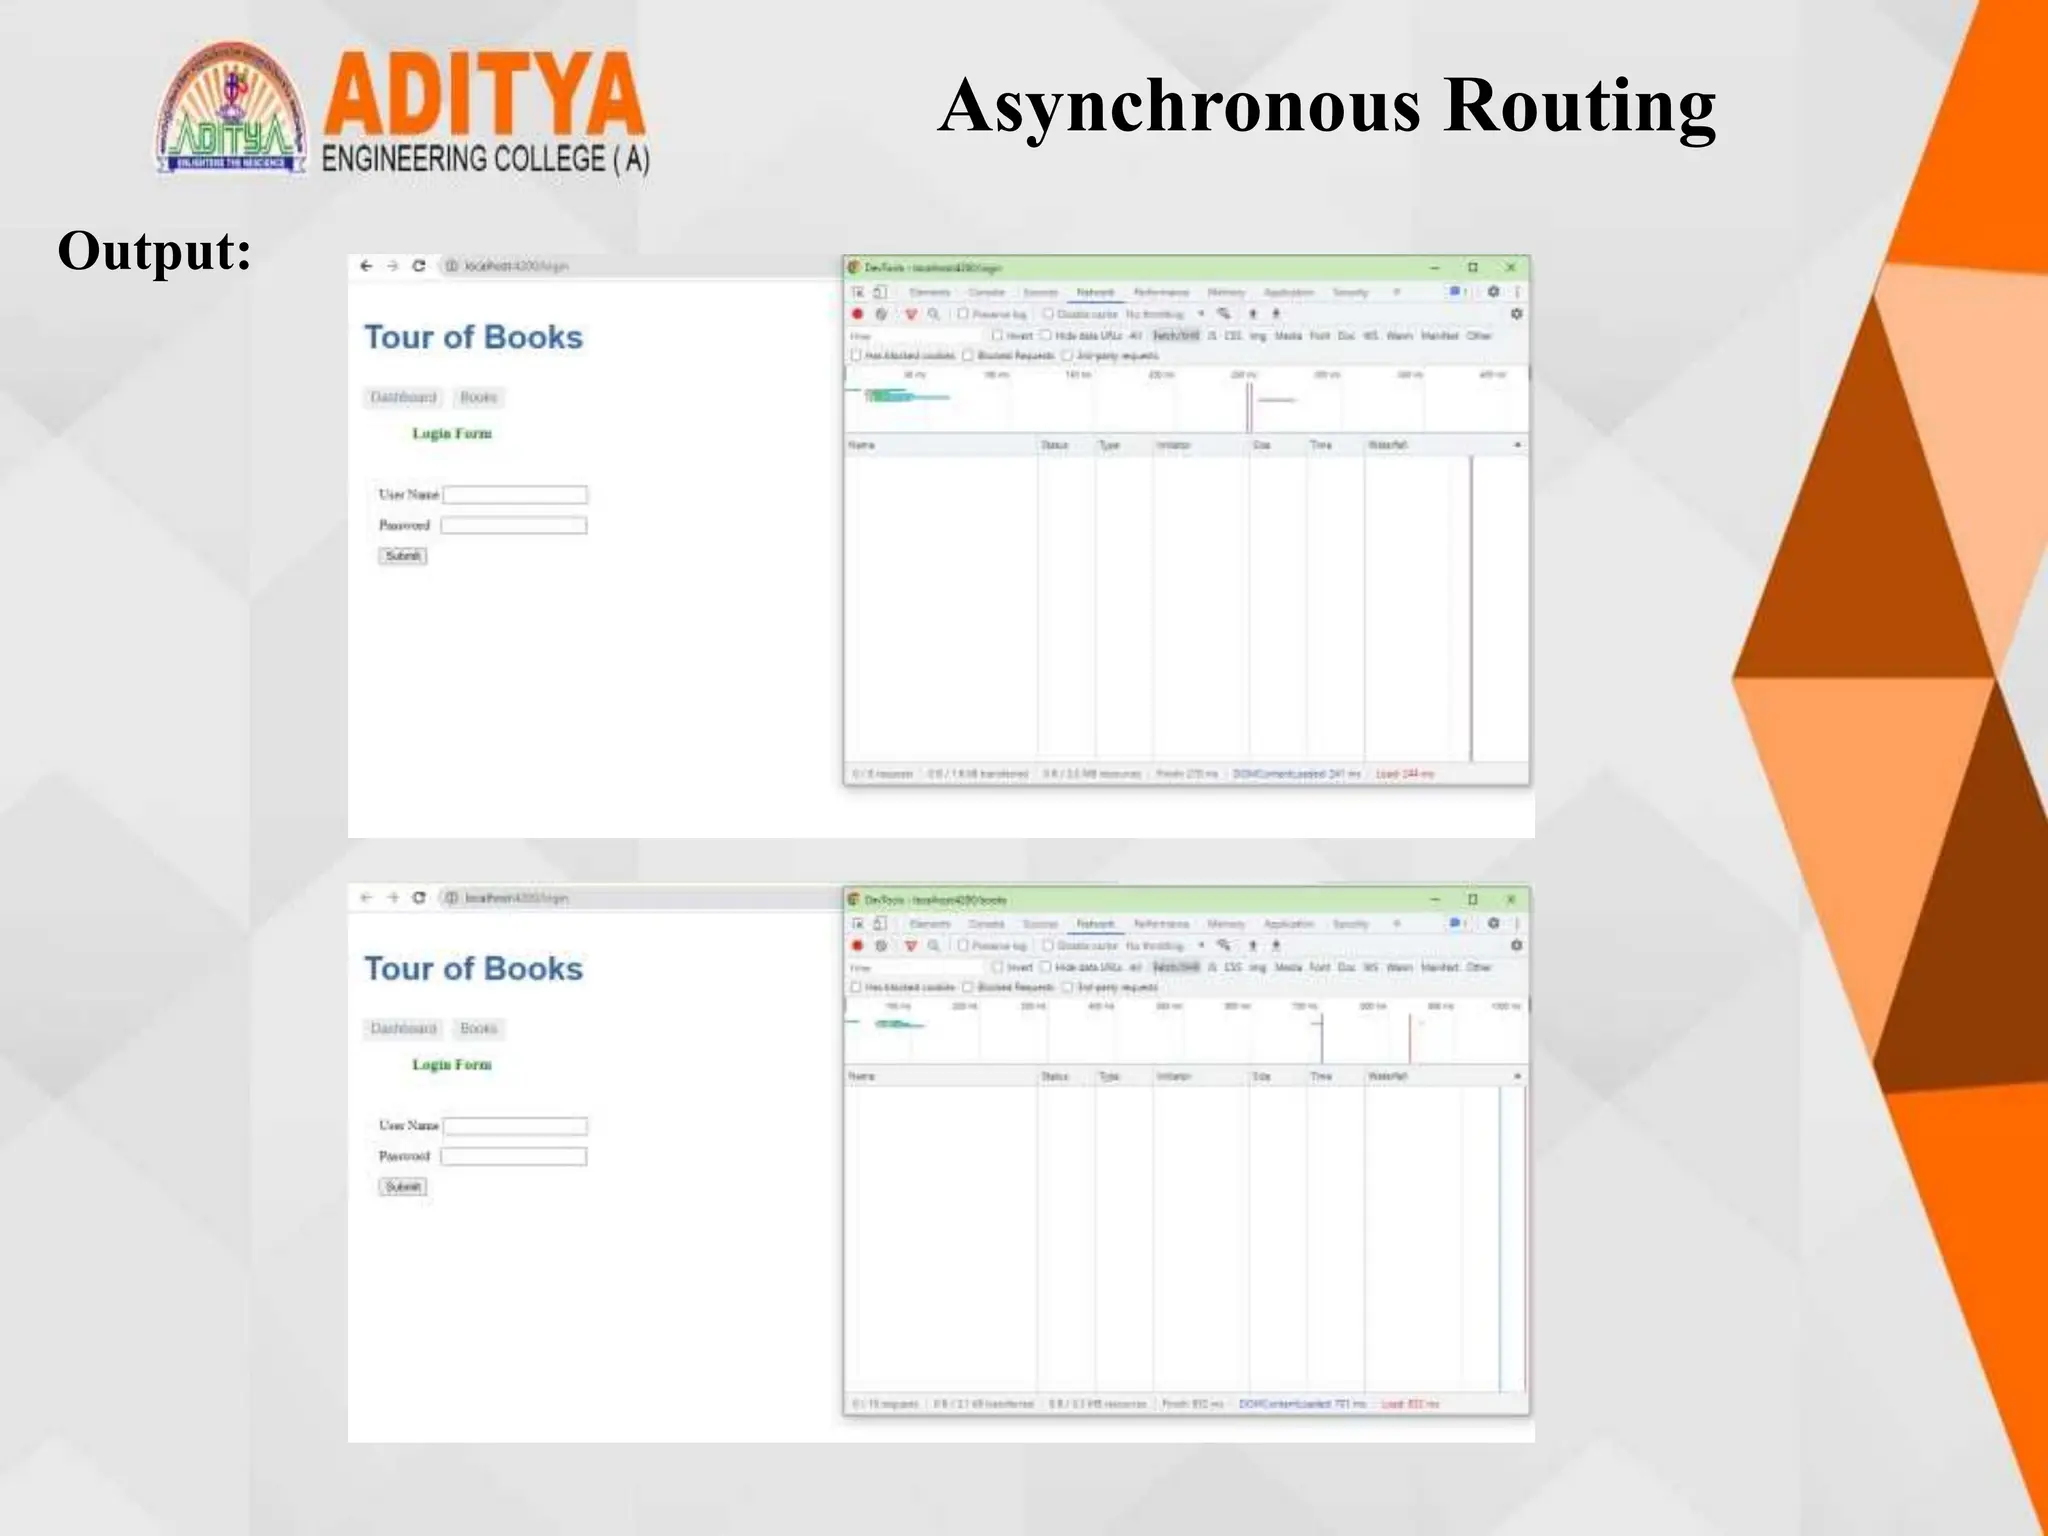
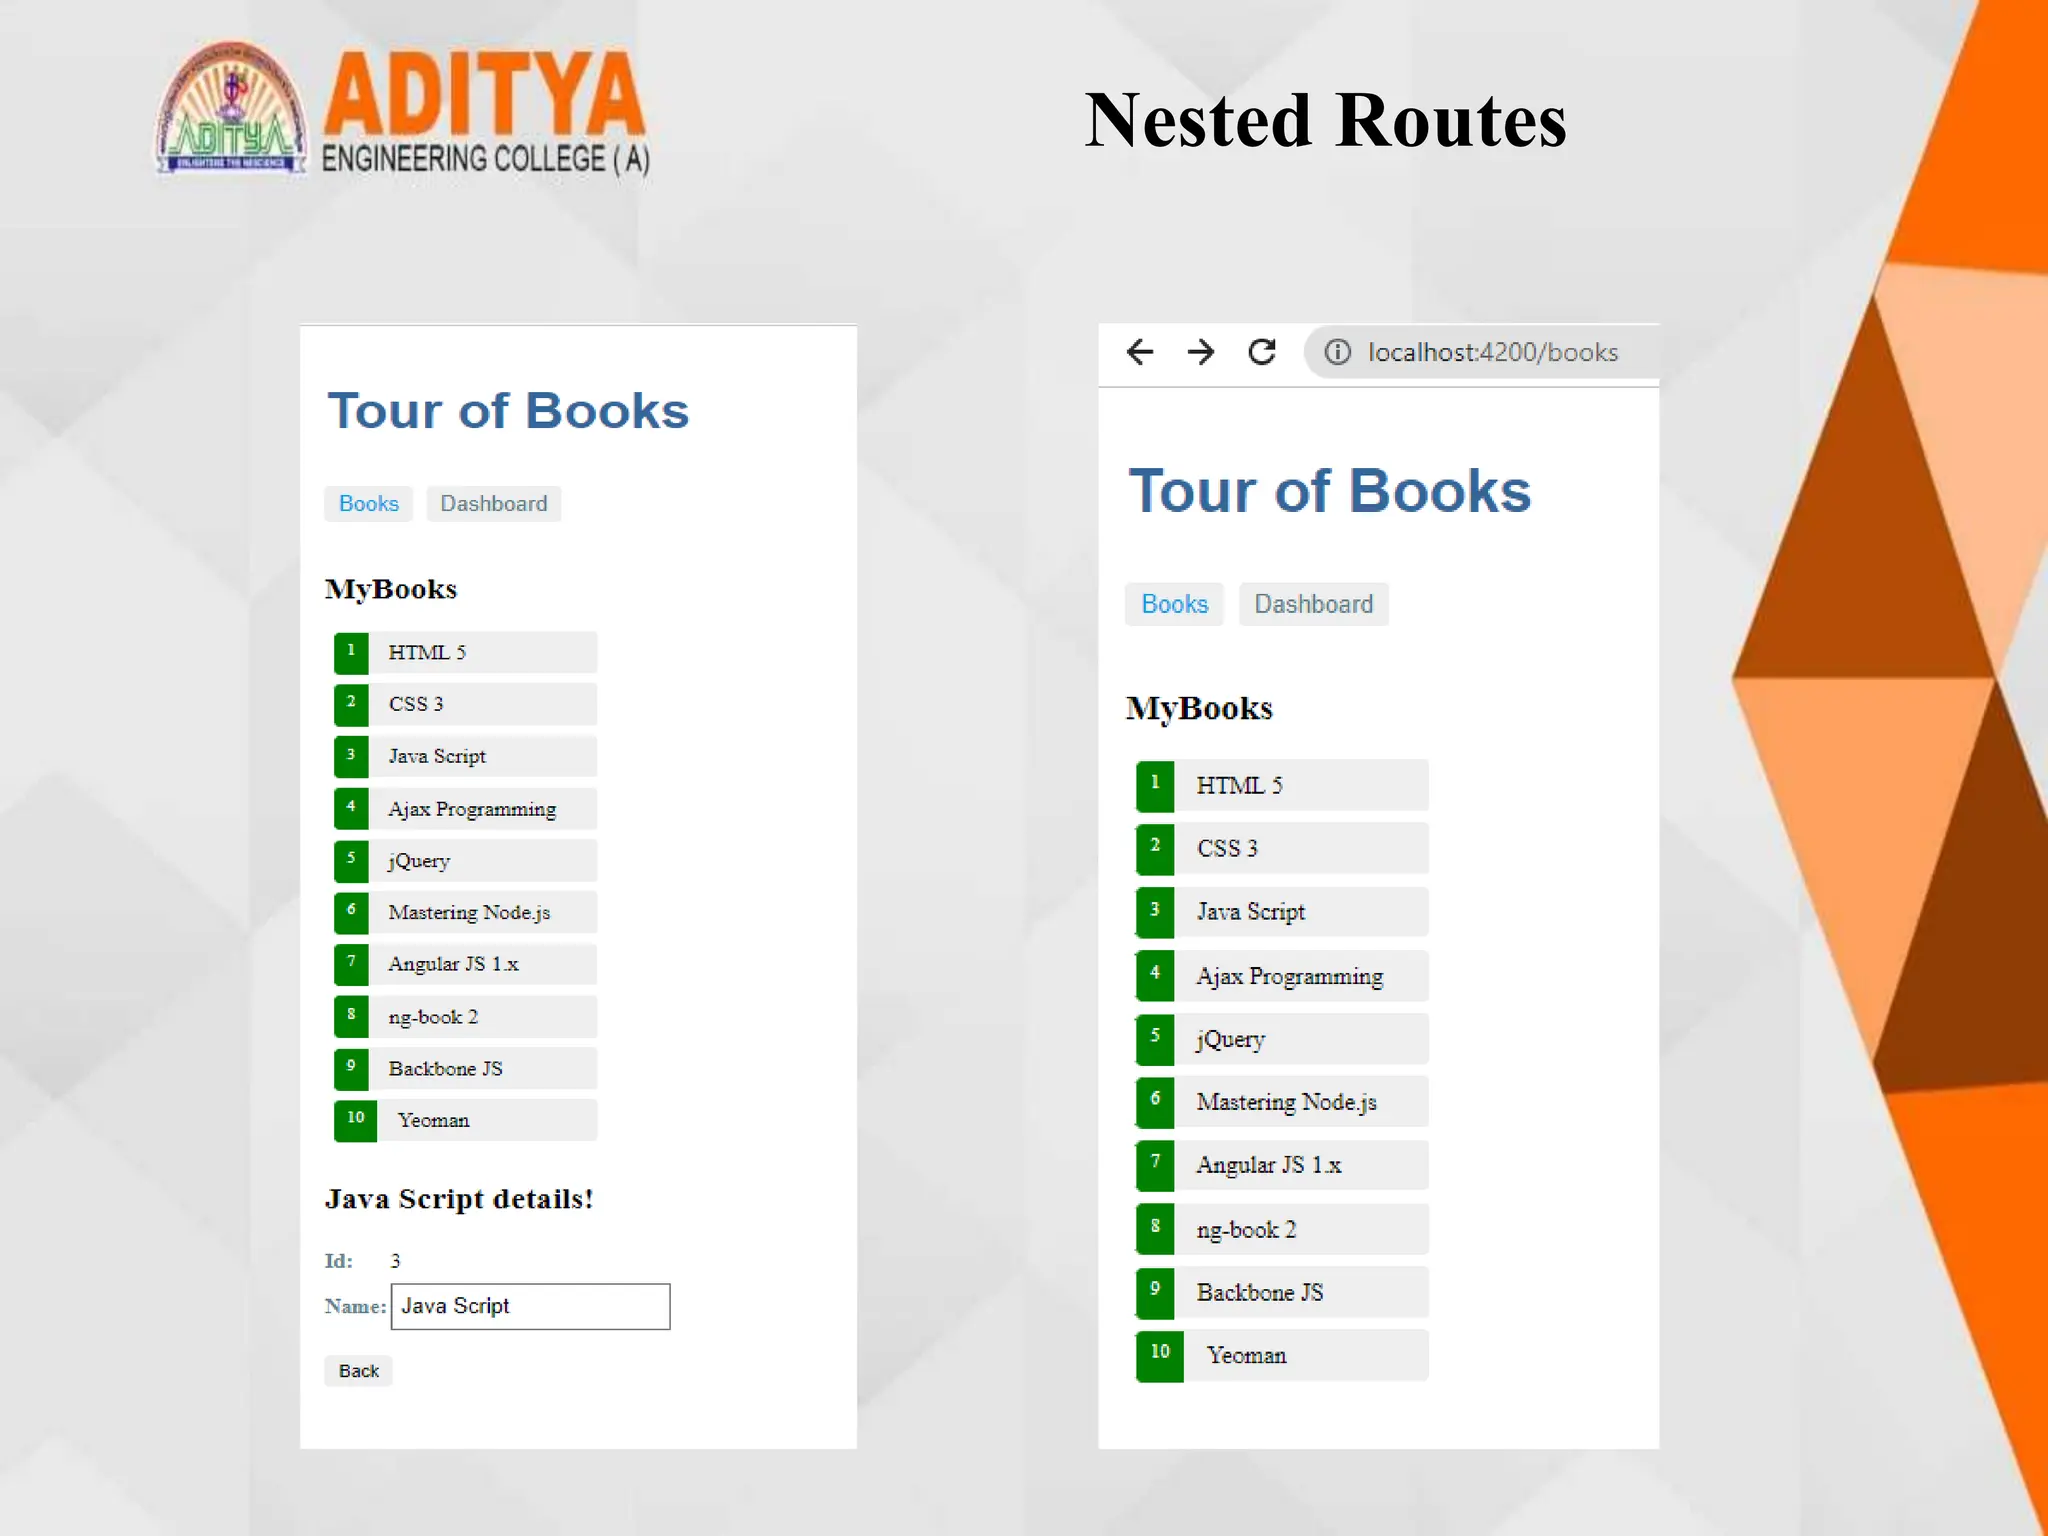
Output:
Route Guards
• Angular route guards are interfaces provided by Angular which, when
implemented, allow us to control the accessibility of a route based on
conditions provided in class implementation of that interface.
• Here are some types of Angular guards: CanActivate, CanActivateChild,
CanLoad, CanDeactivate and Resolve.
• Using canActivate, access can be permitted to only authenticated users.
• Syntax:
Class GuardService implements CanActivate{
canActivate( ): boolean {
}
}
Program:
login.component.html:
<h3 style="position: relative; left: 60px;
color:green">Login Form</h3>
<div *ngIf="invalidCredentialMsg" style="color: red">
{{ invalidCredentialMsg }}
</div>
Route Guards
<br />
<div style="position: relative; left: 20px">
<form [formGroup]="loginForm"
(ngSubmit)="onFormSubmit()">
<p>User Name <input formControlName="username"
/></p>
<p>
Password
<input
type="password"
formControlName="password"
style="position: relative; left: 10px"
/>
</p>
<p><button class="btn-success"
type="submit">Submit</button></p>
</form>
</div>
Route Guards
login.component.ts:
import { Component } from '@angular/core';
import { FormBuilder, FormGroup } from
'@angular/forms';
import { Router } from '@angular/router';
import { LoginService } from './login.service';
@Component({
templateUrl: './login.component.html',
styleUrls: ['./login.component.css'],
})
export class LoginComponent {
invalidCredentialMsg!: string;
loginForm!: FormGroup;
constructor(
private loginService: LoginService,
private router: Router,
private formbuilder: FormBuilder
)
Route Guards
{
this.loginForm = this.formbuilder.group({
username: [],
password: [],
});}
onFormSubmit(): void {
const uname = this.loginForm.value.username;
const pwd = this.loginForm.value.password;
this.loginService.isUserAuthenticated(uname, pwd)
.subscribe({next:(authenticated) => {
if (authenticated) {
this.router.navigate(['/books']);
} else {
this.invalidCredentialMsg = 'Invalid
Credentials. Try again.';
}
}});
}}
Route Guards
user.ts:
export class User {
constructor(public userId: number, public
username: string, public password: string) { }
}
login.service.ts:
import { Injectable } from '@angular/core';
import { Observable, of } from 'rxjs';
import { map } from 'rxjs/operators';
import { User } from './user';
const USERS = [
new User(1, 'user1', 'pass1'),
new User(2, 'user2', 'pass2')
];
const usersObservable = of(USERS);
@Injectable({
providedIn: 'root'
})
Route Guards
export class LoginService {
private isloggedIn = false;
getAllUsers(): Observable<User[]> {
return usersObservable; }
isUserAuthenticated(username: string, password:
string): Observable<boolean> {
return this.getAllUsers().pipe(
map(users => {const Authenticateduser =
users.find(user => (user.username === username) &&
(user.password === password));
if (Authenticateduser) {this.isloggedIn = true;
} else {
this.isloggedIn = false;
}return this.isloggedIn;
}) ); }
isUserLoggedIn(): boolean {
return this.isloggedIn;
} }
Route Guards
login-guard.service.ts:
import { Injectable } from '@angular/core';
import { CanActivate, Router } from '@angular/router';
import { LoginService } from './login.service';
@Injectable({
providedIn: 'root'
})
export class LoginGuardService implements CanActivate
{
constructor(private loginService: LoginService,
private router: Router) { }
canActivate(): boolean {
if (this.loginService.isUserLoggedIn()) {
return true;
}
this.router.navigate(['/login']);
return false;
}}
Route Guards
app.module.ts:
import { NgModule } from '@angular/core’;
--------------------------
import { AppRoutingModule } from './app-
routing.module';
import { PageNotFoundComponent } from './page-not-
found/page-not-found.component';
import { LoginComponent } from
'./login/login.component';
@NgModule({
imports: [BrowserModule, HttpClientModule,
ReactiveFormsModule,FormsModule, AppRoutingModule],
declarations: [AppComponent, LoginComponent,
BookComponent, DashboardComponent,
BookDetailComponent, PageNotFoundComponent],
providers: [],
bootstrap: [AppComponent]
})export class AppModule { }
Route Guards
app-routing.module.ts:
import { NgModule } from '@angular/core';
import { RouterModule, Routes } from '@angular/router’;
----------------------------------------
import { LoginGuardService } from './login/login-
guard.service';
import { LoginComponent } from './login/login.component';
const appRoutes: Routes = [
{ path: 'dashboard', component: DashboardComponent },
{ path: '', redirectTo: '/dashboard', pathMatch: 'full'},
{ path: 'books', component: BookComponent ,
canActivate:[LoginGuardService] },
{ path: 'detail/:id', component: BookDetailComponent},
{path: 'login',component:LoginComponent},
{ path: '**', component: PageNotFoundComponent },
];
Route Guards
@NgModule({
imports: [
RouterModule.forRoot(appRoutes)
],exports: [
RouterModule
]
})
export class AppRoutingModule { }
Output:
Asynchronous Routing
• Asynchronous routing is the most straightforward method of routing signals.
Any asynchronous route can be defined in terms of two signals: a source and
a destination.
• When an Angular application has a lot of components, it will increase the size
of the application. In such cases, the application takes a lot of time to load.
• To overcome this problem, asynchronous routing is preferred, i.e, modules
must be loaded lazily only when they are required instead of loading them at
the beginning of the execution
Lazy Loading has the following benefits:
❖ Modules are loaded only when the user requests for it
❖ Load time can be speeded up for users who will be visiting only certain
areas of the application.
Lazy Loading Route Configuration:
• To apply lazy loading on modules, create a separate routing configuration file
for that module and map an empty path to the component of that module.
Asynchronous Routing
book-routing.module.ts:
import { NgModule } from '@angular/core';
import { RouterModule, Routes } from
'@angular/router';
import { BookComponent } from './book.component';
import { LoginGuardService } from '../login/login-
guard.service';
const bookRoutes: Routes = [
{
path: '',
component: BookComponent,
canActivate: [LoginGuardService]
}
];@NgModule({
imports: [RouterModule.forChild(bookRoutes)],
exports: [RouterModule]
})
export class BookRoutingModule { }
Asynchronous Routing
book.module.ts:
import { NgModule } from '@angular/core';
import { CommonModule } from '@angular/common';
import { BookComponent } from './book.component';
import { BookRoutingModule } from './book-
routing.module';
@NgModule({
imports: [CommonModule, BookRoutingModule],
declarations: [BookComponent]
})
export class BookModule { }
app-routing.module.ts:
import { NgModule } from '@angular/core';
import { RouterModule, Routes } from'@angular/router';
import { BookDetailComponent } from './book-
detail/book-detail.component';
import { BookComponent } from './book/book.component';
Asynchronous Routing
import { DashboardComponent } from
'./dashboard/dashboard.component';
import { LoginGuardService } from './login/login-
guard.service';
import { LoginComponent } from'./login/login.component';
import { PageNotFoundComponent } from './page-not-
found/page-not-found.component';
const appRoutes: Routes = [
{ path: '', redirectTo: '/login', pathMatch: 'full' },
{ path: 'login', component: LoginComponent },
{ path: 'books', loadChildren: () =>
import('./book/book.module').then(m => m.BookModule) },
{ path: 'dashboard', component: DashboardComponent },
{ path: 'detail/:id', component: BookDetailComponent} ,
{ path: '**', component: PageNotFoundComponent }
];
---------------------------------------------
})export class AppRoutingModule { }
Asynchronous Routing
app.module.ts:
import { NgModule } from '@angular/core’;
----------------------------------
import { BookDetailComponent } from './book-detail/book-
detail.component';
import { AppRoutingModule } from './app-routing.module';
import { PageNotFoundComponent } from './page-not-
found/page-not-found.component';
import { LoginComponent } from'./login/login.component';
@NgModule({
imports: [BrowserModule, HttpClientModule,
ReactiveFormsModule,FormsModule, AppRoutingModule],
declarations: [AppComponent, LoginComponent,
DashboardComponent, BookDetailComponent,
PageNotFoundComponent],
providers: [],
bootstrap: [AppComponent]
})export class AppModule { }
Asynchronous Routing
Output:
Nested Routes
• In Angular, you can also create sub-routes or child routes for your components
which means in an application there will be one root route just like a root
component/root module and other routes will be configured for their respective
components. Configuring routes module-wise is the best practice to make
modular Angular applications.
Syntax:
import { NgModule } from '@angular/core';
import { RouterModule, Routes } from '@angular/router';
import { ParentComponent } from './parent.component';
import { ChildComponent } from './child.component';
const routes: Routes = [
{
path: 'parent',
component: ParentComponent,
children: [
{
path: 'child',
component: ChildComponent
Nested Routes
} ]
}
];
@NgModule({
imports: [RouterModule.forChild(routes)],
exports: [RouterModule]
})export class ParentRoutingModule { }
Program:
app.module.ts:
import { NgModule } from '@angular/core’;
-----------------
import { AppRoutingModule } from './app-routing.module';
import { LoginComponent } from'./login/login.component';
@NgModule({
imports: [BrowserModule, HttpClientModule,
ReactiveFormsModule, AppRoutingModule],
------------------------------
})export class AppModule { }
Nested Routes
app-routing.module.ts:
import { NgModule } from '@angular/core';
import { RouterModule, Routes } from '@angular/router';
import { LoginComponent } from'./login/login.component';
import { PageNotFoundComponent } from './page-not-
found/page-not-found.component';
const appRoutes: Routes = [
{ path: '', redirectTo: '/login', pathMatch: 'full' },
{ path: 'login', component: LoginComponent },
{ path: 'books', loadChildren: () =>
import('./book/book.module').then(m => m.BookModule) },
{ path: '**', component: PageNotFoundComponent }
];
-----------------------------------------
})
export class AppRoutingModule { }
Nested Routes
app.component.html:
<h1>{{title}}</h1>
<nav>
<a [routerLink]='["/books"]'
routerLinkActive="active">Books</a>
<a [routerLink]='["/books/dashboard"]'
routerLinkActive="active">Dashboard</a>
</nav><router-outlet></router-outlet>
book.module.ts:
import { NgModule } from '@angular/core';
import { BookComponent } from './book.component’;
import { BookRoutingModule } from './bookrouting.module';
import { CommonModule } from '@angular/common';
@NgModule({
imports: [ CommonModule, BookRoutingModule,
FormsModule],
----------------------------------------------
})export class BookModule { }
Nested Routes
book-routing.module.ts:
import { RouterModule, Routes } from '@angular/router';
import { BookComponent } from './book.component';
import { BookDetailComponent } from '../book-detail/book-
detail.component’;
-----------------------------------
const bookRoutes: Routes = [
{
path: '',
component: BookComponent,
children: [
{ path: 'dashboard', component: DashboardComponent },
{ path: 'detail/:id', component: BookDetailComponent }
],
canActivate: [LoginGuardService]
}];
-------------------------------------
})export class BookRoutingModule { }
Nested Routes
book.component.html:
<br/>
<h2>MyBooks</h2>
<ul class="books">
<li *ngFor="let book of books "
(click)="gotoDetail(book)">
<span class="badge">{{book.id}}</span>
{{book.name}}
</li>
</ul>
<div>
<router-outlet></router-outlet>
</div>
<div class="error"
*ngIf="errorMessage">{{errorMessage}}</div>
Nested Routes
book.component.ts:
import { Component, OnInit } from '@angular/core';
import { Router } from '@angular/router';
import { Book } from './book';
import { BookService } from './book.service’;
-------------------------
export class BookComponent implements OnInit {
books: Book[]=[];
errorMessage!: string;
constructor(private bookService: BookService, private
router: Router) { }
getBooks() {
this.bookService.getBooks().subscribe({
next: books => {console.log(books);this.books =
books},
error:error => this.errorMessage = <any>error
})
}
Nested Routes
gotoDetail(book: Book): void {
this.router.navigate(['/books/detail/', book.id]);
}
ngOnInit(): void {
this.getBooks();
}
}
book-detail.component.html:
<div *ngIf="book">
<h2>{{ book.name }} details!</h2>
<div><label>Id: </label>{{ book.id }}</div>
<div>
<label>Name: </label> <input [(ngModel)]="book.name"
placeholder="name" />
</div>
<button (click)="goBack()">Back</button>
</div>
Nested Routes
book-detail.component.ts:
import { Component, OnInit } from '@angular/core';
import { ActivatedRoute } from '@angular/router';
import { Book } from '../book/book';
import { BookService } from '../book/book.service’;
---------------------------
export class BookDetailComponent implements OnInit {
book!: Book;
error!: any;
constructor(
private bookService: BookService,
private route: ActivatedRoute
) { }
ngOnInit() {
this.route.paramMap.subscribe(params => {
this.bookService.getBook(params.get('id')).subscribe((boo
k) => {
this.book = book ?? this.book;});
Nested Routes
});
}
goBack() {
window.history.back();
}
}
dashboard.component.html:
<h3>Top Books</h3>
<div class="grid grid-pad">
<div *ngFor="let book of books"
(click)="gotoDetail(book)" class="col-1-4">
<div class="module book">
<h4>{{ book.name }}</h4>
</div>
</div>
</div>
Nested Routes
dashboard.component.ts:
import { Component, OnInit } from '@angular/core';
import { Router } from '@angular/router';
import { Book } from '../book/book';
import { BookService } from '../book/book.service’;
-----------------------------
export class DashboardComponent implements OnInit {
books: Book[] = [];
constructor(
private router: Router,
private bookService: BookService) { }
ngOnInit(): void {
this.bookService.getBooks()
.subscribe(books => this.books =
books.slice(1, 5));
}gotoDetail(book: Book): void {
this.router.navigate(['/books/detail', book.id]);
}}
Nested Routes
Output:
Nested Routes

More Related Content

Similar to mean stack

Angular 2 for Java Developers
Angular 2 for Java DevelopersAngular 2 for Java Developers
Angular 2 for Java DevelopersYakov Fain
 
angularJs Workshop
angularJs WorkshopangularJs Workshop
angularJs WorkshopRan Wahle
 
Commit University - Exploring Angular 2
Commit University - Exploring Angular 2Commit University - Exploring Angular 2
Commit University - Exploring Angular 2Commit University
 
Angular - Chapter 3 - Components
Angular - Chapter 3 - ComponentsAngular - Chapter 3 - Components
Angular - Chapter 3 - ComponentsWebStackAcademy
 
angular-concepts-introduction-slides.pptx
angular-concepts-introduction-slides.pptxangular-concepts-introduction-slides.pptx
angular-concepts-introduction-slides.pptxshekharmpatil1309
 
Angular 4 for Java Developers
Angular 4 for Java DevelopersAngular 4 for Java Developers
Angular 4 for Java DevelopersYakov Fain
 
Angular workshop - Full Development Guide
Angular workshop - Full Development GuideAngular workshop - Full Development Guide
Angular workshop - Full Development GuideNitin Giri
 
Angular Js Get Started - Complete Course
Angular Js Get Started - Complete CourseAngular Js Get Started - Complete Course
Angular Js Get Started - Complete CourseEPAM Systems
 
02 - Angular Structural Elements - 1.pdf
02 - Angular Structural Elements - 1.pdf02 - Angular Structural Elements - 1.pdf
02 - Angular Structural Elements - 1.pdfBrunoOliveira631137
 
Voorhoede - Front-end architecture
Voorhoede - Front-end architectureVoorhoede - Front-end architecture
Voorhoede - Front-end architectureJasper Moelker
 
Angular 7 Firebase5 CRUD Operations with Reactive Forms
Angular 7 Firebase5 CRUD Operations with Reactive FormsAngular 7 Firebase5 CRUD Operations with Reactive Forms
Angular 7 Firebase5 CRUD Operations with Reactive FormsDigamber Singh
 
Introduction to angular js for .net developers
Introduction to angular js  for .net developersIntroduction to angular js  for .net developers
Introduction to angular js for .net developersMohd Manzoor Ahmed
 
Adding custom ui controls to your application (1)
Adding custom ui controls to your application (1)Adding custom ui controls to your application (1)
Adding custom ui controls to your application (1)Oro Inc.
 

Similar to mean stack (20)

Angular 2 for Java Developers
Angular 2 for Java DevelopersAngular 2 for Java Developers
Angular 2 for Java Developers
 
AngularJs Crash Course
AngularJs Crash CourseAngularJs Crash Course
AngularJs Crash Course
 
angularJs Workshop
angularJs WorkshopangularJs Workshop
angularJs Workshop
 
Mini-Training: AngularJS
Mini-Training: AngularJSMini-Training: AngularJS
Mini-Training: AngularJS
 
Angular Js Basics
Angular Js BasicsAngular Js Basics
Angular Js Basics
 
Commit University - Exploring Angular 2
Commit University - Exploring Angular 2Commit University - Exploring Angular 2
Commit University - Exploring Angular 2
 
Angular - Chapter 3 - Components
Angular - Chapter 3 - ComponentsAngular - Chapter 3 - Components
Angular - Chapter 3 - Components
 
angular-concepts-introduction-slides.pptx
angular-concepts-introduction-slides.pptxangular-concepts-introduction-slides.pptx
angular-concepts-introduction-slides.pptx
 
Angular 4 for Java Developers
Angular 4 for Java DevelopersAngular 4 for Java Developers
Angular 4 for Java Developers
 
Angular workshop - Full Development Guide
Angular workshop - Full Development GuideAngular workshop - Full Development Guide
Angular workshop - Full Development Guide
 
Introduction to Angular Js
Introduction to Angular JsIntroduction to Angular Js
Introduction to Angular Js
 
An Overview of Angular 4
An Overview of Angular 4 An Overview of Angular 4
An Overview of Angular 4
 
Angular Js Get Started - Complete Course
Angular Js Get Started - Complete CourseAngular Js Get Started - Complete Course
Angular Js Get Started - Complete Course
 
02 - Angular Structural Elements - 1.pdf
02 - Angular Structural Elements - 1.pdf02 - Angular Structural Elements - 1.pdf
02 - Angular Structural Elements - 1.pdf
 
Introduction to AngularJs
Introduction to AngularJsIntroduction to AngularJs
Introduction to AngularJs
 
Angular 2 in-1
Angular 2 in-1 Angular 2 in-1
Angular 2 in-1
 
Voorhoede - Front-end architecture
Voorhoede - Front-end architectureVoorhoede - Front-end architecture
Voorhoede - Front-end architecture
 
Angular 7 Firebase5 CRUD Operations with Reactive Forms
Angular 7 Firebase5 CRUD Operations with Reactive FormsAngular 7 Firebase5 CRUD Operations with Reactive Forms
Angular 7 Firebase5 CRUD Operations with Reactive Forms
 
Introduction to angular js for .net developers
Introduction to angular js  for .net developersIntroduction to angular js  for .net developers
Introduction to angular js for .net developers
 
Adding custom ui controls to your application (1)
Adding custom ui controls to your application (1)Adding custom ui controls to your application (1)
Adding custom ui controls to your application (1)
 

More from michaelaaron25322

Python programming language introduction unit
Python programming language introduction unitPython programming language introduction unit
Python programming language introduction unitmichaelaaron25322
 
memory Organization in computer organization
memory Organization in computer organizationmemory Organization in computer organization
memory Organization in computer organizationmichaelaaron25322
 
EST is a software architectural style that was created to guide the design an...
EST is a software architectural style that was created to guide the design an...EST is a software architectural style that was created to guide the design an...
EST is a software architectural style that was created to guide the design an...michaelaaron25322
 
Spring data jpa are used to develop spring applications
Spring data jpa are used to develop spring applicationsSpring data jpa are used to develop spring applications
Spring data jpa are used to develop spring applicationsmichaelaaron25322
 
Python programming language introduction unit
Python programming language introduction unitPython programming language introduction unit
Python programming language introduction unitmichaelaaron25322
 
Typescript language extension of java script
Typescript language extension of java scriptTypescript language extension of java script
Typescript language extension of java scriptmichaelaaron25322
 
Unit-II AES Algorithm which is used machine learning
Unit-II AES Algorithm which is used machine learningUnit-II AES Algorithm which is used machine learning
Unit-II AES Algorithm which is used machine learningmichaelaaron25322
 
UNIT2_NaiveBayes algorithms used in machine learning
UNIT2_NaiveBayes algorithms used in machine learningUNIT2_NaiveBayes algorithms used in machine learning
UNIT2_NaiveBayes algorithms used in machine learningmichaelaaron25322
 
Spring Data JPA USE FOR CREATING DATA JPA
Spring Data JPA USE FOR CREATING DATA  JPASpring Data JPA USE FOR CREATING DATA  JPA
Spring Data JPA USE FOR CREATING DATA JPAmichaelaaron25322
 
Computer organization algorithms like addition and subtraction and multiplica...
Computer organization algorithms like addition and subtraction and multiplica...Computer organization algorithms like addition and subtraction and multiplica...
Computer organization algorithms like addition and subtraction and multiplica...michaelaaron25322
 
karnaughmaprev1-130728135103-phpapp01.ppt
karnaughmaprev1-130728135103-phpapp01.pptkarnaughmaprev1-130728135103-phpapp01.ppt
karnaughmaprev1-130728135103-phpapp01.pptmichaelaaron25322
 
booleanalgebra-140914001141-phpapp01 (1).ppt
booleanalgebra-140914001141-phpapp01 (1).pptbooleanalgebra-140914001141-phpapp01 (1).ppt
booleanalgebra-140914001141-phpapp01 (1).pptmichaelaaron25322
 

More from michaelaaron25322 (13)

Python programming language introduction unit
Python programming language introduction unitPython programming language introduction unit
Python programming language introduction unit
 
memory Organization in computer organization
memory Organization in computer organizationmemory Organization in computer organization
memory Organization in computer organization
 
EST is a software architectural style that was created to guide the design an...
EST is a software architectural style that was created to guide the design an...EST is a software architectural style that was created to guide the design an...
EST is a software architectural style that was created to guide the design an...
 
Spring data jpa are used to develop spring applications
Spring data jpa are used to develop spring applicationsSpring data jpa are used to develop spring applications
Spring data jpa are used to develop spring applications
 
Python programming language introduction unit
Python programming language introduction unitPython programming language introduction unit
Python programming language introduction unit
 
Typescript language extension of java script
Typescript language extension of java scriptTypescript language extension of java script
Typescript language extension of java script
 
Unit-II AES Algorithm which is used machine learning
Unit-II AES Algorithm which is used machine learningUnit-II AES Algorithm which is used machine learning
Unit-II AES Algorithm which is used machine learning
 
UNIT2_NaiveBayes algorithms used in machine learning
UNIT2_NaiveBayes algorithms used in machine learningUNIT2_NaiveBayes algorithms used in machine learning
UNIT2_NaiveBayes algorithms used in machine learning
 
Spring Data JPA USE FOR CREATING DATA JPA
Spring Data JPA USE FOR CREATING DATA  JPASpring Data JPA USE FOR CREATING DATA  JPA
Spring Data JPA USE FOR CREATING DATA JPA
 
Computer organization algorithms like addition and subtraction and multiplica...
Computer organization algorithms like addition and subtraction and multiplica...Computer organization algorithms like addition and subtraction and multiplica...
Computer organization algorithms like addition and subtraction and multiplica...
 
karnaughmaprev1-130728135103-phpapp01.ppt
karnaughmaprev1-130728135103-phpapp01.pptkarnaughmaprev1-130728135103-phpapp01.ppt
karnaughmaprev1-130728135103-phpapp01.ppt
 
booleanalgebra-140914001141-phpapp01 (1).ppt
booleanalgebra-140914001141-phpapp01 (1).pptbooleanalgebra-140914001141-phpapp01 (1).ppt
booleanalgebra-140914001141-phpapp01 (1).ppt
 
mst_unit1.pptx
mst_unit1.pptxmst_unit1.pptx
mst_unit1.pptx
 

Recently uploaded

An experimental study in using natural admixture as an alternative for chemic...
An experimental study in using natural admixture as an alternative for chemic...An experimental study in using natural admixture as an alternative for chemic...
An experimental study in using natural admixture as an alternative for chemic...Chandu841456
 
Introduction-To-Agricultural-Surveillance-Rover.pptx
Introduction-To-Agricultural-Surveillance-Rover.pptxIntroduction-To-Agricultural-Surveillance-Rover.pptx
Introduction-To-Agricultural-Surveillance-Rover.pptxk795866
 
Instrumentation, measurement and control of bio process parameters ( Temperat...
Instrumentation, measurement and control of bio process parameters ( Temperat...Instrumentation, measurement and control of bio process parameters ( Temperat...
Instrumentation, measurement and control of bio process parameters ( Temperat...121011101441
 
Artificial-Intelligence-in-Electronics (K).pptx
Artificial-Intelligence-in-Electronics (K).pptxArtificial-Intelligence-in-Electronics (K).pptx
Artificial-Intelligence-in-Electronics (K).pptxbritheesh05
 
Churning of Butter, Factors affecting .
Churning of Butter, Factors affecting  .Churning of Butter, Factors affecting  .
Churning of Butter, Factors affecting .Satyam Kumar
 
UNIT III ANALOG ELECTRONICS (BASIC ELECTRONICS)
UNIT III ANALOG ELECTRONICS (BASIC ELECTRONICS)UNIT III ANALOG ELECTRONICS (BASIC ELECTRONICS)
UNIT III ANALOG ELECTRONICS (BASIC ELECTRONICS)Dr SOUNDIRARAJ N
 
Concrete Mix Design - IS 10262-2019 - .pptx
Concrete Mix Design - IS 10262-2019 - .pptxConcrete Mix Design - IS 10262-2019 - .pptx
Concrete Mix Design - IS 10262-2019 - .pptxKartikeyaDwivedi3
 
INFLUENCE OF NANOSILICA ON THE PROPERTIES OF CONCRETE
INFLUENCE OF NANOSILICA ON THE PROPERTIES OF CONCRETEINFLUENCE OF NANOSILICA ON THE PROPERTIES OF CONCRETE
INFLUENCE OF NANOSILICA ON THE PROPERTIES OF CONCRETEroselinkalist12
 
Comparative Analysis of Text Summarization Techniques
Comparative Analysis of Text Summarization TechniquesComparative Analysis of Text Summarization Techniques
Comparative Analysis of Text Summarization Techniquesugginaramesh
 
Architect Hassan Khalil Portfolio for 2024
Architect Hassan Khalil Portfolio for 2024Architect Hassan Khalil Portfolio for 2024
Architect Hassan Khalil Portfolio for 2024hassan khalil
 
Arduino_CSE ece ppt for working and principal of arduino.ppt
Arduino_CSE ece ppt for working and principal of arduino.pptArduino_CSE ece ppt for working and principal of arduino.ppt
Arduino_CSE ece ppt for working and principal of arduino.pptSAURABHKUMAR892774
 
main PPT.pptx of girls hostel security using rfid
main PPT.pptx of girls hostel security using rfidmain PPT.pptx of girls hostel security using rfid
main PPT.pptx of girls hostel security using rfidNikhilNagaraju
 
Work Experience-Dalton Park.pptxfvvvvvvv
Work Experience-Dalton Park.pptxfvvvvvvvWork Experience-Dalton Park.pptxfvvvvvvv
Work Experience-Dalton Park.pptxfvvvvvvvLewisJB
 
Introduction to Machine Learning Unit-3 for II MECH
Introduction to Machine Learning Unit-3 for II MECHIntroduction to Machine Learning Unit-3 for II MECH
Introduction to Machine Learning Unit-3 for II MECHC Sai Kiran
 
Decoding Kotlin - Your guide to solving the mysterious in Kotlin.pptx
Decoding Kotlin - Your guide to solving the mysterious in Kotlin.pptxDecoding Kotlin - Your guide to solving the mysterious in Kotlin.pptx
Decoding Kotlin - Your guide to solving the mysterious in Kotlin.pptxJoão Esperancinha
 

Recently uploaded (20)

An experimental study in using natural admixture as an alternative for chemic...
An experimental study in using natural admixture as an alternative for chemic...An experimental study in using natural admixture as an alternative for chemic...
An experimental study in using natural admixture as an alternative for chemic...
 
Introduction-To-Agricultural-Surveillance-Rover.pptx
Introduction-To-Agricultural-Surveillance-Rover.pptxIntroduction-To-Agricultural-Surveillance-Rover.pptx
Introduction-To-Agricultural-Surveillance-Rover.pptx
 
Instrumentation, measurement and control of bio process parameters ( Temperat...
Instrumentation, measurement and control of bio process parameters ( Temperat...Instrumentation, measurement and control of bio process parameters ( Temperat...
Instrumentation, measurement and control of bio process parameters ( Temperat...
 
Artificial-Intelligence-in-Electronics (K).pptx
Artificial-Intelligence-in-Electronics (K).pptxArtificial-Intelligence-in-Electronics (K).pptx
Artificial-Intelligence-in-Electronics (K).pptx
 
Churning of Butter, Factors affecting .
Churning of Butter, Factors affecting  .Churning of Butter, Factors affecting  .
Churning of Butter, Factors affecting .
 
UNIT III ANALOG ELECTRONICS (BASIC ELECTRONICS)
UNIT III ANALOG ELECTRONICS (BASIC ELECTRONICS)UNIT III ANALOG ELECTRONICS (BASIC ELECTRONICS)
UNIT III ANALOG ELECTRONICS (BASIC ELECTRONICS)
 
Concrete Mix Design - IS 10262-2019 - .pptx
Concrete Mix Design - IS 10262-2019 - .pptxConcrete Mix Design - IS 10262-2019 - .pptx
Concrete Mix Design - IS 10262-2019 - .pptx
 
INFLUENCE OF NANOSILICA ON THE PROPERTIES OF CONCRETE
INFLUENCE OF NANOSILICA ON THE PROPERTIES OF CONCRETEINFLUENCE OF NANOSILICA ON THE PROPERTIES OF CONCRETE
INFLUENCE OF NANOSILICA ON THE PROPERTIES OF CONCRETE
 
Comparative Analysis of Text Summarization Techniques
Comparative Analysis of Text Summarization TechniquesComparative Analysis of Text Summarization Techniques
Comparative Analysis of Text Summarization Techniques
 
young call girls in Green Park🔝 9953056974 🔝 escort Service
young call girls in Green Park🔝 9953056974 🔝 escort Serviceyoung call girls in Green Park🔝 9953056974 🔝 escort Service
young call girls in Green Park🔝 9953056974 🔝 escort Service
 
Architect Hassan Khalil Portfolio for 2024
Architect Hassan Khalil Portfolio for 2024Architect Hassan Khalil Portfolio for 2024
Architect Hassan Khalil Portfolio for 2024
 
POWER SYSTEMS-1 Complete notes examples
POWER SYSTEMS-1 Complete notes  examplesPOWER SYSTEMS-1 Complete notes  examples
POWER SYSTEMS-1 Complete notes examples
 
Arduino_CSE ece ppt for working and principal of arduino.ppt
Arduino_CSE ece ppt for working and principal of arduino.pptArduino_CSE ece ppt for working and principal of arduino.ppt
Arduino_CSE ece ppt for working and principal of arduino.ppt
 
main PPT.pptx of girls hostel security using rfid
main PPT.pptx of girls hostel security using rfidmain PPT.pptx of girls hostel security using rfid
main PPT.pptx of girls hostel security using rfid
 
Work Experience-Dalton Park.pptxfvvvvvvv
Work Experience-Dalton Park.pptxfvvvvvvvWork Experience-Dalton Park.pptxfvvvvvvv
Work Experience-Dalton Park.pptxfvvvvvvv
 
Exploring_Network_Security_with_JA3_by_Rakesh Seal.pptx
Exploring_Network_Security_with_JA3_by_Rakesh Seal.pptxExploring_Network_Security_with_JA3_by_Rakesh Seal.pptx
Exploring_Network_Security_with_JA3_by_Rakesh Seal.pptx
 
young call girls in Rajiv Chowk🔝 9953056974 🔝 Delhi escort Service
young call girls in Rajiv Chowk🔝 9953056974 🔝 Delhi escort Serviceyoung call girls in Rajiv Chowk🔝 9953056974 🔝 Delhi escort Service
young call girls in Rajiv Chowk🔝 9953056974 🔝 Delhi escort Service
 
Introduction to Machine Learning Unit-3 for II MECH
Introduction to Machine Learning Unit-3 for II MECHIntroduction to Machine Learning Unit-3 for II MECH
Introduction to Machine Learning Unit-3 for II MECH
 
Decoding Kotlin - Your guide to solving the mysterious in Kotlin.pptx
Decoding Kotlin - Your guide to solving the mysterious in Kotlin.pptxDecoding Kotlin - Your guide to solving the mysterious in Kotlin.pptx
Decoding Kotlin - Your guide to solving the mysterious in Kotlin.pptx
 
9953056974 Call Girls In South Ex, Escorts (Delhi) NCR.pdf
9953056974 Call Girls In South Ex, Escorts (Delhi) NCR.pdf9953056974 Call Girls In South Ex, Escorts (Delhi) NCR.pdf
9953056974 Call Girls In South Ex, Escorts (Delhi) NCR.pdf
 

mean stack

  • 1. What is Angular? • Angular is an open-source JavaScript framework for building both mobile and desktop web applications. • Angular is exclusively used to build Single Page Applications (SPA). • Angular is completely rewritten and is not an upgrade to Angular 1. • Developers prefer TypeScript to write Angular code. But other than TypeScript, you can also write code using JavaScript (ES5 or ECMAScript 5). • Madewithangularjs.com Features of Angular 1. Dependency Injection 2. Data Binding 3. Testing 4. Model view Controller ANGULAR
  • 2. Angular application setup: To develop an application using Angular on a local system, you need to set up a development environment that includes the installation of: • Node.js (^12.20.2 || ^14.15.5 || ^16.10.0) and npm (min version required 6.13.4) • Angular CLI • Visual Studio Code Steps to install Angular CLI: • Angular CLI can be installed using Node package manager using the command shown below D:> npm install -g @angular/cli ANGULAR APPLICATION SETUP
  • 3. ANGULAR APPLICATION SETUP • Test successful installation of Angular CLI using the following command D:> ng v
  • 4. ANGULAR APPLICATION SETUP • Angular CLI is a command-line interface tool to build Angular applications. It makes application development faster and easier to maintain. • Using CLI, you can create projects, add files to them, and perform development tasks such as testing, bundling, and deployment of applications. --pic---in mail • To create an application in the Angular. ng new MyApp
  • 5. COMPONENTS AND MODULES Components: • A component is the basic building block of an Angular application • It emphasize the separation of concerns and each part of the Angular application can be written independently of one another. • It is reusable Modules: • Modules in Angular are used to organize the application. It sets the execution context of an Angular application. • A module in Angular is a class with the @NgModule decorator added to it. • @NgModule metadata will contain the declarations of components, pipes, directives, services that are to be used across the application. • Every Angular application should have one root module which is loaded first to launch the application. • Submodules should be configured in the root module.
  • 6. COMPONENTS AND MODULES Components: • A component is the basic building block of an Angular application • It emphasize the separation of concerns and each part of the Angular application can be written independently of one another. • It is reusable
  • 11. COMPONENTS AND MODULES • To create a component ng generate component component_name
  • 12. Executing Angular Application Execute the application and check the output. • Open terminal in Visual Studio Code IDE by selecting View Menu -> Integrated Terminal. • Type the following command to run the application ng serve --open
  • 13. Elements of Template Template • Templates separate the view layer from the rest of the framework. • You can change the view layer without breaking the application. • Templates in Angular represents a view and its role is to display data and change the data whenever an event occurs • The default language for templates is HTML The basic elements of template syntax: •HTML •Template Expressions •Template Statements
  • 14. Elements of Template Example: hello.component.ts: import { Component, OnInit } from '@angular/core'; @Component({ selector: 'app-hello', templateUrl: './hello.component.html', styleUrls: ['./hello.component.css'] }) export class HelloComponent implements OnInit { courseName = "Angular"; constructor() { } ngOnInit() { } changeName() { this.courseName = "TypeScript"; }
  • 15. Elements of Template Example: hello.component.html: <h1>Welcome</h1> <h2>Course Name: {{ courseName }}</h2> <p (click)="changeName()">Click here to change</p>
  • 16. Change Detection • Angular’s change detection system operates by comparing the current and previous states of the application data. • When there is a change in the data, the change detection mechanism triggers a re-evaluation of the view, updating it with the new data. • Angular offers two modes of change detection: default and OnPush. • Angular is very fast though it goes through all components from top to bottom for every single event as it generates VM-friendly code. • Due to this, Angular can perform hundreds of thousands of checks in a few milliseconds.
  • 17. Structural Directives • A Structural directive changes the DOM layout by adding and removing DOM elements. *directive-name = expression • Angular has few built-in structural directives such as: • ngIf • ngFor • ngSwitch ngIf:ngIf directive renders components or elements conditionally based on whether or not an expression is true or false. Examlpe: App.component.ts: import { Component } from '@angular/core'; @Component({ selector: 'app-root', templateUrl: './app.component.html', styleUrls: ['./app.component.css'] })
  • 18. Structural Directives export class AppComponent { isAuthenticated!: boolean; submitted = false; userName!: string; onSubmit(name: string, password: string) { this.submitted = true; this.userName = name; if (name === 'admin' && password === 'admin') { this.isAuthenticated = true; } else { this.isAuthenticated = false; } } }
  • 19. Structural Directives app.component.html: <div *ngIf="!submitted"> <form> <label>User Name</label> <input type="text" #username /><br /><br /> <label for="password">Password</label> <input type="password" name="password" #password /><br/> </form> <button (click)="onSubmit(username.value, password.value)">Login</button> </div> <div *ngIf="submitted"> <div *ngIf="isAuthenticated; else failureMsg"> <h4>Welcome {{ userName }}</h4> </div> <ng-template #failureMsg> <h4>Invalid Login !!! Please try again...</h4> </ng-template> <button type="button" (click)="submitted = false">Back</button> </div>
  • 21. Structural Directives • ngFor:ngFor directive is used to iterate over-collection of data i.e., arrays. *ngFor = "expression" Example: App.component.ts: import { Component } from '@angular/core'; @Component({ selector: 'app-root', templateUrl: './app.component.html', styleUrls: ['./app.component.css'] }) export class AppComponent { courses: any[] = [ { id: 1, name: "TypeScript" }, { id: 2, name: "Angular" }, { id: 3, name: "Node JS" }, { id: 1, name: "TypeScript" } ]; }
  • 22. Structural Directives App.component.html: <ul> <li *ngFor="let course of courses; let i = index"> {{i}} - {{ course.name }} </li> </ul> Output
  • 23. Structural Directives • ngSwitch:ngSwitch adds or removes DOM trees when their expressions match the switch expression. Its syntax is comprised of two directives, an attribute directive, and a structural directive. • It is very similar to a switch statement in JavaScript and other programming languages. Example: App.component.ts: import { Component } from '@angular/core'; @Component({ selector: 'app-root', templateUrl: './app.component.html', styleUrls: ['./app.component.css'] }) export class AppComponent { choice = 0; nextChoice() { this.choice++; } }
  • 24. Structural Directives App.component.html: <h4> Current choice is {{ choice }} </h4> <div [ngSwitch]="choice"> <p *ngSwitchCase="1">First Choice</p> <p *ngSwitchCase="2">Second Choice</p> <p *ngSwitchCase="3">Third Choice</p> <p *ngSwitchCase="2">Second Choice Again</p> <p *ngSwitchDefault>Default Choice</p> </div> <div> <button (click)="nextChoice()"> Next Choice </button> </div>
  • 26. Custom Structural Directive • You can create custom structural directives when there is no built-in directive available for the required functionality. • For example, when you want to manipulate the DOM in a particular way which is different from how the built-in structural directives manipulate. Example: Generate a directive called 'repeat' using the following command: ng generate directive repeat Repeat.directive.ts: import { Directive, TemplateRef, ViewContainerRef, Input } from '@angular/core'; @Directive({ selector: '[appRepeat]' })
  • 27. Custom Structural Directive export class RepeatDirective { constructor(private templateRef: TemplateRef<any>, private viewContainer: ViewContainerRef) { } @Input() set appRepeat(count: number) { for (let i = 0; i < count; i++) { this.viewContainer.createEmbeddedView(this.templat eRef); } } } App.component.html: <h3>Structural Directive</h3> <p *appRepeat="5">I am being repeated...</p> Output:
  • 29. Attribute Directives • Attribute directives change the appearance/behavior of a component/element. • Following are built-in attribute directives: • ngStyle • ngClass • ngStyle:This directive is used to modify a component/element’s style. You can use the following syntax to set a single CSS style to the element which is also known as style binding [style.<cssproperty>] = "value“ Example: App.component.ts: import { Component } from '@angular/core'; @Component({ selector: 'app-root', templateUrl: './app.component.html', styleUrls: ['./app.component.css'] }) export class AppComponent { colorName = 'yellow'; color = 'red'; }
  • 31. Attribute Directives • ngClass:It allows you to dynamically set and change the CSS classes for a given DOM element. Use the following syntax to set a single CSS class to the element which is also known as class binding. Example: App.component.ts: import { Component } from '@angular/core'; @Component({ selector: 'app-root', templateUrl: './app.component.html', styleUrls: ['./app.component.css'] }) export class AppComponent { isBordered = true; } App.compnnent.html: <div [class.bordered]="isBordered"> Border {{ isBordered ? "ON" : "OFF" }} </div>
  • 32. Attribute Directives App.component.css: .bordered { border: 1px dashed black; background-color: #eee; } Output:
  • 33. Custom Attribute Directive • You can create a custom attribute directive when there is no built-in directive available for the required functionality. Example: Generate a directive called 'message' using the following command ng generate directive message Message.directive.ts: import { Directive, ElementRef, Renderer2, HostListener, Input } from '@angular/core'; @Directive({ selector: '[appMessage]' }) export class MessageDirective { @Input('appMessage') message!: string; constructor(private el: ElementRef, private renderer: Renderer2) { renderer.setStyle(el.nativeElement, 'cursor', 'pointer');}
  • 34. Custom Attribute Directive @HostListener('click') onClick() { this.el.nativeElement.innerHTML = this.message; this.renderer.setStyle(this.el.nativeElement, 'color', 'red'); } } App.component.ts: import { Component } from '@angular/core'; @Component({ selector: 'app-root', templateUrl: './app.component.html', styleUrls: ['./app.component.css'] }) export class AppComponent { myMessage="Hello, I am from attribute directive" }
  • 35. Custom Attribute Directive app.component.html: <h3>Attribute Directive</h3> <p [appMessage]="myMessage">Click Here</p> App.component.css: h3 { color: #369; font-family: Arial, Helvetica, sans-serif; font-size: 250%; } p { color: #ff0080; font-family: Arial, Helvetica, sans-serif; font-size: 150%; }
  • 45. Property Binding • Property Binding in Angular helps you set values for properties of HTML elements or directives. • To bind to an element's property, enclose it in square brackets, [], which identifies the property as a target property.A target property is the DOM property to which you want to assign a value. Syntax: <img [src] = 'imageUrl' /> or <img bind-src = 'imageUrl' /> • Here the component's imageUrl property is bound to the value to the image element's property src. • Interpolation can be used as an alternative to property binding. Property binding is mostly used when it is required to set a non-string value. Example: app.component.ts import { Component } from '@angular/core'; @Component({ selector: 'app-root', templateUrl: './app.component.html', styleUrls: ['./app.component.css']
  • 46. Property Binding }) export class AppComponent { imgUrl = 'assets/logo.png'; } Inside src/assets and place a logo.png file inside it. app.component.html <img [src]='imgUrl’> Output:
  • 47. Attribute Binding • Property binding will not work for a few elements/pure attributes like ARIA, SVG, and COLSPAN. In such cases, you need to go for attribute binding. • Attribute binding can be used to bind a component property to the attribute directly • Binding to the colspan attribute helps you to keep your tables programmatically dynamic. • Depending on the amount of data that your application populates a table with, the number of columns that a row spans could change. • Attribute binding syntax starts with prefix attr. followed by a dot sign and the name of an attribute. And then set the attribute value to an expression. <td [attr.colspan] = "2+3">Hello</td> Example: app.component.ts import { Component } from '@angular/core'; @Component({ selector: 'app-root', templateUrl: './app.component.html', styleUrls: ['./app.component.css'] })
  • 48. Attribute Binding export class AppComponent { colspanValue = '2’; } app.component.html <table border=1> <tr> <td [attr.colspan]="colspanValue"> First </td> <td>Second</td> </tr> <tr> <td>Third</td> <td>Fourth</td> <td>Fifth</td> </tr> </table>
  • 50. Style and Event Binding  Style binding is used to set inline styles. Syntax starts with prefix style, followed by a dot and the name of a CSS style property. Syntax: [style.styleproperty]  User actions such as entering text in input boxes, picking items from lists, button clicks may result in a flow of data in the opposite direction: from an element to the component.  Event binding syntax consists of a target event with ( ) on the left of an equal sign and a template statement on the right. Syntax: < element (event) = function() > Example: app.component.ts import { Component } from '@angular/core'; @Component({ selector: 'app-root', templateUrl: './app.component.html', styleUrls: ['./app.component.css'] })
  • 51. Style and Event Binding export class AppComponent { onSave($event: any){ console.log("Save button is clicked!", $event) } } app.component.html <h1 [style.color] = "'red'" [style.text-align] = "'left'" > Style Binding!!! </h1> <h2>Event Binding </h2> <button (click)="onSave($event)">Save</button>
  • 52. Style and Event Binding Output:
  • 53. Built in Pipes • Pipes provide a beautiful way of transforming the data inside templates, for the purpose of display. • Pipes in Angular take an expression value as an input and transform it into the desired output before displaying it to the user. • It provides a clean and structured code as you can reuse the pipes throughout the application, while declaring each pipe just once. Syntax: {{ expression | pipe }} • Uppercase:This pipe converts the template expression into uppercase. Syntax:{{ expression | uppercase }} • Lowercase:This pipe converts the template expression into lowercase. Syntax: {{ expression | lowercase }} • Titlecase:This pipe converts the first character in each word of the given expression into a capital letter. Syntax: {{ expression | titlecase }}
  • 54. Built in Pipes Example: app.component.ts import { Component } from '@angular/core'; @Component({ selector: 'app-root', templateUrl: './app.component.html', styleUrls: ['./app.component.css']}) export class AppComponent { title = 'product details'; productCode = 'PROD_P001'; productName = 'Laptop'; } app.component,html <h3> {{ title | titlecase}} </h3> <table style="text-align:left"> <tr> <th> Product Code </th> <td> {{ productCode | lowercase }} </td> </tr>
  • 55. Built in Pipes <tr> <th> Product Name </th> <td> {{ productName | uppercase }} </td> </tr> </table> Output:
  • 56. Passing Parameters to Pipes • A pipe can also have optional parameters to change the output. To pass parameters, after a • pipe name add a colon( : ) followed by the parameter value. pipename : parametervalue • This pipe displays a currency symbol before the expression. By default, it displays the currency symbol $ {{ expression | currency:currencyCode:symbol:digitInfo:locale }} Example: app.component.ts: import { Component } from '@angular/core'; @Component({ selector: 'app-root', templateUrl: './app.component.html', styleUrls: ['./app.component.css'] })
  • 57. Passing Parameters to Pipes export class AppComponent { title = 'product details'; productCode = 'PROD_P001'; productName = 'Apple MPTT2 MacBook Pro'; productPrice = 217021; purchaseDate = '1/17/2018'; productTax = '0.1'; productRating = 4.92; } app.component.html: <h3> {{ title | titlecase}} </h3> <table style="text-align:left"> <tr> <th> Product Code </th> <td> {{ productCode | slice:5:9 }} </td> </tr>
  • 58. Passing Parameters to Pipes <tr> <th> Product Name </th> <td> {{ productName | uppercase }} </td> </tr> <tr> <th> Product Price </th> <td> {{ productPrice | currency: 'INR':'symbol':'':'fr' }} </td> </tr> <tr> <th> Purchase Date </th> <td> {{ purchaseDate | date:'fullDate' | lowercase}} </td> </tr> <tr> <th> Product Tax </th> <td> {{ productTax | percent : '.2' }} </td> </tr>
  • 59. Passing Parameters to Pipes <tr> <th> Product Rating </th> <td>{{ productRating | number:'1.3-5'}} </td> </tr> </table> app.module.ts: import { NgModule } from '@angular/core'; import { BrowserModule } from '@angular/platform- browser'; import { AppRoutingModule } from './app- routing.module'; import { AppComponent } from './app.component'; import { CoursesListComponent } from './courses- list/courses-list.component'; @NgModule({ declarations: [ AppComponent, ],
  • 60. Passing Parameters to Pipes imports: [ BrowserModule, ], providers: [], bootstrap: [AppComponent] }) export class AppModule { } Output:
  • 61. Nested Components Basics • Nested component is a component that is loaded into another component • The component where another component is loaded onto is called a container component/parent component. • The root component is loaded in the index.html page using its selector name. • Similarly, to load one component into a parent component, use the selector name of the component in the template i.e., the HTML page of the container component. • Example Program: app.module.ts import { NgModule } from '@angular/core'; import { BrowserModule } from '@angular/platform-browser'; import { AppComponent } from './app.component'; import { CourseListComponent } from './course-list/course- list.component';
  • 62. Nested Components Basics @NgModule({ declarations: [ AppComponent, CourseListComponent, ], imports: [ BrowserModule, ], providers: [], bootstrap: [AppComponent] }) export class AppModule { } course-list.component.ts: import { Component } from '@angular/core'; @Component({ selector: 'app-course-list', templateUrl: './course-list.component.html', styleUrls: ['./course-list.component.css'] })
  • 63. Nested Components Basics export class CourseListComponent { courses = [ { courseId: 1, courseName: "Node JS" }, { courseId: 2, courseName: "Typescript" }, { courseId: 3, courseName: "Angular" }, { courseId: 4, courseName: "React JS" } ]; } course.component.html: <table border="1"> <thead> <tr> <th>Course ID</th> <th>Course Name</th> </tr> </thead>
  • 64. Nested Components Basics <tbody> <tr *ngFor="let course of courses"> <td>{{ course.courseId }}</td> <td>{{ course.courseName }}</td> </tr> </tbody> </table> course-list.component.css: tr{ text-align:center; } app.component.html: <h2>Popular Courses</h2> <button (click)="show = true">View Courses list</button><br /><br /> <div *ngIf="show"> <app-course-list></app-course-list> </div>
  • 65. Nested Components Basics app.component.ts: import { Component } from '@angular/core'; @Component({ selector: 'app-root', templateUrl: './app.component.html', styleUrls: ['./app.component.css'] }) export class AppComponent { show!: boolean; title: any; } Output:
  • 67. Passing data from Container Component to Child Component • Component communication is needed if data needs to be shared between the components In order to pass data from container/parent component to child component, @Input decorator can be used. • A child component can use @Input decorator on any property type like arrays, objects, etc. making it a data-bound input property. • The parent component can pass value to the data-bound input property when rendering the child within it. • Program: courses-list.component.ts: import { Component, Input } from '@angular/core'; @Component({ selector: 'app-course-list', templateUrl: './course-list.component.html', styleUrls: ['./course-list.component.css'] })
  • 68. Passing data from Container Component to Child Component • Component communication is needed if data needs to be shared between the components In order to pass data from container/parent component to child component, @Input decorator can be used. • A child component can use @Input decorator on any property type like arrays, objects, etc. making it a data-bound input property. • The parent component can pass value to the data-bound input property when rendering the child within it. Program: courses-list.component.ts: import { Component, Input } from '@angular/core'; @Component({ selector: 'app-course-list', templateUrl: './course-list.component.html', styleUrls: ['./course-list.component.css'] })
  • 69. Passing data from Container Component to Child Component export class CourseListComponent { courses = [ { courseId: 1, courseName: "Node JS" }, { courseId: 2, courseName: "Typescript" }, { courseId: 3, courseName: "Angular" }, { courseId: 4, courseName: "React JS" } ]; course!: any[]; @Input() set cName(name: string) { this.course = []; for (var i = 0; i < this.courses.length; i++) { if (this.courses[i].courseName === name) { this.course.push(this.courses[i]); } } } }
  • 70. Passing data from Container Component to Child Component course-list.component.html: <table border="1"> <thead> <tr> <th>Course ID</th> <th>Course Name</th> </tr> </thead> <tbody> <tr *ngFor="let course of courses"> <td>{{c.courseId}}</td> <td>{{c.courseName}}</td> </tr> </tbody> </table>
  • 71. Passing data from Container Component to Child Component app.component.html: <h2>Course Details</h2> Select a course to view <select #course (change)="name = course.value"> <option value="Node JS">Node JS</option> <option value="Typescript">Typescript</option> <option value="Angular">Angular</option> <option value="React JS">React JS</option></select ><br /><br /> <app-courses-list [cName]="name"></app-courses-list> app.component.ts: import { Component } from '@angular/core'; @Component({ selector: 'app-root', styleUrls: ['./app.component.css'], templateUrl: './app.component.html' })
  • 72. Passing data from Container Component to Child Component export class AppComponent { name!: string; } Output:
  • 73. Passing data from Child Component to ContainerComponent • If a child component wants to send data to its parent component, then it must create a property with @Output decorator. • The only method for the child component to pass data to its parent component is through events. The property must be of type EventEmitter. Program: course-list.compnent.ts import { Component,OnInit, Input,Output, EventEmitter } from '@angular/core'; @Component({ selector: 'app-courses-list', templateUrl: './course-list.component.html', styleUrls: ['./course-list.component.css'], }) export class CoursesListComponent { courses = [ { courseId: 1, courseName: 'Node JS' }, { courseId: 2, courseName: 'Typescript' },
  • 74. Passing data from Child Component to ContainerComponent { courseId: 3, courseName: 'Angular' }, { courseId: 4, courseName: 'React JS' }, ]; registerEvent: any; register(courseName:string){ this.registerEvent.emit(courseName); } } course-list.component.html <table border="1"> <thead> <tr> <th>Course ID</th> <th>Course Name</th> <th></th> </tr> </thead>
  • 75. Passing data from Child Component to ContainerComponent <tbody> <tr *ngFor="let course of courses"> <td>{{ course.courseId }}</td> <td>{{ course.courseName }}</td> <td><button (click)="register(course.courseName)">Register</button ></td> </tr> </tbody> </table> app.component.html <h2>Courses List</h2> <app-courses-list (registerEvent)="courseReg($event)"></app-courses- list> <br /><br /> <div *ngIf="message">{{ message }}</div>
  • 76. Passing data from Child Component to ContainerComponent app.component.ts import { Component } from '@angular/core'; @Component({ selector: 'app-root', styleUrls: ['./app.component.css'], templateUrl: './app.component.html' }) export class AppComponent { message!: string; courseReg(courseName: string) { this.message = `Your registration for ${courseName} is successful`; } }
  • 77. Passing data from Child Component to ContainerComponent Output:
  • 78. Shadow DOM • Shadow DOM is a web components standard by W3C. • It enables encapsulation for DOM tree and styles. Shadow DOM hides DOM logic behind other elements and confines styles only for that component.ViewEncapsulation.ShadowDOM enables Angular to use the browser's native Shadow DOM implementation. • Angular doesn’t use shadow DOM in ViewEncapsulation.None. • All the styles defined in a component is applied to the entire document. i.e., a component can overwrite another component’s styles. This is an unscoped strategy. Program: ViewEncapsulation.ShadowDOM: Create a component first using ng generate component first
  • 79. Shadow DOM First.component.css: .cmp { padding: 6px; margin: 6px; border: blue 2px solid; } First.component.html: <div class="cmp">First Component</div> Now generate another component with name Second using ng generate second
  • 80. Shadow DOM Second.component.css .cmp { border: green 2px solid; padding: 6px; margin: 6px; } Second.component.html <div class="cmp">Second Component</div> Second.component.ts import { Component, ViewEncapsulation } from '@angular/core'; @Component({ selector: 'app-second', templateUrl: './second.component.html', styleUrls: ['./second.component.css'], encapsulation: ViewEncapsulation.ShadowDom }) export class SecondComponent {}
  • 81. Shadow DOM App.component.css .cmp { padding: 8px; margin: 6px; border: 2px solid red; } App.component.html <h3>CSS Encapsulation with Angular</h3> <div class="cmp"> App Component <app-first></app-first> <app-second></app-second> </div>
  • 82. Shadow DOM Output: ViewEncapsulation.None App.component.ts: import { Component, ViewEncapsulation } from '@angular/core'; @Component({ selector: 'app-root', styleUrls: ['./app.component.css'], templateUrl: './app.component.html', encapsulation: ViewEncapsulation.None }) export class AppComponent {}
  • 83. Shadow DOM Second.component.ts: import { Component, ViewEncapsulation } from '@angular/core'; @Component({ selector: 'app-second', templateUrl: './second.component.html', styleUrls: ['./second.component.css'], encapsulation: ViewEncapsulation.None }) export class SecondComponent { } Output:
  • 84. Component Life Cycle • A component has a life cycle that is managed by Angular. • It includes creating a component, rendering it, creating and rendering its child components, checks when its data-bound properties change, and destroy it before removing it from the DOM. • Angular has some methods/hooks which provide visibility into these key life moments of a component and the ability to act when they occur. ngOnChanges – It gets invoked when Angular sets data-bound input property i.e., the property attached with @Input(). This will be invoked whenever input property changes its value ngOnInit – It gets invoked when Angular initializes the directive or component ngDoCheck - It will be invoked for every change detection in the application ngAfterContentInit – It gets invoked after Angular projects content into its view ngAfterContentChecked – It gets invoked after Angular checks the bindings of the content it projected into its view
  • 85. Component Life Cycle Program: app.component.ts: import { Component, OnInit, DoCheck, AfterContentInit, AfterContentChecked,AfterViewInit, AfterViewChecked,OnDestroy } from '@angular/core'; @Component({ --------------- }) export class AppComponent implements OnInit, DoCheck, AfterContentInit, AfterContentChecked, AfterViewInit, AfterViewChecked, OnDestroy { data = 'Angular'; ngOnInit() { console.log('Init'); }
  • 86. Component Life Cycle ngDoCheck(): void { console.log('Change detected'); } ngAfterContentInit(): void { console.log('After content init'); } ngAfterContentChecked(): void { console.log('After content checked'); } ngAfterViewInit(): void { console.log('After view init'); } ngAfterViewChecked(): void { console.log('After view checked'); } ngOnDestroy(): void { console.log('Destroy'); } }
  • 87. Component Life Cycle app.component.html: <div> <h1>I'm a container component</h1> <input type="text" [(ngModel)]="data" /> <app-child [title]="data"></app-child> </div> Create child component using the command ng generate component child. child.component.ts: import { Component, OnChanges, Input } from'@angular/core'; @Component({ -------------}) export class ChildComponent implements OnChanges { @Input() title!: string; ngOnChanges(changes: any): void { console.log('changes in child:' + JSON.stringify(changes)); } }
  • 88. Component Life Cycle child.component.html: <h2>Child Component</h2> <h2>{{title}}</h2> app.module.ts: import { NgModule } from '@angular/core’; -------------- import { FormsModule } from '@angular/forms’; -------------------------- imports: [ BrowserModule, AppRoutingModule, FormsModule ], providers: [], bootstrap: [AppComponent], }) export class AppModule { }
  • 90. Template Driven Forms • Template-driven forms are the forms that are created using Angular template syntax. In template-driven form, data binding, validation, etc., will be written in the template itself. • create a component called CourseFormComponent using the following command • D:>ng generate component courseForm Program: course.ts: export class Course { constructor( public courseId: number, public courseName: string, public duration: string ) { } }
  • 91. Template Driven Forms course-form.component.ts: import { Component } from '@angular/core'; import { Course } from './course’; ----------- export class CourseFormComponent { course = new Course(1, 'Angular', '5 days'); submitted = false; onSubmit() { this.submitted = true; }} Install Boostrap PS D:...form> npm install bootstrap@3.3.7 --save angular.json : "styles": [ "styles.css", "./node_modules/bootstrap/dist/css/bootstrap.min.css" ],
  • 92. Template Driven Forms course-form.component.html : <div class="container"> <div [hidden]="submitted"> <h1>Course Form</h1> <form (ngSubmit)="onSubmit()" #courseForm="ngForm"> <div class="form-group"> <label for="id">Course Id</label> <input type="text" class="form-control" required [(ngModel)]="course.courseId" name="id" #id="ngModel"> <div [hidden]="id.valid || id.pristine" class="alert alert-danger"> Course Id is required </div></div> <div class="form-group"> <label for="name">Course Name</label> <input type="text" class="form-control" required [(ngModel)]="course.courseName" name="name" #name="ngModel"> -------------------------------
  • 93. Template Driven Forms <button type="submit" class="btn btn-default" [disabled]="!courseForm.form.valid">Submit</button> <button type="button" class="btn btn-default" (click)="courseForm.reset()">New Course</button> </form> </div> <div [hidden]="!submitted"> <h2>You submitted the following:</h2> <div class="row"> <div class="col-xs-3">Course ID</div> <div class="col-xs-9 pull-left">{{ course.courseId }}</div> </div><div class="row"> <div class="col-xs-3">Course Name</div> <div class="col-xs-9 pull-left">{{ course.courseName }}</div> <br><button class="btn btn-default" (click)="submitted=false">Edit</button> </div></div>
  • 94. Template Driven Forms course-form.component.css: input.ng-valid[required] { border-left: 5px solid #42A948; /* green */ } input.ng-dirty.ng-invalid:not(form) { border-left: 5px solid #a94442; /* red */ } app.component.html: <app-course-form></app-course-form> app.module.ts: import { NgModule } from '@angular/core'; import { FormsModule } from '@angular/forms’; ---------------------------
  • 95. Template Driven Forms imports: [ BrowserModule, FormsModule ], providers: [], bootstrap: [AppComponent] }) export class AppModule { } Output:
  • 96. Model Driven Forms or Reactive Forms • In reactive forms, you can control the form completely from the component class and hence you will get direct, explicit access to the underlying forms object model. • Hence, reactive forms are also known as 'model-driven forms'. As reactive forms are more robust and scalable, they are more suitable for creating all kind of forms in an application, irrespective of the size of form. app.module.ts: import { NgModule } from '@angular/core'; import { ReactiveFormsModule } from '@angular/forms’; -------------------- import { RegistrationFormComponent } from './registration-form/registration-form.component'; imports: [ BrowserModule, ReactiveFormsModule ], ---------------------- })export class AppModule { }
  • 97. Model Driven Forms or Reactive Forms Command:ng generate component RegistrationForm Install Bootstrap: Command: npm install bootstrap@3.3.7 --save registration-form.component.ts: import { Component, OnInit } from '@angular/core'; import { FormBuilder, FormGroup, Validators } from '@angular/forms’; ------------------------ export class RegistrationFormComponent implements OnInit { registerForm!: FormGroup; submitted!:boolean;
  • 98. Model Driven Forms or Reactive Forms constructor(private formBuilder: FormBuilder) { } ngOnInit() { this.registerForm = this.formBuilder.group({ firstName: ['', Validators.required], lastName: ['', Validators.required], address: this.formBuilder.group({ street: [], zip: [], city: [] }) }); } } registration-form.component.html: <div class="container"> <h1>Registration Form</h1> <form [formGroup]="registerForm">
  • 99. Model Driven Forms or Reactive Forms <div class="form-group"> <label>First Name</label> <input type="text" class="form-control" formControlName="firstName"> ---------------------------------------- <label>Last Name</label> <input type="text" class="form-control" formControlName="lastName"> ---------------------- <div class="form-group"> <fieldset formGroupName="address"> <legend>Address:</legend> <label>Street</label> <input type="text" class="form-control" formControlName="street"> <label>Zip</label>
  • 100. Model Driven Forms or Reactive Forms <input type="text" class="form-control" formControlName="zip"> <label>City</label> <input type="text" class="form-control" formControlName="city"> </fieldset> </div> <button type="submit" class="btn btn-primary" (click)="submitted=true">Submit</button> </form> <br/> <div [hidden]="!submitted"> <h3> Employee Details </h3> <p>First Name: {{ registerForm.get('firstName')?.value }} </p>
  • 101. Model Driven Forms or Reactive Forms <p> Last Name: {{ registerForm.get('lastName')?.value }} </p> <p> Street: {{ registerForm.get('address.street')?.value }}</p> <p> Zip: {{ registerForm.get('address.zip')?.value }} </p> <p> City: {{ registerForm.get('address.city')?.value }}</p> </div> </div> registration-form.component.css: .ng-valid[required] { border-left: 5px solid #42A948; /* green */ } .ng-invalid:not(form) { border-left: 5px solid #a94442; /* red */ }
  • 102. Model Driven Forms or Reactive Forms app.component.html: <app-registration-form></app-registration-form> Output:
  • 103. Custom Validators in Reactive Forms  Custom validation can be applied to form controls of a Reactive Form in Angular.  Custom validators are implemented as separate functions inside the component.ts file.  these functions can be added to the list of other validators configured for a form control. Program: registration-form.component.ts: import { Component, OnInit } from '@angular/core’; --------------------------- export class RegistrationFormComponent implements OnInit { registerForm!: FormGroup; submitted!:boolean; constructor(private formBuilder: FormBuilder) { } ngOnInit() {
  • 104. Custom Validators in Reactive Forms this.registerForm = this.formBuilder.group({ firstName: ['', Validators.required], lastName: ['', Validators.required], address: this.formBuilder.group({ street: [], zip: [], city: [] }), email: ['',[Validators.required,validateEmail]] });}} function validateEmail(c: FormControl): any { let EMAIL_REGEXP = /^([a-zA-Z0-9_-.]+)@([a-zA-Z0- 9_-.]+).([a-zA-Z]{2,5})$/; return EMAIL_REGEXP.test(c.value) ? null : { emailInvalid: { message: "Invalid Format!" }};}
  • 105. Custom Validators in Reactive Forms registration-form.component.html: <div class="container"> ------------------------------------ <h1>Registration Form</h1> <form [formGroup]="registerForm"> <div [hidden]="!submitted"> <h3> Employee Details </h3> <p>First Name: {{ registerForm.get('firstName')?.value }} </p> <p> Last Name: {{ registerForm.get('lastName')?.value }} </p> ----------------------------------------- <p> Street: {{ registerForm.get('address.street')?.value }}</p> <p> City: {{ registerForm.get('address.city')?.value }}</p> <p>Email: {{ registerForm.get('email')?.value }}</p></div></div>
  • 107. Custom Validators in Template Driven forms • While creating forms, there can be situations for validations for which built-in validators are not available. • Few such examples include validating a phone number, validating if the password and confirm password fields matches or not, etc. • In such situations, we can create custom validators to implement the required functionality. Program: course.ts: export class Course { constructor( public courseId: number, public courseName: string, public duration: string, public email: string ) { } }
  • 108. Custom Validators in Template Driven forms course-form.component.ts: import { Component } from '@angular/core'; import { Course } from './course’; ------------------- export class CourseFormComponent { course: Course = new Course(1, 'Angular 2', '4 days', 'devikan4353@gmail.com'); submitted = false; onSubmit() { this.submitted = true; } } email.validator.ts: import { Directive } from '@angular/core'; import { NG_VALIDATORS, FormControl, Validator } from '@angular/forms'; @Directive({ selector: '[validateEmail]', ------------------------- })
  • 109. Custom Validators in Template Driven forms export class EmailValidator implements Validator { validate(control: FormControl): any { const emailRegexp = /^([a-zA-Z0-9_-.]+)@([a-zA-Z0-9_-.]+).([a- zA-Z]{2,5})$/; if (!emailRegexp.test(control.value)) { return { emailInvalid: 'Email is invalid' }; } return null; } } app.module.ts: import { FormsModule } from '@angular/forms’; ---------------------------- import { EmailValidator } from './course- form/email.validator';
  • 110. Custom Validators in Template Driven forms @NgModule({ declarations: [ AppComponent, CourseFormComponent, EmailValidator ], -------------------------- }) export class AppModule { } course-form.component.html: <div class="container"> <div [hidden]="submitted"> <h1>Course Form</h1> <form (ngSubmit)="onSubmit()" #courseForm="ngForm"> <div class="form-group"> <label for="id">Course Id</label> -------------------------------
  • 111. Custom Validators in Template Driven forms <div class="form-group"> <label for="name">Course Name</label> ------------------------------- <div [hidden]="duration.valid || duration.pristine" class="alert alert-danger">Duration is required</div> </div> ------------------------------- <div [hidden]="!submitted"> <h2>You submitted the following:</h2> -------------------------------- <div class="row"> <div class="col-xs-3">Email</div> <div class="col-xs-9 pull-left">{{ course.email }}</div></div> <br><button class="btn btn-default" (click)="submitted=false">Edit</button> </div></div>
  • 112. Custom Validators in Template Driven forms App.component.html: <app-course-form></app-course-form> Output:
  • 113. Services Basics • A service in Angular is a class that contains some functionality that can be reused across the application. A service is a singleton object. Angular services are a mechanism of abstracting shared code and functionality throughout the application. • Angular Services come as objects which are wired together using dependency injection. • Angular provides a few inbuilt services also can create custom services. • Services can be used to: 1.share the code across components of an application. 2.make HTTP requests. • Create a new component: ng generate component book • Creating a Service • To create a service class, use the following command: • Command: ng generate service book
  • 114. Services Basics Program: book.ts: export class Book { id!: number; name!: string;} books-data.ts: import { Book } from './book'; export let BOOKS: Book[] = [{ id: 1, name: 'HTML 5' }, { id: 2, name: 'CSS 3' }, { id: 3, name: 'Java Script' }, { id: 4, name: 'Ajax Programming' }, { id: 5, name: 'jQuery' }, { id: 6, name: 'Mastering Node.js' }, { id: 7, name: 'Angular JS 1.x' }, { id: 8, name: 'Core Java' }, { id: 9, name: 'Backbone JS' },{ id: 10, name: 'MongoDB Basics’ } ];
  • 115. Services Basics book.service.ts: import { Injectable } from '@angular/core'; import { BOOKS } from './book.data'; @Injectable({ providedIn: 'root' }) export class BookService { getBooks() { return BOOKS; }} book.component.ts: import { Component, OnInit } from '@angular/core'; import { Book } from './book'; import { BookService } from './book.service'; @Component({ selector: 'app-book', templateUrl: './book.component.html', styleUrls: ['./book.component.css’] })
  • 116. Services Basics export class BookComponent implements OnInit { books!: Book[]; constructor(private bookService: BookService) { } getBooks() { this.books = this.bookService.getBooks(); } ngOnInit() { this.getBooks(); } } book.component.html: <h2>My Books</h2> <ul class="books"> <li *ngFor="let book of books"> <span class="badge">{{book.id}}</span> {{book.name}} </li></ul>
  • 117. Services Basics book.component.css: .books { margin: 0 0 2em 0; list-style-type: none; padding: 0; width: 13em; } .books li { cursor: pointer; position: relative; left: 0; background-color:#eee; margin: 0.5em; padding: 0.3em 0; height: 1.5em; border-radius: 4px; }
  • 118. Services Basics .books li:hover { color: #607d8b; background-color: #ddd; left: 0.1em; } .books .badge { display: inline-block; font-size: small; color: white; padding: 0.8em 0.7em 0 0.7em; background-color: green; line-height: 0.5em; position: relative; left: -1px; top: -4px; height: 1.8em; margin-right: 0.8em; border-radius: 4px 0 0 4px; }
  • 120. RxJS Observables RxJS • Reactive Extensions for JavaScript (RxJS) is a third-party library used by the Angular team. • RxJS is a reactive streams library used to work with asynchronous streams of data. • Observables, in RxJS, are used to represent asynchronous streams of data. Observables are a more advanced version of Promises in JavaScript Program: app.component.ts: import { Component } from '@angular/core'; import { Observable } from 'rxjs'; @Component({ selector: 'app-root', styleUrls: ['./app.component.css'], templateUrl: './app.component.html' })
  • 121. RxJS Observables export class AppComponent { data!: Observable<number>; myArray: number[] = []; errors!: boolean; finished!: boolean; fetchData(): void { this.data = new Observable(observer => { setTimeout(() => { observer.next(43); }, 1000), setTimeout(() => { observer.next(54); }, 2000), setTimeout(() => { observer.complete(); }, 3000); }); this.data.subscribe((value) => this.myArray.push(value), error => this.errors = true, () => this.finished = true); } }
  • 122. RxJS Observables app.component.html: <b> Using Observables In Angular!</b> <h6 style="margin-bottom: 0">VALUES:</h6> <div *ngFor="let value of myArray">{{ value }}</div> <div style="margin-bottom: 0">ERRORS: {{ errors }}</div> <div style="margin-bottom: 0">FINISHED: {{ finished }}</div><button style="margin-top: 2rem" (click)="fetchData()">Fetch Data</button> Output:
  • 123. Server Communication using HttpClient  Most front-end applications communicate with backend services using HTTP Protocol  While making calls to an external server, the users must continue to be able to interact with the page. That is, the page should not freeze until the HTTP request returns from the external server. So, all HTTP requests are asynchronous.  HttpClient from @angular/common/http to communicate must be used with backend services.  Additional benefits of HttpClient include testability features, typed request and response objects, request and response interception, Observable APIs, and streamlined error handling.  HttpClientModule must be imported from @angular/common/http in the module class to make HTTP service available to the entire module. Import HttpClient service class into a component’s constructor. HTTP methods like get, post, put, and delete are made used off.  JSON is the default response type for HttpClient
  • 124. Server Communication using HttpClient Program: Backend Environment Creation: Program: app.js: var express = require('express'); var router = require('./routes/index'); var cors = require('cors'); var app = express(); var bodyParser = require('body-parser');
  • 125. Server Communication using HttpClient app.use(bodyParser.json()) app.use(bodyParser.urlencoded({ extended: true })); app.use(function (req, res, next) { res.header("Access-Control-Allow-Origin", "*"); res.header("Access-Control-Allow-Methods", "GET,HEAD,OPTIONS,POST,PUT,DELETE"); res.header("Access-Control-Allow-Headers", "Origin, X-Requested-With, Content-Type, Accept, x- client-key, x-client-token, x-client-secret, Authorization"); next(); }); app.use(cors()) app.options('*', cors()) app.use('/', router); app.listen(3020, function () { console.log('Server is up and running...’); });
  • 126. Server Communication using HttpClient books.json: [{ "id": 1, "name": "HTML 5" },{ "id": 2, "name": "CSS 3" },{ "id": 3, "name": "Java Script" },{ "id": 4, "name": "Ajax Programming" },{ "id": 5, "name": "jQuery" },
  • 127. Server Communication using HttpClient { "id": 6, "name": "Mastering Node.js" },{ "id": 7, "name": "Angular JS 1.x" },{ "id": 8, "name": "ng-book 2" },{ "id": 9, "name": "Backbone JS" },{ "id": 10, "name": "Yeoman" } ]
  • 128. Server Communication using HttpClient index.js: var express = require('express'); var bookList = [{ "id": 1, "name": "HTML 5" }, { "id": 2, "name": "CSS 3" }, { "id": 3, "name": "Java Script" }, { "id": 4, "name": "Ajax Programming" }, { "id": 5, "name": "jQuery" }, { "id": 6, "name": "Mastering Node.js" }, { "id": 7, "name": "Angular JS 1.x" }, { "id": 8, "name": "ng-book 2" }, { "id": 9, "name": "Backbone JS" }, { "id": 10, "name": "Yeoman" } ] var router = express.Router(); var path = require('path'); router.get('/', function (req, res, next) { console.log("hi") })
  • 129. Server Communication using HttpClient router.post('/addBook', function (req, res) { res.setHeader("Access-Control-Allow-Origin", "*"); res.setHeader("Access-Control-Allow- Credentials", "true"); res.setHeader("Access-Control-Allow-Methods", "POST, GET, OPTIONS, DELETE"); res.setHeader("Access-Control-Allow-Headers", "Content-Type, Accept, X-Requested-With, remember- me"); var body = req.body; bookList.push(body) res.json(body);}); router.delete('/bookList/:id', function (req, res) { var id = req.params.id var index = bookList.findIndex(book => book.id == id)
  • 130. Server Communication using HttpClient bookList.splice(index, 1); res.json(bookList); }); router.get('/bookList', function (req, res) { res.setHeader("Access-Control-Allow-Origin", "*"); res.setHeader("Access-Control-Allow-Origin", "*"); res.json(bookList); }); router.put('/update', function (req, res) { var obj = bookList.findIndex(book => book.id == req.body.id) bookList[obj] = req.body res.json(bookList); }); module.exports = router;
  • 131. Server Communication using HttpClient FrontEnd Code: book.component.css: .books { margin: 0 0 2em 0; list-style-type: none; padding: 0; width: 13em; } .books li { cursor: pointer; position: relative; left: 0; background-color:#eee; margin: 0.5em; padding: 0.3em 0; height: 1.5em; border-radius: 4px; }
  • 132. Server Communication using HttpClient .books li:hover { color: #607d8b; background-color: #ddd; left: 0.1em; } .books .badge { display: inline-block; font-size: small; color: white; padding: 0.8em 0.7em 0 0.7em; background-color: green; line-height: 0.5em; position: relative; left: -1px; top: -4px; height: 1.8em; margin-right: 0.8em; border-radius: 4px 0 0 4px;}
  • 133. Server Communication using HttpClient book.component.html: <h2>{{ title }}</h2> <h2>Books List</h2> <ul class="books"> <li *ngFor="let book of books"> <span class="badge">{{ book.id }}</span> {{ book.name }} </li> </ul> <button class="btn btn-primary" (click)="ADD_BOOK = true">Add Book</button>&nbsp; ------------------------------------- <div *ngIf="ADD_BOOK"> <table> <tr> <td>Enter Id of the book:</td> <td> <input type="number" #id /></td></tr>
  • 134. Server Communication using HttpClient --------------------- <button class="btn btn-primary" (click)="addBook(id.value, name.value); ADD_BOOK = false"> Add Record </button> </td> </tr></table> <br /></div> <div *ngIf="UPDATE_BOOK"> <table> <tr> <td>Enter Id of the book:</td> <td> <input type="number" #id /> </td></tr><br /> ----------------------------------
  • 135. Server Communication using HttpClient <button class="btn btn-primary" (click)="deleteBook(id.value); DELETE_BOOK = false"> Delete Record </button> </td> </tr> </table> </div> <div class="error" *ngIf="errorMessage">{{ errorMessage }}</div> book.component.ts: import { Component, OnInit } from '@angular/core'; import { BookService } from './book.service'; import { Book } from './book’; ---------------------- export class BookComponent implements OnInit {
  • 136. Server Communication using HttpClient title = ' Server Communication using HttpClient '; books!: Book[]; errorMessage!: string; ADD_BOOK!: boolean; UPDATE_BOOK!: boolean; DELETE_BOOK!: boolean; constructor(private bookService: BookService) { } getBooks() { this.bookService.getBooks().subscribe({ next: books => this.books = books, error:error => this.errorMessage = <any>error }) } addBook(bookId: string, name: string): void { let id=parseInt(bookId)
  • 137. Server Communication using HttpClient this.bookService.addBook({id, name }) .subscribe({next:(book: any) => this.books.push(book)}); } updateBook(bookId: string, name: string): void { let id=parseInt(bookId) this.bookService.updateBook({ id, name }) .subscribe({next:(book: any) => this.books = book}); } deleteBook(bookId: string): void { let id=parseInt(bookId) this.bookService.deleteBook(id) .subscribe({next:(book: any) => this.books = book}); }ngOnInit() { this.getBooks(); }}
  • 138. Server Communication using HttpClient book.service.ts: import { Injectable } from '@angular/core'; import { HttpClient, HttpErrorResponse, HttpHeaders } from '@angular/common/http’; -------------------------------------- export class BookService { booksUrl = 'http://localhost:3020/bookList'; constructor(private http: HttpClient) { } getBooks(): Observable<Book[]> { return ---------------------------------------} updateBook(book: Book): Observable<any> { const options = new HttpHeaders({ 'Content- Type': 'application/json' }); ------------------------------------- deleteBook(bookId: number): Observable<any> { const url = `${this.booksUrl}/${bookId}`;
  • 139. Server Communication using HttpClient return this.http.delete(url).pipe( catchError(this.handleError)); } private handleError(err: HttpErrorResponse): Observable<any> { let errMsg = ''; if (err.error instanceof Error) { ----------------------------- console.log(`Backend returned code ${err.status}`); errMsg = err.error.status; } return throwError(()=>errMsg);}} book.ts: export class Book { id!: number; name!: string;}
  • 140. Server Communication using HttpClient books-data.ts: import { Book } from './book'; export let BOOKS: Book[] = [ { id: 1, name: 'HTML 5' }, { id: 2, name: 'CSS 3' }, { id: 3, name: 'Java Script' }, { id: 4, name: 'Ajax Programming' }, { id: 5, name: 'jQuery' }, { id: 6, name: 'Mastering Node.js' }, { id: 7, name: 'Angular JS 1.x' }, { id: 8, name: 'Core Java' }, { id: 9, name: 'Backbone JS' }, { id: 10, name: 'MongoDB Basics' } ];
  • 141. Server Communication using HttpClient app.module.ts: import { NgModule } from '@angular/core'; import { BrowserModule } from '@angular/platform- browser’; ----------------------- @NgModule({ imports: [BrowserModule, HttpClientModule], declarations: [AppComponent, BookComponent], providers: [], bootstrap: [AppComponent] }) export class AppModule { } app.component.html: <app-book></app-book>
  • 143. Communicating with different backend services using Angular HttpClient • Angular can also be used to connect to different services written in different technologies/languages. For example, we can make a call from Angular to Node/Express or Java or Mainframe or .Net services, etc. Program: mobiles.json: [{ "productId": 1, "productName": "Samsung Galaxy Note 7", "productCode": "MOB-120", "description": "64GB, Coral Blue", "price": 800, "imageUrl": "assets/imgs/samsung_note7_coralblue.jpg", "manufacturer": "Samsung", "ostype": "Android", "rating": 4 },
  • 144. Communicating with different backend services using Angular HttpClient { "productId": 2, "productName": "Samsung Galaxy Note 7", "productCode": "MOB-124", "description": "64GB, Gold", "price": 850, "imageUrl": "assets/imgs/samsung_note7_gold.jpg", "manufacturer": "Samsung", "ostype": "Android", "rating": 4 } ]
  • 145. Communicating with different backend services using Angular HttpClient tablets.json : [{ "productId": 1, "productName": "Apple iPad Mini 2", "productCode": "TAB-120", "description": "16GB, White", "price": 450,"imageUrl": "assets/imgs/apple_ipad_mini.jpg", "manufacturer": "Apple","ostype": "iOS", "rating": 4 }, { "productId": 2, "productName": "Apple iPad Air2", "productCode": "TAB-124", "description": "64GB, Black","price": 600, "imageUrl": "assets/imgs/ipad_air.jpg", "manufacturer": "Apple","ostype": "iOS", "rating": 3 }]
  • 146. Communicating with different backend services using Angular HttpClient product.service.ts: import { Injectable } from '@angular/core’; ------------------------- export class ProductService { selectedProducts: any = []; products: any = []; producttype="tablet"; username: string = ''; sessionStorage constructor(private http: HttpClient) { if(sessionStorage.getItem('selectedProducts')) {this.selectedProducts = JSON.parse(sessionStorage.getItem('selectedProducts') + ''); } }
  • 147. Communicating with different backend services using Angular HttpClient getProducts(): Observable<Product[]> { if (this.producttype === 'tablet') { return this.http.get<Product[]>('./assets/products/tablets.js on').pipe( tap((products) => this.products = products), catchError(this.handleError)); } -------------------------------------- private handleError(err: HttpErrorResponse) { return throwError(() => err.error() || 'Server error'); } }
  • 148. Communicating with different backend services using Angular HttpClient products.module.ts: import { ProductsRoutingModule } from './products- routing.module'; import { ProductListComponent } from './product- list/product-list.component’; -------------------- import { RatingComponent } from './rating.component'; import { ProductService } from './product.service'; import { AuthGuardService } from './auth-guard.service'; @NgModule({ imports: [ CommonModule, FormsModule, ProductsRoutingModule ], -------------------------------------- export class ProductsModule { }
  • 149. Communicating with different backend services using Angular HttpClient products.module.ts: import { ProductsRoutingModule } from './products- routing.module'; import { ProductListComponent } from './product- list/product-list.component’; -------------------- import { RatingComponent } from './rating.component'; import { ProductService } from './product.service'; import { AuthGuardService } from './auth-guard.service'; @NgModule({ imports: [ CommonModule, FormsModule, ProductsRoutingModule ], -------------------------------------- export class ProductsModule { }
  • 150. Communicating with different backend services using Angular HttpClient product-list.component.ts: import { ProductService } from '../product.service'; import { Cart } from '../cart/Cart'; import { Product } from '../product’; ---------------------------------------- export class ProductListComponent implements OnInit, AfterViewInit { chkman: any = []; chkmanos: any = []; rate: number = 0; pageTitle = 'mCart’;imageWidth = 80; imageHeight = 120;imageMargin = 12; showImage = false; listFilter: string = ''; manufacturers = [{ 'id': 'Samsung', 'checked': false },
  • 151. Communicating with different backend services using Angular HttpClient { 'id': 'Microsoft', 'checked': false }, { 'id': 'Apple', 'checked': false }, { 'id': 'Micromax', 'checked': false } ]; os = [{ 'id': 'Android', 'checked': false }, { 'id': 'Windows', 'checked': false }, { 'id': 'iOS', 'checked': false }]; price_range = [{ 'id': '300-450', 'checked': false }, ------------------------------------------- tabselect(producttype: string) { this.manufacturers = [{ 'id': 'Samsung', 'checked': false }, { 'id': 'Microsoft', 'checked': false }, { 'id': 'Apple', 'checked': false }, { 'id': 'Micromax', 'checked': false } ];
  • 152. Communicating with different backend services using Angular HttpClient this.os = [{ 'id': 'Android', 'checked': false }, { 'id': 'Windows', 'checked': false }, { 'id': 'iOS', 'checked': false }]; this.price_range = [{ 'id': '300-450', 'checked': false }, { 'id': '450-600', 'checked': false }, { 'id': '600-800', 'checked': false }, { 'id': '800-1000', 'checked': false }]; --------------------------- error: error => this.errorMessage = error }); } onChange(value: string) { this.sortoption = value; } }
  • 153. Communicating with different backend services using Angular HttpClient Output:
  • 154. Routing Basics, Router Links • Routing means navigation between multiple views on a single page. • Routing allows to express some aspects of the application's state in the URL. The full application can be built without changing the URL. • Routing allows to: ❖ Navigate between the views ❖ Create modular applications • ng generate component dashboard • ng generate component bookDetail • ng g c PageNotFound • Run Backend code parallel • And also install service book and book.ts and books-data in book component Program: dashboard.component.ts: import { Component, OnInit } from '@angular/core'; import { Router } from '@angular/router’; ------------------------------------------------------------ @Component({ templateUrl: './dashboard.component.html', styleUrls: ['./dashboard.component.css']})
  • 155. Routing Basics, Router Links export class DashboardComponent implements OnInit { books: Book[] = []; constructor( private router: Router, private bookService: BookService) { } ngOnInit(): void { this.bookService.getBooks() .subscribe({next:books => this.books = books.slice(1, 5)}); } gotoDetail(book: Book): void { this.router.navigate(['/detail', book.id]); } }
  • 156. Routing Basics, Router Links dashboard.component.html: <h3>Top Books</h3> <div class="grid grid-pad"> <div *ngFor="let book of books" (click)="gotoDetail(book)" class="col-1-4"> <div class="module book"> <h4>{{ book.name }}</h4> </div> </div> </div> dashboard.component.css: class*="col-"] { float: left; } *, *:after,
  • 157. Routing Basics, Router Links book.service.ts: import { Injectable } from '@angular/core'; import { HttpClient, HttpErrorResponse, HttpHeaders, HttpResponse } from '@angular/common/http'; import { Observable, throwError } from 'rxjs’; -------------------------------- export class BookService { booksUrl = 'http://localhost:3020/bookList'; private txtUrl = './assets/sample.txt'; constructor(private http: HttpClient) { } getBooks(): Observable<Book[]> { return this.http.get<any>(this.booksUrl, {observe:'response'}).pipe( tap((data: any) => console.log('Data Fetched:' + JSON.stringify(data))), map((data: any) => data.body), catchError(this.handleError)); }
  • 158. Routing Basics, Router Links --------------------------- console.log(`Backend returned code ${err.status}`); errMsg = err.error.status; } return throwError(()=>errMsg); }} book-detail.component.ts: import { Component, OnInit } from '@angular/core'; import { ActivatedRoute } from '@angular/router’; ------------------------------- export class BookDetailComponent implements OnInit { book!: Book; error!: any; constructor( private bookService: BookService, private route: ActivatedRoute ) { }
  • 159. Routing Basics, Router Links ngOnInit() { this.route.paramMap.subscribe(params => { this.bookService.getBook(params.get('id')).subscribe(( book) => { this.book = book ?? this.book; }); }); } goBack() { window.history.back(); }} book-detail.component.html: <div *ngIf="book"> <h2>{{ book.name }} details!</h2> <div><label>Id: </label>{{ book.id }}</div> <div><label>Name: </label> <input [(ngModel)]="book.name" placeholder="name" /> </div><button (click)="goBack()">Back</button> </div>
  • 160. Routing Basics, Router Links book-detail.component.css: label { display: inline-block; width: 3em; margin: 0.5em 0; color: orange; font-weight: bold; }input { height: 2em; font-size: 1em; padding-left: 0.4em; }button { margin-top: 20px; font-family: Arial; background-color: #eee; border: none;padding: 5px 10px; border-radius: 4px;cursor: pointer; cursor: hand;}
  • 161. Routing Basics, Router Links button:hover { background-color: #cfd8dc; } button:disabled { background-color: #eee; color: #ccc; cursor: auto; } h2{ color:Orange; } page-not-found.component.html: <div> <h1>404 Error</h1> <h1>Page Not Found</h1> </div>
  • 162. Routing Basics, Router Links app-routing.module.ts: import { NgModule } from '@angular/core'; import { RouterModule, Routes } from '@angular/router'; import { BookComponent } from './book/book.component’; ------------------------- const appRoutes: Routes = [ { path: 'dashboard', component: DashboardComponent}, { path: '', redirectTo: '/dashboard', pathMatch: 'full' }, { path: 'books', component: BookComponent }, { path: 'detail/:id', component: BookDetailComponent }, { path: '**', component: PageNotFoundComponent }, ]; --------------------------------------------------- }) export class AppRoutingModule { }
  • 163. Routing Basics, Router Links app.module.ts : import { BookComponent } from './book/book.component'; import { DashboardComponent } from './dashboard/dashboard.component'; import { BookDetailComponent } from './book-detail/book- detail.component'; import { AppRoutingModule } from './app-routing.module'; import { PageNotFoundComponent } from './page-not- found/page-not-found.component’; ------------------------------------------- @NgModule({ imports: [BrowserModule, HttpClientModule, FormsModule, AppRoutingModule], declarations: [AppComponent, BookComponent, DashboardComponent, BookDetailComponent,PageNotFound PageNotFoundComponent ], providers: [],bootstrap: [AppComponent] })export class AppModule { }
  • 164. Routing Basics, Router Links app.component.ts: import { Component } from '@angular/core'; @Component({ selector: 'app-root', styleUrls: ['./app.component.css'], templateUrl: './app.component.html' }) export class AppComponent { title = 'Tour of Books';} app.component.html: <h1>{{title}}</h1> <nav> <a [routerLink]='["/dashboard"]' routerLinkActive="active">Dashboard</a> <a [routerLink]='["/books"]' routerLinkActive="active">Books</a> </nav> <router-outlet></router-outlet>
  • 165. Routing Basics, Router Links app.component.css: h1 { color: green; font-family: Arial, Helvetica, sans-serif; font-size: 250%; }h2, h3 { color: #444; font-family: Arial, Helvetica, sans-serif; font-weight: lighter; }body { margin: 2em; }body, input[text], button { color: #888; font-family: Cambria, Georgia; }a { cursor: pointer; cursor: hand; }
  • 166. Routing Basics, Router Links button { font-family: Arial; background-color: #eee;border: none; padding: 5px 10px; border-radius: 4px;cursor: pointer;cursor: hand; }button:hover { background-color: #cfd8dc; }button:disabled { background-color: #eee; color: #aaa; cursor: auto; }nav a { padding: 5px 10px;text-decoration: none; margin-right: 10px;margin-top: 10px; display: inline-block; background-color: #eee;border-radius: 4px; }
  • 167. Routing Basics, Router Links nav a:visited, a:link { color: #607D8B; } nav a:hover { color: #039be5; background-color: #CFD8DC; } nav a.active { color: green; } * { font-family: Arial, Helvetica, sans-serif; } styles.css : body{ padding:10px; }
  • 168. Routing Basics, Router Links book.component.ts: import { Component, OnInit } from '@angular/core'; import { Book } from './book'; import { BookService } from './book.service’; ------------------------ export class BookComponent implements OnInit { books!: Book[]; errorMessage!: string; constructor(private bookService: BookService) { } getBooks() { this.bookService.getBooks().subscribe({ next: books => this.books = books, error:error => this.errorMessage = <any>error }) } ngOnInit(): void { this.getBooks(); } }
  • 169. Routing Basics, Router Links book.component.html: <h2>My Books</h2> <ul class="books"> <li *ngFor="let book of books"> <span class="badge">{{ book.id }}</span> {{book.name }}</li> </ul><div class="error" *ngIf="errorMessage">{{ errorMessage }}</div> Output:
  • 170. Route Guards • Angular route guards are interfaces provided by Angular which, when implemented, allow us to control the accessibility of a route based on conditions provided in class implementation of that interface. • Here are some types of Angular guards: CanActivate, CanActivateChild, CanLoad, CanDeactivate and Resolve. • Using canActivate, access can be permitted to only authenticated users. • Syntax: Class GuardService implements CanActivate{ canActivate( ): boolean { } } Program: login.component.html: <h3 style="position: relative; left: 60px; color:green">Login Form</h3> <div *ngIf="invalidCredentialMsg" style="color: red"> {{ invalidCredentialMsg }} </div>
  • 171. Route Guards <br /> <div style="position: relative; left: 20px"> <form [formGroup]="loginForm" (ngSubmit)="onFormSubmit()"> <p>User Name <input formControlName="username" /></p> <p> Password <input type="password" formControlName="password" style="position: relative; left: 10px" /> </p> <p><button class="btn-success" type="submit">Submit</button></p> </form> </div>
  • 172. Route Guards login.component.ts: import { Component } from '@angular/core'; import { FormBuilder, FormGroup } from '@angular/forms'; import { Router } from '@angular/router'; import { LoginService } from './login.service'; @Component({ templateUrl: './login.component.html', styleUrls: ['./login.component.css'], }) export class LoginComponent { invalidCredentialMsg!: string; loginForm!: FormGroup; constructor( private loginService: LoginService, private router: Router, private formbuilder: FormBuilder )
  • 173. Route Guards { this.loginForm = this.formbuilder.group({ username: [], password: [], });} onFormSubmit(): void { const uname = this.loginForm.value.username; const pwd = this.loginForm.value.password; this.loginService.isUserAuthenticated(uname, pwd) .subscribe({next:(authenticated) => { if (authenticated) { this.router.navigate(['/books']); } else { this.invalidCredentialMsg = 'Invalid Credentials. Try again.'; } }}); }}
  • 174. Route Guards user.ts: export class User { constructor(public userId: number, public username: string, public password: string) { } } login.service.ts: import { Injectable } from '@angular/core'; import { Observable, of } from 'rxjs'; import { map } from 'rxjs/operators'; import { User } from './user'; const USERS = [ new User(1, 'user1', 'pass1'), new User(2, 'user2', 'pass2') ]; const usersObservable = of(USERS); @Injectable({ providedIn: 'root' })
  • 175. Route Guards export class LoginService { private isloggedIn = false; getAllUsers(): Observable<User[]> { return usersObservable; } isUserAuthenticated(username: string, password: string): Observable<boolean> { return this.getAllUsers().pipe( map(users => {const Authenticateduser = users.find(user => (user.username === username) && (user.password === password)); if (Authenticateduser) {this.isloggedIn = true; } else { this.isloggedIn = false; }return this.isloggedIn; }) ); } isUserLoggedIn(): boolean { return this.isloggedIn; } }
  • 176. Route Guards login-guard.service.ts: import { Injectable } from '@angular/core'; import { CanActivate, Router } from '@angular/router'; import { LoginService } from './login.service'; @Injectable({ providedIn: 'root' }) export class LoginGuardService implements CanActivate { constructor(private loginService: LoginService, private router: Router) { } canActivate(): boolean { if (this.loginService.isUserLoggedIn()) { return true; } this.router.navigate(['/login']); return false; }}
  • 177. Route Guards app.module.ts: import { NgModule } from '@angular/core’; -------------------------- import { AppRoutingModule } from './app- routing.module'; import { PageNotFoundComponent } from './page-not- found/page-not-found.component'; import { LoginComponent } from './login/login.component'; @NgModule({ imports: [BrowserModule, HttpClientModule, ReactiveFormsModule,FormsModule, AppRoutingModule], declarations: [AppComponent, LoginComponent, BookComponent, DashboardComponent, BookDetailComponent, PageNotFoundComponent], providers: [], bootstrap: [AppComponent] })export class AppModule { }
  • 178. Route Guards app-routing.module.ts: import { NgModule } from '@angular/core'; import { RouterModule, Routes } from '@angular/router’; ---------------------------------------- import { LoginGuardService } from './login/login- guard.service'; import { LoginComponent } from './login/login.component'; const appRoutes: Routes = [ { path: 'dashboard', component: DashboardComponent }, { path: '', redirectTo: '/dashboard', pathMatch: 'full'}, { path: 'books', component: BookComponent , canActivate:[LoginGuardService] }, { path: 'detail/:id', component: BookDetailComponent}, {path: 'login',component:LoginComponent}, { path: '**', component: PageNotFoundComponent }, ];
  • 179. Route Guards @NgModule({ imports: [ RouterModule.forRoot(appRoutes) ],exports: [ RouterModule ] }) export class AppRoutingModule { } Output:
  • 180. Asynchronous Routing • Asynchronous routing is the most straightforward method of routing signals. Any asynchronous route can be defined in terms of two signals: a source and a destination. • When an Angular application has a lot of components, it will increase the size of the application. In such cases, the application takes a lot of time to load. • To overcome this problem, asynchronous routing is preferred, i.e, modules must be loaded lazily only when they are required instead of loading them at the beginning of the execution Lazy Loading has the following benefits: ❖ Modules are loaded only when the user requests for it ❖ Load time can be speeded up for users who will be visiting only certain areas of the application. Lazy Loading Route Configuration: • To apply lazy loading on modules, create a separate routing configuration file for that module and map an empty path to the component of that module.
  • 181. Asynchronous Routing book-routing.module.ts: import { NgModule } from '@angular/core'; import { RouterModule, Routes } from '@angular/router'; import { BookComponent } from './book.component'; import { LoginGuardService } from '../login/login- guard.service'; const bookRoutes: Routes = [ { path: '', component: BookComponent, canActivate: [LoginGuardService] } ];@NgModule({ imports: [RouterModule.forChild(bookRoutes)], exports: [RouterModule] }) export class BookRoutingModule { }
  • 182. Asynchronous Routing book.module.ts: import { NgModule } from '@angular/core'; import { CommonModule } from '@angular/common'; import { BookComponent } from './book.component'; import { BookRoutingModule } from './book- routing.module'; @NgModule({ imports: [CommonModule, BookRoutingModule], declarations: [BookComponent] }) export class BookModule { } app-routing.module.ts: import { NgModule } from '@angular/core'; import { RouterModule, Routes } from'@angular/router'; import { BookDetailComponent } from './book- detail/book-detail.component'; import { BookComponent } from './book/book.component';
  • 183. Asynchronous Routing import { DashboardComponent } from './dashboard/dashboard.component'; import { LoginGuardService } from './login/login- guard.service'; import { LoginComponent } from'./login/login.component'; import { PageNotFoundComponent } from './page-not- found/page-not-found.component'; const appRoutes: Routes = [ { path: '', redirectTo: '/login', pathMatch: 'full' }, { path: 'login', component: LoginComponent }, { path: 'books', loadChildren: () => import('./book/book.module').then(m => m.BookModule) }, { path: 'dashboard', component: DashboardComponent }, { path: 'detail/:id', component: BookDetailComponent} , { path: '**', component: PageNotFoundComponent } ]; --------------------------------------------- })export class AppRoutingModule { }
  • 184. Asynchronous Routing app.module.ts: import { NgModule } from '@angular/core’; ---------------------------------- import { BookDetailComponent } from './book-detail/book- detail.component'; import { AppRoutingModule } from './app-routing.module'; import { PageNotFoundComponent } from './page-not- found/page-not-found.component'; import { LoginComponent } from'./login/login.component'; @NgModule({ imports: [BrowserModule, HttpClientModule, ReactiveFormsModule,FormsModule, AppRoutingModule], declarations: [AppComponent, LoginComponent, DashboardComponent, BookDetailComponent, PageNotFoundComponent], providers: [], bootstrap: [AppComponent] })export class AppModule { }
  • 186. Nested Routes • In Angular, you can also create sub-routes or child routes for your components which means in an application there will be one root route just like a root component/root module and other routes will be configured for their respective components. Configuring routes module-wise is the best practice to make modular Angular applications. Syntax: import { NgModule } from '@angular/core'; import { RouterModule, Routes } from '@angular/router'; import { ParentComponent } from './parent.component'; import { ChildComponent } from './child.component'; const routes: Routes = [ { path: 'parent', component: ParentComponent, children: [ { path: 'child', component: ChildComponent
  • 187. Nested Routes } ] } ]; @NgModule({ imports: [RouterModule.forChild(routes)], exports: [RouterModule] })export class ParentRoutingModule { } Program: app.module.ts: import { NgModule } from '@angular/core’; ----------------- import { AppRoutingModule } from './app-routing.module'; import { LoginComponent } from'./login/login.component'; @NgModule({ imports: [BrowserModule, HttpClientModule, ReactiveFormsModule, AppRoutingModule], ------------------------------ })export class AppModule { }
  • 188. Nested Routes app-routing.module.ts: import { NgModule } from '@angular/core'; import { RouterModule, Routes } from '@angular/router'; import { LoginComponent } from'./login/login.component'; import { PageNotFoundComponent } from './page-not- found/page-not-found.component'; const appRoutes: Routes = [ { path: '', redirectTo: '/login', pathMatch: 'full' }, { path: 'login', component: LoginComponent }, { path: 'books', loadChildren: () => import('./book/book.module').then(m => m.BookModule) }, { path: '**', component: PageNotFoundComponent } ]; ----------------------------------------- }) export class AppRoutingModule { }
  • 189. Nested Routes app.component.html: <h1>{{title}}</h1> <nav> <a [routerLink]='["/books"]' routerLinkActive="active">Books</a> <a [routerLink]='["/books/dashboard"]' routerLinkActive="active">Dashboard</a> </nav><router-outlet></router-outlet> book.module.ts: import { NgModule } from '@angular/core'; import { BookComponent } from './book.component’; import { BookRoutingModule } from './bookrouting.module'; import { CommonModule } from '@angular/common'; @NgModule({ imports: [ CommonModule, BookRoutingModule, FormsModule], ---------------------------------------------- })export class BookModule { }
  • 190. Nested Routes book-routing.module.ts: import { RouterModule, Routes } from '@angular/router'; import { BookComponent } from './book.component'; import { BookDetailComponent } from '../book-detail/book- detail.component’; ----------------------------------- const bookRoutes: Routes = [ { path: '', component: BookComponent, children: [ { path: 'dashboard', component: DashboardComponent }, { path: 'detail/:id', component: BookDetailComponent } ], canActivate: [LoginGuardService] }]; ------------------------------------- })export class BookRoutingModule { }
  • 191. Nested Routes book.component.html: <br/> <h2>MyBooks</h2> <ul class="books"> <li *ngFor="let book of books " (click)="gotoDetail(book)"> <span class="badge">{{book.id}}</span> {{book.name}} </li> </ul> <div> <router-outlet></router-outlet> </div> <div class="error" *ngIf="errorMessage">{{errorMessage}}</div>
  • 192. Nested Routes book.component.ts: import { Component, OnInit } from '@angular/core'; import { Router } from '@angular/router'; import { Book } from './book'; import { BookService } from './book.service’; ------------------------- export class BookComponent implements OnInit { books: Book[]=[]; errorMessage!: string; constructor(private bookService: BookService, private router: Router) { } getBooks() { this.bookService.getBooks().subscribe({ next: books => {console.log(books);this.books = books}, error:error => this.errorMessage = <any>error }) }
  • 193. Nested Routes gotoDetail(book: Book): void { this.router.navigate(['/books/detail/', book.id]); } ngOnInit(): void { this.getBooks(); } } book-detail.component.html: <div *ngIf="book"> <h2>{{ book.name }} details!</h2> <div><label>Id: </label>{{ book.id }}</div> <div> <label>Name: </label> <input [(ngModel)]="book.name" placeholder="name" /> </div> <button (click)="goBack()">Back</button> </div>
  • 194. Nested Routes book-detail.component.ts: import { Component, OnInit } from '@angular/core'; import { ActivatedRoute } from '@angular/router'; import { Book } from '../book/book'; import { BookService } from '../book/book.service’; --------------------------- export class BookDetailComponent implements OnInit { book!: Book; error!: any; constructor( private bookService: BookService, private route: ActivatedRoute ) { } ngOnInit() { this.route.paramMap.subscribe(params => { this.bookService.getBook(params.get('id')).subscribe((boo k) => { this.book = book ?? this.book;});
  • 195. Nested Routes }); } goBack() { window.history.back(); } } dashboard.component.html: <h3>Top Books</h3> <div class="grid grid-pad"> <div *ngFor="let book of books" (click)="gotoDetail(book)" class="col-1-4"> <div class="module book"> <h4>{{ book.name }}</h4> </div> </div> </div>
  • 196. Nested Routes dashboard.component.ts: import { Component, OnInit } from '@angular/core'; import { Router } from '@angular/router'; import { Book } from '../book/book'; import { BookService } from '../book/book.service’; ----------------------------- export class DashboardComponent implements OnInit { books: Book[] = []; constructor( private router: Router, private bookService: BookService) { } ngOnInit(): void { this.bookService.getBooks() .subscribe(books => this.books = books.slice(1, 5)); }gotoDetail(book: Book): void { this.router.navigate(['/books/detail', book.id]); }}