SlideShare a Scribd company logo
1 of 37
Download to read offline
Angular 7 Firebase5 CRUD Operations 
with Reactive Forms 
 
I am going to share with you ​how to create Angular 7 Firebase5 CRUD 
Operations using Reactive Forms​. 
For the demo purpose, I’m going to create a basic student record management 
system app in which a school admin can do the following things. 
● Create Student 
● Read Student 
● Update Student 
● Delete Student 
Step by step Explanation 
1. Technologies used 
2. GitHub Project Files + Project Demo Link 
3. Prerequisite 
4. Angular Project Set up with Bootstrap 4 and Font Awesome 
5. Firebase Account Set up and AngularFire2 Library Integration 
6. Create CRUD Operations with Firebase API 
7. Generate Angular Components for Adding, Updating & Creating Student Data 
8. Router Service Set up for Navigation 
9. Integrate NGX-Toastr Module to Show Alert Messages 
10.Use Reactive Form to Add Student in Firebase Database using CRUD Services 
11.Set up and Usage of NGX Pagination Module 
12.Show Students List and Delete Student Object using CRUD API 
13.Create Edit Functionality for Students Data using CRUD Services 
1. Technologies used 
● Node 8.11.1 
● Angular CLI 7.0.1 
● Angular 7.0.1 
● Firebase 5.5.5 
● Bootstrap 4.1.3 
● Font Awesome 
● NGX Toastr 9.1.1 
● NGX Pagination 3.2.1 
● RxJS 6.3.3 
● Typescript 2.7.2 
2. GitHub Project Files + Project Demo Link 
GitHub Resources​Project Demo 
3. Prerequisite 
– Setup Node JS development environment 
Before we move ahead I’m assuming you already have ​Node JS development 
environment​ set up in your system. 
Please follow this link ​How to Set up Node JS Development Environment? 
– Install Angular CLI 
Install Angular CLI, Ignore if Angular CLI is already installed. 
npm​ ​install​ -g @angular/cli 
4. Angular Project Set up with Bootstrap 4 and Font 
Awesome 
Let’s set up a fresh new Angular 7 project with Bootstrap 4 and Font Awesome 
for our basic student record management system CRUD app. 
ng new angularfirebase-student-app 
Once the project is installed then get into the project’s directory by following the 
following command. 
cd​ angularfirebase-student-app 
Now its time to setup Bootstrap CSS framework in your Angular project. Use the 
mentioned command to install the latest version of the Bootstrap framework. 
npm​ ​install​ bootstrap 
Install Font Awesome icons set library using Angular CLI 
npm​ ​install​ @fortawesome/fontawesome-free-webfonts 
Once, the Bootstrap and Font Awesome icon set is successfully installed. Then 
go to ​angular.json​ file and paste the given below code in styles array. 
"styles"​:​ ​[ 
​"node_modules/bootstrap/dist/css/bootstrap.min.css"​, 
​"src/styles.css"​, 
 
"node_modules/@fortawesome/fontawesome-free-webfonts/css/fontawesome.
css"​, 
 
"node_modules/@fortawesome/fontawesome-free-webfonts/css/fa-regular.css"​, 
 
"node_modules/@fortawesome/fontawesome-free-webfonts/css/fa-brands.css"​, 
 
"node_modules/@fortawesome/fontawesome-free-webfonts/css/fa-solid.css"​, 
​"node_modules/ngx-toastr/toastr.css" 
​], 
Please don’t forget to restart the server. When you make any changes in the 
angular.json​ file. Otherwise, changes won’t reflect in your Angular project. First 
close the server then use the following command in Angular CLI. 
ng serve --open 
Go through this article to know more about a detailed explanation on setting up 
the Angular project using external dependencies from scratch. 
How to Setup Angular 7 Project using Bootstrap 4, SASS, Font Awesome, and 
Ng Bootstrap? 
5. Firebase Account Set up + AngularFire2 Library 
Integration 
Go to Firebase website​ login using your email id. When you see given below 
screen click on Add Project section. 
 
Afterward, Enter your project name, accept the terms and condition and click on 
create a project button. 
 
Once your project is set up, then click on your project then you’ll see in your 
admin dashboard navigate to ​Develop > Authentication > Web setup​ then click 
on the web setup button, and a popup will appear along with your firebase 
credentials. 
Copy ​your firebase credentials​ from here. 
 
Change your Firebase database rules, go to ​Database > Rules​. Otherwise, you 
won’t be able to access the data without authentication. 
Note:​ Don’t forget to change these rules when you are building a real app for 
your clients. 
{ 
​"rules"​:​ ​{ 
​".read"​:​ true, 
​".write"​:​ ​true 
​} 
} 
Now setup Firebase (AngularFire2 library) in your Angular project. 
Run the given below cmd in Angular CLI. 
npm​ ​install​ firebase @angular/fire --save 
Let’s connect the AngularFire2 library to your Angular project. 
Go to ​src/environments/enviorment.ts​ and ​enviorment.prod.ts​ files in your 
project’s ​enviornments folder​. Then add ​your firebase configuration details ​in 
both the environment files as given below. 
 
Open ​app.module.ts​ file and register the Firebase required services. 
// Firebase Modules 
import​ ​{​ AngularFireModule ​}​ ​from​ ​'@angular/fire'​; 
import​ ​{​ AngularFireDatabaseModule ​}​ ​from​ ​'@angular/fire/database'​; 
import​ ​{​ environment ​}​ ​from​ ​'../environments/environment'​; 
 
@​NgModule​({ 
imports​:​ ​[ 
AngularFireModule​.​initializeApp​(​environment​.​firebase​),​ ​// Main Angular fire 
module  
AngularFireDatabaseModule ​// Firebase database module  
​] 
}) 
We’ve successfully set up the Angular project with Firebase NoSQL real-time 
database. 
6. Create CRUD operations with Firebase API 
Before writing the CRUD operations we must create a separate folder by the 
name of shared within ​src > app > shared​ and create ​crud.service.ts​ (Service) 
and ​student.ts​ (Interface Class) into it. 
Run the following command to generate student interface class for setting up 
data types. 
ng g i shared/student // Generates student interface class within shared folder 
Afterwards, go to ​src > app > shared > student.ts​ file and add the following code 
into it. 
export​ ​interface​ ​Student​ ​{ 
$key​:​ ​string​; 
firstName​:​ ​string​; 
lastName​:​ ​string​; 
email​:​ ​string 
mobileNumber​:​ Number​; 
} 
Run the following command to generate a CRUD service file. 
ng g s shared​/​crud ​// Generates CRUD service within shared folder 
Go to ​src > app > shared > crud.service.ts​ file and add the given below code to 
create CRUD operations with Firebase API. 
import​ ​{​ Injectable ​}​ ​from​ ​'@angular/core'​; 
import​ ​{​ Student ​}​ ​from​ ​'../shared/student'​;​ ​// Student data type interface class 
import​ ​{​ AngularFireDatabase​,​ AngularFireList​,​ AngularFireObject ​}​ ​from 
'@angular/fire/database'​;​ ​// Firebase modules for Database, Data list and Single 
object 
 
@​Injectable​({ 
providedIn​:​ ​'root' 
}) 
 
export​ ​class​ ​CrudService​ ​{ 
studentsRef​:​ AngularFireList​<​any​>​;​ ​// Reference to Student data list, its an 
Observable 
studentRef​:​ AngularFireObject​<​any​>​;​ ​// Reference to Student object, its an 
Observable too 
   
​// Inject AngularFireDatabase Dependency in Constructor 
​constructor​(​private​ db​:​ AngularFireDatabase​)​ ​{​ ​} 
 
​// Create Student 
​AddStudent​(​student​:​ Student​)​ ​{ 
​this​.​studentsRef​.​push​({ 
firstName​:​ student​.​firstName​, 
lastName​:​ student​.​lastName​, 
email​:​ student​.​email​, 
mobileNumber​:​ student​.​mobileNumber 
​}) 
​} 
 
​// Fetch Single Student Object 
​GetStudent​(​id​:​ ​string​)​ ​{ 
​this​.​studentRef ​=​ ​this​.​db​.​object​(​'students-list/'​ ​+​ id​); 
​return​ ​this​.​studentRef​; 
​} 
 
​// Fetch Students List 
​GetStudentsList​()​ ​{ 
​this​.​studentsRef ​=​ ​this​.​db​.​list​(​'students-list'​); 
​return​ ​this​.​studentsRef​; 
​}   
 
​// Update Student Object 
​UpdateStudent​(​student​:​ Student​)​ ​{ 
​this​.​studentRef​.​update​({ 
firstName​:​ student​.​firstName​, 
lastName​:​ student​.​lastName​, 
email​:​ student​.​email​, 
mobileNumber​:​ student​.​mobileNumber 
​}) 
​}   
 
​// Delete Student Object 
​DeleteStudent​(​id​:​ ​string​)​ ​{  
​this​.​studentRef ​=​ ​this​.​db​.​object​(​'students-list/'​+​id​); 
​this​.​studentRef​.​remove​(); 
​} 
   
} 
7. Generate Angular Components for Adding, 
Updating & Creating Student Data 
ng g c add-student 
 
ng g c edit-student 
 
ng g c student-list 
Now we are able to write our app logic in these components. 
8. Router Service Set up for Navigation 
Generate app routing module for navigation using below command 
● –flat adds the file in src/app instead of its own folder. 
● –module=app orders Angular CLI to register it in the imports array of the 
AppModule. 
ng generate module app-routing --flat --module​=​app 
Once the app-routing module is created then Go to ​src > app > 
app-routing.modules.ts​file and add the given below code. 
import​ ​{​ NgModule ​}​ ​from​ ​'@angular/core'​; 
import​ ​{​ CommonModule ​}​ ​from​ ​'@angular/common'​; 
 
// Use RouterModule, Routes for activating routing in angular 
import​ ​{​ RouterModule​,​ Routes ​}​ ​from​ ​'@angular/router'​; 
 
// Include components for in which router service to be used 
import​ ​{​ AddStudentComponent ​}​ ​from​ ​'./add-student/add-student.component'​; 
import​ ​{​ StudentsListComponent ​}​ ​from​ ​'./students-list/students-list.component'​; 
import​ ​{​ EditStudentComponent ​}​ ​from​ ​'./edit-student/edit-student.component'​; 
 
// Routes array define component along with the path name for url 
const​ routes​:​ Routes ​=​ ​[ 
​{​ path​:​ ​''​,​ redirectTo​:​ ​'/register-student'​,​ pathMatch​:​ ​'full'​ ​}, 
​{​ path​:​ ​'register-student'​,​ component​:​ AddStudentComponent ​}, 
​{​ path​:​ ​'view-students'​,​ component​:​ StudentsListComponent ​}, 
​{​ path​:​ ​'edit-student/:id'​,​ component​:​ EditStudentComponent ​} 
]; 
 
// Import RouterModule and inject routes array in it and dont forget to export the 
RouterModule 
@​NgModule​({ 
imports​:​ ​[​CommonModule​,​RouterModule​.​forRoot​(​routes​)], 
exports​:​ ​[​RouterModule​], 
declarations​:​ ​[] 
}) 
export​ ​class​ ​AppRoutingModule​ ​{​ ​} 
 
Afterwards, Go to ​src > app > app.modules.ts​ and add the following code into 
app.module.ts​. 
import​ ​{​ AppRoutingModule ​}​ ​from​ ​'.//app-routing.module'​;​ ​// AppRoutingModule 
Module 
 
@​NgModule​({ 
   
imports​:​ ​[ 
AppRoutingModule ​// Declare AppRoutingModule into imports array 
​] 
 
}) 
 
 
Now go to ​src > app > app.component.html​ file to activate router service and 
layout for the student demo app. 
<!-- Top navigation --> 
<​nav ​class​="​navbar navbar-dark fixed-top bg-dark flex-md-nowrap p-0 
shadow​"> 
​<​a ​class​="​navbar-brand col-sm-3 col-md-2 mr-0​" 
routerLink​="​/register-student​"> 
​<​img ​class​="​brand-logo​"​ ​src​="​assets/logo-positronx-white.svg​" 
alt​="​positronX.io Logo​"> 
​<​span ​class​="​dasboard-text​">​Dashboard​</​span​> 
​</​a​> 
​<​ul ​class​="​navbar-nav px-3​"> 
​<​li ​class​="​nav-item text-nowrap​"> 
​<​a ​class​="​nav-link​"​ ​routerLink​="​/register-student​"> 
​<​span ​class​="​user-image​"​ style​="​background-image​: 
url('assets/user.jpg')​"></​span​> 
Hello Admin 
​</​a​> 
​</​li​> 
​</​ul​> 
</​nav​> 
 
<!-- Sidebar navigation --> 
<​div ​class​="​container-fluid​"> 
​<​div ​class​="​row​"> 
​<​nav ​class​="​col-md-2 d-md-block bg-light sidebar​"> 
​<​div ​class​="​sidebar-sticky​"> 
​<​ul ​class​="​nav flex-column​"> 
 
​<!-- routerLink="/register-student" to navigate to view-students 
component --> 
​<​li ​class​="​nav-item​"> 
​<​a ​class​="​nav-link​"​ ​routerLink​="​/register-student​" 
routerLinkActive​="​active​"> 
​<​i ​class​="​fas fa-plus​"></​i​>​Add Student 
​</​a​> 
​</​li​> 
 
​<!-- routerLink="/view-students" to navigate to view-students component 
--> 
​<!-- routerLinkActive="active" activates active class for component--> 
​<​li ​class​="​nav-item​"> 
​<​a ​class​="​nav-link​"​ ​routerLink​="​/view-students​" 
routerLinkActive​="​active​"> 
​<​i ​class​="​fas fa-list-ul​"></​i​>​Students List 
​</​a​> 
​</​li​> 
​</​ul​> 
​</​div​> 
​</​nav​> 
 
​<!-- Main content --> 
​<​main ​role​="​main​"​ ​class​="​col-md-9 ml-sm-auto col-lg-10 px-4​"> 
​<​div ​class​="​inner-adjust​"> 
 
​<!-- Use router template to show the components for which router service is 
activated --> 
​<​router-outlet​></​router-outlet​> 
 
​</​div​> 
​</​main​> 
 
​</​div​> 
</​div​> 
 
09. Integrate NGX-Toastr Module to Show Alert 
Messages 
We’ll be requiring ​NGX Toastr NPM module​ to show alert messages when an 
update occurs in student’s data. In order to install NGX Toastr, we’ll be using the 
following command. 
npm​ ​install​ ngx-toastr --save 
 
// @angular/animations package is a required dependency ​for​ the default toast 
npm​ ​install​ @angular/animations --save 
 
Then go to ​angular.json​ and add the following code in styles array. 
"styles"​:​ ​[ 
​"node_modules/ngx-toastr/toastr.css"​ // Includes ngx-toastr's css 
] 
Go to app.moudule.ts file and include this code for NGX Toastr 
// Import below modules for NGX Toastr 
import​ ​{​ BrowserAnimationsModule ​}​ ​from 
'@angular/platform-browser/animations'​; 
import​ ​{​ ToastrModule ​}​ ​from​ ​'ngx-toastr'​; 
  
@​NgModule​({ 
imports​:​ ​[ 
BrowserAnimationsModule​,​ ​// required animations module 
ToastrModule​.​forRoot​()​ ​// ToastrModule added 
​] 
}) 
class​ ​MainModule​ ​{} 
How to use NGX-Toastr in the ANgular Component? 
import​ ​{​ ToastrService ​}​ ​from​ ​'ngx-toastr'​; 
  
@​Component​({​...​}) 
export​ ​class​ ​YourComponent​ ​{ 
​constructor​(​private​ toastr​:​ ToastrService​)​ ​{} 
  
​showSuccess​()​ ​{ 
​this​.​toastr​.​success​(​'You'​ve Got It Successfully​!​'​); 
​} 
} 
To know more about ​ngx-toastr NPM module and its API please click on this link​. 
10. Use Reactive Form to Add Student in Firebase 
Database using CRUD Services 
Go to ​src > app > app.module.ts​ file and add the given below code within 
app.module.ts​ file to activate Reactive Forms service in your Angular project. 
import​ ​{​ ReactiveFormsModule ​}​ ​from​ ​'@angular/forms'​;​ ​// Reactive Form 
Module 
 
@​NgModule​({ 
imports​:​ ​[ 
ReactiveFormsModule ​// Reactive forms module 
​] 
}) 
Afterwards, go to ​src > app > add-student.component.html​ file and add the 
following code. It contains Reactive Forms tags and form validation logic and 
HTML layout for add student component. 
<​div ​class​="​pt-3 pb-2 mb-3 border-bottom​"> 
​<​h1 ​class​="​h2​">​Add Student​</​h1​> 
​<​p ​class​="​custom-text​">​A demo CRUD app for ​<​strong​>​student record 
management system​</​strong​>​ built with ​<​strong​>​Angular6 and 
Firebase5​</​strong​></​p​> 
</​div​> 
 
<!-- Student form --> 
<​form ​[formGroup]​="​studentForm​"​ ​(ngSubmit)​="​submitStudentData()​" 
novalidate​>​ // Declared formGroup="studentForm" to create Reactive form 
group, novalidate is used to disable HTML5 default validation  
​<​div ​class​="​row​"> 
​<​div ​class​="​col-lg-5 col-md-12 col-sm-12​"> 
​<​div ​class​="​row​"> 
​<​div ​class​="​col-md-12 mb-3​"> 
​<​label​>​First name​</​label​> 
​<​input ​type​="​text​"​ ​formControlName​="​firstName​"​ ​class​="​form-control​" 
required​>​ // formControlName is used to commnunicate to formGroup's 
properties 
​<​p ​*ngIf​="​firstName.touched && firstName.invalid​" 
class​="​error​"><​sup​>​*​</​sup​>​Please enter atleast first name​</​p​>​ // Accessing 
fromGoup object's property using Getter method 
​<​p ​*ngIf​="​firstName.errors?.minlength​"​ ​class​="​error​"><​sup​>​*​</​sup​>​Name 
shouldn't be less than 2 words​</​p​>​ // Accessing Reactive Forms error 
property using Getter method 
​</​div​> 
​<​div ​class​="​col-md-12 mb-3​"> 
​<​label​>​Last name​</​label​> 
​<​input ​type​="​text​"​ ​formControlName​="​lastName​"​ ​class​="​form-control​"> 
​</​div​> 
​</​div​> 
​<​div ​class​="​row​"> 
​<​div ​class​="​col-md-12 mb-3​"> 
​<​label​>​Email​</​label​> 
​<​input ​type​="​email​"​ ​formControlName​="​email​"​ ​class​="​form-control​" 
required​> 
​<​p ​*ngIf​="​email.touched && email.invalid​" 
class​="​error​"><​sup​>​*​</​sup​>​Please provide email​</​p​> 
​<​p ​*ngIf​="​email.errors?.pattern​"​ ​class​="​error​"><​sup​>​*​</​sup​>​Please enter 
correct email​</​p​> 
​</​div​> 
​<​div ​class​="​col-md-12 mb-3​"> 
​<​label​>​Mobile number​</​label​> 
​<​input ​type​="​text​"​ ​formControlName​="​mobileNumber​" 
class​="​form-control​"​ ​required​> 
​<​p ​*ngIf​="​mobileNumber.touched && mobileNumber.invalid​" 
class​="​error​"><​sup​>​*​</​sup​>​Please provide contact 
number​</​p​> 
​<​p ​*ngIf​="​mobileNumber.errors?.pattern​"​ ​class​="​error​"><​sup​>​*​</​sup​>​Use 
numbers only 
number​</​p​> 
​</​div​> 
​</​div​> 
​<​div ​class​="​form-group text-right​"> 
​<​button ​type​="​button​"​ ​class​="​btn btn-secondary gap-right​" 
(click)​="​ResetForm()​">​Reset​</​button​>​ // (click) event to trigger ResetForm 
​<​button ​type​="​submit​"​ ​class​="​btn btn-success​" 
[disabled]​="​!studentForm.valid​">​Add Student​</​button​>​ // Disable student form 
unless it is valid 
​</​div​> 
​</​div​> 
​</​div​> 
</​form​>​<!-- Student form ends--> 
Afterwards, go to ​src > app > add-student.component.ts​ file and add the given 
below code. It contains Reactive Forms Logic, Getter method to access 
FormGroup’s properties, Reactive Form validation logic, Form Reset method and 
Toastr service for showing alert messages. 
import​ ​{​ Component​,​ OnInit ​}​ ​from​ ​'@angular/core'​; 
import​ ​{​ CrudService ​}​ ​from​ ​'../shared/crud.service'​;​ ​// CRUD services API 
import​ ​{​ FormBuilder​,​ FormGroup​,​ FormControl​,​ Validators ​}​ ​from 
'@angular/forms'​;​ ​// Reactive form services 
import​ ​{​ ToastrService ​}​ ​from​ ​'ngx-toastr'​;​ ​// Alert message using NGX toastr 
 
 
@​Component​({ 
selector​:​ ​'app-add-student'​, 
templateUrl​:​ ​'./add-student.component.html'​, 
styleUrls​:​ ​[​'./add-student.component.css'​] 
}) 
 
export​ ​class​ ​AddStudentComponent​ ​implements​ ​OnInit​ ​{ 
​public​ studentForm​:​ FormGroup​;​ ​// Define FormGroup to student's form 
  
​constructor​( 
​public​ crudApi​:​ CrudService​,​ ​// CRUD API services 
​public​ fb​:​ FormBuilder​,​ ​// Form Builder service for Reactive forms 
​public​ toastr​:​ ToastrService ​// Toastr service for alert message 
​)​ ​{​ ​} 
 
  
​ngOnInit​()​ ​{ 
​this​.​crudApi​.​GetStudentsList​();​ ​// Call GetStudentsList() before main form is 
being called 
​this​.​studenForm​();​ ​// Call student form when component is ready 
​} 
 
​// Reactive student form 
​studenForm​()​ ​{ 
​this​.​studentForm ​=​ ​this​.​fb​.​group​({ 
firstName​:​ ​[​''​,​ ​[​Validators​.​required​,​ Validators​.​minLength​(​2​)]], 
lastName​:​ ​[​''​], 
email​:​ ​[​''​,​ ​[​Validators​.​required​, 
Validators​.​pattern​(​'^[a-zA-Z0-9_.+-]+@[a-zA-Z0-9-]+.[a-zA-Z0-9-.]+$'​)]], 
mobileNumber​:​ ​[​''​,​ ​[​Validators​.​required​,​ Validators​.​pattern​(​'^[0-9]+$'​)]] 
​})   
​} 
 
​// Accessing form control using getters 
​get​ ​firstName​()​ ​{ 
​return​ ​this​.​studentForm​.​get​(​'firstName'​); 
​} 
 
​get​ ​lastName​()​ ​{ 
​return​ ​this​.​studentForm​.​get​(​'lastName'​); 
​}   
 
​get​ ​email​()​ ​{ 
​return​ ​this​.​studentForm​.​get​(​'email'​); 
​} 
 
​get​ ​mobileNumber​()​ ​{ 
​return​ ​this​.​studentForm​.​get​(​'mobileNumber'​); 
​} 
 
​// Reset student form's values 
​ResetForm​()​ ​{ 
​this​.​studentForm​.​reset​(); 
​}   
  
​submitStudentData​()​ ​{ 
​this​.​crudApi​.​AddStudent​(​this​.​studentForm​.​value​);​ ​// Submit student data using 
CRUD API 
​this​.​toastr​.​success​(​this​.​studentForm​.​controls​[​'firstName'​].​value ​+​ ​' successfully 
added!'​);​ ​// Show success message when data is successfully submited 
​this​.​ResetForm​();​ ​// Reset form when clicked on reset button 
​}; 
 
} 
11. Set up and Usage of NGX Pagination Module 
Run below command in Angular CLI to install NGX Pagination NPM module. 
npm​ ​install​ ngx-pagination --save 
Open ​src > app > app.module.ts​ file and add the given below code. 
// NGX Pagination 
import​ ​{​ NgxPaginationModule ​}​ ​from​ ​'ngx-pagination'​; 
 
@​NgModule​({ 
imports​:​ ​[ 
NgxPaginationModule ​// Include it in imports array 
​]  
}) 
 
How to use NGX Pagination? 
// your.component.ts example 
import​ ​{​Component​}​ ​from​ ​'@angular/core'​; 
  
@​Component​({ 
selector​:​ ​'my-component'​, 
template​:​ ​` 
<ul> 
<li *ngFor="let item of collection | paginate: { itemsPerPage: 07, currentPage: 
p }"> ... </li> 
</ul> 
   
<pagination-controls (pageChange)="p = $event"></pagination-controls> 
` 
}) 
export​ ​class​ ​MyComponent​ ​{ 
p​:​ ​number​ ​=​ ​1​; 
collection​:​ ​any​[]​ ​=​ someArrayOfThings​;   
} 
To learn more about ​ngx-pagination and its API please visit Pagination for 
Angular (v2+) 
12. Show Students List and Delete Student Object 
using CRUD API 
I am going to fetch students data list using ​crud.service.ts​, afterwards, I’ll be 
creating student delete functionality and integrate NGX pagination to show 
pagination in student’s data list. 
Go to ​src > app > students-list > student-list.component.html​ file then add the 
following code. 
<​div ​class​="​d-flex justify-content-between flex-wrap flex-md-nowrap 
align-items-center pt-3 pb-2 mb-3 border-bottom​"> 
​<​h1 ​class​="​h2​">​Students List​</​h1​> 
​<!-- It won't show if there is no student data --> 
​<​a ​routerLink​="​/register-student​"​ ​class​="​btn btn-success​" 
*ngIf​="​hideWhenNoStudent​"> 
​<​i ​class​="​fas fa-plus custom-fa-plus​"></​i​> 
Add Student 
​</​a​> 
</​div​> 
 
<​div ​class​="​pricing-header mx-auto​"> 
 
​<!-- Preloader shows before the data loads--> 
​<​div ​class​="​no-data text-center​"​ ​*ngIf​="​preLoader​"> 
​<​img ​src​="​assets/preloader.gif​"​ ​class​="​preloader-icon​"​ ​alt​="​No student​"> 
​</​div​> 
 
​<!-- No data shows when their is no student data available --> 
​<​div ​class​="​no-data text-center​"​ ​*ngIf​="​noData​"> 
​<​img ​src​="​assets/no-student.svg​"​ ​class​="​nodata-msg​"​ ​alt​="​No student​"> 
​<​p ​class​="​nodata-msg​">​No student added yet!​</​p​> 
​<​a ​routerLink​="​/register-student​"​ ​class​="​btn btn-success​"> 
​<​i ​class​="​fas fa-plus custom-fa-plus​"></​i​> 
Add Student 
​</​a​> 
​</​div​> 
 
​<!-- Showing students data --> 
​<​div ​class​="​table-responsive​"​ ​*ngIf​="​hideWhenNoStudent​"> 
​<​table ​class​="​table table-bordered table-responsive-sm table-responsive-md 
table-responsive-lg​"> 
​<​thead​> 
​<​tr​> 
​<​th ​scope​="​col​">​Student Id​</​th​> 
​<​th ​scope​="​col​">​Student name​</​th​> 
​<​th ​scope​="​col​">​Email​</​th​> 
​<​th ​scope​="​col​">​Mobile number​</​th​> 
​<​th ​class​="​text-center​"​ ​scope​="​col​">​Edit​</​th​> 
​</​tr​> 
​</​thead​> 
​<​tbody​> 
​<!-- *ngFor loop iterates over Student array and fetch the student's data --> 
​<!-- paginate pipe will add pagination in student's list, it won't show if items 
are less then 7 --> 
​<​tr ​*ngFor​="​let student of Student| paginate: { itemsPerPage: 7, 
currentPage: p }; let i = index;​"> 
​<​th ​scope​="​row​">​{{student.$key}}​</​th​> 
​<​td​>​{{student.firstName}} {{student.lastName}}​</​td​> 
​<​td​>​{{student.email}}​</​td​> 
​<​td​>​{{student.mobileNumber}}​</​td​> 
​<​td ​class​="​text-center action-block​"> 
​<!-- routerLink="/edit-student/{{student.$key}}" is refered to { path: 
'edit-student/:id', component: EditStudentComponent } in 
app-routing.moudles.ts --> 
​<​i ​class​="​far fa-edit​"​ ​routerLink​="​/edit-student/{{student.$key}}​"></​i​> 
​<​i ​class​="​far fa-trash-alt​"​ ​(click)​="​deleteStudent(student)​"></​i​></​td​> 
​</​tr​> 
​</​tbody​> 
​</​table​> 
​</​div​> 
​<!-- Pagination --> 
​<​pagination-controls ​(pageChange)​="​p = $event​"​ ​autoHide​="​true​" 
responsive​="​true​"></​pagination-controls​> 
</​div​> 
Go to ​src > app > students-list > student-list.component.ts​ file. 
import​ ​{​ Component​,​ OnInit ​}​ ​from​ ​'@angular/core'​; 
import​ ​{​ CrudService ​}​ ​from​ ​'../shared/crud.service'​;​ ​// CRUD API service class 
import​ ​{​ Student ​}​ ​from​ ​'./../shared/student'​;​ ​// Student interface class for Data 
types. 
import​ ​{​ ToastrService ​}​ ​from​ ​'ngx-toastr'​;​ ​// Alert message using NGX toastr 
 
 
@​Component​({ 
selector​:​ ​'app-students-list'​, 
templateUrl​:​ ​'./students-list.component.html'​, 
styleUrls​:​ ​[​'./students-list.component.css'​] 
}) 
 
export​ ​class​ ​StudentsListComponent​ ​implements​ ​OnInit​ ​{ 
p​:​ ​number​ ​=​ ​1​;​ ​// Settup up pagination variable 
Student​:​ Student​[];​ ​// Save students data in Student's array. 
hideWhenNoStudent​:​ ​boolean​ ​=​ ​false​;​ ​// Hide students data table when no 
student. 
noData​:​ ​boolean​ ​=​ ​false​;​ ​// Showing No Student Message, when no 
student in database. 
preLoader​:​ ​boolean​ ​=​ ​true​;​ ​// Showing Preloader to show user data is 
coming for you from thre server(A tiny UX Shit) 
   
 
​constructor​( 
​public​ crudApi​:​ CrudService​,​ ​// Inject student CRUD services in constructor. 
​public​ toastr​:​ ToastrService ​// Toastr service for alert message 
​){​ ​} 
 
 
​ngOnInit​()​ ​{ 
​this​.​dataState​();​ ​// Initialize student's list, when component is ready 
​let​ s ​=​ ​this​.​crudApi​.​GetStudentsList​();  
s​.​snapshotChanges​().​subscribe​(​data ​=>​ ​{​ ​// Using snapshotChanges() method 
to retrieve list of data along with metadata($key) 
​this​.​Student ​=​ ​[]; 
data​.​forEach​(​item ​=>​ ​{ 
​let​ a ​=​ item​.​payload​.​toJSON​();  
a​[​'$key'​]​ ​=​ item​.​key​; 
​this​.​Student​.​push​(​a ​as​ Student​); 
​}) 
​}) 
​} 
 
​// Using valueChanges() method to fetch simple list of students data. It updates 
the state of hideWhenNoStudent, noData & preLoader variables when any 
changes occurs in student data list in real-time. 
​dataState​()​ ​{   
​this​.​crudApi​.​GetStudentsList​().​valueChanges​().​subscribe​(​data ​=>​ ​{ 
​this​.​preLoader ​=​ ​false​; 
​if​(​data​.​length ​<=​ ​0​){ 
​this​.​hideWhenNoStudent ​=​ ​false​; 
​this​.​noData ​=​ ​true​; 
​}​ ​else​ ​{ 
​this​.​hideWhenNoStudent ​=​ ​true​; 
​this​.​noData ​=​ ​false​; 
​} 
​}) 
​} 
 
​// Method to delete student object 
​deleteStudent​(​student​)​ ​{ 
​if​ ​(​window​.​confirm​(​'Are sure you want to delete this student ?'​))​ ​{​ ​// Asking 
from user before Deleting student data. 
​this​.​crudApi​.​DeleteStudent​(​student​.​$key​)​ ​// Using Delete student API to 
delete student. 
​this​.​toastr​.​success​(​student​.​firstName ​+​ ​' successfully deleted!'​);​ ​// Alert 
message will show up when student successfully deleted. 
​} 
​} 
 
} 
13. Create Edit Functionality for Students Data using 
CRUD Services 
Go to ​src > app > edit-student.component.html​ Create the edit form using HTML 
and Reactive Form’s attributes then add form validation block within HTML 
layout. 
<​div ​class​="​d-flex justify-content-between flex-wrap flex-md-nowrap 
align-items-center pt-3 pb-2 mb-3 border-bottom​"> 
​<​h1 ​class​="​h2​">​Edit Student Details​</​h1​> 
​<​div ​class​="​btn-toolbar mb-2 mb-md-0​"> 
​<​div ​class​="​btn-group​"> 
​<!-- goBack() methos to back to previous component --> 
​<​button ​class​="​btn btn-sm btn-outline-secondary​"​ ​(click)​="​goBack()​">​Go 
Back​</​button​> 
​</​div​> 
​</​div​> 
</​div​> 
 
 
<​div ​class​="​row​"> 
​<​div ​class​="​col-lg-12​"> 
​<​div ​class​="​pricing-header form-block mx-auto​"> 
 
​<!-- Student's Edit Form --> 
​<​form ​[formGroup]​="​editForm​"​ ​(ngSubmit)​="​updateForm()​"​ ​novalidate​> 
​<​div ​class​="​row​"> 
​<​div ​class​="​col-lg-5 col-md-12 col-sm-12​"> 
​<​div ​class​="​row​"> 
​<​div ​class​="​col-md-12 mb-3​"> 
​<​label​>​First name​</​label​> 
​<​input ​type​="​text​"​ ​formControlName​="​firstName​" 
class​="​form-control​"​ ​required​> 
​<​p ​*ngIf​="​firstName.touched && firstName.invalid​"​ ​class​="​error​"> 
​<​sup​>​*​</​sup​>​Please enter firstname 
​</​p​> 
​<​p ​*ngIf​="​firstName.errors?.minlength​"​ ​class​="​error​"> 
​<​sup​>​*​</​sup​>​Name shouldn't be less than 2 words 
​</​p​> 
​</​div​> 
​<​div ​class​="​col-md-12 mb-3​"> 
​<​label​>​Last name​</​label​> 
​<​input ​type​="​text​"​ ​formControlName​="​lastName​" 
class​="​form-control​"> 
​</​div​> 
​</​div​> 
​<​div ​class​="​row​"> 
​<​div ​class​="​col-md-12 mb-3​"> 
​<​label​>​Email​</​label​> 
​<​input ​type​="​email​"​ ​formControlName​="​email​" 
class​="​form-control​"​ ​required​> 
​<​p ​*ngIf​="​email.touched && email.invalid​" 
class​="​error​"><​sup​>​*​</​sup​>​Please provide email​</​p​> 
​<​p ​*ngIf​="​email.errors?.pattern​" 
class​="​error​"><​sup​>​*​</​sup​>​Please enter correct email​</​p​> 
​</​div​> 
​<​div ​class​="​col-md-12 mb-3​"> 
​<​label​>​Mobile number​</​label​> 
​<​input ​type​="​text​"​ ​formControlName​="​mobileNumber​" 
class​="​form-control​"​ ​required​> 
​<​p ​*ngIf​="​mobileNumber.touched && mobileNumber.invalid​" 
class​="​error​"> 
​<​sup​>​*​</​sup​>​Please provide contact number 
​</​p​> 
​<​p ​*ngIf​="​mobileNumber.errors?.pattern​"​ ​class​="​error​"> 
​<​sup​>​*​</​sup​>​Use numbers only number 
​</​p​> 
​</​div​> 
​</​div​> 
​<​div ​class​="​form-group text-right​"> 
​<​button ​type​="​submit​"​ ​class​="​btn btn-success btn-block​" 
[disabled]​="​!editForm.valid​"> 
Update Student 
​</​button​> 
​</​div​> 
​</​div​> 
​</​div​> 
​</​form​> 
​<!-- Student's Edit Form ends--> 
   
​</​div​> 
​</​div​> 
</​div​> 
Go to ​src > app > edit-student.component.ts​ file and write the edit form logic 
using Activated Route in the same order as mentioned below. 
import​ ​{​ Component​,​ OnInit​,​ AfterViewInit ​}​ ​from​ ​'@angular/core'​; 
import​ ​{​ FormGroup​,​ FormBuilder​,​ Validators ​}​ ​from​ ​'@angular/forms'​; 
import​ ​{​ CrudService ​}​ ​from​ ​'../shared/crud.service'​; 
import​ ​{​ ActivatedRoute​,​ Router ​}​ ​from​ ​"@angular/router"​;​ ​// ActivatedRoue is 
used to get the current associated components information. 
import​ ​{​ Location ​}​ ​from​ ​'@angular/common'​;​ ​// Location service is used to go 
back to previous component 
import​ ​{​ ToastrService ​}​ ​from​ ​'ngx-toastr'​; 
 
@​Component​({ 
selector​:​ ​'app-edit-student'​, 
templateUrl​:​ ​'./edit-student.component.html'​, 
styleUrls​:​ ​[​'./edit-student.component.css'​] 
}) 
 
export​ ​class​ ​EditStudentComponent​ ​implements​ ​OnInit​ ​{ 
editForm​:​ FormGroup​;​ ​// Define FormGroup to student's edit form 
   
​constructor​( 
​private​ crudApi​:​ CrudService​,​ ​// Inject CRUD API in constructor 
​private​ fb​:​ FormBuilder​,​ ​// Inject Form Builder service for Reactive forms 
​private​ location​:​ Location​,​ ​// Location service to go back to previous 
component 
​private​ actRoute​:​ ActivatedRoute​,​ ​// Activated route to get the current 
component's inforamation 
​private​ router​:​ Router​,​ ​// Router service to navigate to specific 
component 
​private​ toastr​:​ ToastrService ​// Toastr service for alert message 
​){​ ​} 
 
​ngOnInit​()​ ​{ 
​this​.​updateStudentData​();​ ​// Call updateStudentData() as soon as the 
component is ready  
​const​ id ​=​ ​this​.​actRoute​.​snapshot​.​paramMap​.​get​(​'id'​);​ ​// Getting current 
component's id or information using ActivatedRoute service 
​this​.​crudApi​.​GetStudent​(​id​).​valueChanges​().​subscribe​(​data​ ​=>​ ​{ 
​this​.​editForm​.​setValue​(​data​)​ ​// Using SetValue() method, It's a 
ReactiveForm's API to store intial value of reactive form  
​}) 
​} 
 
​// Accessing form control using getters 
​get​ ​firstName​()​ ​{ 
​return​ ​this​.​editForm​.​get​(​'firstName'​); 
​} 
 
​get​ ​lastName​()​ ​{ 
​return​ ​this​.​editForm​.​get​(​'lastName'​); 
​} 
 
​get​ ​email​()​ ​{ 
​return​ ​this​.​editForm​.​get​(​'email'​); 
​} 
 
​get​ ​mobileNumber​()​ ​{ 
​return​ ​this​.​editForm​.​get​(​'mobileNumber'​); 
​}   
 
​// Contains Reactive Form logic 
​updateStudentData​()​ ​{ 
​this​.​editForm ​=​ ​this​.​fb​.​group​({ 
firstName​:​ ​[​''​,​ ​[​Validators​.​required​,​ Validators​.​minLength​(​2​)]], 
lastName​:​ ​[​''​], 
email​:​ ​[​''​,​ ​[​Validators​.​required​, 
Validators​.​pattern​(​'^[a-zA-Z0-9_.+-]+@[a-zA-Z0-9-]+.[a-zA-Z0-9-.]+$'​)]], 
mobileNumber​:​ ​[​''​,​ ​[​Validators​.​required​,​ Validators​.​pattern​(​'^[0-9]+$'​)]] 
​}) 
​} 
 
​// Go back to previous component 
​goBack​()​ ​{ 
​this​.​location​.​back​(); 
​} 
 
​// Below methods fire when somebody click on submit button 
​updateForm​(){ 
​this​.​crudApi​.​UpdateStudent​(​this​.​editForm​.​value​);​ ​// Update student data 
using CRUD API 
​this​.​toastr​.​success​(​this​.​editForm​.​controls​[​'firstName'​].​value ​+​ ​' updated 
successfully'​);​ ​// Show succes message when data is successfully submited 
​this​.​router​.​navigate​([​'view-students'​]);​ ​// Navigate to student's list 
page when student data is updated 
​} 
 
} 

More Related Content

What's hot

Angular directives and pipes
Angular directives and pipesAngular directives and pipes
Angular directives and pipesKnoldus Inc.
 
Spring boot introduction
Spring boot introductionSpring boot introduction
Spring boot introductionRasheed Waraich
 
Angular 16 – the rise of Signals
Angular 16 – the rise of SignalsAngular 16 – the rise of Signals
Angular 16 – the rise of SignalsCoding Academy
 
Spring Framework - AOP
Spring Framework - AOPSpring Framework - AOP
Spring Framework - AOPDzmitry Naskou
 
Microservice With Spring Boot and Spring Cloud
Microservice With Spring Boot and Spring CloudMicroservice With Spring Boot and Spring Cloud
Microservice With Spring Boot and Spring CloudEberhard Wolff
 
Introduction to Spring Framework
Introduction to Spring FrameworkIntroduction to Spring Framework
Introduction to Spring FrameworkHùng Nguyễn Huy
 
Spring boot - an introduction
Spring boot - an introductionSpring boot - an introduction
Spring boot - an introductionJonathan Holloway
 
Spring Framework
Spring Framework  Spring Framework
Spring Framework tola99
 
Selenium Maven With Eclipse | Edureka
Selenium Maven With Eclipse | EdurekaSelenium Maven With Eclipse | Edureka
Selenium Maven With Eclipse | EdurekaEdureka!
 
Introduction to angular with a simple but complete project
Introduction to angular with a simple but complete projectIntroduction to angular with a simple but complete project
Introduction to angular with a simple but complete projectJadson Santos
 

What's hot (20)

Spring Core
Spring CoreSpring Core
Spring Core
 
Java 17
Java 17Java 17
Java 17
 
Angular directives and pipes
Angular directives and pipesAngular directives and pipes
Angular directives and pipes
 
Introduction to Maven
Introduction to MavenIntroduction to Maven
Introduction to Maven
 
Selenium
SeleniumSelenium
Selenium
 
Spring boot introduction
Spring boot introductionSpring boot introduction
Spring boot introduction
 
Introduction to Spring Boot
Introduction to Spring BootIntroduction to Spring Boot
Introduction to Spring Boot
 
Spring Boot
Spring BootSpring Boot
Spring Boot
 
Spring beans
Spring beansSpring beans
Spring beans
 
Angular 16 – the rise of Signals
Angular 16 – the rise of SignalsAngular 16 – the rise of Signals
Angular 16 – the rise of Signals
 
Spring Framework - AOP
Spring Framework - AOPSpring Framework - AOP
Spring Framework - AOP
 
Angular Directives
Angular DirectivesAngular Directives
Angular Directives
 
Angular Observables & RxJS Introduction
Angular Observables & RxJS IntroductionAngular Observables & RxJS Introduction
Angular Observables & RxJS Introduction
 
Microservice With Spring Boot and Spring Cloud
Microservice With Spring Boot and Spring CloudMicroservice With Spring Boot and Spring Cloud
Microservice With Spring Boot and Spring Cloud
 
Angular overview
Angular overviewAngular overview
Angular overview
 
Introduction to Spring Framework
Introduction to Spring FrameworkIntroduction to Spring Framework
Introduction to Spring Framework
 
Spring boot - an introduction
Spring boot - an introductionSpring boot - an introduction
Spring boot - an introduction
 
Spring Framework
Spring Framework  Spring Framework
Spring Framework
 
Selenium Maven With Eclipse | Edureka
Selenium Maven With Eclipse | EdurekaSelenium Maven With Eclipse | Edureka
Selenium Maven With Eclipse | Edureka
 
Introduction to angular with a simple but complete project
Introduction to angular with a simple but complete projectIntroduction to angular with a simple but complete project
Introduction to angular with a simple but complete project
 

Similar to Angular 7 Firebase CRUD

Full Angular 7 Firebase Authentication System
Full Angular 7 Firebase Authentication SystemFull Angular 7 Firebase Authentication System
Full Angular 7 Firebase Authentication SystemDigamber Singh
 
Angular kickstart slideshare
Angular kickstart   slideshareAngular kickstart   slideshare
Angular kickstart slideshareSaleemMalik52
 
Angularjs2 presentation
Angularjs2 presentationAngularjs2 presentation
Angularjs2 presentationdharisk
 
Angular Interview Questions-PDF.pdf
Angular Interview Questions-PDF.pdfAngular Interview Questions-PDF.pdf
Angular Interview Questions-PDF.pdfJohnLeo57
 
Angular4 getting started
Angular4 getting startedAngular4 getting started
Angular4 getting startedTejinderMakkar
 
Angular - Chapter 3 - Components
Angular - Chapter 3 - ComponentsAngular - Chapter 3 - Components
Angular - Chapter 3 - ComponentsWebStackAcademy
 
GDG Atlanta - Angular.js Demo and Workshop
GDG Atlanta - Angular.js Demo and WorkshopGDG Atlanta - Angular.js Demo and Workshop
GDG Atlanta - Angular.js Demo and WorkshopDrew Morris
 
Adding User Management to Node.js
Adding User Management to Node.jsAdding User Management to Node.js
Adding User Management to Node.jsDev_Events
 
Web worker in your angular application
Web worker in your angular applicationWeb worker in your angular application
Web worker in your angular applicationSuresh Patidar
 
ANGULAR JS LAB MANUAL(final) vtu2021 sch
ANGULAR JS LAB MANUAL(final) vtu2021 schANGULAR JS LAB MANUAL(final) vtu2021 sch
ANGULAR JS LAB MANUAL(final) vtu2021 schkannikadg
 
Start your journey with angular | Basic Angular
Start your journey with angular | Basic AngularStart your journey with angular | Basic Angular
Start your journey with angular | Basic AngularAnwarul Islam
 
Progressive Web Application by Citytech
Progressive Web Application by CitytechProgressive Web Application by Citytech
Progressive Web Application by CitytechRitwik Das
 
How to Implement Micro Frontend Architecture using Angular Framework
How to Implement Micro Frontend Architecture using Angular FrameworkHow to Implement Micro Frontend Architecture using Angular Framework
How to Implement Micro Frontend Architecture using Angular FrameworkRapidValue
 
Developing a Demo Application with Angular 4 - J2I
Developing a Demo Application with Angular 4 - J2IDeveloping a Demo Application with Angular 4 - J2I
Developing a Demo Application with Angular 4 - J2INader Debbabi
 
Reactive application using meteor
Reactive application using meteorReactive application using meteor
Reactive application using meteorSapna Upreti
 

Similar to Angular 7 Firebase CRUD (20)

Full Angular 7 Firebase Authentication System
Full Angular 7 Firebase Authentication SystemFull Angular 7 Firebase Authentication System
Full Angular 7 Firebase Authentication System
 
An Overview of Angular 4
An Overview of Angular 4 An Overview of Angular 4
An Overview of Angular 4
 
Angular kickstart slideshare
Angular kickstart   slideshareAngular kickstart   slideshare
Angular kickstart slideshare
 
Angularjs2 presentation
Angularjs2 presentationAngularjs2 presentation
Angularjs2 presentation
 
Angular Interview Questions-PDF.pdf
Angular Interview Questions-PDF.pdfAngular Interview Questions-PDF.pdf
Angular Interview Questions-PDF.pdf
 
Angular4 getting started
Angular4 getting startedAngular4 getting started
Angular4 getting started
 
Angular - Chapter 3 - Components
Angular - Chapter 3 - ComponentsAngular - Chapter 3 - Components
Angular - Chapter 3 - Components
 
GDG Atlanta - Angular.js Demo and Workshop
GDG Atlanta - Angular.js Demo and WorkshopGDG Atlanta - Angular.js Demo and Workshop
GDG Atlanta - Angular.js Demo and Workshop
 
Angularj2.0
Angularj2.0Angularj2.0
Angularj2.0
 
Angular IO
Angular IOAngular IO
Angular IO
 
Adding User Management to Node.js
Adding User Management to Node.jsAdding User Management to Node.js
Adding User Management to Node.js
 
Web worker in your angular application
Web worker in your angular applicationWeb worker in your angular application
Web worker in your angular application
 
ANGULAR JS LAB MANUAL(final) vtu2021 sch
ANGULAR JS LAB MANUAL(final) vtu2021 schANGULAR JS LAB MANUAL(final) vtu2021 sch
ANGULAR JS LAB MANUAL(final) vtu2021 sch
 
Start your journey with angular | Basic Angular
Start your journey with angular | Basic AngularStart your journey with angular | Basic Angular
Start your journey with angular | Basic Angular
 
Progressive Web Application by Citytech
Progressive Web Application by CitytechProgressive Web Application by Citytech
Progressive Web Application by Citytech
 
mean stack
mean stackmean stack
mean stack
 
How to Implement Micro Frontend Architecture using Angular Framework
How to Implement Micro Frontend Architecture using Angular FrameworkHow to Implement Micro Frontend Architecture using Angular Framework
How to Implement Micro Frontend Architecture using Angular Framework
 
Mean stack Magics
Mean stack MagicsMean stack Magics
Mean stack Magics
 
Developing a Demo Application with Angular 4 - J2I
Developing a Demo Application with Angular 4 - J2IDeveloping a Demo Application with Angular 4 - J2I
Developing a Demo Application with Angular 4 - J2I
 
Reactive application using meteor
Reactive application using meteorReactive application using meteor
Reactive application using meteor
 

Recently uploaded

APIForce Zurich 5 April Automation LPDG
APIForce Zurich 5 April  Automation LPDGAPIForce Zurich 5 April  Automation LPDG
APIForce Zurich 5 April Automation LPDGMarianaLemus7
 
Unblocking The Main Thread Solving ANRs and Frozen Frames
Unblocking The Main Thread Solving ANRs and Frozen FramesUnblocking The Main Thread Solving ANRs and Frozen Frames
Unblocking The Main Thread Solving ANRs and Frozen FramesSinan KOZAK
 
Unleash Your Potential - Namagunga Girls Coding Club
Unleash Your Potential - Namagunga Girls Coding ClubUnleash Your Potential - Namagunga Girls Coding Club
Unleash Your Potential - Namagunga Girls Coding ClubKalema Edgar
 
Enhancing Worker Digital Experience: A Hands-on Workshop for Partners
Enhancing Worker Digital Experience: A Hands-on Workshop for PartnersEnhancing Worker Digital Experience: A Hands-on Workshop for Partners
Enhancing Worker Digital Experience: A Hands-on Workshop for PartnersThousandEyes
 
Beyond Boundaries: Leveraging No-Code Solutions for Industry Innovation
Beyond Boundaries: Leveraging No-Code Solutions for Industry InnovationBeyond Boundaries: Leveraging No-Code Solutions for Industry Innovation
Beyond Boundaries: Leveraging No-Code Solutions for Industry InnovationSafe Software
 
Transcript: New from BookNet Canada for 2024: BNC BiblioShare - Tech Forum 2024
Transcript: New from BookNet Canada for 2024: BNC BiblioShare - Tech Forum 2024Transcript: New from BookNet Canada for 2024: BNC BiblioShare - Tech Forum 2024
Transcript: New from BookNet Canada for 2024: BNC BiblioShare - Tech Forum 2024BookNet Canada
 
#StandardsGoals for 2024: What’s new for BISAC - Tech Forum 2024
#StandardsGoals for 2024: What’s new for BISAC - Tech Forum 2024#StandardsGoals for 2024: What’s new for BISAC - Tech Forum 2024
#StandardsGoals for 2024: What’s new for BISAC - Tech Forum 2024BookNet Canada
 
"Federated learning: out of reach no matter how close",Oleksandr Lapshyn
"Federated learning: out of reach no matter how close",Oleksandr Lapshyn"Federated learning: out of reach no matter how close",Oleksandr Lapshyn
"Federated learning: out of reach no matter how close",Oleksandr LapshynFwdays
 
Integration and Automation in Practice: CI/CD in Mule Integration and Automat...
Integration and Automation in Practice: CI/CD in Mule Integration and Automat...Integration and Automation in Practice: CI/CD in Mule Integration and Automat...
Integration and Automation in Practice: CI/CD in Mule Integration and Automat...Patryk Bandurski
 
Build your next Gen AI Breakthrough - April 2024
Build your next Gen AI Breakthrough - April 2024Build your next Gen AI Breakthrough - April 2024
Build your next Gen AI Breakthrough - April 2024Neo4j
 
Designing IA for AI - Information Architecture Conference 2024
Designing IA for AI - Information Architecture Conference 2024Designing IA for AI - Information Architecture Conference 2024
Designing IA for AI - Information Architecture Conference 2024Enterprise Knowledge
 
Understanding the Laravel MVC Architecture
Understanding the Laravel MVC ArchitectureUnderstanding the Laravel MVC Architecture
Understanding the Laravel MVC ArchitecturePixlogix Infotech
 
Snow Chain-Integrated Tire for a Safe Drive on Winter Roads
Snow Chain-Integrated Tire for a Safe Drive on Winter RoadsSnow Chain-Integrated Tire for a Safe Drive on Winter Roads
Snow Chain-Integrated Tire for a Safe Drive on Winter RoadsHyundai Motor Group
 
Science&tech:THE INFORMATION AGE STS.pdf
Science&tech:THE INFORMATION AGE STS.pdfScience&tech:THE INFORMATION AGE STS.pdf
Science&tech:THE INFORMATION AGE STS.pdfjimielynbastida
 
Pigging Solutions in Pet Food Manufacturing
Pigging Solutions in Pet Food ManufacturingPigging Solutions in Pet Food Manufacturing
Pigging Solutions in Pet Food ManufacturingPigging Solutions
 
Tech-Forward - Achieving Business Readiness For Copilot in Microsoft 365
Tech-Forward - Achieving Business Readiness For Copilot in Microsoft 365Tech-Forward - Achieving Business Readiness For Copilot in Microsoft 365
Tech-Forward - Achieving Business Readiness For Copilot in Microsoft 3652toLead Limited
 
Kotlin Multiplatform & Compose Multiplatform - Starter kit for pragmatics
Kotlin Multiplatform & Compose Multiplatform - Starter kit for pragmaticsKotlin Multiplatform & Compose Multiplatform - Starter kit for pragmatics
Kotlin Multiplatform & Compose Multiplatform - Starter kit for pragmaticsAndrey Dotsenko
 

Recently uploaded (20)

APIForce Zurich 5 April Automation LPDG
APIForce Zurich 5 April  Automation LPDGAPIForce Zurich 5 April  Automation LPDG
APIForce Zurich 5 April Automation LPDG
 
Unblocking The Main Thread Solving ANRs and Frozen Frames
Unblocking The Main Thread Solving ANRs and Frozen FramesUnblocking The Main Thread Solving ANRs and Frozen Frames
Unblocking The Main Thread Solving ANRs and Frozen Frames
 
Unleash Your Potential - Namagunga Girls Coding Club
Unleash Your Potential - Namagunga Girls Coding ClubUnleash Your Potential - Namagunga Girls Coding Club
Unleash Your Potential - Namagunga Girls Coding Club
 
Enhancing Worker Digital Experience: A Hands-on Workshop for Partners
Enhancing Worker Digital Experience: A Hands-on Workshop for PartnersEnhancing Worker Digital Experience: A Hands-on Workshop for Partners
Enhancing Worker Digital Experience: A Hands-on Workshop for Partners
 
E-Vehicle_Hacking_by_Parul Sharma_null_owasp.pptx
E-Vehicle_Hacking_by_Parul Sharma_null_owasp.pptxE-Vehicle_Hacking_by_Parul Sharma_null_owasp.pptx
E-Vehicle_Hacking_by_Parul Sharma_null_owasp.pptx
 
Beyond Boundaries: Leveraging No-Code Solutions for Industry Innovation
Beyond Boundaries: Leveraging No-Code Solutions for Industry InnovationBeyond Boundaries: Leveraging No-Code Solutions for Industry Innovation
Beyond Boundaries: Leveraging No-Code Solutions for Industry Innovation
 
Transcript: New from BookNet Canada for 2024: BNC BiblioShare - Tech Forum 2024
Transcript: New from BookNet Canada for 2024: BNC BiblioShare - Tech Forum 2024Transcript: New from BookNet Canada for 2024: BNC BiblioShare - Tech Forum 2024
Transcript: New from BookNet Canada for 2024: BNC BiblioShare - Tech Forum 2024
 
#StandardsGoals for 2024: What’s new for BISAC - Tech Forum 2024
#StandardsGoals for 2024: What’s new for BISAC - Tech Forum 2024#StandardsGoals for 2024: What’s new for BISAC - Tech Forum 2024
#StandardsGoals for 2024: What’s new for BISAC - Tech Forum 2024
 
Hot Sexy call girls in Panjabi Bagh 🔝 9953056974 🔝 Delhi escort Service
Hot Sexy call girls in Panjabi Bagh 🔝 9953056974 🔝 Delhi escort ServiceHot Sexy call girls in Panjabi Bagh 🔝 9953056974 🔝 Delhi escort Service
Hot Sexy call girls in Panjabi Bagh 🔝 9953056974 🔝 Delhi escort Service
 
"Federated learning: out of reach no matter how close",Oleksandr Lapshyn
"Federated learning: out of reach no matter how close",Oleksandr Lapshyn"Federated learning: out of reach no matter how close",Oleksandr Lapshyn
"Federated learning: out of reach no matter how close",Oleksandr Lapshyn
 
Vulnerability_Management_GRC_by Sohang Sengupta.pptx
Vulnerability_Management_GRC_by Sohang Sengupta.pptxVulnerability_Management_GRC_by Sohang Sengupta.pptx
Vulnerability_Management_GRC_by Sohang Sengupta.pptx
 
Integration and Automation in Practice: CI/CD in Mule Integration and Automat...
Integration and Automation in Practice: CI/CD in Mule Integration and Automat...Integration and Automation in Practice: CI/CD in Mule Integration and Automat...
Integration and Automation in Practice: CI/CD in Mule Integration and Automat...
 
Build your next Gen AI Breakthrough - April 2024
Build your next Gen AI Breakthrough - April 2024Build your next Gen AI Breakthrough - April 2024
Build your next Gen AI Breakthrough - April 2024
 
Designing IA for AI - Information Architecture Conference 2024
Designing IA for AI - Information Architecture Conference 2024Designing IA for AI - Information Architecture Conference 2024
Designing IA for AI - Information Architecture Conference 2024
 
Understanding the Laravel MVC Architecture
Understanding the Laravel MVC ArchitectureUnderstanding the Laravel MVC Architecture
Understanding the Laravel MVC Architecture
 
Snow Chain-Integrated Tire for a Safe Drive on Winter Roads
Snow Chain-Integrated Tire for a Safe Drive on Winter RoadsSnow Chain-Integrated Tire for a Safe Drive on Winter Roads
Snow Chain-Integrated Tire for a Safe Drive on Winter Roads
 
Science&tech:THE INFORMATION AGE STS.pdf
Science&tech:THE INFORMATION AGE STS.pdfScience&tech:THE INFORMATION AGE STS.pdf
Science&tech:THE INFORMATION AGE STS.pdf
 
Pigging Solutions in Pet Food Manufacturing
Pigging Solutions in Pet Food ManufacturingPigging Solutions in Pet Food Manufacturing
Pigging Solutions in Pet Food Manufacturing
 
Tech-Forward - Achieving Business Readiness For Copilot in Microsoft 365
Tech-Forward - Achieving Business Readiness For Copilot in Microsoft 365Tech-Forward - Achieving Business Readiness For Copilot in Microsoft 365
Tech-Forward - Achieving Business Readiness For Copilot in Microsoft 365
 
Kotlin Multiplatform & Compose Multiplatform - Starter kit for pragmatics
Kotlin Multiplatform & Compose Multiplatform - Starter kit for pragmaticsKotlin Multiplatform & Compose Multiplatform - Starter kit for pragmatics
Kotlin Multiplatform & Compose Multiplatform - Starter kit for pragmatics
 

Angular 7 Firebase CRUD

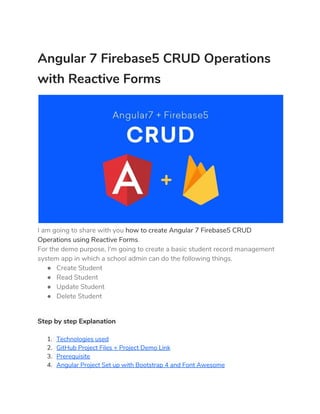
  • 1. Angular 7 Firebase5 CRUD Operations  with Reactive Forms    I am going to share with you ​how to create Angular 7 Firebase5 CRUD  Operations using Reactive Forms​.  For the demo purpose, I’m going to create a basic student record management  system app in which a school admin can do the following things.  ● Create Student  ● Read Student  ● Update Student  ● Delete Student  Step by step Explanation  1. Technologies used  2. GitHub Project Files + Project Demo Link  3. Prerequisite  4. Angular Project Set up with Bootstrap 4 and Font Awesome 
  • 2. 5. Firebase Account Set up and AngularFire2 Library Integration  6. Create CRUD Operations with Firebase API  7. Generate Angular Components for Adding, Updating & Creating Student Data  8. Router Service Set up for Navigation  9. Integrate NGX-Toastr Module to Show Alert Messages  10.Use Reactive Form to Add Student in Firebase Database using CRUD Services  11.Set up and Usage of NGX Pagination Module  12.Show Students List and Delete Student Object using CRUD API  13.Create Edit Functionality for Students Data using CRUD Services  1. Technologies used  ● Node 8.11.1  ● Angular CLI 7.0.1  ● Angular 7.0.1  ● Firebase 5.5.5  ● Bootstrap 4.1.3  ● Font Awesome  ● NGX Toastr 9.1.1  ● NGX Pagination 3.2.1  ● RxJS 6.3.3  ● Typescript 2.7.2  2. GitHub Project Files + Project Demo Link  GitHub Resources​Project Demo  3. Prerequisite  – Setup Node JS development environment  Before we move ahead I’m assuming you already have ​Node JS development  environment​ set up in your system.  Please follow this link ​How to Set up Node JS Development Environment?  – Install Angular CLI 
  • 3. Install Angular CLI, Ignore if Angular CLI is already installed.  npm​ ​install​ -g @angular/cli  4. Angular Project Set up with Bootstrap 4 and Font  Awesome  Let’s set up a fresh new Angular 7 project with Bootstrap 4 and Font Awesome  for our basic student record management system CRUD app.  ng new angularfirebase-student-app  Once the project is installed then get into the project’s directory by following the  following command.  cd​ angularfirebase-student-app  Now its time to setup Bootstrap CSS framework in your Angular project. Use the  mentioned command to install the latest version of the Bootstrap framework.  npm​ ​install​ bootstrap  Install Font Awesome icons set library using Angular CLI  npm​ ​install​ @fortawesome/fontawesome-free-webfonts  Once, the Bootstrap and Font Awesome icon set is successfully installed. Then  go to ​angular.json​ file and paste the given below code in styles array.  "styles"​:​ ​[  ​"node_modules/bootstrap/dist/css/bootstrap.min.css"​, 
  • 4. ​"src/styles.css"​,    "node_modules/@fortawesome/fontawesome-free-webfonts/css/fontawesome. css"​,    "node_modules/@fortawesome/fontawesome-free-webfonts/css/fa-regular.css"​,    "node_modules/@fortawesome/fontawesome-free-webfonts/css/fa-brands.css"​,    "node_modules/@fortawesome/fontawesome-free-webfonts/css/fa-solid.css"​,  ​"node_modules/ngx-toastr/toastr.css"  ​],  Please don’t forget to restart the server. When you make any changes in the  angular.json​ file. Otherwise, changes won’t reflect in your Angular project. First  close the server then use the following command in Angular CLI.  ng serve --open  Go through this article to know more about a detailed explanation on setting up  the Angular project using external dependencies from scratch.  How to Setup Angular 7 Project using Bootstrap 4, SASS, Font Awesome, and  Ng Bootstrap?  5. Firebase Account Set up + AngularFire2 Library  Integration  Go to Firebase website​ login using your email id. When you see given below  screen click on Add Project section. 
  • 5.   Afterward, Enter your project name, accept the terms and condition and click on  create a project button. 
  • 6.   Once your project is set up, then click on your project then you’ll see in your  admin dashboard navigate to ​Develop > Authentication > Web setup​ then click  on the web setup button, and a popup will appear along with your firebase  credentials.  Copy ​your firebase credentials​ from here. 
  • 7.   Change your Firebase database rules, go to ​Database > Rules​. Otherwise, you  won’t be able to access the data without authentication.  Note:​ Don’t forget to change these rules when you are building a real app for  your clients.  {  ​"rules"​:​ ​{  ​".read"​:​ true,  ​".write"​:​ ​true  ​}  }  Now setup Firebase (AngularFire2 library) in your Angular project.  Run the given below cmd in Angular CLI.  npm​ ​install​ firebase @angular/fire --save  Let’s connect the AngularFire2 library to your Angular project. 
  • 8. Go to ​src/environments/enviorment.ts​ and ​enviorment.prod.ts​ files in your  project’s ​enviornments folder​. Then add ​your firebase configuration details ​in  both the environment files as given below.    Open ​app.module.ts​ file and register the Firebase required services.  // Firebase Modules  import​ ​{​ AngularFireModule ​}​ ​from​ ​'@angular/fire'​;  import​ ​{​ AngularFireDatabaseModule ​}​ ​from​ ​'@angular/fire/database'​;  import​ ​{​ environment ​}​ ​from​ ​'../environments/environment'​;    @​NgModule​({  imports​:​ ​[  AngularFireModule​.​initializeApp​(​environment​.​firebase​),​ ​// Main Angular fire  module   AngularFireDatabaseModule ​// Firebase database module   ​]  }) 
  • 9. We’ve successfully set up the Angular project with Firebase NoSQL real-time  database.  6. Create CRUD operations with Firebase API  Before writing the CRUD operations we must create a separate folder by the  name of shared within ​src > app > shared​ and create ​crud.service.ts​ (Service)  and ​student.ts​ (Interface Class) into it.  Run the following command to generate student interface class for setting up  data types.  ng g i shared/student // Generates student interface class within shared folder  Afterwards, go to ​src > app > shared > student.ts​ file and add the following code  into it.  export​ ​interface​ ​Student​ ​{  $key​:​ ​string​;  firstName​:​ ​string​;  lastName​:​ ​string​;  email​:​ ​string  mobileNumber​:​ Number​;  }  Run the following command to generate a CRUD service file.  ng g s shared​/​crud ​// Generates CRUD service within shared folder  Go to ​src > app > shared > crud.service.ts​ file and add the given below code to  create CRUD operations with Firebase API. 
  • 10. import​ ​{​ Injectable ​}​ ​from​ ​'@angular/core'​;  import​ ​{​ Student ​}​ ​from​ ​'../shared/student'​;​ ​// Student data type interface class  import​ ​{​ AngularFireDatabase​,​ AngularFireList​,​ AngularFireObject ​}​ ​from  '@angular/fire/database'​;​ ​// Firebase modules for Database, Data list and Single  object    @​Injectable​({  providedIn​:​ ​'root'  })    export​ ​class​ ​CrudService​ ​{  studentsRef​:​ AngularFireList​<​any​>​;​ ​// Reference to Student data list, its an  Observable  studentRef​:​ AngularFireObject​<​any​>​;​ ​// Reference to Student object, its an  Observable too      ​// Inject AngularFireDatabase Dependency in Constructor  ​constructor​(​private​ db​:​ AngularFireDatabase​)​ ​{​ ​}    ​// Create Student  ​AddStudent​(​student​:​ Student​)​ ​{  ​this​.​studentsRef​.​push​({  firstName​:​ student​.​firstName​,  lastName​:​ student​.​lastName​,  email​:​ student​.​email​,  mobileNumber​:​ student​.​mobileNumber  ​}) 
  • 11. ​}    ​// Fetch Single Student Object  ​GetStudent​(​id​:​ ​string​)​ ​{  ​this​.​studentRef ​=​ ​this​.​db​.​object​(​'students-list/'​ ​+​ id​);  ​return​ ​this​.​studentRef​;  ​}    ​// Fetch Students List  ​GetStudentsList​()​ ​{  ​this​.​studentsRef ​=​ ​this​.​db​.​list​(​'students-list'​);  ​return​ ​this​.​studentsRef​;  ​}      ​// Update Student Object  ​UpdateStudent​(​student​:​ Student​)​ ​{  ​this​.​studentRef​.​update​({  firstName​:​ student​.​firstName​,  lastName​:​ student​.​lastName​,  email​:​ student​.​email​,  mobileNumber​:​ student​.​mobileNumber  ​})  ​}      ​// Delete Student Object  ​DeleteStudent​(​id​:​ ​string​)​ ​{   ​this​.​studentRef ​=​ ​this​.​db​.​object​(​'students-list/'​+​id​); 
  • 12. ​this​.​studentRef​.​remove​();  ​}      }  7. Generate Angular Components for Adding,  Updating & Creating Student Data  ng g c add-student    ng g c edit-student    ng g c student-list  Now we are able to write our app logic in these components.  8. Router Service Set up for Navigation  Generate app routing module for navigation using below command  ● –flat adds the file in src/app instead of its own folder.  ● –module=app orders Angular CLI to register it in the imports array of the  AppModule.  ng generate module app-routing --flat --module​=​app  Once the app-routing module is created then Go to ​src > app >  app-routing.modules.ts​file and add the given below code. 
  • 13. import​ ​{​ NgModule ​}​ ​from​ ​'@angular/core'​;  import​ ​{​ CommonModule ​}​ ​from​ ​'@angular/common'​;    // Use RouterModule, Routes for activating routing in angular  import​ ​{​ RouterModule​,​ Routes ​}​ ​from​ ​'@angular/router'​;    // Include components for in which router service to be used  import​ ​{​ AddStudentComponent ​}​ ​from​ ​'./add-student/add-student.component'​;  import​ ​{​ StudentsListComponent ​}​ ​from​ ​'./students-list/students-list.component'​;  import​ ​{​ EditStudentComponent ​}​ ​from​ ​'./edit-student/edit-student.component'​;    // Routes array define component along with the path name for url  const​ routes​:​ Routes ​=​ ​[  ​{​ path​:​ ​''​,​ redirectTo​:​ ​'/register-student'​,​ pathMatch​:​ ​'full'​ ​},  ​{​ path​:​ ​'register-student'​,​ component​:​ AddStudentComponent ​},  ​{​ path​:​ ​'view-students'​,​ component​:​ StudentsListComponent ​},  ​{​ path​:​ ​'edit-student/:id'​,​ component​:​ EditStudentComponent ​}  ];    // Import RouterModule and inject routes array in it and dont forget to export the  RouterModule  @​NgModule​({  imports​:​ ​[​CommonModule​,​RouterModule​.​forRoot​(​routes​)],  exports​:​ ​[​RouterModule​],  declarations​:​ ​[]  }) 
  • 14. export​ ​class​ ​AppRoutingModule​ ​{​ ​}    Afterwards, Go to ​src > app > app.modules.ts​ and add the following code into  app.module.ts​.  import​ ​{​ AppRoutingModule ​}​ ​from​ ​'.//app-routing.module'​;​ ​// AppRoutingModule  Module    @​NgModule​({      imports​:​ ​[  AppRoutingModule ​// Declare AppRoutingModule into imports array  ​]    })      Now go to ​src > app > app.component.html​ file to activate router service and  layout for the student demo app.  <!-- Top navigation -->  <​nav ​class​="​navbar navbar-dark fixed-top bg-dark flex-md-nowrap p-0  shadow​">  ​<​a ​class​="​navbar-brand col-sm-3 col-md-2 mr-0​"  routerLink​="​/register-student​">  ​<​img ​class​="​brand-logo​"​ ​src​="​assets/logo-positronx-white.svg​"  alt​="​positronX.io Logo​"> 
  • 15. ​<​span ​class​="​dasboard-text​">​Dashboard​</​span​>  ​</​a​>  ​<​ul ​class​="​navbar-nav px-3​">  ​<​li ​class​="​nav-item text-nowrap​">  ​<​a ​class​="​nav-link​"​ ​routerLink​="​/register-student​">  ​<​span ​class​="​user-image​"​ style​="​background-image​:  url('assets/user.jpg')​"></​span​>  Hello Admin  ​</​a​>  ​</​li​>  ​</​ul​>  </​nav​>    <!-- Sidebar navigation -->  <​div ​class​="​container-fluid​">  ​<​div ​class​="​row​">  ​<​nav ​class​="​col-md-2 d-md-block bg-light sidebar​">  ​<​div ​class​="​sidebar-sticky​">  ​<​ul ​class​="​nav flex-column​">    ​<!-- routerLink="/register-student" to navigate to view-students  component -->  ​<​li ​class​="​nav-item​">  ​<​a ​class​="​nav-link​"​ ​routerLink​="​/register-student​"  routerLinkActive​="​active​">  ​<​i ​class​="​fas fa-plus​"></​i​>​Add Student  ​</​a​> 
  • 16. ​</​li​>    ​<!-- routerLink="/view-students" to navigate to view-students component  -->  ​<!-- routerLinkActive="active" activates active class for component-->  ​<​li ​class​="​nav-item​">  ​<​a ​class​="​nav-link​"​ ​routerLink​="​/view-students​"  routerLinkActive​="​active​">  ​<​i ​class​="​fas fa-list-ul​"></​i​>​Students List  ​</​a​>  ​</​li​>  ​</​ul​>  ​</​div​>  ​</​nav​>    ​<!-- Main content -->  ​<​main ​role​="​main​"​ ​class​="​col-md-9 ml-sm-auto col-lg-10 px-4​">  ​<​div ​class​="​inner-adjust​">    ​<!-- Use router template to show the components for which router service is  activated -->  ​<​router-outlet​></​router-outlet​>    ​</​div​>  ​</​main​>    ​</​div​> 
  • 17. </​div​>    09. Integrate NGX-Toastr Module to Show Alert  Messages  We’ll be requiring ​NGX Toastr NPM module​ to show alert messages when an  update occurs in student’s data. In order to install NGX Toastr, we’ll be using the  following command.  npm​ ​install​ ngx-toastr --save    // @angular/animations package is a required dependency ​for​ the default toast  npm​ ​install​ @angular/animations --save    Then go to ​angular.json​ and add the following code in styles array.  "styles"​:​ ​[  ​"node_modules/ngx-toastr/toastr.css"​ // Includes ngx-toastr's css  ]  Go to app.moudule.ts file and include this code for NGX Toastr  // Import below modules for NGX Toastr  import​ ​{​ BrowserAnimationsModule ​}​ ​from  '@angular/platform-browser/animations'​;  import​ ​{​ ToastrModule ​}​ ​from​ ​'ngx-toastr'​;    
  • 18. @​NgModule​({  imports​:​ ​[  BrowserAnimationsModule​,​ ​// required animations module  ToastrModule​.​forRoot​()​ ​// ToastrModule added  ​]  })  class​ ​MainModule​ ​{}  How to use NGX-Toastr in the ANgular Component?  import​ ​{​ ToastrService ​}​ ​from​ ​'ngx-toastr'​;     @​Component​({​...​})  export​ ​class​ ​YourComponent​ ​{  ​constructor​(​private​ toastr​:​ ToastrService​)​ ​{}     ​showSuccess​()​ ​{  ​this​.​toastr​.​success​(​'You'​ve Got It Successfully​!​'​);  ​}  }  To know more about ​ngx-toastr NPM module and its API please click on this link​.  10. Use Reactive Form to Add Student in Firebase  Database using CRUD Services  Go to ​src > app > app.module.ts​ file and add the given below code within  app.module.ts​ file to activate Reactive Forms service in your Angular project. 
  • 19. import​ ​{​ ReactiveFormsModule ​}​ ​from​ ​'@angular/forms'​;​ ​// Reactive Form  Module    @​NgModule​({  imports​:​ ​[  ReactiveFormsModule ​// Reactive forms module  ​]  })  Afterwards, go to ​src > app > add-student.component.html​ file and add the  following code. It contains Reactive Forms tags and form validation logic and  HTML layout for add student component.  <​div ​class​="​pt-3 pb-2 mb-3 border-bottom​">  ​<​h1 ​class​="​h2​">​Add Student​</​h1​>  ​<​p ​class​="​custom-text​">​A demo CRUD app for ​<​strong​>​student record  management system​</​strong​>​ built with ​<​strong​>​Angular6 and  Firebase5​</​strong​></​p​>  </​div​>    <!-- Student form -->  <​form ​[formGroup]​="​studentForm​"​ ​(ngSubmit)​="​submitStudentData()​"  novalidate​>​ // Declared formGroup="studentForm" to create Reactive form  group, novalidate is used to disable HTML5 default validation   ​<​div ​class​="​row​">  ​<​div ​class​="​col-lg-5 col-md-12 col-sm-12​">  ​<​div ​class​="​row​">  ​<​div ​class​="​col-md-12 mb-3​"> 
  • 20. ​<​label​>​First name​</​label​>  ​<​input ​type​="​text​"​ ​formControlName​="​firstName​"​ ​class​="​form-control​"  required​>​ // formControlName is used to commnunicate to formGroup's  properties  ​<​p ​*ngIf​="​firstName.touched && firstName.invalid​"  class​="​error​"><​sup​>​*​</​sup​>​Please enter atleast first name​</​p​>​ // Accessing  fromGoup object's property using Getter method  ​<​p ​*ngIf​="​firstName.errors?.minlength​"​ ​class​="​error​"><​sup​>​*​</​sup​>​Name  shouldn't be less than 2 words​</​p​>​ // Accessing Reactive Forms error  property using Getter method  ​</​div​>  ​<​div ​class​="​col-md-12 mb-3​">  ​<​label​>​Last name​</​label​>  ​<​input ​type​="​text​"​ ​formControlName​="​lastName​"​ ​class​="​form-control​">  ​</​div​>  ​</​div​>  ​<​div ​class​="​row​">  ​<​div ​class​="​col-md-12 mb-3​">  ​<​label​>​Email​</​label​>  ​<​input ​type​="​email​"​ ​formControlName​="​email​"​ ​class​="​form-control​"  required​>  ​<​p ​*ngIf​="​email.touched && email.invalid​"  class​="​error​"><​sup​>​*​</​sup​>​Please provide email​</​p​>  ​<​p ​*ngIf​="​email.errors?.pattern​"​ ​class​="​error​"><​sup​>​*​</​sup​>​Please enter  correct email​</​p​>  ​</​div​>  ​<​div ​class​="​col-md-12 mb-3​"> 
  • 21. ​<​label​>​Mobile number​</​label​>  ​<​input ​type​="​text​"​ ​formControlName​="​mobileNumber​"  class​="​form-control​"​ ​required​>  ​<​p ​*ngIf​="​mobileNumber.touched && mobileNumber.invalid​"  class​="​error​"><​sup​>​*​</​sup​>​Please provide contact  number​</​p​>  ​<​p ​*ngIf​="​mobileNumber.errors?.pattern​"​ ​class​="​error​"><​sup​>​*​</​sup​>​Use  numbers only  number​</​p​>  ​</​div​>  ​</​div​>  ​<​div ​class​="​form-group text-right​">  ​<​button ​type​="​button​"​ ​class​="​btn btn-secondary gap-right​"  (click)​="​ResetForm()​">​Reset​</​button​>​ // (click) event to trigger ResetForm  ​<​button ​type​="​submit​"​ ​class​="​btn btn-success​"  [disabled]​="​!studentForm.valid​">​Add Student​</​button​>​ // Disable student form  unless it is valid  ​</​div​>  ​</​div​>  ​</​div​>  </​form​>​<!-- Student form ends-->  Afterwards, go to ​src > app > add-student.component.ts​ file and add the given  below code. It contains Reactive Forms Logic, Getter method to access  FormGroup’s properties, Reactive Form validation logic, Form Reset method and  Toastr service for showing alert messages.  import​ ​{​ Component​,​ OnInit ​}​ ​from​ ​'@angular/core'​;  import​ ​{​ CrudService ​}​ ​from​ ​'../shared/crud.service'​;​ ​// CRUD services API 
  • 22. import​ ​{​ FormBuilder​,​ FormGroup​,​ FormControl​,​ Validators ​}​ ​from  '@angular/forms'​;​ ​// Reactive form services  import​ ​{​ ToastrService ​}​ ​from​ ​'ngx-toastr'​;​ ​// Alert message using NGX toastr      @​Component​({  selector​:​ ​'app-add-student'​,  templateUrl​:​ ​'./add-student.component.html'​,  styleUrls​:​ ​[​'./add-student.component.css'​]  })    export​ ​class​ ​AddStudentComponent​ ​implements​ ​OnInit​ ​{  ​public​ studentForm​:​ FormGroup​;​ ​// Define FormGroup to student's form     ​constructor​(  ​public​ crudApi​:​ CrudService​,​ ​// CRUD API services  ​public​ fb​:​ FormBuilder​,​ ​// Form Builder service for Reactive forms  ​public​ toastr​:​ ToastrService ​// Toastr service for alert message  ​)​ ​{​ ​}       ​ngOnInit​()​ ​{  ​this​.​crudApi​.​GetStudentsList​();​ ​// Call GetStudentsList() before main form is  being called  ​this​.​studenForm​();​ ​// Call student form when component is ready  ​}   
  • 23. ​// Reactive student form  ​studenForm​()​ ​{  ​this​.​studentForm ​=​ ​this​.​fb​.​group​({  firstName​:​ ​[​''​,​ ​[​Validators​.​required​,​ Validators​.​minLength​(​2​)]],  lastName​:​ ​[​''​],  email​:​ ​[​''​,​ ​[​Validators​.​required​,  Validators​.​pattern​(​'^[a-zA-Z0-9_.+-]+@[a-zA-Z0-9-]+.[a-zA-Z0-9-.]+$'​)]],  mobileNumber​:​ ​[​''​,​ ​[​Validators​.​required​,​ Validators​.​pattern​(​'^[0-9]+$'​)]]  ​})    ​}    ​// Accessing form control using getters  ​get​ ​firstName​()​ ​{  ​return​ ​this​.​studentForm​.​get​(​'firstName'​);  ​}    ​get​ ​lastName​()​ ​{  ​return​ ​this​.​studentForm​.​get​(​'lastName'​);  ​}      ​get​ ​email​()​ ​{  ​return​ ​this​.​studentForm​.​get​(​'email'​);  ​}    ​get​ ​mobileNumber​()​ ​{  ​return​ ​this​.​studentForm​.​get​(​'mobileNumber'​);  ​} 
  • 24.   ​// Reset student form's values  ​ResetForm​()​ ​{  ​this​.​studentForm​.​reset​();  ​}       ​submitStudentData​()​ ​{  ​this​.​crudApi​.​AddStudent​(​this​.​studentForm​.​value​);​ ​// Submit student data using  CRUD API  ​this​.​toastr​.​success​(​this​.​studentForm​.​controls​[​'firstName'​].​value ​+​ ​' successfully  added!'​);​ ​// Show success message when data is successfully submited  ​this​.​ResetForm​();​ ​// Reset form when clicked on reset button  ​};    }  11. Set up and Usage of NGX Pagination Module  Run below command in Angular CLI to install NGX Pagination NPM module.  npm​ ​install​ ngx-pagination --save  Open ​src > app > app.module.ts​ file and add the given below code.  // NGX Pagination  import​ ​{​ NgxPaginationModule ​}​ ​from​ ​'ngx-pagination'​;    @​NgModule​({  imports​:​ ​[ 
  • 25. NgxPaginationModule ​// Include it in imports array  ​]   })    How to use NGX Pagination?  // your.component.ts example  import​ ​{​Component​}​ ​from​ ​'@angular/core'​;     @​Component​({  selector​:​ ​'my-component'​,  template​:​ ​`  <ul>  <li *ngFor="let item of collection | paginate: { itemsPerPage: 07, currentPage:  p }"> ... </li>  </ul>      <pagination-controls (pageChange)="p = $event"></pagination-controls>  `  })  export​ ​class​ ​MyComponent​ ​{  p​:​ ​number​ ​=​ ​1​;  collection​:​ ​any​[]​ ​=​ someArrayOfThings​;    }  To learn more about ​ngx-pagination and its API please visit Pagination for  Angular (v2+) 
  • 26. 12. Show Students List and Delete Student Object  using CRUD API  I am going to fetch students data list using ​crud.service.ts​, afterwards, I’ll be  creating student delete functionality and integrate NGX pagination to show  pagination in student’s data list.  Go to ​src > app > students-list > student-list.component.html​ file then add the  following code.  <​div ​class​="​d-flex justify-content-between flex-wrap flex-md-nowrap  align-items-center pt-3 pb-2 mb-3 border-bottom​">  ​<​h1 ​class​="​h2​">​Students List​</​h1​>  ​<!-- It won't show if there is no student data -->  ​<​a ​routerLink​="​/register-student​"​ ​class​="​btn btn-success​"  *ngIf​="​hideWhenNoStudent​">  ​<​i ​class​="​fas fa-plus custom-fa-plus​"></​i​>  Add Student  ​</​a​>  </​div​>    <​div ​class​="​pricing-header mx-auto​">    ​<!-- Preloader shows before the data loads-->  ​<​div ​class​="​no-data text-center​"​ ​*ngIf​="​preLoader​">  ​<​img ​src​="​assets/preloader.gif​"​ ​class​="​preloader-icon​"​ ​alt​="​No student​">  ​</​div​>    ​<!-- No data shows when their is no student data available --> 
  • 27. ​<​div ​class​="​no-data text-center​"​ ​*ngIf​="​noData​">  ​<​img ​src​="​assets/no-student.svg​"​ ​class​="​nodata-msg​"​ ​alt​="​No student​">  ​<​p ​class​="​nodata-msg​">​No student added yet!​</​p​>  ​<​a ​routerLink​="​/register-student​"​ ​class​="​btn btn-success​">  ​<​i ​class​="​fas fa-plus custom-fa-plus​"></​i​>  Add Student  ​</​a​>  ​</​div​>    ​<!-- Showing students data -->  ​<​div ​class​="​table-responsive​"​ ​*ngIf​="​hideWhenNoStudent​">  ​<​table ​class​="​table table-bordered table-responsive-sm table-responsive-md  table-responsive-lg​">  ​<​thead​>  ​<​tr​>  ​<​th ​scope​="​col​">​Student Id​</​th​>  ​<​th ​scope​="​col​">​Student name​</​th​>  ​<​th ​scope​="​col​">​Email​</​th​>  ​<​th ​scope​="​col​">​Mobile number​</​th​>  ​<​th ​class​="​text-center​"​ ​scope​="​col​">​Edit​</​th​>  ​</​tr​>  ​</​thead​>  ​<​tbody​>  ​<!-- *ngFor loop iterates over Student array and fetch the student's data -->  ​<!-- paginate pipe will add pagination in student's list, it won't show if items  are less then 7 -->  ​<​tr ​*ngFor​="​let student of Student| paginate: { itemsPerPage: 7, 
  • 28. currentPage: p }; let i = index;​">  ​<​th ​scope​="​row​">​{{student.$key}}​</​th​>  ​<​td​>​{{student.firstName}} {{student.lastName}}​</​td​>  ​<​td​>​{{student.email}}​</​td​>  ​<​td​>​{{student.mobileNumber}}​</​td​>  ​<​td ​class​="​text-center action-block​">  ​<!-- routerLink="/edit-student/{{student.$key}}" is refered to { path:  'edit-student/:id', component: EditStudentComponent } in  app-routing.moudles.ts -->  ​<​i ​class​="​far fa-edit​"​ ​routerLink​="​/edit-student/{{student.$key}}​"></​i​>  ​<​i ​class​="​far fa-trash-alt​"​ ​(click)​="​deleteStudent(student)​"></​i​></​td​>  ​</​tr​>  ​</​tbody​>  ​</​table​>  ​</​div​>  ​<!-- Pagination -->  ​<​pagination-controls ​(pageChange)​="​p = $event​"​ ​autoHide​="​true​"  responsive​="​true​"></​pagination-controls​>  </​div​>  Go to ​src > app > students-list > student-list.component.ts​ file.  import​ ​{​ Component​,​ OnInit ​}​ ​from​ ​'@angular/core'​;  import​ ​{​ CrudService ​}​ ​from​ ​'../shared/crud.service'​;​ ​// CRUD API service class  import​ ​{​ Student ​}​ ​from​ ​'./../shared/student'​;​ ​// Student interface class for Data  types.  import​ ​{​ ToastrService ​}​ ​from​ ​'ngx-toastr'​;​ ​// Alert message using NGX toastr   
  • 29.   @​Component​({  selector​:​ ​'app-students-list'​,  templateUrl​:​ ​'./students-list.component.html'​,  styleUrls​:​ ​[​'./students-list.component.css'​]  })    export​ ​class​ ​StudentsListComponent​ ​implements​ ​OnInit​ ​{  p​:​ ​number​ ​=​ ​1​;​ ​// Settup up pagination variable  Student​:​ Student​[];​ ​// Save students data in Student's array.  hideWhenNoStudent​:​ ​boolean​ ​=​ ​false​;​ ​// Hide students data table when no  student.  noData​:​ ​boolean​ ​=​ ​false​;​ ​// Showing No Student Message, when no  student in database.  preLoader​:​ ​boolean​ ​=​ ​true​;​ ​// Showing Preloader to show user data is  coming for you from thre server(A tiny UX Shit)        ​constructor​(  ​public​ crudApi​:​ CrudService​,​ ​// Inject student CRUD services in constructor.  ​public​ toastr​:​ ToastrService ​// Toastr service for alert message  ​){​ ​}      ​ngOnInit​()​ ​{  ​this​.​dataState​();​ ​// Initialize student's list, when component is ready  ​let​ s ​=​ ​this​.​crudApi​.​GetStudentsList​();  
  • 30. s​.​snapshotChanges​().​subscribe​(​data ​=>​ ​{​ ​// Using snapshotChanges() method  to retrieve list of data along with metadata($key)  ​this​.​Student ​=​ ​[];  data​.​forEach​(​item ​=>​ ​{  ​let​ a ​=​ item​.​payload​.​toJSON​();   a​[​'$key'​]​ ​=​ item​.​key​;  ​this​.​Student​.​push​(​a ​as​ Student​);  ​})  ​})  ​}    ​// Using valueChanges() method to fetch simple list of students data. It updates  the state of hideWhenNoStudent, noData & preLoader variables when any  changes occurs in student data list in real-time.  ​dataState​()​ ​{    ​this​.​crudApi​.​GetStudentsList​().​valueChanges​().​subscribe​(​data ​=>​ ​{  ​this​.​preLoader ​=​ ​false​;  ​if​(​data​.​length ​<=​ ​0​){  ​this​.​hideWhenNoStudent ​=​ ​false​;  ​this​.​noData ​=​ ​true​;  ​}​ ​else​ ​{  ​this​.​hideWhenNoStudent ​=​ ​true​;  ​this​.​noData ​=​ ​false​;  ​}  ​})  ​}   
  • 31. ​// Method to delete student object  ​deleteStudent​(​student​)​ ​{  ​if​ ​(​window​.​confirm​(​'Are sure you want to delete this student ?'​))​ ​{​ ​// Asking  from user before Deleting student data.  ​this​.​crudApi​.​DeleteStudent​(​student​.​$key​)​ ​// Using Delete student API to  delete student.  ​this​.​toastr​.​success​(​student​.​firstName ​+​ ​' successfully deleted!'​);​ ​// Alert  message will show up when student successfully deleted.  ​}  ​}    }  13. Create Edit Functionality for Students Data using  CRUD Services  Go to ​src > app > edit-student.component.html​ Create the edit form using HTML  and Reactive Form’s attributes then add form validation block within HTML  layout.  <​div ​class​="​d-flex justify-content-between flex-wrap flex-md-nowrap  align-items-center pt-3 pb-2 mb-3 border-bottom​">  ​<​h1 ​class​="​h2​">​Edit Student Details​</​h1​>  ​<​div ​class​="​btn-toolbar mb-2 mb-md-0​">  ​<​div ​class​="​btn-group​">  ​<!-- goBack() methos to back to previous component -->  ​<​button ​class​="​btn btn-sm btn-outline-secondary​"​ ​(click)​="​goBack()​">​Go  Back​</​button​>  ​</​div​> 
  • 32. ​</​div​>  </​div​>      <​div ​class​="​row​">  ​<​div ​class​="​col-lg-12​">  ​<​div ​class​="​pricing-header form-block mx-auto​">    ​<!-- Student's Edit Form -->  ​<​form ​[formGroup]​="​editForm​"​ ​(ngSubmit)​="​updateForm()​"​ ​novalidate​>  ​<​div ​class​="​row​">  ​<​div ​class​="​col-lg-5 col-md-12 col-sm-12​">  ​<​div ​class​="​row​">  ​<​div ​class​="​col-md-12 mb-3​">  ​<​label​>​First name​</​label​>  ​<​input ​type​="​text​"​ ​formControlName​="​firstName​"  class​="​form-control​"​ ​required​>  ​<​p ​*ngIf​="​firstName.touched && firstName.invalid​"​ ​class​="​error​">  ​<​sup​>​*​</​sup​>​Please enter firstname  ​</​p​>  ​<​p ​*ngIf​="​firstName.errors?.minlength​"​ ​class​="​error​">  ​<​sup​>​*​</​sup​>​Name shouldn't be less than 2 words  ​</​p​>  ​</​div​>  ​<​div ​class​="​col-md-12 mb-3​">  ​<​label​>​Last name​</​label​>  ​<​input ​type​="​text​"​ ​formControlName​="​lastName​" 
  • 33. class​="​form-control​">  ​</​div​>  ​</​div​>  ​<​div ​class​="​row​">  ​<​div ​class​="​col-md-12 mb-3​">  ​<​label​>​Email​</​label​>  ​<​input ​type​="​email​"​ ​formControlName​="​email​"  class​="​form-control​"​ ​required​>  ​<​p ​*ngIf​="​email.touched && email.invalid​"  class​="​error​"><​sup​>​*​</​sup​>​Please provide email​</​p​>  ​<​p ​*ngIf​="​email.errors?.pattern​"  class​="​error​"><​sup​>​*​</​sup​>​Please enter correct email​</​p​>  ​</​div​>  ​<​div ​class​="​col-md-12 mb-3​">  ​<​label​>​Mobile number​</​label​>  ​<​input ​type​="​text​"​ ​formControlName​="​mobileNumber​"  class​="​form-control​"​ ​required​>  ​<​p ​*ngIf​="​mobileNumber.touched && mobileNumber.invalid​"  class​="​error​">  ​<​sup​>​*​</​sup​>​Please provide contact number  ​</​p​>  ​<​p ​*ngIf​="​mobileNumber.errors?.pattern​"​ ​class​="​error​">  ​<​sup​>​*​</​sup​>​Use numbers only number  ​</​p​>  ​</​div​>  ​</​div​>  ​<​div ​class​="​form-group text-right​"> 
  • 34. ​<​button ​type​="​submit​"​ ​class​="​btn btn-success btn-block​"  [disabled]​="​!editForm.valid​">  Update Student  ​</​button​>  ​</​div​>  ​</​div​>  ​</​div​>  ​</​form​>  ​<!-- Student's Edit Form ends-->      ​</​div​>  ​</​div​>  </​div​>  Go to ​src > app > edit-student.component.ts​ file and write the edit form logic  using Activated Route in the same order as mentioned below.  import​ ​{​ Component​,​ OnInit​,​ AfterViewInit ​}​ ​from​ ​'@angular/core'​;  import​ ​{​ FormGroup​,​ FormBuilder​,​ Validators ​}​ ​from​ ​'@angular/forms'​;  import​ ​{​ CrudService ​}​ ​from​ ​'../shared/crud.service'​;  import​ ​{​ ActivatedRoute​,​ Router ​}​ ​from​ ​"@angular/router"​;​ ​// ActivatedRoue is  used to get the current associated components information.  import​ ​{​ Location ​}​ ​from​ ​'@angular/common'​;​ ​// Location service is used to go  back to previous component  import​ ​{​ ToastrService ​}​ ​from​ ​'ngx-toastr'​;    @​Component​({  selector​:​ ​'app-edit-student'​, 
  • 35. templateUrl​:​ ​'./edit-student.component.html'​,  styleUrls​:​ ​[​'./edit-student.component.css'​]  })    export​ ​class​ ​EditStudentComponent​ ​implements​ ​OnInit​ ​{  editForm​:​ FormGroup​;​ ​// Define FormGroup to student's edit form      ​constructor​(  ​private​ crudApi​:​ CrudService​,​ ​// Inject CRUD API in constructor  ​private​ fb​:​ FormBuilder​,​ ​// Inject Form Builder service for Reactive forms  ​private​ location​:​ Location​,​ ​// Location service to go back to previous  component  ​private​ actRoute​:​ ActivatedRoute​,​ ​// Activated route to get the current  component's inforamation  ​private​ router​:​ Router​,​ ​// Router service to navigate to specific  component  ​private​ toastr​:​ ToastrService ​// Toastr service for alert message  ​){​ ​}    ​ngOnInit​()​ ​{  ​this​.​updateStudentData​();​ ​// Call updateStudentData() as soon as the  component is ready   ​const​ id ​=​ ​this​.​actRoute​.​snapshot​.​paramMap​.​get​(​'id'​);​ ​// Getting current  component's id or information using ActivatedRoute service  ​this​.​crudApi​.​GetStudent​(​id​).​valueChanges​().​subscribe​(​data​ ​=>​ ​{  ​this​.​editForm​.​setValue​(​data​)​ ​// Using SetValue() method, It's a  ReactiveForm's API to store intial value of reactive form  
  • 36. ​})  ​}    ​// Accessing form control using getters  ​get​ ​firstName​()​ ​{  ​return​ ​this​.​editForm​.​get​(​'firstName'​);  ​}    ​get​ ​lastName​()​ ​{  ​return​ ​this​.​editForm​.​get​(​'lastName'​);  ​}    ​get​ ​email​()​ ​{  ​return​ ​this​.​editForm​.​get​(​'email'​);  ​}    ​get​ ​mobileNumber​()​ ​{  ​return​ ​this​.​editForm​.​get​(​'mobileNumber'​);  ​}      ​// Contains Reactive Form logic  ​updateStudentData​()​ ​{  ​this​.​editForm ​=​ ​this​.​fb​.​group​({  firstName​:​ ​[​''​,​ ​[​Validators​.​required​,​ Validators​.​minLength​(​2​)]],  lastName​:​ ​[​''​],  email​:​ ​[​''​,​ ​[​Validators​.​required​,  Validators​.​pattern​(​'^[a-zA-Z0-9_.+-]+@[a-zA-Z0-9-]+.[a-zA-Z0-9-.]+$'​)]], 
  • 37. mobileNumber​:​ ​[​''​,​ ​[​Validators​.​required​,​ Validators​.​pattern​(​'^[0-9]+$'​)]]  ​})  ​}    ​// Go back to previous component  ​goBack​()​ ​{  ​this​.​location​.​back​();  ​}    ​// Below methods fire when somebody click on submit button  ​updateForm​(){  ​this​.​crudApi​.​UpdateStudent​(​this​.​editForm​.​value​);​ ​// Update student data  using CRUD API  ​this​.​toastr​.​success​(​this​.​editForm​.​controls​[​'firstName'​].​value ​+​ ​' updated  successfully'​);​ ​// Show succes message when data is successfully submited  ​this​.​router​.​navigate​([​'view-students'​]);​ ​// Navigate to student's list  page when student data is updated  ​}    }