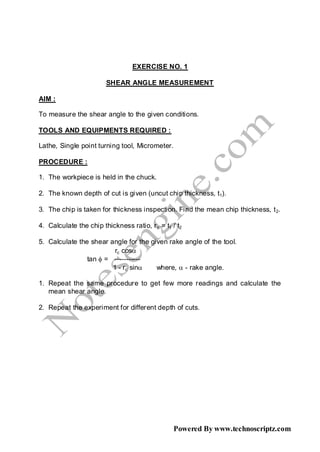
EXERCISE NO. 1

                        SHEAR ANGLE MEASUREMENT

AIM :

To measure the shear angle to the given conditions.

TOOLS AND EQUIPMENTS REQUIRED :

Lathe, Single point turning tool, Micrometer.

PROCEDURE :

1. The workpiece is held in the chuck.

2. The known depth of cut is given (uncut chip thickness, t1).

3. The chip is taken for thickness inspection. Find the mean chip thickness, t 2.

4. Calculate the chip thickness ratio, r c = t1 / t2

5. Calculate the shear angle for the given rake angle of the tool.
                         rc cos
                tan  = -----------
                        1 - rc sin    where,  - rake angle.

1. Repeat the same procedure to get few more readings and calculate the
   mean shear angle.

2. Repeat the experiment for different depth of cuts.


                                                 Powered By www.technoscriptz.com
t2
                                                    Tool
                         t1


                                  Workpiece


NOTE :

1. The value of Shear angle depends on the cutting conditions, tool geometry,
   tool material and work material.

2. If the Shear angle is small, the plane of the shear is large, the chip is
   thicker, more force is required to remove the chip.

3. If the shear angle is large, the plane of shear will be shorter and the chip is
   thin. Hence, less force is required to remove the chip.


                                             Powered By www.technoscriptz.com
CHIP THICKNESS :
                                               LC = Least Count
    DEPTH PITCH SCALE HEAD SCALE HEAD SCALE          CHIP
SL. OF CUT  READING   COINCIDENCE   READING      THICKNESS
NO.
    t1 (mm)   (PSR)       (HSC)   HSR = HSC*LC t2 = PSR + HSR
 1    0.25
 2    0.25
 3    0.25
 4    0.25

 1     0.50
 2     0.50
 3     0.50
 4     0.50


SHEAR ANGLE :

      UNCUT      CHIP      CHIP   SHEAR ANGLE
SL.    CHIP   THICKNESS THICKNESS               AVERAGE
NO. THICKNESS             RATIO               SHEAR ANGLE
       t1 (mm)      t2 (mm)      rc = t1 / t2
 1       0.25
 2       0.25
 3       0.25
 4       0.25

 1       0.50
 2       0.50
 3       0.50
 4       0.50


RESULT :

Thus the shear angle is found for different depth of cuts.


                                                Powered By www.technoscriptz.com
EXERCISE NO. 2

     MACHINING AN INTERNAL KEYW AY USING SLOTTING MACHINE

Aim :

To machine an internal keyway in the given workpiece to the dimensions as
shown in the figure using Slotting Machine.

                             2
                     5
     Ø5
       0                                  2
                                        Ø6


Tools Required :

Slotting Machine, Scriber, Divider, Steel Rule.

Procedure :

1. The given workpiece is measured for its initial dimensions.
2. With the help of scriber mark the keyway dimensions in the workpiece.
3. Fix the workpiece in the vice of the slotting machine.
4. After fixing the workpiece and the slotting tool, allow the ram to vertically
   reciprocate.
5. Start the slotting process by giving the required depth by horizontally
   moving the vice.
6. Slowly increase the depth of cut and repeat the procedure to make the
   required shape.
7. The workpiece is now checked for final dimensions.

Result :
Thus, internal keyway is machined in the given workpiece to the dimensions
as shown in the figure using Slotting Machine.


                                              Powered By www.technoscriptz.com
EXERCISE NO. 3

                            SURFACE GRINDING
AIM :

To grind the workpiece to the given tolerance using surface grinding machine.


                                50


                                                                 50
                 70                                 70

                               10                                     9±0.01


TOOLS AND EQUIPMENTS REQUIRED :

Surface Grinding machine, Micrometer.

PROCEDURE :

1. The given workpiece is checked for its initial dimensions.

2. The permanent magnet worktable is cleaned thoroughly.

3. Keep the workpiece over the worktable and push the lever to “ON” position
   to hold the workpiece.

4. The required depth of cut is given by raising the table.

5. The reciprocating and cross feed is given to grind the required length and
   width of the workpiece respectively.

6. Finally, the finished workpiece is checked for the given dimensions.

RESULT :

Thus the given workpiece is ground to the given tolerance using s urface
grinding machine.


                                             Powered By www.technoscriptz.com
EXERCISE NO. 4

               ASSEMBLY OF BOLT & NUT (ASSEMBLY – I)

AIM :

To machine and assemble a Bolt & Nut to the given dimensions using
required machines.


                                                   M 25.4 x 3.75
    30


                         18


                                                             Chamfer 45° x 2
                   40           10        30


TOOLS AND EQUIPMENTS REQUIRED :

Lathe, Turning tool, Parting tool, Threading tool, Vernier caliper.

PROCEDURE :

1. The given workpiece is checked for its initial dimensions.

2. The workpiece is chucked and turned for the required dimensions.

3. The external thread is made on the workpiece.

4. The internal thread is made on another workpiece.

5. Check for the mating of internal and external threads formed.

RESULT :

Thus, a Bolt & Nut assembly is machined as per the given dimensions and
assembled using the required machines.


                                               Powered By www.technoscriptz.com
EXERCISE NO. 5

              ASSEMBLY OF DIE & PUNCH (ASSEMBLY – II)

AIM :

To machine and assemble a Die & Punch to the given dimensions using
required machines.

                            Ø55


                                                  Ø55
                 Ø50


                                   Ø40


                                          Ø40


                                                         Ø50
                       20   10 5                5 10    20


TOOLS AND EQUIPMENTS REQUIRED :

Lathe, Vernier caliper.

PROCEDURE :

1. The given workpieces are chec ked for its initial dimensions.

2. The workpiece is chucked in lathe and machined to the projection
   dimensions as given in the figure.

3. The other workpiece is machined for recess dimensions as given in the
   figure.

4. Mate both the workpieces.

RESULT :

Thus, a Die & Punch assembly is machined as per the given dimensions and
assembled using the required machines.


                                                Powered By www.technoscriptz.com
EXERCISE NO. 6

               ASSEMBLY OF FLANGE COUPLING (ASSEMBLY – III)

     AIM :

     To machine and assemble the Flange Coupling as shown in the figure using
     required machines.


                 50                                              50
                               PCD 35 mm                                    PCD 35 mm
                                                                            9 mm dia.,
                              8 mm tap, 4 holes                             4 holes

                              10 mm tap                                     10 mm dia.
70


                                                  70


     TOOLS AND EQUIPMENTS REQUIRED :

     Drilling machine, Drill set, Tap set, Bolts & Nuts, Vernier Caliper.

     PROCEDURE :

     1. The given workpieces are checked for its initial dimensions.

     2. The center of the workpieces are marked and the Pitch Circ le Diameter is
        marked in both the workpieces.

     3. The first workpiece is drilled and tapped to the dimensions as shown in the
        figure.

     4. The second workpiece is drilled to the dimensions as shown in the figure.

     5. Both the workpieces are mated together by using bolts and nuts.

     6. Thus a Flange Coupling assembly is made using required machines.


                                                   Powered By www.technoscriptz.com
RESULT :

Thus, a Flange Coupling is machined as per the given dimensions and
assembled using the required machines.


                                     Powered By www.technoscriptz.com
EXERCISE NO. 7

                                CAPSTAN LATHE

AIM :

To machine the workpiece to the given dimensions using capstan lathe.

                      20


                                                     18
                                                     12
                               12          18


TOOLS AND EQUIPMENTS REQUIRED :

Capstan Lathe, Stopper, drill chuck, counter sink bit, drill bit, turning tool,
parting off tool, Vernier Caliper.

PROCEDURE :

1. Prepare the tooling layout for the given workpiece.

2. Set the tools in their respective positions of the tool stations.

3. The workpiece is chucked and checked for the rotation.

4. The adjustment to the length of feed for each tool is adjusted by rotating
   the adjustment screws.

5. Feed the tools in the required sequence to machine the given workpiece.

RESULT :

Thus the given workpiece is machined to the given dimensions using capstan
lathe.


                                                Powered By www.technoscriptz.com
EXERCISE NO. 8

                             SPUR GEAR MILLING

AIM :

To machine a spur gear to the given module and number of teeth in the given
workpiece.

                          Ø5
                             0
                         Ø18


TOOLS AND EQUIPMENTS REQUIRED :

Milling machine, Vernier caliper, Mandrel.

PROCEDURE :

1. Calculate the gear tooth proportions.

            Blank diameter     = ( Z+ 2) m
            Tooth depth        = 2.25 m
            Tooth width        = 1.5708 m
   where,
            Z = Number of teeth required
            m = module

2. Indexing calculation
            Index crank movement = 40 / Z

3. The dividing head and the tail stock are bolted on the machine table. Their
   axis must be set parallel to the machine table.

4. The gear blank is held between the dividing head and tailstock using a
   mandrel. The mandrel is connected with the spindle of dividing head by a
   carrier and catch plate.


                                             Powered By www.technoscriptz.com
5. The cutter is mounted on the arbor. The cutter is centre d accurately with
   the gear blank.

6. Set the speed and feed for machining.

7. For giving depth of cut, the table is raised till the periphery of the gear
   blank just touches the cutter.

8. The micrometer dial of vertical feed screw is set to zero in this positio n.

9. Then the table is raised further to give the required depth of cut.

10.      The machine is started and feed is given to the table to cut the first
      groove of the blank.

11.      After the cut, the table is brought back to the starting position.

12.      Then the gear blank is indexed for the next tooth space.

13.      This is continued till all the gear teeth are cut.

CALCULATION :

Z = No. of teeth      = 23

m = module            = 2 mm

Blank Diameter        = (Z + 2) m
                      = (23 + 2) 2
                      = 50 mm

Tooth Depth           = 2.25 m
                      = 2.25 * 2
                      = 4.5 mm

Indexing Calculation         = 40 / Z
                             = 40 / 23
                             = 1 17/23


RESULT :

Thus the required gear is machined using the milling machine to the required
number of teeth.


                                                  Powered By www.technoscriptz.com
EXERCISE NO. 9

            MACHINING OF HEXAGON IN SHAPING MACHINE


Aim :

To machine a hexagon in the given workpiece to the dimensions as shown in
the figure using Shaping Machine.

                              29                        15


Tools Required :

Shaping Machine, Scriber, Divider, Steel Rule, Chalk piece, Bevel Protractor.


Procedure :

1. The given workpiece is measured for its initial dimensions.
2. With the help of scriber, mark the hexagon dimensions in the workpiece.
3. Fix the workpiece in the vice of the shaping machine.
4. After fixing the workpiece and the shaping tool, allow the ram to
   reciprocate.
5. Start the shaping process by giving the required depth by lowering the tool.
6. Slowly increase the depth of cut and repeat the procedure to make the
   hexagon shape.
7. The workpiece is now checked for final dimensions.


Result :

Thus, a hexagon is machined in the given workpiece to the dimensi ons as
shown in the figure using Shaping Machine.


                                           Powered By www.technoscriptz.com

Me2258 lm

  • 1.
    EXERCISE NO. 1 SHEAR ANGLE MEASUREMENT AIM : To measure the shear angle to the given conditions. TOOLS AND EQUIPMENTS REQUIRED : Lathe, Single point turning tool, Micrometer. PROCEDURE : 1. The workpiece is held in the chuck. 2. The known depth of cut is given (uncut chip thickness, t1). 3. The chip is taken for thickness inspection. Find the mean chip thickness, t 2. 4. Calculate the chip thickness ratio, r c = t1 / t2 5. Calculate the shear angle for the given rake angle of the tool. rc cos tan  = ----------- 1 - rc sin where,  - rake angle. 1. Repeat the same procedure to get few more readings and calculate the mean shear angle. 2. Repeat the experiment for different depth of cuts. Powered By www.technoscriptz.com
  • 2.
    t2 Tool t1 Workpiece NOTE : 1. The value of Shear angle depends on the cutting conditions, tool geometry, tool material and work material. 2. If the Shear angle is small, the plane of the shear is large, the chip is thicker, more force is required to remove the chip. 3. If the shear angle is large, the plane of shear will be shorter and the chip is thin. Hence, less force is required to remove the chip. Powered By www.technoscriptz.com
  • 3.
    CHIP THICKNESS : LC = Least Count DEPTH PITCH SCALE HEAD SCALE HEAD SCALE CHIP SL. OF CUT READING COINCIDENCE READING THICKNESS NO. t1 (mm) (PSR) (HSC) HSR = HSC*LC t2 = PSR + HSR 1 0.25 2 0.25 3 0.25 4 0.25 1 0.50 2 0.50 3 0.50 4 0.50 SHEAR ANGLE : UNCUT CHIP CHIP SHEAR ANGLE SL. CHIP THICKNESS THICKNESS AVERAGE NO. THICKNESS RATIO SHEAR ANGLE t1 (mm) t2 (mm) rc = t1 / t2 1 0.25 2 0.25 3 0.25 4 0.25 1 0.50 2 0.50 3 0.50 4 0.50 RESULT : Thus the shear angle is found for different depth of cuts. Powered By www.technoscriptz.com
  • 4.
    EXERCISE NO. 2 MACHINING AN INTERNAL KEYW AY USING SLOTTING MACHINE Aim : To machine an internal keyway in the given workpiece to the dimensions as shown in the figure using Slotting Machine. 2 5 Ø5 0 2 Ø6 Tools Required : Slotting Machine, Scriber, Divider, Steel Rule. Procedure : 1. The given workpiece is measured for its initial dimensions. 2. With the help of scriber mark the keyway dimensions in the workpiece. 3. Fix the workpiece in the vice of the slotting machine. 4. After fixing the workpiece and the slotting tool, allow the ram to vertically reciprocate. 5. Start the slotting process by giving the required depth by horizontally moving the vice. 6. Slowly increase the depth of cut and repeat the procedure to make the required shape. 7. The workpiece is now checked for final dimensions. Result : Thus, internal keyway is machined in the given workpiece to the dimensions as shown in the figure using Slotting Machine. Powered By www.technoscriptz.com
  • 5.
    EXERCISE NO. 3 SURFACE GRINDING AIM : To grind the workpiece to the given tolerance using surface grinding machine. 50 50 70 70 10 9±0.01 TOOLS AND EQUIPMENTS REQUIRED : Surface Grinding machine, Micrometer. PROCEDURE : 1. The given workpiece is checked for its initial dimensions. 2. The permanent magnet worktable is cleaned thoroughly. 3. Keep the workpiece over the worktable and push the lever to “ON” position to hold the workpiece. 4. The required depth of cut is given by raising the table. 5. The reciprocating and cross feed is given to grind the required length and width of the workpiece respectively. 6. Finally, the finished workpiece is checked for the given dimensions. RESULT : Thus the given workpiece is ground to the given tolerance using s urface grinding machine. Powered By www.technoscriptz.com
  • 6.
    EXERCISE NO. 4 ASSEMBLY OF BOLT & NUT (ASSEMBLY – I) AIM : To machine and assemble a Bolt & Nut to the given dimensions using required machines. M 25.4 x 3.75 30 18 Chamfer 45° x 2 40 10 30 TOOLS AND EQUIPMENTS REQUIRED : Lathe, Turning tool, Parting tool, Threading tool, Vernier caliper. PROCEDURE : 1. The given workpiece is checked for its initial dimensions. 2. The workpiece is chucked and turned for the required dimensions. 3. The external thread is made on the workpiece. 4. The internal thread is made on another workpiece. 5. Check for the mating of internal and external threads formed. RESULT : Thus, a Bolt & Nut assembly is machined as per the given dimensions and assembled using the required machines. Powered By www.technoscriptz.com
  • 7.
    EXERCISE NO. 5 ASSEMBLY OF DIE & PUNCH (ASSEMBLY – II) AIM : To machine and assemble a Die & Punch to the given dimensions using required machines. Ø55 Ø55 Ø50 Ø40 Ø40 Ø50 20 10 5 5 10 20 TOOLS AND EQUIPMENTS REQUIRED : Lathe, Vernier caliper. PROCEDURE : 1. The given workpieces are chec ked for its initial dimensions. 2. The workpiece is chucked in lathe and machined to the projection dimensions as given in the figure. 3. The other workpiece is machined for recess dimensions as given in the figure. 4. Mate both the workpieces. RESULT : Thus, a Die & Punch assembly is machined as per the given dimensions and assembled using the required machines. Powered By www.technoscriptz.com
  • 8.
    EXERCISE NO. 6 ASSEMBLY OF FLANGE COUPLING (ASSEMBLY – III) AIM : To machine and assemble the Flange Coupling as shown in the figure using required machines. 50 50 PCD 35 mm PCD 35 mm 9 mm dia., 8 mm tap, 4 holes 4 holes 10 mm tap 10 mm dia. 70 70 TOOLS AND EQUIPMENTS REQUIRED : Drilling machine, Drill set, Tap set, Bolts & Nuts, Vernier Caliper. PROCEDURE : 1. The given workpieces are checked for its initial dimensions. 2. The center of the workpieces are marked and the Pitch Circ le Diameter is marked in both the workpieces. 3. The first workpiece is drilled and tapped to the dimensions as shown in the figure. 4. The second workpiece is drilled to the dimensions as shown in the figure. 5. Both the workpieces are mated together by using bolts and nuts. 6. Thus a Flange Coupling assembly is made using required machines. Powered By www.technoscriptz.com
  • 9.
    RESULT : Thus, aFlange Coupling is machined as per the given dimensions and assembled using the required machines. Powered By www.technoscriptz.com
  • 10.
    EXERCISE NO. 7 CAPSTAN LATHE AIM : To machine the workpiece to the given dimensions using capstan lathe. 20 18 12 12 18 TOOLS AND EQUIPMENTS REQUIRED : Capstan Lathe, Stopper, drill chuck, counter sink bit, drill bit, turning tool, parting off tool, Vernier Caliper. PROCEDURE : 1. Prepare the tooling layout for the given workpiece. 2. Set the tools in their respective positions of the tool stations. 3. The workpiece is chucked and checked for the rotation. 4. The adjustment to the length of feed for each tool is adjusted by rotating the adjustment screws. 5. Feed the tools in the required sequence to machine the given workpiece. RESULT : Thus the given workpiece is machined to the given dimensions using capstan lathe. Powered By www.technoscriptz.com
  • 11.
    EXERCISE NO. 8 SPUR GEAR MILLING AIM : To machine a spur gear to the given module and number of teeth in the given workpiece. Ø5 0 Ø18 TOOLS AND EQUIPMENTS REQUIRED : Milling machine, Vernier caliper, Mandrel. PROCEDURE : 1. Calculate the gear tooth proportions. Blank diameter = ( Z+ 2) m Tooth depth = 2.25 m Tooth width = 1.5708 m where, Z = Number of teeth required m = module 2. Indexing calculation Index crank movement = 40 / Z 3. The dividing head and the tail stock are bolted on the machine table. Their axis must be set parallel to the machine table. 4. The gear blank is held between the dividing head and tailstock using a mandrel. The mandrel is connected with the spindle of dividing head by a carrier and catch plate. Powered By www.technoscriptz.com
  • 12.
    5. The cutteris mounted on the arbor. The cutter is centre d accurately with the gear blank. 6. Set the speed and feed for machining. 7. For giving depth of cut, the table is raised till the periphery of the gear blank just touches the cutter. 8. The micrometer dial of vertical feed screw is set to zero in this positio n. 9. Then the table is raised further to give the required depth of cut. 10. The machine is started and feed is given to the table to cut the first groove of the blank. 11. After the cut, the table is brought back to the starting position. 12. Then the gear blank is indexed for the next tooth space. 13. This is continued till all the gear teeth are cut. CALCULATION : Z = No. of teeth = 23 m = module = 2 mm Blank Diameter = (Z + 2) m = (23 + 2) 2 = 50 mm Tooth Depth = 2.25 m = 2.25 * 2 = 4.5 mm Indexing Calculation = 40 / Z = 40 / 23 = 1 17/23 RESULT : Thus the required gear is machined using the milling machine to the required number of teeth. Powered By www.technoscriptz.com
  • 13.
    EXERCISE NO. 9 MACHINING OF HEXAGON IN SHAPING MACHINE Aim : To machine a hexagon in the given workpiece to the dimensions as shown in the figure using Shaping Machine. 29 15 Tools Required : Shaping Machine, Scriber, Divider, Steel Rule, Chalk piece, Bevel Protractor. Procedure : 1. The given workpiece is measured for its initial dimensions. 2. With the help of scriber, mark the hexagon dimensions in the workpiece. 3. Fix the workpiece in the vice of the shaping machine. 4. After fixing the workpiece and the shaping tool, allow the ram to reciprocate. 5. Start the shaping process by giving the required depth by lowering the tool. 6. Slowly increase the depth of cut and repeat the procedure to make the hexagon shape. 7. The workpiece is now checked for final dimensions. Result : Thus, a hexagon is machined in the given workpiece to the dimensi ons as shown in the figure using Shaping Machine. Powered By www.technoscriptz.com