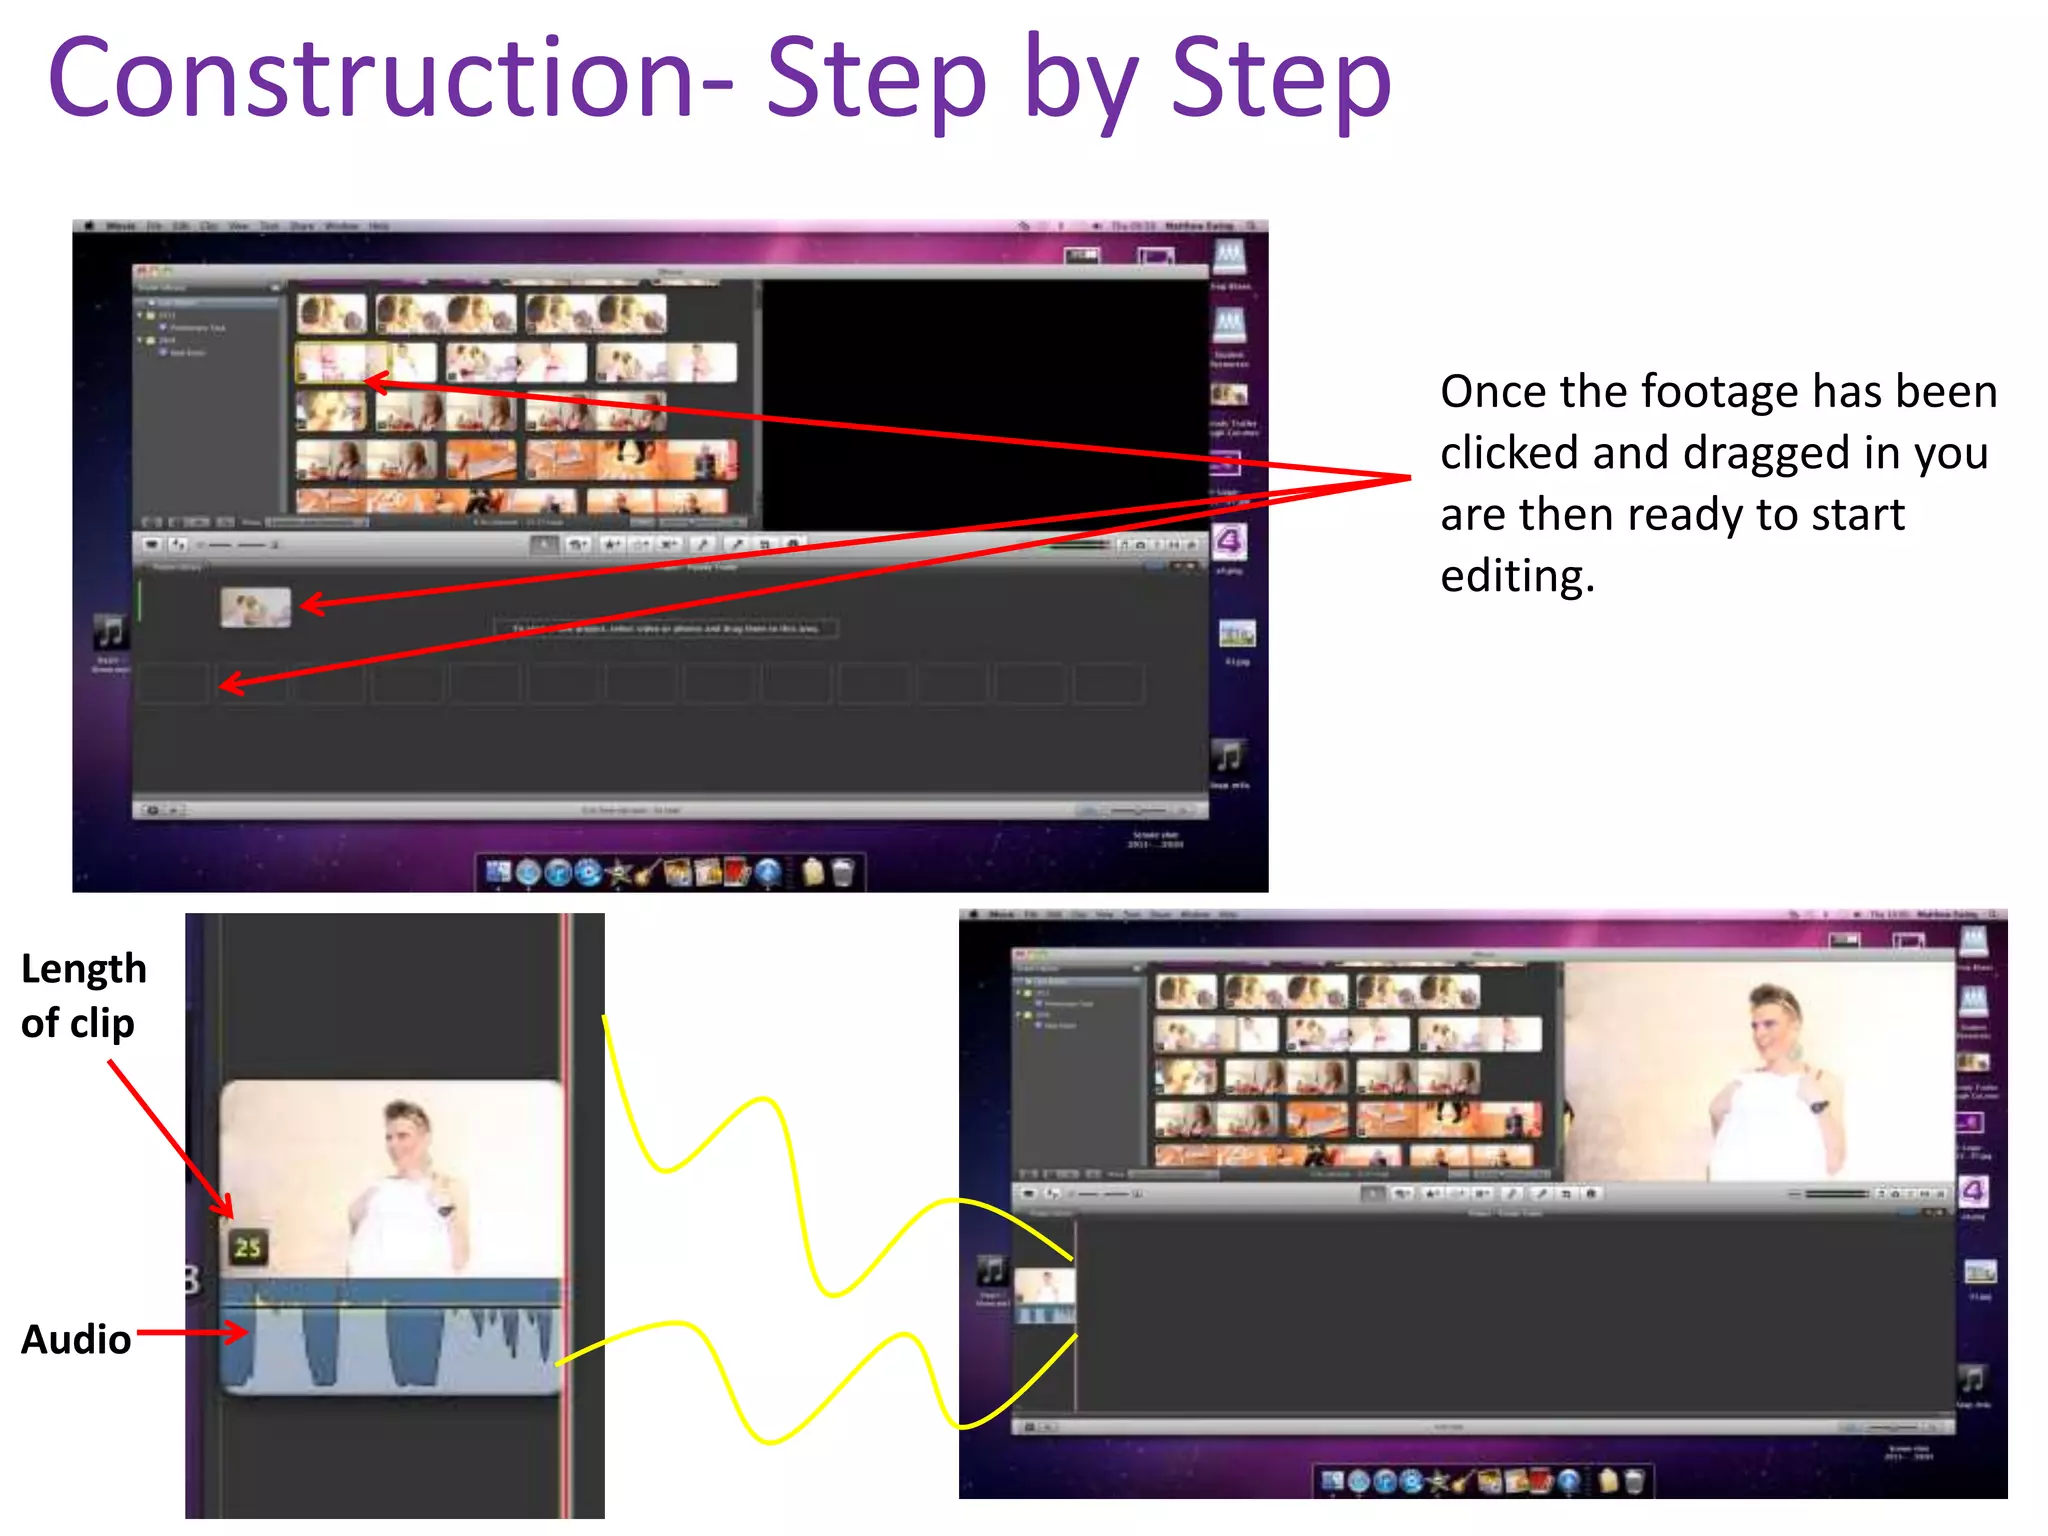
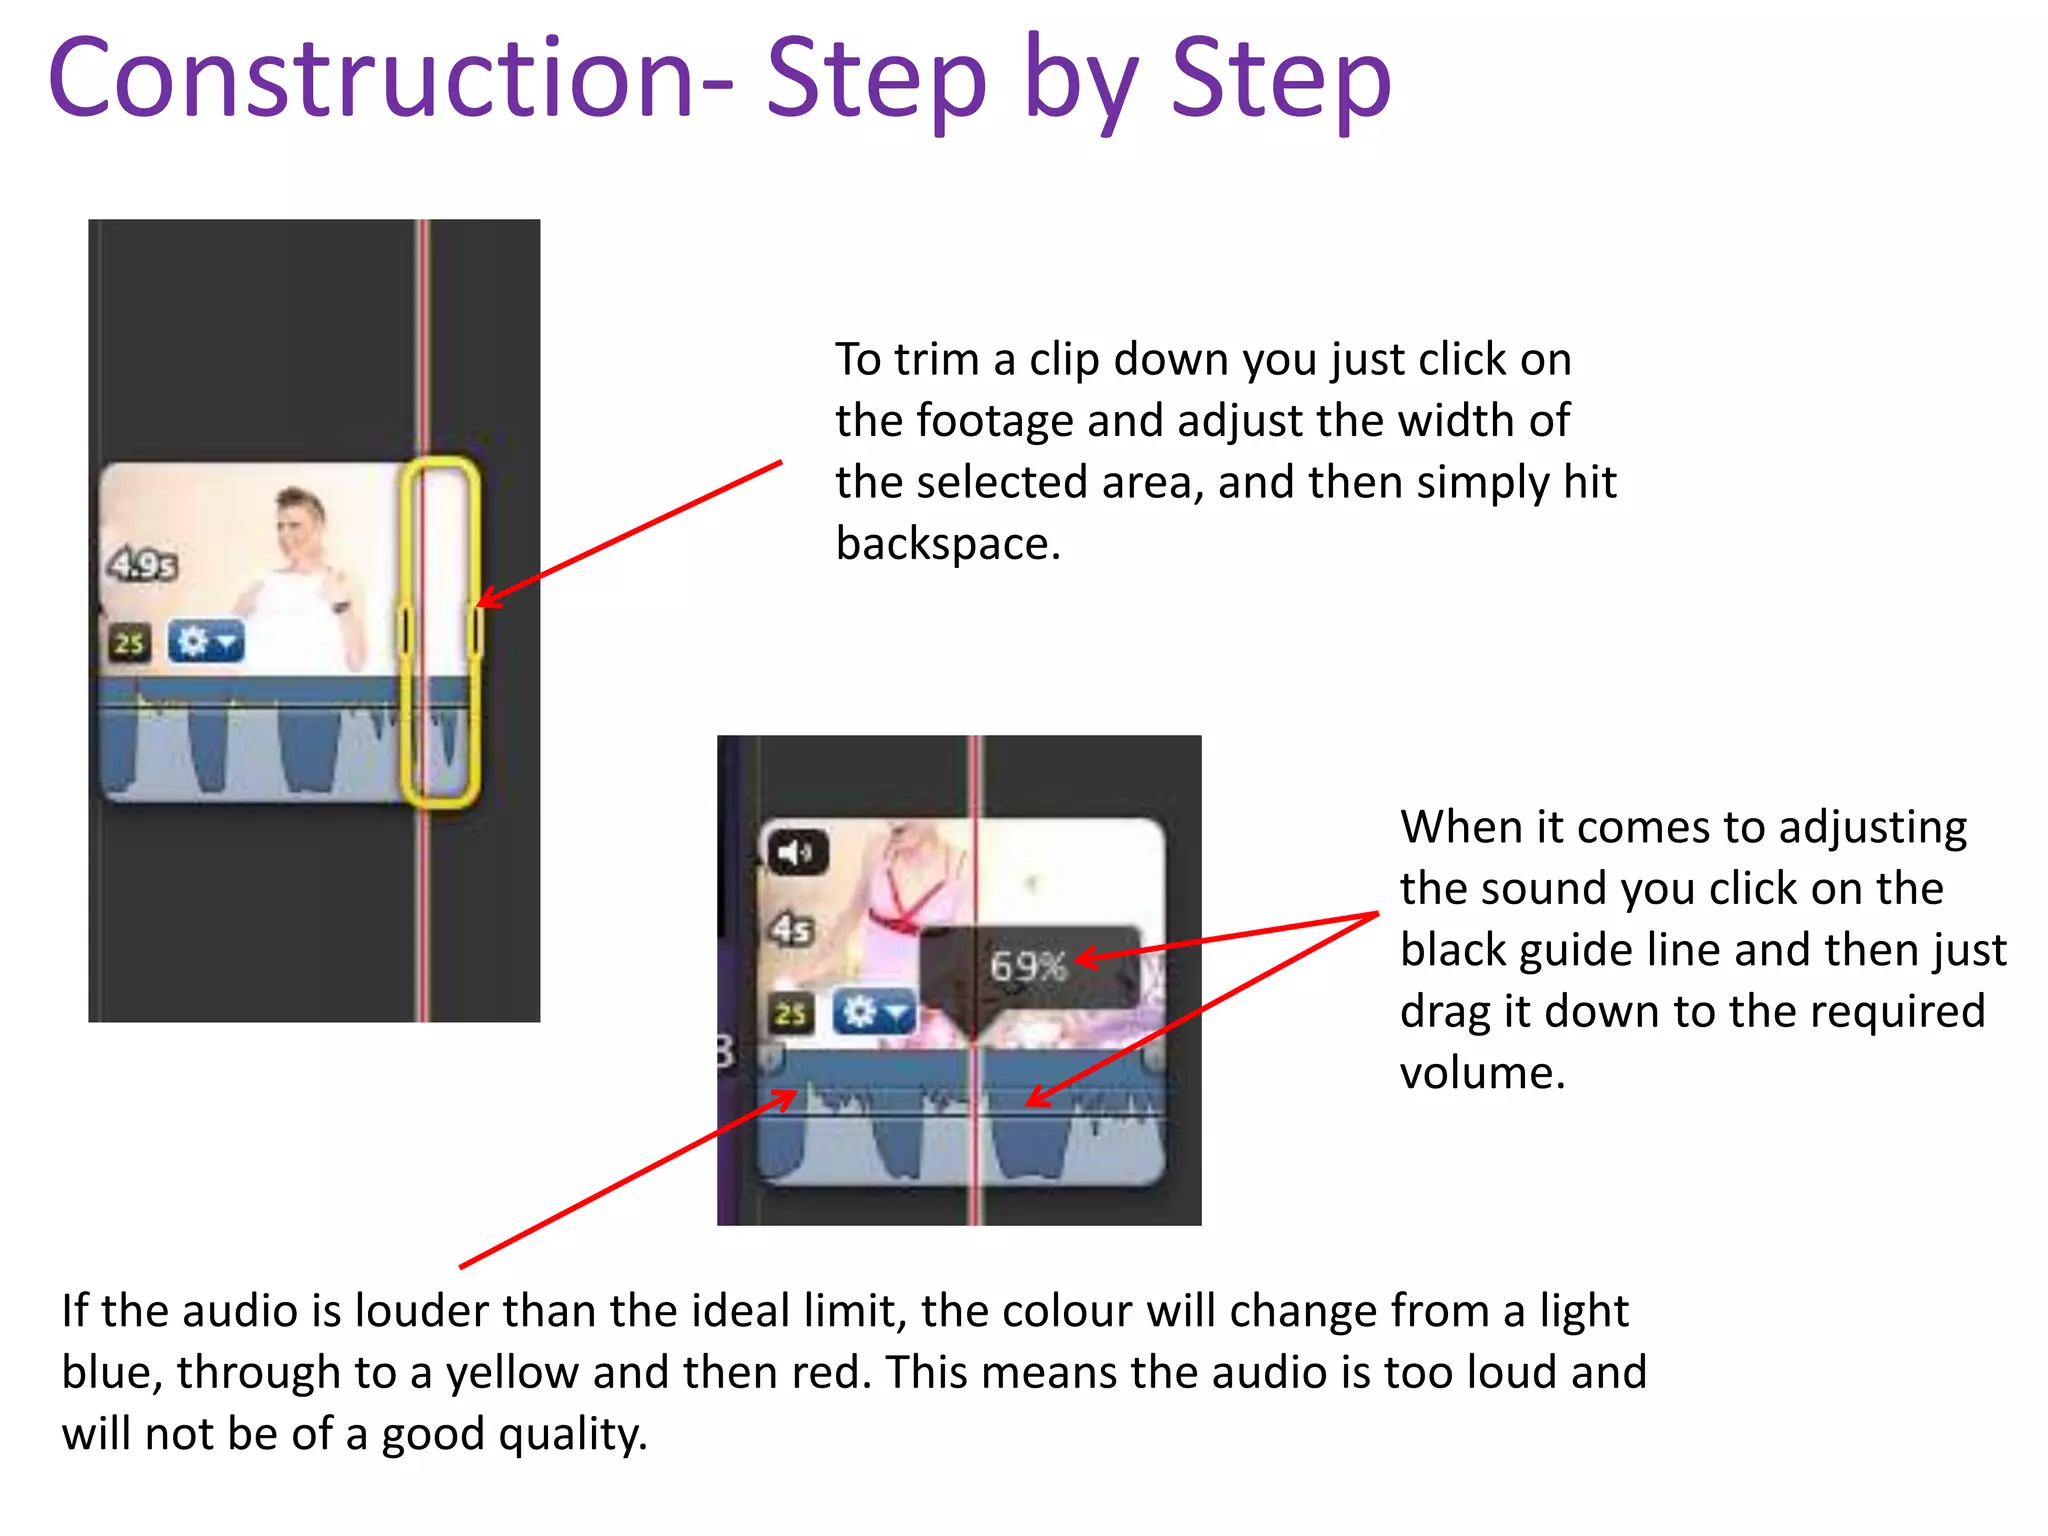
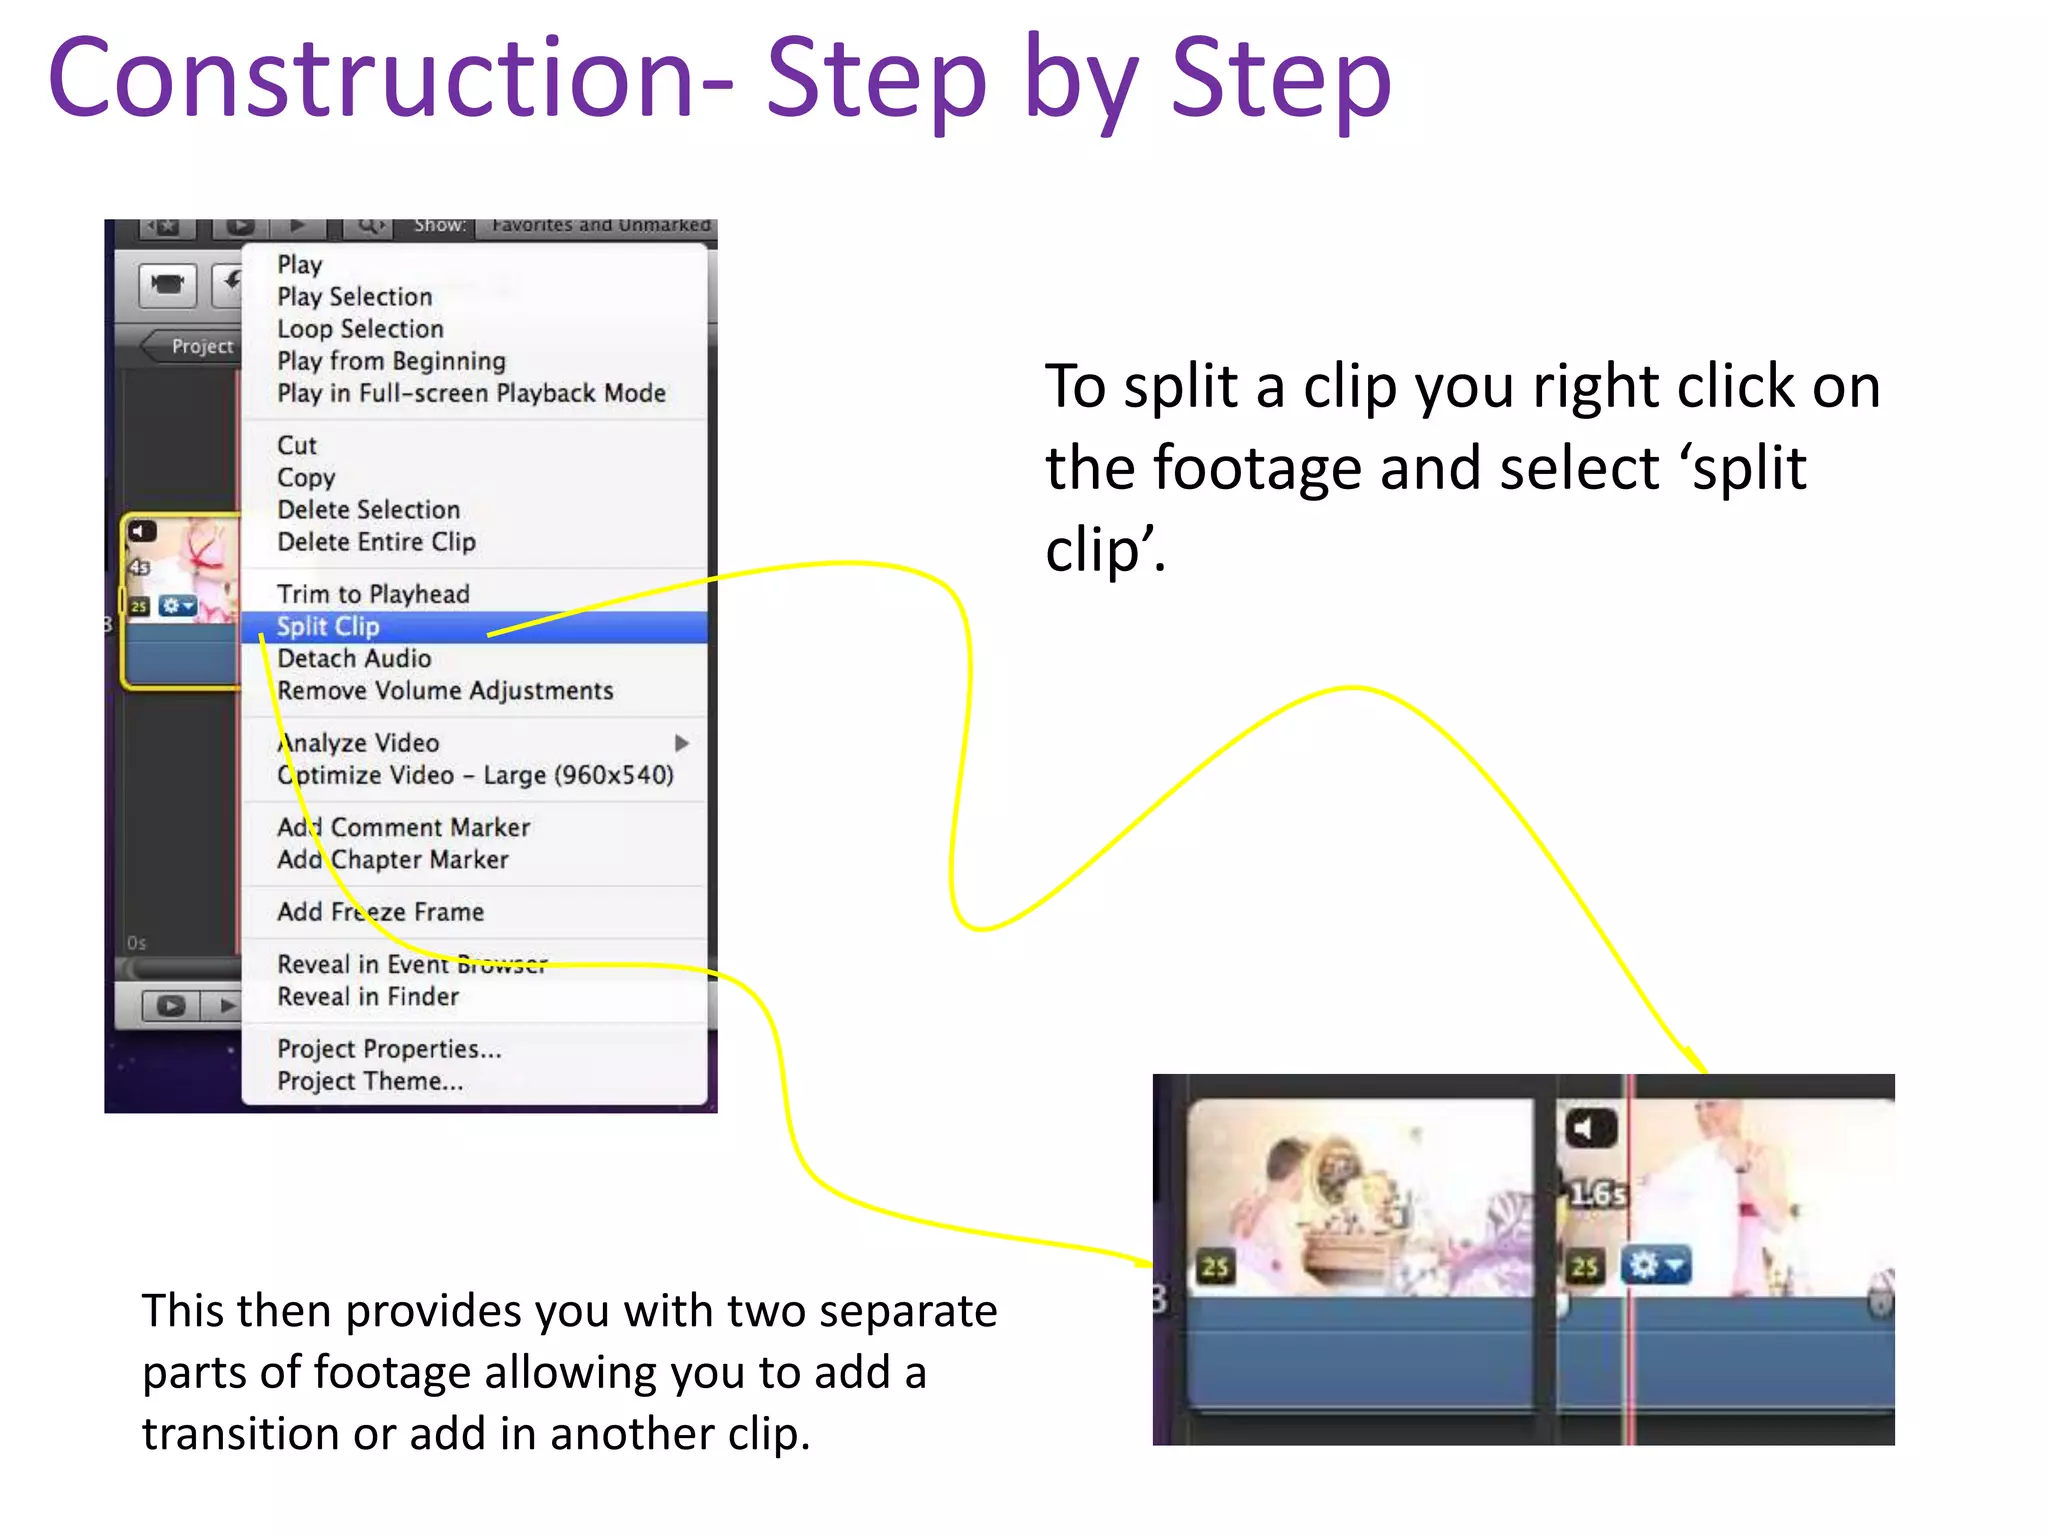
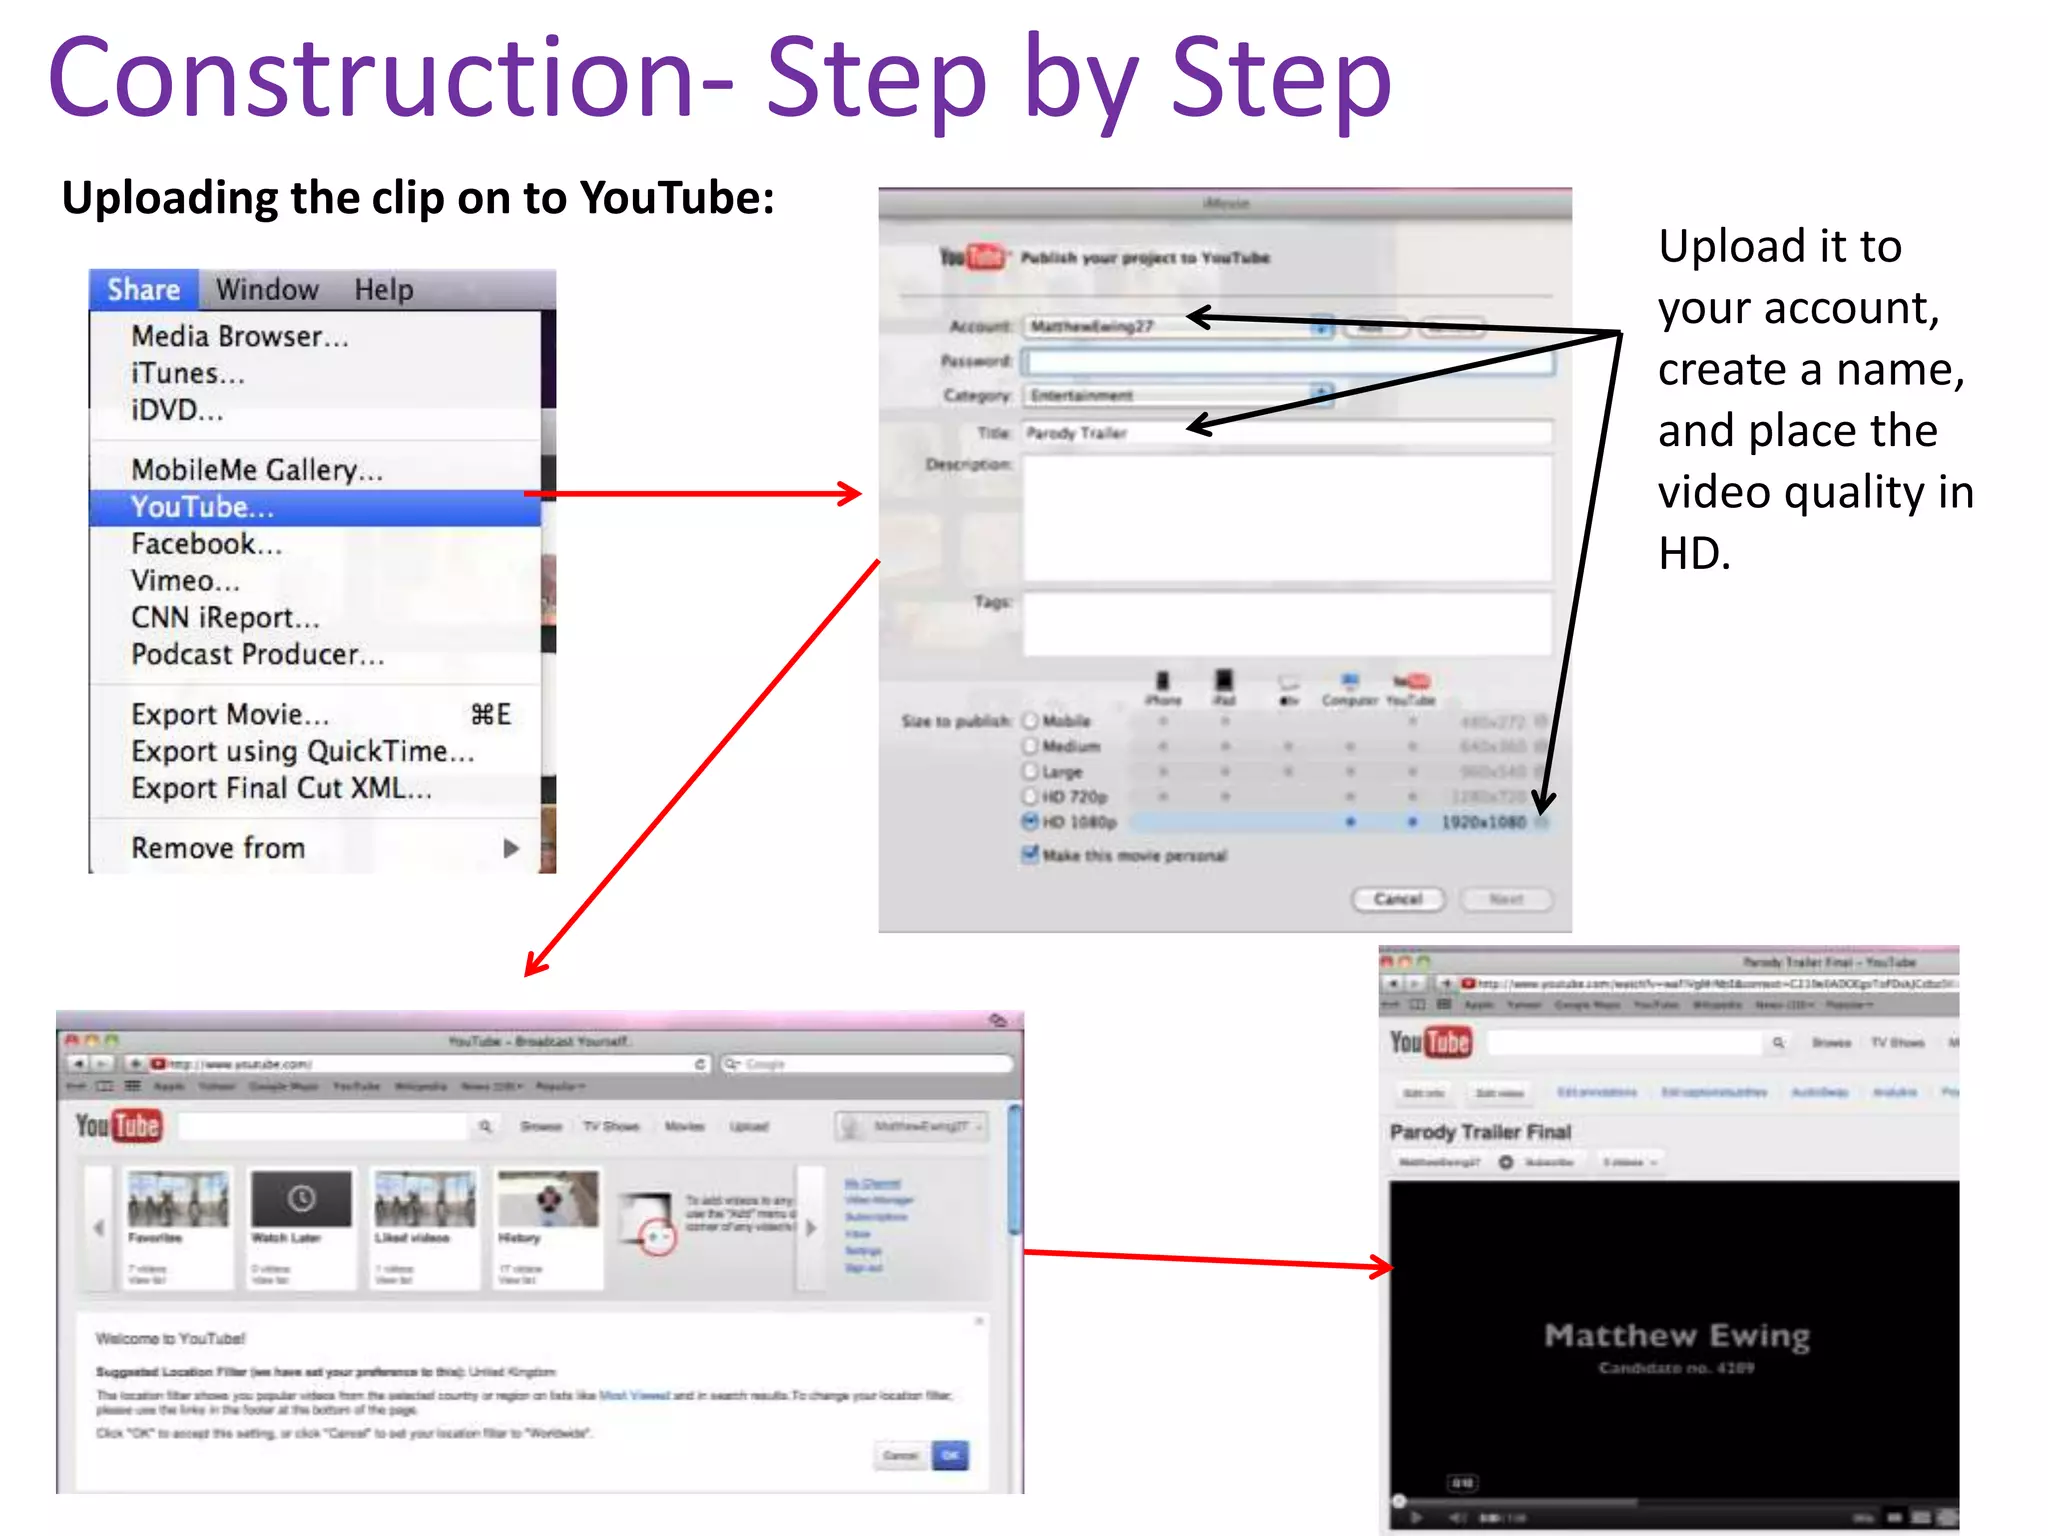
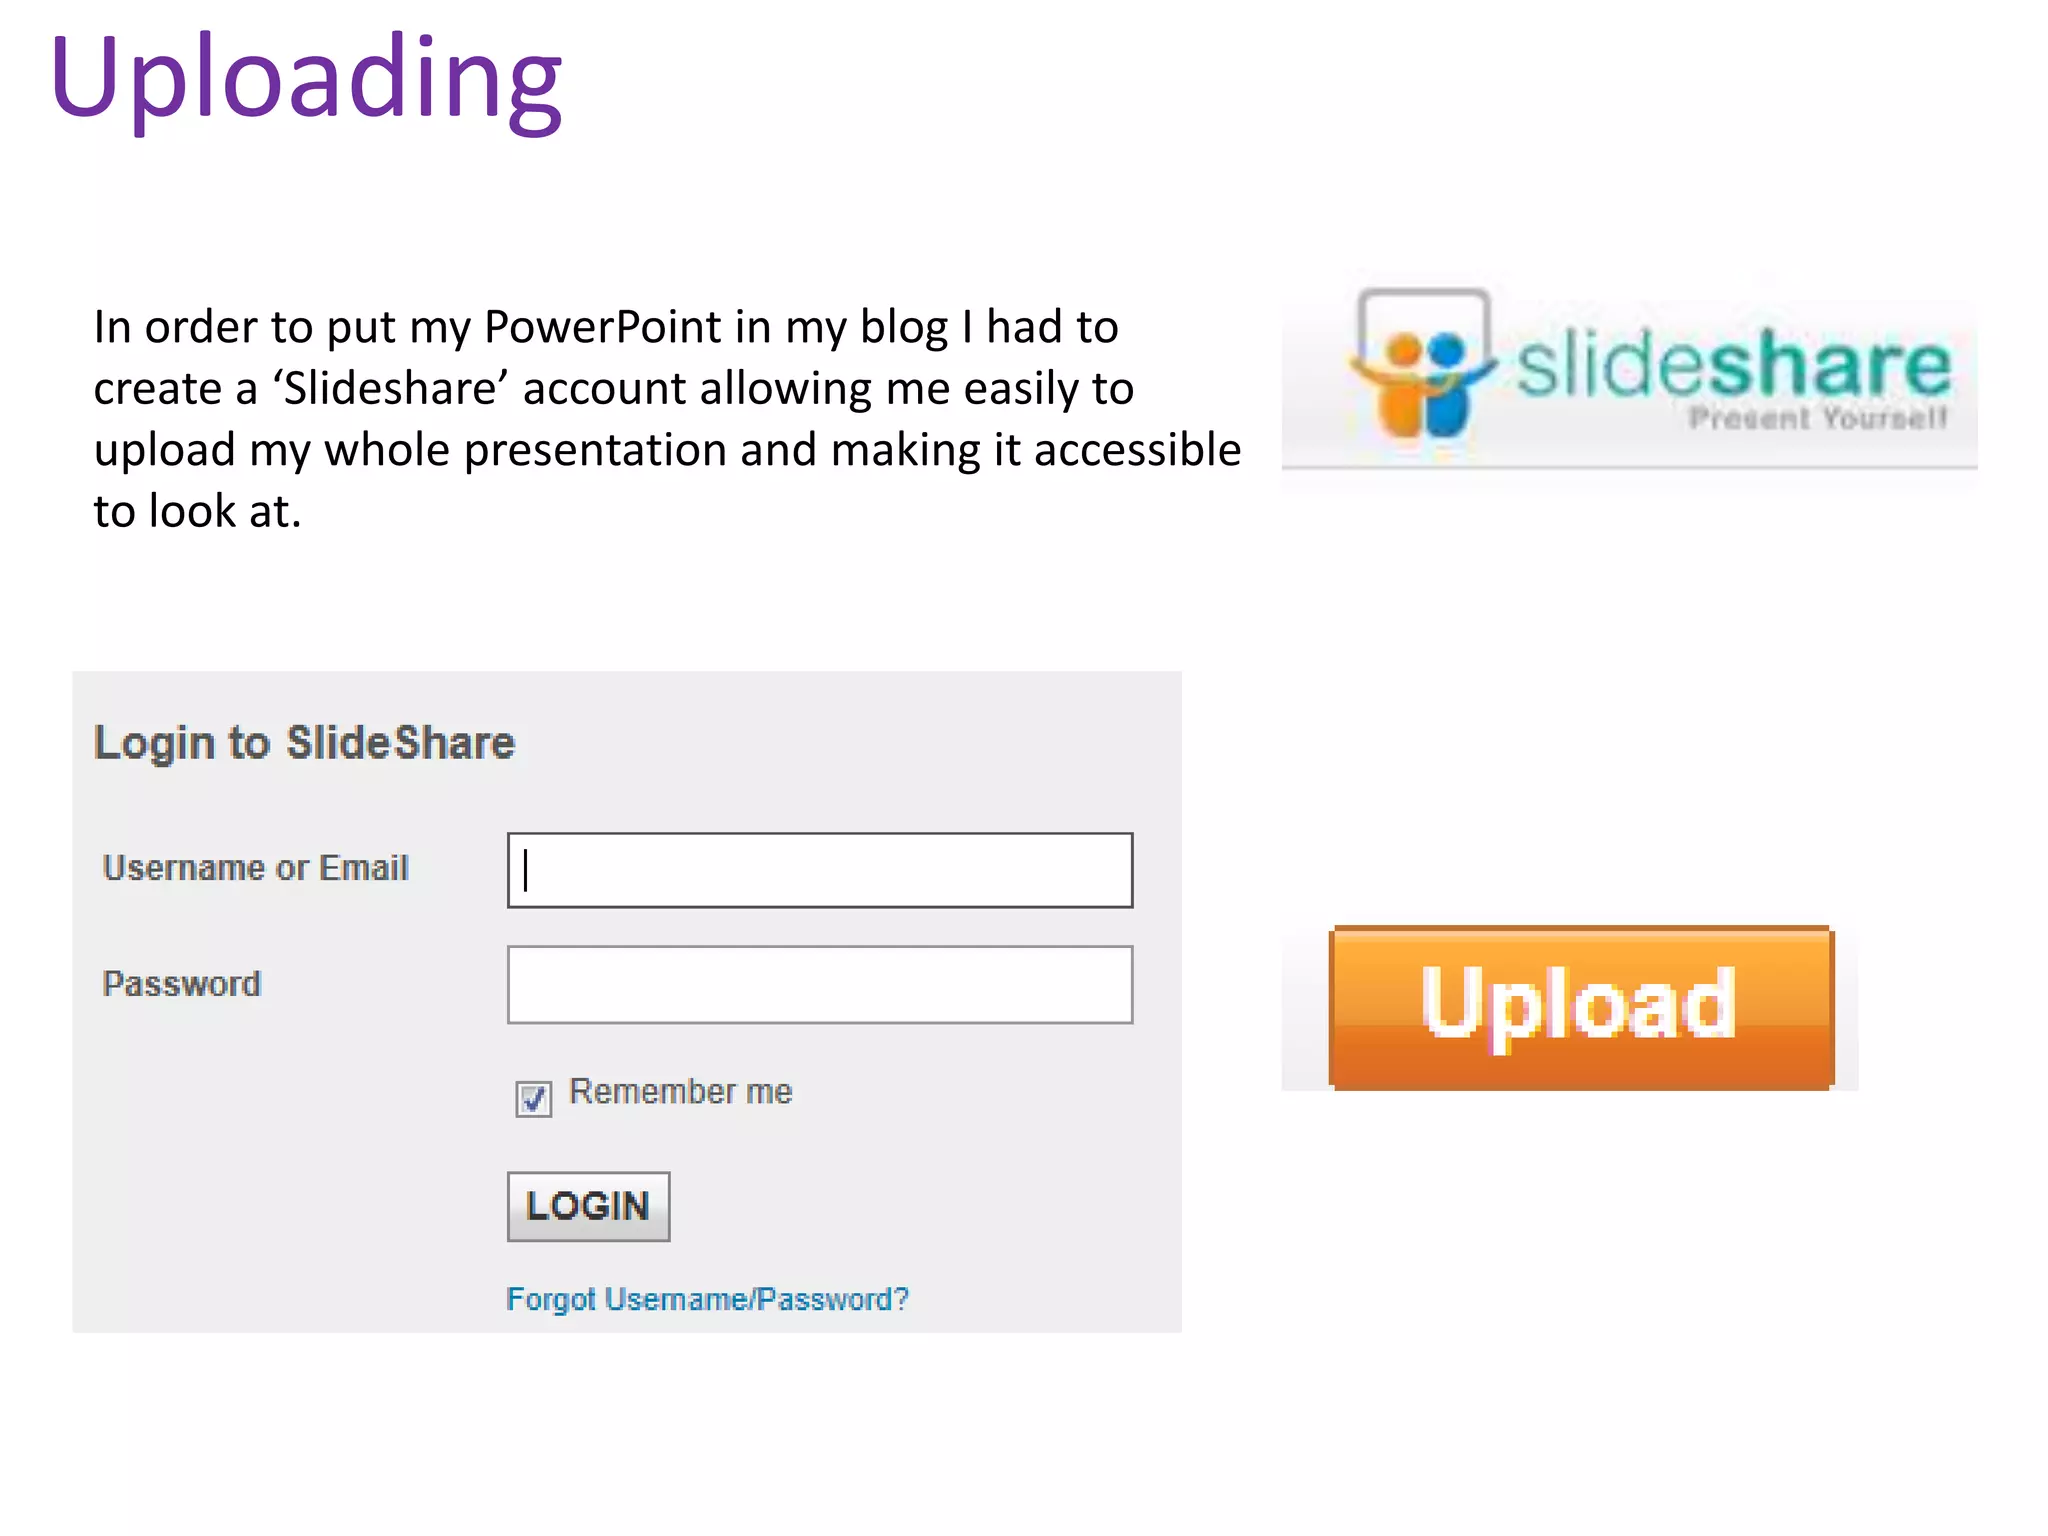
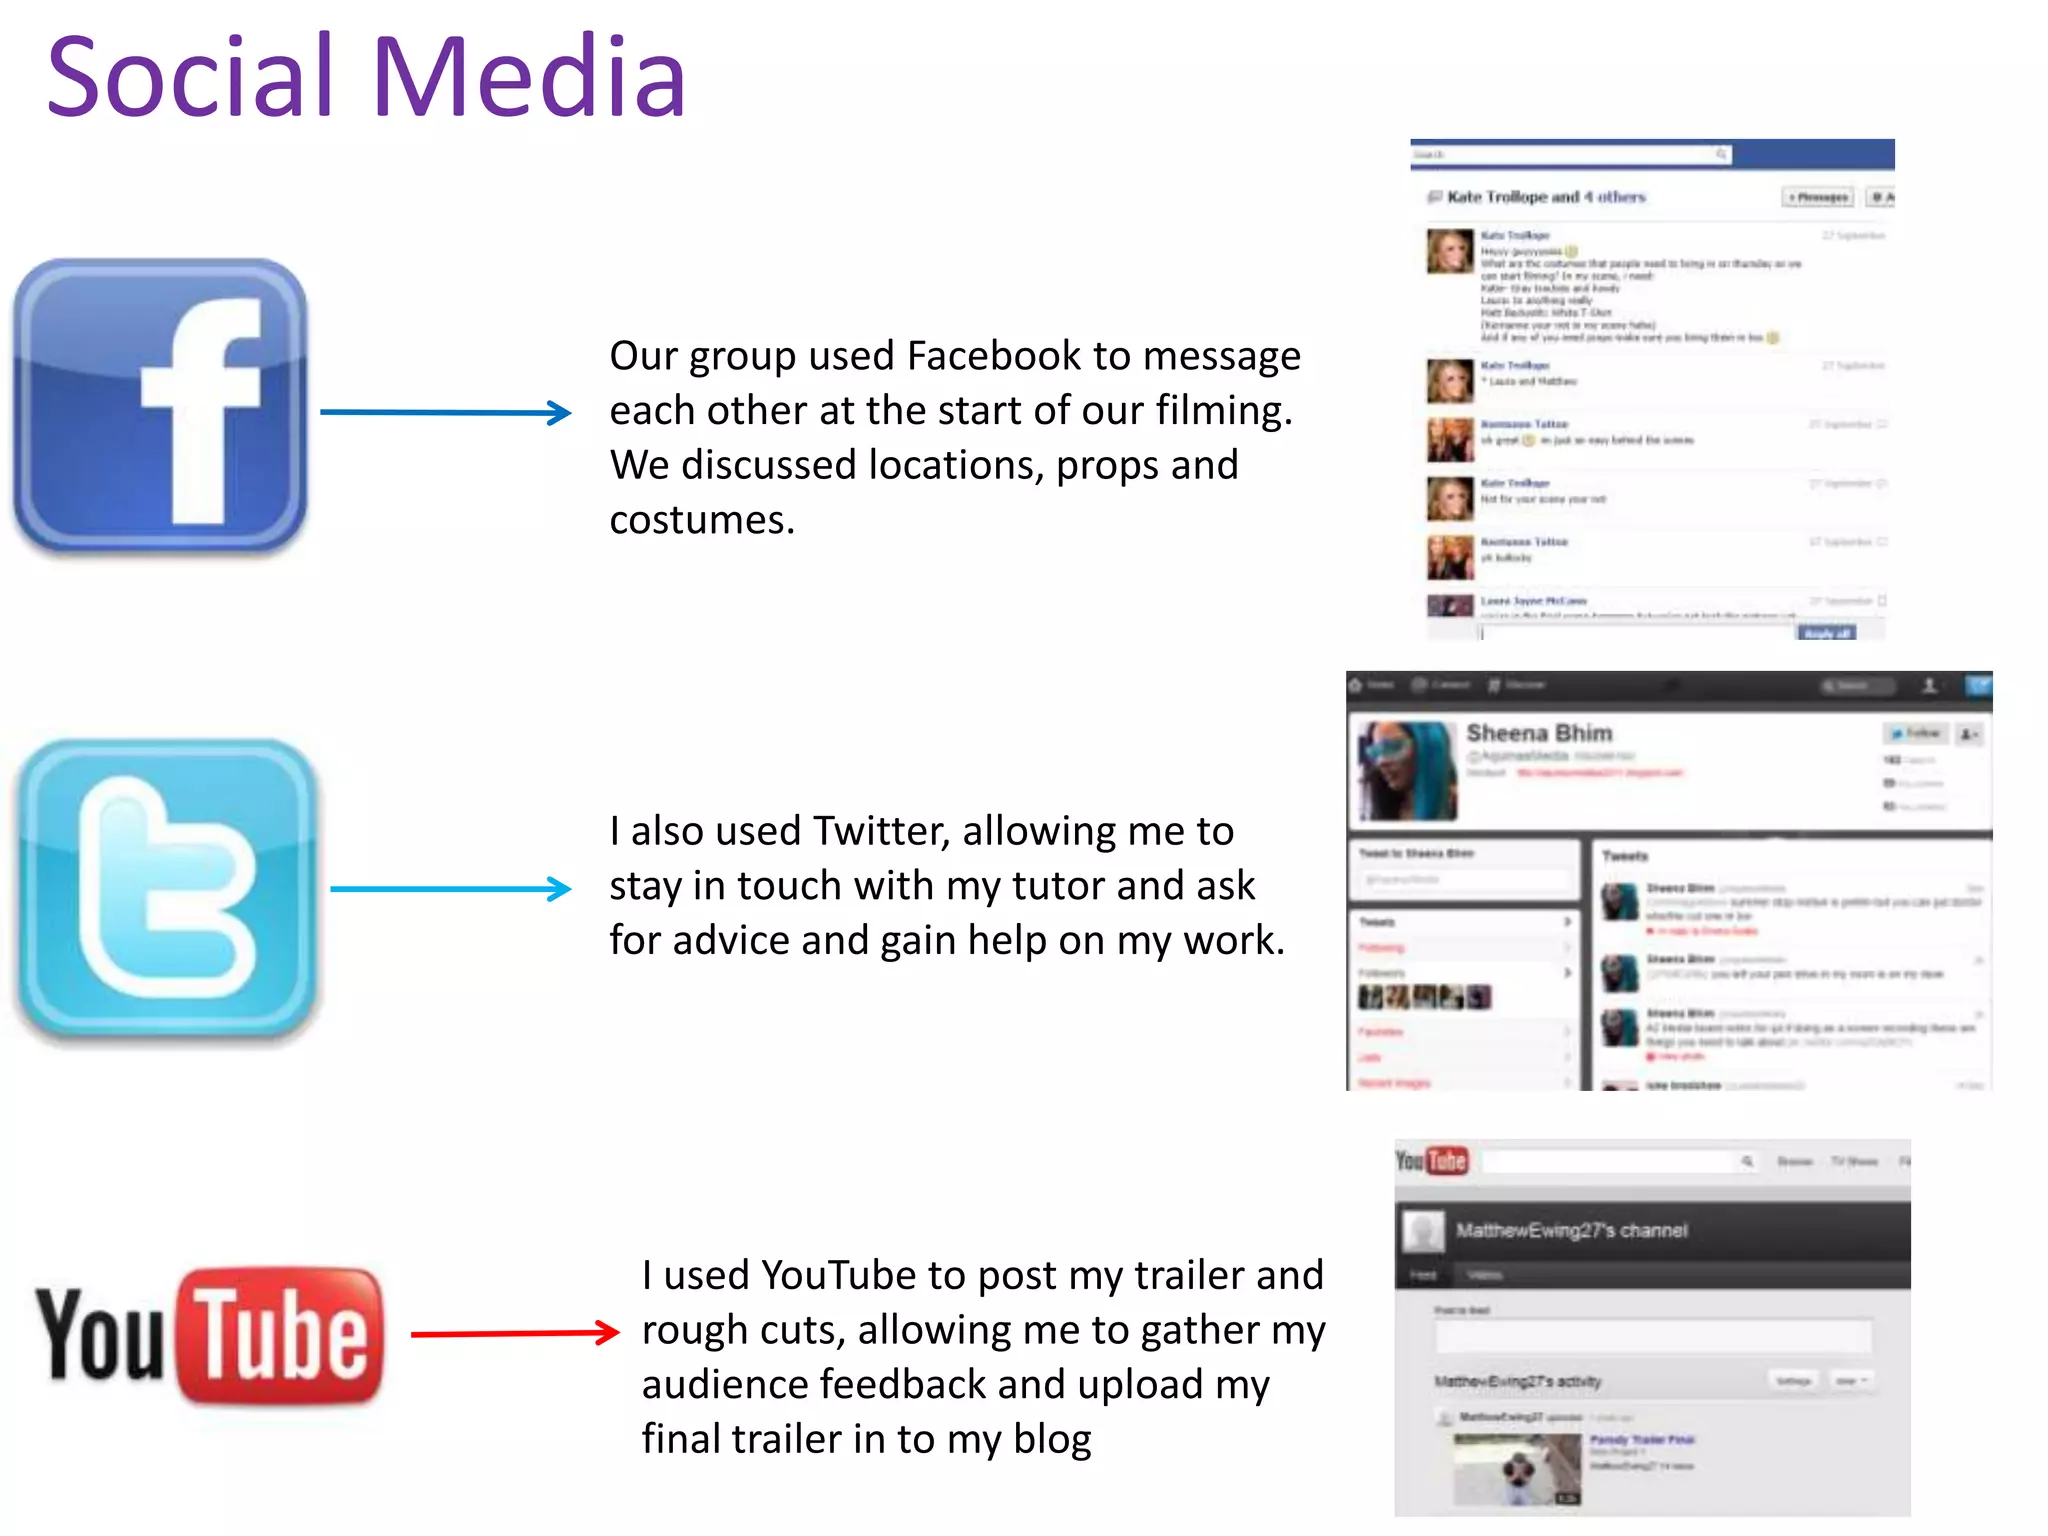
Construction- Step by Step

                              Once the footage has been
                              clicked and dragged in you
                              are then ready to start
                              editing.


Length
of clip


Audio
Construction- Step by Step

                                       To trim a clip down you just click on
                                       the footage and adjust the width of
                                       the selected area, and then simply hit
                                       backspace.


                                                                   When it comes to adjusting
                                                                   the sound you click on the
                                                                   black guide line and then just
                                                                   drag it down to the required
                                                                   volume.


If the audio is louder than the ideal limit, the colour will change from a light
blue, through to a yellow and then red. This means the audio is too loud and
will not be of a good quality.
Construction- Step by Step

                                            To split a clip you right click on
                                            the footage and select ‘split
                                            clip’.


 This then provides you with two separate
 parts of footage allowing you to add a
 transition or add in another clip.
Construction- Step by Step
                  Once your required soundtrack was selected
                  on iTunes you could then import the song in
                  to your trailer.


                    You then simply click and drag the song
                    anywhere around the footage, and it
                    will then be played as the footage is
                    running.
Construction- Step by Step
Uploading the clip on to YouTube:
                                    Upload it to
                                    your account,
                                    create a name,
                                    and place the
                                    video quality in
                                    HD.
Uploading

                                                 Once my trailer was on YouTube, I then
                                                 got the html code of the trailer allowing
                                                 me to import the clip on to my blog.


I then set up an account on blogger which is a
website linked with Google allowing me to post
all my work, for my fellow students and
teachers to comment on and look at.
Uploading
In order to put my PowerPoint in my blog I had to
create a ‘Slideshare’ account allowing me easily to
upload my whole presentation and making it accessible
to look at.
Social Media

          Our group used Facebook to message
          each other at the start of our filming.
          We discussed locations, props and
          costumes.


          I also used Twitter, allowing me to
          stay in touch with my tutor and ask
          for advice and gain help on my work.


           I used YouTube to post my trailer and
           rough cuts, allowing me to gather my
           audience feedback and upload my
           final trailer in to my blog

Matthew Ewing Evaluation Q4 Part 2

  • 1.
    Construction- Step byStep Once the footage has been clicked and dragged in you are then ready to start editing. Length of clip Audio
  • 2.
    Construction- Step byStep To trim a clip down you just click on the footage and adjust the width of the selected area, and then simply hit backspace. When it comes to adjusting the sound you click on the black guide line and then just drag it down to the required volume. If the audio is louder than the ideal limit, the colour will change from a light blue, through to a yellow and then red. This means the audio is too loud and will not be of a good quality.
  • 3.
    Construction- Step byStep To split a clip you right click on the footage and select ‘split clip’. This then provides you with two separate parts of footage allowing you to add a transition or add in another clip.
  • 4.
    Construction- Step byStep Once your required soundtrack was selected on iTunes you could then import the song in to your trailer. You then simply click and drag the song anywhere around the footage, and it will then be played as the footage is running.
  • 5.
    Construction- Step byStep Uploading the clip on to YouTube: Upload it to your account, create a name, and place the video quality in HD.
  • 6.
    Uploading Once my trailer was on YouTube, I then got the html code of the trailer allowing me to import the clip on to my blog. I then set up an account on blogger which is a website linked with Google allowing me to post all my work, for my fellow students and teachers to comment on and look at.
  • 7.
    Uploading In order toput my PowerPoint in my blog I had to create a ‘Slideshare’ account allowing me easily to upload my whole presentation and making it accessible to look at.
  • 8.
    Social Media Our group used Facebook to message each other at the start of our filming. We discussed locations, props and costumes. I also used Twitter, allowing me to stay in touch with my tutor and ask for advice and gain help on my work. I used YouTube to post my trailer and rough cuts, allowing me to gather my audience feedback and upload my final trailer in to my blog