Master Page
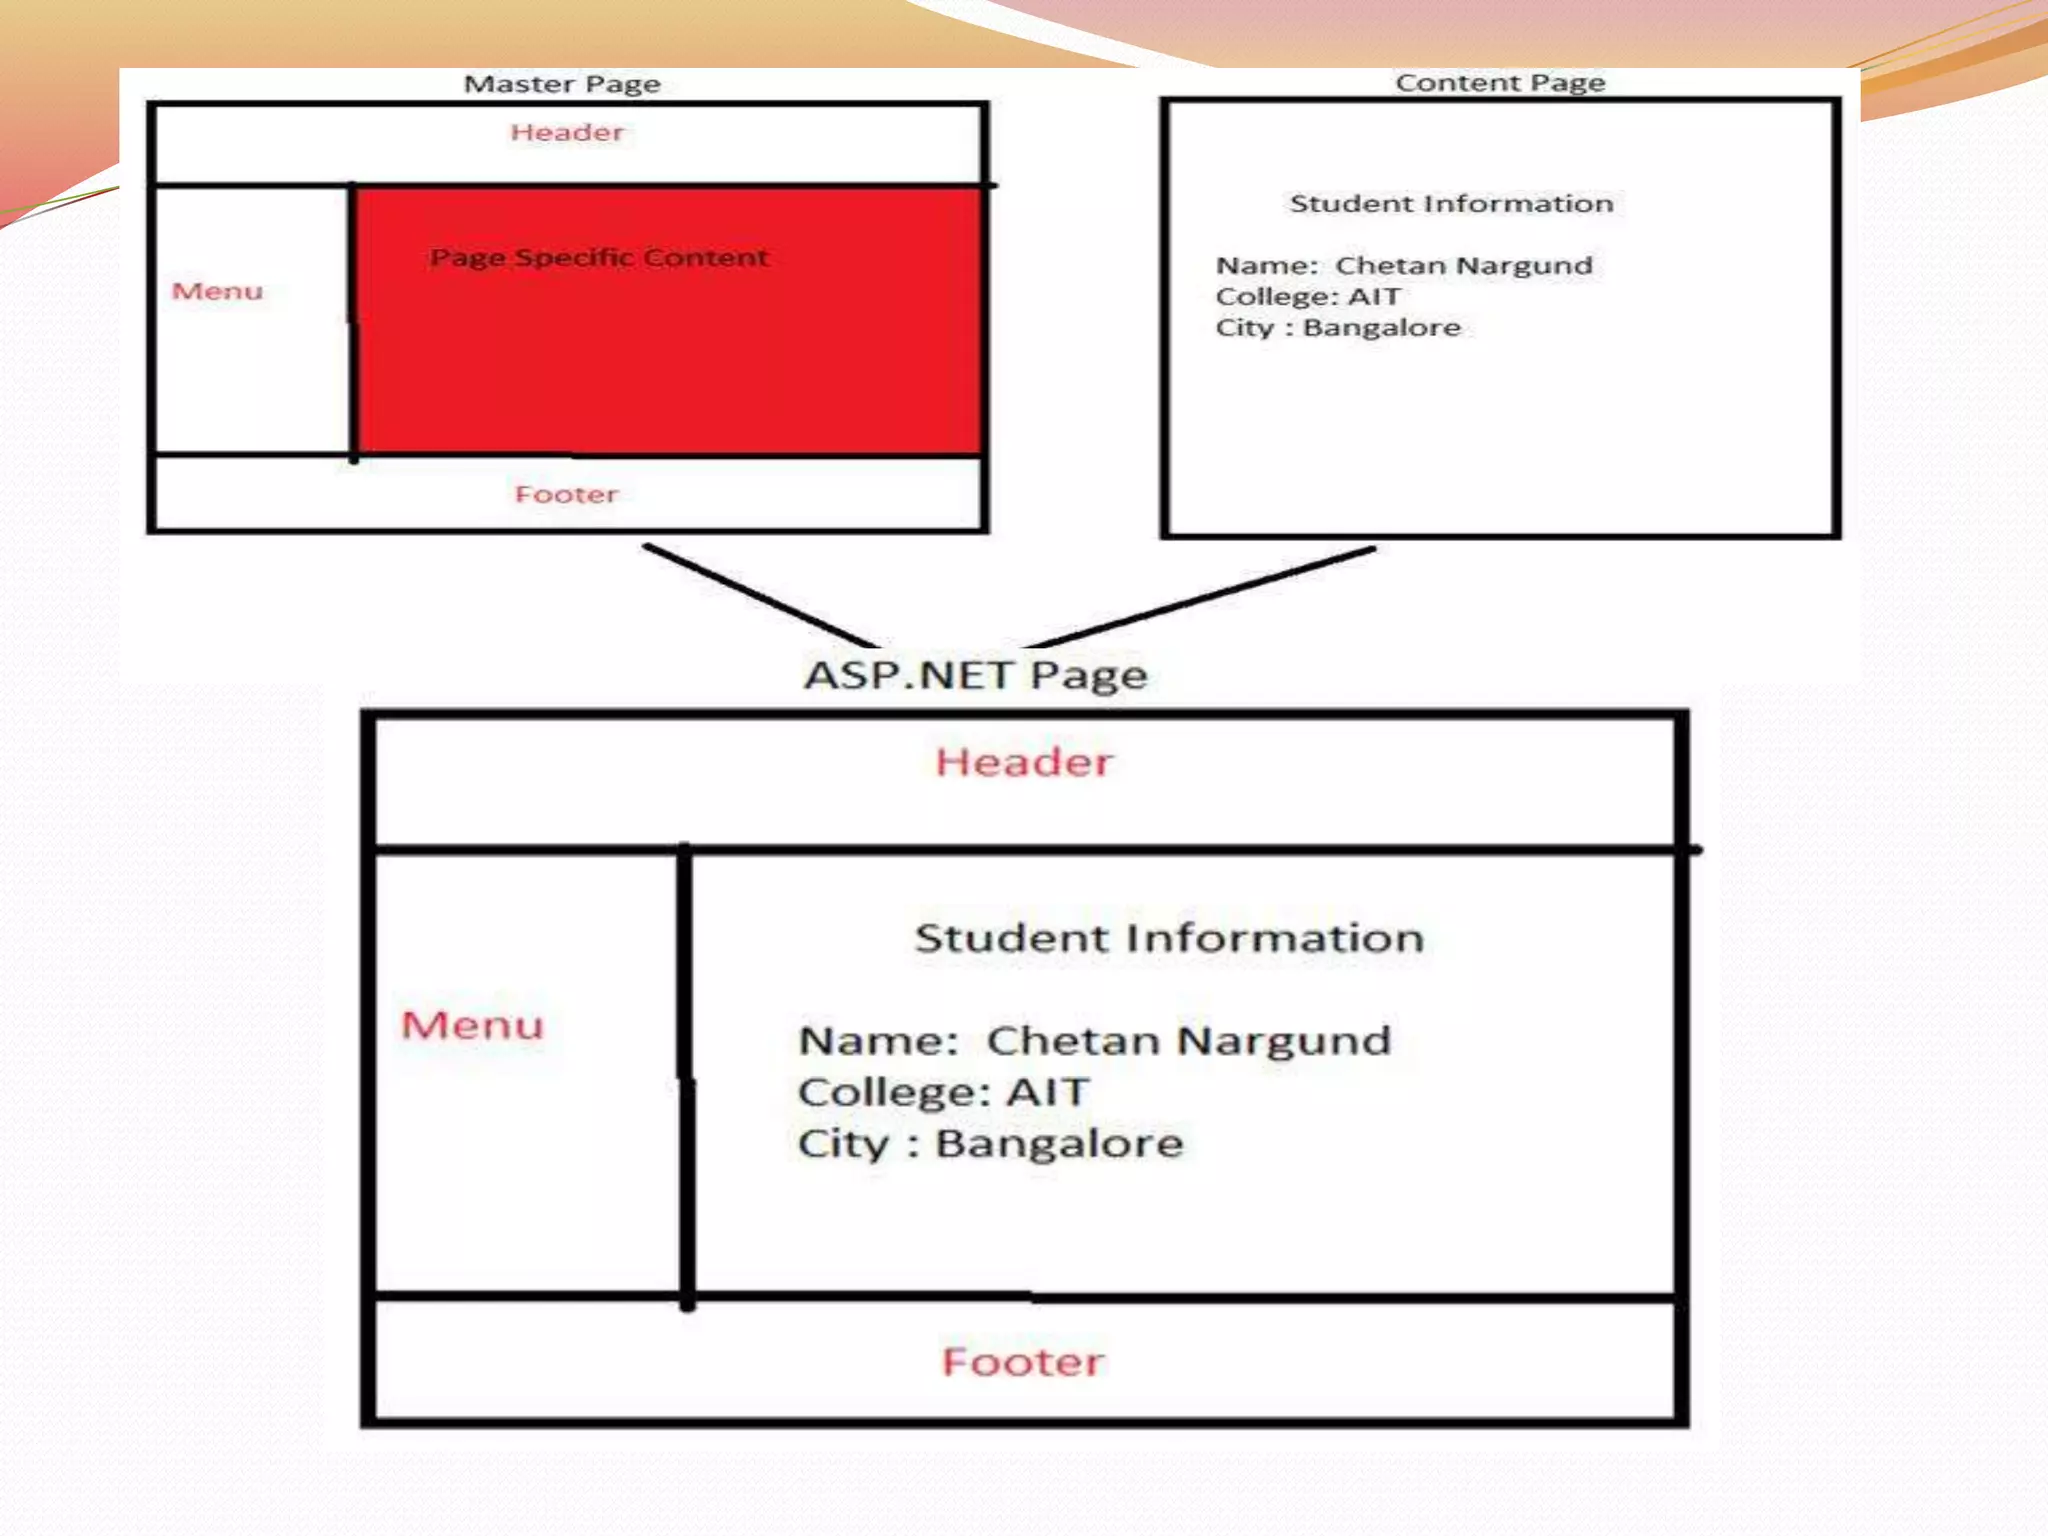
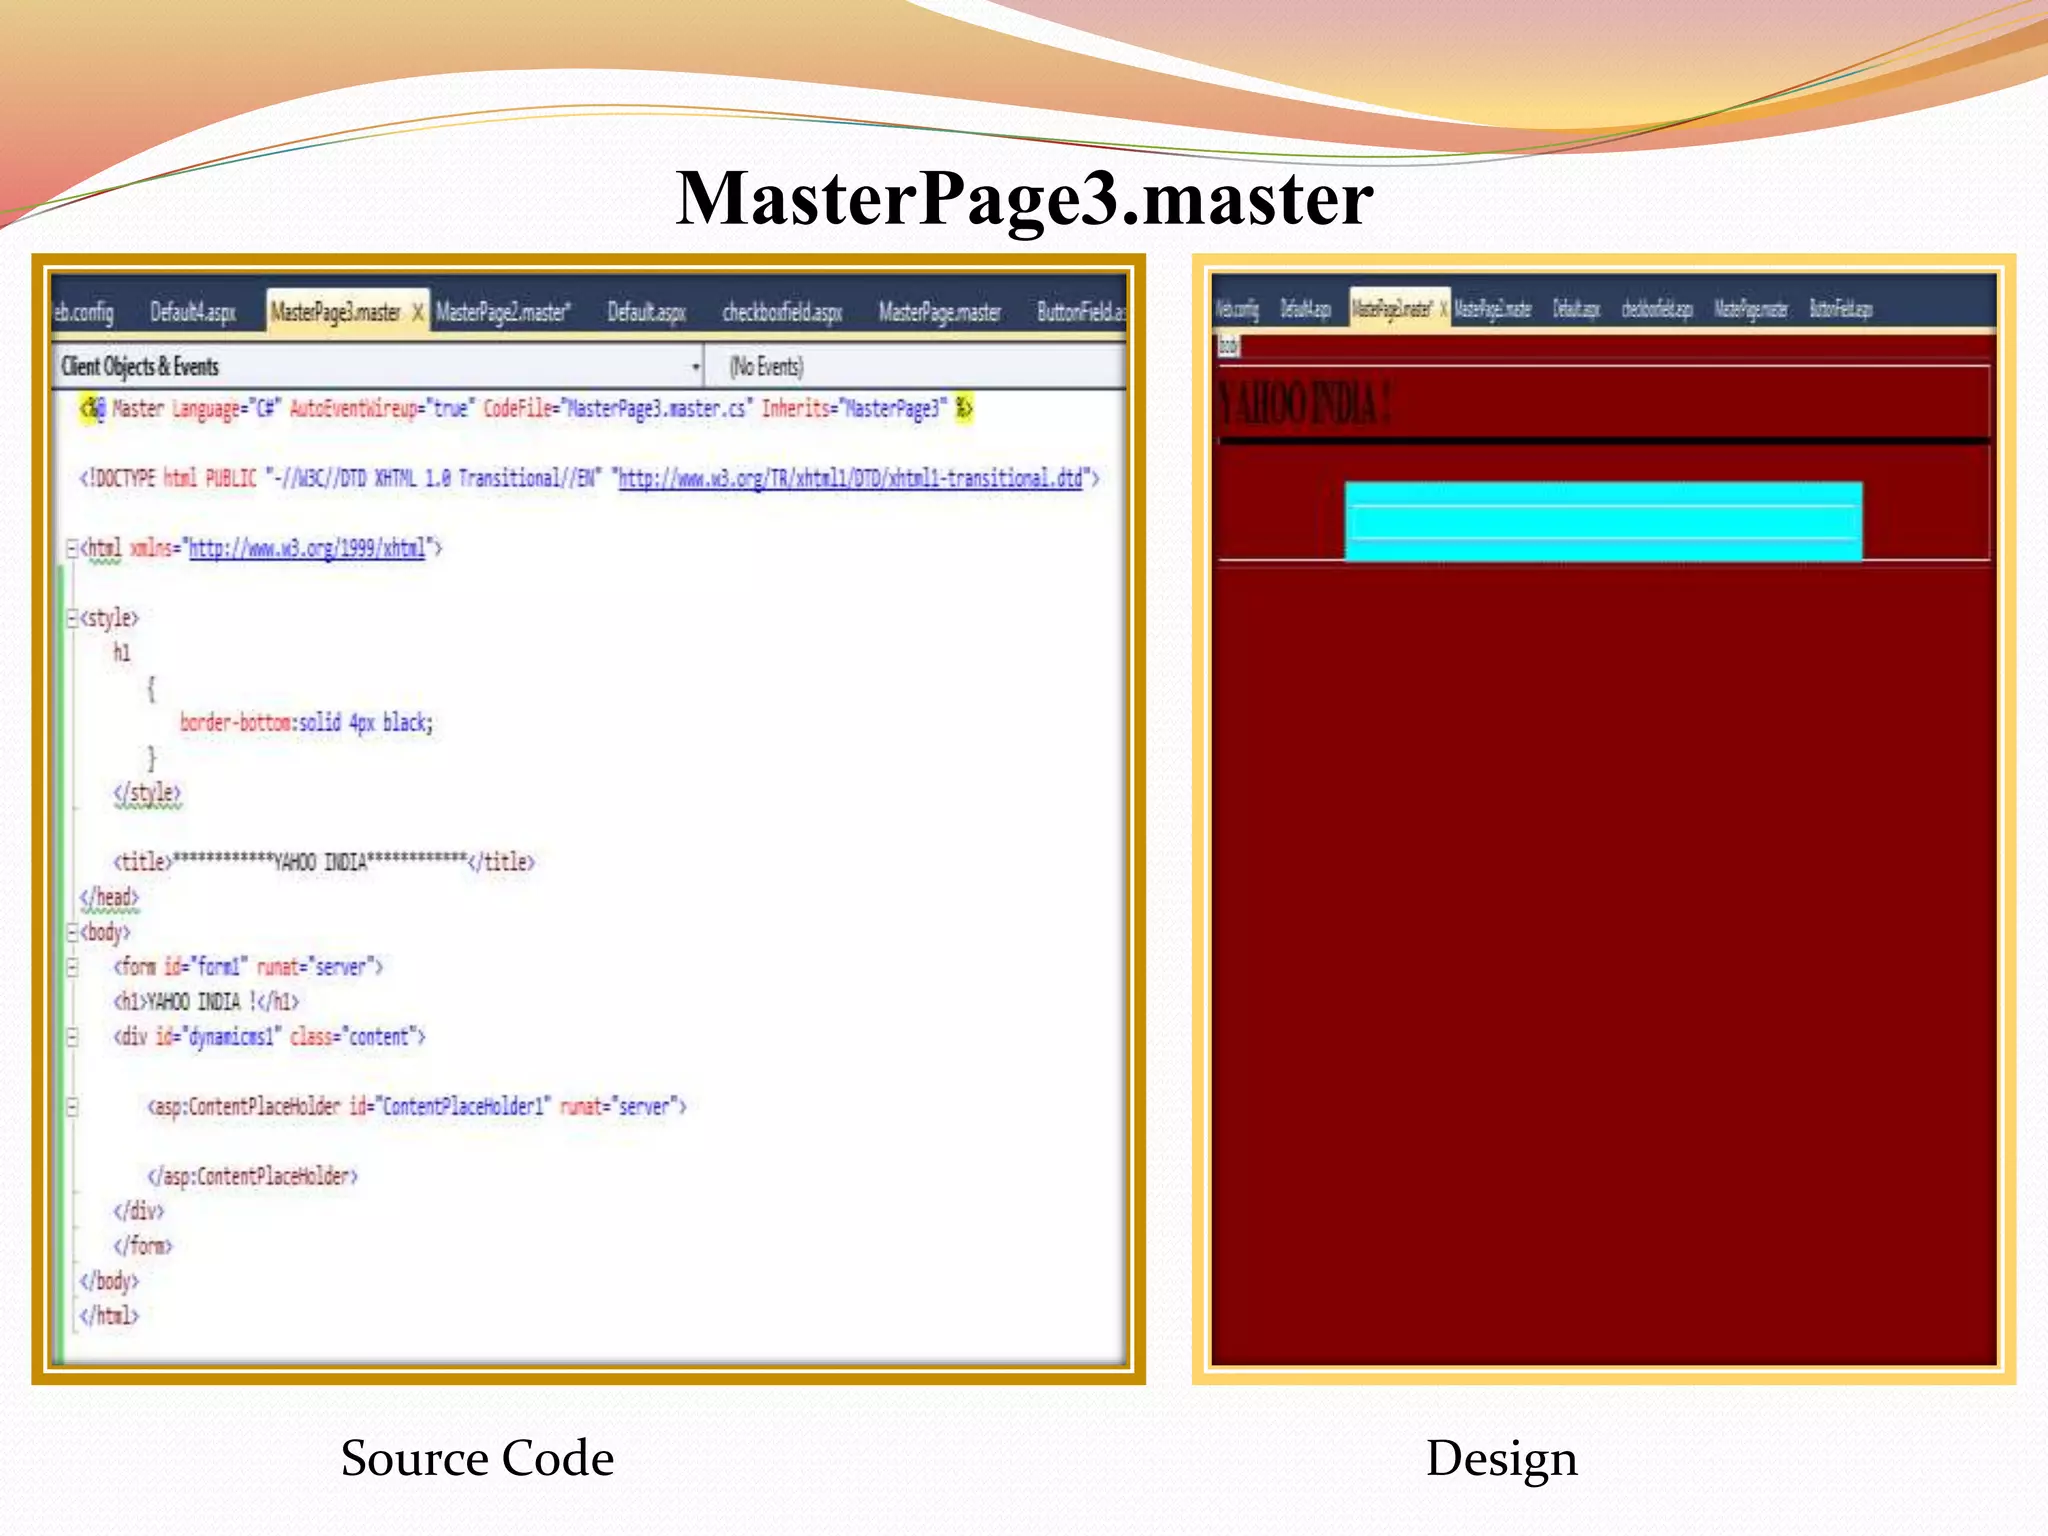
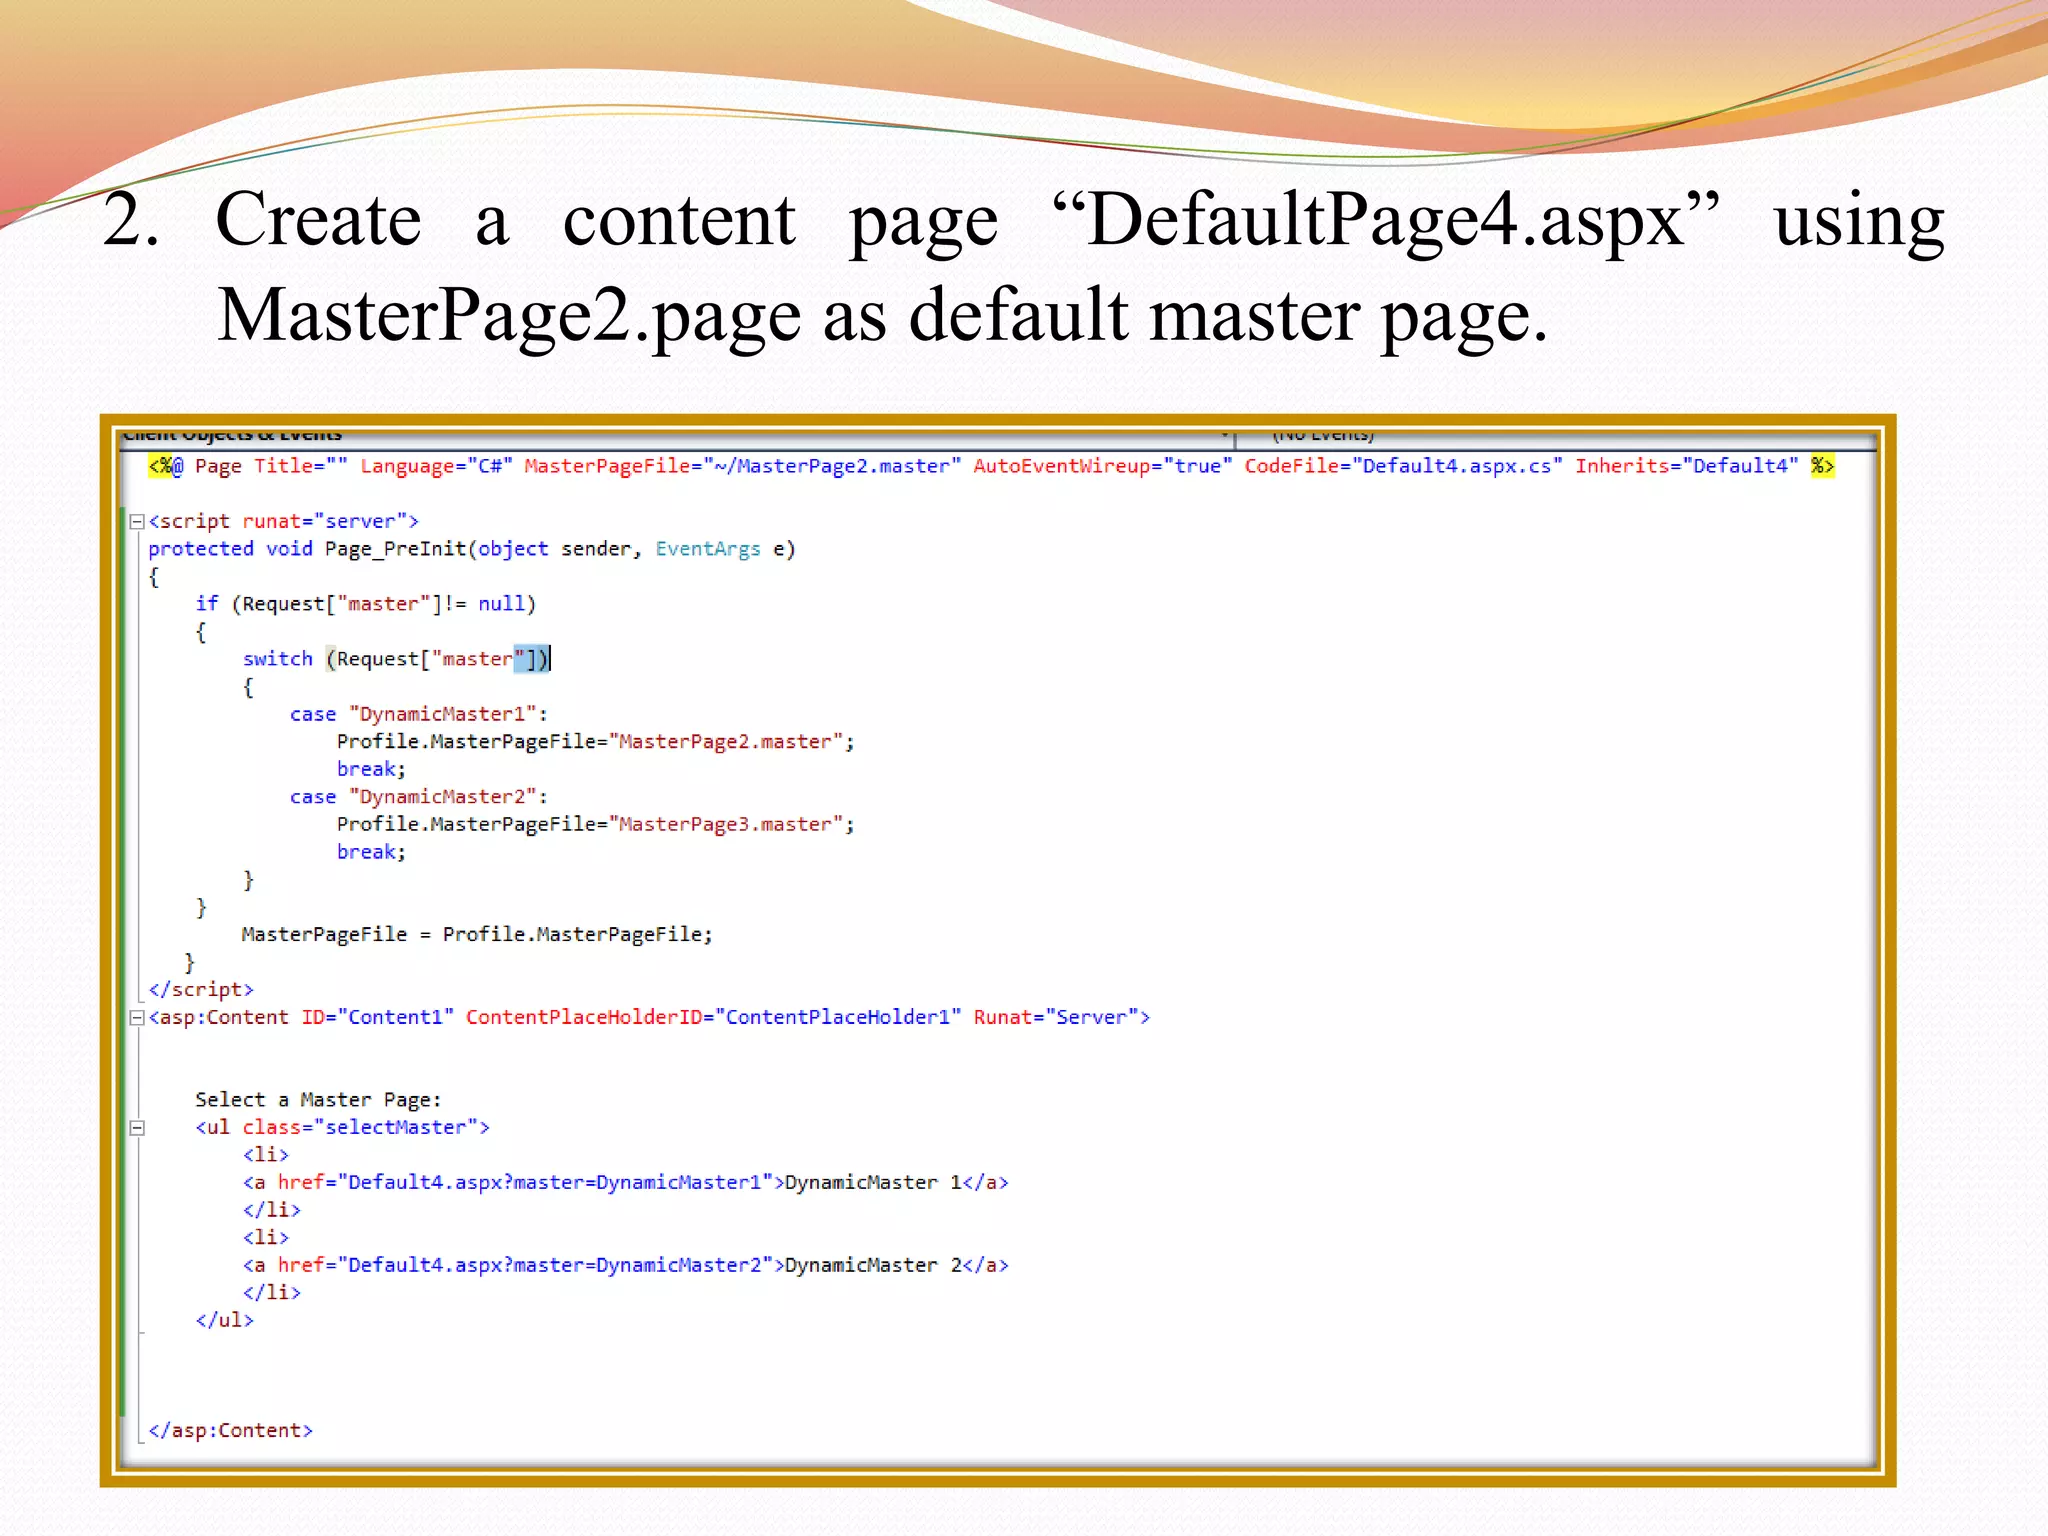
Master page allows you to create a consistent look and behaviour
for all the pages in your web applications . Master Page Design is
common for all the pages. Master page actually consists of two
pieces, the master page itself and one or more content pages..
A master page is an ASP.NET file with the extension .master.
ContentPlaceholder control, which defines a region on the master
page, is where the content pages can plug in page specific content.
 A Master Page enables user to share the same content among
multiple content pages in a website.
ASP.NET master pages allow user to create a consistent layout for
the pages in a application.
When users request the content pages, they merge with the master
page to produce output that combines the layout of the master page
with the content from the content page.
Master Page
 Master pages in ASP.NET Web Forms start with the @Masterdirective .
 The directive looks like the following.
<%@MasterLanguage="C#“CodeFile="MasterPage.master.cs"
Inherits="MasterPage" %>
 @Page directive that is used for ordinary .aspx pages.
 The directive looks like the following.
<%@PageLanguage="C#”
MasterPageFile="~/MasterPages/Master1.master"Title="Content
Page"%>
 To enable pages to insert content, the master page contains a placeholder
tag <asp:ContentPlaceHolder> for individual content.
Working with Master Page
1. To use master pages, first create a master page and add
tables and other common elements.
2. Add <ContentPlaceHolder> controls to the master page
from toolbox.
3. To create the content pages, add standard Web forms,
select the master page check box when creating the
page and then select the master page.
4. Add content to the page.
Creating a Master Page
 Step 1
Create new project in Visual Studio 2010
1. Go to File-> New-> Web Site-> Visual C#->ASP.NET
Website-> Entry Application Name-> OK
2. Create a new web site named MasterPageDemo.
3. Right click on website in Solution Explorer and Click
on Add New Item from pop up menu.
Creating Master Page
4. Add Master Page to the application named
“ MasterPage.master” and create design.
Source Code
Creating Master Page
Design
Creating Master Page
Step 2
5. In Solution Explorer, right click on website and click
on Add New Item and select web form from pop-up
window.
6. Change the name of the web form and select the check
box of Select Master Page then click on Add button.
Creating Master Page
7. Select the Masterpage.master and click on OK.
Creating Master Page
8. In content Page Index.aspx, user can use the content
place holder to add content to the page.
Add
Content
Here
Dynamically Loading Master Page
 Websites uses different master pages dynamically with
a content page depending upon the request.
 This features enables the users to customize the
appearance of the website by loading different master
pages. A menu of master pages allow our users to pick
their favourite layout.
Steps to create dynamically loading master page as
following:
1. Create two Master Page MasterPage2.master and
MasterPage3.master with one ContentPlaceHolder
in each.
MasterPage2.master
Source Code Design
MasterPage3.master
Source Code Design
2. Create a content page “DefaultPage4.aspx” using
MasterPage2.page as default master page.
3. User can switch between master pages using links on
the web page.
Advantages of Master Page
 They allow user to centralize the common functionality of
user pages so that user can make updates in just one
place.
 They make it easy to create one set of controls and code
and apply the results to a set of pages. For example, user
can use controls on the master page to create a menu that
applies to all pages.
 They give user fine-grained control over the lausert of the
final page by allowing user to control how the placeholder
controls are rendered.
 They provide an object model that allows user to
customize the master page from individual content pages.
Thank You

Master page in Asp.net

  • 2.
    Master Page Master pageallows you to create a consistent look and behaviour for all the pages in your web applications . Master Page Design is common for all the pages. Master page actually consists of two pieces, the master page itself and one or more content pages.. A master page is an ASP.NET file with the extension .master. ContentPlaceholder control, which defines a region on the master page, is where the content pages can plug in page specific content.  A Master Page enables user to share the same content among multiple content pages in a website. ASP.NET master pages allow user to create a consistent layout for the pages in a application. When users request the content pages, they merge with the master page to produce output that combines the layout of the master page with the content from the content page.
  • 3.
    Master Page  Masterpages in ASP.NET Web Forms start with the @Masterdirective .  The directive looks like the following. <%@MasterLanguage="C#“CodeFile="MasterPage.master.cs" Inherits="MasterPage" %>  @Page directive that is used for ordinary .aspx pages.  The directive looks like the following. <%@PageLanguage="C#” MasterPageFile="~/MasterPages/Master1.master"Title="Content Page"%>  To enable pages to insert content, the master page contains a placeholder tag <asp:ContentPlaceHolder> for individual content.
  • 4.
    Working with MasterPage 1. To use master pages, first create a master page and add tables and other common elements. 2. Add <ContentPlaceHolder> controls to the master page from toolbox. 3. To create the content pages, add standard Web forms, select the master page check box when creating the page and then select the master page. 4. Add content to the page.
  • 6.
    Creating a MasterPage  Step 1 Create new project in Visual Studio 2010 1. Go to File-> New-> Web Site-> Visual C#->ASP.NET Website-> Entry Application Name-> OK 2. Create a new web site named MasterPageDemo. 3. Right click on website in Solution Explorer and Click on Add New Item from pop up menu.
  • 7.
    Creating Master Page 4.Add Master Page to the application named “ MasterPage.master” and create design. Source Code
  • 8.
  • 9.
    Creating Master Page Step2 5. In Solution Explorer, right click on website and click on Add New Item and select web form from pop-up window. 6. Change the name of the web form and select the check box of Select Master Page then click on Add button.
  • 10.
    Creating Master Page 7.Select the Masterpage.master and click on OK.
  • 11.
    Creating Master Page 8.In content Page Index.aspx, user can use the content place holder to add content to the page. Add Content Here
  • 12.
    Dynamically Loading MasterPage  Websites uses different master pages dynamically with a content page depending upon the request.  This features enables the users to customize the appearance of the website by loading different master pages. A menu of master pages allow our users to pick their favourite layout. Steps to create dynamically loading master page as following: 1. Create two Master Page MasterPage2.master and MasterPage3.master with one ContentPlaceHolder in each.
  • 13.
  • 14.
  • 15.
    2. Create acontent page “DefaultPage4.aspx” using MasterPage2.page as default master page.
  • 16.
    3. User canswitch between master pages using links on the web page.
  • 17.
    Advantages of MasterPage  They allow user to centralize the common functionality of user pages so that user can make updates in just one place.  They make it easy to create one set of controls and code and apply the results to a set of pages. For example, user can use controls on the master page to create a menu that applies to all pages.  They give user fine-grained control over the lausert of the final page by allowing user to control how the placeholder controls are rendered.  They provide an object model that allows user to customize the master page from individual content pages.
  • 18.