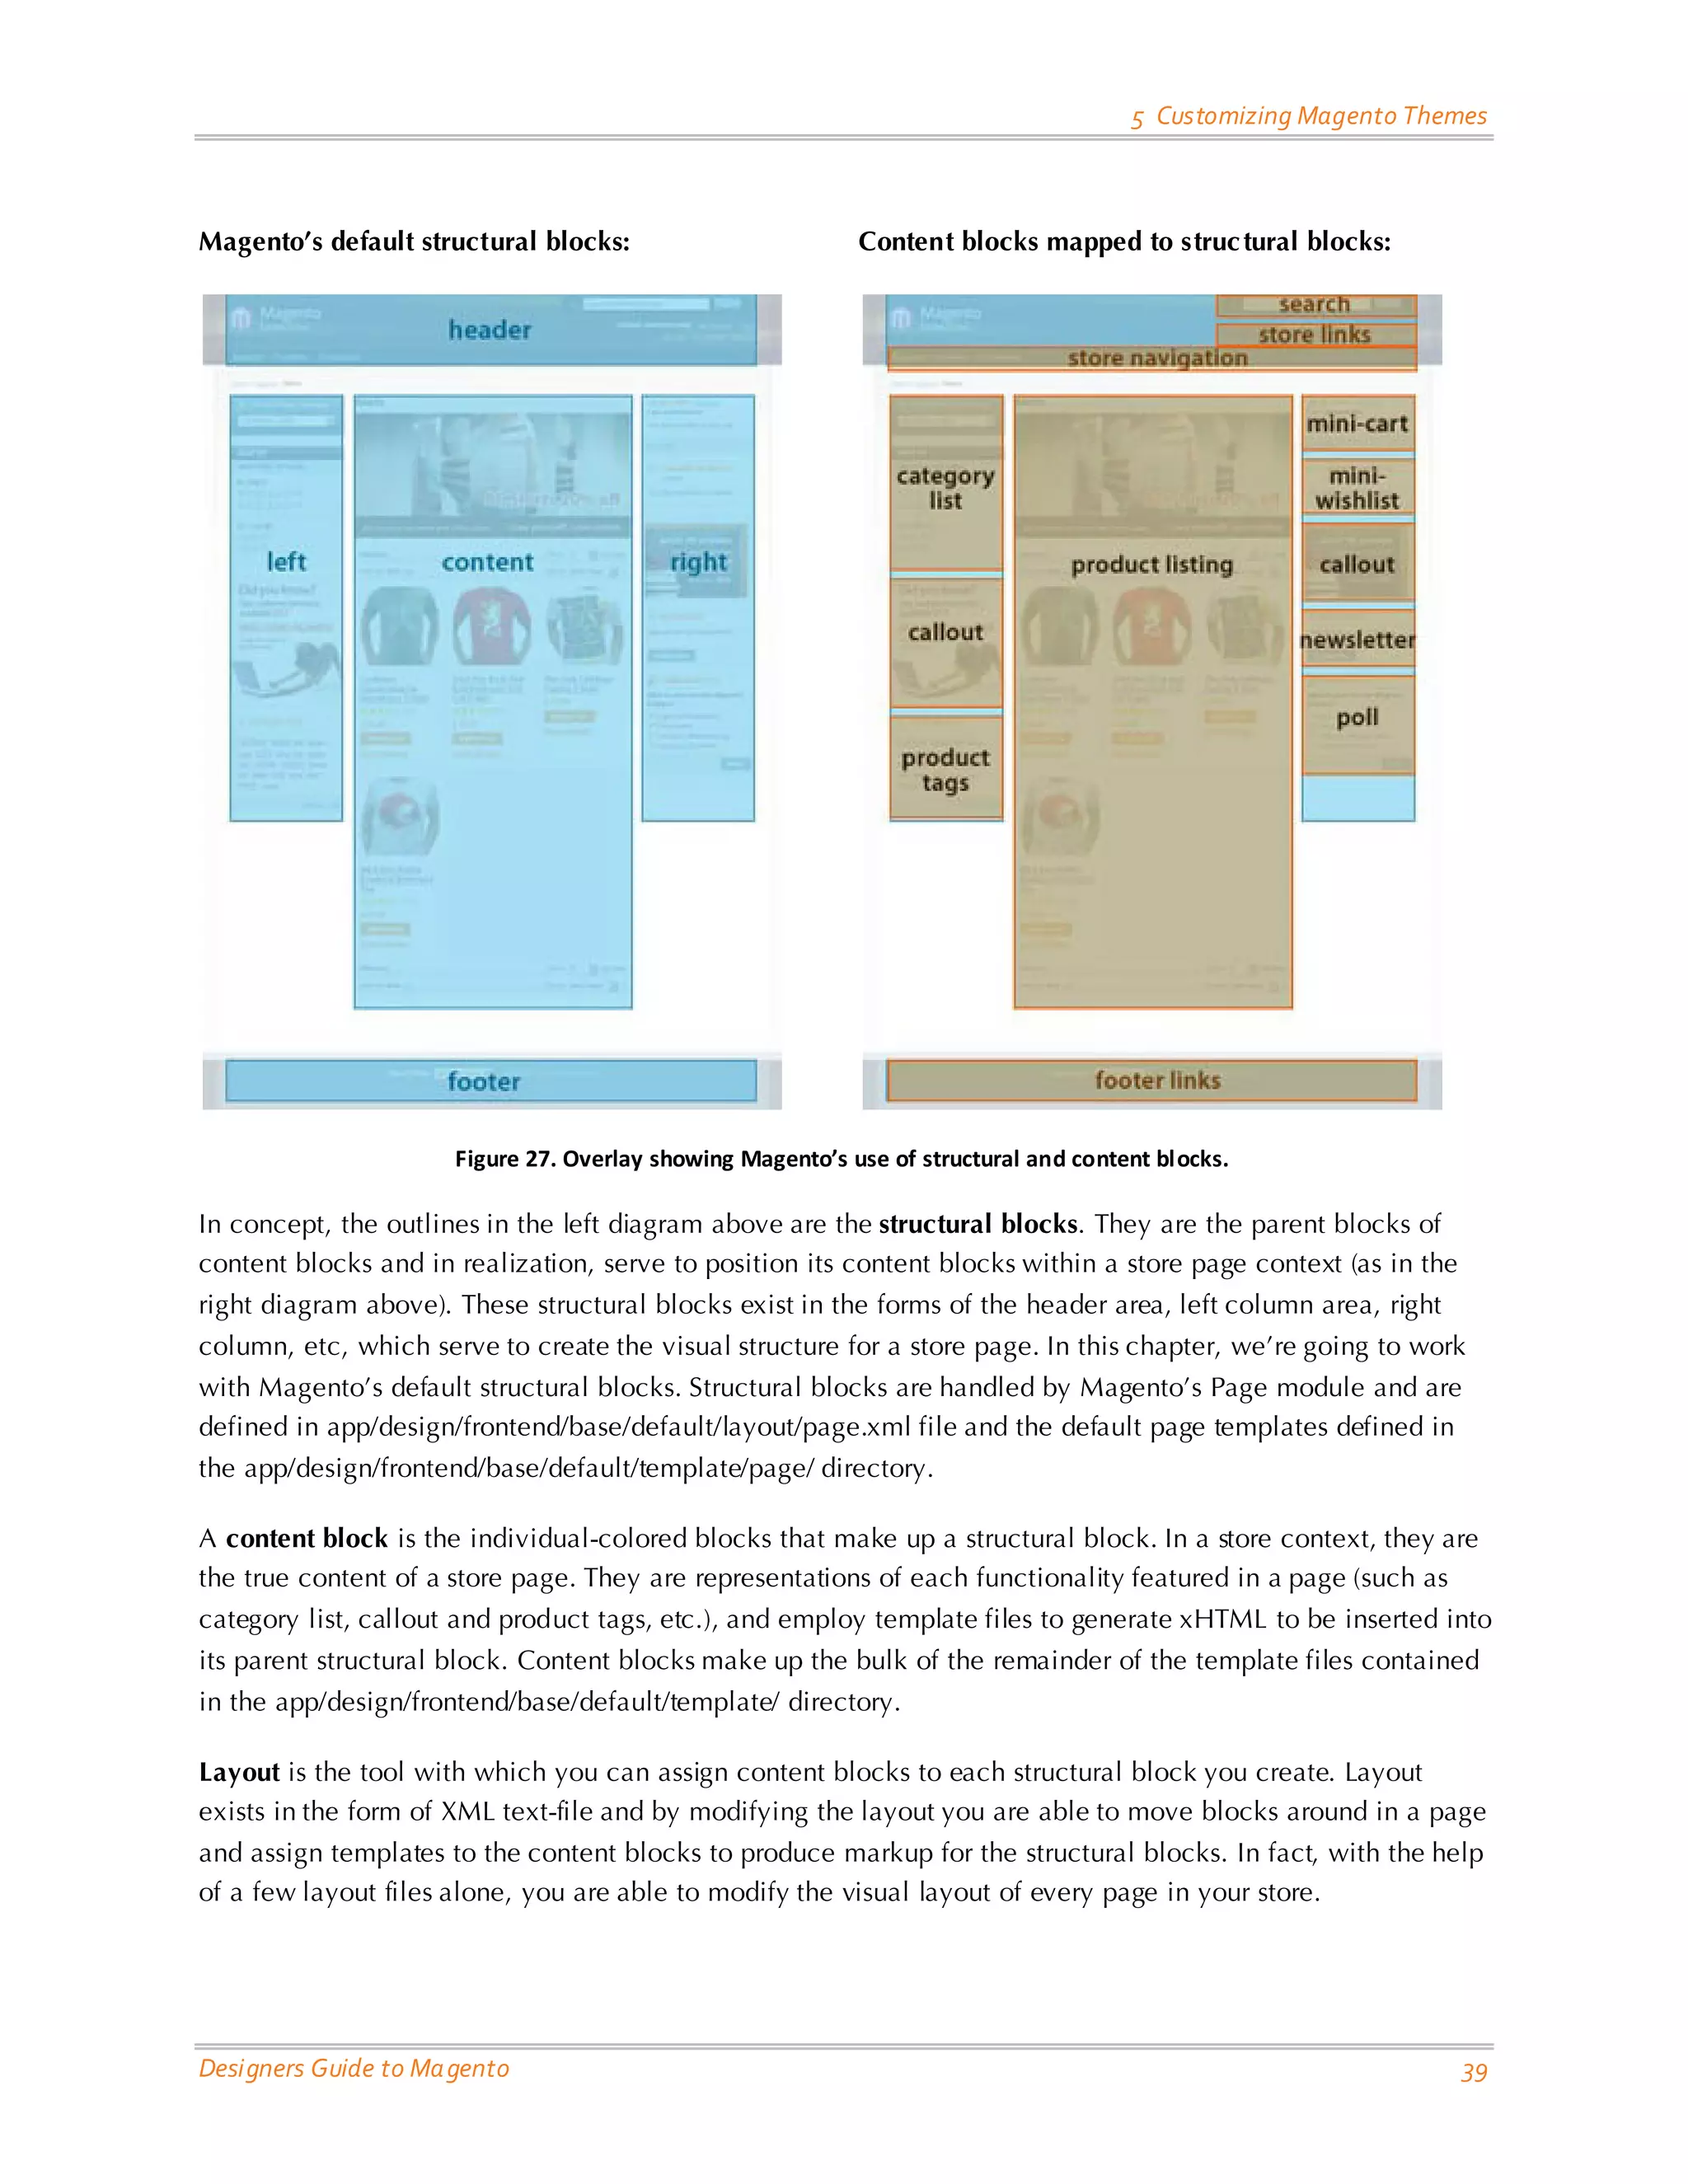
Download to read offline


![4 Applying Themes in Magento
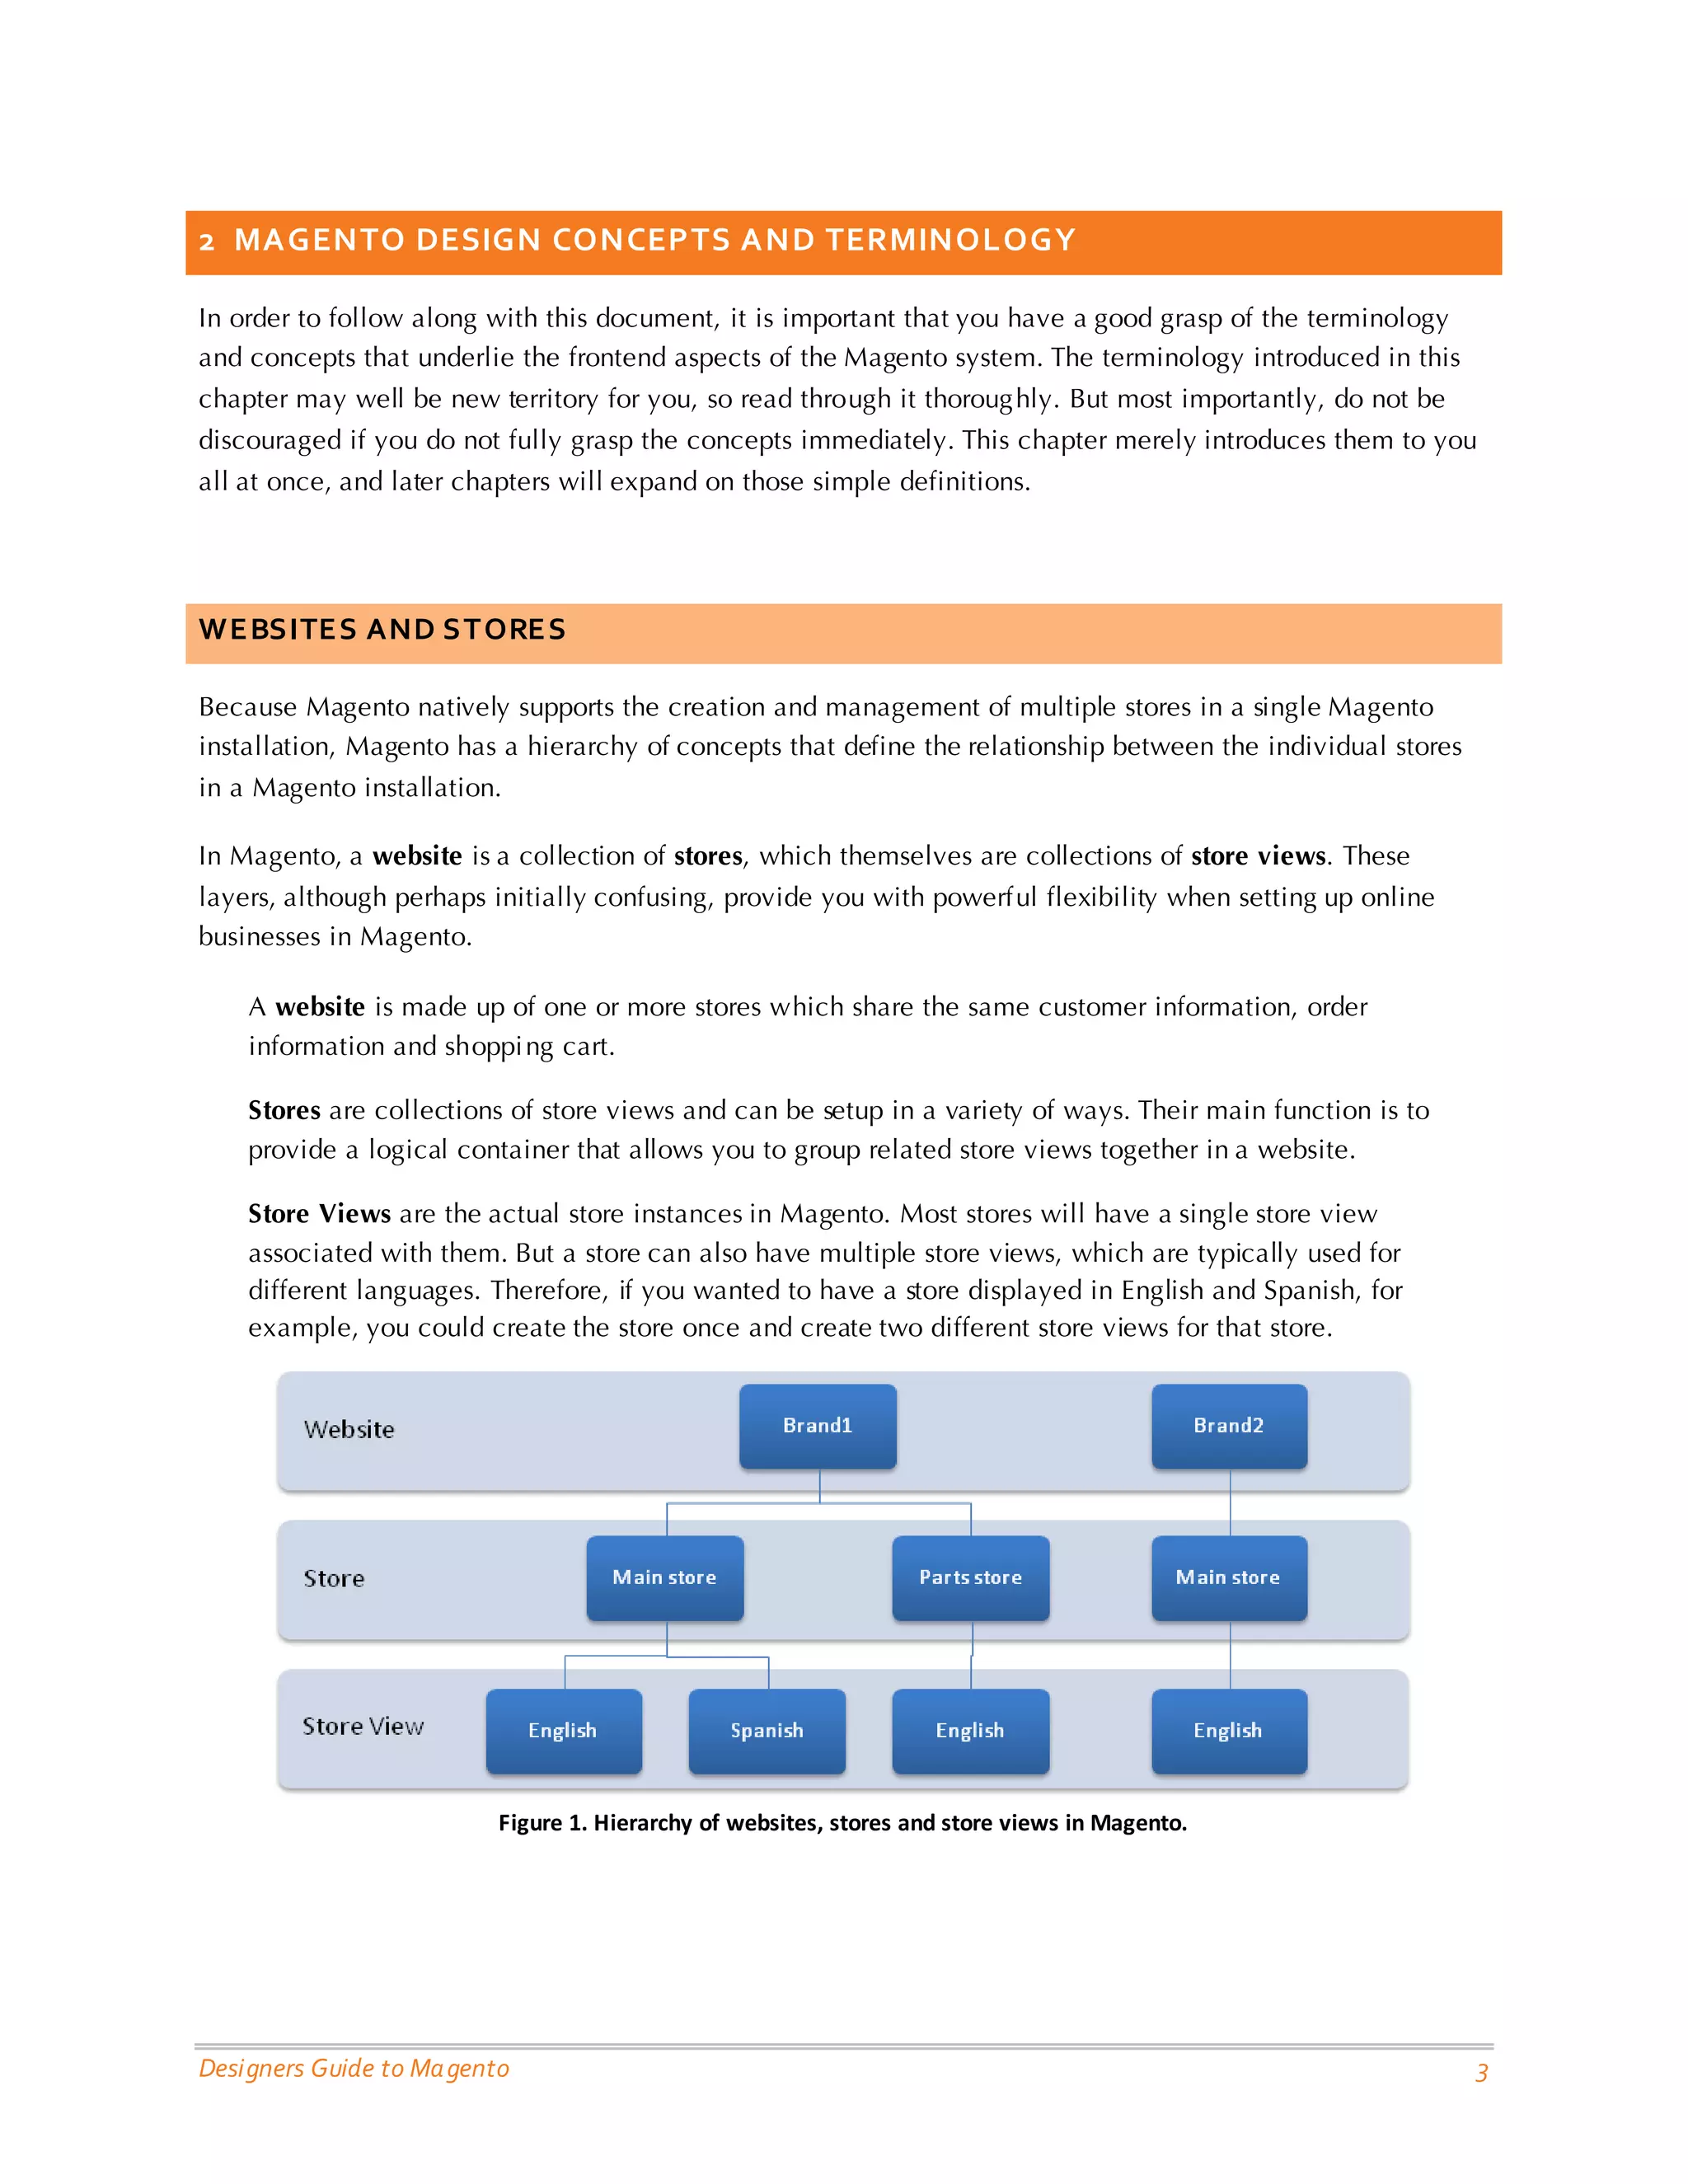
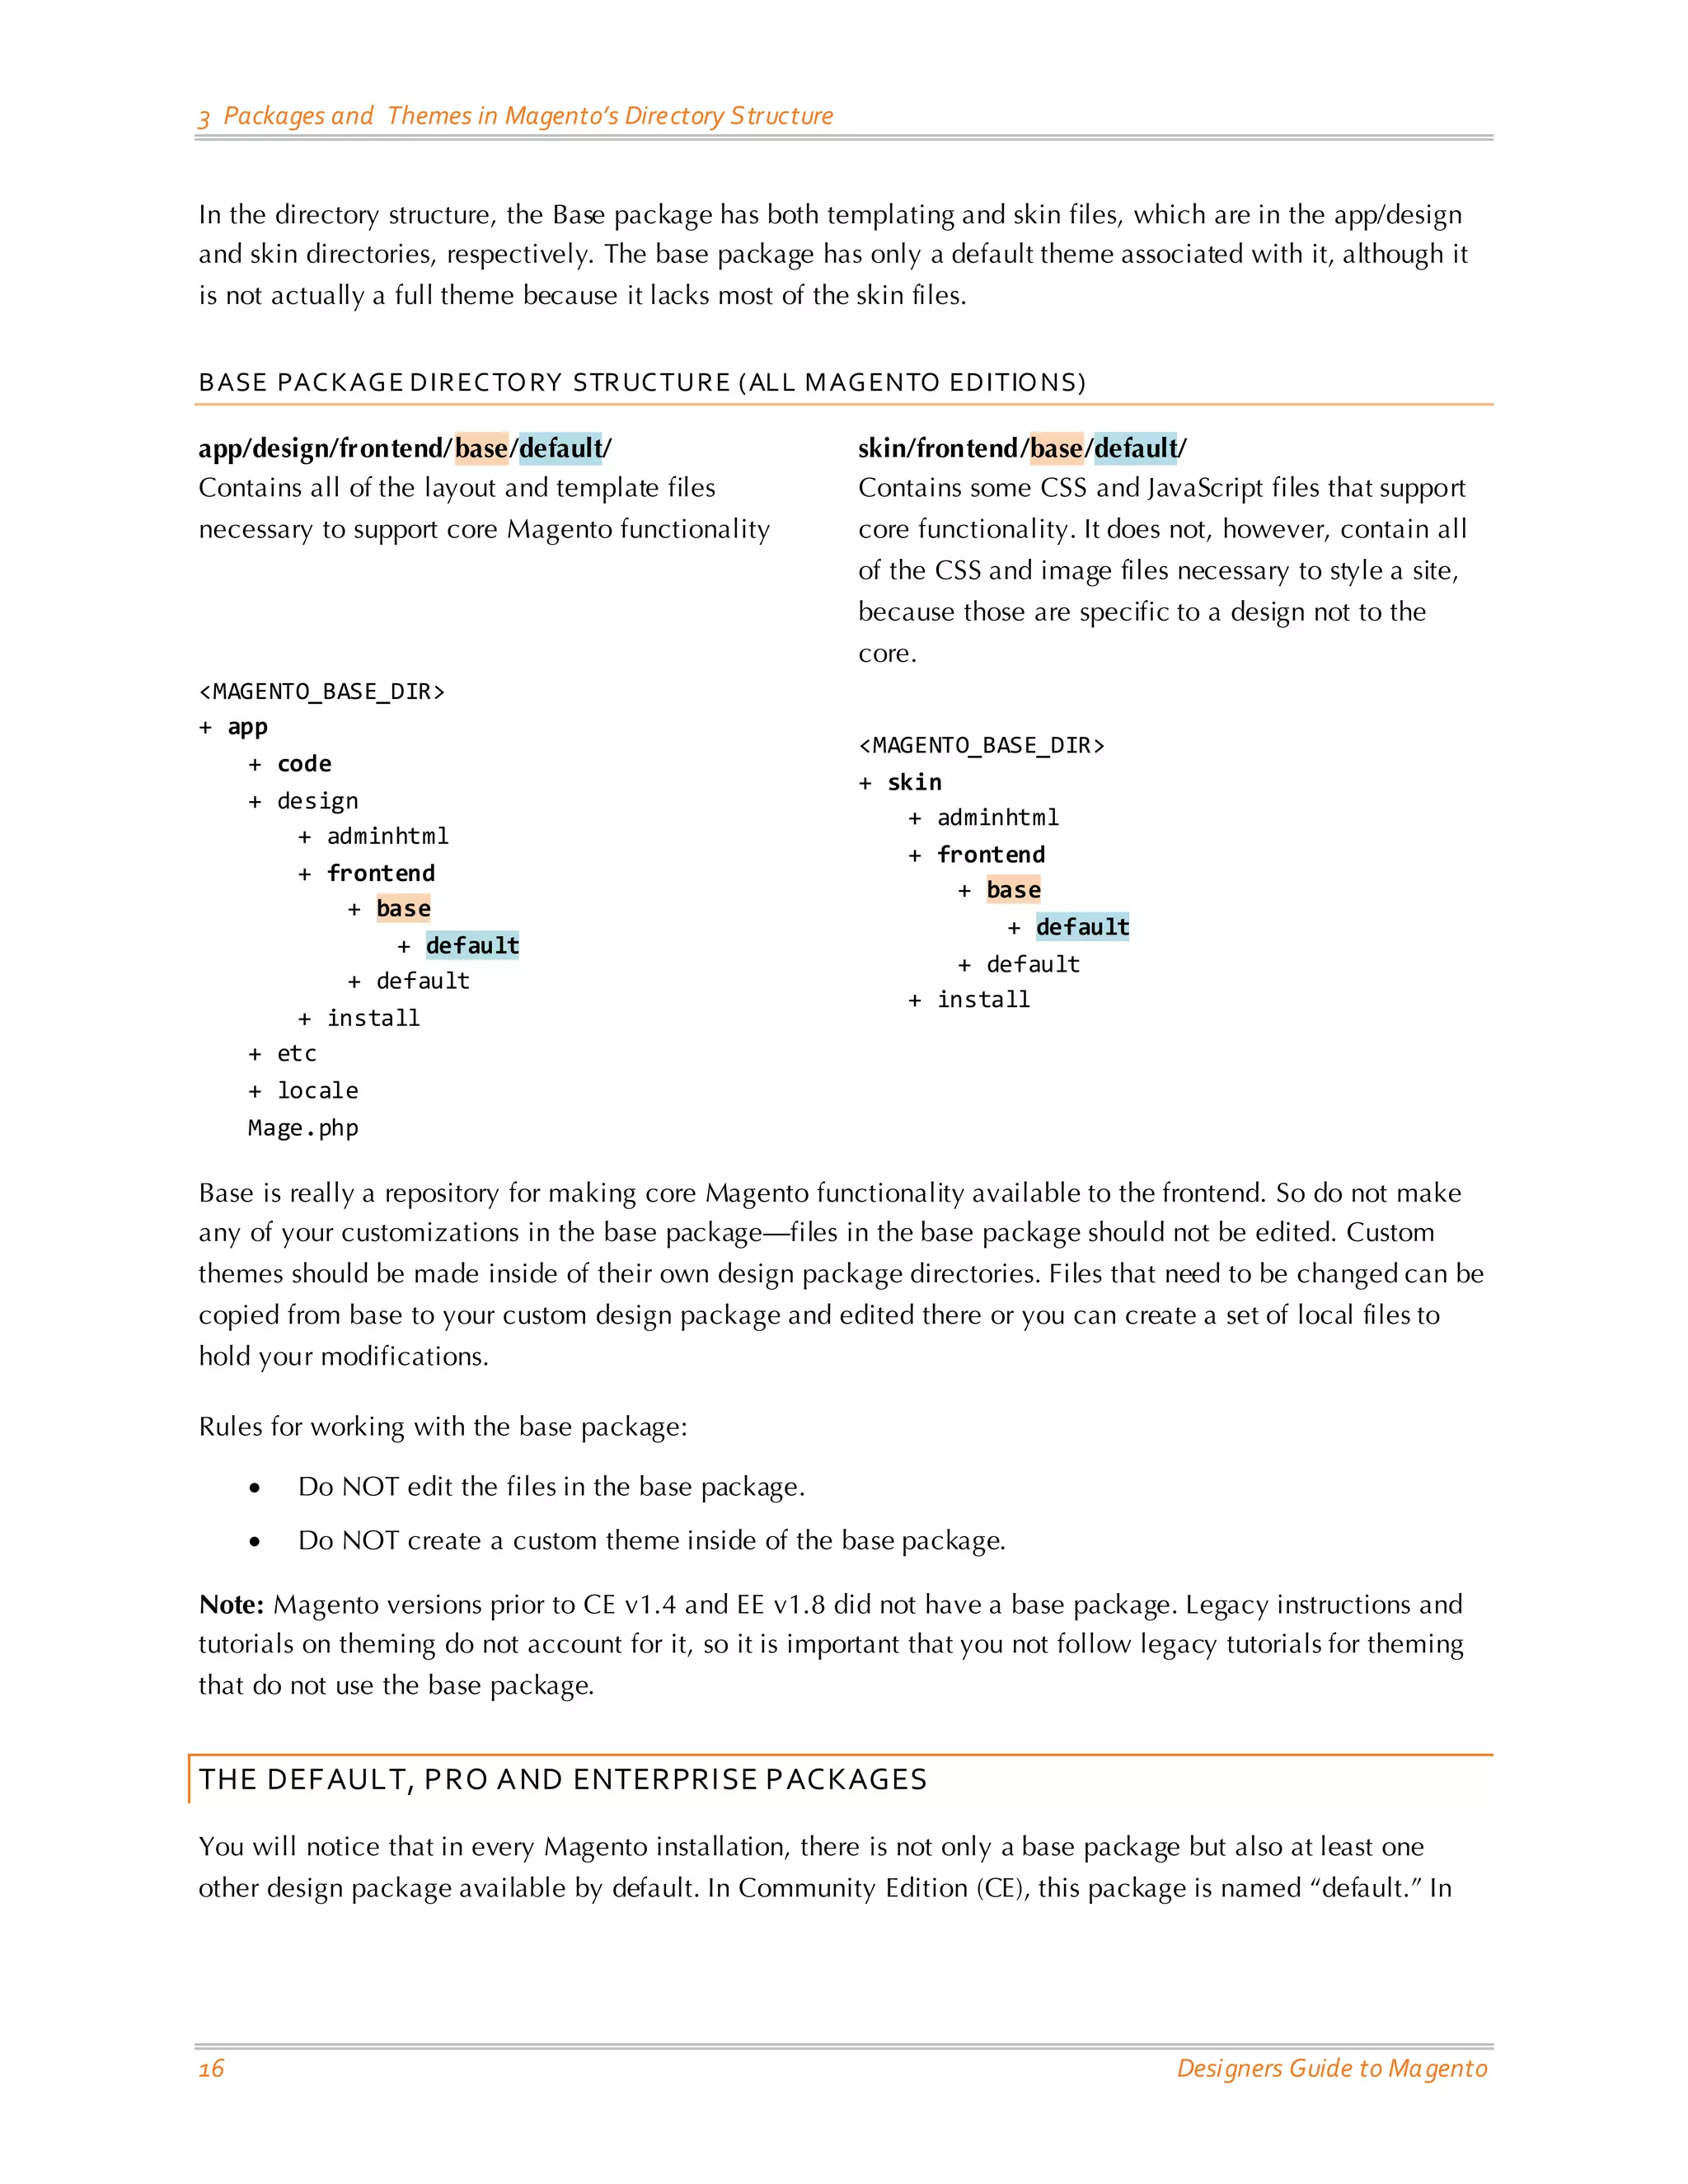
Designers Guide to Magento 23
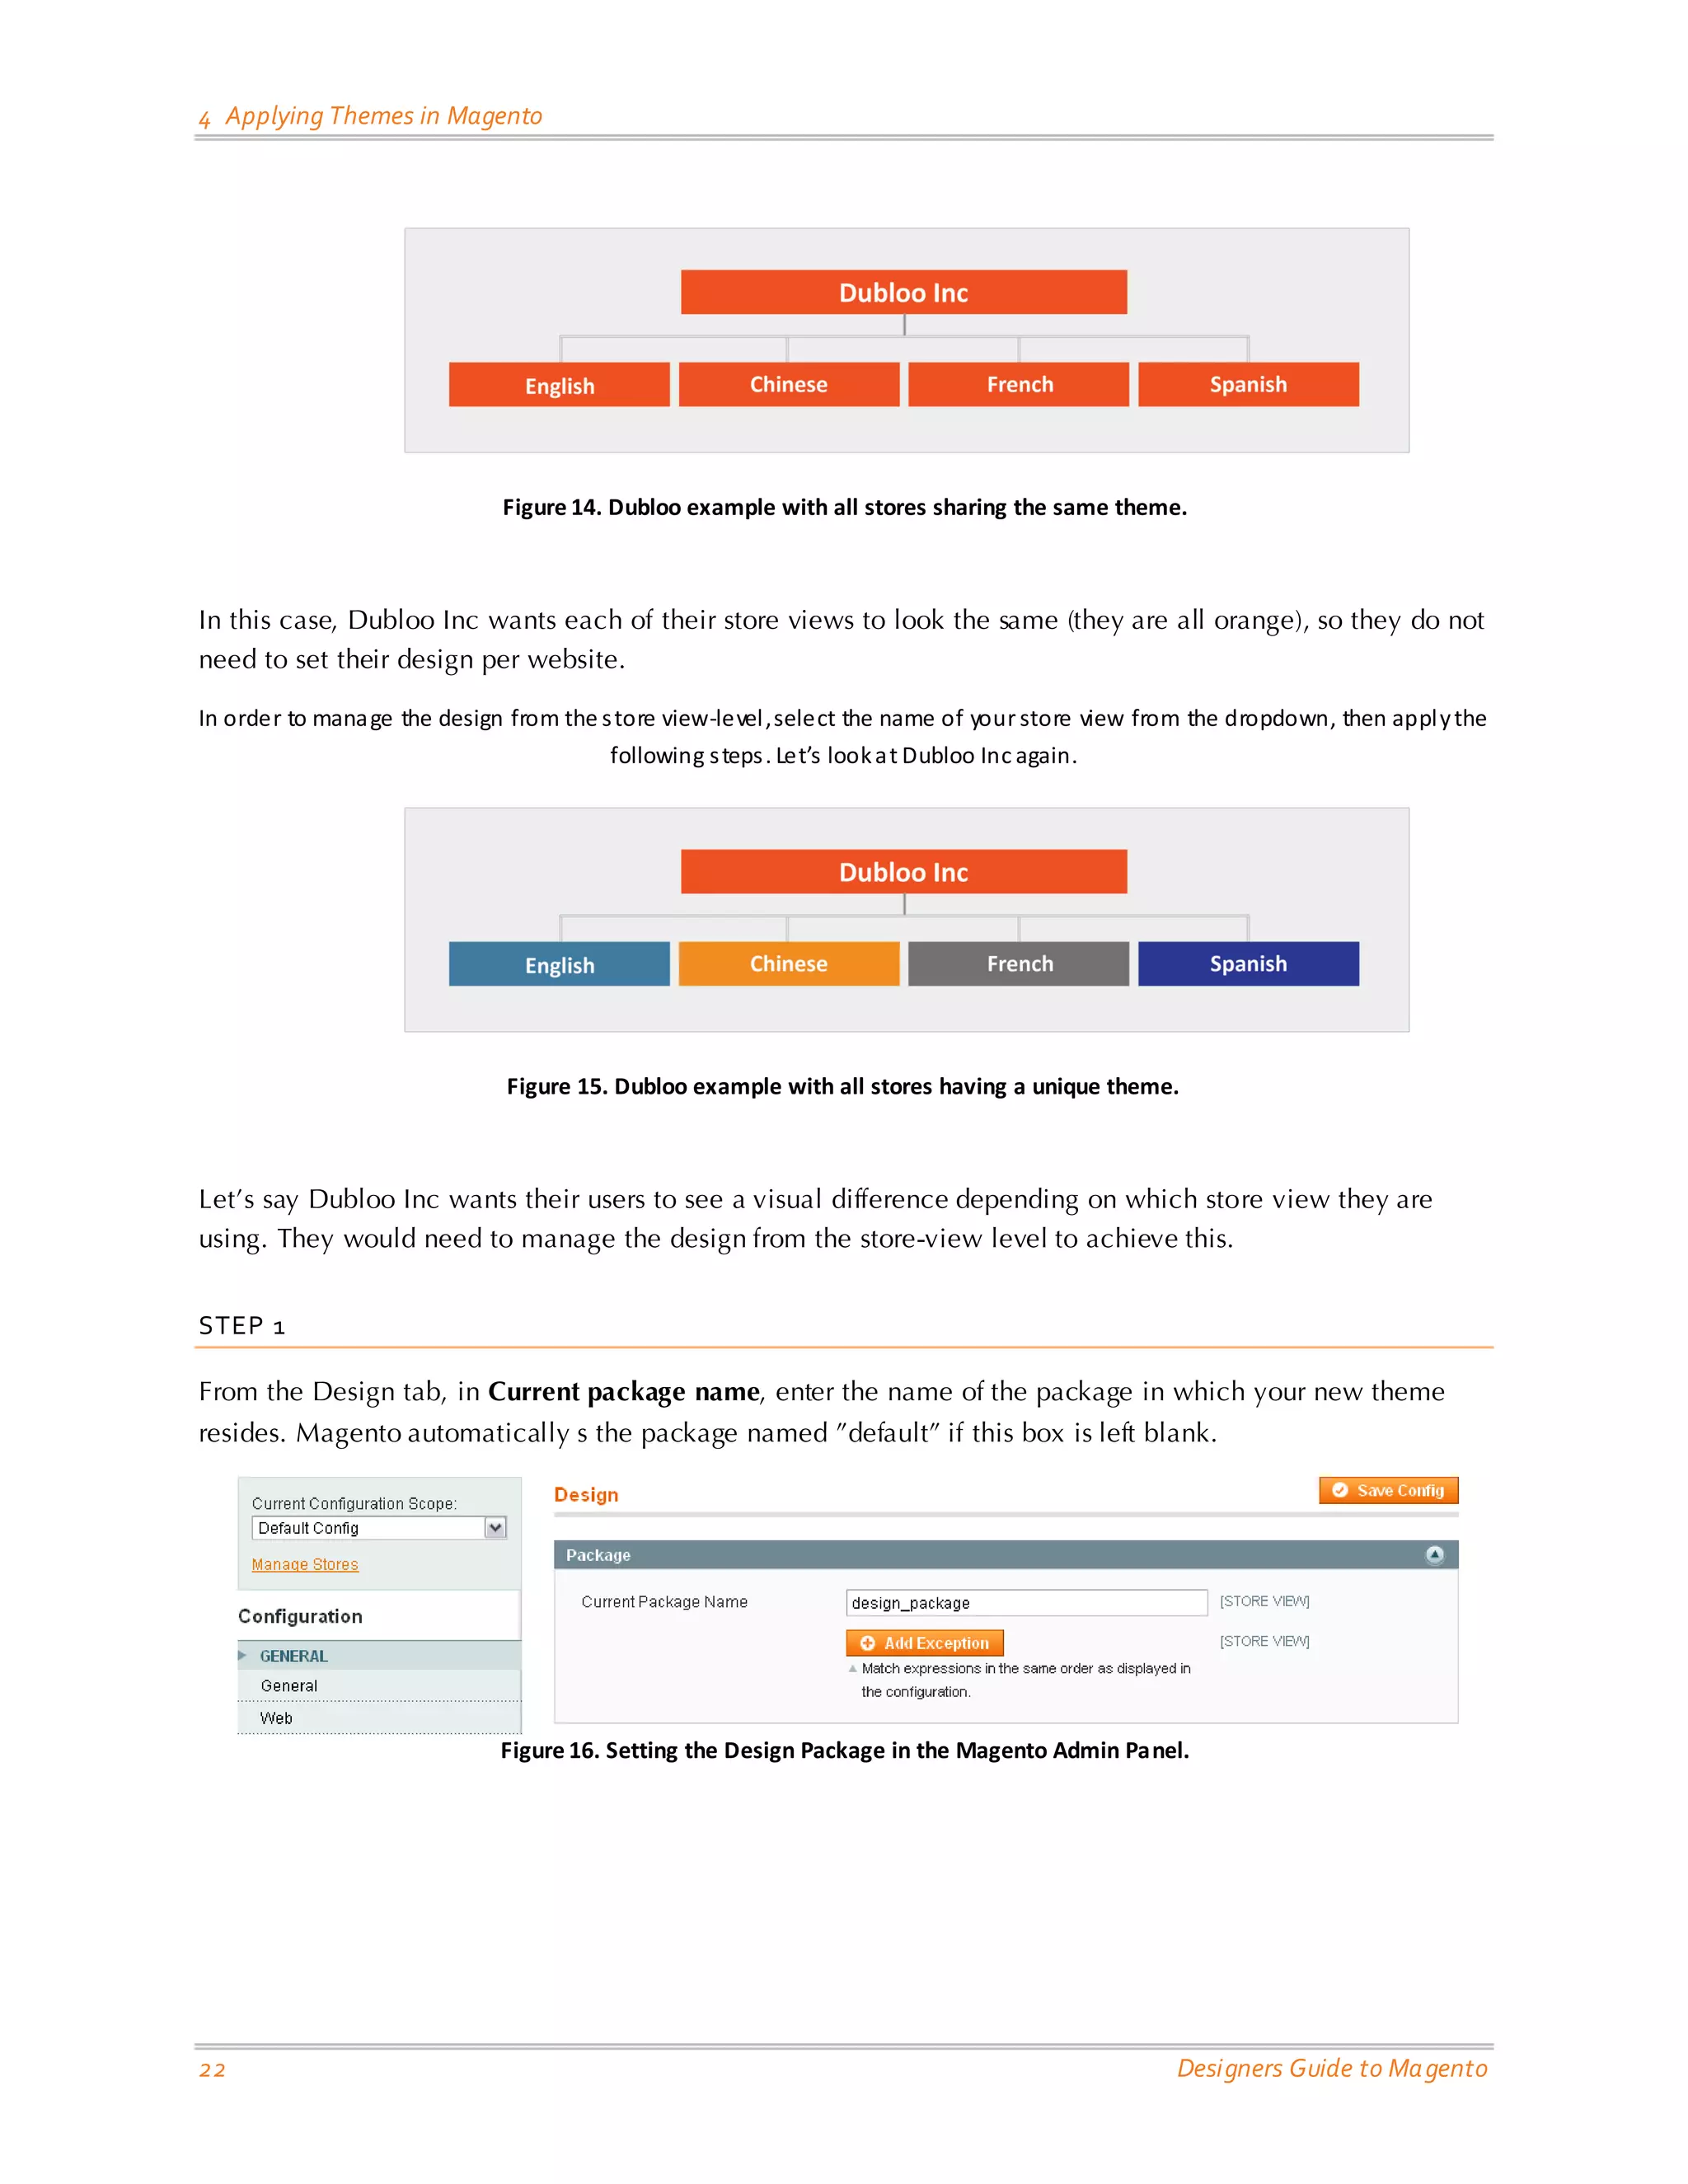
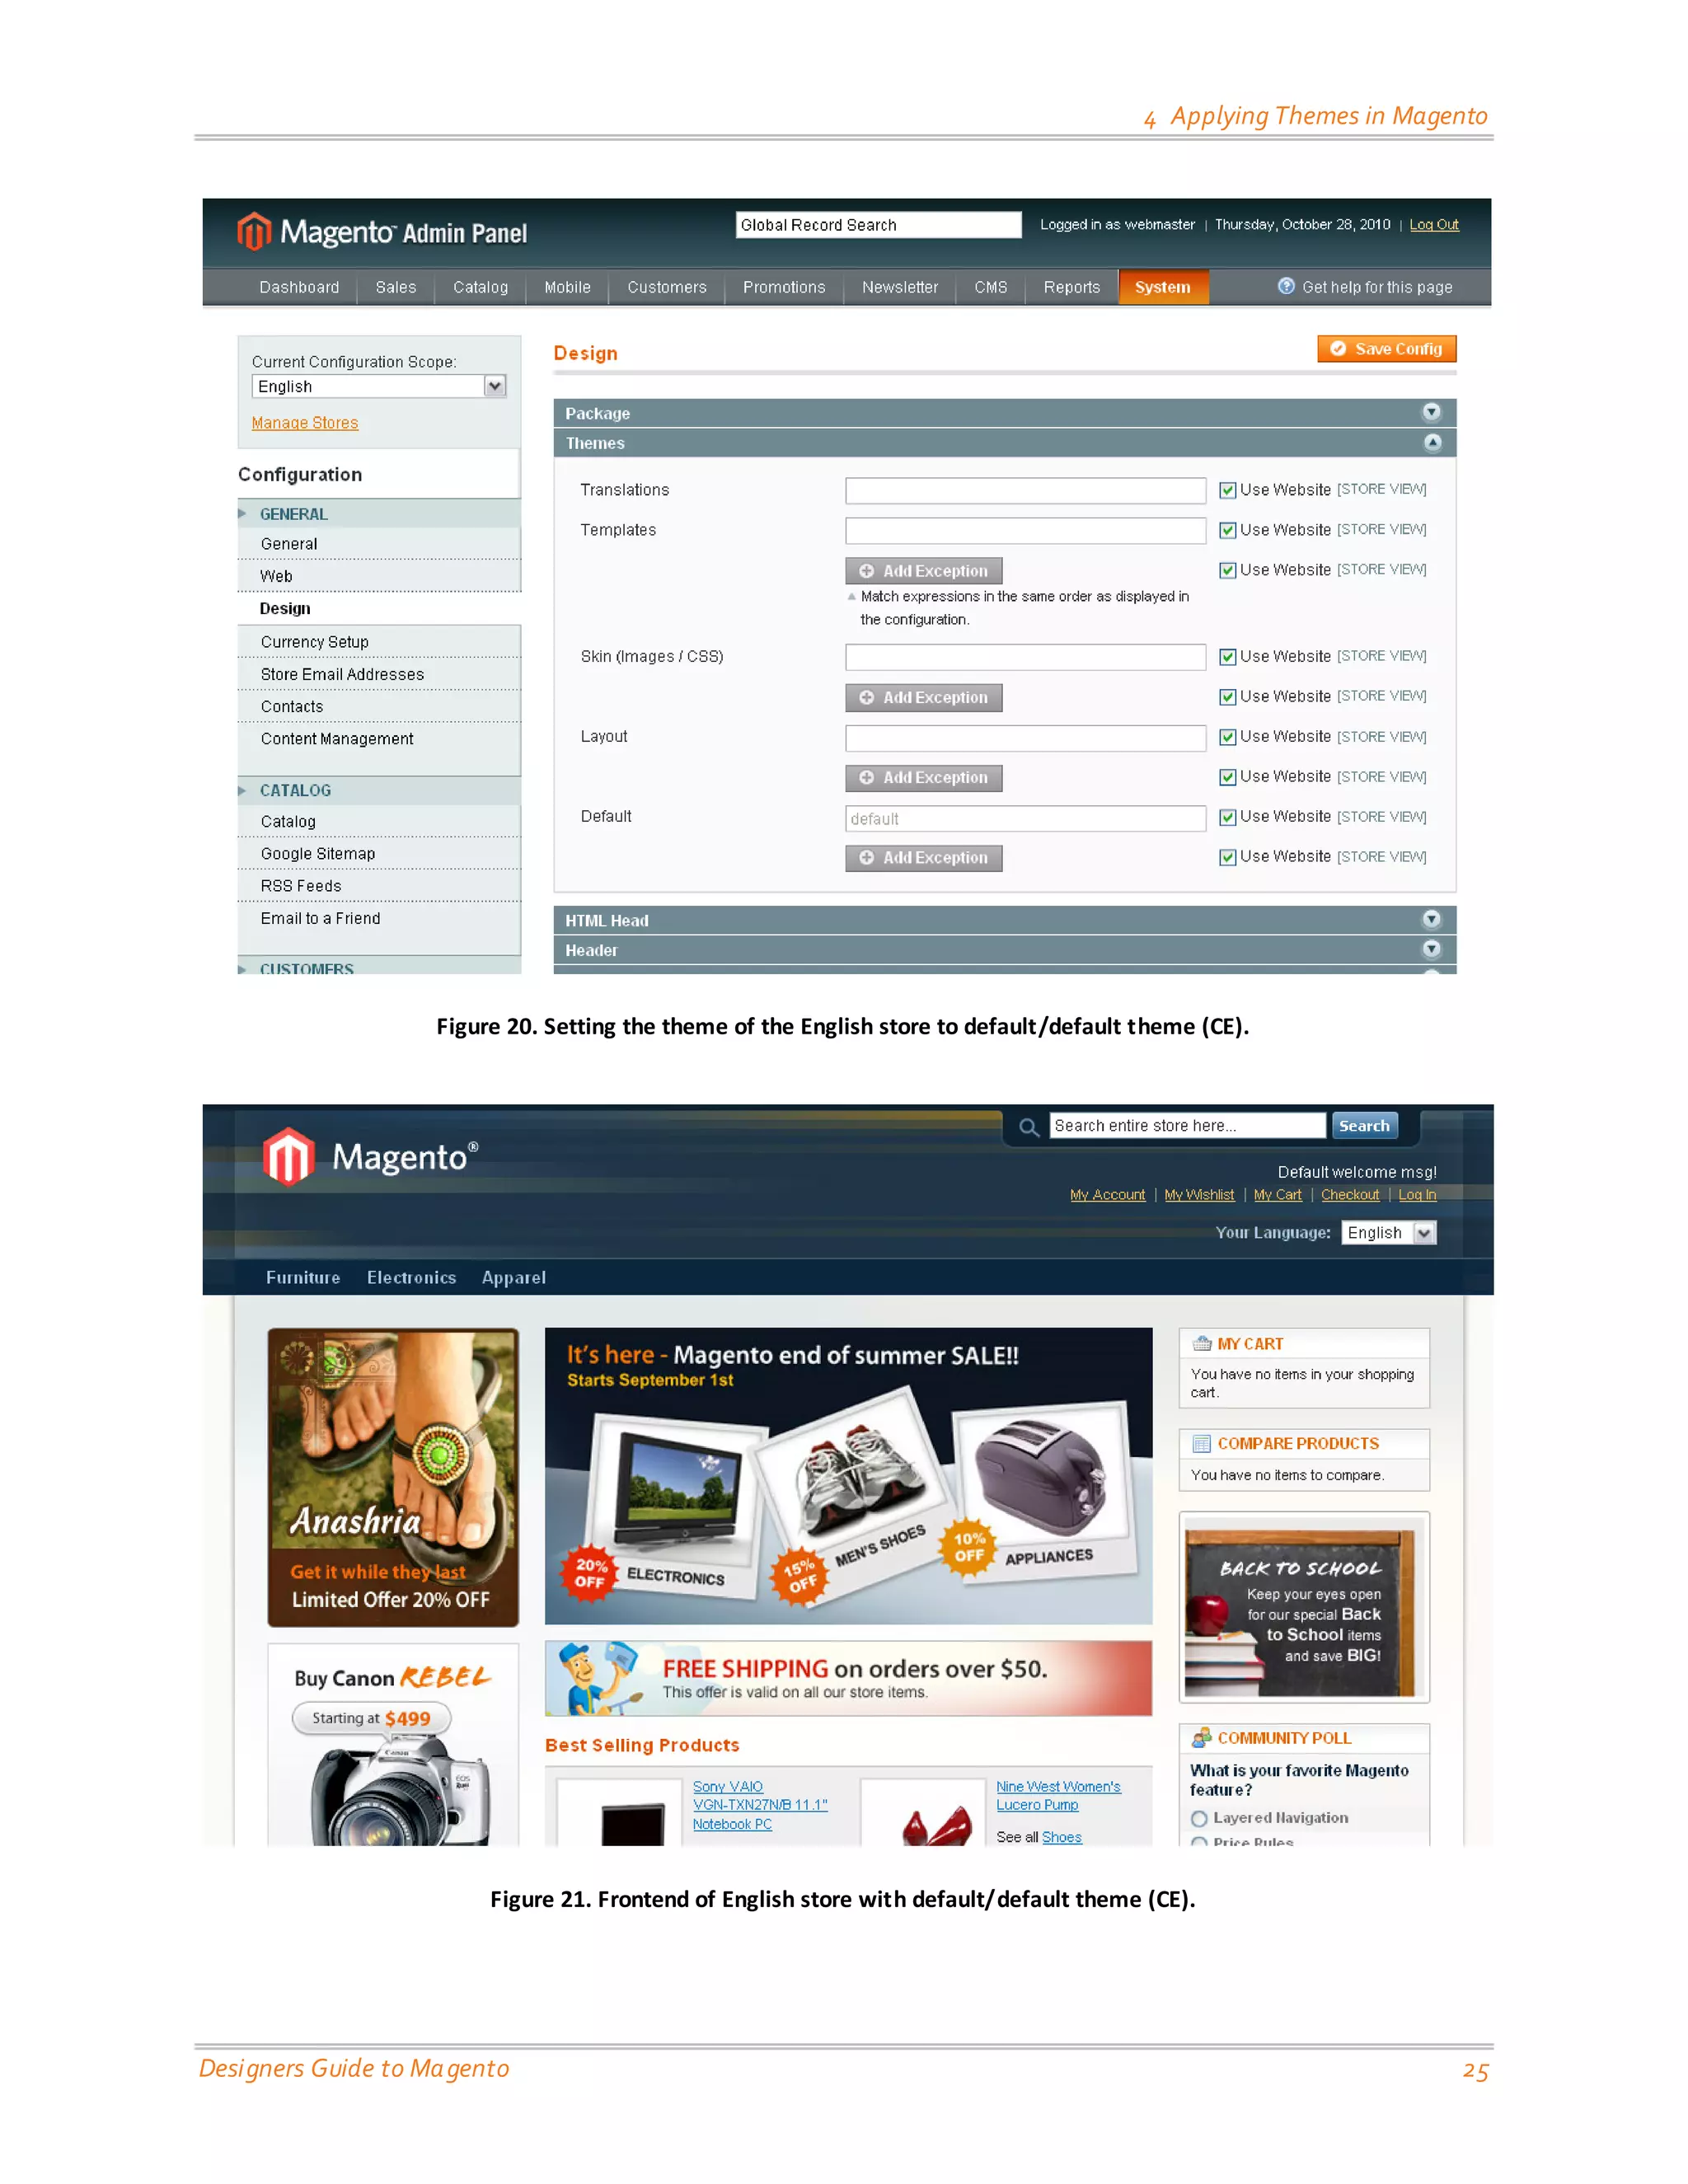
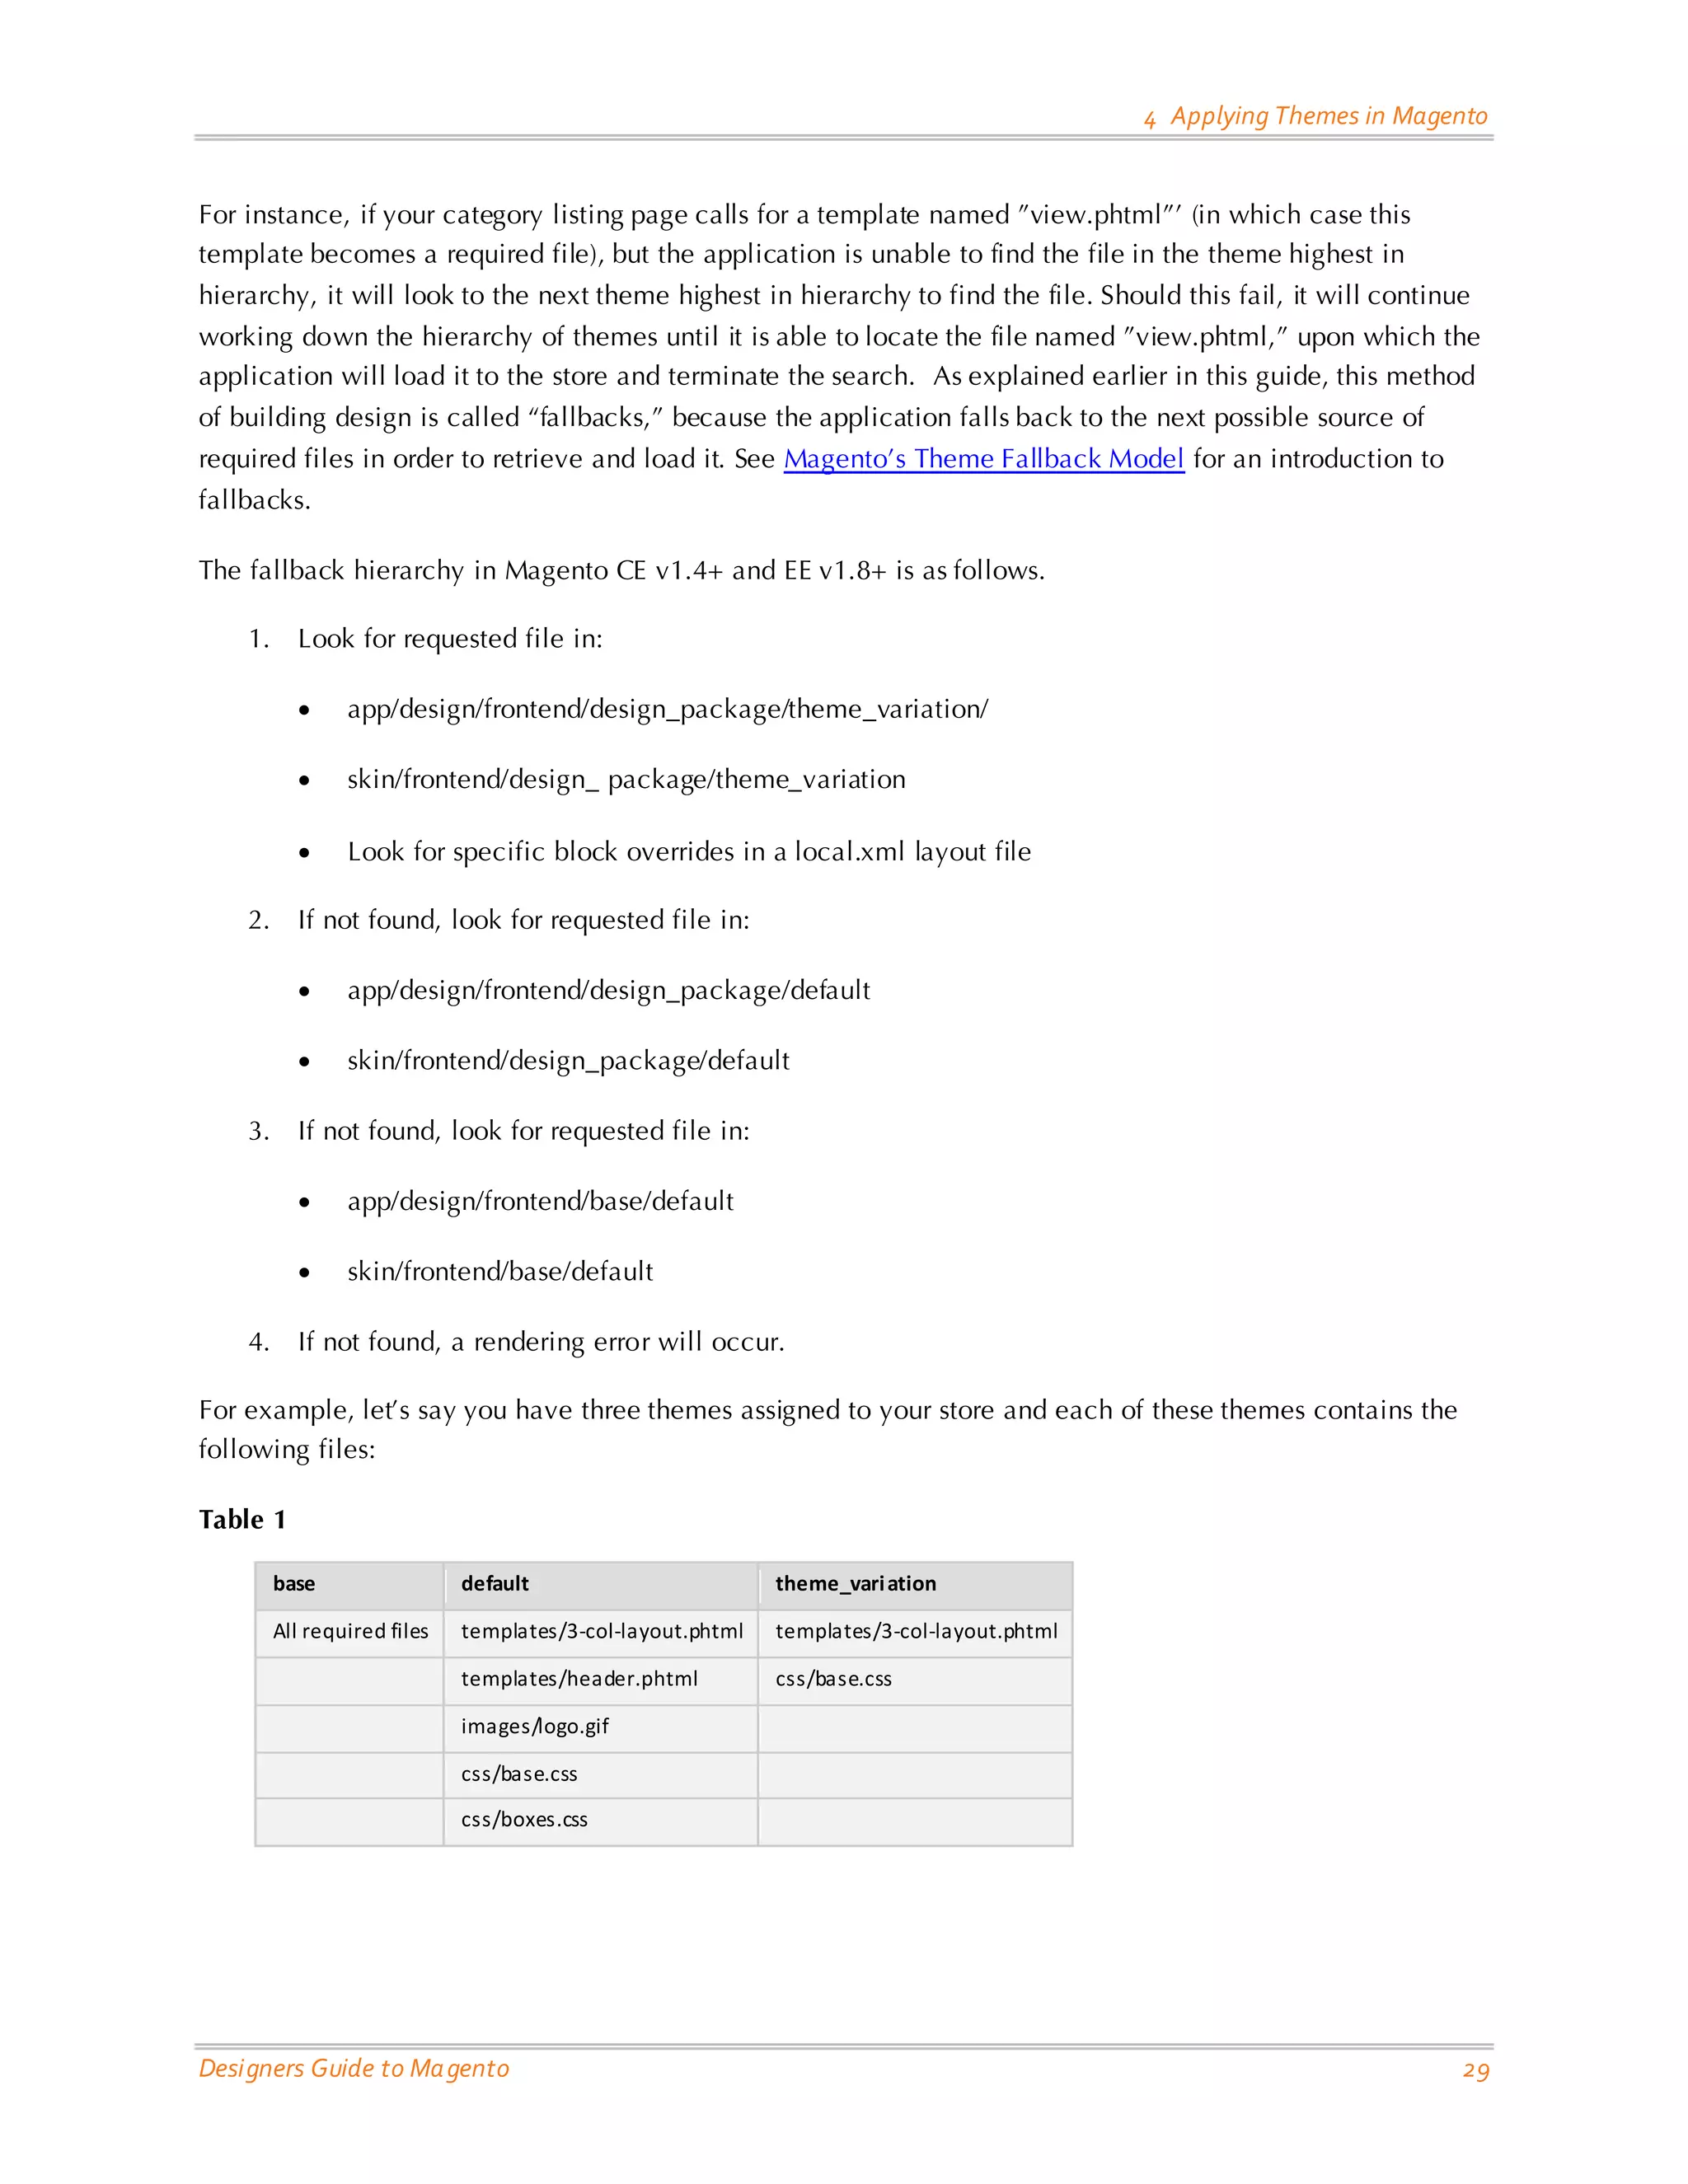
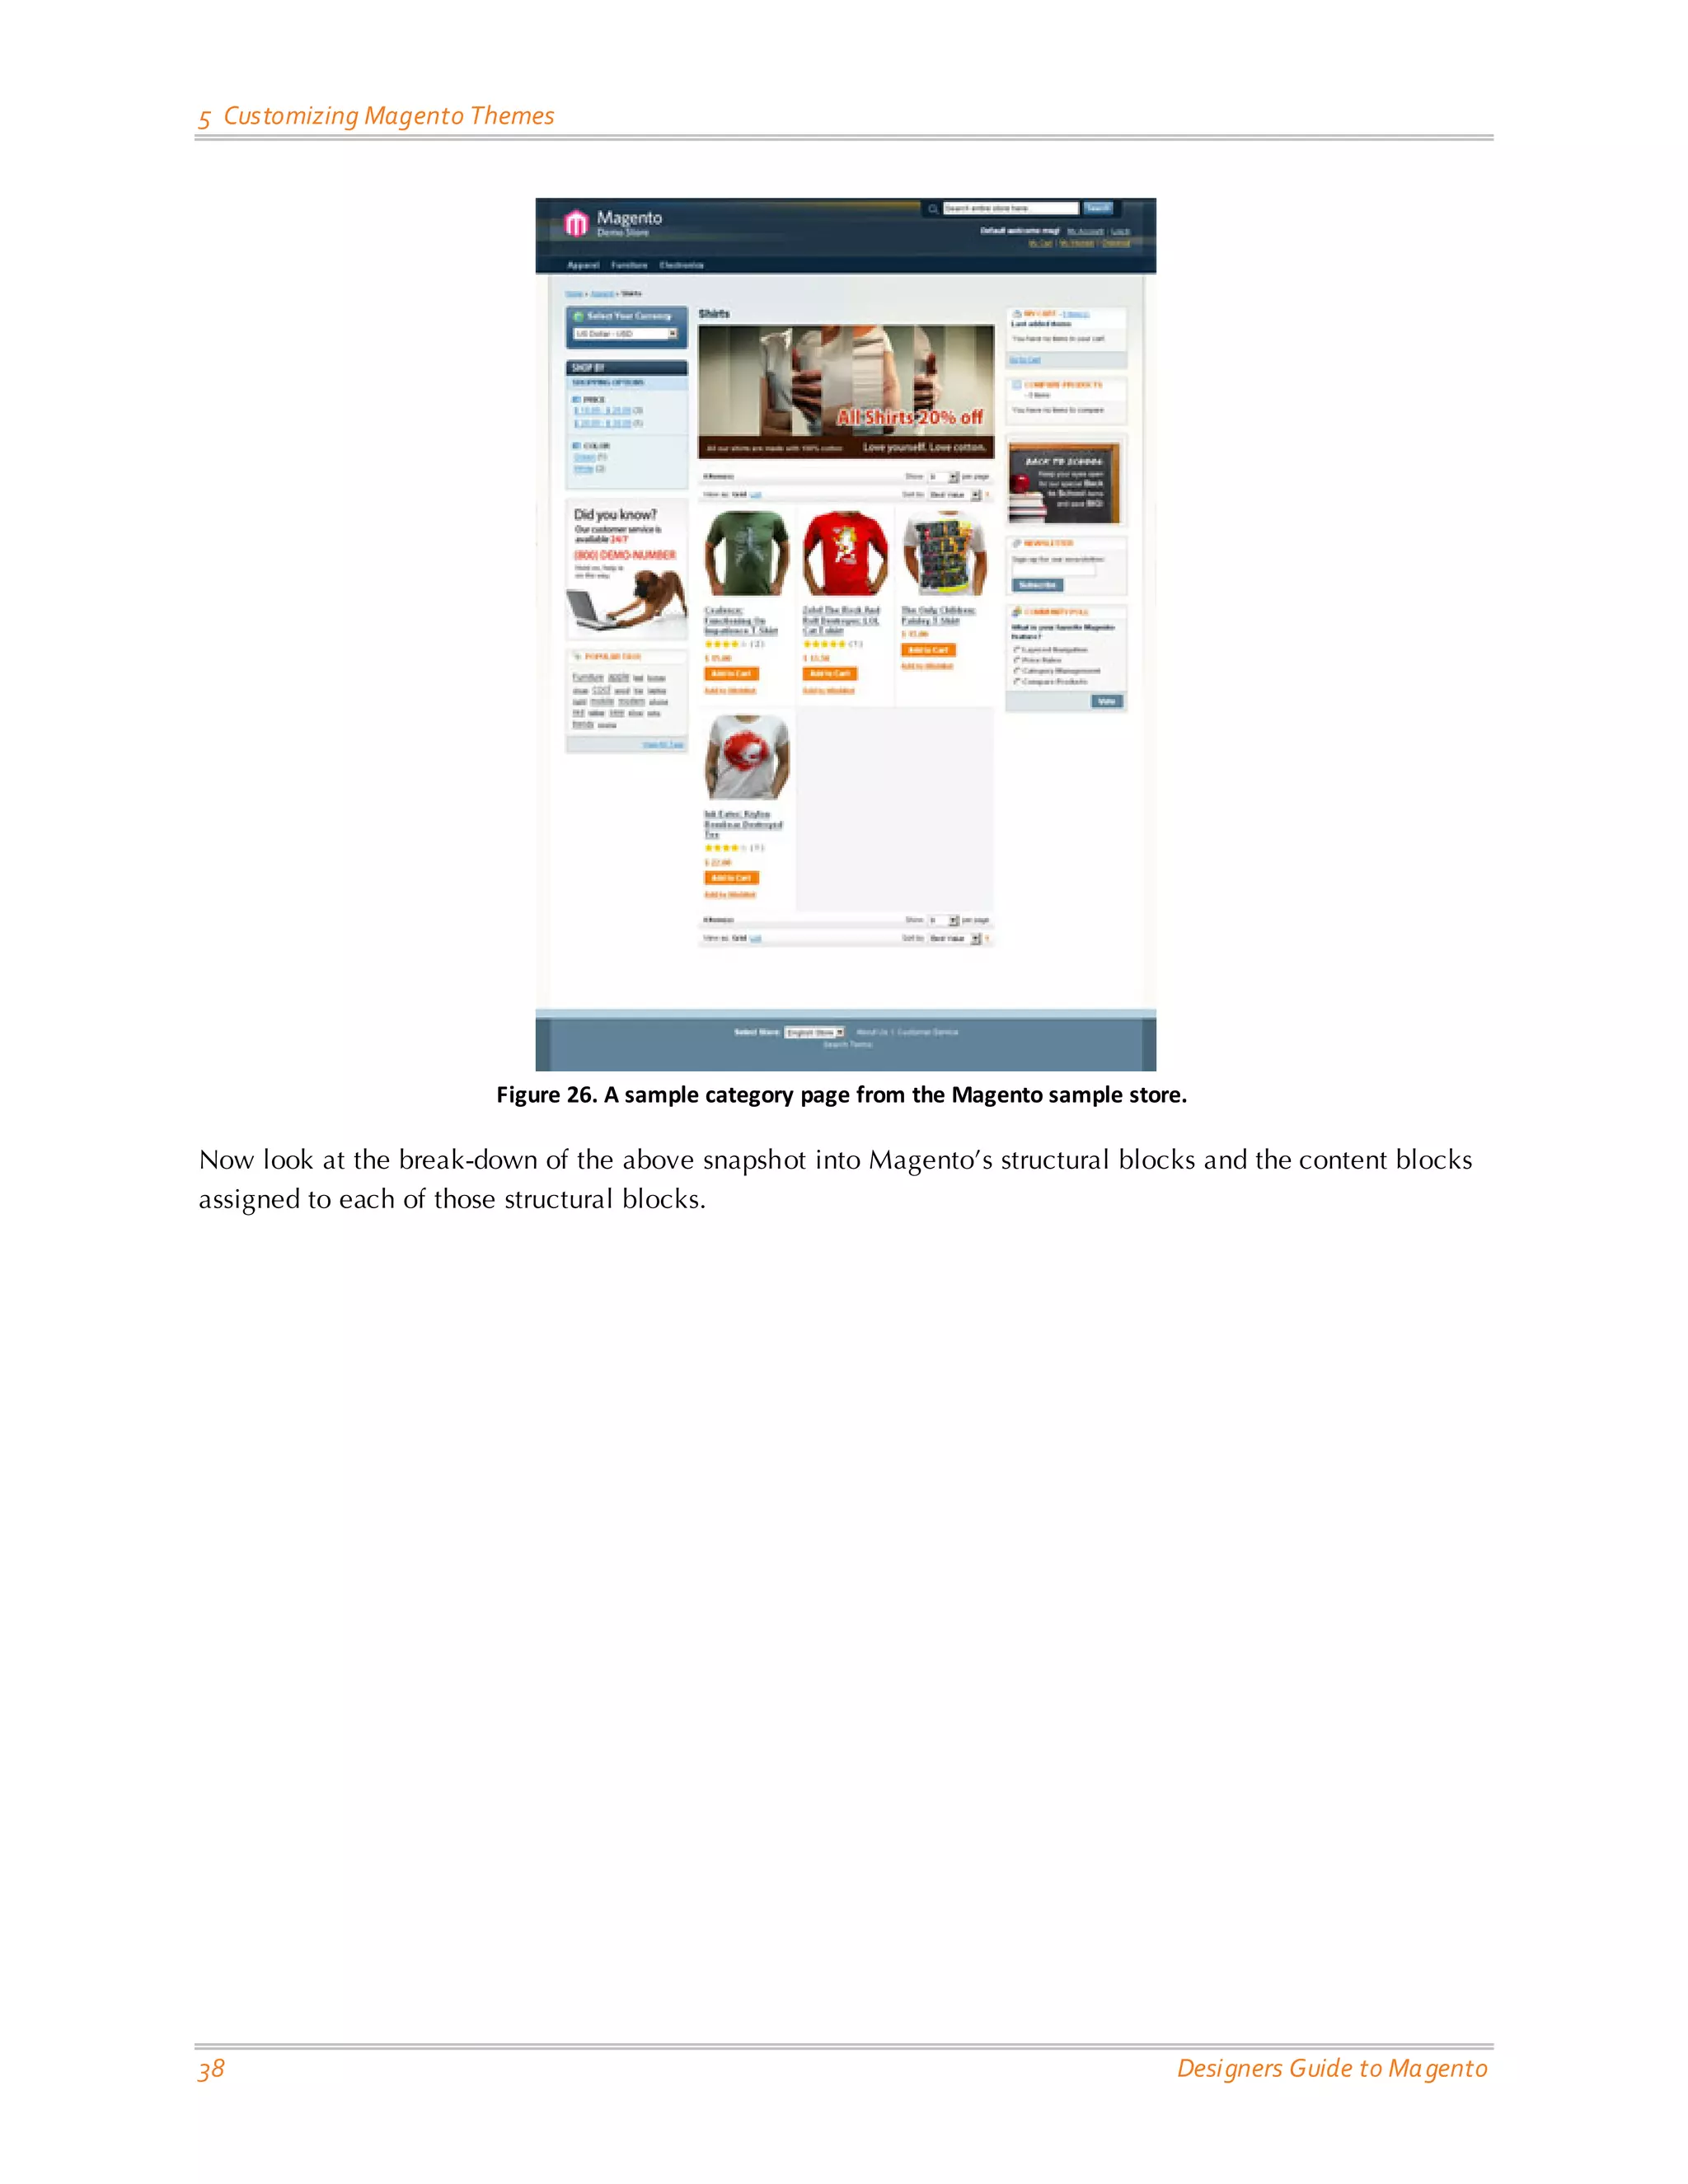
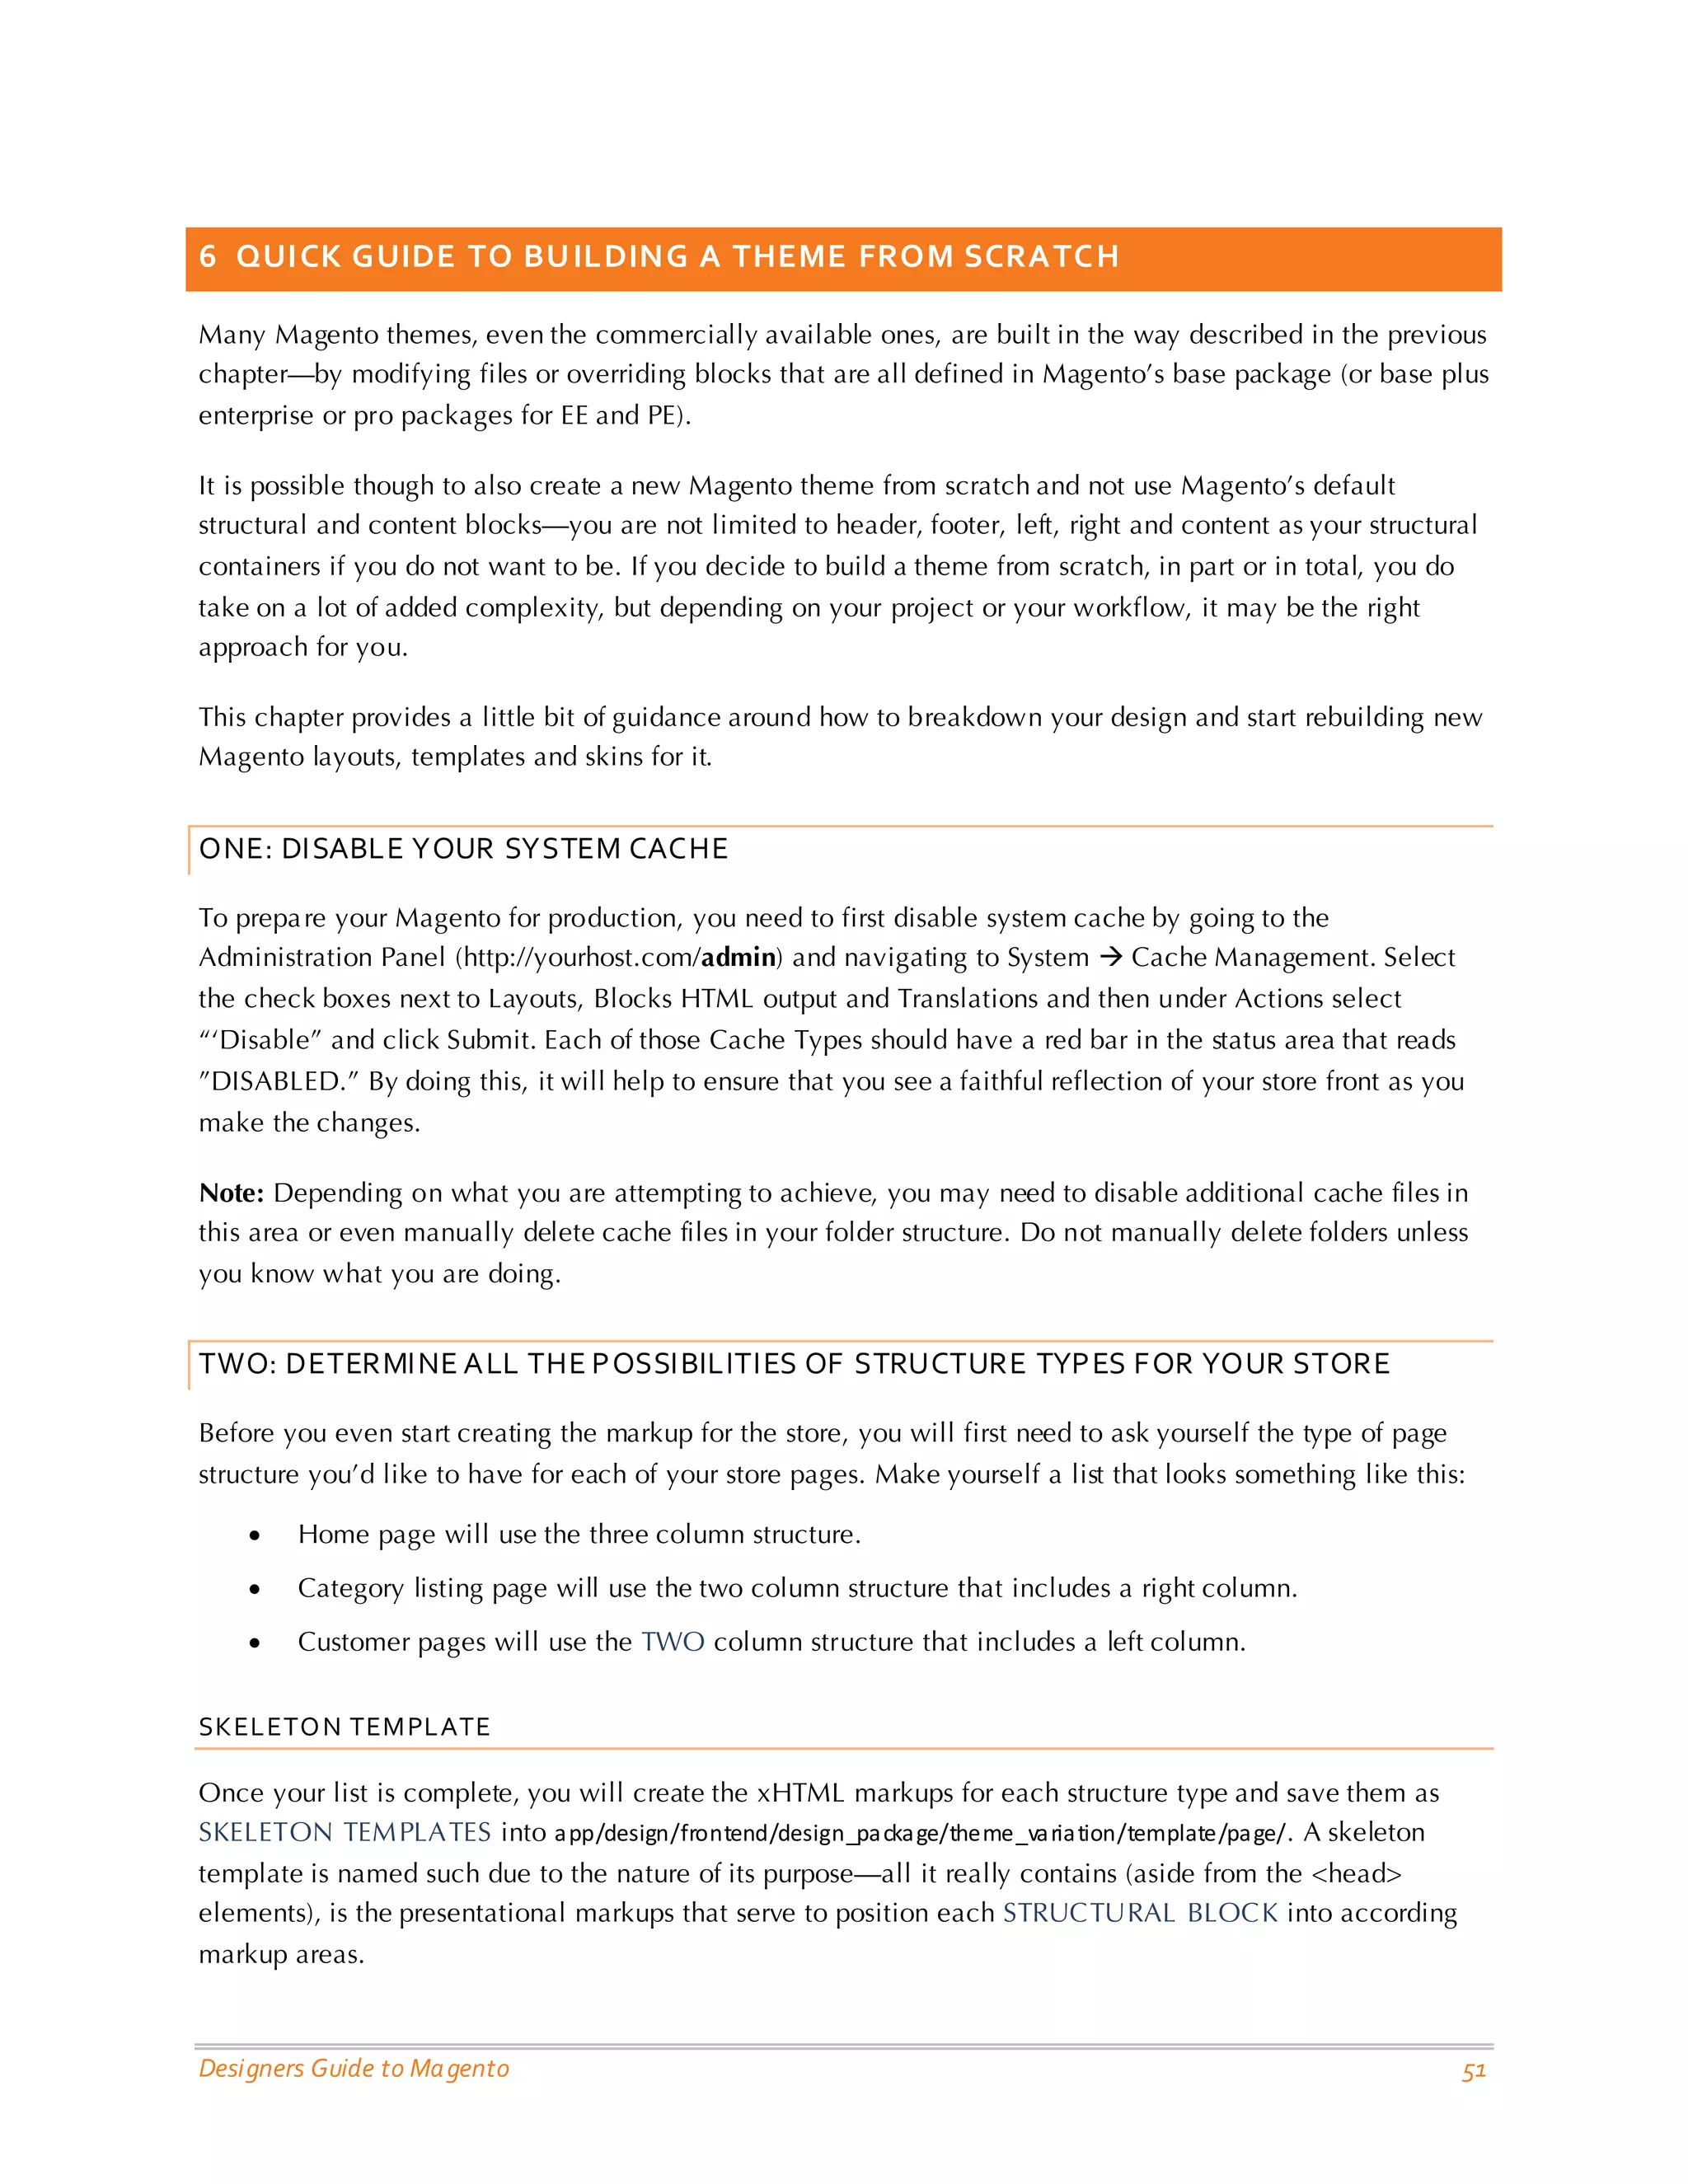
STEP 2
In the default field (in the Themes panel), enter the name of the new theme you would like to apply to your website, store or store view. If you leave this field blank, Magento will apply the “default” theme of the design package you set in step 1. Remember, according to Magento’s fallback scheme, if you specify a theme name, Magento will look for files first in the specified theme, then in the “default” theme for your design package and finally in “base/default”. Notice that you can also override the theme you have applied for specific file types such as layouts, templates, translations and skins. If you enter a different theme name in any of these fields, Magento will look for those file types first in the theme you have indicated there and then fallback to the “default” theme for this design package.
Figure 17. Setting the theme in the Magento Admin Panel.
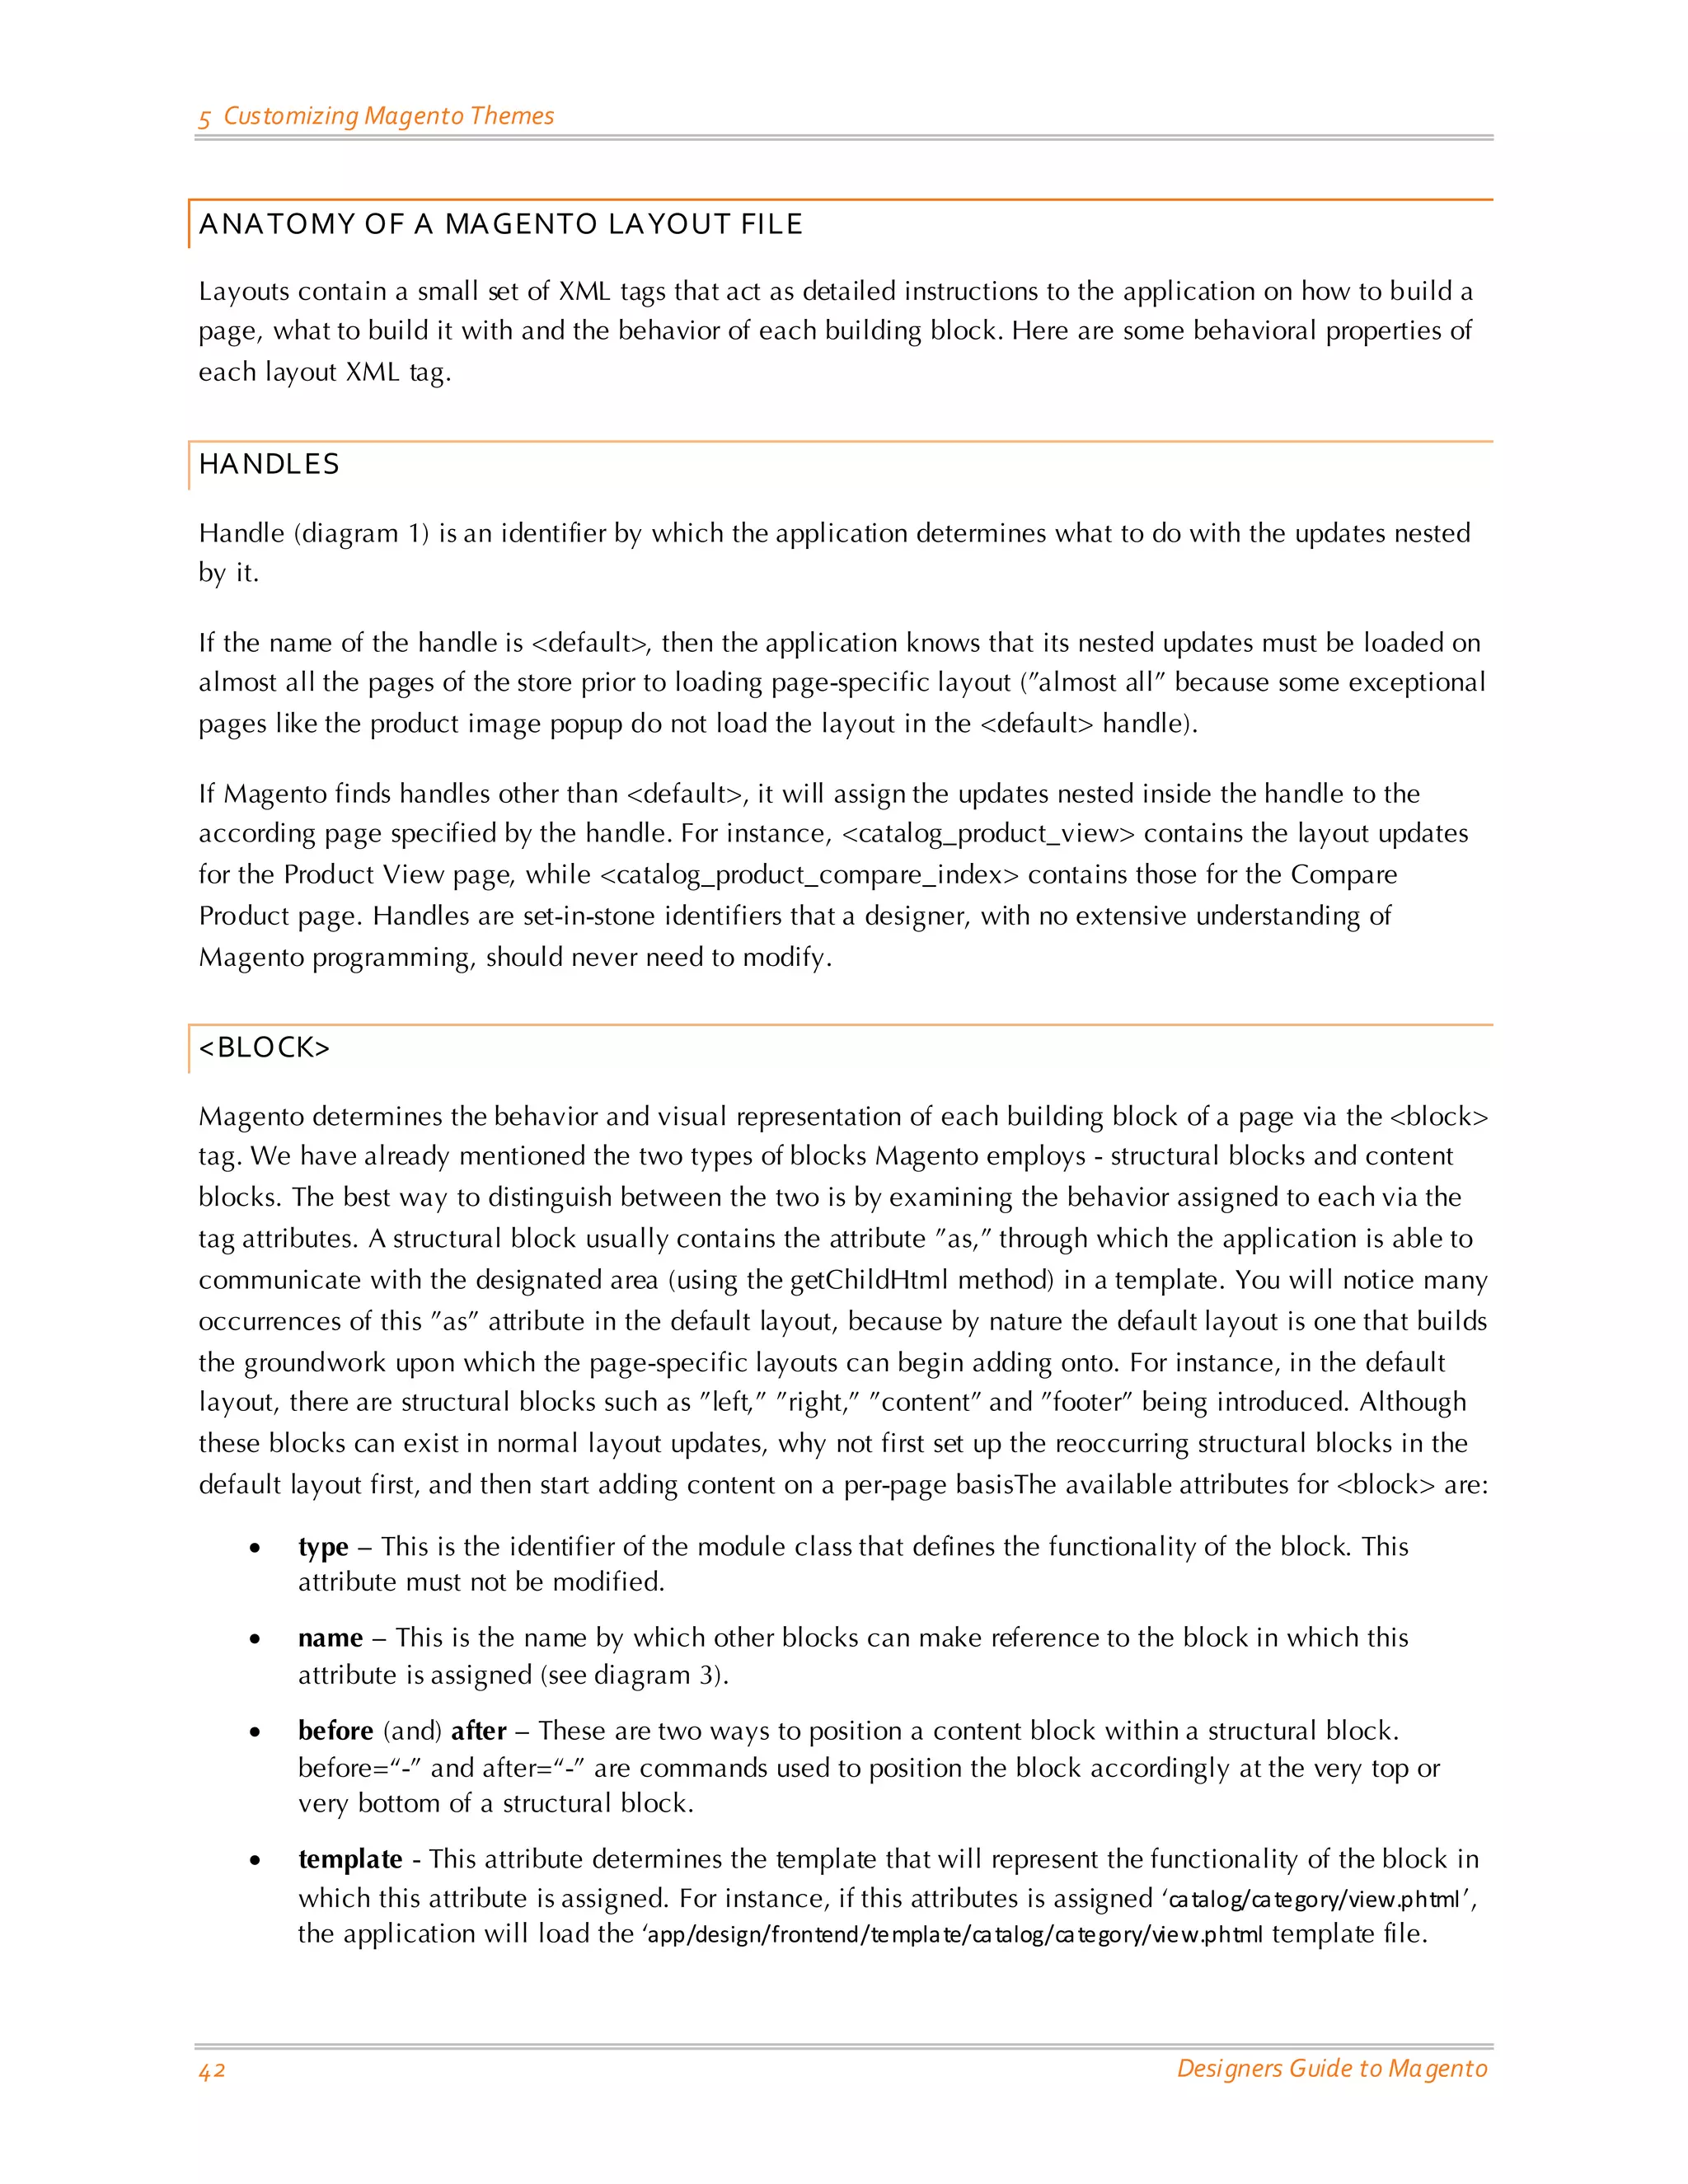
STEP 3
When you are done, click Save config and reload your store. Voila! You now see your new theme reflected in the frontend.
Now that we have covered how to create and manage themes, let’s move on to how Magento handles those themes.
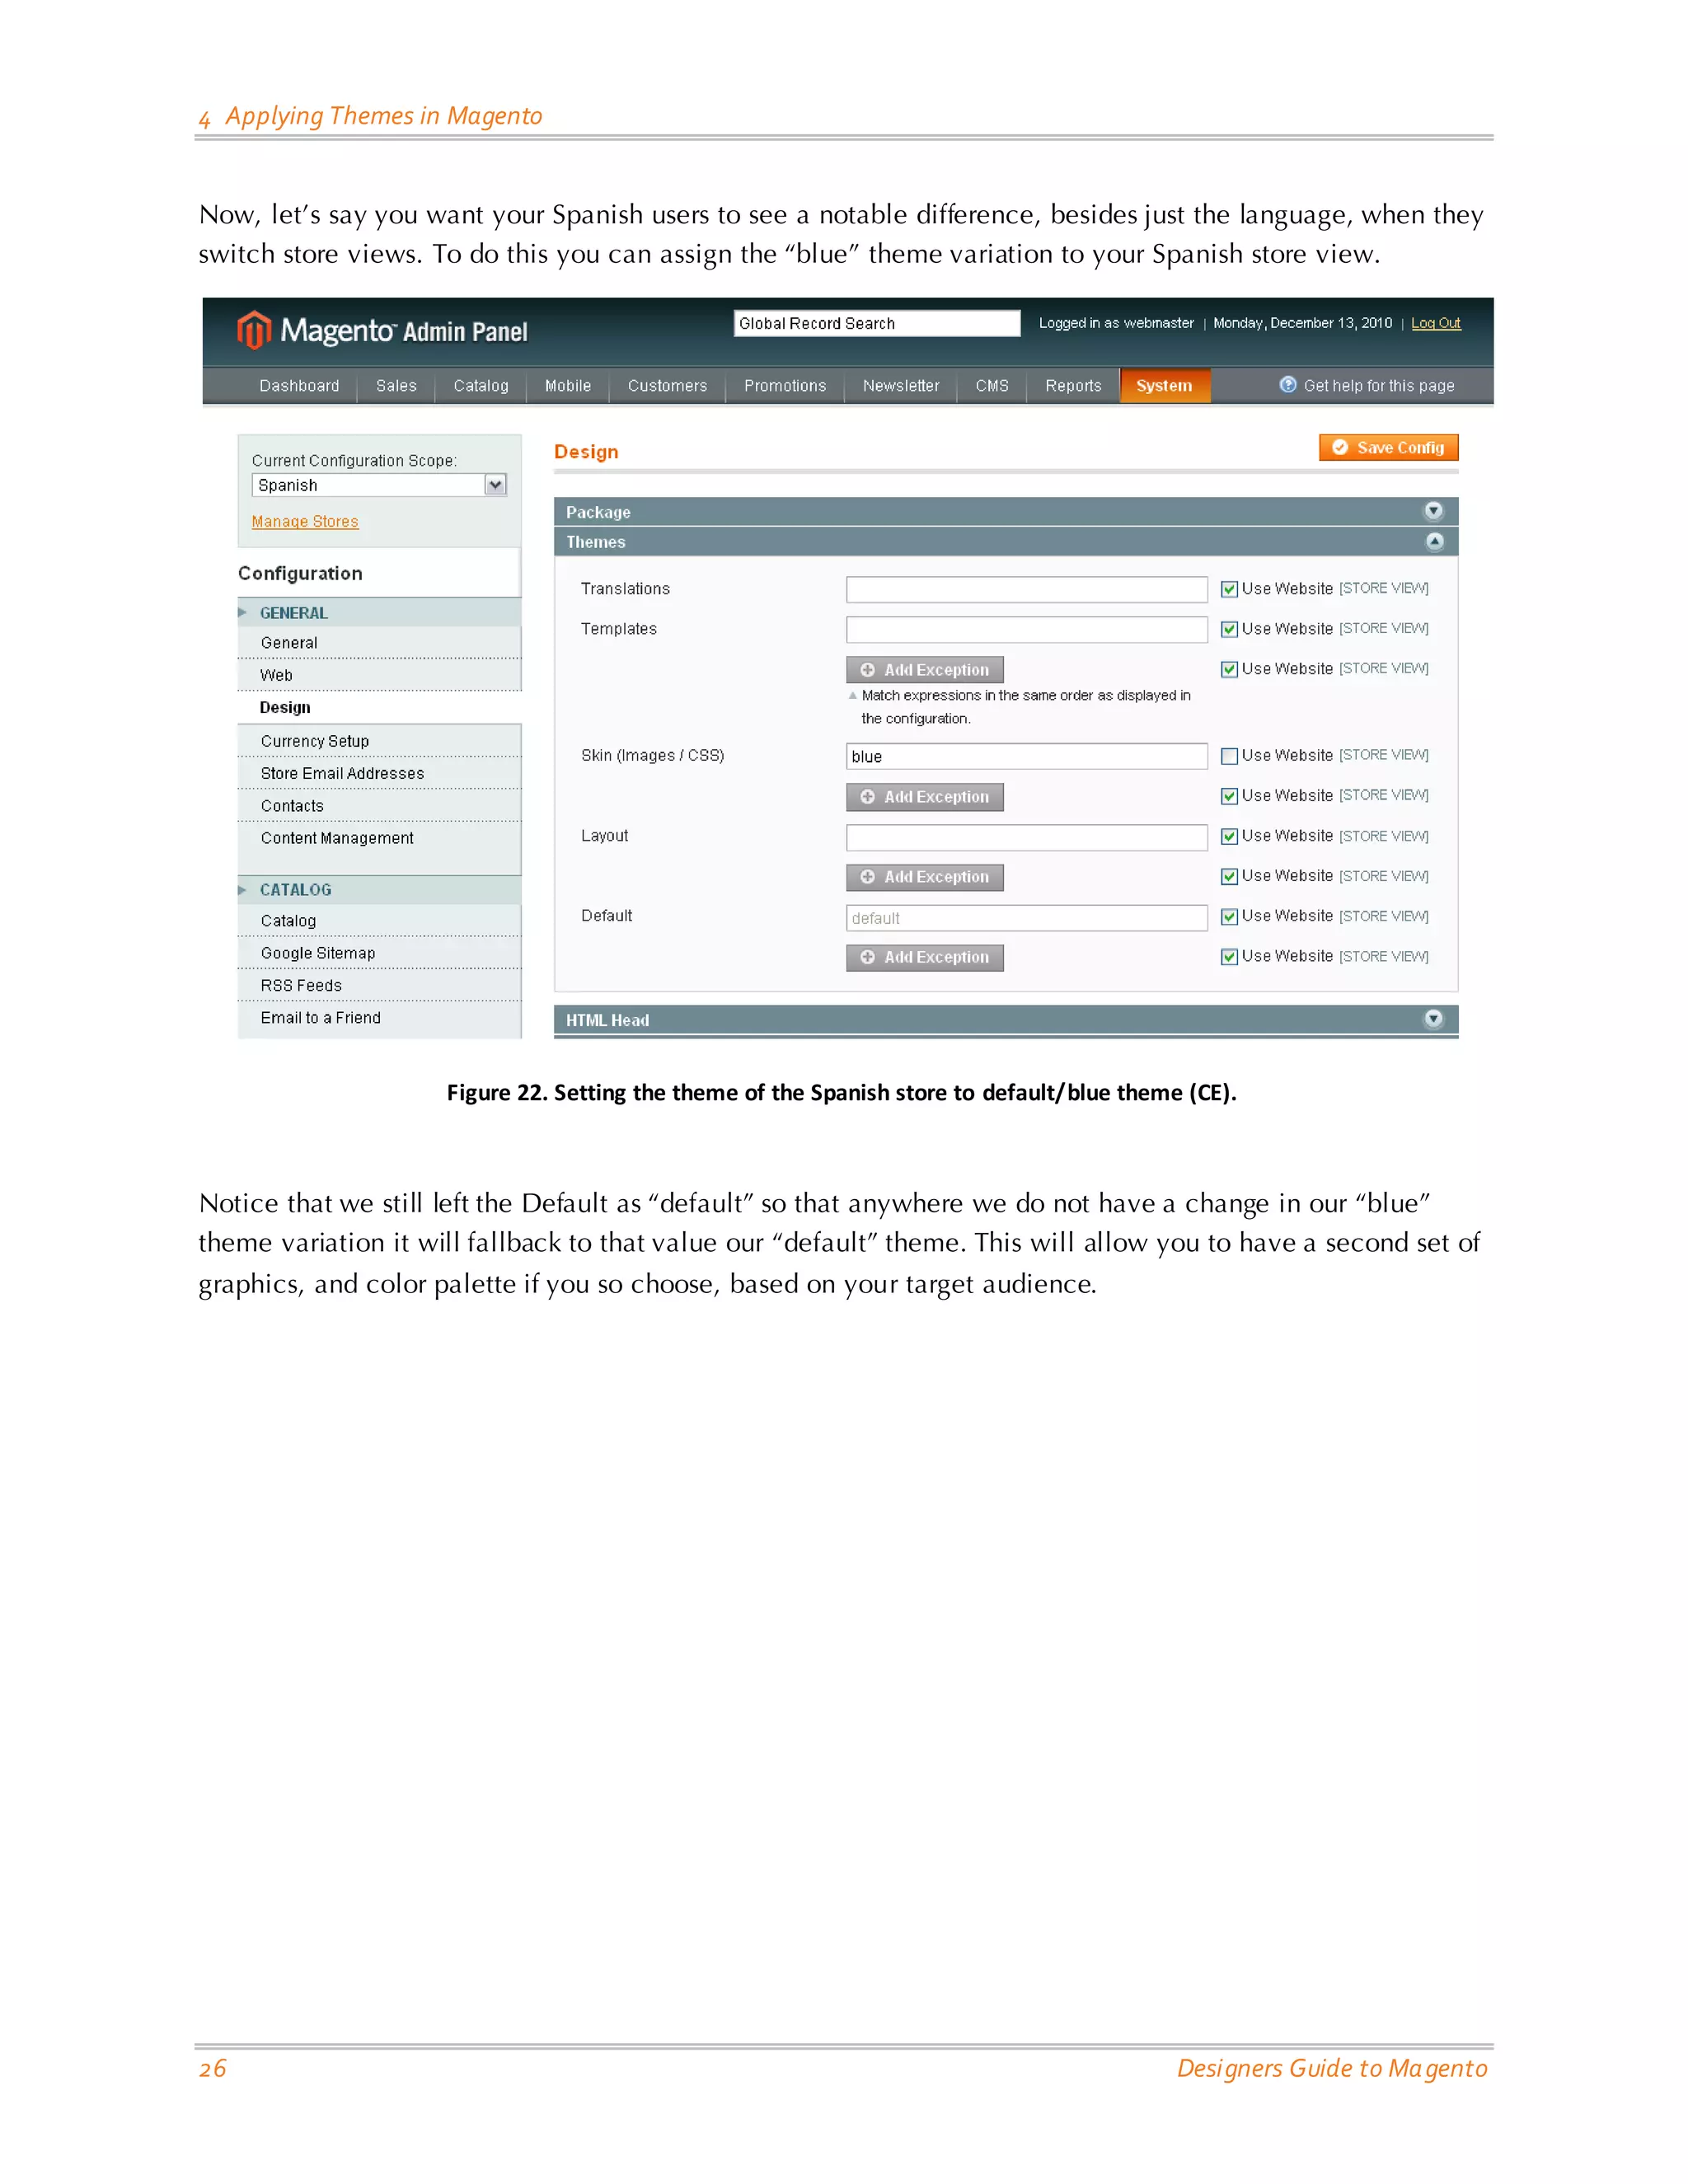
WALKTHROUGH 2: APPLYING MULTIPLE THEMES
Magento allows you the flexibility of using multiple themes even within the same layout and template. Let’s say you want to have the same template structure and layout across all store views but vary the actual graphics and color scheme. Magento makes this really simple.
Remember how our layout and template folders are located within app/design/frontend/[package]/[theme] and our actual style is located within skin/frontend/[package]/[theme]? The two do not have to be named the same!](https://image.slidesharecdn.com/magentodesignguide-141206084210-conversion-gate02/75/Magento-Design-Guide-27-2048.jpg)


This document provides an overview of theming in Magento and introduces important concepts and terminology for designers working with Magento themes. It discusses websites and stores, design packages and themes, blocks and layouts, and widgets. It explains Magento's directory structure for packages and themes and how to apply themes. The document also provides guidance on customizing themes using skin, layout, and template files and includes exercises for practice.


![Number_Guessing_Game_Dsbsbssbzboc[1].pptx](https://cdn.slidesharecdn.com/ss_thumbnails/numberguessinggamedoc1-251206215042-a076fc05-thumbnail.jpg?width=640&height=640&fit=bounds)


