SlideShare a Scribd company logo
1 of 15
Download to read offline
Macro Photography
Beyond Flowers and Butterflies
An introduction to the fascinating world of close-up and macro photography
Reinier Munguía
email: rmung@wildstockphotos.com
www.wildstockphotos.com
2 Introduction
This publication will help you get
started in the amazing world of
macro photography, its challenges
and the techniques I use to over-
come some of these challenges.
Although not a complete guide, it
provides you with the knowledge
required to take beautiful images.
You’ll learn useful techniques that I
have learned over the years, sav-
ing you time and frustration when
shooting small creatures.
Most people entering this fasci-
nating field of photography think
there’s only one way of doing
things, but in reality you can ac-
complish the same effect using
different techniques. Problem
solving in the field will depend on
many factors including the weather,
your equipment limitations and
your subject. That’s the reason why
there isn’t a single and specific so-
lution to most macro photography
questions. My best advice is to
familiarize yourself with your gear,
learn as much as possible about
your subject, even before you get
out the door. Research plays a big
role in successful photography.
Preparing yourself to what you
might encounter will increase your
chances of capturing that unique
image.
Obviously, equipment is a limit-
ing factor in how close you can get
and the quality of the image you
obtain. We’ll discuss some of the
most commonly used equipment,
their advantages and how to prop-
erly use them to get the best they
can provide. Basic photographic
techniques such as depth of field,
focusing and exposure will be
discussed in terms of their applica-
tions in macro photography. I have
also covered few things that we can
do to make our photography more
affordable by building simple gad-
gets that will improve our photog-
raphy with a minimal investment.
Finally, I’ll emphasize the im-
portance of learning about your
subject and the environment in
which it lives. How to approach
those skittish subjects and how to
deal with nature’s obstacles will
also be discussed. In order to be
a successful nature photographer,
you must first become a naturalist.
Only through direct observation
of the subject, one can learn about
the natural world and that leads to
better images. One final thought:
practice makes perfect, and all
good nature photographers are the
result of many years of experience.
Frustration is part of the equation,
and without it, we can’t learn.
INTRODUCTION
Eastern Tiger Swallowtail, Florida. Nikon D70, 105mm, 1/250 sec. at f8
Defining Macro 3
First, lets define macro photogra-
phy, as there are several interpreta-
tions, but only one correct. This
was caused in part to the marketing
hype of many manufacturers that
claim the macro capabilities of
their lenses, in which cases were
merely lenses that allowed for
closer focusing, but not real magni-
fication. While the term macro and
close-ups have been used inter-
changeably over the years, there’s a
difference that sets them apart. The
main difference is on the magni-
fication rate. Macro photography
falls in a category of the so called
close ups in which the subject is
magnified or enlarge to about 1X, a
term also expressed as 1:1 that rep-
resents the size of the subject over
the size of the image on film. The
typical example is the macro photo
of a coin. On 35mm photography,
we reach 1X when the image pro-
duced on film matches the actual
size of the coin. Twenty years back,
a lens with a maximum magnifica-
tion of .25X also expressed as 1:
4 was considered a macro lens.
Nowadays, a true macro lens is one
that allows you to achieve at least
a 1:1.
To further explain the concept
lets start by defining the term
magnification as the ratio between
the image on film and the actual
size of the subject. To give you an
example, an image of a ladybug-
about 1/4 inch at 1X, will render
an image of the bug of about 1/4
inch on the film. The following
table will help you understand how
magnification ratios work and the
two ways of expressing them as
ratios and magnification power.
For a subject that is 1 in. long.
For instance, an image captured
at 1:2 is called half life-size while
one captured at 1:1 is called life-
size. Take, for example, the nickel
coin below. If we shoot the coin at
1X or 1:1 ratio, the image produced
on the 35mm frame will be the
same size of the actual coin.
When looking for a macro lens,
you’ll find that those that can reach
a 1:1 magnification ratio without
any attachments are considered true
macros.
Once the image size on the film
exceeds the actual size of the
subject, then we’re talking about
high magnification macro photog-
raphy. This should not be confused
with microphotography that covers
magnifications of 100X and more.
For most nature photographers, the
magnification ratios and the cal-
culations involved are irrelevant.
They’re happy with what they see
through the viewfinder and pay
no attention to the actual magni-
fication, but for a photographer
involved in research of insects or
other small creatures knowing it
can be a plus.
On this book, we’ll cover not
only how to shoot real macro imag-
es, but also how to get good close-
up shots. As I mentioned before,
most images considered macro
aren’t real macro shots, but merely
close-ups. Most nature photog-
raphers are more interested on
close-ups than true macro images,
due to several causes including the
difficulty of working at such close
range with subjects in the wild, the
weather and the light conditions
that dictate your shutter speed.
The closer you get to the subject,
the more light you’ll be blocking
from it, plus you run the risk of the
subject fleeing the scene. Extreme
macro shots require additional
equipment that can be cumbersome
for field work or too heavy to carry
for prolonged walks.
Nevertheless, there are situations
in which you would love to get re-
ally close to tiny subjects, in which
case you can use alternative meth-
ods to achieve the extra magnifica-
tion. Some of these methods I will
discuss in more details later in this
book.
DEFINING MACRO
Actual Size
on Film
Magnification Ratio
1/8 in. 0.125X 1:8
1/4 in. 0.25X 1:4
1/2 in. 0.50X 1:2
3/4 in. 0.75X 1:1.3
1 in. 1X 1:1
2 in. 2X 2:1
4 Equipment
EQUIPMENT
The basic and most recommend-
ed equipment for macro photogra-
phy is the 35mm SLR (Single Lens
Reflex) camera with TTL capabili-
ties. With an SLR system, you see
through the viewfinder exactly
what will be captured by your
camera when you press the shutter
release. TTL stands for (Through
The Lens) metering, a system in
which the amount of light delivered
by a flash or ambient light can be
metered as the light passes through
the lens. This system ensures bet-
ter exposures without the guessing
work. Before TTL systems hit the
market, photographers had to use
special exposure calculators to get
the right exposure for the subject
and to compensate for the magni-
fication being used. Digital SLR
(DSLR) offers the same advantages
and, in some cases, larger magni-
fication due to the cropping fac-
tor produced by the fact that their
CCDs are smaller than the 35mm
frame. Besides, they offer a hand-
ful of tools for the digital photog-
rapher, including instant previews,
histograms and highlight warn-
ings. Most SLRs provide you with
the flexibility of interchangeable
lenses, and an array of attachments
for macro photography. Even to-
day’s compact digital cameras can
produce impressive images, and
the live previews through the LCD
can help on framing the subject and
overcome the parallax error found
in non-slrs cameras.
Almost any SLR or DSLR
system will do just fine for close-
up work as long as you have the
proper lenses and/or attachments.
The brand of the camera is irrel-
evant, but its ruggedness, reliability
and available accessories are very
important points when selecting a
system. The lens is probably the
most important factor to consider.
Buying good glass means sharper
images, less distortion and better
color rendition. For most of us
it’s better to save the money on
the camera and invest it in a better
lens. One other thing to consider
is the weight of your setup. If you
do more than just closeups, you’ll
probably carry few lenses in your
backpack to cover all the focal
lengths, then you know how heavy
that can be. Since the quality of
an image depends on the glass, I
prefer to have a lighter camera and
save the weight for the quality lens.
Most of my close-up photogra-
phy was created while scouting a
site for bird or wildlife photogra-
phy. Being prepared can save you
a lot of aggravation and frustration.
Many times I’ve walked through a
nature preserve full of macro and
close-up opportunities to suddenly
realize that I have left my heavy
macro lens at home. But a knowl-
edgeable photographer can actually
solve this problem without having
to come back later. If you plan to
come back later, chances are your
subject will not longer be there.
Among the things you want to
have on your camera is the abil-
ity of shooting manual mode or
at least, some way to override a
programmed mode such as aper-
ture or shutter priority. Being able
to control the aperture settings
will help you control the depth of
field. Meanwhile, having control
of the shutter speed ensures proper
exposures and balanced exposures
between your subject illuminated
by flash and the ambient light over
the background. Most macro and
close up work requires the use of
artificial light to compensate for the
low light levels around the sub-
ject and to avoid blur due to slow
shutter speeds. A flash unit is an
essential tool that should be care-
fully selected to ensure total TTL
capabilities. Let’s discuss in detail
the basic gear to get you started.
Camera Body
Any SLR or DSLR body will
work as long as macro lenses or
attachments are provided for the
purpose of close focusing on the
subject. Things to consider when
buying a camera system and espe-
cially the body include:
-Interchangeable lens capability.
-Manual exposure mode.
-Exposure compensation.
-Depth of field preview.
-Flash synch of at least 1/250 sec.
-Ergonomic design.
-Mirror-lockup.
-Light weight.
-Full range of accessories.
Lenses
I recommend using lenses that
without any attachment or exten-
sion tubes can achieve at least a
1:2 magnification ratio. The
ultimate lens for macro work is
the true macro lens that gives you
a 1:1 ratio without any attach-
ment. Three basic focal lengths
are available in the market: 50mm,
90mm and 105mm. Each one
has a particular advantage over
the others, even when they of-
fer the same maximum aperture
of f2.8. The main difference they
all have is the minimum focusing
distance at which they achieve the
1:1 magnification. The 50mm has
the shortest focusing distance with
Equipment 5
only 7.4 in., followed by the 90mm at 11.40 in. and
finally the 105mm at 12.3 in. This distance is impor-
tant especially when working with skittish subjects.
Having to focus down to barely 7.4 inches from a
jumpy grasshopper will prove to be an impossible task
using the 50mm lens. The 105mm is the best choice
to tackle this job as it offers you a better working dis-
tance. Most true macro lenses are heavy due to their
construction and numerous elements incorporated into
the barrel. You can achieve magnification ratios of 1:
1 even without owning one of these lenses by using
extension tubes.
Extension Tubes
Extension tubes are similar to a teleconverter with-
out the glass elements. They create magnification
by separating the prime lens from the focal plane.
They’re usually sold as a set of three different lengths:
12mm, 20mm and 36mm. They can be used individu-
ally or combined, and produce similar quality as that
of a macro lens, as long as the prime lens is of good
quality glass. Nowadays, these extension tubes come
equipped with electronic contacts that allow you to
correctly meter the exposure. In the past, this wasn’t
possible, and the macro photographer relied on calcu-
lations to get the exposure right. Combined with the
TTL capability for flash photography, extension tubes
can be an affordable way to get into quality macro
photography, with prices ranging from $100.00 US to
$200.00 US for a set of three. We’ll discuss them in
more details later in this book.
Supplementary lenses
These are the so called close-up lenses or diopters
that can be attached to the front of the lens in the
same way filters do, and
indeed many people call
them close-up filters. They
come in different strengths,
measured in diopters such
as +1, +2 and +3. The magnification obtained will
depend on the diopter power and the lens being used.
Most of these supplementary lenses are made of a sin-
gle element lens that works by shortening the effective
focal length of the lens in which they are used, thus
allowing you to focus closer to your subject. They can
be used singly or combined, but let me warn you about
the degraded quality when combined. These lenses are
inexpensive and easy to use, and can be a good way to
get started.
Bellows
A bellows is simply a
variable length exten-
sion tube. Magnifica-
tion can be changed
by how much the
bellows is extended
and the focal
length of the
prime lens used. They are placed between your cam-
era body and the lens. Extremely powerful magnifica-
tion can be obtained from this setup, but unfortunately
they’re too bulky to carry into the field. Besides,
they’re not TTL capable and the aperture needs to be
stopped down physically by moving the diaphragm or
using a double cable release. Focusing can also be a
challenge and requires to be mounted on a tripod at all
times for effective use.
Macro lens
The macro lens is definitely the best way to do mac-
ro in the field. These lenses are especially designed to
obtain maximum magnification with minimal distor-
tion. A true macro lens can yield a 1:1 magnification
without any attachment. Most of today’s macro lenses
EQUIPMENT
Sigma Macro 105 mm f2.8
6 Equipment
are autofocus and work perfectly
with modern TTL technology.
Unfortunately, using autofocus on
these lenses can be very frustrating
at high magnification, as they tend
to be slow and erratic. I personally
do most of my macro work focus-
ing manually anyway, so this does
not bother me that much. The most
common focal length of true macro
lenses are 50mm, 90mm, 105mm
and 180mm. While they all give
you the same magnification, it’s the
working distance that varies. In
terms of pricing, they are expen-
sive, but worth every single penny.
Flash
Most, if not all macro work,
requires some flash to aid in stop-
ping motion and softening shad-
ows. A TTL unit will offer you
the best results as long as it allows
you to dial in exposure compensa-
tion. Smaller units are preferred
because of their weight and size.
Their small size makes them less
frightening to your subject. They
don’t need to be powerful as your
subject to camera distance will be
short enough to use stopped down
apertures in excess of f16 without
using all the power stored in the
capacitors. The selection of the
flash should be based in compat-
ibility and features, rather than size
or value.
Flash Extension Cables
The top mounted flash is not
very useful in macro photography
because the subject might be too
close to the lens. For this reason,
it’s preferably to have it off-camera
and usually at a 45° to either side
of the subject. The only way to
achieve this is by using TTL flash
extension cables. Many recent
cameras offer wireless capabili-
ties that remove the needs of these
cables, but their performance at
close range is questionable.
Tripod
The tripod is probably one of the
most important pieces of equip-
ment for any type of photography,
but when it comes to macro pho-
tography, you need a sturdy one
that offers flexibility of motion.
Meaning that you can move the
axis in various directions and an-
gles. A removable center column is
a must, and if it can be positioned
diagonally towards the ground,
even better. A tripod to be used
for macro work should allow you
to extend the legs out, flat against
the ground so that you can work
with the camera upright. The idea
of inverting the center column is
awkward and risky to say the least.
If you want to achieve maximum
sharpness, I’ll recommend using
a tripod whenever possible. Also,
there’s no such thing as a light-
weight tripod that is strong enough
for nature photography. Heavier
tripods are more stable and dura-
ble. Avoid those with many plastic
parts; they won’t survive the rough
outdoors.
Flash Meter
The flash meter can be a really
helpful tool when using non-TTL
extension tubes or bellows. By
metering the available light or that
of a flash exposure, you can then
calculate the amount of light loss
due to extension and get the right
exposure. Remember when you
extend the lens by any mean, there
will be a loss of light.
Macro Focusing Rail
This device makes focusing at
short distances a lot easier by keep-
ing the camera over a moving rail
that can be adjusted to move back
and forth. When working at close
to 1:1, focusing the lens might also
change the extension of the lens.
In other words, as you focus on a
subject, the front element of your
lens is displaced forward, chang-
ing the extension of the lens. This
change in extension affects the
magnification requiring you to
recompose by moving the camera.
No better way to do this than by
using a focusing rail. They can be
expensive and too bulky to carry
on your backpack on long walks.
Macro Bracket
This item will be your third hand
for holding a flash. While there
are several designs in the market,
I have used one simple design that
can be easy to build and very flex-
ible. With just one trip to Home
Depot or Lowe’s, and a quick stop
by the local camera store, you’re
set to build your own flash bracket.
More details on page 8.
EQUIPMENT
Do It Yourself 7
Here’s a list of some household
items I used in my photography.
They are cheap and very helpful.
Aluminum Foil
This highly reflective material
can be used to bounce some light
into your subject. Its malleabil-
ity allows you to shape it in a self
standing form around branches or
the ground.
Cardboard Reflectors
I usually make this by cutting
pieces of cereal boxes and gluing a
piece of foil to one side. You can
create different shapes to accom-
modate any situation.
Small Mirrors
Small mirrors serve the same pur-
pose of the reflectors with the only
difference that they can deliver a
lot more light from even farther
distances.
Masking Tape
Masking tape and wire ties can
be used to tie obstructive vegeta-
tion away from the subject. They
can also be used to hold reflectors
or mirrors on branches.
Clamps and Clips
These useful tools work as a third
hand for the photographer by keep-
ing things together, such as reflec-
tors or flash extension cables.
Diffused Light Bowl
Here’s a way to create more
natural light from your flash expo-
sures by softening the light. It’s
very useful when available light is
too low, and your only solution to
get the shot is to use a flash. Any
semi-transparent plastic bowl will
work, but should be large enough
to allow the lens to go through for
really tight close-ups. Cut the bot-
tom section of the bowl and glue a
piece of foil halfway through the
inside wall. You should end up
with half of the bowl covered with
aluminum foil.
DO IT YOURSELF
Aluminum Foil
Small Mirrors
Masking Tape
Diffused Light Bowl
Clamps and Clips
Household items useful for macro and close-up photography
Cardboard Reflector
8 Do It Yourself
DO IT YOURSELF
When it comes to macro pho-
tography, the hobby can become
expensive. Fortunately, you can
reduce the cost by building some of
your gear. I built this custom flash
bracket for a fraction of the cost
of the ones commercially avail-
able. By doing so, you’ll be able to
customize it to your liking and to
fit your camera and flash needs.
This bracket idea came from
John Shaw, a well-known nature
photographer, who designed this
rig to satisfy his macro lighting
needs. Having spent many hours
using commercial units, he was
able to find all their flaws and came
out with one of the most effective
systems. Based on his idea, I de-
cided to adjust mine to my needs,
too. Most flash brackets mount
the flash by the shoe. Over time,
this can bring trouble to your flash
unit due to increased vibrations and
stress over this sensitive part. To
reduce the stress on the hot shoe,
I simply wrap two rubber bands
over the flash body onto the metal
arm. This has an added conve-
nience. In the field, while walking
through thickets and bushes, it’s
really easy to hit the flash, but the
rubber bands act as a shock ab-
sorber. The flash arm is mounted
on a dual function mini-ball head
that controls the motion of the flash
in almost any direction. Finally,
the bottom section that attaches the
bracket to the camera is fitted with
a Bogen quick- release plate, al-
lowing for easy and fast mounting
of the system on a tripod. I have
drilled several holes on the flash
arm for additional accessories, in-
cluding extensions and diffusers.
The construction of this bracket
is very easy and reliable. The frame
is made of a 1/8” in. thick by 1” in.
wide aluminum strip. Your choice
for the mini-ball head will de-
pend on availability, but should be
strong enough to hold the weight
of your flash loaded with batter-
ies. For the quick release, I used
the readily available Bogen 3049.
I wrapped some duct-tape on the
bottom metal piece to avoid the
camera from slipping during use.
A piece of thin cork or rubber can
be used instead, but since gluing it
to the smooth metal surface can be
hard and non-durable, I opted for
using duct-tape. It works great and
creates a good non-slip surface. At
the end, I spent less than $50.00
dollars building this rig, and it
works flawlessly. Now, if we can
build a good macro lens, then we
would have saved more than 50%
off all the cost of macro photogra-
phy. Well, there’s a way to even
save on that, by simply reversing
a lens you end up with nice macro
lens for a fraction of the cost.
Exposure 9
Exposure
Close ups are exposed following
the same rules you apply to any
other type of photography, with
the only difference that compen-
sation needs to be applied when
using non-TTL equipment. Every
time we add extension to any lens,
there’s a loss of light associated
with the extension. In a TTL sys-
tem, these extensions are taken in
consideration to adjust the expo-
sure readings of the built-in meter
in your camera. When using non-
TTL coupled equipment, such as
a bellows or extension tubes, then
you need to calculate the right ex-
posure using an external light /flash
meter and compensating for the
amount of light loss due to exten-
sion. Most extension tubes come
with a chart that specify how many
stops of light you lose when using
them singly or combined.
Determining the exposure re-
quires the same procedure as a
regular photo. Establishing the
tonal value of your subject before
shooting can make the difference,
especially when working with ani-
mated subjects that can disappear
in the blink of an eye. By defin-
ing the subject’s tonality, you’ll
be able to make exposure correc-
tions. Remember, your camera
built-in meter is calibrated to see a
middle toned subject, in which case
it’s easy to just go by the metered
exposure. But if your subject is
too dark or too light, you need to
compensate to obtain the right ex-
posure. When selecting the expo-
sure, you need to pay attention to
the background. Dark backgrounds
will take away from the image
and even more, if the subject is a
diurnal animal. Black backgrounds
will definitely enhance the color of
your subject, but when it comes to
be biologically correct, it’s hard to
accept a monarch butterfly spread-
ing the wings over a black back-
ground. I treat subjects based on
their biology. Some tree frogs, for
example, will benefit from a dark
background to imply their noctur-
nal behavior.
First, I meter for the background
with the selected aperture I have
anticipated for the depth of field
I want. Since I use the flash at
almost all times, then I proceed to
determine if I need any compen-
sation for the subject in the fore-
ground. By adjusting the flash out-
put, I obtain a balanced exposure
in which the foreground is lit by a
mix of ambient and flash while the
background is lit by available light.
If the subject is not middletone,
then compensation needs to be add-
ed accordingly. The image of the
grasshoppers was a straight middle-
toned image in which no com-
pensation was required. For the
White Peacock butterfly, I needed
to reduce the flash exposure to keep
detail in the highlight areas. In this
case, I dialed -1.7 EV on my cam-
era to avoid blowing the highlights.
Remember, your TTL flash is also
calibrated to read middletoned sub-
jects, and the darker background in
this image would have fooled the
flash to believe that more light was
needed, thus overexposing the but-
terfly. In the case of the frog, I had
to increase the flash output since
the lighter leaf would have fooled
the TTL system making the frog
way darker. By dialing a +1 EV on
the flash compensation, I was able
to overcome this problem. Each
image presents different problems,
and there’s not a single solution.
By carefully studying each case as
it happens, you’ll be able to rec-
ognize problematic situations and
implement a solution based on your
previous experiences.
Mating Grasshoppers, Florida
Nikon D100 105mm f8 1/125
White Peacock, Florida
Nikon D70 105mm f4 1/125
with flash -1.7 EV .
Black & Green Dart Frog, Costa Rica
Nikon D70 105mm f8 1/250
with flash +1.0 EV .
10 Depth of Field
DEPTH OF FIELD
Depth of field (DOF) comprises
the area of sharpness right in front
and behind the focus plane. In
other words, how much in front
and behind the subject will look
totally sharp. In theory, you can
focus your camera in a precise
area on your subject and that will
define the focus plane. However,
there are areas of relative sharpness
that extent 1/3 in front of the focus
plane and 2/3 behind. This zone
of sharpness is what we refer to as
depth of field. Depth of field varies
directly with the aperture selected:
the smaller the aperture, the greater
depth; the wider the aperture, the
shallower depth of field. At the
same time, depth of field is shal-
lower as you focus closer to the
subject, regardless of the focal
length of the lens. For example,
when focusing on a large subject
10 feet away, the depth of field for
a particular lens at f16 is almost in-
finite behind the subject and close
to 10 feet in front of the subject.
The same lens focus on a subject
10 inches away produces a depth of
field of less than 1/2 in. in front and
2 inches behind the subject.
Focal length does not change
the depth of field, it’s the distance
between the lens and the subject
that matters. Shoot a subject with a
50mm lens at f8 and then shoot the
same subject with a 100mm lens
at the same aperture, but change
the distance to create the same
image coverage of the 50mm lens,
and you’ll end up with the same
depth of field, regardless of focal
length. Now if you maintain the
same distance while shooting with
these two lenses, then the longer
focal length will render a shallower
depth of field.
In the field, you need to pay at-
tention to the depth of field. It’s
important that you determine the
areas that you want to maintain in
total sharpness. By doing so, you
can establish some degree of sepa-
ration between the subject and the
background. Having a background
that is too crowded and sharp can
compete with your subject to the
point that the subject loses impact.
When selecting the right aperture
for the desired depth of field, make
sure that you include all of your
subject whenever possible. Occa-
sionally, depth of field is so mini-
mal that some parts of your subject
may render soft. As a rule of
thumb when shooting insects, it’s
better to keep the area surrounding
the eyes as sharp as possible.
To avoid the guessing work of
how much to stop down the lens
for the desired depth, manufactur-
ers have incorporated depth of field
previews in the cameras. Simply
select the aperture and press the
DOF preview to see how far the
area of sharpness extends. Note
that when using the DOF preview,
your viewfinder will get dark as
less light is passing through the
lens. In low light situations, this
method might not be as effective.
In the photo below, I have taken
two separate exposures, one us-
ing f 11(left) and the other using
f4 (right). Notice how the back-
ground makes the left picture
too cluttered. The picture on the
right makes the subject stand out,
without sacrificing detail on its
body. By simply selecting the right
aperture, I was able to keep enough
detail on the subject and less on the
background. It’s that easy, practice
is all it takes.
Dragonfly, Florida . Nikon D70, 105mm, 1/250 sec. at f11 Nikon D70, 105mm, 1/1600 sec. at f4
Maximum Sharpness 11
Sharp images are the result of
careful planning and a good con-
trol of several factors. In order to
obtain sharp images, we need to
take in consideration the subject’s
movements, wind, camera shake
and shutter speed. Some of these
factors can be controlled by the
photographer, but others are left for
the subject to decide. Obviously,
it’s hard to control the fleeing
instinct of a dragonfly as you get
closer, or the leap for life of a tree
frog, but there are things we can
do to reduce the chances. The wind
can, in many cases, be controlled
by using your body to block the
stream. A slight breeze can render
your image blurred when working
at such a close range. As a matter
of fact, everything that affects the
image quality on a normal picture
will be intensified when working
close ups and macro photography.
Take, for example, low light. Low
light can be an issue for regular
photography, but with macro is
even worse, as you reduce the
amount of light hitting the subject
when you get closer, and further
reduce the light if using exten-
sions. Camera vibrations can be
disastrous in macro photography; a
slight move, and your subject will
come out soft. That’s why most
macro work improves with the
freezing action of a flash exposure.
When composing a landscape
shot, moving three feet to either
side barely affects the composition.
If you move 1/4 in. while shooting
a macro, you left half of the subject
out of the frame. This is why it’s
so hard to do handheld shots of
tiny subjects. A tripod is your best
defense against blurred images,
but it needs to be stable and vibra-
tion free, especially when shooting
in low light situations that require
extended exposure time. In such
event, it’s recommended to use a
cable release or remote to trigger
the shutter, reducing induced vibra-
tions.
Selecting the right focus plane is
important as the depth of field is so
limited when working a few inches
from your subject. The best way to
reach the perfect focus is by actu-
ally moving the camera until the
image is sharp, rather than focus-
ing the lens, as this might change
the magnification, and you’ll find
yourself moving the camera any-
way. That’s when a focusing rail
comes handy.
Another factor to take in consid-
eration is the quality of your lens,
in the case of a macro lens or the
prime lens used with extensions.
Macro lenses offer the best qual-
ity in terms of resolution and by
far less distortion than any other
combination. If you use diopters
to increase the magnification of a
normal lens, you can expect a loss
of sharpness that gets progressively
worst as it reaches the edges of
the frame. DSLRs with cropping
factor of 1.5X will benefit a bit by
using only the center area of the
diopter, where distortion is less
noticeable. As you can see, several
factors influence how sharp your
photos may look. Take also in
consideration the aperture selected
and the depth of field it produces.
These will have a great impact on
how much sharpness you get. The
above image was focused on the
eyes of the spider with the camera
mounted on a tripod and an aper-
ture of f16 to increase the apparent
sharpness created by the increased
depth of field.
MAXIMUM SHARPNESS
Green Lynx Spider, Florida. Nikon D70, 105mm, 1/250 sec. at f16 w/flash -1.
12 Flash Technique
As I mentioned before, flash is
instrumental in close-up photogra-
phy. As matter of fact, 95% of my
macro work uses a flash one way
or the other. Either as a fill or main
light, using flash has many added
advantages. The freezing effect
of the flash is great for fast mov-
ing creatures. When using flash
as your only main light source,
you can obtain sharp images even
when hand holding the camera.
Since the duration of most flashes
are between 1/10,000 sec. and
1/25,000 sec., any last minute
movement will be frozen by the
light. Now, this is true only if the
available light exposure is fast
enough to avoid ghosting. Ghost-
ing is caused when the subject
moves during a long exposure to
balance the available light. A long
exposure with flash is considered
two separate exposures starting at
the same time. The light emitted
by the flash has a shorter duration
than the shutter speed used on the
long exposure. The flash exposure
is controlled by the aperture only.
When you fire a flash during a long
exposure, the camera continues to
capture light throughout the length
of the exposure. If your subject
moves during that time, the move-
ment will be recorded as a blurred
image that extends beyond that of
the one created by the flash. Also,
any camera movement during the
ambient light exposure may cause
a ghosting effect. Balancing the
ambient light with your flash ex-
posure can be tricky and, in many
cases, if not handled correctly, can
make your images look unnatural.
Sometimes, macro images can look
over-flashed if the background is
too dark. The opposite occurs when
the background is too light and
the subject is too dark. If ever in
doubt about the right exposure for
the ambient light, then bracket the
shutter speed and leave the aper-
ture untouched. Remember that
when using the flash, the exposure
of the subject will be determined
primarily by the aperture selected,
so any changes to the flash expo-
sure should be made by dialing
compensation instead of opening
or closing the aperture that will
also change your DOF. For sure,
the more natural looking images
are those where the foreground
was illuminated by flash blends
perfectly with the ambient light of
the background. Many things need
to be taken in consideration when
making your selection of shutter
speed and aperture for a particular
situation. Pay attention to your
shutter speed, as this is the culprit
in most throw-away macro im-
ages, but don’t neglect the aperture,
since depth of field depends on it.
Every shot brings its own chal-
lenges. Practicing with unanimated
subjects at home can improve your
flash techniques.
For most images, the flash should
be positioned at 30° over the lens
and facing your subject. This way,
shadows will fall behind the sub-
ject. Using one single flash offers
more natural light and less spec-
tacular highlights, and only one eye
catch light.
FLASH TECHNIQUE
Clear Wing Butterfly, Costa Rica. 50mm
Macro 1/60 at f8. A main flash exposure
shot.
Cicada sp, Costa Rica. The shot on the left was exposed for 1/25 sec. at f8, creating
a flash based exposure that rendered the background too dark. In order to balance the
ambient light of the background, I used a slower speed of 1/2 sec. for the picture to the
right that resulted in some ghosting of the subject due to camera or subject movement.
Magnification 13
The magnification required for
macro photography can be obtained
by utilizing different methods. In
order to magnify, the front element
of the lens must be displaced for-
ward and away from the film plane
of the camera. This is achieved
by extending the lens. In essence,
that’s how all macro lenses work.
As you focus closer, the front ele-
ment is displaced forward. If you
don’t have a macro lens, then ex-
tension tubes will produce the same
effect. A 50mm lens is considered
a normal lens as its field of view is
fairly similar to that of the human
eye. This lens can produce great
macro shots when used with exten-
sions. Put a 25mm extension tube
on a regular non macro 50mm lens,
and you’re ready to capture images
at 1/2X or 1:2. If you add 50mm
of extension to the same lens, the
magnification goes to 1X or 1:1.
The following formula can be used
to determine the magnification fac-
tor when using extensions tubes or
bellows with any lens.
Take for example a 100mm with
a 25mm extension an you get 1/4 X
or 1:4.
0.25X = 25mm/100mm
Another way to express 0.25 is
in the fraction equivalence of 1/4X
and in the ratio format of 1:4.
When adding extension, the light
that passes through the lens is
reduced. In TTL systems, this loss
is compensated by the metering
system, but when you use a non-
TTL extension tube, then you need
to calculate the light loss. Most of
the time, adding the same number
of extension as that of the focal
length results in light loss of at
least 2 stops. Even though most
extension tubes manufacturers
include this information with their
products, it’s best to run a series of
tests with your camera focused on a
neutral colored surface under even
light. First put on the prime lens,
meter, and then record the metered
exposure with a fixed aperture of
f8.0. Proceed to take the image.
Then, add the extension, and take a
series of exposures using apertures
that range from two stops over and
two under of f8, and keep record
of each one in reference to frame
number. In a DSLR, it’s easy to
follow the serial number and time
as they were taken. Review each
one of those images and compare
them with the original image with
no extension. Say that the exten-
sion shot at f5.6 is the closest
match to the exposed at f8 without
extension, then you can assume
that the extension produced a 1
stop of light loss.
Another way to achieve extreme
magnification is by actually revers-
ing a lens in front of another lens,
also called stacked lenses. Put a
50mm lens in front of a 100mm
lens by means of a reversing ring
and now you have 2X magnifica-
tion. In this case you can use the
following formula to calculate
magnification.
4X = 200mm/50mm
Stacked lenses offer great image
quality and, when used with a TTL
system, the metering works fine as
long as the prime lens is coupled
and TTL compatible. The stacked
lens should be left wide open to
avoid light loss.
MAGNIFICATION
Garden Fly, Florida. This fly was photographed using a 135mm macro with a stacked
50mm len. The magnification is about 3X for this subject of less than 1/4 in. long.
Extension
Focal Length
Mag.=
Focal length of prime lens
Focal length of stacked lens
Mag.=
14 Macro Photography Tips
INTRODUCTIONMACRO PHOTOGRAPHY TIPS
Paralleling the subject
For increased depth of field
without having to stop down the
lens too much, try paralleling the
subject as much as possible. By
turning your camera until the sub-
ject is parallel with the film back
or ccd, you will obtain the sharp-
est focus possible, even with fairly
open apertures.
Early in the morning
While almost any time is good
for macro work, the best time to
shoot animated macro subjects is
early in the morning, before they
get too hyper. Most insects and
reptiles are slow during the early
hours and depend on sunlight to
gain their normal body operat-
ing temperatures. Being there
early will improve your chances
of finding these creatures when
they’re still in slow motion, and
even sleeping. Another reason to
be there early is to beat the wind.
An hour too late, and you’ll be
fighting and losing a battle with
the wind. Cool early mornings are
my favorite time for most macro
shots, unless there’s an overcast or
I’m working under the canopy of a
rainforest.
Focusing
When handholding a camera, it’s
better to focus by moving the cam-
era forward than using the focus-
ing ring. If mounted on a tripod, a
focusing rail will give you the best
results.
Better Backgrounds
The focal length you use will dic-
tate how your background looks.
Wide lenses will include more of
the background than a tele. When
using a 50mm lens with diopters,
you’ll get a lot more of the back-
ground in the picture than when
using the same diopter on a 200mm
lens. Also, by simply changing
your position in respect to the sub-
ject, you can avoid having a dark or
uninteresting background.
Softer Light
When shooting wildflowers and
other unanimated subjects, you can
soften the light by actually block-
ing the light with your body. The
shade created will soften the light,
making it look like an overcast.
Also, by using the light bowl tech-
nique, you can enhance the shadow
areas.
Working with amphibians
Amphibians are sensitive subjects
and should be handled with care.
Handling these beautiful creatures
requires a little knowledge about
their physiology as well as their
behaviors. Avoid using insect re-
pellent, perfume or lotion if you’re
planning on working with these
animals. Always have distilled
water handy to keep your subject
moist at all times. Even the contact
with your bare hands can take away
the moisture of their skin.
Forgot the lens?
I normally carry a good assort-
ment of lenses in my backpack.
But over long distances, this can be
a burden and can leave you with a
back pain. To avoid this problem,
I packed the lenses according to
what I’m planning to shoot. Well,
this approach had left me without
my heavy macro lens in situa-
tions where I could have used it.
One time, while shooting birds, I
found a tiny and colorful cricket,
but without the macro lens, I was
doomed. I then realized the po-
tential of reversing lenses. I took
my lightweight 35-80mm lens and
Dragonfly, Florida. Nikon D70, 105mm 1/125 at f5.6. Paralleling the subject ensures
the sharpness focus and enough depth of field, even with fairly large apertures.
Macro Photography Tips 15
placed it in reverse in front of the
lens mount of the camera. Voila!
It worked. Then, I had to take a
series of exposures to select the
best, since all TTL capabilities are
lost when the lens is not physi-
cally attached to the electronic
couplings. The focusing is done by
moving the camera, and the mag-
nification can be changed by using
the zoom. The Nikon D lens series
are equipped with an aperture ring
that can be operated even when the
lens is removed from the camera.
I could select any aperture I want
prior to pressing the shutter release
to get the right depth of field. Cool
stuff that can save you when far
from home.
Approaching the subject
Some macro subjects are easier
than other. For instance, a flower
won’t move unless is blown by the
wind, but a grasshopper will jump
at the first sign of danger. Unfortu-
nately, they don’t know our inten-
tions and our massive size when
compared to them, doesn’t help
either. But there are ways we can
get close without scaring them off.
Watch your shadow as you move
close to your subject. This can
make them aware of your presence
way before you get in position.
Avoid making noises and sudden
moves when working with reptiles
and amphibians. Many insects
including butterflies are easier to
approach from a low level position,
where your profile is less threaten-
ing.
Study your subject
There’s nothing better than to be
prepared for the subject you’ll be
working with in the field. Knowing
about their behaviors can greatly
enhance the quality of images you
produce. While looking for insects,
I found this praying mantis. Within
seconds, a butterfly stopped on the
same bush where the mantis was.
The mantis showed interest on the
visitor and, within seconds, was at
striking distance. This time, the
butterfly flew before the attack. I
decided to wait for another try, and
as I always say, those who wait, get
the chance. The next butterfly that
came by the bush wasn’t that lucky
and I was able to capture the event,
on video and still. Opportunities
for great shots are out there waiting
for you. Take your time and enjoy.
Respect nature
Photography is one of the best
ways to promote the importance
of all living things. Take pride on
your work and share it with others.
The knowledge that you gain by
doing so is great and the benefits
to others are priceless. Learning
to respect and appreciate nature
should be in any nature photogra-
pher’s best interest. The welfare
of our subjects should be our main
concern. Only then, we can teach
others about the beauty of nature
and the importance of all the living
things.
MACRO PHOTOGRAPHY TIPS
Praying Mantis, Florida. Nikon D70, 105mm Macro 1/500 f8 w/ fill flash.

More Related Content

What's hot

Using Flash in digital photography
Using Flash in digital photographyUsing Flash in digital photography
Using Flash in digital photographychristimothy12
 
Macro photography research
Macro photography researchMacro photography research
Macro photography researcherinmchugh1
 
Introduction to Portable Flash
Introduction to Portable FlashIntroduction to Portable Flash
Introduction to Portable FlashAdam Lowe Creative
 
Cool Photography Techniques
Cool Photography TechniquesCool Photography Techniques
Cool Photography TechniquesAbigail Sullivan
 
Week 5 Flash Or Not
Week 5 Flash Or NotWeek 5 Flash Or Not
Week 5 Flash Or Notgueste784af
 
Sharp Photos
Sharp  PhotosSharp  Photos
Sharp Photosdianawild
 
Beginner photography blogeguide
Beginner photography blogeguideBeginner photography blogeguide
Beginner photography blogeguideJalanthiran Selva
 
Tech Bits: Taking your mobile photography to the next level
Tech Bits: Taking your mobile photography to the next levelTech Bits: Taking your mobile photography to the next level
Tech Bits: Taking your mobile photography to the next levelrobin fay
 
Camera Settings Guide
Camera Settings GuideCamera Settings Guide
Camera Settings GuideChris Bailey
 
Session 5 Shutter Speed (Basic Photography Class)
Session 5 Shutter Speed (Basic Photography Class)Session 5 Shutter Speed (Basic Photography Class)
Session 5 Shutter Speed (Basic Photography Class)Jeremy Eliab
 
Idiots guide for using a camera
Idiots guide for using a cameraIdiots guide for using a camera
Idiots guide for using a cameraGoogle
 
11 Outdoor Photography Tips for Shooting with Your Smartphone
11 Outdoor Photography Tips for Shooting with Your Smartphone11 Outdoor Photography Tips for Shooting with Your Smartphone
11 Outdoor Photography Tips for Shooting with Your SmartphoneJeff Mohlman
 
EMC 3130/2130 Lecture Two - The Camera Lens
EMC 3130/2130 Lecture Two - The Camera LensEMC 3130/2130 Lecture Two - The Camera Lens
EMC 3130/2130 Lecture Two - The Camera LensEdward Bowen
 
Digital photography
Digital photographyDigital photography
Digital photographyTone2217
 

What's hot (20)

Using Flash in digital photography
Using Flash in digital photographyUsing Flash in digital photography
Using Flash in digital photography
 
Macro photography research
Macro photography researchMacro photography research
Macro photography research
 
Introduction to Portable Flash
Introduction to Portable FlashIntroduction to Portable Flash
Introduction to Portable Flash
 
Cool Photography Techniques
Cool Photography TechniquesCool Photography Techniques
Cool Photography Techniques
 
Using external flash
Using external flashUsing external flash
Using external flash
 
Week 5 Flash Or Not
Week 5 Flash Or NotWeek 5 Flash Or Not
Week 5 Flash Or Not
 
Cameras task1b
Cameras task1bCameras task1b
Cameras task1b
 
Sharp Photos
Sharp  PhotosSharp  Photos
Sharp Photos
 
Beginner photography blogeguide
Beginner photography blogeguideBeginner photography blogeguide
Beginner photography blogeguide
 
Tech Bits: Taking your mobile photography to the next level
Tech Bits: Taking your mobile photography to the next levelTech Bits: Taking your mobile photography to the next level
Tech Bits: Taking your mobile photography to the next level
 
Camera Settings Guide
Camera Settings GuideCamera Settings Guide
Camera Settings Guide
 
Exposure
ExposureExposure
Exposure
 
Introduction to Exposure
Introduction to ExposureIntroduction to Exposure
Introduction to Exposure
 
Session 5 Shutter Speed (Basic Photography Class)
Session 5 Shutter Speed (Basic Photography Class)Session 5 Shutter Speed (Basic Photography Class)
Session 5 Shutter Speed (Basic Photography Class)
 
Understanding camera lenses
Understanding camera lensesUnderstanding camera lenses
Understanding camera lenses
 
Idiots guide for using a camera
Idiots guide for using a cameraIdiots guide for using a camera
Idiots guide for using a camera
 
11 Outdoor Photography Tips for Shooting with Your Smartphone
11 Outdoor Photography Tips for Shooting with Your Smartphone11 Outdoor Photography Tips for Shooting with Your Smartphone
11 Outdoor Photography Tips for Shooting with Your Smartphone
 
EMC 3130/2130 Lecture Two - The Camera Lens
EMC 3130/2130 Lecture Two - The Camera LensEMC 3130/2130 Lecture Two - The Camera Lens
EMC 3130/2130 Lecture Two - The Camera Lens
 
Digital photography
Digital photographyDigital photography
Digital photography
 
Hdr.pptx final
Hdr.pptx finalHdr.pptx final
Hdr.pptx final
 

Viewers also liked

1 apakah cinta itu
1 apakah cinta itu1 apakah cinta itu
1 apakah cinta ituYosoa Eric
 
Macro photography
Macro photographyMacro photography
Macro photographyKeir McGinn
 
Wildlife Photographer: Tips of the Year
Wildlife Photographer: Tips of the YearWildlife Photographer: Tips of the Year
Wildlife Photographer: Tips of the YearDreamsDiary
 
Session 12 Macro photography
Session 12 Macro photographySession 12 Macro photography
Session 12 Macro photographyJeremy Eliab
 

Viewers also liked (7)

1 apakah cinta itu
1 apakah cinta itu1 apakah cinta itu
1 apakah cinta itu
 
Macro photography
Macro photographyMacro photography
Macro photography
 
Wildlife Photographer: Tips of the Year
Wildlife Photographer: Tips of the YearWildlife Photographer: Tips of the Year
Wildlife Photographer: Tips of the Year
 
Session 12 Macro photography
Session 12 Macro photographySession 12 Macro photography
Session 12 Macro photography
 
Macro Photography
Macro PhotographyMacro Photography
Macro Photography
 
Macro photography
Macro photographyMacro photography
Macro photography
 
Macro photography
Macro photographyMacro photography
Macro photography
 

Similar to Macro photography pdf

Wildlife teaching notes
Wildlife teaching notesWildlife teaching notes
Wildlife teaching noteswdpsorg
 
Digital photography-tip
Digital photography-tipDigital photography-tip
Digital photography-tipYasir Khan
 
10 Best Macro Lens For Canon Camera in 2023
10 Best Macro Lens For Canon Camera in 202310 Best Macro Lens For Canon Camera in 2023
10 Best Macro Lens For Canon Camera in 2023Zenith Clipping
 
Kodak easysharez981
Kodak easysharez981Kodak easysharez981
Kodak easysharez981easyshare45
 
Camera work
Camera workCamera work
Camera workEazyE99
 
Insect macro photography tips
Insect macro photography tipsInsect macro photography tips
Insect macro photography tipsChris Halajian
 
Close up & macro photography - 2011 uk
Close up & macro photography - 2011  ukClose up & macro photography - 2011  uk
Close up & macro photography - 2011 ukMarjoWright
 
Digital Photography Basics
Digital Photography BasicsDigital Photography Basics
Digital Photography BasicsValerie Goettsch
 
Digital Photography Beginners course
Digital Photography Beginners courseDigital Photography Beginners course
Digital Photography Beginners courseMike Sleigh
 
ExtendingDOFWithPhotoshopCS4
ExtendingDOFWithPhotoshopCS4ExtendingDOFWithPhotoshopCS4
ExtendingDOFWithPhotoshopCS4tutorialsruby
 
ExtendingDOFWithPhotoshopCS4
ExtendingDOFWithPhotoshopCS4ExtendingDOFWithPhotoshopCS4
ExtendingDOFWithPhotoshopCS4tutorialsruby
 
2. [pro forma] camera getting started guide(4)
2. [pro forma] camera getting started guide(4)2. [pro forma] camera getting started guide(4)
2. [pro forma] camera getting started guide(4)EPAYNE52
 
Introduction to Photography-Kallol Majumdar.pptx
Introduction to Photography-Kallol Majumdar.pptxIntroduction to Photography-Kallol Majumdar.pptx
Introduction to Photography-Kallol Majumdar.pptxKallol Majumdar
 
Macrophotography & Vacation Photography
Macrophotography & Vacation PhotographyMacrophotography & Vacation Photography
Macrophotography & Vacation PhotographyKyosuke Takahashi
 
Photo Tips
Photo TipsPhoto Tips
Photo Tipsteh6
 
Digital camera basics
Digital camera basicsDigital camera basics
Digital camera basicsjillian b
 

Similar to Macro photography pdf (20)

Wildlife teaching notes
Wildlife teaching notesWildlife teaching notes
Wildlife teaching notes
 
Digital photography-tip
Digital photography-tipDigital photography-tip
Digital photography-tip
 
10 Best Macro Lens For Canon Camera in 2023
10 Best Macro Lens For Canon Camera in 202310 Best Macro Lens For Canon Camera in 2023
10 Best Macro Lens For Canon Camera in 2023
 
Kodak easysharez981
Kodak easysharez981Kodak easysharez981
Kodak easysharez981
 
Camera work
Camera workCamera work
Camera work
 
Insect macro photography tips
Insect macro photography tipsInsect macro photography tips
Insect macro photography tips
 
Close up & macro photography - 2011 uk
Close up & macro photography - 2011  ukClose up & macro photography - 2011  uk
Close up & macro photography - 2011 uk
 
Better photo tips
Better photo tipsBetter photo tips
Better photo tips
 
Digital Photography Basics
Digital Photography BasicsDigital Photography Basics
Digital Photography Basics
 
Digital Photography Beginners course
Digital Photography Beginners courseDigital Photography Beginners course
Digital Photography Beginners course
 
ExtendingDOFWithPhotoshopCS4
ExtendingDOFWithPhotoshopCS4ExtendingDOFWithPhotoshopCS4
ExtendingDOFWithPhotoshopCS4
 
ExtendingDOFWithPhotoshopCS4
ExtendingDOFWithPhotoshopCS4ExtendingDOFWithPhotoshopCS4
ExtendingDOFWithPhotoshopCS4
 
photography
photography photography
photography
 
2. [pro forma] camera getting started guide(4)
2. [pro forma] camera getting started guide(4)2. [pro forma] camera getting started guide(4)
2. [pro forma] camera getting started guide(4)
 
Introduction to Photography-Kallol Majumdar.pptx
Introduction to Photography-Kallol Majumdar.pptxIntroduction to Photography-Kallol Majumdar.pptx
Introduction to Photography-Kallol Majumdar.pptx
 
Photography jco
Photography jcoPhotography jco
Photography jco
 
Macrophotography & Vacation Photography
Macrophotography & Vacation PhotographyMacrophotography & Vacation Photography
Macrophotography & Vacation Photography
 
Photo Tips
Photo TipsPhoto Tips
Photo Tips
 
Digital camera basics
Digital camera basicsDigital camera basics
Digital camera basics
 
FMP Experiments.pptx
FMP Experiments.pptxFMP Experiments.pptx
FMP Experiments.pptx
 

More from جمال الكندي (20)

History of photography ppt
History of photography pptHistory of photography ppt
History of photography ppt
 
History of photography ppt
History of photography pptHistory of photography ppt
History of photography ppt
 
History of photography-notes
History of photography-notesHistory of photography-notes
History of photography-notes
 
Camera basics lesson_1
Camera basics lesson_1Camera basics lesson_1
Camera basics lesson_1
 
Basic camera controls
Basic camera controlsBasic camera controls
Basic camera controls
 
Portraiture ppt
Portraiture pptPortraiture ppt
Portraiture ppt
 
Landscapeseminar ppt
Landscapeseminar pptLandscapeseminar ppt
Landscapeseminar ppt
 
Kcc macro ppt1
Kcc macro ppt1Kcc macro ppt1
Kcc macro ppt1
 
silloute_7ppt
silloute_7pptsilloute_7ppt
silloute_7ppt
 
Wildlife photography ppt
Wildlife photography pptWildlife photography ppt
Wildlife photography ppt
 
lifewie digital photography_pdf
lifewie  digital photography_pdflifewie  digital photography_pdf
lifewie digital photography_pdf
 
portrait pdf
portrait pdfportrait pdf
portrait pdf
 
Panorama photography pdf
Panorama photography pdfPanorama photography pdf
Panorama photography pdf
 
panorama ppt
panorama pptpanorama ppt
panorama ppt
 
night ppt
 night  ppt night  ppt
night ppt
 
landscape pdf
 landscape pdf landscape pdf
landscape pdf
 
black & white ppt
black & white pptblack & white ppt
black & white ppt
 
Schools wide angle pdf
Schools wide angle pdfSchools wide angle pdf
Schools wide angle pdf
 
Angle ppt
Angle pptAngle ppt
Angle ppt
 
abstract photography pdf
 abstract photography pdf abstract photography pdf
abstract photography pdf
 

Recently uploaded

AI as an Interface for Commercial Buildings
AI as an Interface for Commercial BuildingsAI as an Interface for Commercial Buildings
AI as an Interface for Commercial BuildingsMemoori
 
SIEMENS: RAPUNZEL – A Tale About Knowledge Graph
SIEMENS: RAPUNZEL – A Tale About Knowledge GraphSIEMENS: RAPUNZEL – A Tale About Knowledge Graph
SIEMENS: RAPUNZEL – A Tale About Knowledge GraphNeo4j
 
Presentation on how to chat with PDF using ChatGPT code interpreter
Presentation on how to chat with PDF using ChatGPT code interpreterPresentation on how to chat with PDF using ChatGPT code interpreter
Presentation on how to chat with PDF using ChatGPT code interpreternaman860154
 
Install Stable Diffusion in windows machine
Install Stable Diffusion in windows machineInstall Stable Diffusion in windows machine
Install Stable Diffusion in windows machinePadma Pradeep
 
Tech-Forward - Achieving Business Readiness For Copilot in Microsoft 365
Tech-Forward - Achieving Business Readiness For Copilot in Microsoft 365Tech-Forward - Achieving Business Readiness For Copilot in Microsoft 365
Tech-Forward - Achieving Business Readiness For Copilot in Microsoft 3652toLead Limited
 
Automating Business Process via MuleSoft Composer | Bangalore MuleSoft Meetup...
Automating Business Process via MuleSoft Composer | Bangalore MuleSoft Meetup...Automating Business Process via MuleSoft Composer | Bangalore MuleSoft Meetup...
Automating Business Process via MuleSoft Composer | Bangalore MuleSoft Meetup...shyamraj55
 
Unblocking The Main Thread Solving ANRs and Frozen Frames
Unblocking The Main Thread Solving ANRs and Frozen FramesUnblocking The Main Thread Solving ANRs and Frozen Frames
Unblocking The Main Thread Solving ANRs and Frozen FramesSinan KOZAK
 
Hyderabad Call Girls Khairatabad ✨ 7001305949 ✨ Cheap Price Your Budget
Hyderabad Call Girls Khairatabad ✨ 7001305949 ✨ Cheap Price Your BudgetHyderabad Call Girls Khairatabad ✨ 7001305949 ✨ Cheap Price Your Budget
Hyderabad Call Girls Khairatabad ✨ 7001305949 ✨ Cheap Price Your BudgetEnjoy Anytime
 
Snow Chain-Integrated Tire for a Safe Drive on Winter Roads
Snow Chain-Integrated Tire for a Safe Drive on Winter RoadsSnow Chain-Integrated Tire for a Safe Drive on Winter Roads
Snow Chain-Integrated Tire for a Safe Drive on Winter RoadsHyundai Motor Group
 
08448380779 Call Girls In Greater Kailash - I Women Seeking Men
08448380779 Call Girls In Greater Kailash - I Women Seeking Men08448380779 Call Girls In Greater Kailash - I Women Seeking Men
08448380779 Call Girls In Greater Kailash - I Women Seeking MenDelhi Call girls
 
CloudStudio User manual (basic edition):
CloudStudio User manual (basic edition):CloudStudio User manual (basic edition):
CloudStudio User manual (basic edition):comworks
 
Transcript: #StandardsGoals for 2024: What’s new for BISAC - Tech Forum 2024
Transcript: #StandardsGoals for 2024: What’s new for BISAC - Tech Forum 2024Transcript: #StandardsGoals for 2024: What’s new for BISAC - Tech Forum 2024
Transcript: #StandardsGoals for 2024: What’s new for BISAC - Tech Forum 2024BookNet Canada
 
Neo4j - How KGs are shaping the future of Generative AI at AWS Summit London ...
Neo4j - How KGs are shaping the future of Generative AI at AWS Summit London ...Neo4j - How KGs are shaping the future of Generative AI at AWS Summit London ...
Neo4j - How KGs are shaping the future of Generative AI at AWS Summit London ...Neo4j
 
Pigging Solutions in Pet Food Manufacturing
Pigging Solutions in Pet Food ManufacturingPigging Solutions in Pet Food Manufacturing
Pigging Solutions in Pet Food ManufacturingPigging Solutions
 
Maximizing Board Effectiveness 2024 Webinar.pptx
Maximizing Board Effectiveness 2024 Webinar.pptxMaximizing Board Effectiveness 2024 Webinar.pptx
Maximizing Board Effectiveness 2024 Webinar.pptxOnBoard
 
08448380779 Call Girls In Friends Colony Women Seeking Men
08448380779 Call Girls In Friends Colony Women Seeking Men08448380779 Call Girls In Friends Colony Women Seeking Men
08448380779 Call Girls In Friends Colony Women Seeking MenDelhi Call girls
 
Making_way_through_DLL_hollowing_inspite_of_CFG_by_Debjeet Banerjee.pptx
Making_way_through_DLL_hollowing_inspite_of_CFG_by_Debjeet Banerjee.pptxMaking_way_through_DLL_hollowing_inspite_of_CFG_by_Debjeet Banerjee.pptx
Making_way_through_DLL_hollowing_inspite_of_CFG_by_Debjeet Banerjee.pptxnull - The Open Security Community
 
Human Factors of XR: Using Human Factors to Design XR Systems
Human Factors of XR: Using Human Factors to Design XR SystemsHuman Factors of XR: Using Human Factors to Design XR Systems
Human Factors of XR: Using Human Factors to Design XR SystemsMark Billinghurst
 

Recently uploaded (20)

AI as an Interface for Commercial Buildings
AI as an Interface for Commercial BuildingsAI as an Interface for Commercial Buildings
AI as an Interface for Commercial Buildings
 
SIEMENS: RAPUNZEL – A Tale About Knowledge Graph
SIEMENS: RAPUNZEL – A Tale About Knowledge GraphSIEMENS: RAPUNZEL – A Tale About Knowledge Graph
SIEMENS: RAPUNZEL – A Tale About Knowledge Graph
 
Presentation on how to chat with PDF using ChatGPT code interpreter
Presentation on how to chat with PDF using ChatGPT code interpreterPresentation on how to chat with PDF using ChatGPT code interpreter
Presentation on how to chat with PDF using ChatGPT code interpreter
 
E-Vehicle_Hacking_by_Parul Sharma_null_owasp.pptx
E-Vehicle_Hacking_by_Parul Sharma_null_owasp.pptxE-Vehicle_Hacking_by_Parul Sharma_null_owasp.pptx
E-Vehicle_Hacking_by_Parul Sharma_null_owasp.pptx
 
Install Stable Diffusion in windows machine
Install Stable Diffusion in windows machineInstall Stable Diffusion in windows machine
Install Stable Diffusion in windows machine
 
Tech-Forward - Achieving Business Readiness For Copilot in Microsoft 365
Tech-Forward - Achieving Business Readiness For Copilot in Microsoft 365Tech-Forward - Achieving Business Readiness For Copilot in Microsoft 365
Tech-Forward - Achieving Business Readiness For Copilot in Microsoft 365
 
The transition to renewables in India.pdf
The transition to renewables in India.pdfThe transition to renewables in India.pdf
The transition to renewables in India.pdf
 
Automating Business Process via MuleSoft Composer | Bangalore MuleSoft Meetup...
Automating Business Process via MuleSoft Composer | Bangalore MuleSoft Meetup...Automating Business Process via MuleSoft Composer | Bangalore MuleSoft Meetup...
Automating Business Process via MuleSoft Composer | Bangalore MuleSoft Meetup...
 
Unblocking The Main Thread Solving ANRs and Frozen Frames
Unblocking The Main Thread Solving ANRs and Frozen FramesUnblocking The Main Thread Solving ANRs and Frozen Frames
Unblocking The Main Thread Solving ANRs and Frozen Frames
 
Hyderabad Call Girls Khairatabad ✨ 7001305949 ✨ Cheap Price Your Budget
Hyderabad Call Girls Khairatabad ✨ 7001305949 ✨ Cheap Price Your BudgetHyderabad Call Girls Khairatabad ✨ 7001305949 ✨ Cheap Price Your Budget
Hyderabad Call Girls Khairatabad ✨ 7001305949 ✨ Cheap Price Your Budget
 
Snow Chain-Integrated Tire for a Safe Drive on Winter Roads
Snow Chain-Integrated Tire for a Safe Drive on Winter RoadsSnow Chain-Integrated Tire for a Safe Drive on Winter Roads
Snow Chain-Integrated Tire for a Safe Drive on Winter Roads
 
08448380779 Call Girls In Greater Kailash - I Women Seeking Men
08448380779 Call Girls In Greater Kailash - I Women Seeking Men08448380779 Call Girls In Greater Kailash - I Women Seeking Men
08448380779 Call Girls In Greater Kailash - I Women Seeking Men
 
CloudStudio User manual (basic edition):
CloudStudio User manual (basic edition):CloudStudio User manual (basic edition):
CloudStudio User manual (basic edition):
 
Transcript: #StandardsGoals for 2024: What’s new for BISAC - Tech Forum 2024
Transcript: #StandardsGoals for 2024: What’s new for BISAC - Tech Forum 2024Transcript: #StandardsGoals for 2024: What’s new for BISAC - Tech Forum 2024
Transcript: #StandardsGoals for 2024: What’s new for BISAC - Tech Forum 2024
 
Neo4j - How KGs are shaping the future of Generative AI at AWS Summit London ...
Neo4j - How KGs are shaping the future of Generative AI at AWS Summit London ...Neo4j - How KGs are shaping the future of Generative AI at AWS Summit London ...
Neo4j - How KGs are shaping the future of Generative AI at AWS Summit London ...
 
Pigging Solutions in Pet Food Manufacturing
Pigging Solutions in Pet Food ManufacturingPigging Solutions in Pet Food Manufacturing
Pigging Solutions in Pet Food Manufacturing
 
Maximizing Board Effectiveness 2024 Webinar.pptx
Maximizing Board Effectiveness 2024 Webinar.pptxMaximizing Board Effectiveness 2024 Webinar.pptx
Maximizing Board Effectiveness 2024 Webinar.pptx
 
08448380779 Call Girls In Friends Colony Women Seeking Men
08448380779 Call Girls In Friends Colony Women Seeking Men08448380779 Call Girls In Friends Colony Women Seeking Men
08448380779 Call Girls In Friends Colony Women Seeking Men
 
Making_way_through_DLL_hollowing_inspite_of_CFG_by_Debjeet Banerjee.pptx
Making_way_through_DLL_hollowing_inspite_of_CFG_by_Debjeet Banerjee.pptxMaking_way_through_DLL_hollowing_inspite_of_CFG_by_Debjeet Banerjee.pptx
Making_way_through_DLL_hollowing_inspite_of_CFG_by_Debjeet Banerjee.pptx
 
Human Factors of XR: Using Human Factors to Design XR Systems
Human Factors of XR: Using Human Factors to Design XR SystemsHuman Factors of XR: Using Human Factors to Design XR Systems
Human Factors of XR: Using Human Factors to Design XR Systems
 

Macro photography pdf

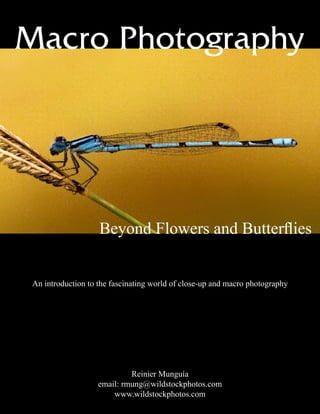
  • 1. Macro Photography Beyond Flowers and Butterflies An introduction to the fascinating world of close-up and macro photography Reinier Munguía email: rmung@wildstockphotos.com www.wildstockphotos.com
  • 2. 2 Introduction This publication will help you get started in the amazing world of macro photography, its challenges and the techniques I use to over- come some of these challenges. Although not a complete guide, it provides you with the knowledge required to take beautiful images. You’ll learn useful techniques that I have learned over the years, sav- ing you time and frustration when shooting small creatures. Most people entering this fasci- nating field of photography think there’s only one way of doing things, but in reality you can ac- complish the same effect using different techniques. Problem solving in the field will depend on many factors including the weather, your equipment limitations and your subject. That’s the reason why there isn’t a single and specific so- lution to most macro photography questions. My best advice is to familiarize yourself with your gear, learn as much as possible about your subject, even before you get out the door. Research plays a big role in successful photography. Preparing yourself to what you might encounter will increase your chances of capturing that unique image. Obviously, equipment is a limit- ing factor in how close you can get and the quality of the image you obtain. We’ll discuss some of the most commonly used equipment, their advantages and how to prop- erly use them to get the best they can provide. Basic photographic techniques such as depth of field, focusing and exposure will be discussed in terms of their applica- tions in macro photography. I have also covered few things that we can do to make our photography more affordable by building simple gad- gets that will improve our photog- raphy with a minimal investment. Finally, I’ll emphasize the im- portance of learning about your subject and the environment in which it lives. How to approach those skittish subjects and how to deal with nature’s obstacles will also be discussed. In order to be a successful nature photographer, you must first become a naturalist. Only through direct observation of the subject, one can learn about the natural world and that leads to better images. One final thought: practice makes perfect, and all good nature photographers are the result of many years of experience. Frustration is part of the equation, and without it, we can’t learn. INTRODUCTION Eastern Tiger Swallowtail, Florida. Nikon D70, 105mm, 1/250 sec. at f8
  • 3. Defining Macro 3 First, lets define macro photogra- phy, as there are several interpreta- tions, but only one correct. This was caused in part to the marketing hype of many manufacturers that claim the macro capabilities of their lenses, in which cases were merely lenses that allowed for closer focusing, but not real magni- fication. While the term macro and close-ups have been used inter- changeably over the years, there’s a difference that sets them apart. The main difference is on the magni- fication rate. Macro photography falls in a category of the so called close ups in which the subject is magnified or enlarge to about 1X, a term also expressed as 1:1 that rep- resents the size of the subject over the size of the image on film. The typical example is the macro photo of a coin. On 35mm photography, we reach 1X when the image pro- duced on film matches the actual size of the coin. Twenty years back, a lens with a maximum magnifica- tion of .25X also expressed as 1: 4 was considered a macro lens. Nowadays, a true macro lens is one that allows you to achieve at least a 1:1. To further explain the concept lets start by defining the term magnification as the ratio between the image on film and the actual size of the subject. To give you an example, an image of a ladybug- about 1/4 inch at 1X, will render an image of the bug of about 1/4 inch on the film. The following table will help you understand how magnification ratios work and the two ways of expressing them as ratios and magnification power. For a subject that is 1 in. long. For instance, an image captured at 1:2 is called half life-size while one captured at 1:1 is called life- size. Take, for example, the nickel coin below. If we shoot the coin at 1X or 1:1 ratio, the image produced on the 35mm frame will be the same size of the actual coin. When looking for a macro lens, you’ll find that those that can reach a 1:1 magnification ratio without any attachments are considered true macros. Once the image size on the film exceeds the actual size of the subject, then we’re talking about high magnification macro photog- raphy. This should not be confused with microphotography that covers magnifications of 100X and more. For most nature photographers, the magnification ratios and the cal- culations involved are irrelevant. They’re happy with what they see through the viewfinder and pay no attention to the actual magni- fication, but for a photographer involved in research of insects or other small creatures knowing it can be a plus. On this book, we’ll cover not only how to shoot real macro imag- es, but also how to get good close- up shots. As I mentioned before, most images considered macro aren’t real macro shots, but merely close-ups. Most nature photog- raphers are more interested on close-ups than true macro images, due to several causes including the difficulty of working at such close range with subjects in the wild, the weather and the light conditions that dictate your shutter speed. The closer you get to the subject, the more light you’ll be blocking from it, plus you run the risk of the subject fleeing the scene. Extreme macro shots require additional equipment that can be cumbersome for field work or too heavy to carry for prolonged walks. Nevertheless, there are situations in which you would love to get re- ally close to tiny subjects, in which case you can use alternative meth- ods to achieve the extra magnifica- tion. Some of these methods I will discuss in more details later in this book. DEFINING MACRO Actual Size on Film Magnification Ratio 1/8 in. 0.125X 1:8 1/4 in. 0.25X 1:4 1/2 in. 0.50X 1:2 3/4 in. 0.75X 1:1.3 1 in. 1X 1:1 2 in. 2X 2:1
  • 4. 4 Equipment EQUIPMENT The basic and most recommend- ed equipment for macro photogra- phy is the 35mm SLR (Single Lens Reflex) camera with TTL capabili- ties. With an SLR system, you see through the viewfinder exactly what will be captured by your camera when you press the shutter release. TTL stands for (Through The Lens) metering, a system in which the amount of light delivered by a flash or ambient light can be metered as the light passes through the lens. This system ensures bet- ter exposures without the guessing work. Before TTL systems hit the market, photographers had to use special exposure calculators to get the right exposure for the subject and to compensate for the magni- fication being used. Digital SLR (DSLR) offers the same advantages and, in some cases, larger magni- fication due to the cropping fac- tor produced by the fact that their CCDs are smaller than the 35mm frame. Besides, they offer a hand- ful of tools for the digital photog- rapher, including instant previews, histograms and highlight warn- ings. Most SLRs provide you with the flexibility of interchangeable lenses, and an array of attachments for macro photography. Even to- day’s compact digital cameras can produce impressive images, and the live previews through the LCD can help on framing the subject and overcome the parallax error found in non-slrs cameras. Almost any SLR or DSLR system will do just fine for close- up work as long as you have the proper lenses and/or attachments. The brand of the camera is irrel- evant, but its ruggedness, reliability and available accessories are very important points when selecting a system. The lens is probably the most important factor to consider. Buying good glass means sharper images, less distortion and better color rendition. For most of us it’s better to save the money on the camera and invest it in a better lens. One other thing to consider is the weight of your setup. If you do more than just closeups, you’ll probably carry few lenses in your backpack to cover all the focal lengths, then you know how heavy that can be. Since the quality of an image depends on the glass, I prefer to have a lighter camera and save the weight for the quality lens. Most of my close-up photogra- phy was created while scouting a site for bird or wildlife photogra- phy. Being prepared can save you a lot of aggravation and frustration. Many times I’ve walked through a nature preserve full of macro and close-up opportunities to suddenly realize that I have left my heavy macro lens at home. But a knowl- edgeable photographer can actually solve this problem without having to come back later. If you plan to come back later, chances are your subject will not longer be there. Among the things you want to have on your camera is the abil- ity of shooting manual mode or at least, some way to override a programmed mode such as aper- ture or shutter priority. Being able to control the aperture settings will help you control the depth of field. Meanwhile, having control of the shutter speed ensures proper exposures and balanced exposures between your subject illuminated by flash and the ambient light over the background. Most macro and close up work requires the use of artificial light to compensate for the low light levels around the sub- ject and to avoid blur due to slow shutter speeds. A flash unit is an essential tool that should be care- fully selected to ensure total TTL capabilities. Let’s discuss in detail the basic gear to get you started. Camera Body Any SLR or DSLR body will work as long as macro lenses or attachments are provided for the purpose of close focusing on the subject. Things to consider when buying a camera system and espe- cially the body include: -Interchangeable lens capability. -Manual exposure mode. -Exposure compensation. -Depth of field preview. -Flash synch of at least 1/250 sec. -Ergonomic design. -Mirror-lockup. -Light weight. -Full range of accessories. Lenses I recommend using lenses that without any attachment or exten- sion tubes can achieve at least a 1:2 magnification ratio. The ultimate lens for macro work is the true macro lens that gives you a 1:1 ratio without any attach- ment. Three basic focal lengths are available in the market: 50mm, 90mm and 105mm. Each one has a particular advantage over the others, even when they of- fer the same maximum aperture of f2.8. The main difference they all have is the minimum focusing distance at which they achieve the 1:1 magnification. The 50mm has the shortest focusing distance with
  • 5. Equipment 5 only 7.4 in., followed by the 90mm at 11.40 in. and finally the 105mm at 12.3 in. This distance is impor- tant especially when working with skittish subjects. Having to focus down to barely 7.4 inches from a jumpy grasshopper will prove to be an impossible task using the 50mm lens. The 105mm is the best choice to tackle this job as it offers you a better working dis- tance. Most true macro lenses are heavy due to their construction and numerous elements incorporated into the barrel. You can achieve magnification ratios of 1: 1 even without owning one of these lenses by using extension tubes. Extension Tubes Extension tubes are similar to a teleconverter with- out the glass elements. They create magnification by separating the prime lens from the focal plane. They’re usually sold as a set of three different lengths: 12mm, 20mm and 36mm. They can be used individu- ally or combined, and produce similar quality as that of a macro lens, as long as the prime lens is of good quality glass. Nowadays, these extension tubes come equipped with electronic contacts that allow you to correctly meter the exposure. In the past, this wasn’t possible, and the macro photographer relied on calcu- lations to get the exposure right. Combined with the TTL capability for flash photography, extension tubes can be an affordable way to get into quality macro photography, with prices ranging from $100.00 US to $200.00 US for a set of three. We’ll discuss them in more details later in this book. Supplementary lenses These are the so called close-up lenses or diopters that can be attached to the front of the lens in the same way filters do, and indeed many people call them close-up filters. They come in different strengths, measured in diopters such as +1, +2 and +3. The magnification obtained will depend on the diopter power and the lens being used. Most of these supplementary lenses are made of a sin- gle element lens that works by shortening the effective focal length of the lens in which they are used, thus allowing you to focus closer to your subject. They can be used singly or combined, but let me warn you about the degraded quality when combined. These lenses are inexpensive and easy to use, and can be a good way to get started. Bellows A bellows is simply a variable length exten- sion tube. Magnifica- tion can be changed by how much the bellows is extended and the focal length of the prime lens used. They are placed between your cam- era body and the lens. Extremely powerful magnifica- tion can be obtained from this setup, but unfortunately they’re too bulky to carry into the field. Besides, they’re not TTL capable and the aperture needs to be stopped down physically by moving the diaphragm or using a double cable release. Focusing can also be a challenge and requires to be mounted on a tripod at all times for effective use. Macro lens The macro lens is definitely the best way to do mac- ro in the field. These lenses are especially designed to obtain maximum magnification with minimal distor- tion. A true macro lens can yield a 1:1 magnification without any attachment. Most of today’s macro lenses EQUIPMENT Sigma Macro 105 mm f2.8
  • 6. 6 Equipment are autofocus and work perfectly with modern TTL technology. Unfortunately, using autofocus on these lenses can be very frustrating at high magnification, as they tend to be slow and erratic. I personally do most of my macro work focus- ing manually anyway, so this does not bother me that much. The most common focal length of true macro lenses are 50mm, 90mm, 105mm and 180mm. While they all give you the same magnification, it’s the working distance that varies. In terms of pricing, they are expen- sive, but worth every single penny. Flash Most, if not all macro work, requires some flash to aid in stop- ping motion and softening shad- ows. A TTL unit will offer you the best results as long as it allows you to dial in exposure compensa- tion. Smaller units are preferred because of their weight and size. Their small size makes them less frightening to your subject. They don’t need to be powerful as your subject to camera distance will be short enough to use stopped down apertures in excess of f16 without using all the power stored in the capacitors. The selection of the flash should be based in compat- ibility and features, rather than size or value. Flash Extension Cables The top mounted flash is not very useful in macro photography because the subject might be too close to the lens. For this reason, it’s preferably to have it off-camera and usually at a 45° to either side of the subject. The only way to achieve this is by using TTL flash extension cables. Many recent cameras offer wireless capabili- ties that remove the needs of these cables, but their performance at close range is questionable. Tripod The tripod is probably one of the most important pieces of equip- ment for any type of photography, but when it comes to macro pho- tography, you need a sturdy one that offers flexibility of motion. Meaning that you can move the axis in various directions and an- gles. A removable center column is a must, and if it can be positioned diagonally towards the ground, even better. A tripod to be used for macro work should allow you to extend the legs out, flat against the ground so that you can work with the camera upright. The idea of inverting the center column is awkward and risky to say the least. If you want to achieve maximum sharpness, I’ll recommend using a tripod whenever possible. Also, there’s no such thing as a light- weight tripod that is strong enough for nature photography. Heavier tripods are more stable and dura- ble. Avoid those with many plastic parts; they won’t survive the rough outdoors. Flash Meter The flash meter can be a really helpful tool when using non-TTL extension tubes or bellows. By metering the available light or that of a flash exposure, you can then calculate the amount of light loss due to extension and get the right exposure. Remember when you extend the lens by any mean, there will be a loss of light. Macro Focusing Rail This device makes focusing at short distances a lot easier by keep- ing the camera over a moving rail that can be adjusted to move back and forth. When working at close to 1:1, focusing the lens might also change the extension of the lens. In other words, as you focus on a subject, the front element of your lens is displaced forward, chang- ing the extension of the lens. This change in extension affects the magnification requiring you to recompose by moving the camera. No better way to do this than by using a focusing rail. They can be expensive and too bulky to carry on your backpack on long walks. Macro Bracket This item will be your third hand for holding a flash. While there are several designs in the market, I have used one simple design that can be easy to build and very flex- ible. With just one trip to Home Depot or Lowe’s, and a quick stop by the local camera store, you’re set to build your own flash bracket. More details on page 8. EQUIPMENT
  • 7. Do It Yourself 7 Here’s a list of some household items I used in my photography. They are cheap and very helpful. Aluminum Foil This highly reflective material can be used to bounce some light into your subject. Its malleabil- ity allows you to shape it in a self standing form around branches or the ground. Cardboard Reflectors I usually make this by cutting pieces of cereal boxes and gluing a piece of foil to one side. You can create different shapes to accom- modate any situation. Small Mirrors Small mirrors serve the same pur- pose of the reflectors with the only difference that they can deliver a lot more light from even farther distances. Masking Tape Masking tape and wire ties can be used to tie obstructive vegeta- tion away from the subject. They can also be used to hold reflectors or mirrors on branches. Clamps and Clips These useful tools work as a third hand for the photographer by keep- ing things together, such as reflec- tors or flash extension cables. Diffused Light Bowl Here’s a way to create more natural light from your flash expo- sures by softening the light. It’s very useful when available light is too low, and your only solution to get the shot is to use a flash. Any semi-transparent plastic bowl will work, but should be large enough to allow the lens to go through for really tight close-ups. Cut the bot- tom section of the bowl and glue a piece of foil halfway through the inside wall. You should end up with half of the bowl covered with aluminum foil. DO IT YOURSELF Aluminum Foil Small Mirrors Masking Tape Diffused Light Bowl Clamps and Clips Household items useful for macro and close-up photography Cardboard Reflector
  • 8. 8 Do It Yourself DO IT YOURSELF When it comes to macro pho- tography, the hobby can become expensive. Fortunately, you can reduce the cost by building some of your gear. I built this custom flash bracket for a fraction of the cost of the ones commercially avail- able. By doing so, you’ll be able to customize it to your liking and to fit your camera and flash needs. This bracket idea came from John Shaw, a well-known nature photographer, who designed this rig to satisfy his macro lighting needs. Having spent many hours using commercial units, he was able to find all their flaws and came out with one of the most effective systems. Based on his idea, I de- cided to adjust mine to my needs, too. Most flash brackets mount the flash by the shoe. Over time, this can bring trouble to your flash unit due to increased vibrations and stress over this sensitive part. To reduce the stress on the hot shoe, I simply wrap two rubber bands over the flash body onto the metal arm. This has an added conve- nience. In the field, while walking through thickets and bushes, it’s really easy to hit the flash, but the rubber bands act as a shock ab- sorber. The flash arm is mounted on a dual function mini-ball head that controls the motion of the flash in almost any direction. Finally, the bottom section that attaches the bracket to the camera is fitted with a Bogen quick- release plate, al- lowing for easy and fast mounting of the system on a tripod. I have drilled several holes on the flash arm for additional accessories, in- cluding extensions and diffusers. The construction of this bracket is very easy and reliable. The frame is made of a 1/8” in. thick by 1” in. wide aluminum strip. Your choice for the mini-ball head will de- pend on availability, but should be strong enough to hold the weight of your flash loaded with batter- ies. For the quick release, I used the readily available Bogen 3049. I wrapped some duct-tape on the bottom metal piece to avoid the camera from slipping during use. A piece of thin cork or rubber can be used instead, but since gluing it to the smooth metal surface can be hard and non-durable, I opted for using duct-tape. It works great and creates a good non-slip surface. At the end, I spent less than $50.00 dollars building this rig, and it works flawlessly. Now, if we can build a good macro lens, then we would have saved more than 50% off all the cost of macro photogra- phy. Well, there’s a way to even save on that, by simply reversing a lens you end up with nice macro lens for a fraction of the cost.
  • 9. Exposure 9 Exposure Close ups are exposed following the same rules you apply to any other type of photography, with the only difference that compen- sation needs to be applied when using non-TTL equipment. Every time we add extension to any lens, there’s a loss of light associated with the extension. In a TTL sys- tem, these extensions are taken in consideration to adjust the expo- sure readings of the built-in meter in your camera. When using non- TTL coupled equipment, such as a bellows or extension tubes, then you need to calculate the right ex- posure using an external light /flash meter and compensating for the amount of light loss due to exten- sion. Most extension tubes come with a chart that specify how many stops of light you lose when using them singly or combined. Determining the exposure re- quires the same procedure as a regular photo. Establishing the tonal value of your subject before shooting can make the difference, especially when working with ani- mated subjects that can disappear in the blink of an eye. By defin- ing the subject’s tonality, you’ll be able to make exposure correc- tions. Remember, your camera built-in meter is calibrated to see a middle toned subject, in which case it’s easy to just go by the metered exposure. But if your subject is too dark or too light, you need to compensate to obtain the right ex- posure. When selecting the expo- sure, you need to pay attention to the background. Dark backgrounds will take away from the image and even more, if the subject is a diurnal animal. Black backgrounds will definitely enhance the color of your subject, but when it comes to be biologically correct, it’s hard to accept a monarch butterfly spread- ing the wings over a black back- ground. I treat subjects based on their biology. Some tree frogs, for example, will benefit from a dark background to imply their noctur- nal behavior. First, I meter for the background with the selected aperture I have anticipated for the depth of field I want. Since I use the flash at almost all times, then I proceed to determine if I need any compen- sation for the subject in the fore- ground. By adjusting the flash out- put, I obtain a balanced exposure in which the foreground is lit by a mix of ambient and flash while the background is lit by available light. If the subject is not middletone, then compensation needs to be add- ed accordingly. The image of the grasshoppers was a straight middle- toned image in which no com- pensation was required. For the White Peacock butterfly, I needed to reduce the flash exposure to keep detail in the highlight areas. In this case, I dialed -1.7 EV on my cam- era to avoid blowing the highlights. Remember, your TTL flash is also calibrated to read middletoned sub- jects, and the darker background in this image would have fooled the flash to believe that more light was needed, thus overexposing the but- terfly. In the case of the frog, I had to increase the flash output since the lighter leaf would have fooled the TTL system making the frog way darker. By dialing a +1 EV on the flash compensation, I was able to overcome this problem. Each image presents different problems, and there’s not a single solution. By carefully studying each case as it happens, you’ll be able to rec- ognize problematic situations and implement a solution based on your previous experiences. Mating Grasshoppers, Florida Nikon D100 105mm f8 1/125 White Peacock, Florida Nikon D70 105mm f4 1/125 with flash -1.7 EV . Black & Green Dart Frog, Costa Rica Nikon D70 105mm f8 1/250 with flash +1.0 EV .
  • 10. 10 Depth of Field DEPTH OF FIELD Depth of field (DOF) comprises the area of sharpness right in front and behind the focus plane. In other words, how much in front and behind the subject will look totally sharp. In theory, you can focus your camera in a precise area on your subject and that will define the focus plane. However, there are areas of relative sharpness that extent 1/3 in front of the focus plane and 2/3 behind. This zone of sharpness is what we refer to as depth of field. Depth of field varies directly with the aperture selected: the smaller the aperture, the greater depth; the wider the aperture, the shallower depth of field. At the same time, depth of field is shal- lower as you focus closer to the subject, regardless of the focal length of the lens. For example, when focusing on a large subject 10 feet away, the depth of field for a particular lens at f16 is almost in- finite behind the subject and close to 10 feet in front of the subject. The same lens focus on a subject 10 inches away produces a depth of field of less than 1/2 in. in front and 2 inches behind the subject. Focal length does not change the depth of field, it’s the distance between the lens and the subject that matters. Shoot a subject with a 50mm lens at f8 and then shoot the same subject with a 100mm lens at the same aperture, but change the distance to create the same image coverage of the 50mm lens, and you’ll end up with the same depth of field, regardless of focal length. Now if you maintain the same distance while shooting with these two lenses, then the longer focal length will render a shallower depth of field. In the field, you need to pay at- tention to the depth of field. It’s important that you determine the areas that you want to maintain in total sharpness. By doing so, you can establish some degree of sepa- ration between the subject and the background. Having a background that is too crowded and sharp can compete with your subject to the point that the subject loses impact. When selecting the right aperture for the desired depth of field, make sure that you include all of your subject whenever possible. Occa- sionally, depth of field is so mini- mal that some parts of your subject may render soft. As a rule of thumb when shooting insects, it’s better to keep the area surrounding the eyes as sharp as possible. To avoid the guessing work of how much to stop down the lens for the desired depth, manufactur- ers have incorporated depth of field previews in the cameras. Simply select the aperture and press the DOF preview to see how far the area of sharpness extends. Note that when using the DOF preview, your viewfinder will get dark as less light is passing through the lens. In low light situations, this method might not be as effective. In the photo below, I have taken two separate exposures, one us- ing f 11(left) and the other using f4 (right). Notice how the back- ground makes the left picture too cluttered. The picture on the right makes the subject stand out, without sacrificing detail on its body. By simply selecting the right aperture, I was able to keep enough detail on the subject and less on the background. It’s that easy, practice is all it takes. Dragonfly, Florida . Nikon D70, 105mm, 1/250 sec. at f11 Nikon D70, 105mm, 1/1600 sec. at f4
  • 11. Maximum Sharpness 11 Sharp images are the result of careful planning and a good con- trol of several factors. In order to obtain sharp images, we need to take in consideration the subject’s movements, wind, camera shake and shutter speed. Some of these factors can be controlled by the photographer, but others are left for the subject to decide. Obviously, it’s hard to control the fleeing instinct of a dragonfly as you get closer, or the leap for life of a tree frog, but there are things we can do to reduce the chances. The wind can, in many cases, be controlled by using your body to block the stream. A slight breeze can render your image blurred when working at such a close range. As a matter of fact, everything that affects the image quality on a normal picture will be intensified when working close ups and macro photography. Take, for example, low light. Low light can be an issue for regular photography, but with macro is even worse, as you reduce the amount of light hitting the subject when you get closer, and further reduce the light if using exten- sions. Camera vibrations can be disastrous in macro photography; a slight move, and your subject will come out soft. That’s why most macro work improves with the freezing action of a flash exposure. When composing a landscape shot, moving three feet to either side barely affects the composition. If you move 1/4 in. while shooting a macro, you left half of the subject out of the frame. This is why it’s so hard to do handheld shots of tiny subjects. A tripod is your best defense against blurred images, but it needs to be stable and vibra- tion free, especially when shooting in low light situations that require extended exposure time. In such event, it’s recommended to use a cable release or remote to trigger the shutter, reducing induced vibra- tions. Selecting the right focus plane is important as the depth of field is so limited when working a few inches from your subject. The best way to reach the perfect focus is by actu- ally moving the camera until the image is sharp, rather than focus- ing the lens, as this might change the magnification, and you’ll find yourself moving the camera any- way. That’s when a focusing rail comes handy. Another factor to take in consid- eration is the quality of your lens, in the case of a macro lens or the prime lens used with extensions. Macro lenses offer the best qual- ity in terms of resolution and by far less distortion than any other combination. If you use diopters to increase the magnification of a normal lens, you can expect a loss of sharpness that gets progressively worst as it reaches the edges of the frame. DSLRs with cropping factor of 1.5X will benefit a bit by using only the center area of the diopter, where distortion is less noticeable. As you can see, several factors influence how sharp your photos may look. Take also in consideration the aperture selected and the depth of field it produces. These will have a great impact on how much sharpness you get. The above image was focused on the eyes of the spider with the camera mounted on a tripod and an aper- ture of f16 to increase the apparent sharpness created by the increased depth of field. MAXIMUM SHARPNESS Green Lynx Spider, Florida. Nikon D70, 105mm, 1/250 sec. at f16 w/flash -1.
  • 12. 12 Flash Technique As I mentioned before, flash is instrumental in close-up photogra- phy. As matter of fact, 95% of my macro work uses a flash one way or the other. Either as a fill or main light, using flash has many added advantages. The freezing effect of the flash is great for fast mov- ing creatures. When using flash as your only main light source, you can obtain sharp images even when hand holding the camera. Since the duration of most flashes are between 1/10,000 sec. and 1/25,000 sec., any last minute movement will be frozen by the light. Now, this is true only if the available light exposure is fast enough to avoid ghosting. Ghost- ing is caused when the subject moves during a long exposure to balance the available light. A long exposure with flash is considered two separate exposures starting at the same time. The light emitted by the flash has a shorter duration than the shutter speed used on the long exposure. The flash exposure is controlled by the aperture only. When you fire a flash during a long exposure, the camera continues to capture light throughout the length of the exposure. If your subject moves during that time, the move- ment will be recorded as a blurred image that extends beyond that of the one created by the flash. Also, any camera movement during the ambient light exposure may cause a ghosting effect. Balancing the ambient light with your flash ex- posure can be tricky and, in many cases, if not handled correctly, can make your images look unnatural. Sometimes, macro images can look over-flashed if the background is too dark. The opposite occurs when the background is too light and the subject is too dark. If ever in doubt about the right exposure for the ambient light, then bracket the shutter speed and leave the aper- ture untouched. Remember that when using the flash, the exposure of the subject will be determined primarily by the aperture selected, so any changes to the flash expo- sure should be made by dialing compensation instead of opening or closing the aperture that will also change your DOF. For sure, the more natural looking images are those where the foreground was illuminated by flash blends perfectly with the ambient light of the background. Many things need to be taken in consideration when making your selection of shutter speed and aperture for a particular situation. Pay attention to your shutter speed, as this is the culprit in most throw-away macro im- ages, but don’t neglect the aperture, since depth of field depends on it. Every shot brings its own chal- lenges. Practicing with unanimated subjects at home can improve your flash techniques. For most images, the flash should be positioned at 30° over the lens and facing your subject. This way, shadows will fall behind the sub- ject. Using one single flash offers more natural light and less spec- tacular highlights, and only one eye catch light. FLASH TECHNIQUE Clear Wing Butterfly, Costa Rica. 50mm Macro 1/60 at f8. A main flash exposure shot. Cicada sp, Costa Rica. The shot on the left was exposed for 1/25 sec. at f8, creating a flash based exposure that rendered the background too dark. In order to balance the ambient light of the background, I used a slower speed of 1/2 sec. for the picture to the right that resulted in some ghosting of the subject due to camera or subject movement.
  • 13. Magnification 13 The magnification required for macro photography can be obtained by utilizing different methods. In order to magnify, the front element of the lens must be displaced for- ward and away from the film plane of the camera. This is achieved by extending the lens. In essence, that’s how all macro lenses work. As you focus closer, the front ele- ment is displaced forward. If you don’t have a macro lens, then ex- tension tubes will produce the same effect. A 50mm lens is considered a normal lens as its field of view is fairly similar to that of the human eye. This lens can produce great macro shots when used with exten- sions. Put a 25mm extension tube on a regular non macro 50mm lens, and you’re ready to capture images at 1/2X or 1:2. If you add 50mm of extension to the same lens, the magnification goes to 1X or 1:1. The following formula can be used to determine the magnification fac- tor when using extensions tubes or bellows with any lens. Take for example a 100mm with a 25mm extension an you get 1/4 X or 1:4. 0.25X = 25mm/100mm Another way to express 0.25 is in the fraction equivalence of 1/4X and in the ratio format of 1:4. When adding extension, the light that passes through the lens is reduced. In TTL systems, this loss is compensated by the metering system, but when you use a non- TTL extension tube, then you need to calculate the light loss. Most of the time, adding the same number of extension as that of the focal length results in light loss of at least 2 stops. Even though most extension tubes manufacturers include this information with their products, it’s best to run a series of tests with your camera focused on a neutral colored surface under even light. First put on the prime lens, meter, and then record the metered exposure with a fixed aperture of f8.0. Proceed to take the image. Then, add the extension, and take a series of exposures using apertures that range from two stops over and two under of f8, and keep record of each one in reference to frame number. In a DSLR, it’s easy to follow the serial number and time as they were taken. Review each one of those images and compare them with the original image with no extension. Say that the exten- sion shot at f5.6 is the closest match to the exposed at f8 without extension, then you can assume that the extension produced a 1 stop of light loss. Another way to achieve extreme magnification is by actually revers- ing a lens in front of another lens, also called stacked lenses. Put a 50mm lens in front of a 100mm lens by means of a reversing ring and now you have 2X magnifica- tion. In this case you can use the following formula to calculate magnification. 4X = 200mm/50mm Stacked lenses offer great image quality and, when used with a TTL system, the metering works fine as long as the prime lens is coupled and TTL compatible. The stacked lens should be left wide open to avoid light loss. MAGNIFICATION Garden Fly, Florida. This fly was photographed using a 135mm macro with a stacked 50mm len. The magnification is about 3X for this subject of less than 1/4 in. long. Extension Focal Length Mag.= Focal length of prime lens Focal length of stacked lens Mag.=
  • 14. 14 Macro Photography Tips INTRODUCTIONMACRO PHOTOGRAPHY TIPS Paralleling the subject For increased depth of field without having to stop down the lens too much, try paralleling the subject as much as possible. By turning your camera until the sub- ject is parallel with the film back or ccd, you will obtain the sharp- est focus possible, even with fairly open apertures. Early in the morning While almost any time is good for macro work, the best time to shoot animated macro subjects is early in the morning, before they get too hyper. Most insects and reptiles are slow during the early hours and depend on sunlight to gain their normal body operat- ing temperatures. Being there early will improve your chances of finding these creatures when they’re still in slow motion, and even sleeping. Another reason to be there early is to beat the wind. An hour too late, and you’ll be fighting and losing a battle with the wind. Cool early mornings are my favorite time for most macro shots, unless there’s an overcast or I’m working under the canopy of a rainforest. Focusing When handholding a camera, it’s better to focus by moving the cam- era forward than using the focus- ing ring. If mounted on a tripod, a focusing rail will give you the best results. Better Backgrounds The focal length you use will dic- tate how your background looks. Wide lenses will include more of the background than a tele. When using a 50mm lens with diopters, you’ll get a lot more of the back- ground in the picture than when using the same diopter on a 200mm lens. Also, by simply changing your position in respect to the sub- ject, you can avoid having a dark or uninteresting background. Softer Light When shooting wildflowers and other unanimated subjects, you can soften the light by actually block- ing the light with your body. The shade created will soften the light, making it look like an overcast. Also, by using the light bowl tech- nique, you can enhance the shadow areas. Working with amphibians Amphibians are sensitive subjects and should be handled with care. Handling these beautiful creatures requires a little knowledge about their physiology as well as their behaviors. Avoid using insect re- pellent, perfume or lotion if you’re planning on working with these animals. Always have distilled water handy to keep your subject moist at all times. Even the contact with your bare hands can take away the moisture of their skin. Forgot the lens? I normally carry a good assort- ment of lenses in my backpack. But over long distances, this can be a burden and can leave you with a back pain. To avoid this problem, I packed the lenses according to what I’m planning to shoot. Well, this approach had left me without my heavy macro lens in situa- tions where I could have used it. One time, while shooting birds, I found a tiny and colorful cricket, but without the macro lens, I was doomed. I then realized the po- tential of reversing lenses. I took my lightweight 35-80mm lens and Dragonfly, Florida. Nikon D70, 105mm 1/125 at f5.6. Paralleling the subject ensures the sharpness focus and enough depth of field, even with fairly large apertures.
  • 15. Macro Photography Tips 15 placed it in reverse in front of the lens mount of the camera. Voila! It worked. Then, I had to take a series of exposures to select the best, since all TTL capabilities are lost when the lens is not physi- cally attached to the electronic couplings. The focusing is done by moving the camera, and the mag- nification can be changed by using the zoom. The Nikon D lens series are equipped with an aperture ring that can be operated even when the lens is removed from the camera. I could select any aperture I want prior to pressing the shutter release to get the right depth of field. Cool stuff that can save you when far from home. Approaching the subject Some macro subjects are easier than other. For instance, a flower won’t move unless is blown by the wind, but a grasshopper will jump at the first sign of danger. Unfortu- nately, they don’t know our inten- tions and our massive size when compared to them, doesn’t help either. But there are ways we can get close without scaring them off. Watch your shadow as you move close to your subject. This can make them aware of your presence way before you get in position. Avoid making noises and sudden moves when working with reptiles and amphibians. Many insects including butterflies are easier to approach from a low level position, where your profile is less threaten- ing. Study your subject There’s nothing better than to be prepared for the subject you’ll be working with in the field. Knowing about their behaviors can greatly enhance the quality of images you produce. While looking for insects, I found this praying mantis. Within seconds, a butterfly stopped on the same bush where the mantis was. The mantis showed interest on the visitor and, within seconds, was at striking distance. This time, the butterfly flew before the attack. I decided to wait for another try, and as I always say, those who wait, get the chance. The next butterfly that came by the bush wasn’t that lucky and I was able to capture the event, on video and still. Opportunities for great shots are out there waiting for you. Take your time and enjoy. Respect nature Photography is one of the best ways to promote the importance of all living things. Take pride on your work and share it with others. The knowledge that you gain by doing so is great and the benefits to others are priceless. Learning to respect and appreciate nature should be in any nature photogra- pher’s best interest. The welfare of our subjects should be our main concern. Only then, we can teach others about the beauty of nature and the importance of all the living things. MACRO PHOTOGRAPHY TIPS Praying Mantis, Florida. Nikon D70, 105mm Macro 1/500 f8 w/ fill flash.