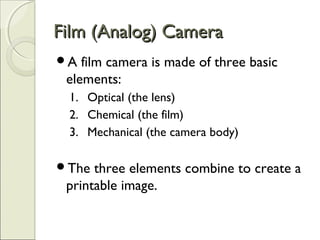
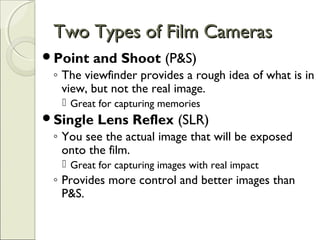
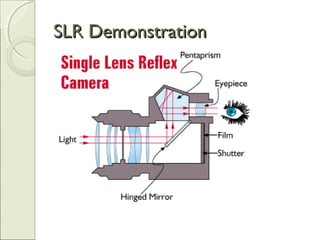
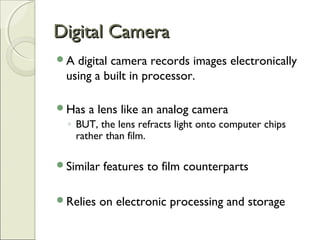
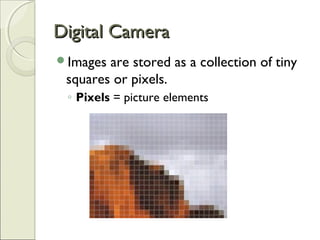
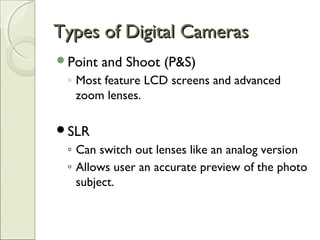
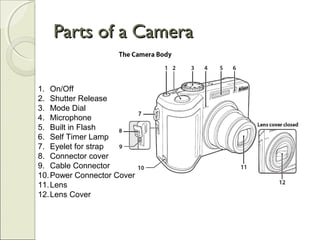
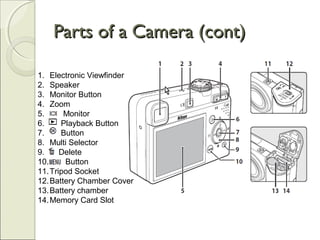
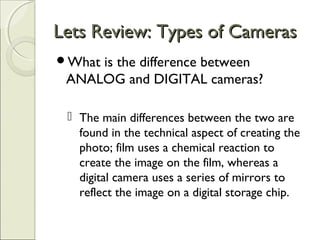
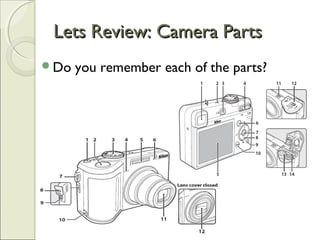
Camera BasicsCamera Basics
Do you have a camera?Do you have a camera?
What kind of camera is it?
Why do you take photographs?
Types of CamerasTypes of Cameras
Film (Analog) Cameras
Digital Cameras
Film (Analog) CameraFilm (Analog) Camera
A film camera is made of three basic
elements:
1. Optical (the lens)
2. Chemical (the film)
3. Mechanical (the camera body)
The three elements combine to create a
printable image.
Two Types of Film CamerasTwo Types of Film Cameras
Point and Shoot (P&S)
◦ The viewfinder provides a rough idea of what is in
view, but not the real image.
 Great for capturing memories
Single Lens Reflex (SLR)
◦ You see the actual image that will be exposed
onto the film.
 Great for capturing images with real impact
◦ Provides more control and better images than
P&S.
SLR DemonstrationSLR Demonstration
Digital CameraDigital Camera
A digital camera records images electronically
using a built in processor.
Has a lens like an analog camera
◦ BUT, the lens refracts light onto computer chips
rather than film.
Similar features to film counterparts
Relies on electronic processing and storage
Digital CameraDigital Camera
Images are stored as a collection of tiny
squares or pixels.
◦ Pixels = picture elements
Digital CameraDigital Camera
Resolution: number of pixels captured
by the image sensor.
Higher Resolution Image
300 ppi
Lower Resolution Image
72 ppi
Types of Digital CamerasTypes of Digital Cameras
Point and Shoot (P&S)
◦ Most feature LCD screens and advanced
zoom lenses.
SLR
◦ Can switch out lenses like an analog version
◦ Allows user an accurate preview of the photo
subject.
Parts of a CameraParts of a Camera
1. On/Off
2. Shutter Release
3. Mode Dial
4. Microphone
5. Built in Flash
6. Self Timer Lamp
7. Eyelet for strap
8. Connector cover
9. Cable Connector
10.Power Connector Cover
11.Lens
12.Lens Cover
Parts of a Camera (cont)Parts of a Camera (cont)
1. Electronic Viewfinder
2. Speaker
3. Monitor Button
4. Zoom
5. Monitor
6. Playback Button
7. Button
8. Multi Selector
9. Delete
10. Button
11.Tripod Socket
12.Battery Chamber Cover
13.Battery chamber
14.Memory Card Slot
How to use a cameraHow to use a camera
Getting your camera readyGetting your camera ready
1. Remove the lens cap if necessary and set
the mode dial.
2. Turn on the camera.
3. Check the battery levels and number of
exposures or images you have room to
capture.
4. Apply any necessary additional settings
to ensure quality while taking photos.
Taking the photoTaking the photo
1. Ready the camera including stabilize the
camera to minimize movement.
2. Frame the picture.
3. Press the shutter release button half way
to automatically focus the camera.
4. Depress the shutter release button to
capture the image.
Viewing and Transferring PhotosViewing and Transferring Photos
Review the photos you have taken.
Download the images to your computer
using the provided cable or a card reader.
Lets Review: Types of CamerasLets Review: Types of Cameras
What is the difference between
ANALOG and DIGITAL cameras?
 The main differences between the two are
found in the technical aspect of creating the
photo; film uses a chemical reaction to
create the image on the film, whereas a
digital camera uses a series of mirrors to
reflect the image on a digital storage chip.
Lets Review: Camera PartsLets Review: Camera Parts
Do you remember each of the parts?
Lets Review: Taking a PhotoLets Review: Taking a Photo
What is the first step to getting your
camera ready?
◦ Remove the lens cap (if necessary) and set
the mode dial.
What happens if you do not stabilize
your camera before taking a picture?
◦ Your picture will not be as clear as it could
have been.
Tomorrow…Tomorrow…
We will talk about the composition of
your photo and how to make your
photographs great!

Camera basics lesson_1

  • 1.
  • 2.
    Do you havea camera?Do you have a camera? What kind of camera is it? Why do you take photographs?
  • 3.
    Types of CamerasTypesof Cameras Film (Analog) Cameras Digital Cameras
  • 4.
    Film (Analog) CameraFilm(Analog) Camera A film camera is made of three basic elements: 1. Optical (the lens) 2. Chemical (the film) 3. Mechanical (the camera body) The three elements combine to create a printable image.
  • 5.
    Two Types ofFilm CamerasTwo Types of Film Cameras Point and Shoot (P&S) ◦ The viewfinder provides a rough idea of what is in view, but not the real image.  Great for capturing memories Single Lens Reflex (SLR) ◦ You see the actual image that will be exposed onto the film.  Great for capturing images with real impact ◦ Provides more control and better images than P&S.
  • 6.
  • 7.
    Digital CameraDigital Camera Adigital camera records images electronically using a built in processor. Has a lens like an analog camera ◦ BUT, the lens refracts light onto computer chips rather than film. Similar features to film counterparts Relies on electronic processing and storage
  • 8.
    Digital CameraDigital Camera Imagesare stored as a collection of tiny squares or pixels. ◦ Pixels = picture elements
  • 9.
    Digital CameraDigital Camera Resolution:number of pixels captured by the image sensor. Higher Resolution Image 300 ppi Lower Resolution Image 72 ppi
  • 10.
    Types of DigitalCamerasTypes of Digital Cameras Point and Shoot (P&S) ◦ Most feature LCD screens and advanced zoom lenses. SLR ◦ Can switch out lenses like an analog version ◦ Allows user an accurate preview of the photo subject.
  • 11.
    Parts of aCameraParts of a Camera 1. On/Off 2. Shutter Release 3. Mode Dial 4. Microphone 5. Built in Flash 6. Self Timer Lamp 7. Eyelet for strap 8. Connector cover 9. Cable Connector 10.Power Connector Cover 11.Lens 12.Lens Cover
  • 12.
    Parts of aCamera (cont)Parts of a Camera (cont) 1. Electronic Viewfinder 2. Speaker 3. Monitor Button 4. Zoom 5. Monitor 6. Playback Button 7. Button 8. Multi Selector 9. Delete 10. Button 11.Tripod Socket 12.Battery Chamber Cover 13.Battery chamber 14.Memory Card Slot
  • 13.
    How to usea cameraHow to use a camera
  • 14.
    Getting your camerareadyGetting your camera ready 1. Remove the lens cap if necessary and set the mode dial. 2. Turn on the camera. 3. Check the battery levels and number of exposures or images you have room to capture. 4. Apply any necessary additional settings to ensure quality while taking photos.
  • 15.
    Taking the photoTakingthe photo 1. Ready the camera including stabilize the camera to minimize movement. 2. Frame the picture. 3. Press the shutter release button half way to automatically focus the camera. 4. Depress the shutter release button to capture the image.
  • 16.
    Viewing and TransferringPhotosViewing and Transferring Photos Review the photos you have taken. Download the images to your computer using the provided cable or a card reader.
  • 17.
    Lets Review: Typesof CamerasLets Review: Types of Cameras What is the difference between ANALOG and DIGITAL cameras?  The main differences between the two are found in the technical aspect of creating the photo; film uses a chemical reaction to create the image on the film, whereas a digital camera uses a series of mirrors to reflect the image on a digital storage chip.
  • 18.
    Lets Review: CameraPartsLets Review: Camera Parts Do you remember each of the parts?
  • 19.
    Lets Review: Takinga PhotoLets Review: Taking a Photo What is the first step to getting your camera ready? ◦ Remove the lens cap (if necessary) and set the mode dial. What happens if you do not stabilize your camera before taking a picture? ◦ Your picture will not be as clear as it could have been.
  • 20.
    Tomorrow…Tomorrow… We will talkabout the composition of your photo and how to make your photographs great!

Editor's Notes

  • #3 Have the students share briefly about their cameras and why they take photographs. Reinforce reasons why people take photographs. Fun or hobby Capture memories Job or career Tell a story (for news)
  • #6 Point and Shoot (P&S) The viewfinder provides a rough idea of what is in view, but not the real image. This occurs because you are not looking through the lens. Have students make a viewfinder with their fingers. Have them simulate a camera by closing one eye and holding their simulated viewfinder over their open eye. This is what taking a P&S photo is like. P&S are great for capturing memories Single Lens Reflex (SLR) You see the actual image that will be exposed onto the film. Great for capturing images with real impact. Provides more control and better images than P&S. See video for SLR animation in resources and lesson plan.
  • #7 “When you press the button on an SLR camera. The mirror flips up exposing the film to the light coming through the lens”, artwork by David Garrison
  • #10 Note the differences in the clarity of the higher resolution image versus the lower resolution image.
  • #12 On/Off: Controls all operations of the camera Shutter Release: Controls the capture of the photos Mode Dial Allows user to set some controls See lesson plan for overview of specific mode dial options. Microphone: For use with audio and video capture Built in Flash Settings for the flash are controlled through the setting menu. See lesson plan for explanation of each flash setting. Self Timer Lamp: Indicates that the self-time is set and blinks until one second before the picture is taken and will remain lit until the image is captured. Eyelet for strap: Where the strap is connected to the camera. Connector cover Cable Connector: Connection for digital image downloading cable Power Connector Cover Lens Lens Cover: Opens and closes automatically on some models, but may have to manually remove the lens cover before turning the power on for some models to operate properly
  • #13 Electronic Viewfinder: Used to frame images; especially when bright light makes the monitor hard to see. Speaker: Allows you to hear the volume when playing audio and video back. Monitor Button: Pushing switches between the monitor and electronic viewfinder. Zoom T increases how much of the subject is in the frame W increases the area visible in the frame Monitor: Can be used in the place of the electronic viewfinder or to view images and videos captured on the digital camera. Playback Button: Allows you to view images and other media captured using the camera OK Button: Allows you to accept changes via the multi selector and settings menu. Multi Selector Allows you to apply various settings including (flash and focus modes, timer, and exposure compensation). You can also make menu selections using the multi selector arrows. Delete: Provided to remove images before transferring to a computer Menu Button: Provides all of the additional settings that can be navigated. Tripod Socket: Area ready for tripod attachment Battery Chamber Cover: Cover for the battery storage area. Battery chamber: Some cameras require special batteries while this camera requires AA batteries. Memory Card Slot: Where memory card is inserted or stored while camera is in use.
  • #15 See lesson plan/ handout
  • #16 See lesson plan/ handout