1. Get started with digital photography!
Use the right digital camera for you. Learn how to use your camera and trans-
fer photos into a computer. Practice, practice, practice taking photos. Play with
and manage your photos. Print, e-mail, or post your photos on the web.
Have FUN!
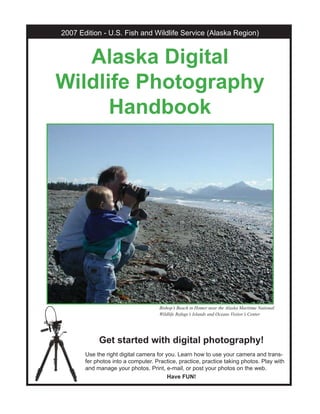
2007 Edition - U.S. Fish and Wildlife Service (Alaska Region)
Alaska DigitalAlaska Digital
Wildlife PhotographyWildlife Photography
HandbookHandbook
Bishop’s Beach in Homer near the Alaska Maritime National
Wildlife Refuge’s Islands and Oceans Visitor’s Center
2. 2
DIGITAL WILDLIFE PHOTOGRAPHY handbook
Photography NotesPhotography Notes
Before You Go - Pack your camera bag
Extra Batteries and Power Source
Small notepad and pen to make
any notes about your pictures
Extra media (compact flash card,
smartmedia, SD card, xD, cd’s, or
whatever your camera uses)
Binoculars (not required, but nice
to have)
Neckstrap—Use a neckstrap for your
camera instead of only a wrist strap.
Ziplock plastic bag (fits your
camera while around water, rain,
melting snow, etc.)
Lens cleaner—Use only photo lens
cleaners, never ammonia or clothing or
paper towels
Camera instruction manual, tide
books, animal guides
Filters or lenses (if your camera has
these, be sure they’re clean)
USB cord or media reader to
download your pictures onto a
computer
Identification if you lose your bag or camera - include phone, e-mail, contact
information.
Pack your tripod or monopod.
Photographers work
with line, shape, texture,
color and pattern.
Cameras don’t capture objects.
They capture light. In nature, light
is always different. Winter light
is different from summer light.
Morning and evening light are the best. It’s far better than bright noon
sun or dark night.
Tell a story. Composition, color and the story are more important
than detail and sharpness. Your best plan is to follow the actions
of the animal. If you stick it out, you get a great shot of animals
behaving naturally, which can produce some amazing results.
Usually the strongest photos are simple, clear, and uncluttered.
Use natural light and a tripod so your pictures are not blurry. Using
a flash makes sharper pictures, but often scares your wildlife or
makes you lose details and background. Tripods help you take great
pictures with less or natural light.
Your goal as a photographer is to grab the viewer’s attention, and
communicate an idea, or share an experience, What photos do this
best?
If you think about an animal’s
character in the same way
you do when you take
pictures of people, you’ll be
on the right track. Make sure
you know what you want
your images to say about the
animal before you begin.
Many photographers start
wildlife photography by
reading BOOKS and all they
can find about the wildlife
they want to photograph.
NO PICTURE is
worth HURTING
or sacrificing fish
and wildlife or
their homes/
habitats.
Whiskered auklets
- USFWS Photo
Homer Shorebird Festival
birdwatchers- USFWS Photo
3. 3
DIGITAL WILDLIFE PHOTOGRAPHY handbook
The more you know about fish and wildlife
the better your photos will be. Learn Your TermsLearn Your Terms
A megapixel is a million pixels. The word “pixel” originated
from “picture element” (say it fast and abbreviate it and that’s
how they came up with
“pixel”).
The more megapixels in
a camera, the better the
picture quality (resolution)
will be when you print the
picture. Large pictures
need more megapixels for
picture quality.
A digital camera with 1.3
megapixels will print a
4x6 inch print. It is also
small enough to e-mail or
post on the web. For larger size or
better quality photos, you need more
megapixels.
A printer that can print 175 or more
dots per inch (dpi) can make good
quality pictures.
Largest
Print Size
Megapixels
Resolution/
Picture Quality
Wallet Size Less than 1
megapixel
Very low, okay to e-
mail or web
4” x 6” 1 megapixel 800 x 600 low
5” x 7” 2 megapixels 1024 x 768 okay
8” x 10” 3 megapixels 1600 x 1200
average
11” x 14” 4–5 megapixels 2272 x 1704 high
13” x 19” and
above
6+ megapixels Very high
WHAT IS A MEGAPIXEL?
Bald Eagle. USFWS Photo
Basic Photography Terms
angle up
down
straight
framing subject
shapes
composition
distance close
medium
far
level eye level
high
low
focus soft
sharp
pan forward
left
right
zoom telephoto
wide-angle
composition portrait
landscape
CAMERA
MEDIA SIZE*
128 MB 256 MB 512 MB 1 GB
6 Megapixels 40 80 160 320
5 Megapixels 51 102 204 409
4 Megapixels 64 128 256 512
3 Megapixels 106 213 426 853
*Estimated shots per digital media using high resolution setting
4. 4
DIGITAL WILDLIFE PHOTOGRAPHY handbook
Keep Your DistanceKeep Your Distance
Tips for Wildlife Photographers
Observe animals from a safe distance without
changing their behavior. Wear natural colors and
avoid lotions or scents. Relax your muscles and
do not stare. Animals can sense your emotions
and may feel a direct stare is a threat.
Approach wild animals slowly and quietly.
Avoid sudden movements. NEVER CHASE
WILDLIFE FOR PHOTOS.
Do not ever feed the animals. Learning when
animals feed can help you find the animals.
Never throw rocks or things to get attention.
Harassing animals is against Alaska State Law.
Always leave space for an animal to get away.
Be especially careful around females with young,
spawning, and nesting areas.
Research. Learn wild animal signals that tell you
that you are too close. This is your signal to sit or
stand quietly or move slowly away. You may lose
your picture, but you will be safe and so will the
animal. More viewing and wildlife tips: http://www.wc.adfg.
state.ak.us/index.cfm?adfg=viewing.tips and wildlife guides:
http://www.wc.adfg.state.ak.us/index.cfm?adfg=guides.main
Too close to birds!
Alarm calls, repeated chirping and chipping.
Raised head, looking at observers.
Repeated flushing, skittishness.
Excessive preening or pecking at dirt or foot,
bill wiping.
Pretending to have a broken wing.
Too close to mammals!
Head raised high, ears pointed in the direction
of the observer.
Skittishness, the animal jumps at sounds or
movements.
Animal moves away or lowers head with ears
back ready to charge, erect hairs on neck and
shoulders.
Displays of aggression or nervous behavior.
Too close to marine mammals!
A rapid change in direction or speed.
Escaping such as long dives or fleeing into the
water from shore.
Swimming in all directions.
Interruptions of feeding or migratory activities.
Looks aggressive or charges intruders.
Attempts to shield a calf or pup from a human
observer or a vessel.
Vocalizations, finning, tail lobbing, tail raking,
or breaching.
Kittiwake, USFWS Photo
Stellar Sea Lions, USFWS Photos
Fox kit,
USFWS photo
5. 5
DIGITAL WILDLIFE PHOTOGRAPHY handbook
BirdsBirds
Never approach too close to a nest, handle
eggs, or baby birds!
Discover when and where your bird nests.
Great horned owls nest when it is still winter.
They don’t make their own nests, but use hawk
nests.
Watch for nest-building activity. Hawks and
eagles often collect twigs, branches, or greens
before laying eggs. Hummingbirds collect
spider webs by wrapping them around their
bill.
Prepare your camera and equipment away
from the nest, so you’ll arrive ready to take
pictures. Attach camera to tripod, carry a chair
or stool.
Be prepared to wait at the nest to get your
picture. Move as little as possible. You may
want to wait for the parents to leave. When the
flash goes off, the birds will flutter, but should
return and soon ignore the flash.
Did you know? Bird parents should never
be away from a nest for more than
20 minutes.
Birds at the NestBirds at the Nest
Bird FestivalsBird Festivals
Research birds in your area
and when or where they
migrate. Learn all you can.
Use bird identification books,
such as Peterson Field Guides
or National Geographic’s Field
Guide to the Birds of North
America. Check your library or internet.
Use binoculars or spotting scopes and
observe.
Practice. One of the easiest places to start
bird photography is at a bird feeder. Set up
your tripod and try to capture birds perched,
hovering, grooming, or eating.
Wear boots and old clothes. Use care around
mud flats, beaches, woods, and waterways.
Know tide schedules, as shorebirds, seabirds,
and waterfowl follow the tides when they feed.
Check the weather and know what to expect
for light.
Prepare your equipment in advance, use
a tripod. Birds are constantly on the move.
Tripods help you capture fast action without
making blurry pictures.
How to start and what to do
Glaucous-winged gull in nest. USFWS Photo
Birding festivals
and the nonprofit
Bird Treatment
and Learning
Center can
provide some
great photo
opportunities and help you learn about birds in
Alaska.
Alaska’s Bird Treatment and Learning Center in
Anchorage http://www.birdtlc.net/
Kachemak Bay Shore Bird Festival in Homer
http://www.homeralaska.org/shorebird.htm
Copper River Delta Shorebird Festival in Cordova
http://www.cordovachamber.com
Stikine River Garnet Festival in Wrangell
http://www.wrangellchamber.org/garnet.php
Sandhill Crane Festival in Fairbanks
http://www.arcticaudubon.org/crane.html
Alaska Bald Eagle Festival in Haines
http://baldeaglefestival.org/
Alaska Hummingbird Festival in Ketchikan
http://www.fs.fed.us/r10/tongass/districts/discoverycenter/
index.html
Rock Sandpipers USFWS Photo
Bartailed godwit,
USFWS Photo
6. 6
DIGITAL WILDLIFE PHOTOGRAPHY handbook
Moose are unpredictable. With all wild animals,
give them space. Do not feed them. Even a
calf can injure you if it charges. When a moose
charges, it kicks forward with its front hoofs.
Keep your distance! Back off!
Take pictures from behind a solid barrier
where you don’t get the moose’s attention. If
possible, avoid using a flash. The flash may
catch the moose’s attention.
Look at your picture. Frame the moose and be
aware of your light. Be patient and wait for your
picture. Running and moving moose are very
difficult to photograph.
Danger signs. To know if a moose may attack,
look for:
Long hairs raised on back hump
Ears laid back
Licking lips
Walks right at you or appears to charge
Alaska MammalsAlaska Mammals
BearsBears
ALWAYS use caution when around bears.
Taking pictures of bears at a zoo or Big Game
Alaska Wildlife Center is the SAFEST way.
KNOW your bears, read all you can about them.
Bears are often moving. They are difficult to
capture on film. Their little beady eyes can get
lost without some sort of light striking them.
Many photographers visit McNeil River or Brooks
Camp and take pictures of brown bears standing
in a waterfall and catching leaping salmon. This
is not the way most bears catch fish.
Photographing a fishing or moving bear takes
more skill than that of a grazing or resting bear.
This is because of the action and having to deal
with water.
Overcast days seem to be the best light for
bears.
A cool thing about bears is being able to
photograph their sides or with light coming
behind them. Their hairs just naturally glow.
Sometimes just capturing the bear’s paws or
prints can make an awesome photo.
MooseMoose
Brown Bear with Salmon, USFWS photo
Moose calf, USFWS photo
7. 7
DIGITAL WILDLIFE PHOTOGRAPHY handbook
Marine MammalsMarine Mammals
Taking pictures of marine mammals is
different because of the ocean. You need to
practice. Often you will be in a moving boat. The
light and motion is constantly changing. It is one
of the most difficult types of wildlife photography.
Try going on a nature cruise from Seward,
Whittier, Homer, or anywhere they are offered.
Practice taking pictures of marine mammals
using a tripod.
Water reflects light and is constantly moving.
Water is part of the picture and the landscape.
Ice and snow also reflect light.
You need to learn how to take pictures from
a distance. As with all wildlife, unless you are
in a zoo or animal park, you need to be careful.
Some marine mammals are endangered. You
can help save these mammals by keeping your
distance. Do not harrass wildlife, it is against
Alaska state law and can mean a $1,000 fine
and up six months in jail.
Research – The more you learn about marine
mammals, the better you will be able to take
pictures of them.
To get a good marine mammal photo, you
must be patient. Allow the animal to approach
you or your boat. Never chase a sea lion, sea
otter, or any other subject. The trick is to change
your own behavior to make the subject curious.
It’s amazing how creatively marine mammals
can avoid having their picture taken. Many
seem to take great pleasure in approaching a
photographer’s boat up close, only to dart out of
range before you can click the picture.
One way is to ignore the animal completely.
Focus your attention on the bottom or some
other creature, and the animal may come close
to investigate. Another trick I use is to pick up
a rock, and repeatedly toss it up and catch it.
Frequently a nearby sea mammal will come in
and investigate.
Sea Otter
USFWS Photo
8. 8
DIGITAL WILDLIFE PHOTOGRAPHY handbook
FishFish
Too close to fish!
Fish see you and skitter away or hide.
Fish abandon spawning places (holes
in the creek or river bed dug by the
fish) and move to deeper water or
under cutbanks.
Fish don’t move back onto spawning
places.
Spawning behavior stops.
Note: Never walk into waters where fish
are spawning. Take pictures from the
banks.
Where to get good fish pictures: If you visit the
Seward Sealife Center or aquariums, you can get
good pictures of fish in water. Salmon spawning areas,
clear creeks and streams, and clear ponds or lakes
are good places to take pictures of fish.
Underwater photography. Some digital cameras
have special “underwater housing” to take the
camera underwater. There are some disposable
waterproof cameras that you can use in the water.
Most professional pictures are taken by scuba diving
photographers with special equipment. For underwater
digital photo tips or equipment, check
http://www.wetpixel.com.
Live fish photos are tough to get! Most people
know how to take pictures of their fishing catch, but it’s
harder to get live fish. Have you tried to capture live
fish in the water?
Fill the frame. You see it larger than it is and often
have too much in the picture.
When taking pictures through an aquarium,
remember light reflects off the glass! Angle your
camera to reduce the reflection or put it right up
against the glass.
Using a flash can stop the fish motion. If you don’t
use a flash, it is better to take pictures with the room
dark and only the aquarium lighted. It is also better not
to point towards the water surface. Fish can see light
and colors, so don’t be surprised if your flash or shadow
frightens them.
Grayling, USFWS Photo
Salmon swimming in creek,
USFWS Photo
9. 9
DIGITAL WILDLIFE PHOTOGRAPHY handbook
Look for what makes pictures work — or not work
Practice at Home.
Use your pets or stuffed animals
to practice! Try taking pictures in
different light and capturing their
eyes. You can try many poses in
all kinds of light and learn what
works.
Practice Framing.
Compose your
pictures. Make
a frame from
cardstock, cardboard,
construction paper,
poster paper, etc.
Cut a rectangle
in the center.
Look through the rectangle and
pretend it is your viewfiender.
Zoom. Move it forward and
backward.
Landscape or Portrait. Try
turning it to see how the picture
looks better.
Find the best picture with the
frame, before you use your
actual camera. Now take the
*real* picture.
Use the Experts.
Contact your local National Wildlife
Refuge, Alaska Zoo, Big Game
Alaska wildlife park, and reindeer
or muskox farms.
Digital Image Library.
The U.S. Fish and Wildlife Service’s
Digital Image Library and Alaska
Digital Image Library is on the web at
http://images.fws.gov/
More TipsMore Tips
RED or GLOWING Eyes
The cause of red-eye is
biology—the pupils expand
and contract when exposed to
light. In bright light, the pupils
are small; in low light they
can get really big. Your flash
travels through the dilated
pupil and reflects light off of the blood vessels behind the
retina inside the eye. This reflects light back at the camera
in the form of a distracting red spot.
The cause of a yellow or green glow is also biology—most
animal eyes have a tapetum (ta-PEE-tum), human eyes do
not. The tapetum lies beneath the retina. It acts like a mirror
and reflects light back through the retina to better capture
light. Animals that are active at night have a tapetum.
Tapetums cause a yellow or green glow when light hits an
animal’s eyes.
You can usually fix red eyes, but not yellow or green
glow, using your photo software. Did you know loons
have red eyes?
Turn the lights on. Turn on a light, use daylight, or move
the subject to a brighter area. Pupils become smaller and
this reduces the red-eye reaction in your pictures.
Look away from the lens. A flash located close to the
lens causes more red eye because the light directly hits
the pupil. Have the subject look away, above the camera,
or to the side opposite the flash.
Get a removable flash. The best solution for red-eye is
to move the flash away from the lens. This is possible on
cameras with a hot shoe or tripod for an external flash, but
not on cameras where the flash is built-in.
Know your flash range. Even the most powerful flash
only works at close range. Outdoors the flash has half
its indoor range because there are no ceilings or walls to
contain the light.
Use red-eye reduction. Many cameras have a setting
that reduces red-eye. The camera does a “pre-flash” to
open the pupil before the actual flash goes off. This can
be frustrating with wildlife, because many animals will look
away during the pre-flash, which can ruin the picture.
10. 10
DIGITAL WILDLIFE PHOTOGRAPHY handbook
One of the most popular ‘rules’ in photography is the Rule Of Thirds.
The rule works like this:
Divide your picture into thirds. Focus your attention where the two lines come together.
How to do it. Look at the musk oxen picture below. The dashed lines show where your imaginary
lines should be to divide this picture into thirds. There are three boxes on each line and three
columns. You should move your camera so the subject of your picture is where these lines come
together. Good places to put things are at the first line from the bottom or edge of the picture, or a
third of the way in from the left. Practice framing things in the middle, top, bottom, or away in the
corner. See how using the Rule of Thirds changes your picture.
Using the Rule of Thirds helps make your pictures nicely balanced and easy on the eye. It helps
get rid of the ‘tiny subject surrounded by vast empty space’ when you use only the center of your
viewfinder.
Rule of ThirdsRule of Thirds
This handbook is designed and written by Karen J. Laubenstein, Publications Specialist, Office of Subsistence
Management, U.S. Fish and Wildlife Service, Alaska Region, and with much help from Cathy Rezabeck and External
Affairs staff at the U.S. Fish and Wildlife Service, Alaska Region Office. karen_laubenstein@fws.gov
You can find this handbook online http://alaska.fws.gov/external/education/pdf/ak_digital_photography_handbook.pdf
and graphics from the USFWS Alaska Digital Image Library http://images.fws.gov
Karen has worked as a USFWS photographer on special assignments, often with her husband, Ron, a graphic artist with USFWS External Affairs. Karen
is a former photographer for the U.S. Department of Health and Human Service’s Health Resources and Services Administration, National Institutes
of Health, and other Federal agencies. Her photos are published in newspapers and publications. She is a lifelong photographer, and specialized in
photography at the University of Maine and Rochester Institute of Technology.
Muskoxen,USFWSPhoto
2007 Edition