
Recommended
Recommended
More Related Content
Similar to Introduction to Photography-Kallol Majumdar.pptx
Similar to Introduction to Photography-Kallol Majumdar.pptx (20)
Recently uploaded
Recently uploaded (20)
Introduction to Photography-Kallol Majumdar.pptx
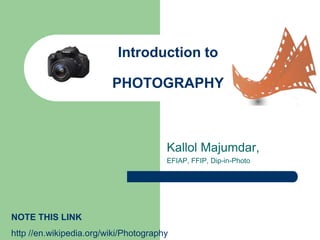
- 1. Introduction to PHOTOGRAPHY Kallol Majumdar, EFIAP, FFIP, Dip-in-Photo NOTE THIS LINK http //en.wikipedia.org/wiki/Photography
- 2. Welcome
- 3. INTRODUCTION
- 4. AIM To apprise about the basics and some fundamental aspects of photography and cameras
- 5. Present condition of Photography
- 6. Definition Process of recording images by means of capturing light on a light-sensitive medium, such as a film or electronic sensor during a timed exposure. The process is done through mechanical, chemical or digital devices known as cameras. Traditionally, the product of photography has been called a photograph, commonly shortened to photo.
- 7. Drawing with Light The word "photography" comes from French word photographie which is based on the Greek φώς (fotos) - "light" + γραφή (graphê) - "stylus", "paintbrush" or "representation by means of lines" or "drawing", together meaning "Drawing with Light." Photography is considered to be an art form but is closely related to Scientific fields like chemistry, physics & Computer Science .
- 8. Famous International and Indian Photographers EXERCISE List out at least 10 different International and Indian photographers of repute. Collect their work and present it in the next class.
- 9. Why do we need photos? Journalistic (informational) purpose Commercial purpose Educational purpose Medical and scientific purpose Personal Legal purpose Archival and record purpose Security concerns ANY OTHER REASONS………..?????
- 10. Scope Present condition of photography Types of photography Few Important things to know at first Types of camera and lenses Fundamental aspects for shooting Some advices for aspiring photographers Summery and guidelines
- 11. Types Black & White Negative Colour Negative Colour Transparency Polaroid Digital Photography
- 12. Photography Genres / Styles Outlined below photography styles that call for specialized treatment. – Commercial (Ads, Fashion / Glamour, Portrait & Wedding, Editorial / Photojournalism , Nature / Landscape, Conceptual, Wildlife, Pornography etc.) – Social (Social Cause) – Art (Fine Art ) – Technical photography (Astrophotography, Forensic, Infrared, Panoramic etc.) – Others (photocopy or xerography, Photograms, image scanner etc.)
- 13. Types of photography Landscape photography
- 14. Types of photography Portrait photography
- 21. How Photographs are produced?
- 22. 1. It is a freelance job 2. DSLR has revolutionized the field of photography. 3. Enormous competitions are there now around the world. 4. Inspired by the success of Bangladeshi photographers 5. Nowadays there are a lot of courses are available. 6. Passion giving some money has geared up the field.
- 23. Few important things to know 1. Megapixel myth 2. Digital zoom Vs optical zoom 3. Know your camera, go through the manual in detail 4. More expensive camera, the better photo – wrong idea 5. Avoid auto mode, know how to operate in manually. 6. For protecting camera and lenses from fungus, use silica gel 7. Know the post processing…..adobe lightroom, Photoshop CS6 , CC 2018 etc..
- 24. Advice For Aspiring Photographers 1. See more and more photographs which will broaden our picture and composition sense. 2. Visit different Galleries, Exhibitions 3. Know about life and works of renowned photographers of Home and abroad 4. Read different photographic and art magazine…it will help ! 5. Use YouTube … it is the best recourse to learn 6. Finally and most importantly…take camera and go out…shoot as much as possible…only then we really learn something.
- 25. Becoming a photographer is definitely a journey and one that is marked with all kinds of problems and mistakes. Eencountering these issues along the way is simply part of the process of learning the craft. Along the journey of becoming a better photographer, here we’ve assembled a list of the most common photography mistakes that negatively impact the quality of our photos. For each problem presented, here we offer a simple, straightforward solution that will help you minimize mistakes and become more confident in your abilities to take amazing photos. 2 5 The Most Common Problems
- 26. Problem #1: Holding a Camera Properly Solution #1: Focus on Your Left Hand Many beginning photographers find that their camera can feel ungainly at times, but it’s quite simple to learn how to hold it correctly. Holding your camera with your left hand under the lens – not on top or to the side of it – will give it the most support. Use these guidelines for holding the camera in a manner that gives it the most support: •Elbows in against your chest •Left hand under the lens, not on top or on the side •Use a comfortably wide stance, with your feet shoulder-width apart •Lean gently and slightly into the camera such that it is tight to your forehead The Most Common Problems
- 27. Holding a Camera Properly 1. Elbows In 2. Raise Your Left Shoulder…. 3. Create a Tripod With Your Knee 4. Lay Down 5. The Machine Gun Hold 6. Cradle It
- 28. Holding a Camera Properly 1. Elbows In
- 29. Holding a Camera Properly 2. Raise Your Left Shoulder
- 30. Holding a Camera Properly 3. Create a Tripod With Your Knee
- 31. Holding a Camera Properly 4. Lay Down
- 32. Holding a Camera Properly 5. The Machine Gun Hold
- 33. Holding a Camera Properly 6. Cradle It
- 34. Holding a Camera Properly
- 35. Problem #2: Determining the Most Stable Tripod Positioning Solution #2: Position Your Tripod According to Your Lens Type The manner in which we position our tripod will depend on the type of lens we’re using. Determining the best positioning of the tripod (and our positioning relative to it) can be a challenge at first. The positioning of our tripod’s legs depends on what lens we are using. For those longer, heavier lenses, like a telephoto, having the leg out front (as picture above) is the best option because it will provide additional support for the lens. But when using a wide-angle lens, we don’t want the tripod foot showing up in the bottom of the image, so positioning the camera between two legs with the third leg backward towards us is the way to go. The Most Common Problems
- 36. 1 – Find composition first 2 – Point one of the tripod legs towards our subject 3 – Keep the centre post vertical and perpendicular to the ground 4 – Avoid extending the centre post 5 – Use an L-bracket for short lenses 6 – Use a tripod collar for long lenses 7 – Hang a camera bag or other heavy object from the centre post for extra stability Tripod Positioning
- 37. When using a wide-angle lens, positioning the camera between two legs with the third leg backward towards us is the way to go. Tripod Positioning For telephoto lens, having the leg out front (as picture above) is the best option because it will provide additional support for the lens.
- 38. Problem #3: Dust on the Camera Sensor Solution #3: Shoot the Sky Dust is everywhere, and it will get into our camera and find its way to our sensor. Needless to say, dust on the sensor will negatively impact the quality of the images we are able to capture, so learning how to remove that dust – and do so safely – is a top priority! Take a photo of a blue sky or another clear, bright subject. Put your camera in aperture priority mode and set a small aperture like f/22 and focus on infinity. If we’re using a zoom lens, zoom out to its full focal length. Snap some shots and then on our computer, compare each photo at 100%. If we see any dark spots in the same place over successive shots, then we’ve got dust on our sensor. The Most Common Problems
- 39. Sensor Cleaning Sensor swabs are one of many tools we can use to clean dust off your camera’s sensor. To clear dust away from the sensor, the safest method is to use our camera’s sensor cleaning function. This, however, doesn’t always get the sensor in tip-top shape. If dust is still evident, we can use a hand blower, an anti-static brush, or a sensor swab (pictured above) to do a more thorough cleaning. But beware! These methods require us to touch the inside parts of the camera, which are extremely delicate. So primarily avoid it. A great way to minimize the amount of dust that gets into your camera in the first place is to practice preventative measures. Change lenses as infrequently as possible, and never change lenses in a windy or overly dusty area. Clean lenses and dust caps before making any switches as well.
- 40. Keep DSLR lens safe from a fungus Control Humidity and Keep Mould Away With Silica Gel Many photography enthusiasts use silica gel to protect their cameras and lenses from the humidity, because mould can damage their expensive equipment. Most of us will be familiar with silica gel – it is those white little sachets we sometimes see in food packaging or new bags. The purpose of these sachets is as a desiccant where the silica gel within absorbs the humidity in the air and keeps the products fresh for longer. When humidity decreases, the incidence of mould similarly decreases. We can use Silica gel to reduce the incidence of mould on our leather bags.
- 41. Keep DSLR lens safe from a fungus Control Humidity and Keep Mould Away With Silica Gel There are some silica gel that will change colour when they have absorbed the moisture from the air. Normally it is blue in colour and it gets pink when moisture has been absorbed. After the beads are all pink, we can reuse the silica gel beads by placing them in a hot oven for a few minutes so the beads dry out. It will come back to deep blue and can be used again.
- 42. Control Humidity and Keep Mould Away With Silica Gel Buy an airtight plastic container (same thing you find in kitchens but make sure its airtight); Buy a packet of Silica gel and pour the beads into the plastic container. Put everything including our camera equipments in the airtight container and cover it. Keep DSLR lens safe from a fungus
- 43. Protecting Camera Gear from Fungus with Dry Cabinets Another way of combating fungus is by storing our DSLRs and lenses inside an electronic dry cabinet. These things regulate the relative humidity inside the enclosure to ensure that our gear isn't being exposed to excessive moisture, dirt, or dust while being stored. Keep DSLR lens safe from a fungus
- 45. Thank You