Downloaded 11 times


The document provides an overview of Apache JMeter, an open-source tool designed for load testing and performance measurement, originally for web applications but now applicable to various testing functions. It discusses installation, setup, key features such as thread groups, samplers, listeners, assertions, and the process of creating test plans. Additionally, it includes information on applying JMeter in real projects and references for further reading.
Overview of JMeter's purpose and features, including load testing, advantages, and components.
Details on the installation and initial setup of JMeter, including Java requirements and download instructions.
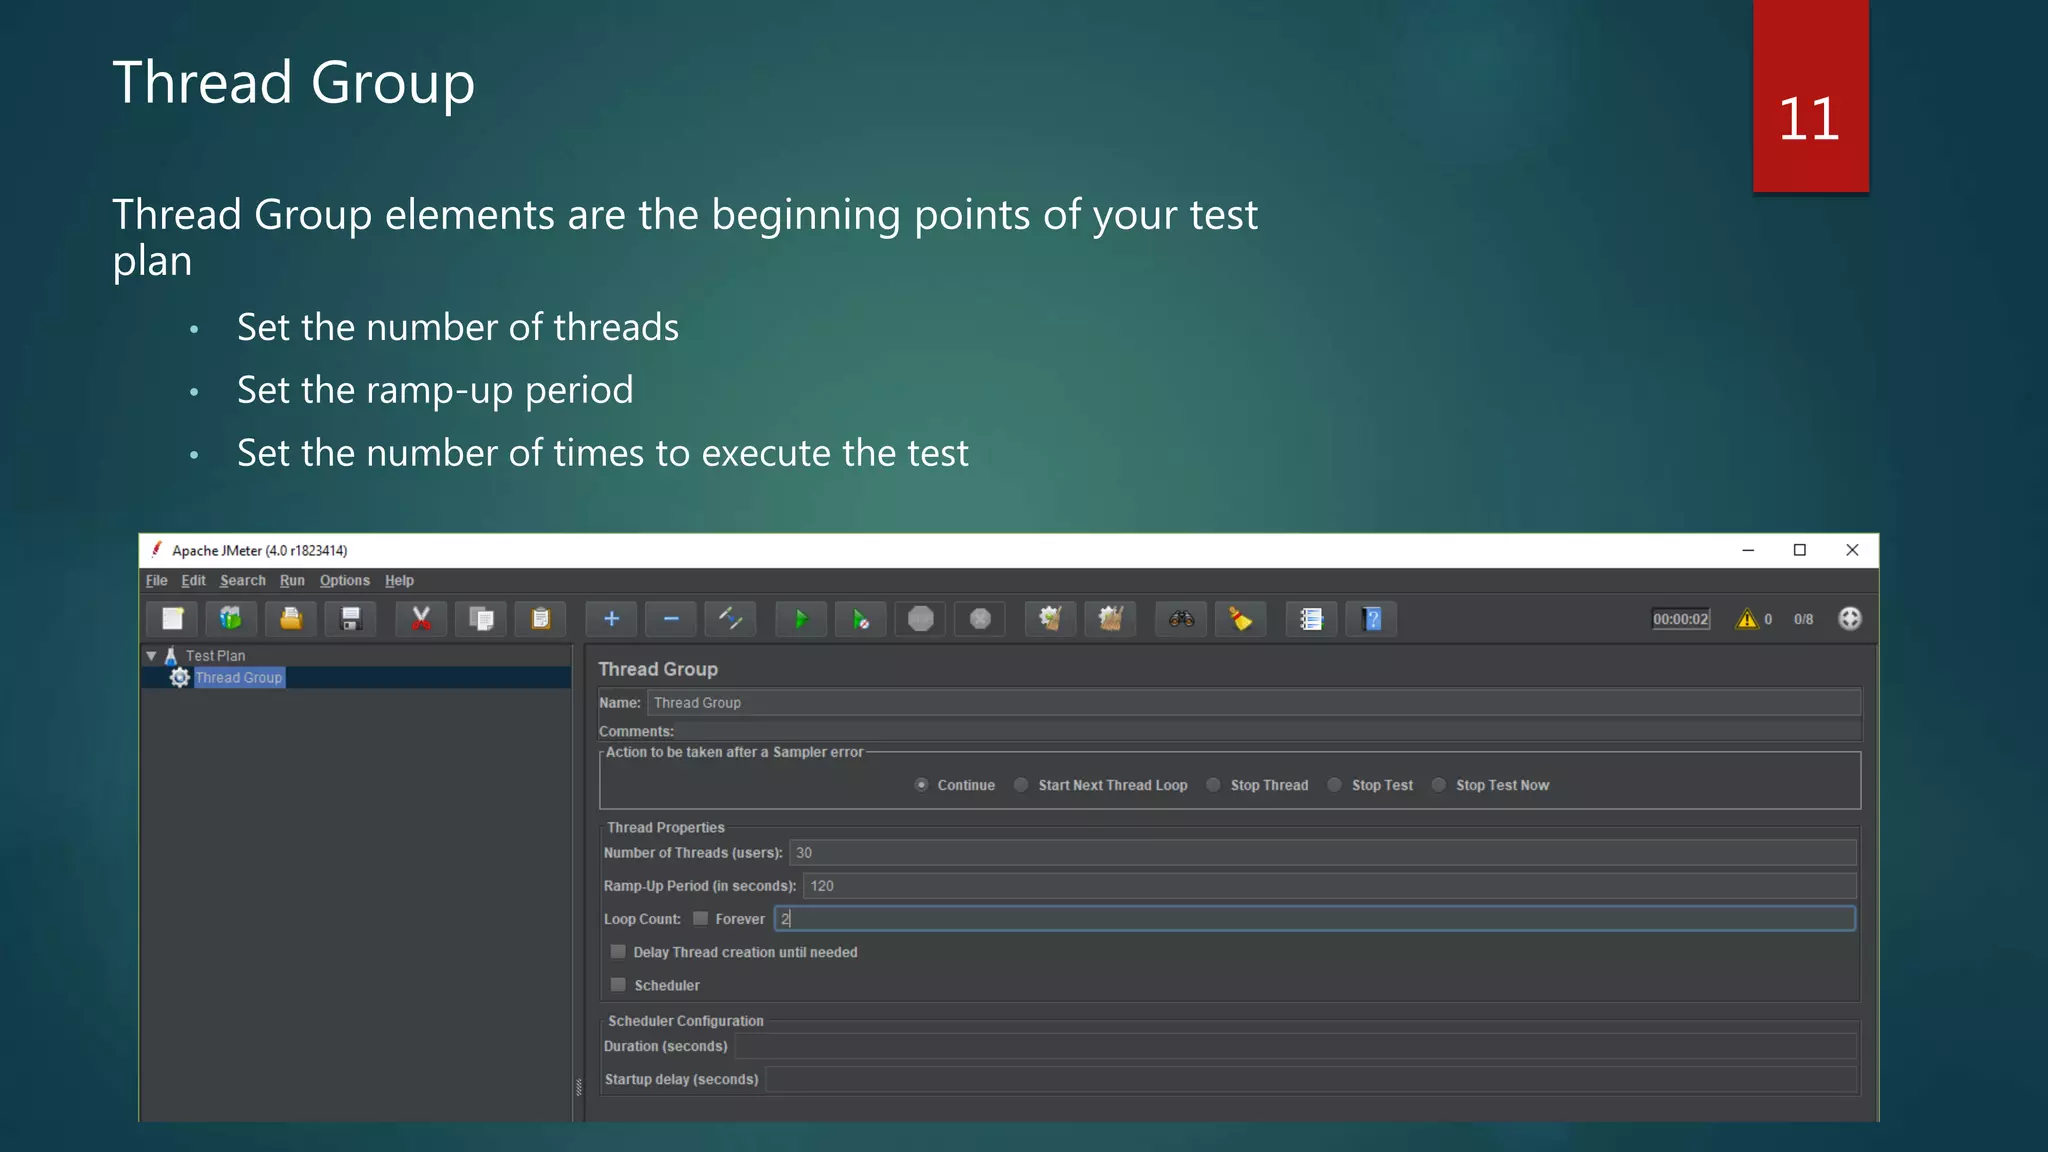
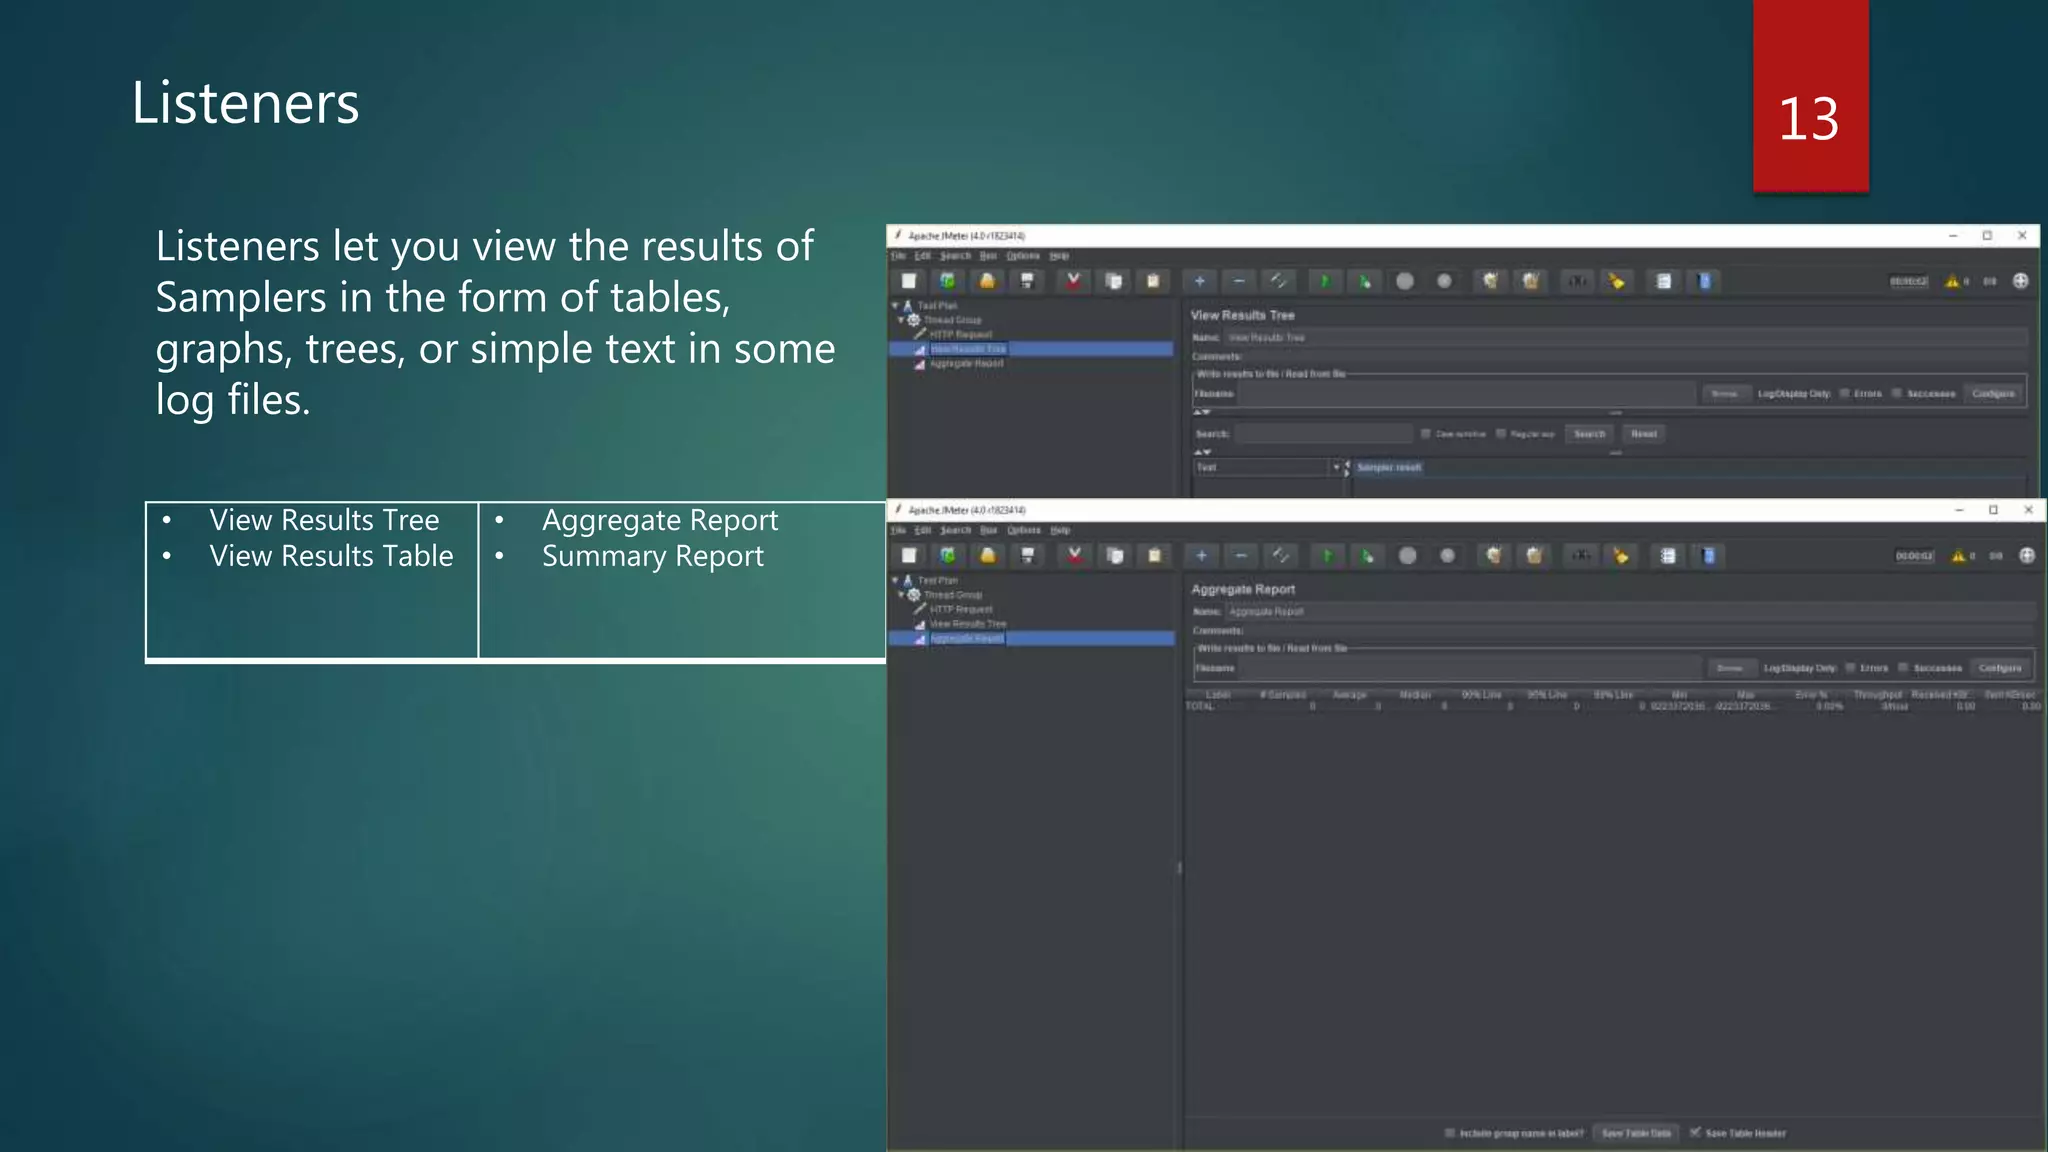
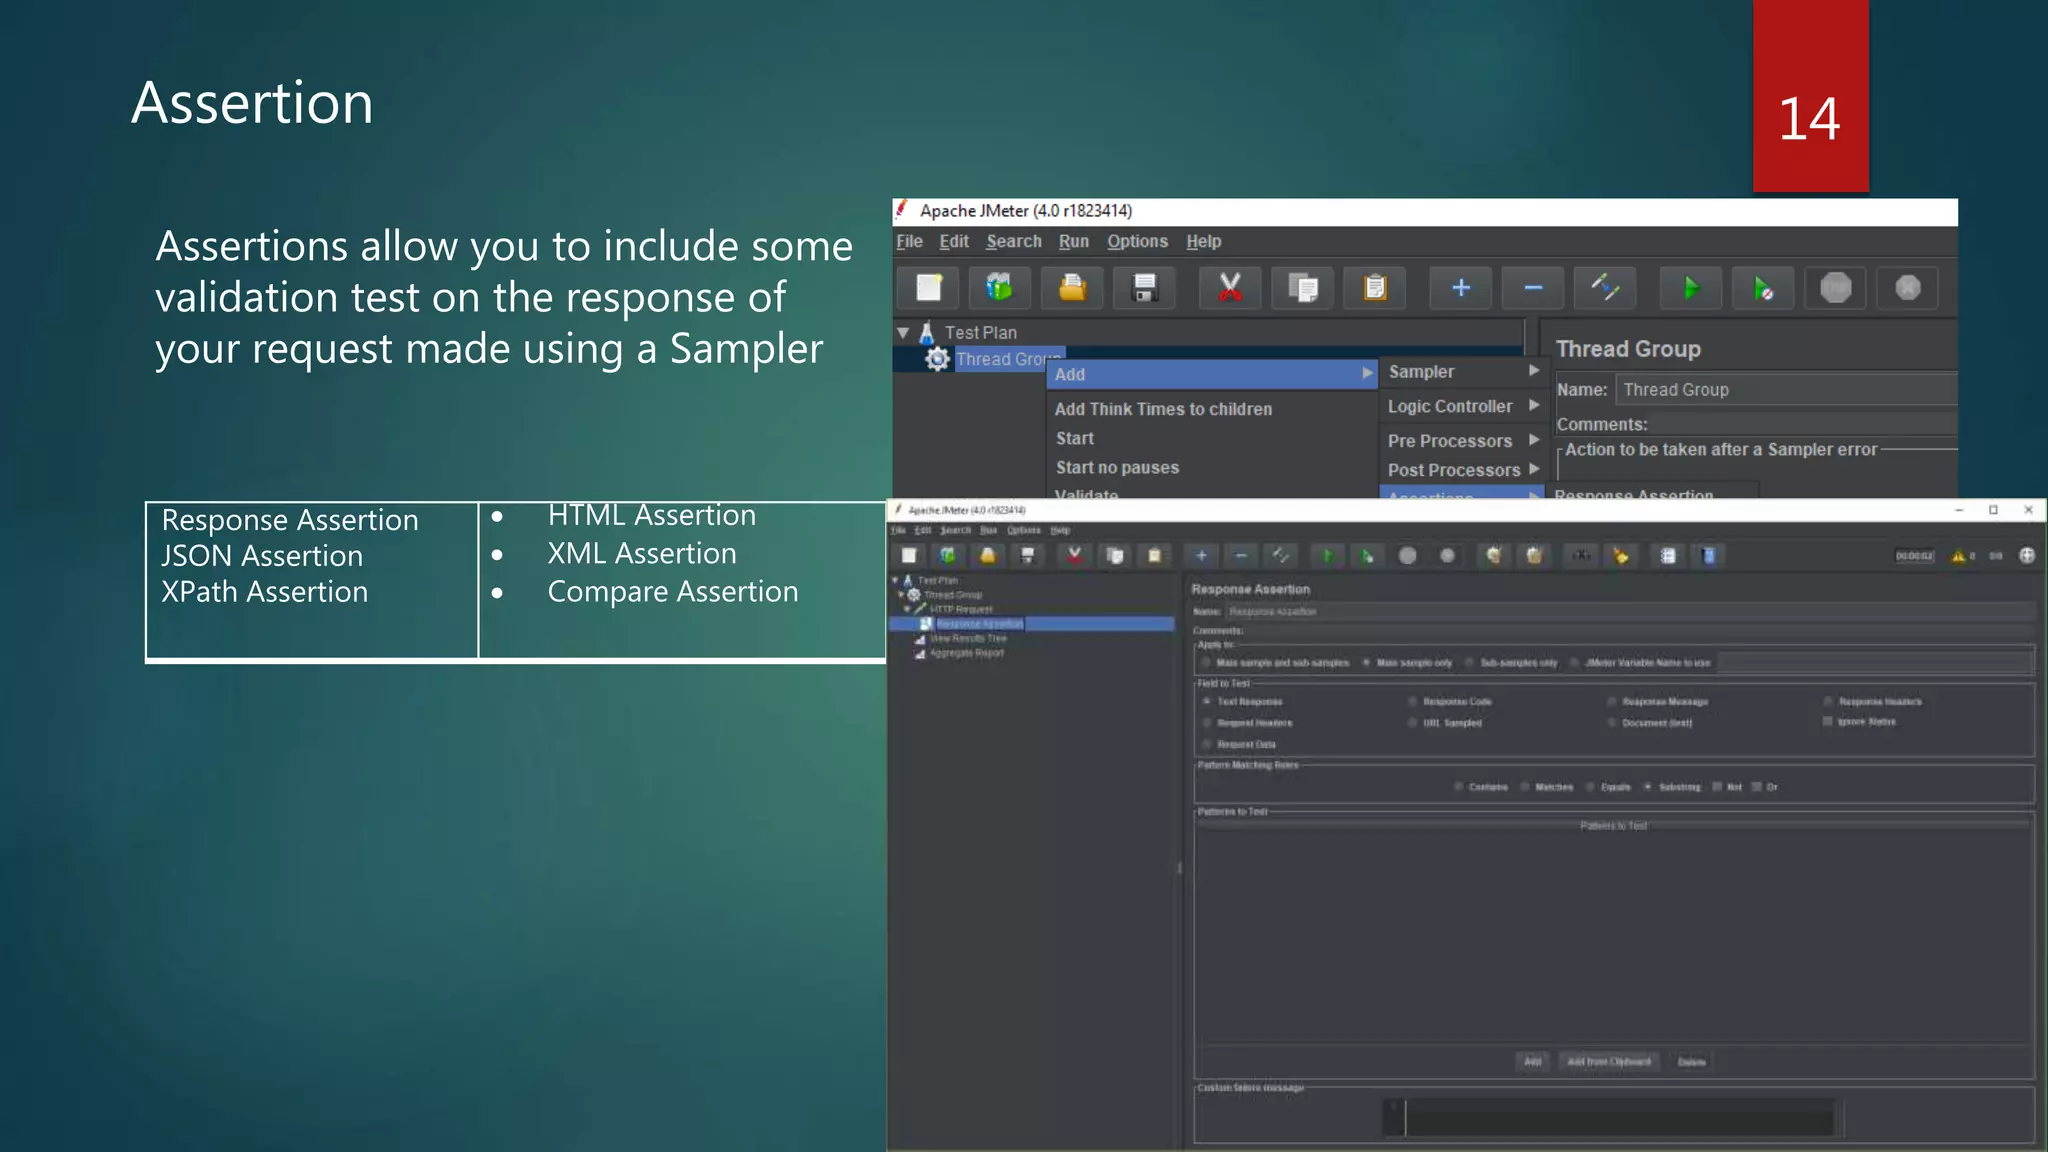
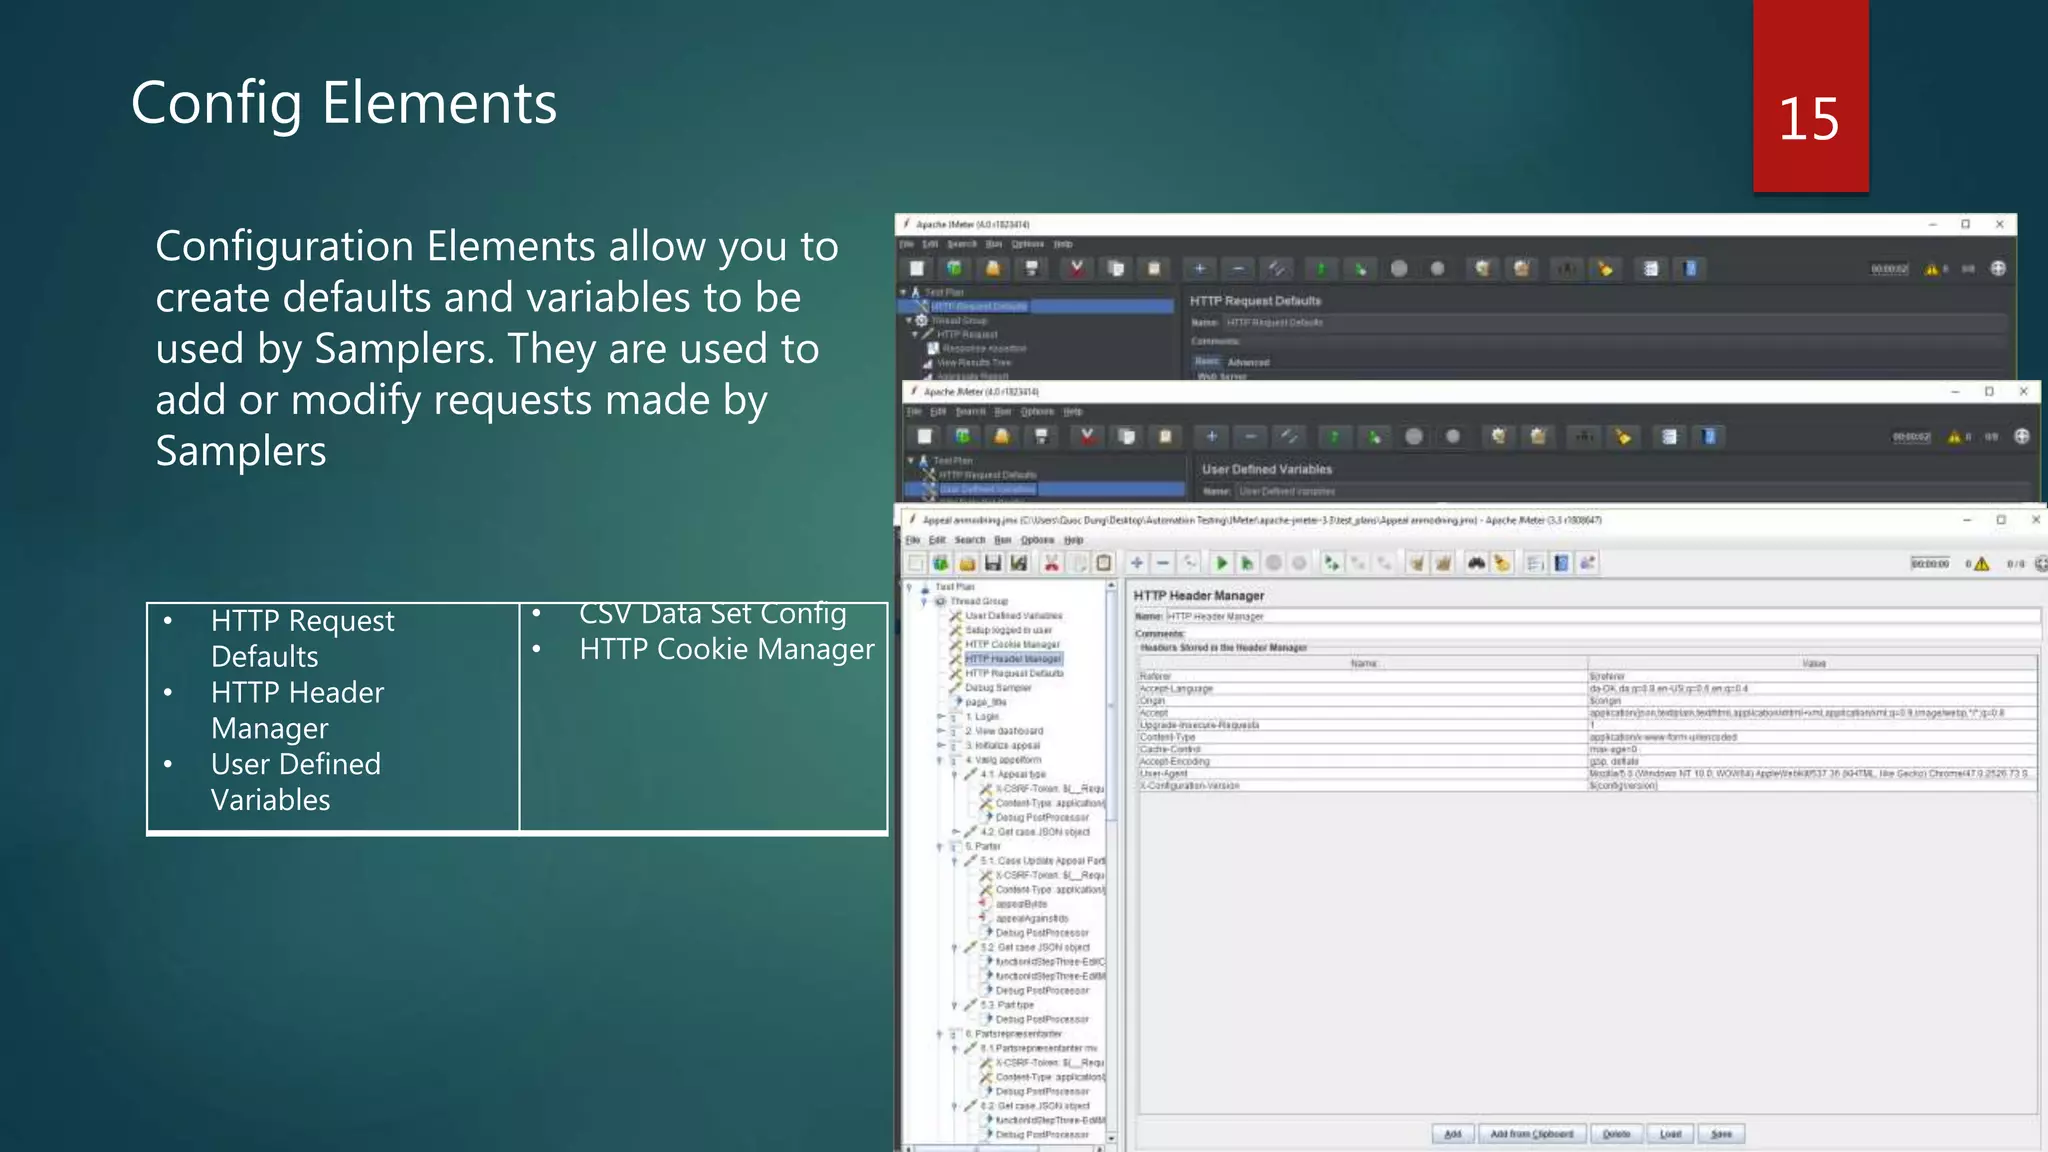
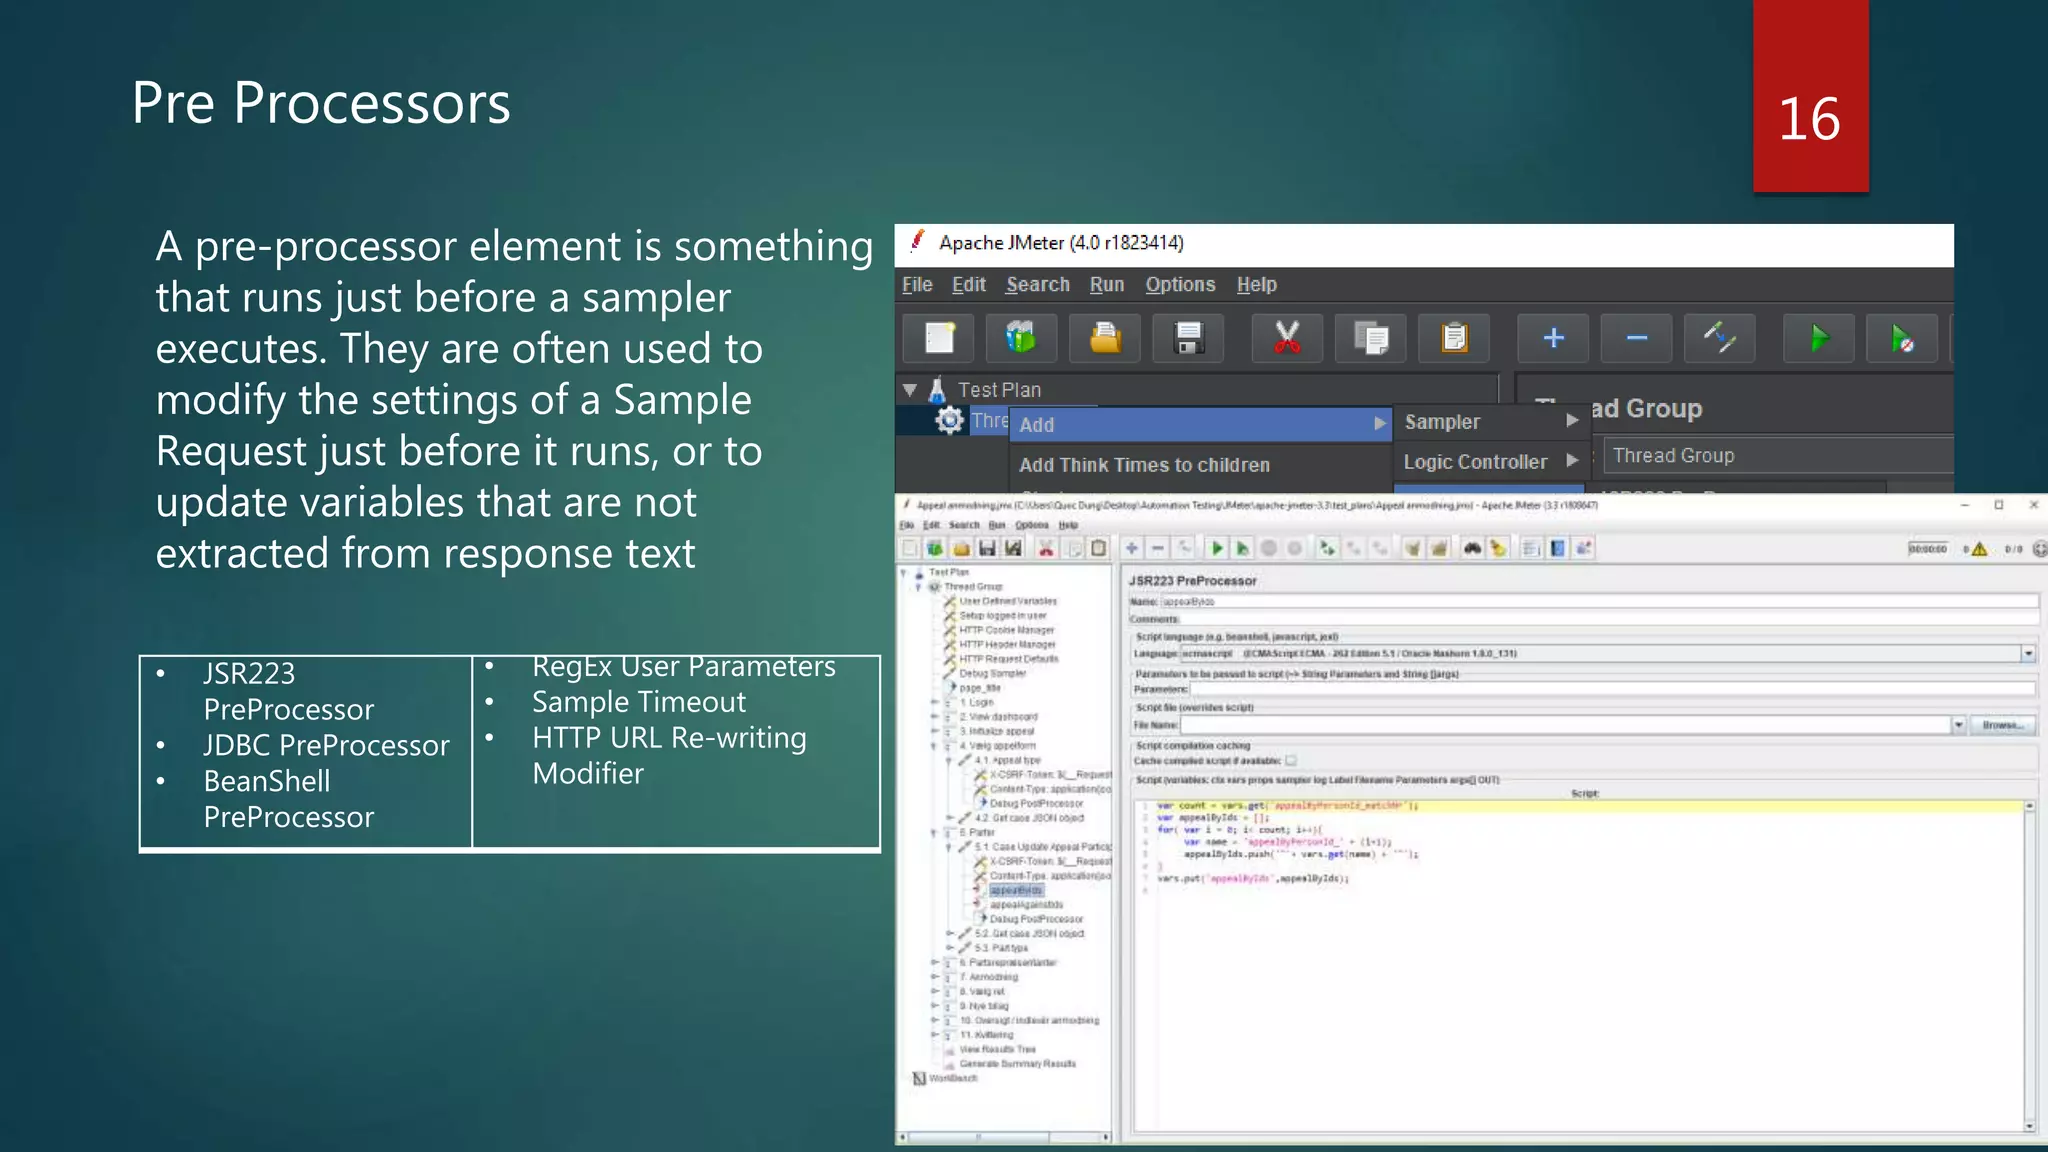
Explanation of JMeter components like Thread Groups, Samplers, Listeners, Assertions, and more.
Demonstrates creating web test plans using JMeter with specific scenarios such as HTTP requests and CSV data reading.
Using JMeter scripts in automated tests within CI jobs and analyzing test results.
References for further reading and resources related to JMeter.