Jenkins log monitoring with elk stack
•
5 likes•353 views

Demonstration of Jenkins log and Job build log monitoring using Filebeat and ELK Stack

Recommended
More Related Content
What's hot
What's hot (20)
Similar to Jenkins log monitoring with elk stack
Similar to Jenkins log monitoring with elk stack (20)
Recently uploaded
Recently uploaded (20)
Jenkins log monitoring with elk stack
- 1. Jenkins Log Monitoring with ELK 1 | P a g e S u b h a s i s R o y
- 2. Jenkins Log Monitoring with ELK 2 | P a g e S u b h a s i s R o y Table of Contents Purpose...................................................................................................................................................3 Jenkins ....................................................................................................................................................4 Installation..........................................................................................................................................4 Start & Status Check of Jenkins Server ...........................................................................................4 Access and Setup Jenkins in Browser..............................................................................................5 Configure JDK and Maven..................................................................................................................6 JDK Configure..................................................................................................................................6 Maven Configure.............................................................................................................................6 Elasticsearch...........................................................................................................................................7 Installation..........................................................................................................................................7 Configure Elasticsearch ......................................................................................................................7 Start & Test Elasticsearch...................................................................................................................7 Kibana.....................................................................................................................................................8 Installation..........................................................................................................................................8 Configure & Start................................................................................................................................8 Filebeat ...................................................................................................................................................9 Installation..........................................................................................................................................9 Configure Filebeat..............................................................................................................................9 Define input log type and enable log input ....................................................................................9 Define the Jenkins Log location ....................................................................................................10 Enable the Kibana Dashboard.......................................................................................................10 Define Kibana & Elasticserach Server ...........................................................................................10 Configure Logging .........................................................................................................................11 Verify YML file configuration ........................................................................................................11 Start Filebeat & Import Kibana Dashboard.....................................................................................11 Jenkins Project Build & Test Log in Kibana..........................................................................................12
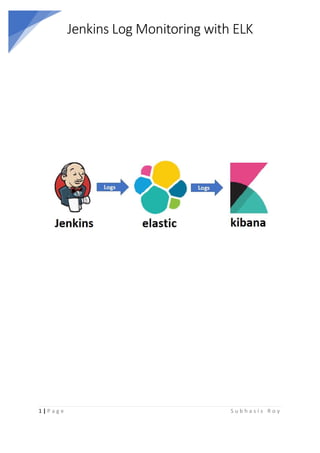
- 3. Jenkins Log Monitoring with ELK 3 | P a g e S u b h a s i s R o y Purpose A build log of a Jenkins Job contains full set of record for a job, including the build name, number, execution time, result (success or fail) and other things. Here we have demonstrated Jenkins log and Job build log monitoring using Filebeat and ELK Stack greater visibility, tracking and monitoring. Filebeat will ship the Jenkins logs to Elasticsearch for indexing and then we can see it in Kibana Dashboard. In this tutorial we have used VMWare with Ubuntu 16.04 to demonstrate this. The installation packages may differ in case of other Ubuntu versions.
- 4. Jenkins Log Monitoring with ELK 4 | P a g e S u b h a s i s R o y Jenkins It is an open source automation server which can be used to automate tasks related to build, test, deliver, deploying projects. Installation You need to follow the below steps to install Jenkins in Ubuntu 16.04 Step1: Add the repository key to the system wget -q -O - https://pkg.jenkins.io/debian/jenkins-ci.org.key | sudo apt-key add – Step2: Add the Jenkins source to the server source list echo deb https://pkg.jenkins.io/debian-stable binary/ | sudo tee /etc/apt/sources.list.d/jenkins.list Step3: Run an update to use the new repository sudo apt-get update Step4: Install Jenkins and dependencies sudo apt-get install jenkins Start & Status Check of Jenkins Server Use systemctl for start/stop Jenkins instance. Start server: sudo systemctl start jenkins.service Stop server: sudo systemctl stop jenkins.service Status check: You can use sudo systemctl status jenkins to check if the server is in Active or Inactive state.
- 5. Jenkins Log Monitoring with ELK 5 | P a g e S u b h a s i s R o y Access and Setup Jenkins in Browser Open your browser and you can access Jenkins by using either IP Address http://ipaddess:8080 OR by domain name http://domainname:8080 Jenkins by default runs on a port 8080. At the start, you will get an “Unlock Jenkins” screen. You can find your initial password under “/var/lib/jenkins/secrets/initialAdminPassword”. Login to server command prompt (using putty or other tools) and do a cat on the above file to get the password. Put the password in the “Administrator Password” field in the browser and click on Continue button. Next page select/click on “Install suggested plugins” option and it will start the Jenkins plugin installation. Once the installation process is complete, you will get a prompt to Create First Admin user and password and click on Save and Finish. Your Jenkins is up and ready to use.
- 6. Jenkins Log Monitoring with ELK 6 | P a g e S u b h a s i s R o y Configure JDK and Maven To configure JDK and Maven globally for any project build, you can configure then under the Global Tool Configuration in Jenkins. Login to Jenkins and click on Manage Jenkins Then click on Global Tool Configuration and configure any build tools you. Below you can see how to configure JDK and Maven. You can use similar approach to configure the other build tools, like Gradle or ANT JDK Configure Click on the Add JDK button under JDK and then put your JAVA_HOME (The JDK installation directory in your server) Maven Configure Click on the Add Maven button under Maven and then put your MAVEN_HOME (The MAVEN installation directory in your server) Click on Apply button at the end of page to save the above setting.
- 7. Jenkins Log Monitoring with ELK 7 | P a g e S u b h a s i s R o y Elasticsearch Elasticsearch is a search engine based on the Lucene library. Elasticsearch is developed in Java. Installation Step1: Add the repository key to the system wget -qO - https://artifacts.elastic.co/GPG-KEY-elasticsearch | sudo apt-key add – Step2: Add the Elastic source to the server source list echo "deb https://artifacts.elastic.co/packages/6.x/apt stable main" | sudo tee -a /etc/apt/sources.list.d/elastic-6.x.list Step3: Run an update to use the new repository sudo apt-get update Step4: Install Elasticsearch sudo apt-get install elasticsearch Configure Elasticsearch After Elasticsearch installation is complete, we need to open elasticsearch.yml under “/etc/elasticsearch” and configure network.host property. You can set it a network.host: localhost Or, You can set it as network.host: 0.0.0.0 (0.0.0.0 IP address will bind to all network interfaces) Start & Test Elasticsearch Now you can restart the elastic search instance by sudo service elasticsearch start Elastic search by default, runs on 9200 port. You can test your elastic search is up and running by doing a CURL or hitting the http://<ip_address>:9200/ URL in your browser. It will give you a response something like this mentioned below, { "name" : "dRb9-zU", "cluster_name" : "elasticsearch", "cluster_uuid" : "sxP-yPqIS4uMogJFEIa_yw", "version" : { "number" : "6.8.9", "build_flavor" : "default", "build_type" : "deb", "build_hash" : "be2c7bf", "build_date" : "2020-05-04T17:00:34.323820Z",
- 8. Jenkins Log Monitoring with ELK 8 | P a g e S u b h a s i s R o y "build_snapshot" : false, "lucene_version" : "7.7.3", "minimum_wire_compatibility_version" : "5.6.0", "minimum_index_compatibility_version" : "5.0.0" }, "tagline" : "You Know, for Search" } Kibana Kibana provides visualization capability for indexed content of Elasticsearch. Installation Step1: Install Elasticsearch sudo apt-get install kibana Configure & Start After Elasticsearch installation is complete, we need to open kibana.yml under “/etc/kibana” and configure elasticsearch.hosts property and server.host property. Property server.host is the server ipaddress where Kibana is running. Property elasticsearch.hosts is where the location of the elasticsearch server running. Default value is http://localhost:9200 Also check the server.port property, the value should be 5601 (Default Kibana server port) Now you can restart the elastic search instance by sudo systemctl start kibana
- 9. Jenkins Log Monitoring with ELK 9 | P a g e S u b h a s i s R o y Filebeat Filebeat is a lightweight software which forwards and centralizes log data Installation Step1: Add the repository key to the system wget -qO - https://artifacts.elastic.co/GPG-KEY-elasticsearch | sudo apt-key add – Step2: Add the Elastic source to the server source list echo "deb https://artifacts.elastic.co/packages/6.x/apt stable main" | sudo tee -a /etc/apt/sources.list.d/elastic-7.x.list Step3: Run an update to use the new repository sudo apt-get update Step4: Install Filebeat with dependencies sudo apt-get install filebeat Configure Filebeat Go to the configuration directory of Filebeat under location “/etc/filebeat” in the server using putty or other tools. Here you can see filebeat.yml file which holds all the configuration. Now we will configure the Jenkins logs (Location: /var/log/jenkins/jenkins.log) and Jenkins Job build logs (Location: /var/lib/jenkins/jobs/*/builds/*/log) inside this file. Define input log type and enable log input First, we have to set the type of the Filebeat inputs and also, we need to enable the input configuration. It tells which type of file inputs we are passing to Filebeat and it will enable Filebeat to accept that logs. (Refer screen below) Initially the “enabled” property will be by default false. So make it true.
- 10. Jenkins Log Monitoring with ELK 10 | P a g e S u b h a s i s R o y Define the Jenkins Log location Then set the path of the log files which you want to monitor. Here we want to monitor Jenkins logs as mentioned above, Enable the Kibana Dashboard Set the flag to true, so that logs will be visible to Kibana dashboard. Define Kibana & Elasticserach Server Define the host and port name of the Kibana server This is another important part where you define the elastic search, where your logs will be routed for indexing.
- 11. Jenkins Log Monitoring with ELK 11 | P a g e S u b h a s i s R o y Configure Logging Another important part is to configure the logging in Filebeat. By default, the below settings will be commented out. Here we have set the log level to INFO and gave the log file name as filebeat1, and also set the number of files to 3. Verify YML file configuration You can now go to “/usr/share/filebeat/bin” where the Filebeat has been installed and use the following command to check if your YML file configuration is correct or not. root@myvm:/usr/share/filebeat/bin# ./filebeat test config -e -c /etc/filebeat/filebeat.yml If everything is fine you can see “Config OK” message at the end after executing the above command. Start Filebeat & Import Kibana Dashboard You can restart the elastic search instance by sudo service filebeat start Now as our main intention is to show these logs into Kibana dashboard, so we will create an index from command prompt using the following command. Go to the “/usr/share/filebeat/bin” directory where Filebeat is installed. Command to create index: filebeat setup --dashboards -E setup.dashboard.kibana_index=filebeat-* This will setup and index called “filebeat-*” under which the log data will be stored in elastic and also the same indexed data will be visible in Kibana dashboard.
- 12. Jenkins Log Monitoring with ELK 12 | P a g e S u b h a s i s R o y Jenkins Project Build & Test Log in Kibana You can log in to Jenkins (http://ip_address:8080/) and start building a Job. Now you open the Kibana(http://ip_address:5601) and click on the Discover link. You should be able to see your index filebeat-* You can see the Jenkins build log file path properly and also you can see the SUCCESS message for the build. (Marked in Screenshot) Sample Kibana log screenshot